
Hello Quilty Friends!
Happy Thursday to you!
I hope you are ready for another Free Motion Quilting (FMQ) lesson! But before we do that, I want to take a moment and congratulate Janie in Texas, who is our 1000th email subscriber! WAHOO!!!!!! Thank you, Janie, for supporting the VRD Blog!
I trust you are all practicing your FMQ loops from last week’s leeson. Remember, don’t spend too much time doodling on your white boards before you actually start trying those loops out on your sewing machine.
If you missed our previous FMQ lessons, you can find them below:
Lesson 1: All the Background Information
Lesson 3: Practice, Practice, Practice
I want to take a couple minutes to talk about useful beginning projects as you are developing your FMQ skills.
Projects to Build Your FMQ Skills On
Please don’t tackle a king sized Double Wedding Ring quilt top made by your granny in the Depression as your first FMQ project. I can almost guarantee that you will end up tearing everything out. First you must crawl before you can run!
Maybe you have a whole stack of meticulously pieced antique or vintage quilt tops just waiting to be lovingly completed and that’s your motivation for learning to FMQ. Goodness knows, there are probably as many reasons to learn as there are quilting patterns! But please slow down a little bit.

Do you remember when you learned to tie your shoes? It took a lot of practice before you successfully tied those shoestrings. Same goes with riding a bike. What about driving a car? Or doing pretty much anything you want to master – it all takes work and practice.
FMQ is like that, too. It takes practice to get to the level of mastery you want to achieve. Remember that Rome wasn’t built in a day and most likely you will not be a master free machine quilter in a few practice sessions. It’s going to take some time to get where you want to be. But I promise you, if you put in the work you will get better every time you practice. And the more you practice, the more quickly you’ll be wow-ing your family and friends with your FMQ skills.
Okay, I’m jumping down off my soapbox now.
So you’ve been making up some practice squares and practicing those loops since Lesson 3 last week and you feel pretty good about alternating your loops to the left and to the right. Maybe those loops still look kind of like wiggly carrots sometimes, but you’re itching to quilt something for real.

I suggest starting with smaller projects that are not dear to your heart — potholders, baby bibs, snack mats, place mats, table runners, anything small so you won’t feel like you’re wrestling an alligator while you’re trying to FMQ. I bet you have some orphan quilt blocks lurking in your stash somewhere – make them into potholders or whatever. Then layer those practice quilt pieces with batting and backing (yes, I even give you permission to use up all your ugly fabrics as quilt backing). Now quilt them with loops! Loop to the left, loop to the right. Lots and lots of loops. Consider these practice quilt pieces as practice square variations. Hate how it turned out? Then recycle it into dust cloths. Guilt free. The important thing here is you are building up your FMQ skills by sewing over seams and through different fabrics. Just keep going and growing!
When I taught free motion classes for beginners, I asked the students to layer a printed panel with batting and backing as homework before class (along with their practice squares) and bring it with them. Panels are such a great beginner free motion quilting project because you haven’t put a lot of yourself into it with all the cutting, piecing, and/or applique that usually goes into a quilt.
If you love how your panel project turns out, that’s great! Put it on your wall and show it off or gift it to someone special and tell them you quilted it yourself. Enjoy that lovely feeling of pride in your work!
If you don’t love it, that’s okay, too, because panels are a nice size to make into lovely pet quilts for your own pets or your furry grandbaby. Or donate them to your local shelter or rescue. Either way, they will be used and loved. Of course, if any of your beginning projects end up a total mess, I give you permission to recycle them into cleaning rags.

You can find this panel by P&B Textiles HERE.
Looking for more great panels?
We’ve got ’em at the VRD quilt shop.
Let’s keep moving and dive into today’s lesson – we are going to practice our cursive writing as free motion quilting! Yup, let’s write our way to a finished quilt.
Writing as Free Motion Quilting
Most likely you know how to write in cursive but if you do not or haven’t done so for a long time, never fear – there are great resources and tutorials on the Internet and how-to books out there, too.
If you are like me, your handwriting is a combination of printed and cursive letters. And that is just fine. I am not going to wrap your knuckles with my wooden ruler, I promise. Your cursive writing doesn’t have to be perfect 4th grade handwriting, the letters just have to connect together. You do you.
Let’s use our whiteboards to write the lowercase cursive alphabet, connecting the letters in one long string. The reason I said the lowercase letters is because they naturally flow into the next letter, while not all capital letters will do that. We’re not looking for perfection here, so stop thinking and just do it. I found if I did it quickly without too much thought, I actually wrote better.
Go ahead and practice this a few times, you might be a little rusty and writing the letters on your board will bring back some of your muscle memory.

I hope you have a little room on your most recent practice squares – or you can put together another one like I did – because I want you to try to free motion quilt the alphabet. Seriously. This is great practice to develop a smoother flow to your quilting. So go ahead and quilt the alphabet a couple times.

That was kind of fun, wasn’t it?
Next up is writing your name in cursive on your whiteboards. Depending on the first letter of your name, you might be able to use a capital letter. Mostly, I just use all lowercase letters to keep things simple and so I don’t forget whether I’m using capital letters or not.
Since I’ve been doing this for a while, I’ve already figured out how to dot my i’s and cross my t. Cute, huh? Just my way to incorporate those zany loops into my quilted writing.
Go ahead and practice writing your name. You might have to do this a couple of times until you get the look you want. You can even try different ways to dot any i’s or cross any t’s. Or maybe a capital letter works for your first letter. Just have fun with it.

And now it’s time to quilt your name on your practice squares. Feel free to do this as many times as you want to in order to get the look that makes you happy. I used both a lowercase and a capital T below in my examples and I definitely prefer the all lowercase letters. I think it looks more whimsical with my loopy dotted i’s and my curvy swoosh crossed t. Which one do you like better?

Isn’t this fun? I think it’s pretty cool that my quilted signature looks a lot like my written one. Does your quilted signature look like your written signature, too?
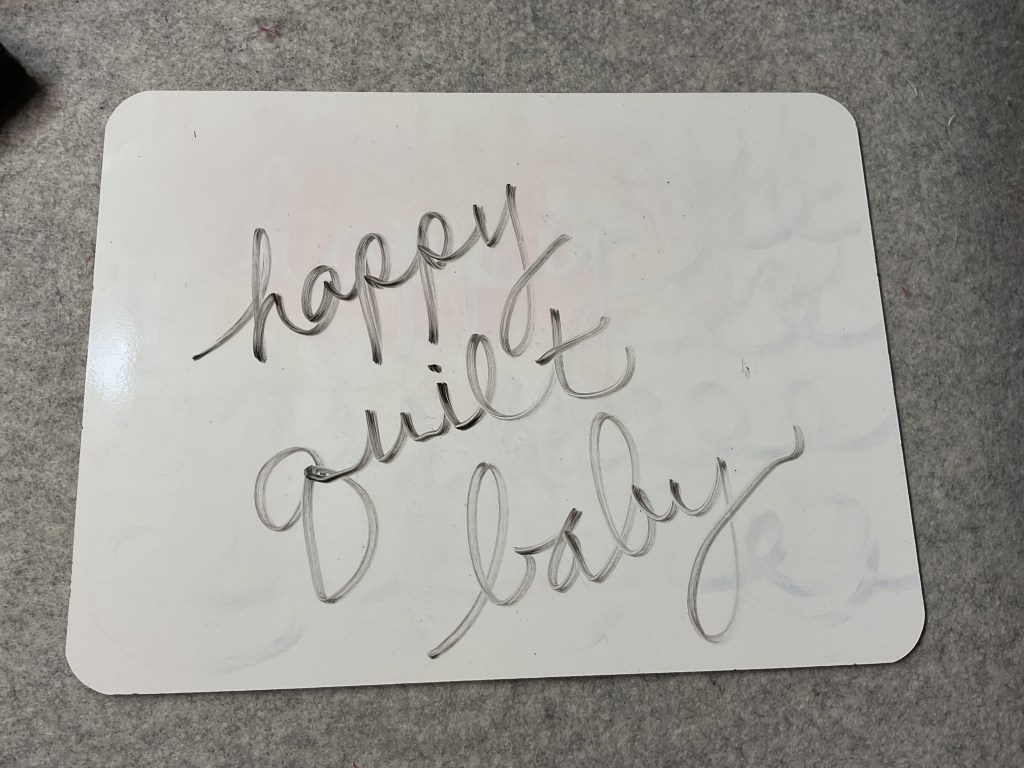
Now let’s try writing other words on our whiteboards. One time I had the brilliant idea to quilt the word “baby” in rows across a baby quilt I was making for my coworker. I loved how it looked after I quilted it, but quilting one word over and over became quite tedious and I was so glad when I finished it. Afterwards, I wished I had included other baby words like bottle, bib, crib, bear, love, etc. That would have made my quilted written design that much more interesting. Oh well. Live and learn.
Let’s write! Just make sure all the letter are connected. Go ahead and experiment with dotted and crossed letters.
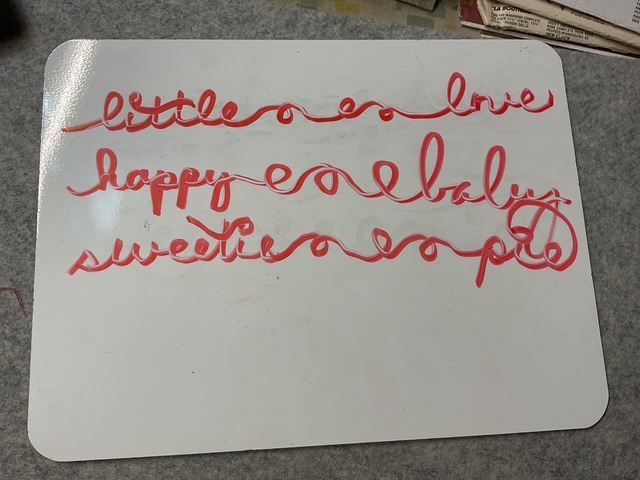
Now let’s connect words together into continuous lines. When I do this, I like to make a consistent number of alternating loops between the words to separate them and I leave lots of room between words to give them space to breathe, which makes the words a little easier to read.
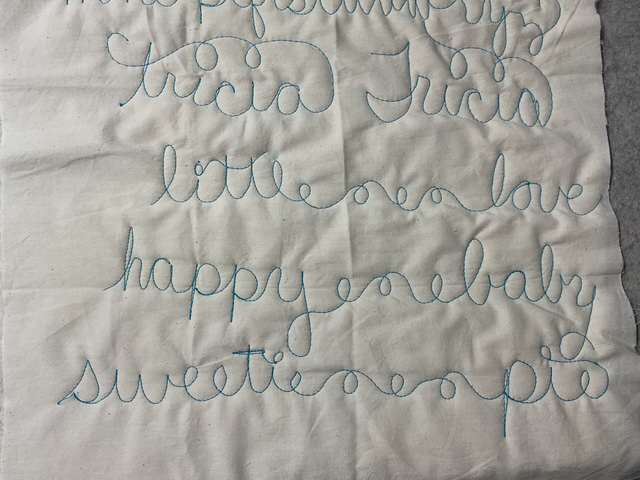
Now let’s practice quilting the words together. Don’t forget to put loops between the words so you can read the words after you quilt them. You may have to be creative with any dots and crosses.
Now it’s your turn to use your cursive writing as a quilting design. Keep practicing. Don’t be afraid to try your FMQ on some actual projects, too — a panel or place mats or orphan quilt blocks turned into potholders. Go ahead – you know you want to! Keep practicing your alternating loop design, too.
Stay tuned next week for Lesson 5: Going Beyond Loops. See you then!
Take care and stay warm. It was -3 this morning here in northwest Pennsylvania. BRRRR!
Sew. Laugh. Practice. Repeat.
Always,
Tricia @ VRD
