
Hello Quilty Friends!
Happy Thursday to you!
First, I want to give each of you a great big THANK YOU hug!

Thank you for reading our Villa Rosa Designs quilt blog, Villa Rosa Quilts. This past week, the number of views has exploded and we’ve added new followers, too. And it’s all because of you, our VRD fans and followers. We are thrilled that you find our blog to be informative, fun, and worthwhile.
Did you know you can follow our blog and never miss a Thursday Post? All you need to do is type in your email address and click the subscribe button just to the right of the blog post towards the top and you’ll get each new post delivered right to your email inbox every Thursday!
Now let’s hop right into this week’s Basic Quilting Skills for Beginners post — Squaring Up.
You cut, you sewed, you quilted, and now it’s time to square up your quilt. I was planning to do both Squaring Up and Binding in this post, but I decided it would probably be better to separate the two topics, otherwise the post was going to be too long, too wordy, and probably too boring and we can’t have that.
Forgive me, but you’ll have to wait until next week for Binding.
Squaring Up
Before you can do the binding, you first must square up your quilt.
Why should I square up my quilt? Can’t I just slap on the binding and be done?
That’s a good question — sure, you could just slap on the binding, but you probably wouldn’t be satisfied with the results. Things can get distorted as you handle your quilt, press (or maybe you iron), quilt it, tug, pull, crumple it up and throw it on the floor — well, you get the picture. Think of squaring up like pre-binding.
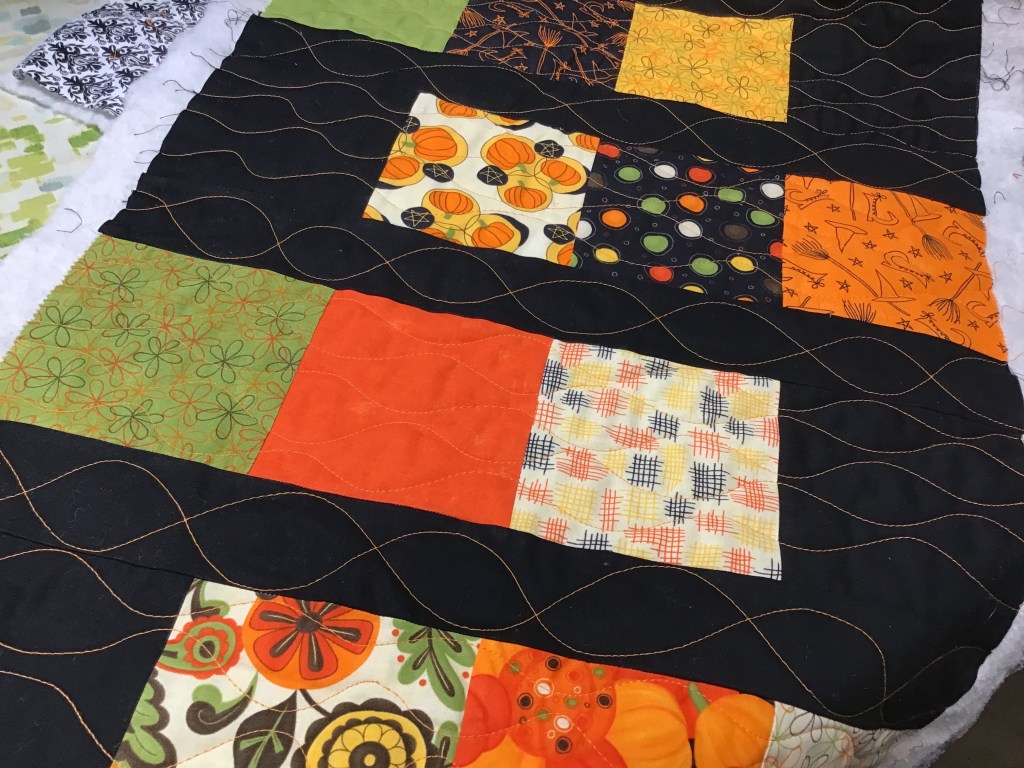
My quilt “volunteer” today is a new Halloween version of my Ice Jam VRD pattern. I made this runner a couple months ago as a sample project in my 2022 Villa Rosa Rose Card Table Runner a Month class, but never finished it.


BIG SHOUT OUT to all my awesome class buddies — Mary Lee, Sherry, Missi, Debbie, Anita, Robin, Kim, Gaynel, Jean, Donna and Gayle (the owner of my local shop, Homespun Treasures, where my class meets). Homespun Treasures, of course, has lots of Rose Card patterns in stock. Just sayin’….
Here’s the Ice Jam Rose Card pattern. It’s a super fast and fun table runner which measures 18″ x 54″ and uses 5″ charm squares. It’s a very versatile pattern and will look great in any style or theme. So, try it out.
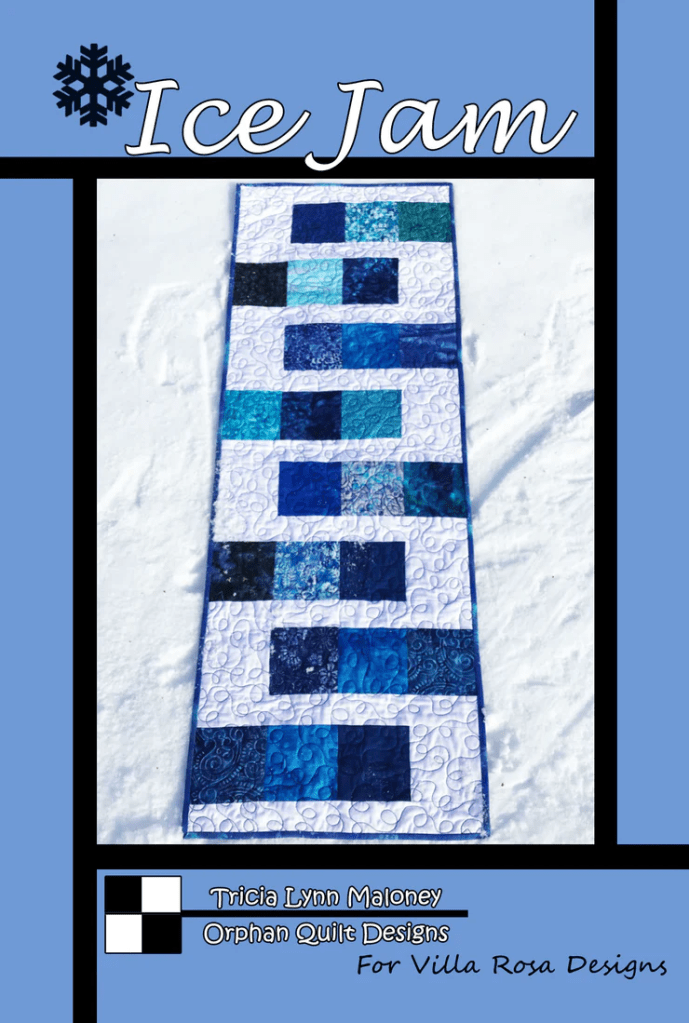
What!?! You don’t have the pattern? You can order it HERE.
Just a quick note about the machine quilting. If you missed our Quilt As Desired post last week, you can find it HERE. I added my wiggly lines free motion quilting video to last week’s post and I just wanted to point out my fun wiggly squiggly lines on this table runner.
Okay, okay……let’s get back to squaring up.
You might want to press your quilt before squaring it up. Pressing your quilt will help everything lay nice and flat.
Next lay your quilt out on your cutting mat, centering one corner of the quilt on the mat because we will square up the corners before cutting the sides. If you are working on a large quilt, it helps to support the weight of the quilt on a table or chair. The problem with larger quilts is that if the quilt is hanging off your cutting mat/table and down to the floor, the weight of the quilt can pull things out of whack . Oops! Gravity works. Now if you lived on the moon, you wouldn’t have to worry about this issue…. (wink, wink)
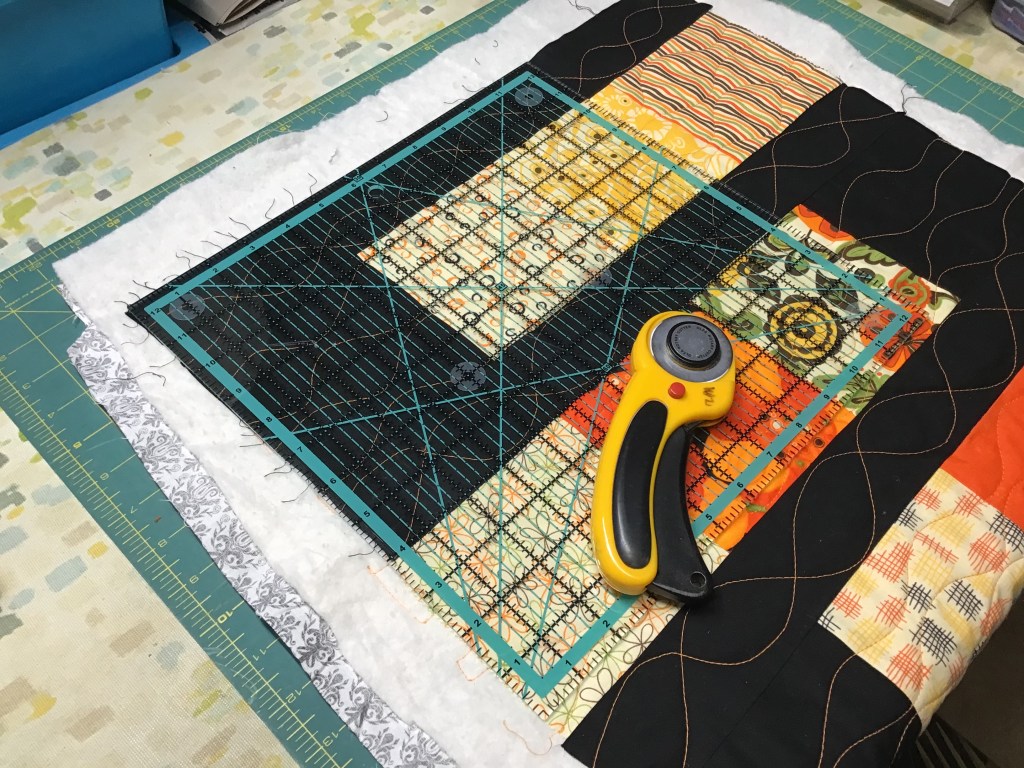
Use the biggest square ruler you have for cutting your quilt corners, the bigger the ruler, the easier it is to square up your corners. I personally love my 12 1/2″ square for working with table runners and smaller quilts, but I also have 15″ and 18″ square rulers to use for larger quilts.
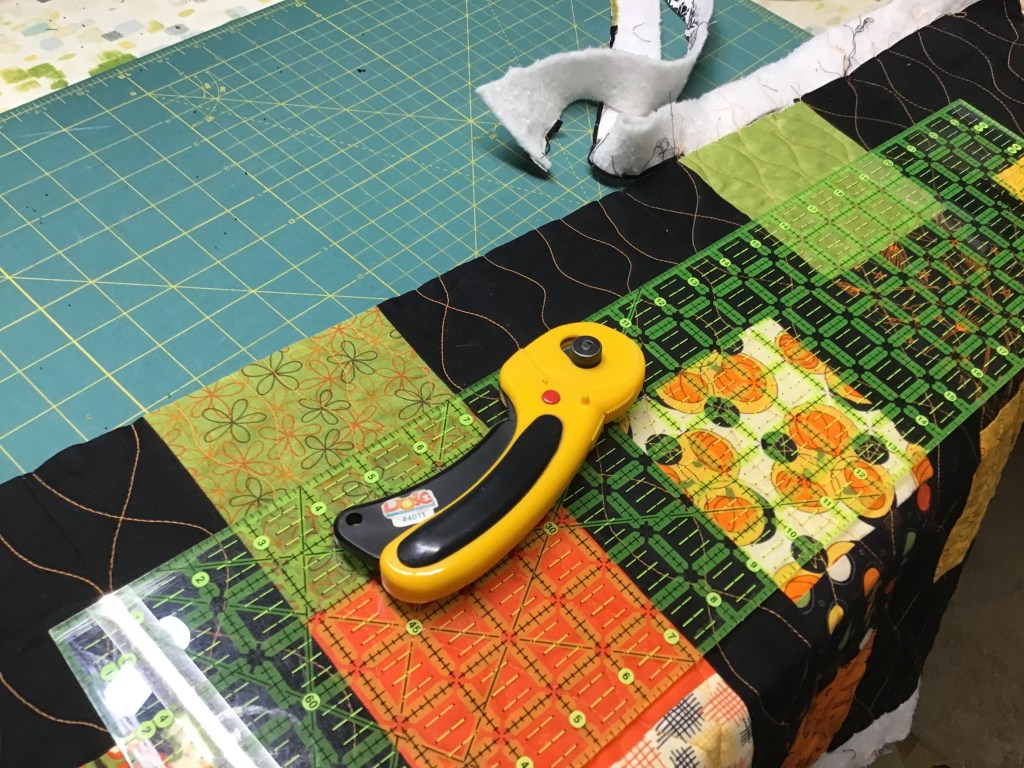
Once you’ve smoothed your quilt out flat, lay your square ruler down on a corner of your quilt. Adjust the square as needed to make the corner 90 degrees, sliding a little this way and that way until it’s square.
Don’t worry if batting, backing, and even slivers of your top are beyond the edges of the ruler. If you see too much of the front of the quilt beyond your ruler edge, though, wiggle the ruler around some more until there is very little of the quilt top showing beyond the ruler. You don’t want to cut much from your quilt edges, especially if you have triangles all the way to the edge of the quilt because you will probably cut off your triangle points and that will not make you very happy.
Take your time here because once you cut, you can’t go back. Hold the ruler down with one hand using good solid pressure — be careful not to shift the ruler – and cut on the 2 outer sides of the ruler, thus making this corner square.

Let’s move on to the next corner. Line up the ruler, adjust it gently for another nice square corner, then cut. Repeat for corners 3 and 4. Yep — you’re going to have weird strips of batting/backing hanging off your quilt. That’s okay. We’ll take care of that in the next step. In the meantime, think of it like quilt spaghetti.


Now it’s time to position the quilt on the cutting mat so we can cut the long edges and remove all that quilt spaghetti. I use my 6″ x 24″ ruler for this part. Again, if you’re working on a big quilt, support the weight so the quilt doesn’t slide off your mat/table or skew your cutting.
Please be patient and take your time with your squaring up (I know it’s hard but trust me — I have the attention span of a four year old, so if I can do it, you can do it) because if you don’t square up properly during this step, your quilt will never be square, no matter how much you tug and pull later down the road. Wonky quilts don’t lay well on tables or beds nor do they look nice hung up on walls.
Start at one nicely squared up corner and line up the long ruler. Again, don’t worry if you see bits of your quilt top sticking out beyond the ruler edge as that is completely okay and to be expected. Once things are lined up to your satisfaction, cut with your rotary cutter along the ruler edge, stopping before you reach the end of the ruler so you don’t accidentally cut into your quilt. Gently slide the ruler across the quilt edge so you don’t distort your nice straight edge or your square corner. Make sure that the ruler is still lined up with your fresh cut quilt edge. Cut again. Continue doing this until you can line up your ruler from your freshly cut edge to your next squared up corner and cut. Yay you! Only 3 more sides to go.
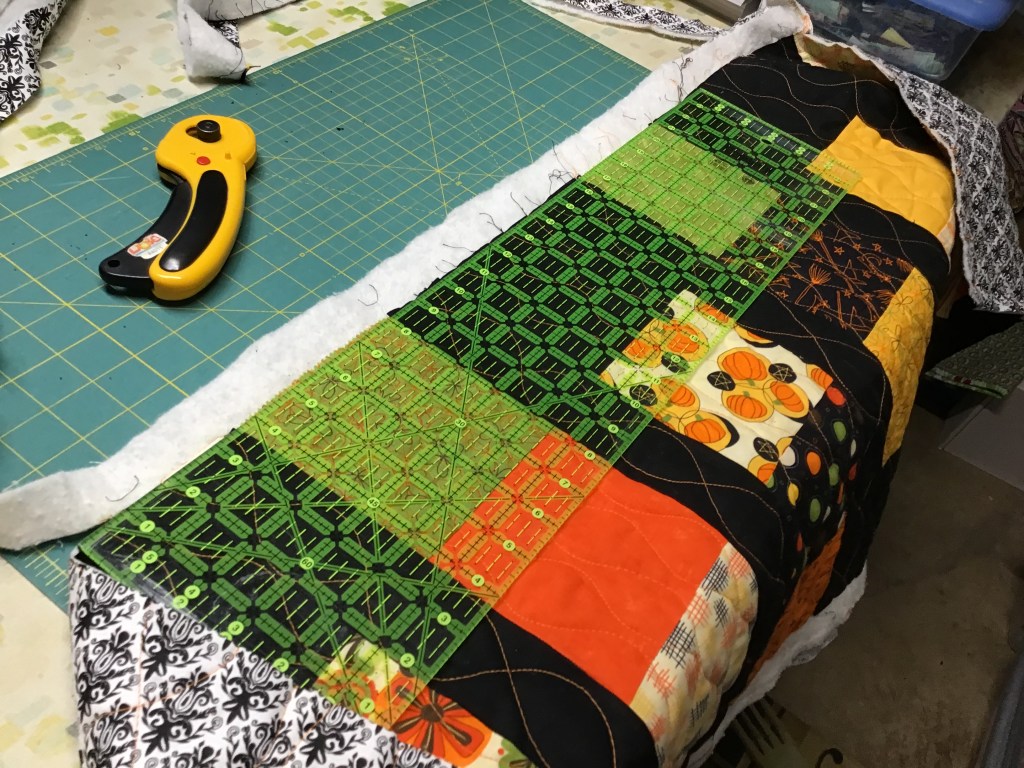


Go ahead and repeat for the other 3 sides. Luckily with a table runner, I usually only have to cut the 2 long sides this way as the short sides get squared up when I use my 12 1/2″ square ruler for the corners. Not so lucky with big quilts — sometimes it’s like wrestling an octopus, but keep at it, you will be the winner.
Here it is! My squared up quilt. Yay!

Let’s do a quick check to make sure things are all square before we move on.
Fold your quilt in half, lining up the edges and corners as best as you can, use a few straight pins if you need to. If things are nice and square, everything should line up pretty well (there really is no such thing as perfect, so if things aren’t 100% exact, that’s okay). If corners or edges are not lined up, then you need to check the squareness of your corners with your large square ruler again and make any necessary minute adjustments to square up those corners. Then check the long sides again using your long ruler to make sure things are nice and straight, only cutting away slivers of quilt to make things more square and straight.
Fold your quilt again, lining up corners and edges, to check your squareness. Repeat until things are as square and straight as you can get them.

Well, I think that’s it for today. Next week I promise we will attack the Binding in our Basic Quilting Skills for Beginners series.
Quilt on, my friends, quilt on.
Until next Thursday —
Sew. Laugh. Repeat.
Always,
Tricia @VRD
