
Hello Quilty Friends!
Happy Thursday to you!
Fall is in full swing here in northwestern Pennsylvania. We haven’t quite gotten to peak viewing for fall leaves in my area yet, but it should be very soon. There’s nothing like the crunch of leaves underfoot, cooler nights and warm sunny days, colorful leaves sparkling in the autumn sun, and there’s always something crisp about the autumn air. Yes, I admit it — Fall is my most favorite time of the year.
After the “dog days of summer” I am so ready for Fall. It’s time to wrap up old projects and get started on new ones. It’s only a few months until Christmas, so it’s time to start my Christmas crafting and sewing. Fall inspires me to clean, organize, and declutter, getting ready for the upcoming winter season. It’s time to pull out warmer clothes and put the quilts on the beds. I just love sleeping under a quilt or when it’s really cold, under several quilts. There’s nothing like the comfort of sleeping under the cozy weight of a quilt — it’s better than any weighted blanket.
Embrace Fall wherever you are — jump in a pile of leaves with your kids, sit in silence and watch the leaves drift down, go for a hayride, take a walk in the park, go to the farmer’s market, carve a pumpkin, pick apples and make apple pie, drink apple cider and eat doughnuts (an old tradition where I live), go to a Halloween parade or festival. Celebrate the season.


Labeling Your Quilt
There are lots and lots of different ways to label your quilt, but today I’m going to show you my favorite way of labeling ALL my quilts from table runners to baby quilts to bed-sized quilts. It took me a lot of experimenting with different kinds of labels over the years before I finally found this simple, fast and easy label method.
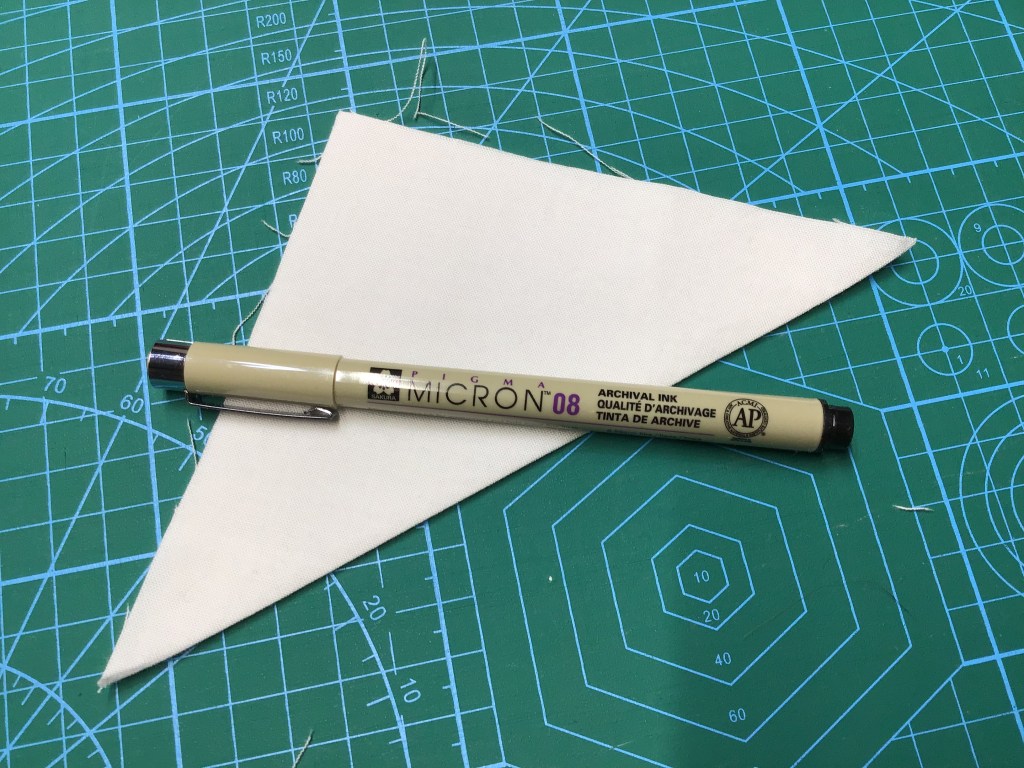
First I start with a square of white cotton solid fabric. For table runners, I might use a 4″ square, for baby quilts maybe 5″, and for bed quilts 6″ works great. Of course, the more information you want on your label, the larger you need to cut your square. The square below is actually 5″. I’m going to put put this label on my Halloween Ice Jam table runner, my sample I’ve been using for the last couple weeks. Normally, a 4″ square works great for a table runner, but I had a 5″ square just sitting there so I thought I’d use it. The size of your square really doesn’t matter, as long as it is large enough for all the writing you plan to do.

The next thing I do is fold my square on the diagonal to make a triangle. With solid fabrics, it usually doesn’t matter which way you fold as both sides are pretty much the same, but if you are using some kind of printed fabric, fold the wrong sides together.

Press your triangle with a hot iron on the cotton setting and let it cool down for a moment or two before moving on to the next step. You want a nice flat wrinkle-free triangle to work with.
Now grab your fabric pen. I use a Sakura Pigma Micron pen in black size 05 or 08 for writing my labels. The ink is archival quality and doesn’t bleed.
Before you write your information, take a moment to decide what it is you want to write on your label. A basic label includes the maker of the quilt, the quilter if different from the maker, a date, the recipient, and maybe a location. Imagine a hundred years from now, if someone finds your quilt and they see your label. They could do research to discover more about you, the quiltmaker, and perhaps even the recipient. The more information that is on the label, the more “valuable” someone may consider your quilt and its provenance, or history.
As an antique quilt and textile collector, I cannot stress this enough — label EVERY quilt. I have so many pieces in my collection without any information. Sure, quilts and textiles can give you some clues about their history, but without a maker, the story is always incomplete. Don’t let this happen to your quilts and your story. If you have family quilts without labels, please please please make sure to add a label to the quilt with any information you have or that quilt’s story might get lost forever.
You can add whatever you want to your label. Here are some other ideas — the story behind the quilt, the occasion, the quilt pattern if it’s not your pattern, the name of the quilt if you name your quilts like I do, a favorite quote, the inspiration behind the quilt, or whatever your heart desires. This is why I said above that you can make your label as large or small as you want, just make sure there is enough space to add all the details that you want to add. If you like to draw or doodle, you can even add artwork to your label. It’s your label, make it a special part of your quilt. Good at calligraphy? Why not make your labels extra special with unique lettering?
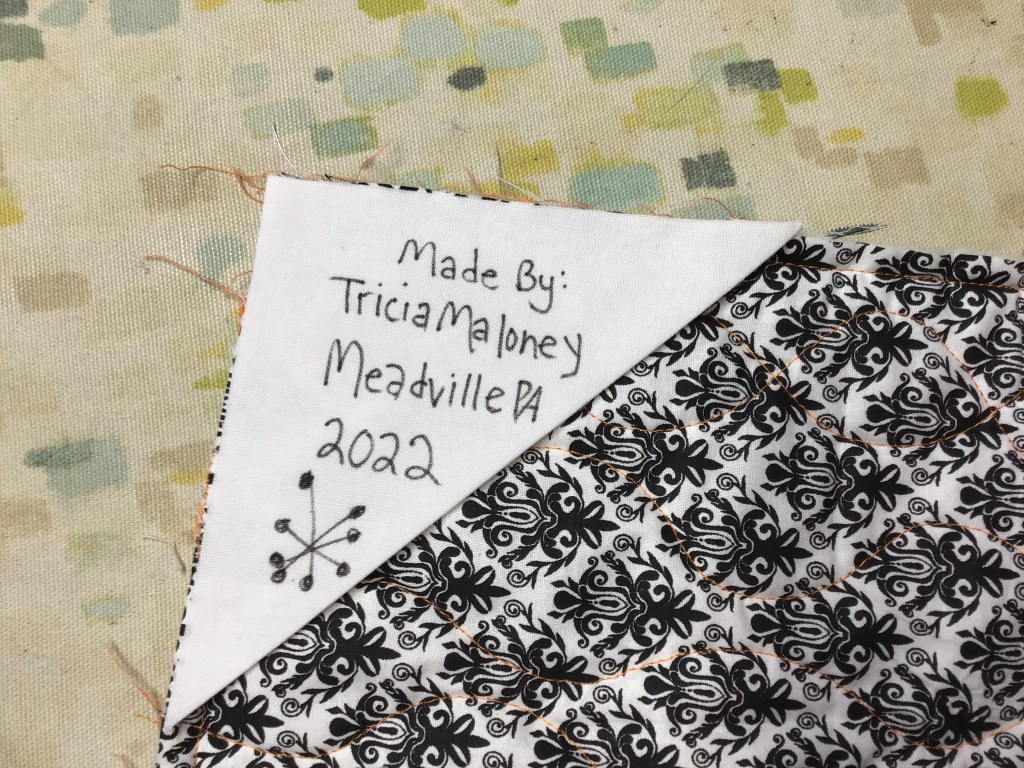
Here is a typical label for me. I write my name, my location, and the year I made the quilt. Sometimes I have enough room to add my characteristic starburst design, like in the first example. Often I write the name of the quilt above my name like in the second example, but not always.


After you write out your label, make sure to press it again with your hot iron on the cotton setting.
Now it’s time to pin the label to a corner of my Halloween table runner. It doesn’t really matter to me in which corner I put the label, but it usually ends up in the top left corner, particularly on larger quilts. I add my label to my quilts after I have machine-stitched the binding to the quilt, but before I have sewn the binding down. That way the binding helps to hold the label in place and it eliminates most the the fussy hand-sewing that is the norm for labels. This fussiness is probably why so many people do not bother labeling their quilts.
I usually place 3 pins in the label to hold it in place for machine stitching — one in the center and one in each corner. Keep in mind that you will need to flip your quilt over for sewing, so when you place the pins think about where you are putting them as that will be the back as you sew. This idea might sound kind of confusing right now, but hang in there and it will become much clearer in just a moment.

I next flip the quilt over with the front of the quilt facing up and the label now on the back. The pins keep the label from shifting.
Time to sew the label onto the quilt. Do you seethe line of stitches where I sewed the binding on in last week’s post? Did you miss last week’s post called Binding 101??? You can find it HERE.
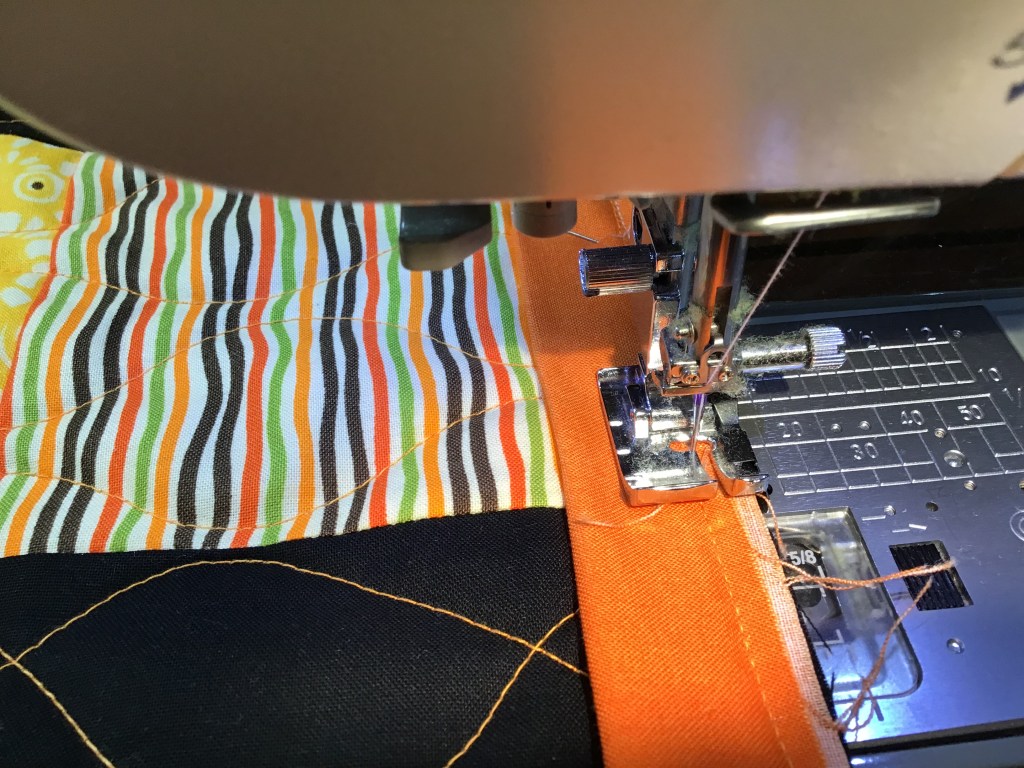
Be careful sewing the label on the back — remember the pins? Begin before the first pin on the side. Back-stitch a few stitches, then continue to sew. Make sure you stay in the seam allowance of the binding, or else the bound edge of your quilt will not be straight and square. Sew until you get close to the fold in the corner, back-stitch a couple stitches and stop. Cut your thread. You don’t want sew into the fold or your beautiful French-folded corner will not be so beautiful anymore. It’s a good idea to pin the fold out of your way.


Take the pin in the fold out. Now turn the quilt and begin sewing again at the edge, making sure to stay in the binding seam allowance. Begin sewing and do a few back-stitches then sew until you go beyond the 2nd pin in the corner of the quilt. Back-stitch again and cut your thread.
Voila! Your label is sewn onto your quilt and when you sew down the binding either by hand or machine, the raw edges of the label will be sandwiched between the quilt and the binding. Later you can hand-stitch the folded edge down to the quilt if you want to, but it really isn’t necessary because the label isn’t going anywhere. I do strongly suggest you take that extra time to sew down the folded edge on baby, young child, and pet quilts.


As labels go, that was fast and easy, wasn’t it?
I hope you will go forward and label each and every one of your quilts, preserving your quilt story for the future.
NEW October 2022 Villa Rosa Rose Card Patterns
They’re here! They’re here! I’m always really excited at the beginning of every month because that’s when Pat, our Villa Rosa Designs Rose Queen, debuts our newest Rose Card patterns.

Aren’t they AWESOME! Every month our VRD designers just blow me away with their creativity. Quilting is one of the few areas in the world where you can keep reinventing the wheel. Our VRD designers do that every month!
You can order all five of the new October Rose Cards for the special price of $8.95 HERE. Wow! These patterns normally sell for $2 each on the website, so you’re getting a great deal at $8.95. Besides, why would you want only a few cards, when you can order ALL of them?!?
If you missed a monthly set or are just looking for a fun little surprise for yourself or your quilting buddy, you can check out our other Rose Card sets HERE, we have lots!
But wait….there’s MORE! (You know how much I love saying this! LOL!)
We have two — yep that’s TWO new table runners this month. Yippee!
Heidi revisited her bestselling Gummies pattern (you can get the Gummies pattern HERE if you missed it) and she came up with this delicious table runner using 5″ squares.

You can order Goody Goody Gumdrops HERE.
And here’s my new table runner pattern for this month, Pumpkin Hollow. You have to have pumpkins in October!

You can order Pumpkin Hollow HERE.
Interested in receiving the NEW patterns each month to your postal box (international quilters get digital patterns delivered right to their inbox) every month?
You can go HERE to sign up for our Monthly Pattern Clubs.
Don’t forget — patterns ship FREE!
Well, that’s it for me this week. And this is the end of our Basic Quilting Skills for Beginners series. Do you have any other special topics you’d like to see on the blog? Drop us a message or email and we’ll do our best.
Happy Fall, Y’All!
Until next Thursday —
Sew. Laugh. Repeat.
Always,
Tricia @VRD

Love the idea of putting it in the corner and part of the binding. Thanks for the idea
LikeLike
I do believe in labeling all of your work. I use the folded square method, but find it easy to just baste it into place in the corner, which secures it well during application of the binding. Baste just outside of your stitching line for binding, ie: at about 1/8 inch.
LikeLike
Thanks for the super ideas, Connie! You rock!
LikeLike