Blog Hop 2023 · Panel Quilts · Rose Cards · Tips and Tricks · Tutorials · villa rosa designs

VRD Bella Vista Panel Quilt Tutorial and Finally — the VRD Blog Hop Grand Prize Winners!

Hello Quilty Friends!

Happy Thursday to you!

What have you been up to this past week?

Another week has zoomed by and I am not getting anything accomplished! Or at least it feels that way. We’ve had some lovely February weather here in northwest Pennsylvania and I’m getting those “Spring into Spring” feelings when I want to clean, sort, and organize everything! Hah! I wish I could find an extra 2 hours in every day to get started on that ginormous undertaking, but I do need to sleep at least a few hours every night. You would think working from home, I’d have so much extra time to work on stuff, but sadly that is not the case for me. ARGH!

I want to start with my studio because it kind of looks like a fabric store/flea market threw up. I totally serious here. One of my local quilt shops hosts a “fabric yard sale” every year and I think it’s time to get signed up for it! I wasn’t planning on it this year because of a few time conflicts, but now those conflicts have been postponed, so I am calling today to get my space reserved. Even with less time than usual to prepare, this will inspire me to do some purging in my fabrics and such.

What do you do when your studio gets taken over by fabric, notions, patterns, books, rulers, scraps, and everything else?

VRD Blog Hop Grand Prize Winners

Okay, you’ve all been waiting to hear who won the 2 Grand Prize boxes from the Blog Hop.

Drum roll please………….

Congratulations to:

Joy from Oregon

and

Charlene from Georgia

Here’s a photo from the blog hop showing some of the fun quilting goodies in the boxes:

As for the rest of the prizes, they are being shipping out this week, so if you are a winner and you haven’t received your prize yet, you should have it shortly.

Wow! I think I’ve gone through 3 rolls of tape preparing all the packages! But you know what? I smile while I put on the labels because I know how much each winner is going to enjoy their prize from the Blog Hop.

VRD Bella Vista Panel Quilt Tutorial

Recently, I decided to make a special quilt for a cousin of mine who is having some rough times. I knew I wanted to use a panel because panel quilts go together so quickly, so I thought I’d give our new Bella Vista pattern a go.

This is a fabulous pattern for those horizontal panels. Sometimes it can be hard to find a pattern that uses this type of panel, so Bella Vista is a great pattern to have up your sleeve. It also works with ANY style of horizontal panel and can work with different sizes, too, as long as you measure as you go instead of cutting everything out first.

Don’t want to use a panel? You could replace that section of the quilt with blocks, appplique, or even a novelty fabric. Just keep in mind, you might have to do a little math. Yay math! Love math!

You can buy the Bella Vista pattern HERE.

Looking for a panel to jump-start a new project? You can go HERE and check out Villa Rosa’s large selection of panels.

Let’s get started on our quilt project!

So, the first thing I did was gather up my fabrics. My cousin loves eagles so I chose this flying eagle panel and a coordinating eagle print along with a light grey (I decided not to use the medium grey you see in the photo) texture, red tonal, and a blue tonal for the binding. My plan will be to back this quilt with fleece to make a cozy quilt for my cuz, so it will be like wrapping him up in a warm hug when he needs one.

Quilts are one of the BEST forms of therapy for folks going through tough times in their lives, wouldn’t you agree?

You all know how much I love The Quilts of Valor Foundation and the impact they are making one quilt at a time. To learn more about the Quilts of Valor Foundation, go HERE.

My cousin does not have a military background, but he loves red, white, and blue and is very patriotic, so an eagle quilt will be a good fit for him.

Now I have all the fabrics ready, it’s time to get going on this quilt project. The first thing I’m going to do is trim off the selvedges on the panel. This panel is bigger than the dimensions of the panel in the pattern, but I don’t really need to cut it down. Instead, I will measure as I go before I cut my fabrics.

Here I am cutting the red strips for the first border.
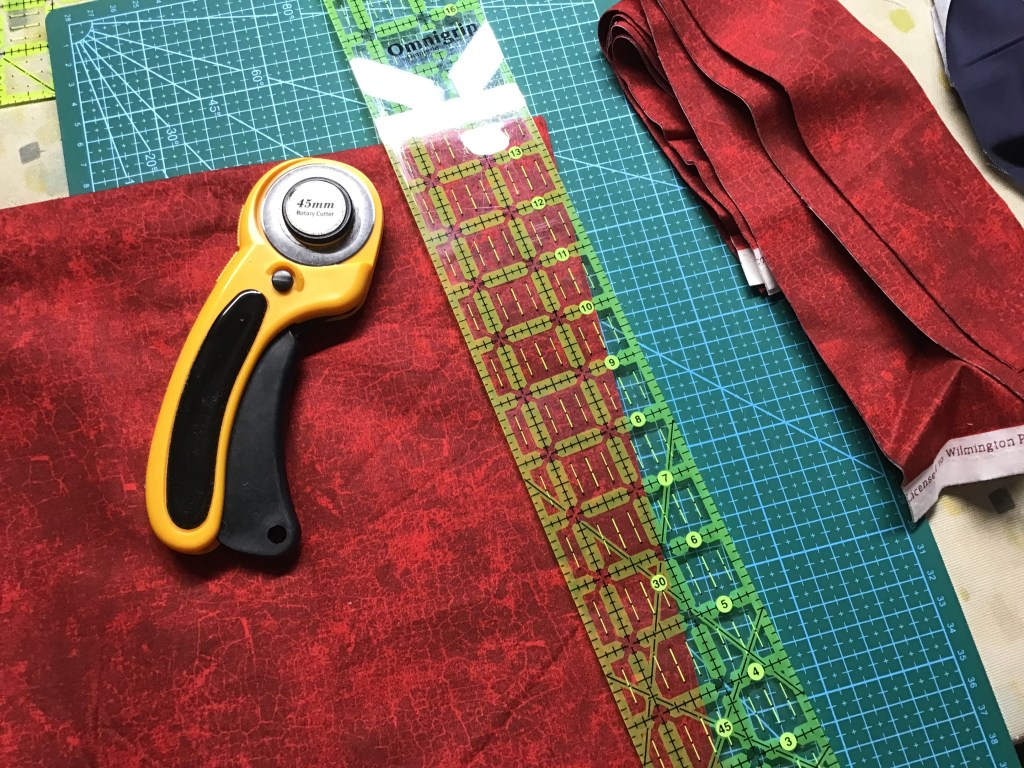
Next I measured the panel through the center horizontally. Those who know me won’t be surprised when I share this little Lazy Quilter hint about measuring. Tehehe……

I don’t use a ruler or a measuring tape. Nope, not at all to measure when I’m putting a quilt together. Instead I use my fabric or border strip or whatever I’m sewing together in order to get the right measurement. I’m a pretty consistent quilter, so this works well for me. I will say that this technique may not work for everyone, so use it at your own risk. LOL!

I folded my panel in half horizontally and laid it on my flat surface. I smoothed it all out nice and flat with the edges even. Then I gathered up my border strips which were already sewn end to end to make longer strips. These will be sewn to the top and bottom as per the directions.

I carefully laid the border strips out along the folded center. Then I smoothed the strips and lined up the edge of the strip to the edge of the panel. I usually put a pin at the edge to keep things from sliding around. Finally, I took a deep breath and cut the border strips to the width of the panel. I repeat this process all over again for the side borders, too, except that I use the vertical center to measure with, instead of the horizontal. I hope this makes sense…….

Now let’s sew the border strips onto the top and bottom of the panel.

Let me tell you how I do that, too, because I have another little trick up my sleeve.

First, I find the middle of the panel and the middle of the strip, match them up, and put a pin in the centers. Next I smooth the border strip along the edge of the panel and pin the outside, matching up the edges of the strip to the panel edges. I also put a pin at the bottom outside edge of the strip in a horizontal fashion (see this trick in the photo below on the left side). This helps to keep the strip square to the panel. Such a simple little thing can really make a difference. I learned this tip from an experienced quilter when I a beginner.

Then I add some more pins between the center and the ends before I head to the sewing machine.

Here is the panel with the first red border sewn onto all four sides. Don’t you just love the cool framed and matted effect of the printed borders in brown and navy around the edge of the panel.

So far, so good. Let’s keep moving.

I cut my second border strips using the light grey fabric. Next, I sewed 2 strips together to make a longer border strip. I decided to sew my border strips together with a straight seam instead of doing a diagonal seam for this project. It’s quicker and has less fabric waste, but mainly the tonals will hide the straight seam. I like to press my seam open to reduce the bulk. (I did the same with the first red border, but didn’t do a photo of it.) Take a look at the last photo in this group and you can hardly see on the front side of the border strip where I sewed the seam.

Now to measure the grey border strips against the panel just like I did above with the first red border. Time to pin, pin, pin. Then sew, sew, sew. Oops, sewing over my pins………

Here’s the quilt so far with the first red border and the second grey border on all four sides. Looking good!

Now I’m going to add the third border, which only goes on the top and bottom of the quilt.

You know, if you wanted to, you could sew the next borders together before sewing the border strip sets to the top and bottom of the quilt center. Just sayin’…….

Anyway, let’s add the top and bottom red borders.

I can’t believe how big this quilt is getting to be! It will be a really nice size when it’s finished.

I think for the eagle print border strip and the last red border, I am going to sew the strips together and then sew the border strip sets to the top and bottom of the quilt center. I wish I would have done this when I sewed the previous red border to the top and bottom (as I hinted to all of you, above, which was really after the fact). I think it would have been a bit easier. Did I mention this quilt is getting big? LOL.

I had to be careful when I was sewing the eagle print strips together into a longer border strip because it is directional and I didn’t want my eagles flying in different directions. There’s just something wrong with eagles flying backwards……

Then I had to watch when I was sewing the outer red border strips to the eagle print border strips because of the eagle print’s directionality — I really didn’t want my eagles flying upside down when I sewed them to the quilt center.

So if you are working with a directional fabric, take your time and double check placement before you sew, that way you don’t have to rip out your stitches.

Okay, the border strips are sewn together and now I need to sew them to the panel quilt. Again, I have to make sure I’m sewing the right border strip set to the right part of the quilt, or my eagles will be belly up. Deep breath….here goes!

YAY! All the eagles are flying straight and true! I am so relieved about that.

(Psst. In the bottom right corner of the above photo, you can see prizes in priority mailers getting ready to be mailed — they took over my comfy chair in my studio!)

Here’s a couple more photos of the finished Bella Vista top. I headed outside for these photos, even though it was a bit breezy. I just love to see quilts swaying in the breeze on a clothesline on a nice day, don’t you? Right now I can close my eyes and smell the clean fresh outside smell of quilts (and laundry) hung outside to dry on a breezy spring or summer day. Ahhhhhhh.

I mentioned above that my plan was to back this quilt with cozy fleece. When I put fleece on the back of a quilt, I do not use batting because it makes the quilt too heavy and too thick. I will most likely machine quilt it simply, probably with a large meander. I have learned over the years, that when quilting fleece, it’s not a good idea to cross over lines when you are machine quilting because fleece stretches and the cotton fabric on the front of the quilt doesn’t stretch like that. I definitely don’t want bunchy areas and pleats on the back of my quilt.

I’ll have to head over to one of my local quilt shops so I can use the tables in the classroom to layer and pin this quilt. Of course, I’ll probably do a spot of shopping while I’m there…………. Sorry, not sorry.

Well, that’s it for me for this week.

Take care and I’ll see you all next Thursday!

Until then —

Sew. Laugh. Repeat.

Always,

Tricia @ VRD

Basic Quilting Skills Series · Tips and Tricks · Tutorials

Basic Quilting Skills for Beginners: Batting, Backing, and Preparing a Quilt for Quilting

Hello Quilty Friends!

Happy Thursday to you!

We’re going to jump right into our topic today — batting, backing, and preparing a quilt for quilting. There’s a lot to cover, so grab your cup of coffee and let’s get to it. I apologize in advance, but this post will be text-heavy. Sorry……..

Batting

If you’re new to quilting, you might not know what the filling inside of a quilt is called. Here in the USA, we call it “batting” or you might see it as “batt.” If you are in Europe or Canada, you might hear it called “wadding.” Whatever it’s called, we are talking about the layer between the top of the quilt and the back (or bottom layer) of the quilt.

If you’ve looked at batting options out there, you might be a little overwhelmed. There’s cotton, polyester, cotton/poly blends, wool, recycled, bamboo, natural, bleached, white, black, etc., etc. How do you know what batting is the best?

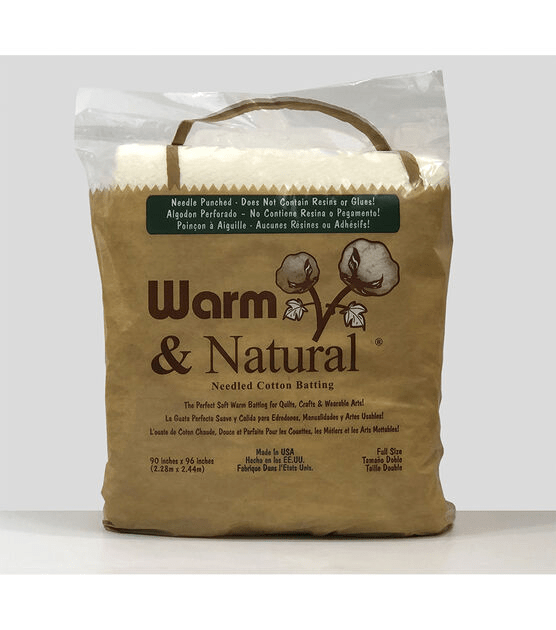
I’m here to to tell you that there isn’t only 1 “best” batting out there. A lot of what batting you choose depends on your project as well as your personal likes/dislikes or even possibly allergies. Classic favorites include: Warm and Natural, Hobbs, and Mountain Mist, but there are many more companies offering batting today.

Warm and Natural
Hobbs
Mountain Mist

So your best bet is to try some different samples of batting. Do you like the feel of cotton? Or a blend? Or polyester? Or silk? Or…? Which batting is easier to work with? Are there differences/similarities in the same fiber contents but different companies? If you’re going to quilt your own quilt, how does each sample quilt? Hand quilting or machine? Maybe you are tying your quilts?

Eventually, you will find the batting that you prefer and that’s probably the one you’ll use over and over again in your quilts. If you are interested in reading detailed articles about choosing quilt batting, there are LOTS on the Internet, just type “how do I choose quilt batting” into your favorite search engine and go from there.

What if the pattern I’m using doesn’t tell me how much batting to buy for my quilt?

I’m so glad you asked! You can figure out how much batting you will need with a simple formula.

1. You need to know how big the finished quilt will be ( be aware if you are adding or subtracting blocks or borders, your finished size might be different from the size listed on the pattern).

2. You will add 8 inches to both the length of the finished size and the width of the finished size.

Why 8 inches? Most professional quilters ask that your batting and backing be at least 4″ bigger on each side of your quilt top. If you are quilting the quilt yourself, you can sometimes get along with less, but it’s better to have too much batting and backing around the sides than not enough. If you are getting your quilt quilted by someone else, make sure to ask if 8 inches is enough for them, they may want more.

So, let’s do a few examples.

Quilt A is 57″ wide by 75″ long. Let’s add 8″ to each measurement for a total of 62″ x 83″ — this is the minimum batting size you need for your quilt.

Quilt B is 21″ wide by 52″ long. Let’s add 8″ to each measurement for a total of 29″ x 60″ — this is the minimum batting size for this table runner.

Great, but I can’t go to the quilt shop and buy exactly 62″ x 83″ or 29″ x 60″ of batting. So now what?

You can usually purchase batting by the yard or by the package at your favorite retailer. A yard of batting would be 36″ long by whatever width the batting is, which could range from 45″ – 120″!

Batting by the Yard

Okay, for Quilt A we need to buy a piece at least 62″ x 83″. At Quilt Shop X, we can buy batting that is 90″ wide, so that would be long enough if we turn the quilt sideways (83″ wide x 62″ long). Now what would be the closest yardage amount for 62″? 1.75 yards equals 63″. I would probably buy 2 yards of the 90″ wide batting, just to be on the safe side — it would give me 72″ x 90″, which is larger than what I need, so that’s good. Done.

Batting by the Package

Instead of batting by the yard, Quilt Shop Z offers a selection of prepackaged batting in different sizes. Here’s what you might find:

Craft – 34″ x 45″

Crib – 45″ x 60″

Throw – 60″ x 60″

Twin – 72″ x 90″

Full – 81″ x 96″

Queen – 90″ x 108″

King – 120″ x 120

Keep in mind that these measurements might be slightly different depending on the manufacturer.

Okay, for Quilt B our table runner, we need at least 29″ x 60″. Hmmm. A Crib or Throw size might work because they are both 60″, but that might be cutting it a little close, so I would probably go up to the next size, which is a Twin at 72″ x 90″. Of course, I will have leftover batting, but I can save that and use it for another project (or 2 or 3…).

Backing

Getting the correct size of backing for your project is pretty much the same process as I described above for quilt batting — you will want the backing to be at least 4″ bigger than the quilt top all the way around, or just add 8″ to the finished width and length of the quilt. Mostly, you’ll buy backing fabric by the yard, but there are more and more shops that are offering precut pieces of extra wide backing, usually in 2 or 3 yard pieces by the extra wide width, usually 108″, but you might find 120″ as well.

It’s really easy to figure out how much backing you need if you plan to buy the extra wide fabric. Buying extra wide fabric is a huge time and effort saver.

But, some of the time the fabric you want for the backing is the regular width of 42″ – 45″ wide.

How do I figure out how many yards of fabric to buy if the pattern doesn’t tell me?

A great question! Let’s use our Quilt A example from the Batting section.

Quilt A is 57″ wide by 75″ long. Let’s add 8″ to each measurement for a total of 62″ x 83″ — this is the minimum backing size you need for your quilt (we figure this just like the batting).

We know that a yard of fabric is 36″ long. The average width of regular-width quilt fabric on the bolt is about 44″ wide. But because fabric can vary a bit in width, I usually use 40″ as my width measurement.

For Quilt A — I know I need it to be at least 62″ x 83″. There are 2 main ways to piece a backing fabric together: vertical or horizontal, but sometimes one will work better than the other. In Quilt A, we will need to piece the backing vertically because horizontally there wouldn’t be enough fabric as 40″ + 40″ is only 80″ and we need at least 83″).


A vertically-pieced backing

Using the 40″ width, I would need 2 widths to get at least 62″ wide. I know I need at least 83″ for the length. So that means I would need to sew together 2 pieces of fabric each at least 40″ x 90″ (I chose 90 as it’s greater than 83″ and it’s 2.5 yards). So I would buy 5 yards of regular width fabric. Cut the 5 yards into two 2.5 yard pieces (90″) and sew them together down the middle using a 1/2″ seam (instead of a 1/4″ seam) to add some durability. Then press the seams open and press out the wrinkles and creases. DONE!

Here are my favorite tips for selecting backing fabric:

  1. Use quilting weight fabric, just like what you used for your quilt top. Backing a quilt with a sheet may result in a stiff quilt that does not drape well.
  2. Choose a backing fabric that compliments the front of your quilt.
  3. Make sure the fabric for your backing is big enough.
  4. Use a busy printed backing fabric as it will not only look really good on the back of your quilt, it also can hide the quilting stitches — this is particularly great when you are just starting out either hand or machine quilting.

In the first example, the black thread really sticks out like a sore thumb on the grey backing fabric. The thread and backing look fine together, but if you flipped over your quilt to the back, any mistakes or wobbles in the quilting would really jump out at you!

In the second example, the grey thread blends in more with the multicolored argyle backing fabric, which would help to hide or at least make less noticeable any mistakes or wobbles in your quilting.

5. One of my favorite places to find fabric for backing is in the discounted or clearance section, where you’re sure to find a selection of great quilting fabrics that are older and are being sold at a discount to make room for newer fabrics.

Preparing Your Quilt for Quilting

Now that we have our quilt top completed, we have batting that is 8″ wider and 8″ longer than our quilt top, and we have a busy backing fabric that is also 8″ wider and 8″ longer than our quilt top, it’s time to get it ready for quilting.

First you have to make some decisions before you go any further:

  1. Hand quilting or machine quilting? (or perhaps tying the quilt?)
  2. If hand quilting, are you doing it yourself?
  3. If machine quilting, are you doing it yourself?

So, let’s say we have decided to send our Quilt A to Sally who is a reputable long arm machine quilter in the area.

You should ask the long arm quilter how to prepare your quilt for quilting, but here are some general suggestions:

  1. Carefully press the top of the quilt and the backing of the quilt
  2. Turn the quilt top so that the underside is up and trim any and all strings and threads
  3. If your batting was folded or wadded up in a package, you may need to lay out the batting so the creases can relax. You can speed this up by tossing the batting into the dryer on low or air fluff (so it doesn’t shrink)
  4. It wouldn’t hurt to press the quilt top and backing one more time, but be careful not to distort or stretch the quilt top

Sally the long arm quilter will load the backing, batting, and quilt top onto her frame and will quilt the layers together using whatever design the two of you decided upon. You may also be able to select the thread color you want used on your quilt. White, ecru, or grey are always safe choices, but colors like red, orange, pink, blue, or purple can really give your quilt that little extra something-something.

If you are going to quilt your quilt yourself, you will need to layer your backing, batting, and quilt top.

  1. Lay your wrinkle-free backing fabric wrong side up on a flat surface. Tape the edges of the backing fabric down to the table, making adjustments until the backing fabric is perfectly smooth and flat without any wrinkles or bumps. You will need to stretch the backing gently to make it nice and flat, but be careful not to overstretch the backing as this can skew the fabric.
  2. Center your batting on top of your backing and smooth it out until it is wrinkle-free.
  3. Now center your quilt top right sides up on top of the batting. You should see at least 4″ of batting and backing around all the edges of the quilt top. Smooth your quilt top so it is perfectly flat with no bumps or wrinkles.
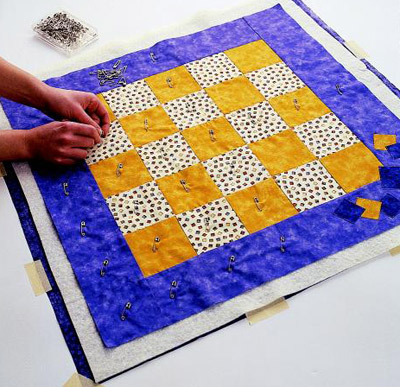
  4. Using pins, a basting tool, or needle and thread, baste the 3 layers together. If pinning, place pins about every 4-5 inches (some quilters like their pins closer together and some like them farther apart). I like to pin across the center horizontally and vertically and then pin in diagonal lines from the center out to the corners. If needed, I add extra pins here and there. You can check out http://www.AllPeopleQuilt.com HERE for a good article about different ways to layer and baste your quilt.
Photo from AllPeopleQuilt.com

WHEW! I know this was a lot of information to absorb. You may need to read it more than once. LOL!

There are also lots of great resources about this topic online, in quilting books, and in the back of your favorite quilting magazines.

Next week, we’ll talk address Quilt as Desired.

Until next Thursday —

Sew. Laugh. Repeat.

Always,

Tricia @VRD

Rose Cards · Tips and Tricks · Tutorials · villa rosa designs

A Little Gardening and Cake Day Quilt Block Assembly Tips

Hello Quilty Friends!

Happy Thursday to you! I hope you all are having a wonderful summer so far.

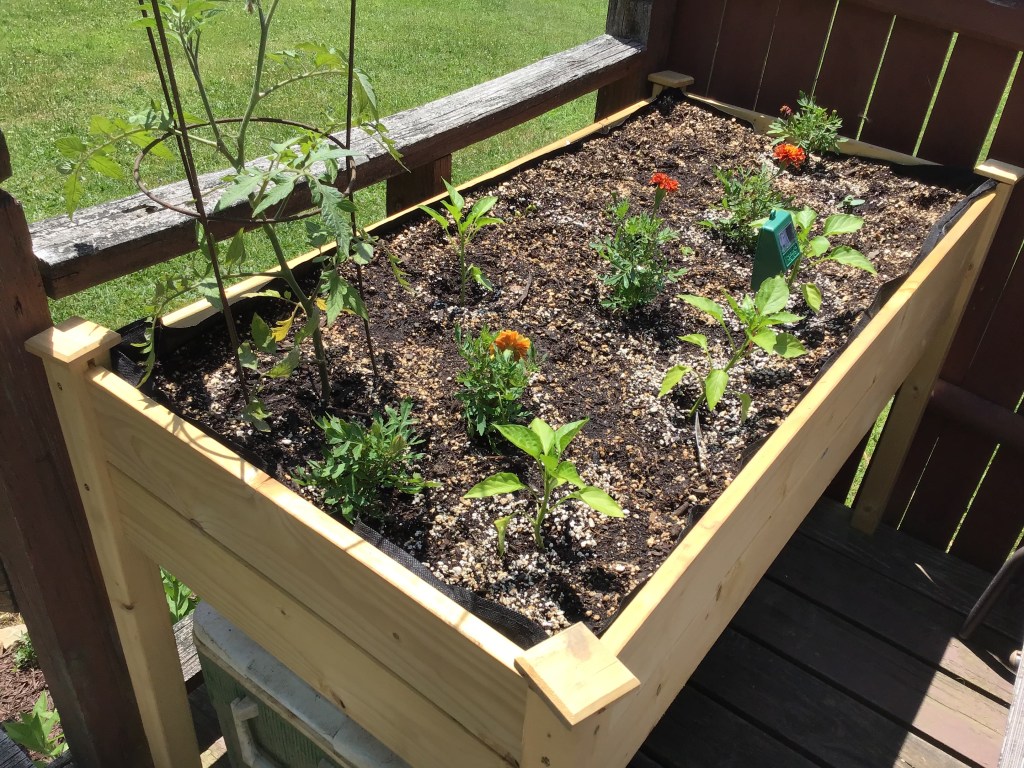
My summer just got a whole lot better! Just recently my family got in gear and finally got our little back porch raised garden planted. And our flowers, too. We may be running a little behind, but I have hopes that in late summer/early fall we’ll be enjoying some fresh veggies picked right out of our little garden pf goodness. If it goes well, next year we are going to add a second raised bed garden.

I used to be an avid gardener way back when, but gave up the year I planted my garden twice and the critters ate everything before it even had a chance to grow. That was it.

But now I’m excited to try container gardening. Besides, ”container gardening” sounds so trendy, don’t you agree?

Cake Day Quilt Block Assembly Tips

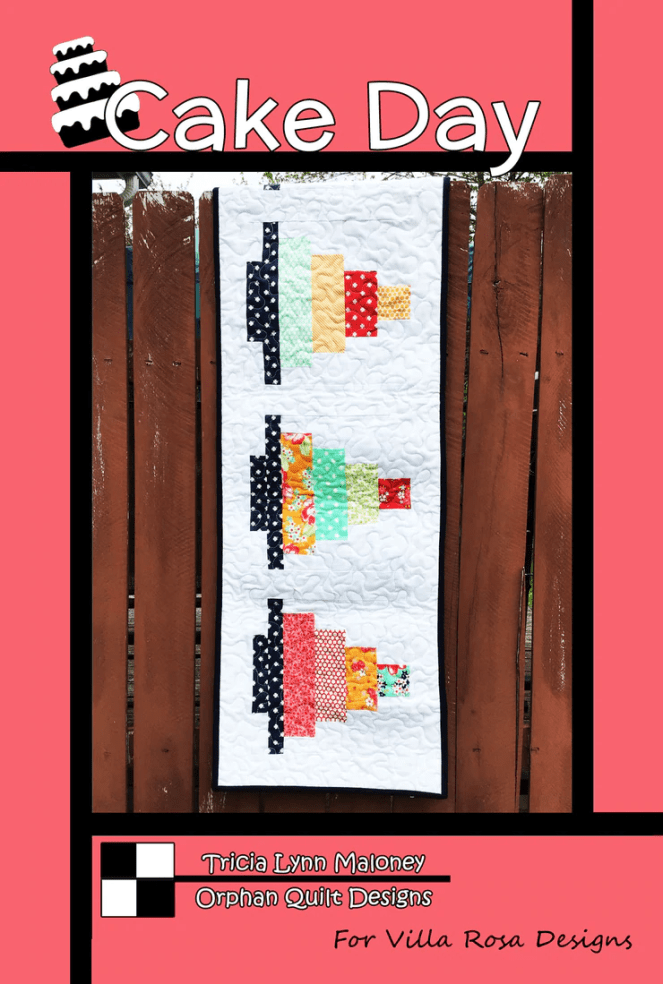
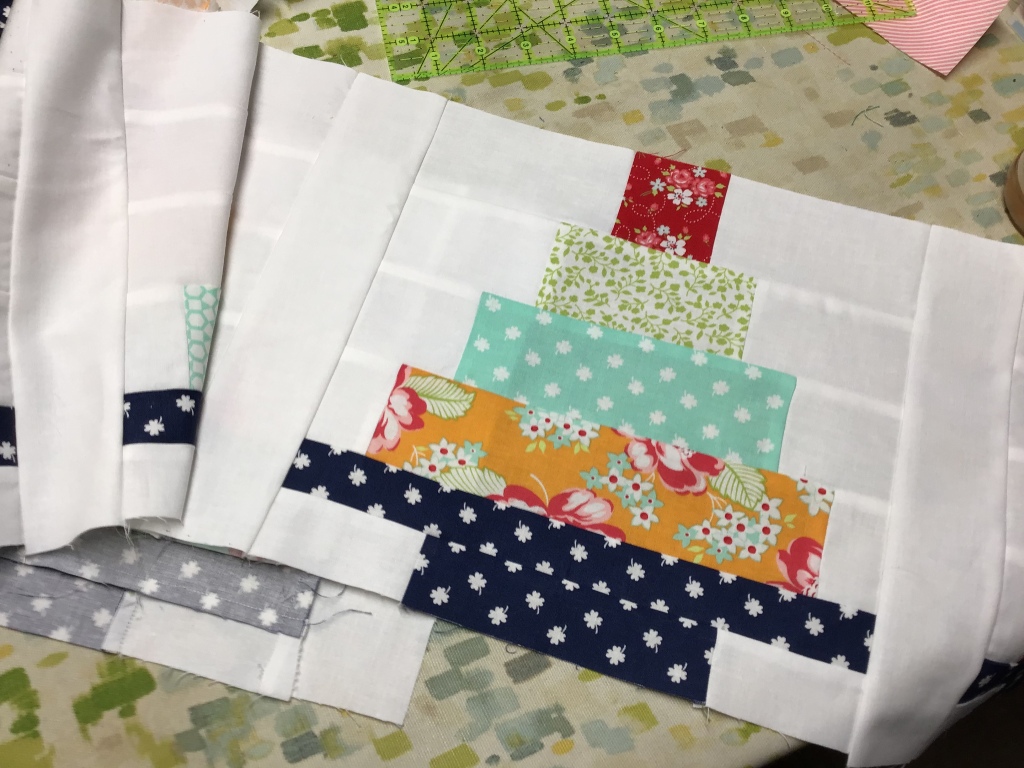
I thought I’d share a quick tutorial on how I put the Cake Day table runner quilt block together along with some of my favorite piecing tips.

Cake Day Table Runner Rose Card Pattern

You can get your own Cake Day Table Runner Rose Card pattern HERE.

Often, I prefer to cut out all my pieces for the blocks before I start sewing. I find this is usually quicker than cutting and sewing one block at a time.

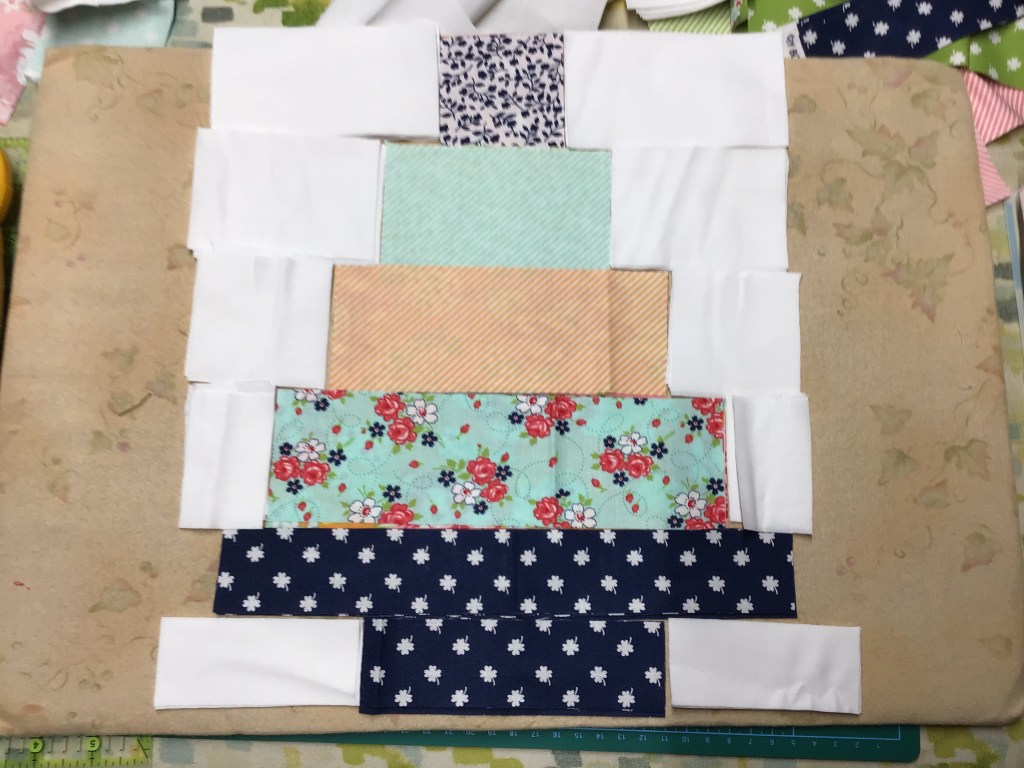
Here you can see the pieces all laid out in the right order (all four blocks are stacked) on a flannel board and then I can simply take everything to my sewing machine. This works well if you have to stop in the middle and come back to your project later. Everything stays right where you left — unless of course, you have gremlins or leprechauns or some other little mischievous creatures running around your sewing room when you are not looking.

I have also found that laying out and stacking the pieces in order makes sewing them together faster and easier because I don’t have to stop and figure out where each piece goes.

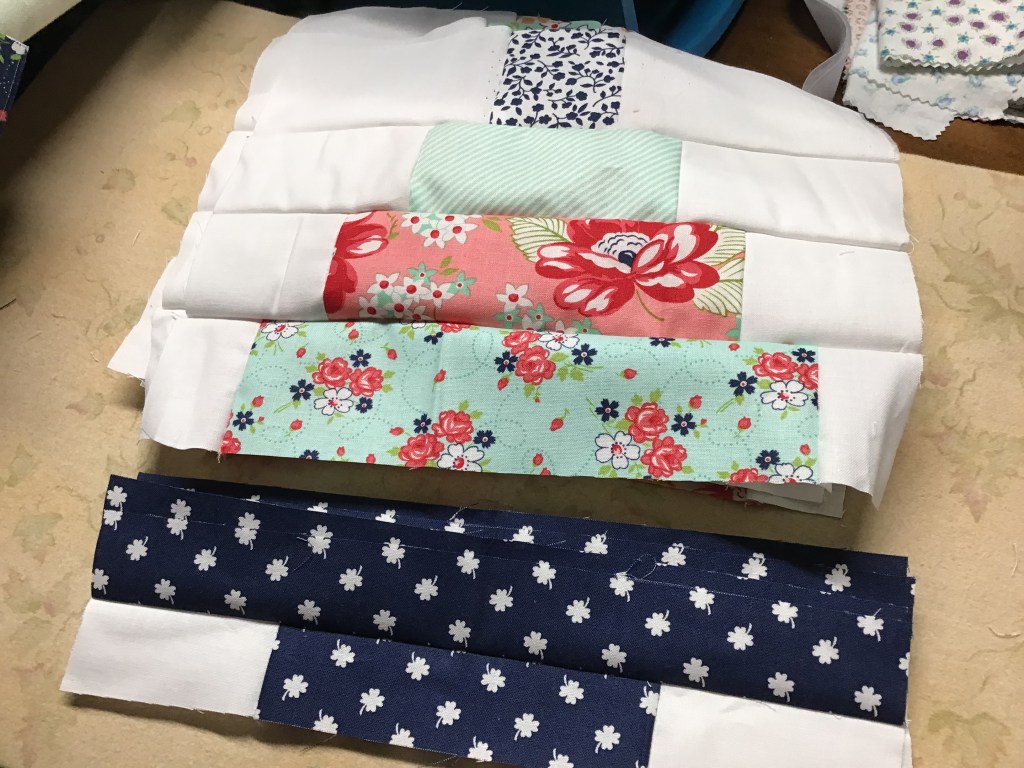
With all the pieces cut and laid out right sides up, sewing them together is a breeze, especially when I chain-stitch the units one right after the other without cutting my thread in between the units.

Nope! No need to head to my ironing board after clipping the thread between the units, I just kept sewing and chain-stitched the other side too.

I have discovered that the less I press as I’m putting together quilt blocks, the less the blocks stretch or get distorted, which of course improves the accuracy of my sewing.

In the next photo you can see I have the left side background sewn to the Cake print rectangles. Now it’s time to sew the right side.

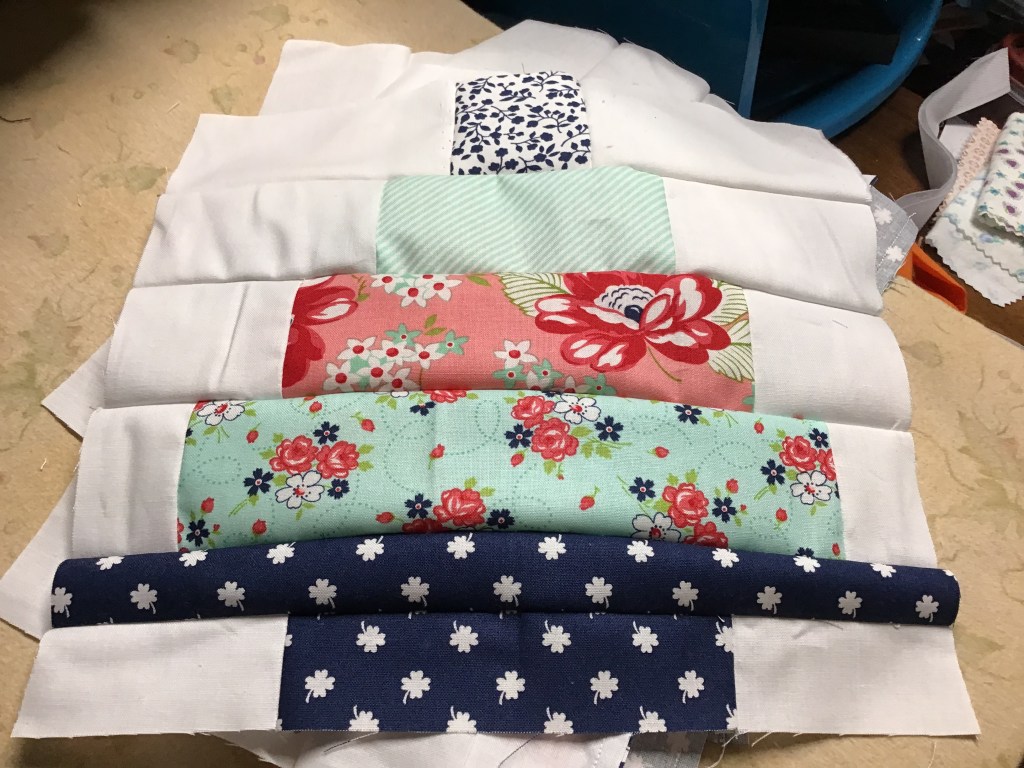
All right! All the units are sewn together and I’ve clipped the threads between them. I made double sure I layered the units again exactly the same as when I started — we’re ready for the next step.

Again, I’m going to ignore my iron (it must be getting lonely). Time to sew the units together. More chain piecing.

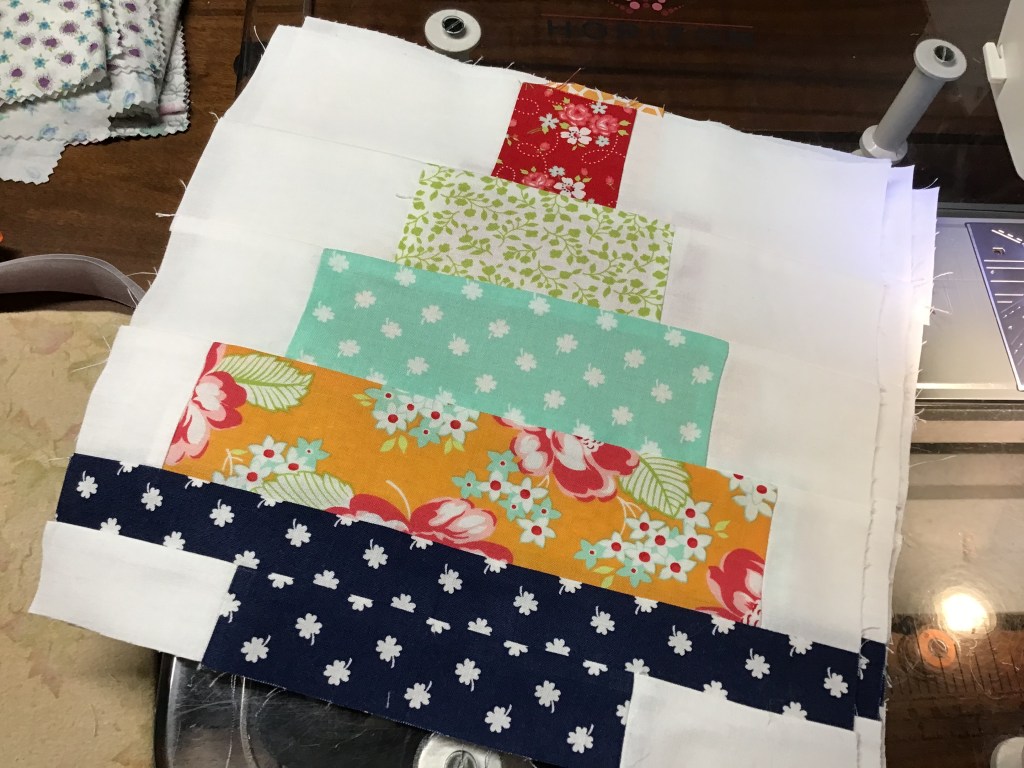
Want to know what happens when I get to seams (remember I haven’t done any pressing at this point)? I’ve already decided which way I wanted my seams to go so as I sew, I hold them down and keep on sewing. Pedal to the metal!

In this next photo you can see I sewed the top unit to the second unit. We’re on a roll — let’s keep sewing.

Okay, we’re almost there! I sewed the rest of the units all together and presto — all 4 of our blocks are now complete and I didn’t even have to get up from my sewing machine.

All right, all right, I relented and finally pressed my blocks — my iron was getting a little dusty from disuse.

Voila! Here is a finished Cake Day block. It’s a cutie, isn’t it?

My 4 blocks are now ready to assemble into a runner. There are sew many possibilities for this runner — birthdays, weddings, showers, parties, and the list goes on and on.

Any day can be a “Cake Day.” What’s yours?

Until next Thursday —

Sew. Laugh. Repeat.

Always,

Tricia @VRD

Rose Cards · Tips and Tricks · Tutorials · villa rosa designs

Cats and a VRD Cat City Block Tutorial + a Mini Quilt

Hello Quilty Friends!

Sigh……I’ve been thinking about cats lately. A lot. In addition to my own cats, I’ve been working on a couple cat quilt projects. If you don’t like cats, you might want to turn around now before it’s too late. (You can’t see me of course, but I’m rolling my eyes here. LOL!)

Let me tell you a little bit about MY CATS (sorry, not sorry — I did warn you).

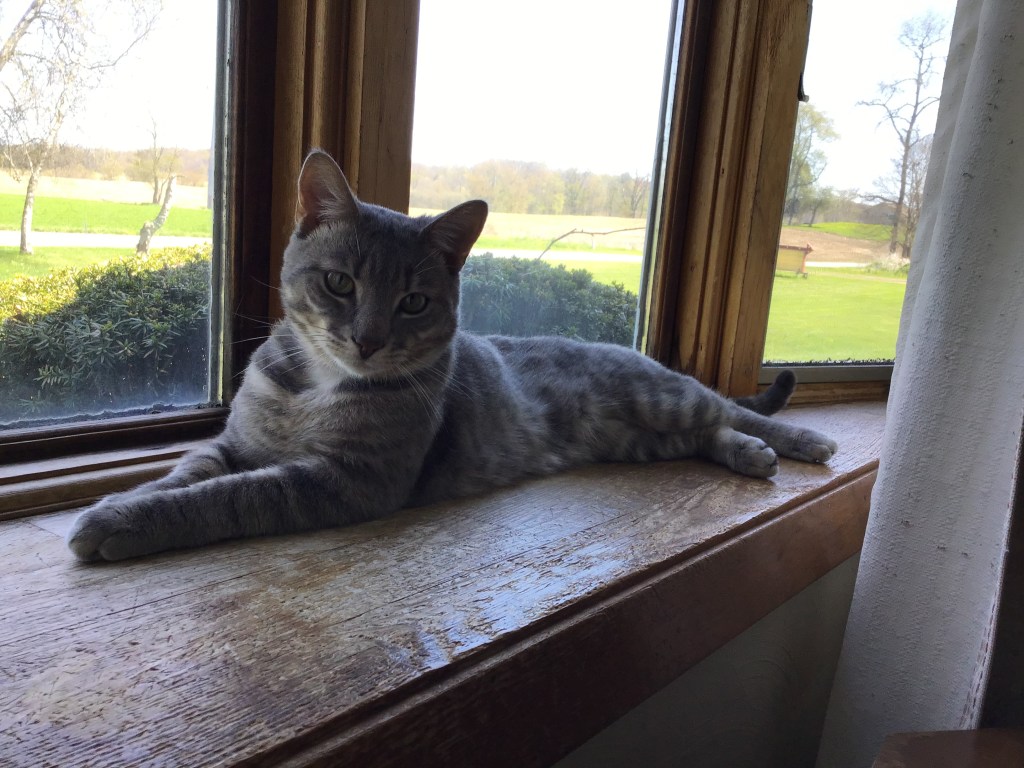
Pip is my beautiful 12 year old silver tortie. She is sweet, rarely says a word, and is very generously-sized. Pip is a real foodie like me. I tell her frequently that she’s “practically perfect in every way,” but she can be very stubborn. And sneaky! Especially when she thinks no one is paying attention and she tries to get her little brother’s food (she is usually successful, too). Silly Pip!

Practically-perfect Pip!

Griffin just turned 1 at the end of April and is my little wild child. He zooms from one end of the house to the other and then back again. Over and over. As energetic as he is, he’s also my snuggle bug when he eventually slows down. Seriously. He loves to be held and snuggled! Griffin likes to watch “bird TV,” loves to be rocked, likes music, and even enjoys painting on a cute game on my tablet. He’s quite a fella!

Crazy man Griffin in a brief moment of stillness.

For some reason, cats and quilting just seem to go together. Like peanut butter and jelly! I just love seeing photos of cats “helping” their human quilters on social media, don’t you? Too bad neither of my cats are into that, but then again, if they were, I’d probably never get any quilting done.

In fact, as I sit here writing, Pip is hanging out in her favorite chair upstairs and Griffin is watching his birds on TV about 10 feet away from my desk. He is not only my little buddy but he’s also THE best coworker I’ve ever had.

Not long ago, Pat, our “Rose Queen” and the owner of Villa Rosa Designs, asked me to help her with some new quilt diagrams for her VRD pattern, Cat City.

To purchase the Cat City Pattern, click HERE Or to purchase the Cat City kit, click HERE

I was really intrigued by the cat block in the pattern, and thought I’d try it out before making the diagrams so I knew exactly how to put the block together. I discovered it’s a really fun block, but it can be a little tricky the first time you make it.

Let me show you how to put the Cat City block together.

Cat City Block Tutorial

First things first, follow the cutting instructions for the pattern. I chose a white fabric and a black fabric for this tutorial (you’ll see why a little bit later). I layered the two fabrics and cut the pieces out at the same time.

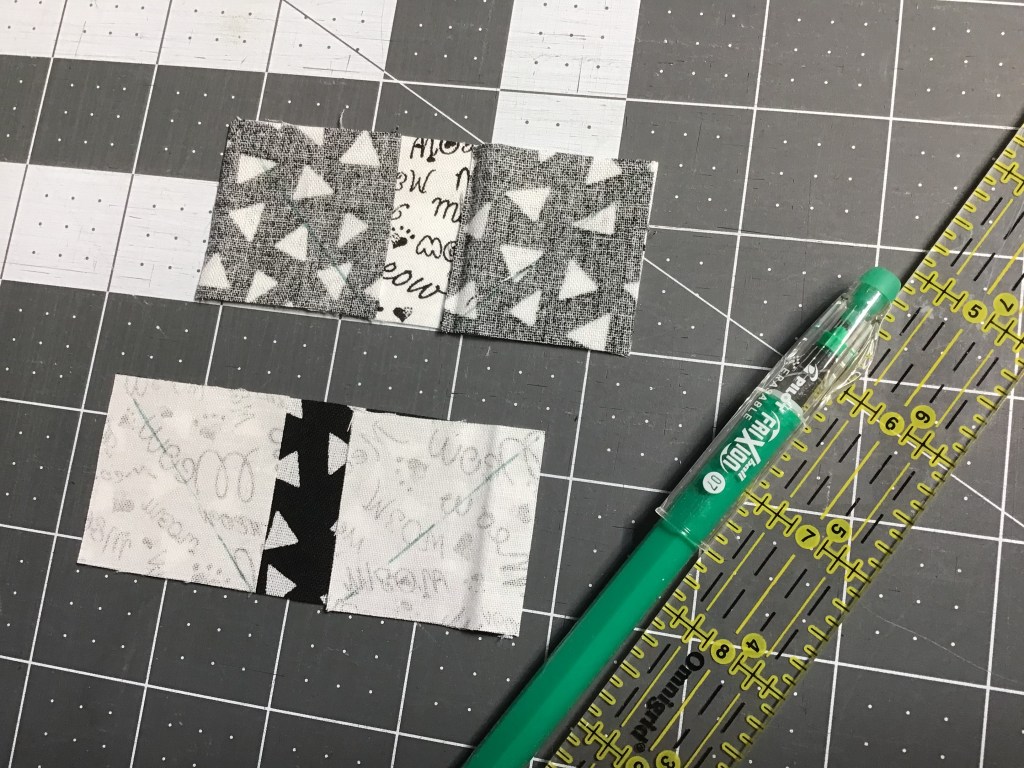
Layer your background and cat fabrics as you see here. I am making 2 cats at the same time and they will be a mirror image of each other. I used a pin to help hold things together on my way to my sewing machine. I also drew a sewing line with my marking pen (I LOVE Frixion pens for marking sewing lines on my fabric). Now off to my machine to sew on the line.

Next, trim off the waste triangles and press the unit open. I pressed my seams to the dark fabric.

Now to make some little ears! Layer your squares right sides together (RST) on the background fabric. Draw diagonal sewing lines on your squares with your marking tool. Sew on the line. Then cut away the waste triangles and press the units open. I pressed the seams towards the cat fabric.

Okay, we’re in the home stretch now. Yippee! Sew the ear unit to the top of the cat body — the ear fabric should match the cat (unless you’re feeling wild and crazy) and then sew the bottom of the ears to the cat body.

OOPS! You will see in the second photo, my cat ears didn’t line up very well with my cat body. Argh! No, it’s okay after all — the one edge of the cat fabric was folded under — whew, I was afraid my cat was growing right before my eyes!

Darn, time to use the tool all quilters and sewists run from in fear — THE SEAM RIPPER. (Cue creepy music.)

Done. It only took me a quick minute to rip out the seam, press the folded-under edge straight, and resew. Now we’re back in business. I pressed the seam towards the cat body.

In the first photo here, you can see how my cats will look after I sew the cat backs to the cat body/ear unit. I am planning to sew my cats front sides together. Ying and Yang, I think I will call them.

The middle photo shows the cats stitched together …….furever (sorry, I couldn’t resist).

The third photo shows how I pressed the seams — center seam between the cats open because of sewing the fiddly little ears together and the cat body/back seam I pressed towards the cat body. The ears wanted to be a bit difficult but I pressed them into submission with a little pressing spray (my favorite is Mary Ellen’s Best Press).

There you have it — a cat block with mirror-image cats. Of course, instead of sewing them fronts together, you might want to sew them with their backs together — would this be a cat fight???? — take a look at the quilt on the front of the Cat City pattern above for ideas.

BUT WAIT — there’s more! I just love saying that, don’t you?

I decided to cut 2″ strips for a border around my cat blocks for a fast to finish little quilt. I sewed the sides on first and then the top and bottom strips.

Voila! A little quilt, mini quilt, doll quilt, table quilt, place mat or whatever you want to call it.

Now I just need to layer my little quilt with batting and backing. Quilt it. Bind it.

DONE! My favorite kind of project. 🙂

Here is my black and white Ying and Yang alongside my first little Cat City quilt in pink and brown. When I finished the pink and brown one (which was my original example to figure out how the block went together), I decided that I had to make a black and white one.

I hope you will enjoy making your own Cat City quilt. Or maybe you just want to play a little bit and make yours mini. Whatever you choose, I can’t wait to see your cat quilts (and maybe your cats)!

You can share them on our Facebook page. Not a member yet? Join us to take part in all the Villa Rosa Designs fun HERE . We really are a fun bunch. Really.

Until next Thursday —

Sew. Laugh. Repeat.

Always,

Tricia @VRD