Hello Quilty Friends!
Happy Thursday to you!
I hope January is off to a good start for you. I’ll bet you have some great quilting plans for this year. Me too! In fact, I am already getting started on some. Yay!
What about New Year’s Resolutions? Do you make any? If you do, how hard is it for you to keep them?
I don’t really make “Resolutions” anymore because they’ve always been so specific and of course, that just set myself up for failure — sigh…….I guess I’m just not disciplined enough. So, instead of Resolutions, I make “Goals” for the New Year. The great thing about Goals over Resolutions for me is that my goals are not carved in stone and can change over time, can become completely irrelevant, or even get carried over into the next year. Know what I mean?
That being said, here are my Goals so far for the New Year:
- Eat more healthfully and get more active
- De-clutter, downsize, and organize
- Finish more projects
- Use my stash more efficiently
- Save more money
- Stick to a regular daily work schedule
- Find more time for creativity
- Change what I can and accept what I cannot change
- Be kind
I find that if I actually write my Goals down and review them once in a while, then I am more likely to accomplish them, or at least break them down into smaller steps so I am working my way towards the finish line. I keep a list of my Goals (written in pencil) in the front of my yearly planner. Sometimes I add more Goals throughout the year, change a Goal completely or even erase it if it no longer makes sense to me. Basically, I think it really all boils down to beginning and maintaining new habits.
Speaking of the New Year, it’s the Thursday after the first Friday of the month, which means NEW Rose Card Quilt Patterns! Yay!
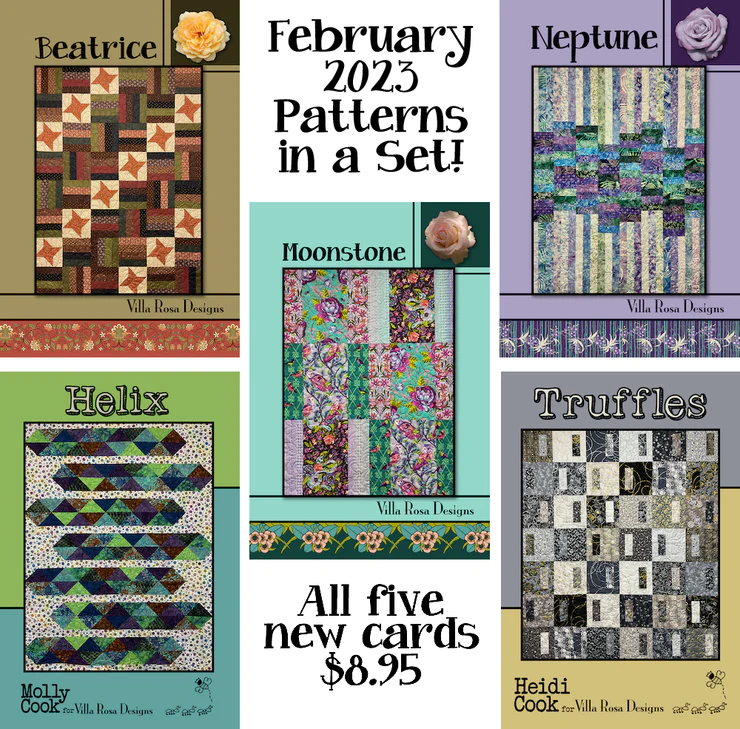
January 2024 VRD Rose Card Quilt Patterns

January’s patterns are awesome, aren’t they? Lucky you, you can get the set of 5 patterns for the special price of $8.95 HERE.
Please join me in warmly welcoming our newest designers, Rachelle of Rachelle Handmade and Deanne of Creative Sewlutions! Welcome Rachelle and Deanne! Hopefully soon, we’ll have Designer Spotlights here on the blog so everyone can get to know the two of you better.
Yep, there’s a new table runner pattern for Janaury, too. It’s called Snowberry and you can get it HERE.

Did you know you can get the New Rose Card patterns delivered right to you mailbox every month? You can sign up to get just the 5 monthly patterns HERE or you can get the 5 monthly patterns plus table runner(s) HERE.
But wait — there’s MORE!
If you missed last week’s blog post, I debuted our very special NEW Collection of patterns in partnership with the Quilts of Valor Foundation (QOVF). The collection features 12 Rose Card patterns that meet the size requirements for a QOV quilt. And of course, they are FAST and FUN patterns!
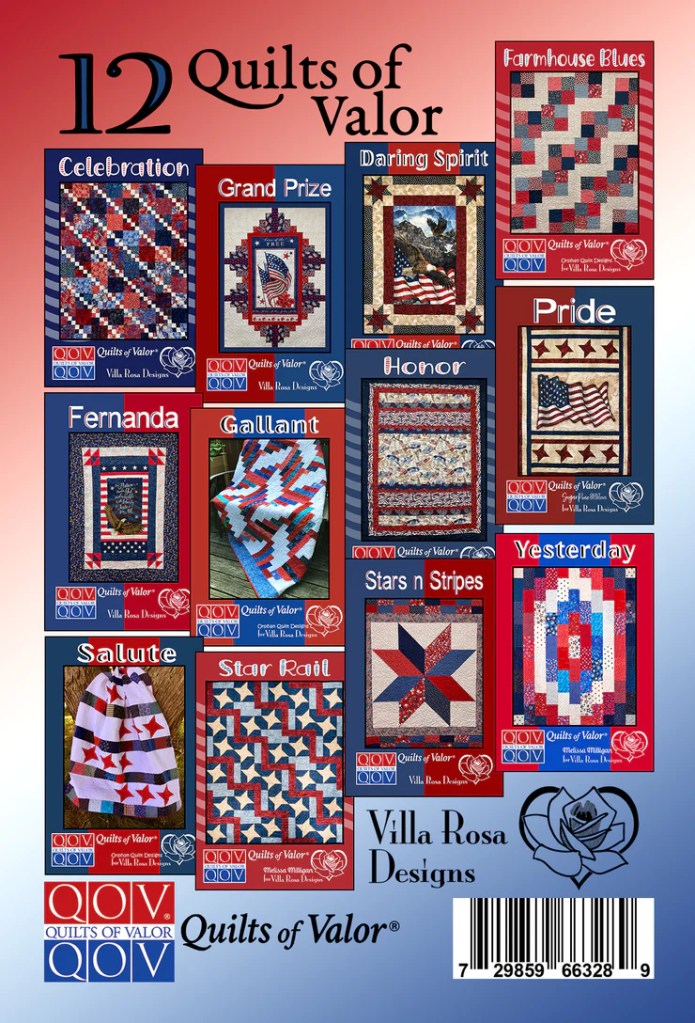
You can get the collection of 12 QOV patterns for the amazing price of $14.95 HERE. AND, a portion of the sales will be donated to the QOVF. It’s a win-win-win for you, for the QOVF, and for Villa Rosa Designs!
This collection of QOV patterns is sew inspiring that I challenge you to get together with a group of your quilty pals and make some quilts to donate to your local QOV organization. You can check HERE to find your closest QOV chapter. Maybe you’ll join and support the QOVF’s mission to get quilts into the hands of veterans and active service members.
Quilting Together
I know I’ve talked about getting together with your quilt posse before, but with a brand new year, it’s time to make some plans to quilt together. Quilting together is not a new idea at all, our grandmothers and their grandmothers gathered together to make quilts as well as to work on hand-sewing projects. Quilting circles were very popular during the Civil War, while women and girls did their part for the war effort by sewing for the soldiers, often their fathers and sons, neighbors and friends. My point is that quilting together is an important part of quilting and sewing and has been for generations.

Here are some great benefits we get when we quilt together:
- Social Connection, Community, and Friendship
- Sharing and Collaboration
- Learning New Skills
- Improving Existing Skills
- Teaching Others
- Self Esteem and Confidence
- Stress Relief and Relaxation (for some quilters, anyway)
Quilt Guilds are a continuation of the quilting bees and sewing circles of the past. I’ve been a member of the Free Spirit Quilters for quite some time now. And I know I’ve talked about my Friday Quilt Class/Group here on the blog before and how important those ladies are to me. Additionally, I have several friends (yes, I have friends [eye roll here]) with whom I get together to sew. It might be hand-sewing hexies while watching tennis or mysteries on TV or sewing all day in a friend’s newly set-up quilt room. And as part of my decluttering, downsizing, and organizing goal, I hope to get a second workspace set up in my studio so I can have a friend over to quilt with me in my space, too.
When I was a Girl Scout a long time ago, I can remember singing the song “The More We Get Together.” Do you remember this song?
The more we get together,
Together, together,
The more we get together,
The happier we’ll be.
For your friends are my friends
And my friends are your friends.
The more we get together,
The happier we’ll be.
Written by Irving King
This is Quilting to me.
Sew. Laugh. Quilt Together. Repeat.
Always,
Tricia @ VRD