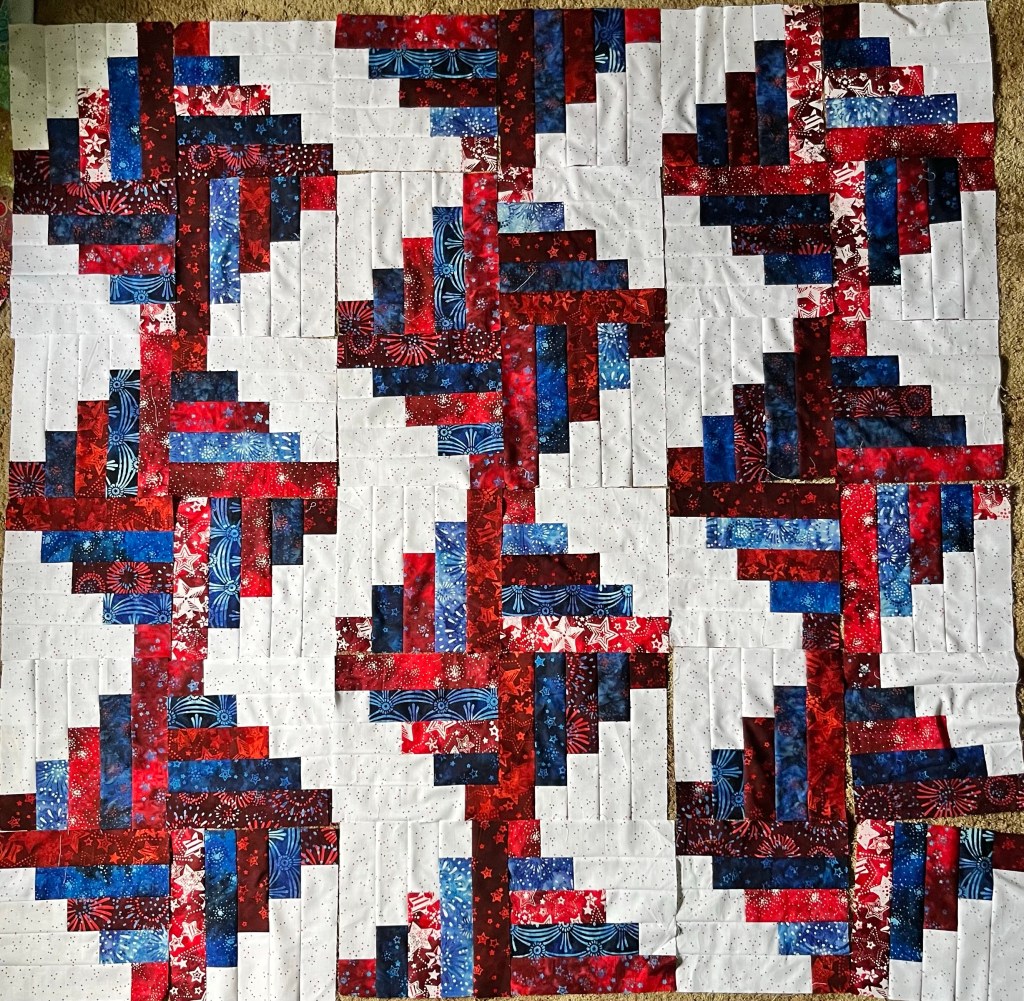
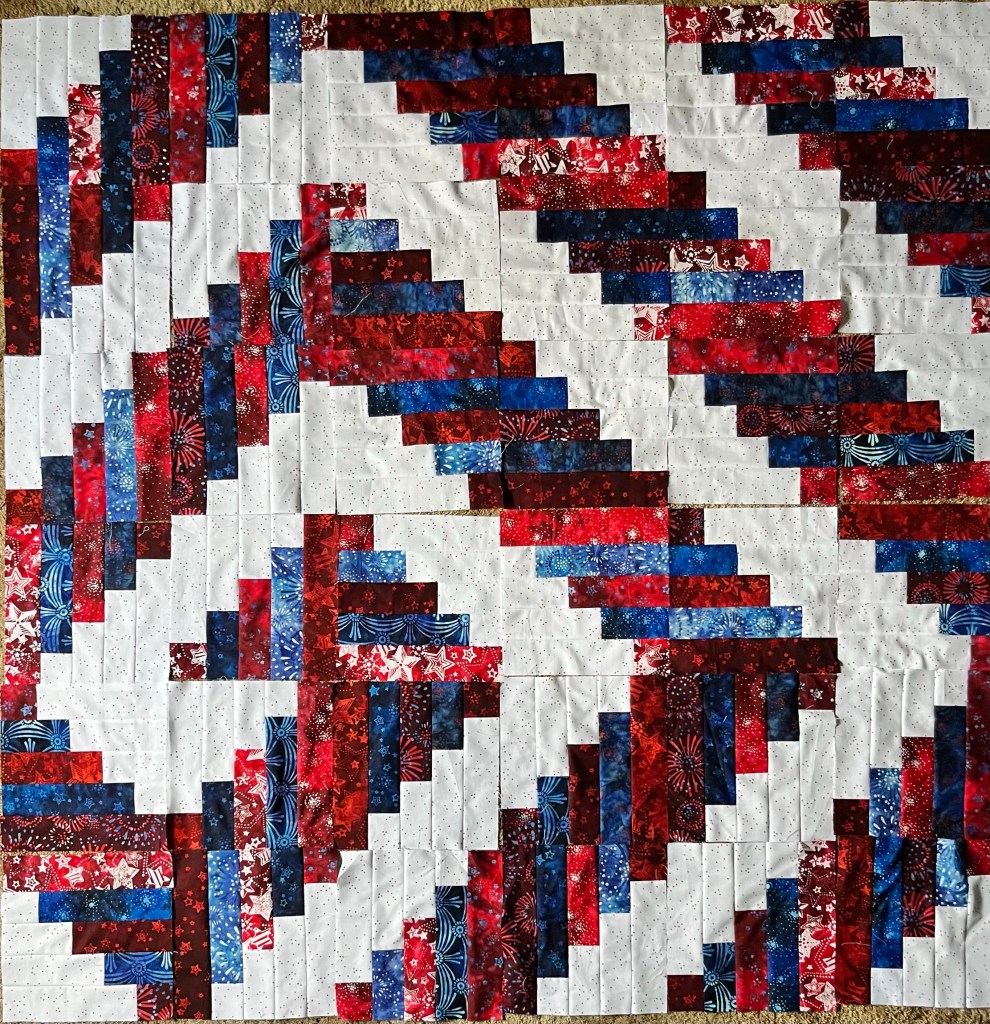
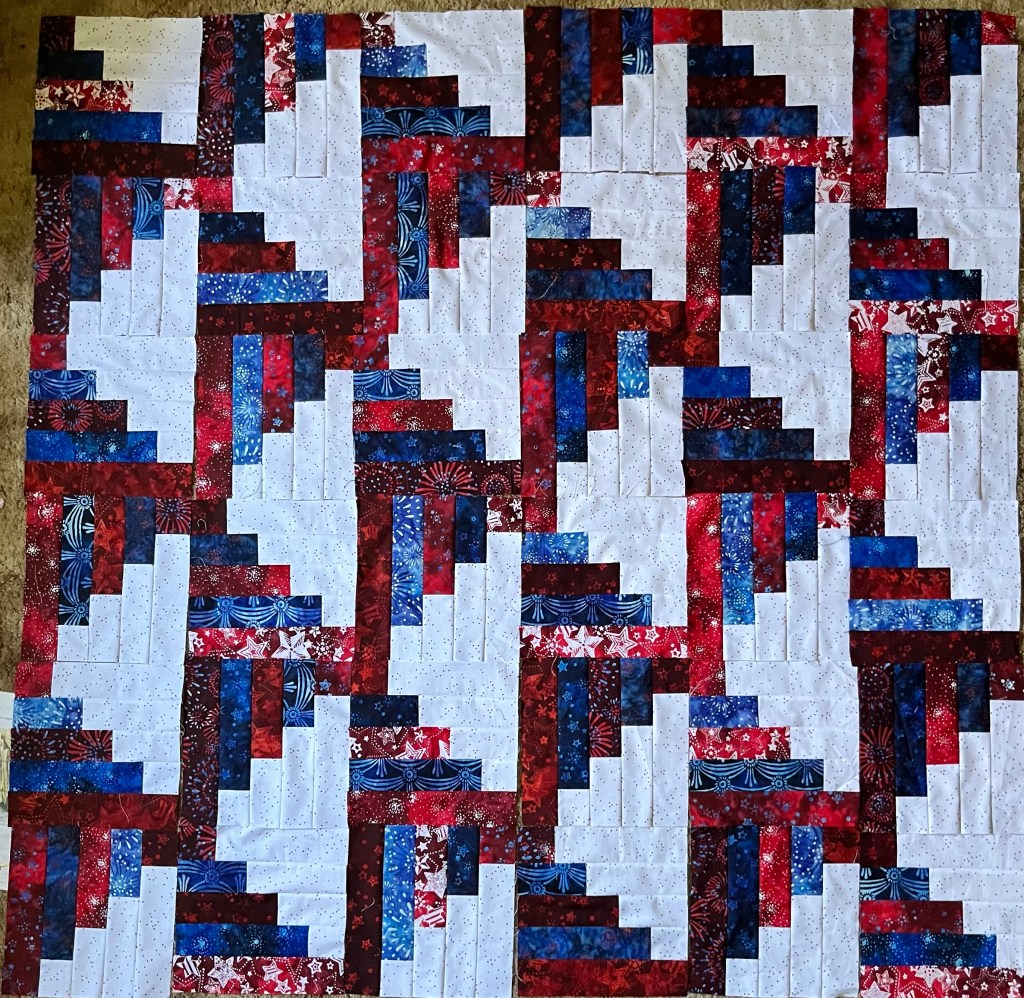
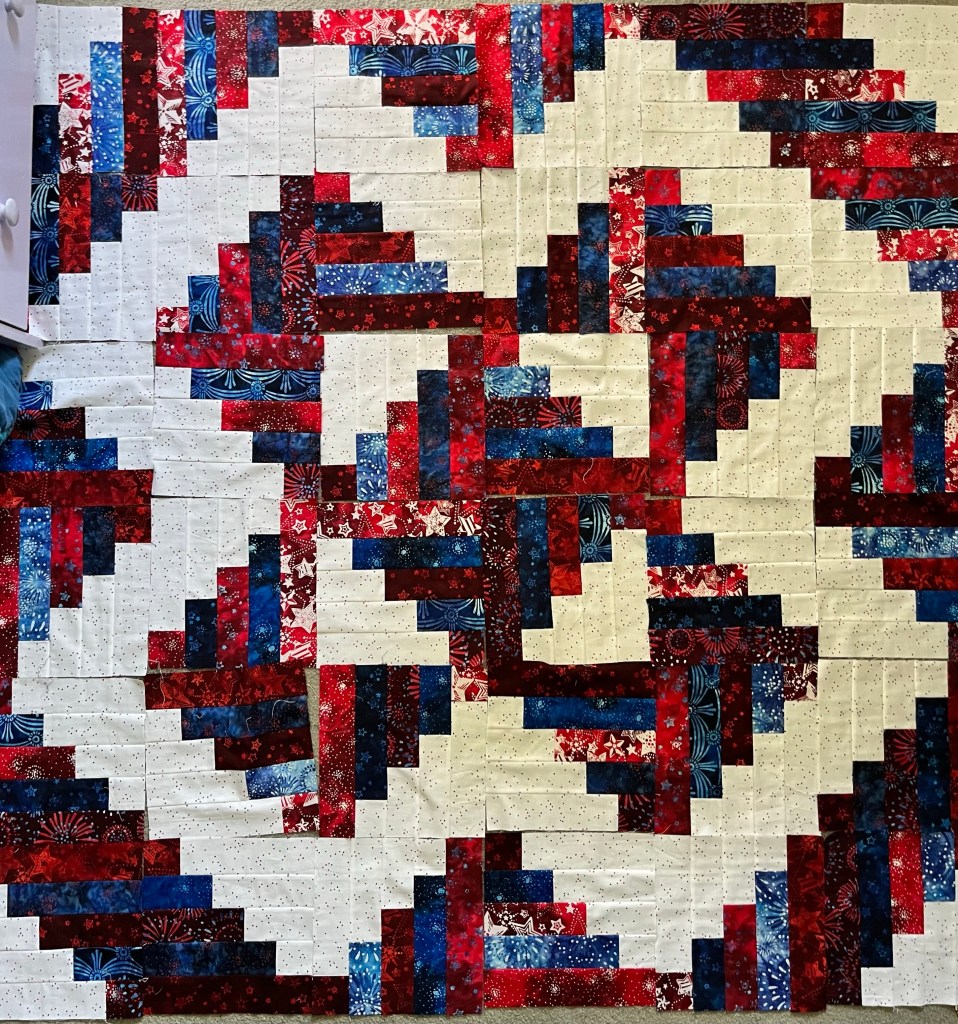
Tips and Tricks · villa rosa designs

Getting Organized for 2023 and a VRD Quilt Blog Hop!

Hello Quilty Friends!

Happy Thursday to you!

Here we are, wrapping up the year 2022. Already. Can you believe it? That’s really hard for me to wrap my head around!

How about you? Are you ready for a whole new year?

Image by Freepik

I used to write New Year’s Resolutions at the end of each year, but like most people, after a couple months, those Resolutions just didn’t resonate with me anymore and I failed more often than I succeeded. And each year, I would repeat the same process with the same results.

Somehow I stumbled onto the idea to write GOALS, not Resolutions.

Aha! Just a different word choice, but the same thing, you might think. But there is a big difference.

According to the Oxford Dictionary, a Resolution is a firm decision to do or not to do something.

A Goal on the other hand is defined as the object of a person’s ambition or effort; an aim or desired result.

Same general idea, but Resolutions and Goals really are different things.

So now I write down a list of Goals for each new year (PSST! I love writing lists! My sister, Tracy, knows this and gave me a list-making journal for Christmas. LOL!). For me, Resolutions just end in failure and why should I set myself up for failure when Goals are a more positive concept — goals in sports, anyone!?! — and feel more attainable to me. I have also discovered that Goals can change or morph into new Goals, they can have multiple components to accomplish, a series of steps to complete in a specific order or not, and I can even — gasp! — add, subtract, or refine Goals throughout the year.

Goals are definitely more valuable to me than Resolutions.

Do you do New Year’s Resolutions or Goals?

One of my biggest Goals every year is to Get Organized. It is certainly an ongoing project for me (as in ongoing for years…). Maybe this is one of yours too?

Something I’ve found out in the last couple years about myself is that keeping a planner/journal/calendar helps me to organize my goals, my thoughts, appointments, tasks, and more. Writing things down helps me to see my progress over time, plan what steps I need to do next, and even to change directions if I need to.

I am such a believer in planners/journals/calendars that — Big Surprise! — I even designed one, which incorporates blank weekly and monthly grids so people can start it whenever it’s convenient AND it’s a Block of the Month project too! Woo-hoo! Talk about multi-tasking — keep yourself organized and make a quilt one block at a time for a whole year!

It’s called the Blue Moon Block of the Month Quilter’s Planner and you can find it HERE.

I guess you could consider my planner my main tool for getting organized. Maybe 2023 will be my best organized year yet!

How do you approach getting organized? I can always use more tips!

Speaking of organization, recently I’ve been seeing some posts on our VRD Facebook pages about organizing Rose Cards. I know we’ve talked about this before — you can revisit the posts HERE and HERE. With over 500 patterns in our catalog with more added every month, we hope to offer some kind of storage option for your Rose Cards in the future.

What would you like to see? What kind of storage options for your Rose Cards would you be interested in? What do you need to keep your Rose Cards organized?

We’ve got a lot of new fun stuff coming in 2023 here at Villa Rosa Designs (not sure if some kind of Rose Card organizational tool will be one of them though) and I’m sew sew excited to tell you about the very first one coming in January — our very first Villa Rosa Designs Blog Hop!

VRD Blog Hop

What’s a Blog Hop? It’s a group of bloggers who write about a specific topic or theme. The participating bloggers write and share their posts during a specific period of time. During the blog hop, people can read the posts each day of the hop and register for prizes. YES! I said prizes! It’s a lot like a quilt shop hop, but you hop from blog to blog instead of store to store.

Our blog hop will be January 19-26, 2023 and we have a great group of participants who will be telling you all about their Fast & Fun VRD projects. We will also be offering a special Blog Hop Rose Card Collection.

Mark your calendars for January 19-26 and stay tuned for more about the Blog Hop next week.

Looking Ahead to 2023

What would you like to see in 2023 at Villa Rosa Designs? Ideas? Products? Are there new types of patterns you’d like to see that we aren’t already creating?

We always welcome your thoughts and feedback. Feel free to leave a comment on this post or email me at tricia@villarosadesigns.com.

Thank you, dear friends, for your support and enthusiasm for Villa Rosa Designs during 2022. We couldn’t do what we do without you and we are looking forward to a New Year filled with exciting new Rose Cards and more.

Stay safe and warm as you celebrate the New Year.

Until next Thursday —

Sew. Laugh. Repeat.

Always,

Tricia @VRD
Rose Cards · villa rosa designs

A Quilty Christmas Party and Perfect Last Minute Christmas Gift Ideas Quilters Can Make

Hello Quilty Friends!

Happy Thursday to you!

Today is December 15th — 10 days until Christmas!

Are you ready yet?

Gulp — other than shopping, I have yet to even get started. Oh wait! I put out a couple decorations in the living room and got the outside lights on. Hmm. That’s it.

Yikes! I’d better get moving, there’s only 10 days until Christmas…..

Background Image by Freepik

December Quilt Class Christmas Party

Recently, I wrapped up (pun intended) my 2022 Table Runner a Month class with a festive December Christmas party/class. What a lot of fun we had — we met an hour earlier than usual so we could do a pot luck lunch. YUM! I don’t know why, but quilting and food always go together. And chocolate — you have to have chocolate!

It was a soup and sandwich pot luck — we had 2 soups, sandwich wraps, meatballs, and an awesome assortment of everything else! Way too much food, but OH SO DELICIOUS! I tried my hand at potato soup. I ended up mashing 3 different recipes together. I made it on the stove top and then transferred it to a crock pot. I was amazed at how good it actually turned out, considering I’d never made potato soup this way before. In the past, I always started with a white sauce, but this time I started with chicken broth — I didn’t even have to add any flour — the starch in the potatoes thickened up the soup when I squashed them up with a spatula once they were soft. Of course, the cream cheese and shredded cheddar didn’t hurt any either! Here is one of the recipes I mashed up: Easy Potato Soup Recipe.

We did a 1 yard fabric exchange, too. For my group, that means we each brought the equivalent of about a yard of fabric in a gift bag or box (could be 4 fat quarters, 8 fat eighths, 1 charm pack, 2 half yards — you get the idea). To do the fabric exchange, we sat in a circle and played a Christmas game using a Right Left version of Frosty the Snowman.

Don’t know what a Right Left Gift Exchange is? You can go HERE for more information and 5 fun Right Left stories. Or just search “Right Left Christmas Game” on the Internet and you will get lots of different story options so you can choose your favorite! What I love about this game is that it doesn’t take a lot of time, you can do it with any size group, and no one’s feelings get hurt.

I also went over our December project and introduced the group to the Disappearing Nine and Four Patch blocks. Are you familiar with these? I just love all the different ways you can do them and how each time, your quilt looks completely unique even though you are using the same concept over and over. Lots of fun! If you are new to Disappearing Nine and Four Patch designs, you can go HERE for more information.

Our 2022 class was a Table Runner a Month theme this year (I try to choose a different theme or project each year). We began the class in March and met once a month through December. We skip January and February because those are usually the worst winter months in our area, but sometimes March and April can be worse than January and February. Oh, jolly Pennsylvania….. Each month in 2022, we made a different Villa Rosa Rose Card table runner pattern.

One of my quilty pals, Sherry, had been after me for a couple years to do a class on my VRD runners. I finally agreed to do a year of my VRD table runner Rose Cards for 2022 — it felt kind of weird to do an entire year of my own patterns, but Sherry was right — it turned out to be an awesome group/class.

Here is the list of the Rose Cards we did for 2022 (I added the links to the VRD website just in case you want to know more or purchase the patterns) —

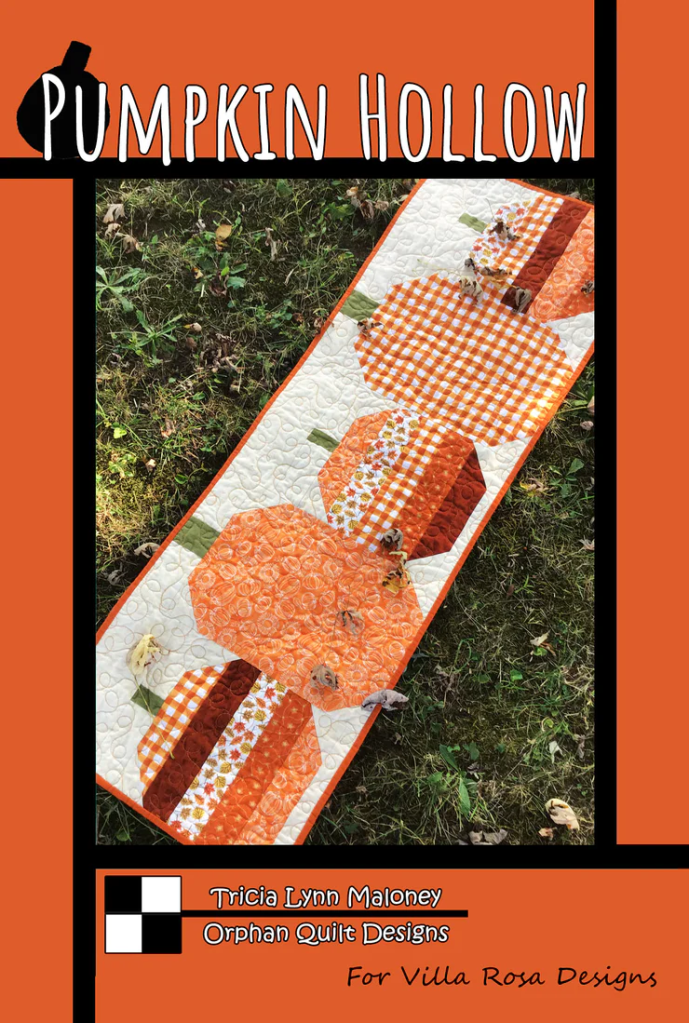
March — Ice Jam

April — Belle Amie

May — Pinwheel Picnic

June — Unfurled

July — Whirly Bird

August — Lattice

September — Leaf

October — Dapper

November — Peppermint & Holly

December — Coffee Break

Now for the fun! Here are photos of some of the table runners made by members of the group.

Awesome runners, aren’t they??? And these are only some of the numerous runners!

I love how each person showed their own styles, used their own fabrics, modified the design by adding or subtracting borders, made the runners smaller or larger or even a square, and even made some runners extra special by piecing extra fabric into the backing. These ladies are not only talented, they are a great group of people.

I was so inspired this year using my Villa Rosa patterns, we are going to do a Year of Panels and Novelties in 2023, using — you guessed it — Villa Rosa patterns.

Villa Rosa Designs has over 500 patterns in our VRD catalog, so I could seriously go for years without using the same pattern twice. How cool is that? Besides, VRD releases 5+ NEW patterns every month — that’s over 60 NEW patterns EACH YEAR.

You might wonder why I am taking so much time to talk about the Table Runner class, but it leads right into my next topic!

Perfect Last Minute Christmas Gift Ideas Quilters Can Make

Table Runners!

Yep — table runners are my go-to solution for a quick last minute handmade gift.

Let’s break this down:

Table Runners are….

  1. quilts
  2. handmade
  3. a very personal gift
  4. a lot faster to make than larger quilts
  5. easy to personalize to the recipient
  6. less expensive to make because they require small amounts of fabric
  7. precut and stash-friendly
  8. a great gift for practically anyone on your list
  9. special
  10. AWESOME!

Of course, any small quilt or project that can be finished quickly makes a great last minute gift — table runners, place mats, wall quilts, table quilts, doll quilts, mini quilts, pillows, and more.

Villa Rose Designs has got your back, I promise you!

A stack of VRD Rose Cards makes an amazing gift for yourself or your favorite quilty pals, too…..just sayin’……..

If you don’t have time to make a runner or other project before the holidays, consider gifting a quilt kit — pick a fun pattern and add the required fabrics for the top and binding. A kit for your fav quilty friend will give that person something new and fun to do during the winter months. Or gift a kit to a non-quilty person with a note saying you will complete it for them after the holidays.

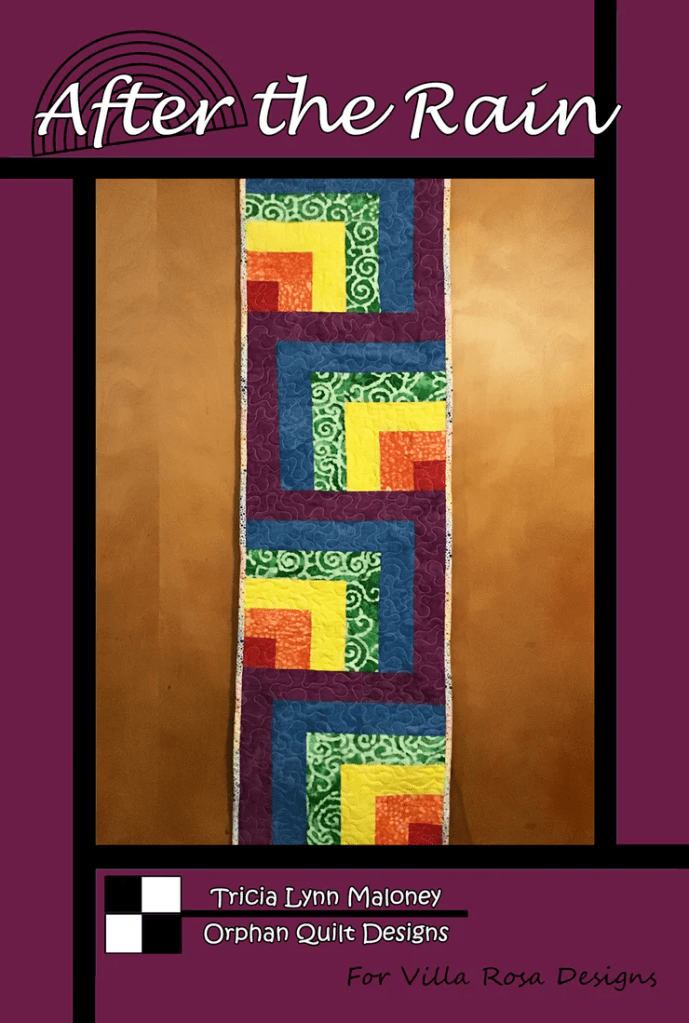
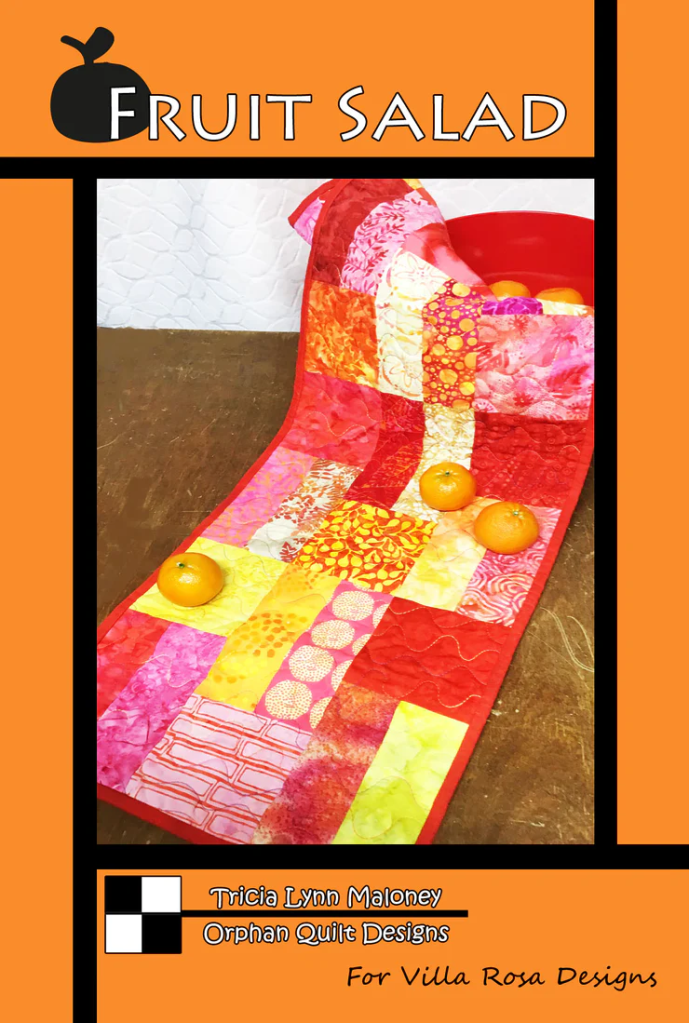
However you do it, here are some great Villa Rosa Designs Rose Card patterns to inspire you:

Table Runners and Place Mats

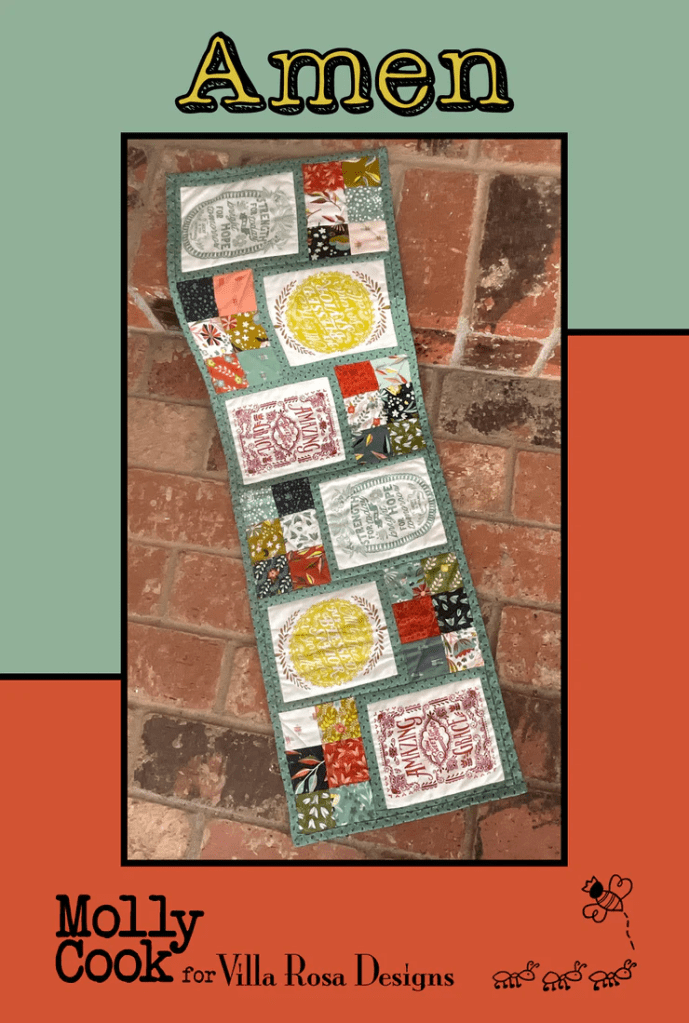
Amen uses pre-printed panel squares or a theme fabric which means some of the work is already done for you before you even get started.

Griddle uses stash or scraps so there’s no need to head to the quilt shop (unless you really want to…).

Ripple Runner is super fast to make and finish. Short on time? Use a light, medium, and dark fabric instead of making it scrappy. Or go Christmas scrappy — what fun!

Season’s Greetings is a no-brainer — really. Don’t have fat sixths (12″ x 22″)? Dive into your scraps and stash instead!

Sugarplum is a super simple and cute pattern that goes together in a snap. 1 fat quarter and a bunch a scraps. Sew sew sew! Presto! DONE!

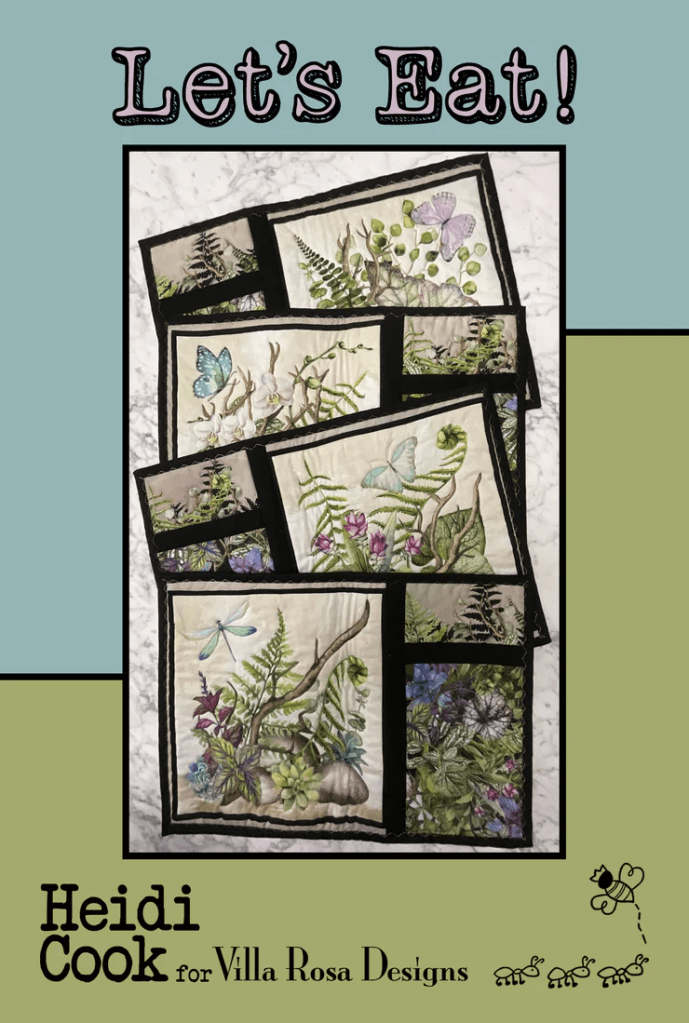
Let’s Eat is a fun set of place mats that uses pre-printed panel squares or a theme fabric which means of course that some of the work is already done for you.

Small Quilts

Baby Goose is a great versatile quilt at 42″ x 58″ and can be backed with only one width of fabric. It would take longer than a table runner to make, but it still goes very fast because the focal fabric does most of the work.

Blue Girl — just 3 fabrics….

Cabin Fever is the perfect size for a baby quilt or a wall quilt or a small lap quilt AND it goes really fast.

Cat City for your favorite feline lover. Go HERE for a 2 Cat City quilt block mini cat quilt tutorial.

Dainty Machines has directions for multiple sizes, including a 26″ x 26″ mini quilt with 4 blocks. You can check out my interview with Sewl Sister HERE.

Mod Tiles and Mod Tiles Too — got charm squares???

Fun Stuff

Did you know we have a whole VRD collection of Accessory Rose Cards? Accessories make great gifts for anyone and everyone. I’ll show you some of my favs, but you can click on the link above to see the whole collection.

Olivia Jane — a Charm Square Patchwork Tote

Savannah Jane — Cool pieced scarf. Add a fleece backing to make it cozy for winter.

Belinda Jane — Pillow Sham

Petula Jane — Roll & Go Place Mat and Napkin

Emmalina Jane — Eyeglass Case

I hope these great projects have not only inspired you but give you the desire to whip up those last minute holiday gifts. There’s still time, but you’d better hurry!

Well, that’s it for this week.

Until next Thursday —

Sew. Laugh. Repeat. And SEW some more.

Always,

Tricia @VRD

Rose Cards · Tips and Tricks · Tutorials · villa rosa designs

A Thanksgiving Turkey (Quilt Block) For You!

Hello Quilty Friends!

Happy Thursday to you!

Huh! It just occurred to me that our weekly Thursday blog post will happen on Thanksgiving Day!

I was planning to return to my Panel Quilt series, but then I thought it would be fun to design a little project just for Y-O-U as a Thanksgiving gift, because we here at Villa Rosa Designs couldn’t exist without the loyal support of you, our enthusiastic VRD fans and supporters. We are sew thankful for you.

Image by Freepik

What are your traditions for Thanksgiving? Do you cook a big family meal? Go out for Thanksgiving dinner? Watch football? Attend or watch the Macy’s Thanksgiving Day Parade? Do you celebrate alone or with a big boisterous family? Do you celebrate at someone else’s home or does everyone come to yours? Do you get a head start on your holiday shopping?

Thanksgiving is generally a small quiet affair with my family. Sometimes we cook and eat in, but in the past we’ve gone out, too. Usually there are just three of us but occasionally my sister and her family will stop by later for pumpkin pie. Depending on which teams are playing football on Thanksgiving, I usually find a little time to get some quilting in while my family is cheering on their team.

My favorite Thanksgiving holidays have been spent at my Aunt Helen’s house with my many cousins and their families. My Aunt’s house is usually bursting at the seams with people and dogs. Squabbling, laughter, enough amazing food to feed an army, and lots of good conversation and memories. Football on the television in the living room. Sometimes cards or board games after dinner at the kitchen table. Good times and new memories in the making.

All of these warm fuzzy feelings and memories made me want to design a special Turkey Quilt Block as a way to say “Thank You” to all of you! I was inspired by Lori Holt’s Tom Turkey Quilt Block tutorial, but I created my own turkey block, based on a humble Nine Patch because I wanted my Talking Turkey block to be happy and plump.

My Talking Turkey block finishes at 16″ high by 22″ wide.

Below is my sample Talking Turkey block. Isn’t he a handsome fellow????

Now that you’ve seen how yummy this block turned out, let’s get started on the tutorial!

Talking Turkey Quilt Block Tutorial

Supplies

12 assorted charm squares (5″) for the feathers/body

1 fat quarter for the background

1 fat eighth brown for the head/neck

Scrap of red for the wattle, approximately 2″ x 5″

Cutting

Background: 3 5″ squares, 1 4 1/2″ square, 3 2 1/2″ squares, 1 2 1/2″ x 12 1/2″ rectangle, 1 2 1/2″ x 8 1/2″ rectangle, 1 2 1/2″ x 4 1/2″ rectangle, 1 1 1/2″ x 4 1/2″ rectangle , and 1 1/2″ square

Red Scrap: Trim to 1 1/2″ x 4 1/2″

Brown: 1 2 1/2″ x 16 1/2″ rectangle, 1 2 1/2″ x 4 1/2″ rectangle, and 1 2 1/2″ square

Making the Block

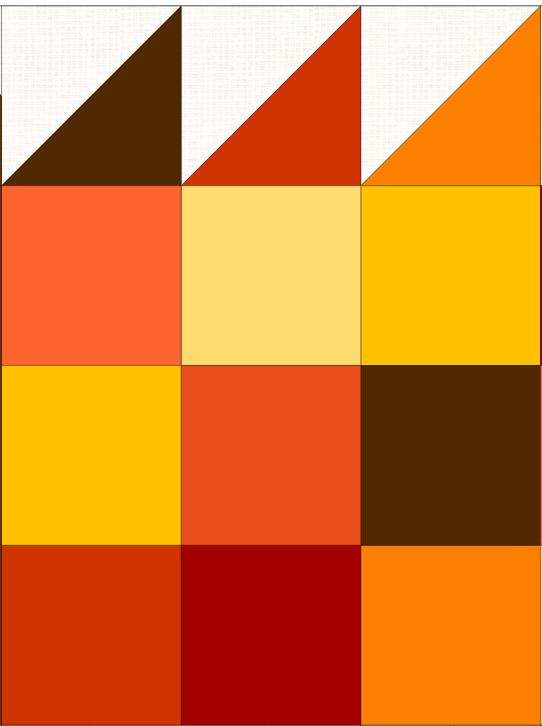
Step1. Trim 9 assorted charm squares down to 4 1/2″ and sew them together into a Nine Patch block.

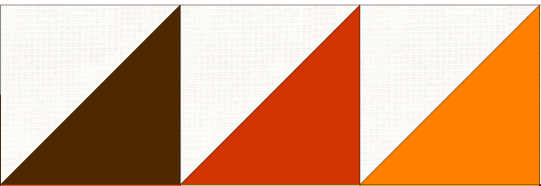
Step 2. Layer a print 5″ square right sides together (RST) with a background 5″ square. Draw a diagonal line from one corner to the opposite corner. Sew 1/4″ away from both side of the drawn line. Cut apart on the drawn line. Press units open to make 2 Half Square Triangle blocks (HSTs). Repeat to make a total of 6 HSTs. Trim your HSTs to 4 1/2″ if needed.

Step 3. Sew 3 assorted HSTs together into a row with the top point to the right as shown.

Step 4. Sew the remaining 3 HSTs together with the top point to the left as shown. (You are making a mirror image of the unit in Step 3.)

Step 5. Sew the HST unit from Step 3 to the top of your Nine Patch block.

Step 6. Sew a 4 1/2″ background square to the left end of the HST unit from Step 4. Then sew the HST strip to the right side of the Nine Patch block.

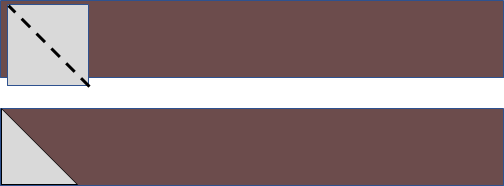
Step 7. Layer a background 2 1/2″ square RST on the end of the brown 2 1/2″ x 16 1/2″ rectangle. Draw a diagonal line from the top left corner to the opposite corner. Sew on the line. Trim away the waste piece 1/4″ beyond the sewing line. Open and press.

Step 8. Layer a background 2 1/2″ square on the other end of the brown 2 1/2″ x 16 1/2″ rectangle. Draw a diagonal line from the top left corner to the opposite corner. Sew on the line. Trim away the waste piece 1/4″ beyond the sewing line. Open and press.

Step 9. Layer a background 2 1/2″ square RST on the end of a brown 2 1/2″ x 4 1/2″ rectangle. Draw a diagonal line from the bottom left corner to the opposite corner. Sew on the line. Trim away the waste pieces 1 /4″ beyond the sewing line. Open and press.

Step 10. Layer a background 1 1/2″ square RST on the end of a red 1 1/2″ x 4 1/2″ rectangle. Draw a diagonal line from the bottom left corner to the opposite corner. Sew on the line. Trim away the waste pieces 1/4″ beyond the sewing line. Open and press.

Step 11. Sew a background 1 1/4″ x 4 1/2″ to the Step 10 unit. Then sew a 2 1/2″ x 8 1/2″ rectangle to the bottom of the unit as shown.

Step 12. Sew the brown unit from Step 9 to the end of the unit from Step 11.

Step 13. Layer a brown 2 1/2″ square RST on the end of a background 2 1/2″ x 4 1/2″ rectangle. Draw a diagonal line from bottom left corner to the opposite corner. Sew on the line. Trim away the waste pieces 1 /4″ beyond the sewing line. Open and press. Then sew the unit on the right end of a background 2 1/2″ x 12 1/2″ rectangle.

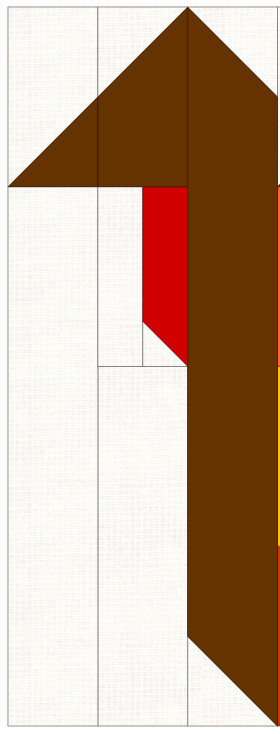
Step 14. Sew the units from Steps 8, 12, and 13 together to make the turkey head, wattle, and neck.

Step 15. Sew the front of the turkey from Step 14 to the back of the turkey from Step 6.

Voila! A plump and yummy Talking Turkey block for you to enjoy! Happy Thanksgiving to you!

As per our Copyright for Quilters post last week, I give you permission to use my original Talking Turkey quilt block for personal and commercial use, as long as you provide proper attribution that I am the designer of the Talking Turkey quilt block.

Add a narrow border, quilt and bind for a little wall or table quilt.

Enjoy!

Until next Thursday —

Eat. Sew. Laugh. Repeat.

Always,

Tricia @VRD

Rose Cards · villa rosa designs

Fireworks and the NEW Villa Rosa Quilt Patterns for July

Hello Quilty Friends!

Another Happy Thursday to you!

I hope you all had a wonderful and safe 4th of July week end — how fun that the actual July 4th was on Monday. I bet a lot of you had a 3 day week end. Sew, what did you do for the holiday?

And I’d like to add a belated Happy Canada Day for our friends in Canada! How did you celebrate?

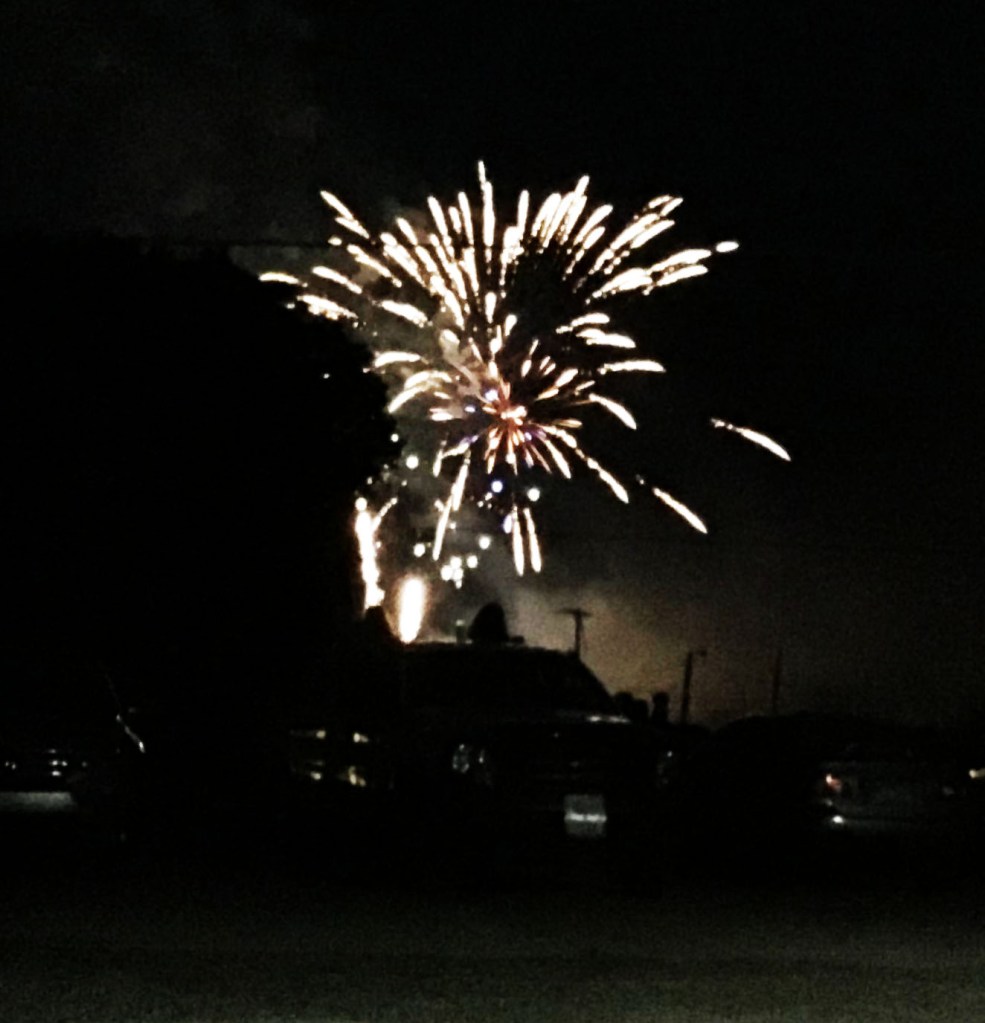
Celebrating the 4th of July for me is usually family, food, and fireworks in no particular order. I personally saw fireworks 3 times — 2 were live and 1 was a live stream of Boom over the Bay in Erie, PA. I love watching fireworks, although I am not a fan of the big booms themselves. I saw a lot of new fireworks this past week end, including hearts and stars as well as some awesome color combinations. Did you know that the Chinese invented fireworks thousands of years ago?

I even tried to capture a few photos of the amazing fireworks display in Sheakleyville, PA.

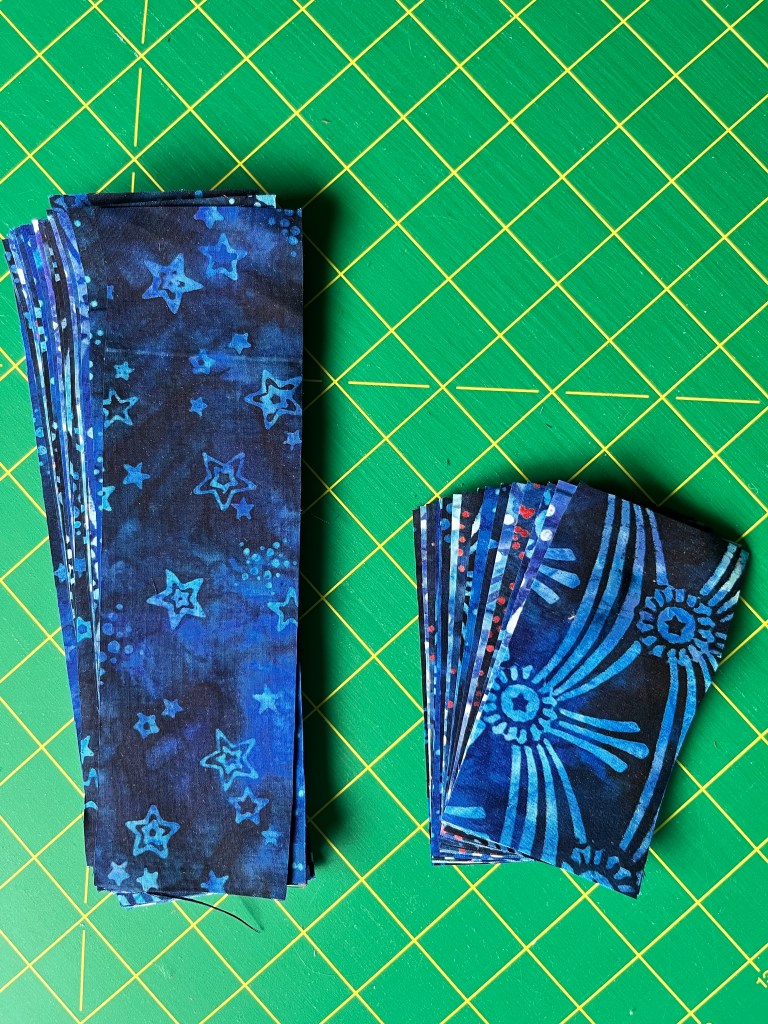
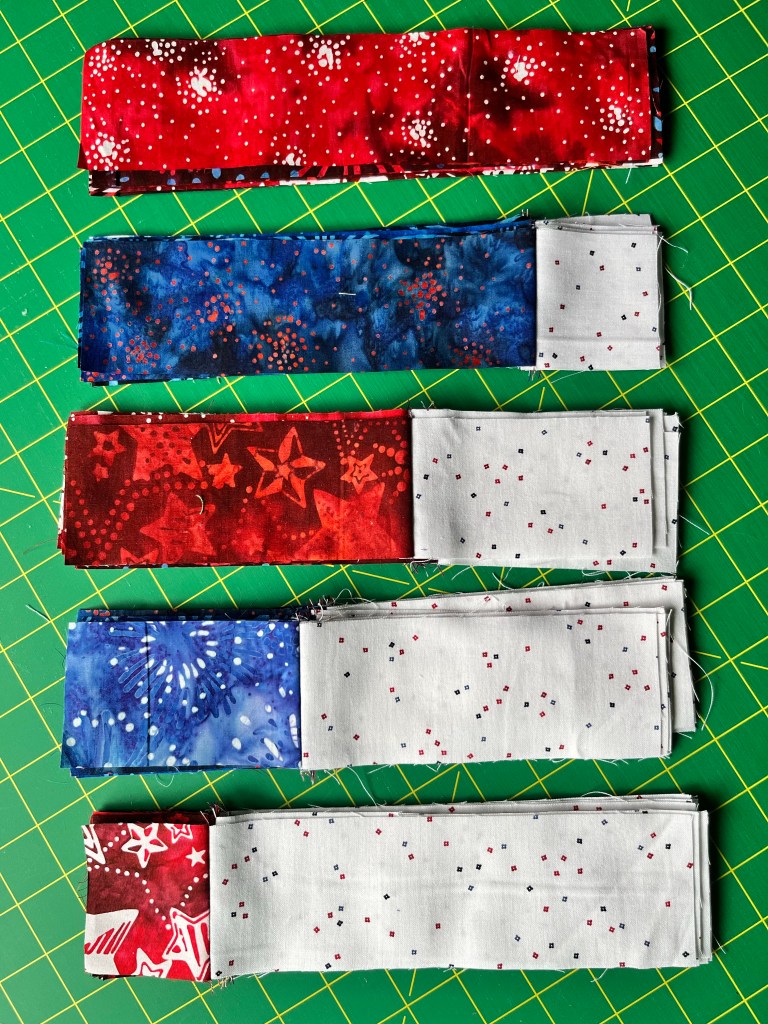
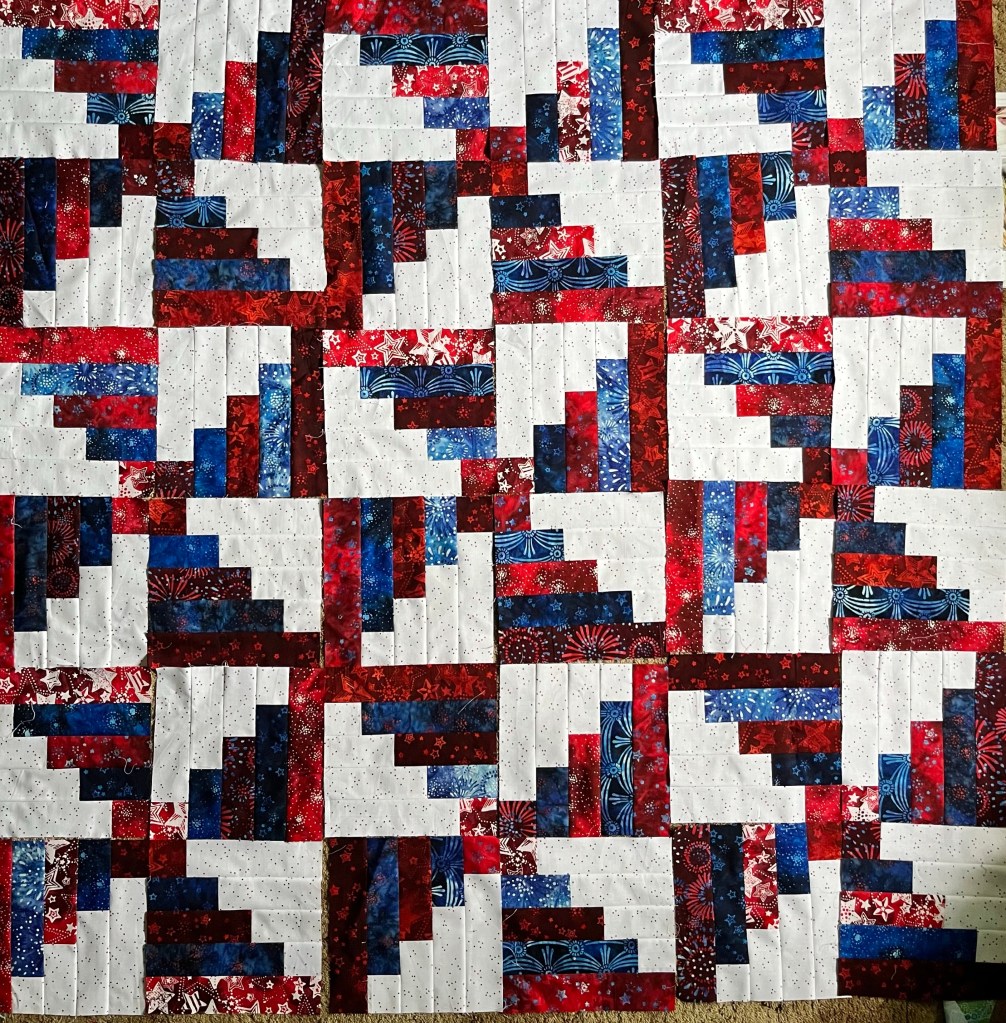
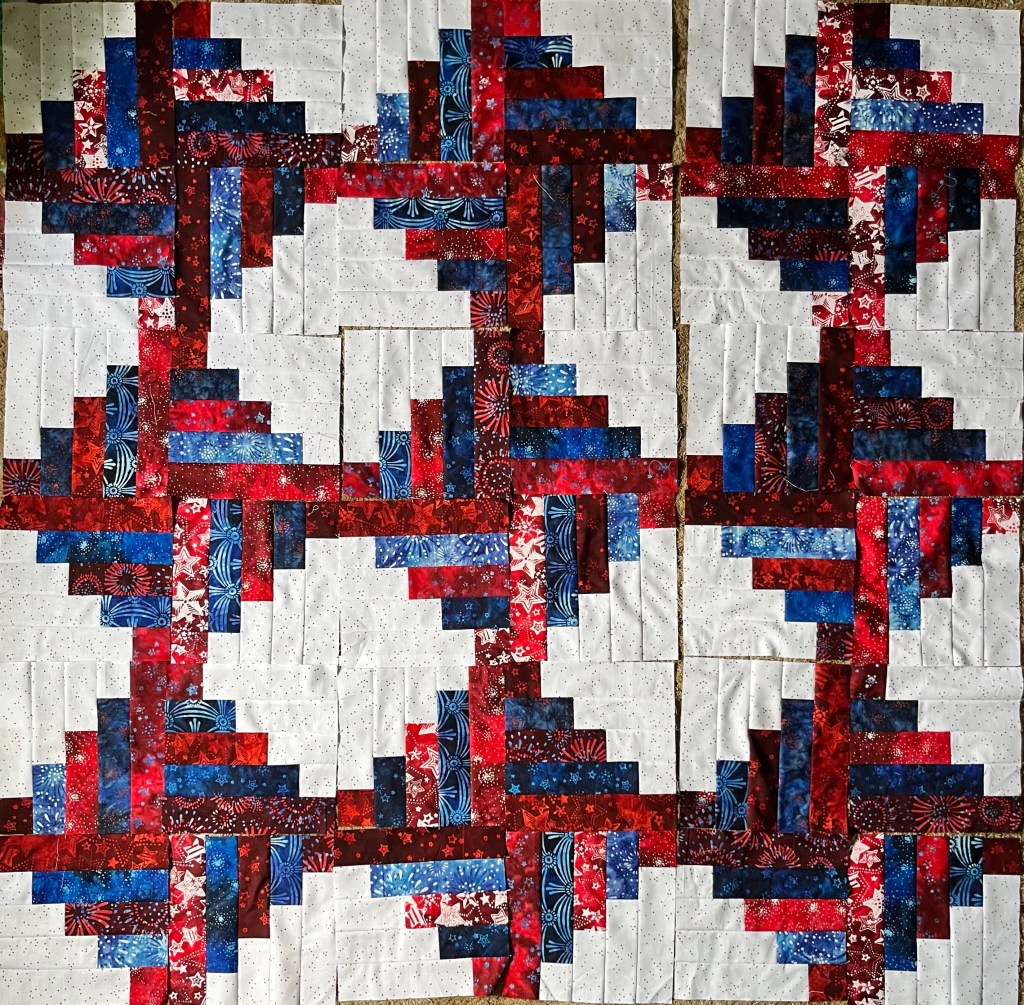
I even managed to start a new quilt project. Psst…….it’s red, white, and blue……and batik! Stay tuned for more on this project down the road.

Have you ever thought about creating a quilt that looks like fireworks? I do every time I see fireworks, but that’s as far as it ever goes. Maybe this year will be different and I’ll give it a try. Who knows?

NEW July VRD Patterns

Speaking of fireworks, the new July VRD patterns are out! Here’s my new table runner pattern for July, Firecracker:

Isn’t it fun? AND it goes together really really fast. You can order the pattern HERE. Or you can order a kit which includes the pattern HERE. Please keep in mind I don’t know how long the kit will be available so get yours now.

But wait! There’s MORE! (I just love saying that — it makes me giggle, although you might be rolling your eyes…)

One of the VRD folks came up with this super fun variation:

POPSICLES! How fun is this? And clever?? You can order the Firecracker Popsicles kit HERE. Again, I have no idea how long the kit will last, so get don’t wait to order yours.

And finally, here are the rest of the NEW patterns for July:

Aren’t they great? You can order all 5 cards for one low price HERE.

And these are the links to the kits (which include the pattern as well as the fabrics for the top and binding). Remember, there is no way to know how long the kits will last, so get yours now:

Sugar & Spice

Love Cats

Rainbow Road

Dainty Machines — Please note the kit for Dainty Machines makes a 32″ x 32″ quilt. Super cute, may I add! This would be perfect in your sewing room or as a gift for your fav quilting buddy.

Optic

Well, that’s it for this week.

Until next Thursday —

Sew. Laugh. Repeat.

Always,

Tricia @VRD

Rose Cards · Tips and Tricks · Tutorials · villa rosa designs

A Little Gardening and Cake Day Quilt Block Assembly Tips

Hello Quilty Friends!

Happy Thursday to you! I hope you all are having a wonderful summer so far.

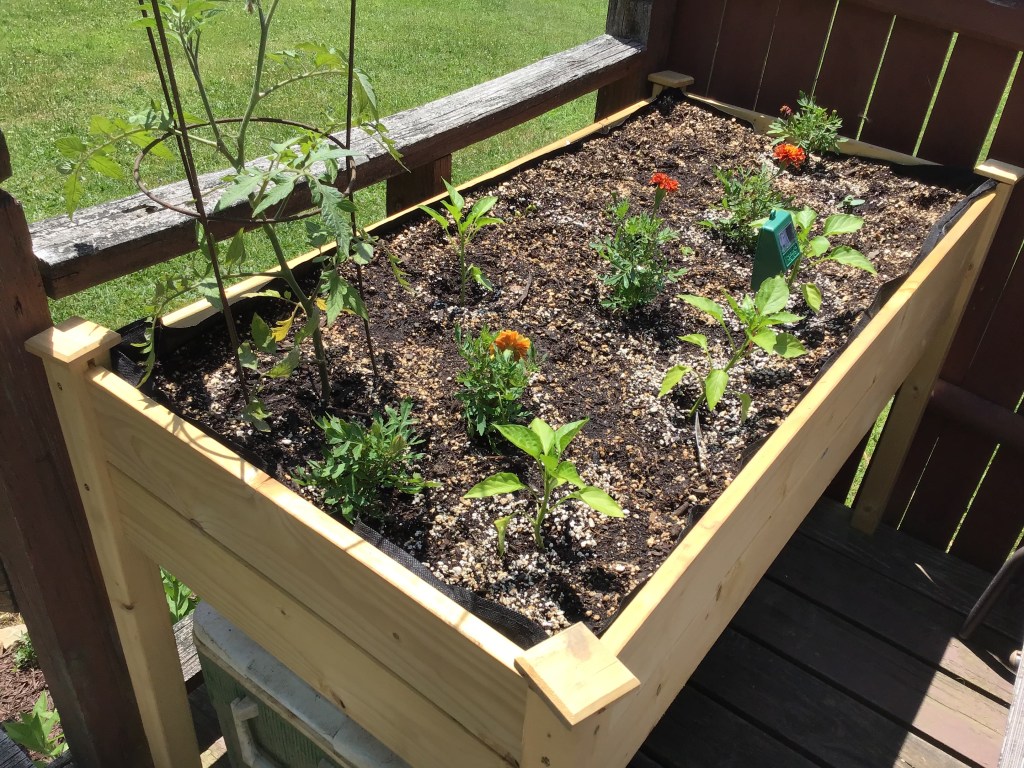
My summer just got a whole lot better! Just recently my family got in gear and finally got our little back porch raised garden planted. And our flowers, too. We may be running a little behind, but I have hopes that in late summer/early fall we’ll be enjoying some fresh veggies picked right out of our little garden pf goodness. If it goes well, next year we are going to add a second raised bed garden.

I used to be an avid gardener way back when, but gave up the year I planted my garden twice and the critters ate everything before it even had a chance to grow. That was it.

But now I’m excited to try container gardening. Besides, ”container gardening” sounds so trendy, don’t you agree?

Cake Day Quilt Block Assembly Tips

I thought I’d share a quick tutorial on how I put the Cake Day table runner quilt block together along with some of my favorite piecing tips.

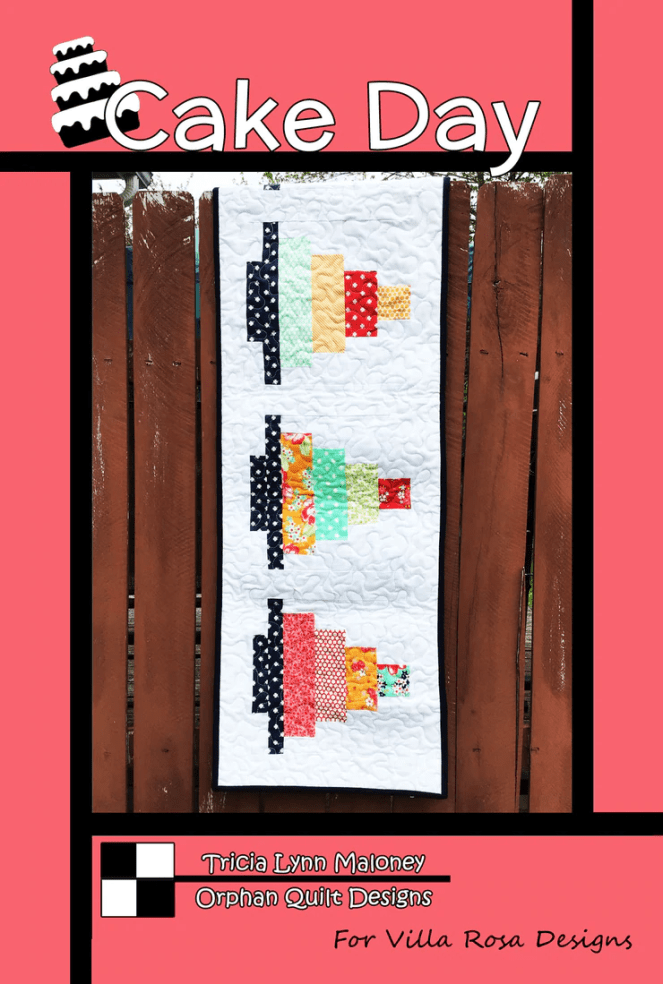
Cake Day Table Runner Rose Card Pattern

You can get your own Cake Day Table Runner Rose Card pattern HERE.

Often, I prefer to cut out all my pieces for the blocks before I start sewing. I find this is usually quicker than cutting and sewing one block at a time.

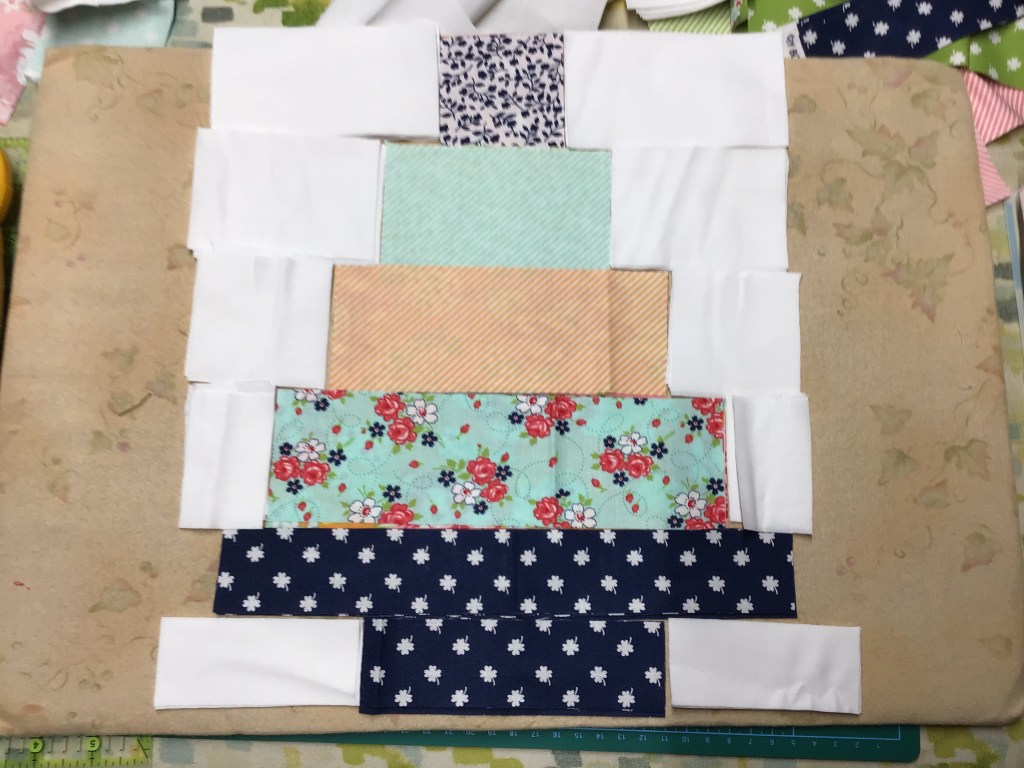
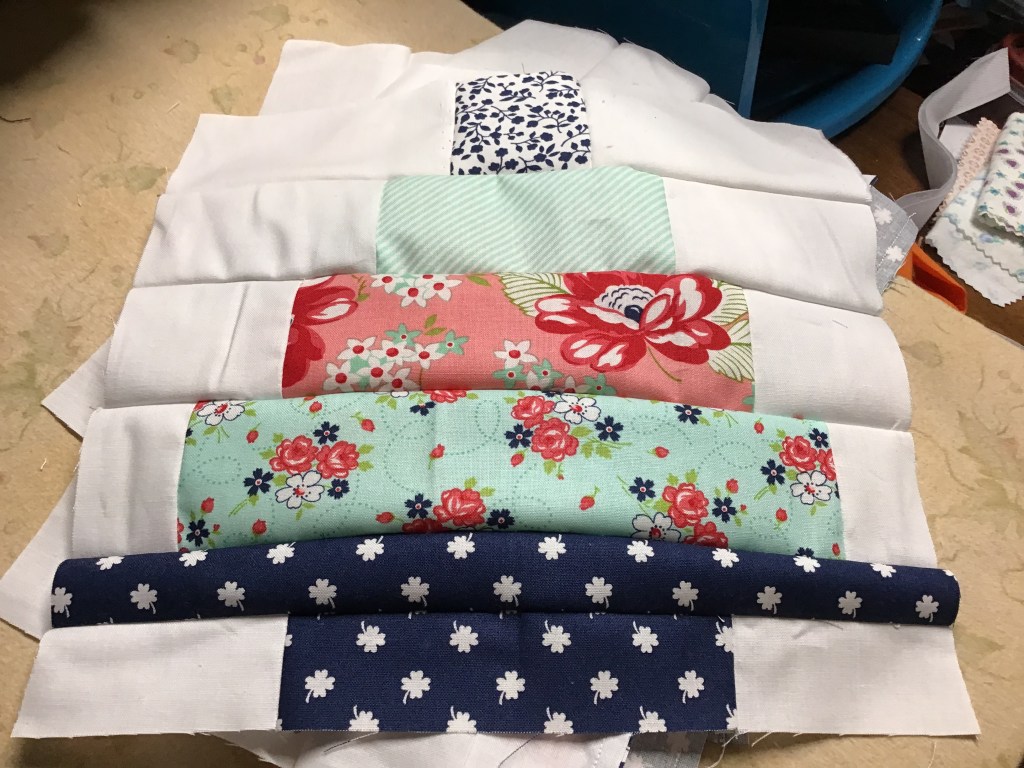
Here you can see the pieces all laid out in the right order (all four blocks are stacked) on a flannel board and then I can simply take everything to my sewing machine. This works well if you have to stop in the middle and come back to your project later. Everything stays right where you left — unless of course, you have gremlins or leprechauns or some other little mischievous creatures running around your sewing room when you are not looking.

I have also found that laying out and stacking the pieces in order makes sewing them together faster and easier because I don’t have to stop and figure out where each piece goes.

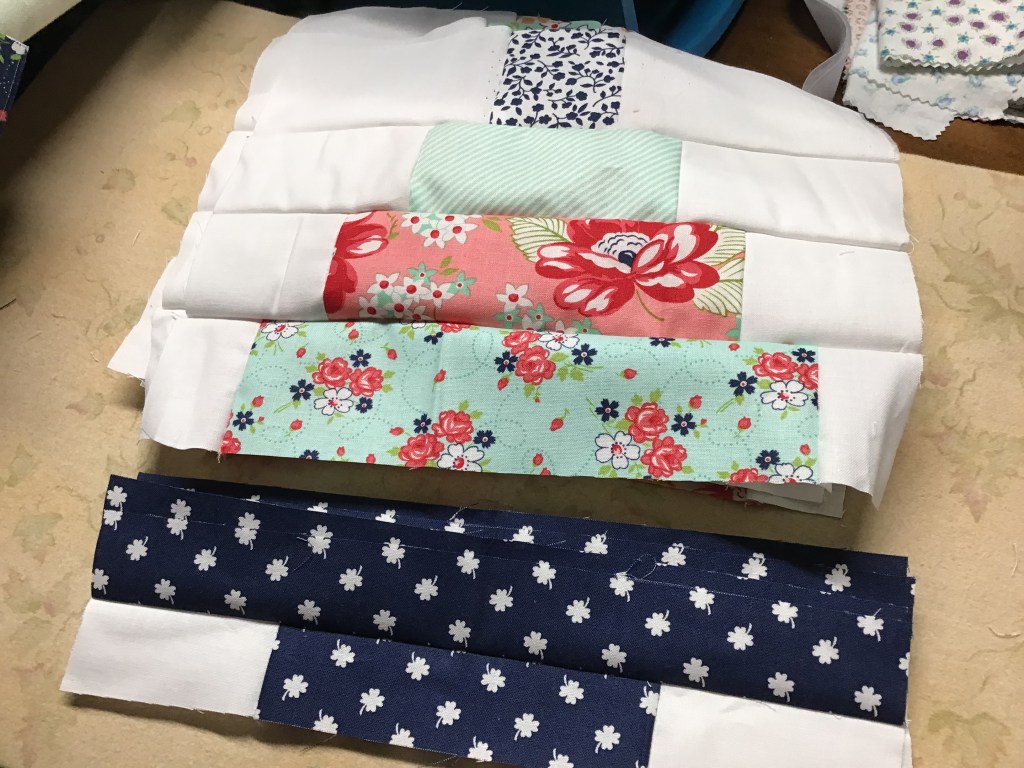
With all the pieces cut and laid out right sides up, sewing them together is a breeze, especially when I chain-stitch the units one right after the other without cutting my thread in between the units.

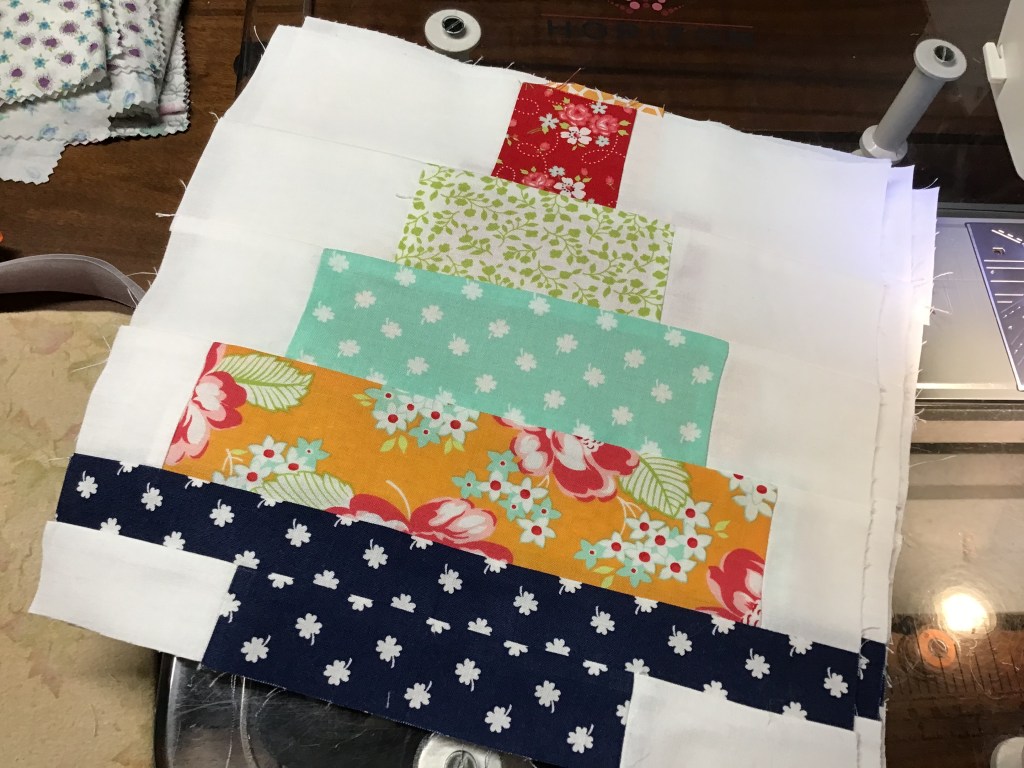
Nope! No need to head to my ironing board after clipping the thread between the units, I just kept sewing and chain-stitched the other side too.

I have discovered that the less I press as I’m putting together quilt blocks, the less the blocks stretch or get distorted, which of course improves the accuracy of my sewing.

In the next photo you can see I have the left side background sewn to the Cake print rectangles. Now it’s time to sew the right side.

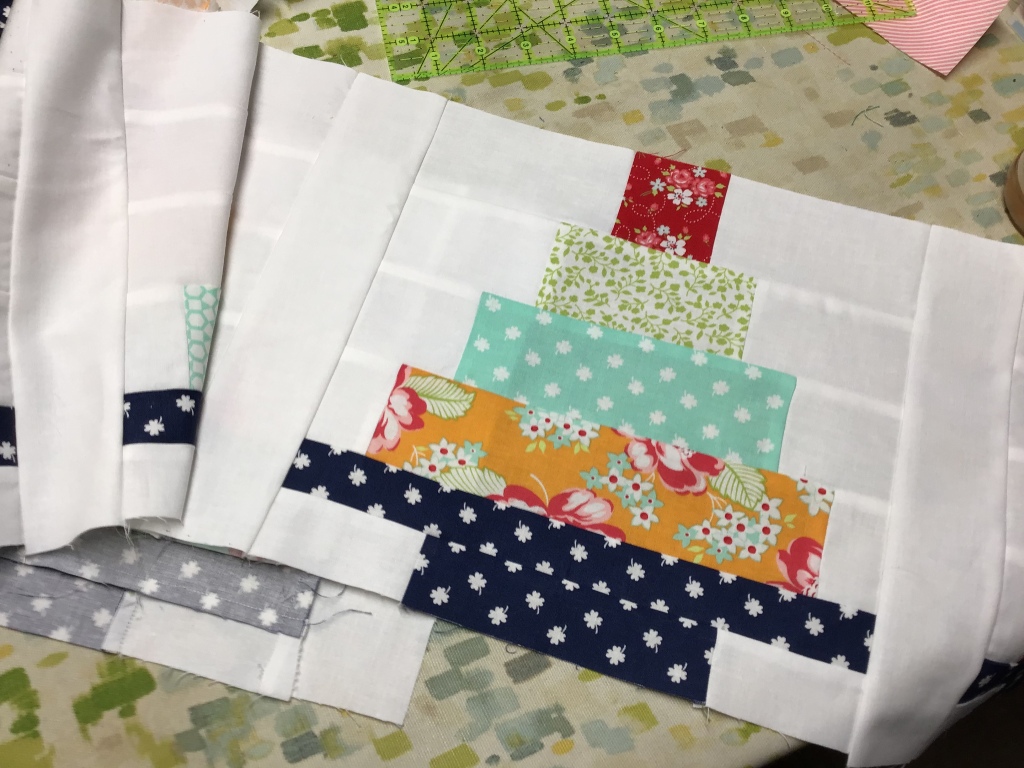
All right! All the units are sewn together and I’ve clipped the threads between them. I made double sure I layered the units again exactly the same as when I started — we’re ready for the next step.

Again, I’m going to ignore my iron (it must be getting lonely). Time to sew the units together. More chain piecing.

Want to know what happens when I get to seams (remember I haven’t done any pressing at this point)? I’ve already decided which way I wanted my seams to go so as I sew, I hold them down and keep on sewing. Pedal to the metal!

In this next photo you can see I sewed the top unit to the second unit. We’re on a roll — let’s keep sewing.

Okay, we’re almost there! I sewed the rest of the units all together and presto — all 4 of our blocks are now complete and I didn’t even have to get up from my sewing machine.

All right, all right, I relented and finally pressed my blocks — my iron was getting a little dusty from disuse.

Voila! Here is a finished Cake Day block. It’s a cutie, isn’t it?

My 4 blocks are now ready to assemble into a runner. There are sew many possibilities for this runner — birthdays, weddings, showers, parties, and the list goes on and on.

Any day can be a “Cake Day.” What’s yours?

Until next Thursday —

Sew. Laugh. Repeat.

Always,

Tricia @VRD

Quilting Partners · Tips and Tricks · Tutorials · villa rosa designs

Let’s Design a Quilt Together — A Peek into My Quilt Design Process

Hello Quilty Friends!

It’s Thursday again! Here’s hoping your week has been going well. Mine has been good and fast — just the way I love my quilt projects to be! LOL!

A lot of people ask about my design process so I thought I’d tell you a little bit about my process. Keep in mind that all designers have their own way of doing things and this post is only about my process.

Sometimes it’s like I eat, sleep, and breathe quilts and quilting! Not only do I read/flip through quilt books and magazines, I also look online for new trends. I talk to my quilt friends about what they are doing. I teach a quilt class once a month. I design patterns, write instructions, make quilts, take photos of quilts. I look at and get inspired by fabric. I jot down ideas and even do rough sketches of quilt blocks (which I promptly lose most of the time). I have even been known to wake up in the middle of the night with a new idea for a quilt. Whew!

Inspiration comes in a lot of different forms for me. Sometimes I see a fabric or collection and an idea pops into my head. Sometimes I start with a favorite quilt block and a quilt develops out of that. I have quite a few quilt block references that I use for ideas. Here are a few books in my library:

The first 2 books are by Barbara Brackman. The one on the left is the first edition of the 2nd book and is out of print and can be hard to find. I have both of them and love them both. The newer edition has even more blocks in it than the first edition! Barbara Brackman is one of the most renowned quilt historians of our time! You can visit her blog, Material Culture, HERE.

I also have Barbara Brackman’s software program, Blockbase, which works with Electric Quilt. You can find Blockbase HERE.

The third book, 5500 Quilt Block Designs, is by well-known quilter and author Maggie Malone. I have only known about this book since 2021 when a friend of mine showed it to me and I was so impressed, I had to grab a copy for myself. This book is out of print so it can be harder to find as well.

I have talked about Electric Quilt software before in an earlier post, but I want to mention it again here because I really couldn’t design quilts without it! Some designers sit down with a ruler and graph paper to draft quilt patterns, but I am an Electric Quilt user because it makes designing quilts a lot easier for me. You can find Electric Quilt 8 (EQ8) software HERE.

If you are interested in designing your own quilts, I totally recommend EQ8 if you’re into computers. If you’re not into computers, graph paper and a ruler might be your new BFF.

Once I get an idea, it’s time to play — which usually means I head to my computer and EQ8. I play with blocks, try different color combinations, download different fabrics to try all before I actually make anything at all. Some designers start by making the project and then work backwards to create the pattern and instructions. I do my designing on my computer and then make the project once I know what I am going to do. At least this is what I do probably 99% of the time. That’s one of the fun things about being a designer — I can try different ways of doing things. They don’t always work out for me, but that’s okay, there’s always another way to try.

Let me show you an example of my design process. For this example, I’m gong to start with my favorite quilt block, the Shoo Fly block.

When I am starting with the quilt design before I select the actual fabrics, I usually design in red, black, white, and grey. I don’t know exactly why I do that, but I think it probably has to do with the high contrast so I get a good sense of the pattern before I add actual fabric.

So, let’s make a wall quilt using 4 Shoo Fly blocks. It will look something like this:

Hmmmmm. This doesn’t really excite me. How about you? Let’s tweak it a little bit and see what happens next. We’ll add a bit more color, too.

Okay, this is better, don’t you think? By adding a sashing between the blocks, I was able to put another Shoo Fly block in the center. I changed the colors of the larger blocks to black and grey with the smaller center Shoo Fly block in red. It definitely has a lot more interest, doesn’t it? But it’s not quite there. Let’s tweak it a little bit more, shall we?

Now we’re getting somewhere! I got rid of the grey and went with plain black. Then I added 2 narrow blocky borders so I could continue to build out with more Shoo Fly blocks. Now I think we need a border.

Yay! A finished quilt design. I added an outer plain black border and a red binding. Pretty zippy, isn’t it? Now we’re gong to add some real fabric to the design.

Here are 3 different versions of our Shoo Fly quilt using Hoffman’s Paisley in Love batik collection. Of the 3, I think the last one with the white background is my favorite. I like the contrast, but I think I need to do a little more tweaking with the design, so back to the drawing board (or EQ8).

What are your thoughts? How would you improve this design? Any ideas?

Well, I hope you enjoyed a peek into my design process. Who knows? You might see this design as a VRD Rose Card some day.

Until next Thursday —

Sew. Laugh. Repeat.

Always,

Tricia @VRD
Quilt As Desired · Rose Cards · Tips and Tricks · Tutorials · villa rosa designs

NEW June VRD Rose Card Patterns and A Free Motion Quilting Demo

Hello Quilty Friends!

Welcome to another Thursday — the first Thursday in June. Summertime, right? The kids are out of school or will be soon. Life will get crazy. Fun. And more crazy.

Are you kidding? I thought it was still March.

At least, it should still be March, don’t you think?

Que sera, sera.

OH! Did you see the new Rose Cards for June yet???? As always, our VRD designers didn’t let you down.

You can order all 5 cards HERE.

And here is June’s NEW Table Runner, Cake Day. Cute, huh?

You can purchase the Cake Day pattern HERE.

Did you know you can actually join the Rose Card Pattern Club and get the new monthly Rose Cards delivered right to your mailbox every month without you having to do a thing????

If you live out of the USA, you can sign up for the digital Rose Cards, which will be delivered to your inbox without you having to do a single thing.

There are even several different Pattern Club options to consider. Cool, huh?

You can sign up for the Pattern Clubs HERE .

Another really AWESOME thing about Villa Rosa is that we create a lot of kits using our Rose Card patterns. You can find kits for this month’s new patterns AND you can find kits for lots of other favorites, too. You can visit the website HERE to see what our selection of kits are. Please remember that we add new kits all the time, with all kinds of different fabric, so make sure you stop in often to see what’s new.

A Little Bit of Free Motion Quilting and a Video Demo

How many of you are a little bit afraid of free motion quilting on your own domestic sewing machine?

Be honest!

Okay, that’s better, I see a lot of hands raised and heads nodding out there.

Well, I’m here to tell you that you don’t have to be afraid anymore. I’ve been teaching free motion quilting (FMQ) for more than 10 years and I haven’t lost anyone yet!

Here’s my TOP 12 TIPS for FMQ:

1. Find a teacher at your local quilt shop to show you how and to guide you so you feel safe. Don’t try to teach yourself by using YouTube videos.

2. Start out small — the smaller the project the better for beginners. Potholders, table runners, place mats, wall quilts, or other small projects.

3. Start with a beginner-friendly design like wavy lines or loops. Meandering and stippling are NOT beginner-friendly.

4. Try to relax. The more tense you are, the worse your quilting will be.

5. Play music while you quilt, something with a beat. A beat will help you find your rhythm for FMQ on your own machine.

6. Keep practicing, every day if you can, even if it’s only for 10 minutes. The more you practice, the more comfortable you will feel, and the better your quilting will get.

7. Practice machine quilting with a friend. You can encourage each other and laugh together.

8. Try machine quilting gloves. There are a lot of different types of gloves out there, so you might have to try different kinds to find the ones that work for you. Machine quilting gloves will help you get a good grip on the fabric so you can move the quilt more easily when you are quilting.

9. Doodle. Doodle a lot. Practice drawing the designs before you quilt them — this builds some muscle memory between your hands and you brain.

10. Practice…….practice……..practice…….

11. Practice……practice…..practice……. (I can’t stress this one enough)

12. HAVE FUN!

Here’s a little video I put together demonstrating how to free motion quilt wiggly lines on last week’s Ying Yang Cats. Enjoy!

I hope this video inspires you to try free motion quilting some wiggly lines on your own little project.

Until next Thursday —

Sew. Laugh. Repeat.

Always,

Tricia @VRD

Rose Cards · Tips and Tricks · Tutorials · villa rosa designs

Cats and a VRD Cat City Block Tutorial + a Mini Quilt

Hello Quilty Friends!

Sigh……I’ve been thinking about cats lately. A lot. In addition to my own cats, I’ve been working on a couple cat quilt projects. If you don’t like cats, you might want to turn around now before it’s too late. (You can’t see me of course, but I’m rolling my eyes here. LOL!)

Let me tell you a little bit about MY CATS (sorry, not sorry — I did warn you).

Pip is my beautiful 12 year old silver tortie. She is sweet, rarely says a word, and is very generously-sized. Pip is a real foodie like me. I tell her frequently that she’s “practically perfect in every way,” but she can be very stubborn. And sneaky! Especially when she thinks no one is paying attention and she tries to get her little brother’s food (she is usually successful, too). Silly Pip!

Practically-perfect Pip!

Griffin just turned 1 at the end of April and is my little wild child. He zooms from one end of the house to the other and then back again. Over and over. As energetic as he is, he’s also my snuggle bug when he eventually slows down. Seriously. He loves to be held and snuggled! Griffin likes to watch “bird TV,” loves to be rocked, likes music, and even enjoys painting on a cute game on my tablet. He’s quite a fella!

Crazy man Griffin in a brief moment of stillness.

For some reason, cats and quilting just seem to go together. Like peanut butter and jelly! I just love seeing photos of cats “helping” their human quilters on social media, don’t you? Too bad neither of my cats are into that, but then again, if they were, I’d probably never get any quilting done.

In fact, as I sit here writing, Pip is hanging out in her favorite chair upstairs and Griffin is watching his birds on TV about 10 feet away from my desk. He is not only my little buddy but he’s also THE best coworker I’ve ever had.

Not long ago, Pat, our “Rose Queen” and the owner of Villa Rosa Designs, asked me to help her with some new quilt diagrams for her VRD pattern, Cat City.

To purchase the Cat City Pattern, click HERE Or to purchase the Cat City kit, click HERE

I was really intrigued by the cat block in the pattern, and thought I’d try it out before making the diagrams so I knew exactly how to put the block together. I discovered it’s a really fun block, but it can be a little tricky the first time you make it.

Let me show you how to put the Cat City block together.

Cat City Block Tutorial

First things first, follow the cutting instructions for the pattern. I chose a white fabric and a black fabric for this tutorial (you’ll see why a little bit later). I layered the two fabrics and cut the pieces out at the same time.

Layer your background and cat fabrics as you see here. I am making 2 cats at the same time and they will be a mirror image of each other. I used a pin to help hold things together on my way to my sewing machine. I also drew a sewing line with my marking pen (I LOVE Frixion pens for marking sewing lines on my fabric). Now off to my machine to sew on the line.

Next, trim off the waste triangles and press the unit open. I pressed my seams to the dark fabric.

Now to make some little ears! Layer your squares right sides together (RST) on the background fabric. Draw diagonal sewing lines on your squares with your marking tool. Sew on the line. Then cut away the waste triangles and press the units open. I pressed the seams towards the cat fabric.

Okay, we’re in the home stretch now. Yippee! Sew the ear unit to the top of the cat body — the ear fabric should match the cat (unless you’re feeling wild and crazy) and then sew the bottom of the ears to the cat body.

OOPS! You will see in the second photo, my cat ears didn’t line up very well with my cat body. Argh! No, it’s okay after all — the one edge of the cat fabric was folded under — whew, I was afraid my cat was growing right before my eyes!

Darn, time to use the tool all quilters and sewists run from in fear — THE SEAM RIPPER. (Cue creepy music.)

Done. It only took me a quick minute to rip out the seam, press the folded-under edge straight, and resew. Now we’re back in business. I pressed the seam towards the cat body.

In the first photo here, you can see how my cats will look after I sew the cat backs to the cat body/ear unit. I am planning to sew my cats front sides together. Ying and Yang, I think I will call them.

The middle photo shows the cats stitched together …….furever (sorry, I couldn’t resist).

The third photo shows how I pressed the seams — center seam between the cats open because of sewing the fiddly little ears together and the cat body/back seam I pressed towards the cat body. The ears wanted to be a bit difficult but I pressed them into submission with a little pressing spray (my favorite is Mary Ellen’s Best Press).

There you have it — a cat block with mirror-image cats. Of course, instead of sewing them fronts together, you might want to sew them with their backs together — would this be a cat fight???? — take a look at the quilt on the front of the Cat City pattern above for ideas.

BUT WAIT — there’s more! I just love saying that, don’t you?

I decided to cut 2″ strips for a border around my cat blocks for a fast to finish little quilt. I sewed the sides on first and then the top and bottom strips.

Voila! A little quilt, mini quilt, doll quilt, table quilt, place mat or whatever you want to call it.

Now I just need to layer my little quilt with batting and backing. Quilt it. Bind it.

DONE! My favorite kind of project. 🙂

Here is my black and white Ying and Yang alongside my first little Cat City quilt in pink and brown. When I finished the pink and brown one (which was my original example to figure out how the block went together), I decided that I had to make a black and white one.

I hope you will enjoy making your own Cat City quilt. Or maybe you just want to play a little bit and make yours mini. Whatever you choose, I can’t wait to see your cat quilts (and maybe your cats)!

You can share them on our Facebook page. Not a member yet? Join us to take part in all the Villa Rosa Designs fun HERE . We really are a fun bunch. Really.

Until next Thursday —

Sew. Laugh. Repeat.

Always,

Tricia @VRD

Rose Cards · Welcome Blog Post

Brand New Day, Brand New Blog

Welcome

Hi there, Quilty Friends!

I’m sew glad you’re here and I want to welcome you to our brand new Villa Rosa Quilts (VRQ) blog. You will find new posts here most Thursdays featuring great tips and tutorials, Villa Rosa Designs news and updates, a bit of silly and a smidge of serious. And quilts — lots and lots of quilts and quilting.

Sew, grab a sweet tea or iced coffee, put your feet up, and let’s get to know each other. It’s all about sewing, laughter, and then — well, repeat. Repeat as often as possible! (wink, wink.)

If you’re new to Villa Rosa Designs and you’d like to know more, you can hop over to our About page HERE. You can also visit our main website HERE.

Interested in carrying our Rose Cards in your quilt shop? You can go HERE for wholesale information.

_________________________________________________________________________________________

Let’s Get to Know Each Other!

I’m excited to be your new Villa Rosa Quilts (VRQ) cruise director. My name is Tricia Maloney — let me tell you a little bit about myself:

This is me!

I’ve been quilting for more than 25 years. I am mostly a self-taught quilter, although over the years I’ve learned sew much from other quilters and designers. I’ve worked in quilt shops, taught classes and workshops, and I’m a member of my local quilt guild, Free Spirit Quilters.

My professional quilting life started in 2010 when my first book was published. I wrote 2 more books in the next 6 years as well as designing quilts and writing articles for many popular US quilt magazines.

I met Pat Fryer, the owner and “Rose Queen” of Villa Rosa Designs at my very first Fall Quilt Market in Houston in 2010, when I was promoting my first book. I was immediately fascinated with her wonderful postcard-sized quilt patterns. After that, every time I attended a Quilt Market, I eagerly found the Villa Rosa Designs booth to catch up with Pat and see the latest batch of Rose Cards.

In 2017, our stars finally aligned and Pat invited me to design quilt patterns for her Rose Cards. I was thrilled! What a fun challenge — designing fun-to-make quilts to fit on the back of a 4×6 card.

Here are my first 2 Rose Card patterns from 2017.

Fast forward 5 years and I currently have over 50 patterns with VRD! And I love being part of the Villa Rosa Designs family of designers.

Then last year in 2021, I had the opportunity to work for Villa Rosa Designs. A dream come true! This is the interesting part of our story — Pat and Villa Rosa Designs are located in lovely California while I live in beautiful northwestern Pennsylvania. It certainly makes things interesting as we are 3 hours apart. Thank goodness for the Internet! LOL!

So here I am — your friendly VRQ blog cruise director!

_________________________________________________________________________________________

May 2022 Rose Cards

I’m pleased to show you our NEW Rose Card patterns for this month.

Did you know Villa Rosa Designs publishes at least 5 new patterns EVERY MONTH??? That’s at least 60 new patterns every year. Currently, we have over 400 patterns available — wow!

Here are our 5 new quilt patterns for May 2022:

You can order these 5 patterns as a group for the low price of $8.95 HERE.

We also have 2 new table runner patterns this month:

To order the table runner patterns, just click on the pattern names below:

GRIDDLE

PRETTY POSIES

Of course, you can always check with your local quilt shops to see if they carry Villa Rosa Rose Cards.

And if they don’t, why don’t you introduce them to the magic of Rose Cards?

Sew. Laugh. Repeat.

Always,

Tricia at VRD