
Hello Quilty Friends!
Happy Thursday to you!
Although it’s really March 26th as I write this post, it sure feels more like April Fool’s Day here in NW PA! Mother Nature is laughing loudly at us because this morning we woke up to a layer of snow on the ground. Of course, it’s already beginning to melt away as the temperature increases a bit, but it was certainly a deja vu moment. Just another crazy weather day….
So, I definitely think it’s a fitting day to do a new tutorial for you featuring a beautiful blue and lavender batik collection.
VRD Brickwork Quilt Tutorial
Brickwork is a super fun fast fat quarter quilt designed by our VRD designer, Molly Cook. Don’t know Molly? Check out an interview with Molly HERE.

Get your digital pattern HERE or your print pattern HERE
We do have a few different Brickwork kits available (sorry, not the fabrics used in this tutorial, though) – you can find the kits HERE
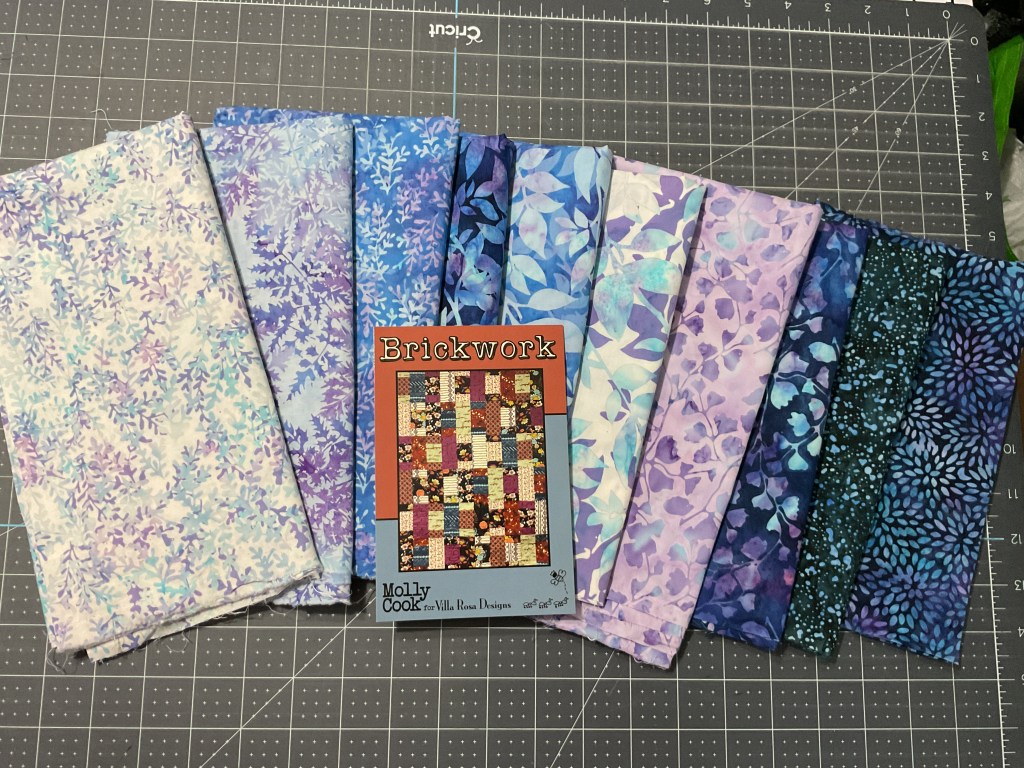
For this tutorial, we’re using yummy batik fabrics from the Hoffman collection Dragonflies at Dusk. I just love these gorgeous blues and lavenders – perfect for a snowy day like today.
Who am I kidding??? I just love the saturated colors, smooth hand, and interesting designs of batiks regardless of the weather outside. LOL!
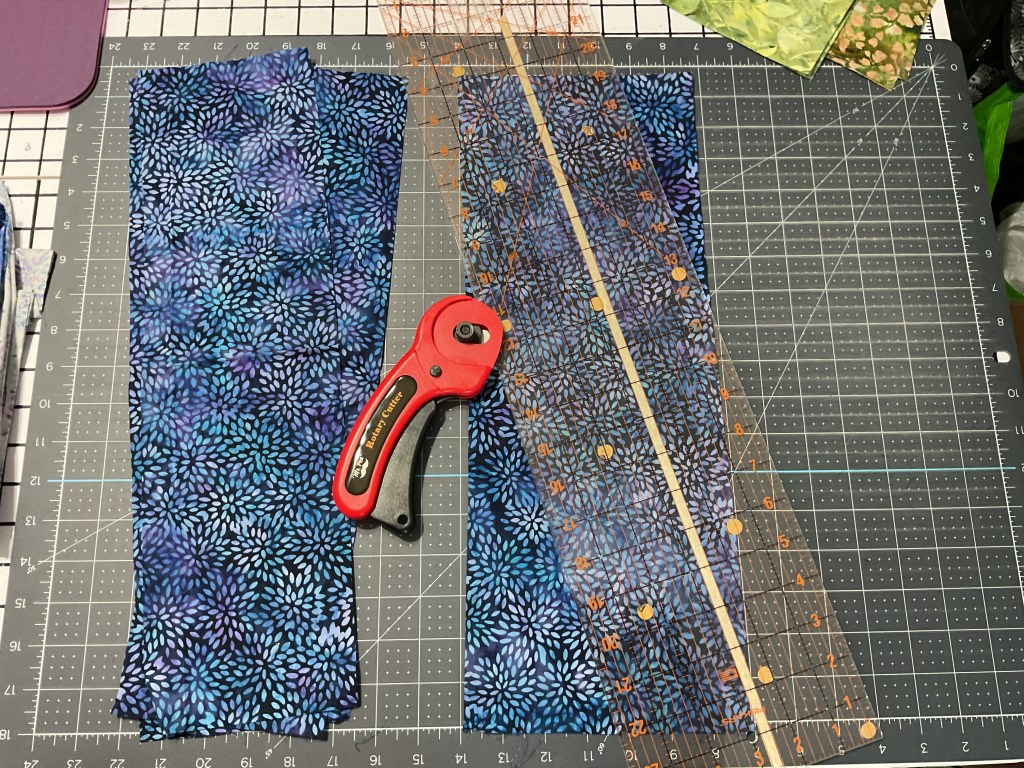


Let’s get started with our cutting. If you feel comfortable layering a couple fat quarters with the right side facing up, the cutting goes super fast. But if you are only comfortable cutting one layer at a time, that works great too. You do you.

Next you need to pair up 2 matching smaller rectangles with a different larger rectangle. Sew the larger rectangle between the 2 matching smaller rectangles. This is a great block on which to practice your chain piecing skills.

Once you have all of the blocks pieced, head to the ironing board and press everything. It doesn’t matter how you choose to press these ones, just be consistent.
After pressing the blocks (sorry, for some reason I didn’t snap a photo of this step), we’re heading to the design wall (ie: a flannel-backed tablecloth – LOL!) to arrange our blocks.

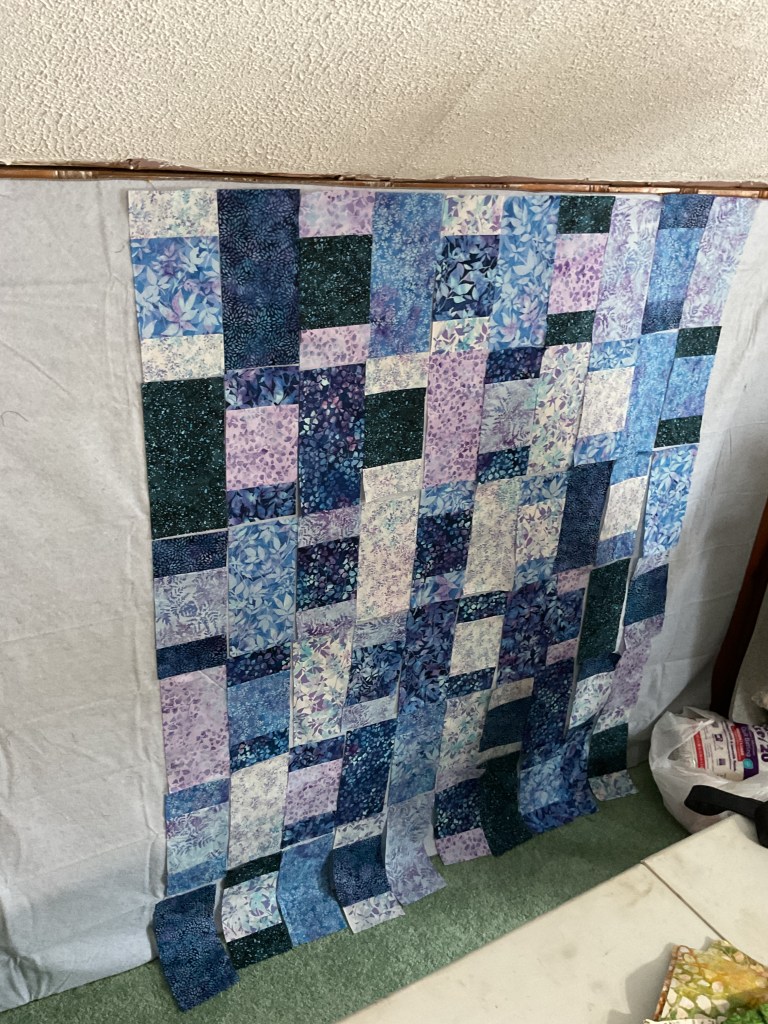
Okay, now the real work begins – rearranging the blocks so we have a nice balance of colors and lights/darks. The funny thing is that sometimes this process takes longer than actually making the blocks added to the actual time spent sewing the blocks. Just take your time and keep arranging until you are happy with what you see.
This quilt did give us some challenges, though, because the fabrics looked either light or dark and we didn’t have a lot of medium values to balance things out.
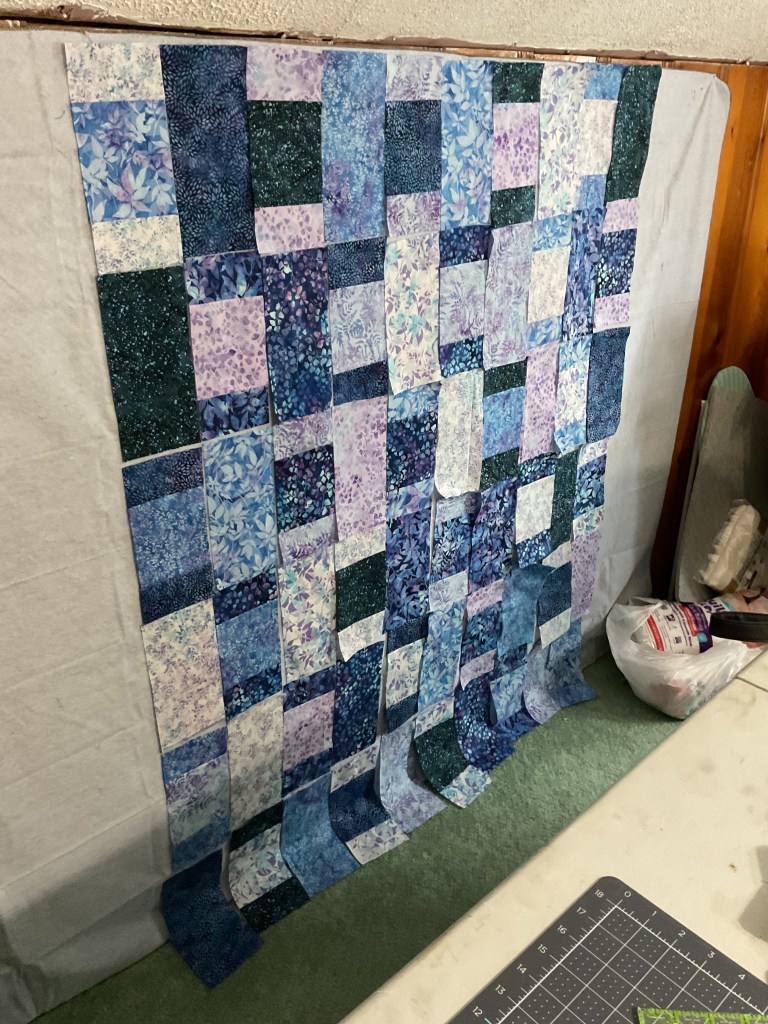

Here are some photos showing subtle changes in block placement while we try to achieve a better balance of colors. Bear with us while we keep changing blocks around….
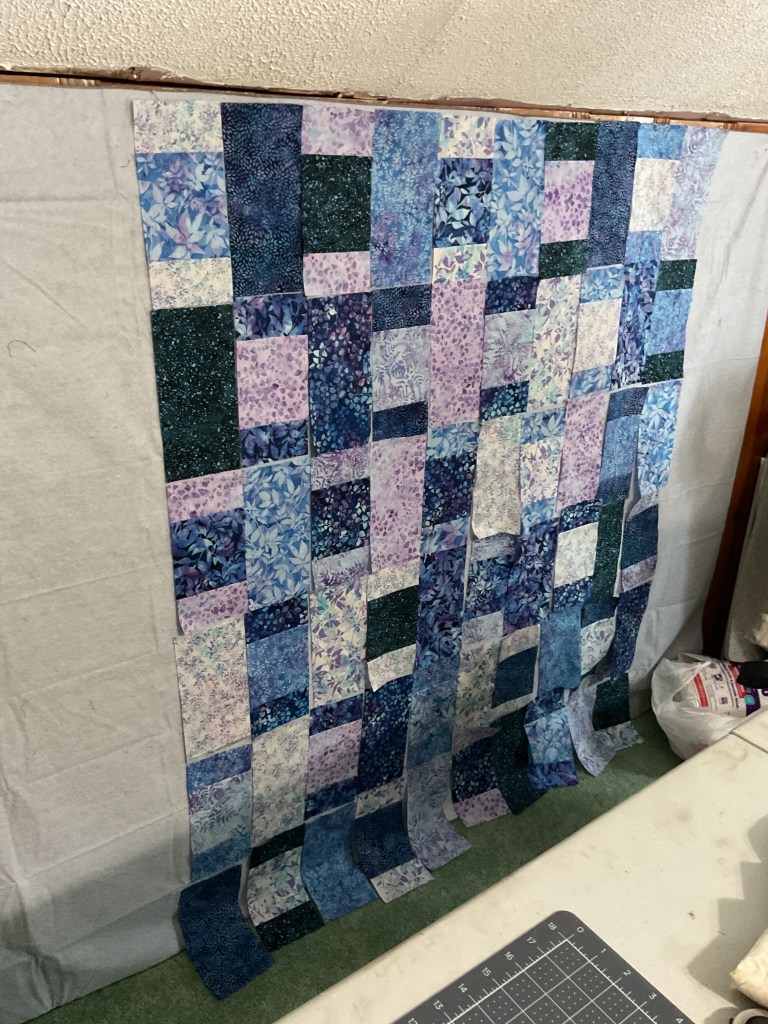
Finally! We found a pleasing block arrangement and then it was time to sew the blocks together into rows and then sew the rows together.
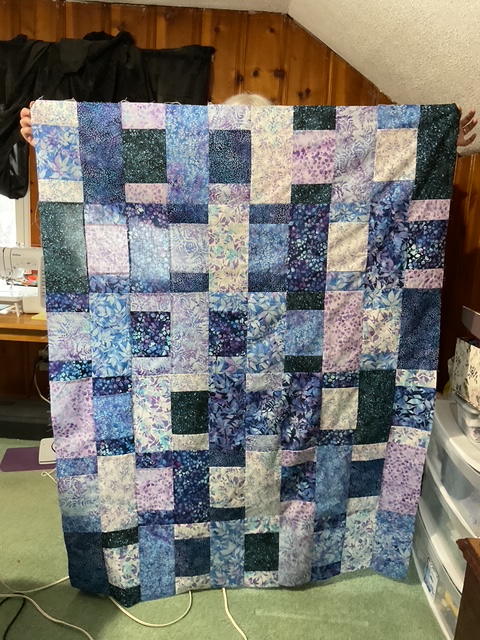
Here is the finished Brickwork quilt top! Now to layer it with batting and backing, quilt it, bind it, and label it. Not sure how to do all of that? You can check out our 2022 Basic Quilting Skills Series over on the right side of the blog for useful tutorials on
Batting, Backing, and Preparing a Quilt for Quilting
Of course, if you’re interested in learning more about Free Motion Quilting (FMQ), we just wrapped up a 7 part series about Beginner FMQ, which is also located over on the right side of the blog.
I want to thank my pal, Robin, for helping me with this tutorial – thanks, Robin!
Have fun making your very own Brickwork and I look forward to seeing your quilts on our VRD Facebook Page.
Well, that’s it for me. Take care and find a little time to quilt this week.
Until next time –
Sew. Laugh. Repeat.
Always,
Tricia @ VRD
