
Hello Quilty Friends!
Happy Thursday to you!
PSST! Did you hear???
Punxatawney Phil (the groundhog extraordinaire) saw his shadow on Monday, February 2nd, which means 6 more weeks of winter. Like that’s a big surprise this year, right?
Have you ever attended the spectacle in Punxatawney? I have not, but when I was an early childhood educator in a former life, I would get up early and watch it on TV as I always planned some fun things for the kiddos. Now? I tend to agree with all the fun and silly memes on Facebook. MY favorite showed a wolf in a winter landscape and said something like “The groundhog saw his shadow – 6 more weeks of winter. So I ate him.” Succinct. Punchy. Perfect. Huh. That’s winter for you.
As promised last week, I’m back with my Blue and White quilt tutorial featuring Pat’s Rose Card pattern, Whirlaway. Have you ever made Whirlaway? It’s a really fast and fun quilt. Perfect for beginners. And it looks great in any fabric combination, even fabrics right out of your scrap stash. And the best part – it’s fat quarter friendly so it’s a fantastic pattern to use up some of those delicious fat quarter bundles gathering dust on your storage shelves because they’re just too pretty all tied up with a ribbon to cut them up. Well, now you can. The alternating squares give you plenty of space to enjoy the fabrics and Whirlaway handles large prints like a dream. So what are you waiting for??? Grab your fabrics and the Whirlaway pattern and make a quilt with me.
Before I begin the tutorial, though, I have a quick question for you, dear readers. Which tutorial format do you prefer?
- Each step numbered with the written instructions first followed by the image(s)
- Each step numbered with the image(s) first followed by the written instructions
- Steps are not numbered, with the written instructions first followed by the image(s)
- Steps are nit numbered, with the image(s) first followed by the written instructions
I would appreciate you weighing in on this because I seem to go back and forth among these different options and I would like to make the tutorials as useful and easy to follow as I can.
On to the Whirlaway tutorial we go!
VRD Whirlaway Quilt Tutorial
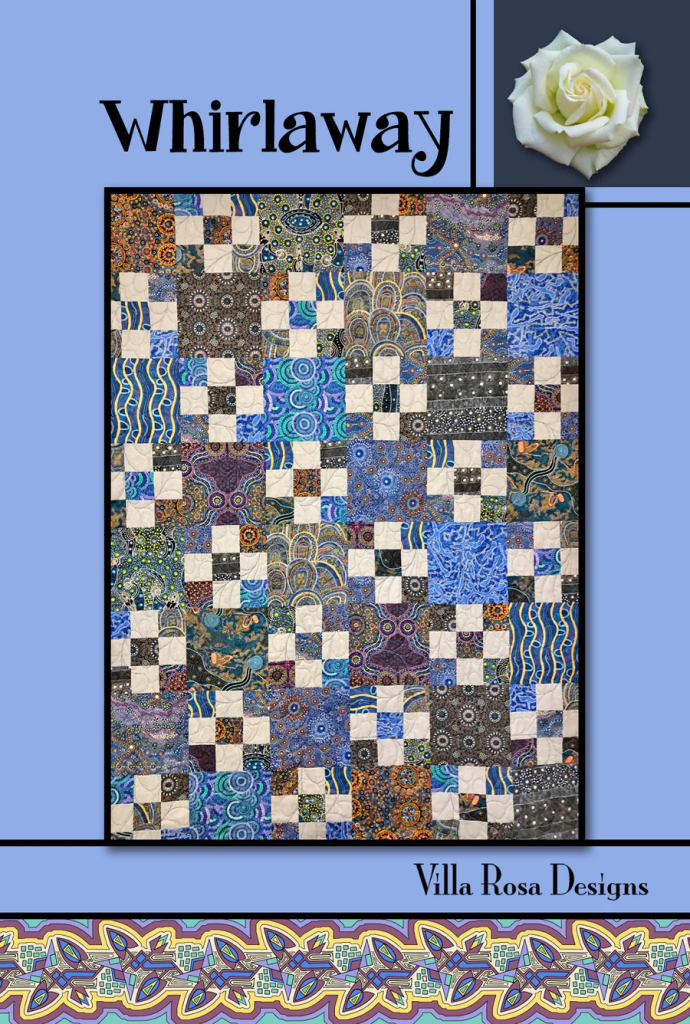
Get your digital pattern HERE or your print pattern HERE
As I mentioned above Whirlaway is fat quarter friendly and uses a single background fabric to unify everything together. It finishes at a very nice 54″ x 72″, which is a great throw-sized quilt. Of curse, you can add or subtract blocks to make it larger or smaller. Or you can out an outer border. If you added a 6″ finished border, the quilt would become 66″ x 84″ which would work on a twin sized bed. Just remember that if you decide to make more blocks or add an outer border, you will need additional fabric.
Let’s gather up our fabrics now!
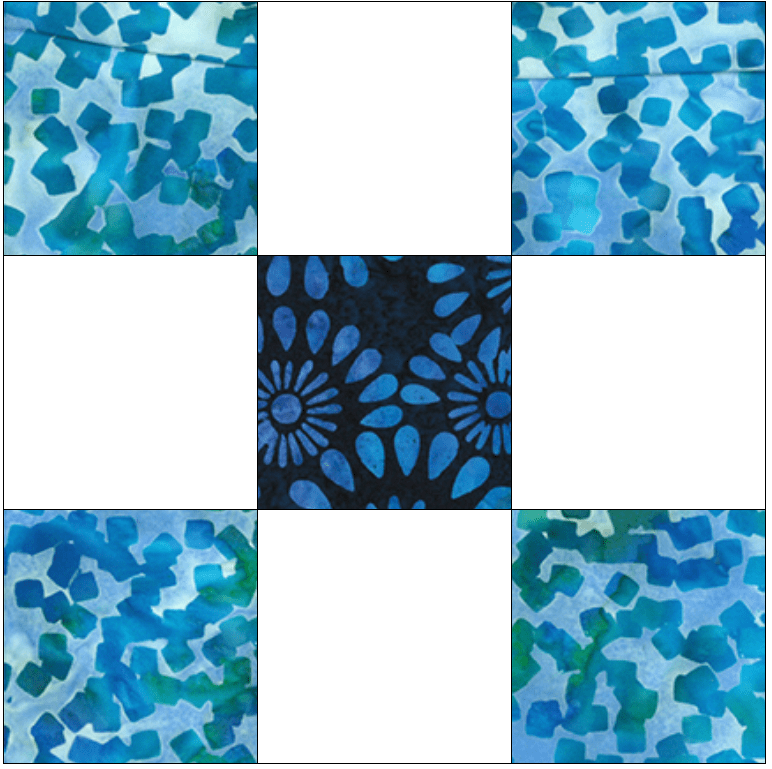
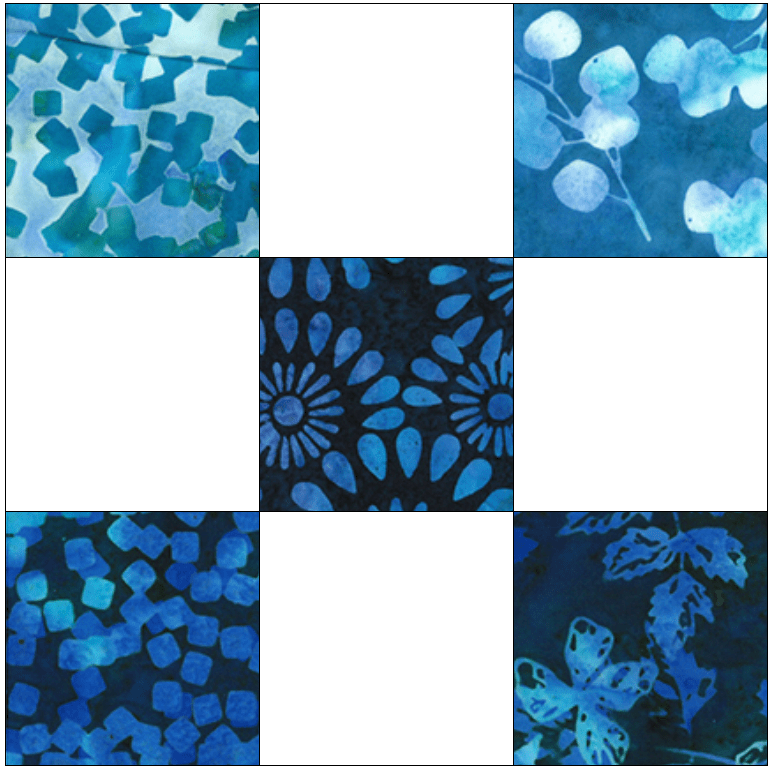
Today I am using yummy batik fabrics from our friends over at Hoffman Fabrics. This is an older collection called Aurora, which probably long gone. I am totally in love with the range of colors – medium blues to brighter blues to deep blues to a touch of purple just for fun. I’m using one of my favorites – Hoffman’s Ocean Aquatic Dot Batik – for my background. I find myself using the lighter Dot Batiks as backgrounds and I love love love the darker ones for binding.
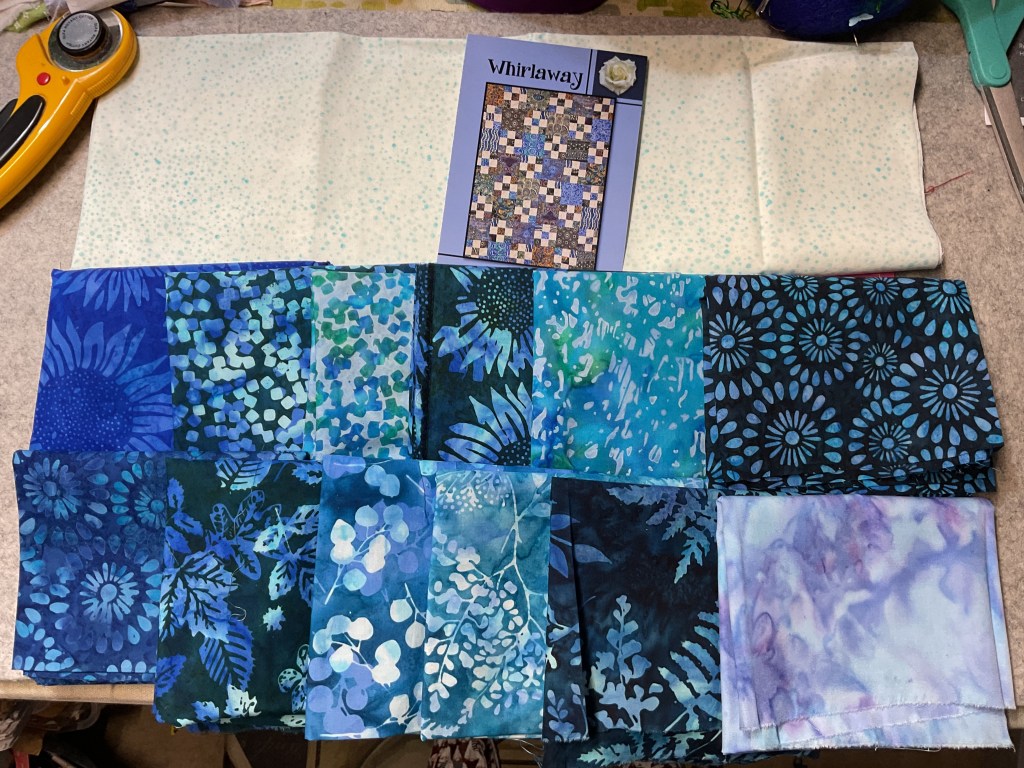
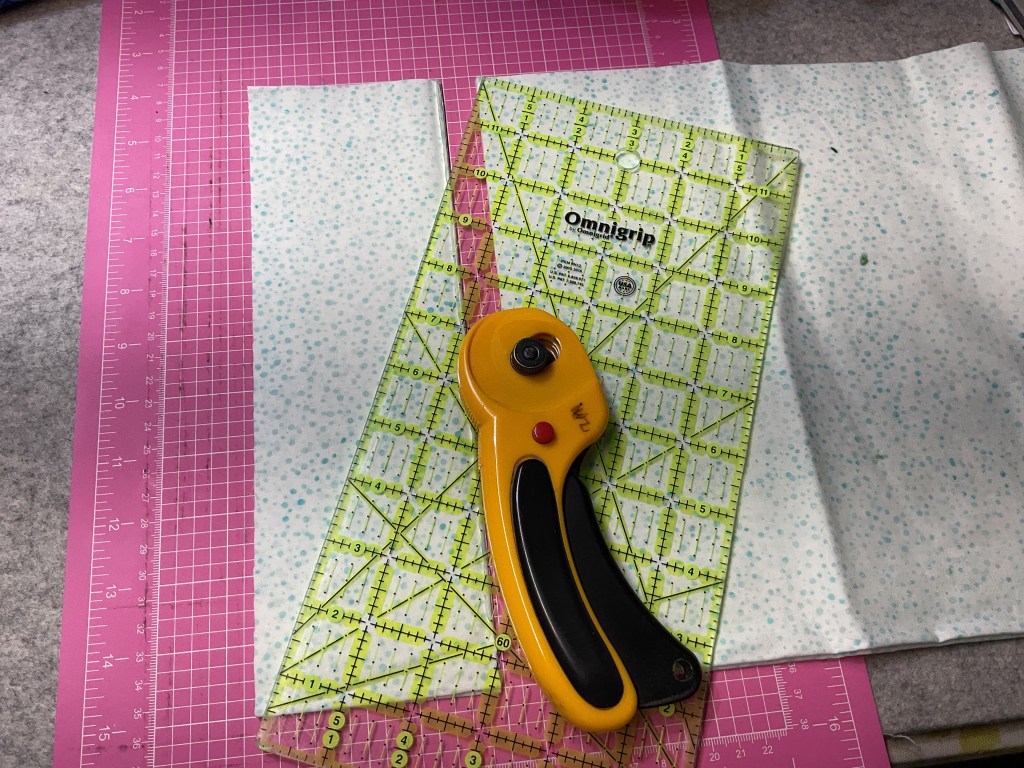
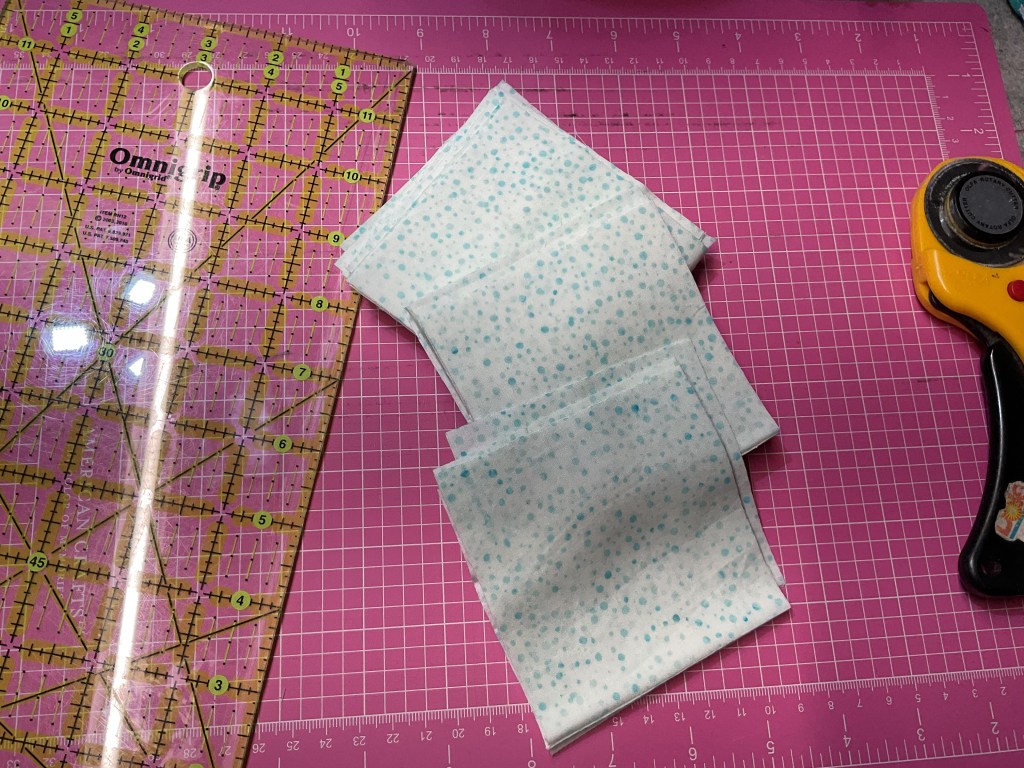
Now that we’ve gathered everything up, we are ready to begin cutting out fabrics. For Whirlaway, we are cutting 2 different sized squares from our FQ’s and that’s it. Fast and simple. Easy peasy.
I like to layer 3-4 fabrics at a time when I cut. Do likewise if you feel comfortable, but don’t feel like you have to. Whether you cut one fabric at a time or multiples, we’ll all get to the finish line. Here you can see that I cut my fabric into strips and then cut my strips into squares. Efficient and accurate.
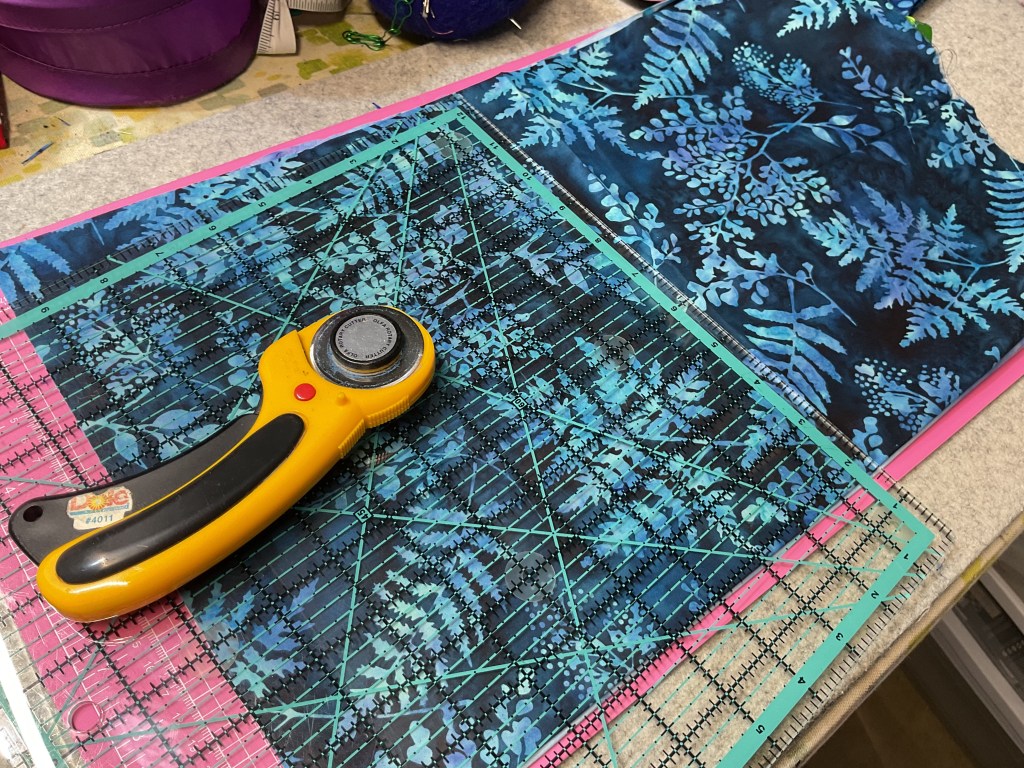
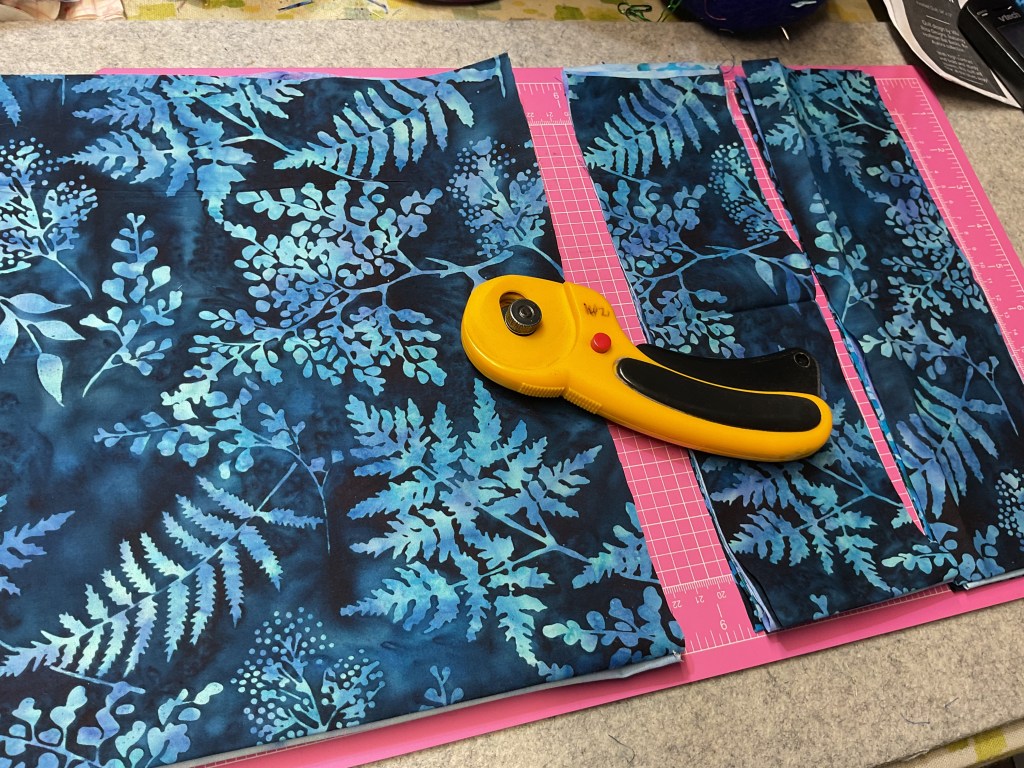

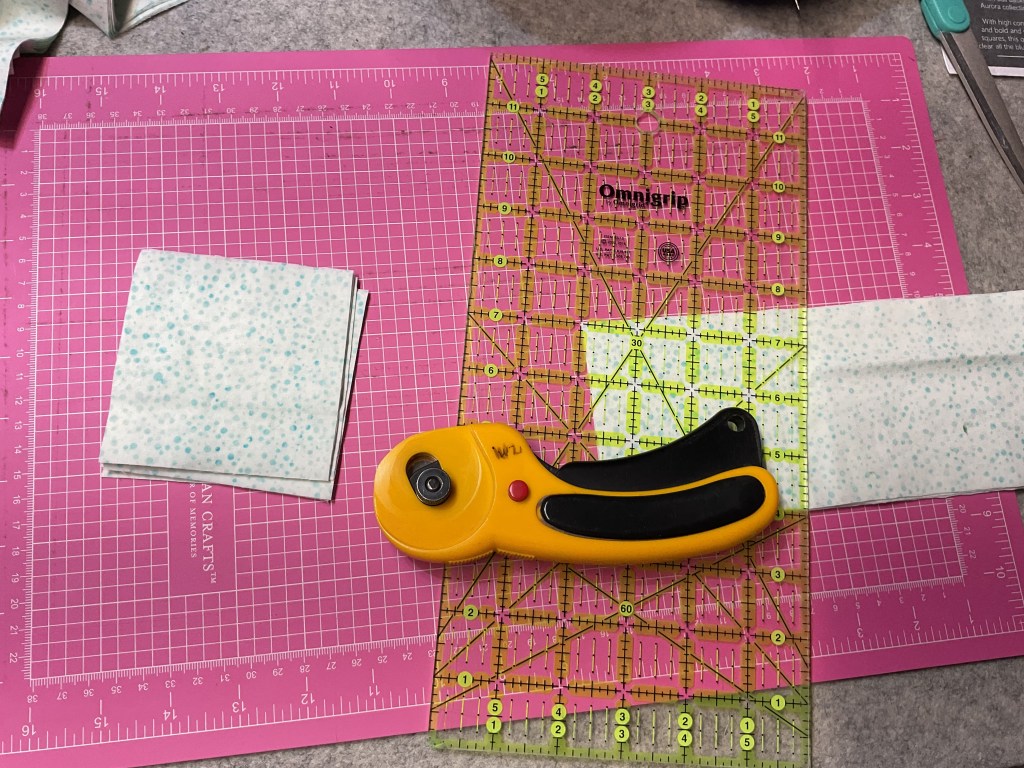
We only need to cut the smaller size squares from the background fabric. Again, I cut the strips first then cut my strips into squares.
Next we’re going to make a stack of Nine Patch blocks. Yay! You have some options to consider for your Nine Patch blocks. It’s like being a guest quilt designer for your very own project!
A). You can use only 2 fabrics for each Nine Patch – the background fabric and 1 of the FQ’s.
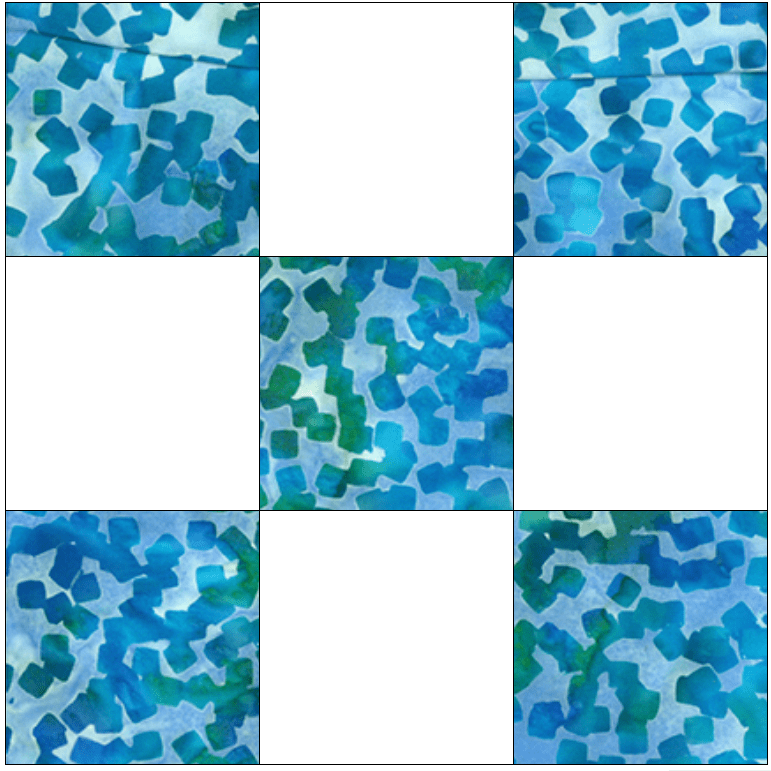
B). You can use 3 fabrics for each block – the background fabric, 1 FQ square for the center square, and a 2nd FQ for the 4 corners
C) 5 assorted FQ squares and 4 background squares to make fun scrappy blocks
I chose option C. Surprised?
What’s your process for making Nine Patch quilt blocks?
I like to make all of my Nine Patch blocks at once, using chain piecing, without stopping to do any pressing in between. I have found this to be the most efficient way for me to make a bunch of Nine Patch blocks in the shortest possible time. I am all about finding the quickest, easiest, most successful – LAZY – way to quilt and sew. That attitude has earned me the nickname, “the Lazy Quilter” amongst my friends. LOL!
Let me share with you how I do it.
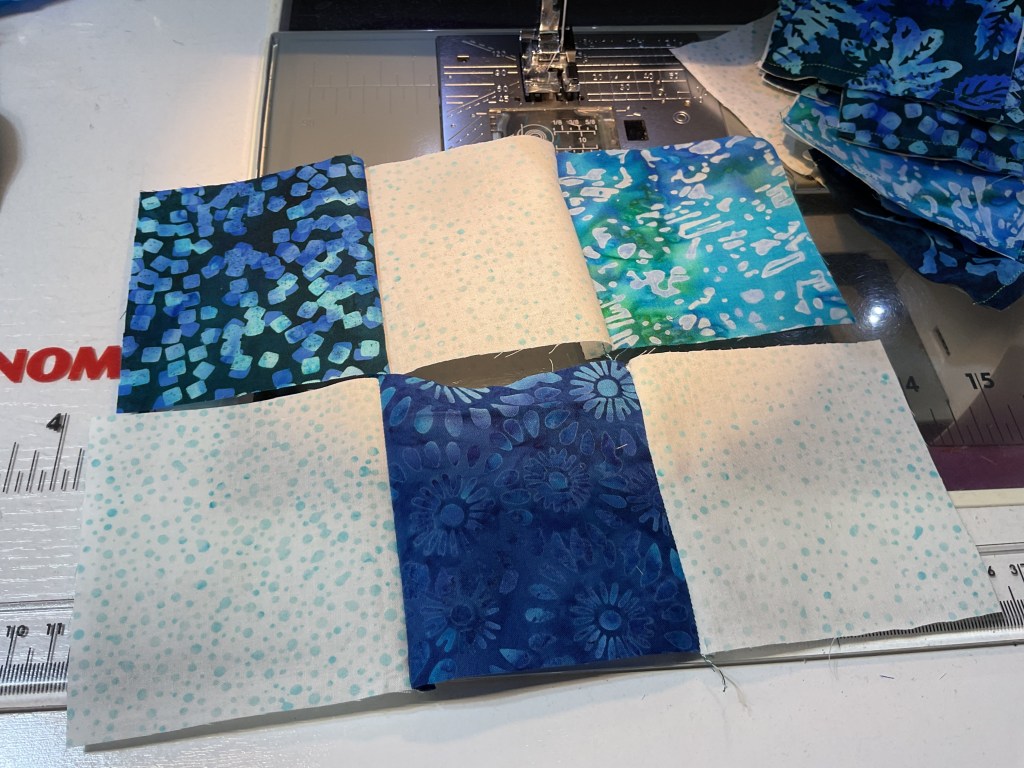
First, I need to know the number of Nine Patch blocks required for the quilt.
Now it’s time to sew a FQ square and a background square together. I need to make pairs 3x the number of blocks required for the project.
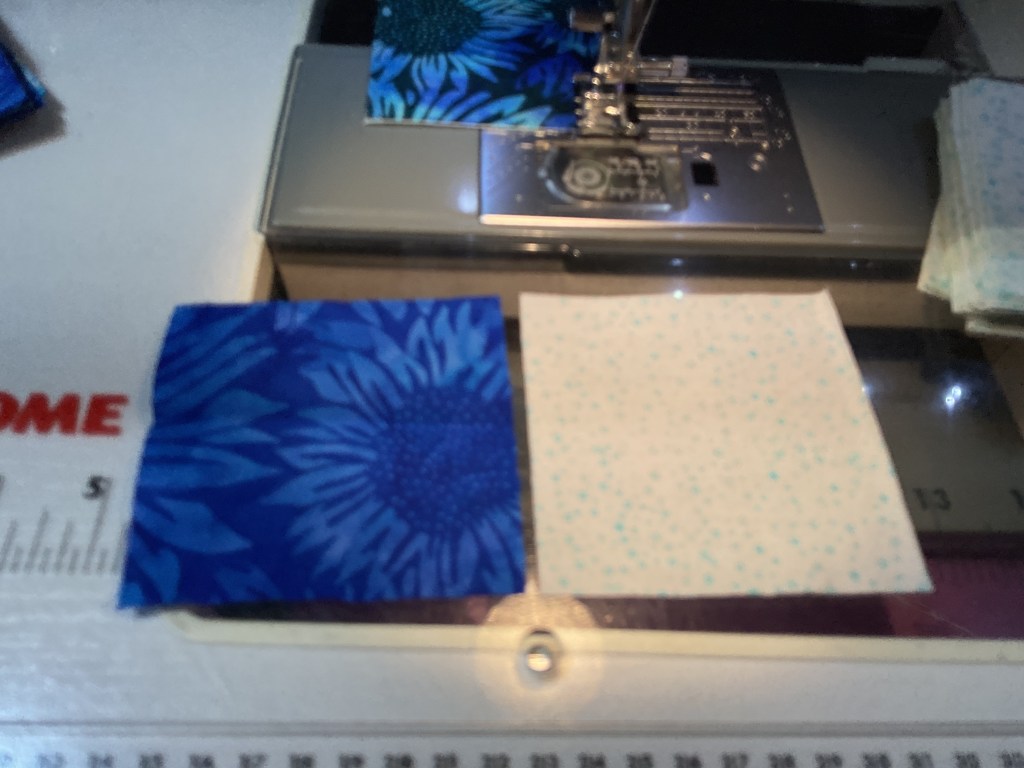
Once I have all of the pairs sew together, next I’m going to add a third square to each pair. The first group will have a background square on each side of a FQ square and I need to make 1 of these rows for each block, so I will need to make the same number as the number of blocks I need for the quilt. Gosh, I hope this isn’t confusing……
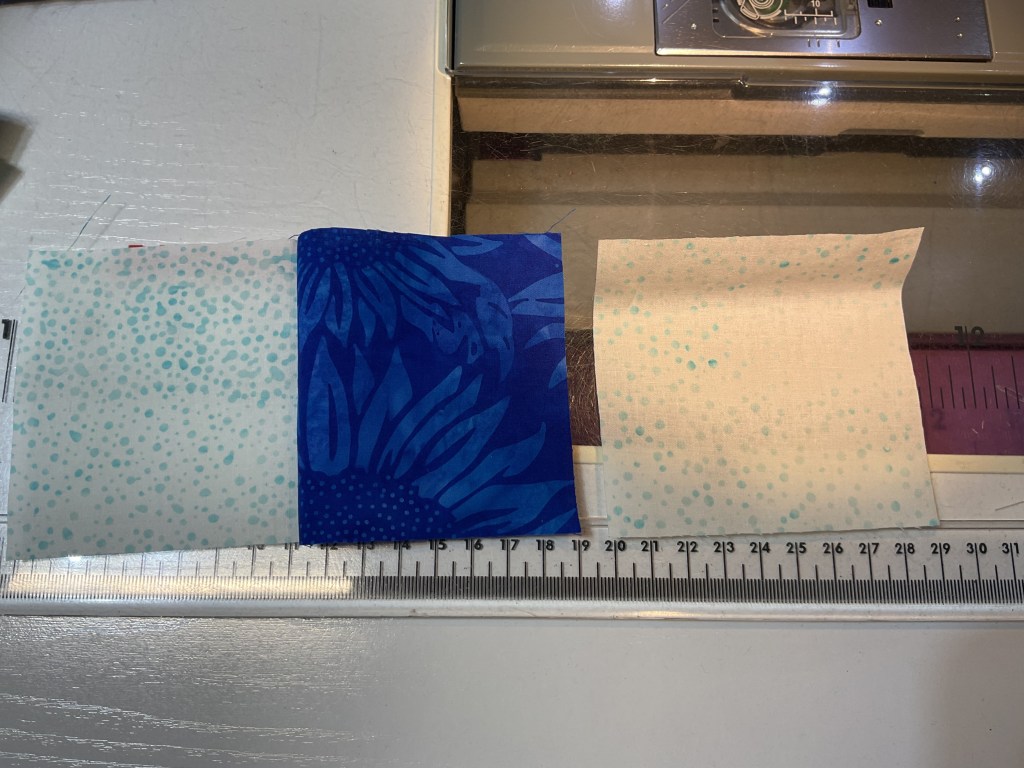
When that is done, I will sew a different FQ square together with each remaining pair. If I did the math right (YAY MATH!), I will have 2X the number of blocks for this row as I will use 2 of them for each Nine Patch block.

Then it’s time to sew 3 rows together (a background-FQ- background row between 2 FQ-background-FQ rows) into a scrappy Nine Patch block. I sew 2 rows together and then after I’ve done that, I go back and add the third row to make me a big passel of Nine Patch blocks all at the same time.
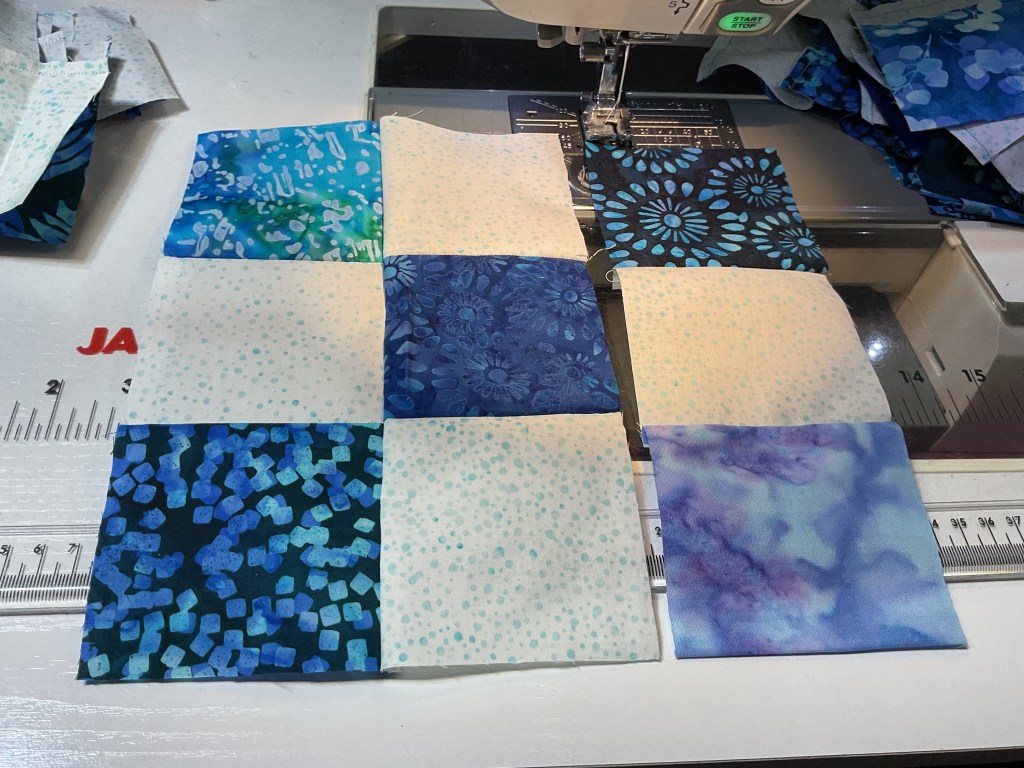
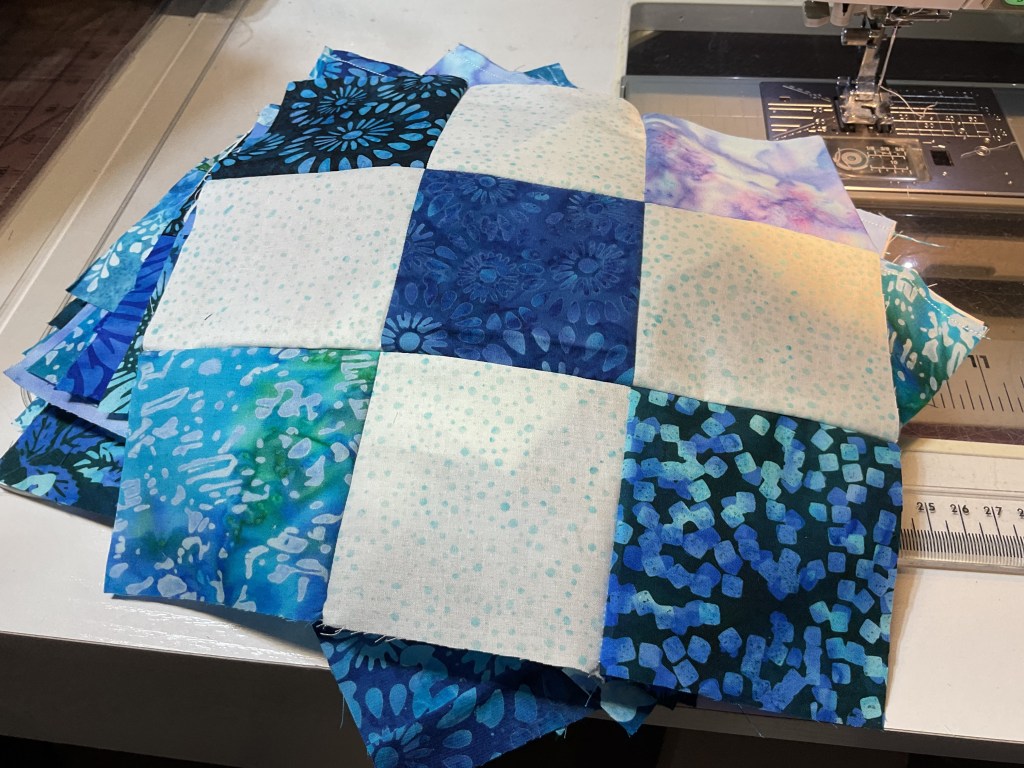
Whew – that was really fast! Now all of my Nine Patch blocks are finished. I can press the blocks at this point, or if I’m feeling really brave or pressed for time, I’ll save the pressing until the whole quilt top is finished before I press the whole thing.
I’m feeling brave so let’s skip the pressing for now. I have found that batiks usually behave themselves better than standard quilting cottons because of their denser weave so I feel pretty confident that the quilt will still turn out well. Besides, this is a very forgiving pattern with Nine Patches alternating with big squares. I guess it all really depends on your personal comfort level. If you need to press, then by all means, press. No judgements here, just quilts.
If you’ve been following the blog for a while, then you might already know how much I adore simple quilt blocks like Nine Patches. Here are a few past blog posts about Nine Patch quilt blocks you might find interesting:
Quilt Block Basics — Four Patch and Nine Patch
Let’s Design a Quilt: Playing with Nine Patch Blocks
All right, time to put all the blocks and squares up on my design wall and play switcheroo with them until I’m happy with the arrangement of the blocks. I am trying not to have any squares of the same fabric touching, but we’ll see how well that’s going to work out for me.
I seriously didn’t have much trouble getting the blocks to play nice with their neighbors. WHEW! Sometimes this part of making a quilt takes longer than the actual cutting and sewing, but not today.
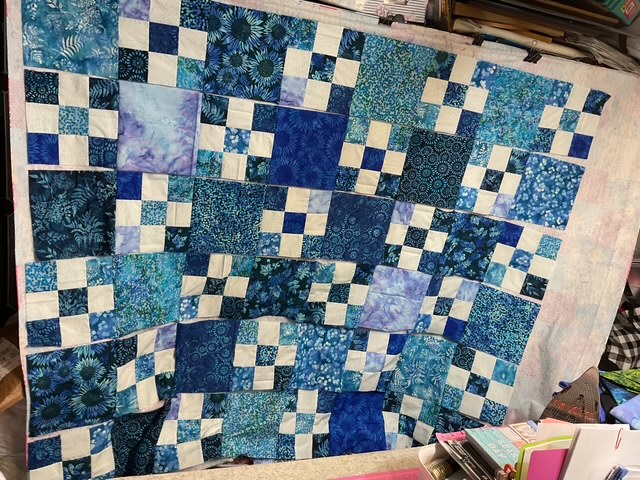
Voila! Here is my blue and white Whirlaway arranged and ready to sew together. Please note, I had to lay the quilt blocks and squares out sideways to fit on my design wall.

WOOHOO! Now it’s time to sew the blocks into rows.
You really can make this lovely quilt top in a weekend or even a day if you’re in a hurry.
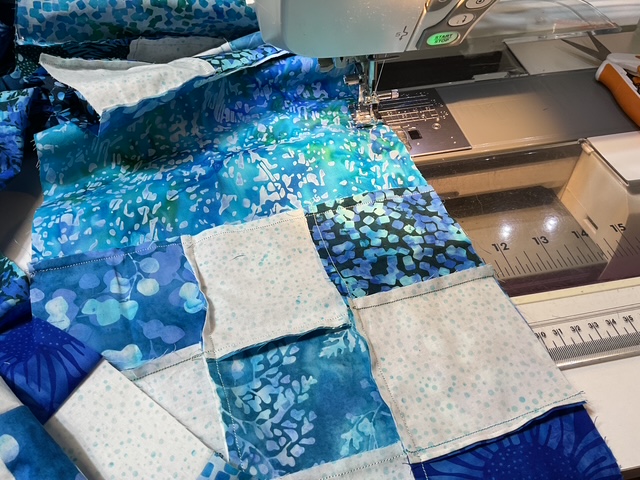
Here we are, almost done! Rows are stitched and now it’s time to sew the rows together.
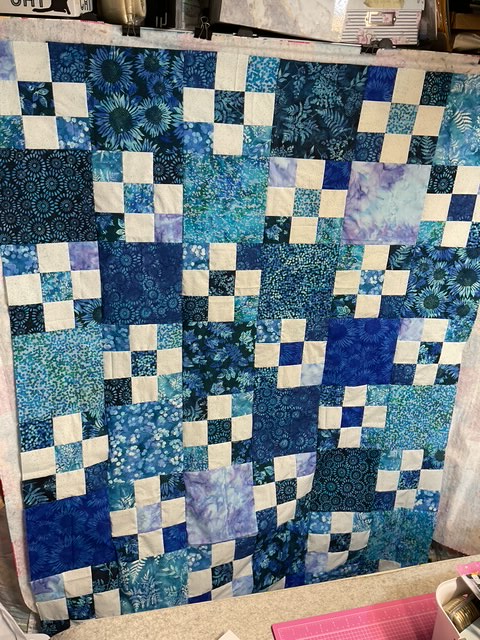
And finally, here is my finished Whirlaway quilt top. I really like how it turned out, don’t you? It’s very wintry and perfectly appropriate for this Polar Vortex weather pattern we’ve been stuck in.
I really love how the purple adds a lot of interest to the quilt.
Now I’ll have to add it to my to-be-quilted pile. Sigh……you know the towering teetering pile that would be taller than me if I stacked all of them in one pile for real? Yup, that one.
Well, that’s it for me this week. Let me know your thoughts on your preferred tutorial format, please. And I’ll adapt my format to whichever one seems to be the most popular.
Stay warm and stay busy. Spring will come someday. I think.
See you right here, next time!
Sew. Laugh. Repeat.
Always,
Tricia @ VRD

Laughing out loud at today’s email. I live in CA so he doesn’t travel this far west! If he did, the environmental idiots would put him on the endangered species list. LOL
Yes he died. I went to his funeral
Thanks for the tutorial! I like pictures and written instructions please Have a great day. Susan
LikeLike
Thanks Susan, your comment made me laugh. If you need some groundhogs………we have lots and lots here in PA. LOL!
LikeLike
Steps are not numbered, with the written instructions first followed by the image(s)
Steps are not numbered, with the written instructions first followed by the image(s)
LikeLike
Hey, thanks for weighing in. I appreciate the feed back. Happy sewing!
LikeLike