There was more I wanted to share with you last week about the H&H Americas Show, but I ran out of time. LOL! So I thought I’d continue with “the rest of the story,” as Paul Harvey used to say.
Right across from our VRD booth was the Oliso booth. I’m sure you know what Oliso is, right? They create really amazing irons for quilting that actually lift up so you won’t scorch your fabrics. Well, when I wasn’t busy talking to all the wonderful folks who stopped by our booth, I must admit that I was eyeing their gorgeous irons. They come in super yummy colors – pink, blue, yellow, and lavender.
At the end of the show, I just had to go over to their booth to chat and before I knew it – a brand new blue Oliso iron was going back home to Pennsylvania with me. Huh…. How’d that happen??? (Eye roll here.)
I haven’t taken her out of the box yet (yes, she is a “her”), but will be doing that very soon, I promise you. Just as soon as I find my pressing station – I seem to have lost it somewhere. Has anyone seen it?
I think a wild band of pixies tossed my sewing studio when I was in Chicago at the H&H Show. At least, that’s what I’m telling people.
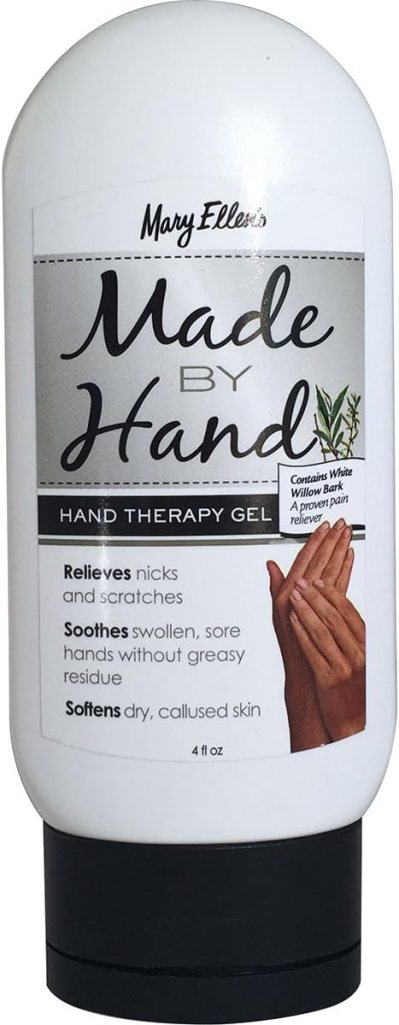
Another fun thing I brought home was a bottle of Made By Hand gel lotion, made byMary Ellen Products, who is also the maker of Best Press. I’m looking forward to giving it a try – just as soon as I find it again. It’s supposed to help sore fingers and arthritis, too.
Breakfast
After the show was over on Friday, it didn’t take us long to pack up and head out.
The funny thing is, when I’d made my travel plans, I thought the H&H Show lasted longer than it actually did (found this out later), which accidentally gave Pat and I an extra day before we both headed back home in opposite directions on Sunday. So Pat suggested we go out to breakfast and on a shop hop on Saturday! Yay!
She totally had me at breakfast! And quilt shops – joy oh joy!
Let’s start with breakfast!
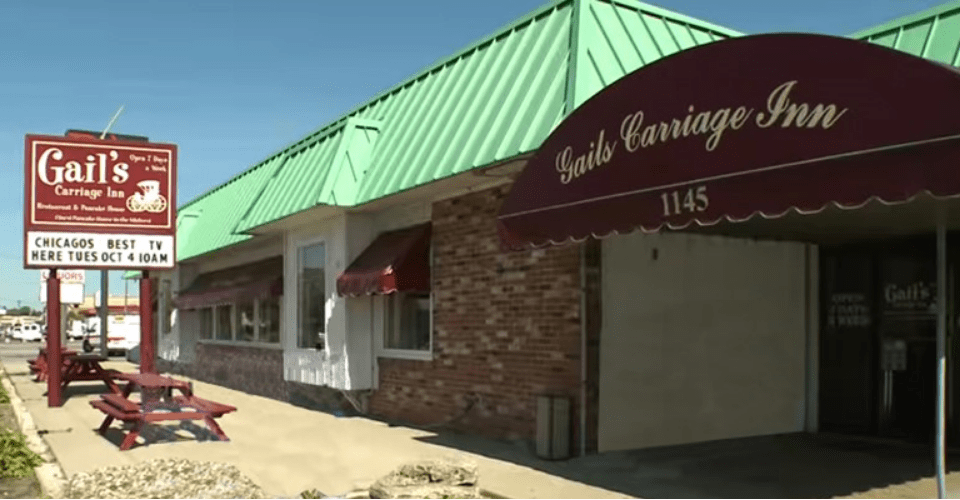
image from the website
We went to Gail’s Carriage Inn, which wasn’t far from where we were staying. Gail’s is known for their iconic “spuds” which is an omelet with your choice of fillings totally encased in hash browns. Is your mouth watering yet?
But wait! There’s more!
How about a duo of the lightest fluffiest buttermilk pancakes on the side?
Yup, that is exactly what I had for breakfast……….and leftovers for dinner. What can I say????? It was totally amazing! Pat had a lovely scramble and somehow managed to clean up her plate.
After dropping my leftovers back at the house, we were off on our Shop Hop adventure.
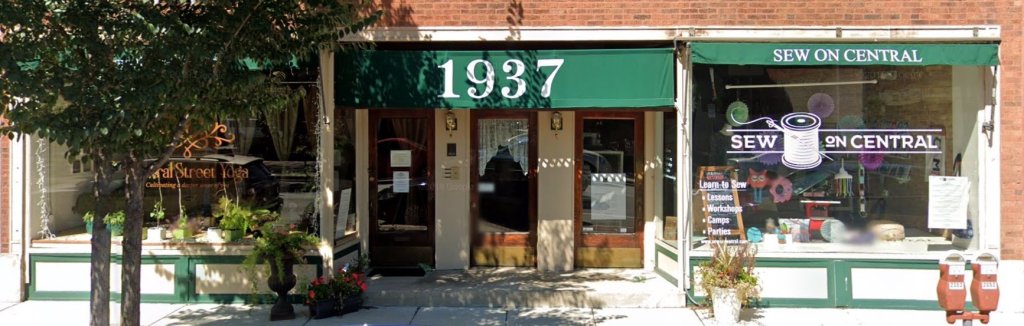
Sew on Central was right in the middle of everything in Evanston. Located in an active busy downtown, the shop had a bright and fun vibe. In fact, when we stopped in, there was a kids’ sewing class going on in the back of the shop. It wasn’t a huge shop, but it was a hive of activity and it totally made me smile. I even heard a Mom ask her kiddos if they wanted to sign up for sewing camp in the summer. How awesome is that??? What a way to bring new quilters into the world of quilting and sewing!
Quilter’s Heaven was a traditional quilt shop located in a shopping center in Northbrook. In addition to fabric and supplies, it featured sewing machines, long arm quilting services, and classes.
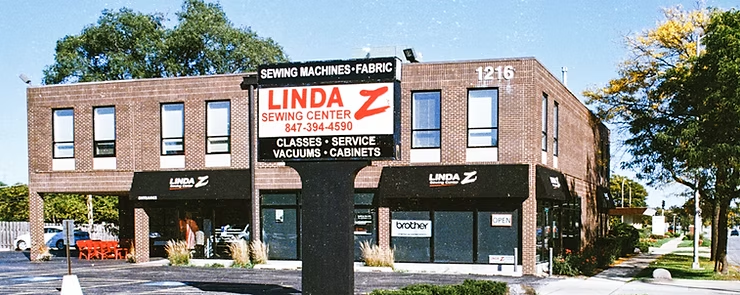
Linda Z’s was a really unique shop as it had been in business for over 50 years. The shop was 2 stories and even had an elevator with quilts hanging in it to enjoy (of course!) as you zipped up to the second floor or came down again – cool! This shop featured sewing machines as well as a large classroom for teaching – including classes in sit down long arm quilting. Wow! And did I mention the FABRIC???
Check out their rainbow batik wall below – the batiks even had their own room on the first level!
Amazing, right? The second floor had A LOT more fabric, including a selection of garment fabrics, too. I mention this because of the cosplay stuff at the H&H Show.
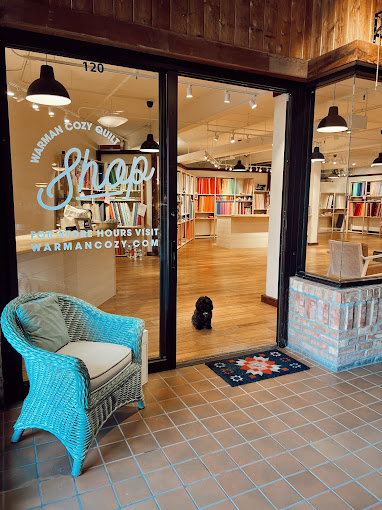
Warman Cozy (don’t you love the play on words???) is a wonderful quilt shop tucked into a quiet corner of the Ice House Mall in Barrington.
Right across the walkway was a really cool antique shop and we just had to stop in and admire the antiques for a few minutes before stepping into Warman Cozy. Warman Cozy was a bright and modern shop with a thoughtfully curated selection of modern fabrics along with lots of sample projects to inspire you. I certainly had too much fun in this shop. LOL!
I really enjoyed our Shop Hop, because not only did I get to drool over fabric, but I also got to spend time with Pat. And I added lots of fun stuff to my already-overflowing stash back in gool ol’ Pennsylvania. But, isn’t that the whole point of a shop hop – to buy fabric? Tehehe………..
Check out my shop hop goodies below. I found some great yardage along with fat quarters and a bunch of 2.5″ mini charm packs. Mini charms are hard to come buy in my area, so when I see them, I snap them up. I like to use them to make EPP hexies with. Of course, I have no idea what those hexies will turn into, though.
Now I need to get busy and and turn that beautiful fabric into finished projects. I wonder how long that will take?
I hope you get a little time to work on a new project this week, as well as an old one. I’d love to hear what you’re working on in the comments. 🙂
We have lots to cover this week, so let’s jump right in with both feet! Elf shoes are optional.
First up I’m going to share with you awesome, fast, and fun VRD Rose Card patterns you can whip up as last minute Holiday gifts. And after that I’ll share our NEW VRD Rose Card quilt patterns with you.
Fast and Fun Holiday Gifts to Make in a Hurry
Snack Mats
Snack Mats make great gifts all through the year! They are about 8″ x 14″ and are in between a place mat and a mug rug. We have 10 different designs right now, so you have lots of choices! You can make Snack Mats up in a wink x 2 because each pattern makes 2 mats at a time.
You can find all of our Snack Mat Patterns (digital and print) HERE.
Scarves
Did you know we have Rose Card patterns for super fun and fast quilty scarves??? Your pals will be truly amazed at both your creativity and your savvy gifting skills.
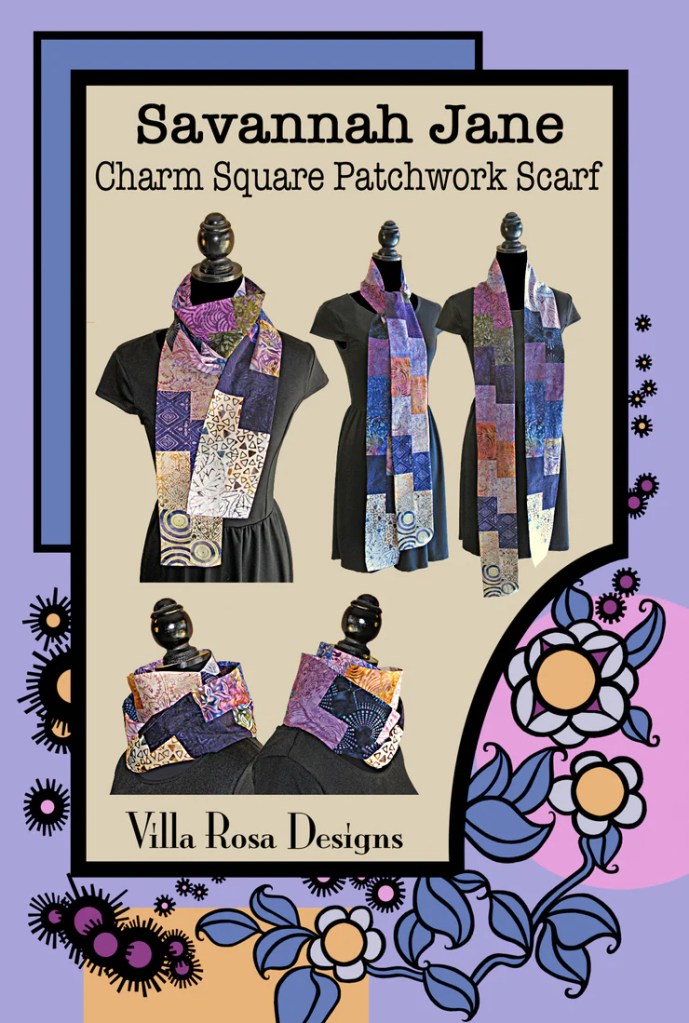
Here is Savannah Jane. It uses a collection of your favorite 5″ squares, so every scarf you make can be totally different, depending on the charm squares you choose. Hey! You can even raid your stash and make scrappy scarves — very economical. Or try some cozy flannel…..
Get your Savannah Jane Rose Card print pattern HERE.
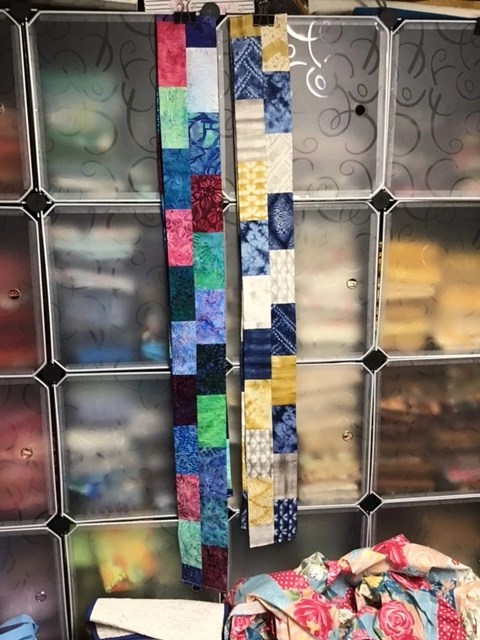
LOVE this pattern! I’ve made several Savannah Jane scarves and they go together in a jiffy. Last year I even gifted the scarves, below, to my 2 nieces, Meg and Morgan.
BUT WAIT! THERE’S MORE!!
We have another scarf pattern just for you! Check out Inessa Jane, a fun and super fast Infinity scarf. You only need 1 yard of your favorite fabric! Easy peasy and done in a flash! While you’re making them as last-minute gifts, make one for yourself, too.
Place mats are a great way to make a statement on your table or on someone else’s. They go together quickly and you can get them wrapped and gifted in the nick of time for the Holidays.
Dinner Party is our newest place mat pattern — it’s part of our new 12 Quilts of Christmas pattern collection. 4 fat quarters make 4 coordinated place mats. Done before you can sing your favorite Christmas carol.
Get your Dinner Party digital pattern HERE or print pattern HERE.
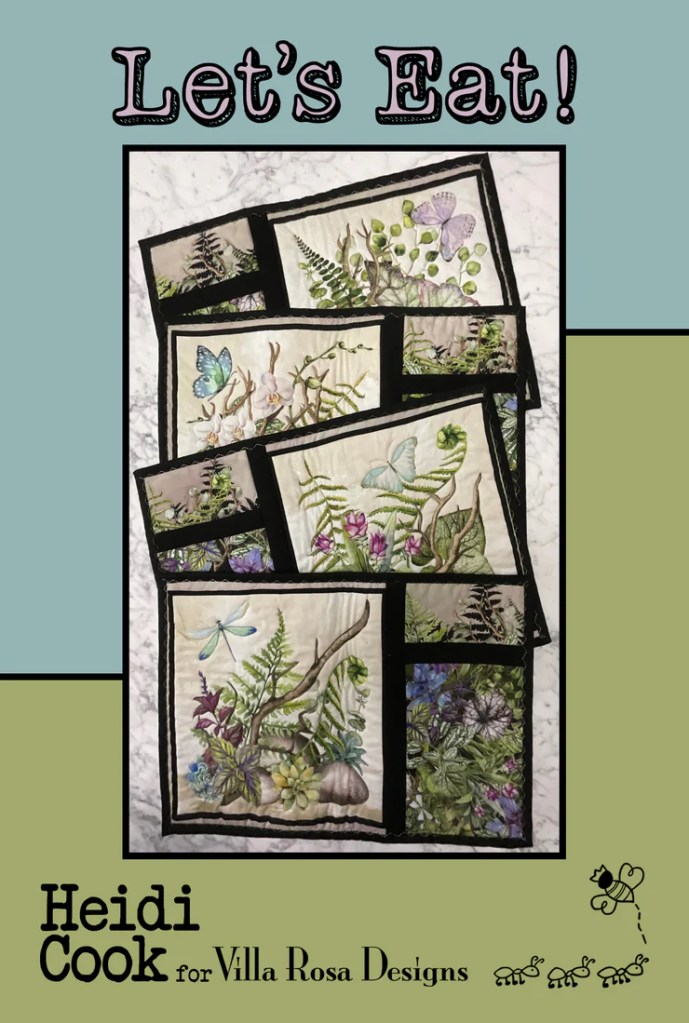
Let’s Eat! uses panel squares and coordinates, but you can use whatever fabrics your li’l ol’ heart desires! Wouldn’t these be adorable with Christmas fabric? Or Hanukkah fabric? Or Kwanza fabric? Maybe a set for winter with blue and white and lots of snowflakes? Anything goes with Let’s Eat!
Get your Let’s Eat digital pattern HERE or your print pattern HERE.
Petula Jane is a great place mat for friends and family who eat at their desks at work. This great easy-to-make portable place mat rolls up and secures with a tab and even has pockets for a napkin and silverware. This place mat will elevate your desk lunch and make you smile.
Surprised??? Yep, we’ve got Tote Bag patterns, too. Here at VRD, we’ve really got something for everyone when it comes to our Rose Card patterns. Totes make great gifts for just about anyone and it is fun to tailor the fabric choices to the person who will receive the bag. Did I mention they go together in a flash?
Here’s Tabitha Jane. All you need is 6 fat quarters! I bet you’ve got some of those yummy 6 fat quarter bundles tucked away in your stash — I know I do!
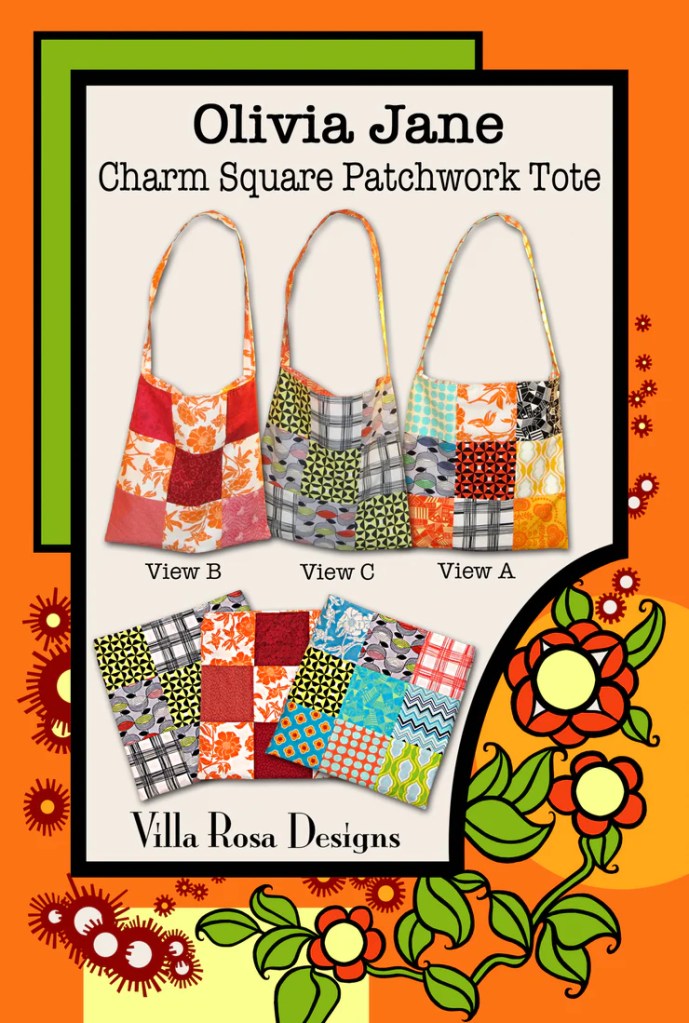
Below you can see my Olivia Jane tote. I had some happy blue and yellow charm squares and added a few coordinates. Didn’t it turn out cute?
Accessory Patterns
In addition to the scarves and tote bags, above, we have many other great small project VRD patterns. These patterns are great to have around when you need a quick little gift for someone.
You can find all of our VRD Accessory Rose Card print patterns HERE.
Table Runners
Table Runners are always a great gift to give and we have runner patterns that go together faster than you can whip up a batch of microwave fudge (okay, maybe not quite that fast, but still really quick). Okay, now that I’ve piqued your interest in fudge, here’s one of my favorite Easy Fudge recipes – 2 Ingredient Fudge.
You can find ALL of our table runner patterns HERE, but I’m going to showcase a few runners that you can make up in no time flat.
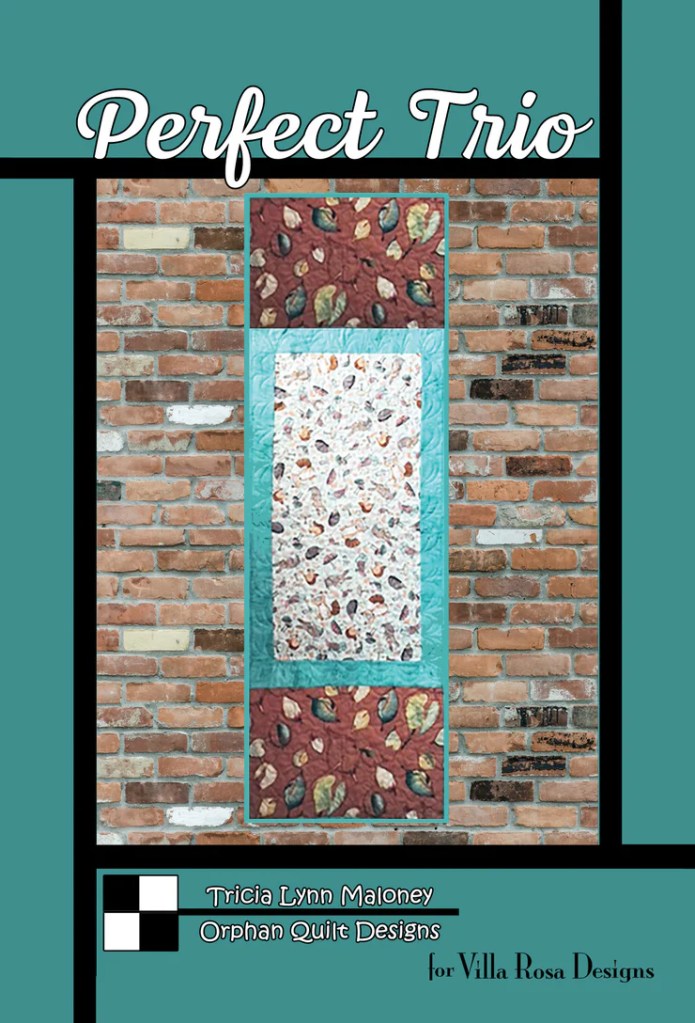
Get your Perfect Trio digital pattern HERE or print pattern HERE
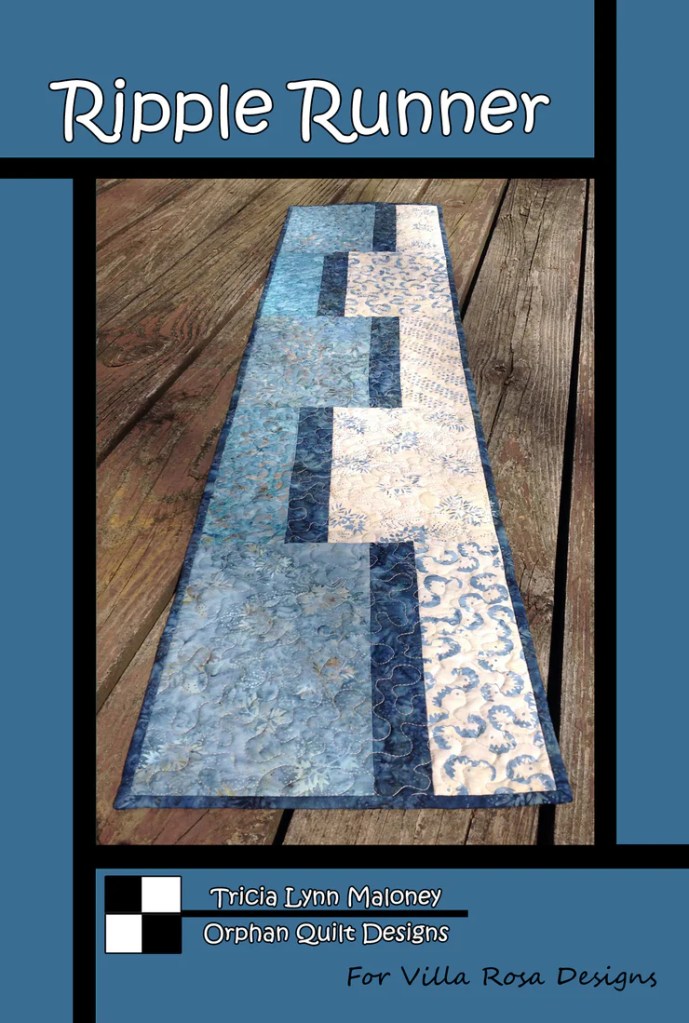
Get your Ripple Runner digital pattern HERE or print pattern HERE.
Get your Season’s Greetings digital pattern HERE or print pattern HERE.
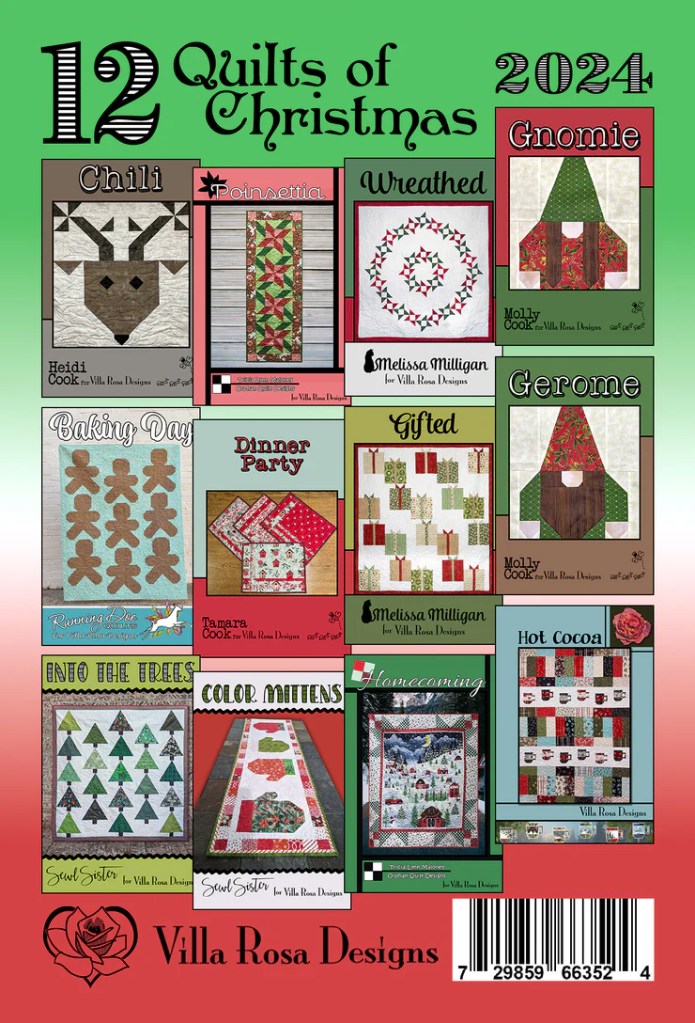
12 Quilts of Christmas
I wanted to include our new 12 Quilts of Christmas collection because the set of 12 patterns is a gift in itself — one that will provide the receiver with hours and hours of quilty pleasure. Or maybe you want to select some of these great projects to make and give as gifts. They are fast and fun, of course!
If you can’t get a project made in time for a quilty friend, why not gift her with the whole 12 Quilts of Christmas collection? You could even add the fabric ingredients for one of the projects as an extra something something. Just remember to get a set for yourself, too.
Get your 12 Quilts of Christmas print pattern collection HERE.
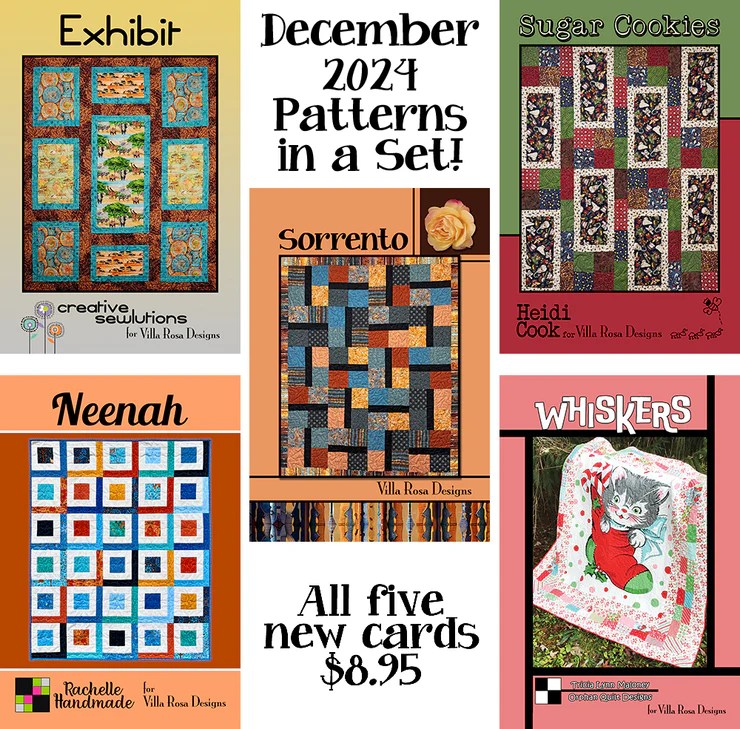
Now let’s take a look at our exciting NEW December patterns because new VRD patterns every month is like getting presents each and every month of the year from VRD!
NEW December Villa Rosa Designs Rose Card Patterns
Woohoo! Check out this month’s NEW Rose Card Patterns!
Exhibit and Sugar Cookies can handle printed panel squares or large prints with ease. Grab your fat eighths and fat quarters for Sorrento and Neenah. And Whiskers gives you a great pieced frame for those large 36″ panels.
One of my favorite things to do when I go anywhere is to be on the lookout for antique and vintage quilt blocks, fabrics, and other textile goodies. I haven’t talked much about my super secret life as a textile collector on the blog, so I thought today would be a great opportunity to share that side of me with you.
I started out as a collector and an appreciator of antique and vintage textiles long before I became a quilter, so those early roots in textiles are still with me and are actually pretty strong. Instead of a collector, though, maybe I should call myself a curator of my own textile museum. Yep, I really do have that many textiles in my possession. And I do really enjoy adding more to my antique and vintage stash whenever I can.
Sit back and enjoy my new playthings!
Hand-Crafted Santa
Here’s my adorable Santa made out of a couple circa 1870’s/1880’s quilt blocks. I don’t know if any of you have ever been to Una’s booth at Quilt Festival in Houston? She creates the most amazing Santas using antique quilts, tops, and blocks. This cutie is my second Santa. Last year, I brought home my first Santa, which was created from lovely indigo and white quilt blocks circa 1900/1910. I haven’t started my holiday decorating yet, though, so he isn’t out of storage yet. Now they will be good company for each other. And they are a fun addition to my textile collection, don’t you think?
Feed Sack Doll
Isn’t she a little darling??? She is from the 1930’s or 1940’s and was handmade by some sweet mama or grammy for a lucky child. The pink floral body is actually made out of a feed sack and the face/hair is hand-painted. I think she is in marvelous condition, considering she’s almost 100 years old now. I just love her chubby legs!
I found this little sweetie at Quilt Festival in my friend, Tenny’s booth, Tenny Roche’ Vintage. You can find Tenny on Facebook HERE or visit her Etsy shop HERE where you’ll find all sorts of intriguing vintage items.
I have a deep interest in feed sacks, having started seriously to collect them during the pandemic. I now have crates and crates of them — I just love these wonderful colorful patterns and colors! So what’s a girl to do with all those feed sacks?
Write a pattern showcasing them, maybe?
Yup, did that! I used lots of feed sack bits and pieces out of my vintage stash for the blocks in this runner. It was a really fun project! You can find the digital Nana’s Aprons HERE or the print Nana’s Aprons HERE.
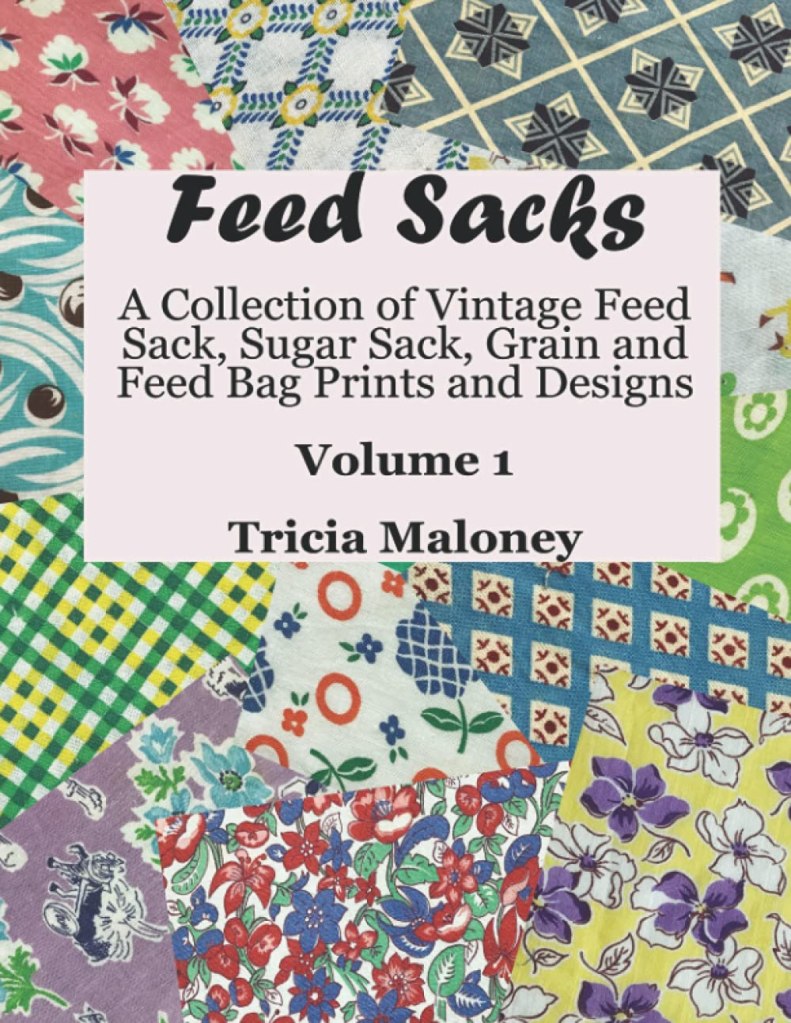
WHat’s really exciting is that right now I’m getting ready to launch my second feed sack book, Volume 2, hopefully later this week. The first volume has over 1000 feed sack prints and designs while my new book will have another 1400+ prints and designs. Wow! And I’m just getting started on this very dear-to-my-heart project because I have lots more feed sacks to document.
Antique Quilt Blocks
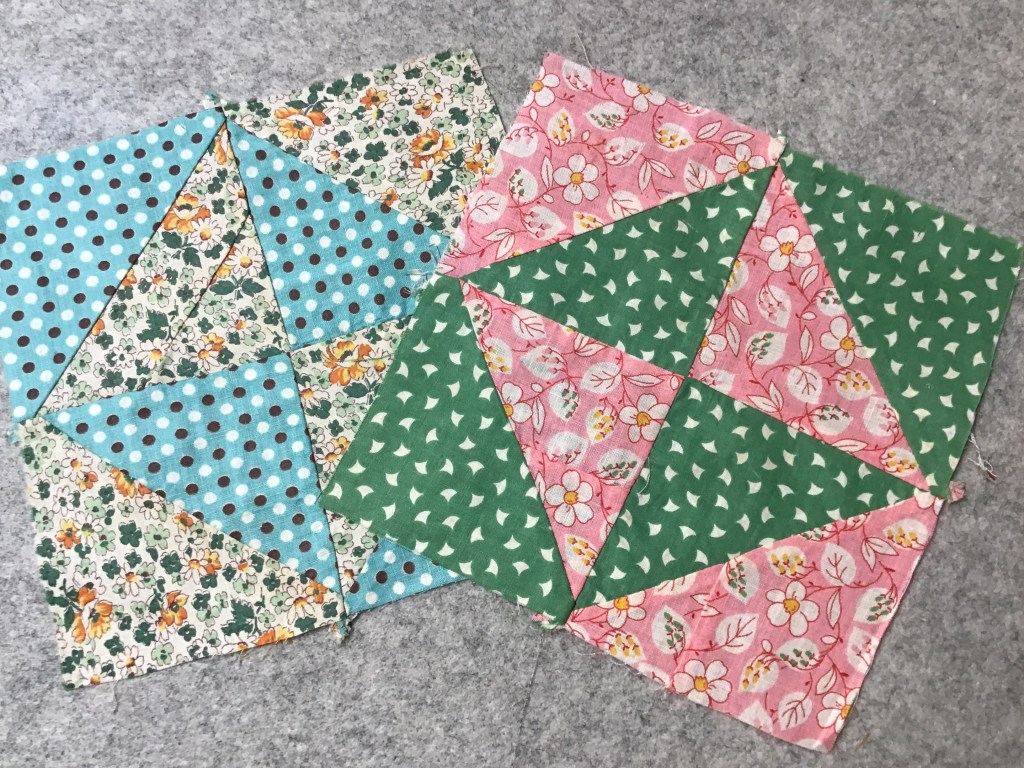
At Quilt Market and Festival, one of the first things I like to do when I get the chance away from the VRD booth is to visit all of the antique quilt and textile vendors. They pretty much now all know me by name. LOL! I also scour flea markets, second hand shops, antique shops, etc. whenever I go anywhere in the hopes of finding more textile goodies. Here, I’ll show you what I found at Quilt Market and Festival as well as some from my Mom’s birthday trip to Ohio Amish country.
I’ve loved antique and vintage quilt blocks for a long time now — I started collecting them long before I ever actually knew how to quilt. I was totally hooked on learning to quilt once I saw how antique fabrics in garments made it into the quilts of the time. After that, I paired up my love of antique and vintage textiles with my love of quilting.
In fact, my very first quilt book was called Orphan Block Quilts, and I showed how I could feature both antique quilt blocks and modern quilt blocks in the same quilt design. If you’ve noticed my byline on my VRD patterns — Orphan Quilt Designs — my first book is what started the whole orphan quilt thing for me. That being said, I LOVE adding antique and vintage orphan blocks to my textile menagerie.
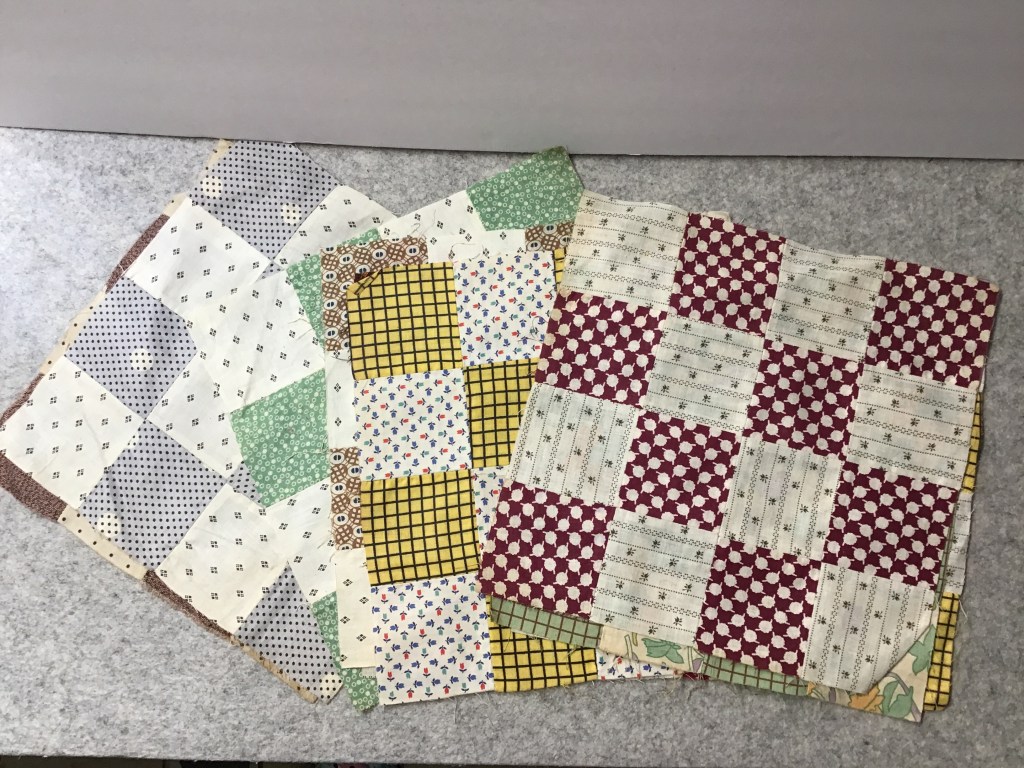
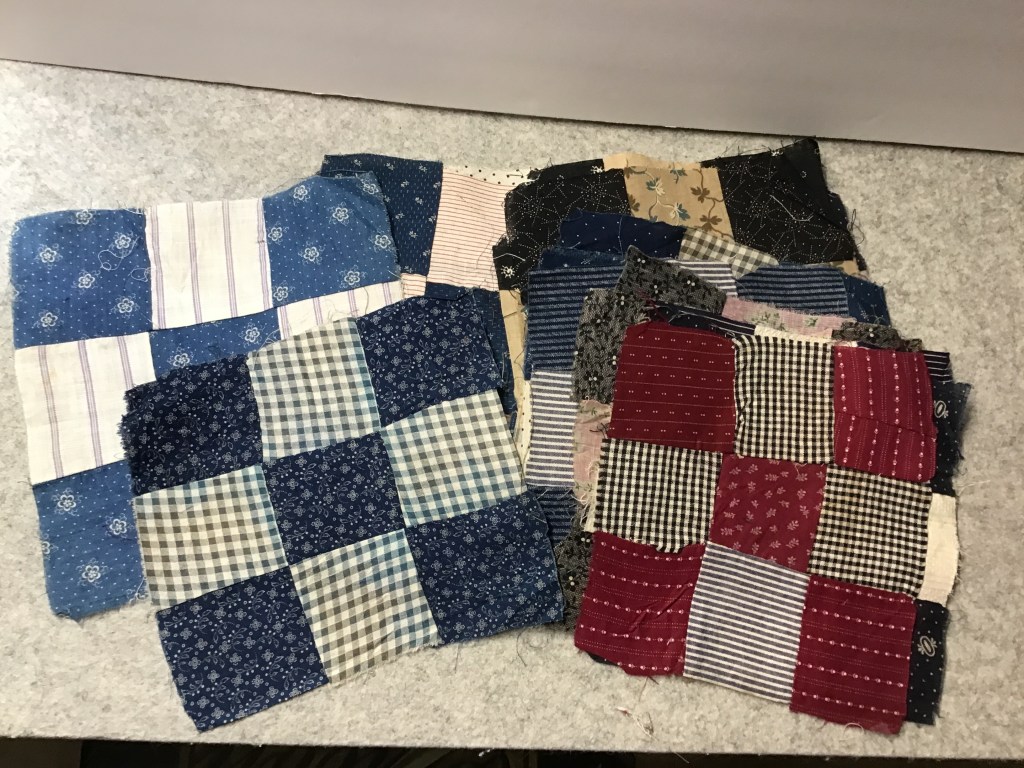
1920’s/1930’s Double Four Patch blocks1890’s-1910’s Nine Patches1930’s/1940’s Nine Patch blocks. The block in the center even has feed sack squares.
Humble quilt blocks like Nine Patches and Four Patches are some of my favorite blocks because they are often the first blocks a quiltmaker makes and boy, have I come across some delightful wonky blocks over the years that I suspect were early projects or rejects from quilters of the past. I love them all!
I wanted to show the Nine Patch block below all by itself because it has such wonderful fabrics in it. Can you guess how old it is (answer below the photo)?
I cannot pinpoint an exact date, but I would say second half of the 1800’s. The turkey red fabric really fascinates me — the colors are so bright. The center blue and brown stripe is also a very interesting fabric.
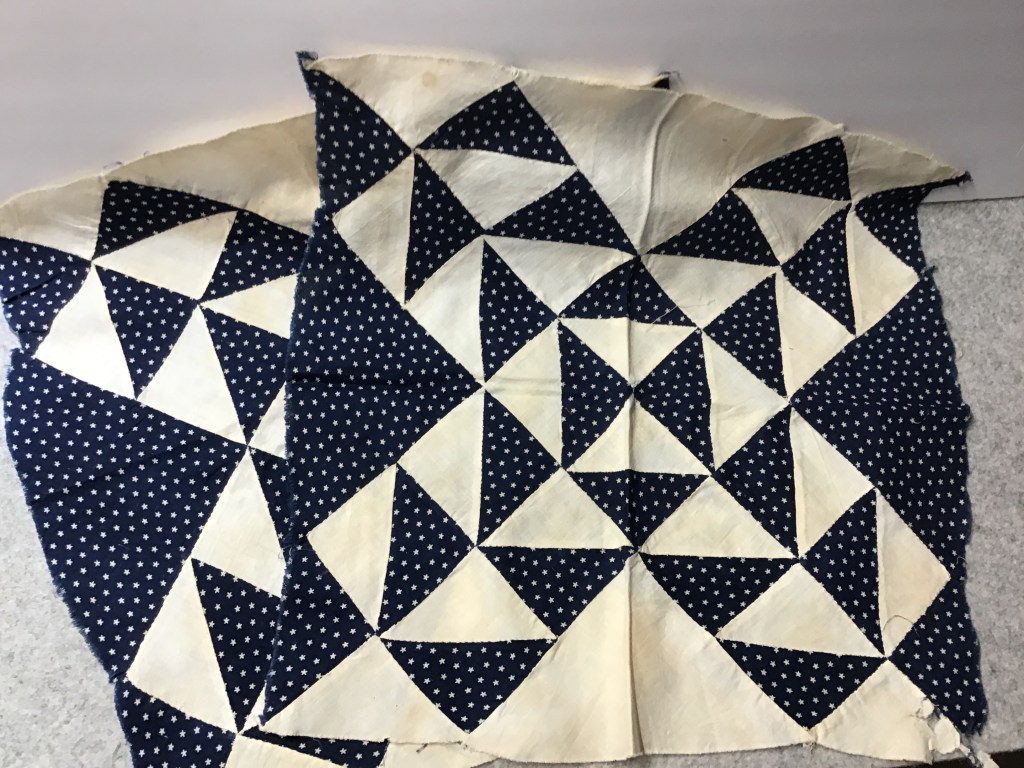
Indigo and white is probably the most classic color combination for quilts and I’m always on the lookout for them. I also really like indigo and double pink, so I am always happy to find those, too. Maybe someday I’ll put together a book filled with examples of antique and vintage indigo.
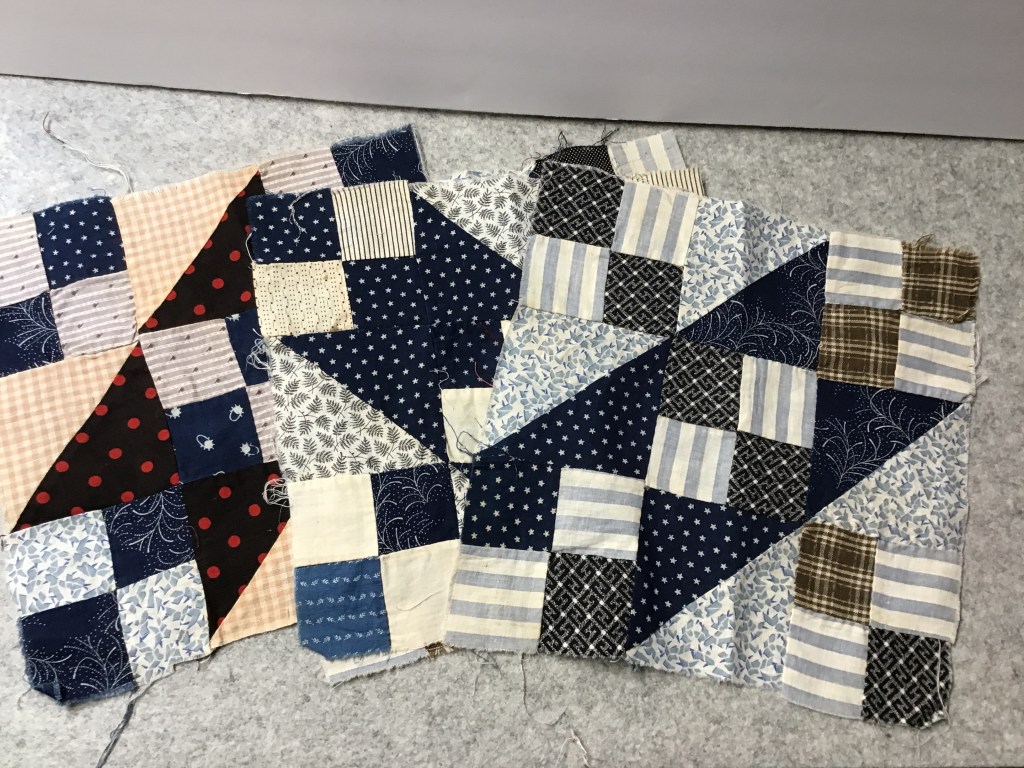
Scrappy quilt blocks are a lot of fun. Sometimes I shake my head at the fabric combinations quilters put together, but they also make me smile. Besides, the scrappier the blocks are, the more interesting they seem to be, particularly with their wonderful treasure troves of fabrics.
In opposition of the scrappy blocks above, below are some nice examples of organized blocks with thoughtful fabric choices.
Check out these cute Bow Tie blocks from 1890’s-1910’s. Red and black fabric combinations, like the block on the right, were very popular in the 1890’s and were sometimes called Garibaldi prints, which were named after Giuseppe Garibaldi, an important Italian leader who often wore a red shirt with a black kerchief, as did his men and followers.
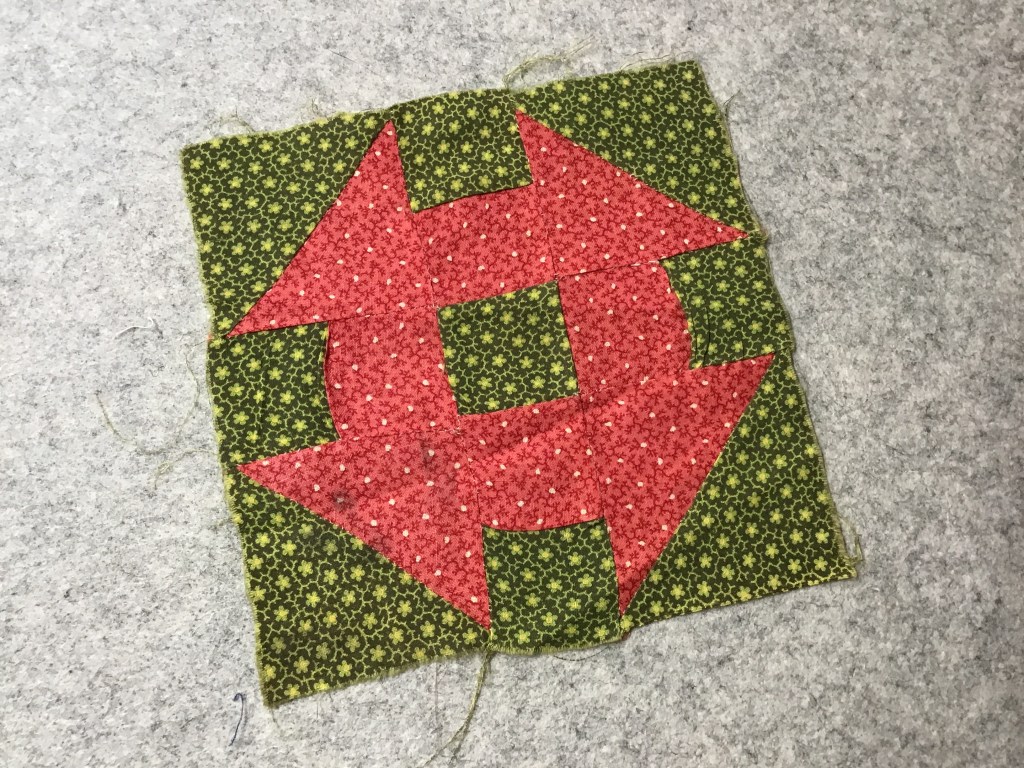
I found a couple of very antique blocks that were truly orphan blocks because they were the only ones of their kind that I found. I know you will agree that they are pretty special.
The first Leaf block could actually date from 1840-1870. WOW! Do you see the little dots on the red fabric? Whatever metallic mordant used to dye the fabric actually ate through the colored dots, so where you see dots, they are actually tiny holes. Isn’t it quite fascinating that this little block has so much to say?
The second Monkey Wrench block is a traditional poison green (called poison green because it was originally dyed with arsenic — just a little bit of quilt history trivia for you) and double pink combination which was popular in the 1870’s. You can’t tell by the photos, but these blocks are only around 6 or 7 inches.
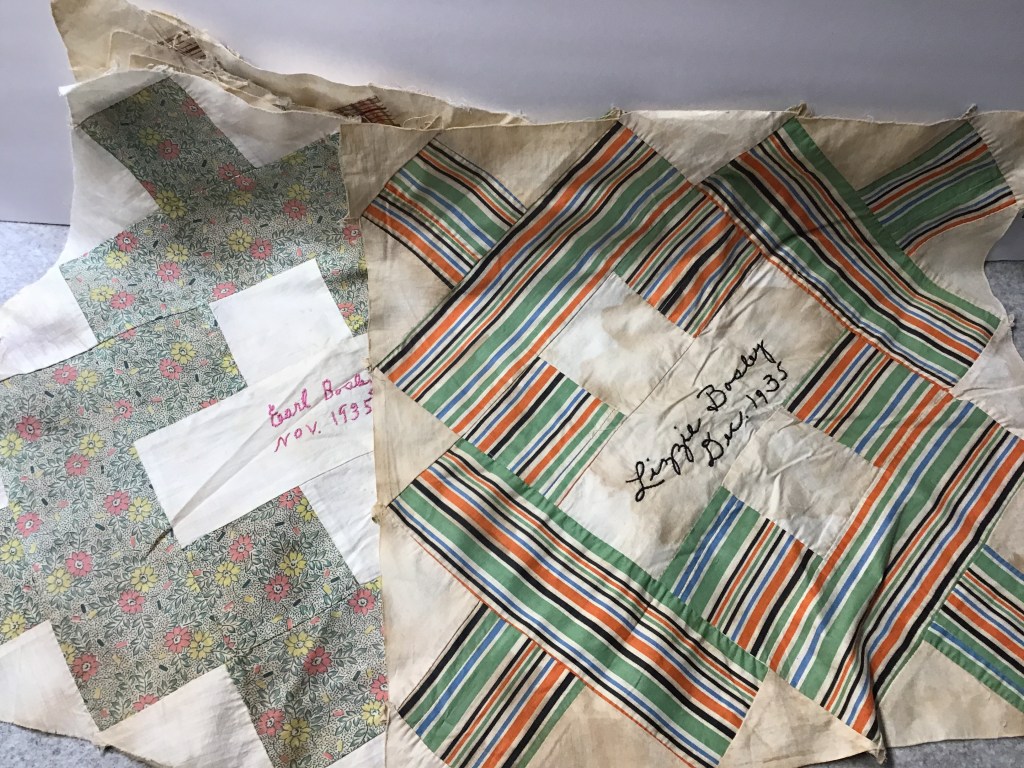
Another great find was a lovely set of signature blocks from 1935. Signature blocks have always been an interesting challenge to me because I like to actually research the names on the blocks.
I remember one time I had a stack of signature blocks and did the research only to find a living relative. The blocks were so much more meaningful to her than to me just as a collector and history buff, so I gave them to her. I imagine she probably finished then into a quilt to honor her mother, grandmother, mother in law, and other relatives and friends found amongst the embroidered names on blocks in the collection.
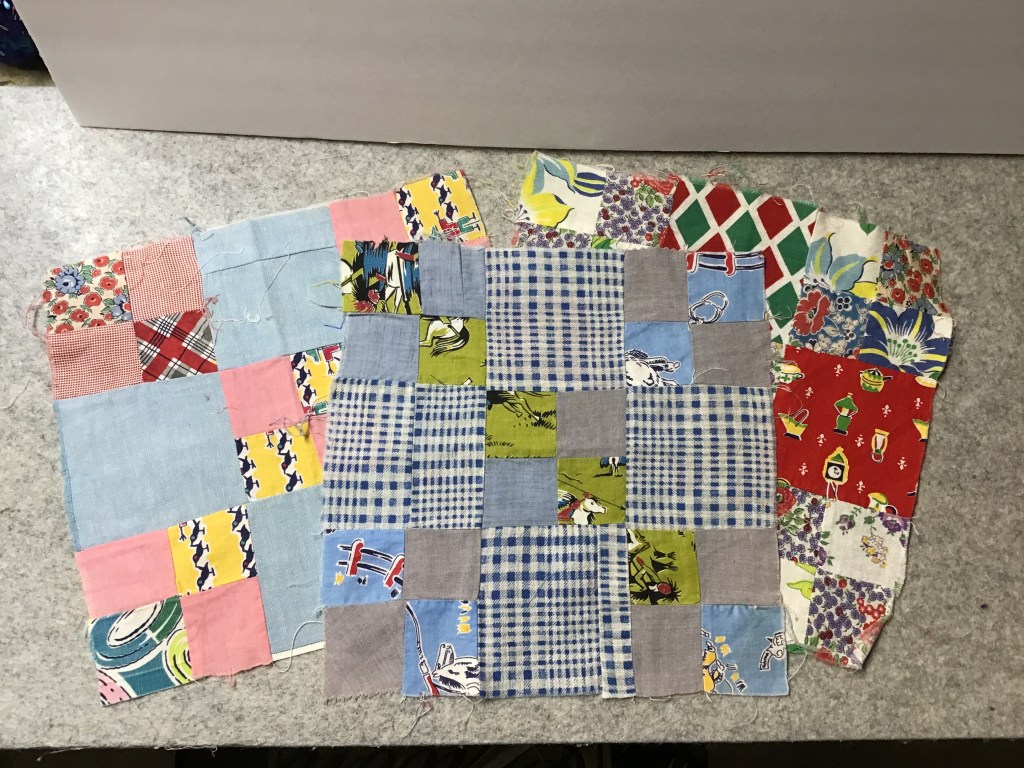
Another fun find was this great set of blocks from the 1940’s/1950’s, which I found at thePlaid Sheep Company shop in Berlin, Ohio. The fabrics are just so bright and colorful and busy, I can’t help but love them. And the blocks are really big, too, so I could actually turn the 18 blocks into a nice-sized quilt. Hmmm. Maybe.
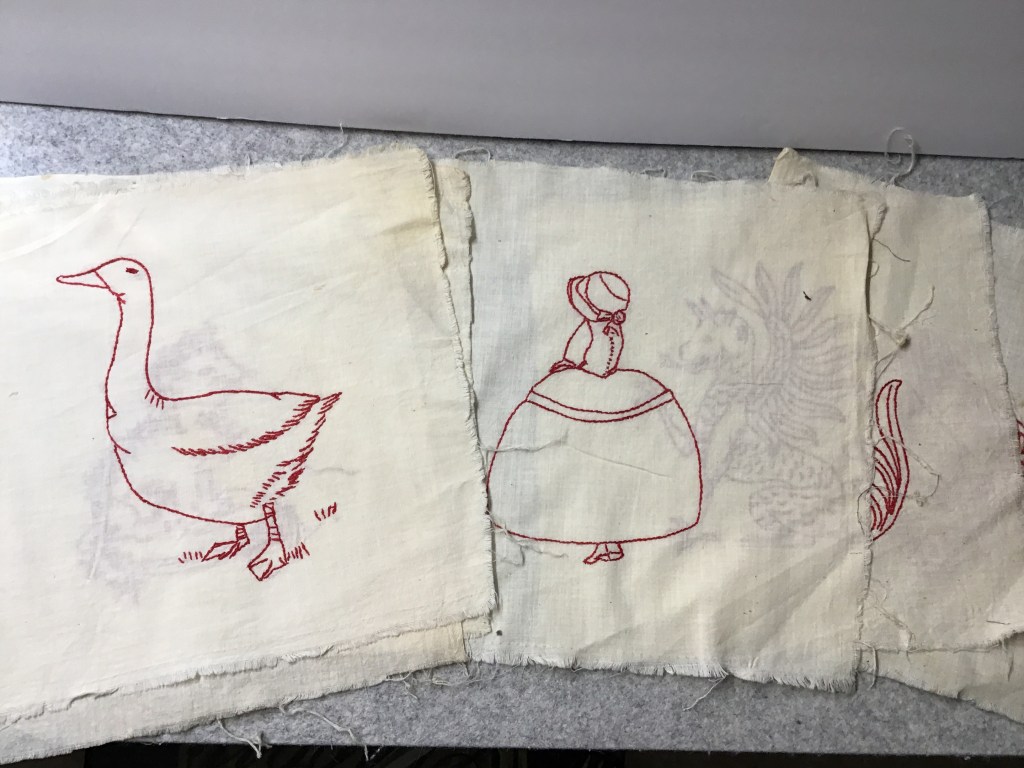
I even found some stray redwork blocks at Quilt Market.
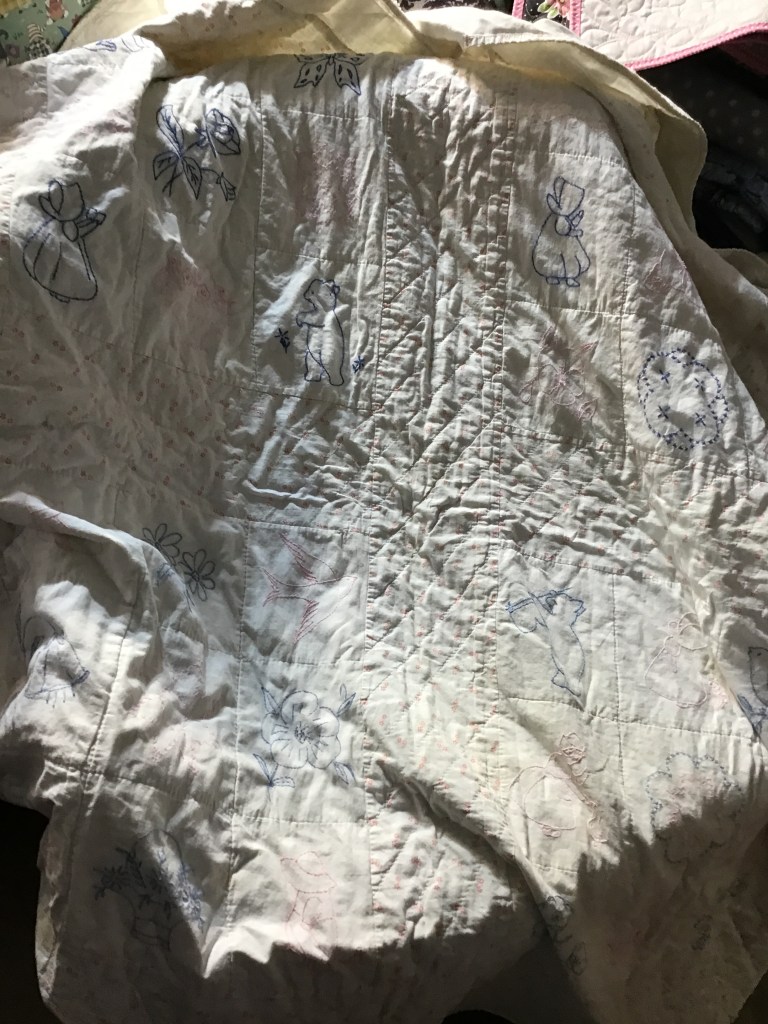
In Millersburg, Ohio on my Mom’s birthday trip, my sister found a a delightful children’s quilt with embroidered blocks in pink and blue. She messaged me a photo in case I was interested and the rest is history. Sun Bonnet Sue, Overall Sam, Cupie dolls, flowers, bears, dogs, and other motifs adorn this sweet quilt, below.
The last quilty treasure I have to share with you today is a tiny little doll quilt. I found this one in an antique mall in Berlin, Ohio. The maker dated the quilt on the back, but sadly there is no name, only an initial.
I hope you enjoyed taking a peek at some of my recent textile goodies.
That’s it for me! Take care and remember to label your quilts so someone someday can research you.
As I write this post, I am still in Colton’s Point, Maryland with 2 of my (I want to say oldest here, but I don’t mean ages, I mean the number of years we’ve known each other) quilty pals, Leslie and Cathey.
I must confess that I am having a wonderful time here! Colton’s Point is a very special hidden treasure right on the Potomac River, it’s about 1.5 hours from Washington D.C. and a couple hours from Baltimore. Of course, we’re not here during any festivals or events, so it’s been quiet and peaceful — 2 things I’ve been craving for quite a while now. Too bad Leslie and I are only visiting Cathey and her husband, Bryon for 4 days — 4 days is barely enough time to unzip my suitcase, let alone unwind completely. Then again, not sure I could ever truly unwind completely, even if I tried — I don’t think it’s in my nature. LOL!
It was about a 7 hour drive to get to Colton’s Point from northwestern PA. Of course, Leslie and I do not live in the same area anymore, so we met about halfway in between. My sister, Tracy, kindly drove me to meet Leslie and then we were on our way! I rode shotgun and Leslie drove. I totally could not believe her car was getting 48.3 miles per gallon on average! Wowzer!
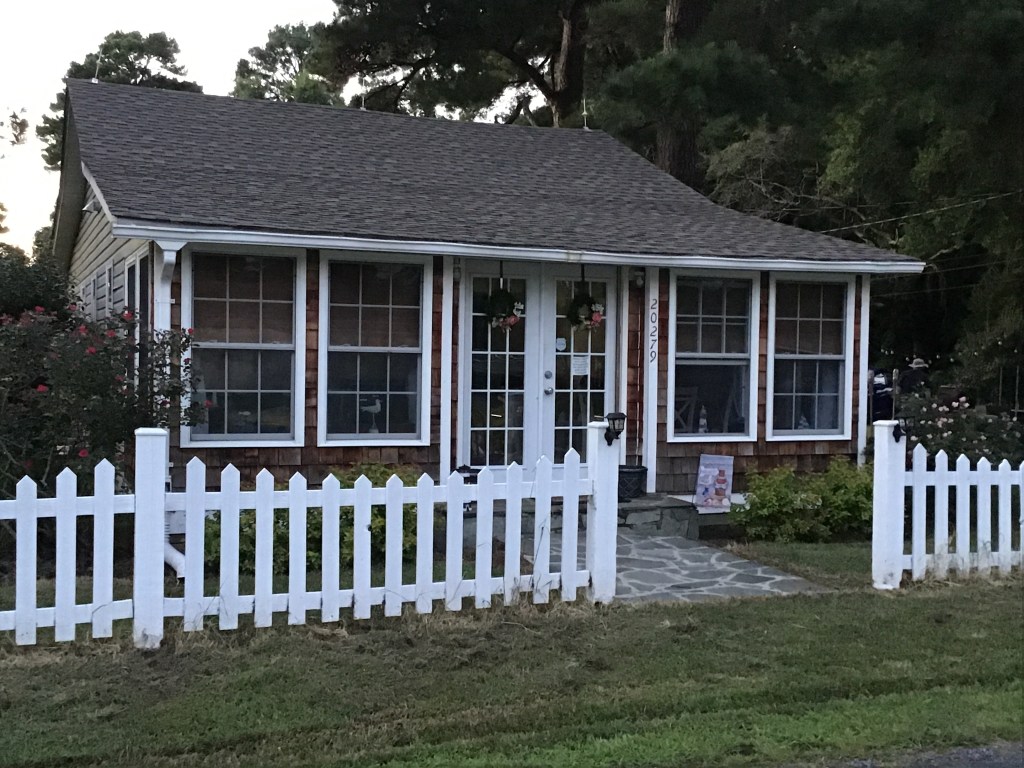
Here is Cathey and Bryon’s adorable cottage (it’s bigger than it looks as it is quite deep). It has a wonderful beachy vibe and is very welcoming.
One of the coolest things about their home is that mere steps away from their cottage is Cathey’s lovely quilt studio. This is, of course, where we definitely will be spending A LOT of our time together on our little “quilt retreat.”
Don’t you just love her barn quilt out front??? Cathey brought it all the way from PA when they moved here.
It didn’t take the 3 of us long to settle back into sewing together, although it’s been simply ages since our last quilt retreat experience. We certainly had a lot of catching up to do!
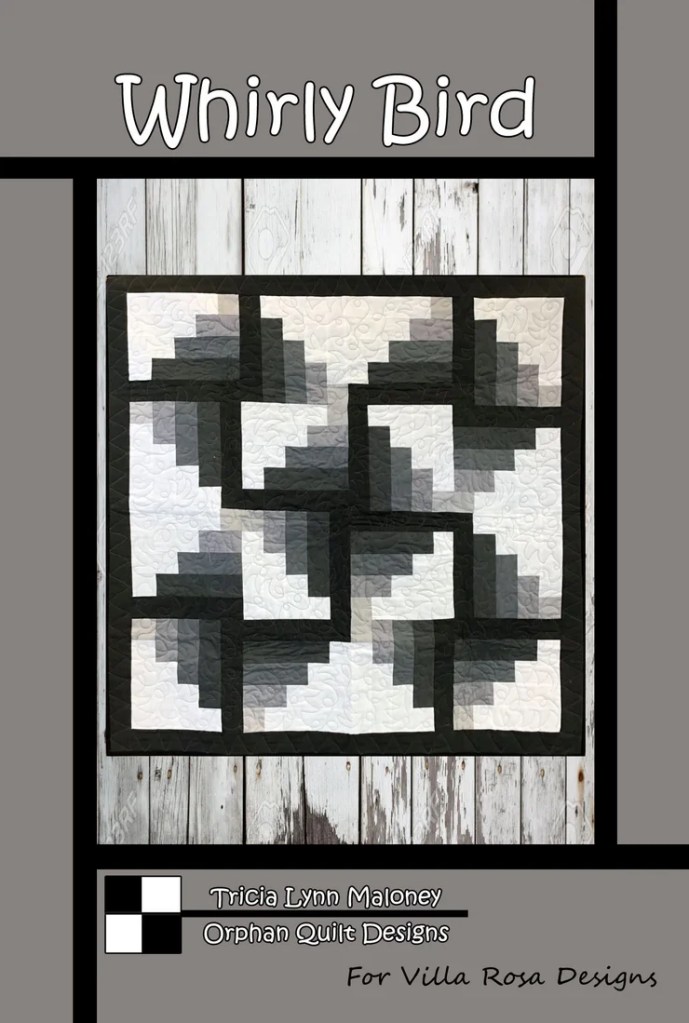
I know I packed too many projects to bring with me, but I wanted to be prepared. And I really wanted to do some free motion quilting — I have way too many unfinished tops, or flimsies, right now — so I brought along 3 table runners and my Whirly Bird top from last week’s summer tutorial to machine quilt. If you missed the Whirly Bird tutorial, you can find it HERE. I also brought a challenge project for the 3 of us — I think I’ll talk more about this project in next week’s post, though — I also brought several quilt kits in case I had time to do any cutting and piecing.
Luckily, Cathey has the same model of machine as I do — a Janome 8900 — so quilting on her machine felt a lot like quilting on my machine, although no 2 machines ever feel quite the same. In fact, Cathey is the person who got me into Janome machines, when she bought her first Janome 6260, it was such a nice machine, I had to get one too. Later she upgraded to a 8900, and so did I.
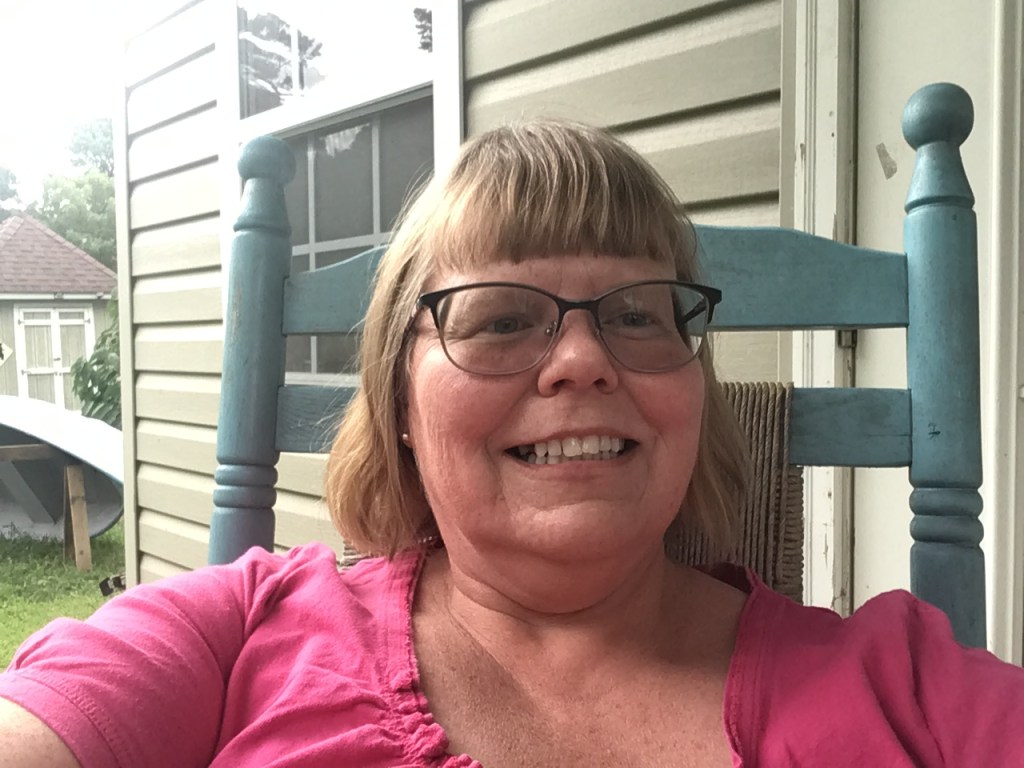
Here I am sitting on Cathey’s studio front porch, just chilling for a few minutes.
Here is Cathey, working on cutting out some projects.
Here is Leslie working on a second version of a quilt she designed several years ago.
Here is the view from where I am sitting in front of Cathey’s 8900 while I machine quilting Whirly Bird.
I think I’ve mentioned before that Cathey is a quilter/designer and is the owner of Cathey Marie Designs.
And after a long hiatus from quilting when life happened, Leslie is getting back into quilting once again.
And you all know little ol’ me. LOL!
Cathey, Leslie, and I have all designed quilts for magazines, too.
We’ve been trying to figure out when we first met and Leslie thinks it was 2007. Both Leslie and Cathey were relatively new quilters when we met on a bus trip to Chautauqua Institution in New York for Quilting Around Chautauqua. Cathey and I had met in the summer when I was seated behind her on the bus for our local Shop Hop. It was both our first Shop Hop. Those meetings led to many Shop Hops and quilting road trips, along with some quilting retreats (and staying in a cottage at Chautauqua for Quilting Around Chautauqua with our quilty pal, Mary Lee — HEY MARY LEE!) sprinkled in for good measure. But as things happen, life got in the ways and over time we didn’t spend as much time together. How wonderful to spend 4 days together quilting, sewing, catching up, and eating (yep, who can forget eating??).
The Potomac River….and Quilts!
We walked down to the river just to take it in, but we didn’t have a lot of time to soak it all in, as thunder started to rumble in the distance and before we arrived back at the cottage, it had started to rain.
What really amazed me was how wide the Potomac is right here at Colton’s Point! I could barely see the land on the other side of the river (which just so happened to be Virginia). I tried to find out how wide the Potomac was at Colton’s Point but could only find that the widest section was around 11 miles across and that was farther down towards Chesapeake Bay.
Do you see the little island there on the right beyond the pier? That is St. Clements Island, which is where the first settlers to Maryland landed in the 1600’s. Of course, back then the island was something like 10 times larger!
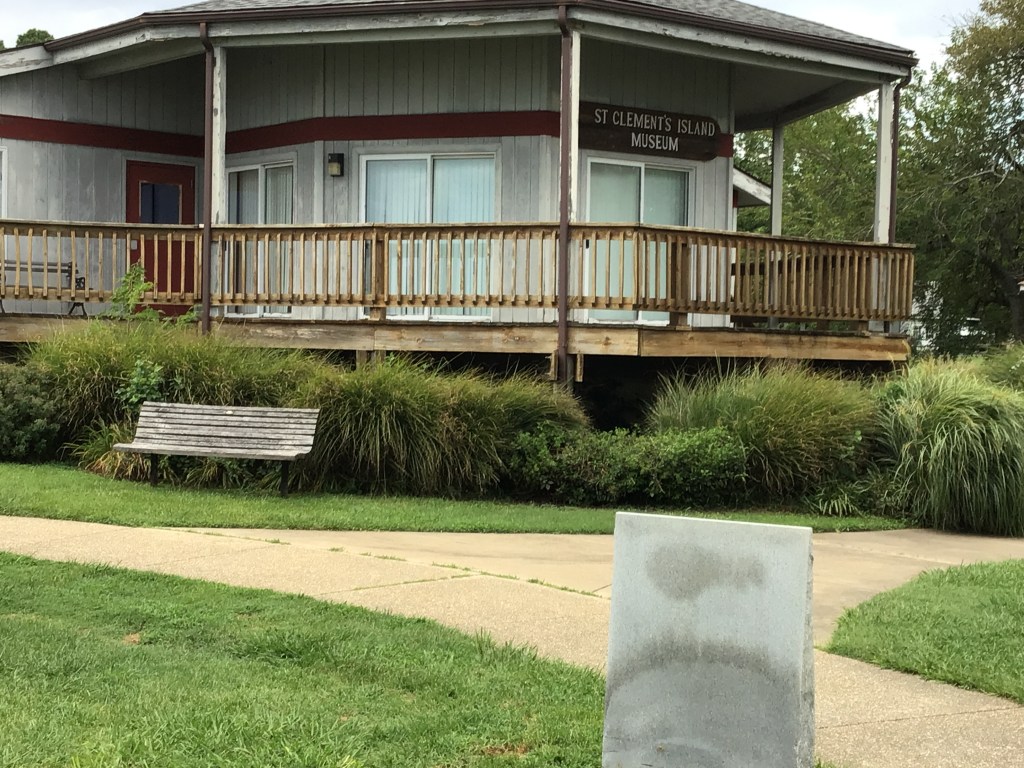
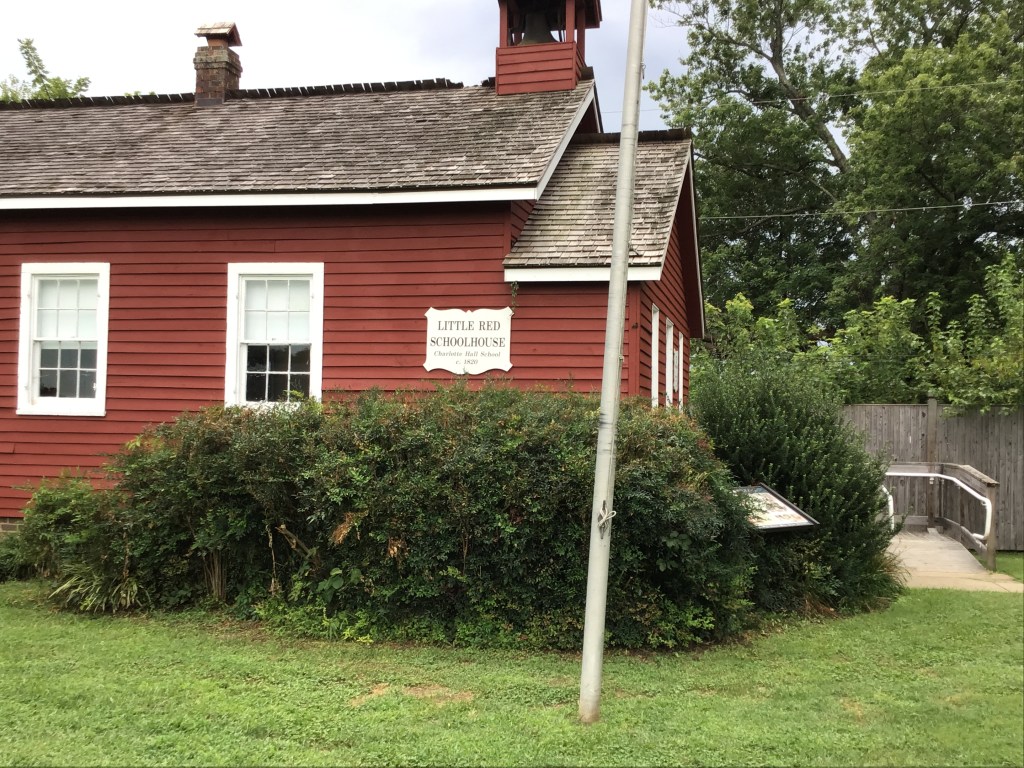
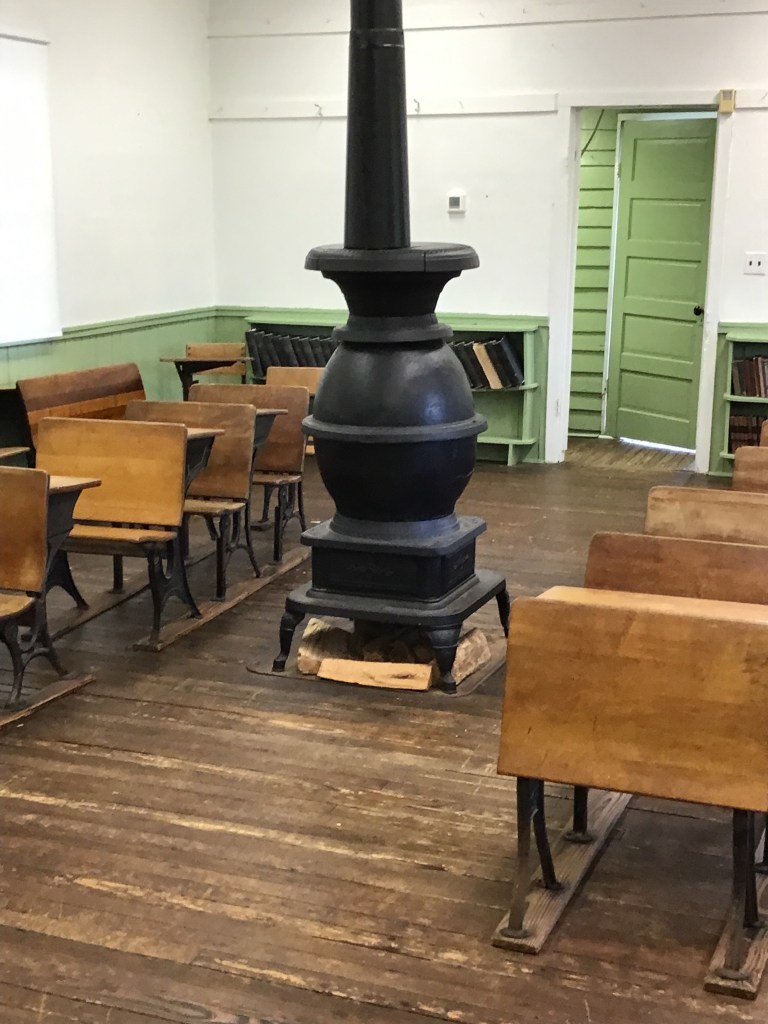
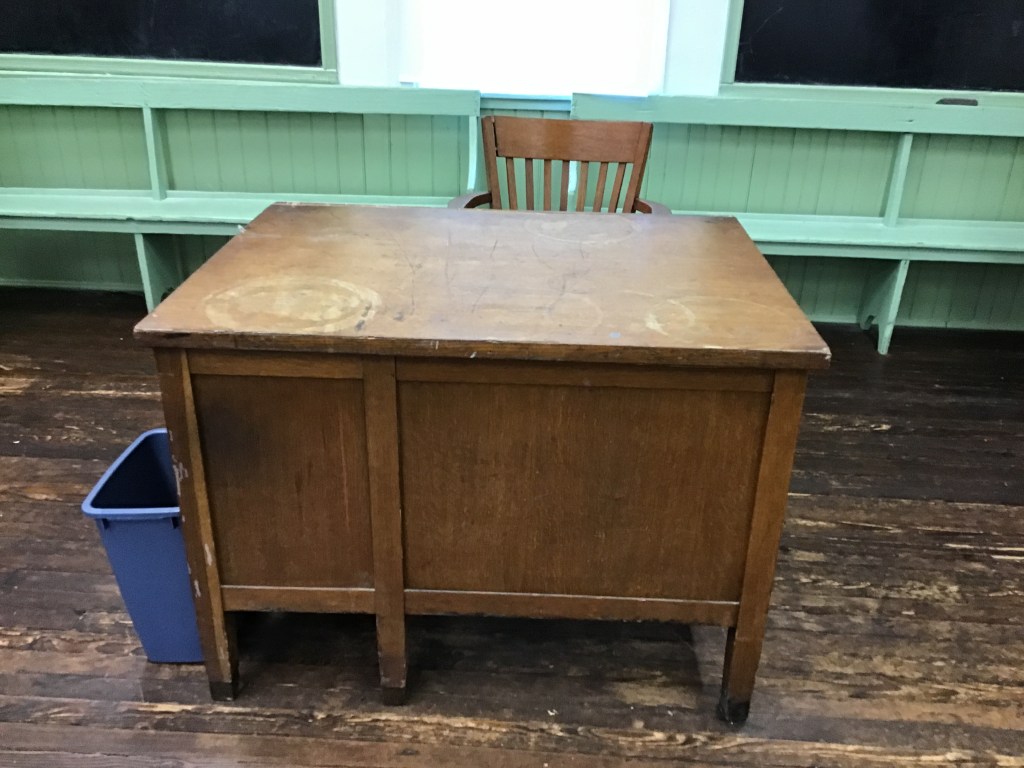
You can find the St. Clement’s Island Museum Campus down near the river. And on the museum grounds is a lovely Little Red Schoolhouse, built in 1820. We were able to go right into the schoolhouse, which is used for school field trips and events. It was like stepping back in time to Little House on the Prairie……
As a former children’s librarian, I was thrilled to see a Little Free Library right outside the Little Red Schoolhouse!
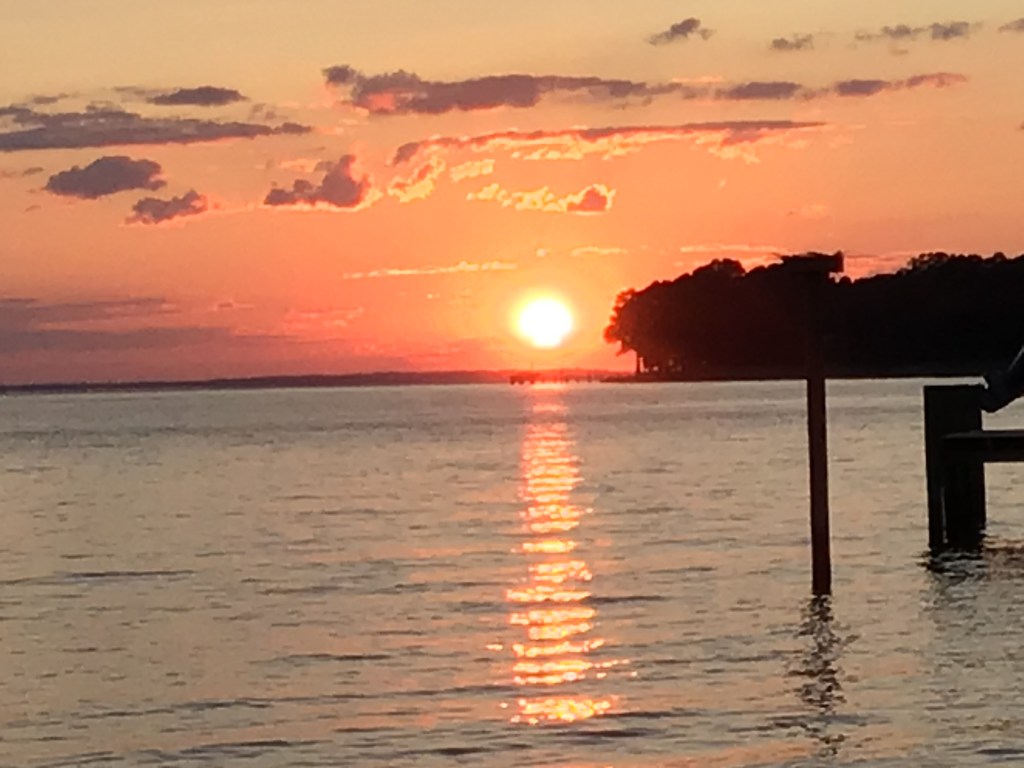
The next day, Bryon kindly shepherded Leslie and I back to the river, this time out on a pier, to witness the sunset. I was a little apprehensive walking out on the boardwalk to the pier, but I really wanted to have a front row seat for the sunset. Mother Nature did not disappoint! Not at all! My, what a sight! We also went to see the sunset again Wednesday night.
Tuesday night’s sunset.
Wednesday night’s sunset.
And on Wednesday afternoon, I wandered back down to the pier for more photos, taking the 2 runners I quilted, Whirly Bird, and the Discovery top I had just completed (stay tuned for a Discovery tutorial next week).
Here is my Whirly Bird quilt from last week’s tutorial! I haven’t added the binding yet, but it still looks beautiful. Being down at the river was really peaceful — I felt like I was the only person in the world for a little while, which really was priceless. I felt like I could really breathe here.
Get your own print Whirly Bird HERE or digital Whirly Bird HERE.
Here are 2 of the 3 table runners I brought with me to machine quilt. The one on the right is Molly’s Amen runner and the runner on the left is a variation of Amen.
You can get your own print Amen HERE or digital Amen HERE.
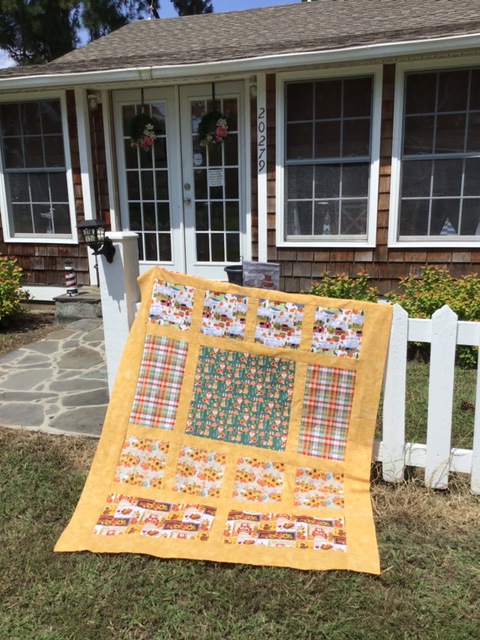
And here is my Discovery quilt top. I did a couple photos down at the river, but I think the autumn colors looked better on the picket fence in front of Cathey’s cottage.
Get your print discovery HERE or your digital Discovery HERE.
Sadly, Leslie and I are heading home in the morning, but we will be back. Soon.
Just one more photo…………
Well, that’s it for me this week! Stop back next week for a final Summer Tutorial.
I knew I wasn’t going to have time to do a tutorial for this week because I’ve been working on a couple other projects for VRD, so I started brainstorming about a topic for today’s blog post. Then it occurred to me that I haven’t ever talked about how to incorporate quilts into your life. So it’s about time I explore how to do more than just stack ’em in a corner or toss ’em on a bed. Make yourself a cup of ice cold sweet tea and enjoy a little air conditioning while we delve into Living With our Quilts. Let’s get started!
11 Awesome Ways to Incorporate Quilts into Your Life
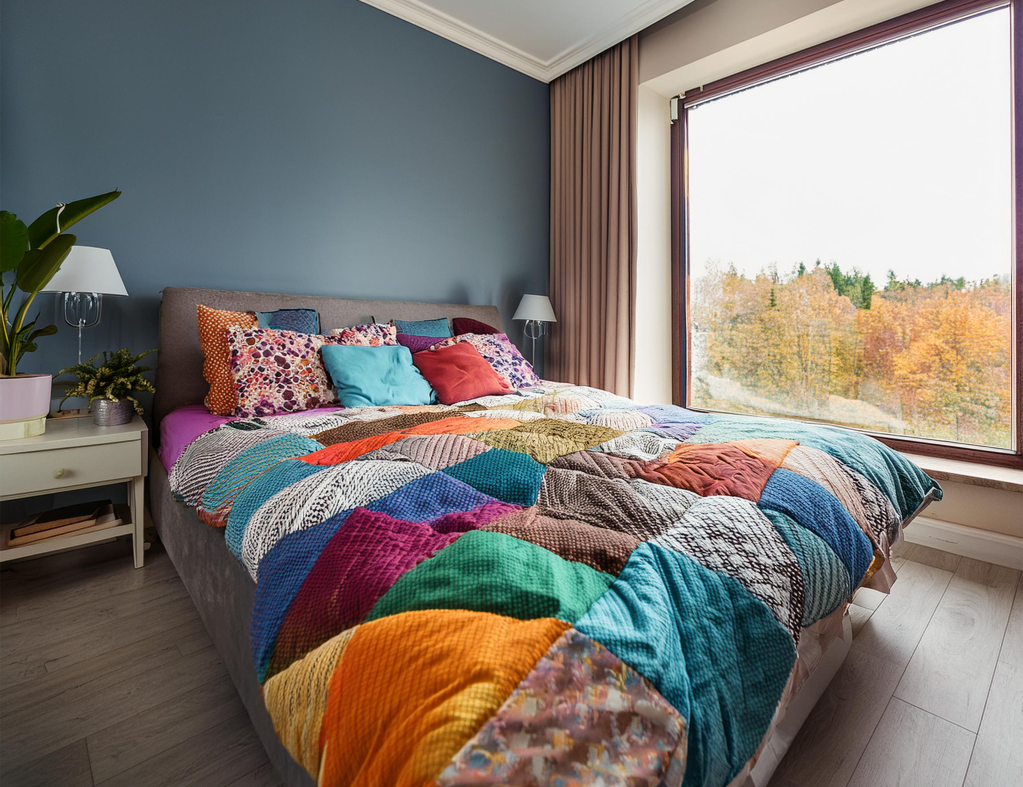
1. Embrace Cozy Comfort
Image by Moi
Yep, you CAN put quilts on every bed in your home. Did you ever have any doubts? LOL! Why not transform your sleeping spaces into havens of warmth and style? Quilts are versatile pieces of functional art — they provide comfort and add character to your bedroom!
Go ahead and experiment with different patterns and textures to create your very own unique inviting atmosphere that shows your personal taste. Consider layering quilts of varying weights so you can adapt to changing seasons, ensuring year-round coziness. Lightweight cotton quilts such as hand-stitched Indian Kantha quilts without batting offer breathability for warmer months while options with batting, fleece, and flannel can provide extra warmth during those chilly nights. Don’t be afraid to mix and match colors and designs to refresh your space — make it totally you.
2. Wall Art with a Personal Touch
Image by Moi
Why not embrace your inner quilter and transform your living spaces into vibrant galleries of memories and craftsmanship by showcasing your quilts as wall art? Quilts deserve to be admired daily, not just when adorning a bed so by displaying quilts on your walls, you can create a unique and personal display that tells your story and celebrates the art of quilting.
Consider rotating your quilt displays seasonally to refresh your home’s decor. You can even expand your creativity by exploring different hanging techniques such as decorative quilt hangers, shelves with attached quilt rails, or even tree branches (I personally love birch). What about suspending quilts from rustic wooden beams or even folding them over the rungs of a folksy wooden ladder for a charming farmhouse feel?
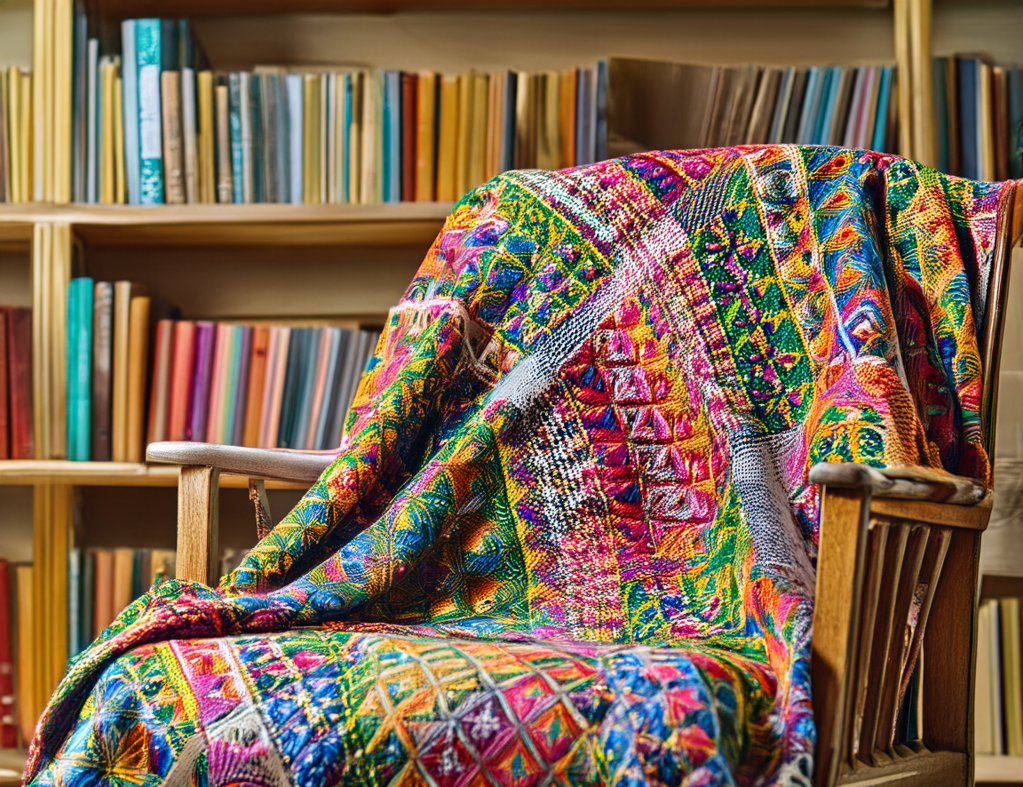
3. Snuggle Up in Style
Image by Moi
Isn’t it time to transform your living space into a haven of warmth and comfort by adding quilts? Quilts can add a touch of style to your decor but can also invite you to curl up and relax — isn’t that what we want in our living spaces? Drape a colorful quilt over your favorite armchair to create an instant reading nook, perfect for losing yourself in a good book on lazy afternoons.
Experiment with different textures and patterns to breathe new life into your space — a patchwork quilt (or 2…) can become a focal point or even the start of a new decor style. Why not try layering quilts, especially in the colder months of the year? Every chair or sofa in my living room has at least one quilt folded over the back — just sayin’…….
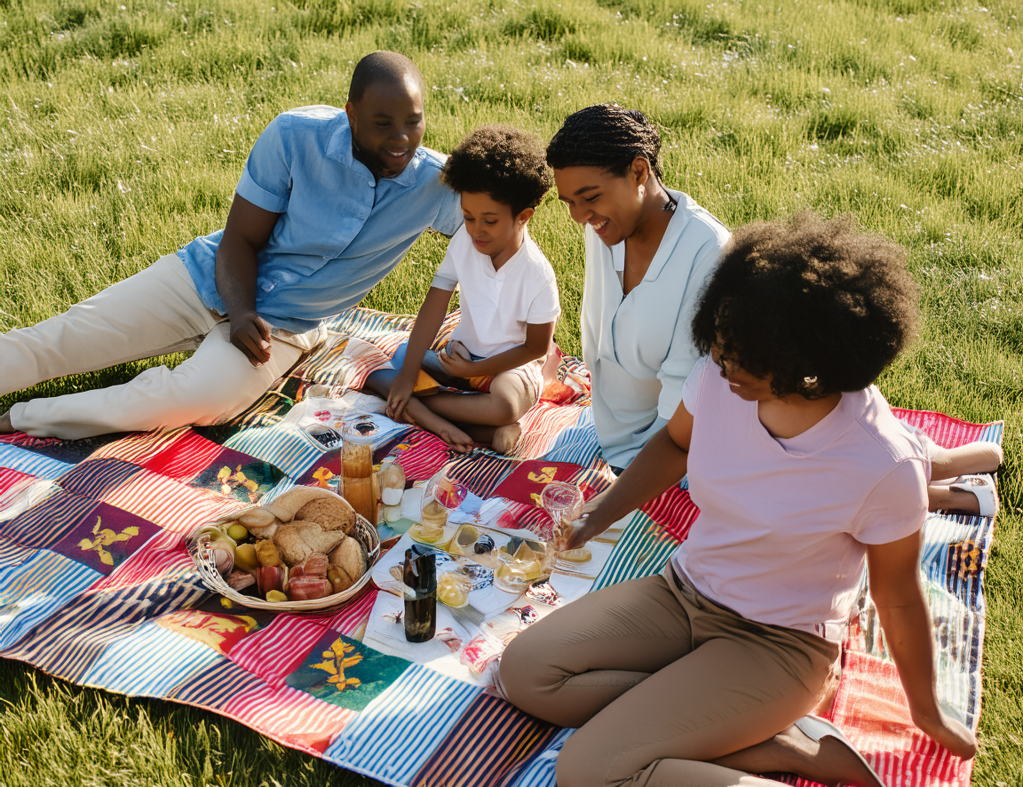
4. Outdoor Quilting Adventures
Image by Moi
Imagine the joy of spreading your quilt beneath a canopy of stars, or laying it out on a sun-dappled meadow for a perfect picnic. Outdoor adventures can offer unique and special ways to blend your passion for quilting with the beauty of nature.
Consider making weatherproof quilts, designed with durable fabrics and water-resistant backings and you’ll have trusty quilt companions for every outdoor escapade. Imagine the memories you’ll create when you add special quilts into the mix — the laughter of family and friends sharing stories over a picnic feast, or the quiet wonder of pointing out constellations to loved ones on a clear night. Quilts are so much more than simply a “blanket” — quilts can be a canvas for life’s precious moments.
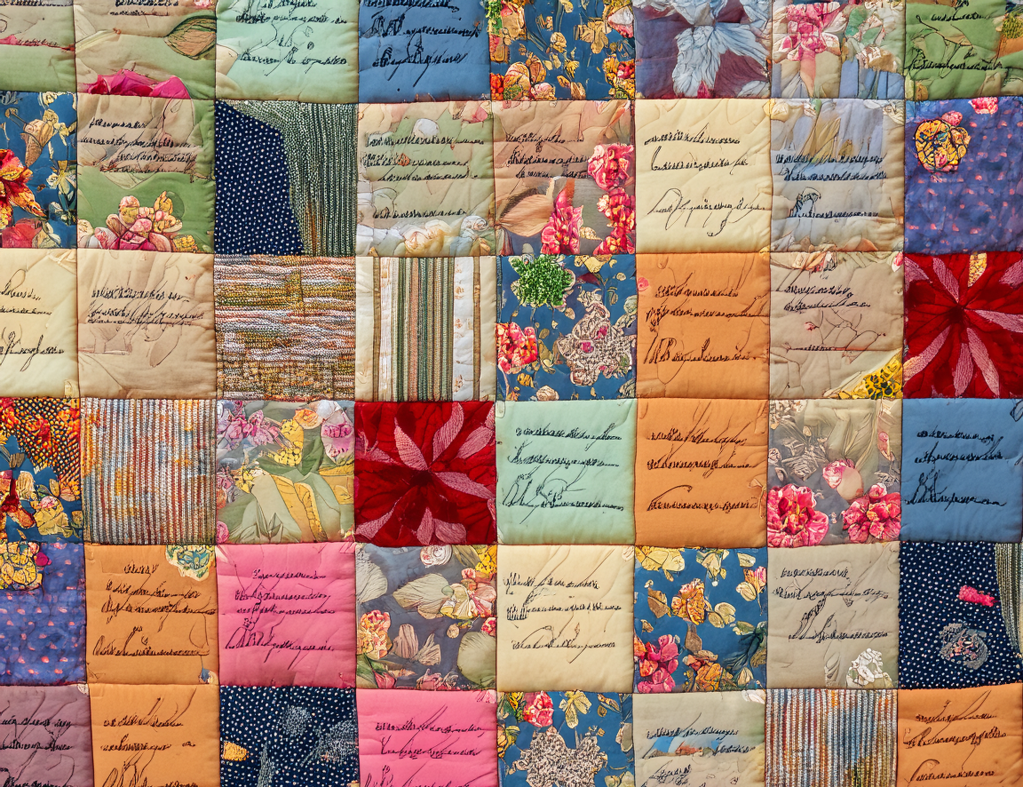
5. Wrap Yourself in Memories
Image by Moi
Memory quilts are tangible pieces of history that can tell our stories. These one of a kind special creations allow us to preserve cherished moments, honor loved ones, and pass down our family legacies. Whether you’re a seasoned quilter or just beginning, creating a memory quilt can be a deeply fulfilling experience.
Have you ever considered making a photo quilt? You can transfer favorite snapshots onto fabric and incorporate your photos into your quilt design. Photo quilts bring your memories to life, allowing you to relive those special moments every time you wrap yourself in the quilt or look at that wall hanging. You can preserve your family’s story as a quilt and pass it down to the next generation.
You could also use clothing from significant events or people in your life to tell your story. Once you decide on a quilt design, you can add these cherished fabrics into a patchwork of nostalgia. For those looking to create a family heirloom, consider incorporating items like handwritten recipes, old letters, or even small trinkets into your quilt design. These personal touches add depth and meaning to your creation, making it a true treasure for generations to come.
Another idea for creating a quilt to remember a special event like a wedding or a birth is to make quilt blocks and have loved ones sign (and date) the blocks. Signers could even write sentiments, good wishes, or advice on the quilt blocks. The center quilt block can detail the information about the special event.
You could even incorporate multiple techniques to create your very own one of a kind unique memory quilt.
6. Quilted Fashion Statements
Image by Moi
Have you embraced the exciting world of quilted fashion yet? Quilted wearables are where tradition meets contemporary style! Quilt jackets are no longer just cozy comforts — they’ve become bold fashion statements. Quilted bags are must-have accessories, combining functionality with artistic flair.
Patchwork fashion even extends beyond jackets and bags. Quilted accessories like scarves, hats, and even shoes are pushing the boundaries of conventional style. These pieces not only keep you warm but also wrap you in wearable art that expresses your individuality. Don’t forget that by donning quilted fashion, you’re not just following a trend, you’re carrying forward a rich heritage of textile artistry into the modern world.
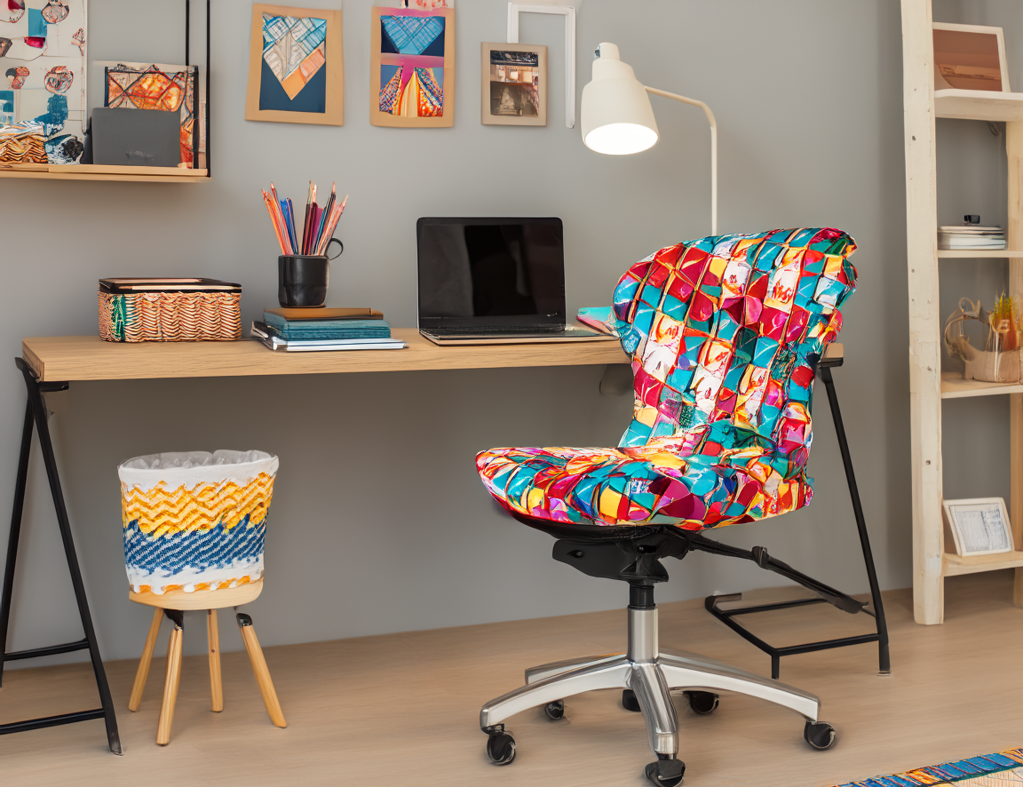
7. Cozy Up Your Workspace
Image by Moi
Transform your home office into a haven of creativity and comfort with the warmth of quilts! Quilts are pieces of art and can add a personal touch to your workspace as well as boost productivity by creating a welcoming atmosphere. Drape a colorful quilt over your office chair or even create a patchwork chair cover for an instant ergonomic upgrade and a pop of personality. Incorporate quilted desk accessories like mouse pads or keyboard wrist rests for both functionality and style.
Did you know that the textures and patterns of quilts can inspire innovative thinking and problem-solving? Go ahead and select designs that resonate with your work ethos – maybe geometric patterns for analytical tasks or floral motifs for creative endeavors. What about hanging a special family quilt on the wall as a reminder of your roots and motivation? Quilts can provide a soothing visual break during intense work sessions.
8. Kid-Friendly Quilt Spaces
Image by Moi
Often when people think of quilts, they think of a quilt for a new baby. Making a quilt for a new baby in the family is a good start, but there is so much more you can do to incorporate quilts into children’s spaces. Decorating with kid-friendly quilts in nurseries, bedrooms, and play spaces can create a warm, inviting atmosphere that sparks imagination and fosters learning.
Vibrant, colorful quilts featuring playful patterns and educational designs can be functional decor as well as interactive tools for young minds. Consider incorporating alphabet quilts that teach letter recognition or number-themed designs to introduce basic counting skills. For playrooms, opt for durable quilt materials that can withstand active play while adding a cozy touch to reading nooks or play areas. Quilts with scenes from favorite storybooks or featuring beloved characters can encourage storytelling and imaginative play. In nurseries, soft, tactile quilts with gentle textures and soothing colors can provide comfort and stimulate sensory development.
Don’t just stop at quilts, though! Show your quilting prowess with quilted toys, blocks, fabric matching games, stuffed toys and dolls and whatever else your can dream up.
9. Holidays and Seasonal Celebrations
Image by Moi
Enjoy every season and holiday with colorful quilts that turn your home into a festive haven. From cozy winter throws sprinkled with snowflakes to spring wall quilts bursting with flowers, quilts can capture the essence of each holiday and special occasion.
Imagine draping your Thanksgiving table with a richly-hued autumn runner, or surprising loved ones with personalized quilted stockings at Christmas. Or a red, white, and blue quilt to cuddle on and watch Independence Day fireworks? These thoughtful creations not only add warmth to your living spaces but also become cherished family heirlooms to be passed down through generations.
Celebrate life’s milestones with quilts — a baby’s first quilt, a graduation memory blanket, or an anniversary piece showcasing a couple’s journey — each stitch tells a unique story. These quilts aren’t just decorations; they’re expressions of love, care, and the artistry of human hands.
10. Quilted Sanctuaries
Image by Moi
Quilts have the power to change ordinary spaces into cozy havens of tranquility. By incorporating quilts into your home, you can create serene retreats that nurture both body and soul.
There are so many ways to use quilts to soften and soothe your world. Imagine a meditation corner with a soft earth-toned quilt, its intricate patterns serving as a focal point for mindfulness practice. Or picture a reading nook enveloped in a vibrant patchwork quilt, inviting you to lose yourself in the pages of your favorite book. Quilted room dividers offer a unique way to define spaces while adding warmth and texture to your environment.
11. Love Your Pets
Image by Moi
Don’t forget about those special furry, feathered, and scaly creatures sharing your space! You can share your quilty love with them, too!
Quilted patchwork coats, collars, and leashes are a must for your trendy companions. What about a soft and cozy bed for your pup or a cage cover for your feathered friend? Just like their people, every pet deserves their own quilt too. Patchwork diaper covers are perfect for indoor tortoise buddies (In case you didn’t know, there is a delightful tortoise in my family named Carl. He is my niece Morgan’s special companion. You might think it’s odd, but Carl is a house tortoise and wears diapers because you can’t exactly potty train a tortoise, hence the idea for quilted diaper covers.).
PSST! Here is Carl celebrating his 9th birthday earlier this year. You can find him on Facebook.
Quilts possess a unique ability to weave their magic into every facet of our lives. From adorning our homes with warmth and beauty to preserving cherished memories, quilts offer far more than mere comfort. They serve as a testament to human creativity, patience, and skill, connecting us to our past while inspiring future generations.
Whether you’re a seasoned quilter, just beginning on your quilting journey, or simply an admirer of these textile treasures, embracing the world of quilts can bring a sense of joy, accomplishment, and connection to your daily life. So, let the vibrant patterns, rich textures, and heartfelt stories of quilts envelop you and your living spaces, enriching your experiences in ways you never imagined possible.
I hope you enjoyed exploring ways to live with your quilts. Go ahead and spread some quilt joy through your world. You know you wanna……….
Summer is here! Let the good times roll! Get out there and soak up some sunshine! That’s an order!
Sorry….I know I said I was going to do a table runner tutorial this week, but I just had to show off the new Rose Card patterns for June and share my recent quilt show experience with you. We’ll save the table runner for next week, I promise.
What a special day — today is the Thursday after the first Friday of the month. And you know what that means!
Woohoo!
NEW PATTERNS!
New June VRD Rose Card Patterns
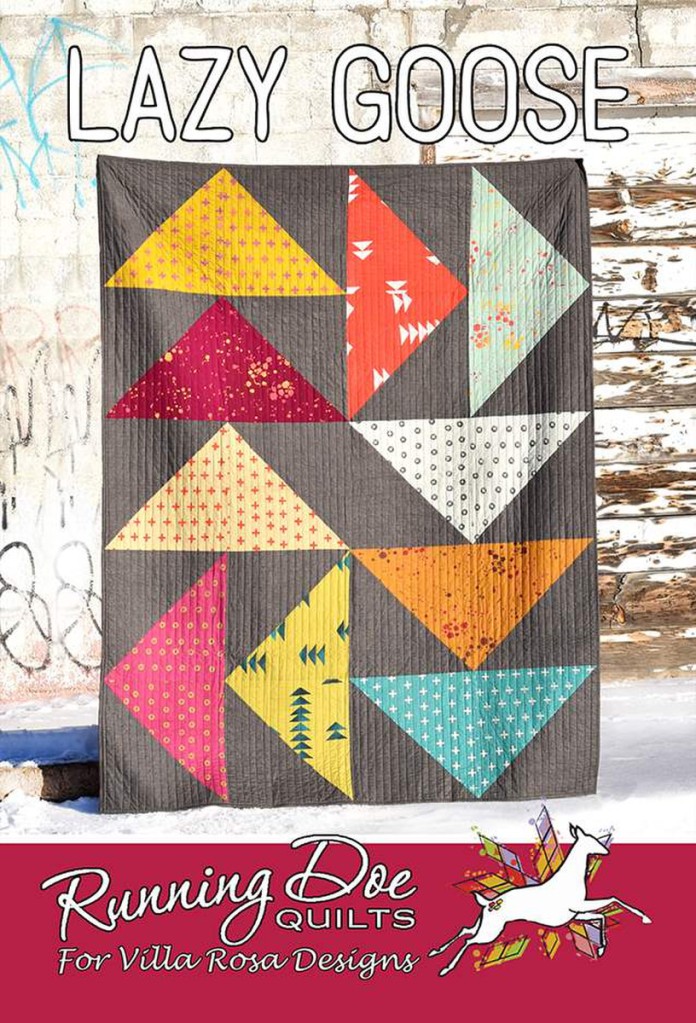
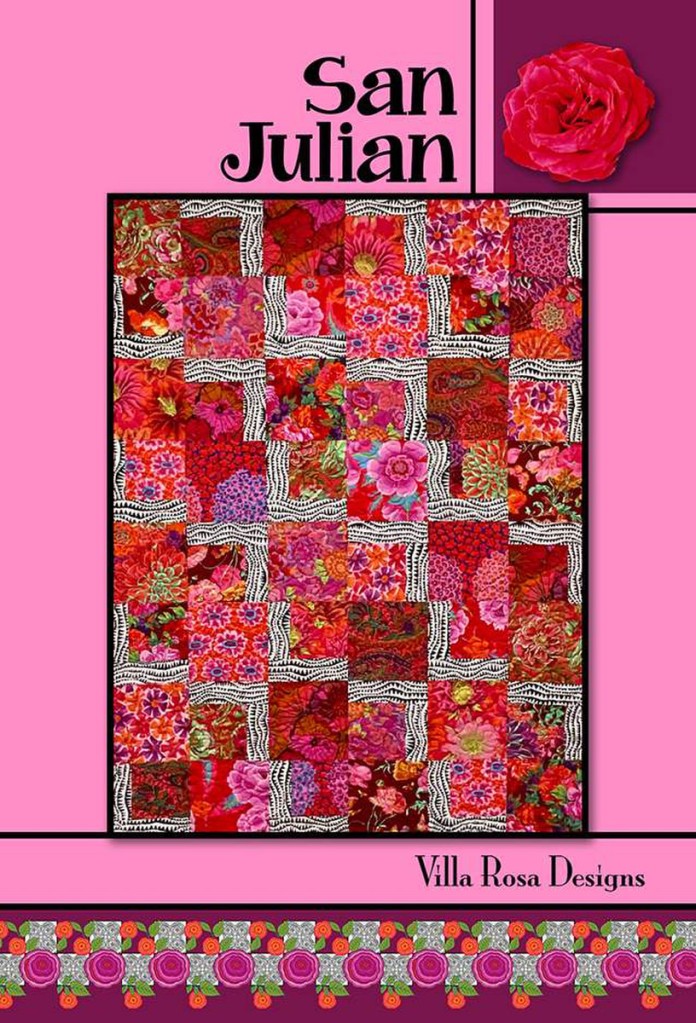
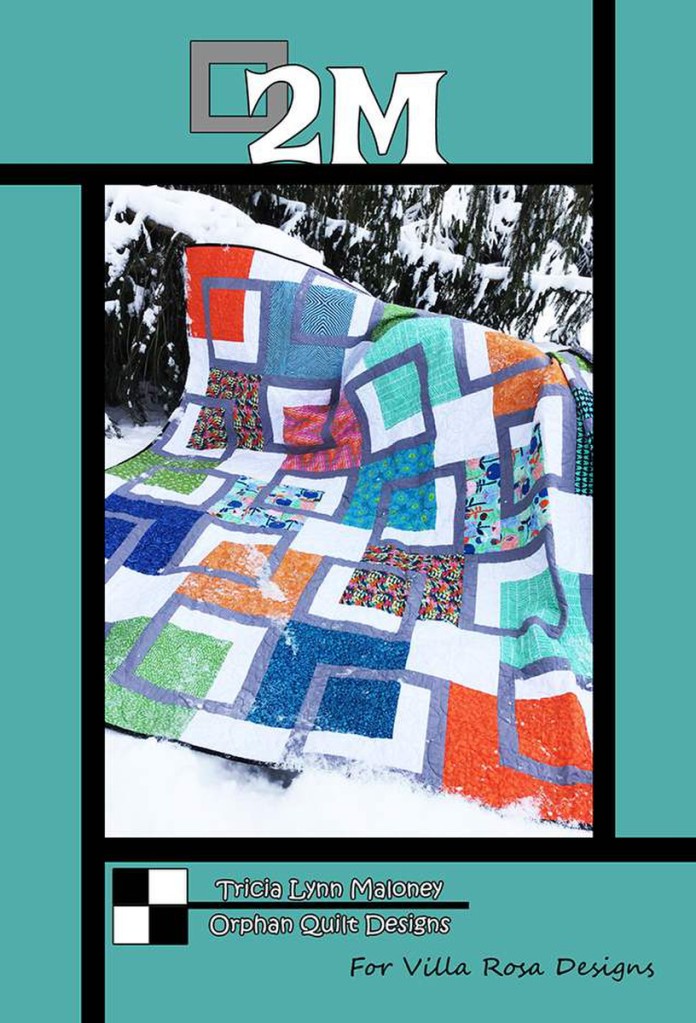
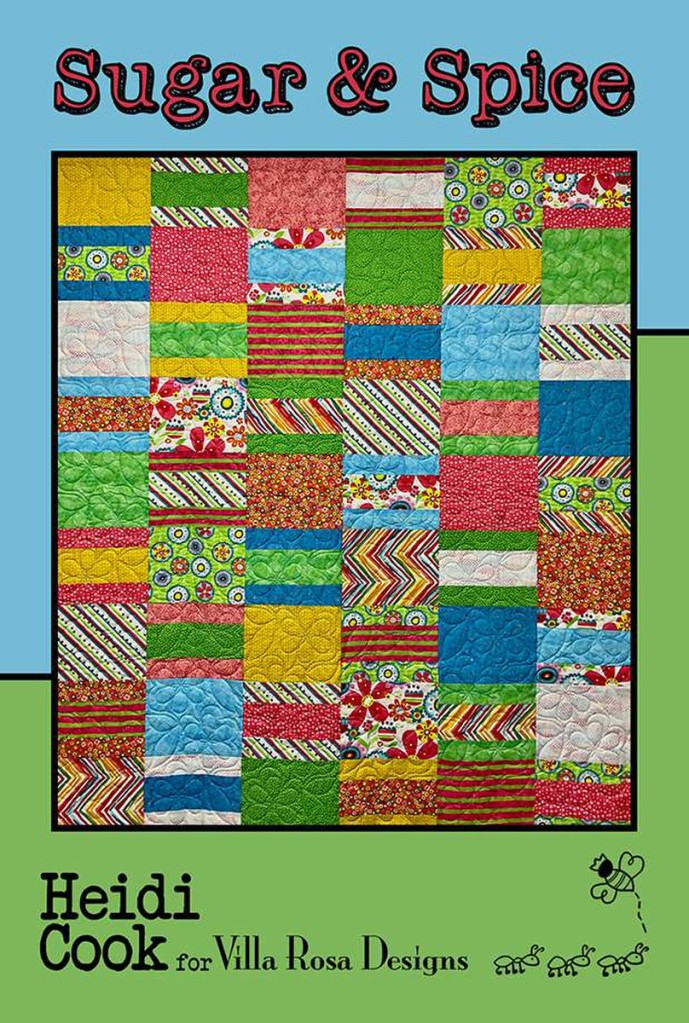
Yay! Here they are. Aren’t they fun? I don’t think you’ll go wrong with whichever pattern you chose to make first. They are all equally great.
Want a F-U-N way to get started on a summer quilt? Order a kit from VRD, of course! You can see all of our kit offerings HERE. In fact, some of the new patterns, above, still have kits available. They’re going fast, though, so get yours before they’re gone.
But wait! There’s more! (Sorry, it looks like I’m in an exclamation kind of mood today. I’m not really yelling at you, though, just excited.)
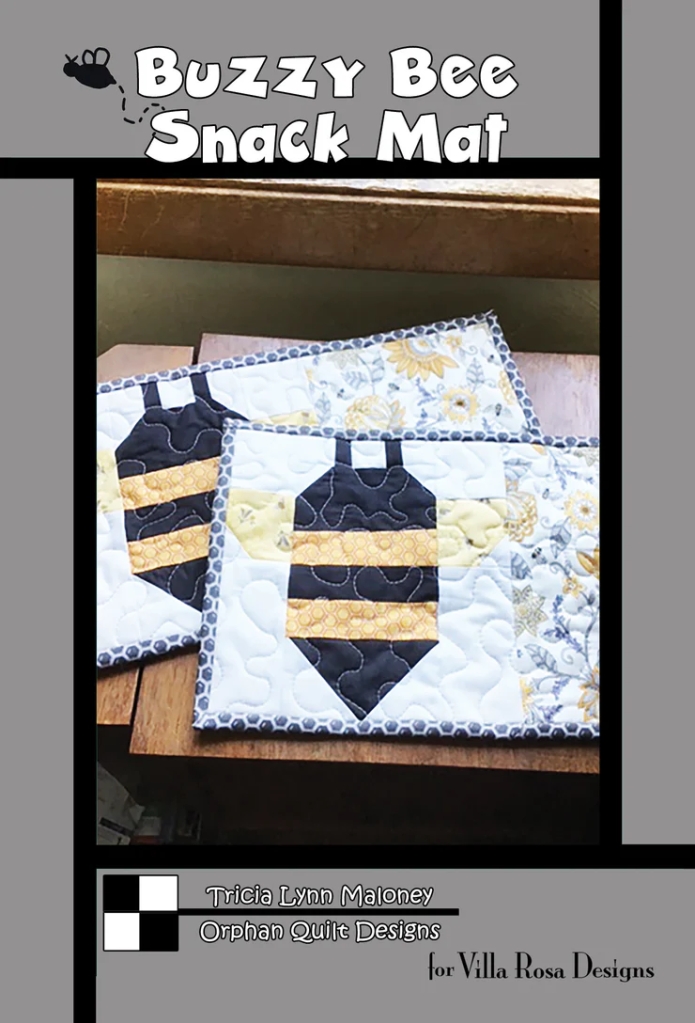
No table runner this month due to technical difficulties, but check out these cute little Buzzy Bee Snack mats! And no stingers, so you can enjoy them safely, even if you’re allergic.
Get your Buzzy Bee Snack Mat physical pattern HERE
Now that you’ve seen the new patterns for June, let me tell you about the quilt show I went to last week.
2024 HAAEQG Quilt Show
The HAAEQG stands for Hands All Around Erie Quilt Guild. It’s actually been a couple years since I’ve been to an actual quilt show, so when I saw the poster on Facebook, I was so ready for a huge inspiration shot in the arm. And I wasn’t disappointed. We filled up the car with my 3 crazy quilting cousins (I call them the Cuz Crew) — Kim, Robin, and Lisa — and me (Hi there Cuz Crew!). We headed to Erie, PA (about 30 minutes away) for a FART (Fabric Acquisition Road Trip). We found the church where the show was being help, but we decided to find somewhere to eat because I wasn’t quite sure whether there would be food at the show, but of course there was).
The church was a couple streets over from the medical center where I’ve been taking my Mom for her appointments, and we’d recently had a very good lunch at the neighboring hospital cafeteria. So when we ended up by the medical center and hospital, I suggested we eat at the cafeteria. Maybe you think that’s a little weird, but — hey — the food is good and you have a lot of options in the food court. Everyone was game, so off to the hospital cafeteria we went.
Yum! The food was great! 3 of us had hot turkey sandwiches with either real mash potatoes and gravy or a broccoli rice casserole and/or a lovely veggie mix. Wish I’d thought to take a photo of all that food for you, but I imagine drooling on your device wouldn’t be such a great idea, would it?
Yup, now we were all powered up for the Quilt Show and back to the church we went.
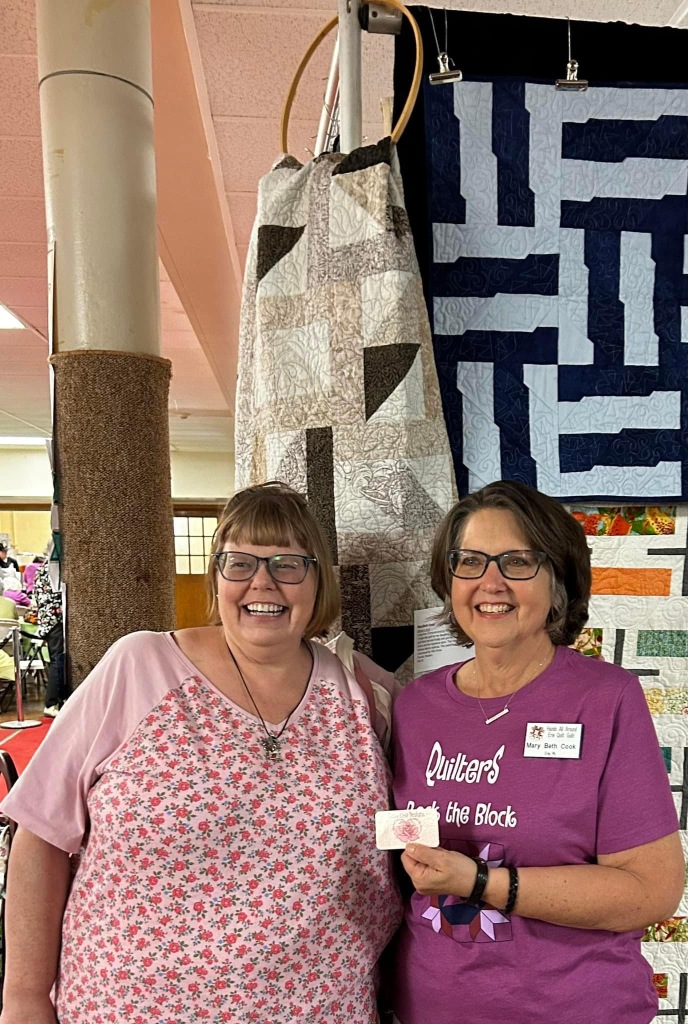
Would you believe one of the first quilts I saw was my VRD Rose Card pattern Sisterhood made up in a lovely calming neutral palette.
Here I am with that gorgeous Sisterhood quilt, made by MaryBeth Cook, a member of the HAAEQG.
Here’s the Sisterhood Rose Card pattern in case you can’t really get an idea of the actual design or if you haven’t added this top seller Rose Card to your collection. I love how the neutral shades really change the whole look of the quilt, don’t you?
I was so excited and couldn’t wait to share the news with my Cuz Crew, who had already started to wander. A guild member was nearby and heard me. She got really excited, too, and told me not to move so she could get her sister, who had made the quilt.
This is how I met MaryBeth Cook (Hey there, MaryBeth!). What a lovely way to meet a new quilting friend and VRD fan!
Here we are together, posing in front of MaryBeth’s gorgeous quilt, which she made for her daughter. Lucky daughter, indeed! I didn’t get to ask you, MaryBeth, but what drew you to the Sisterhood pattern?
Now, let me tell you about the quilt show. There were somewhere between 350-400 or so quilts on display in every style, technique, and color combination you could think of! They were amazing! I must admit that I was a real slowpoke looking at and photographing quilts. By the time I did a spot of shopping, the Cuz Crew were sitting and waiting for me. Sorry. Not sorry. Meeting MaryBeth, seeing her Sisterhood quilt, and oohhing and aahhing over all the quilts really made my day. My cuz, Robin, told me later that she hadn’t seen me smile so much for a long time.
There were 2 very cool things going on at the quilt show, in addition to the quilts, that made the show experience even more fun:
When you entered the show, you were given a sheet of paper with numbered lines on it for a Scavenger Hunt. Hidden amongst the quilts in the show were quilt blocks from an Underground Railroad quilt. The quilt was on display at the front table for reference. We had to write the correct quilt block name next to each number and then return the completed list to the table to register for prizes. What fun!
Throughout the show quilt blocks were lined up alphabetically depicting a quilter’s alphabet. It was a show within a show!
While I enjoyed each and every quilt, I took photos of some of my favs to make you a slide show. Please note that each quilt’s maker information/story is the slide following the quilt in my slide show.
Why do I include the maker information??? It’s important to share the maker’s name and story not only to celebrate the maker’s accomplishment, but also to acknowledge that they are the creator of that quilt.
So, grab a frosty glass of sweet tea and watch my little slide show full of quilts from the HAAEQG Quilt Show!
I hope you enjoyed seeing some of the wonderful quilts on display at the quilt show. I have been enjoying looking at them a few more times myself! There would have been more photos, but on many of them I jerked or moved which resulted in a smear of colors — pretty, but not identifiable as a quilt. Oops! Next time, I’ll take my time and take better photos. Uh Oh, Cuz Crew, I’ll be even slower next time. Just sayin’……..
Huh. Would you believe that I walked out without turning in my Underground Railroad Scavenger Hunt paper before we left? Oh well.
Sending out a big round of applause to the HAAEQG for the wonderful Quilt Show they put on! Look forward to the next one! You can check out HAAEQG on Facebook HERE.
I am now bubbling over with lots of great ideas for new quilts and patterns. Now I just have give myself the time to get to use all that inspiration for good, not evil (Waahaahaa!).
Hey there! I hope you all had a great Memorial Day weekend!
My big plans were having a multi-generational family garage sale on Friday and Saturday. I haven’t had a garage sale since before the Pandemic, so I really had no idea what to expect. We ended up with a very interesting assortment of items from the regular household stuff and clothing to antiques and collectibles to automotive items to vintage toys to beautiful collectible glassware and pottery and everything in between (except for quilting stuff, as I’m saving that for a later fabric yard sale). The comment I said frequently during the sale was “We have a little bit of a lot of different stuff.” And, boy, was that true!
While I was at the garage sale, I was thinking about what to write for the blog this week and I was inspired to come up with a fun list of ideas to make the most of your summer quilting because I know how difficult it is to fit quilting in during all the hustle and bustle of summer.
While I was at the garage sale and taking money, I was also working sewing down some binding which was something I could pick up and put down easily. By the way, I bound 3 out of the 4 snack mats I took with me to the sale. Not too shabby.
14 Ways to Get the Most Out of Your Summer Quilting
OF COURSE, I had to have our VRD Rose Card patterns on the top of the list! As you probably already know, we have around 700 current patterns with new patterns coming out every month from our very talented group of designers. If Villa Rosa Designs was an entry in a dictionary, you know the definition would be FAST & FUN! With patterns for accessories, table runners, baby quilts, small quilts, throw quilts, and even large bed quilts — we really DO have a pattern for everyone for whatever purpose or occasion they need to make a quilt for! You can find our entire catalog of physical Rose Card patterns HERE or our digital Rose Card patterns HERE.
Kits are a real time saver because the fabrics and the pattern are packaged together. Did you know Villa Rosa has kits galore both in the physical quilt shop in California and in our online shop? You can find our current kit offerings HERE.
Precuts
Grab your favorite 2 1/2″ strip set, 5″ charm squares, 10″ squares, or fat quarter bundle………. VRD has a pattern for that! LOL! Using precuts is a HUGE time saver because some of the cutting is already done for you. AND you can pair your precuts with a great VRD Rose Card pattern.
Small Projects
You can find our Fast & Fun Accessory patterns HERE
Think small in the summertime — place mats, snack mats, mug rugs, small accessory patterns, throw pillows, wall quilts, and table runners are all great options for summer quilting. I personally find that summer is a great time to start working on small fun Christmas gifty items that can be whipped up in little pockets of time.
My advice is to save that complicated Double Wedding Ring Quilt for Fall and Winter and focus on Fast & Fun projects for the summer. Selecting easier projects that only take a couple days or even a couple hours to make will keep you moving right along instead of feeling stuck with a single more complex project for the whole summer. Check out my Go-to list for Fast & Fun Rose Card patterns that go together in a snap HERE.
Prepare a take along project (hand piecing, applique, embroidery, whatever you like) and have it ready to go for summer trips, picnics, vacations, appointments, kids’ events, etc. You might even want to prepare several small projects for on the go, so you can just grab one on your way out the door. You will be amazed at how those little pockets of time will give you additional quilting time. Maybe it’s time to try a little English Paper Piecing with Hexies. Just Sayin’….
Projects in Different Stages of Completion
Image created with Photoshop by moi
Not everyone will agree with me on this one and it might not work for everyone, but this is how I roll. If you have a quilt or 2 cut and ready to piece, another couple that you are quilting (either hand or machine), several that need the binding sewn on or tacked down, along with your take along project (or projects!) — you will never be bored and you can work on whatever project that fits into your current time/space.
On the go? Grab the quilt that needs the binding done (I’m thinking smaller projects here, not big bed quilts) or one of your take along projects — like maybe a hand applique pillow front.
Have an hour or two? Start piecing that quilt you cut out or maybe you can machine quilt a table runner.
Need a project in the evening while hanging out with the kiddos or friends? Maybe one that needs binding fits the bill or perhaps an ongoing project you already started hand-quilting?
Bored with one project? Then work on another one.
Use your time wisely by choosing the project that fits into specific pockets of time.
Try to Keep Your Sewing Space Organized
Image created with Photoshop by moi
You will notice I said “try”? I know how hard it is to keep your space uncluttered and organized from my personal struggles in my own space (which, by the way, looks like a quilt shop exploded). If you can find what you are looking for when you need it, that itself will save you time. Then you can get quilting faster and you may even have a little bit more time to work on your project in between swim practice and dinner if you’re not hunting for your scissors or thread or a new machine needle because you broke one.
Use Your Leaders and Enders to Maximize Your Sewing Time
What are Leaders and Enders, you might be wondering. Scraps of fabric to begin and end your chain-piecing so that your machine doesn’t “eat” your fabric at the beginning of your first unit (bet you know what I mean by this!). Bonnie’s idea is all about making simple scrappy blocks by using the pieces of one quilt as the Leaders and Enders for a second quilt — literally a two-fer! You go, Bonnie!
Sewing with friends is always a great idea — not only are you quilting, but you’re getting social time with your pals, too. Go ahead and actually schedule time on your calendar to quilt with your posse. Bring a project to work on and something for a pot luck. Why not make it a theme night — Taco Tuesday, Wacky Wednesday, or maybe Fast & Fun Friday? By combining social time with quilting time, you get the best of both worlds at the same time!
Take a Quilt Class
Image created on Photoshop by moi
Learn something new or brush up on your skills. You are prioritizing quilting by scheduling it into your busy summer. Make that class even more fun by taking along your best quilting bud.
Yup, join a Quilt Guild where all the quilters hang out once or twice a month. Again, you are combining social time with quilting time as well as making quilting a priority. You can even tote a take along project with you to meetings. You’ll enjoy the camaraderie of like-minded folks and you might learn a thing or three from other members.
Maybe you don’t have a guild near where you live? You could join an online guild. Or maybe start a guild in your area!
Teach Someone to Quilt
Image created on Photoshop by moi
Have you ever heard the quote: “Tell me and I forget. Teach me and I remember. Involve me and I learn.”? Do you know who said these important words? If you said Ben Franklin, then kudos to you!
So, teach someone to quilt!
Kids or grands need something to occupy their time besides video games and their cell phones? Teach them to make a simple quilt! Know someone who always wanted to make a quilt, but doesn’t know how? Teach them! Or maybe you know an expectant parent or grandparent who wants to make a baby quilt for that special little bundle? Don’t hesitate, teach them! You can even make the same project that you are teaching, so not only are you getting in some much-needed quilting time, you are also sharing your love of quilting with someone else.
Yay! Get your motors running! Head on out on the highway — er, on a Quilting Road Trip or FART (Fabric Acquisition Road Trip). Whether you’re going on a quilt retreat, to a quilt show, or hopping from shop to shop, enjoy some quilting R&R with your fav quilty pals. Don’t forget your take along project for the road….
I hope these fun ideas help you to squeeze a little more quilting time into your busy summer. If you have any additional ones to add, please leave a comment to share. Thanks!
Just keep quilting……just keep quilting…..just keep quilting………………………………….
Happy Memorial Day Week end to you too! What are your plans for this unofficial kick off to summer? For me, I am hustling to put together a garage sale for Friday and Saturday as this is THE BEST weekend all year to have a sale where I live. Fingers crossed that I’m not pulling an all-nighter Thursday to have everything ready for Friday. Wish me luck!
I am SEW EXCITED to share some AWESOME NEWS about Villa Rosa so I’m going to jump right in.
Exciting VRD NEWS!
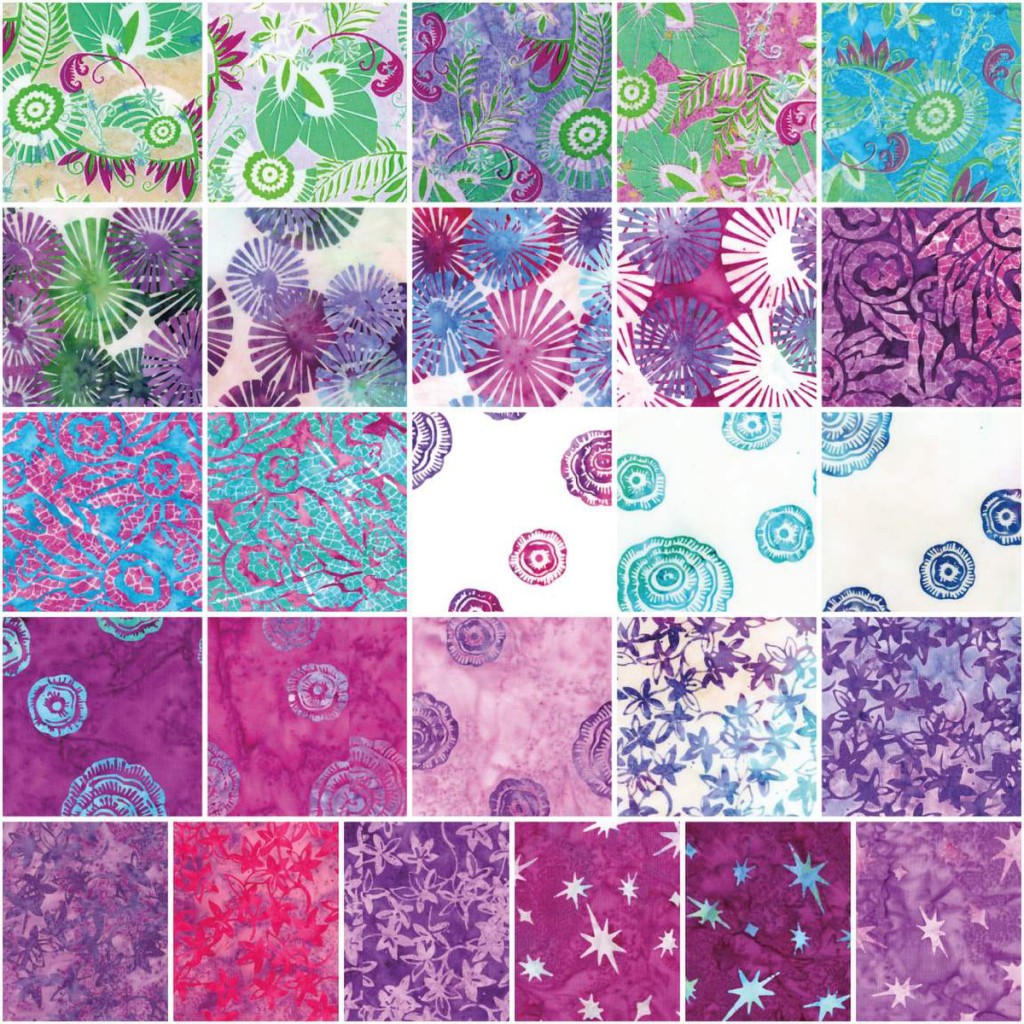
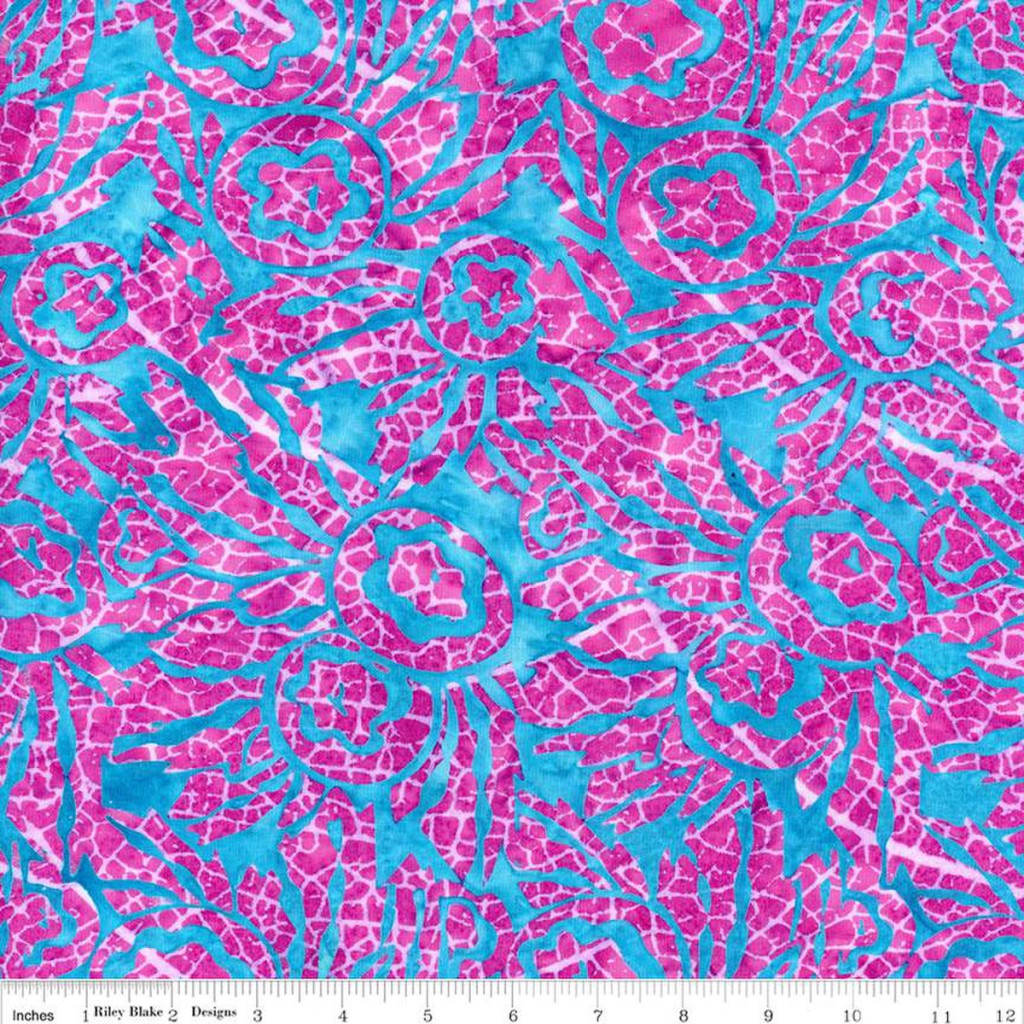
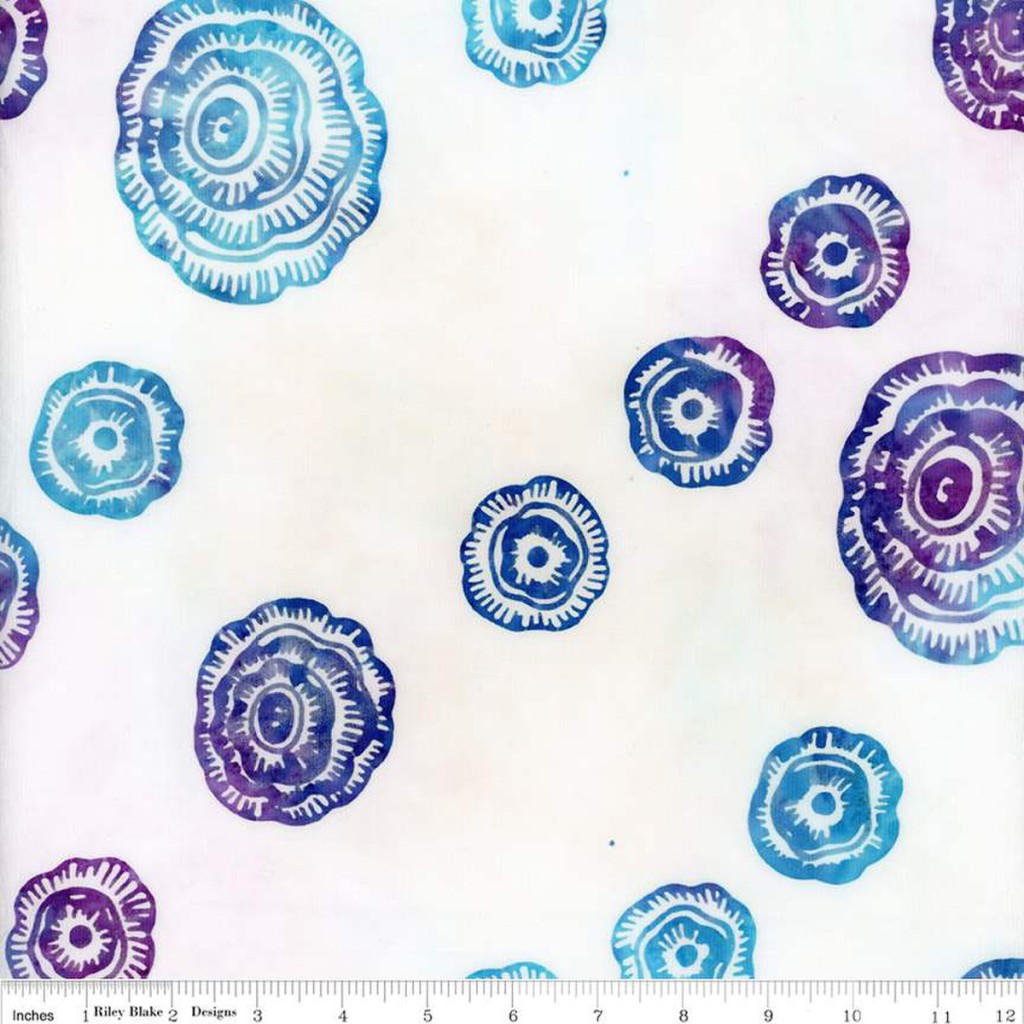
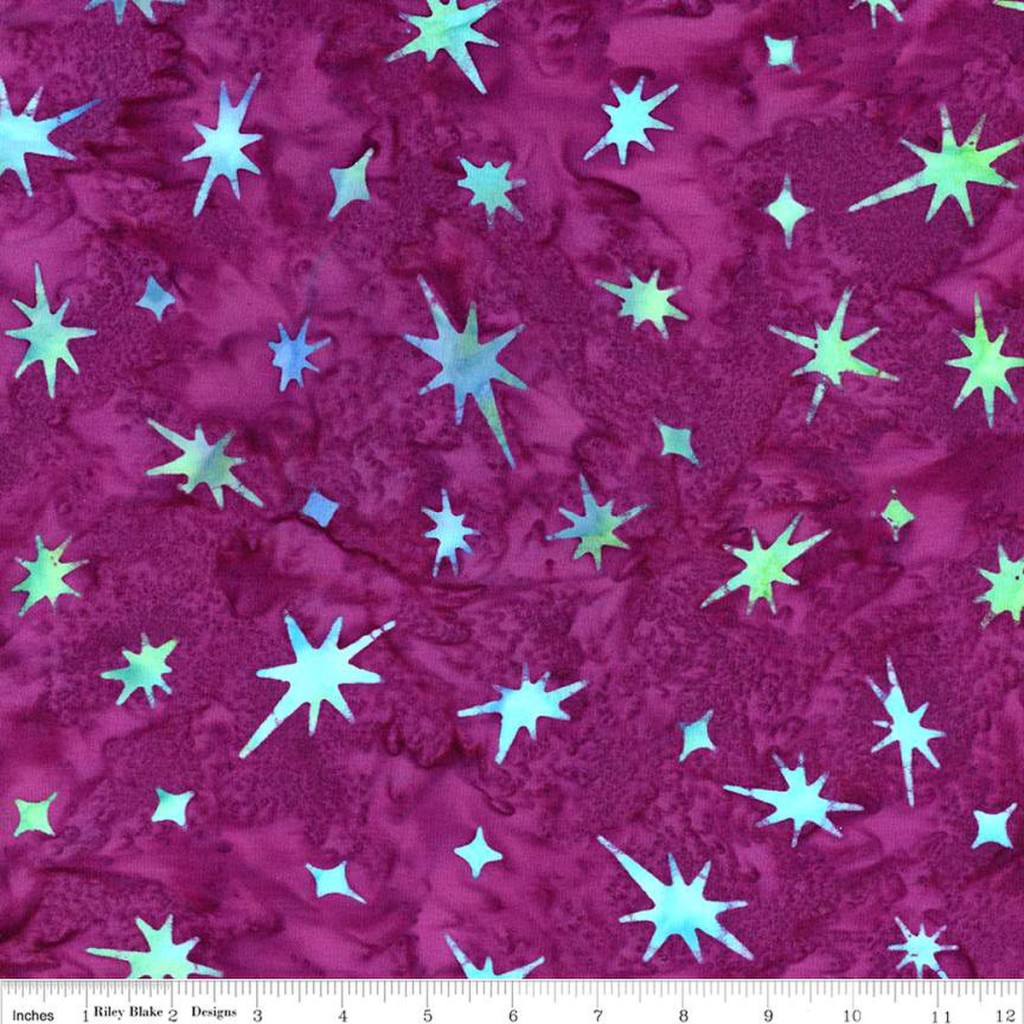
Our Rose Queen and VRD owner, Pat Fryer, has a brand new fabric collection coming out with Riley Blake Designs! It’s called Bedazzled! and I can’t wait to share it with you! It will be available at your local quilt shops and at our online shop, villarosadesigns.com, in December! So mark your calendars now AND ask for it at your local shops.
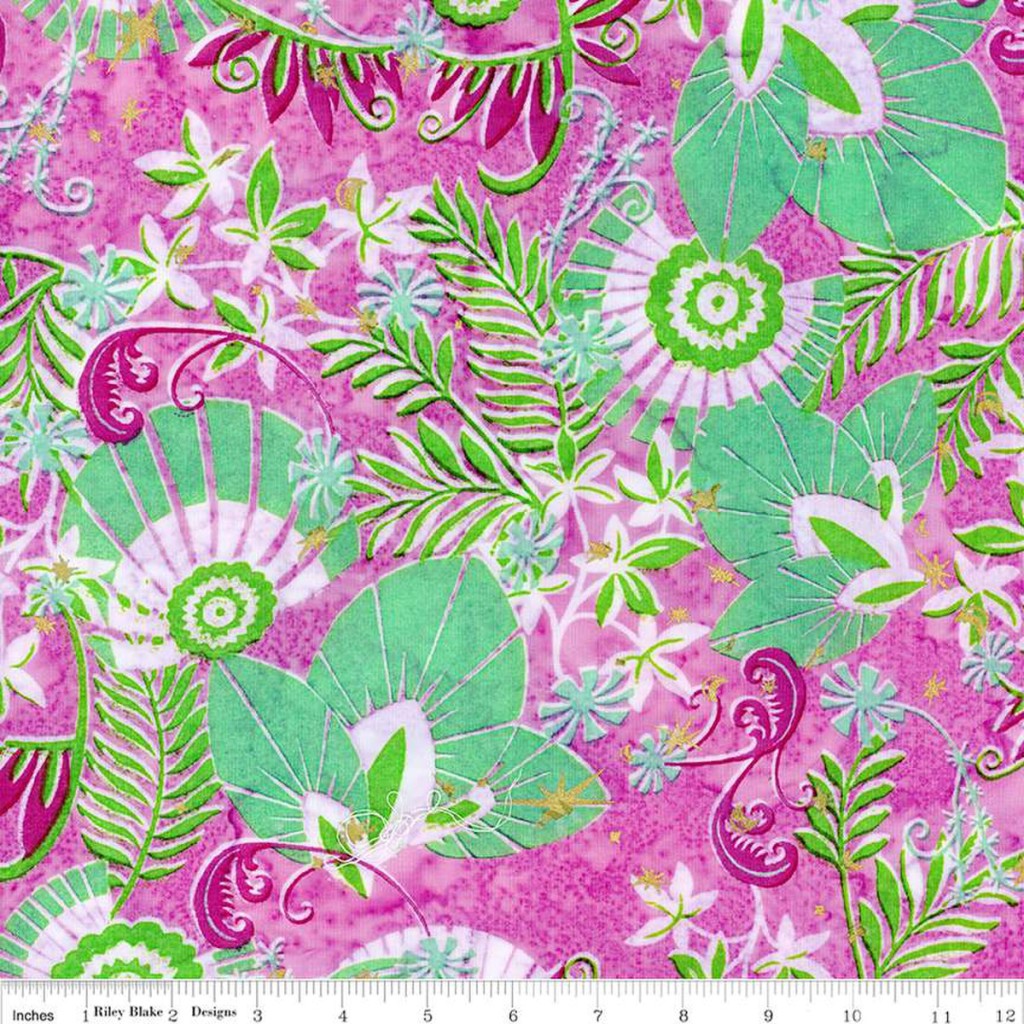
Bedazzled! is a batik collection and is part of the Riley Blake Expressions line. It has 26 fabrics in rich saturated eye-popping colors! It’s fun and whimsical too!
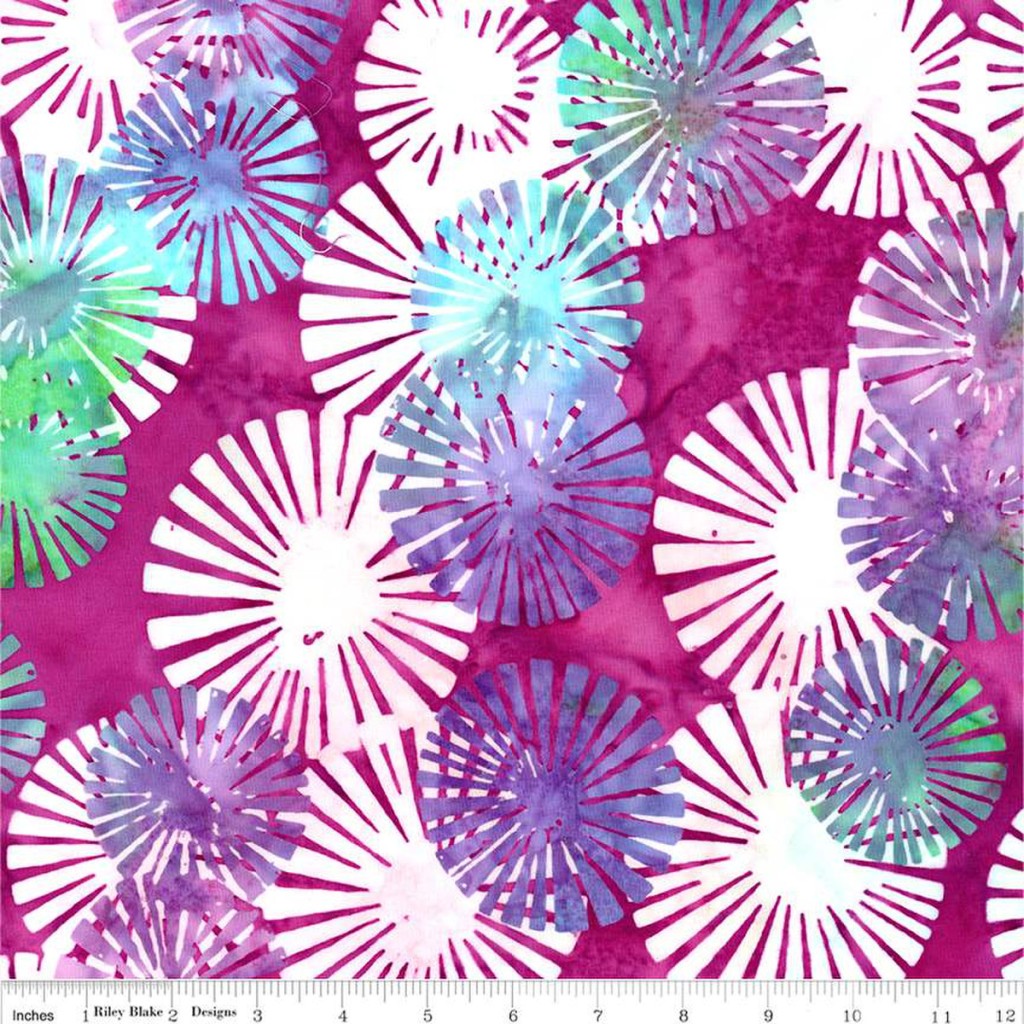
Here is the entire collection:
Here are some larger images of each different pattern so you can see just how yummy the fabrics are:
Of course, Bedazzled! will be available in precuts — 5″ squares, 10″ squares, 2.5″ strips, and fat quarter bundles, so the collection will shine in lots and lots of VRD Rose Card patterns!
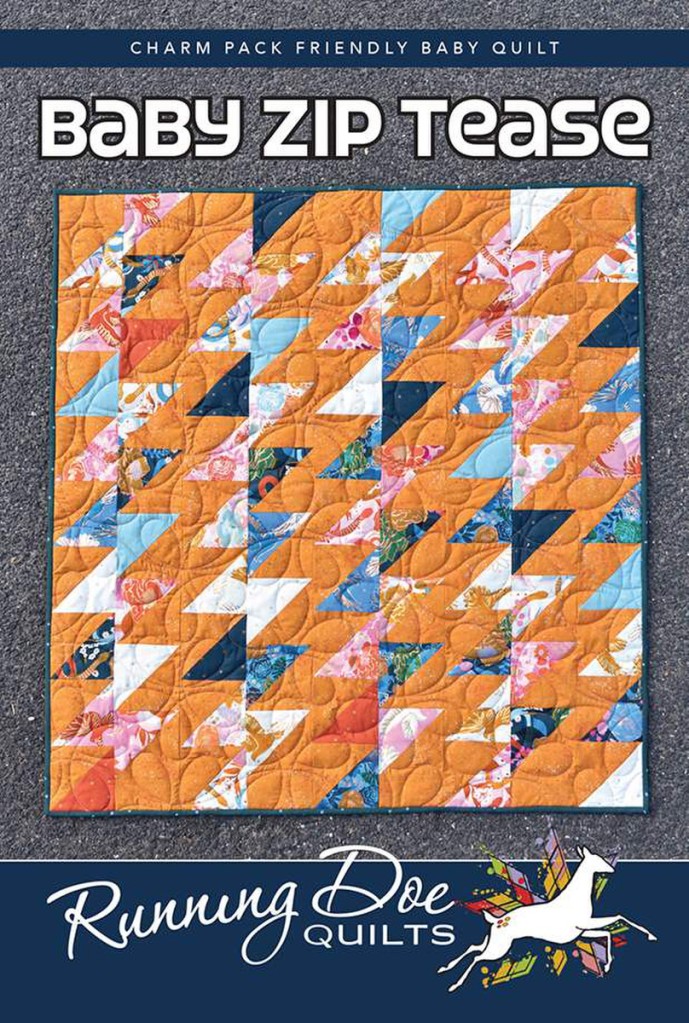
Speaking of VRD Rose Cards, here are the patterns Riley Blake Designs has selected to showcase with the collection.
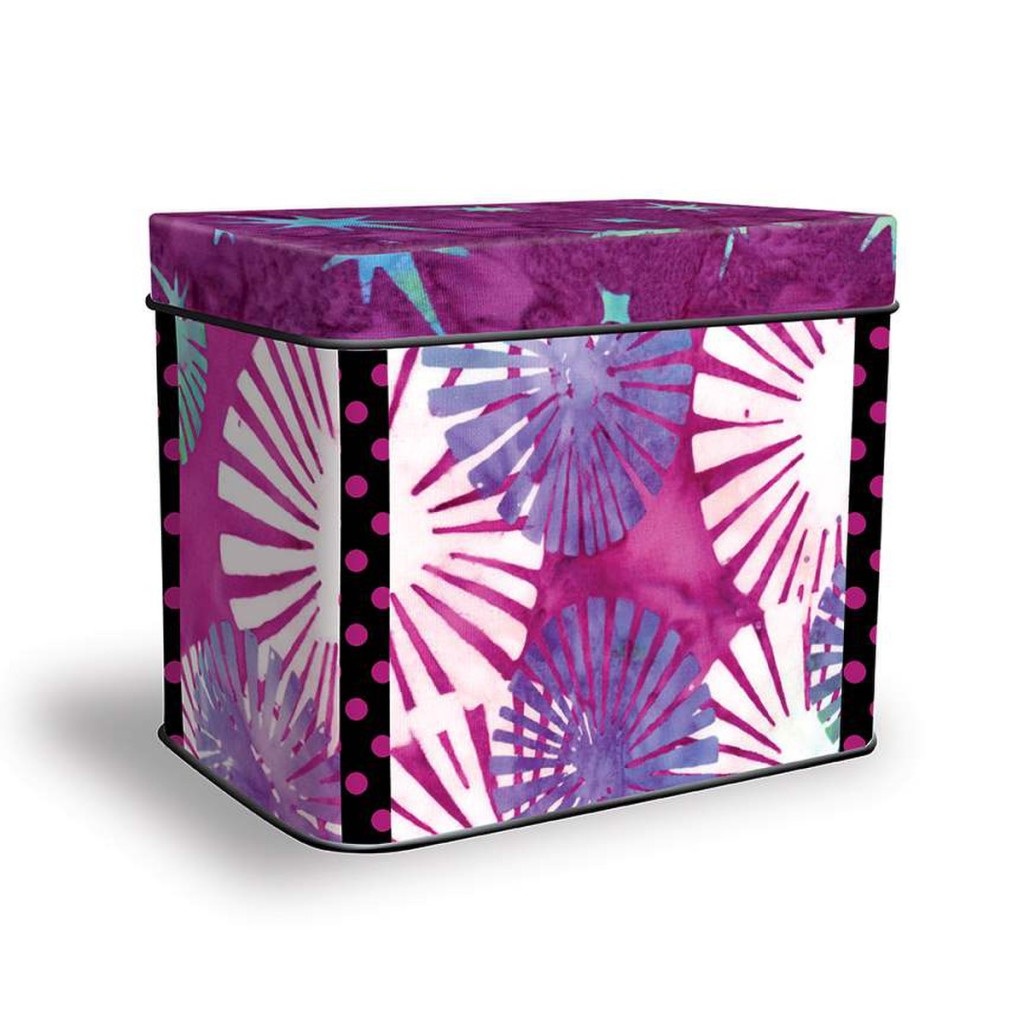
And if that’s not enough — Riley Blake Designs has created a SUPER SPECIAL Rose Card Pattern Storage Tin! Finally!!! We’ve talked about storage ideas for your Rose Card collections many times in the past here on the blog and I know the topic comes up frequently on the Facebook group.
Thank you Riley Blake Designs for creating a solution for storing our Rose Card collections!
I am really excited about this tin and can’t wait to order several. I imagine we’ll carry them at villarosadesigns.com, but make sure you request these tins at your local quilt shop! I think they’ll go fast, so make sure you get yours in December.
Are you getting EXCITED yet???? Remember, Bedazzled! will be in stores in December, just in time for Christmas! I know what I’ll have on my Christmas list this year. Just sayin’ . . . .
One More VRD Update For You
Do you watch (and shop) Pat’s Fry-Day VRD Live Shows on Facebook? Or maybe you didn’t even know we had a weekly Live Show and Sale.
Here’s the info:
FRY-DAY HAPPY HOUR
Join us every Friday at 4pm PST on our Facebook Page for our Fry-Day Happy Hour.
Watch as we show new fabric and last-chance items – and comment to buy directly from the video.
I just wanted to let you know the show will now be available on the website due to some changes with the platform. We’re trying a few different things out right now in order to pick the new format that will be easiest for you, the shoppers and fans, so please be patient with us.
For now, you will be able to find the Fry-Day VRD Live Shows under the Live Shows tab at the top of the website. Please reach out if you have any questions.
Well, I guess that’s it for me this week. I’m off to work on getting my garage sale ready. If you find yourself in Crawford County, Pennsylvania, stop on over — I’d love to meet you in person.
Take care and be safe this Memorial Day Weekend. Don’t forget to kick back and relax, too.
Did you know quilting has its very own language? I am going way beyond quarter inch seams here.
Recently, I’ve been gathering up a long list of Quilting Acronyms and thought I’d share them with you. Some of them are so silly, they will make you laugh.
Before we dive into this crazy list, here’s an update on our Blog Hop last week.
Fast & More Fun Blog Hop Update
First, I want to thank you for hopping along with us. I hope you all had a great time last week for our second Villa Rosa Designs Blog Hop, Fast & More Fun! If you’re new to VRD, I bet you now know why we called the Hop Fast & More Fun.
What was your favorite part of the Hop? Mine was seeing all of the quilts. I couldn’t wait to see each day’s blogs and the quilts — oh my goodness! — the quilts were simply out of this world!
I am sending a great big quilty hug to each of our 28 amazing bloggers —
I hope you hoppers met some new quilty friends and found some new-to-you quilt blogs filled with inspiration. I know I did. Now how will I have time to write this blog when I’m sew busy reading all the others??? LOL!
I am sew in love with all of the quilts featured on the blogs for the Hop — it amazes me how quilters can take the same Villa Rosa Designs Rose Card pattern, add their own spin, and create a OOAK (wanna know what OOK means, keep reading!) really awesome quilt. Cheree at The Morning Latte comes to mind with her delightful scrappy pieced border on her version of the Gypsy pattern. I could literally go on and on about what I learned and saw on the Hop, but instead, let me ask you what you took away from the Hop?
Right now I am working my way through each blog’s winners — please be patient — that’s a lot of folks to contact and get shipping info from.
Let’s do the math (you might remember that I like math — check out my Quilting and Math post from a while back HERE):
28 blogs x 3 sponsor prizes each + 6 VRD quilts = 90 Individual prizes
30 blog posts x 1 set of patterns each = 30 Pattern Set prizes
30 blog posts x 3 Grand Prize entrants each = 90 Grand Prize entrants
So, 120 prizes are being given out and there are 90 entrants into 3 Grand Prize drawings.
Holy Cow! Go big or go home — that’s my motto!
Speaking of prizes, this blog hop would never have happened without the generosity of our lovely sponsors —
And don’t forget, you can order the Blog Hop Rose Card pattern set HERE if you haven’t gotten your own set yet. Of course, I am still working in notifying winners so maybe you’ll win a set.
While you are all waiting breathlessly to see if you are a Blog Hop winner — let’s dive right into a world of its own — Quilting Lingo!
Quilting Acronyms
Below you’ll find a long list of Quilting Acronyms. How many do you know already?
Who knew there was literally a dictionary of Quilting Acronyms? I guess it makes sense, though, because of text messaging abbreviations and acronyms like LOL, TTYL, and others. So why not Quilting acronyms too?
Read on. I dare you not to laugh — some of them are downright silly and will tickle your funny bone.
BC — Bias Cut
BDNQ — Bad Day, No Quilting
BOB — Beginners Only Block
BOM — Block of the Month
BOW — Block of The Week
BSK — Basic Sewing Kit
BSS — Basics Sewing Supplies
COC — Cream on Cream
DF — Double Fold
DSM — Domestic Sewing Machine
EPP — English Paper Piecing
FART — Fabric Acquisition Road Trip (One of my fav things to do! Tehehe….)
FE — Fat Eighth
FFO — Finally Finished Object
F-ing G’s — Flying Geese ( this one is for Gaynel and the rest of the Friday Quilt Crew!)
FMQ — Free Motion Quilting
FOB — Fear of Binding
FPP — Foundation Paper Piecing
FQ — Fat Quarter
FS — Forgotten Stash
FW — Featherweight (sewing machine)
GTG — Get ToGether
HSY — Haven’t Started Yet
HIPS — Hundreds of Ideas Piling Skyward. (Very true!)
HST — Half Square Triangle
HSY — Haven’t Started Yet
HQ — Hand Quilted/ing
LA — Long Armer. (Donna O!)
LAQ — Long Arm Quilter/Quilting
LOF — Length Of Fabric
LQS — Local Quilt Shop. (What would we do without our LQSs?)
MAQ — Mid Arm Machine
MGBTQ — Must Get Back to Quilting. (Yeah……every day)
NESTY — Not Even Started Yet
NQR — Not Quilt Related
NTBB — Needs To Be Bound
OOAK — One Of A Kind
OBW — One Block Wonder
OOP — Out of Print
PFC — Professional Fabric Collector
PhD — Projects Half Done
PIGS — Projects in Grocery Sacks
PIP — Project In Process
PIPS — Projects In Pretty Sacks
PIZB — Project In Ziplock Bag
PNTBF — Project Needs To Be Finished
PP — Paper Piecing
PFD — Prepared for Dyeing
PPO — Project Put Off
QAL — Quilt Along
QAYG — Quilt As You Go
QB — Quilting Board (flannel or felt board, I think….)
QMWL — Quilt More, Work Less
QR — Quilt Related
QST — Quarter Square Triangle
QTFDD — Quilt Top Finishing Deficit Disorder
RR — Round Robin
RST — Right Sides Together
SA — Seam Allowance
SABLE — Stash Accumulation Beyond Life Expectancy. Yup, that’s me!)
SF — Single Fold
SAQM — Small Arm Quilting Machine
SAS — Steam A Seam
SEX — Stash Enhancing Experience
SID — Stitch in the Ditch
SnW — Stack and Whack
SQUID — Sewing a Quilt Until I Die
SQUIDS — Some Quilts in DrawerS
SOG — Straight of Grain
STASH — Special Treasures All Hidden Secretly
TBQ — To Be Quilted
TGIF — Thank Goodness It’s Finished!
TIH — There is Hope
TOAD — Trashed Object Abandoned in Disgust. (We all have them!)
TOT — Tone on Tone
UFO — Unfinished Object
USO — UnStarted Project
VIP — Very Important Project
WHIMM — Works Hidden In My Mind
WIP — Work in Progress
WISP — Work In Slow Progress
WITHWIT — What In The Heck Was I Thinking?
WIWMI — Wish It Would Make Itself
WOA — Work Of Art
WOF — Width of Fabric
WOMBAT — Waste of Money and Time
WOW — White on White
WST — Wrong Sides Together
WTF — Where’s the Fabric?
WWIT — What Was I Thinking?
YD — Yard/Yardage
Whew! That’s a lot of Acronyms — it’s almost a dictionary. As many as there are on my list, I know that I missed some. Please feel free to comment with any that I missed. Maybe someone needs to write a Quilting Dictionary? Hmmmmmmmm. I’ll add it to the list. At the rate I’m going, I might get to start it as a project in the year 3078.
Well, that’s it for me, I need to get back to organizing and contacting all the Blog Hop winners so we can get all these quilty goodies sent out to their forever homes. Maybe even yours……
Aren’t they amazing??? I am so itching to make the Eclipses quilt by Creative Sewlutions before we have the Eclipse in April because I live in one of the viewing areas to see the total eclipse. Our local hotels are already booked up for the event.
Oh my gosh! I haven’t ordered my special viewing glasses yet. I’d better get on that, huh?
But wait — there’s more! Of course there is, right?
This month we have a cute new runner designed for your special fabrics you do not want to cut up.
We also have a snack mat this month perfect for those mugs of celebratory drink and green snacks on St. Patrick’s Day. Remember when I mentioned last year that in 2024, we’d be adding some new Accessory patterns? Well, here’s the first one. It’s super cute and quick to make up and you can use some of that St. Patrick’s Day fabric you’ve been hoarding.
Can’t wait to see your Shamrock Snack Mats on our Facebook group, so get ’em made and post those pics!
So…….which pattern are you going to make first? Me, definitely Eclipses. I know — let’s do that one as a tutorial after we wrap up the Blog Hop!
Now, let’s talk about the Blog Hop. You know, March 14th is next Thursday. Gulp! I just hope I’m ready. Are you ready? It’s going to be super amazing.
VRD Fast & More Fun Blog Hop
Are you getting excited??? The Villa Rosa Designs Fast & More Fun Blog Hop is literally just around the corner!!! It all starts right here next Thursday, March 14th!
Gather up all your quilty friends and family and join in on all the Blog Hop fun together! There are lots of prizes up for grabs, including quilt pattern sets, books, precuts from fat quarters to 5″ squares, and more.
This year, we also have 4 — count ’em — 4 very awesome Grand Prizes for you to register for on all of the Blogs. You’ll have to wait until March 14th to see them, though! Yep, I’m a tease…. (wink, wink)
Below, please find a list of our super fabulous Bloggers. Check them out and see what they’re all about.
Of course, this Blog Hop wouldn’t be possible without all of our fantastic super generous Blog Hop Sponsors. A great big THANK YOU HUG goes out to each of our Sponsors!
Mark your calendars for next Thursday’s Blog Hop kick off post — you won’t want to miss it. There are so so many prizes just waiting to be won. You just might be a winner. But you can’t win if you don’t join us on our Blog Hop adventure.
I’ll see you right here bright and early on March 14th for the kick off of our Fast & More Fun Blog Hop!