Rose Cards · villa rosa designs

H&H Americas and NEW VRD Rose Card Quilt Patterns for May

Happy Thursday to you!

I hope you are getting a bit of nice spring weather where you live. Everything is greening up nicely now in Pennsylvania and a lot of the spring flowers are finally blooming. I just love ALL the colors – it’s sew inspiring after a long grey and white winter.

I’m sorry, but this week’s post is going to be a short one. Pat and I are at the H&H Americas show in Chicago, IL right now. I was planning to walk around the show and scope out new and interesting things to show you on today’s blog post but that simply isn’t going to happen.

The VRD booth was completely swamped all day today with excited quilt shop owners and other industry professionals. I want to thank each of you who stopped by and shared your VRD stories and quilt photos with us. b Connecting with you really makes us happy.

This very lonely photo is the only one I managed to snap last night after Pat and I were finished setting up.

A booth display at the H&H Americas show features a variety of colorful quilts hung on walls and draped over tables, showcasing designs from Villa Rosa Designs.

I hope that I’ll get the chance to see some of the new and interesting things and show you my cool finds on next week’s blog. No promises, though – if the rest of the show is as crazy busy as today was, I probably won’t get to wander and take photos.

It’s the first Thursday after the first Friday of the month and we all know what that means – new VRD Rose Card patterns. YAY! Let’s take a look.

Here is the May set of 5 patterns:

Promotional image showcasing the May 2025 quilt patterns including 'Charlie', 'Mint Julep', 'Heritage', 'Shear', and 'Triple It' with price information.

Get the set of 5 patterns HERE

Aren’t they fun? Another great panel pattern, several fat quarter patterns, and a really neat mod pattern. Can you guess which is which?

Of course, a new monthly pattern set would not be complete without a new table runner, would it? This month, we have a new runner pattern by Molly:

A quilt titled 'Tea for 2' designed by Molly Cook, displayed on a vibrant background of blooming flowers, showcasing its intricate patterns and colors.

Get your digital pattern HERE or your print pattern HERE

I just adore the fabrics Molly used in her cute runner from the Let’s Partea collection (isn’t that just too clever???).

Guess what???? We still have some Tea for 2 kits which include the fabrics for the top and binding along with a pattern. You can find Tea for 2 kits HERE.

Here are some of the other kits we still have in stock for the May patterns. Get ’em before they’re gone.

Heritage featuring Tim Holtz Palette Neutral

Mint Julep in Moda’s Botany collection

Triple It in Winged Garden

Charlie in Fur Friends (see below)

A quilt featuring a colorful cat pattern with playful cat illustrations framed by vibrant borders in various prints.

If you love kits as much as we do, you can find all of our quilt kit offerings HERE.

Well, I must admit that I’m fading fast after the busy day Pat and I had, so I’m going to wrap up here. Have a wonderful week and take a little time to admire the flowers and maybe, just maybe, do a spot of quilting while you are at it.

Until next week –

Always,

Tricia @VRD

Copyright and Quilting · villa rosa designs

Common Questions Quilters Ask About Copyright

Happy Thursday to you!

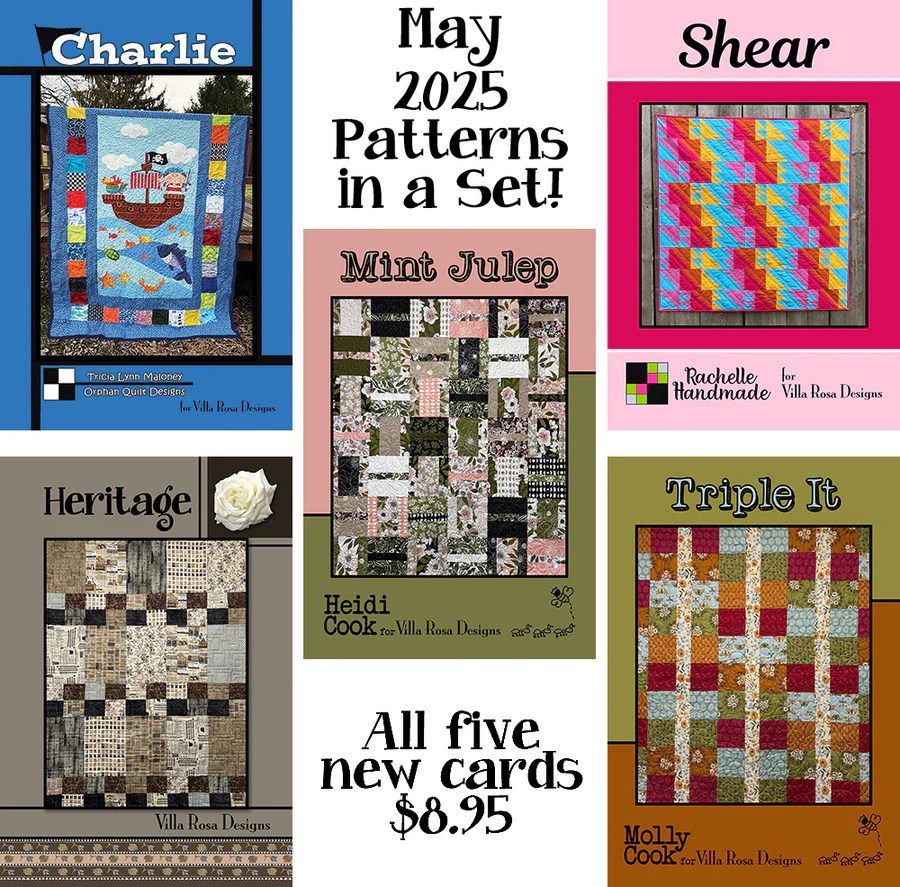
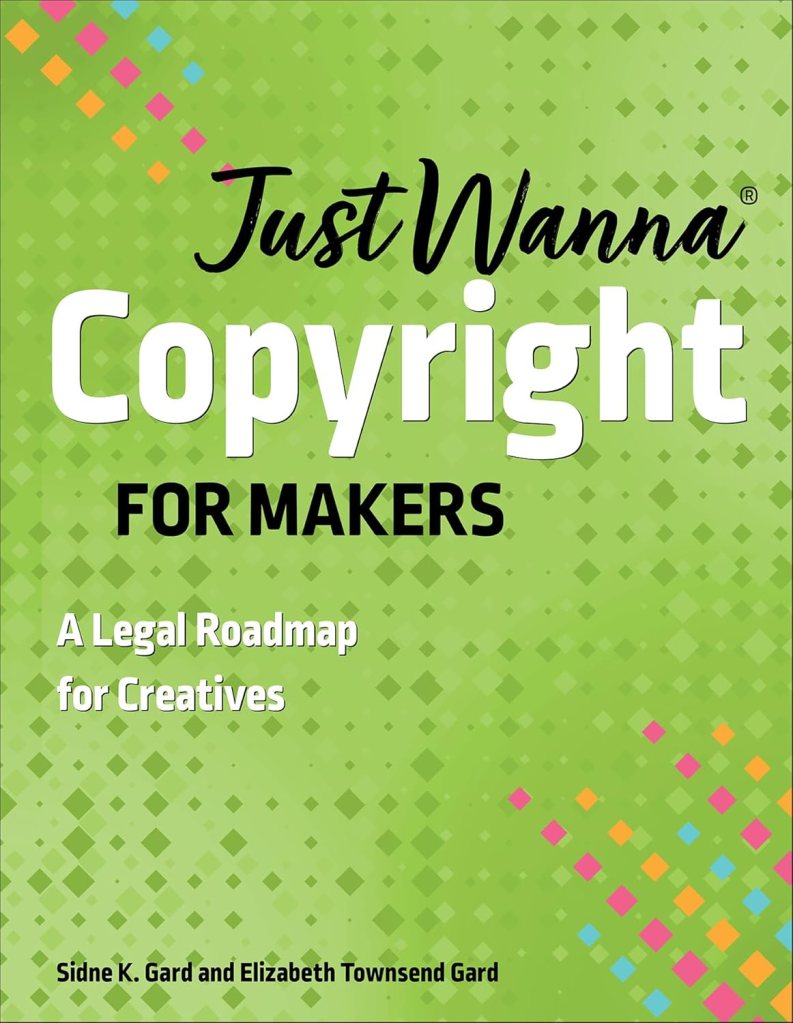
Last week I talked about copyright for quilters and showed a new book about copyright law for people who create, Just Wanna Copyright for Makers, by Sidne K. Gard and Elizabeth Townsend Gard. I am still reading and processing all the information in the book – and believe me there is plenty – I even have a few sticky notes marking sections that I will probably go back to over and over. I am learning a lot and I totally recommend this book for anyone who makes anything, whether it’s professional or just for fun.

If you missed last week’s post, you can find it HERE.

There is certainly a lot of information to wrap one’s head around in the book. I’m normally a very fast reader, but I am finding that I absolutely must slow down so I can understand what I am reading. There is just so much in this book – it’s kind of mind-boggling! One thing I’m really getting, though, is that copyright law is very confusing and there aren’t always hard and fast answers to questions or scenarios.

Cover of the book 'Just Wanna Copyright for Makers' featuring a bright green background with a geometric design, and the title prominently displayed in bold white and black text.

Before we go any further today, I do want to remind you that I am not a copyright professional or a lawyer. If you do have questions about copyright and what you can and cannot do, please consult with a professional.

Did you know there are 6 different ways one can legally use a copyright protected item (quilt pattern, quilt book, image of a quilt, or quilt design to name a few.)?

  1. It’s your own work
  2. You ask and get permission
  3. First Sale doctrine
  4. Classroom use
  5. Library use
  6. Fair use

These things are pretty self-explanatory except perhaps First Sale doctrine, which I will talk about shortly. I’m not going to explain the other 5 here, but you can explore them in detail in Just Wanna Copyright for Makers.

As there are legal ways to use copyrighted items, there are also illegal ways, which is called Copyright Infringement. The most common types of infringement are:

  1. Copying someone else’s work exactly
  2. Making something so similar that the copyright protected design (or photo, or whatever) is recognizable

It’s important to understand what is okay and what isn’t when it comes to creating and using copyright protected material. Sadly, there isn’t always a perfect answer to our questions, though.

Let’s take a look at 3 common questions quilters and other crafters ask.

If I change 3 things or 10% or… of someone else’s copyrighted pattern or book, am I creating a new design?

The answer to this question is no……and maybe.

Simply changing a few things (like the colors or the number of blocks) in someone else’s work does not create a new design you can take credit for.

Yet, if you use a copyright protected image or painting or what-have-you as the basis of an entirely new creation, then the answer is maybe. If this is your interest, you might want to consult a lawyer for more information.

I bought the pattern (or book, etc.), so I can do whatever I want with it, right?

Again, the answer is kind of. Sigh……

According to Just Wanna Copyright for Makers book, First Sale doctrine gives the purchaser the legal right to “make it, write on it, lend it to a friend, donate the pattern after you use it, and even throw it away.”

Does the “make it” in the First Sale doctrine give the purchaser the right to sell items made from the pattern, then? Or not? It isn’t clear and I’m so confused………

It is important to note that First Sale does not apply to digital items. Legally, you can’t share a PDF of a pattern (or book) with anyone else – they must purchase their own digital copy.

Can I use someone else’s pattern to make quilts (or other handmade items) to sell?

This a complicated matter with no clear cut answer. Let’s explore it a bit, though. 

When you buy a copyright protected book or pattern, you are granted First Right doctrine (unless it is in a digital format and then First Sale doctrine does not apply); however, it is not completely clear whether you can make and sell quilts from the pattern or book you purchased. It seems to be a grey area and goodness knows, every designer and maker has their own opinion about this subject.

Some folks believe that when you buy a copyright protected pattern, the copyright holder grants you permission to do whatever you want. This is not exactly true – please check out the First Sale info above or read more about First Sale in Just Wanna Copyright for Makers. Copyright protects certain rights for the copyright holder and those rights do not transfer to the purchaser of a pattern or book unless the copyright holder specifically transfers rights.

Others think that it’s just a pattern and patterns are not copyright protected. This is not exactly true, either. Clothing and sewing patterns may not be copyrightable because they are considered utilitarian objects, but a quilt isn’t necessarily a basic utilitarian object, it has an artistic design and it might very well be considered more a piece of art than a utilitarian object. Huh…more grey area.

Consider this – most designers do make a physical quilt before they write and offer a pattern for sale. Is the quilt itself or at least the design of the quilt protected by copyright? If it demonstrates enough creativity and originally, then yes, the physical quilt and/or design just might be copyrightable. If the quilt/design itself is copyright protected and the creator writes a pattern explaining how to make that quilt, then what? The pattern itself may be copyrightable, too. Is it then copyright infringement if one uses someone else’s copyright protected pattern of a copyright protected quilt design to make and sell items from?

Just remember that basic things such as shapes, techniques, and math are not actually copyrightable on their own. What is copyrightable is the combination of elements along with the creativity involved.

Another interesting scenario – what if a designer only makes a drawing or a digital rendering of the quilt they are writing a pattern for? The drawing or image itself might be copyrightable. Then what if the designer writes a pattern for someone else to create a physical version of their quilt drawing/image?

Additionally, are all photos, images, and diagrams copyright protected as individual things or only as part of the pattern or book?

About as clear as mud, isn’t it?

Can a designer or author come after you? You bet they can if you have infringed on their copyright protected material. Will they? Maybe, maybe not.

As copyright law is not always completely straightforward and clear cut, you should also consider the ethics of making items to sell from someone else’s pattern or book. No, there really isn’t a quilt police force out there watching you. Instead, it helps to ask yourself questions such as: How would you feel if you were the designer and someone used your pattern to make and sell items for a profit? Would you be okay if someone made a quilt from your pattern and donated it to a charity to be sold to benefit said charity? Would you be cutting into the income a designer or author can make from their own work? Would you be competing with the designer in the same markets?

For example, if I am the designer of a copyright protected pattern and I choose to sell my pattern on Etsy, is it okay for someone else to sell my pattern (legally obtained, of course) on Etsy too? Or maybe I make and sell derivatives of the quilt design in my copyright protected pattern (which I also sell on Etsy). Would it be okay for someone else to sell their versions of my quilt created from my quilt pattern (which they purchased) on Etsy, too? Hmmm……..

Definitely so much to consider when you want to make and sell items from some else’s copyright protected pattern or book. And so confusing because there aren’t always clear concise answers. If this really is what you want to do, you may need to contact a lawyer for more specific information.

Here is my best answer to the question ” Can I use someone else’s pattern to make quilts (or other handmade items) to sell?”

1. The very first thing you should look at on any pattern is the copyright.

If there isn’t copyright information, assume that it is still protected, although there are several different factors that go into how long copyright lasts. If the pattern or book is really really old, it might be in the public domain. To confirm this, you would have to do some research.

If there is a copyright notice, check the date. If the date is super old, the pattern or book might be in the public domain. Again, you would have to do some research.

Look at the copyright holder. This would be important if you need to contact them to ask for permission.

Is there a copyright statement such as “All rights reserved” or “For personal use only” or something else more specific? Use this as a guideline for using the pattern or book. If you are not sure or it doesn’t have a statement, you should contact the copyright holder or consult a lawyer for help.

2. If you are not the copyright holder, ask permission

An author or designer might just be so thrilled that you took the time to ask (because many do not), they might just grant you permission.

Be aware you might get different answers from different designers/authors/copyright holders because everyone has their own take on copyright, which is probably influenced by their own experiences.  And that’s okay because there just isn’t one simple answer. 

If one designer says “sure, make as many as you want and sell them as long as you include the name of the pattern and my name as the designer on your quilt label and in any tags, labels, descriptions, listings, etc.”, that’s great. But don’t assume that all designers will grant you the same courtesy.  Of course, a different designer could say “no, you cannot make items from my pattern to sell and make a profit.”  Another designer might tell you: “You can make no more than 5 to sell and after that you must purchase a license.”

Ask for permission every time.

Please don’t get upset with a designer if they do tell you no. Please don’t badmouth them online. They might have a very good reason (or more than one) for saying no. Respect their decision as the copyright holder and find a different pattern by a different designer that will work for you.

To protect yourself, get permission in writing.

3. If you want to sell items made from someone else’s pattern or book, then find a pattern or book that does give you permission. Some designers and authors grant you permission to make and sell items made from their patterns (or books) in their copyright statement or you might have to contact a copyright holder directly to ask permission.

Author Virginia Lindsay created 2 such books – Sewing to Sell and More Sewing to Sell. In Virginia’s books, she shows you how to start a craft business and she gives you permission to use the patterns in her books to make and sell items: “The designs in this book may be used to make items for personal use or for sale without limitations.”

Cover of the book 'Sewing to Sell' by Virginia Lindsay, featuring colorful fabric bags and a crafting workspace.
Cover of the book 'More Sewing to Sell' by Virginia Lindsay, featuring a photography setup with a camera on a tripod, sewing projects, and workspace elements.

I bet there are other designers and authors out there who allow you to make and sell items from their patterns and books – you just have to do your homework to find them.

Make sure you understand and follow what the designer/author/copyright holder grants you. Maybe you are permitted to make up to 5 items to sell from a pattern. If that’s what the designer says, respect them and only make 5. If you want to make more than 5, ask permission and be aware that you might need to purchase a license.

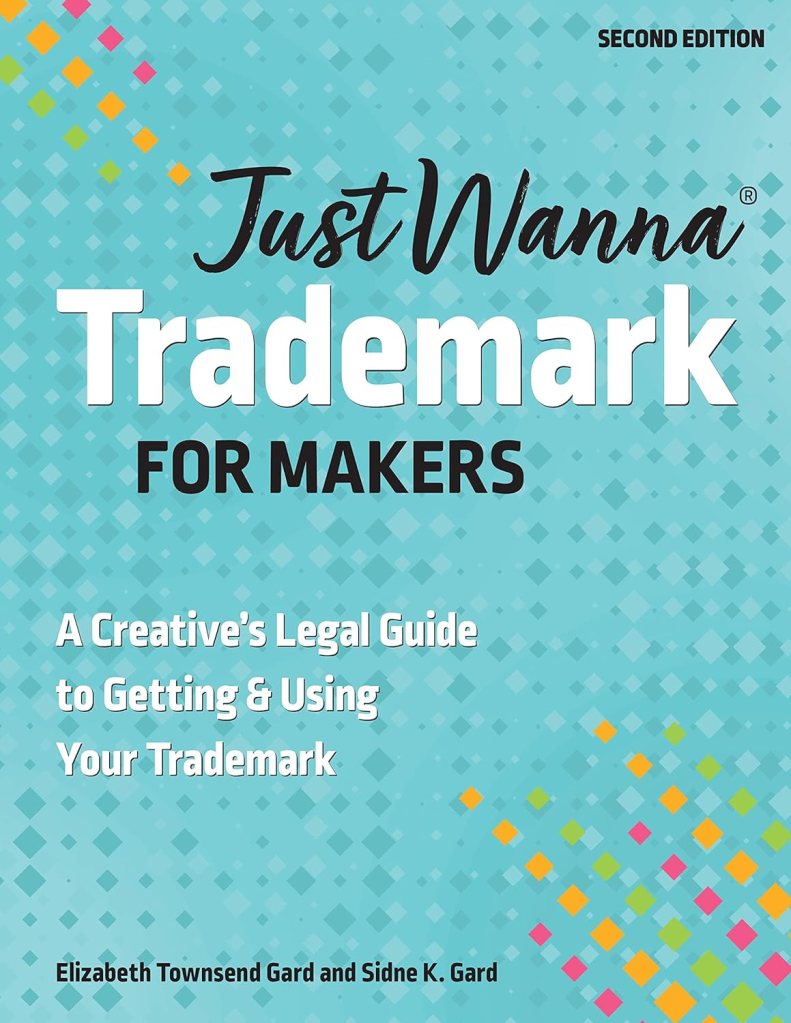
4.  Ultimately, the best way to protect yourself if you want to make quilts and sell them is to use quilt blocks and patterns in the public domain.  Basic shapes like squares and triangles are in the public domain.  Classic patterns like Log Cabin, LeMoyne Star, Nine Patch, Sunbonnet Sue and probably thousands of others are all in the public domain.  You could even explore books about quilting in the public domain. Go ahead and mix and match the blocks, use a straight set or a diagonal set, change the size, use whatever fabrics you want. If it’s in the public domain, you can use it pretty much however you want, short of calling yourself the author. The only caveat here would be items with trademarks have different rules (you can check out the book Just Wanna Trademark for Makers: A Creative’s Legal Guide to Getting & Using Your Trademark for more information).

If you create your own quilt designs to make and sell, they might just be copyrightable. And who knows? You might decide to write your own copyright protected patterns or books down the road. Good for you.

By no means am I an expert, but I hope this blog post gave you some more things to think about when it comes to copyright and quilting, even if there aren’t always perfect answers for our questions. Remember, you can always consult a lawyer to help you understand.

Thanks for taking the time to read this post the whole way through. I look forward to your comments and discussions in the comments.

For more information:

www.copyright.gov

Copyright and the Quilter (featuring Elizabeth Townsend Gard)

How Copyright Affects the Quilter

Quilting and Copyright Rules

Copyright for Quilters — A Commonsense Approach

Royalty Free vs. Public Domain Quilt Patterns

Quilting & Knitting and Copyright Law

Copyrights and Quilting

Help with Design Rights

That’s it for me. Until next week –

Always,

Tricia @VRD

Copyright and Quilting

At Last! A Book About Copyright for Quilters and Other Creative Folks

Happy Thursday to you!

I’m SEW excited to share with you a very important book I discovered recently. It’s called Copyright for Makers: A Legal Roadmap for Creatives by Sidne K. Gard and Elizabeth Townsend Gard. The book was released in 2024 and is published by C&T Publishing.

How did I not know about this book before???

Cover of the book 'Just Wanna Copyright for Makers: A Legal Roadmap for Creatives' by Sidne K. Gard and Elizabeth Townsend Gard, featuring a green background with colorful geometric shapes and bold title text.

You can find the print book HERE or the digital book HERE

I really feel like I dropped the ball by not knowing about this very important book. If you’ve been following the blog for a while, then you probably know I have a serious interest in copyright for quilters and how it impacts how we create, what we create, how we choose to share (or not share), as well as how we can protect our work.

If you’ve missed my posts about copyright, you can find them below:

The Copyright Question for Quilters

NEW April 2023 Villa Rosa Designs Rose Card Quilt Patterns and Revisiting the Copyright Question for Quilters

My Recent Copyright Issue and NEW Villa Rosa Quilts Rose Card Patterns for May

Most of what I’ve learned up until now has been from reading articles/researching online as well as talking to other professional quilters and crafters. A friend and mentor, Cheryl Weiderspahn, who owned her own clothing pattern company and even published a few books – Low Sew Boutique and Around Randolph Township and Guys Mills (Images of America) wrote a very straightforward and down-to-earth explanation of copyright for quilters and sewists some years ago. You can find Cheryl’s copyright statement in my post, The Copyright Question for Quilters. Cheryl’s article was the first and best document about copyright I’ve ever read, so you might want to check it out.

Over the past year, I’ve had some copyright issues on Facebook and Pinterest. For some reason, there are people out there who think it’s perfectly okay to post the instructions of a copyrighted pattern online and share it for free with all their friends and friends of their friends and so on. This is definitely NOT okay. Rather, this is an example of copyright infringement. I reported the infringements (yes, plural) to Facebook and Pinterest. The forms take forever to fill out. I cannot understand why it is so easy for someone to post or pin copyright infringement content yet when you are reporting the violation of your copyrighted intellectual property, you have to go through a lot of hoops just for them to believe that you own the copyright. There has got to be an easier way.

Another issue I’ve had recently is on Etsy, where I have found a few folks making quilts using my patterns (called derivatives) and selling them for profit. This is also an infringement of copyright. Including the name of the pattern used and/or the designer of the pattern as part of an Etsy item listing does NOT make it okay to sell a derivative of someone else’s work. I have contacted the guilty parties directly as well as reporting it to Etsy. We’ll see what happens….

Ignorance is not bliss – ignorance of copyright law does not protect someone from being held responsible for their copyright infringement.

ARGH! As much as I love designing new quilt patterns, sometimes I question whether it’s really worth it when people think nothing of trying (and often succeeding) to rip someone off.

So, what can a quilter do?

  1. Read the book Just Wanna Copyright for Makers.
  2. Spread the word to everyone you know that there’s finally a book explaining copyright for quilters and other creatives written in a way normal people can understand.
  3. If you see copyright infringement, don’t just ignore it – report it. Report it to Facebook or Etsy or whatever. If you don’t know how to report it to a website or business, then contact the copyright owner and inform them so they can report it.
  4. Know your rights!

If we keep reporting copyright infringement and sharing knowledge with our family, friends, quilt guild members, online community, etc. – it is my hope that someday everyone will respect the intellectual property of others.

I’ve just started reading Just Wanna Copyright for Makers. It is divided into 4 main sections – Creating, Borrowing, Protecting, and Enforcing so it’s easy to skip around and read the parts that pertain to you, although I do recommend reading the entire book.

As far as I can tell, the authors have covered all the important stuff from your first idea on paper to what can be copyrighted to protecting your intellectual property. Even if you’re not designing patterns or creating works of art in some kind of media, I still think this is a must-have for anyone who creates.

Just Wanna Copyright for Makers was written by a mother-daughter duo who really know their stuff. One is a law professor and the other is an artist/crafter/writer. I think this is the perfect combination to create an easy-to-understand book about copyright and how it impacts the lives and the work of quilters and other makers. This is not a dry read – far from it – the authors impart humor into their snappy writing style. That being said, please understand that copyright law itself is full or twists, turns, and grey areas.

The authors conducted a lot of research before writing their book, including something like 400 interviews with creative people. They posted these research discussions as podcasts for several years before their book came out. I am looking forward to catching up with their podcast. You can check out the Just Wanna Quilt website HERE.

Happily, The Gards have another super useful book for creatives called Just Wanna Trademark for Makers: A Creative’s Legal Guide to Getting & Using Your Trademark, which was actually their first book in the Just Wanna series. I wonder what they’ll write next?

Cover of the book 'Just Wanna Trademark for Makers', featuring a teal background with colorful geometric shapes and white text.

You can find the print book HERE or the digital book HERE.

Well, that’s about it for me today. SHHH! I really want to get back to my reading.

Until next Thursday —

Always,

Tricia @VRD

Quilting Partners · Rose Cards · Tutorials · villa rosa designs

VRD Stepped Quilt Tutorial

Happy Thursday to you!

I’ve got a fun and happy quilt tutorial for you today – Stepped by Running Doe Quilts for Villa Rosa Designs.

But before we get into the tutorial – I have an AMAZING announcement for you!

Drum roll, please!

Cue the confetti! Or how about a balloon drop from the ceiling this time?

Our Rose Queen and owner, Pat Fryer, has done it again!

She has a new batik fabric collection with Riley Blake Designs coming this October!

It’s called Kalinda.

WOOHOO!

Here’s a sneak peak –

Kalinda is simply perfect for all your autumn projects! You can download the collection PDF with all the fabrics and skus below.

Guess what????? There will be another collectible pattern storage tin for the Kalinda collection, too! I can’t wait! I love love love my tin from Pat’s first collection, Bedazzled. I can’t wait to collect them all as she designs new collections in the future!

Mark your calendars for October – when Kalinda makes its debut. Don’t forget to ask your local quilt shop to order the collection if they haven’t already.

Now I’ve spilled the beans about Pat’s new collection, it’s time to jump into our tutorial.

Stepped is a fun modern Rose Card pattern designed by Running Doe Quilts for Villa Rosa Designs. It is a large quilt, finishing at 66″ x 78″ and is fat quarter friendly – yay!

Get your digital pattern HERE or your print pattern HERE

For this tutorial I chose a wonderful warm and sunny collection from our friends, Hoffman Fabrics, called Sunset Hour. I chose the bright blue as the frame and binding for a wonderful pop of color against the warm sunset tones.

As usual, the first thing I’m going to do is cut the pieces for the blocks. Since this quilt doesn’t have a border (which is common for modern quilts, by the way), we don’t have to worry about that.

I’m wondering – do you cut your borders when you cut the fabric for the blocks or do you wait until after the center of the quilt is assembled? For me, I usually cut the border strips when I cut the block fabrics, but I don’t piece and cut the borders to size until after I finish the blocks.

Oops, let me get back to the cutting. LOL!

Here are all the pieces I need to make the whole quilt top. Isn’t that blue striking?

Now we’re ready to rock and roll at the sewing machine! The Stepped block goes together really quick (of course, it’s a VRD Rose Card pattern!). I like to put the large rectangle to my left and the blue frame strip to my right so I can grab a rectangle, place a frame strip on top, and zip it through the sewing machine. Then I repeat this same step for all the blocks, using chain piecing (meaning I’m not cutting the thread between blocks as I sew).

Working with batiks is lots of fun – you don’t usually have to worry about right or wrong sides because they are dyed the whole way through.

I could just flip the frame strip over, give it a finger press, and add the 2nd frame strip on, but I want my blocks to be nice and crisp, so I’m going to head to my ironing board to press the blocks before adding the 2nd frame strip.

Now I’m ready to sew the 2nd frame strip on the side of each block. Easy piezy – just the way I like ’em!

Then it’s back to the iron to press the blocks one more time. I warn you – there are a lot of blocks! Seriously!

Next I’m heading to my flannel board, which is actually behind my pressing station, to lay out my blocks. SHHH! My flannel board is really a flannel backed tablecloth hung in front of my fabric storage wall. To hang it, I clip the tablecloth to the tops of my storage doors with big binder clips. That way, I can take it down whenever I need access to the fabric cubbies (these particular cubbies hold my yardage and fat quarters by color).

Now the fun begins. As I lay out the blocks, I’m moving them around to spread the colors and fabrics out over the whole quilt. Laying out your blocks is an important step in making a quilt because you don’t want all the same fabrics or colors clumped together in the same area by accident.

Yikes! I’m actually running out of flannel board for this quilt because it’s big, so I think I need to sew this section together before I can add the final 4 rows. Off to the sewing machine I go…..

All right, here’s the section sewn together. Sorry, just noticed in this photo, I have it turned upside down from the previous photos. Mea culpa.

Finally, I can lay out the final 4 rows and add them to the quilt top. Ugh, you can’t see the bottom section I just added because my ironing station is in the way. Did I mention this is a BIG quilt???

I know! Let’s go outside so I can show you the completed quilt top!

I LOVE the warm and sunny colors of the sunset and the blue plays nicely. I reminds me of photos of the sun setting over the ocean. I say photos as I’ve yet to actually see an ocean. Someday…….

OH! Rats!

Take a look at the bottom of the quilt, I ended up with too much light colored fabrics bunched together. This happened because I couldn’t lay out the entire quilt on my flannel board all at once before I stitched the blocks together. ARGH!

Looks like I will be doing some un-sewing with my trusty seam ripper sidekick, Jack. Then I can relocate some of those light blocks from the bottom towards the center. Sigh……definitely a project for another day. Sorry about that.

Have you ever made the Stepped quilt? If so, I’d love to see your quilts on our VRD Facebook group.

Well, that’s it for me. Have a great week! Find some time to do a little sewing this week. Or maybe some un-sewing……

Until next time –

Always,

Tricia @ VRD

Quilting Partners · Rose Cards · villa rosa designs

NEW VRD April Rose Card Quilt Patterns and A Fabulous Catalog by our Quilting Partner, QT Fabrics

Happy Thursday to you!

Guess what today is??? It’s the Thursday after the first Friday in April, which means………..NEW PATTERNS!

If you are a new blog follower, you might not know that at Villa Rosa Designs, we add 5-7 NEW Rose Card patterns each and every month, all year long. New monthly patterns are usually launched the first Friday of the month on VRD’s Fry-Day Live event online. You can find Fry-Day Live events HERE most Fridays at 4:00 PM Pacific Time (7 PM Eastern time).

With 5-7 new patterns every month, that adds up to between 60-84 NEW patterns every year – WOW! Then add those to our over 700 patterns already in print! It’s almost mind-boggling. We really do have something for everyone!

I know you’re anxious to see this month’s patterns, so here they are –

Collage of five new quilting pattern cards for April 2025, including Butterfield, Dakota, Havenwood, Cadott, and Turtle Soup, featuring colorful quilt designs.

Get the set of 5 print cards HERE

As usual, our talented VRD designers do not disappoint!

Butterfield is by our own Rose Queen, Pat, uses a collection of fat quarters and goes together really fast. You can find the Digital pattern HERE or the Print pattern HERE. We also have Butterfield kits (includes the pattern) featuring Tim Holtz Palette Yellow fabrics.

Dakota is also by Pat and is a quick to make fat quarter quilt. You can find the Digital pattern HERE or the Print pattern HERE. And we have Dakota kits (includes the pattern) featuring Victory Garden fabrics.

Havenwood, designed by Rachelle, is Jelly Roll or scrap friendly. It works up fast with your favorite quick piecing techniques. You can find the Digital pattern HERE or the Print pattern HERE. We have Havenwood kits (includes the pattern) featuring the Sweet Melodies collection (below).

A colorful quilt featuring a patchwork design with various patterns and fabrics, arranged in blocks of different colors including red, blue, yellow, green, and floral prints.

Havenwood in Sweet Melodies

Cadott is also by Rachelle and is a fun modern quilt with A LOT of visual appeal. It uses yardage or your stash. You can find the Digital pattern HERE or the Print pattern HERE. Sorry, no kits for this one.

Turtle Soup by Heidi features a theme fabric or border stripe – and what a fun name! You can find the Digital pattern HERE or the Print pattern HERE. Sorry, the kits are already sold out.

But Wait………there’s more! (Tehehe, you know how much I love writing this.)

Our NEW April Table Runner (by moi) is called Window Boxes. You can use panel squares or fat quarters for this pretty runner pattern.

Cover of the quilt pattern 'Window Boxes' featuring a quilt with hexagonal shapes in yellow, turquoise, and pink fabrics, surrounded by floral prints, set against a peach background.

Get the Digital pattern HERE or the Print pattern HERE.

That’s it for the new patterns this month. Which one are you going to make first??? I can’t wait to see your April projects on our VRD Facebook Group.

Now let me tell you about QT Fabrics and VRD.

As many of you already know, Villa Rosa Designs has made lots of connections with other companies in the quilting industry in recent years. We call them our Quilting Partners. You can find our Quilting Partners over on the right side of the blog towards the top.

Are you familiar with our pals over at QT Fabrics? They are an employee-owned and operated company and have been in business for a long time. You can find QT fabrics at your local quilt shop AND you can check out VRD’s QT Fabric offerings on our website HERE.

We’ve been partnering with QT Fabrics for a while now and I’m really excited to share with you their recent publication featuring our Rose Card patterns and QT’s newest fabric collections, which will be out in quilt shops this Fall. Aren’t you the lucky ones to get a sneak peak???

Here’s the PDF version of the wonderful catalog that QT put together featuring ALL VRD Rose Card patterns paired with their new 2025 Summer Collection, which will available this fall.

I definitely have some of these on my to-do and look forward to sharing new tutorials here on the blog featuring some of these fun designs and fabrics. Woohoo!

If you’d rather check out the really cool digital Flipbook version, you can find it HERE.

I hope you found a lot of inspiration in this catalog – maybe some new-to-you patterns and/or great upcoming fabric collections. If you see a collection you love, ask for it at your local quilt shop – the fabrics will be available this fall. All of the featured patterns in the catalog are available on our website, villarosadesigns.com.

Well, that’s it for me. Take care and do something fun this week.

Until next time –

Always,

Tricia @ VRD

Curated Rose Card Pattern Lists · Rose Cards · villa rosa designs

A Super Fun Spring Bingo Download and a Curated List of VRD Rose Card Quilt Patterns for April

Happy Thursday to you!

Well, I’m happy that spring is finally here in NW PA. I think it’s here, anyway. Sometimes it’s hard to tell.

Tulips, Daffodils, and Crocuses are blooming which is a welcome burst of color against our still dreary winter landscape. The trees are just staring to wake up a little bit, but we won’t have full leafy coverage until the end of April into May. Spring weather here is also quite unpredictable — we’ve already had a few days in the 70’s, but we’ve still gotten a bit of snow. And rain. And hail. Even with its craziness, spring is definitely one of my favorite seasons.

Spring also gets me re-energized for quilting with spring colors, Easter, flowers, birds, blue skies with fluffy clouds, baby animals…I could keep going but you get the idea. Spring is all about renewal, so go ahead and welcome the season in your quilting world, too.

YAY! Lucky you! I created a fun Spring Fling Bingo download to help you enjoy the season. Please download the PDF below and have fun completing the 20 spring ideas!

Now let’s have a pattern shower for April! Because a collection of Spring quilts will surely brighten your day and give you some Spring inspiration. It certainly inspired me as I put it together.

If you’re a blog follower, you might have seen my Curated Spring List from last year, so instead of repeating that lovely collection of patterns, I thought I’d create a new collection of patterns just for April. And April means showers, rainbows, Easter, gardening, babies, and….

Digital Pattern or Print Pattern

Print Pattern only

Digital Pattern or Print Pattern

Digital Pattern or Print Pattern

Digital Pattern or Print Pattern

Digital Pattern or Print Pattern

Digital Pattern or Print Pattern

Digital Pattern or Print Pattern

Digital Pattern or Print Pattern

Digital Pattern or Print Pattern

Digital Pattern or Print Pattern

Digital Pattern or Print Pattern

Digital Pattern or Print Pattern

Digital Pattern or Print Pattern

Digital Pattern or Print Pattern

Digital Pattern or Print Pattern

Digital Pattern or Print Pattern

Digital Pattern or Print Pattern

Digital Pattern or Print Pattern

Digital Pattern or Print Pattern

Digital Pattern or Print Pattern

Digital Pattern or Print Pattern

Digital Pattern or Print Pattern

Digital Pattern or Print Pattern

Digital Pattern or Print Pattern

Digital Pattern or Print Pattern

Digital Pattern or Print Pattern

Digital Pattern or Print Pattern

Digital Pattern or Print Pattern

Digital Pattern or Print Pattern

Digital Pattern or Print Pattern

Digital Pattern or Print Pattern

Digital Pattern or Print Pattern

Digital Pattern or Print Pattern

Print Pattern Only

Digital Pattern or Print Pattern

Digital Pattern or Print Pattern

Digital Pattern or Print Pattern

Digital Pattern or Print Pattern

Digital Pattern or Print Pattern

Digital Pattern or Print Pattern

Digital Pattern or Print Pattern

Digital Pattern or Print Pattern

Digital Pattern or Print Pattern

Digital Pattern or Print Pattern

Digital Pattern or Print Pattern

Digital Pattern or Print Pattern

Digital Pattern or Print Pattern

Digital Pattern or Print Pattern

Print Pattern Only

Digital Pattern or Print Pattern

Digital Pattern or Print Pattern

Digital Pattern or Print Pattern

Digital Pattern or Print Pattern

Digital Pattern or Print Pattern

Digital Pattern or Print Pattern

Well, I hope you enjoyed this great selection of VRD Rose Card patterns. I really enjoyed putting it together. Did you know we now have around 700 patterns in print? How many do you have?

Don’t forget — there’s FREE SHIPPING on patterns. Always.

Stay tuned for next week’s post showcasing our brand new April Rose Card patterns.

Until then –

Always,

Tricia @ VRD

Rose Cards · Tutorials · villa rosa designs

VRD Brickwork Quilt Tutorial

Happy Thursday to you!

Although it’s really March 26th as I write this post, it sure feels more like April Fool’s Day here in NW PA! Mother Nature is laughing loudly at us because this morning we woke up to a layer of snow on the ground. Of course, it’s already beginning to melt away as the temperature increases a bit, but it was certainly a deja vu moment. Just another crazy weather day….

So, I definitely think it’s a fitting day to do a new tutorial for you featuring a beautiful blue and lavender batik collection.

Brickwork is a super fun fast fat quarter quilt designed by our VRD designer, Molly Cook. Don’t know Molly? Check out an interview with Molly HERE.

Get your digital pattern HERE or your print pattern HERE

We do have a few different Brickwork kits available (sorry, not the fabrics used in this tutorial, though) – you can find the kits HERE

For this tutorial, we’re using yummy batik fabrics from the Hoffman collection Dragonflies at Dusk. I just love these gorgeous blues and lavenders – perfect for a snowy day like today.

Who am I kidding??? I just love the saturated colors, smooth hand, and interesting designs of batiks regardless of the weather outside. LOL!

Let’s get started with our cutting. If you feel comfortable layering a couple fat quarters with the right side facing up, the cutting goes super fast. But if you are only comfortable cutting one layer at a time, that works great too. You do you.

Next you need to pair up 2 matching smaller rectangles with a different larger rectangle. Sew the larger rectangle between the 2 matching smaller rectangles. This is a great block on which to practice your chain piecing skills.

Once you have all of the blocks pieced, head to the ironing board and press everything. It doesn’t matter how you choose to press these ones, just be consistent.

After pressing the blocks (sorry, for some reason I didn’t snap a photo of this step), we’re heading to the design wall (ie: a flannel-backed tablecloth – LOL!) to arrange our blocks.

Okay, now the real work begins – rearranging the blocks so we have a nice balance of colors and lights/darks. The funny thing is that sometimes this process takes longer than actually making the blocks added to the actual time spent sewing the blocks. Just take your time and keep arranging until you are happy with what you see.

This quilt did give us some challenges, though, because the fabrics looked either light or dark and we didn’t have a lot of medium values to balance things out.

Here are some photos showing subtle changes in block placement while we try to achieve a better balance of colors. Bear with us while we keep changing blocks around….

Finally! We found a pleasing block arrangement and then it was time to sew the blocks together into rows and then sew the rows together.

Here is the finished Brickwork quilt top! Now to layer it with batting and backing, quilt it, bind it, and label it. Not sure how to do all of that? You can check out our 2022 Basic Quilting Skills Series over on the right side of the blog for useful tutorials on

Batting, Backing, and Preparing a Quilt for Quilting

Quilt As Desired

Squaring Up Your Quilt

Binding 101

Label Your Quilt

Of course, if you’re interested in learning more about Free Motion Quilting (FMQ), we just wrapped up a 7 part series about Beginner FMQ, which is also located over on the right side of the blog.

I want to thank my pal, Robin, for helping me with this tutorial – thanks, Robin!

Have fun making your very own Brickwork and I look forward to seeing your quilts on our VRD Facebook Page.

Well, that’s it for me. Take care and find a little time to quilt this week.

Until next time –

Always,

Tricia @ VRD

2025 Free Motion Quilting (FMQ) Series

Beginner Free Motion Quilting (FMQ) Lesson 7 – Quilting Borders with 3 Simple Designs

Happy Thursday to you!

I am so happy that spring has pretty much sprung here in NW PA, at least for right now, anyway! Last week the weather was simply gorgeous and after a day of cold temps, we’ve bounced back into spring. Today will be in the 70’s! For me, I know that spring is finally here when I fall asleep listening to the peepers. The robins, red- winged blackbirds, and grackles are back, too. When do you know it’s spring in your neck of the woods?

This week we are wrapping up our Beginner Free Motion Quilting (FMQ) series with some ideas for quilting borders. I’ll let you in on a little secret of mine – when I’m rushed for time, I use an allover design for the entire quilt, but when I have some extra time or if a quilt just needs it, I use a different design in the border. Let’s jump right in, there’s a lot to cover today.

If you missed any FMQ lessons, you can find them here:

Lesson 1: All the Background Information

Lesson 2: Let’s Doodle!

Lesson 3: Practice, Practice, Practice

Lesson 4: The Write Way to Doodle!

Lesson 5: Going Beyond Loops Part 1

Lesson 6: Gong Beyond Loops Part 2

I’m going to share with you 3 of my favorite go-to border designs along with variations of each to spark your creativity and to help you expand your FMQ toolbox of designs.

The hardest part of quilting borders, in my humble opinion, is making the transition around the corners. Usually, I add some kind of element in the corners to connect my border designs, but sometimes a design lends itself to bending around the corner without needing an element. Below, I’m going to show you both styles.

Zig Zags

Zig Zags are a SUPER border option when you’re just getting started with FMQ. It is a base design you can add to as your skills grow.

Here’s a good example of the basic Zig Zag design. You can see in the corner, I did an inverted triangle, which fills the space nicely and is a nice transition. The Zig Zag design is a very flexible design that can be sized to the width of the border strips – make it narrow for inner borders or wide for outer borders. You can even use it for sashings!

Above is the Zig Zag design doodled on my white board with my trusty dry erase marker. Easy piezy. Really.

If you’re not a fan of the inverted corner triangle, try some of your own ideas in the corners. Doodle, doodle, doodle.

Then when it’s easy for you to draw, it’s time to make a fresh practice square and practice quilting the Zig Zag design until you feel comfortable with it. Finally, take a deep breath and quilt it on a small project.

It might not be perfect, but that’s okay. Pat yourself on the back. It takes courage to do something new. I want you to remember there is no such thing as perfect. A finished quilt is a lot more satisfying than trying to find perfection and never finishing that project. YOU CAN DO IT!

Now let’s look at some variations of the Zig Zag border design. The following designs were created by quilting the border once and then going back and adding a second layer of quilting. The red line is the first quilting line and the blue line is the second quilting line in my doodles below.

PSST! One of the biggest secrets to quilting borders is that you don’t have to create the design in only one pass. Breaking a design into multiple passes can make a real jaw-dropping finished border design and you’ll be the only one who knows how simple it is, so don’t tell anyone, okay?!?

Double Zig Zag

Double Zig Zag is simply quilting the basic Zig Zag design and then echoing another line either above or below the original Zig Zag. Depending on what you put in the corners, you might have to make a different transition than the one I used.

Mirror Image Diamonds

In this variation, I quilted the basic Zig Zag design and then with my second pass, I quilted the mirror image to make Diamonds. Again, depending on your corner element, you might have to come up with your own transition.

Argyle

Here I overlapped 2 lines of Zig Zags, off-setting the second Zig Zag about a half a Zig Zag so that the points are opposite of each other.

Trees

I LOVE this design! So many ways to use it. The first pass is the basic Zig Zag design – just make sure to leave enough space at the inside edges of the border so you have room for your second quilting pass with the trunks. I drew over my corner inverted triangle on the second pass and made it into an outward-facing tree. SEW cute!

I’m going to stop making Zig Zag variations right now or else I’ll never get to show you the 2 other designs! Have fun creating your own variations. I warm you though, it can be addictive. LOL!

Hillside

I’m calling our 2nd border design Hillside. It’s a lot like Zig Zag, but with curves instead of points. This design can also be used as an allover design and it lends itself to lots of variations. Yay!

I’m sorry if the example above might be a little hard to see because of the blue backing fabric, but I think you can still make out the Hillside design.

You’ll notice I quilted a teardrop shape in the corner, but you can place any element you want in your corners, or omit corner elements entirely. Be creative, make this design your own.

Here’s my Hillside doodle on my white board. Fun, huh? I really like using this design because curves can be very forgiving.

On the following Hillside variations, please note that the red line is my first quilting pass and the blue line is my second pass.

Grab your white board and doodle along with me!

Hillside Fans

This version is a very simplified Baptist Fan. Like the Zig Zag design, you can size this design for any width of border. If it’s a really wide border, you can quilt multiple passes of the Hillside design to fill the space. In this version, I moved over half a Hillside to offset the second row. I also opted to skip the corner element and simply quilted a big Hillside arc in the corner. Snazzy!

Hillside Echo

Here is Hillside with an echo. This design has a great vibe, is easy to do, and looks very nice on a quilt. Again, I omitted the corner teardrop and just made 2 passes of Hillside.

Rainbows

Isn’t this a really fun and quirky Hillside variation? It looks great on kids’ quilts but could also look elegant on a formal table runner, too. Again, I did not draw a corner teardrop, instead I just let the Hillside Echo strut its stuff. This design is also made with 2 passes; however, you can add as many Rainbow passes as you want and have space for – the more the merrier!

Hillside Zig Zag

Another big secret of FMQ is combining different designs together to make more interesting and more complex-looking designs. It just takes some practice, some time, and a sprinkle of patience. I drew the Hillside design first and then added the Zig Zag inside the Hillside as my second pass.

These are just a few beginner-friendly variations of Hillside. I bet when you’re doodling, you’ll come up with some more. Just don’t forget to actually try quilting on your practice square and once you feel comfortable, quilt a real small project! WOW!

Loops

I’m sorry, but I couldn’t find a quilted example of a border Loops design, so we’ll have to use my doodles as our reference.

This design is a lot like our basic Loop allover design from earlier in the series , but it is straight instead of meandering and the loops all point in one direction.

In the Loops design, above, I drew alternating big and little loops, which is sometimes called E’s and L’s.

Most of the time, though, I make my loops roughly the same size instead of alternating big and small. Grab your white board and try this one out. When you’re ready, try it on your practice square. I bet you’ll get comfortable with this design quickly, so don’t forget to move on to quilting an actual small quilt project.

Now let’s play with a couple Loops variations. Like the previous designs, the red line is my first pass and the blue line is my second pass.

Lace Edge 1

This quilt example, above, is a corner of my recent Erin table runner. I added a simple leaf in the corners because of the foliage border fabric. Want to see more of the quilt? You can find the Erin pattern HERE.

In this Lace Edge doodle, I did Loops (all roughly the same size) for the first pass and then I quilted Hillside as the second pass. This is absolutely one of my favorite designs – hands down! I use it often, quilting different elements in the corners or no elements at all.

Lace Edge 2

In this Lace Edge variation, I quilted 2 rows of Loops, but I flipped the second one over so it was facing the first pass of Loops and I moved over a half space. This design can look stunning on quilts. And complicated, too. SHHH! Never tell anyone how easy it really is. LOL!

Once you’ve quilted your quilt, it’s time to add binding to finish the edge. And don’t forget your label.

Check out these posts from our 2022 Beginner Quilting series:

Squaring Up Your Quilt

Binding 101

Label Your Quilt

Well, that’s a wrap! I hope you found our Beginner FMQ series to be helpful. Leave a comment if you did and what you liked the best about the series.

And as always, I’d love to see your free motion quilted quilts! Please share them on our VRD Facebook page.

Have a great week with some sunshine, some FMQ, and a sprinkle of Irish luck (wink, wink!).

Until next week –

Always,

Tricia @ VRD

Quilting Partners · Rose Cards · Tips and Tricks · Tutorials · villa rosa designs

NEW March VRD Rose Card Quilt Patterns and Lucky, a Quilt Tutorial for St. Patrick’s Day

Happy Thursday to you!

I trust you’re all having fun with your Free Motion Quilting (FMQ) practice. We’re going to take a quick break from our Beginner FMQ series this week because I have NEW March patterns to share as well as a fun table runner tutorial just in time for St. Patrick’s Day. We’re all Irish on St. Patrick’s Day, right?

Here are the new patterns for March – be prepared to be inspired….

Get the print set of all 5 patterns HERE.

The 5 main patterns are great, aren’t they?

Molly created a brand new St. Patrick’s Day throw-sized quilt called Clover Patch. I just love that she added a single Four Leaf clover to her quilt – can you find it in the Clover Patch?

Molly also created a second pattern this month called Jackknife. This clever block uses long quarters instead of fat quarters. We still have a few kits left, too, if you’re interested.

Get your Jackknife kit in Art Glass AbstrArt HERE.

Heidi wows with her new 24″ panel quilt pattern, Jerky. If you don’t already know, Heidi always gives her patterns a foodie name because she loves to cook.

Rachelle created a new modern pattern called Kenosha. I love the secondary design that happens in this striking quilt pattern.

Pat, our Rose Queen, has another fun and fast throw sized pattern for you called Zamora. If you didn’t know, Pat always names her quilts after a rose. Yep, Zamora is the name of a rose. Zamora only uses three main fabrics plus a binding fabric. Sew easy piezy. We still have a few Zamora kits left, too.

Get your Zamora in Indelible kit HERE.

We also have a new table runner pattern this month called Erin.

Get your digital Erin pattern HERE or your print Erin pattern HERE.

I’ve always wanted to make a green and white Double Irish chain for St. Patrick’s Day. I can now check that off my bucket list. The Double Irish chain looks complicated, but I promise you, it really isn’t when you break it down. Give it a try.

I guess I should have done a tutorial for today with Erin, but I’d already gotten Lucky stepped out and photographed before I even designed Erin. I’m sure I’ll do a tutorial for Erin sometime in the future – you’ll just have to stay tuned.

That being said, let’s move right along to our Lucky tutorial.

The first thing we’re going to do is gather up our fabrics.

I’m using a beautiful Hoffman batik collection called Forest Floor. Don’t you just love the greens? With a pop of orange? Love Love Love it!

The first photo shows the background and the greens for the blocks. The second photo shows the border and binding.

Grab your rotary cutter, board, and ruler and let’s start cutting out our pieces!

Now that our pieces are all cut out, let’s start sewing!

Layer a background square right sides together on the corner of a Clover square and draw a diagonal line from corner to corner. I love my Frixion Fineliner pens and my 1×6 little ruler for making my flippy corners and HSTs right at my sewing machine. What are your favorite tools for making yours?

Next we’re going to sew on the drawn line.

Let’s cut 1/4″ away from our drawn line. Did you knou can use these little cut off triangles for a scrappy little project? I’ve been saving mine for a long time, and have even started sewing them into HSTs, but I haven’t started making anything with them yet.

TIP: You might notice in the photo below that my seam is slightly to the right of the drawn line. This is actually on purpose because it gives a bit more room for the seam and my flippy corners are more precise. I learned this little trick from my quilty pal, Mary Lee. THANK YOU, Mary Lee!

Don’t forget to press that flippy corner open.

We’re not done yet! Go ahead and make flippy corners on 2 more corners of the Clover square.

Okay, now we’re talking! Let’s repeat these 3 flippy corners for the rest of the Clover squares while we’re at it.

Finally it’s time to make a Clover block. Yeah! Sew 4 matching Clover squares together with the 4th unpieced corners towards the center so they all meet for the middle of the Clover block. Such a pretty block!

Repeat to make a total of 4 Clover blocks. Don’t you just love that pop of orange???

The next thing we need to do is sew the 4 Clover blocks together with background strips in between the blocks and at each end.

Then we’re going to add top and bottom background borders. Lookin’ good!

Now it’s time to add the side outer borders and then the top and bottom outer borders. And DONE!

Yay! All that is left to do is layer it with batting and backing, quilt it, bind it, and label it.

I hope you enjoyed the Lucky runner tutorial and are super inspired by the new March patterns. Next week we are going to wrap up our Beginner Free Motion Quilting (FMQ) series by addressing borders.

Until next week –

Always,

Tricia @ VRD

2025 Free Motion Quilting (FMQ) Series

Beginner Free Motion Quilting (FMQ) Lesson 6 – Going Beyond Loops Part 2

Happy Thursday to you!

I hope you have all been practicing your Loops and your Loop variations from last week’s Lesson 5. This week we are going to continue Going Beyond Loops with 3 more Loop variations.

If you missed any of our Beginner Free Motion Quilting (FMQ) Lessons so far, you can find them all below:

Lesson 1: All the Background Information

Lesson 2: Let’s Doodle!

Lesson 3: Practice, Practice, Practice

Lesson 4: The Write Way to Doodle!

Lesson 5: Going Beyond Loops Part 1

I have also added a section over on the right side of the blog entitled 2025 Beginner Free Motion Quilting Series where you will be able to easily find all of the lessons in the future so you don’t have to sift through posts to find them.

If you’ve been having fun playing around with the Loop variations from last week, good for you! I hope you came away with the knowledge that you can add any kind of motif to the basic Loop design to change it up. Stars? Check! Hearts? Check Check! Elephants? Sure, why not. You just need to practice drawing an elephant motif without lifting your dry erase marker on your handy dandy white board. Practice until you are happy with your motif. Then practice drawing your Loops and motif together on your white board. Again, practice until it feels natural and you are not lifting up your dry erase marker (this is super important!). Then make a fresh practice square, take a deep breath, and just do it! This is my basic method for creating endless Loop variations. I’ve done hot air balloons and palm trees, to name a few. You can too, it only takes practice. And courage. You. CAN. Do. It.

Are you ready? Strap on your helmet and put on your your seat belt cause here we go!

#4 Double Loops

I think you’ll love these Double Loops – they are quick and fun and look great on most any project except maybe Civil War reproductions.

Check out my Double Loop example below. This is a close up of the quilting on my cover quilt for my Sunny Day VRD Rose Card pattern. Yes, I quilted a simple Feather design in the borders. LOL!

So, let’s grab our white boards and give Double Loops a try. Go ahead and draw a loop, then loop around the loop. Easy and very fun.

Now let’s practice connecting our Double Loops together.

Go ahead and practice this a bit until it feels comfortable.

It’s time to try this design on a practice square on your sewing machine. Below, you can see how I make Double Loops. It takes a little practice, but because you’ve already been working on the basic Loops design, adding a second loop around your first loop won’t take as long to master. So, get to it and quilt some Double Loops!

Wasn’t that a fun design? Just imagine all the quilts you can finish using this quirky and cool FMQ design? And don’t forget that you can change it up and make it entirely your own designs.

#5 Leaves

Leaves are a super element to have in your FMQ toolbox because leaves are all around us from the fabrics to the quilt blocks to the trees right outside the window. Can’t you picture how leaves will look quilted on your autumn quilts?

You can create leaves in just about any shape or style you can imagine. For this lesson, I’m going to show you a simple leaf or two. Feel free to use your imagination to come up with your own leaf shapes, too.

Here is a simple heart-shaped leaf for you to practice.

Once you get the leaf shape down, now it’s time to add it to your basic Loop design.

Go ahead and practice the Leaf variation until you can do it smoothly. Then it’s time to try it on your practice square with your sewing machine.

Here’s a quick video clip of me quilting the Leaf and Loop variation.

Practice. Practice. Practice.

#6 Flowers

Our last variation is adding flowers to our basic Loop design. Like leaves, you can create any flower shape you want or you can even mix different flower shapes together with you loops to create an entire quilted flower garden. For today, we are going to focus on Daisies.

Daisies are simple to make. A circle followed by a ring of petals. Add an echo around the daisy if you want as this will make your flowers stand out.

Now it’s your turn to doodle and draw some flowers on your white board. What’s your favorite flower? Can you draw it without lifting your dry erase marker?

Next we’re going to add our Daisy to our basic Loop design. Go ahead and practice this variation on your white board.

Okay, time to quilt the Daisy and Loop variation on your practice square with your sewing machine. You can do it. Of course you can.

Below is a short video of me quilting Daisies and Loops.

I hope you are having fun with all of the designs and variations we’ve been exploring. Keep practicing as often as you can, but don’t wait too long before you quilt a small project for real. A snack mat, place mats, table runner or other small project is the perfect sized project on which to hone your skills. So hop to it and get quilting the FMQ way.

I hope you’ll stop back in 2 weeks as we wrap up our Beginner FMQ series with our final lesson – Quilting Borders with Simple Designs. Next week we’ll be showing our March patterns and a fun quilt tutorial for St. Patrick’s Day.

Until then –

Always,

Tricia @ VRD