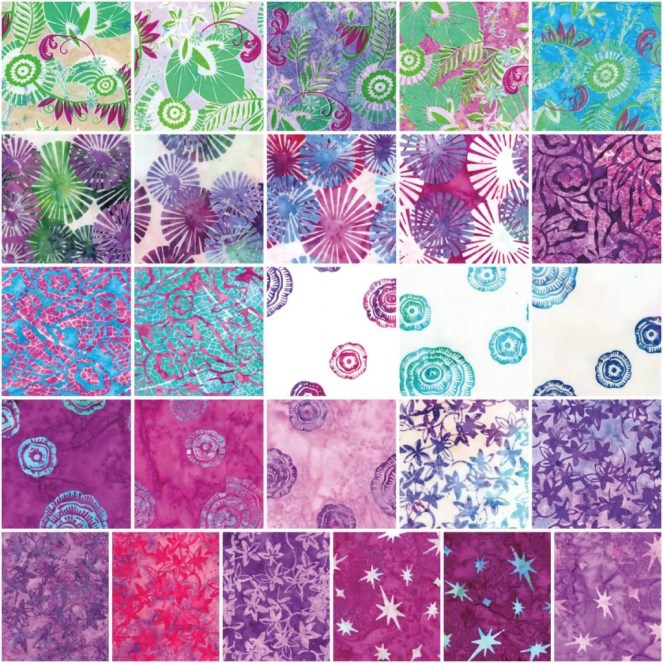
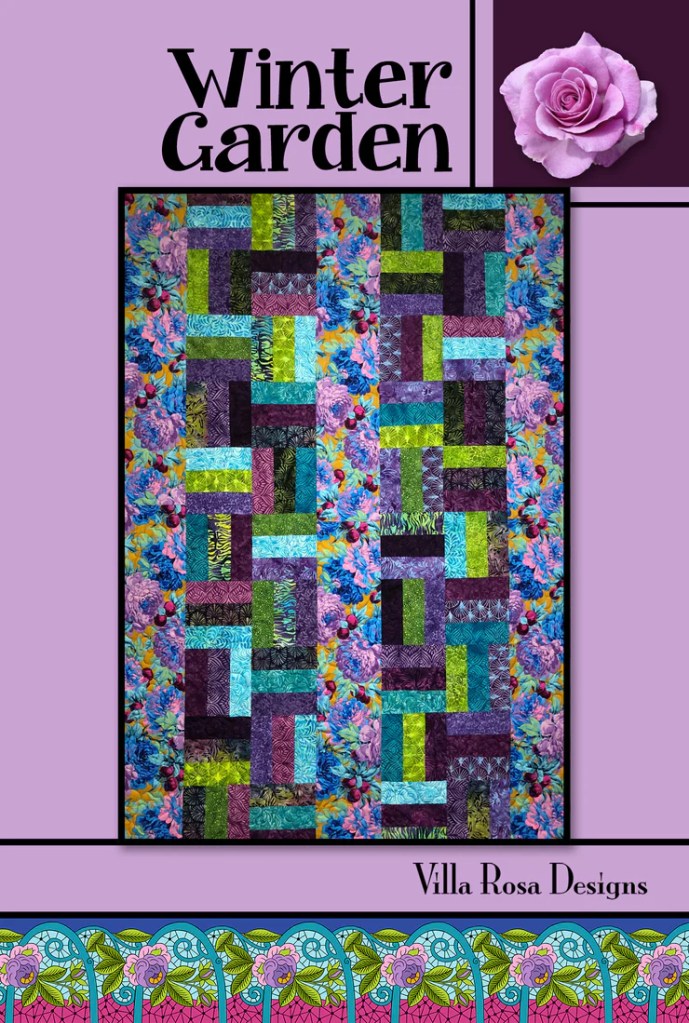
Pat’s new fabric collection for Riley Blake Designs, BEDAZZLED!, is finally here!!!
I’m so sorry, but I have to pause our new Free Motion Quilting series so I can celebrate Pat’s new collection. I promise to continue our FMQ series in a couple weeks because I have 2 new tutorials to share, featuring Pat’s Bedazzled! collection.
Here she is – Pat Fryer, owner and Rose Queen of Villa Rosa Designs and designer for Riley Blake Designs
Bedazzled
A yummy color-drenched batik collection with glitter accents because one can never have enough glitter!
Or you can find the Bedazzled fabric by the yard HERE
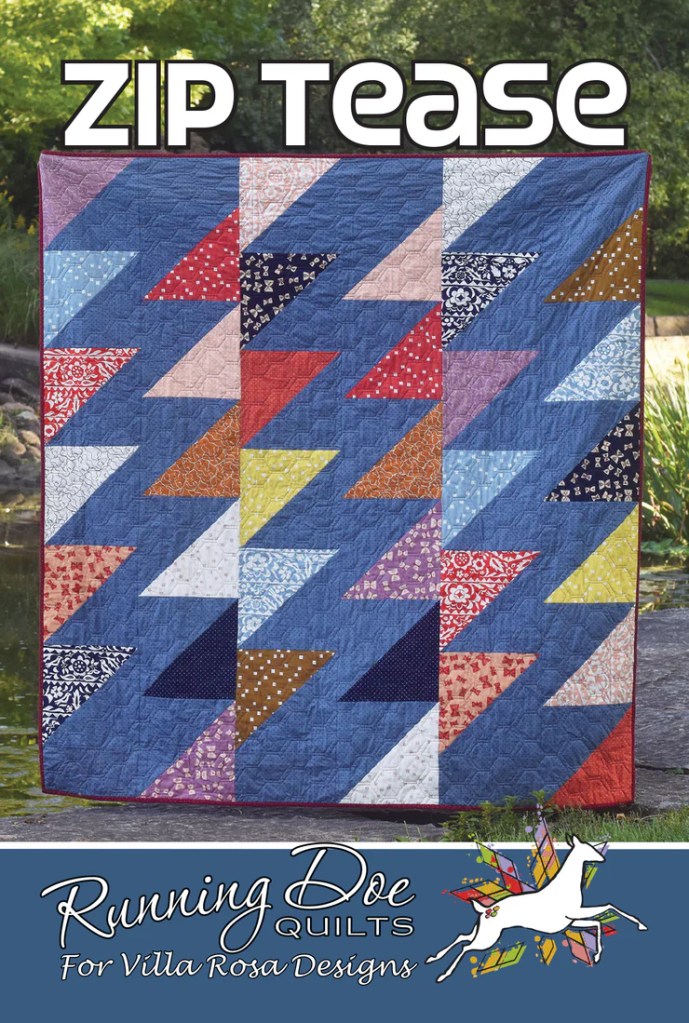
Although they aren’t ready yet, soon we will have kits for Baby Zip Tease in Bedazzled!, so check back soon. I’ll add the link HERE just as soon as it’s available.
BUT WAIT! There’s MORE!
There is one more piece to the collection – a one of a kind Bedazzled tin just the right size to store your VRD patterns! I’m not sure how many patterns it holds yet because I haven’t received my tin yet, but I’ll be sure to let you know when I find out. There’s no question about how to store your VRD Rose Card patterns now. Get yours ASAP, because I know they’ll sell out quickly.
I was at my pal, Robin’s house (Hi Robin!) the day I created this tutorial. We have sew days as frequently as we can. Robin has a lovely sewing room upstairs in her farmhouse with room for at least 2 people to sew.
In fact, I leave one of my sewing machines there all the time so I don’t have to drag one back and forth. Her husband, Rich (Hey Rich!), threatens to charge me rent. LOL!
Robin and her big kitty boy, Tigger. Tigger has a very important job — to hold down any project Robin tries to work on! LOL! Anyone else have one of these special furry helpers?
So let’s get started with our Baby Zip Tease tutorial!
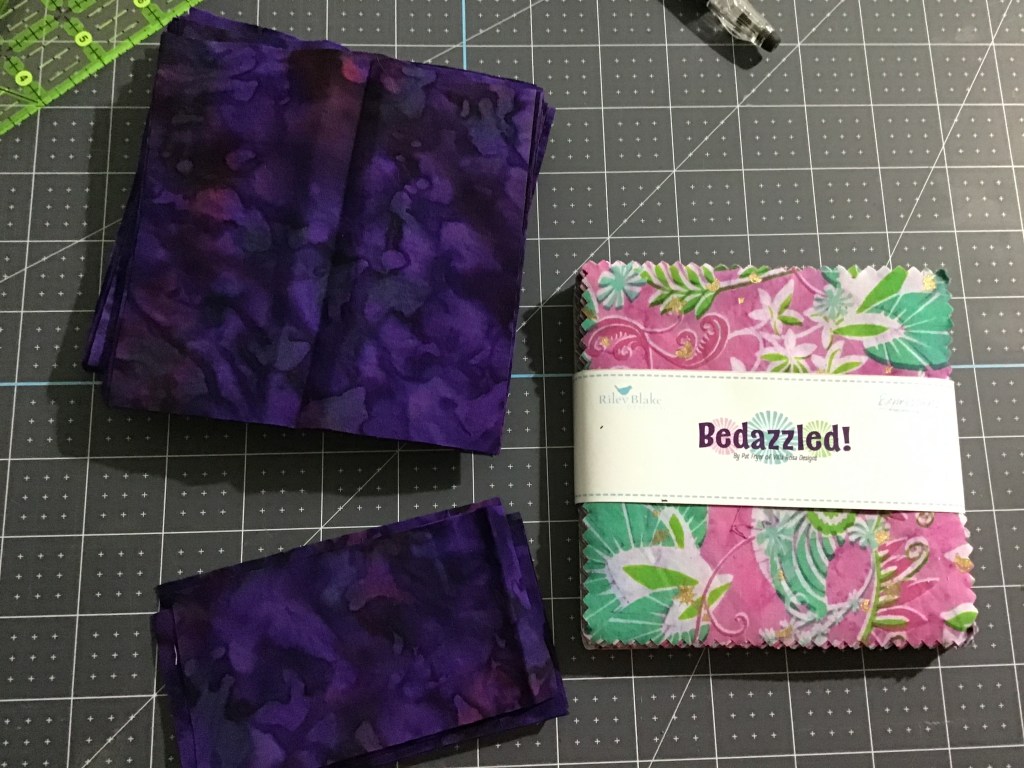
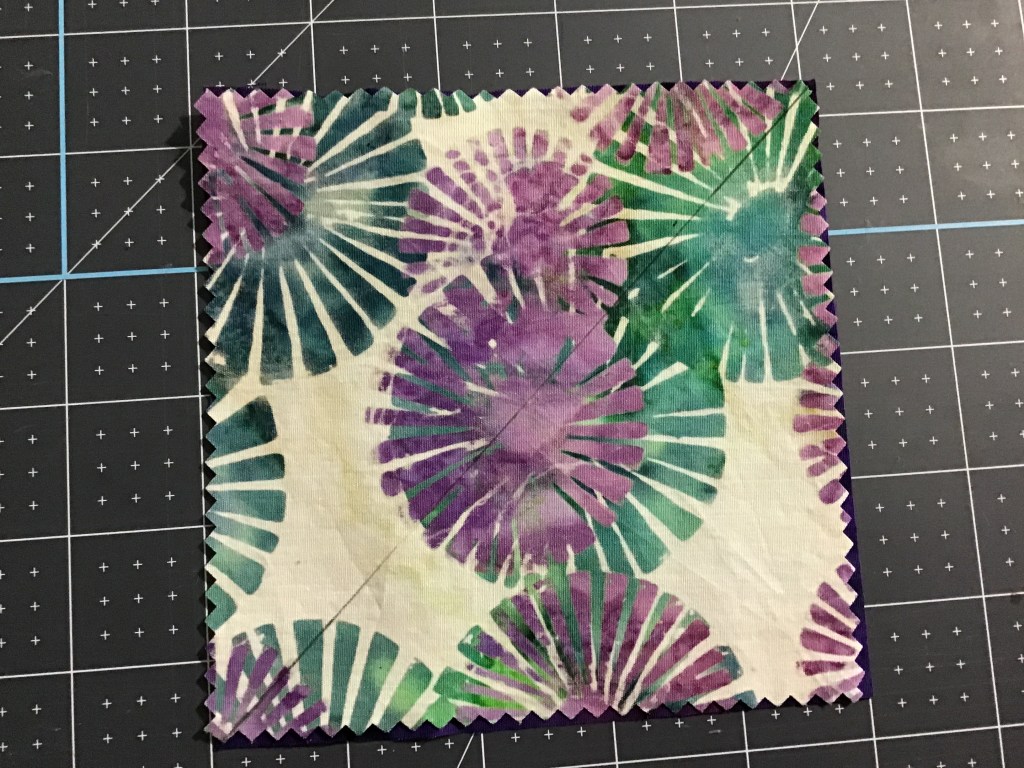
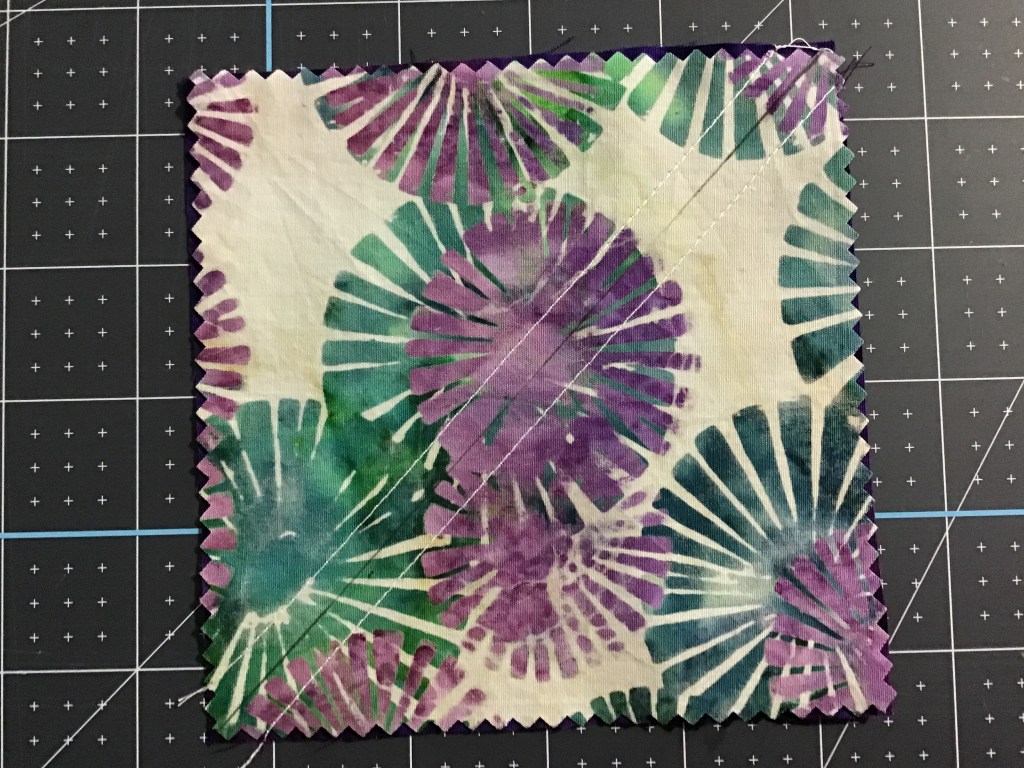
Of course, the first thing we need to do is gather up our fabrics and cut what we need for the project. I’m using a 5″ stacker from Pat’s new Bedazzled! collection and a yummy Riley Blake Designs Expressions Batik basic.
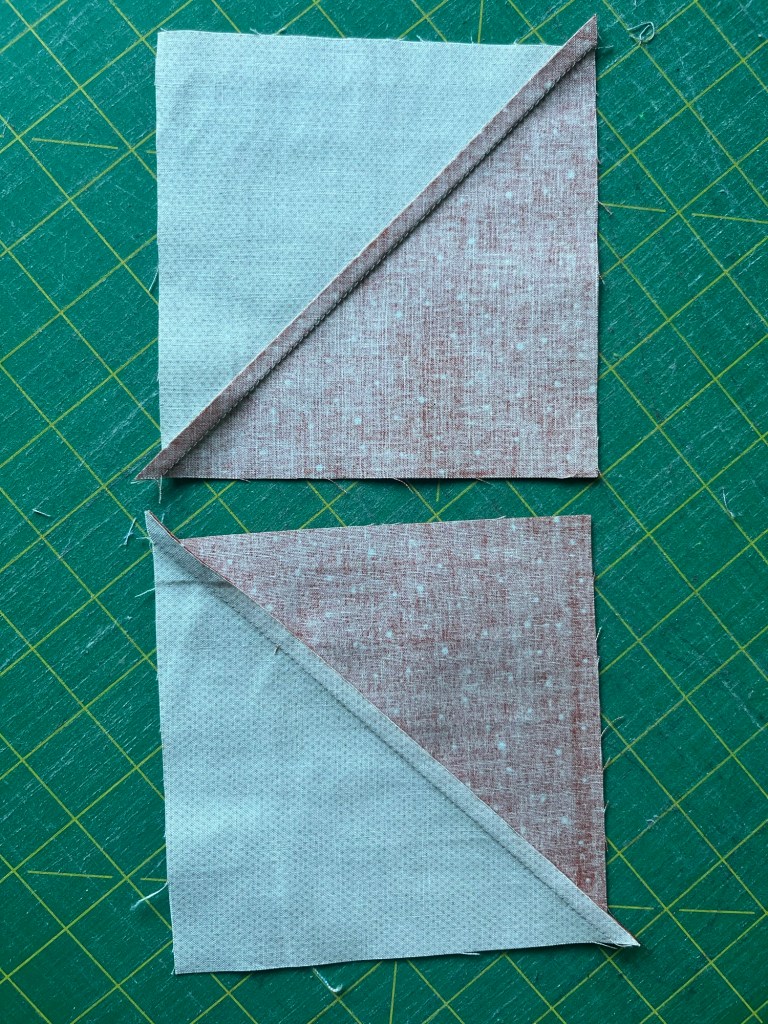
Let’s make some Half Square Triangles (HSTs).
Photo 1: Layer a print square right sides together (RST) with a background square. Draw a diagonal line from one corner to the opposite corner.
Photo 2 and 3: Sew 1/4″ away from both sides of the line.
Photo 4: Cut apart on the drawn line.
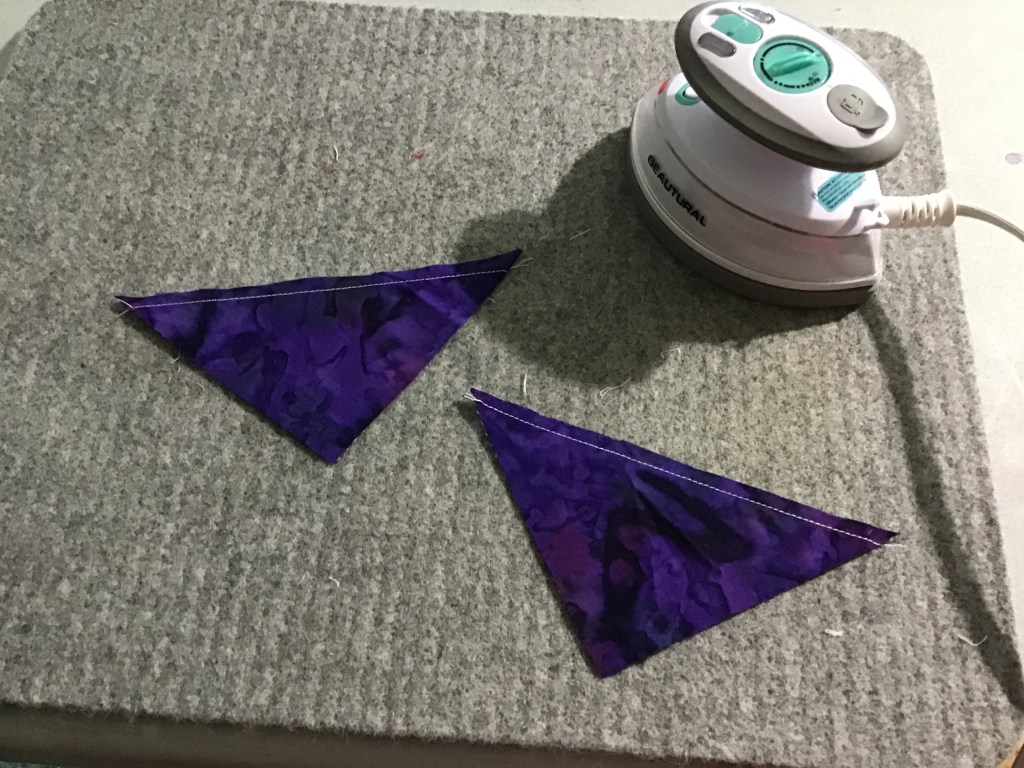
Photo 5 and 6: Press open to make 2 HSTs.
123456
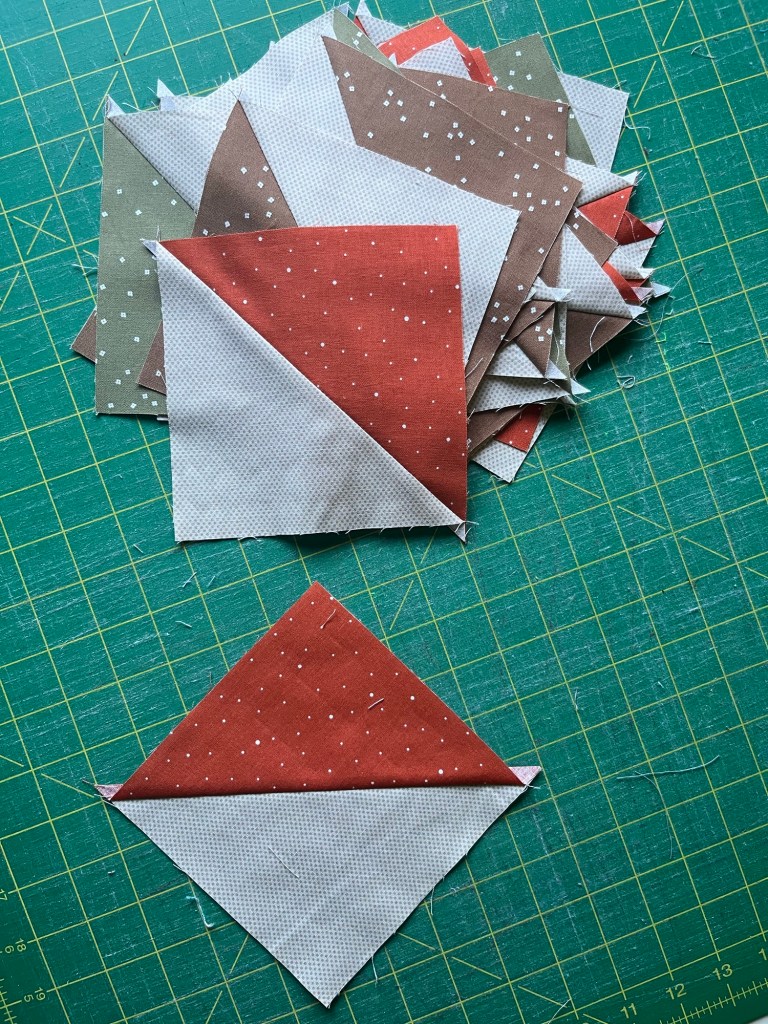
Don’t stop now, go ahead and make the rest of the HSTs .
Square up and trim your HSTs. Cut off all the little “dog ears.”
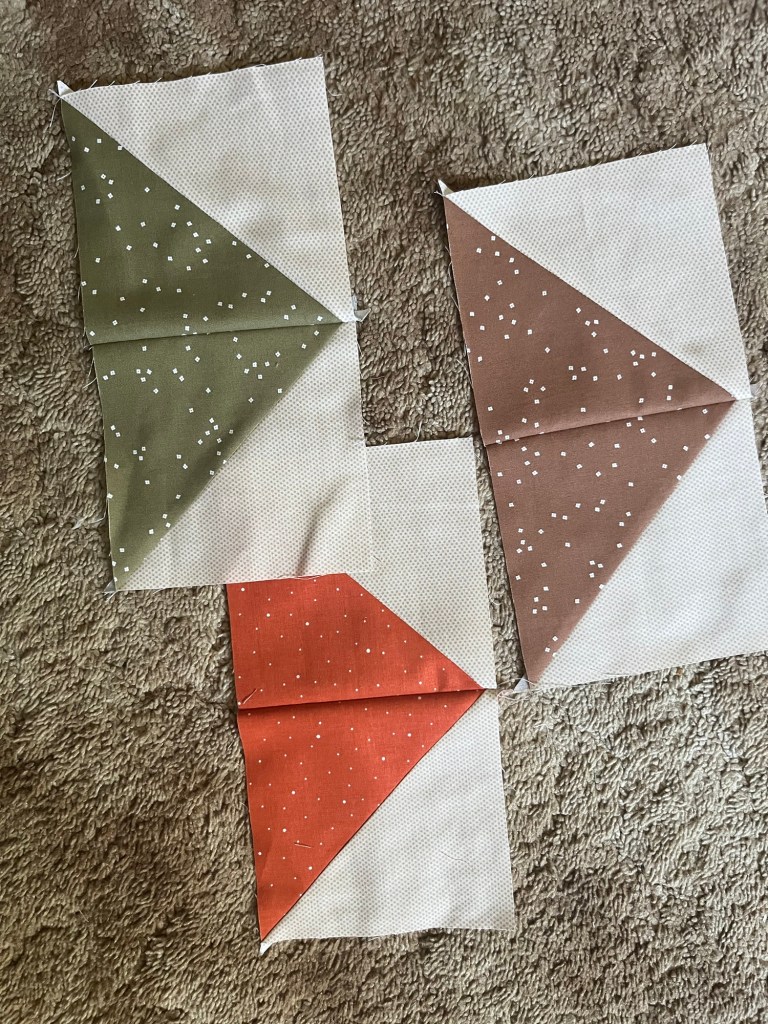
At this point, you can sew your HSTs into rows and then sew the rows together. But where’s the fun in that???
I wanted to make sure the colors and fabrics were spread evenly throughout the quilt, so I put the HSTs up on Robin’s flannel wall and spent some time moving HSTs around to distribute colors and patterns. Argh! Sometimes this part of the process takes the most time.
This was actually a very important step for me because I kept turning the HSTs the wrong way. This was certainly one quilt project that being left-handed made more difficult. Of course, Robin pretty much just laughed at me every time I had to rotate a block in 90 degree increments until I got it going the right way. SHEESH!
Once I was happy with how it looked, it was time to sew the HSTs into rows. Finally!
Sigh…….I can’t tell you how many times I ended up turning a block on my way to the sewing machine. Time to unsew…….
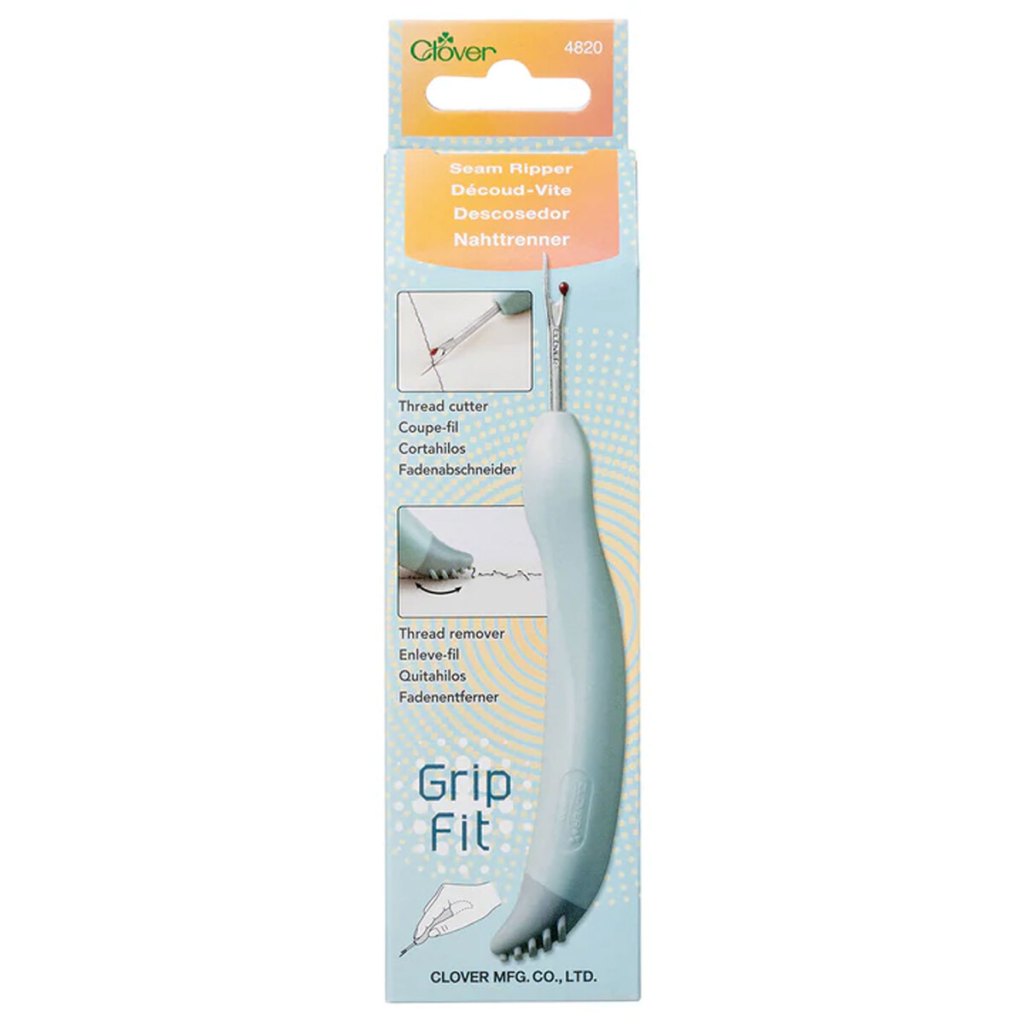
What’s your favorite seam ripper? Mine is the Clover Ergonomic Seam Ripper seen in the photo below, but have you seen Clover’s latest seam ripper?
I just ordered one and I’ll let you know what I think after I try it out. If it’s as good as the one I already have, I’ll probably love it. Just sayin’……
Got that flipped HSTs fixed and survived sewing the blocks into rows – barely! Now it’s time to sew the rows together.
I’m really liking the cool zig zag effect! Let’s keep sewing those rows together! We are making progress!
YAY! Quilt top finished! Woohoo!
Now you get a chance to see how the fabrics of Bedazzled! play together. Aren’t they really great with the dramatic purple background fabric?
Next week I’ll have another Bedazzled quilt tutorial for you. The week after that we’ll continue on with our FMQ series. So please stay tuned!
Be sure to tune into our Fry-Day Live Sale tomorrow for more information and a closer look at the Bedazzled collection. You can find the Live Sale HERE on Fry-Day from 7-8 PM EST. You can also find the Live Sale on Facebook HERE.
I’m excited to continue on our Beginner Free Motion Quilting adventure! Put your seat belt on and get ready to ride!
I hope you had a chance to read last week’s post, which was a lot of information about things to know before you start. You can find Lesson 1 HERE.
Please note that I’m adding the FMQ series to the right side of the screen under the Blog Topic section so that it’s easy to find each lesson as they get posted.
Lesson 2 – Let’s Doodle!
All right! In Lesson 2, we’re going to DOODLE! Yep, that’s right! DOODLE!
Whenever I taught a Beginner FMQ class, I started out with doodling on a dry erase board. I actually bought a class set of boards which came with felt erasers and even markers, which was super for a class with 4-12 students.
Any kind of dry erase board works – you don’t have to buy a special classroom set (unless you plan to teach FMQ – LOL!). You can even find dry erase boards and dry erase markers at your local Dollar Tree store. So if you don’t already have one, they are easy to find and relatively inexpensive to purchase.
Just make sure you are using real dry erase markers (not sharpies!) on your board or else you won’t be able to erase it and use it over and over.
You might wonder why I’m starting off with doodling and not just jumping right into FMQ on the sewing machine.
Doodling gives you the opportunity to develop eye hand coordination and to build muscle memory. Believe it or not, but doodling really does help when you are starting out with FMQ. If you’ve practiced the movements on your board, they will come easier and more quickly when you are working with your sewing machine.
Besides, doodling is fun and relaxing. You can do it while watching TV, during the commercials, listening to your favorite audiobook, or even while waiting at the doctor’s office! AND you have the ability to erase your doodling whenever you want to. Yay!
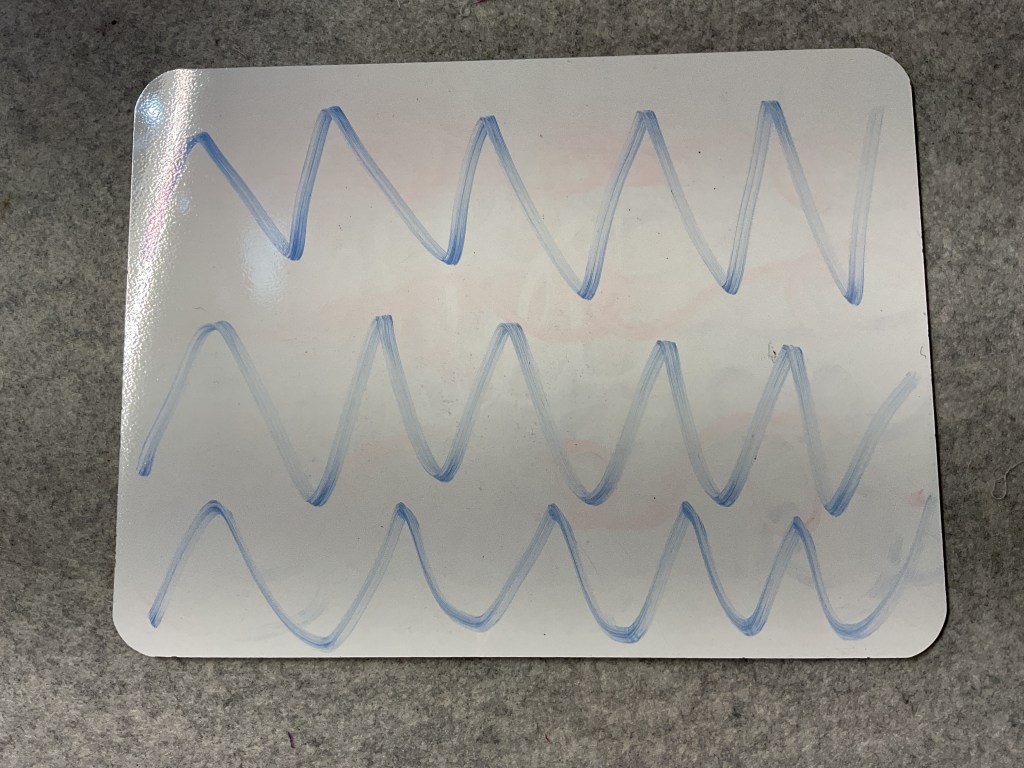
Zigzags
Let’s start out with some fun zigzags. Zigzags will help us to feel comfortable moving across the board and going up and down at the same time. Like hills and valleys. V’s and W’s. Give it a try. Make sure to connect each shape/letter with the next one.
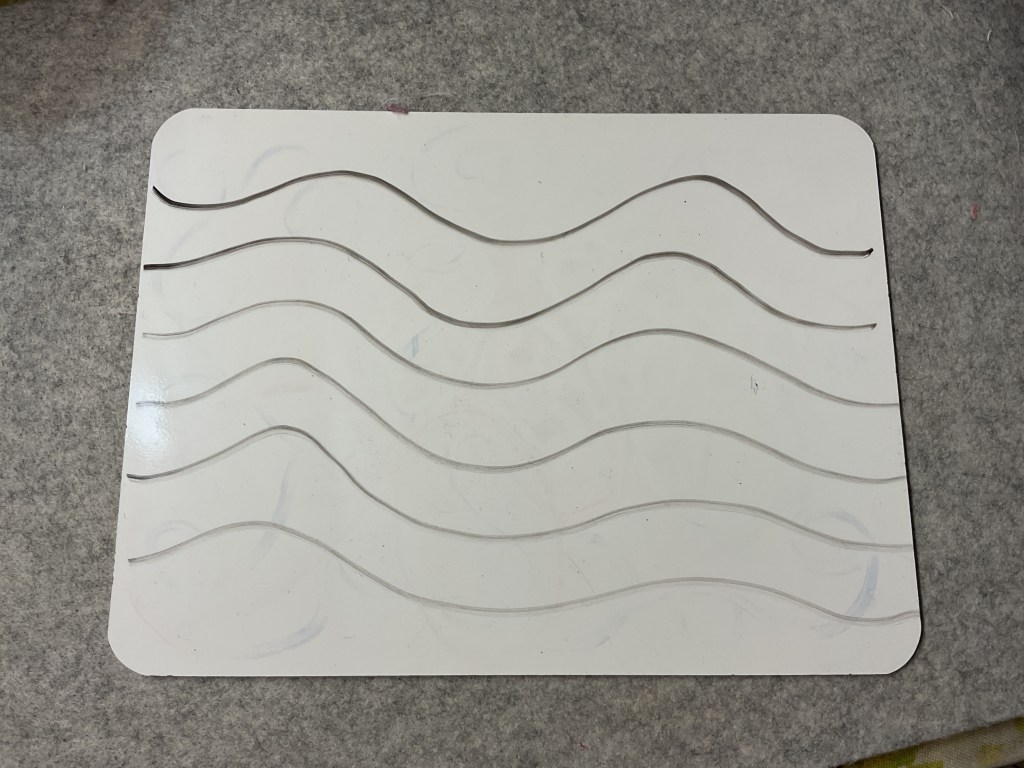
Curves and Waves
Let’s practice some gentle curves and waves on our boards just to get a feeling for the smooth movement. Don’t overthink this, just relax and glide across the board. If desired, you can even practice these motions in the air with your hands and arms. I’ve always been a big proponent of “air writing.”
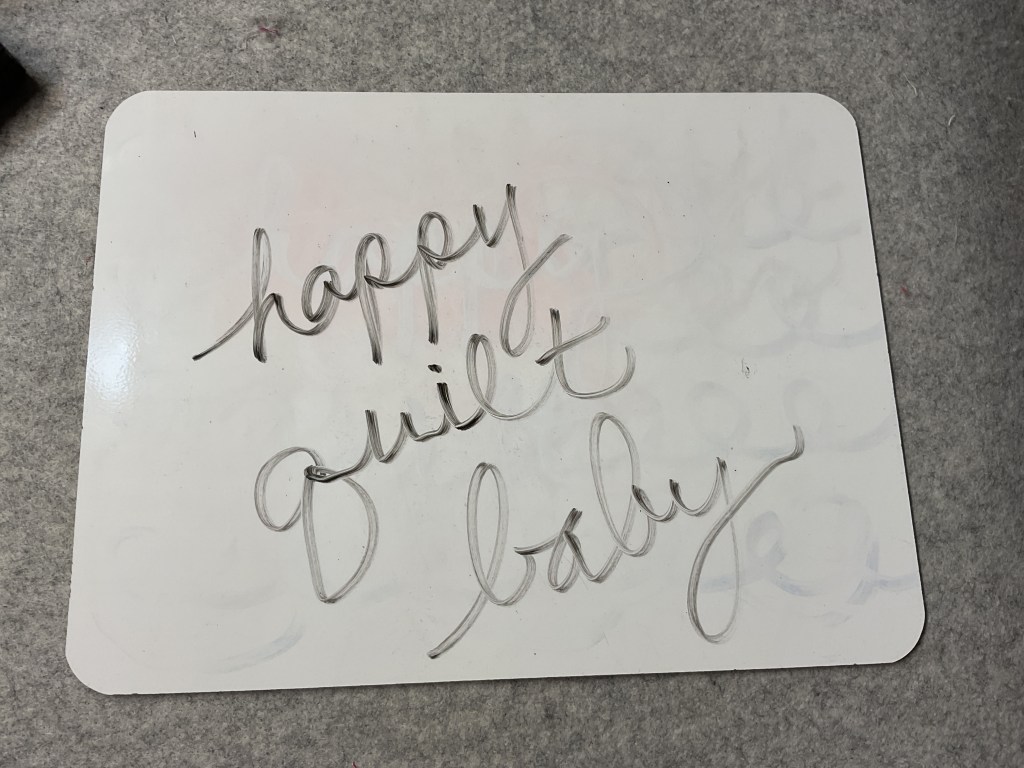
ABC’s
Now let’s try some cursive writing! Believe it or not, but lowercase cursive letters are great practice for FMQ! Seriously! Make sure you are connecting the letters together. I find that the faster I write the alphabet in cursive, the better it looks. Don’t think about the shape of each letter – you already know it – just write it.
Go ahead and write your name in all lowercase cursive letters. You know you want to! Try some other words, too. Just remember to connect the letters together. Feel free to have some fun like I did with my name when I dotted my i’s and crossed my t.
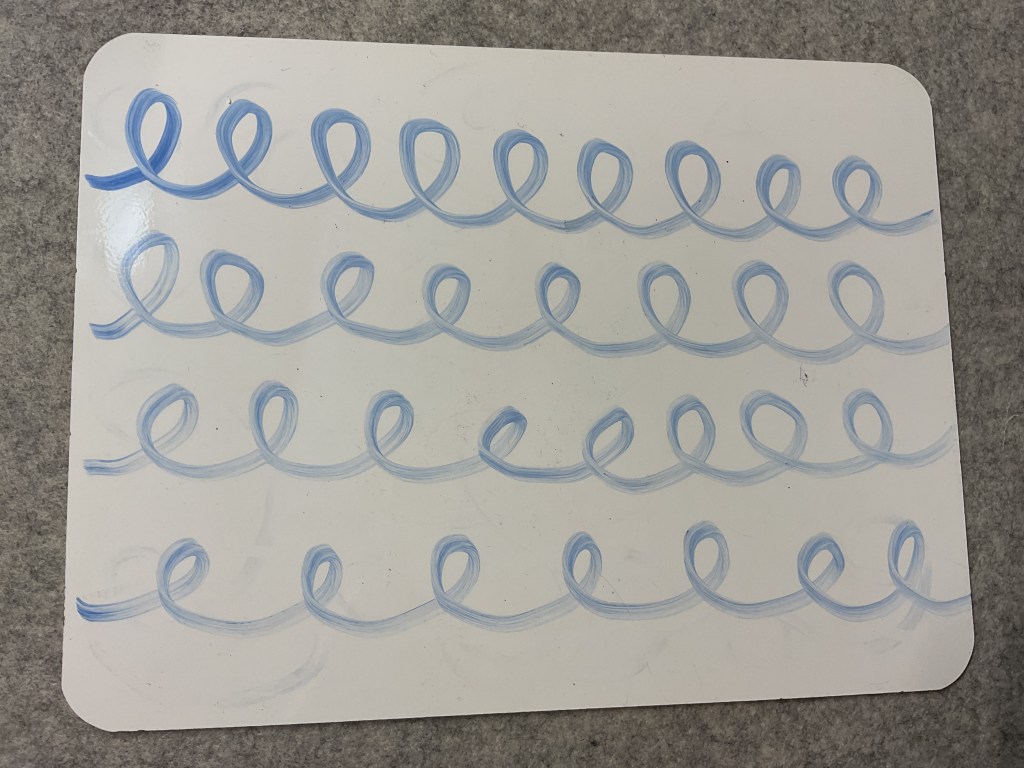
Okay, now we’re going to focus on the cursive lowercase “E” (e) and the lowercase “L” (l). Just keep connecting them together.
After you are comfortable making e’s and l’s, I want you to try alternating the loops. This may be challenging for some of you, but keep doodling until you feel more comfortable with this. Doodle, doodle, doodle.
We definitely want to alternate the loops, or else we’ll get something like this. Yikes! The idea is to move across the board and fill in the white space, not to make clouds and weird flowers.
Once you’ve got alternating the loops reasonably down, we’re ready to add more movement to this design. This time we’re going to move our loops up, down, and across the board while alternating the loops (yep, all at the same time!) so we can fill up the white space.
Try not to overthink things here. Don’t stress yourself out if things aren’t perfect – we’re not going for perfection here. I find the faster I go, the better it looks. Remember, you can keep erasing it and trying again.
Loops!
Wohoo! Pat yourself on the back! You are making loops!
Loops are one of my favorite and best go-to designs. AND it’s the design I start out with when I teach FMQ! Go you!
I’ve found Loops to be more beginner friendly for most people. Being able to cross over your lines gives you a little more feeling of control. I have found, though, that perhaps 1 in 10 quilters have a hard time mastering loops – mainly the alternating of them – so those folks I encourage to move on to stippling/meandering.
Have you ever taken a beginner FMQ class where the teacher starts you out with stippling/meandering? I bet there are a lot of you who felt really frustrated because you couldn’t master the design and may have even quit trying to master FMQ after that class.
Well, I’m here to tell you that –
YES, YOU CAN MASTER FMQ!
So “let’s start at the very beginning, a very good place to start” (kudos if you can name the movie, the song, and the actress for this quote).
And the very beginning is making loops!
I hope you’ll spend a little time doodling this week because next week for Lesson 3, we are going to start working with our machines and our Loopy design. I’d love to see your doodles in the comments or on our VRD Facebook page.
I’ve been itching to do a new series on the blog and decided that I really wanted to do one about Free Motion Quilting, or FMQ for short. I taught beginner FMQ at my local quilt shops for many years, but it’s been awhile since I’ve taught a class that I also thought it would be fun to revisit my FMQ techniques and share them with you.
This series will be aimed at beginning Free Motion Quilters, but more experienced quilters are of course welcome. LOL! I thought I’d start off with an intro post about getting ready to quilt.
Is there anything specific you would like me to address in this Beginner FMQ series? I’ll try to include it.
Let’s get started!
What the Heck is Free Motion Quilting (FMQ)?
Before we can go much further, I’d like to take a minute and talk about what FMQ really is.
A lot of quilters I know use a walking foot and quilt straight lines on their quilts with their feed dogs up. This is great and gets the job done, but this in NOT FMQ.
Ruler work is starting to take hold in my area now, but this isn’t exactly FMQ either, but it has many similarities.
Free Motion Quilting is exactly as the name implies — it is free motion quilting. This means that you, the quilter, are moving the quilt sandwich. Yes, you can FMQ on a long arm quilting machine, but for this series I am going to work from the domestic machine perspective as that is how I roll.
The feed dogs are down (or covered) when you are Free Motion Quilting and you, the quilter, are making things move which then creates whatever design you are quilting. The machine’s job is simply to provide the juice so the needle will go up and down.
Don’t believe me? Watch this quick video:
The needle goes up and down really fast. And that’s it!
If you still don’t believe me, try it yourself. Disengage your feed dogs, attach a FM foot (darning foot) and push your foot pedal to the metal. No hands!
See??? All the needle does is go up and down really fast until you make a thread knot on the back and your thread eventually breaks. That’s it.
YOU are what creates the actual quilting design in FMQ. YOU are in control.
One more thing about true FMQ — we don’t really mark our quilts or try to quilt on a drawn line. True Free Motion Quilting is free.
When I was a beginning quilter, I tried hand-quilting and my stitches were terribly huge. So then I tried machine quilting in the ditch and couldn’t quilt a straight line to save my life. Then I finally discovered FMQ and found out I wasn’t a complete dunce and I really could machine quilt. Yay me!
The Fear of Free Motion Quilting
As a FMQ instructor for many years, I heard a lot of different ideas about FMQ from my students. One of the most repeated statements was a fear of how fast FMQ looks.
Please don’t be afraid of speed in FMQ. YOU are the one moving the quilt around on your domestic sewing machine. The machine itself just powers the needle to go up and down. If you’ve forgotten, watch the video, above, again to remind you.
The machine is not moving anything — YOU are moving the quilt sandwich so the speed at which you move the quilt is entirely up to you. The needle’s job is just to go up and down. What you do and what the needle does are 2 different things. You need to focus on moving the quilt sandwich at a comfortable speed for you, not trying to go as fast as the needle is going up and down. You will need to find the perfect balance for YOU.
Take a deep breath and repeat after me — “My job is to move the quilt. The needle’s job is to go up and down.” Repeat as many times as you need to in order to internalize and believe this statement.
Another fear I have frequently heard was that quilters were afraid of the needle itself. Just like when we are sewing a seam, we have to keep in mind where our fingers are in relation to the needle. So it is with FMQ. Keep your hands away from the needle by repositioning frequently. We’ll talk about this more later in the series.
No fear, okay? With a little practice, FMQ is a lot of fun and it’s very satisfying to machine quilt your own projects.
The Tools of FMQ
Like anything else, yep, there are tools that can make FMQ easier and more comfortable. Of course, the tools I am going to talk about below are the ones I personally use, and may not be what works for everyone. So please use what tools work best for you. If you’re not sure what works for you yet, try out some different ones to see what you like. If you were a student in my class, I would have all of the thing below so that you could try them out. I’ve even had students use my own sewing machine in class.
Sewing Machine
This is an absolute must for FMQ! LOL!
You don’t need a fancy shmancy machine, though, to successfully FMQ your quilts. What you do need is a reliable sewing machine on which you can drop your feed dogs. Dropping (or disengaging) the feed dogs is a lot better than simply covering the feed dogs. The cover can create a bump on your machine bed which may have a negative affect on your FMQ.
A heavier machine is a better choice than a lightweight one because the lighter the machine, the more it will bounce while you FMQ.
Just a heads up — my quilty pal, Mary Lee, found out the hard way that older Pfaff machines DO NOT like to do FMQ. It just about ruined her machine. She ended up buying a Janome.
Janomes are great machines for FMQ. I can say that personally because I’ve had 2 different Janomes. My current one is a Horizon MC8900 QCP. I’m not sure if they even make this model anymore, though, as it’s some years old now. What makes my big machine awesome at FMQ is that it has a large throat at 11″. I know that some domestic machines are being made today with even larger throats. Wowza!
If you are considering a new machine, head to your local machine retailer (which is also one of my local quilt shops for me). Talk to the people, tell them what you need and might want to do in the future with your machine. Make sure you test lots of different machines. Take your time selecting you new best quilting friend. I’ve bought machines online and I’ve bought machines at my local quilt shop. The best part of buying at your local shop is the customer service. You don’t get that online.
Get the biggest throat on your new machine you can afford. Make sure the feed dogs drop. Does it come with all the quilting feet or do you have to buy them separately? Remember, take your time and get the best machine that does what you want it to do at a price you can afford. You can always upgrade sometime down the road if your needs change.
Needles
I found out a long time ago that quilting needles worked better than universal needles for, well, quilting. There is pretty much a needle for any type of sewing you want to do — embroidery, jeans, etc. So why shouldn’t we be using quilting needles for quilting?
Here are the needles I’ve used and been happy with:
Klasse and Schmetz needles are very good and easy to find at your local shop or online. But these days, I primarily use Janome Purple Tip needles for piecing and quilting on my Janome machine. My machine likes these needles best and as I like to keep my sewing machine happy, I use Purple Tip needles.
You might want to check with your sewing machine manufactureror your local retailer to find out what needles they recommend for free motion quilting on your particular sewing machine.
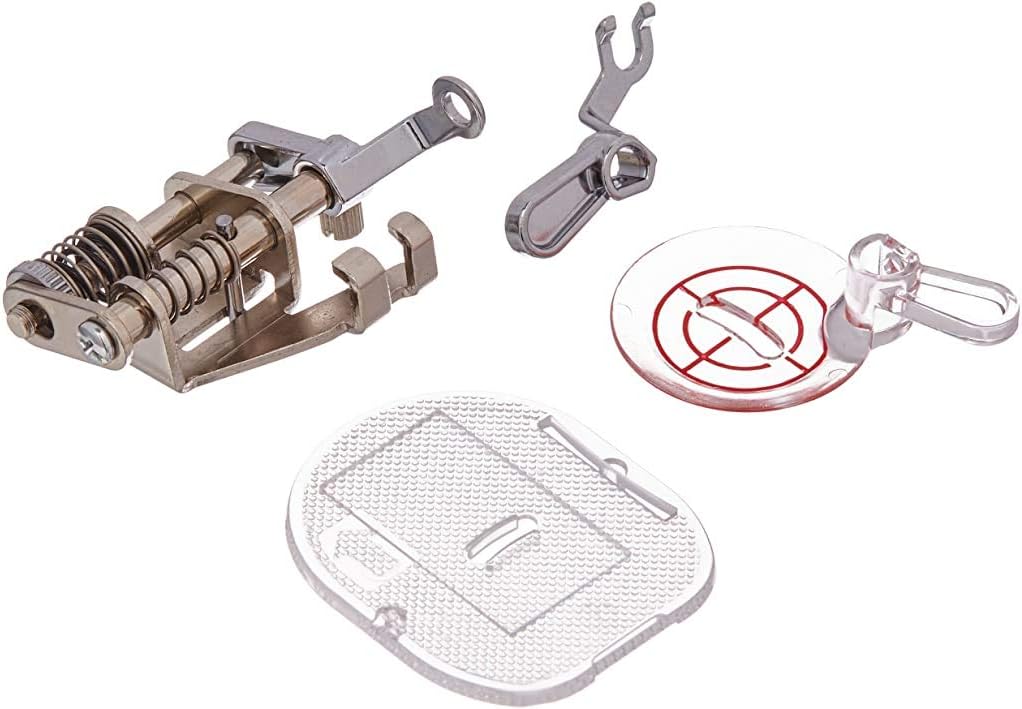
Sewing Machine Foot
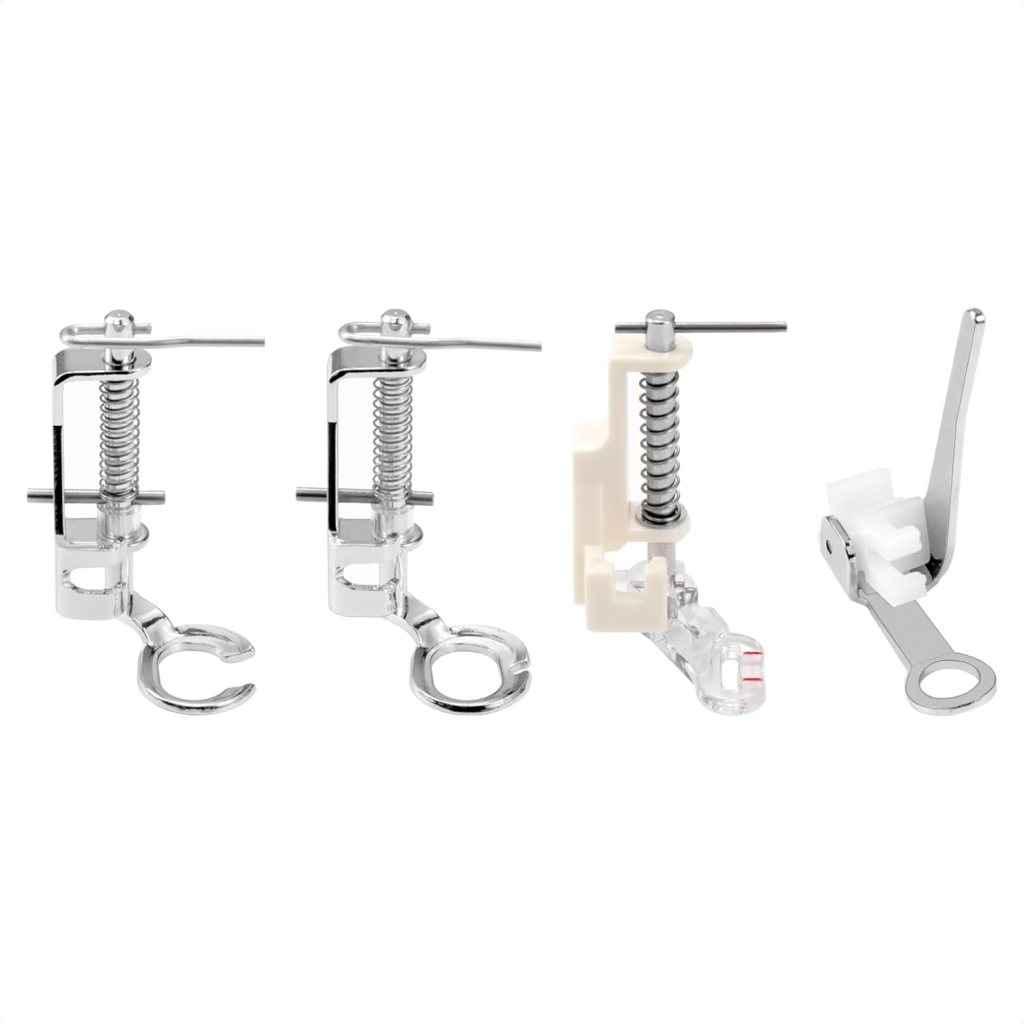
In order to do FMQ, you will need a darning foot, which is also called a FMQ foot or a hopping foot.
Please make sure to check your sewing machine manual to find out what type of shank your machine has. These days most are low shank, but there are also high shank and slant shank.
If you are fortunate, your sewing machine might have come with a set of quilter’s feet which usually includes a 1/4″ foot for piecing, a walking foot for straight line quilting, and a darning foot for FMQ. If your machine didn’t come with a darning foot, you will need to purchase one. Please make sure to check your sewing machine manual to find out what type of shank your machine has. These days most are low shank, but there are also high shank and slant shank machines. A good place to start is your machine retailer who will hopefully have the foot you need to fit your sewing machine. If you cannot find one that matches your machine, there are different generic feet available out there.
Here are some darning foot examples.
When it comes to the darning foot I use on my machine, I have a convertible foot that came with my machine, but can be bought separately.
You might wonder why I like this FMQ foot system the best. First, it work great with my machine. Second, I prefer an open toe for my FMQ foot and this set has one. And third, it doesn;t hop up and down — it’s stationary, so FMQ is smoother, which improves my quilting.
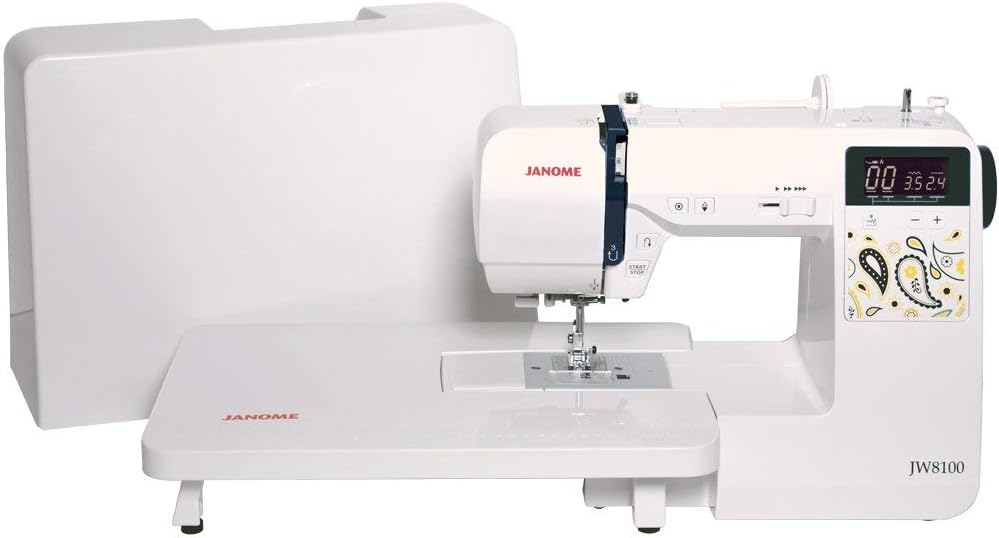
Extension Table
Does your sewing machine have an extension table? My Janome does as do my 2 smaller Brother machines. An extension table is a great thing when you are doing FMQ because it gives your hands somewhere to rest while you work. Most sewing machine beds are pretty small which doesn’t give you much room to work. An extension table is like a super secret FMQ weapon!
If you are lucky, your sewing machine came with an extension table built exclusively for your machine model. If you don’t have one, check with your local machine retailer to see if there is one that fits your machine. Of course, there are generic extension tables too, but I personally feel that they don’t fit your machine as well as one specifically built for that model.
An example of a sewing machine with an extension table.
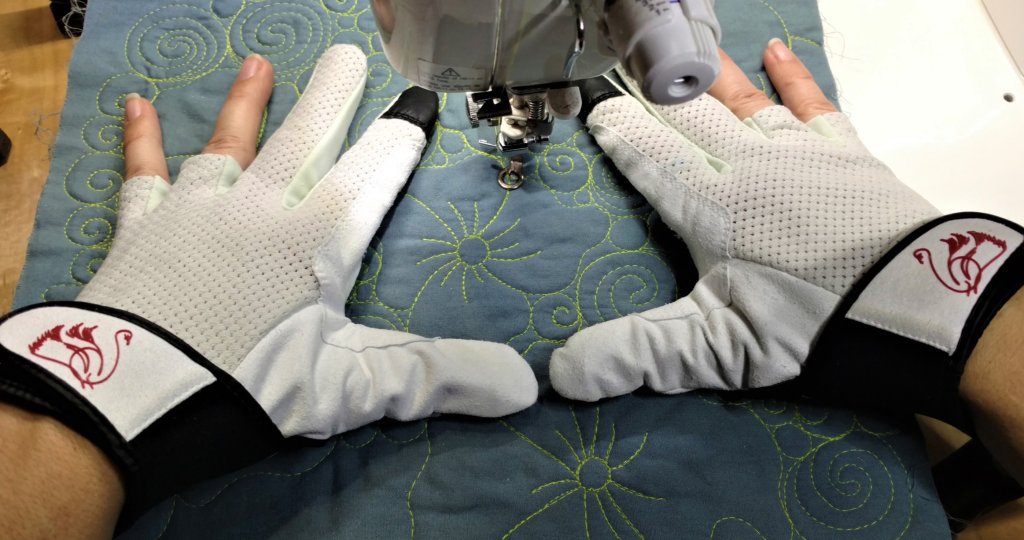
Gloves
When I first began FMQ, I didn’t even know there were gloves out there for FMQ. I saw my first pair of gloves in a lovely urban quilt shop called Quiltology in Chicago (the shop is now closed and morphed into a personal design studio) when I was at a teaching conference years and years ago (I slipped away for a few hours one afternoon and took a cab to the shop). The first pair of gloves I ever used were called Machingers.
Wow! What a difference in my FMQ when I started using gloves. I had much better control over the quilt sandwich and I had better gripping power. The only problem I experienced with Machingers was that the elastic wrists stretched out after a while and the gloves were kind of loose.
Eventually I stumbled onto Grabaroos. They fit more snugly than the Machingers and were nice and cool, even when I was FMQ in the middle of a hot summer day in my un-air conditioned studio, but the fingers were a bit too long for me. But they worked great and I kept improving my machine quilting. Alas, the wrist elastic also stretched out and I went through several pairs a year.
Then some years ago, I went to a Quilt Market Schoolhouse lecture and found the perfect machine quilting gloves for me! Swan Amity gloves. Yep, I’ve talked about these gloves before. I love that they are leather and they have an adjustable wrist strap so they fit perfectly every time. And they last a long time! My first pair lasted for years and I’d still be using them right now except I bought another pair a a couple years ago.
Do you have to have gloves for FMQ? No, not really. BUT, like a sewing machine extension table, quilting gloves are a secret weapon in your FMQ arsenal.
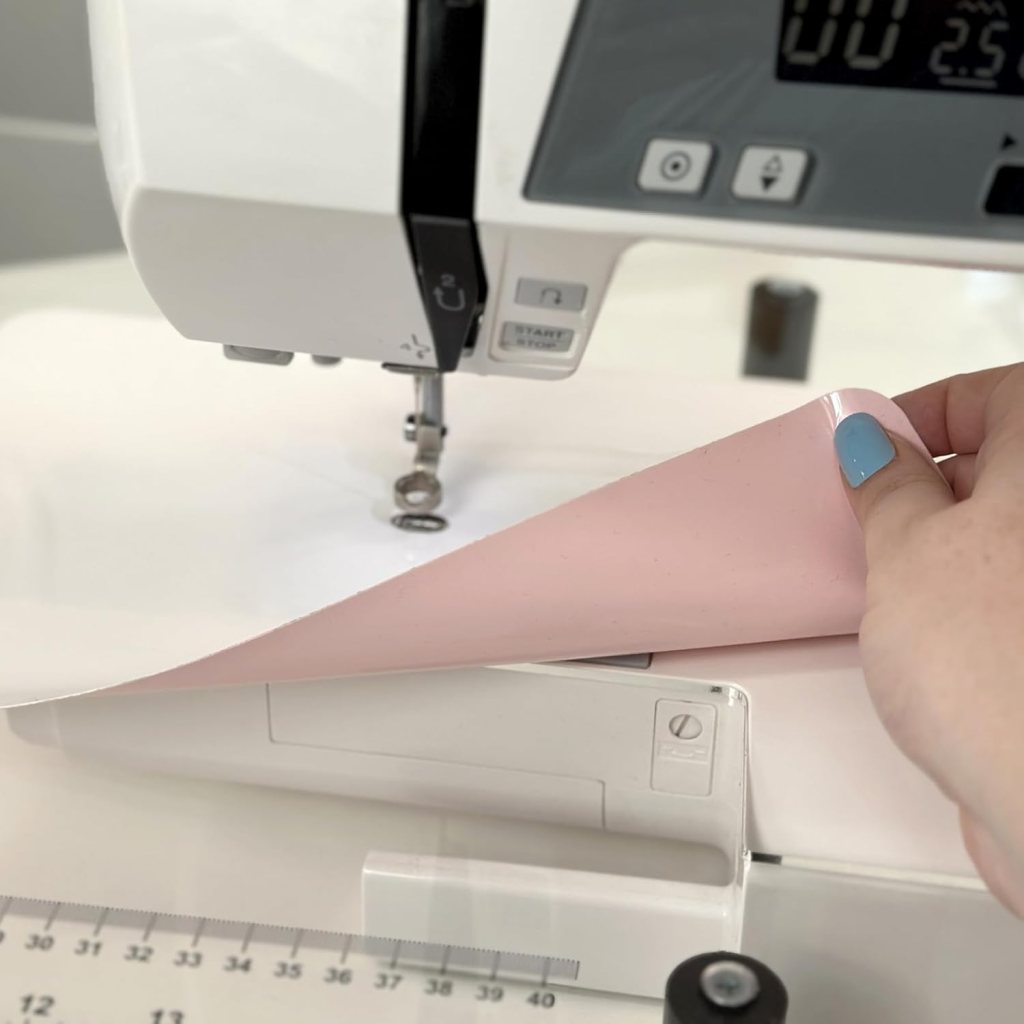
Supreme Slider
As I’ve become a more experienced free motion quilter, I rarely use my Supreme Slider anymore. But it is a good tool to have around so that when your quilt sandwich just won’t slide nicely on your sewing machine bed, you can take a quick break and slap on your Supreme Slider. Voila! Your quilt sandwich now slides around for lovely consistent smooth stitching.
A Supreme Slider is a super slippery Teflon sheet that sticks to your sewing machine bed. It has a tacky back that is reusable — you just need to dampen it and pat it dry so it sticks again.
Just a note — do make sure your Supreme Slider is tacky and sticks to your machine bed. If it isn’t sticking, you will sew the thing to the back of your quilt. Been there, done that. Learn from my mistake.
A Supreme Slider is a very thin slippery sheet that sticks to your sewing machine bed.
A Supreme Slider really does improve your FMQ by reducing friction between your quilt sandwich and the sewing machine bed.
Sewer’s Aid
I’m sure I’ve talked about Sewer’s Aid before. It is another one of those FMQ tools that are great to have around when you need them, although you might not use it very often. There are times that I get so frustrated with my FMQ — those days when no matter what I do, my thread keeps breaking. UGH! So, what do I do??? I drop beads of Sewer’s Aid all over my spool of thread, re-thread my machine, take the bobbin out and put it back in, and then I get back to the business of FMQ.
I call this stuff liquid magic!
Sewer’s Aid is a polymer liquid you drop onto your spool of thread which then helps your thread to pass smoothly through the machine without breaking. Yup, it reduces friction for the thread just like the Supreme Slider does for your quilt sandwich.
Do you have to have all of these things to get started with Free Motion Quilting? Of course not, but I am a proponent for using tools to make sure I achieve the positive results I want. The tools, above, help you to be more successful with FMQ. Of course, there are lots of other FMQ tools out there. What are your favorites?
Thread
Have you looked at thread lately? There is so much to choose from these days. When I first started FMQ, “machine quilting” were bad words in the quilt community so we free motion quilters used invisible thread because it supposedly looked more like hand quilting (naw, it didn’t look anything like hand quilting). Eventually, FMQ became its own art form with its own super stars. Now your choices of thread are literally mind-boggling.
I guess you could call me old school because I prefer 100% long staple cotton thread for piecing and FMQ. Over the years, I’ve tried other types of threads, but I always come back to my cotton thread. I like how it quilts, how it looks, and my machines have always liked cotton thread the best.
So, what kind of thread should you use? These days, pretty much anything goes. My suggestion is to try out different types of threads and see what you — and your machine — like the best.
I do caution you, however, about using old spools of thread. Thread can weaken over time, so as economical and green as it sounds to use old spools of thread, I recommend that you steer clear of them. You don’t want you quilt to fall apart someday down the road.
Books, Websites, and More
As a former teacher and librarian, of course I have a list of helpful books for FMQ. Tehehe….
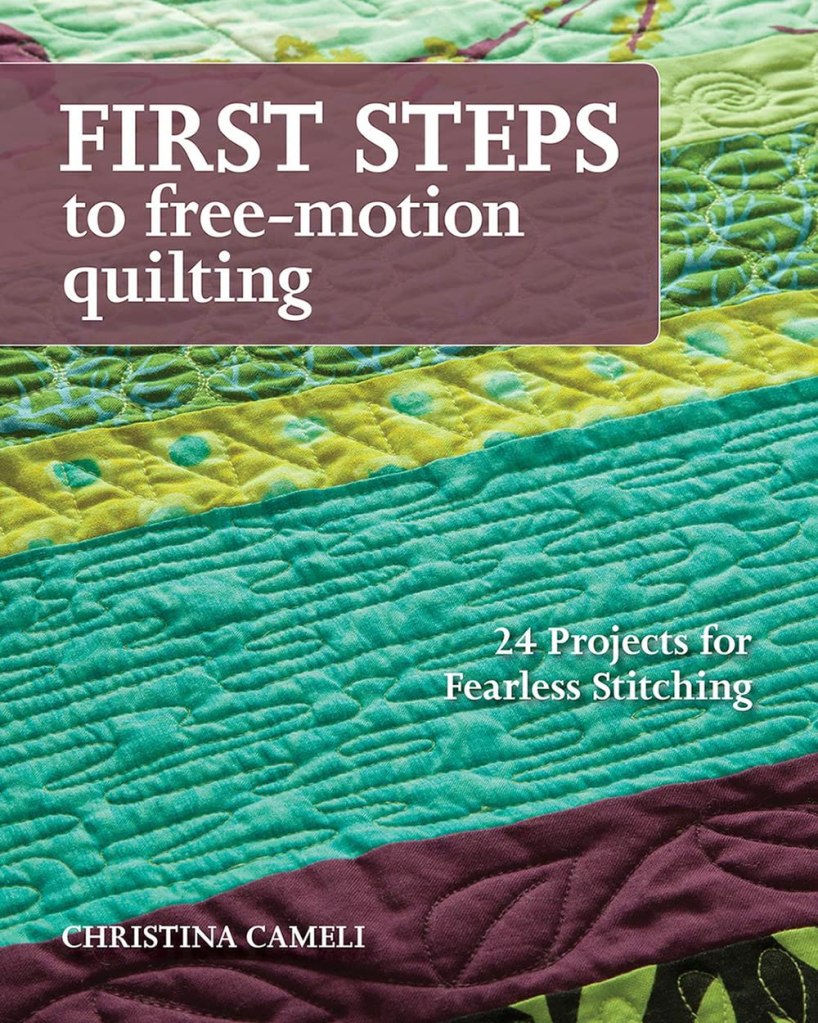
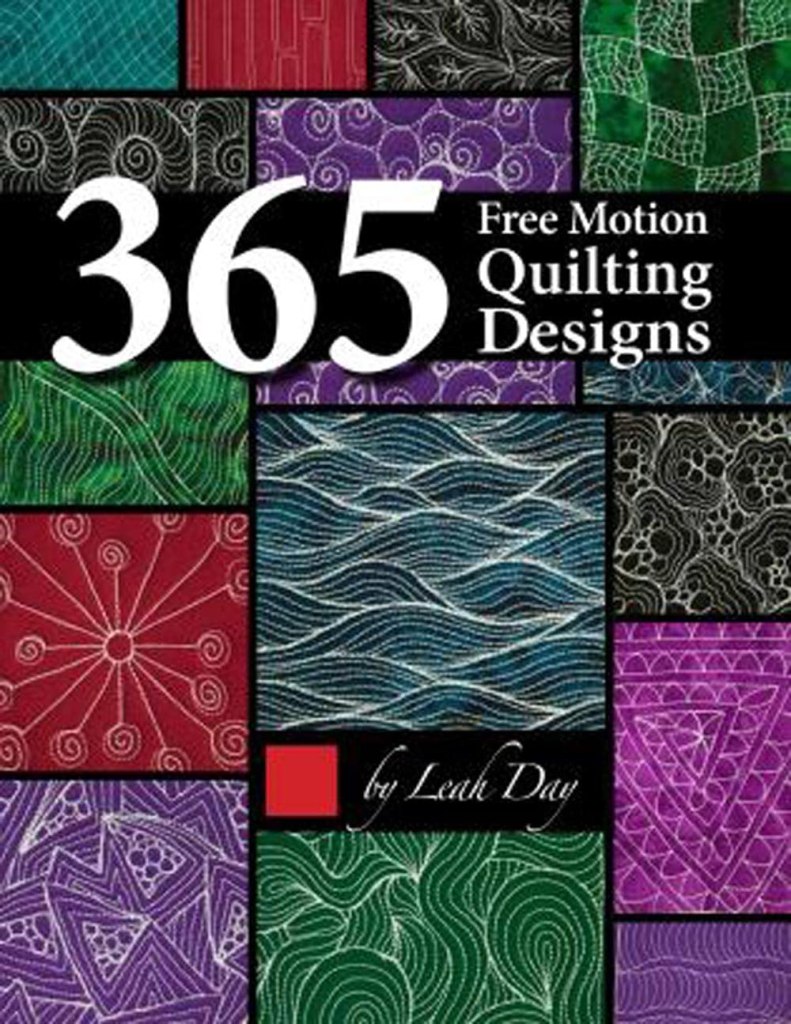
How Do I Quilt It? Christa also has quite a few books out there on machine quilting.
Leah Day was probably the first Free Motion Quilter I ever actually saw in action on the Internet.
365 Free Motion Quilting Designs This book is out of print now so if you see it, snap it up. Years ago Leah Day challenged herself to do a new FMQ design every day for a year. On her website she has 100 of the designs as free tutorials.
These days, you can find tons of beginner FMQ videos, blogs, and how-tos online. Just make sure they are giving you quality information. There are many different sewing and crafting academies online, too, where you can take video classes. You might want to check them out.
Well, I think that’s enough introductory information today. Join me next week for more FMQ!
It’s been a long time since I jumped on here for a tutorial, but I finally got this one put together just for you!
I was looking at some panels in the shop recently (to see my tour of the VRD shop, go HERE) to sew up into a quilt. I was SEW inspired by the National Parks panels and I LOVE that there are a couple of different choices. Have you seen these yet???
UtahCalifornia
You can find the Utah panel HERE and the California panel HERE.
We also have some awesome Rose Card patterns to showcase these great panels!
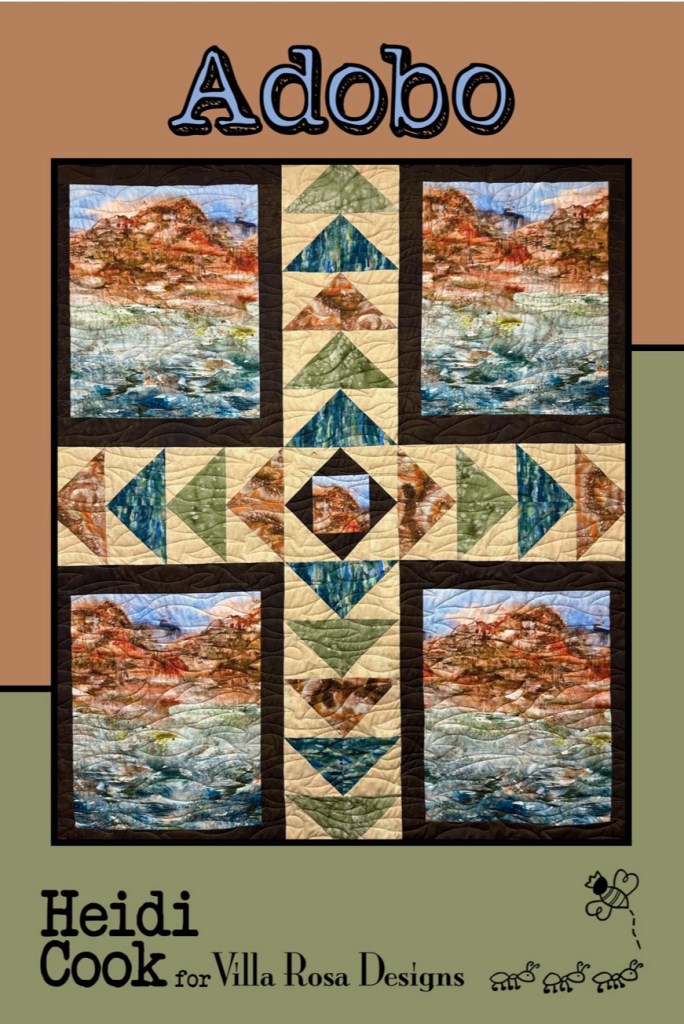
Both are fun and amazing patterns — of course, I might be a little biased, since one is my sister’s pattern and the other one is mine. LOL! 😁
If you don’t already have these great patterns in your stash, you can find digital Picture Perfect HERE, digital Adobo HERE, print Picture Perfect HERE, and print Adobo HERE.
For today’s tutorial, though, I’m going to do Heidi’s pattern Adobo because I really want to use the Riley Blake Utah panel.
VRD Adobo Quilt Pattern Tutorial
GUESS WHAT????
You can sew along with me! We made up kits for today’s tutorial. Go grab your Utah Adobo kit HERE and we can sew together! How cool is that?
Your Adobo kit will include all the fabric for the top and binding as well as the pattern.
I wanted to make this Adobo quilt in all Riley Blake Designs (RBD) so I found some RBD fabrics that pulled out the colors from the panel — Poparazzi sand for the background, Poparazzi brown for the sashing, with Dapple orange, Blossom brown, and Blossom green for the Flying Geese.
Let’s get started!
Cut the squares from the background and the coordinates. Pair up each coordinate square to a background square.
Make Half Square Triangles (HSTs) by drawing a diagonal line then sewing 1/4” on either side. Cut apart and press open. Don’t forgot to square up your HSTs if needed.
Tip from Heidi (who’s keeping an eye on me as I work on this tutorial) – Press half the seams of each color HST to the background and the other half to the color.
Now sew 2 matching HSTs together to make a Flying Geese Block A. If you pressed half of the HSTs to the colored fabric and the other half to the background, use one of each to make a Flying Geese Block A. Like magic, the seams will lock together! Great tip, Heidi!
Next we need to create a Flying Geese block for the sashing center. We’re going to use a slightly different technique for this one.
Layer a background square right sides together (RST) on the side of a rectangle sashing fabric. Draw a diagonal line from the bottom outside corner to the opposite top corner. Sew on the drawn line and cut 1/4″ away from the line. Repeat for the other side. Make 4 Flying Geese units.
Next sew background squares to the ends of 2 Flying Geese units.
Sew the 2 Flying Geese units to the sides of an orange square. Then sew the Flying Geese units with the background squares on the ends to the top and bottom. Make 1 Block B.
Molly’s Tip – If using your main print for the center square, cut it from the yardage after you cut your main print/panel C pieces.
Instead of using a main print, though, I’m using the Utah panels so we just need to cut them apart (make sure they are the right measurements – trim if needed).
If using a main fabric, cut the C pieces to the size listed on the pattern.
Next, cut the sashing and add them to sides first, then to the top and bottom. Make 4.
Lay out the main print/panel C pieces and the Flying Geese Block A’s so the Geese are flying away from the center. Sew together (please note that I added an extra background strip to the top and bottom of my quilt. Feel free to do the same, but you will need a little bit more background fabric).
Layer your quilt. Quilt it as desired. Bind it. And don’t forget your label!
TA DA! That’s it! Done! Eazy piezy!
I’m going to add one more little detail to my quilt — I’m going to embroider UTAH in the center square!
Here are some other fun Adobo quilts VRD has as kits. You can find them HERE.
Kitty The CatCall of the Wild
Thanks for stopping by and sewing with me!
Now let’s check out the new January VRD Rose Card patterns!
NEW January VRD Rose Card Patterns
I’m excited that I get to show the new patterns off today! Tricia usually does it, but today it’s my turn. Yay!
Here are the 5 main patterns.
Look! There are 2 panel quilt patterns this month – one using a 24″ panel and the other one uses a 36″ panel. Cool!
This set of patterns gives you a nice variety to add to your VRD Rose Card collection. You can get all 5 print patterns HERE (if you want digital patterns, you can order each pattern individually).
But wait — there’s more (Sorry, been wanting to say that)!
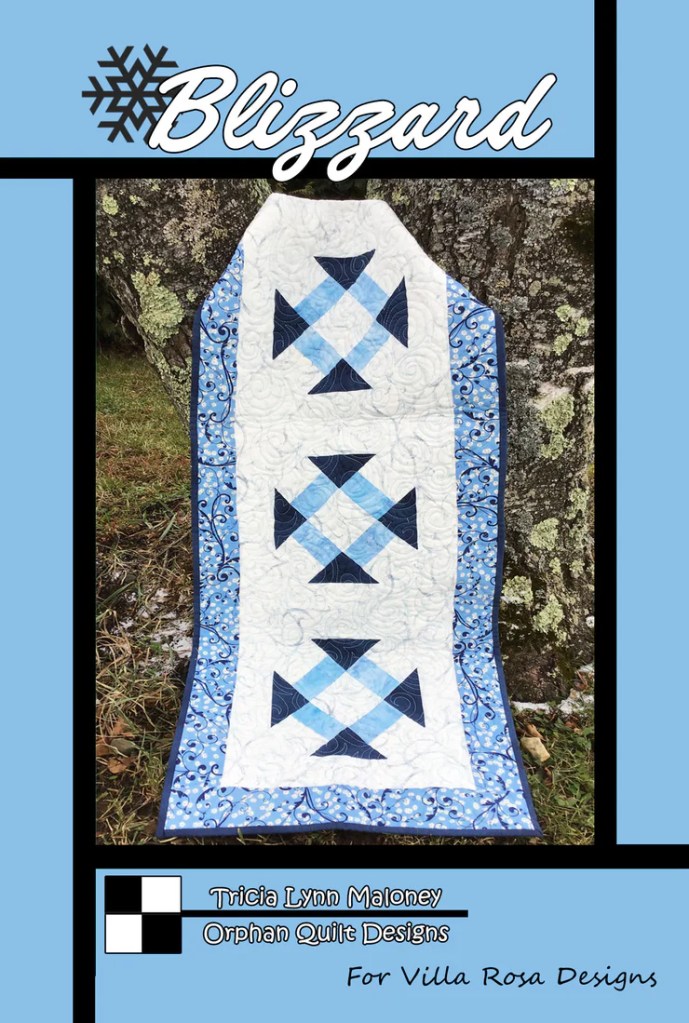
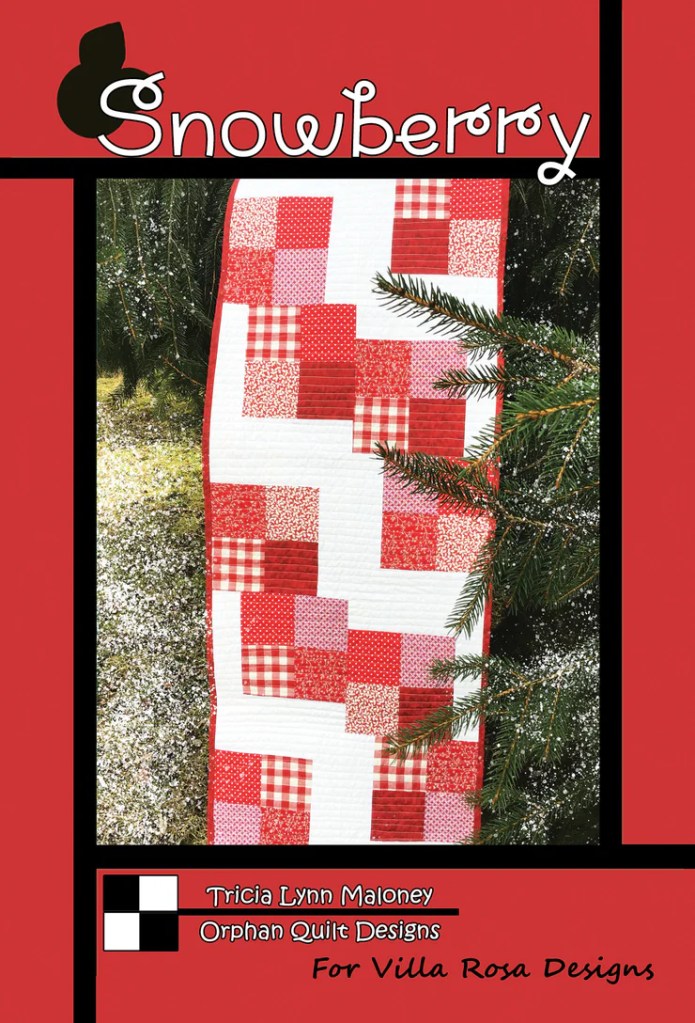
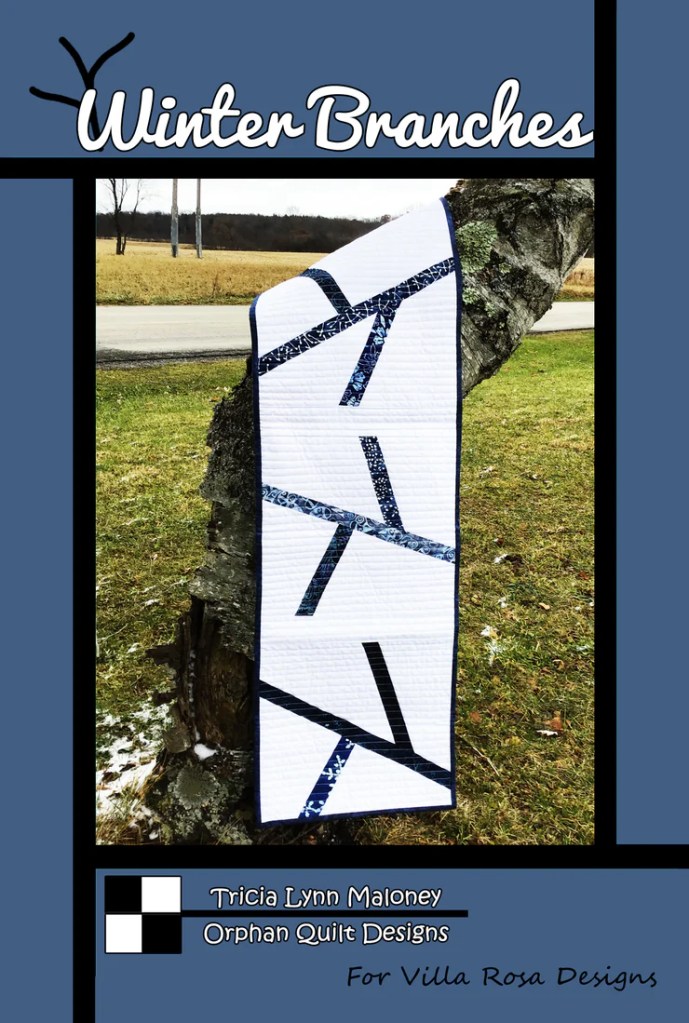
Tricia has a new table runner for you called Snowfall.
You can get the print Snowfall HERE or the digital Snowfall HERE.
And here’s our 11th Snack Mat, Woolly Mitten (just in case you’re keeping track, this is the next to the last one).
You can get the print Woolly Mitten Snack Mat HERE or the digital Woolly Mitten Snack Mat HERE.
We still have some kits available for this month’s patterns (if you know me, I’m all about kits). Get yours now before they’re gone cause they’re going fast.
Farm Fresh (with the Out of Farm’s Way collection)
To start out 2025, I thought I’d do a curated winter pattern list just for you with lots of great Inspiration for the new year as well as some lovely seasonal quilts to warm you heart and soul through the winter.
So sit back, grab a cuppa, and enjoy!
Curated Winter VRD Rose Card Quilt Patterns
Imagine skiing down the slopes and seeing the sugar-sprinkled trees with curious wildlife peaking out at you as you zoom by.
I hope you found some new-to-you patterns to add to your personal Rose Card collection. Remember, there’s never any shipping on patterns. I look forward to seeing your winter projects on our VRD Facebook page.
Oh! Almost forgot!
What content would you like to see this year on the VRD blog???
I also want to wish our friends a Happy Hanukkah and a Joyous Kwanza!
If you celebrate Christmas, do you have any special traditions for the day after? When I was a kid, we used to head to the mall for all the deep discounts. As I got older, the 26th became a day to sleep in and chill out, eat leftovers, spend some quality time with my gifts (my family, too — LOL!), listen to Christmas music, and maybe even watch Christmas movies. I think this year I’m going to wear my jammies all day, too.
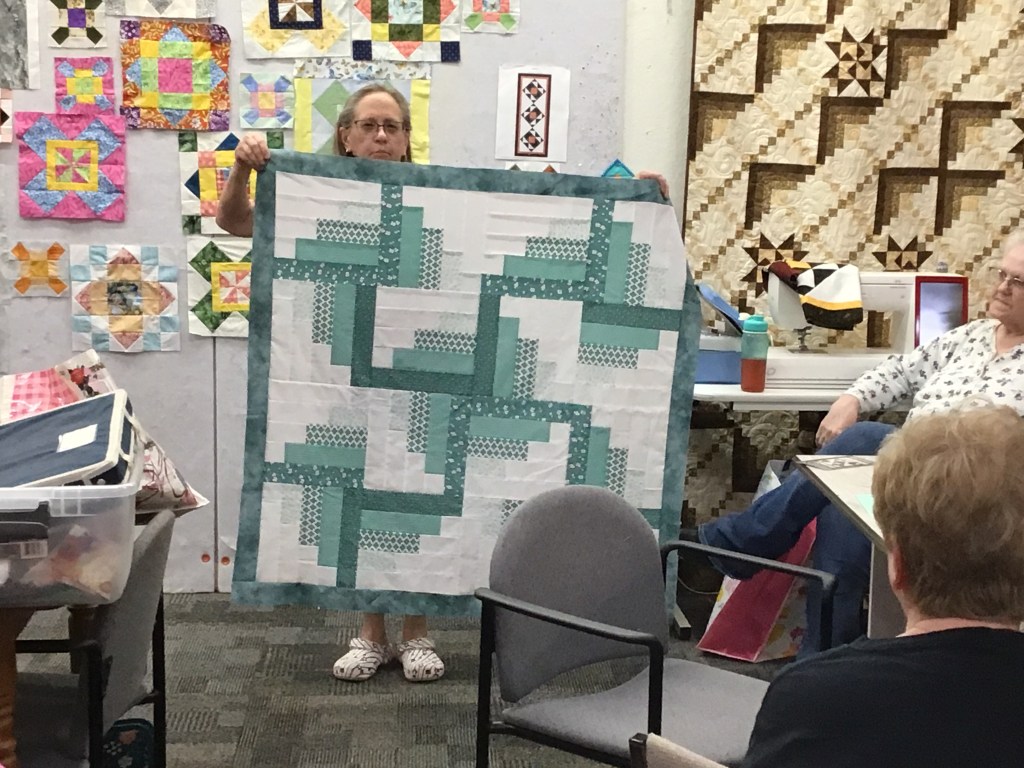
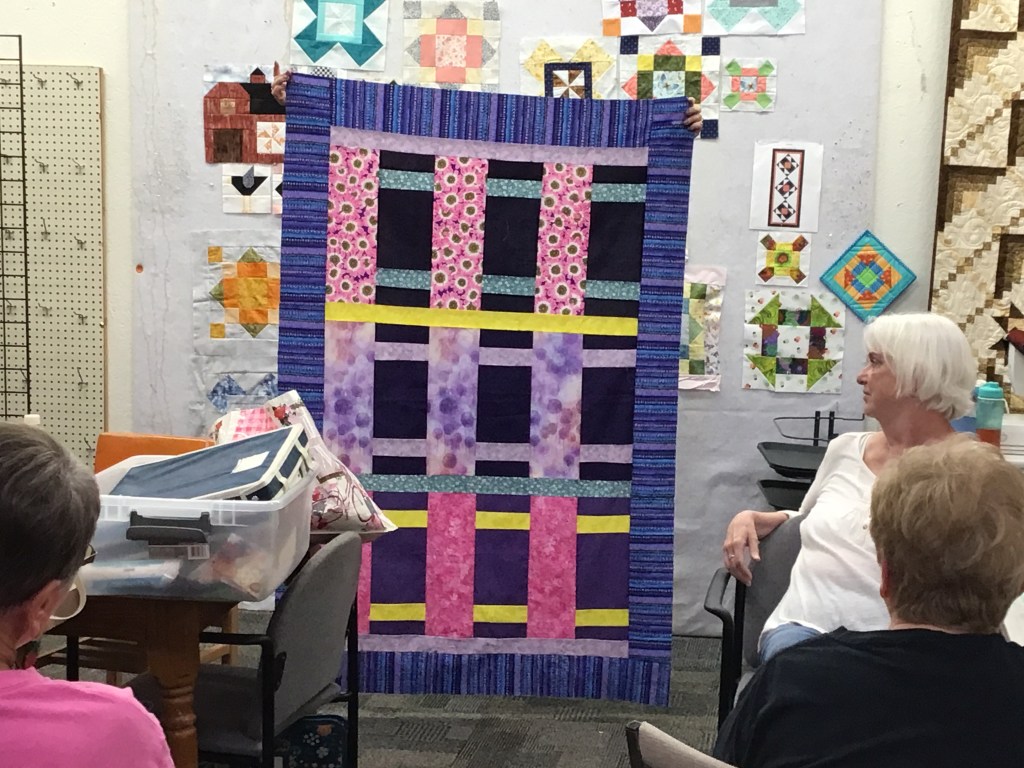
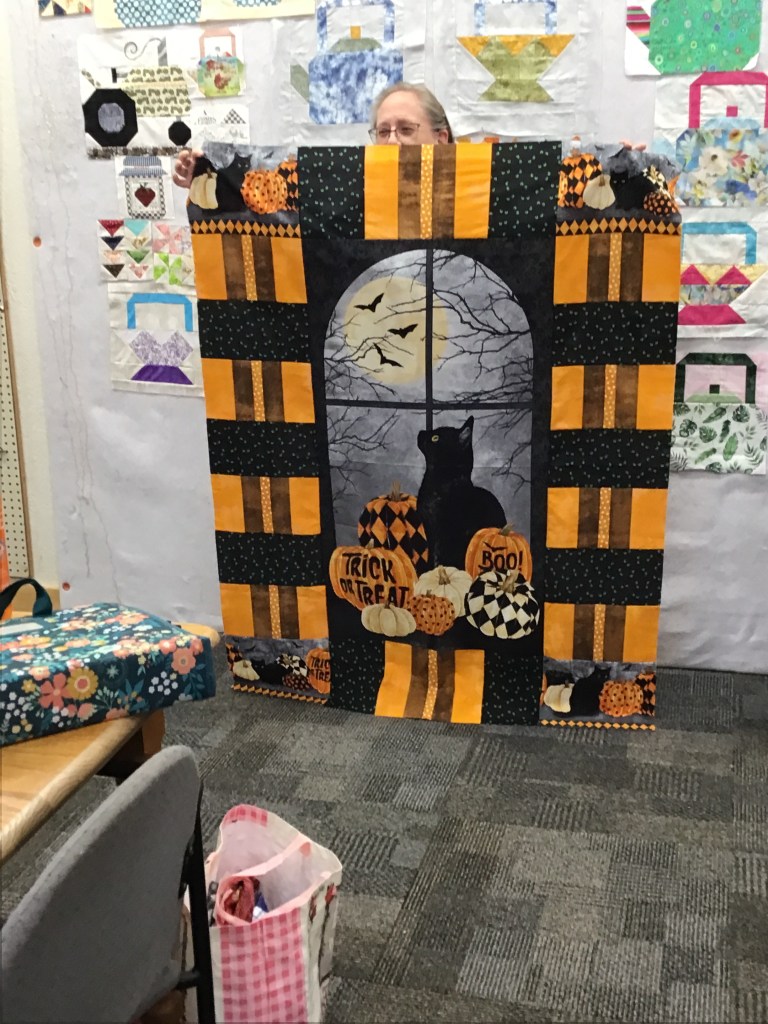
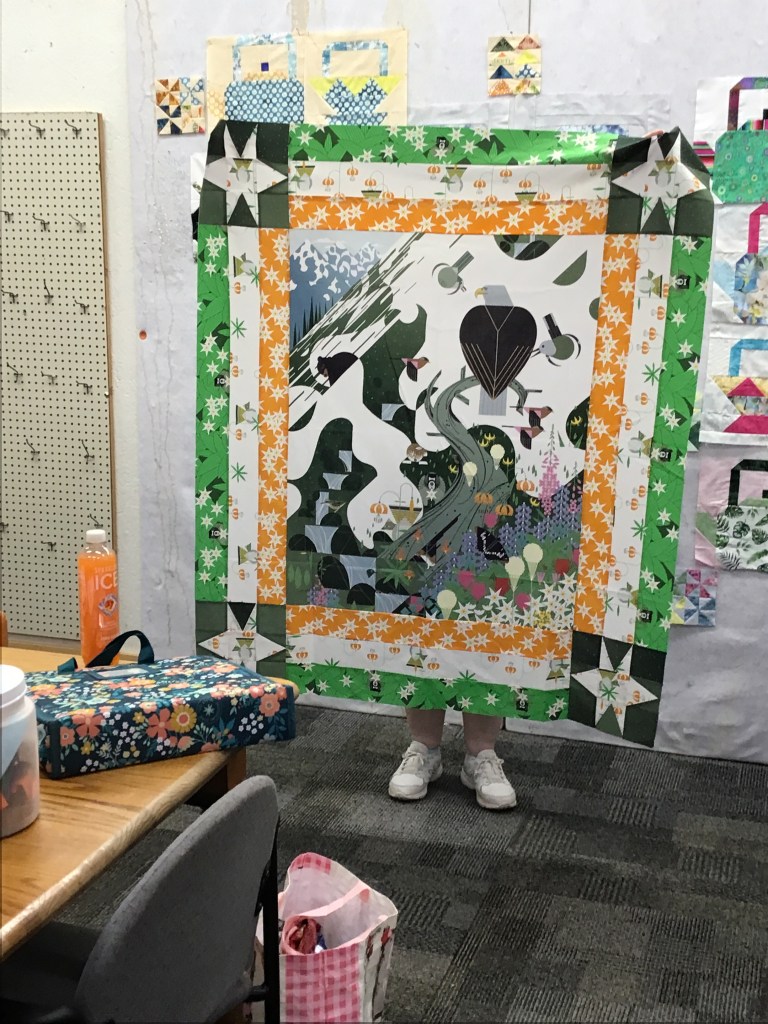
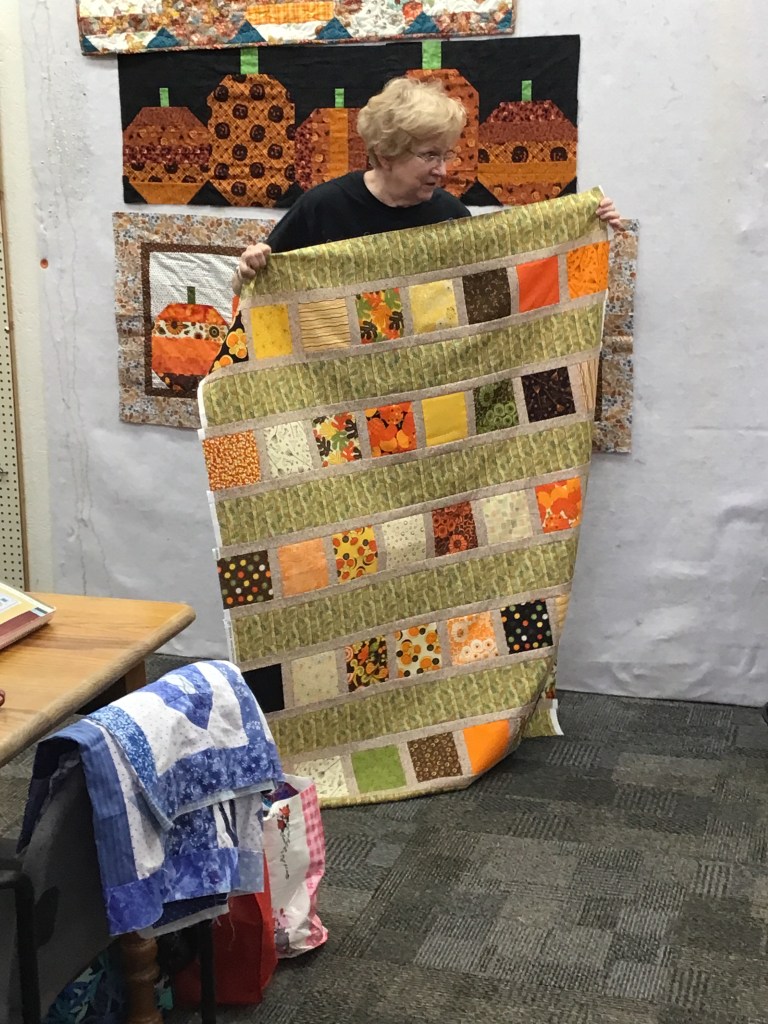
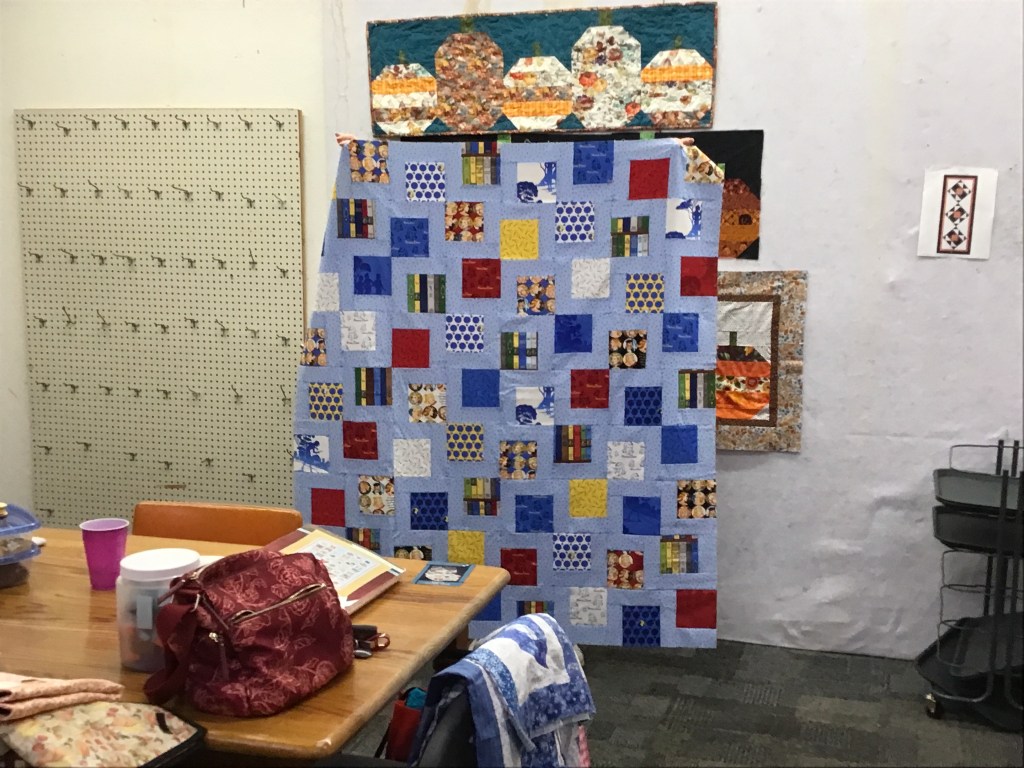
While wracking my brain for a topic for the day after Christmas, I realized I could share photos of this year’s VRD Quilt Challenges I issued to my Friday quilt group. (Big Shout Out to my Friday pals!)
This year in my group, we tackled Lori Holt’s Vintage Farm Girl book.
As I’ve probably mentioned before, my group is totally wild about Villa Rosa Rose Card patterns. Huh? Imagine that. LOL! In addition to the Lori Holt sampler, they demanded that we still do some VRD patterns so I came up with the idea of sprinkling VRD quilt challenges throughout the year. We had a fat quarter quilt challenge, 5″ square quilt challenge, panel quilt challenge, and a 2 1/2″ strip quilt challenge. I must apologize, I was having so much fun in our December get together that I totally forgot to take photos of the 2 1/2″ challenge quilts. Bummer…….
The challenge rules were very simple — participation was optional and participants had to choose a Rose Card pattern that we hadn’t done in the last couple years when we were doing monthly VRD projects. Easy Peasy.
Please enjoy this feast of quilts. Maybe something will spark your creativity for the coming New Year. For your convenience, I am including the link to the pattern for each quilt. What really amazed me was that rarely did 2 people make the same quilt. These ladies really R O C K!
Are you ready for the upcoming holidays? I certainly am NOT! As of writing this post, I’ve yet to get my tree decorated. My cookies are not baked. And I’m hoping the gifts will magically wrap themselves. And maybe the cleaning fairy will have a little time to stop over during the night and do a tidy up? Funny enough, though, everything seems to get done just in time, even if I have to forgo some sleep to get there. How do you get everything done? Thank you, any tips or ideas would be greatly appreciated.
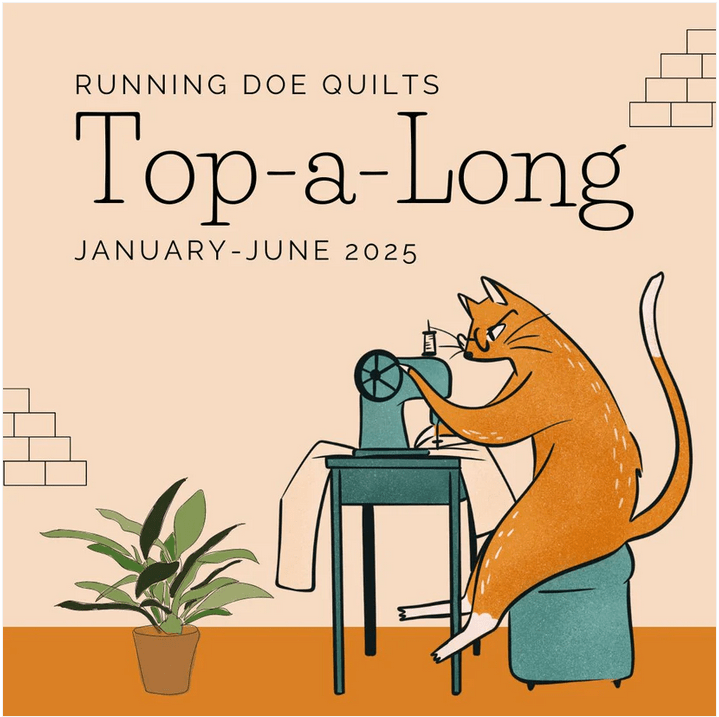
I’ve got an exciting event coming in January for you!
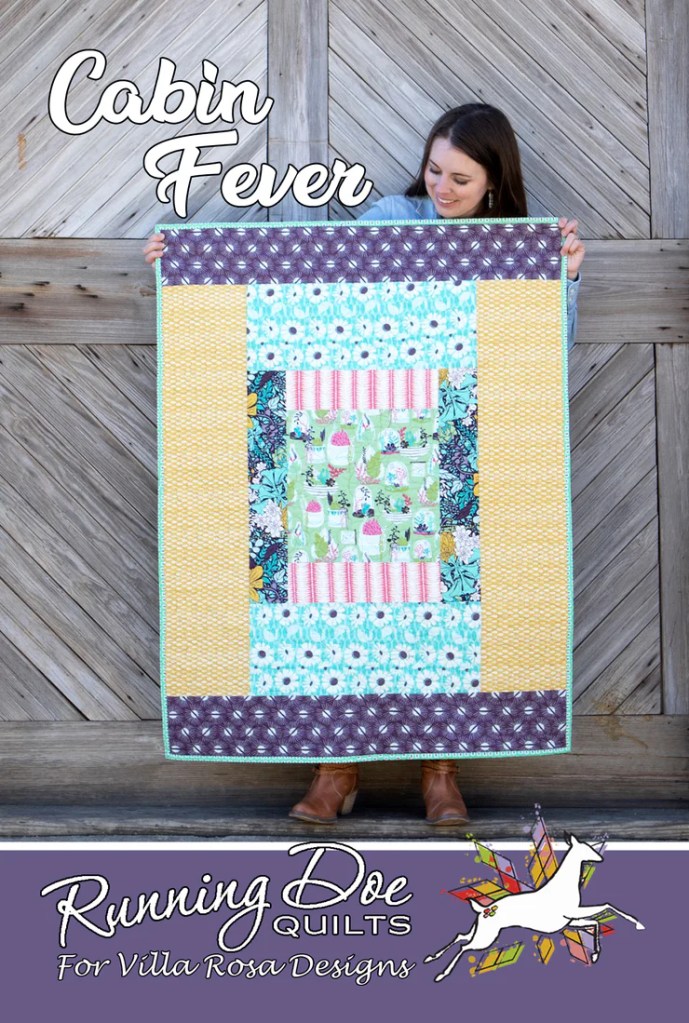
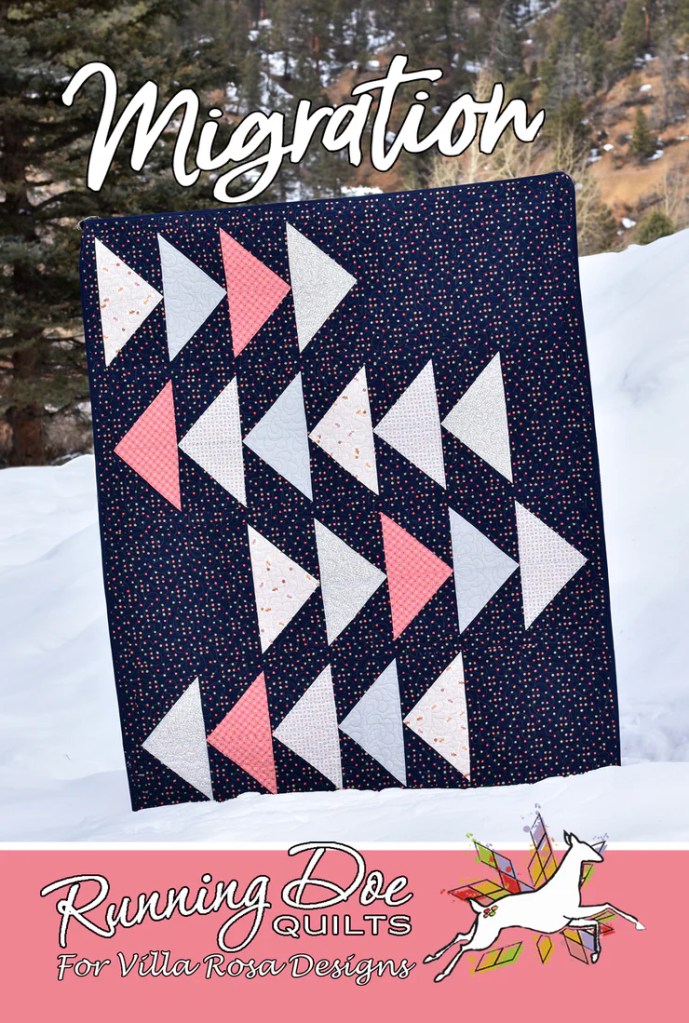
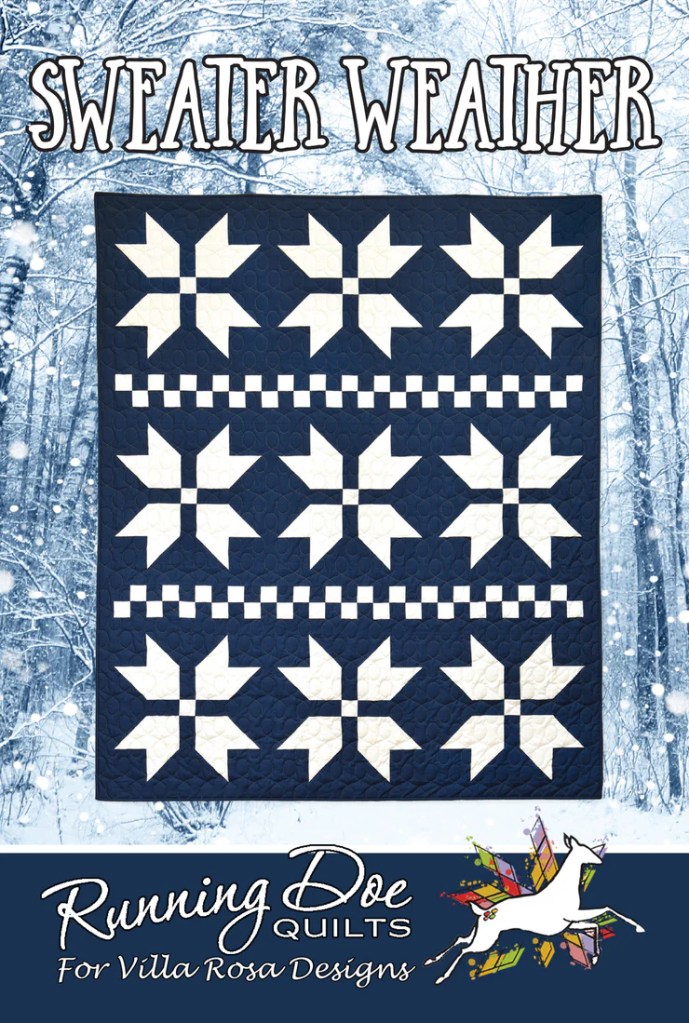
One of our VRD designers, Catherine @ Running Doe Quilts, is starting another Top A Long in January 2025 and it will go for six months.
Image from runningdoequilts.com
If you plan to make a New Year’s Resolution (or a goal in my case) of busting your scrap stash, you will want to sign up for Catherine’s Top Along, which features some of her VRD Rose Card patterns. It’s a great way to get in some sewing in the New Year, hang out with other quilters in the Facebook group, and use up some of that stash. It’s a win-win-win situation!
This is such a great idea to get us motivated for winter sewing, isn’t it?
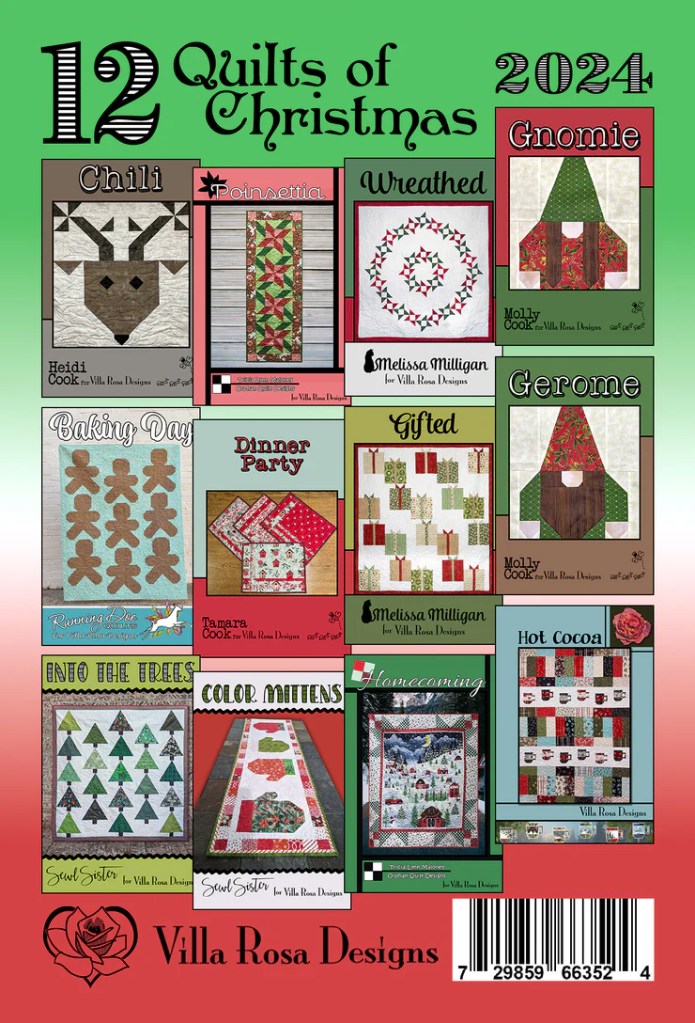
I thought about doing a curated list of Holiday patterns for this post, too, but when I looked back, I saw I did that in 2022. Yep, we’ve added a lot of new patterns since then, but instead of doing that topic again so soon, I decided that I wanted to show you ALL 12 of our 12 Quilts of Christmas patterns. You can get the whole collection of 12 print patterns HERE or you can get them individually as either digital or print patterns.
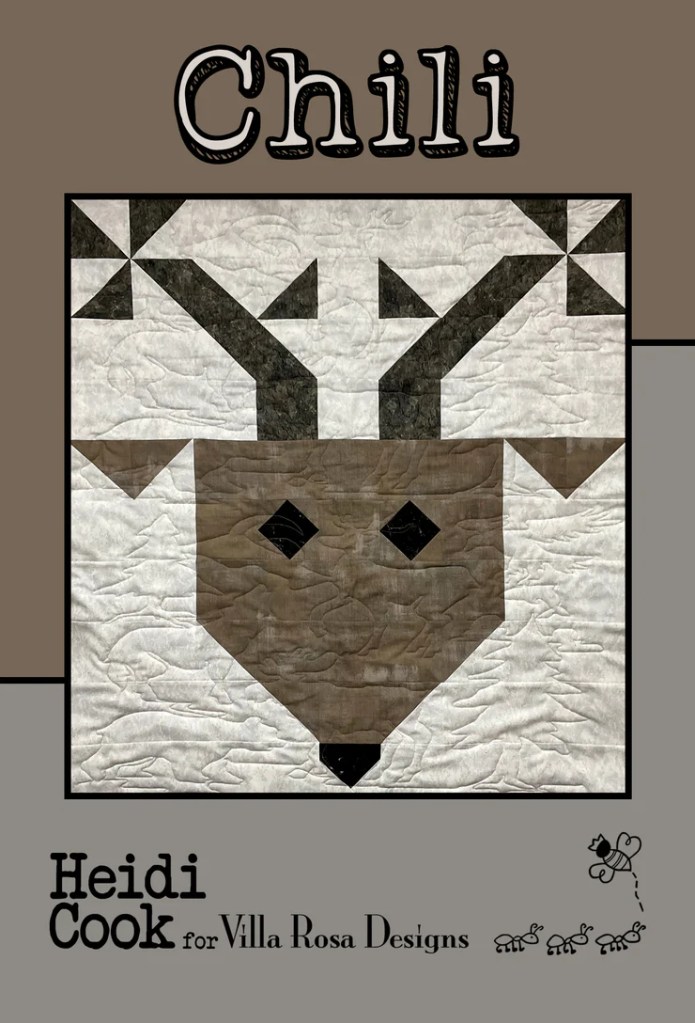
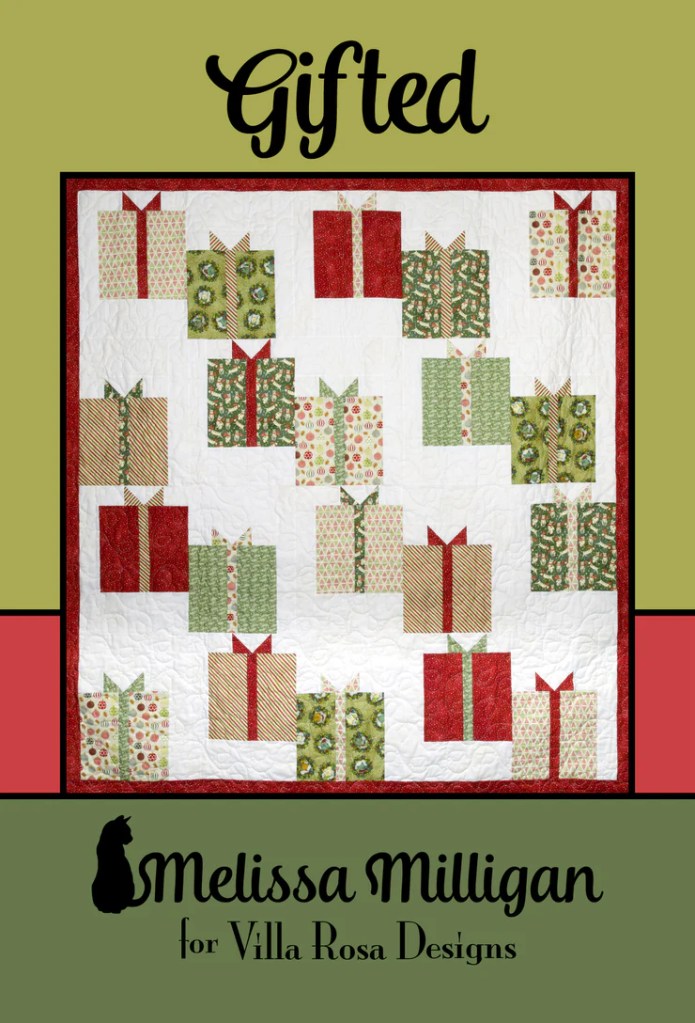
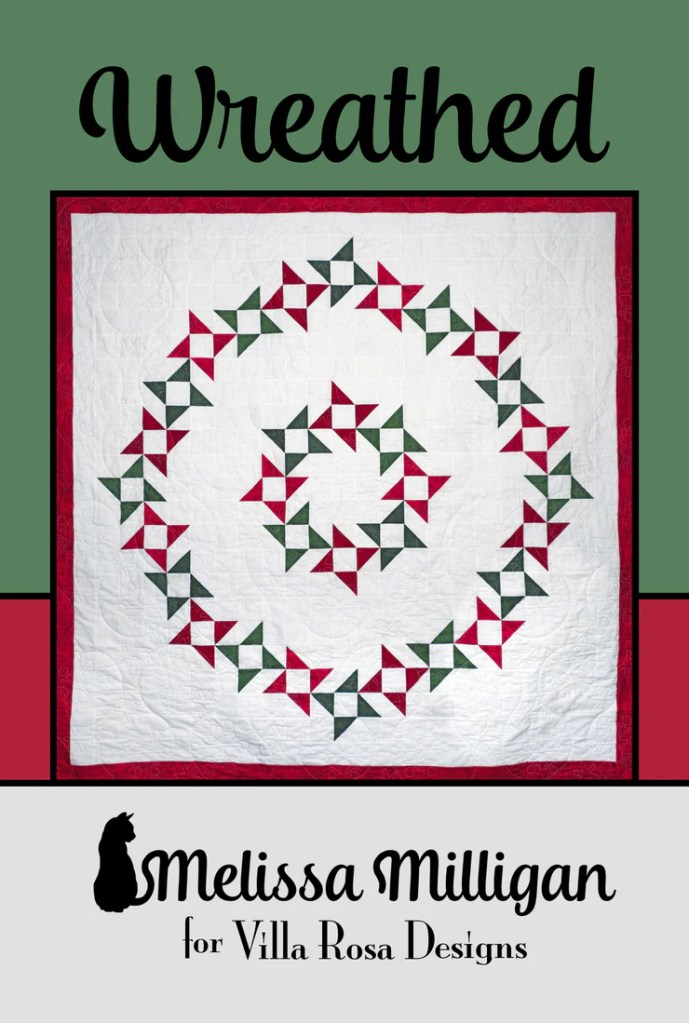
The 12 Quilts of Christmas
Get your Baking Day digital pattern HERE or print pattern HERE
Get your Chili digital pattern HERE or print pattern HERE
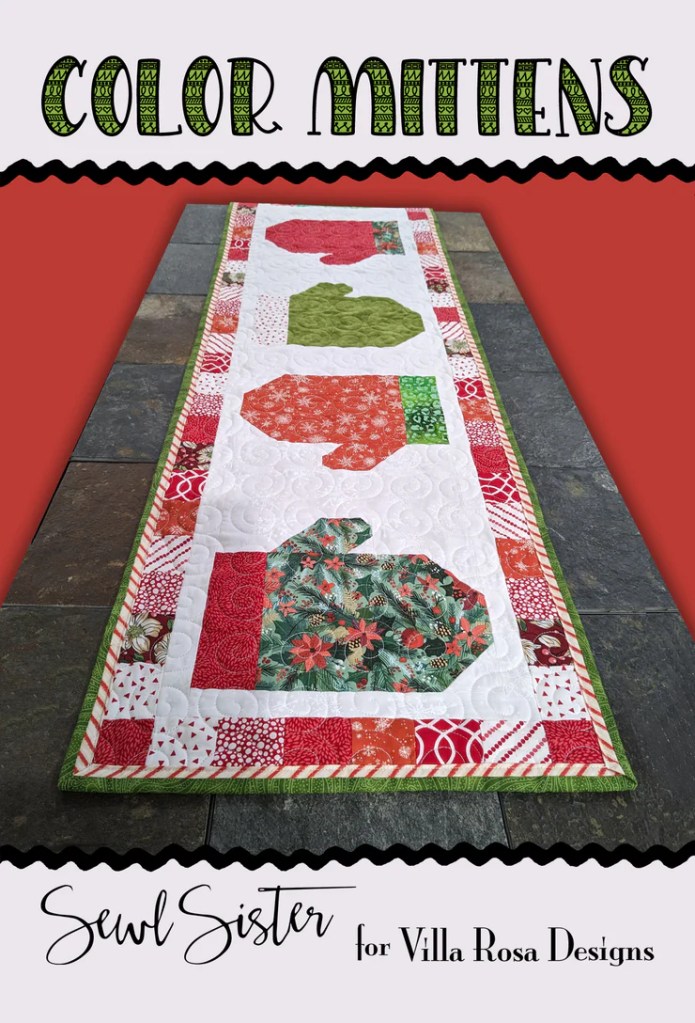
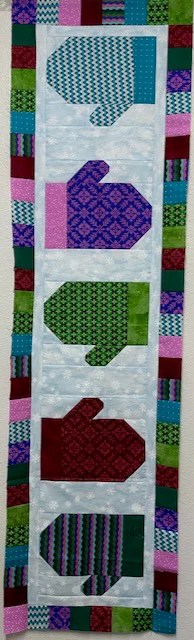
Get your Color Mittens digital pattern HERE or print pattern HERE
Get your Dinner Party digital pattern HERE or print pattern HERE
Get your Gerome digital pattern HERE or your print pattern HERE
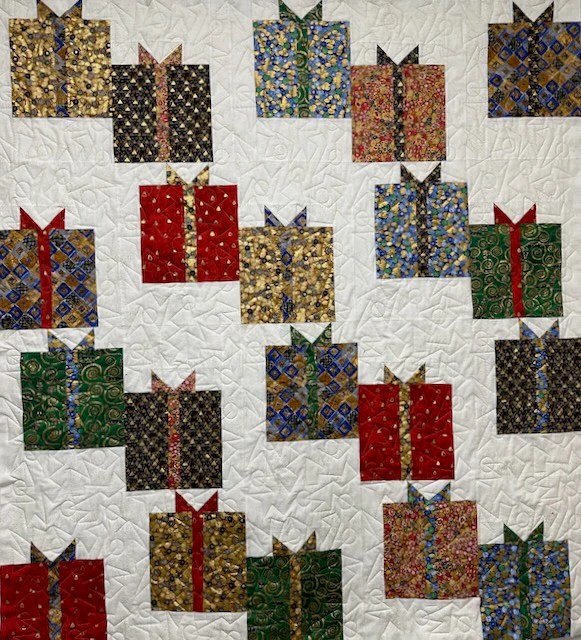
Get your Gifted digital pattern HERE or print pattern HERE
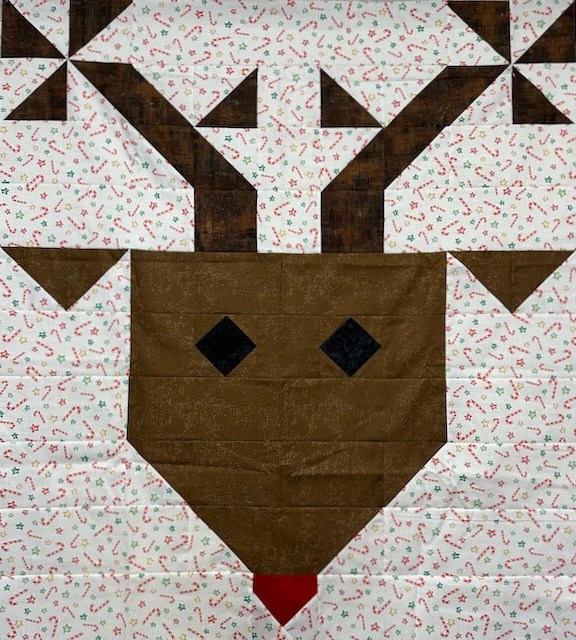
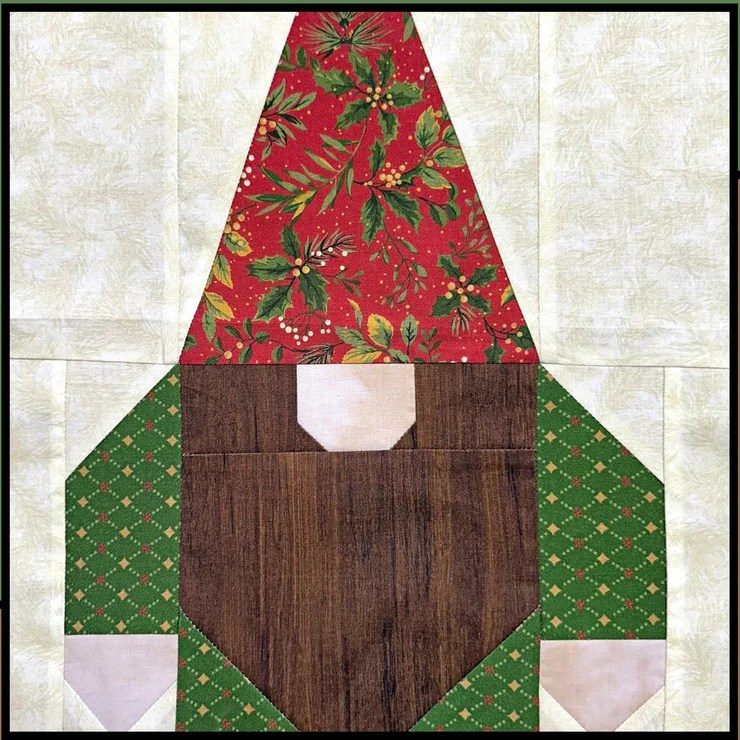
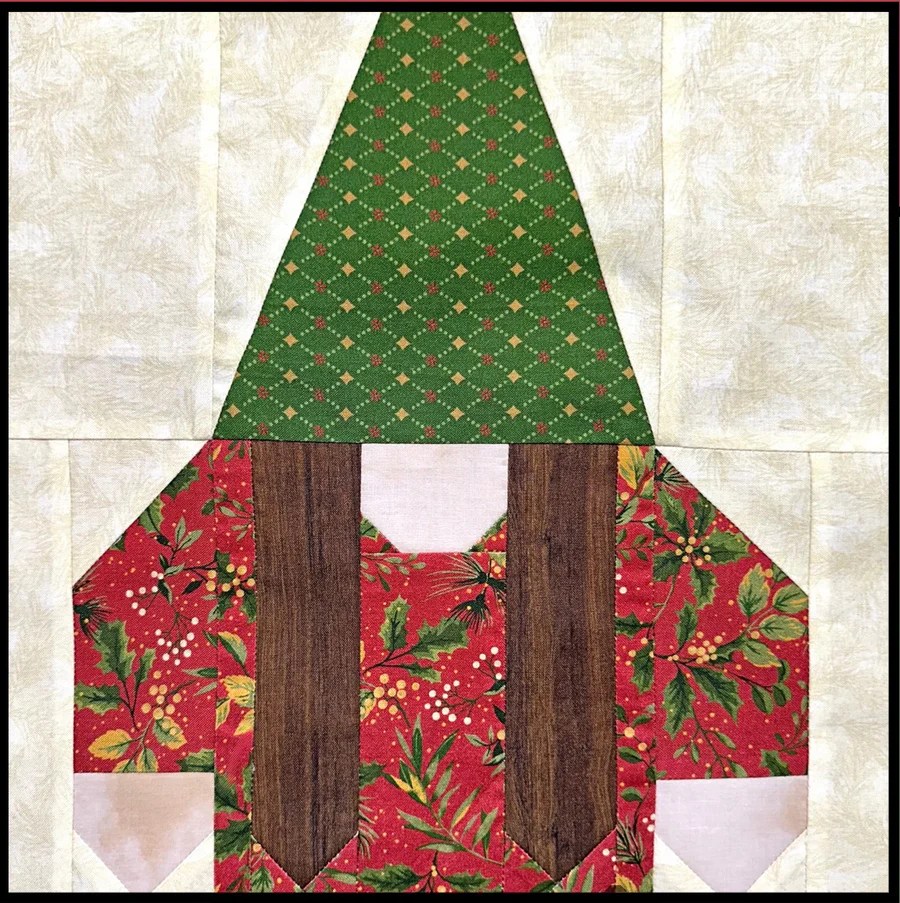
Get your Gnomie digital pattern HERE or print pattern HERE
Get your Homecoming digital pattern HERE or print pattern HERE
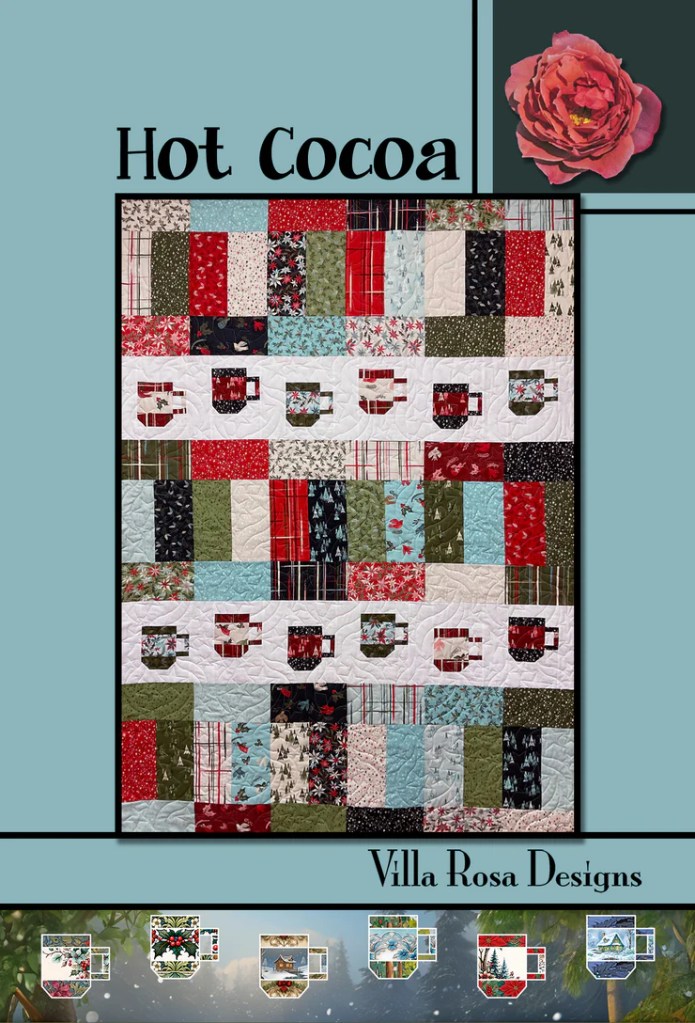
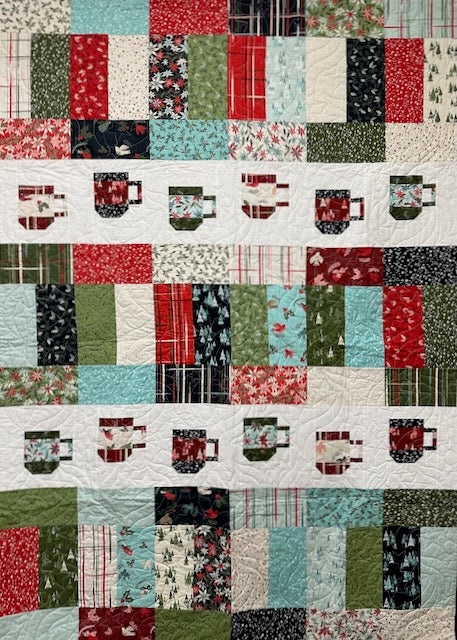
Get your Hot Cocoa digital pattern HERE or print pattern HERE
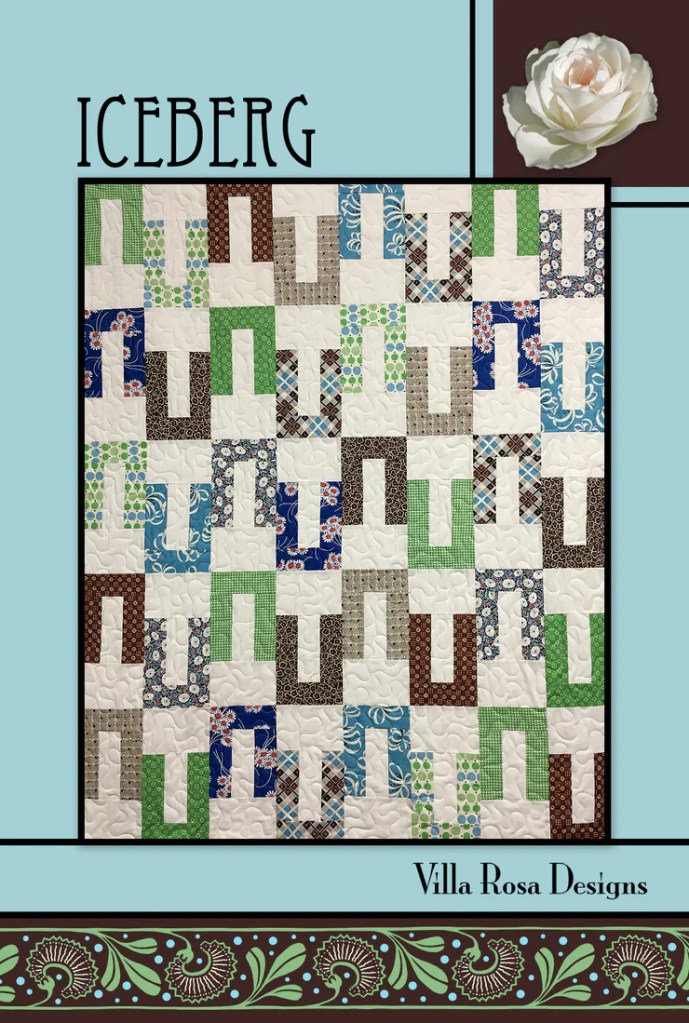
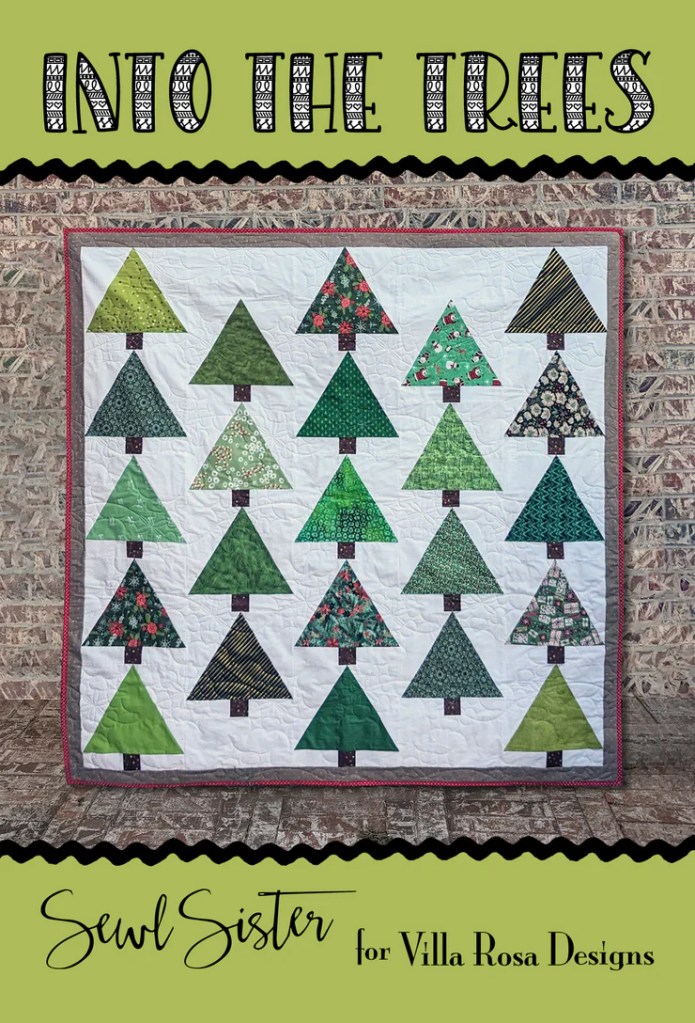
Get your Into the Trees digital pattern HERE or print pattern HERE
Get your Poinsettia digital pattern HERE or print pattern HERE
Get your Wreathed digital pattern HERE or print pattern HERE
Recently on Facebook, we did the 12 Days of Christmas and offered a kit for each of the patterns, a new one each day. We do have some of the kits still available, but in limited quantities, so get yours now before they’re gone!
We have lots to cover this week, so let’s jump right in with both feet! Elf shoes are optional.
First up I’m going to share with you awesome, fast, and fun VRD Rose Card patterns you can whip up as last minute Holiday gifts. And after that I’ll share our NEW VRD Rose Card quilt patterns with you.
Fast and Fun Holiday Gifts to Make in a Hurry
Snack Mats
Snack Mats make great gifts all through the year! They are about 8″ x 14″ and are in between a place mat and a mug rug. We have 10 different designs right now, so you have lots of choices! You can make Snack Mats up in a wink x 2 because each pattern makes 2 mats at a time.
You can find all of our Snack Mat Patterns (digital and print) HERE.
Scarves
Did you know we have Rose Card patterns for super fun and fast quilty scarves??? Your pals will be truly amazed at both your creativity and your savvy gifting skills.
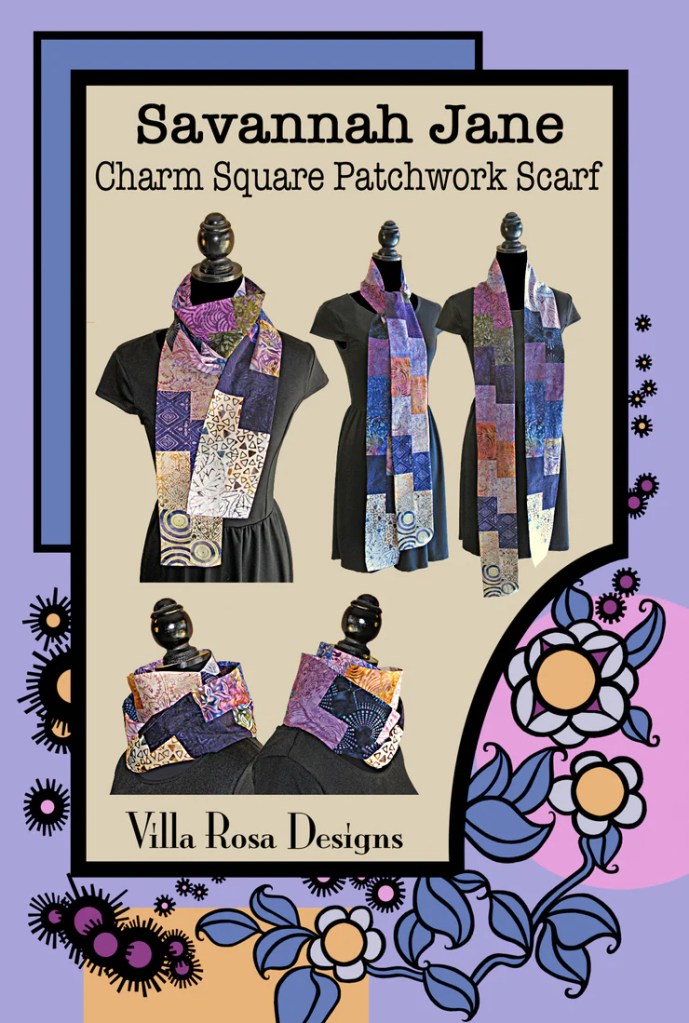
Here is Savannah Jane. It uses a collection of your favorite 5″ squares, so every scarf you make can be totally different, depending on the charm squares you choose. Hey! You can even raid your stash and make scrappy scarves — very economical. Or try some cozy flannel…..
Get your Savannah Jane Rose Card print pattern HERE.
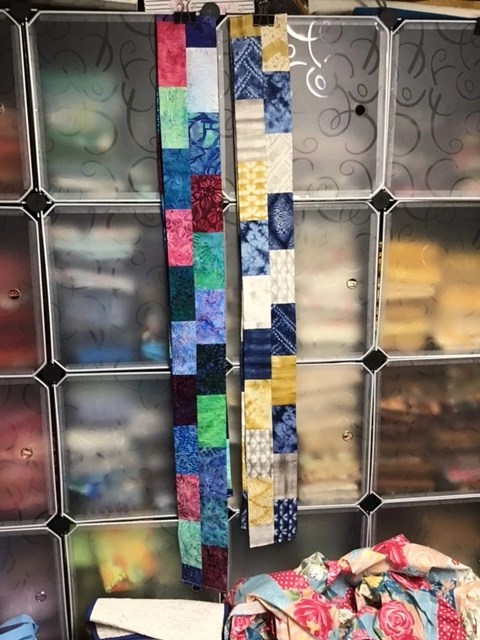
LOVE this pattern! I’ve made several Savannah Jane scarves and they go together in a jiffy. Last year I even gifted the scarves, below, to my 2 nieces, Meg and Morgan.
BUT WAIT! THERE’S MORE!!
We have another scarf pattern just for you! Check out Inessa Jane, a fun and super fast Infinity scarf. You only need 1 yard of your favorite fabric! Easy peasy and done in a flash! While you’re making them as last-minute gifts, make one for yourself, too.
Place mats are a great way to make a statement on your table or on someone else’s. They go together quickly and you can get them wrapped and gifted in the nick of time for the Holidays.
Dinner Party is our newest place mat pattern — it’s part of our new 12 Quilts of Christmas pattern collection. 4 fat quarters make 4 coordinated place mats. Done before you can sing your favorite Christmas carol.
Get your Dinner Party digital pattern HERE or print pattern HERE.
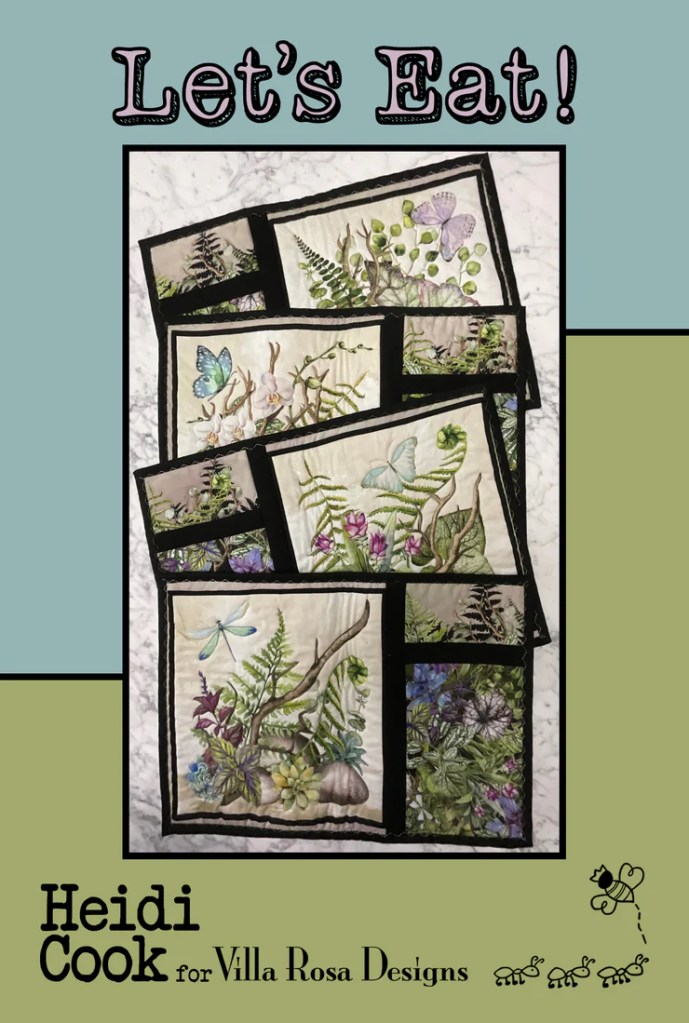
Let’s Eat! uses panel squares and coordinates, but you can use whatever fabrics your li’l ol’ heart desires! Wouldn’t these be adorable with Christmas fabric? Or Hanukkah fabric? Or Kwanza fabric? Maybe a set for winter with blue and white and lots of snowflakes? Anything goes with Let’s Eat!
Get your Let’s Eat digital pattern HERE or your print pattern HERE.
Petula Jane is a great place mat for friends and family who eat at their desks at work. This great easy-to-make portable place mat rolls up and secures with a tab and even has pockets for a napkin and silverware. This place mat will elevate your desk lunch and make you smile.
Surprised??? Yep, we’ve got Tote Bag patterns, too. Here at VRD, we’ve really got something for everyone when it comes to our Rose Card patterns. Totes make great gifts for just about anyone and it is fun to tailor the fabric choices to the person who will receive the bag. Did I mention they go together in a flash?
Here’s Tabitha Jane. All you need is 6 fat quarters! I bet you’ve got some of those yummy 6 fat quarter bundles tucked away in your stash — I know I do!
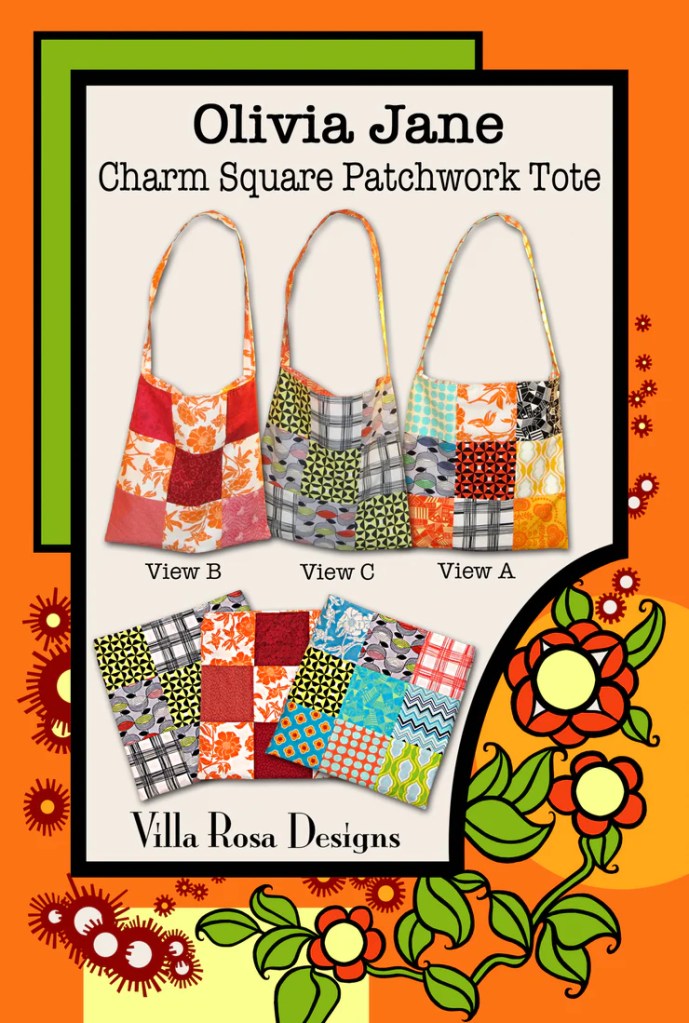
Below you can see my Olivia Jane tote. I had some happy blue and yellow charm squares and added a few coordinates. Didn’t it turn out cute?
Accessory Patterns
In addition to the scarves and tote bags, above, we have many other great small project VRD patterns. These patterns are great to have around when you need a quick little gift for someone.
You can find all of our VRD Accessory Rose Card print patterns HERE.
Table Runners
Table Runners are always a great gift to give and we have runner patterns that go together faster than you can whip up a batch of microwave fudge (okay, maybe not quite that fast, but still really quick). Okay, now that I’ve piqued your interest in fudge, here’s one of my favorite Easy Fudge recipes – 2 Ingredient Fudge.
You can find ALL of our table runner patterns HERE, but I’m going to showcase a few runners that you can make up in no time flat.
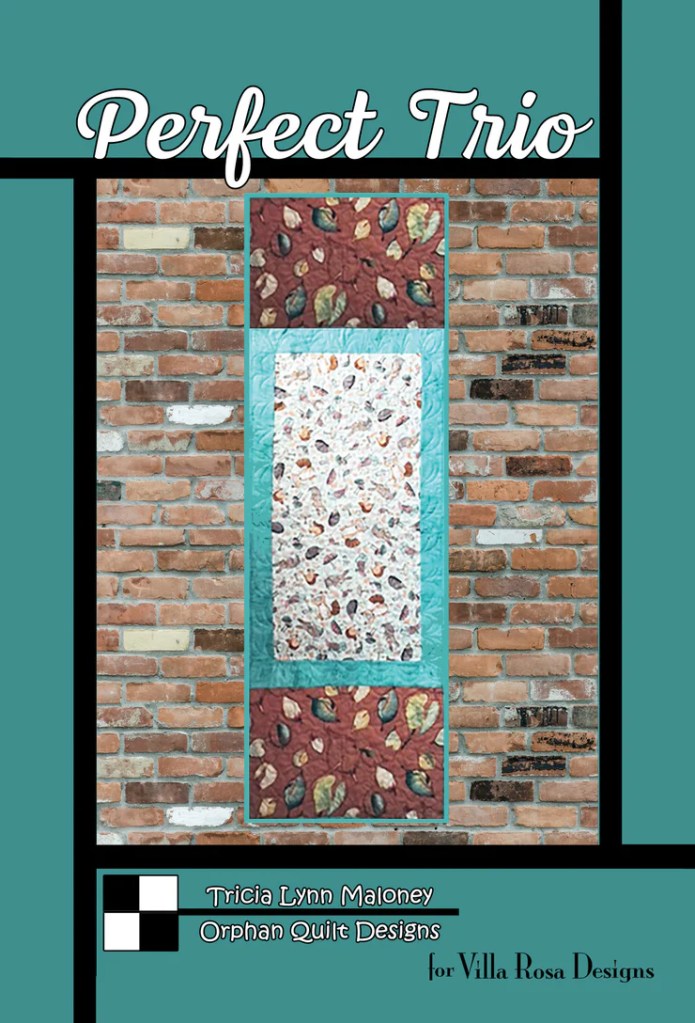
Get your Perfect Trio digital pattern HERE or print pattern HERE
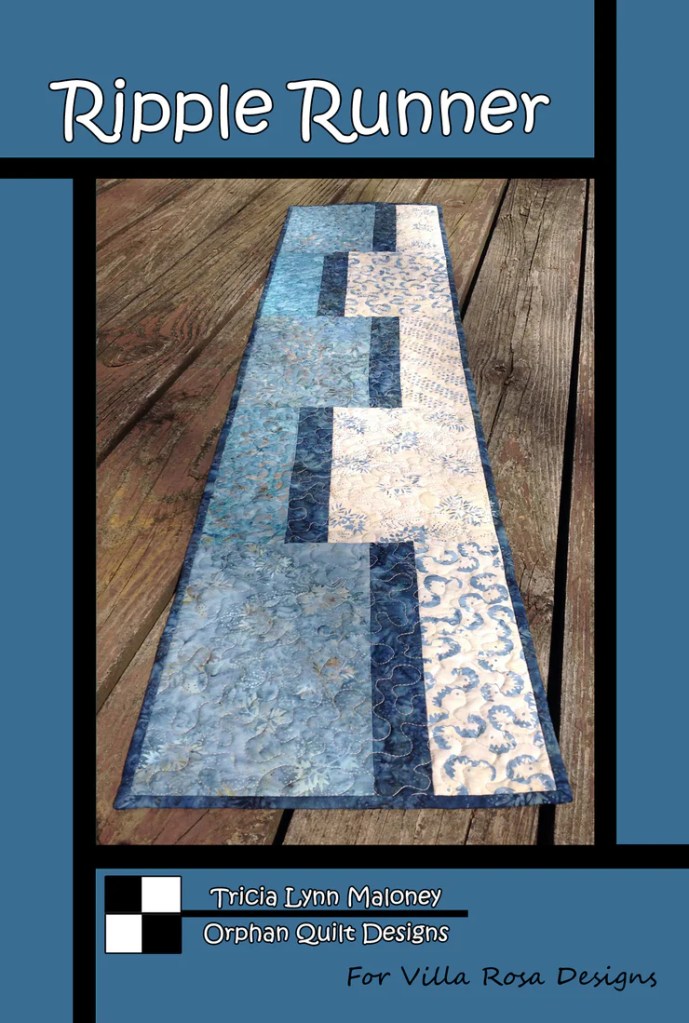
Get your Ripple Runner digital pattern HERE or print pattern HERE.
Get your Season’s Greetings digital pattern HERE or print pattern HERE.
12 Quilts of Christmas
I wanted to include our new 12 Quilts of Christmas collection because the set of 12 patterns is a gift in itself — one that will provide the receiver with hours and hours of quilty pleasure. Or maybe you want to select some of these great projects to make and give as gifts. They are fast and fun, of course!
If you can’t get a project made in time for a quilty friend, why not gift her with the whole 12 Quilts of Christmas collection? You could even add the fabric ingredients for one of the projects as an extra something something. Just remember to get a set for yourself, too.
Get your 12 Quilts of Christmas print pattern collection HERE.
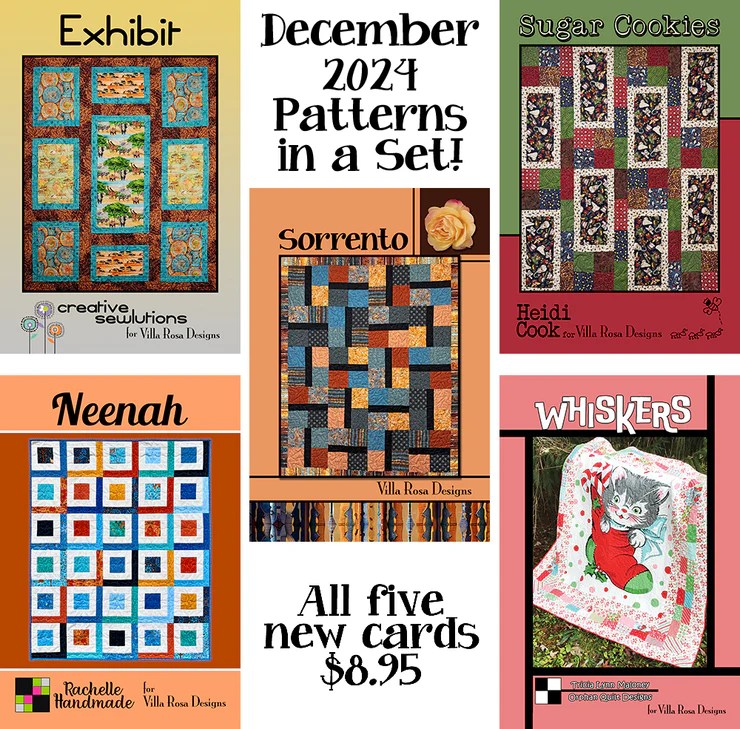
Now let’s take a look at our exciting NEW December patterns because new VRD patterns every month is like getting presents each and every month of the year from VRD!
NEW December Villa Rosa Designs Rose Card Patterns
Woohoo! Check out this month’s NEW Rose Card Patterns!
Exhibit and Sugar Cookies can handle printed panel squares or large prints with ease. Grab your fat eighths and fat quarters for Sorrento and Neenah. And Whiskers gives you a great pieced frame for those large 36″ panels.
One of my favorite things to do when I go anywhere is to be on the lookout for antique and vintage quilt blocks, fabrics, and other textile goodies. I haven’t talked much about my super secret life as a textile collector on the blog, so I thought today would be a great opportunity to share that side of me with you.
I started out as a collector and an appreciator of antique and vintage textiles long before I became a quilter, so those early roots in textiles are still with me and are actually pretty strong. Instead of a collector, though, maybe I should call myself a curator of my own textile museum. Yep, I really do have that many textiles in my possession. And I do really enjoy adding more to my antique and vintage stash whenever I can.
Sit back and enjoy my new playthings!
Hand-Crafted Santa
Here’s my adorable Santa made out of a couple circa 1870’s/1880’s quilt blocks. I don’t know if any of you have ever been to Una’s booth at Quilt Festival in Houston? She creates the most amazing Santas using antique quilts, tops, and blocks. This cutie is my second Santa. Last year, I brought home my first Santa, which was created from lovely indigo and white quilt blocks circa 1900/1910. I haven’t started my holiday decorating yet, though, so he isn’t out of storage yet. Now they will be good company for each other. And they are a fun addition to my textile collection, don’t you think?
Feed Sack Doll
Isn’t she a little darling??? She is from the 1930’s or 1940’s and was handmade by some sweet mama or grammy for a lucky child. The pink floral body is actually made out of a feed sack and the face/hair is hand-painted. I think she is in marvelous condition, considering she’s almost 100 years old now. I just love her chubby legs!
I found this little sweetie at Quilt Festival in my friend, Tenny’s booth, Tenny Roche’ Vintage. You can find Tenny on Facebook HERE or visit her Etsy shop HERE where you’ll find all sorts of intriguing vintage items.
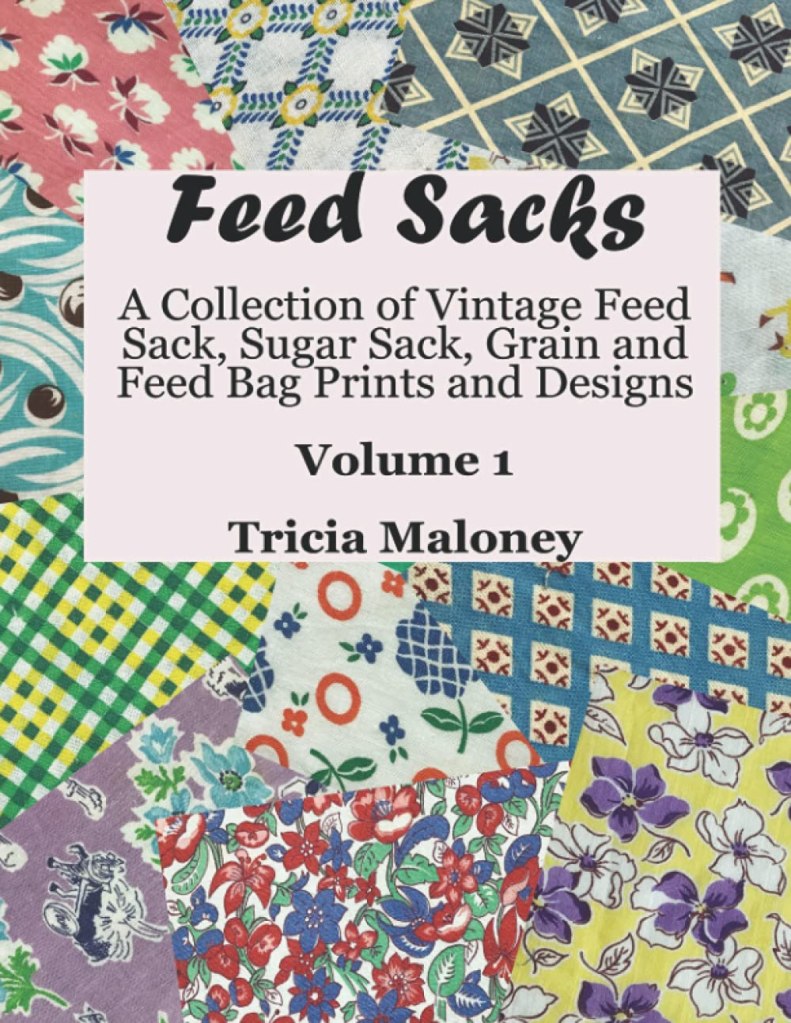
I have a deep interest in feed sacks, having started seriously to collect them during the pandemic. I now have crates and crates of them — I just love these wonderful colorful patterns and colors! So what’s a girl to do with all those feed sacks?
Write a pattern showcasing them, maybe?
Yup, did that! I used lots of feed sack bits and pieces out of my vintage stash for the blocks in this runner. It was a really fun project! You can find the digital Nana’s Aprons HERE or the print Nana’s Aprons HERE.
WHat’s really exciting is that right now I’m getting ready to launch my second feed sack book, Volume 2, hopefully later this week. The first volume has over 1000 feed sack prints and designs while my new book will have another 1400+ prints and designs. Wow! And I’m just getting started on this very dear-to-my-heart project because I have lots more feed sacks to document.
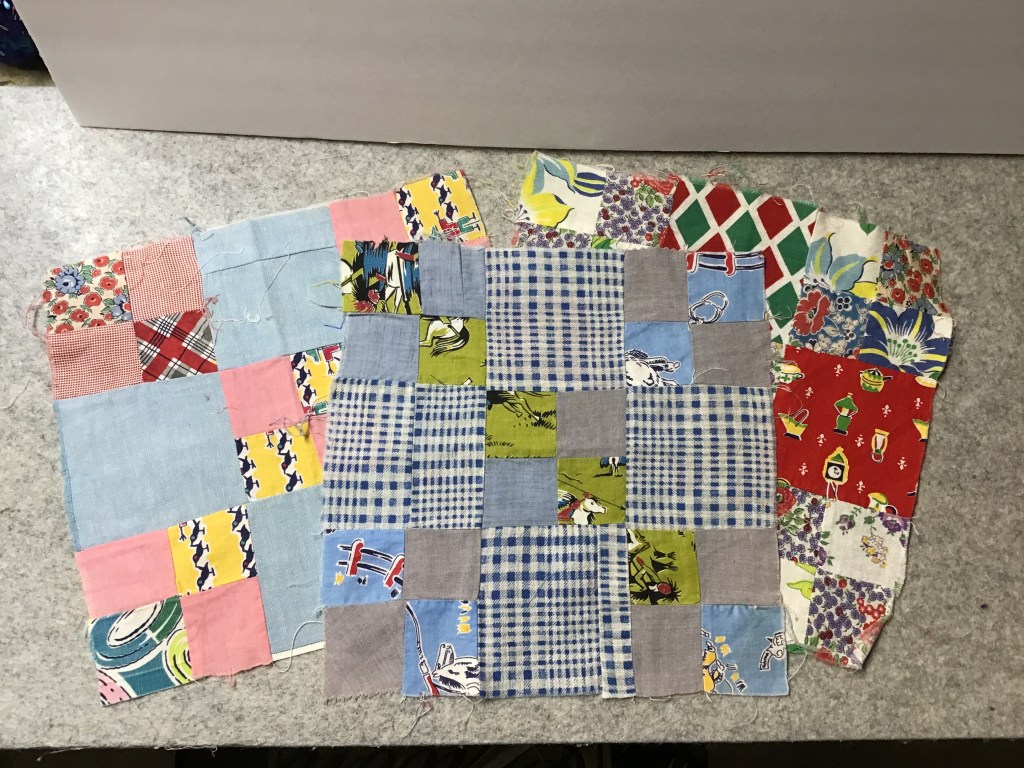
Antique Quilt Blocks
At Quilt Market and Festival, one of the first things I like to do when I get the chance away from the VRD booth is to visit all of the antique quilt and textile vendors. They pretty much now all know me by name. LOL! I also scour flea markets, second hand shops, antique shops, etc. whenever I go anywhere in the hopes of finding more textile goodies. Here, I’ll show you what I found at Quilt Market and Festival as well as some from my Mom’s birthday trip to Ohio Amish country.
I’ve loved antique and vintage quilt blocks for a long time now — I started collecting them long before I ever actually knew how to quilt. I was totally hooked on learning to quilt once I saw how antique fabrics in garments made it into the quilts of the time. After that, I paired up my love of antique and vintage textiles with my love of quilting.
In fact, my very first quilt book was called Orphan Block Quilts, and I showed how I could feature both antique quilt blocks and modern quilt blocks in the same quilt design. If you’ve noticed my byline on my VRD patterns — Orphan Quilt Designs — my first book is what started the whole orphan quilt thing for me. That being said, I LOVE adding antique and vintage orphan blocks to my textile menagerie.
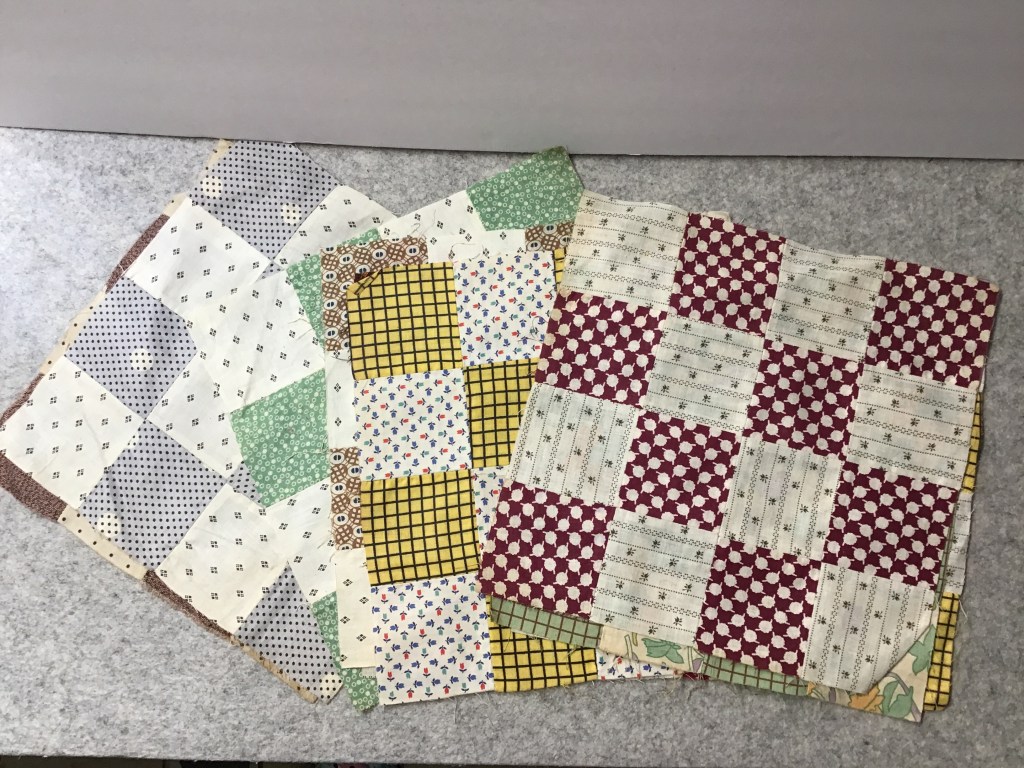
1920’s/1930’s Double Four Patch blocks1890’s-1910’s Nine Patches1930’s/1940’s Nine Patch blocks. The block in the center even has feed sack squares.
Humble quilt blocks like Nine Patches and Four Patches are some of my favorite blocks because they are often the first blocks a quiltmaker makes and boy, have I come across some delightful wonky blocks over the years that I suspect were early projects or rejects from quilters of the past. I love them all!
I wanted to show the Nine Patch block below all by itself because it has such wonderful fabrics in it. Can you guess how old it is (answer below the photo)?
I cannot pinpoint an exact date, but I would say second half of the 1800’s. The turkey red fabric really fascinates me — the colors are so bright. The center blue and brown stripe is also a very interesting fabric.
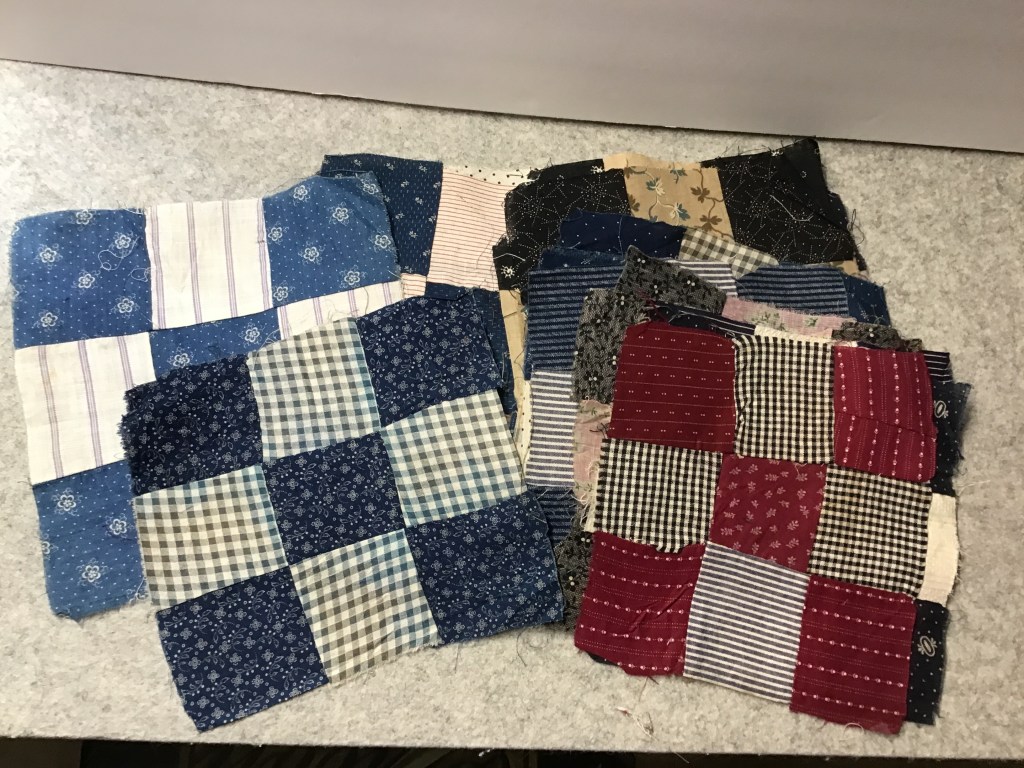
Indigo and white is probably the most classic color combination for quilts and I’m always on the lookout for them. I also really like indigo and double pink, so I am always happy to find those, too. Maybe someday I’ll put together a book filled with examples of antique and vintage indigo.
Scrappy quilt blocks are a lot of fun. Sometimes I shake my head at the fabric combinations quilters put together, but they also make me smile. Besides, the scrappier the blocks are, the more interesting they seem to be, particularly with their wonderful treasure troves of fabrics.
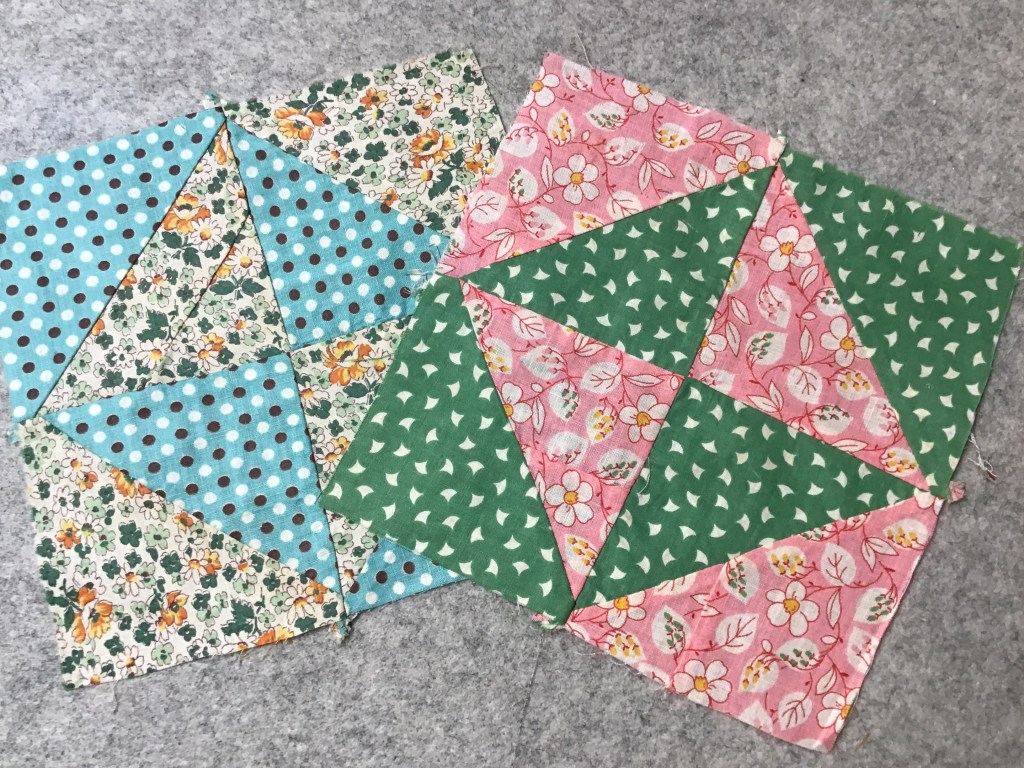
In opposition of the scrappy blocks above, below are some nice examples of organized blocks with thoughtful fabric choices.
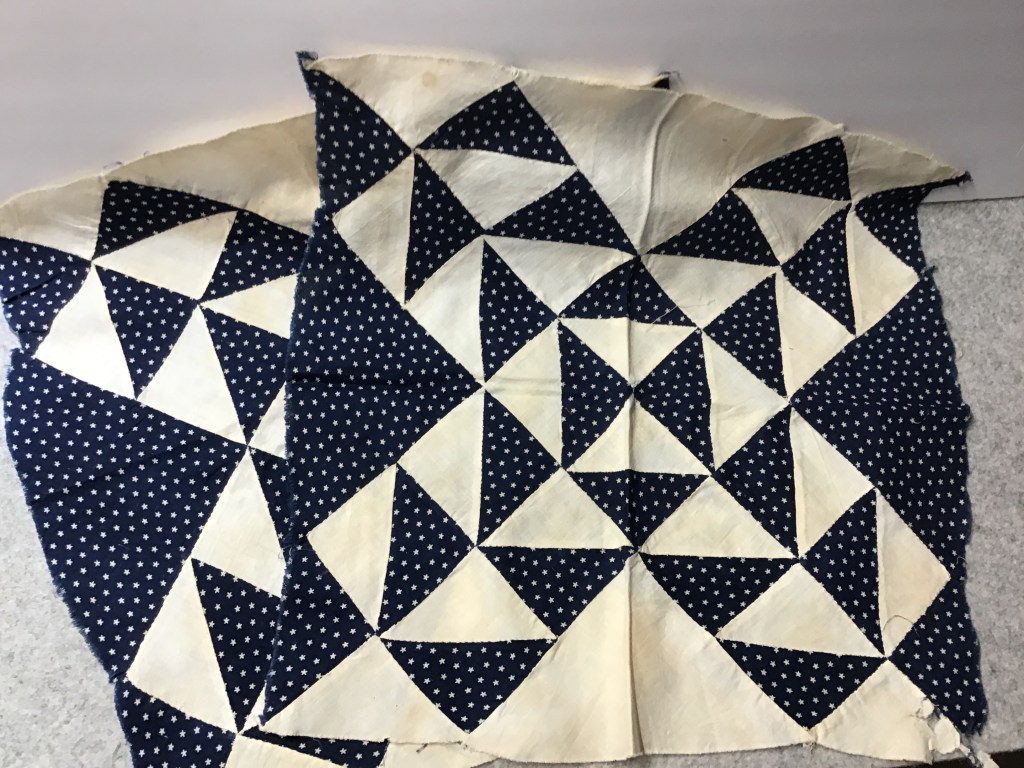
Check out these cute Bow Tie blocks from 1890’s-1910’s. Red and black fabric combinations, like the block on the right, were very popular in the 1890’s and were sometimes called Garibaldi prints, which were named after Giuseppe Garibaldi, an important Italian leader who often wore a red shirt with a black kerchief, as did his men and followers.
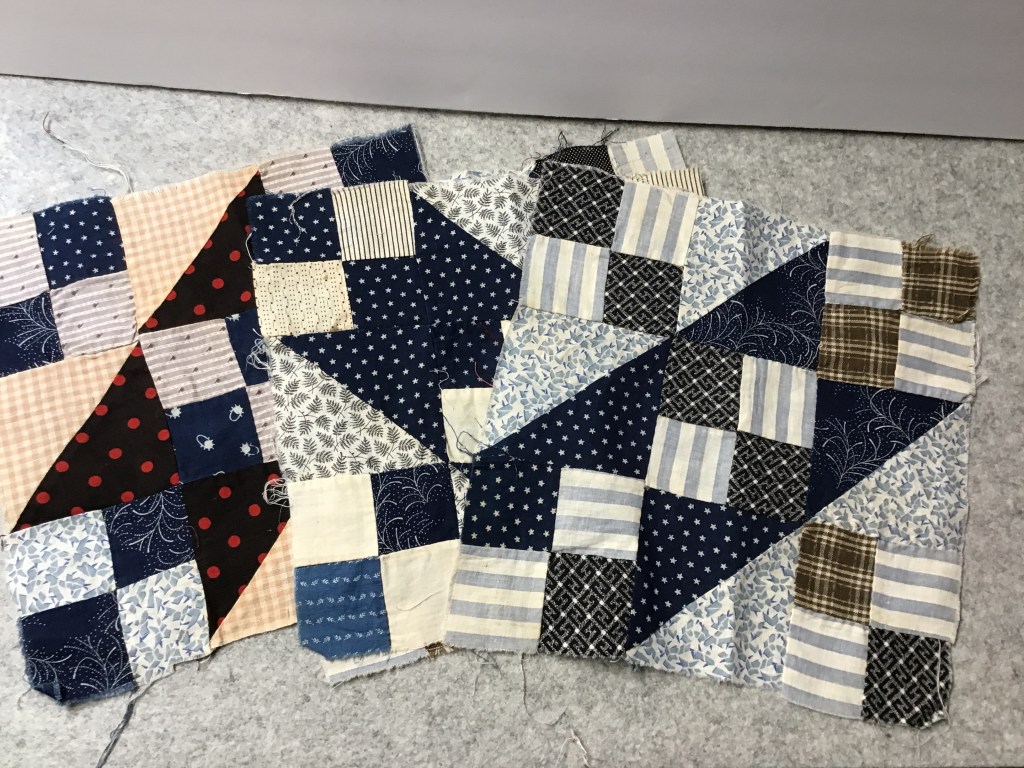
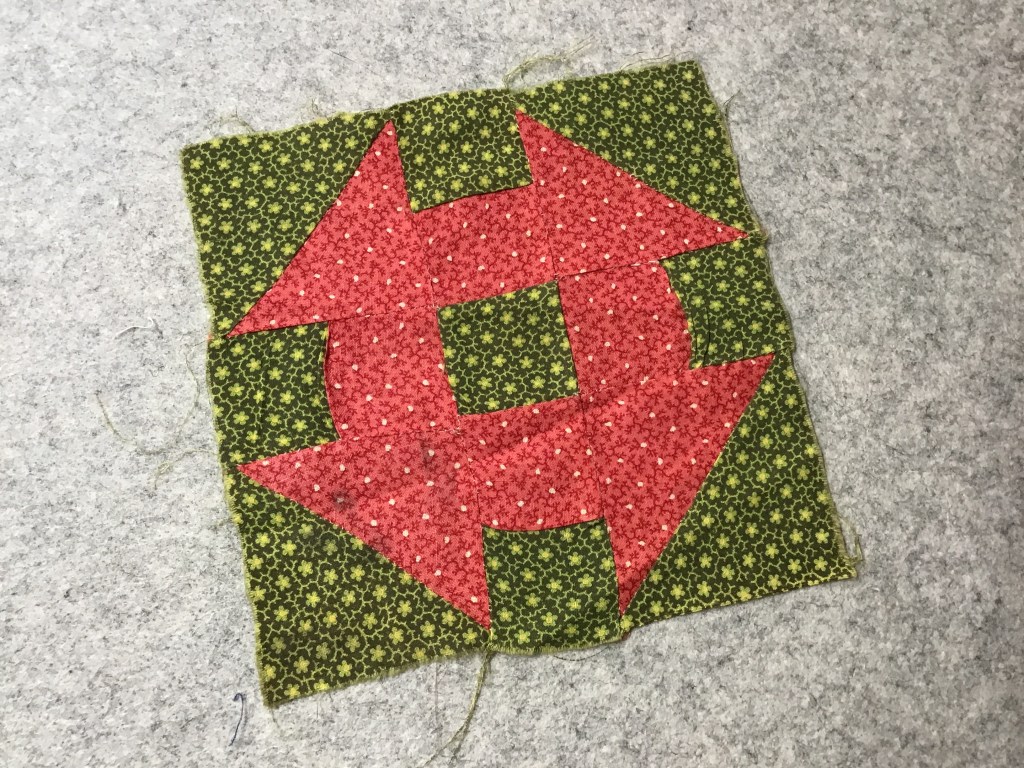
I found a couple of very antique blocks that were truly orphan blocks because they were the only ones of their kind that I found. I know you will agree that they are pretty special.
The first Leaf block could actually date from 1840-1870. WOW! Do you see the little dots on the red fabric? Whatever metallic mordant used to dye the fabric actually ate through the colored dots, so where you see dots, they are actually tiny holes. Isn’t it quite fascinating that this little block has so much to say?
The second Monkey Wrench block is a traditional poison green (called poison green because it was originally dyed with arsenic — just a little bit of quilt history trivia for you) and double pink combination which was popular in the 1870’s. You can’t tell by the photos, but these blocks are only around 6 or 7 inches.
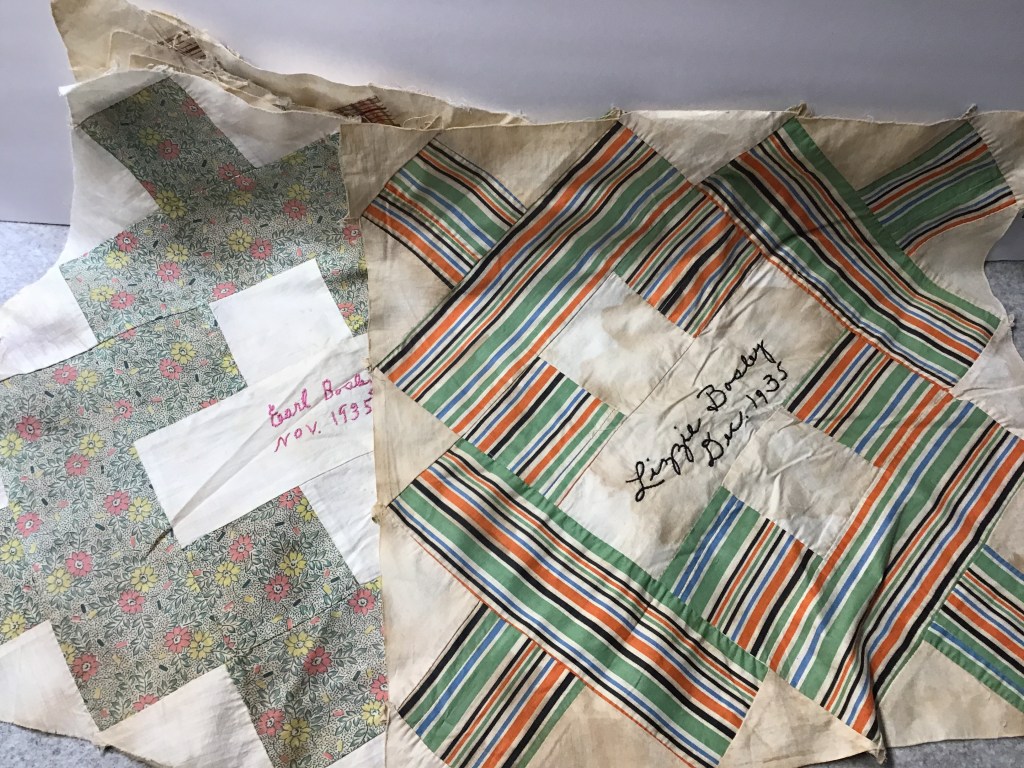
Another great find was a lovely set of signature blocks from 1935. Signature blocks have always been an interesting challenge to me because I like to actually research the names on the blocks.
I remember one time I had a stack of signature blocks and did the research only to find a living relative. The blocks were so much more meaningful to her than to me just as a collector and history buff, so I gave them to her. I imagine she probably finished then into a quilt to honor her mother, grandmother, mother in law, and other relatives and friends found amongst the embroidered names on blocks in the collection.
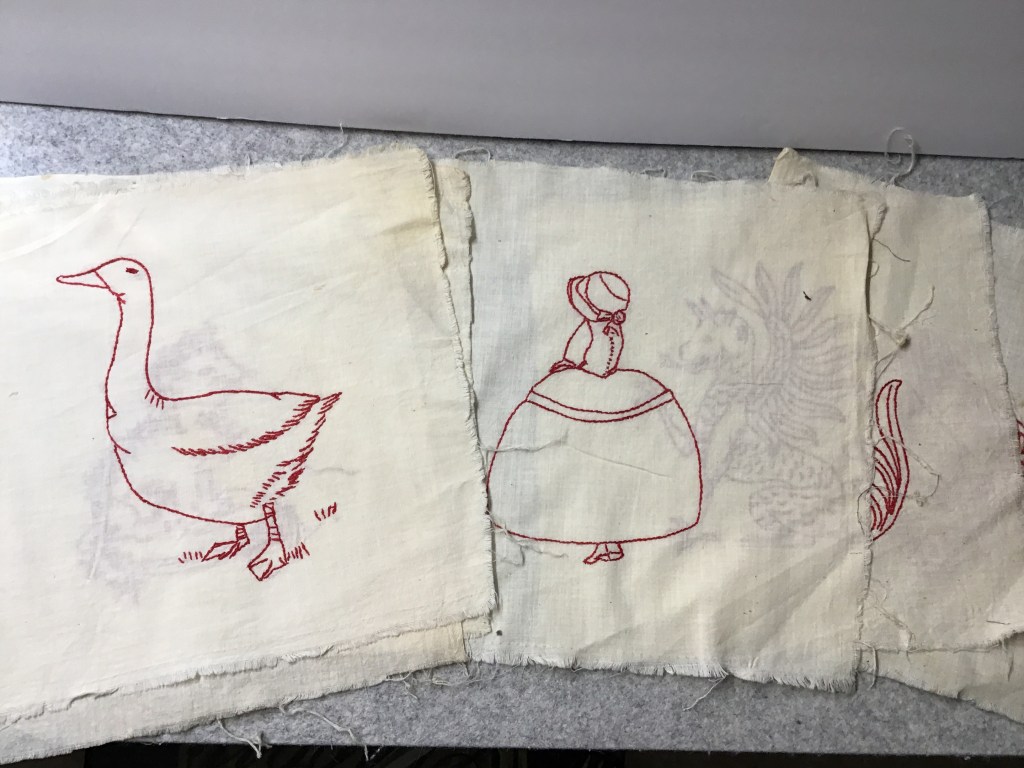
Another fun find was this great set of blocks from the 1940’s/1950’s, which I found at thePlaid Sheep Company shop in Berlin, Ohio. The fabrics are just so bright and colorful and busy, I can’t help but love them. And the blocks are really big, too, so I could actually turn the 18 blocks into a nice-sized quilt. Hmmm. Maybe.
I even found some stray redwork blocks at Quilt Market.
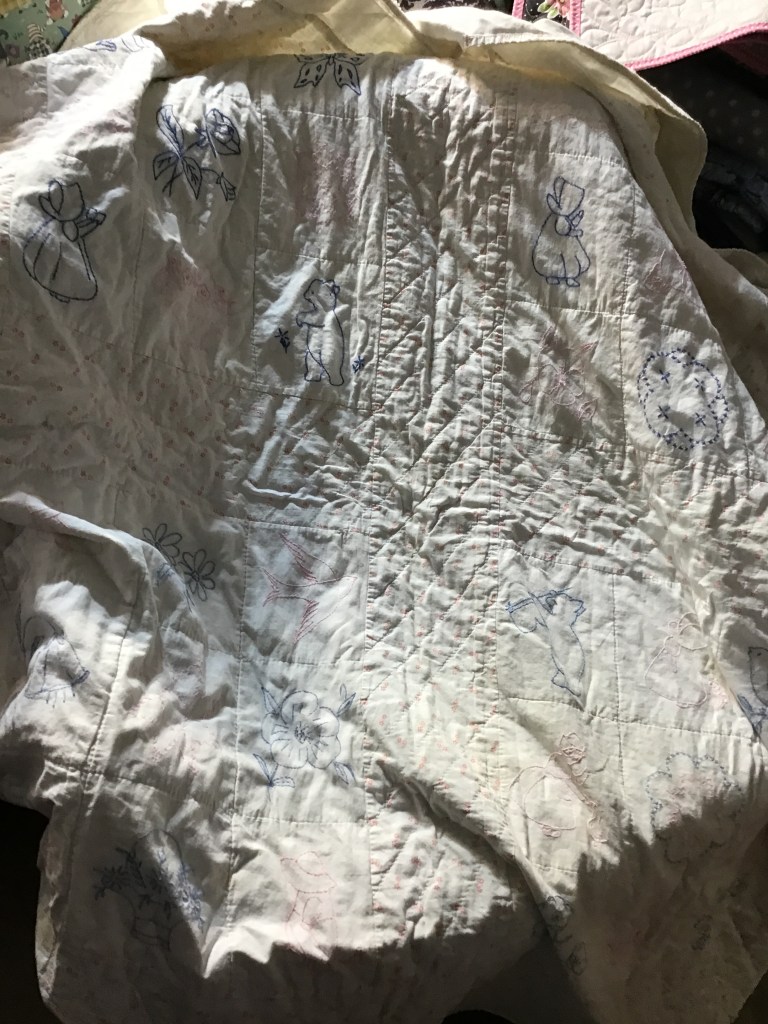
In Millersburg, Ohio on my Mom’s birthday trip, my sister found a a delightful children’s quilt with embroidered blocks in pink and blue. She messaged me a photo in case I was interested and the rest is history. Sun Bonnet Sue, Overall Sam, Cupie dolls, flowers, bears, dogs, and other motifs adorn this sweet quilt, below.
The last quilty treasure I have to share with you today is a tiny little doll quilt. I found this one in an antique mall in Berlin, Ohio. The maker dated the quilt on the back, but sadly there is no name, only an initial.
I hope you enjoyed taking a peek at some of my recent textile goodies.
That’s it for me! Take care and remember to label your quilts so someone someday can research you.
So, what are you doing for Thanksgiving? Originally, I was planning to have ham because I’m not wild about turkey. Then, wouldn’t you know it, but my father brought home a turkey — change of plans. Huh. I am hoping to put the turkey in the crock pot, which is so much easier and a lot moister, in my opinion. Hopefully the turkey will actually fit into the crock pot…..fingers crossed!
In the meantime, I want to take a moment and congratulate our 2 winners from the recent blog drawing for 2 sets of our brand new beautiful 12 Quilts of Christmas Rose Card pattern collection.
12 Quilts of Christmas Winners
Throw the confetti! Cue the band!!
Special Congratulations goes out to Heidi from CT and Barb from NE.
Thanks to everyone who commented on your favorite holiday traditions. I so enjoyed reading them and wish I could send each of you a prize……… If you didn’t win, though, it’s not too late to grab your own set of the 12 Quilts of Christmas patterns HERE.
PSST! I’ve been itching to share my recent trip after getting home from Houston earlier this month, but I had already planned to wrap up Quilt Market and Festival for last Thursday’s post, so my trip to Ohio had to wait until this week.
Ohio Amish Country
A few days after I got home from Houston, I asked my Mom what she wanted for her birthday (which at the time was about a week and a half away). She thought about it for a moment and then answered, “I’d like to get away.”
It wasn’t quite the answer I thought I was going to get, but as I knew she hadn’t gone on any vacations since before the Pandemic, I decided to talk to my sister and see if we could figure something out together. So I told my mom, “Okay, let me see what I can do.”
Later that night, I messaged my sister and asked her what she thought about taking our mom on a mini vacation the weekend of her birthday (her birthday was going to be on a Saturday). My sister, Tracy, surprised me and jumped right onboard with my idea.
We tossed around a few places that wouldn’t be too far for us to go for a weekend. I suggested Findley Lake, NY or maybe Berlin, OH. Within a few days, my sister sent me a hotel reservation and our trip was on! For real!
We were off to Millersburg and Berlin Ohio, in the middle of Ohio’s Amish country in five days. Woohoo! I’d been there once on a bus trip and had loved the area, Tracy had driven through there a few times but had never really spent any time there and our Mom had never been there.
We left late Friday afternoon, as my sister had to work. Mom rode shot gun and I was the puppy wrangler in the backseat.
Oh?!? Didn’t I mention it??? We took my pup, Bailly, along on our girls’ week end! It was a three hour or so drive until we got to Millersburg to check into our hotel, the Holiday Inn Express, which was pet friendly. Bailly did very well, considering she usually gets anxious on car rides, even though she really loves to go places. She’s a Shih Tzu — she doesn’t have to make sense.
The next day, Saturday, we were off to explore Berlin, which was only about 6 miles from Millersburg. Our first stop was a coffee shop for my sister as she needed to get her coffee drink to function, LOL!
There was a really cute kids’ metal truck outside the coffee shop. While Tracy went in to get her coffee I.V., I took Bailly for a little walk and we went to check out that little red truck. Anyone that knows me, is probably shaking their heads about now because they know how much I like red trucks.
Then I had the brilliant idea to take a photo of Bailly in the truck. Great idea, but it didn’t work well because she was just too little. Sweet little dear — when you weigh a whopping 12 pounds, everything is pretty much too big for you. So I posed with her and my sister snapped the photo.
After my sister was caffeinated enough, we headed to a couple big buildings with signs that read “Antiques Mall” and “Craft Mall”. Goody, goody. I hope they didn’t have a problem with small little furry girls in shopping carts……
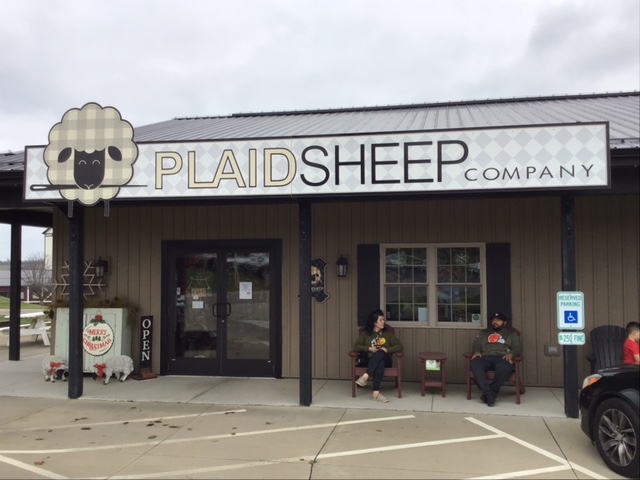
What a shock when we got over to the buildings and there wasn’t a soul there+. We drove around, looking a for another entrance, but both buildings looked abandoned. So, we headed to a cute shop across the road called the Plaid Sheep Company. We figured it was some kind of gift shop, maybe with crafts, and I was hoping perhaps they’d have some wool yarns as my sister did a little knitting now and then.
But guess what????? It was a QUILT SHOP!!!! I sure was surprised as I wasn’t planning to go to any quilt shops (although there are quite a few in the area) because it was my Mom’s weekend and I expected we’d be busy going to antique shops, gift shops, and maybe some second hand shops, too.
Another wonderful surprise was that just as soon as I walked into the shop (about the same time I realized we’d walked into a quilt shop), I spied antique quilt blocks. Yippee! I snapped those blocks up as fast as I could. By then I imagine Mom and Tracy were rolling their eyes at me.
Plaid Sheep Company was a homey delightful shop with loads of finished samples and corresponding patterns, lots of kits, wool fabrics, cotton fabrics, and precuts. There were fun gifty items that kept my Mom occupied. I passed Bailly off to my sister before I dove right in (the shop welcomed my little lady). What fun!
I really enjoyed all of the project samples that each had a number which directed you to a column of patterns where you could find the pattern for the sample. Easy piezy! I was admiring some lovely bags towards the back of the shop and when I turned around the corner of the display, I couldn’t help but stop and stare!
There right in front of me was a nice neat row of 8 Villa Rosa table runner patterns! Hah! My sister and Bailly came around the shelf after me and asked me what I was “cackling” about. All I could do was point. She burst out laughing too and said she was going to go tell the person up at the register that I was with Villa Rosa. Fun, exciting, and embarrassing all at once. LOL!
I finished up my looking and shopping, checked out, and we headed on our way to see what other mischief the four of us could get up to……
After visiting a couple antique shops and stopping by the Guggisberg Cheese Chalet — home of the original Baby Swiss Cheese (Bailly and I stayed in the car while Tracy and Mom went into the cheese shop, but I popped in after they came back to the car).
Earlier in the day, Bailly had discovered how much fun the back window was, especially for people watching. At the Cheese Shop, there was a group of young women who were walking by and they saw Bailly in the window. One of the girls asked the others if they thought the dog was real and then Bailly moved and scared them! Hah! Silly Bailly.
Then we headed back to the hotel to figure out where to eat for Mom’s birthday dinner. I had volunteered to stay in the room with Bailly so Mom and Tracy could go to a nice Amish restaurant and they could just bring me something back. But Mom would have nothing to do with that! She wanted to eat dinner with all her girls, so Tracy and I made a food run down to the Millersburg Hotel and Tavern to grab steaks and seafood. We ended up eating dinner in the dining area of the hotel. Together. That evening, we just hung out in our room and laughed and talked. Bailly was exhausted and she napped. It was a really special day.
On Sunday, after we’d checked out of the hotel, we spent some time exploring Millersburg and found this amazing antique shop in downtown Millersburg, Village Antique Emporium. We were happily surprised to fnd it open on Sunday. It was three stories of antiques and collectibles! OH MY!
Talk about crazy — Tracy and Mom even found this interesting Talon display in the shop.
Which was really quite bizarre as our hometown of Meadville, PA is where the “hookless fastener” was invented and home to the Talon Zipper Company. How strange to travel into another state and find collectibles from your own hometown…….
Then, it was time to head back home. Back to good ol’ Meadville.
What a really fun adventure — a true girl’s weekend, something we’d never done before. I don’t know why. We are already planning to go back to Millersburg and Berlin in the spring and want to spend an extra day there so we can get into even more trouble together.
Well, that’s it for me this week. Save me a piece of pumpkin pie — just make sure it has lots and lots of whipped topping!
Here we all are — my Mom (center) and her girls (Bailly is the small furry one…….)