Hello Quilty Friends!
Happy Thursday to you!
Oh My Goodness! It’s 4 days until Christmas Day. Wow! That’s so hard to wrap my head around. I hope you are more ready for the holidays than I am……I am so far behind now, I don’t know how everything is going to get done unless I forgo sleep until the 25th….
Happily, our December Sew Along gives me the chance to slow down a little bit and enjoy sewing something really fun.
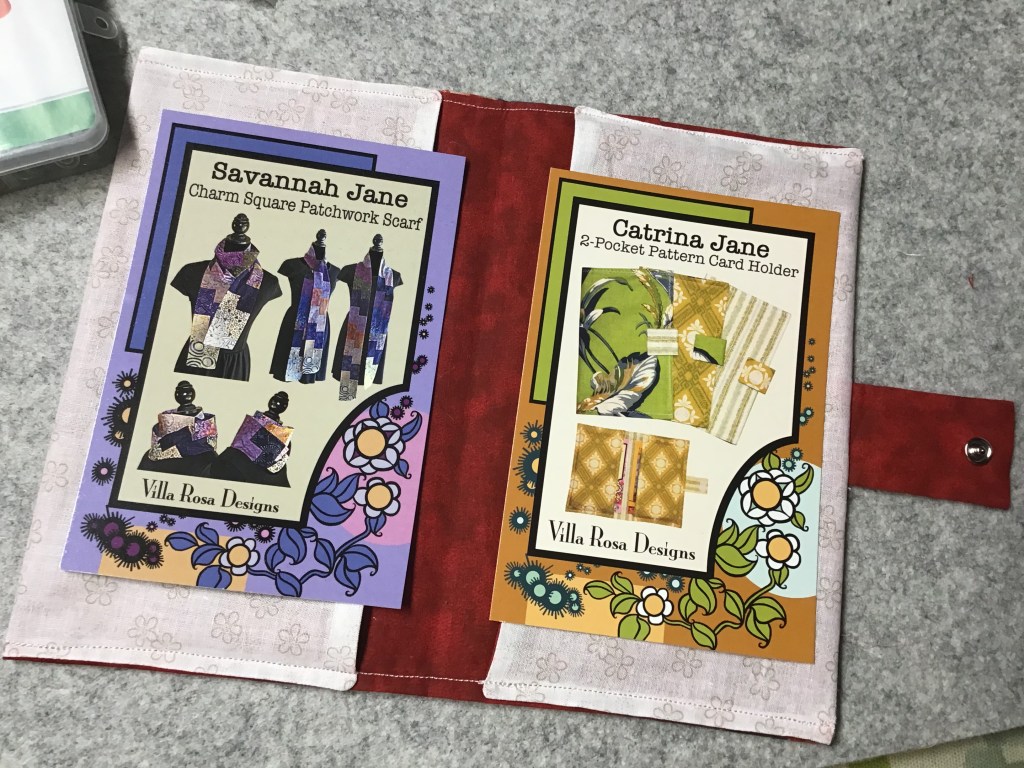
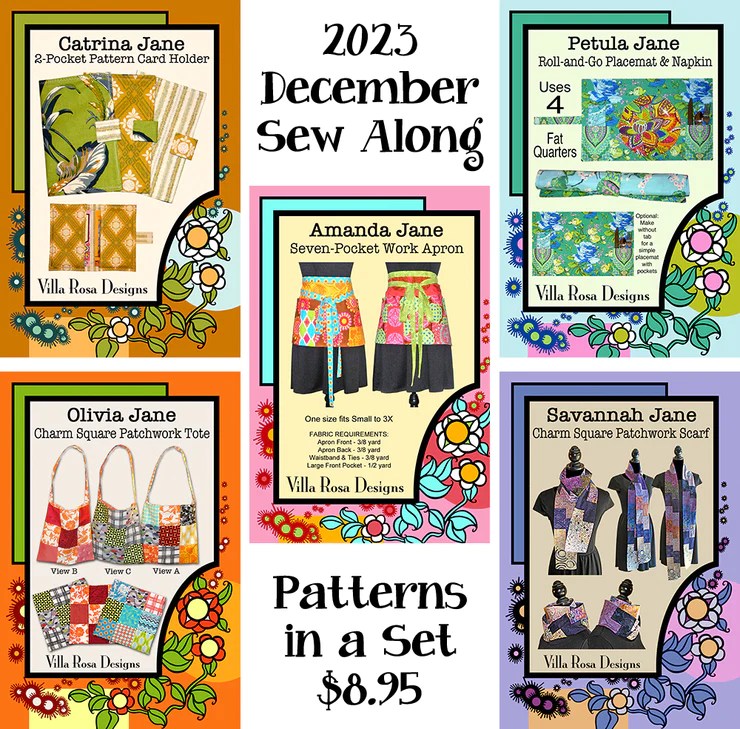
I am sorry, but it’s probably a little late to join in the fun of our December Sew Along at this point as we are now on Week 4 out of 5 weeks. However, you can still order the set of 5 Accessory patterns HERE and do the SAL at your own pace as I will add the December SAL along the right side of the blog so you can find the individual posts easily.
If you missed the December Sew Along projects so far, you can find them here:
Olivia Jane
VRD December Sew Along Week 4

Olivia Jane is one sassy lady! Variety is the spice of her life. She has too many interests and hobbies to count and makes these cute patchwork totes in multiples just to keep her life organized. They are quick and fun and Olivia Jane can use charm square packs, fat quarters, and even her scraps and stash to whip up these great little totes. Each bag that she makes in truly one of a kind! Olivia Jane keeps a few bags empty so she she can take them shopping, antiquing, to her quilt guild meetings, to knitting club, or to her multiple book clubs. Whew! Trying to keep up with Olivia Jane is a difficult task for all her friends. To thank her besties for everything they do for her, this year Olivia Jane is making these fun bags for everyone. Of course, she started them early in the year so she would be ready for holiday gift-giving. Just one more to go.....
Your Sew Along Challenge this week is to make your very own Olivia Jane tote bag.
That’s right — this week, for Week 4 of our December Sew Along, you need to have your pattern pack in hand. Grab your supplies and create your own one of a kind unique Charm Square Patchwork Tote Bag.
Please make sure to join us on the Villa Rosa Facebook page to share your project this week and to check out the projects of your fellow VRD enthusiasts. The “social connection” is what makes sew alongs SEW much fun! Show us your fabrics! Any tips or hints for construction? Anything you need help with or don’t understand? Did you customize your project? Maybe you’re making 10 of them for Christmas! Please share because we ALL want to see your Sew Along “sew and tells.”
Villa Rosa Designs Facebook Page — you can use this link to take you to the VRD Facebook page. Make sure you are signed into your Facebook account and on the VRD page you can “like” us to join in the fun. The more folks that join in, the more fun it will be!
Before we get to my Olivia Jane tote bag, I wanted to talk a little bit about the pattern. Olivia Jane is a great pattern to add your own touch or to use your own finishing techniques. The pattern even gives you 3 different options for sewing your squares together! The tote works up quickly and it’s fun to play around in your charm squares and stash — we all need a reason to dive back into our own stashes, right? Or, head to your local quilt shop and gather up a beautifully-coordinated collection of fabrics to use for your tote bag. Whatever you do, Olivia Jane will be right by your side.
One of the cool things about bag-making is that there are a lot of different techniques to explore as well as a lot of different ways to get to the same end results. If you’re reading between the lines here, what I’m really saying is that I don’t follow directions very well — Mea Culpa….
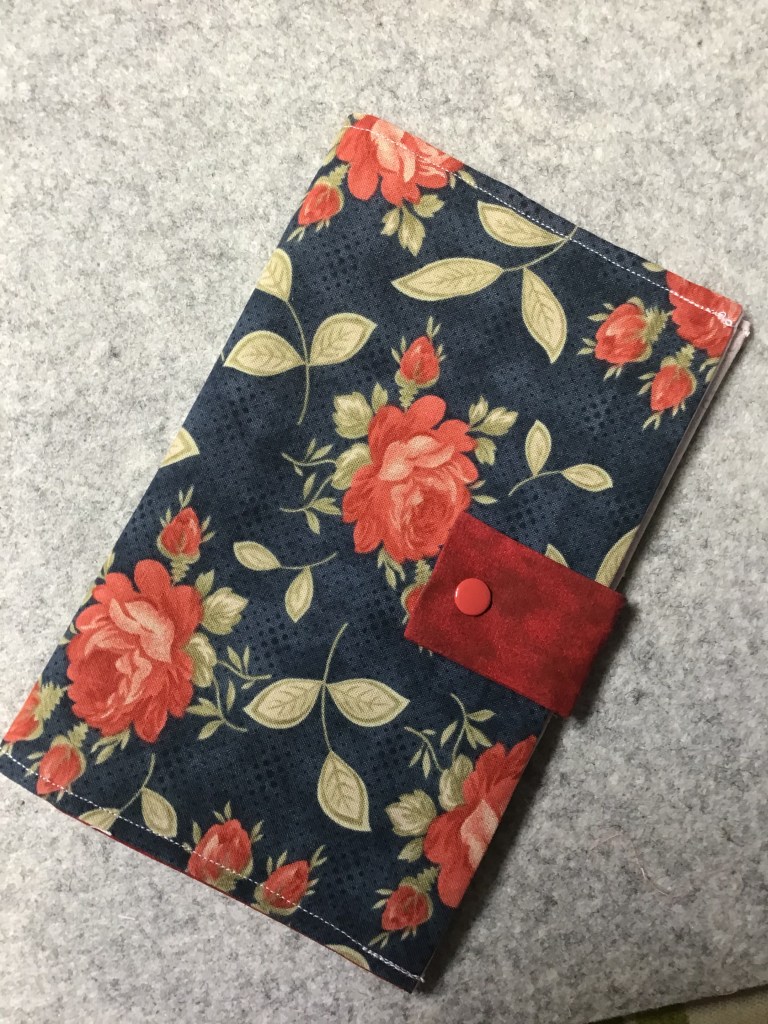
Tricia’s Olivia Jane Sew Along Project
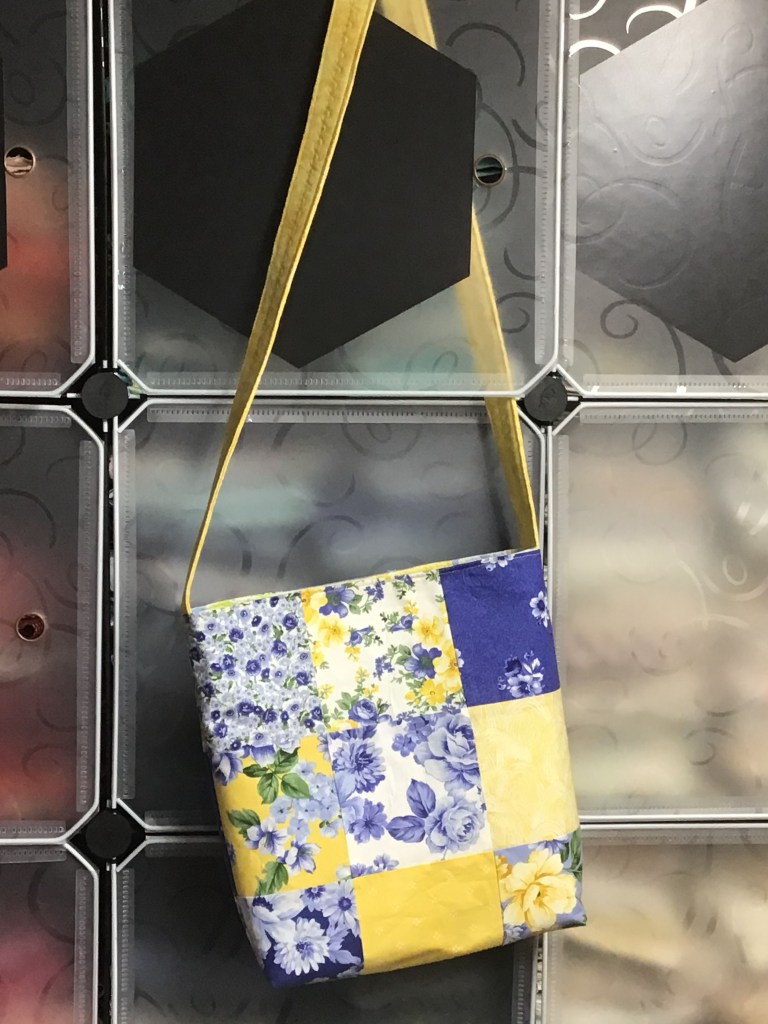
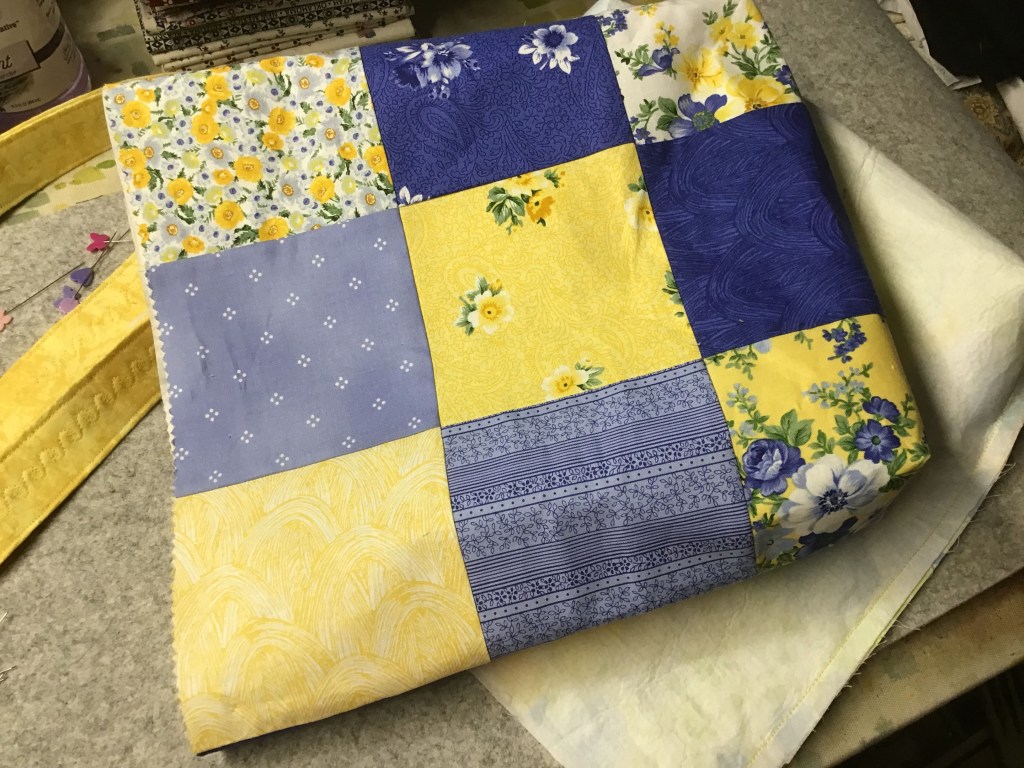
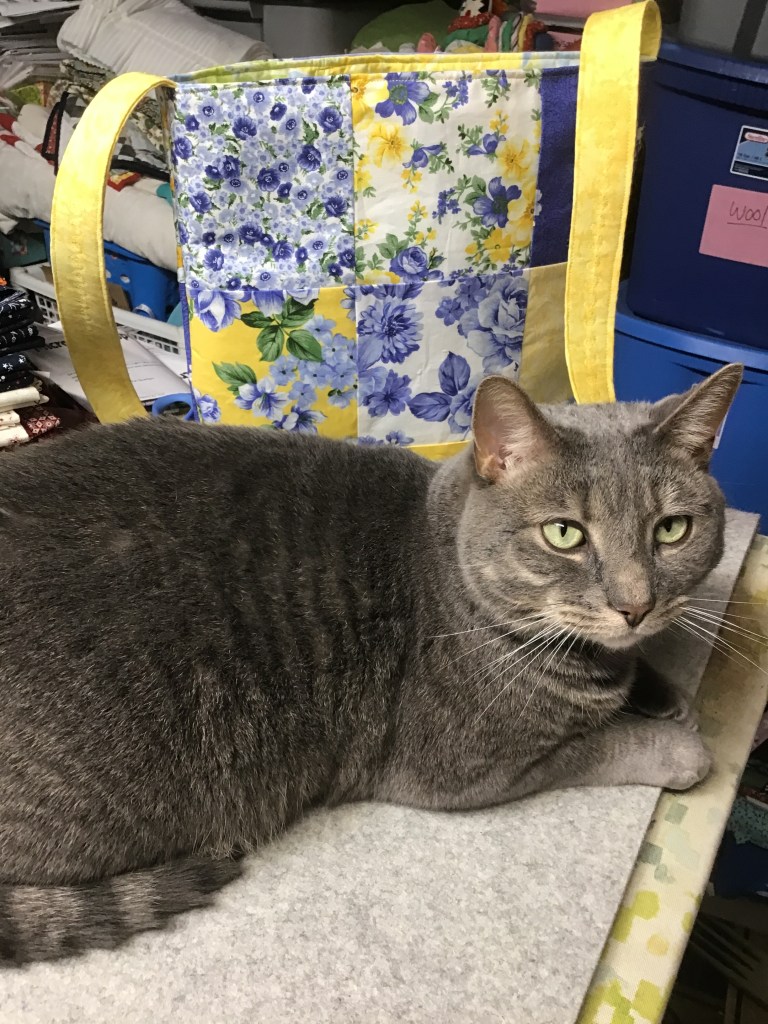
Here is my finished Olivia Jane tote! I just love how it turned out. Isn’t it adorable??? This would be a great tote for carrying books to/from the library, going to quilt guild meetings, or whatever. With its open top design, though, I wouldn’t use it as a purse because my wallet and personal items wouldn’t be secure. But beyond that, anything goes!
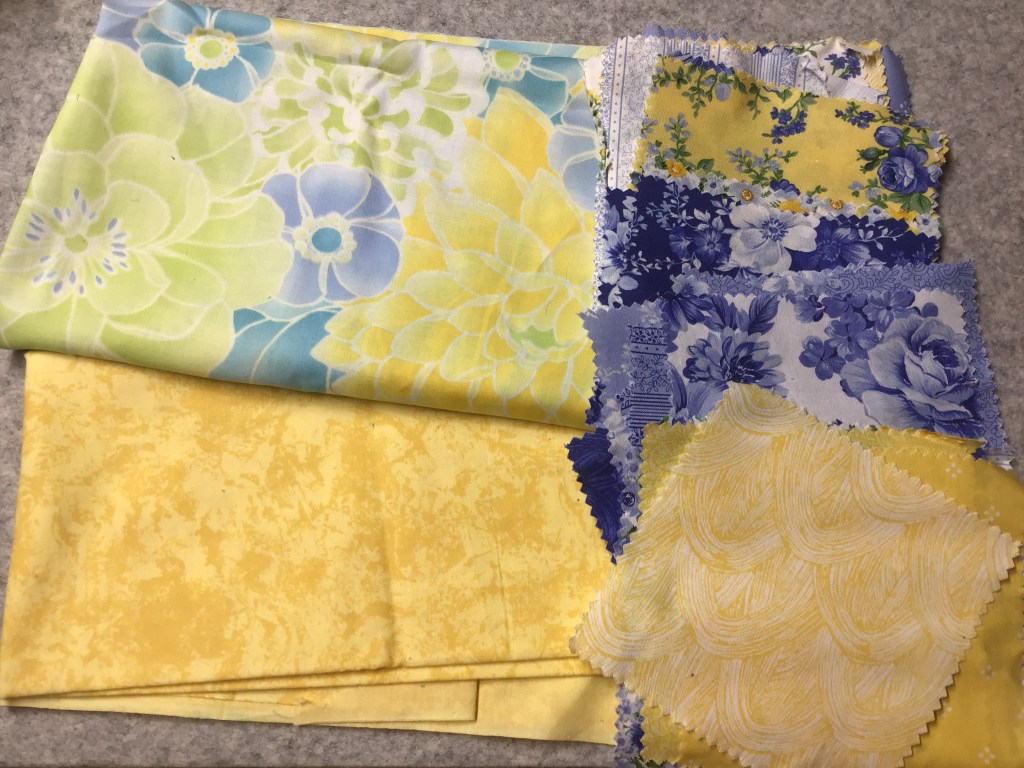
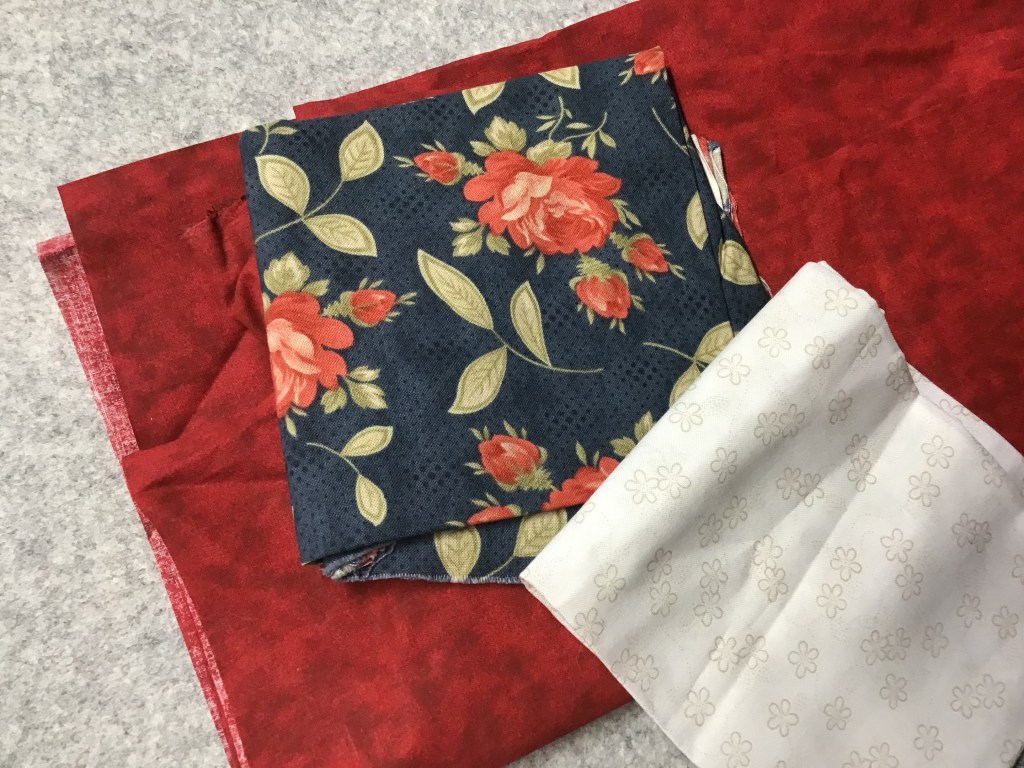
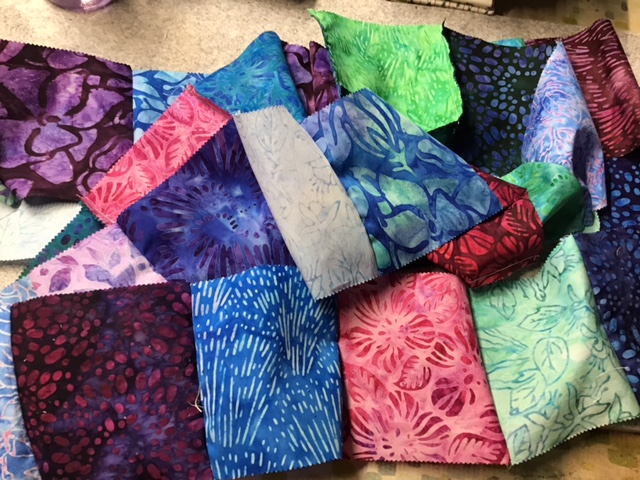
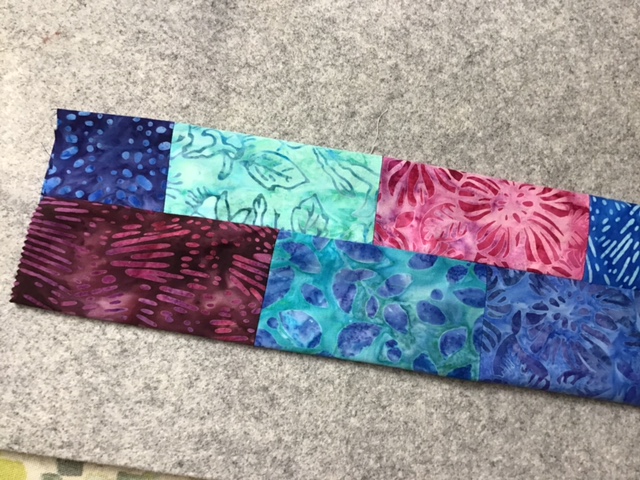
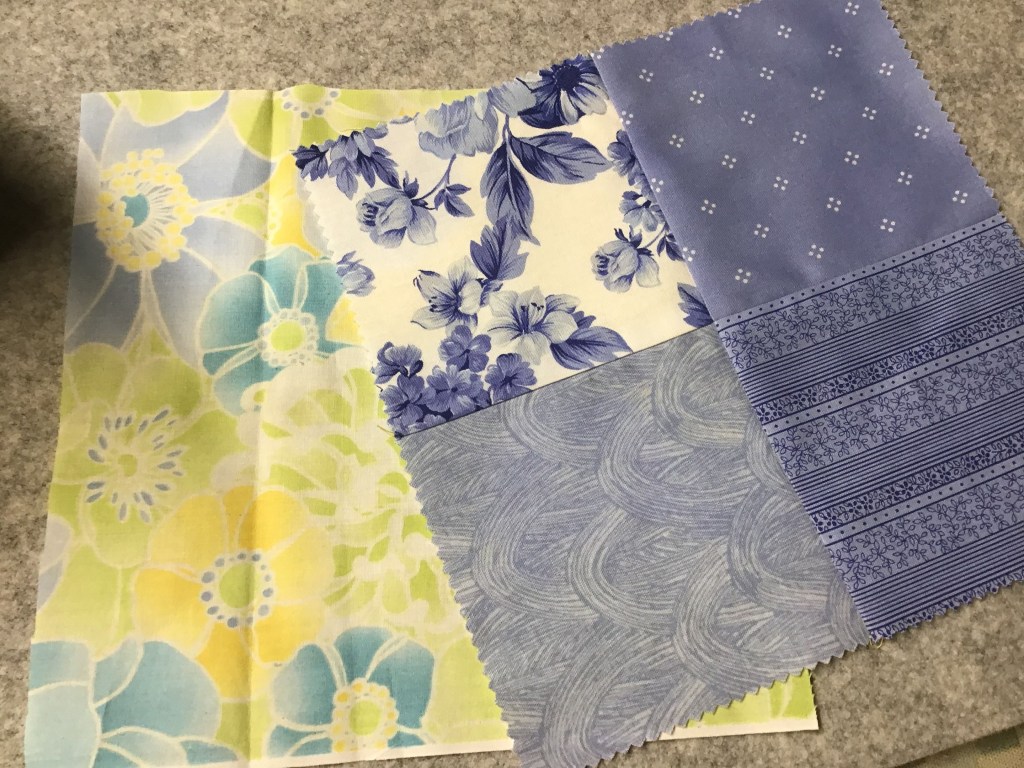
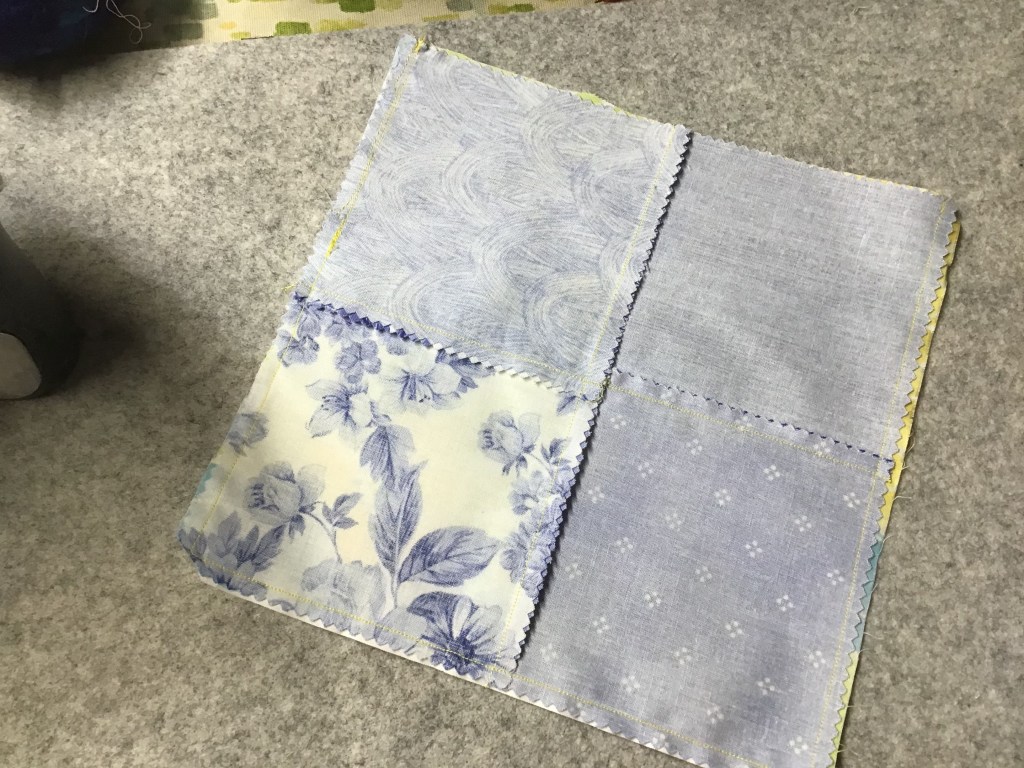
Here are my fun and sunny fabrics! I looked through my stash of partial charm packs and this blue and yellow one begged to be used. I added the leftover floral print for the lining and the tonal yellow for the strap. Ready to go!
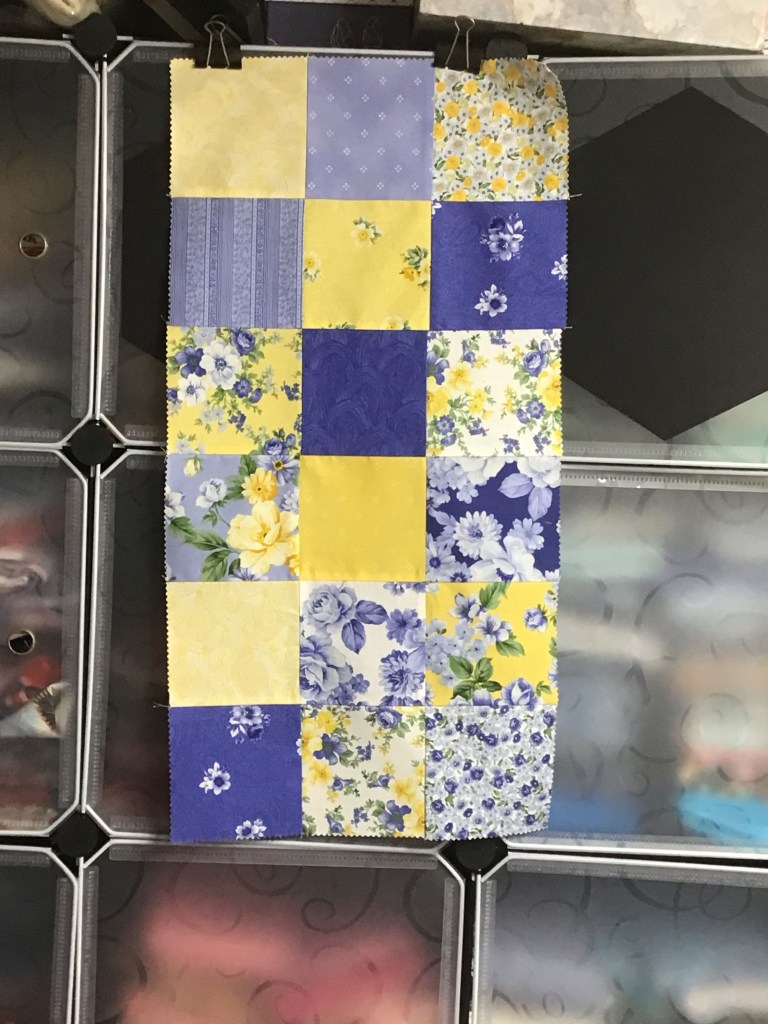
The first thing I did was to sew my charm squares together. I chose to alternate my blue and yellow squares. Do likewise of you want or not. It’s your tote! Don’t forget to read over the pattern because it gives 3 different variations for the charm square arrangement on the front of the tote.

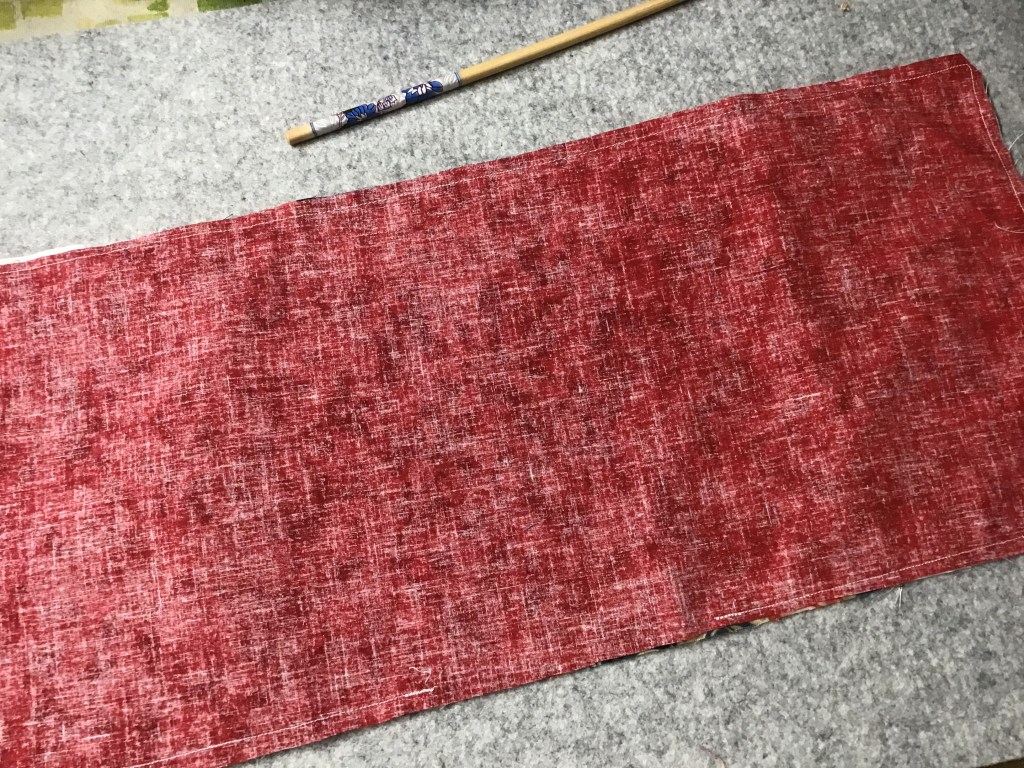
Shhhh, but I deviated from the pattern a little bit. I decided that I wanted a sturdier tote that would hold up to what I usually put in my tote bags like books and sewing projects on the go. I added a layer of Pellon Decor Bond, which is my favorite fusible interfacing for bags and totes. I fused Decor Bond to the back side of my charm square bag front, my lining fabric, and the strap. I really like this product because it gives my bags and totes body so they stand up without wilting. Love that.

Another option would be to add a layer of batting in your tote to give it a little bit more body. But wait — there’s more! Other possibilities include Soft and Stable foam from byAnnie’s, Flex-Foam from Pellon, or Bosal’s In-R-Form Plus fusible foam stabilizer.

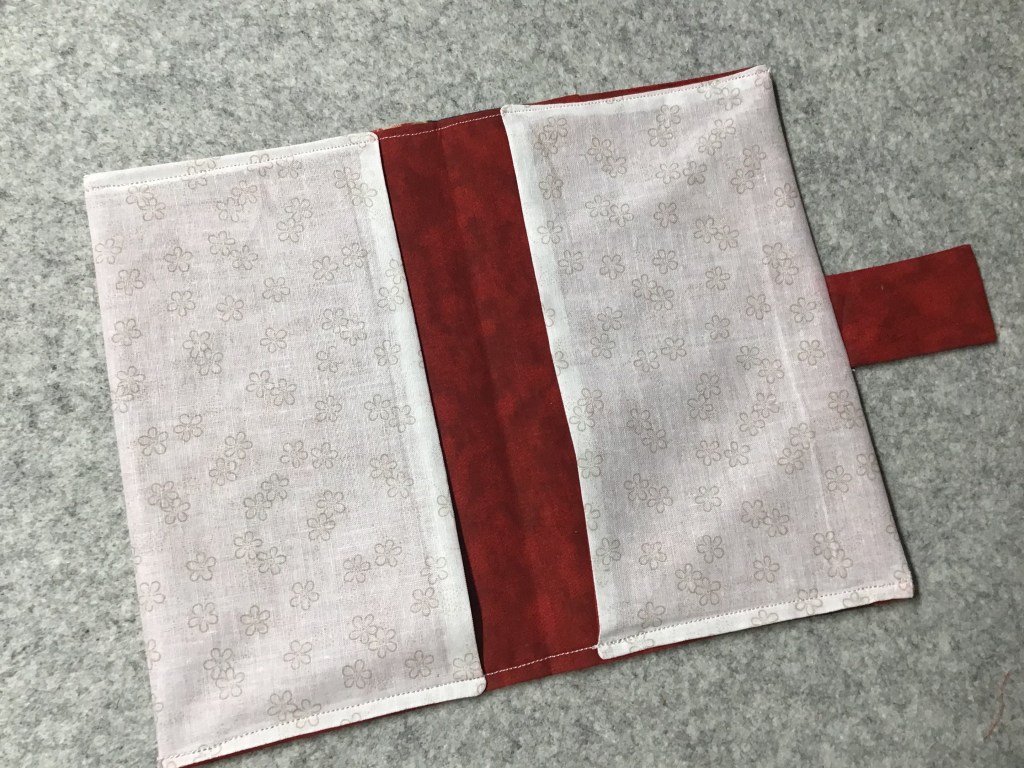
Another adaptation I made was to add an inside pocket because you can never have enough pockets!


I sewed 4 leftover charm squares together into a Four Patch block. Then I sewed the pieced pocket front right sides together with a same-size square of leftover lining fabric. I sewed around both sides and the bottom, leaving the top open. Then I turned my pocket right sides out and pushed out the corners. I pressed it well, folded the top edge down, and folded it down again to encase the raw edges. This little trick gives you a sassy little strip of fabric at the top of your pocket.
Next I measured about 2″ up from the center bottom of the lining fabric and centered my pocket on the lining. (Yup, that’s a friction pen I’m using to mark my lines on the lining fabric. With a quick press of my iron, the lines will disappear!) Finally, I sewed around both sides and the bottom of the pocket. Done! Now I have a place for a bottle of water or my keys or a small notebook…or whatever fits. LOL!

I also added a little fun to my strap by using one of the gazillion fancy stitches on my sewing machine. I stitched this really cute spiral design down the center of my strap. It actually helps to keep the strap from stretching; however, it looks like a fancy-shmancy embellishment.
Adding little details like this to any bag or tote raises the bar for its uniqueness. Little details like this are also the difference between a 2nd place and a first place finish at your local fair or show. Just sayin’……
The last thing I did to change up Olivia Jane was to box the corners of the bottom of my bag. This gave my bag a flat base so it could stand up, which works better for me and my stuff.


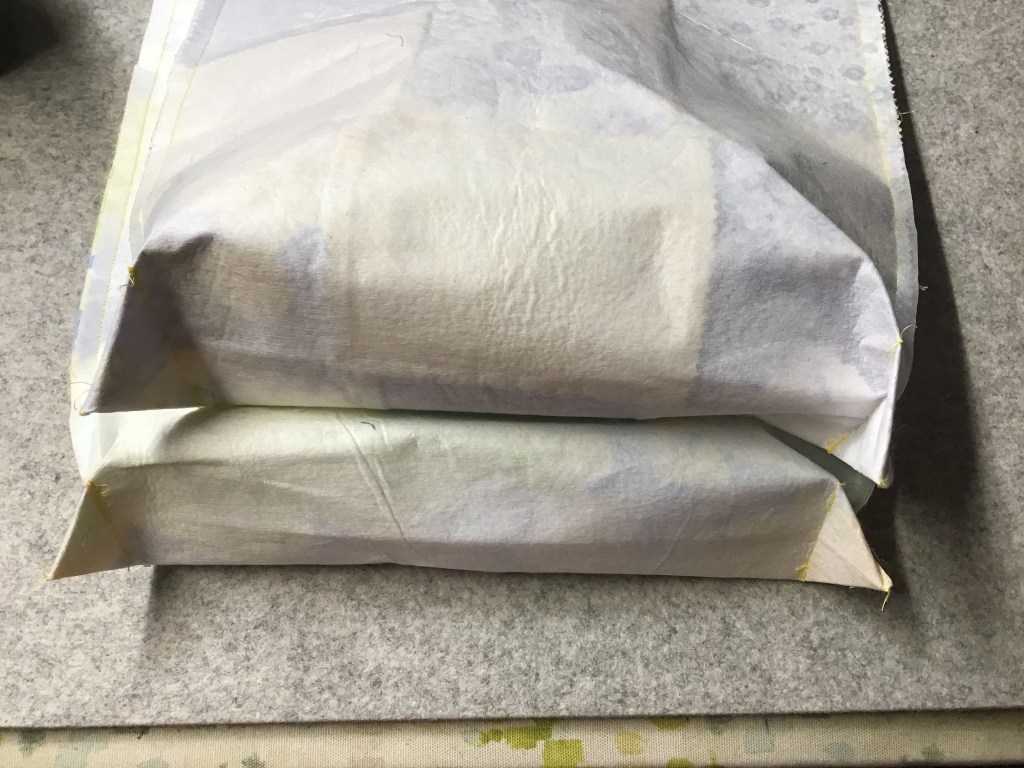
Boxed corners aren’t hard to do. First you make sure the inside of the lining or bag is on the outside and then fold the bottom of your bag so that the side seams create a point like you see in the first photo above. I decided to use 1.5″ as my measurement for making my boxed corners because I didn’t want to make the bag much smaller in size. In the second photo you see my Frixion pen line, which is measured 1.5″ from the point. Then simply sew on the line, back-stitching at each end. Repeat for both sides of the lining fabric as well as the the corners of the charm square bag front. Some people trim away the waste triangle at each side, but I leave them there to add a little extra support to the bottom of my bag.
There are actually lots of other things you can do or add to your Olivia Jane tote to make yours individual to you. You could add a flap and magnetic snap, velcro, or a button to secure the top of the bag. You could add more pockets — even on the front and back of the tote. Make 2 straps instead of just one or use ready-made bag handles as another option. Make the strap(s) longer or shorter to suit your needs. Make the bag bigger by adding more charm squares — just remember to make the lining fabric the same size. Another idea would be to use batting on the inside of your bag and practice your free motion quilting to quilt the front of the bag and the batting together. All of these options make bag-making really fun because you can start with the same pattern and end up with totally different bags.
Okay, now it’s your turn! I hope you will enjoy making your Olivia Jane tote!
Time to get your Patchwork Tote made this week (between Thursday December 21at and Thursday December 28th) and share it on the VRD Facebook page. I’ll see you there and I can’t wait to see what you make and hear your Olivia Jane sewing story! Let’s add where you’re from, too! It’s lots of fun to see where all our VRD friends hail from!
See you next Thursday for Week 5 of our December Sew Along.
(PSST! If you’re one of those work ahead kind of folks — our Week 5 project is Petula Jane which will officially begin next Thursday, December 28th. Feel free to have at it, but please don’t post any of your photos or progress on Petula Jane until after next week’s blog post. Between now and then, let’s focus on Olivia Jane. Thank you!)
See you on the VRD FB page!
Sew. Laugh. Repeat.
Merry Happy Jolly Holidays to You and Yours.
Always,
Tricia @ VRD