I hope you are getting a bit of nice spring weather where you live. Everything is greening up nicely now in Pennsylvania and a lot of the spring flowers are finally blooming. I just love ALL the colors – it’s sew inspiring after a long grey and white winter.
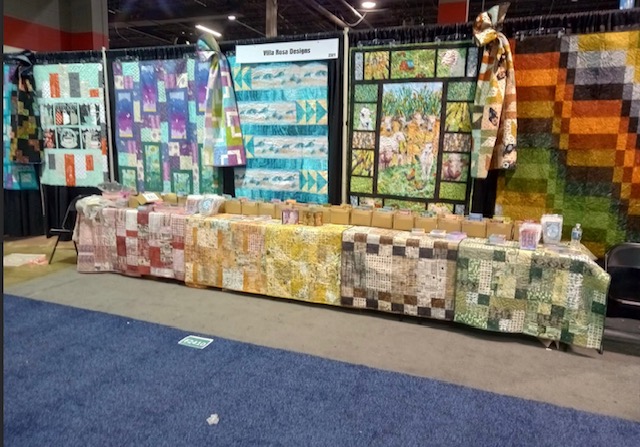
I’m sorry, but this week’s post is going to be a short one. Pat and I are at the H&H Americas show in Chicago, IL right now. I was planning to walk around the show and scope out new and interesting things to show you on today’s blog post but that simply isn’t going to happen.
The VRD booth was completely swamped all day today with excited quilt shop owners and other industry professionals. I want to thank each of you who stopped by and shared your VRD stories and quilt photos with us. b Connecting with you really makes us happy.
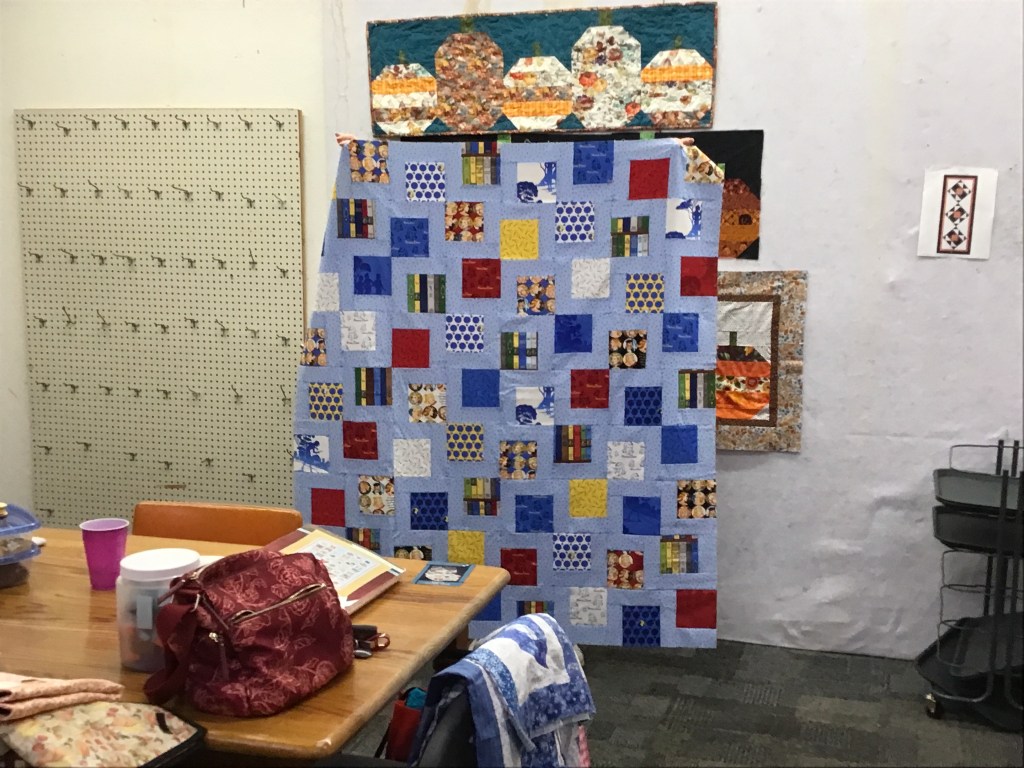
This very lonely photo is the only one I managed to snap last night after Pat and I were finished setting up.
I hope that I’ll get the chance to see some of the new and interesting things and show you my cool finds on next week’s blog. No promises, though – if the rest of the show is as crazy busy as today was, I probably won’t get to wander and take photos.
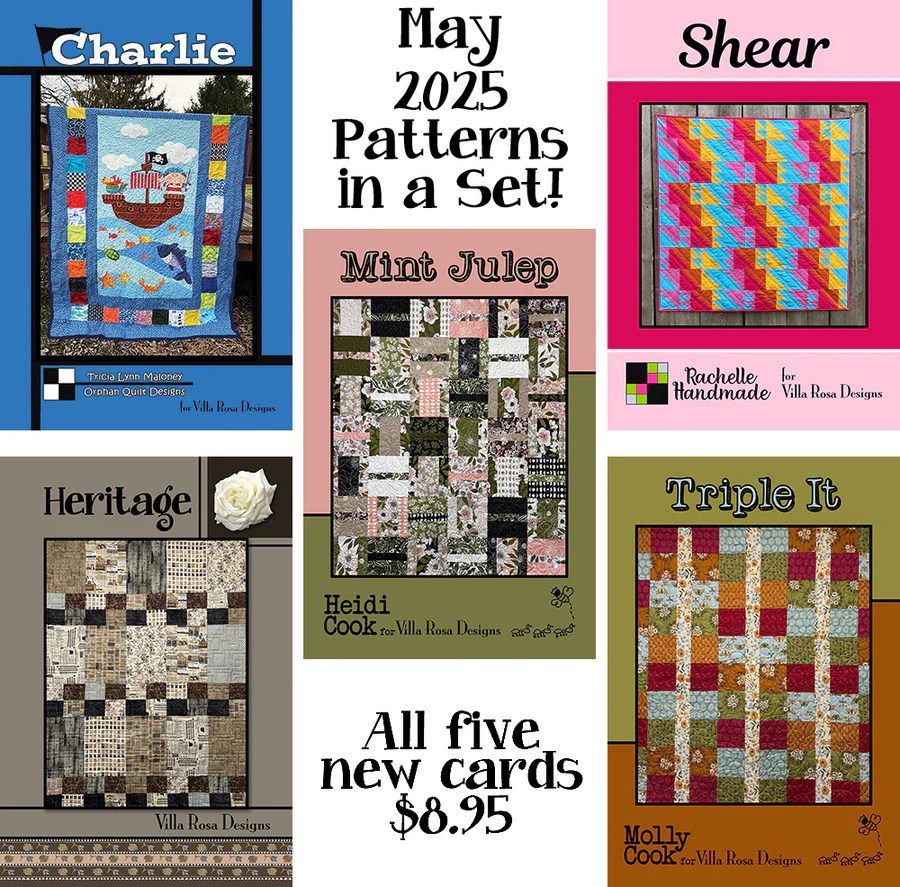
It’s the first Thursday after the first Friday of the month and we all know what that means – new VRD Rose Card patterns. YAY! Let’s take a look.
I just adore the fabrics Molly used in her cute runner from the Let’s Partea collection (isn’t that just too clever???).
Guess what???? We still have some Tea for 2 kits which include the fabrics for the top and binding along with a pattern. You can find Tea for 2 kits HERE.
Here are some of the other kits we still have in stock for the May patterns. Get ’em before they’re gone.
If you love kits as much as we do, you can find all of our quilt kit offerings HERE.
Well, I must admit that I’m fading fast after the busy day Pat and I had, so I’m going to wrap up here. Have a wonderful week and take a little time to admire the flowers and maybe, just maybe, do a spot of quilting while you are at it.
I also want to wish our friends a Happy Hanukkah and a Joyous Kwanza!
If you celebrate Christmas, do you have any special traditions for the day after? When I was a kid, we used to head to the mall for all the deep discounts. As I got older, the 26th became a day to sleep in and chill out, eat leftovers, spend some quality time with my gifts (my family, too — LOL!), listen to Christmas music, and maybe even watch Christmas movies. I think this year I’m going to wear my jammies all day, too.
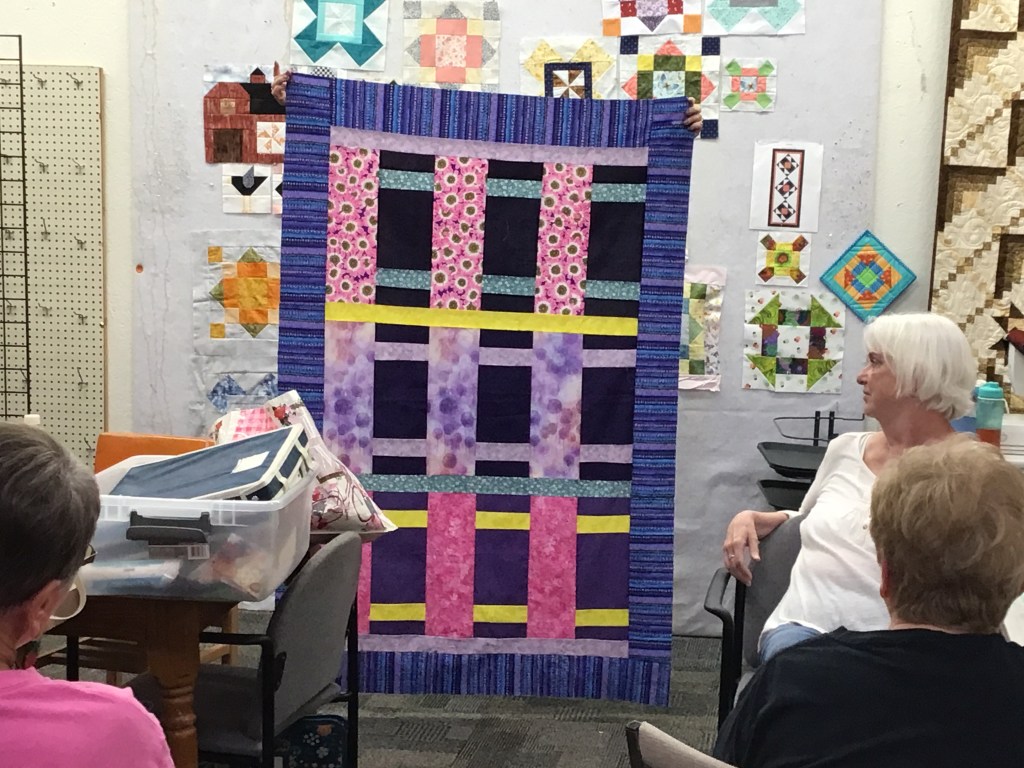
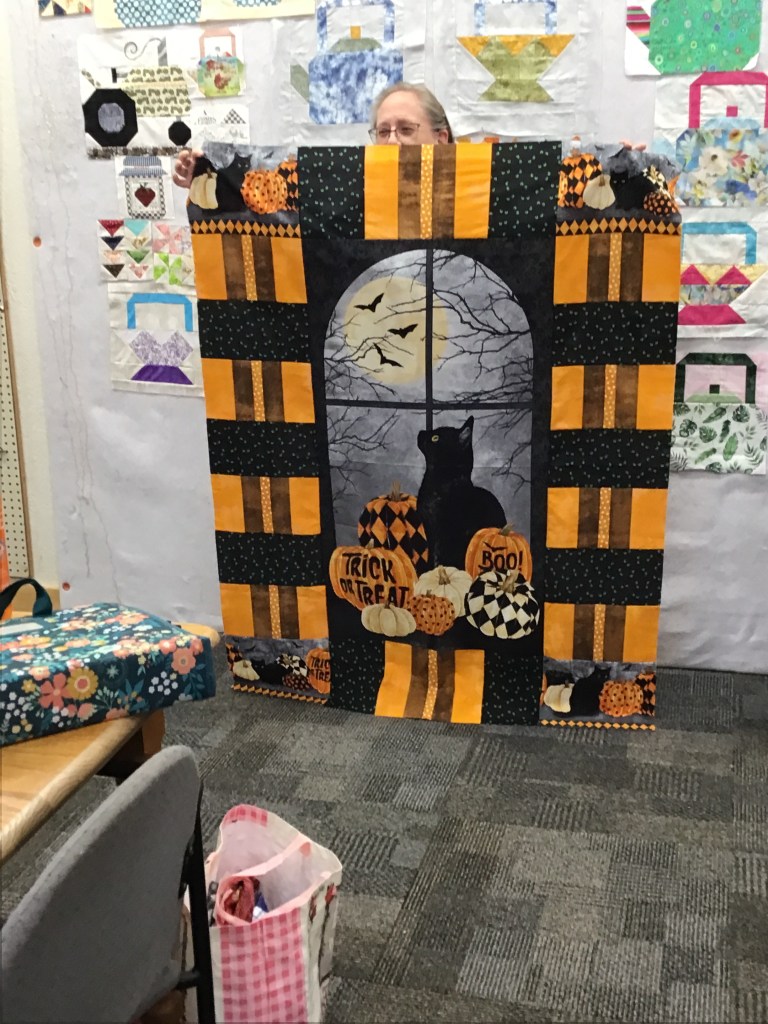
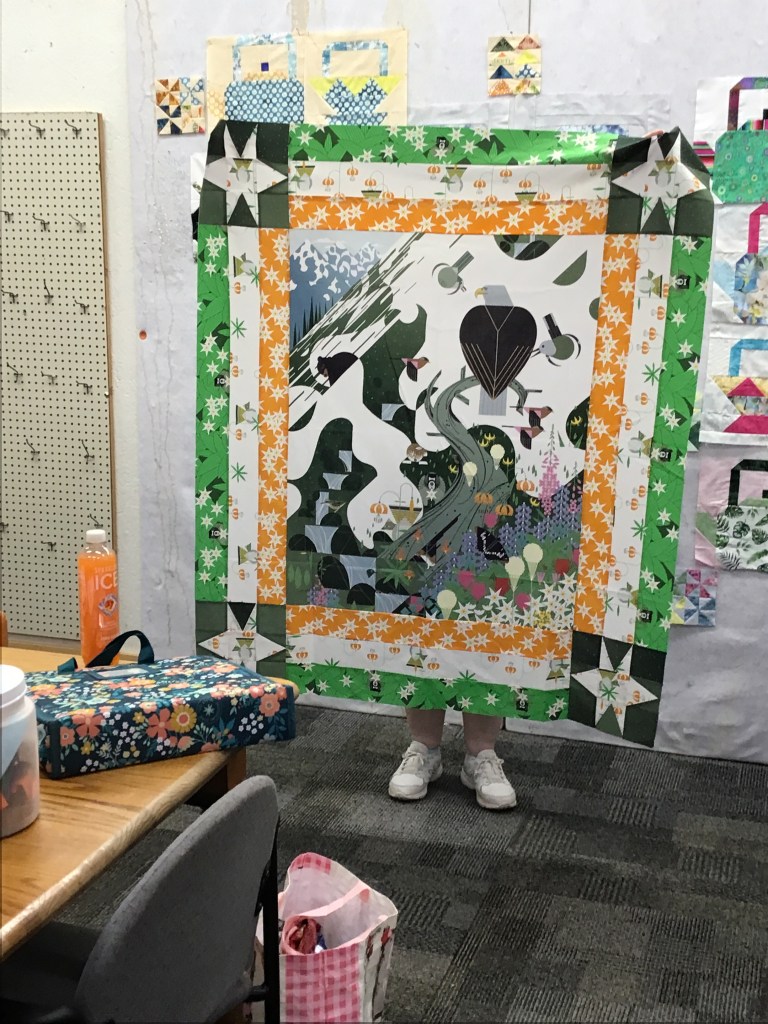
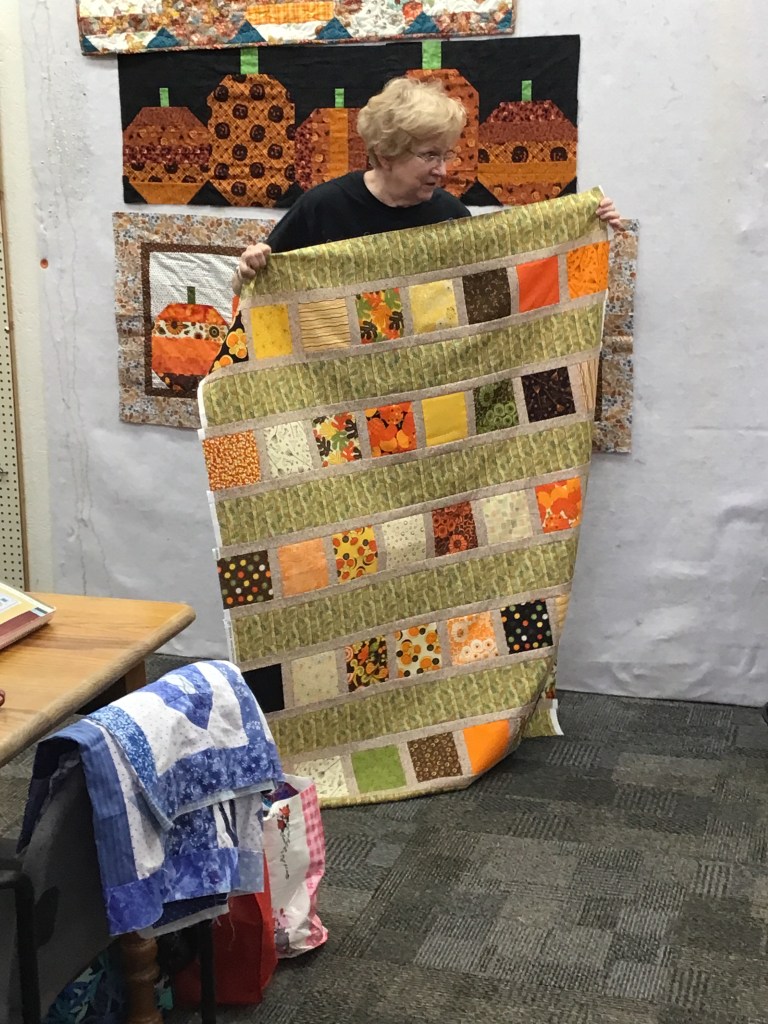
While wracking my brain for a topic for the day after Christmas, I realized I could share photos of this year’s VRD Quilt Challenges I issued to my Friday quilt group. (Big Shout Out to my Friday pals!)
This year in my group, we tackled Lori Holt’s Vintage Farm Girl book.
As I’ve probably mentioned before, my group is totally wild about Villa Rosa Rose Card patterns. Huh? Imagine that. LOL! In addition to the Lori Holt sampler, they demanded that we still do some VRD patterns so I came up with the idea of sprinkling VRD quilt challenges throughout the year. We had a fat quarter quilt challenge, 5″ square quilt challenge, panel quilt challenge, and a 2 1/2″ strip quilt challenge. I must apologize, I was having so much fun in our December get together that I totally forgot to take photos of the 2 1/2″ challenge quilts. Bummer…….
The challenge rules were very simple — participation was optional and participants had to choose a Rose Card pattern that we hadn’t done in the last couple years when we were doing monthly VRD projects. Easy Peasy.
Please enjoy this feast of quilts. Maybe something will spark your creativity for the coming New Year. For your convenience, I am including the link to the pattern for each quilt. What really amazed me was that rarely did 2 people make the same quilt. These ladies really R O C K!
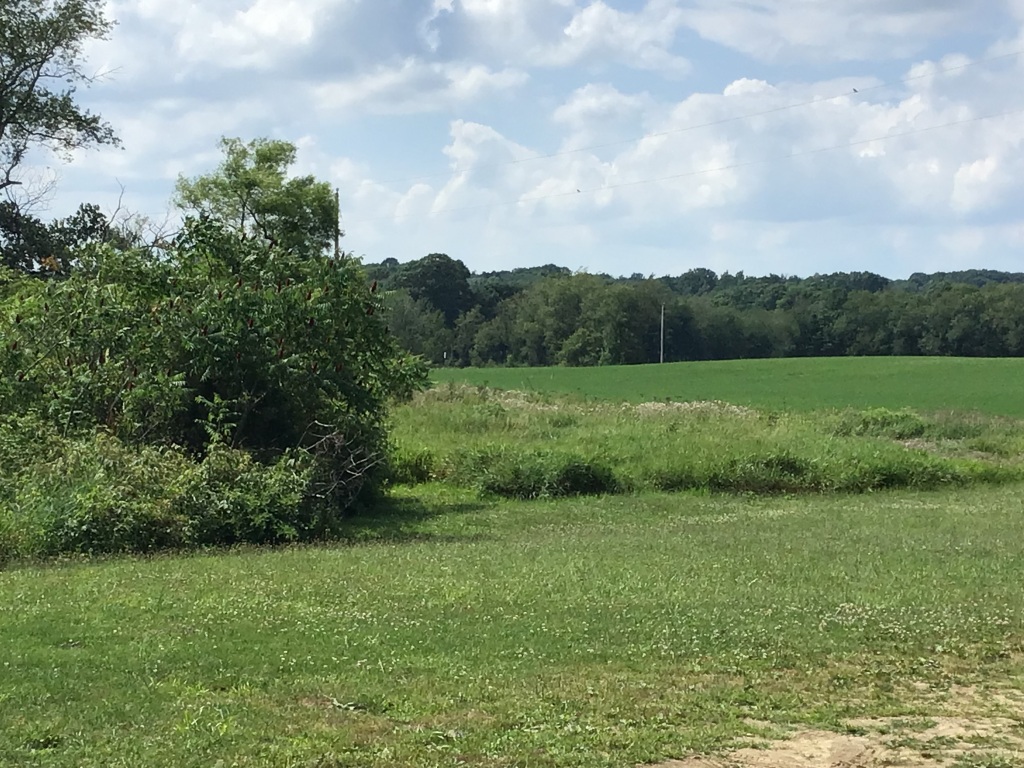
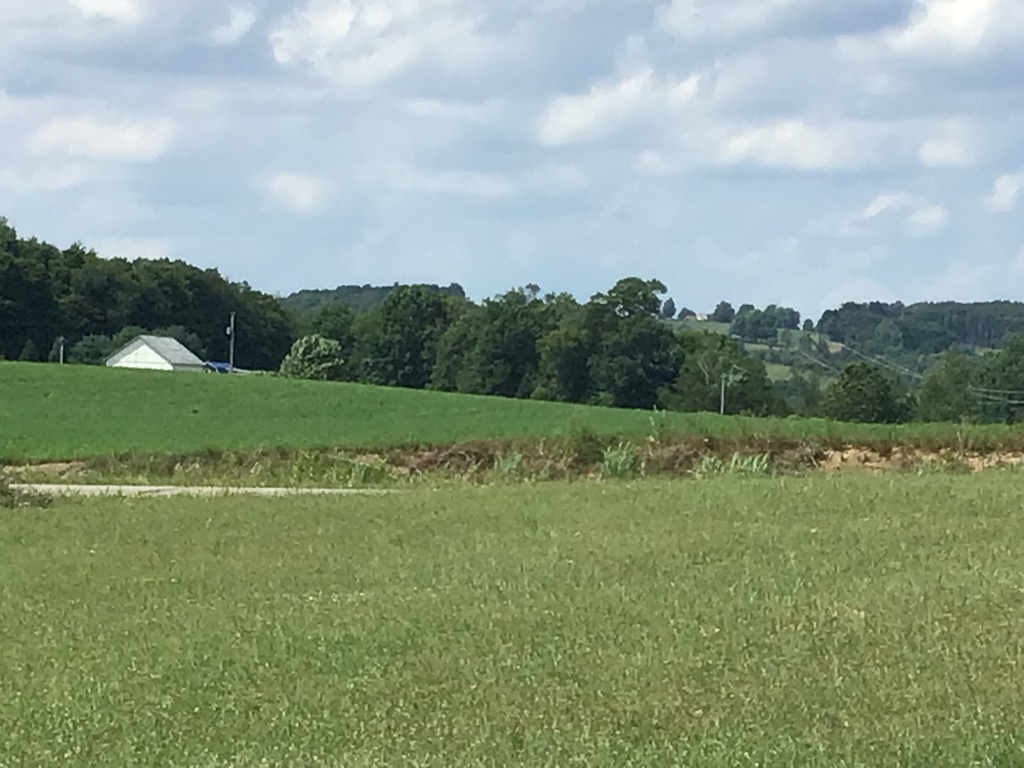
It’s summer time and the living is easy! After last week’s unusual heatwave here in NW PA, this week has been delightfully pleasant! I’ve enjoyed some quality time on the back porch hanging out with my pup, Bailly, and watching our local eagles. Breakfast on the porch? Yup! Lunch on the porch? Double yup!
As I’ve shown in photos before, the little valley where I live, tucked into the foothills of the Allegheny Mountains, truly is a little slice of paradise.
I hope you are able to slow down your pace a smidge in order to enjoy nature, too.
I’ve also been getting in some much-needed sewing as well. WHEW! I am so relieved that crazy has settled down a little bit for me in recent weeks! You’ll see some of my industriousness when the new July Rose Card patterns are revealed!
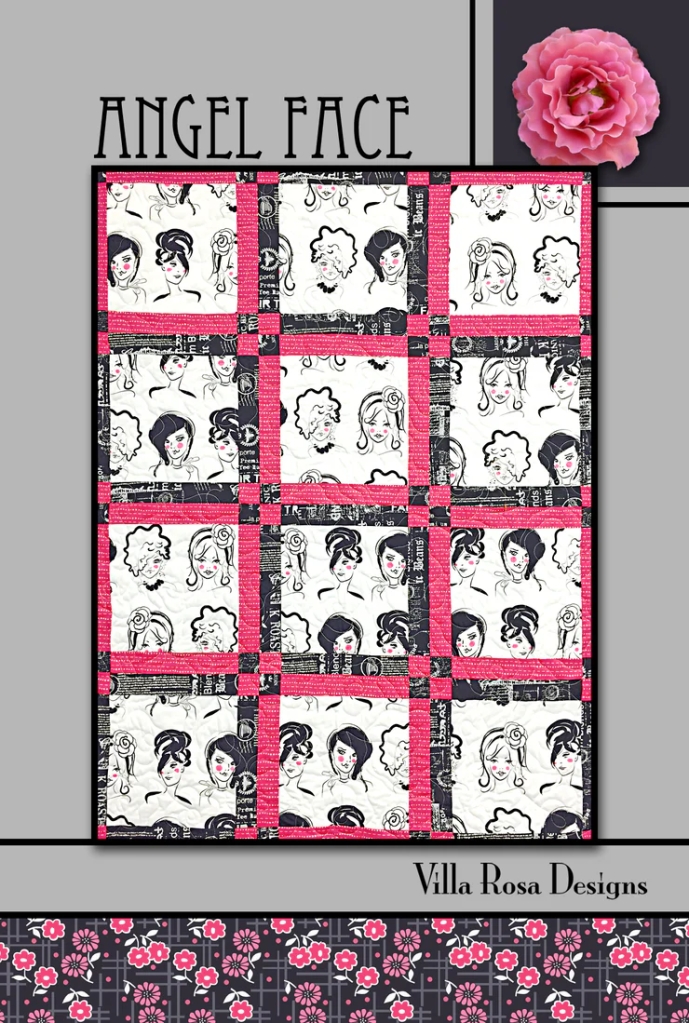
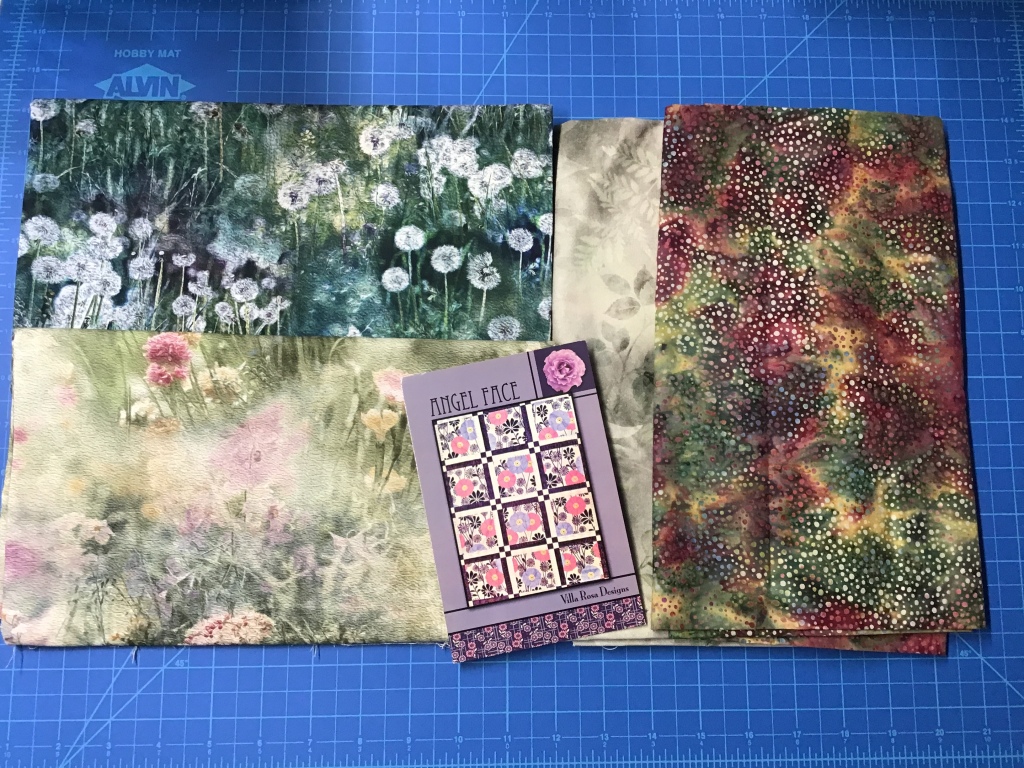
In the meantime, let’s get going on this week’s summer tutorial — Angel Face.
Angle Face VRD Quilt Tutorial
I’ve been a big fan of Villa Rosa Designs Rose Cards since my first Quilt Market in 2010 when I first met the amazing Pat Fryer, but Angel Face was one of the very first VRD patterns I’d seen in one of my local quilt shops way back when as they used it as the pattern for their beginner quilting series. Funny how little memory nuggets resurface, isn’t it???
You can find the Angel Face Print Pattern HERE or the Digital Pattern HERE.
Sew, let’s get this tutorial part started!!
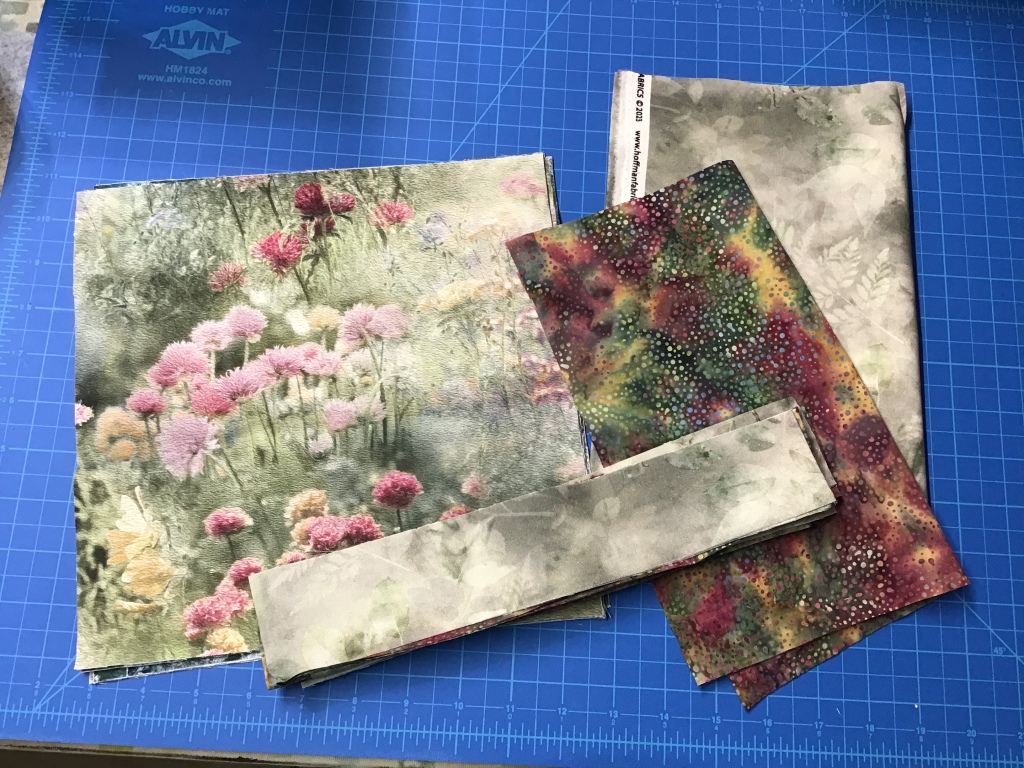
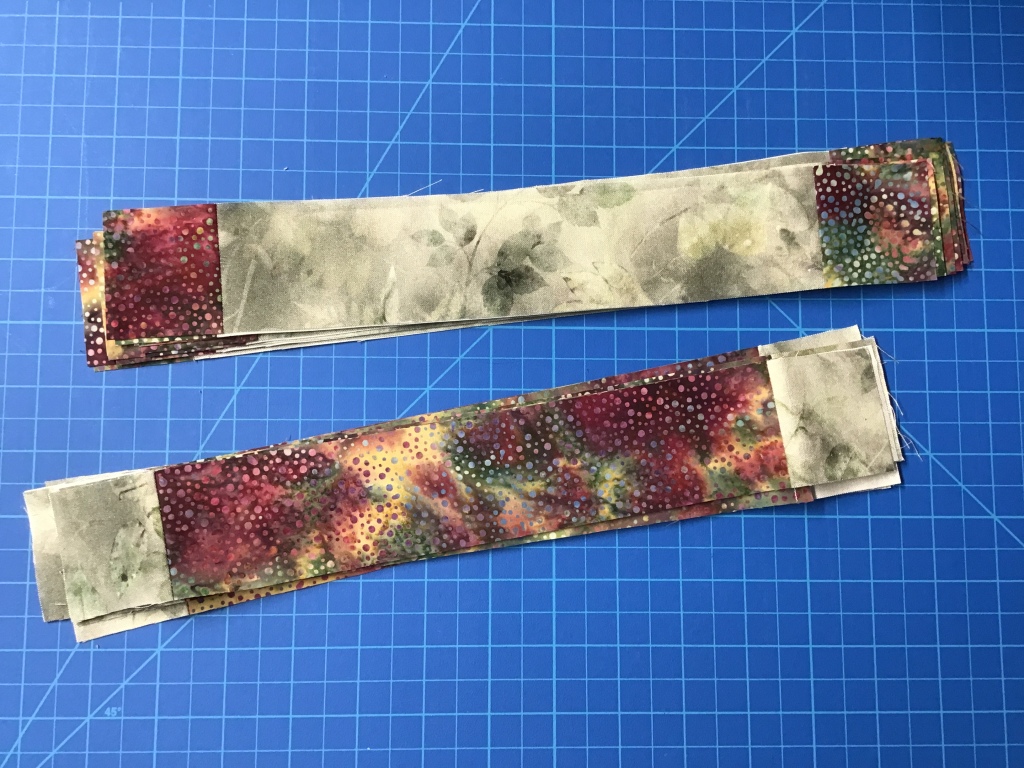
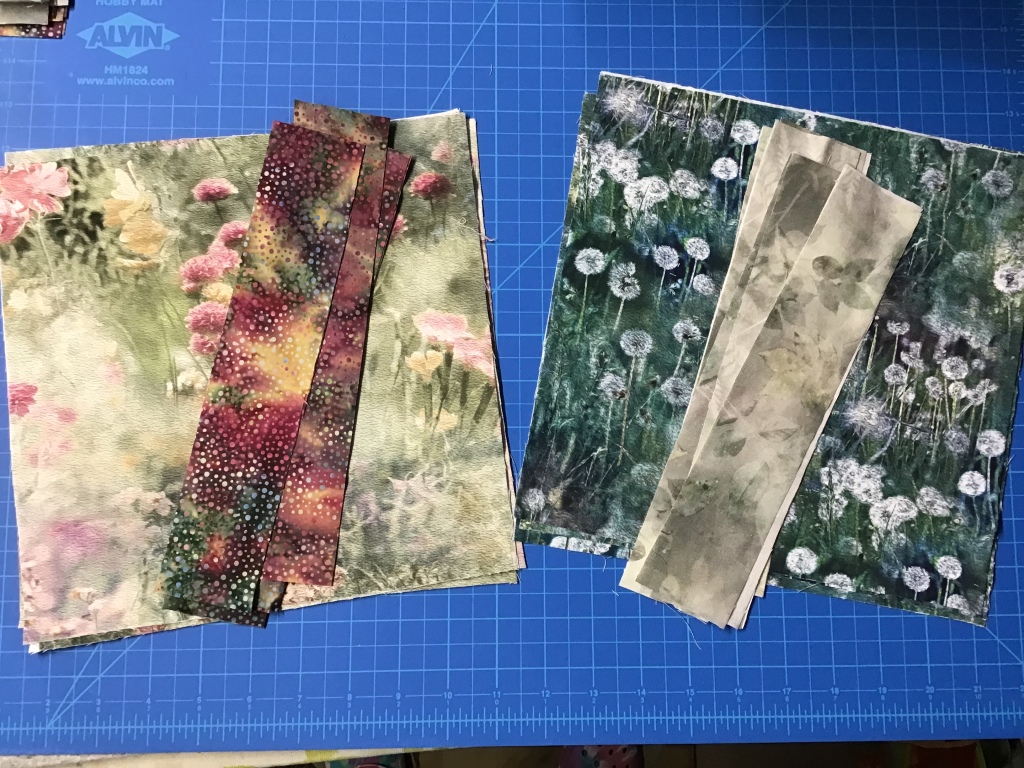
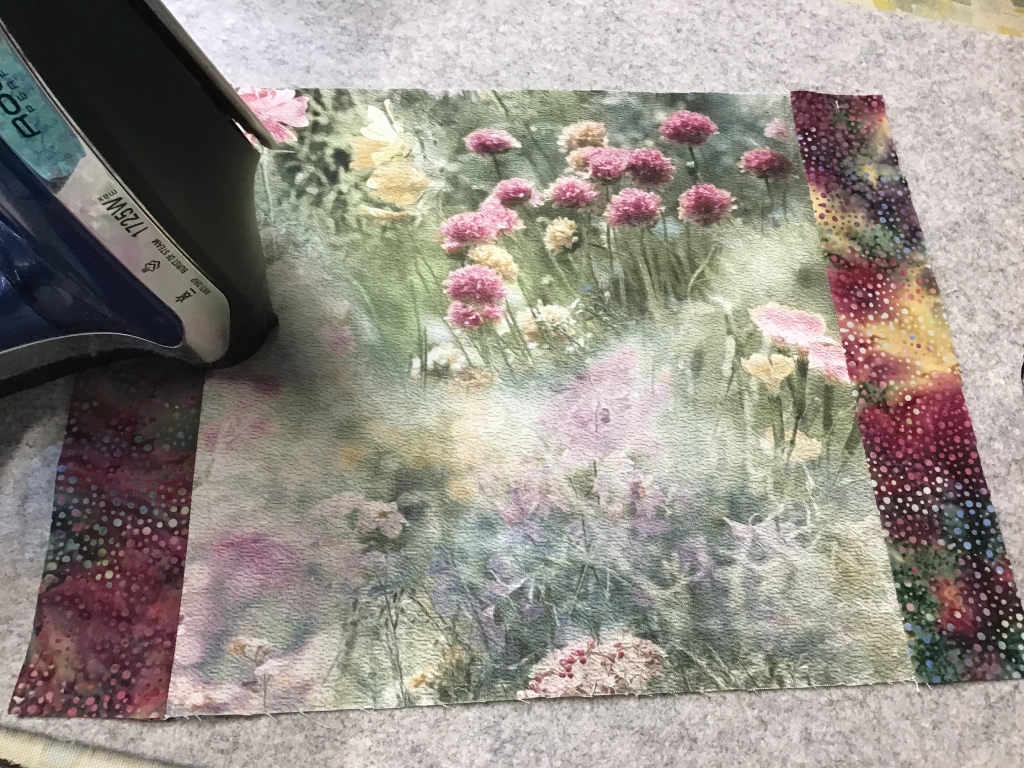
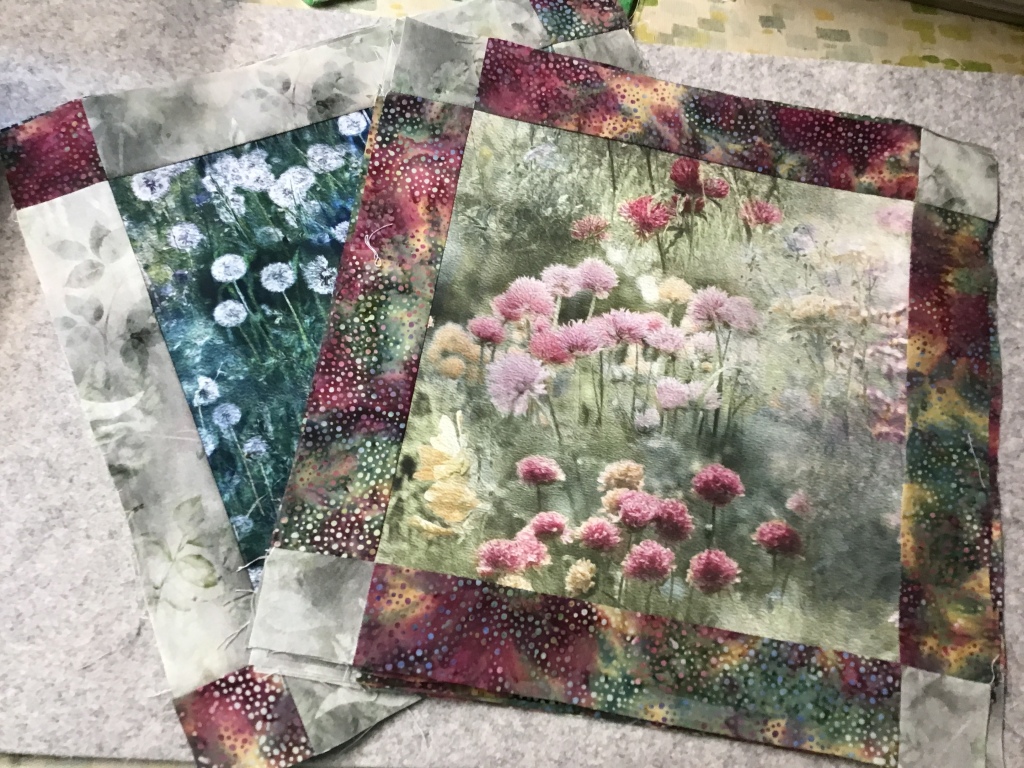
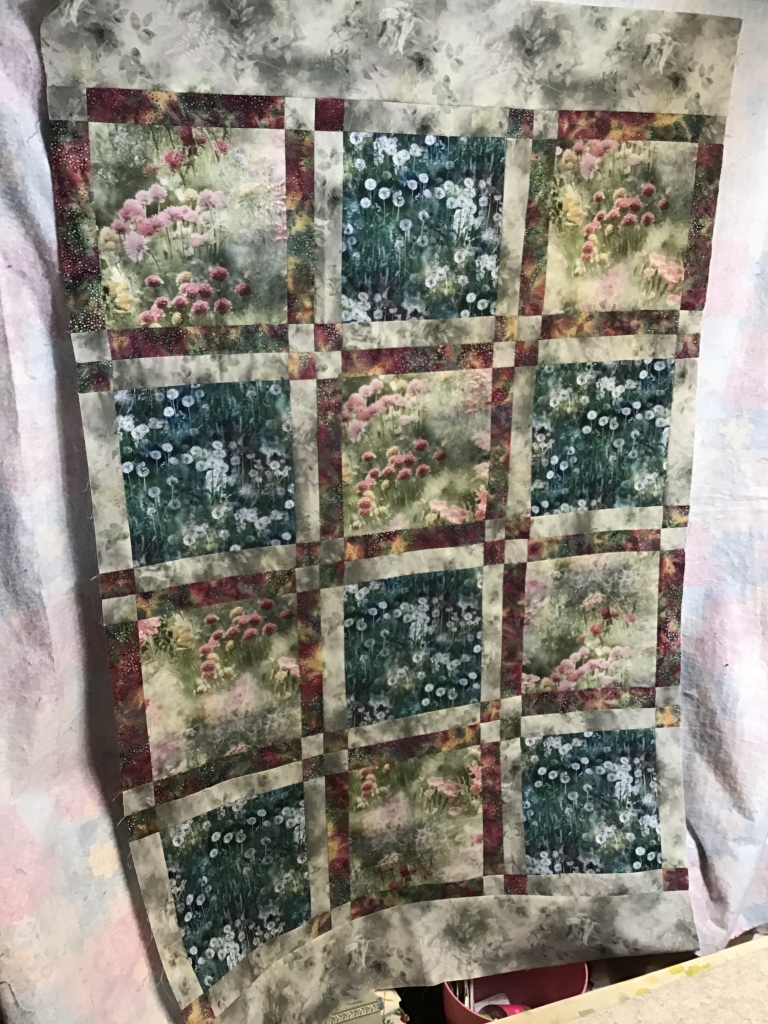
Today I’m using fabric from the Dandelion Wishes digital collection and an 885 Dot Batik companion from our quilting pal, Hoffman. Love, love, love these fabrics — the colors are so so soft and gentle. There are 2 colorways — green and pink — and I used a little of both for this fun beginner quilt project.
Heads up! I did make a slight change to the pattern instructions. The pattern calls for a single main print, but I went with and alternated the 2 prints you see on the left side of the photo because I just couldn’t decide between them. Big surprise, there, huh?
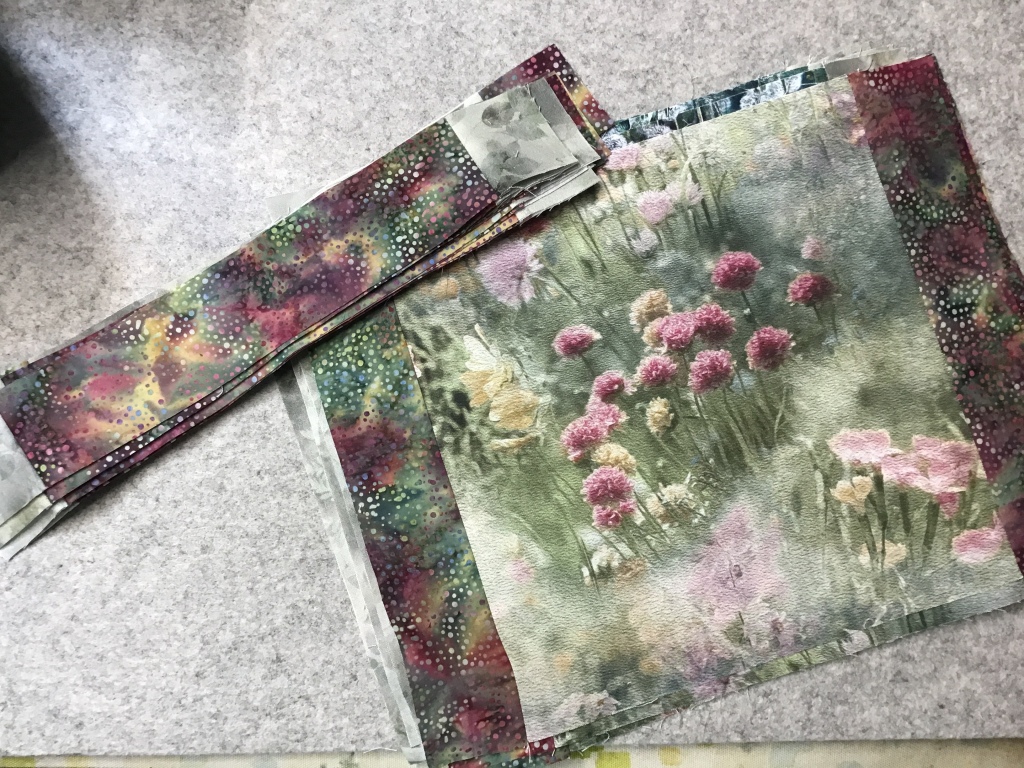
First up is cutting out all the pieces, which doesn’t take because we’re going to do some strip sets, so no little pieces. Easy Piezy!
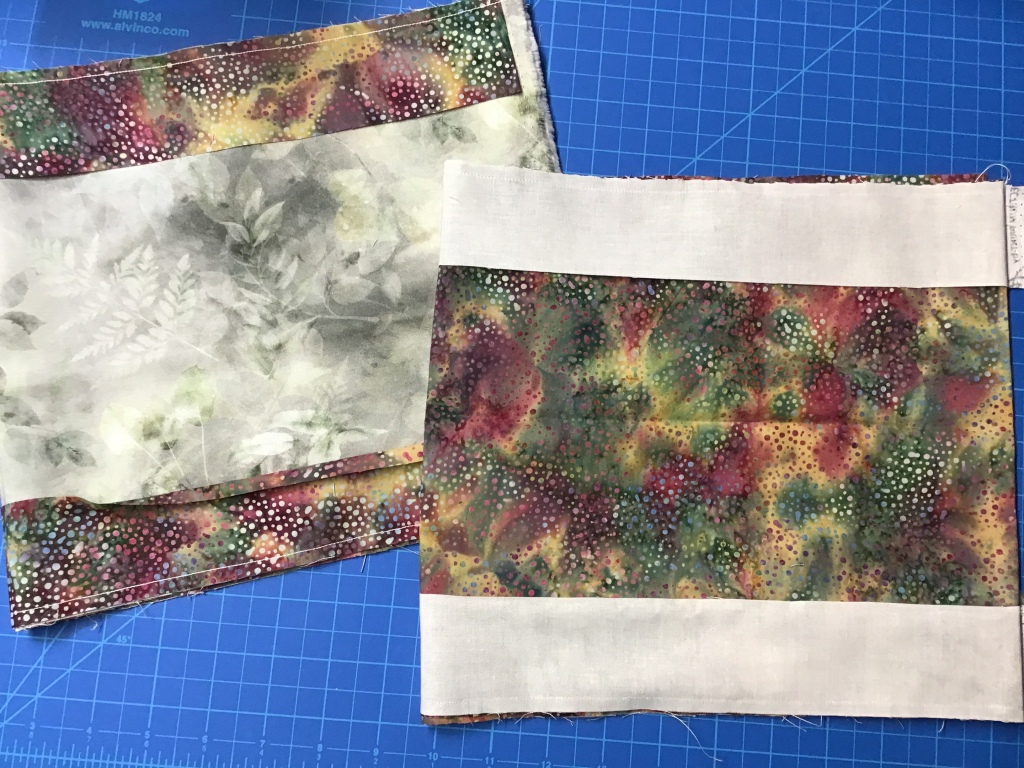
Let’s sew a couple strip sets together. Press the seams towards the narrow strips. Then we need to subcut our strip sets into units. Bet you can do this with both eyes closed, right?
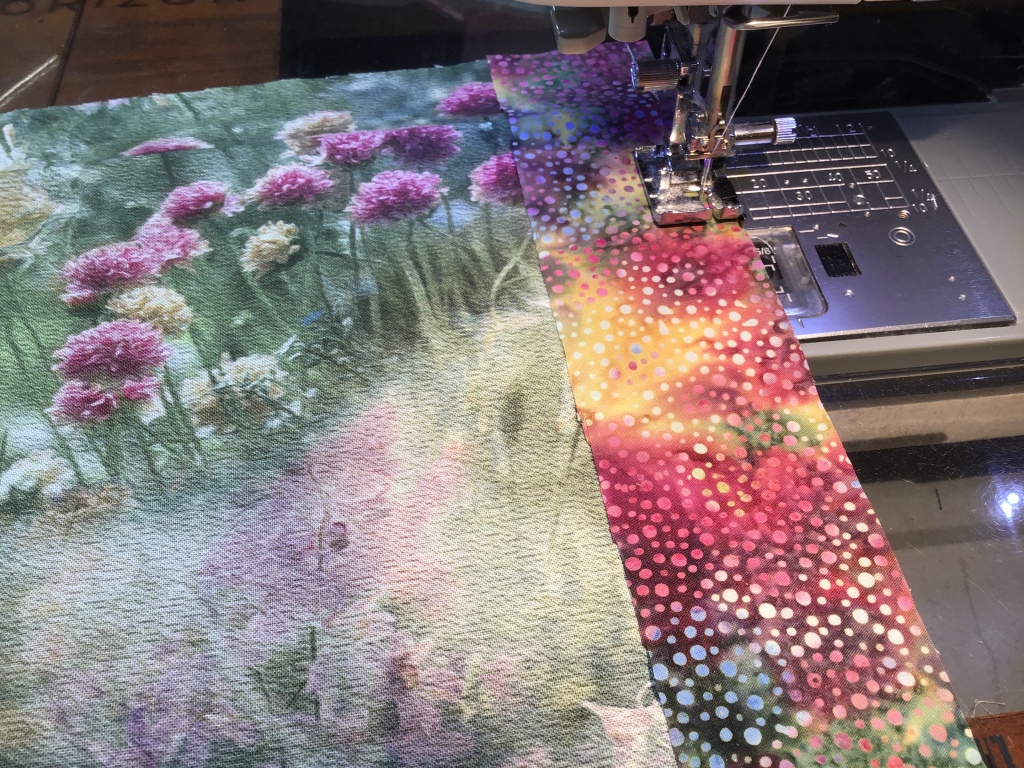
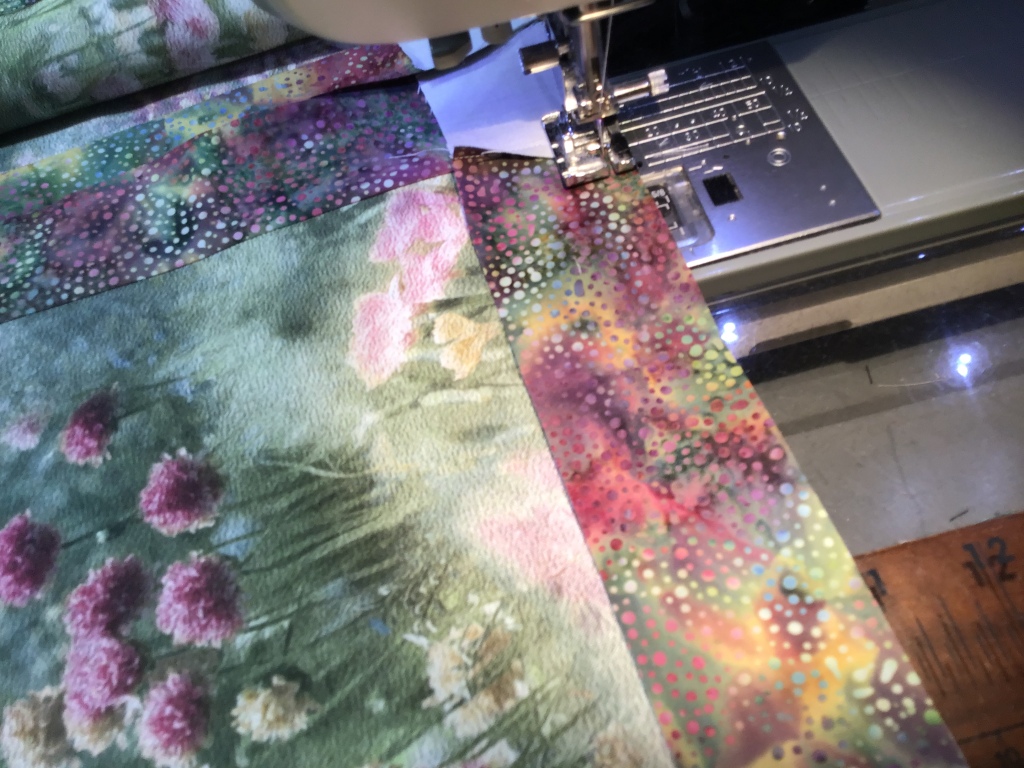
Our next step is to sew the unpieced strips to opposite sides of our main print (or prints) squares.
Now that our strips are sewn to our squares, let’s give them a nice press. Press your seams towards the center square.
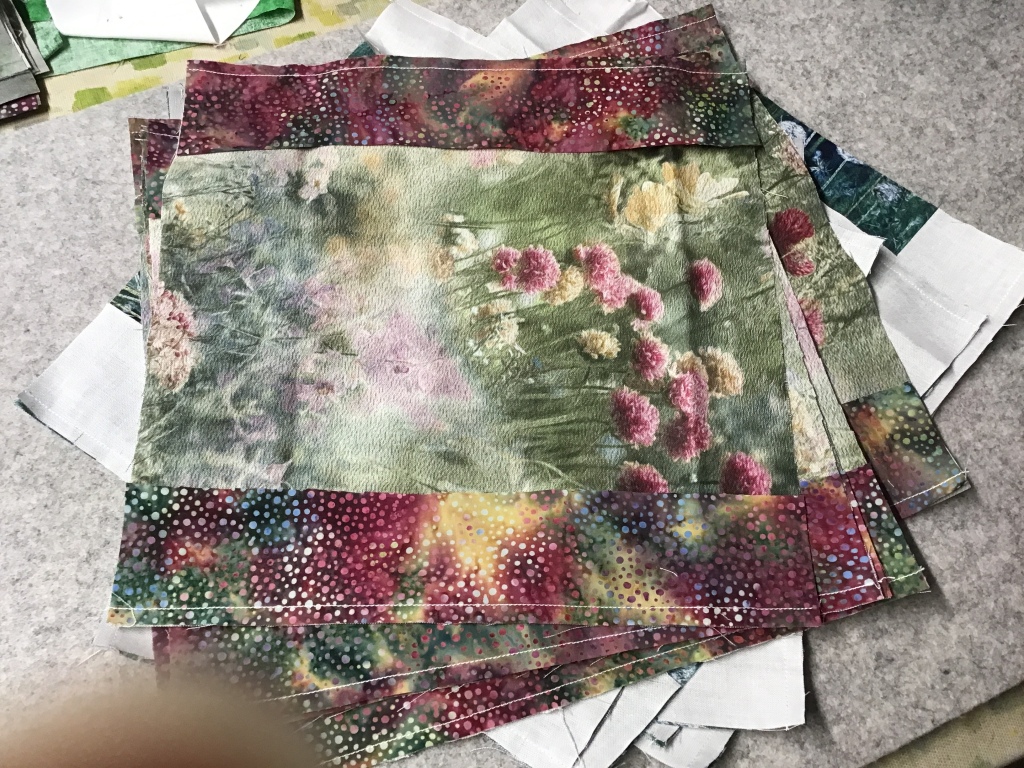
Remember those pieced units we cut from our strip sets? It’s time to sew them to the other 2 sides of the squares. There is a teeny bit of matching seams on the ends, but if you pressed the way I suggested above, the seams will nestle together nicely. Pin if you need to and just take your time.
Good to go! Time to give them a little press.
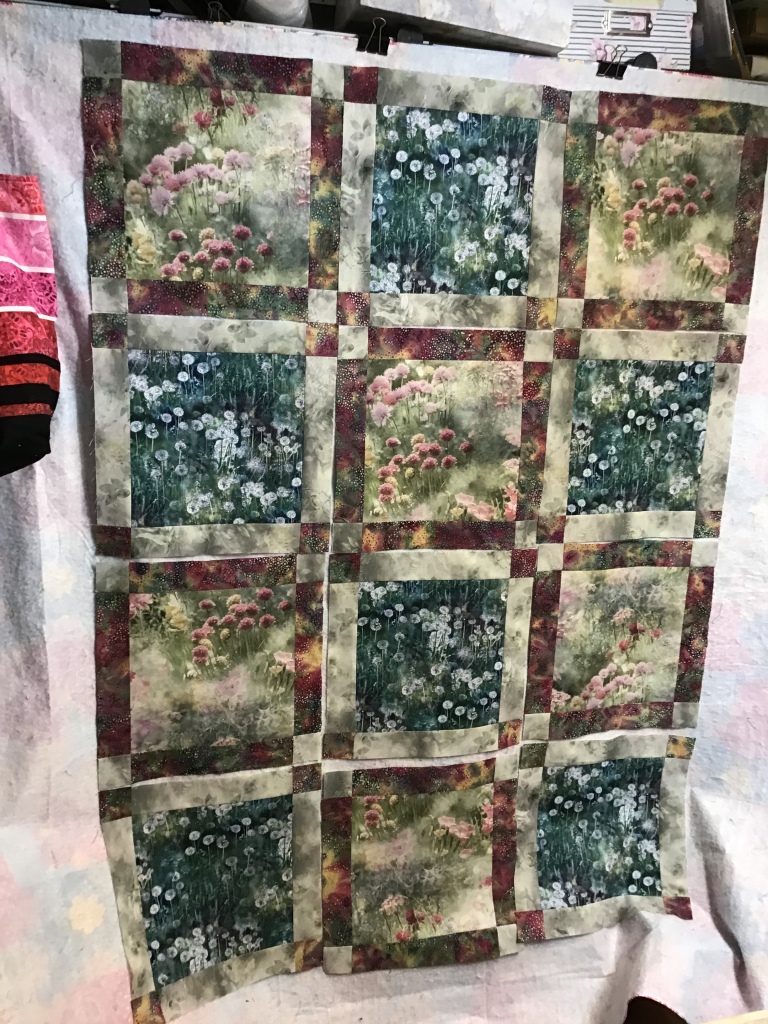
My next step because I used 2 different main prints is to slap my blocks up on my design wall so I can make sure to alternate the 2 blocks. I really like how it looks with 2 fabrics, don’t you? You could even use 12 different fabrics for the squares if you wanted to. Angel Face is a very versatile pattern.
Now let’s sew the blocks together into a quilt top. Remember, that there is some fidgety seam matching when you sew the blocks together, so pin if you need to and go slowly. I promise you, though, that Angel Face goes together super fast!
You can stop here and call your top finished. This size makes a wonderful baby quilt! Layer, quilt, lable, and bind.
OR, you can add a border to make Angel Face the perfect size for a throw quilt.
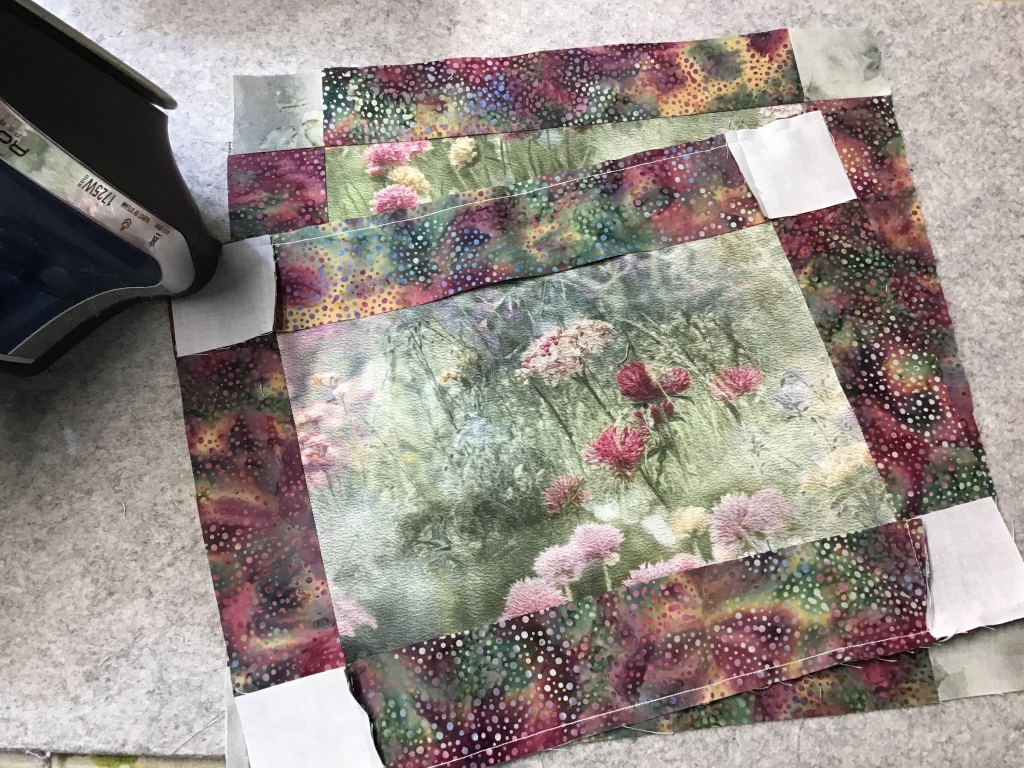
I’m going to add a border. In fact, I’m using the lighter of the 2 accent fabrics as my border. I think it will make the mottled purple accent strips really pop!
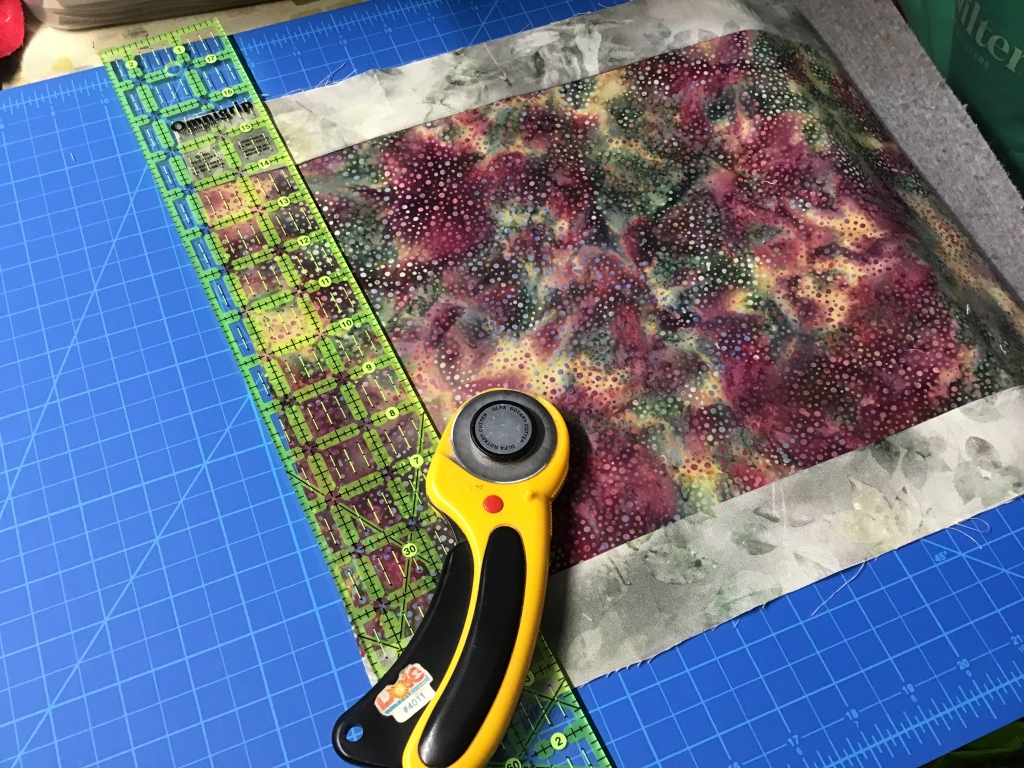
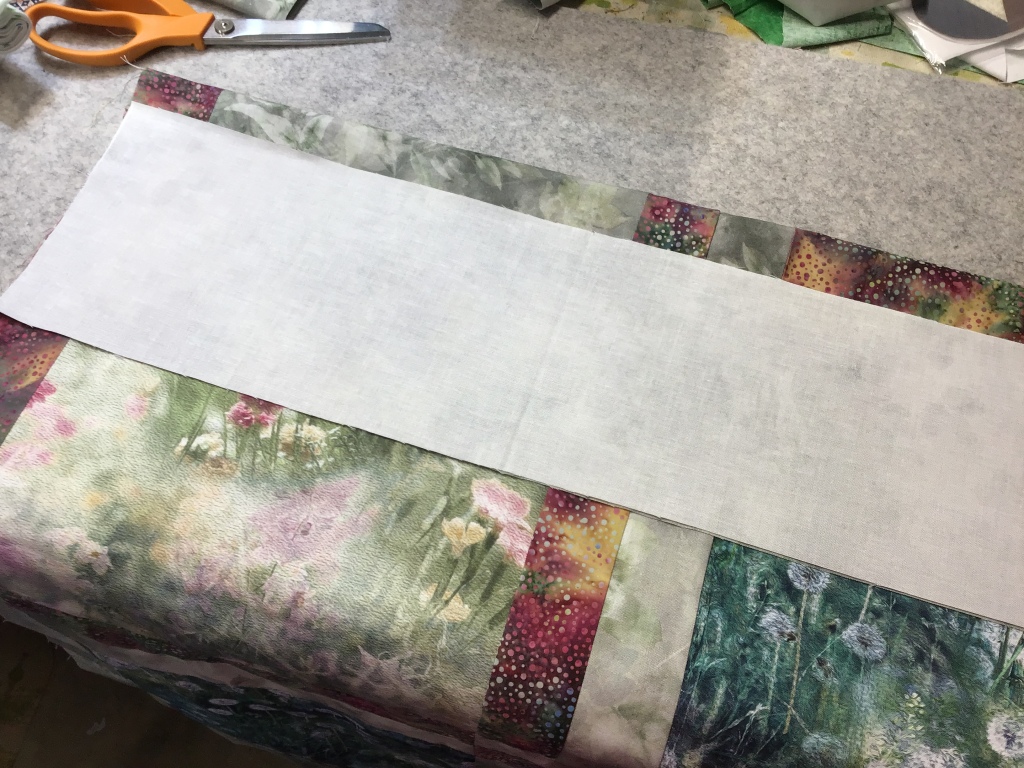
Go ahead and cut out your border strips for the quilt. I chose to add the top and bottom borders on first because the width of the quilt top is less than the width of my fabric, so I won’t have to piece the top and bottom borders.
To measure my top and bottom border strips for cutting, I found the center of my quilt vertically (up and down) and I line up the end of my 2 strips and then I match them up to the edge of the quilt. I pin everything together to keep the 2 borders and the quilt lined up. Then I smooth the strips across the width of the quilt center and cut them to match the width of the quilt top. No more measuring with a measuring tape or ruler for me when cutting border strips.
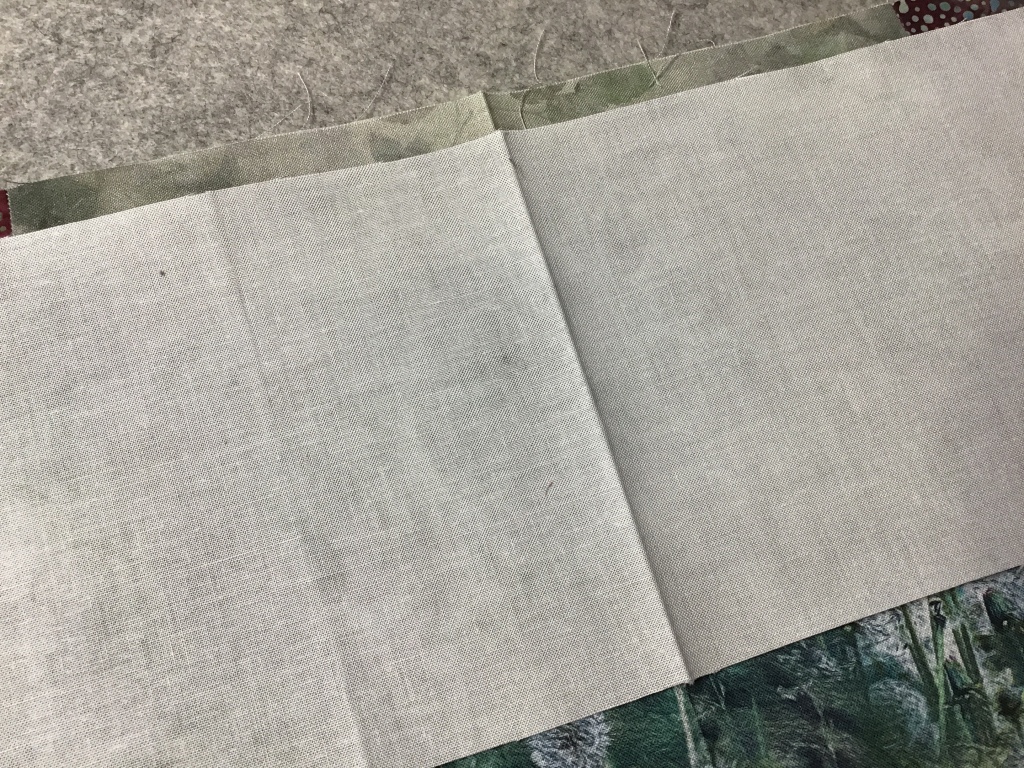
Then I find and make creases at the centers of the top and bottom borders and the centers of the top and bottom of the quilt. This little step makes it really easy to match up the centers to assist in keeping my borders nice and square instead of getting all crazy and wavy.
Match up the center creases and pin. Next match the ends of the border strips to the ends of the quilt. Pin.
Sew the borders to the top and bottom of the quilt.
For the side borders, you’ll need to piece the strips. Then measure and cut the side border strips. Crease the centers of the strips and the sides of the quilt. Match them up and pin. Match up the ends of the borders and quilt. Pin some more. Finally, sew the side borders to the quilt.
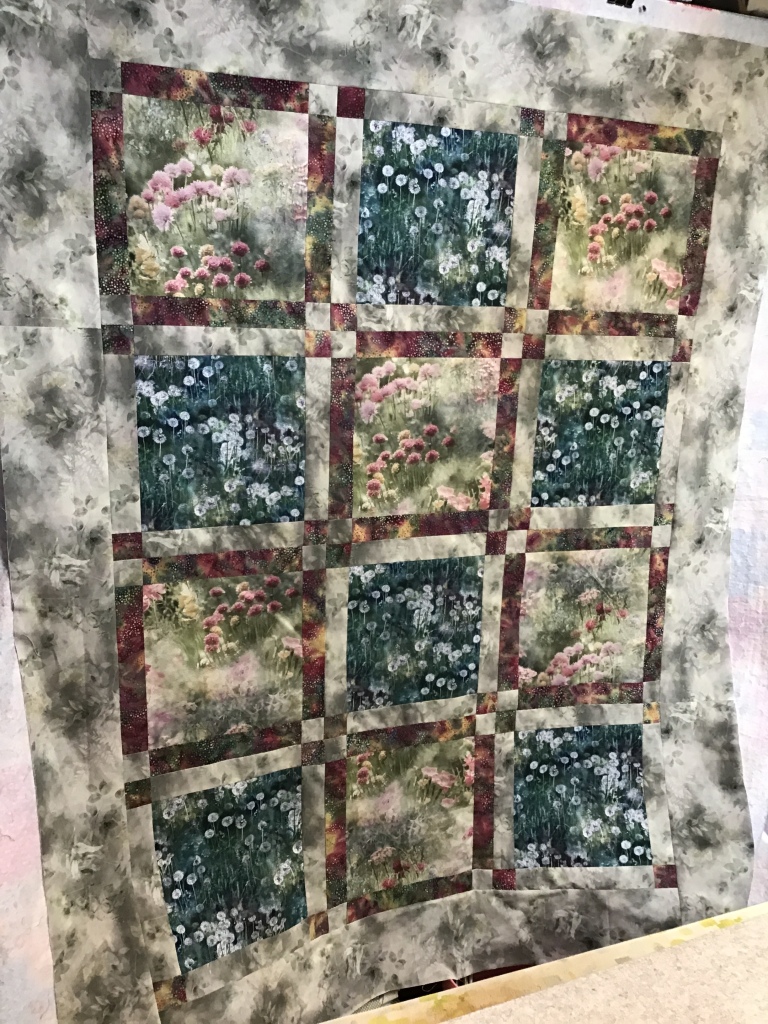
Isn’t it a really soft and pretty quilt???
Here’s a “beauty” shot on my back porch……….
I hope you enjoyed today’s tutorial. Angel Face is a wonderful project. Perfect for a beginner, yet fun and versatile for a more experienced quilter.
Don’t forget to stop and enjoy summer before it’s gone.
I am SEW excited to finally give you the scoop on our upcoming 2nd annual VRD Blog Hop! There’s been a lot of behind the scenes work going on and now I can share information with you. Our theme this year is: Fast & MoreFun. As you know VRD Rose Card patterns really are super fun and super fast to make. Besides, there’s really not much I can do to improve on the Fast & Fun theme from 2023, is there?
The dates for the Hop are March 14-21 2024. So mark your calendars now and let all your quilty friends know so they can hop right along with you.
I have 17 bloggers lined up so far. I still have a little room for additional bloggers if any of you are active quilt bloggers and are interested, please email me at tricia@villarosadesigns.com for more information.
At the time of this post, I already have some awesome sponsors and am looking forward to adding more because a Blog Hop has to have great prizes for the Hoppers, doesn’t it? So, if anyone is interested in being a sponsor for the event, please email me at tricia@villarosadesigns.com for more information.
This year’s blog hop will be similar to last year’s hop — we have selected 5 super fun VRD Rose Card patterns for the Hop and each of the bloggers will chose a pattern (or two) and will create their own version to share with you on their blog hop day. Yep — there will be quilty prizes too!
It’s going to be great fun, so I hope you and your quilting pals will join us March 14-21. We’ll be talking more about the Hop as we get closer to the kick off on March 14th right here on our VRD blog.
National Quilts of Valor Sew Day
Are you planning to participate in this year’s Quilts of Valor National Sew Day? Every year, members and friends get together and sew on the first Saturday in February to make quilts for Quilts of Valor. This year’s Sew Day is February 3rd. You can find more information about National Sewing Day HERE.
I am thrilled to be participating in my very first National Sewing Day, organized by my local organization, Pennsylvania Stitchers of Valor’s Sew Day. Our event is actually 2 days Friday and Saturday February 2nd and 3rd. My local group not only set up sewing for 2 days, but they arranged for 2 different locations in 2 different towns in order to accommodate more quilters. I can’t wait to see how many quilt tops we get done in 2 days!
I signed myself up along with 3 of my sewing buddies (and cousins) Kim, Lisa, and Robin (Hey Ladies!). Stitchers even put quilt kits together with fabric and patterns for anyone attending either location.
I’ve already got my kit cut out and ready to go. I am also making sure to cut out a few more projects just in case. 2 days of sewing is a lot of time so I want to be prepared to make the most of my sewing time.
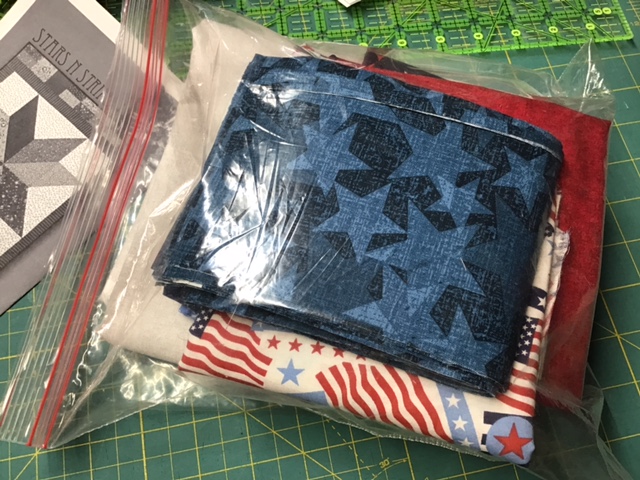
Here’s my project kit. It’s called Primarily Stars and it was designed by Jodie Davis. The pattern was featured in the Fall 2013 Patriotic Quilts Fons and Porter publication. It looks like a fun scrappy project — the more fabrics you us, the more fun it looks.
I have a group of fat quarters from Moda’s American Gatherings II by Primitive Gatherings picked out for another project, but as you can see, I haven’t cut the pieces out yet. At the moment it’s only in the planning stage. You’ll have to wait to see this one because eventually, it will be a new Villa Rosa pattern.
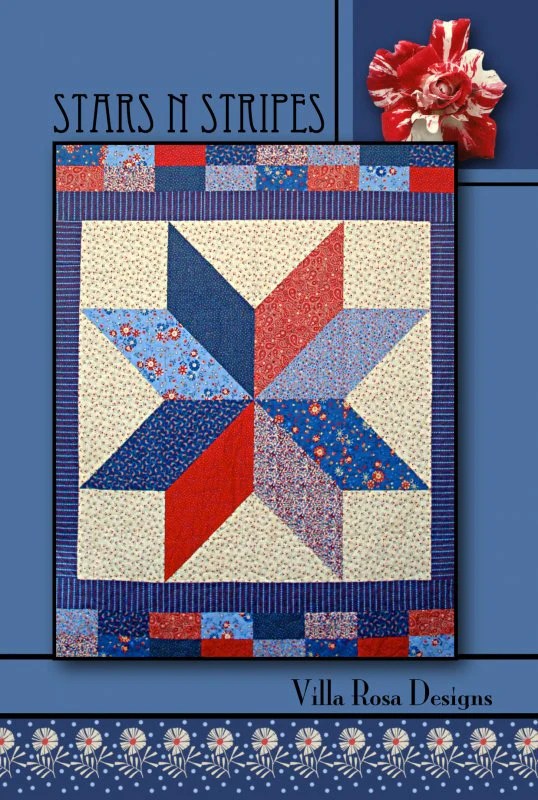
Here’s a group of red, white, and blue fabrics from my stash for a VRD Stars & Stripes quilt. I’m not pre-cutting this one, though, it’s an extra project in case one of my pals gets her quilt done early and needs another project to work on.
You can find the Stars & Stripes pattern HERE. It’s also part of the 12 Quilts of Valor (see below).
Of course, if you can’t get together with your local organization (or maybe there isn’t a branch close to you), you can sew at home in your own space. Just make sure to check the quilt requirements HERE.
Maybe you’re looking for a great pattern for your Quilt of Valor? Then check out our 12 Quilts of Valor pattern collection! Don’t forget that a portion of the sales will be donated to the Quilts of Valor Foundation. You can find the 12 QOV collection HERE.
If you don’t have enough time to order the collection or your local shop doesn’t have it yet, then you might just have some of the patterns in the collection floating around in your very own Rose Card Collection. Please note though, that borders were added to some of the quilts in the collection to make them the perfect size for a Quilt of Valor. Just make sure you check those requirements on the QOVF website HERE to avoid any confusion when making your own quilt to donate.
I’ll tell you more about my Sew Days in next week’s post, so stay tuned!
Decluttering
Here’s an update on my decluttering project in my studio:
Once I grouped all the stuff hanging out on my cutting surface into categories I could work with — fat quarters, batiks, yardage, patterns, future projects, etc. I actually started putting things away, if you can believe it!
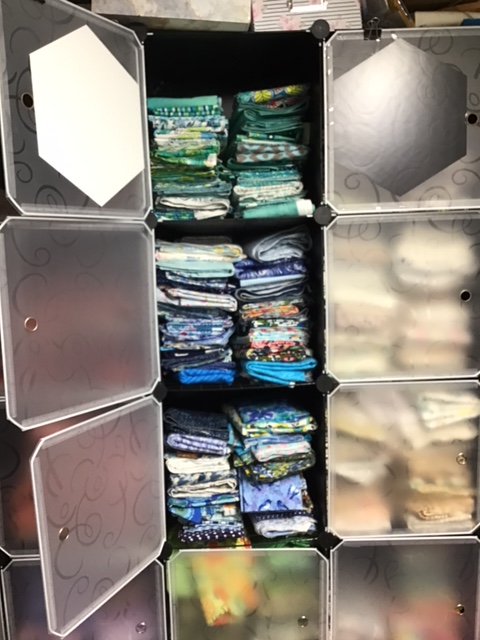
I subdivided my fat quarters by color and actually put them away in my fat quarters baskets!
Then I did the same thing with my assorted yardage.
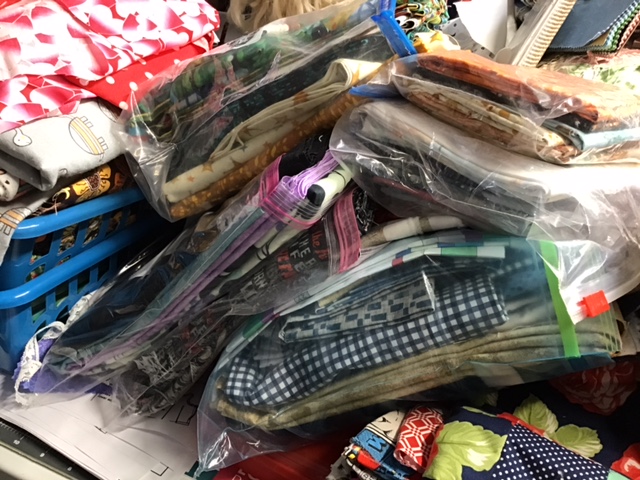
Instead of having piles of future projects just sitting around, waiting to fall over and get all mixed up, I put each project in a gallon-sized plastic bag.
Next I need to label the bags and find a place to keep them until I sew them together. I also need to make sure I put the pattern or book in each bag. That way I don’t pull out a project bag and wonder what I was going to make with it.
Additionally, I’ve found some quilt tops from previous projects that I will probably never finish, so I’m considering either selling or donating them. Either way, re-homing them will free up some space — not only physical space, but also head space. LOL! I may not be making fast progress, but I AM making progress and that’s what counts.
I know I’ve mentioned the idea of a fabric yard sale before and I’m happy to say that one of my local quilt shops, Fox’s Sew and Vac, is hosting their annual Fabric Yard Sale in March. I just signed up and now I have a real reason to do some purging. Fingers crossed………
If you’re looking for some ideas for refreshing your own quilting space, check out my post, 11 Ways to Get Your Space Ready for a New Year of Quilting and Sewing, HERE.