Hello Quilty Friends!
Happy Thursday to you!
Now that we’re past the middle of April, spring is finally springing around here, although it’s still either cold or rainy. We’ve had so much rain here in NW PA, there is a lake in the field back behind my house. And the fun thing is that a small group (flock? gaggle?) of Canadian geese have claimed it as their very own little oasis! Silly goosies! But I do love to hear them honking out there to each other and it’s fun to see them waddling around. The lake is starting to dissipate, but we keep getting enough rain that it refills, so right now the geese are in luck.
Speaking of April, I know it’s spring when my Friday Quilt group starts meeting again. We skip January and February because those months are historically our snowiest months and usually start up again in March. I didn’t get a chance to mention my group back in March because we were all busy with the Blog Hop.
I know I’ve talked about these amazing quilting gals before and I’m so thrilled that we’re back together once a month again. I want to do a shout out to the Friday Gals — you know who you are — Hey Ladies! (If you want to know a little bit more about these Friday ladies, you can go HERE.)
You might wonder why I am talking about these gals, but for the last 2 years, we’ve been doing Villa Rosa Designs quilt projects. But his year, everyone wanted somethng a little different and everyone agreed that they wanted to go back to a sampler quilt again. It’s been quite a few years since we’ve done a year-long sampler project, so it’s time.
Farm Girl Vintage by Lori Holt of Bee in My Bonnet Co. was an easy choice for 2024 because of the fun blocks in both 6″ and 12″ finished sizes as well as a plethora of terrific projects in which you can mix and match blocks. In fact, Lori has 2 other books, Farm Girl Vintage 2 and Vintage Christmas which also use both 6″ and 12″ blocks. And guess what that means??? All the projects are interchangeable among these 3 books! WOW! In addition to some other fun quilt books, Lori has a bunch of super patterns and even a book about scrap quilting called Scrappiness is Happiness. If you’re not familiar with Lori’s designs, you should check them out.

She is a fabric designer for Riley Blake as well as an author and quilt designer. I’ve designed quilts using a few of her collections over the years — they were lots of fun. Very scrap happy and bright with a vintage vibe. You can find out more about Lori Holt HERE.
Beginning last month in March, we are going to work our way through the 12″ and 6″ blocks (as well as the delightful tractor block) in the book by making a mix of 6″ and 12″ blocks each month until December.

I like to offer my own sampler layout when we do a year-long sampler quilt project, and this year is no different! I designed 2 different settings — one as a throw/twin and one as a full/queen. Of course, the Farm Girl Vintage book has lots of fun projects of all sizes, too, which means everyone has options! And boy, do I LOVE to have options!
I’ll give you a sneak peak at the center of my full/queen quilt (without the borders — I’ll get those on someday!). I chose a scrappy blue and white farmhouse-y color scheme and I really love how it turned out. What do you think?

After making VRD quilts for the last couple years, we couldn’t entirely abandon our VRD projects, of course, so for 2024 I set up a series of VRD quilt challenges. (You know, this could be a great idea for quilt guilds and groups or even quilt shops — just sayin’……)
Anyway, here is our challenge schedule:
June 2024 — Fat Quarter Project
August 2024 — Panel Project
October 2024 — 5″ or 10″ Charm Square Project
December 2024 — 2 1/2″ Strip Project
Of course, there are a few rules:
- You must complete a quilt top before we meet that month
- You may not use projects from classes 2022 or 2023
I’ll try to take photos when we have the Challenge quilt reveals, so you’ll have to stop back to see what VRD projects the Friday Gals create.
In our most recent meeting, our group made portable flannel boards to accommodate 12″ blocks so I thought I’d show you how we made them because everyone should have a small flannel board. This size is super to carry back and forth from your cutting area to your sewing machine or even to a quilt class, retreat, or sew day.
Make Your Own Quilt Block Flannel Board
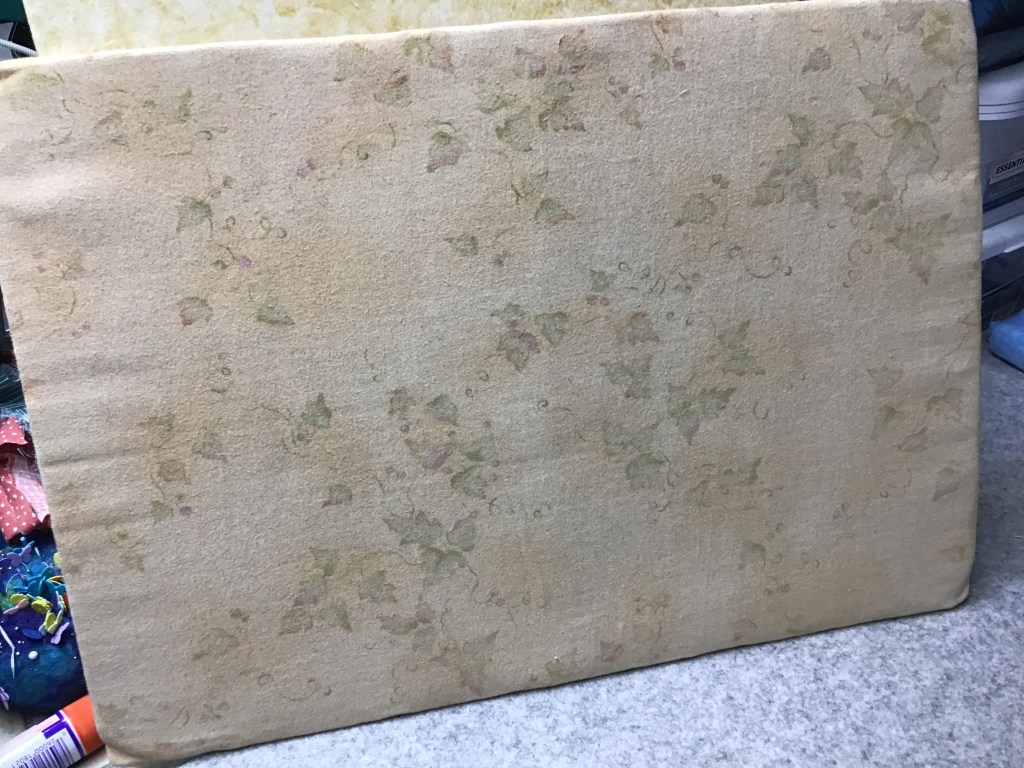
Here’s a flannel board I made maybe 15-20 years ago. This board has seen a lot of wear and tear and the corners are all bent up, but it’s definitely stood the test of time and use because the only thing I’ve really had to do is to tighten and re-tape the fabric on the back once or twice. This board is around 12″ x 18″ and is made out of a heavy duty cardboard. It is great for smaller blocks, but doesn’t quite hold the pieces for a 12″ block, so that’s why I had the idea to make one sized for 12″ blocks.

What You Need:
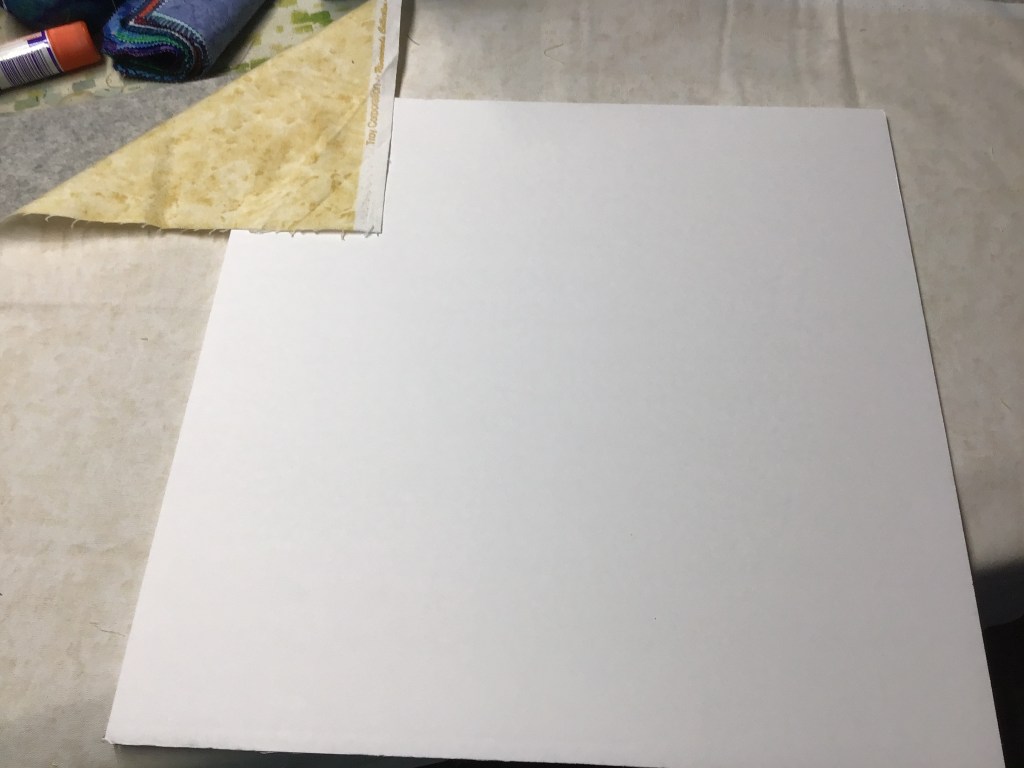
A piece of sturdy cardboard or a sheet of foam core board
A piece of neutral tonal or solid quality flannel fabric as large as the board you want to make plus an additional 3-4 inches all around.
Duct tape.
I chose to use a piece of foam core from Dollar Tree (LOVE Dollar Tree!) which will actually give me 2 boards about 15″ x 15″ and a leftover long rectangle for some other project. Because the boards aren’t exactly 30″ long long, my finished boards won’t be exactly 15″ square, but that’s okay, it’s close enough for jazz. If you want your boards to be perfect squares, go ahead and measure the length of your foam core board and divide that number in half. Use a ruler to draw lines to make 2 equal boards. If you want 1 big board, you can use the whole piece of foam core, just keep in mind it will be kind of clunky to carry back and forth from your cutting area to you sewing machine to your pressing area. But if it works for you, go for it.

One you’ve drawn your lines, time to cut on the lines with a utility knife or scissors. BE CAREFUL! We don’t need any accidents on this step.

Here’s 1 board around 15″ x 15″, which will allow me to lay out the pieces for a 12″ block (or smaller). Now let’s get our flannel fabric ready. I suggest pressing it so the flannel is nice and flat before you put it on your board.

Okay, lay your flannel fabric on a flat surface with the wrong side facing up. Center your board. Then fold one side up and tape it firmly to the board. Repeat for the opposite side. Make it smooth and taut before you tape it to the back of the board.

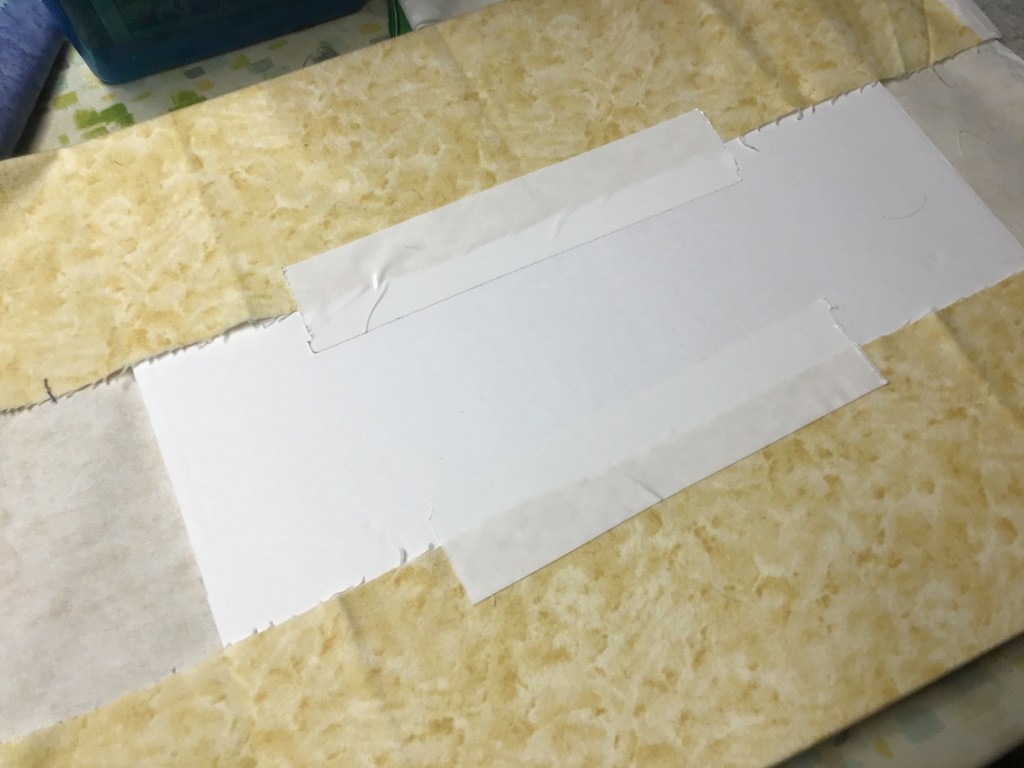
Next up, we are going to fold the corners in on 1 of the remaining 2 sides and then tape the side to the board. Repeat for the other side, pulling the fabric smooth and taut before taping that last side. I used an extra piece of tape on each side to help keep the flannel nice and tight.


Voila! Here it is — a board block big enough to layout a 12″ or smaller block!


Wasn’t that super easy? Now you know how to make a flannel board, you can make them in any size you want, just make sure that your flannel fabric is 3-4 inches bigger all the way around your board so you have enough to wrap around and tape. (Psst! Flannel boards are great activity and story activities for kiddos, too! Use left over fabric and felt to make letters, numbers, and story pieces to delight any kiddo.)
One More Thing Before You Go…..And a Giveaway!
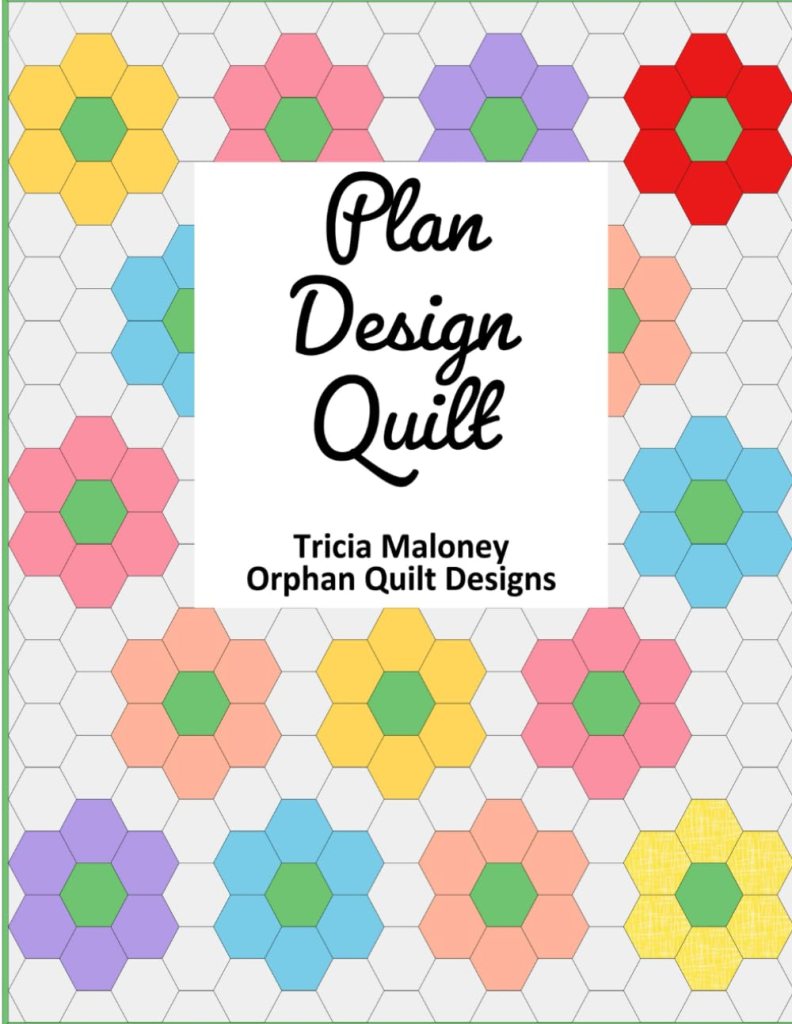
I’m excited to share some BIG NEWS with you — I just finished putting together my 6th book in print! Yippee! Kudos! AWESOME! (Go me!)
It’s called Plan Design Quilt and it is kind of like a workbook for designing quilts on paper. I do design a lot of my projects using Electric Quilt 8 software, but I also scribble blocks and quilt settings down whenever inspiration strikes. Usually I jot ideas down on snippets of paper, sticky notes, napkins, or whatever, and then I lose them only to find them at some later time after I have already forgotten all about that idea. Kind of disorganized, I know.
So I created this book for myself because it gives me someplace to do my little scribbles and keep them all in one place. It’s kind of cool to create a book that fulfills your own needs and then share it with the world. I tell myself that if it’s something I can use, then there are other quilters out there who might need this too. So I designed this workbook-style book with lots of space to doodle and draw quilt blocks and settings, to jot down notes, try out/add fabric swatches, and more. You can find Plan Design Quilt here. Woo Hoo!
But wait — there’s more!
To kick off this new book, I’m going to give away a copy of Plan Design Quilt right here on the VRD blog, Villa Rosa Quilts. All you have to do is leave me a comment telling me your favorite color scheme for making a quilt. I apologize, but this giveaway will be for US residents only. I haven’t decided yet if offering this book in ebook format would actually be helpful for people. Your thoughts?
Oh, almost forgot! You have from today, April 25th through Thursday, May 2nd to leave a comment. I will select a winner randomly.
Well, that’s it for me.
Take a little time to quilt this week!
Until next Thursday —
Sew. Laugh. Repeat.
Always,
Tricia @VRD