Curated Rose Card Pattern Lists · Quilting Partners · Rose Cards · villa rosa designs

Curated List of Holiday Themed VRD Rose Card Quilt Patterns Part 2 and Holiday Gift Idea #2

Hello Quilty Friends!

Happy Thursday to you!

And Happy Thanksgiving!

Thanksgiving dinner setting with a golden roasted turkey centerpiece, surrounded by various side dishes, pumpkins, and autumn decorations, with 'Happy Thanksgiving' text overlay.

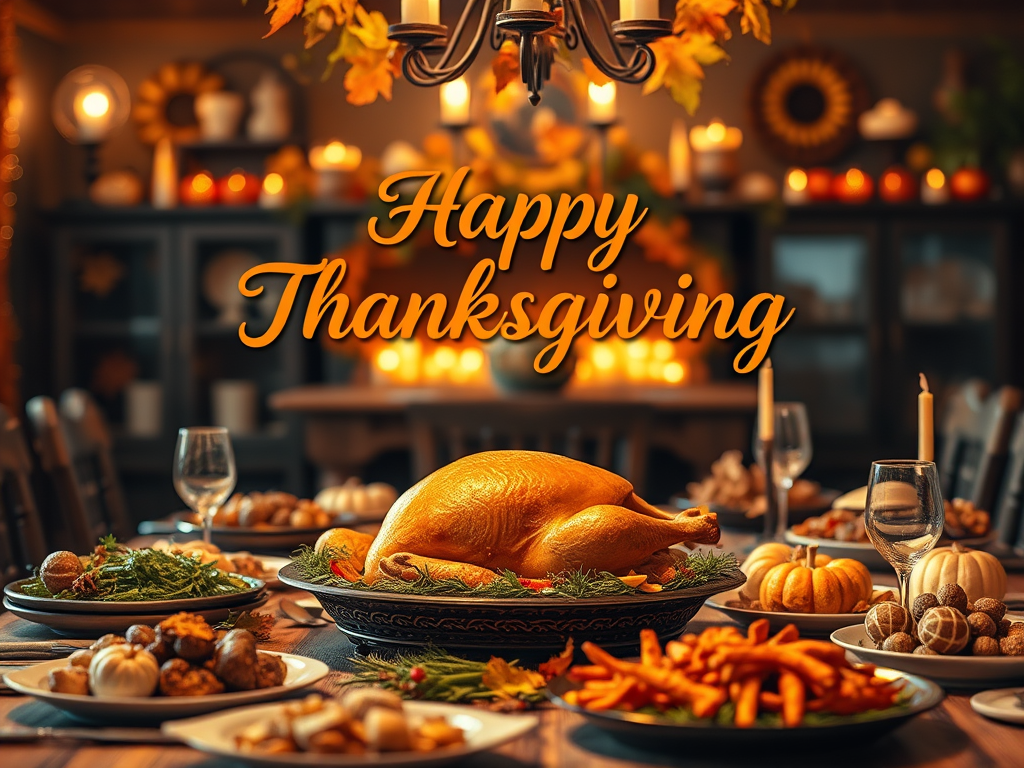
I hope you are spending the day with those you love in a safe place, especially if you are in the path of a wicked snowstorm, as I am here in NW PA. They’re saying anywhere from 6-19 inches of snow. But the real problem is the fierce wind that just won’t stop. The power has already blinked off 3 times while I’ve been writing this post, so I’m going to wrap it up and cross my fingers that I can launch it before we lose the power again. Please forgive me if you find any typos as I’m going to skip my usual final edit and read through today.

I hope you’re back to enjoy Part 2 of my Curated Holiday Themed List of Rose Card Quilt Patterns. I have included the links for both the the digital and the print patterns. Print patterns always ship free in the US, and for our International friends, please consider our digital versions which will come right to your inbox.
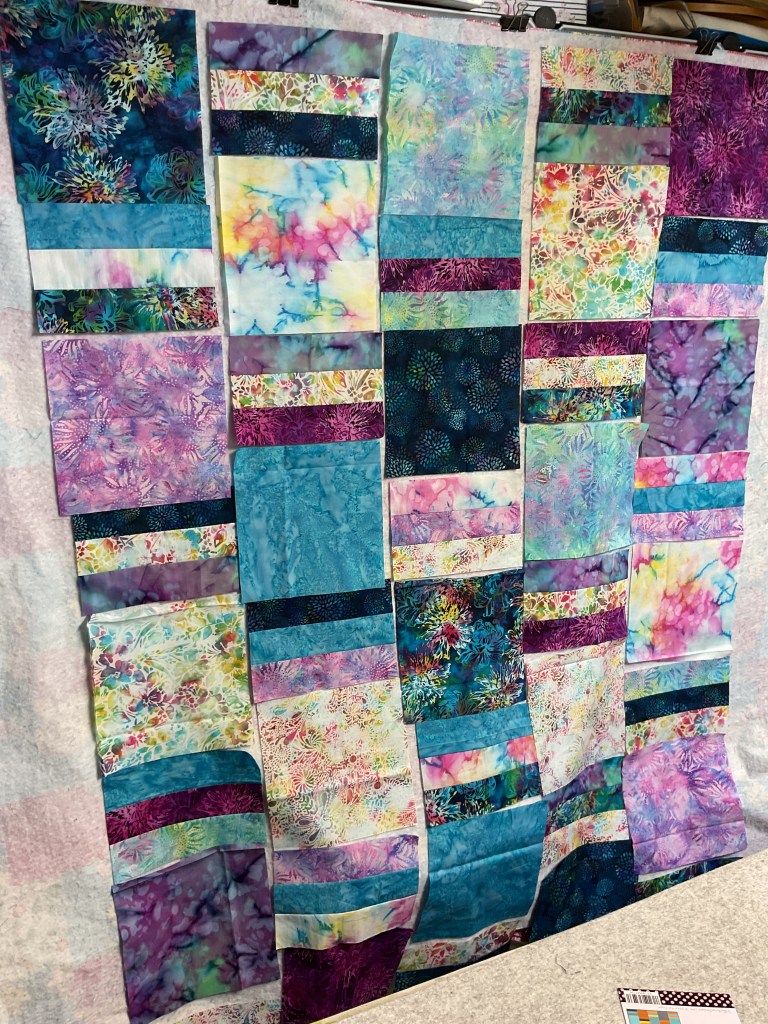
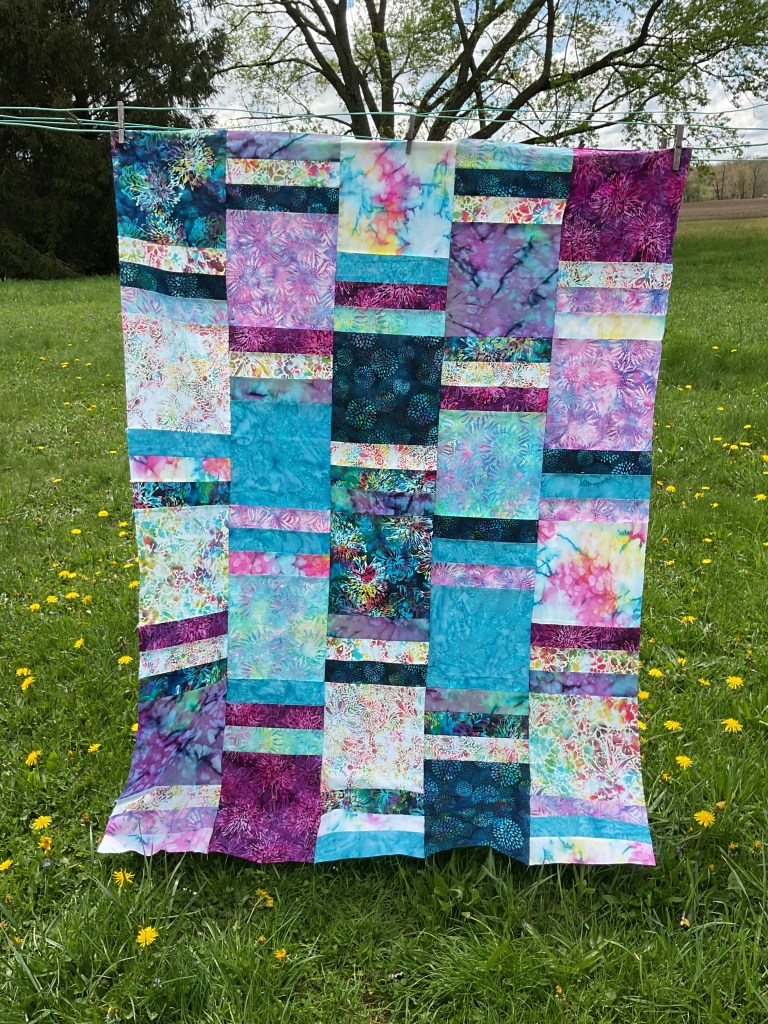
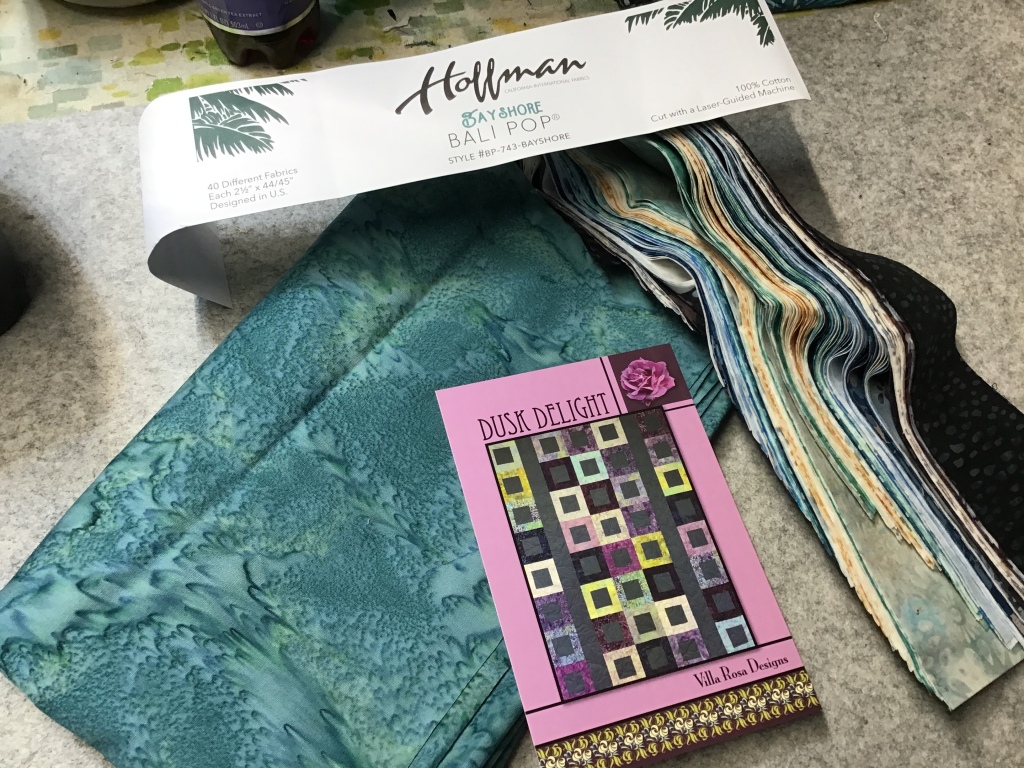
Prizes for our Weeks 4-6 winners will be in the mail shortly, so enjoy your quilty surprises sponsored by our good friends over at Hoffman Fabrics. Thanks so much, Hoffman!

Now please enjoy this parade of patterns while you nosh on leftover turkey and mashed potatoes. And don’t forget the pie…..

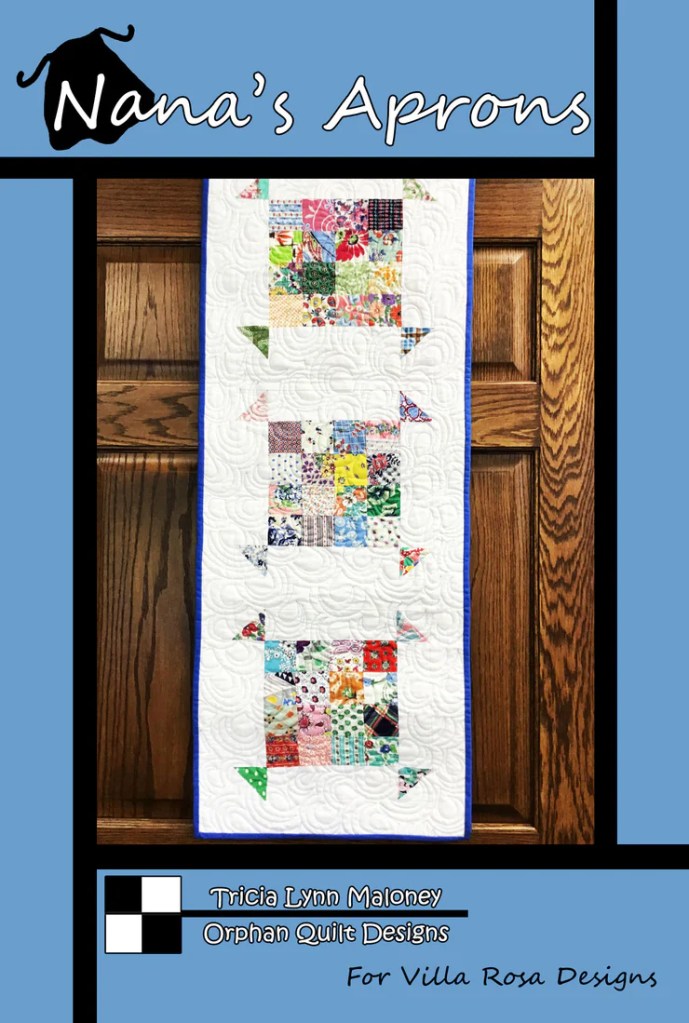
Nana’s Aprons – Memories of baking cookies with Nana.

A quilt design titled 'Nana's Aprons' featuring colorful patchwork patterns, displayed on a wooden background.

Digital HERE or Print HERE

Olivia Jane – Patchwork bags make great gift wrapping – a gift within a gift.

Colorful charm square patchwork tote bag design featuring three views, with vibrant patterns and designs, titled 'Olivia Jane' by Villa Rosa Designs.

Print Only HERE

Painted Moon – A sweet quilt for your wall or for a special child.

Cover of the 'Painted Moon' quilt pattern featuring a colorful quilt design with floral and geometric elements, accompanied by the text 'PAINTED MOON' and 'Villa Rosa Designs'.

Digital HERE or Print HERE

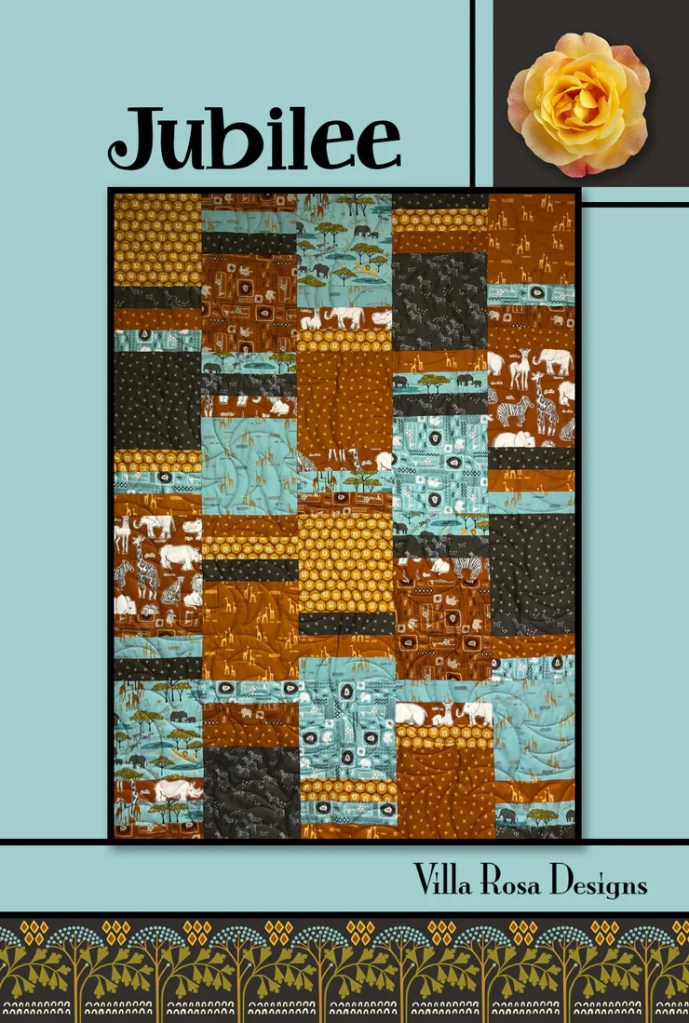
Parade – Memories of watching the Macy’s Christmas Parade on Christmas morning.

A colorful quilt titled 'Parade' featuring a grid of various patchwork squares on a floral background, designed by Villa Rosa Designs.

Digital HERE or Print HERE

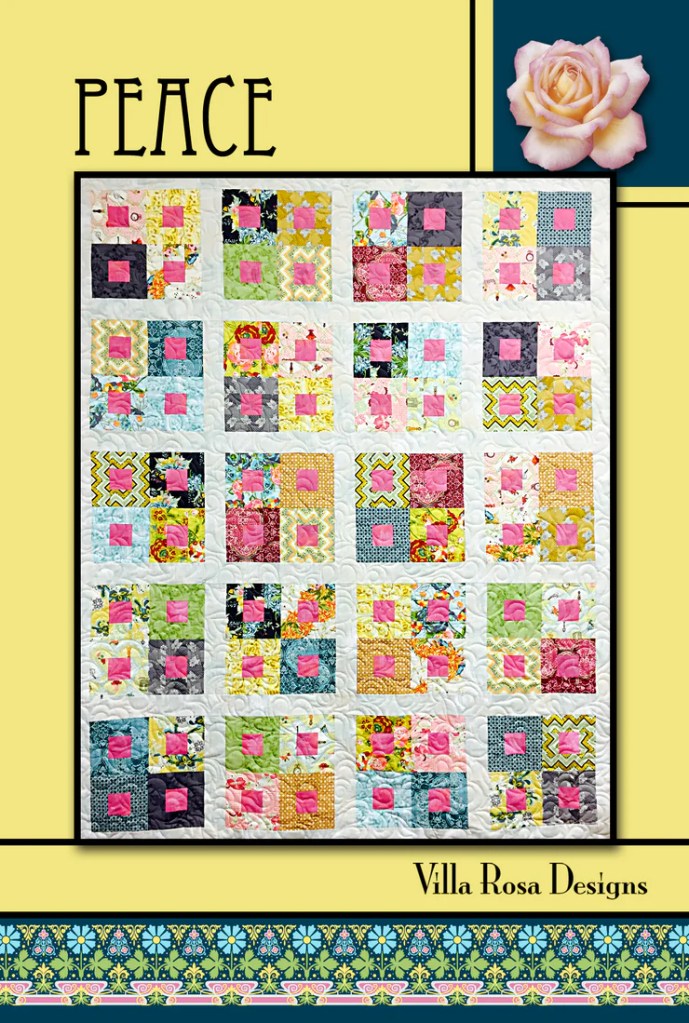
Peace – What can I say – the world needs more of this.

Colorful quilt titled 'Peace' featuring a patchwork design with various fabrics in shades of pink, green, blue, and yellow, displayed against a bright yellow background.

Digital HERE or Print HERE

Peppermint – A classic Christmas must have.

A quilt design titled 'Peppermint' featuring a pattern of red, green, and blue fabric with festive imagery, framed with decorative borders.

Digital HERE or Print HERE

Peppermint & Holly – A sweet table runner to delight one and all.

A quilted table runner named 'Peppermint & Holly' displayed against a backdrop of evergreen branches, featuring red and green colors with festive patterns.

Digital HERE or Print HERE

Phyllis – Add your favorite holiday fabrics for a star-worthy season.

A quilt named 'Phyllis' featuring a star pattern with floral and green fabrics, displayed against a white brick wall with a logo at the bottom.

Digital HERE or Print HERE

Petit Fours – Cake??? Did someone say cake???

A colorful quilt titled 'Petit Fours' featuring red borders and a variety of square patches in floral and solid patterns.

Digital HERE or Print HERE

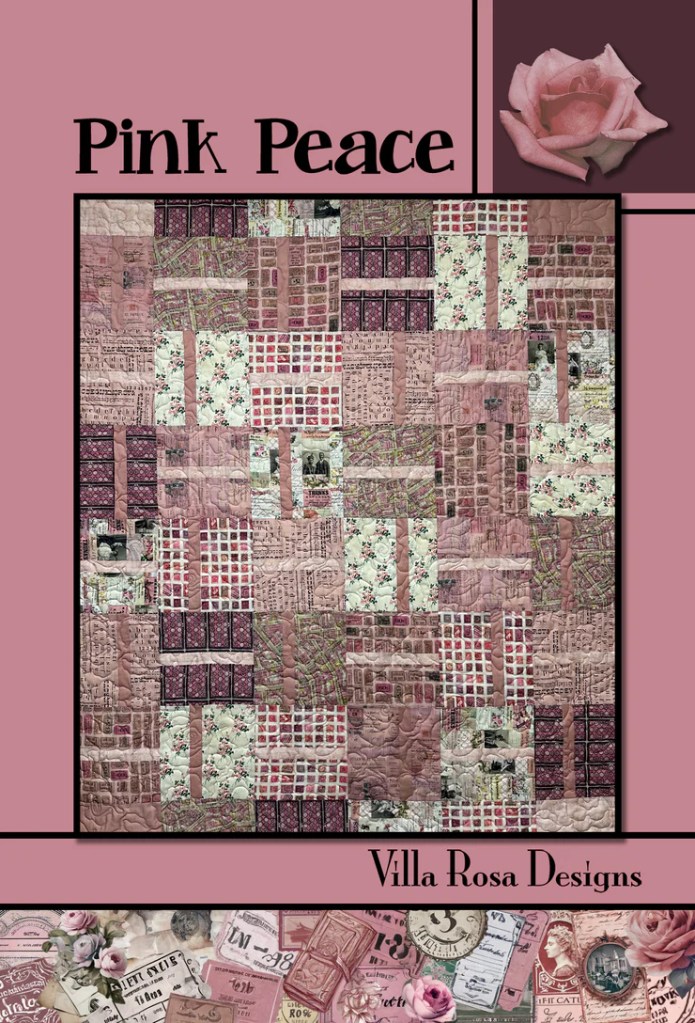
Pink Peace – Enjoy the quiet moments.

A quilt pattern named 'Pink Peace' featuring a patchwork design in soft pink tones, with various floral and geometric prints, presented by Villa Rosa Designs.

Digital HERE or Print HERE

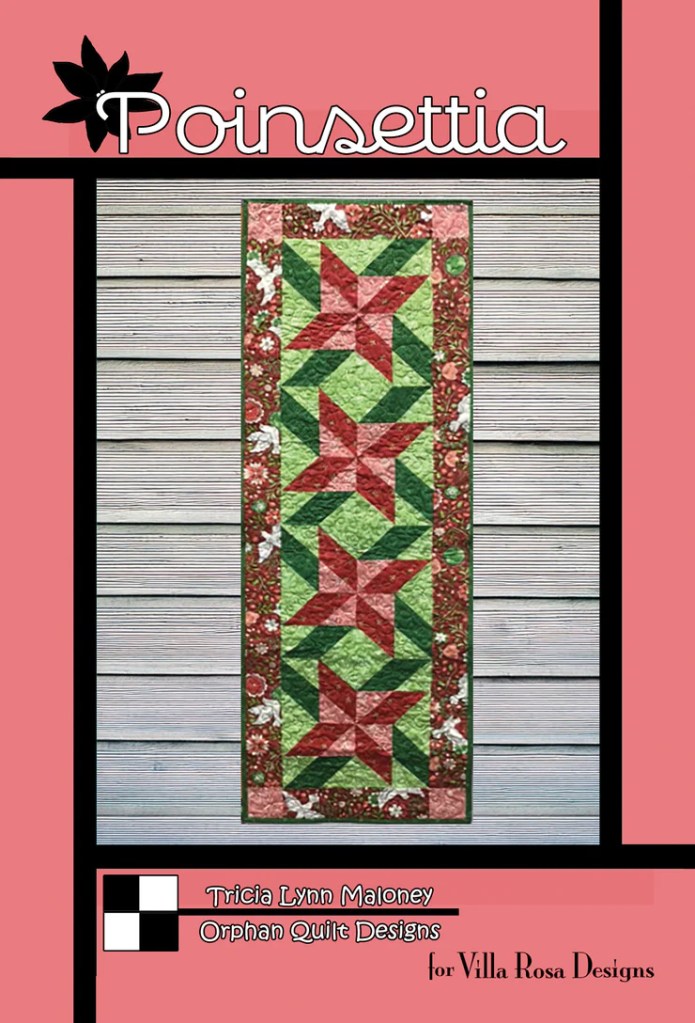
Poinsettia – You need at least one for the holidays.

A vibrant quilt pattern featuring red and green poinsettias, displayed on a pink background with a decorative border.

Digital HERE or Print HERE

Puppy Love – I always wanted a puppy for Christmas!

A quilt design titled 'Puppy Love' featuring playful phrases about dogs and heart motifs, surrounded by a colorful patchwork border.

Digital HERE or Print HERE

Puzzled – Jigsaw puzzles were always fun gifts.

A quilt titled 'Puzzled' featuring a pattern of overlapping squares in black, gray, and white tones, displayed with an elegant border and text by Molly Cook for Villa Rosa Designs.

Digital HERE or Print HERE

Raspberry Cream – When I was a kid, I would actually take a little bite out of each chocolate in my Mom’s box of chocolates until I found the ones I liked.

A vibrant quilt titled 'Raspberry Cream' featuring a variety of fabric patterns in shades of pink, blue, and gray, framed by a floral border.

Digital HERE or Print HERE

Red Rose – Flowers for Christmas.

Colorful quilt featuring a pattern named 'Red Rose', with floral and geometric designs in shades of red, yellow, blue, and pink. The quilt is bordered by a decorative stripe and a red rose graphic in the corner.

Digital HERE or Print HERE

Remember Me – The Holidays are all about remembers those you hold dear, near and far.

A quilt design titled 'Remember Me' featuring a pattern with vibrant purples, golds, and intricate geometric shapes, alongside a pink rose graphic and the text 'Villa Rosa Designs'.

Digital HERE or Print HERE

Savannah Jane – A handmade gift sure to please someone special on your gift list.

Savannah Jane patchwork scarf displayed on mannequins, showcasing various colorful fabric patterns. The design features charm squares in a mix of purples, blues, and coordinating prints.

Print Only HERE

Season’s Greetings – This runner is so fast, you can make one for someone on your list and one for yourself.

A colorful patchwork table runner with holiday-themed fabric featuring patterns like candy canes, snowflakes, and plaid, set against a green background.

Digital HERE or Print HERE

Sierra Snow – There will be snow for Christmas this year….

A quilt design named 'Sierra Snow' featuring a patchwork of teal and black fabrics with a snowflake pattern and the logo of Villa Rosa Designs.

Digital HERE or Print HERE

Silver Star – We always put the star tree topper on last, right before we turned off the lights in the house and turned on the tree lights. Magical.

Cover image of the 'Silver Star' quilt pattern by Villa Rosa Designs, featuring a brightly colored star pattern set against a gray background, with a vibrant border.

Digital HERE or Print HERE

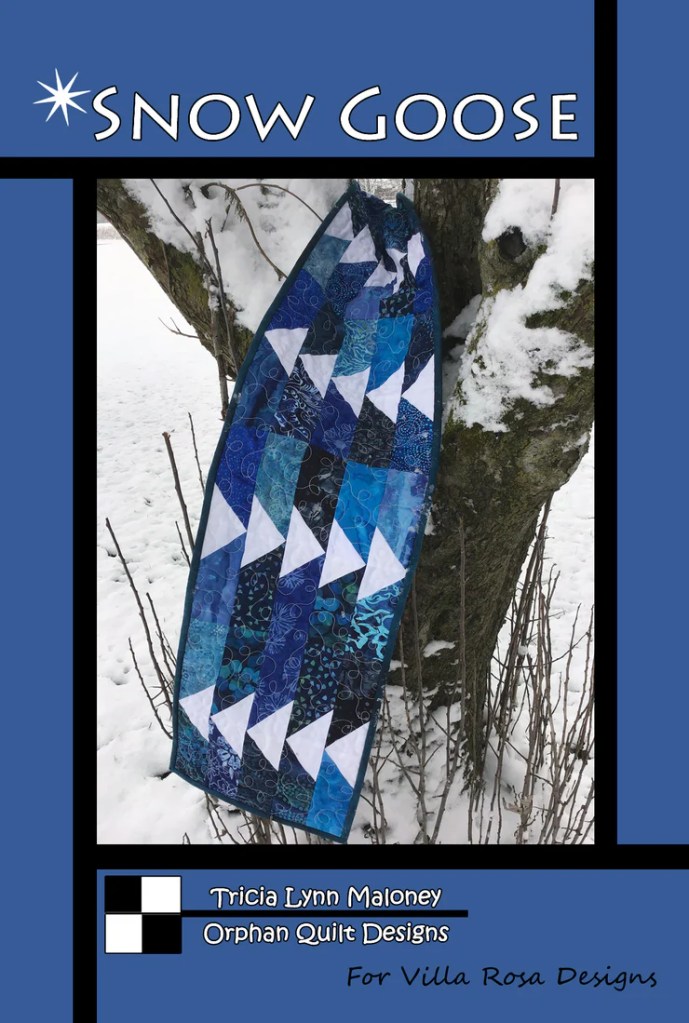
Snow Goose – Another Holiday classic in blue and white.

A quilt titled 'Snow Goose' featuring blue and white geometric patterns, hanging on a tree branch amidst a snowy background.

Digital HERE or Print HERE

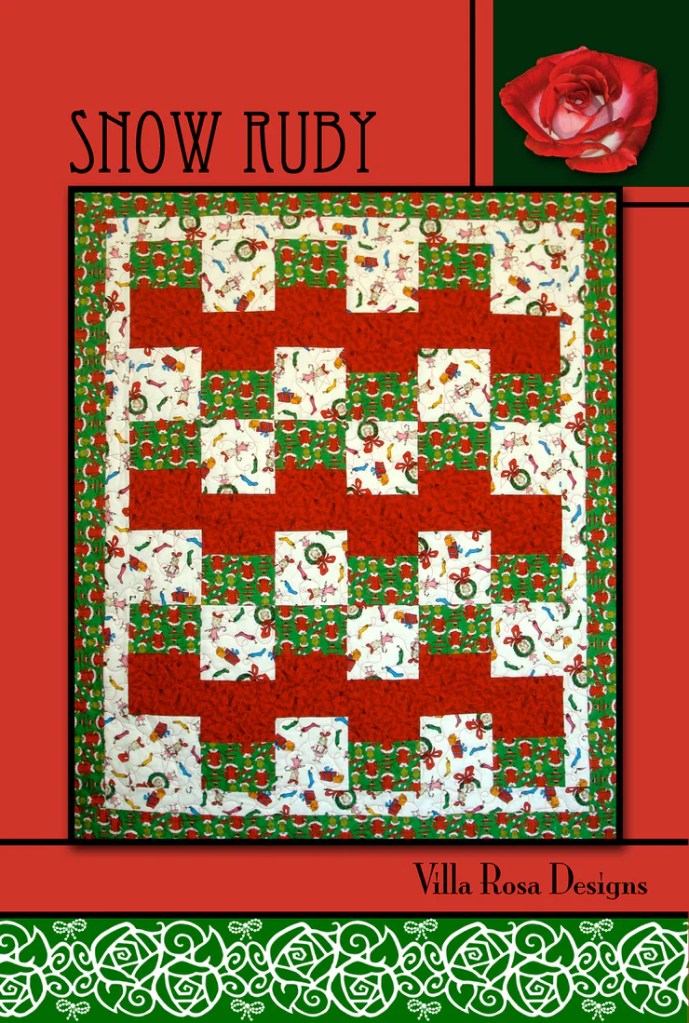
Snow Ruby – A fast last minute make for the holidays.

A quilt titled 'Snow Ruby' featuring a festive red and green color scheme with playful holiday-themed patterns, bordered by intricate designs, showcasing the Villa Rosa Designs logo.

Digital HERE or Print HERE

Snowberry – Add some classic red and white to your holiday table this year.

A quilt pattern titled 'Snowberry' featuring a montage of red and white checkered and patterned squares, displayed against a snowy backdrop and evergreen branches.

Digital HERE or Print HERE

Snowdrop – Sweet and simple and fast to make.

A quilt design titled 'Snowdrop' featuring a patchwork of various fabric patterns in shades of teal and gray, bordered by a floral motif and the text 'Villa Rosa Designs'.

Digital HERE or Print HERE

Snowfall – Snow always makes the Holidays more special.

Cover of the quilt pattern titled 'Snowfall,' featuring a blue and white quilt draped on snow-covered evergreen branches.

Digital HERE or Print HERE

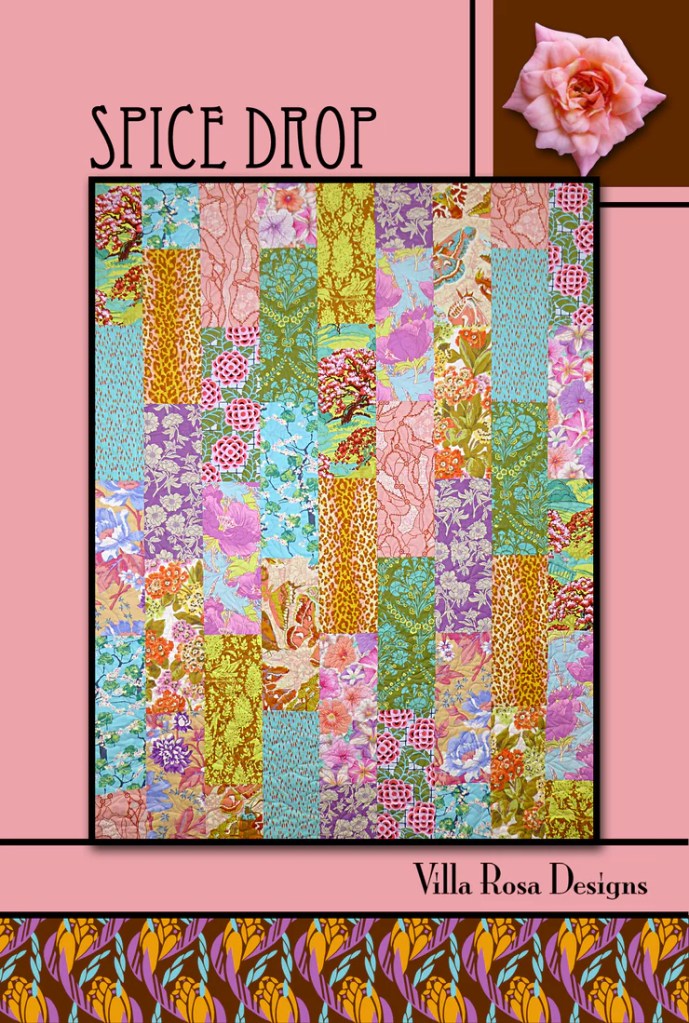
Spice Drop – Christmas candy was always a special little treat.

A colorful quilt pattern titled 'Spice Drop' featuring various vibrant fabrics in a patchwork design, surrounded by a pink background and floral border.

Digital HERE or Print HERE

Splendor – Gold and Silver ribbons and papers make for an elegant holiday.

A quilt design titled 'Splendor' featuring a decorated Christmas tree in a decorative pot, surrounded by a patchwork border of gold, silver, and white fabrics.

Digital HERE or Print HERE

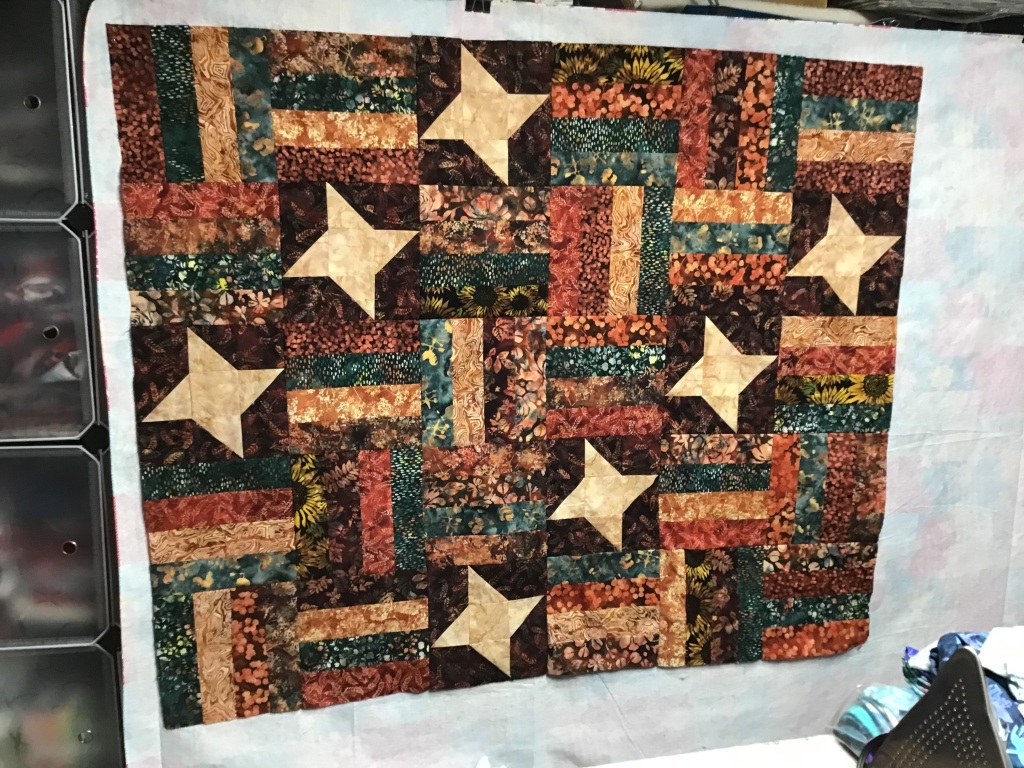
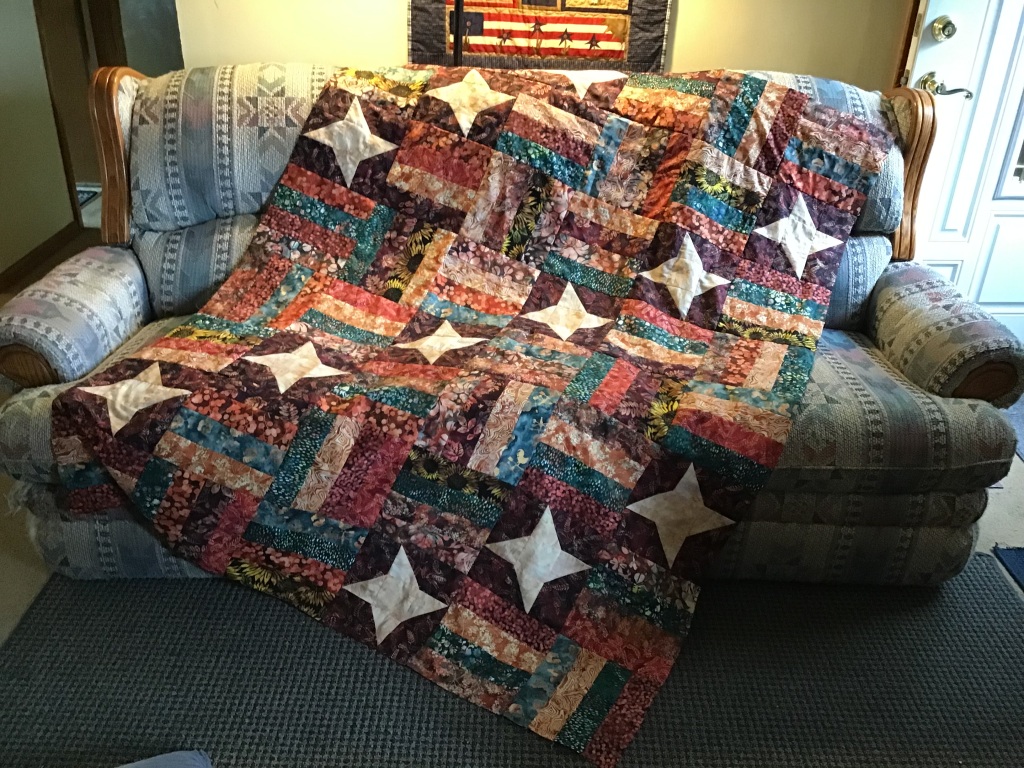
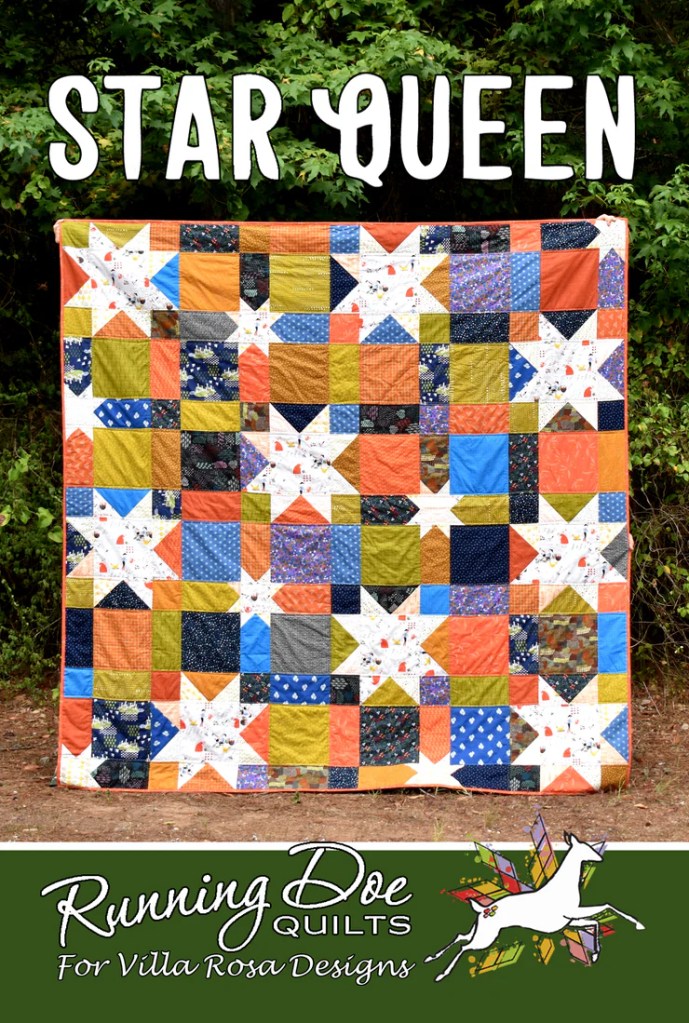
Star Queen – Imagine this starry stunner in the shades of Christmas gracing your bed, bringing holiday cheer all night long.

A colorful quilt titled 'Star Queen' displayed outdoors, featuring a patchwork design with star motifs in various colors.

Digital HERE or Print HERE

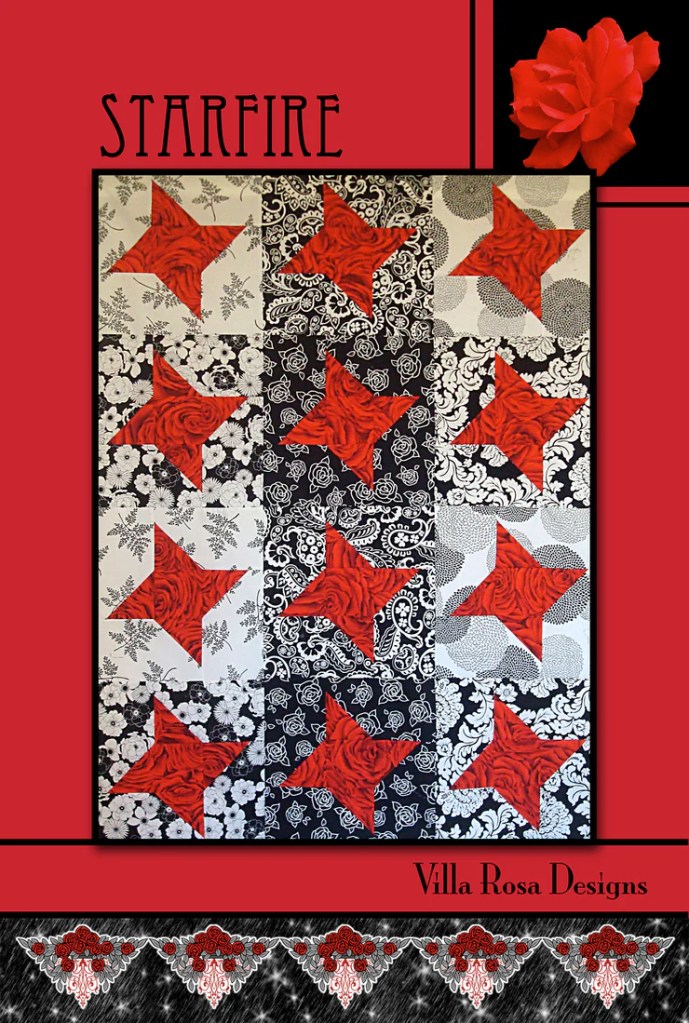
Starfire – Stars twinkle on the tree.

A vibrant quilt design titled 'Starfire' featuring red stars on black and white floral patterns, bordered with a decorative design at the bottom.

Digital HERE or Print HERE

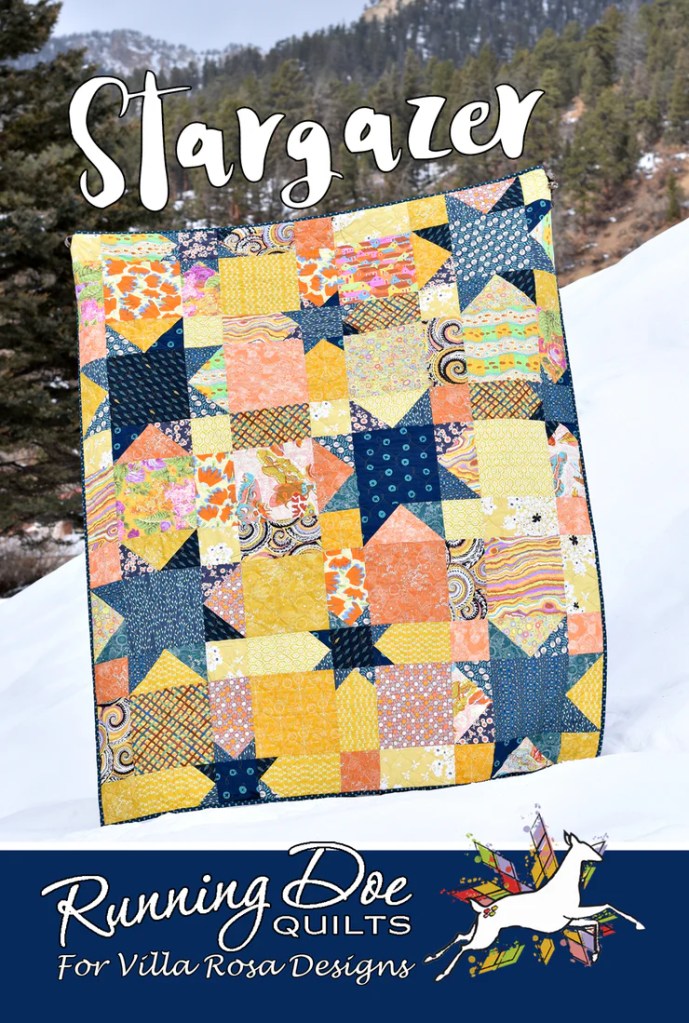
Stargazer – Stars have a very special place in our holiday celebrations.

A colorful quilt titled 'Stargazer' displayed outdoors on snow, featuring various patterns in shades of yellow, blue, and orange, with text overlay by Running Doe Quilts for Villa Rosa Designs.

Digital HERE or Print HERE

Sugar & Spice – Cookies are baking and the whole house smells divine.

A colorful quilt design named 'Sugar & Spice' featuring a patchwork of vibrant fabrics in red, green, blue, and yellow. The quilt has a playful arrangement of patterns, including flowers, stripes, and polka dots, and is attributed to Heidi Cook for Villa Rosa Designs.

Digital HERE or Print HERE

Sugar Cookies – My Aunt’s sugar cookies were always the best with gobs of frosting and lots of sprinkles.

Quilt design featuring colorful squares and rectangles with festive sugar cookie patterns, titled 'Sugar Cookies' designed by Heidi Cook for Villa Rosa Designs.

Digital HERE or Print HERE

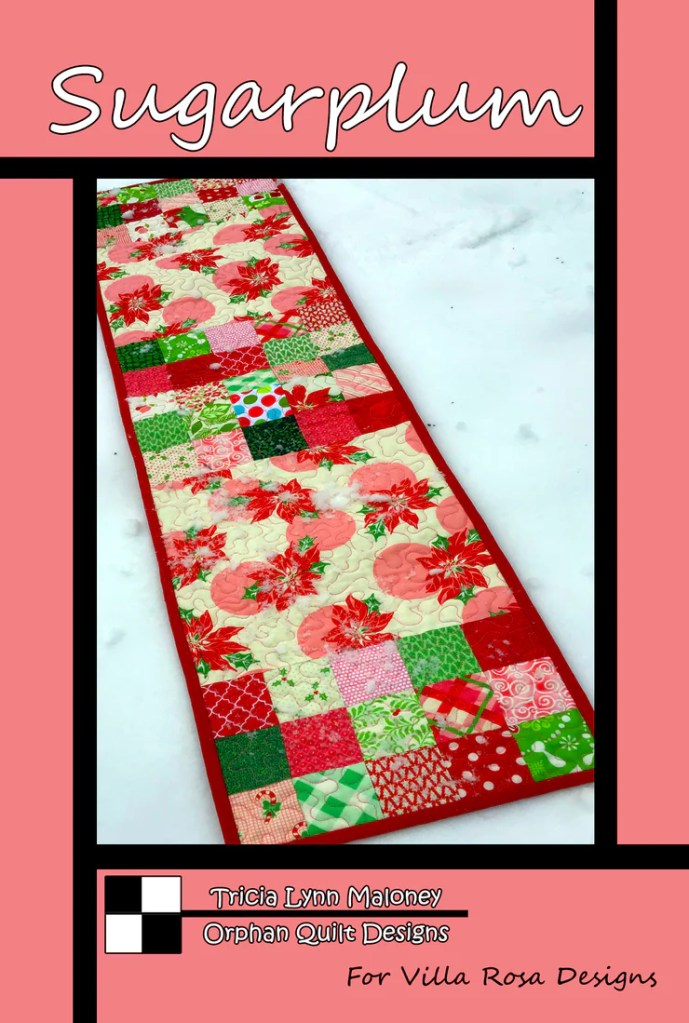
Sugarplum – …While visions of sugarplums dance in their heads.

Colorful quilted table runner titled 'Sugarplum' with a patchwork design featuring red, green, and pink fabrics, set against a snowy background.

Digital HERE or Print HERE

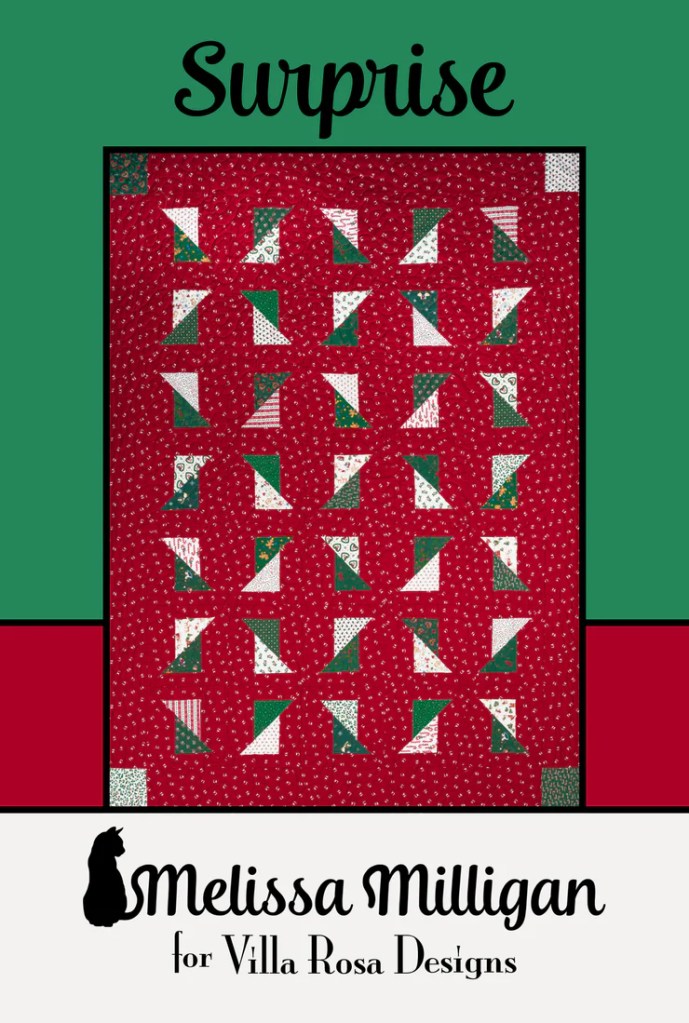
Surprise – It’s hard to wait until Christmas morning to discover all the surprises the special day will reveal.

Quilt titled 'Surprise' featuring a pattern of red, green, and white fabrics, designed by Melissa Milligan for Villa Rosa Designs.

Digital HERE or Print HERE

Sweater Weather – Don your favorite ugly Christmas sweater!

A quilt titled 'Sweater Weather' featuring a blue background with white star patterns, surrounded by a snow-covered forest.

Digital HERE or Print HERE

Tabitha Jane – A fun and fast to make tote bag, perfect for your holiday haul.

Promotional graphic for the 'Tabitha Jane' reversible tote bag, featuring four different fabric designs with a shoulder strap. The design includes text detailing fabric requirements, dimensions, and construction notes.

Digital HERE or Print HERE

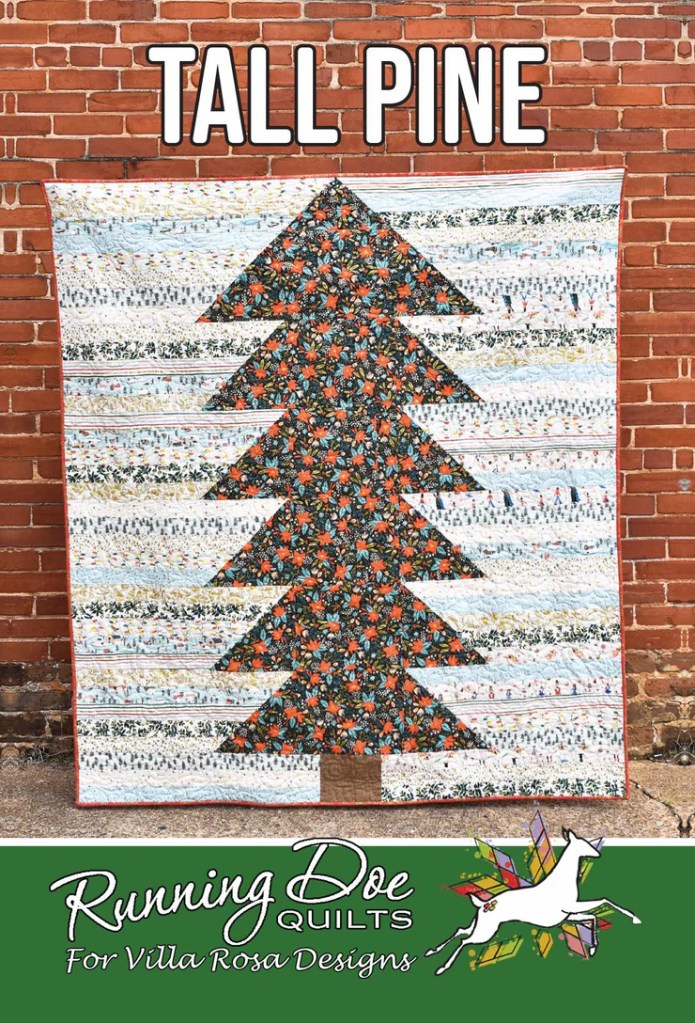
Tall Pine – Rockin’ Round the Christmas Tree!

A patchwork quilt design featuring a tall pine tree on a colorful background, with the words 'TALL PINE' at the top and 'Running Doe Quilts For Villa Rosa Designs' at the bottom.

Digital HERE or Print HERE

Turkish Delight – This is always a special treat during the holidays in my family.

A colorful quilt pattern titled 'Turkish Delight' by Heidi Cook for Villa Rosa Designs, featuring various fabric squares, set against a background with flowers.

Digital HERE or Print HERE

Twinkle – The lights on the tree twinkle like stars in the sky.

A colorful quilt titled 'Twinkle' featuring a pattern of multi-colored triangles and squares, displayed outdoors against a cloudy sky.

Digital HERE or Print HERE

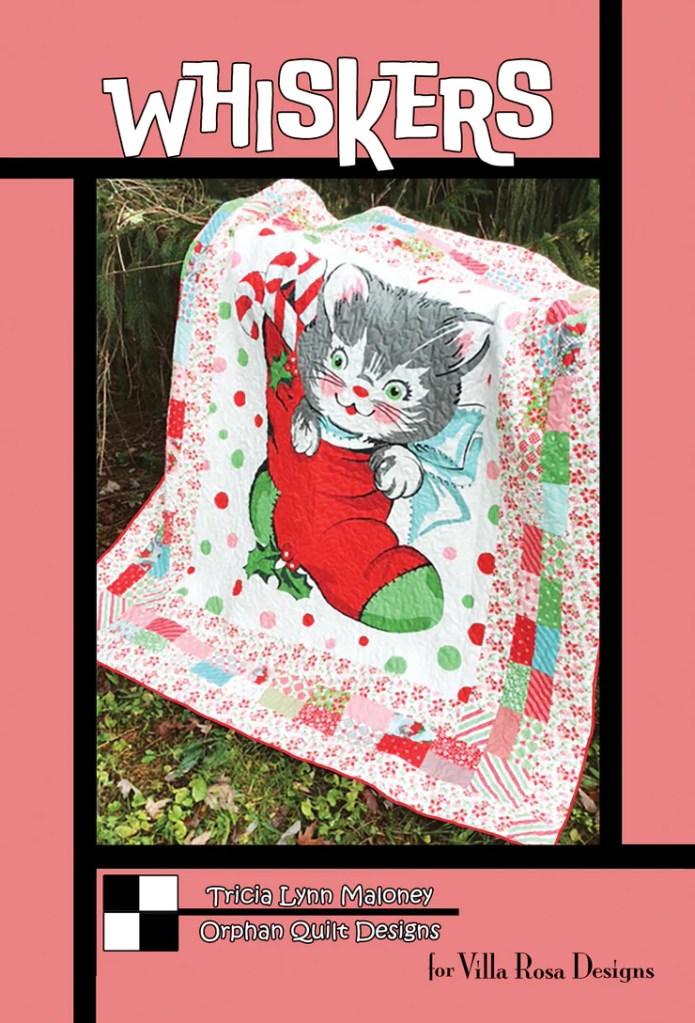
Whiskers – I always wanted to find a fluffy little kitten in my Christmas stocking.

Cover of the quilt pattern titled 'Whiskers' featuring a playful kitten holding a candy cane, with a colorful quilt background decorated with festive patterns.

Digital HERE or Print HERE

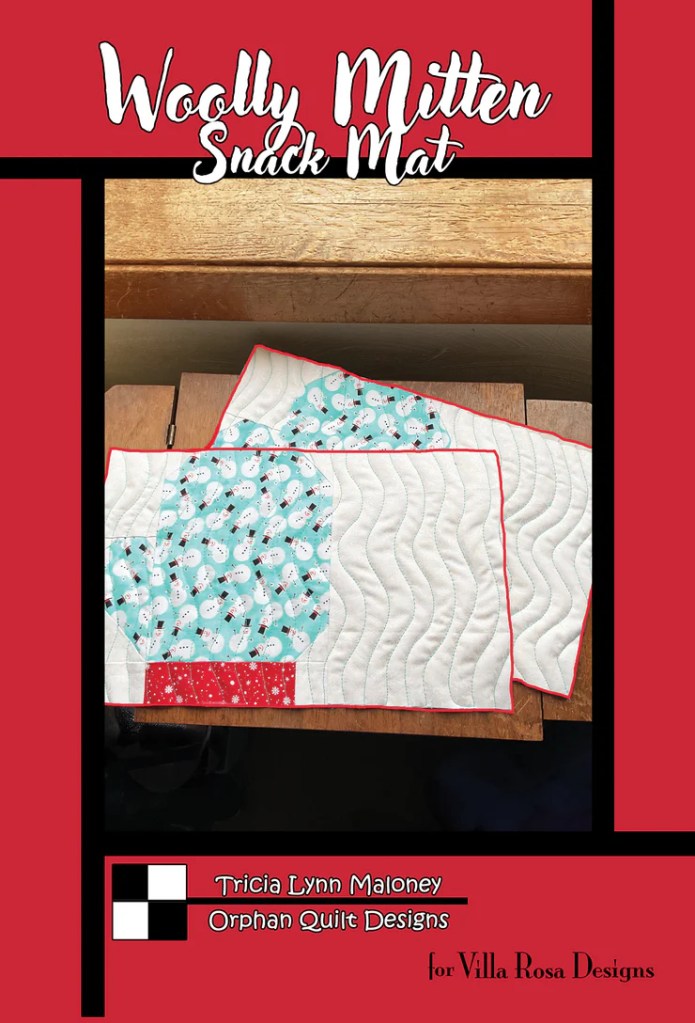
Woolly Mitten Snack Mat – Don’t forget your mittens when you go outside!

A quilted snack mat featuring a woolly mitten design with snowman fabric, set against a bright red background, labeled 'Woolly Mitten Snack Mat.'

Digital HERE or Print HERE

Wreathed – Time to hang the wreath on the door and add a bright red bow.

A quilt design titled 'Wreathed' featuring a circular pattern with red, green, and white elements, designed by Melissa Milligan for Villa Rosa Designs.

Digital HERE or Print HERE

And that, folks, is the end of my Curated Holiday VRD Rose Card List. I hope you enjoyed it and perhaps discovered some new-to-you patterns.

Last week, I started a Holiday Gift Idea series – one for each week until Christmas. The idea could be for yourself, someone else, or even something to make.

As most of you know our VRD Rose Queen, Pat Fryer, is in the process of relocating to Tyler, Texas where our VRD designer, Catherine of Running Doe Quilts, is opening a new quilt shop called Rose City Quilting, which will be the new Texas home of Running Doe Quilts and Villa Rosa Designs.

There are 2 designs to choose from:

Rose City Quilting T Shirts (front design) HERE

Black t-shirt featuring a pink graphic design with a deer, sewing machine, and roses, labeled 'Rose City Sewing - Home of Running Doe Quilts & Villa Rosa Designs'.

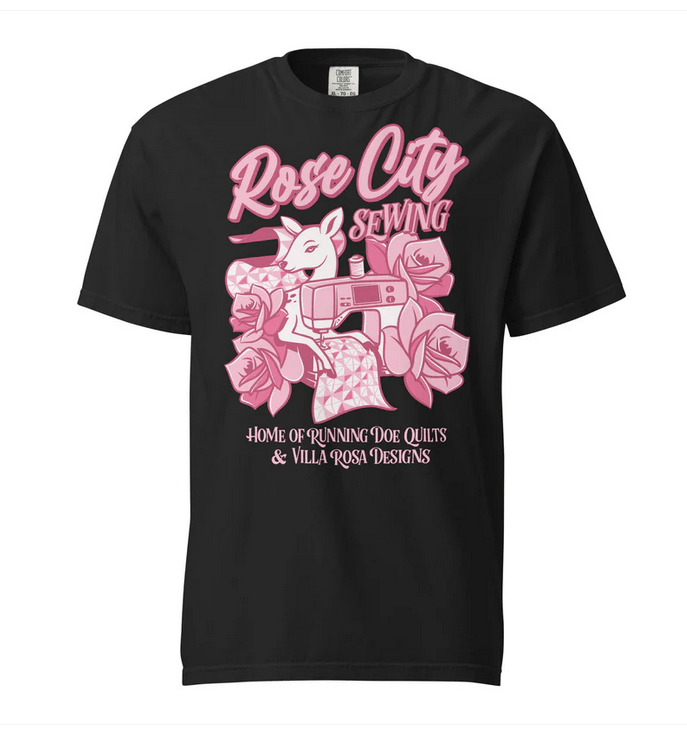
Rose City Quilting T Shirts (back design) HERE

A light blue t-shirt featuring a graphic design with 'Rose City Sewing' text on the back, alongside images of roses and a sewing machine.

Just tell ’em Tricia sent you! (Wink, wink.)

That’s it for me this week – I’m off to enjoy a little Thanksgiving food of my own. And pie. With lots of whipped topping. Yum!

Sew. Laugh. Eat. Repeat.

Always,

Tricia @ VRD

Rose Cards · Tips and Tricks · Tutorials

NEW VRD Rose Card Patterns for September and VRD Cinnamon Stix Quilt Tutorial

Happy Thursday to you!

I hope you are enjoying this collection of VRD quilt tutorials to inspire you to leap back into quilting this fall. May these tutorials nudge you into making a quilt for someone special or maybe just for yourself.

We’ve got lots to do today, so let’s get moving.

First up, it’s the Thursday after the first Friday of the month, and you know what that means – NEW PATTERNS! Talk about fall inspiration!!!

Here’s the new collection of 5 VRD Rose Cards for September. Aren’t they super???

A collage of quilt pattern cards for September 2025, featuring designs titled Awestruck, Edwina, Pumpkin Parade, Besties, and Viroqua, each with vibrant colors and unique patterns.

Get the set of 5 print patterns HERE

(Patterns are also available individually both as print and digital versions)

Awestruck by Molly uses 5″ squares and finishes at 44″ x 60″. There are kits still available HERE featuring Tula’s True Colors collection while they last. Totally loving the name!

Melissa wows us with her Pumpkin Parade throw quilt. It uses yardage (or your stash!) and finishes at 45″ x 56″. We still have a few kits left HERE featuring Riley Blake Seasonal fabrics, so grab one before they’re gone.

Pat is back this month with her latest Tim Holtz Palette quilt pattern, Edwina, featuring the Indigo Palette. Edwina finishes at 45″ x 60″ and is fat quarter friendly. Kits are still available, but going fast, so get yours HERE.

Besties is my new throw-sized quilt pattern this month. It’s fat quarter friendly and finishes at 48″ x 64″. We have kits featuring Anna Maria’s Iconic collection (see below) still available HERE.

Colorful patchwork quilt featuring various floral patterns and vibrant colors arranged in a grid layout.

Besties in the Iconic Collection

Viroqua is Rachelle’s latest smashing mod pattern. It finishes at 42″ x 48″ and uses half yards and yardage (stash friendly!). There are kits still available HERE featuring Windham’s Sketchbook 21 collection (see below).

A patchwork quilt top featuring various fabric patterns arranged in a geometric design with triangles and squares, showcasing a mix of colors and textures.

Viroqua in the Sketchbook 21 collection (please disregard the 2 mistakes where we turned the HSTs the wrong way – it’s getting fixed as we speak)

Last, but certainly not least is this month’s new table runner, Beachcomber. I’m sorry I missed the deadline boat last month with this fun runner, but I think it’s not too late to have just a wee bit more summer before it’s officially autumn on September 22nd.

You can really use just about any fabric collection or your stash for this fun and clever runner. Beachcomber finishes at 18″ x 54″ and uses yardage. Autumn? Halloween? Thanksgiving? Christmas? And the list goes on. Have you ever thought about making a 2 sided runner with 2 different seasons….here’s your chance!

A digital mockup of the Beachcomber quilt pattern designed by Tricia Lynn Maloney, featuring a colorful quilt laid out on a sandy beach with ocean waves in the background.

Get your digital Beachcomber pattern HERE or your print pattern HERE.

Now we’ve covered all of the new September patterns, which one will you make first?

OH! One last little thing about the new patterns – Melissa’s new Pumpkin Parade throw quilt is a fabulous companion to our best-selling Pumpkin Hollow table runner.

A quilted table runner featuring orange pumpkins on a white background with a checked pattern, accompanied by autumn leaves, titled 'Pumpkin Hollow' designed by Tricia Lynn Maloney for Villa Rosa Designs.

Get your Pumpkin Hollow digital pattern HERE or print pattern HERE.

All right, moving on, let’s dive into this week’s quilt tutorial – Cinnamon Stix.

Cinnamon Stix is a great pattern for a favorite fabric collection. You can use a stripe or even a seasonal/novelty fabric in the long strips, so it’s really versatile. Then simply add your coordinating fabrics for the Stix, a sashing, and border. Cinnamon Stix is fat quarter friendly and finishes at a nice 46″ x 63″.

A vibrant quilt titled 'Cinnamon Stix' featuring horizontal stripes of various fabrics in warm autumn colors and patterns, framed by a green border.

Get your Cinnamon Stix digital pattern HERE or your print pattern HERE.

I promised you a few weeks ago that I was going to have another quilt featuring Hoffman’s Rodeo Dreams digital collection – well, here it is! Today we’re using the border stripe in the collection along with fun coordinates, including a few batiks.

A variety of fabric swatches in red, blue, and neutral tones arranged on a sewing table, featuring a western-themed border print with cowboys and horses, alongside a quilting pattern titled 'Cinnamon Stix'.

First up, we’re going to cut out the Stix for the 3 pieced Stix rows.

A rotary cutter and acrylic ruler on a cutting mat with the 'Cinnamon Stix' quilt pattern card by Heidi Cook.

Once we’ve gotten all of the Stix cut, we’re going to slap them up on the design wall so we can arrange and rearrange them until we’re happy with the fabric placement.

Heads up – because the Stix are cut different widths, each row might look a bit different, depending on how you arrange your Stix.

Fabric squares arranged on a design wall in a patchwork pattern, featuring red, white, and blue colors.

Now we’re happy with how the Stix rows look, so it’s time to sew them together. I like to sew them into pairs, then sew the pairs into quads, and so on until all the pieces are stitched together into a row. Then repeat for the next 2 rows.

Close-up of a sewing machine stitching layers of fabric together, featuring a mixture of light beige and patterned blue fabric.

Okay, all the Stix are sewn together into 3 rows. Lookin’ good!

Three rows of colorful quilt fabric blocks arranged on a design wall, featuring blue, red, and cream tones.

Next let’s work on prepping and cutting the Rodeo border stripe fabric. My pal (and cousin), Robin, is helping me out with this tutorial today – we’re working on it in her sewing room.

A person cutting fabric on a cutting mat with a rotary cutter, featuring printed rodeo scenes and decorative fabric borders.
Hey Robin!

Once the stripe is cut, we’re going to work on cutting the narrow sashing, which is this gorgeous blue 885 Dot batik. LOVE IT!

A rotary cutter is placed on a cutting mat with strips of navy blue fabric featuring white dot patterns, alongside a clear acrylic ruler for measuring.

Let’s sew the sashing to both sides of our pieced Stix rows.

A sewing machine stitching together several pieces of fabric, including a patterned pink fabric and solid blue fabric, arranged on a sewing table.

Now we’re going to lay out the sashed Stix rows with the stripe. My tip is to find the center of the sashed Stix row and the center of the border stripe. Then match and pin the centers together and pin outward towards the ends to keep the quilt nice and square. We’re ready to sew the rows together. And then we need to add sashing all the way around as our first border.

Yay! The center of the quilt is finished. Easy peasy!

A quilt featuring western-themed fabric panels depicting riders on horses and dogs, arranged in alternating striped sections of blue, red, and patterned fabric, displayed against a light-grey backdrop.

Okay, time to cut the final border, which is a wonderful red bandana print from the Rodeo Dreams collection. Then we’re going to sew it to the quilt. Yay!

A person cutting red bandana fabric with a rotary cutter on a cutting mat using a ruler for measurements.

And here it is – the finished Cinnamon Stix quilt top in Rodeo Dreams. Isn’t it really fun???

A colorful quilt featuring cowboy and rodeo-themed fabric, arranged in vertical stripes with red borders, displayed against a light backdrop.

Here it is outside for a straight-on shot. It was really breezy so we ended up taking the photo in front of one of Robin’s hubby’s farm toys so it blocked the wind, instead of in front of the old barn (our first choice). Thank you Mary Lee and Robin for holding the quilt and fighting the wind for me. Perfect!

Two people holding a finished quilt featuring horse and cowboy patterns against a construction vehicle background.

I bet you’re already thinking about border stripes in your stash (or something new at your local quilt shop) to use in this fun and fast VRD pattern. We’d love to see your Cinnamon Stix quilts on our VRD Facebook page.

Now that the top (or flimsy) is done, it’s time to layer it with batting and backing, quilt it, bind it, and lastly add a label. Eventually…..

Stay tuned next week for another great VRD tutorial.

Until then –

Always,

Tricia @ VRD

Quilting Partners · Rose Cards · Tips and Tricks · Tutorials · villa rosa designs

VRD Augustina Quilt Tutorial – Perfect Summer Project

Happy Thursday to you!

WHEW! If you’re like me, you are having a heatwave right now. 90’s every day. It even hit 100 on the thermometer on Monday! YIKES! I’m sooooo not ready for these temps. It’s like we went straight from 50’s to 90’s in a couple weeks.

90’s are definitely not normal for this time of year here in northwestern Pennsylvania. AND we have high humidity to go with the heat which makes me want to just melt into a puddle on the ground every time I have to step outside. I literally had to scramble on Sunday to get the window AC units in, but we’re all good now. I just don’t want to go outside anymore.

A woman in a floral dress appears distressed while crawling on a sunlit street, with water droplets visually distorting around her, creating an impression of melting.
I’m melting into a puddle………!!!!

Luckily my dungeon studio is still cool enough (sadly, it is not air conditioned) to work in comfortably. I have several fans on to keep the air moving, but when the heat finally infiltrates my space, it’ll get quite uncomfortable. That usually isn’t until August and September, though, but we’ll see what summer brings this year. Northwestern Pennsylvania is an interesting place to live – record amounts of snow and cold in the winter, a wet and cold spring, then – POOF! – record high temps in June. Only the strong survive……..

I finally got a little quality time with my sewing machine this week so I decided to put together a new tutorial for you. Augustina is a such great project for summer!

Of course Augustina is fast and fun – it’s a VRD pattern, but it’s also not so big that you feel like you’re wrestling an alligator while your body is dripping with sweat. I promise you, this quilt really is quick – I made the top in a couple hours and that included both cutting and photographing my step-outs for the tutorial. It’s a very satisfying afternoon project.

Augustina is a great sized quilt for a small throw or a juvenile quilt. And this is a pattern you are going to turn to over and over again for a beautiful quilt with little effort, yet it looks like a million bucks (sorry, it’s late and I couldn’t think of another phrase to use). So don’t forget to get your own Augustina pattern if you don’t have it yet.

A vibrant quilt pattern titled 'Augustina' featuring colorful fabric blocks in shades of purple, yellow, and orange, with floral and geometric designs. The quilt is displayed on a warm orange background, showcasing its cheerful and lively aesthetic.

Get your digital pattern HERE or your print pattern HERE

Let’s get started!

The first thing we need to do, of course, is round up our fabrics. Augustina is a fat quarter project, so you can march right over to your stash and find some coordinating fat quarters or you can use this project as an excuse to visit your local quilt shop to buy new fabric. Yeah, I know, we quilters really don’t need an excuse, but it is handy to have one anyway, isn’t it?

For this tutorial, I am using Flower Shoppe fabrics from our quilty friends over at Hoffman Fabrics. The flower fabrics are all amazing Hoffman digital prints – have you seen these in person yet? The colors are so bright and clear – I feel like I could pick these flowers right off the fabric. We’ve paired a few Hoffman batiks to balance out the gorgeous flower prints.

Please remember when using digital prints, that they do not react exactly the same as regular quilting cottons. Always start with a new needle in your machine so you are not pulling threads when sewing as well as a new rotary cutting blade so you are cutting cleanly through the fabric instead of sawing at it, which can damage the fibers.

A collection of fabric pieces featuring floral patterns, including sunflowers and roses, stacked with an Augustina quilt pattern booklet on a cutting mat.

Next up…..cutting.

SHHHHH! The secret of this quilt is that the pieces are big. Big pieces mean you don’t have to spend loads of time cutting little squares, rectangles, or triangles. Big pieces are a huge time saver! Big pieces also mean you can use bigger prints (when you use big prints in small pieces, the design gets all chopped up and you tend to lose what you loved about the print to begin with). Yay! Let’s GO BIG!

In the photos, below, we’re cutting our accent fabric into strips and then into rectangles.

Below, we’re cutting our FQs into strips and then into 2 different sized rectangles.

VIOLA! Cutting done. Easy peasy. Here’s all the pieces we need to make Augustina.

A selection of colorful quilting fabrics featuring vibrant floral patterns, including poppies and roses, arranged on a green cutting mat with a ruler and rotary cutter nearby.

Before we can sew Augustina together, we have to lay out our fabrics. I’m going to put them up on my handy dandy flannel board which consists of a flannel-backed table cloth clamped to the tops of my fabric storage unit doors. As I’ve mentioned before, this idea came from my pal, Mary Lee. Kudos to you, Mary Lee! It’s a great option if you don’t have a spare wall to put up a more permanent quilt wall solution. I can simply take it down when I need access to my yardage stash. I’ve actually had this tablecloth for years now, so it’s even an economical option.

Hmmm……I think I need to move some fabrics around.

After several switcharoos, I think I’m happy with the layout now.

Let’s sew!

This quilt is sewn together in vertical rows. I took my time, only taking one vertical row off of my board at a time. I worked from the top down to sew the pieces together. It doesn’t matter whether you sew your strips top down or bottom up, just be consistent with all of your rows or else you might get your fabrics out of kilter.

Okay, all the fabrics are now sewn into vertical rows.

Vertical strips of colorful floral and solid fabrics are laid out for a quilt project, with a cutting mat visible below.

Now I’m going to sew the vertical rows together into pairs. As this quilt has an odd number of rows, the last row will have to hang out all by itself for a while.

Vertical strips of colorful floral fabrics arranged on a flannel board in preparation for quilting.

Next, I’m going to sew the first 2 pairs together into a foursome. Then I’ll sew the third pair and the last row together into a trio.

Two vertical quilt sections showcasing a colorful patchwork of floral and solid fabrics on a cutting mat.

One last seam to sew the 2 sections together and the Augustina top will be finished. Fast as can be! There isn’t a lot of matching seams, but you do want to make sure your accent pieces are relatively even-looking across the quilt.

And here it is! Our completed Augustina quilt top.

Colorful quilt top featuring floral and solid fabric blocks arranged in a vertical pattern.

Although it was hot, I decided to take Augustina outside for a glamour photo. Sigh…….it was a little breezy out and I couldn’t get a photo with it hanging nicely for you. Bummer. But I do love how it looks surrounded by all the green – the flowers look like they are about to burst right off the quilt! That’s digital fabric for you – the number of colors that can be printed on fabric is phenomenal and creates stunning designs.

A colorful quilt featuring floral patterns and various fabrics, hanging on a clothesline outdoors with green grass and trees in the background.

And that’s it! Finito! Next I need to layer, quilt, and bind it…….someday, anyway.

If you’re looking for another great summer quilt pattern, check out the Jubilee tutorial from a few weeks ago. It’s also a super go-to project.

That’s it for me today, gotta go have me some summer……..in the air conditioning. LOL!

See you next week, same time same place —

Always,

Tricia @ VRD

Rose Cards · Tutorials · villa rosa designs

VRD Jubilee Quilt Tutorial

Happy Thursday to you!

Warm temps are here……..finally! Maybe a bit too much too fast, but I’ll take it! The sun is shining, the sky is blue, it’s actually warm in the upper 80s, but there’s a nice breeze to make the heat tolerable. Believe it or not, I’m sitting here in shorts and a t shirt as I write this blog post. Last week, I was wearing a fleece jacket and long pants. Oh, the difference a week can make. I hope you are having some nice weather wherever you are, too.

I thought we’d kick off the gorgeous weather here in my little corner of the world with a fun quilt tutorial.

Let’s make Jubilee today. It’s a super fast and fun fat quarter quilt and it’s a great option when you need a quilt in a hurry. Looks great in just about any fabric. Perfect for summer quilting. Make it in the afternoon and still have time for dinner and s’mores around the campfire in the evening.

A vibrant quilt titled 'Jubilee' featuring an assortment of patterned batik fabrics in earthy tones of brown, turquoise, and black, designed by Villa Rosa Designs.

Get your digital Jubilee pattern HERE or your print Jubilee pattern HERE

The first thing we need is fabric! YAY FABRIC!

Today I’m using batiks from the Sweet Shoppe collection by our friends at Hoffman Fabrics. Aren’t these fabrics yummy? I can’t wait to see how the quilt turns out!

A collection of colorful batik fabrics arranged around a Jubilee quilt pattern, showcasing vibrant colors and intricate designs.

Of course, we need to do some cutting before we can sew. Let’s get to it.

In the left photo, below, you can see how many layers I’m cutting at once. I find batiks to be great for layering for cutting as the fabric is finer. When I’m cutting thick or slippery fabrics, I only cut one layer at a time.

Let’s get the rest of the fabrics cut. For Jubilee, we only need 2 different shapes, which is one thing that makes this quilt go together so quickly. Wow! That was fast!

Time to start sewing the strips together so we can make strips sets and then we’ll cut the strip sets down into the block size we need.

I like to set all my strips to the left of my machine while I sew. Then I select strips randomly to sew together, making sure I don’t grab 2 of the same strip. We want these strip sets to be as scrappy as possible.

Once I’ve sewed 2 strips together for the required sets, I then go back and add the third strip to all of the sets. I find it more efficient to complete each step for all the pieces at once before moving onto the next step.

Sewing colorful fabric strips together at a sewing machine for a quilt project, with scissors nearby.

Once our strip sets are sewn together, it’s a good idea to press them before we begin cutting out the blocks.

Do you struggle with which way to press your seams on the back of your blocks? Me too. More often than not I end up flipping the seams in the other directions when I go to assemble blocks. Oy vey!

The good news with Jubilee is that it doesn’t matter which way you press your seams because the blocks do not line up and the seam do not cross – another reason why Jubilee is quick as a wink.

Next we need to cut our strippy blocks from our strip sets. I’m layering 3 strip sets on top of each other for cutting. To do this, I line then up on the left edge (or the right edge if you cut from that side), but I stagger them a bit top to bottom so the seams are not sitting right on top of each other because stacked seams make a big lump. It’s not a good idea to attempt to cut through lumpy seams or you might accidentally miscut something.

Awesome applesauce! All of the blocks are pressed, cut, and ready to go. Time to head to my flannel wall to lay them out.

A collection of colorful batik fabric pieces organized on a work surface, showcasing various floral and abstract patterns.

I’m going to put the blocks up, alternating the squares with the pieced blocks. I’m just going to slap the blocks up randomly and then I’ll shuffle them around to distribute both colors and fabrics until I find a layout that pleases me. When you are putting blocks together, what is your process?

Below are 3 photos showing shuffled blocks. Sometimes this step takes longer than actually making the whole quilt top (eye roll here).

Here is my final layout.

A colorful quilt layout featuring various batik fabrics arranged in a vibrant pattern, showcasing different shapes and sizes of fabric pieces on a design wall.

Because the blocks don’t line up horizontally, we’re going to sew the blocks into columns and then sew the columns together.

And done! Here is the finished quilt top. Isn’t it pretty? I love that the blocks are large so one can enjoy the beauty of the batik fabrics. It turns into a nice throw at 45″ x 60″, but it would be easy to make the quilt larger by adding a border or additional blocks.

A colorful quilt made with batik fabrics, hanging on a clothesline outdoors against a backdrop of green grass and trees.

Now I just have to layer, quilt, and bind it.

Looking for info on finishing your quilts? Check out these posts in our Basic Quilting Skills blog series:

Batting, Backing, and Preparing Your Quilt for Quilting

Quilt As Desired

Squaring Up Your Quilt

Binding 101

Label Your Quilt

Now I’m off to my sewing machine to work on more quilts. Hope you are too!

See you next week, same time same place —

Always,

Tricia @ VRD

Quilting Partners · Rose Cards · villa rosa designs

Hanging Out With Hoffman California International Fabrics

Happy Thursday to you!

Hello Autumn! Here it is — the season I’ve been waiting for all year. I don’t really know what it is about autumn, though, that inspires me so much. The colors? The sounds? The smells? Warm days and cool nights? Sweaters and fuzzy socks? Hot tea and a little snack in the afternoon? Huh! I think it’s all of the above!

Image by moi

Many of you already know that Villa Rosa Designs partners with other companies in the quilt industry. You can see our quilting partners on the far right side of the blog (just click on the company to be directed to their website). Perhaps you’re wondering how that all came about? Well, the easiest and quickest answer to that question is that our wonderful fast and fun VRD Rose Card patterns pair beautifully with pretty much any fabric collection and we have patterns for just about any fabric cut or style. Rose Card patterns also provide a terrific way to feature and showcase new fabric collections because VRD patterns really are all about the fabrics, not fussy cutting or piecing. Yay, Rose Card patterns — you rock ! Want to check out our entire catalog of 650+ Rose Card patterns? Print Patterns HERE or Digital Patterns HERE

One of the really FUN things I get to do is work closely with fabric companies to match our patterns to their collections. If you’ve visited any fabric company websites recently to check out their newest fabric collections, you might have seen some of our Rose Card patterns hanging out there. How cool is that???

Hoffman California International Fabrics is one of the companies that we partner with. It’s really fun playing with digital fabrics in their new collections paired with our VRD Rose Card patterns. You know how a lot of quilters make quilts in their heads while others make quilts with fabric? I get to make quilts on a computer screen with digital files! Neat-o!

Did you know that Hoffman has been in business since 1924? Wowzer! That’s 100 YEARS!!! Imagine all the amazing fabrics they have produced in 100 years! It’s positively mind-boggling!

Let’s all sing Happy Birthday to Hoffman. On the count of 3 — 1…….2…..3! Sing! Happy Birthday to you…………..

SPeaking of Hoffman, I LOVE using yummy Hoffman batiks and stunning digitally-printed fabrics for blog tutorials. One of my all-time favorite tutorials is Hillside Charm featuring the Wading with Water Lilies collection from a couple years ago. Do you have a favorite tutorial? If so, which one?

You can find the Hillside Charm print and digital patterns HERE. There are some pretty cool kits available too!

If you missed the Hillside Charm tutorial, you can find it HERE.

PSST! We still have a few Wading with Waterlilies fabrics at the VRD shop, including a couple panels! You can find them HERE.

I certainly hope everyone is in the mood for a little Fall inspiration today because I’m going to share some with you whether you’re ready or not! LOL! I’m really excited to share Hoffman’s Fall 2024 Project Catalog with you. It is literally HOT OF THE PRESS! I just saw it the other day and I totally knew I had to share it with you. Yep, it’s that good!

Take your time and enjoy flipping through the catalog. I guarantee you will find A LOT of inspiration here. Pay special attention to our VRD patterns in the catalog because you might just see some of them in the future as blog tutorials. Just sayin’………

I hope you enjoyed the catalog. Stay tuned for lots of exciting things coming soon, including new blog tutorials. Who doesn’t love tutorials???

That’s it for me this week.

Until next Thursday —

Always,

Tricia @VRD

Quilting Partners · Rose Cards · Tutorials · villa rosa designs

VRD Dusk Delight Quilt Tutorial

Happy Thursday to you!

I’ve been thinking about ideas for summer posts and I think I’ll do a series of Summer Quilt Tutorials. Creating tutorials gives me a reason for getting some sewing in AND I have a stack of wonderful kits just waiting for me to make into quilts. The only problem with making a bunch of tops will be getting them quilted. LOL!

I can’t promise one tutorial a week over the summer, but I will definitely try. I may need to alternate tutorials with text posts because sometimes making the top and doing the photography takes me longer than a week to get ready, especially as summers get busier and busier.

Well, let’s get to it.

I chose Dusk Delight as my first summer tutorial because this pattern has been on my mind recently. I’ve done a few “digital” quilt mock ups with it recently and it really resonated with me for some reason. Maybe because of the controlled scrappy look? Or perhaps the vertical arrangement? Whatever it was, I was itching to make this one. Isn’t it wonderful that I had a quilt kit to make one???

Dusk Delight goes together easily, but I will caution you that making a big stack of blocks does take a little time. The assembly is not difficult, but can take some time to get everything put together. I would call Dusk Delight a quilt that you can make in a long weekend.

Read on!

Get your Dusk Delight physical pattern HERE or your digital pattern HERE.

Here’s the fabric I’m using for my Dusk Delight quilt. I just love pairing Hoffman batiks with our VRD Rose Card patterns! I’m using an 1895 Watercolors batik for the block centers and the vertical strips and a Bayshore Bali Pop for the blocks. I can’t wait to see how this turns out because I just love these beachy colors!

The first thing we’re going to do is cut all of our fabrics. We need block centers, vertical strips, and 2 sizes of rectangles for the blocks.

Here’s a couple tips for working with batiks:

  1. Start with a new machine needle because a dull needle will only damage the fabric.
  2. Use leaders and enders so that your machine doesn’t try to eat your fabrics at the beginning of a seam. Want to know more about leaders and enders? Check out this post HERE.

For my leaders and enders, I ‘m using a stack of green and white triangle cut-offs from a previous project. Who knows? Maybe I’ll get another little project out of these cut-off triangles.

Okay, let’s make blocks! A lot of blocks….

  1. Sew a small block rectangle to the side of a block center.
  2. Sew a matching rectangle to the other side of the block center.
  3. Take a moment and press your unit so far. This helps to keep the block square as you add the next pieces.
  4. Sew a big rectangle to the side of the unit.
  5. Then sew the last matching rectangle to other side of the unit.
  6. Press your block and voila! One block done.
  7. Now make 39 more blocks! LOL!

Another tip — I made 5 or 6 blocks at a time so that I didn’t get the rectangles too mixed up as I sewed. This went faster than sewing a single block together at a time.

Oh goody! Now one of my favorite things — laying out the blocks. Of course, sometimes this part of the quilt-making process takes me longer than actually sewing everything together. The more I look at the arrangement, the more I move things around. But I do definitely love mixing and matching the colors….

To help me arrange the blocks, I put all the blocks and the vertical strips up on my handy dandy flannel board. It really is handy dandy — I use it way more than I ever thought I would. I have no idea why it took me so long to put one up. The only issue I ran into was that the quilt was longer than my board, so I had to do some creative layering at the bottom so I could see the bottom 2 block rows.

If you’re experiencing flannel board envy, let me tell you how to have your own handy dandy flannel board in a matter of minutes with very little cost. I stole this idea from my quilty pal, Mary Lee (Hi Mary Lee!), who has one up tacked to the top of a set of double doors that lead to her front enclosed porch (which she uses for storage).

Go ahead and get yourself a rectangular flannel backed tablecloth. You will want a heavy duty one with a thicker flannel on the back so that it will grab and hold your fabrics. They do come in different sizes — mine is 50″ x 72″ — so you can choose the one that fits your space. Now that it’s the good ol’ summertime, it’s the perfect time to find your very own flannel backed tablecloth.

There are lots of different ways to put your flannel backed tablecloth up. I use binder clips to clip my tablecloth to the top row doors of my cube storage wall. This way, I can remove it when I need to. If yours is removable like mine, you could even use it as a tablecloth so make sure to pick out a fun pattern on the front that matches your outside decor.

Well, I guess I’ve got the blocks arranged the way I want them…..maybe…….

So let’s sew them together before I change my mind again. LOL!

I’m going to sew the outside blocks together into rows before I tackle the center block section.

Now that the outer blocks are sewn together, I can no longer move them around.

Before I start the center block section, I need to piece my vertical strips together to make longer strips. I don’t want to forget to do this step or else my strips won’t be long enough.

Sew…..sew……sew. Press…..press…..pres…… Yay! The center section blocks are now sewn together. Of course, I had to play switcheroo a couple — or maybe a dozen — times before I sewed them together.

Wait! Which way do I want the center section? Gah! I’m still not done arranging, even though the blocks are sewn together. Which one do I like better — right side up in the left photo or upside down in the right photo. Decisions…..decisions…….

Which ever one I choose, this will be the final arrangement. Of course, I could flip the whole quilt upside down……ARGH!

I take it back, maybe arranging the blocks isn’t my favorite step after all!

Before I can sew the vertical sections together, I need to cut my vertical strips to the right length. Holding my breath here that it will be the perfect length. Of course it will, right?

Time to sew again. I pinned the vertical strip to the inside edge of each of the outer single block sections, matching centers and outside edges before stitching them together.

This part looks easy in the photos but it took me quite a while because my work space is so cramped right now. It was like wrestling an alligator from time to time.

I matched up the centers and ends of the left section with the left side of the center section. I crossed my fingers that the blocks would be decently lined up across the vertical strip.

Then I lined up, pinned, and sewed the right section to the right side of the center section.

Yay! Top done!

Wowzer! Why was I even worried??? It turned out great and the colors are just so calming. Ahhhhh! Now to get it layered with batting and backing (or with just fleece) so I can machine quilt it……someday!

I’d love to see your Dusk Delight quilts! If you haven’t joined our rockin’ fun and uber cool Facebook Group, please do! You can find the Group HERE. And post your Dusk Delights so we can all ooooh and ahhhh over them!

Back to my summer sewing, what fun! Next week’s tutorial will be a table runner, so stop back next Thursday to see which one.

Until next week —

Always,

Tricia @VRD

Quilting Partners · Rose Cards · Tips and Tricks · Tutorials · villa rosa designs

VRD Beatrice Quilt Tutorial and the Fall 2023 Hoffman Project Catalog

Happy Thursday to you!

I hope you are all getting some sewing and quilting tucked in around your busy fall schedule. I don’t know about you, but if I don’t get regular access to my sewing machine, I get — well, grumpy. I am not kidding. I have found over the years that if I don’t get time to devote to my creative endeavors, I become out of sorts — you can ask my family. LOL! So when I get short-tempered, the best cure is sewing and quilting, even if it’s only a half hour here or twenty minutes there, I absolutely have to have time to be creative.

So I must say that using the excuse of creating a series of fall quilt tutorials with all these glorious Hoffman batik fabric collections, I am feeding my creative soul AND at the same time, I have rekindled my interest in getting back into quilting after basically taking the summer off. Of course, the next part of my making a quilt top or two a week, is to actually get them layered, quilted, bound, labeled — FINISHED. I have started this process by going to my local quilt shop, Homespun Treasures, to pin three of the recent quilts, and now they are ready for machine quilting. I use the tables in the classroom to layer my quilts and maybe I check out the new fabrics while I’m there….

But first, I have another Villa Rosa Designs Rose Card quilt tutorial, Beatrice, for you!

Ever since Beatrice came out earlier this year, I’ve been eager to make it. I love that it pairs two classic blocks — a Rail Fence and a Friendship Star (which is really a Nine Patch block in disguise) — together. You can check out our Rail Fence post and Nine Patch post, which are part of our Quilt Block Basics series, for more block fun and inspiration.

I also love how the Friendship Star blocks are arranged in diagonal rows cascading through woven Rail Fence blocks in a less-than-typical arrangement. Beatrice finishes at a generous 54″ x 72,” which is a very nice-sized throw quilt.

I hope you’ll give this one a try!

Get Beatrice HERE

Let’s take a look at the gorgeous Hoffman Bali Batik collection, Homestead, I am using for my Beatrice quilt. Ask for it at your favorite quilt shop or online retailer!

Isn’t this collection delicious? I added an 1895 Watercolor batik as my star fabric — can you find it?? (Hint: it’s the lightest fabric….)

Ready? Set. Go! Let’s get started on Beatrice!

1. We’re going to cut all of our fabrics before we start to sew. Do you do that or do you cut your pieces out as you sew? Or do you make a sample block before you cut everything out? For my VRD quilts, I feel totally comfortable just jumping in — no need to make a sample block to make sure everything fits together properly because I know that everything will fit together perfectly. Just another thing I love about our Rose Card patterns.

2. Now let’s sew some Friendship Star blocks! The first thing we need to do is make some Half Square Triangles (HSTs) for the star points. When I first started quilting, I did not enjoy making HSTs, but the more I made them (so many quilt patterns use HSTs!), the more I found I actually liked them. Of course, the more I made them, the more accurate my HSTs became, too.

Layer your squares right sides together (RST). Draw a diagonal line from corner to corner. Sew 1/4″ away from both sides of your drawn line. Cut on the drawn line to make 2 HSTs. Press the blocks open. And don’t forget to trim off your little dog ears at the corners (this will help the accuracy of your piecing — trust me).

3. Next we’re going to lay out a Friendship Star block, which is a Nine Patch block with HSTs. That way, we know how the block should look. With Friendship Star blocks, it’s easy to turn the HSTs the wrong way, which makes for some wonky stars. I actually kept this block layout up on my flannel wall so I could use it as my reference as I sewed the blocks together.

4. Time to sew the blocks together. I am happy to say, I only stitched one block wrong, which of course meant that I had to unsew it and then sew it back together the right way. Mea culpa. Press your blocks. Stars done — yay!

5. Moving right along — let’s make some Rail Fence blocks. Now, the pattern walks you through sewing strip sets together and then sub-cutting the strip sets into the units for the Rail Fence blocks.

I prefer cutting my fabrics before sewing them together. I used to do the strip set method, but I always had a problem keeping my strips straight — mine would bow like a rainbow. This, of course, affected the accuracy of my piecing. This frustration is what led me to determining what the (unfinished) length of the unit would be and then cutting all my pieces before sewing the units. The easiest way to figure out the length is to look at the size of the unit you’re cutting out of the strip sets — usually that measurement is what you need.

Here are my rectangles ready to sew together into Rail Fence blocks.

6. Time to sew the Rail Fence blocks together. First, I sew the rectangles into pairs, then I sew the pairs into quads. Another thing I like better about sewing the rectangles together versus strip piecing is that I get a lot more variety in my blocks. After all the blocks are pieced, go ahead and press them. Rail Fence blocks done. Yippee!

7. All the blocks are finished!

8. Boy, am I glad that I have my handy dandy flannel backed table cloth already clipped up on my fabric storage cubes because the next step is to lay out the blocks according to the diagram on the pattern. Whoever discovered that fabric sticks to flannel was a genius! Thank you, thank you!

This quilt is big and I can’t get the entire thing arranged on my flannel wall so I will have to divide the quilt into sections and then sew the sections together. While the blocks are up in the first larger section, I moved a few things around so that the fabrics are well-distributed throughout and not concentrated in any one area.

I will say that these fabrics from the Homestead collection definitely make a gorgeous quilt! It just looks so warm and inviting, like a cup of hot apple cider. Where’s my doughnut??? Boston creme, if you please….

9. I sewed the blocks into rows and then I sewed the rows together into the top section of the quilt.

10. I folded the top section in half and moved it to the top of my flannel wall to make room at the bottom the last rows. That way, I will still be able to move blocks around in the bottom rows if needed. Next I sewed the blocks into rows and the rows into the bottom section. Finally I sewed the bottom section to the top section.

11. Here is my Beatrice quilt top, or flimsy. Yay! I am very happy with how it turned out. It is simply beautiful!

While I was sewing Beatrice together, I kept wondering how it would look in patriotic colors (the quilt diagram on the back of the pattern is done in red, white, and blue). But for this quilt to be large enough to be a Quilts of Valor quilt, you would have to add a border or another column of blocks because it’s not quite wide enough.

Adding a 4″ finished border all the way around would make the quilt 62″ x 80″ which is a wonderful size for a QOF quilt as well as a twin-sized quilt. You would need about 1 1/4 yards fabric for the border (cut strips 4 1/2″ wide) and a total of 5/8 yard for the binding for this larger size.

Who knows, maybe Beatrice will be my next QOF quilt project to make and donate. You’ll have to check back later to see if it is. LOL!

I look forward to seeing your Beatrice quilts! You can post them on our VRD Facebook page. Hope to see you there!

Speaking of Hoffman Fabrics, the new Fall 2024 catalogs have just come out. Check out the Project Book, filled with loads of inspiration and Villa Rosa Design Rose Card patterns featuring the latest Hoffman collections. Truly, a feast for the eyes. Ask at your favorite quilt shop or online retailer for the patterns, fabrics, or maybe even kits. ENJOY!

What quilt will you make first?

Until next Thursday —

Always,

Tricia @ VRD

Quilting Partners · Rose Cards · Tutorials · villa rosa designs

NEW Villa Rosa Designs Rose Card Patterns for September, New Website Content, and VRD Ebb Tide Quilt Tutorial

Happy Thursday to you!

Welcome to September! Now that fall and back-to-school is in full swing, we all need to turn our thoughts to MORE QUILTING! In order to help you get sewing again, today’s post is brimming over with quilty goodness.

First up is our brand new collection of September Rose Card patterns.

YAY! By now most of you know that I just love the Thursday after the first Friday of the month because that’s New Pattern Day here on the blog. So, here they are — Candies, Icing, Elsie May, Delphinium, and Jolie.

Every month the VRD designers never fail to create a new collection of wonderful quilt patterns. I am sew blessed to be part of this VRD family. Just looking at the new patterns every month, I get inspired and can’t wait to spend some quality time with my sewing machine.

You can get all 5 patterns HERE.

But wait……..there’s more! Here is my new September table runner, Carousel.

Get Carousel HERE

I’m not sure if you can really see the background fountain in the cover photo, above, but I took this photo at Diamond Park, a lovely tree-lined park in the heart of my hometown. The land for the Park was gifted to the city in 1795 (Meadville was founded in 1788) by the city founder, David Mead. This gorgeous fountain was then gifted and constructed in the park in 1863 by the Shippen family. It still stands and functions today, after being renovated a couple times through the years.

Image from Meadville Calendar,
https://www.facebook.com/MeadvilleClub

Here’s a photo of the fountain with the park in the background. I didn’t even think to take any photos of the fountain itself when I was taking photos of Carousel. Silly me! Sorry for that. It truly is a beautiful fountain — and well over 150 years old.

As much as I’d like to keep talking history (another of my favorite things), we’d better keep moving or we’re never going to get to today’s tutorial. LOL!

Just this week, a new feature was added to the VRD website — a printable list of all the FAT QUARTER patterns in our VRD Rose Card catalog!

People and fabric companies have been asking for such a list for a while now. The fat quarter patterns on the list are thoughtfully organized by the number of fat quarters needed for each pattern — how ingenius! This awesome list will be updated monthly to include all new fat quarter patterns going forward, so the list will always be current and up-to-date. WOW!

You can find the printable list at the bottom of the website under Patterns (see the screenshot below). In fact, there is LOTS of stuff at the bottom of the website. If you’ve never scrolled down that far, you should. You might just be missing something good down there, like a directory of the tutorials on the blog, for example. Or maybe something important like Corrections.

Here’s a screenshot of the bottom of the VRD website, showing the things
you will find down there.

You can find the printable Fat Quarter Quilt List HERE.

Now on to our tutorial!

Keeping with our recent Fall fabric theme, I have another great VRD quilt tutorial for you today. You will want to add Ebb Tide to your collection of VRD Rose Cards if you don’t have it yet. So far, it’s the fastest and easiest VRD pattern I have made. It also looks great in any fabric, and can even handle large prints with ease. Ebb Tide will definitely become one of your go-to Rose Card patterns, if it hasn’t already.

Get Ebb Tide HERE

Today I’m working with Hoffman batiks again — more yummy luscious fall fabrics. Aren’t they beautiful??? This collection is appropriately called Shades of Autumn. Ask for it at your favorite quilt shop or retailer.

I want to point out a couple things about the fabrics I am using for Ebb Tide. It takes 6 fabrics plus a background. I chose 3 light fabrics and 3 dark fabrics. I liked the idea of a color-balanced quilt. Some other options might be to choose 6 medium or dark fabrics with a light background or 6 light fabrics with a medium or dark background. The fun thing about this quilt is that it really does go together lightening-fast and you’ll probably want to make more than, which will then give you more opportunities to play with different fabric options.

Let’s make Ebb Tide!

1. After you’ve gathered up your fabrics, it’s time to cut your pieces out. This doesn’t take very long, but keep in mind the pieces you cut out of the fat quarters will be large and you might need a bigger ruler. I used my 8 1/2″ x 24″ ruler to cut the rectangles out. This really helped to keep my cutting more accurate as I didn’t need to joggle multiple rulers around to get the wider strips. I also layered and cut three fabrics at a time, but don’t feel you have to layer your fabrics for cutting if you’re not comfortable doing that. Cutting one layer at time works just as well.

Don’t have an 8 1/2″ x 24″ ruler? You can find it HERE. You can find the my absolute favorite rotary cutter, the Olfa ergonomic cutter, HERE.

2. Now that my fat quarters are cut out, it’s time to cut the background pieces. For this part, I switched to a 2 1/2″ x 18″ ruler, which makes cutting my 2 1/2″ strips and rectangles a breeze. Don’t have a 2 1/2″ ruler? You can find it HERE.

3. I’m going to use my new handy-dandy design wall to lay the quilt out so I can arrange the fabrics before I sew everything together. The beauty of Ebb Tide is that because you aren’t piecing the quilt blocks, you can get right to laying out and arranging the entire quilt. Sew simple!

PSST! In case you didn’t know — my fancy-smancy design wall is actually a flannel-backed large rectangular table cloth clipped to the top of my fabric storage cubes doors with large binder clips. Here’s a great traditional plaid flannel backed table cloth that comes in multiple colors and sizes. What a HUGE improvement this has been for putting quilts together — so much easier than laying blocks out on the floor or on a bed to shuffle things around.

Here is my final layout for the Ebb Tide, not including the horizontal background strips in between each block row. What do you think of this layout? I really like how your eye travels down the quilt, following the light fabrics path, kind of like stepping stones.

4. Now that I’m happy with my layout, it’s time to sew the horizontal rows together. I just gathered one row at a time and took it right to my sewing machine (which is close to my flannel design wall). I sewed the large rectangles and the sashing strips together one row at a time, then I put the rows back on the flannel wall, so I didn’t get things mixed up as I worked.

5. Now I’m ready to sew the long sashing strips in between the pieced rows. One last look to make sure I have the rows in the right order, and back to the sewing machine. I sewed the rows and sashing strips into sections and then sewed the sections together, that way I didn’t have to struggle with the growing quilt top with each row I added.

6. One more step and Ebb Tide will be done (or at least the quilt top will be done). Did you know that a quilt top is called a flimsy in quilt lingo? Isn’t that fun??? Sorry, I’m easily distracted — did someone say squirrel??? Tehehehe……..

Now that the quilt center is finished, let’s sew the top and bottom borders on. But before we do that, I need to cut my border strips to the right size. I like to lay my border strips across the center of the quilt, trimming the strips to the width of the quilt center. I use the center because the edges can sometimes stretch out. By cutting my strips to the center width, I can bring those stretchy edges back to square. I know this sounds weird, but trust me, it works.

Next I pin my borders to the quilt top. I start by matching the center of the border to the center of the side I’m sewing the border to ( I fold them in half to find the centers, making a crease at the true center). Then I match and pin the outside edges. After the edges, I straighten and smooth the quilt and border, adding more pins between the center and outside edges to keep everything in place while I sew. Finally, it’s time to sew them together, knowing that my borders will be flat and not waving all over the place.

7. The side borders are the last thing to sew to the quilt. They will need to be pieced so the border strips are long enough. For this quilt, I used a straight seam to sew the strips together, but sometimes I use a diagonal seam (I do this when fabrics are busy in order to hide my seam a little better).

Yay! Ebb Tide is done. Eventually, I will back it with cozy fleece, machine quilt, bind, and label it. Hopefully sometime in the next 100 years. Ha!

By the way, I wanted to let you know that it took me about 2 hours to make the Ebb Tide flimsy — that included cutting the fabrics, laying it out, and doing the photography for this tutorial. I wonder how long will it take you to make it?

Here’s a “beauty” shot of my Ebb Tide flimsy — I really wanted to get a pretty picture with my Black-Eyed Susans. Sadly, the breeze wouldn’t cooperate with me, so the bottom of the flimsy kept blowing under the porch. Oh well…….

Thanks for sticking with me through the entire blog post, I know it was a long one, but I hope you enjoyed all of the quilty inspiration.

Take care and get quilting!

Until next week —

Always,

Tricia

Rose Cards · Tutorials · villa rosa designs

VRD Alassio Quilt Tutorial

Happy Thursday to you!

Yep, I am still in my fall quilt-making zone. Which is not a big surprise really because for the last couple weeks, here in NW PA, we’ve been having very fall-like weather. Today is quite cool with a high temperature only in the 60s and it feels really really chilly. Usually, August is in the 80s and even 90s occasionally. You know the “dog days” of summer? So the 60s is kind of a shock to the system. Our nights have even dipped down into the 40s a couple times. Just chalk it up to the ever-changing world of weird weather, I guess.

So in honor of our early autumn weather in August, I am going to show you how to make anther great Villa Rosa Designs Rose Card pattern, Alassio. Do you really have to use a fall-themed fabric collection like I am doing? Nope, not at all. This pattern will work beautifully with any fabric collection!

Get Alassio HERE

I made my Alassio quilt sample with the Hoffman All Things Spice batik collection and coordinating 1895 Watercolors batiks. Isn’t it sew yummy? I just want to crawl into those fabrics with a good book, a cup of cider, and a donut………

On that note, let’s make Alassio together!

  1. First, we need to cut out our background squares.

2. Next up is cutting the pieces for our framed blocks from our fat quarters. I like to stack my fabrics and cut 3 or 4 at a time. Do likewise if you want, but it’s perfectly fine to cut them one at a time, too.

3. Moving right along, let’s mix and match our fabrics so each square will have a different fabric frame around it. And after that’s done, we’ll sew matching shorter strips to opposite sides of the squares.

4. Now we need to press our blocks so far before we add the long strips on the other sides of the center squares. I don’t normally do a lot of pressing when I’m making blocks but I do think pressing these blocks as you go results in crisper seams and better blocks.

5. Okay, now we’re ready to sew the long strips on the opposite sides of the center squares. Make sure the long strips match the strips you’ve already sewn onto the squares.

The again, who says your strips have to match — just sayin’…….

6. Head over to your iron again and press those blocks one more time — now our blocks done. That was fast, wasn’t it?

7. I just clipped my flannel-backed tablecloth up on my fabric storage cubes, which is my new design wall. I have to hang it sideways because it’s too long to hang up and down. And because this quilt is so big, I’m going to need to lay it out sideways, too. Fingers crossed that the tablecloth is long enough (or wide enough because it’s hung sideways) to lay out all the blocks.

How do you lay out your blocks before sewing them together? When I first started quilting, I used to lay my blocks out a cement floor. Yikes! Then for a really long time, I laid them out on a queen sized bed, which accommodated most of the quilts I made and saved some stress on my knees and my back. Now I have my very own portable design wall, otherwise known as a flannel-backed tablecloth. And it works great!

So, while we’re laying out the blocks according to the quilt diagram on the back of the pattern, go ahead and move the blocks around so fabrics and colors are well-distributed throughout the entire quilt.

Then once we’re satisfied with our layouts (yay — all the blocks fit on the flannel tablecloth!), it’s time to sew them into rows. Then we will sew the rows together. Quilt top done! Easy piezy!

I am so pleased with how my Alassio top turned out! I can’t wait to get it layered with pretty autumn-themed fleece, machine quilted, bound, and labeled so I can start enjoying it right away!

Alassio finishes faster because it doesn’t have a border, but if you want to make the quilt larger, you could add a border. It would look kind of like this:

This version of Alassio features a 4 1/2″ finished border. With this border, Alassio would finish at 64″ x 82″, which fits a twin bed or makes a nice big comfy throw.

To make Alassio with the border, you need 1 1/4 yds for the border (cut 8 strips that are 5″ x WOF) and a total of 5/8 yard (cut 8 strips that are 21/2″ x WOF) for binding.

Isn’t this a great quilt? Bet you can’t make just one!

I’d love to see your Alassio quilts! You can share them on our Villa Rosa Designs Facebook group page.

Until next week —

Always,

Tricia

Panel Quilts · Quilting Partners · Rose Cards · Tutorials · villa rosa designs

VRD October Sky Panel Quilt Tutorial

Hello Quilty Friends!

Happy Thursday to you!

Today is a kind of blah day — raining off and on, overcast, and grey — not what I’d call a typical summer day at all. It’s been looking more fall-like here in NW PA. In fact, I was looking at one of the maple trees in the back yard yesterday and I actually saw the leaves starting to change on ends of several branches. As much I hate to see summer going, I do love autumn. What’s your favorite season?

As I’ve mentioned before, I get fall fabrics on my brain this time of year! Then I can’t wait to start making fall quilts. What better day than a dreary one to share an awesome FALL tutorial with you? And you can’t get more fall than October Sky!

Get October Sky HERE

Don’t let the name of the pattern fool you — you can use any kind of horizontal panel — any one your little hear desires. I’m not using actual fall fabrics for this quilt, but to me, it still feels like a fall quilt. I think it’s the jewel-tone colors. Take a look at these yummy fabrics from Hoffman California Fabrics, one of our quilting partners. The digital panel is called Nightshade and the fabrics are coordinating 1895 Watercolors batiks. Simply scrumptious!

Let’s get started!

1. Trim the selvages off your panel. Horizontal panels can vary slightly so it doesn’t hurt to do a quick measurement of your panel, then you’ll know how it compares to the pattern. You don’t really need these numbers right now, but if your panel is not as wide as the pattern, you will need to make a small adjustment a bit later in the construction process.

2. Cut your border strips for the top and bottom of the panel and sew them on.

3. Now we are going to cut out the squares for the pieced sections at the top and bottom of the panel. I just love these 1895 Watercolors batiks — they go with everything. The dark plum in front is my background.

4. Time to make some Half Square Triangles, or HSTs. Layer 2 squares right sides together, drawn a diagonal line from corner to opposite corner. Sew 1/4″ away from both sides of the drawn line. Cut apart on the drawn line and press open.

5. Having a flannel board — or in my case, the back of a flannel tablecloth clipped to my wall cube unit — to arrange the HSTs makes getting the arrangement right the first time much easier to accomplish.

6. Sew the HSTs together. Make 2 identical pieced sections. You will be flipping one upside down to sew t the bottom of the panel. It makes an interesting design even without the panel in the middle though, doesn’t it?

7. Refer back to your panel measurements. If your panel is not as wide as the panel measurement in the pattern, you may need to add a little extra width to the side background rectangles. To be on the safe side, I added an extra 1″ or so to the side rectangles just to make sure my pieced sections would be wide enough because my panel wasn’t quite the same size as the one listed in the pattern.

It’s okay if the side rectangles make the pieced sections a little wider than the panel — you can trim and square things up in a later step.

8. The most important part of this step is to find the centers of both the pieced sections and the panel. Then match those centers up before sewing because nobody wants off-center sunbursts! LOL!

Once you’re happy with your placement (I used pins to keep everything lined up just right), sew the pieced sections onto the panel. Lookin’ good!

9. Now it’s time to trim and square up the sides of the pieced sections. Ahhh! Much better!

10. Time to add top and bottom borders. I actually increased the width of my borders a couple inches to make the quilt just a little bit bigger as a throw. Do the same if you’d like. Just keep in mind, you might need more fabric if you increase the width of your borders.

11. Ready to add those side borders now? You will need to piece those side borders to make them long enough. VOILA! The top is done!

Since I couldn’t get the breeze to cooperate with me, I took another photo of the October Sky out flat. Gorgeous, isn’t it? The colors are so rich and yummy.

12. The next steps will be layering, quilting, binding, and labeling the quilt. And then….another VRD quilt DONE!

I hope you enjoyed this tutorial! I’d love to see your October Sky quilts — you can post them on our Facebook page HERE or drop me an email if you’d like. And there will be more fun VRD tutorials coming, so stay tuned!

Well, that’s it for me. See you next week!

Always,

Tricia