
Hello Quilty Friends!
Happy Thursday to you!
Wow! It’s May!?! 2023!?! How did that happen??? I’m so far behind in everything that I think it’s still 2015. LOL!
Do you remember that movie Cloned from the 90’s (I think)? That’s what I need — 3 of me — one to focus on each part of my life, then I could really get caught up with everything. Of course, things that sounds too good to be true usually are….
That being said, let’s jump right into our Quilt Block Basics this week and explore the Flying Geese (or Goose) unit.

Most likely you are familiar with the Flying Geese block, but did you know it is also a smaller unit used frequently in many quilt block designs? Let’s take a look at some quilt blocks featuring the Flying Goose unit.


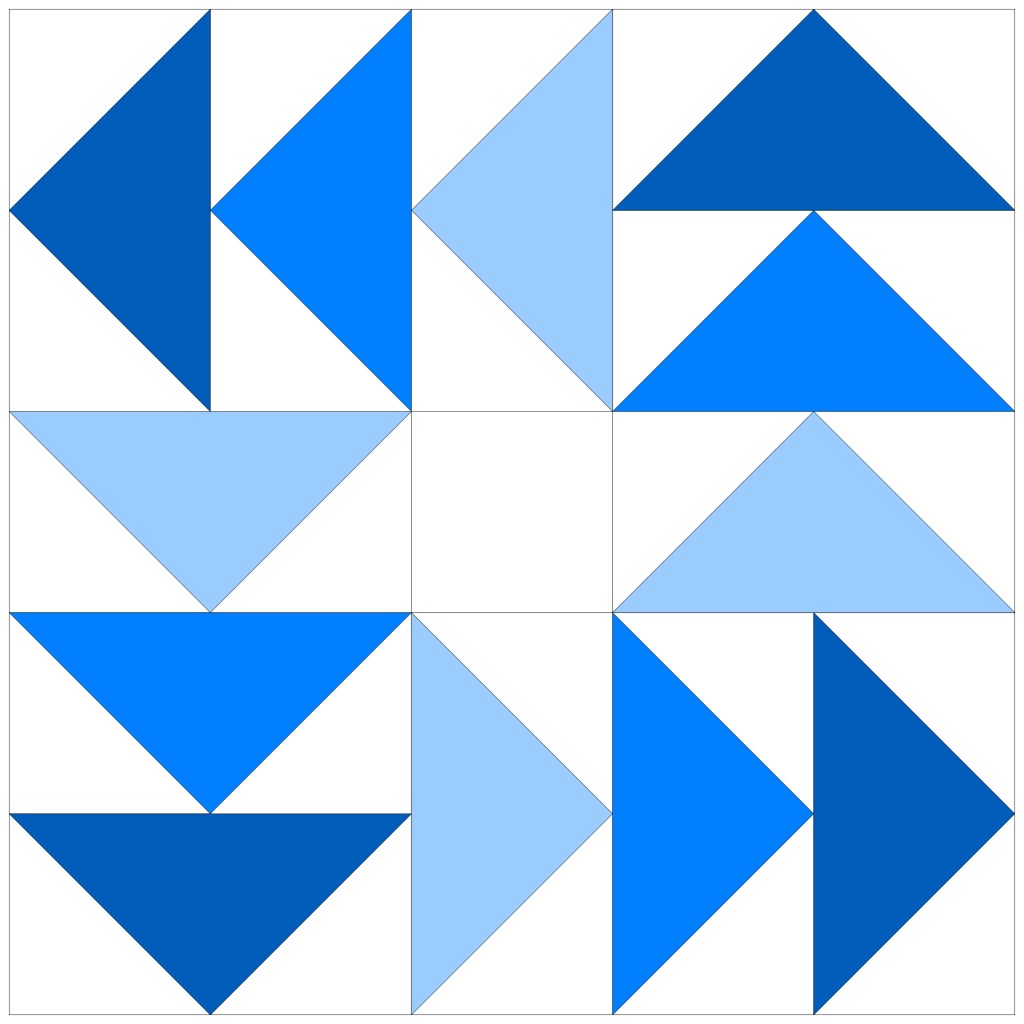
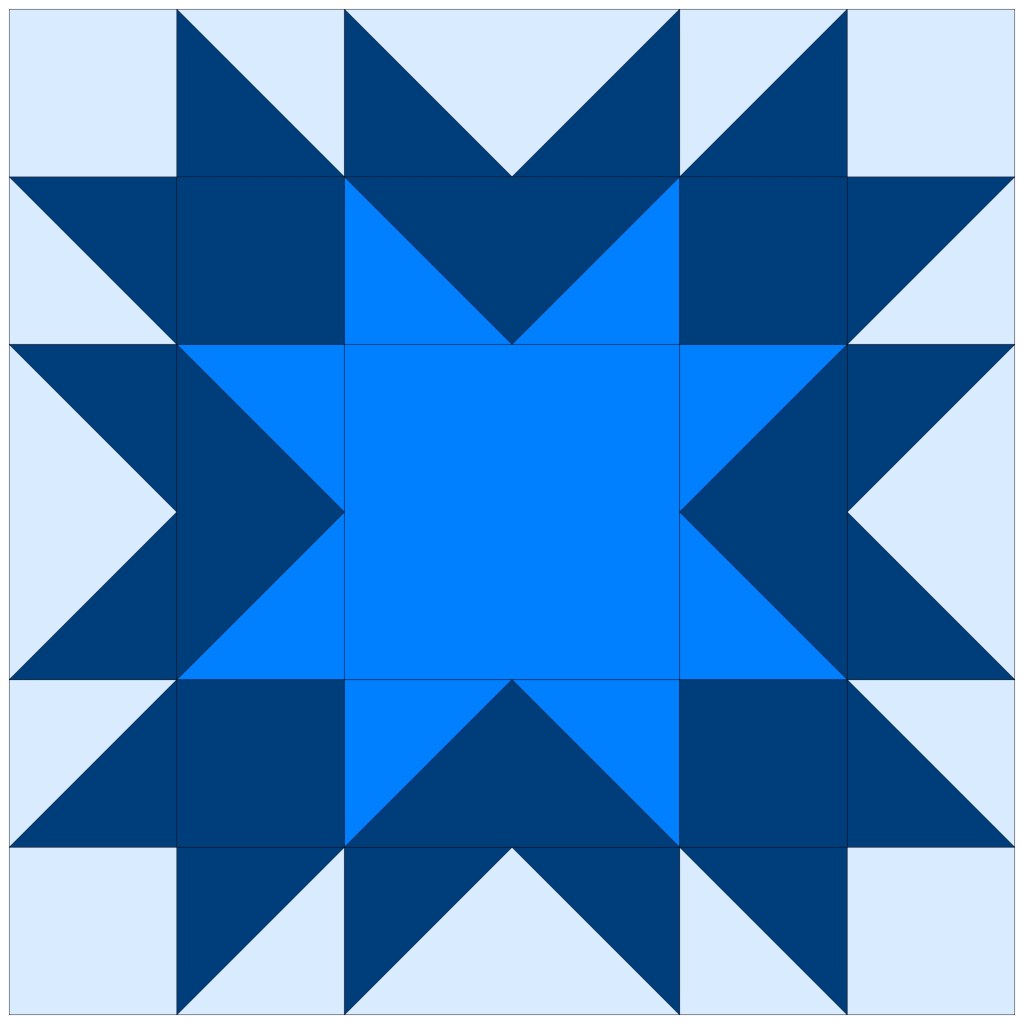

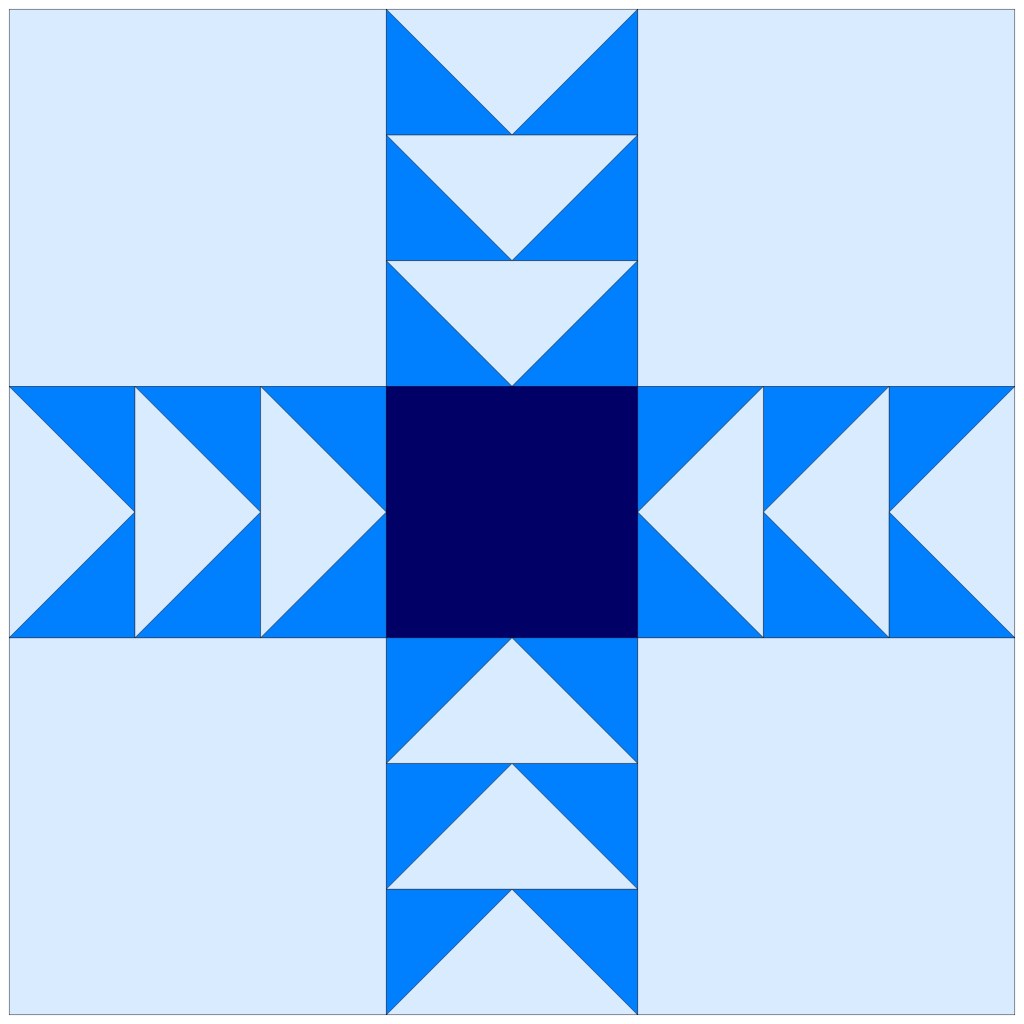


I’m sure you probably recognize some of the blocks above and can also see how much interest and movement the Flying Goose unit can add to a quilt block.
It’s really fun to be a quilt pattern designer because I get to take all these little units we’ve been talking about and mix and match them into new and different quilt blocks for new quilt patterns. I have the option to make things as simple or as complex as I desire. As I stated last week, I can really get lost playing with quilt blocks and quilt ideas in EQ8 — sometimes I completely lose track of time. LOL!
How to Make a Flying Goose Unit
Like many other units, there are numerous ways to make the Flying Goose unit. I’m going to show you my go-to instructions for constructing Flying Geese and I will touch on some of the other methods, too.
To make 1 Flying Goose unit, you will need 2 squares and a rectangle. True Flying Goose units are twice as wide as they are tall. You do need to know what your finished size of the Flying Goose unit is. Then you simply add 1/2″ seam allowance.
So, if you want a 2″ x 4″ Flying Goose unit, you need to cut 1 rectangle 2 1/2″ x 4 1/2″ and 2 squares that are 2 1/2″ x 2 1/2″.
3″ x 6″? Then cut a 31/2″ x 61/2″ rectangle and 2 squares 31/2″ x 3 1/2″.
1 1/2″ x 3″? Then cut a 2″ x 31/2″ rectangle and 2 squares 2″ x 2″.
Easy Peasy, right?
Please note: If you like to make things a little bigger and then trim them to size, you can add 3/4″ – 1″ and then trim your units to the right size.
Art Gallery Fabrics has a lovely downloadable Flying Geese Cheat Sheet with instructions and a chart with cutting for common size units. Yay! Find the download HERE.
Now that we know the math secret for cutting, let’s make the unit!
- Layer a square right sides together on the left side of the rectangle with the edges aligned. Draw a diagonal line from bottom left corner on the square to the top right corner.
- Sew on the line. Trim 1/4″ away from the line. Open and press.
- Layer a square right sides together on the right side of the rectangle with the edges aligned (the right side square will overlap the left triangle top by about 1/4″ in order to create the top seam allowance). Draw a diagonal line from the bottom right corner of the square to the top left corner.
- Sew on the line. Trim 1/4″ away from the line. Open and press. (Note that the top of the unit will have the 1/4″ seam allowance.)
- Voila! A Flying Goose unit.

Here are links to some other Flying Geese methods:
No Waste 4 Flying Geese at a time — Art Gallery Fabrics download with instructions and cutting chart
One Seam Flying Geese — Piecemeal Quilts download with instructions, formula, and photos
Traditional 3 Triangle Flying Geese — Threadbare Creations tutorial with cutting cheat sheet
Scrap Bin Geese — A Bright Corner (a super fun and easy variation using 2 1/2″ strips and it’s great for scraps!)
There are Rulers, too!
Eleanor Burns Quilt in a Day Flying Geese Rulers:
1. Small Ruler — 1 1/2″ x 3 and 3″ x 6″
2. Large Ruler — 2″ x 4″ and 4″ x 8″
3. Mini Set — 1″ x 2″ and 2″ x 4″, 3/4″ x 1 1/2″ and 1 1/2″ x 3″, and a 21/2″ fussy cutting ruler
4. Jumbo Set — 2 1/2″ x 5″ and 5″ x 10″, 1 1/4″ x 21/2″ and 2 1/2″ x 5″
Lazy Girl Flying Geese x 4 No Math Ruler
Creative Grids Ultimate Flying Geese Ruler
Bloc Loc Flying Geese Ruler — comes in different sizes
Now let’s check out my curated list of VRD Flying Geese Rose Card Patterns, shall we?
Flying Geese VRD Rose Card Patterns

Get Baby Goose Here
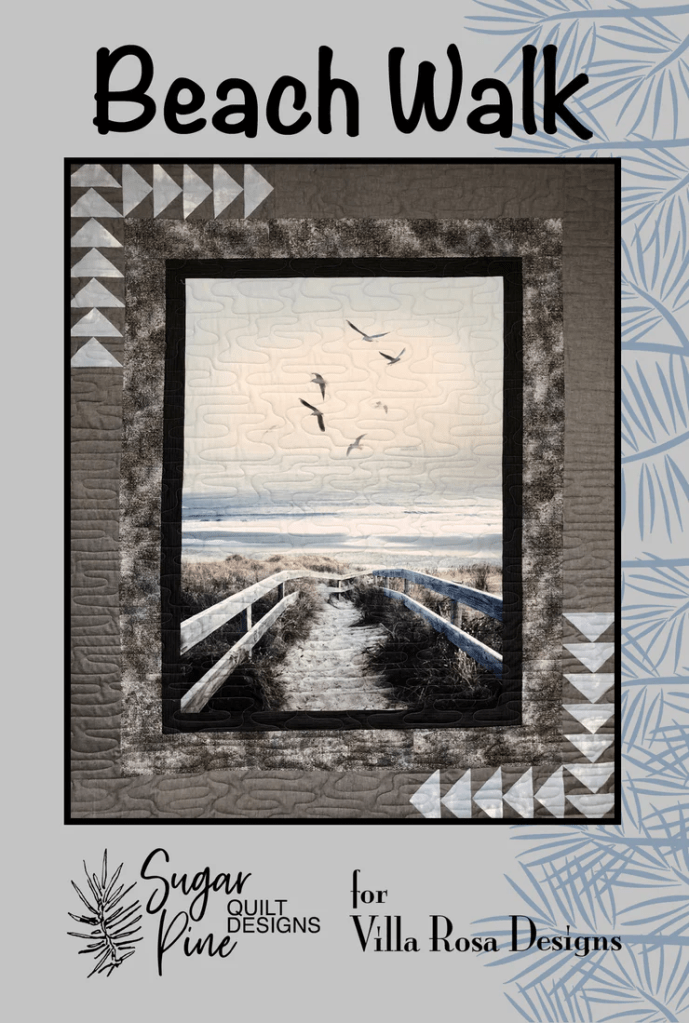
Get Beach Walk HERE

Get Duffy HERE

Get Flock Together HERE

Get Grandma’s Girl HERE

Get Goodnight Starlight HERE

Get Lazy Goose HERE

Get Long Island Star HERE

Get Migration HERE

Get Remember Me HERE

Get Snow Goose HERE

Get Splash HERE

Get Star Queen HERE
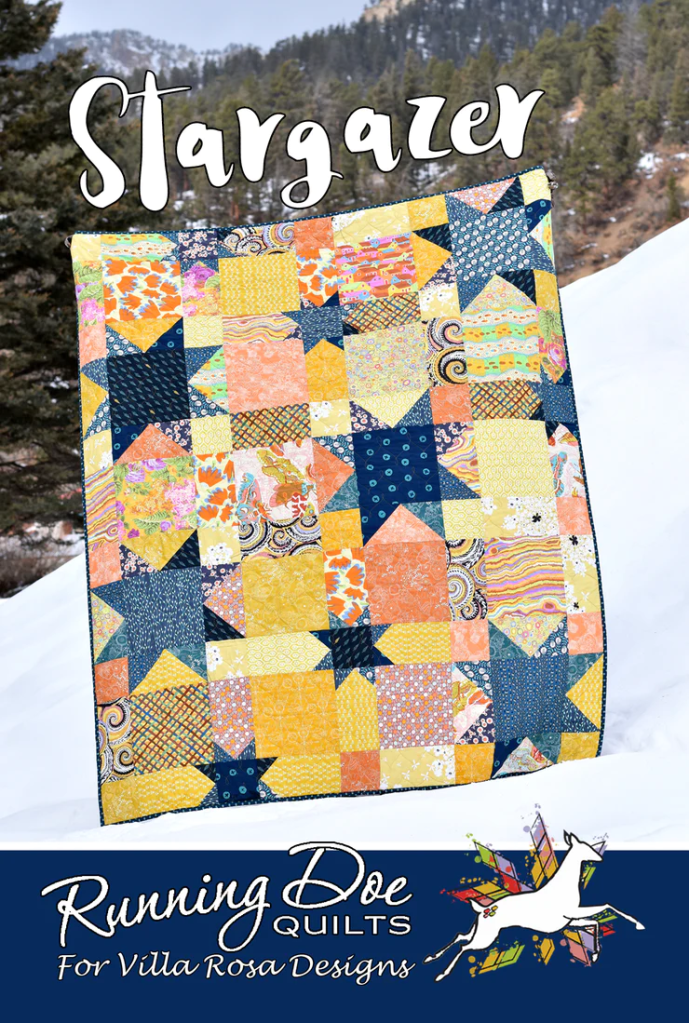
Get Stargazer HERE

Get Today’s Special HERE

Get Zip-a-Dee-Do–Dah HERE
What a nice collection of VRD Rose Card patterns featuring Flying Geese Units!
I am excited to show off some new photos of a previous tutorial — Hypnotized.
Revisiting VRD Rose Card Pattern Hypnotized
Remember Hypnotized? You can find the tutorial HERE.
This was my tutorial quilt top. Sadly, this is as far as it’s gotten, but I plan to quilt it soon (you know in the next 20 years or so! LOL!).
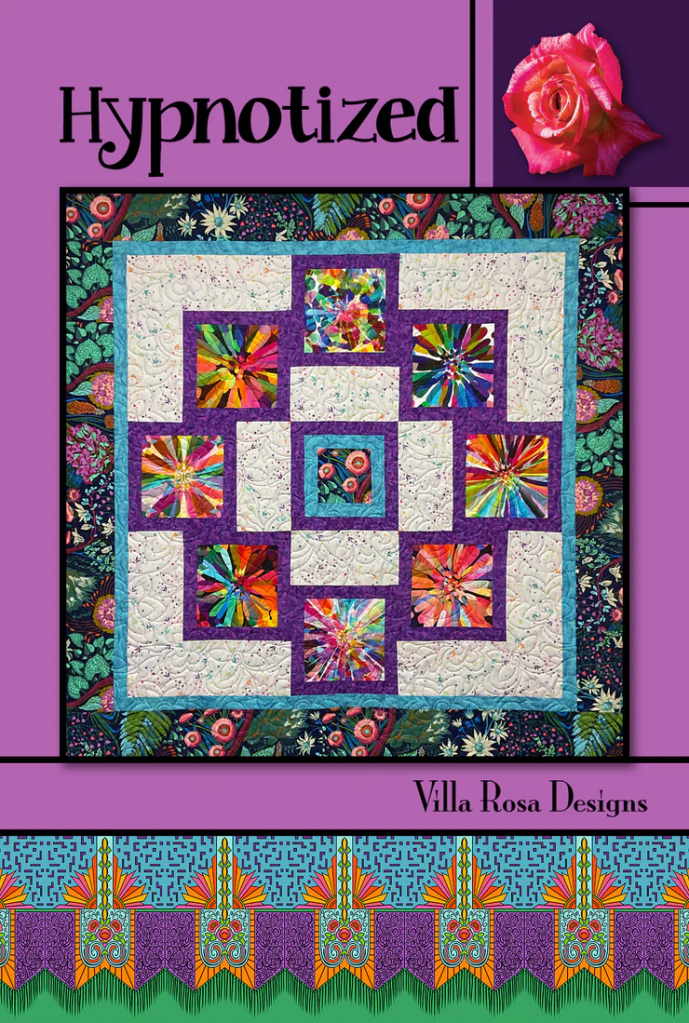
Get Hypnotized HERE
I have a group of wonderful delightful ladies who are part of my monthly “quilt class” at my local quilt shop, Homespun Treasures. It’s more like a slumber party or a gab fest than a class, though. LOL!
BIG SHOUT OUT to everyone in the class — Mary Lee, Sherry, Gaynel, Kim, Robin, Lisa, Jean, Donna, Debbie, Anita, Missi (an honorary member right now), and Gail (the shop owner)!
Anyway, this year our class is called Panels and Novelties Oh My! and we are featuring 10 Villa Rosa Rose Card patterns (one each month from March through December) using panels and novelty fabrics.
Did you know that in most cases, panels and novelty fabrics are interchangeable???
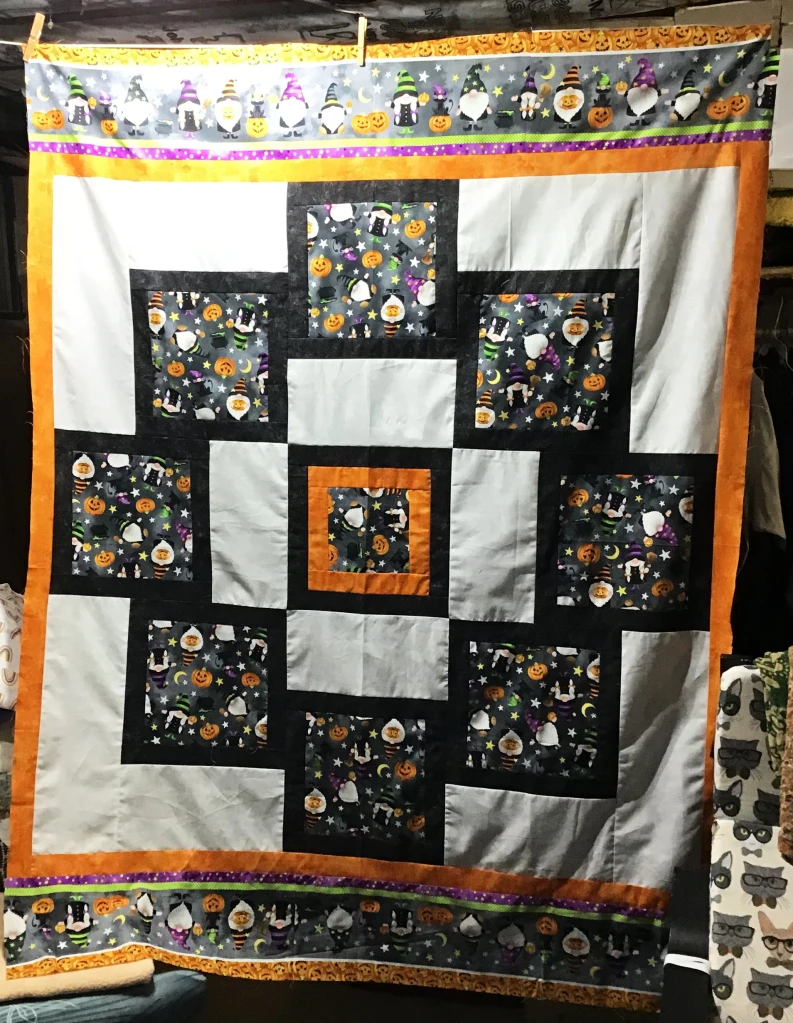
Our March project for April was Hypnotized. Here is a Gallery of the some of the quilt tops and finished quilts made by my Panel and Novelties group.
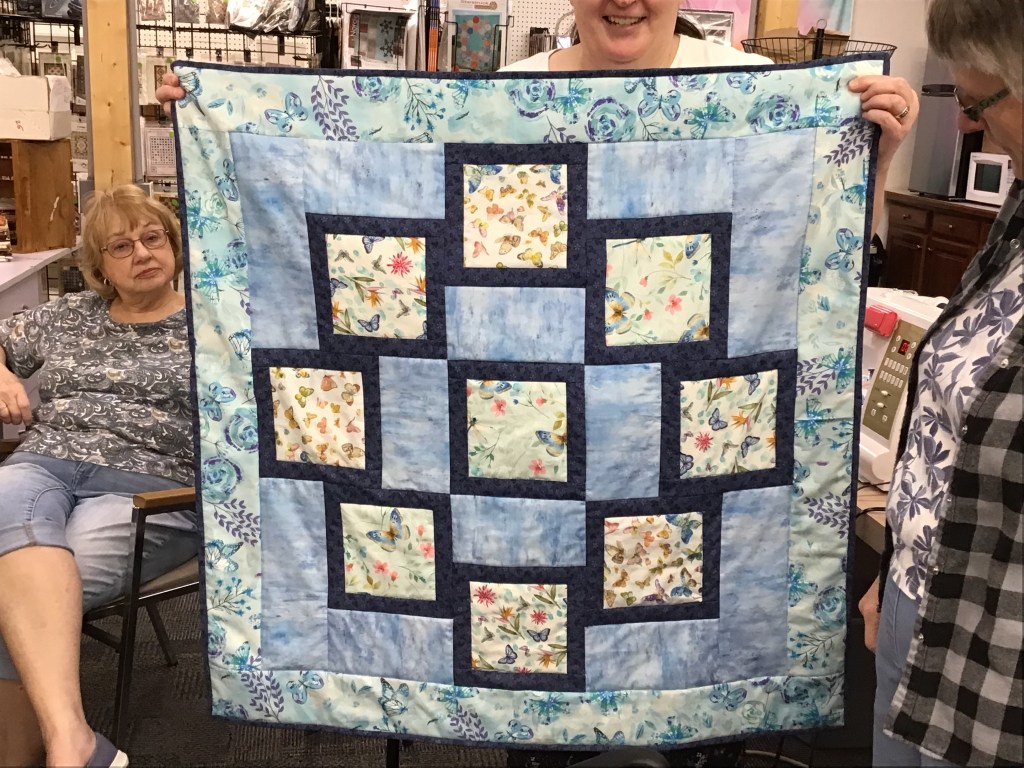


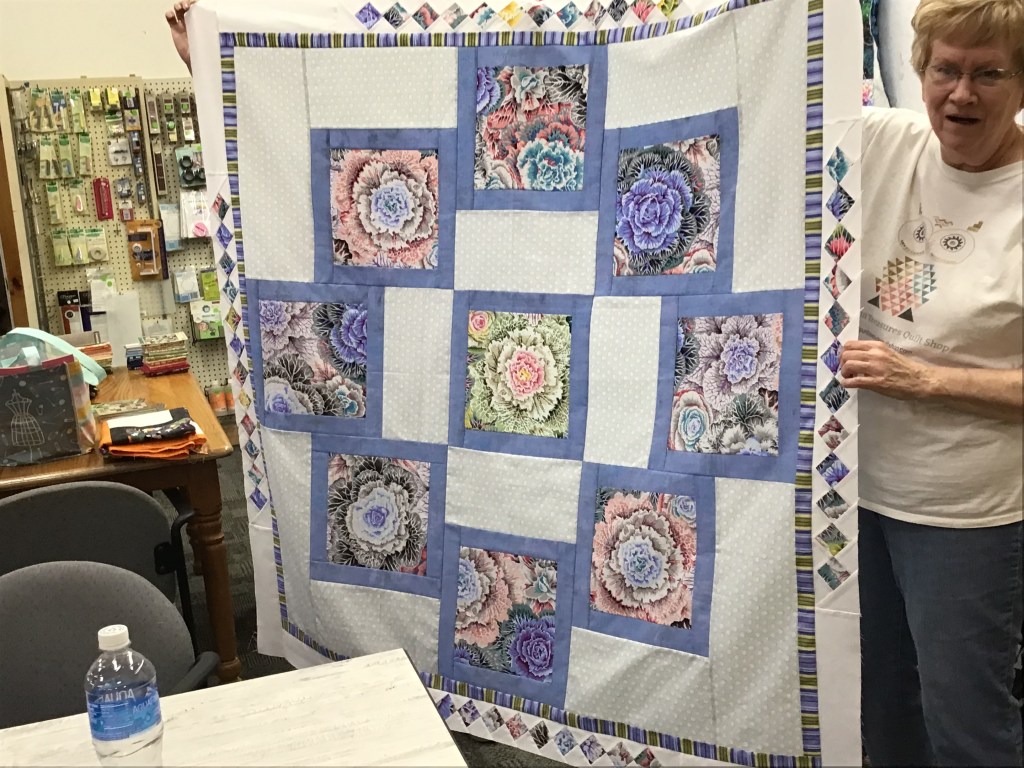

Aren’t they marvelous????
LOVE the Hypnotized pattern — it is sew sew versatile and looks good with just about anything! AND you can use panel squares or novelty fabric.
The last photo with the patriotic theme was made by my pal, Mary Lee, and was already completed and donated to our local Quilts of Valor organization before our April meeting.
Thank you, Mary Lee!
For more information about how you can get involved with the Quilts of Valor Foundation, please go HERE.
Well, I guess that’s it for me today. I am feeling so energized and inspired, I need to go make a quilt.
OH! I almost forgot! MAY THE FOURTH BE WITH YOU!
Until next Thursday —
Sew. Laugh. Repeat.
Always,
Tricia @VRD


