Yep – you’re right, it’s not Thursday yet, but I had some important information to share with you about Villa Rosa Designs and it couldn’t wait until our usual Thursday post.
Please read on –
Moving Along
Pat Fryer is making changes – all toward scaling back her personal work load and concentrating on the Villa Rosa patterns.
California fabric shop and online fabric store –
All of the fresh new fabrics will be handed off to Heidi and Molly Cook. The location is the same and all of the good things will be there. They have a new name – 3 Aunts Quilt Shop. The website 3AuntsQuiltShop.com will be live October 1. There will be links on the VillaRosaDesigns.com website and in our newsletters. All of Villa Rosa Designs patterns will be available at the shop and on 3AuntsQuiltShop.com. 3 Aunts Quilt Shop will carry on as the California home of Villa Rosa Designs. Great things are in store!
VillaRosaDesigns.com –
The website will continue to have all of the Villa Rosa Designs patterns, and will still have close-out fabric and kits. There is much remaining inventory after years of buying and overbuying fabric.
Pat and company [me included!] are going to be adding much more in the way of videos, tutorials, challenges, social sharing. Let’s keep Villa Rosa Designs quilting and connected!
The new Texas home of Villa Rosa Designs –
A new East Texas location is opening in October. The location is a partnership between Pat of Villa Rosa Designs and Catherine of Running Doe Quilts. Running Doe Quilt Shop is expanding there – more machines, more fabric and notions, more classes. Running Doe’s new shop will be renamed Rose City Sewing. The location will have all of the Villa Rosa patterns available, along with close-out Villa Rosa fabrics. Great things are in store!
Wholesale Operations –
Austin, TX is still home to Villa Rosa Designs administration and print shop. Leann Fryer handles operations, web design, programming, wholesale ordering, and special orders. Wholesale orders for quilt shops can be placed on VillaRosaWholesale.com.
Pattern Shipping –
Central Missouri houses the patterns. Eric Aitken fills pattern orders – wholesale and retail. Nancy Aitken heads our art department from there.
With all these moves, Villa Rosa Designs continues to be scattered over 3 states. Centralizing contacts – phone and emails – will be a challenge we hope to simplify.
Contacts –
3 Aunts Quilt Shop – Molly Cook, Heidi Cook 3auntsquiltshop@gmail.com 530-509-5133 530-798-8506 530-755-6467 3AuntsQuiltShop.com 12438 Loma Rica Dr., Ste. A Grass Valley CA 95945
Although it’s really March 26th as I write this post, it sure feels more like April Fool’s Day here in NW PA! Mother Nature is laughing loudly at us because this morning we woke up to a layer of snow on the ground. Of course, it’s already beginning to melt away as the temperature increases a bit, but it was certainly a deja vu moment. Just another crazy weather day….
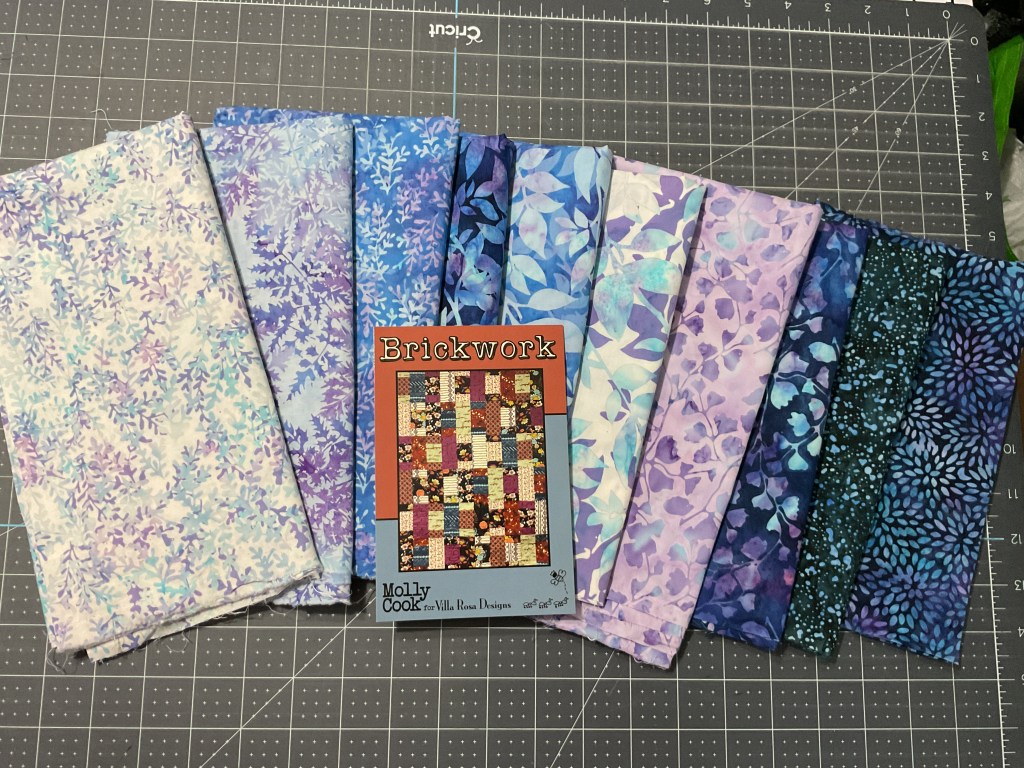
So, I definitely think it’s a fitting day to do a new tutorial for you featuring a beautiful blue and lavender batik collection.
VRD Brickwork Quilt Tutorial
Brickwork is a super fun fast fat quarter quilt designed by our VRD designer, Molly Cook. Don’t know Molly? Check out an interview with Molly HERE.
Get your digital pattern HERE or your print pattern HERE
We do have a few different Brickwork kits available (sorry, not the fabrics used in this tutorial, though) – you can find the kits HERE
For this tutorial, we’re using yummy batik fabrics from the Hoffman collection Dragonflies at Dusk. I just love these gorgeous blues and lavenders – perfect for a snowy day like today.
Who am I kidding??? I just love the saturated colors, smooth hand, and interesting designs of batiks regardless of the weather outside. LOL!
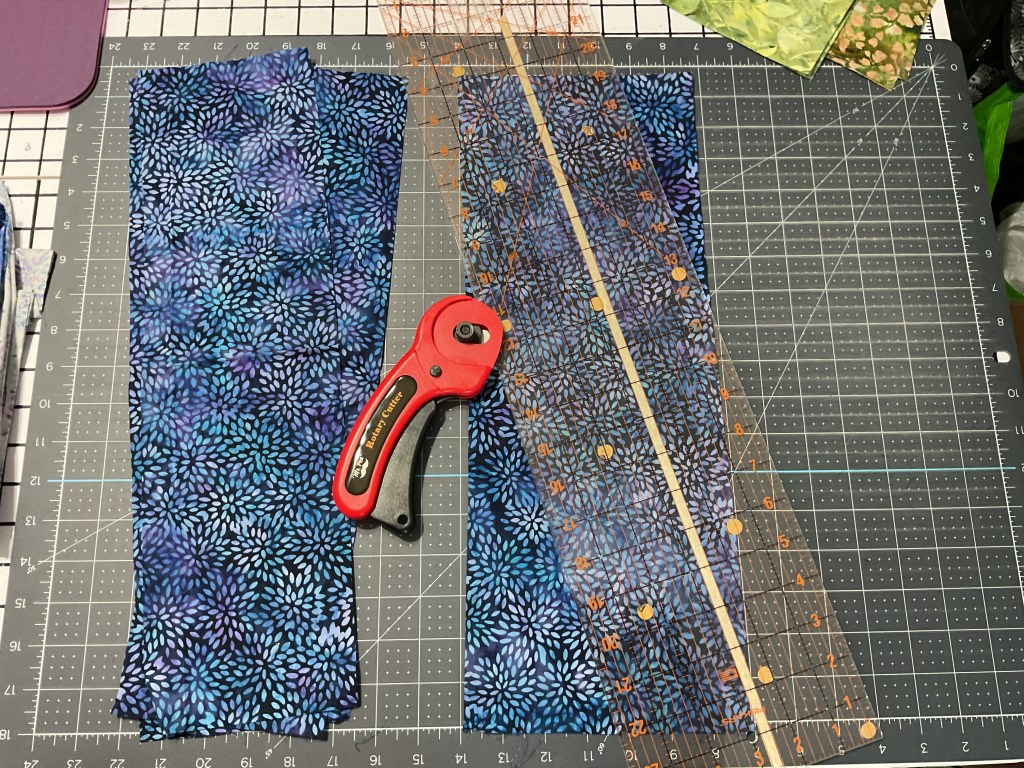
Let’s get started with our cutting. If you feel comfortable layering a couple fat quarters with the right side facing up, the cutting goes super fast. But if you are only comfortable cutting one layer at a time, that works great too. You do you.
Next you need to pair up 2 matching smaller rectangles with a different larger rectangle. Sew the larger rectangle between the 2 matching smaller rectangles. This is a great block on which to practice your chain piecing skills.
Once you have all of the blocks pieced, head to the ironing board and press everything. It doesn’t matter how you choose to press these ones, just be consistent.
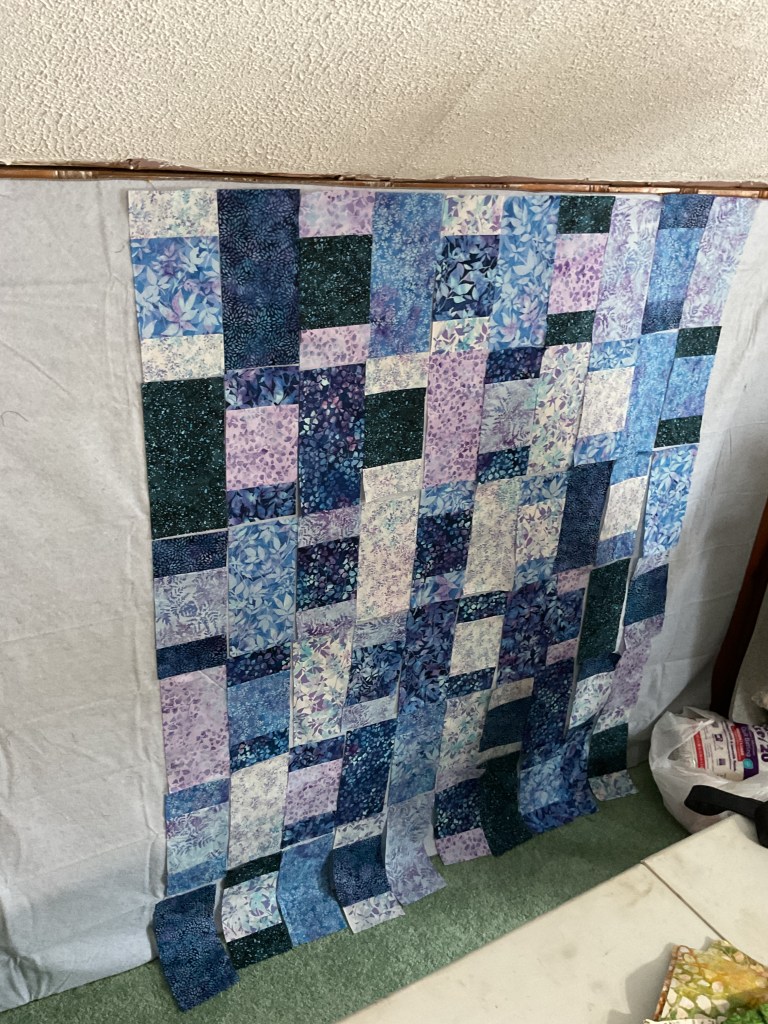
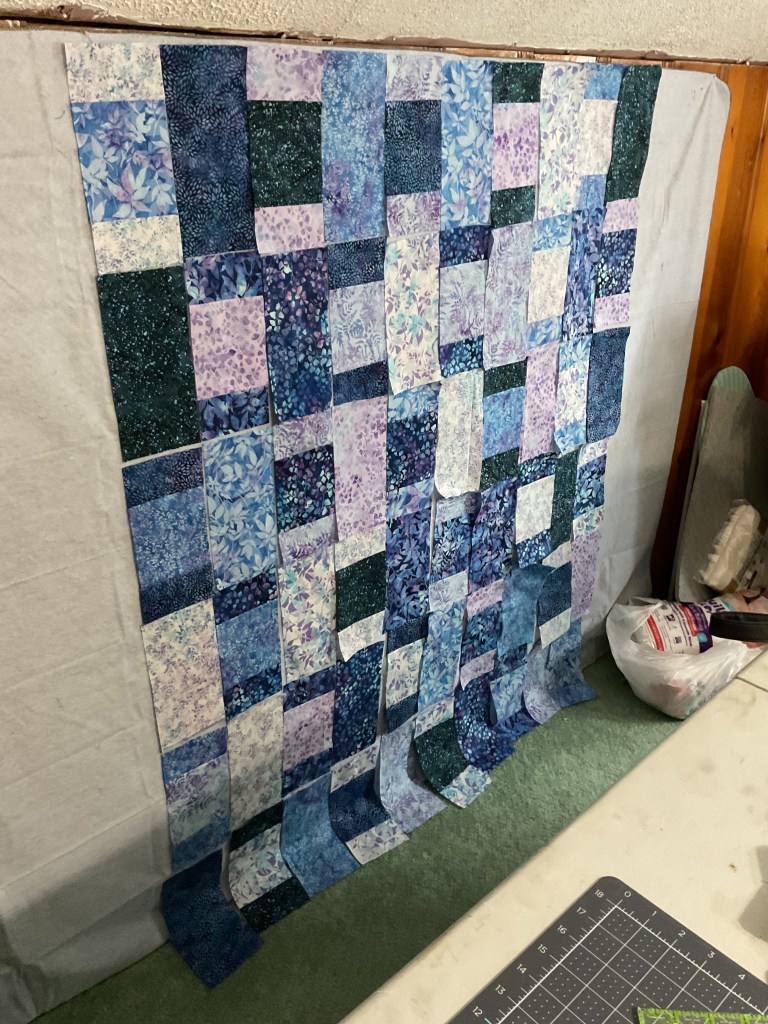
After pressing the blocks (sorry, for some reason I didn’t snap a photo of this step), we’re heading to the design wall (ie: a flannel-backed tablecloth – LOL!) to arrange our blocks.
Okay, now the real work begins – rearranging the blocks so we have a nice balance of colors and lights/darks. The funny thing is that sometimes this process takes longer than actually making the blocks added to the actual time spent sewing the blocks. Just take your time and keep arranging until you are happy with what you see.
This quilt did give us some challenges, though, because the fabrics looked either light or dark and we didn’t have a lot of medium values to balance things out.
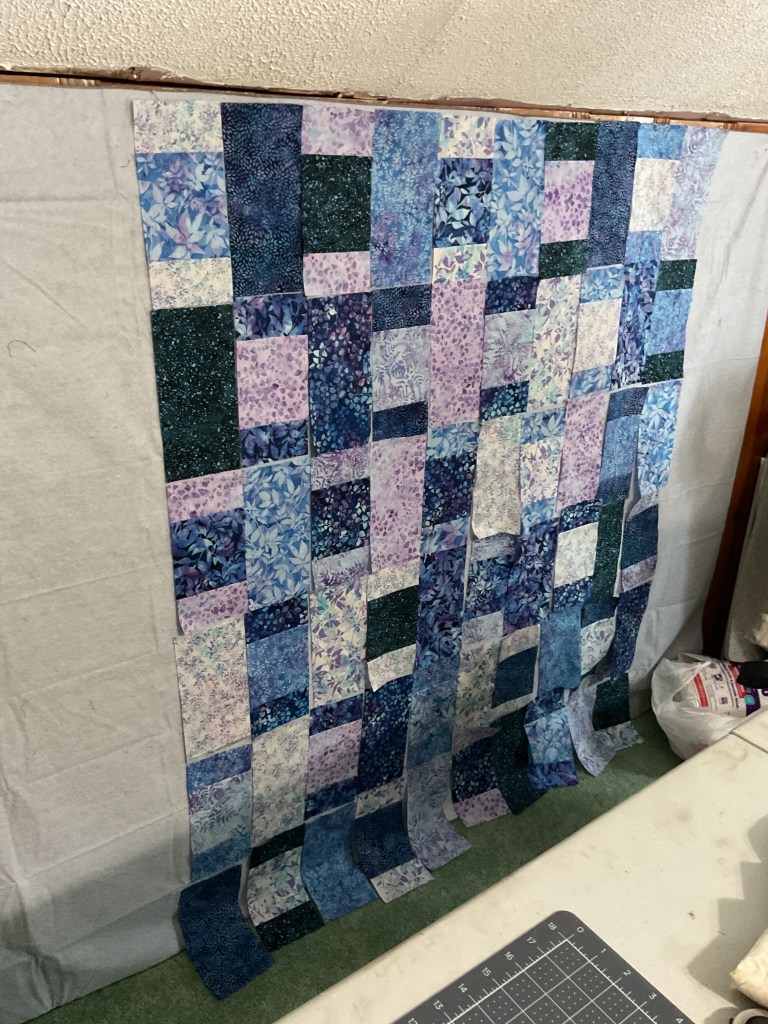
Here are some photos showing subtle changes in block placement while we try to achieve a better balance of colors. Bear with us while we keep changing blocks around….
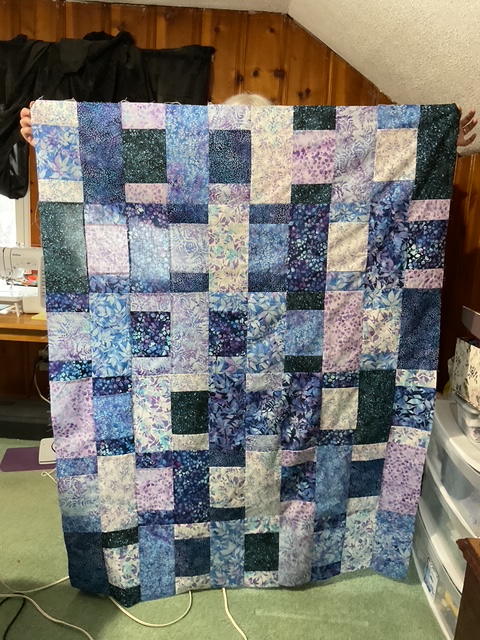
Finally! We found a pleasing block arrangement and then it was time to sew the blocks together into rows and then sew the rows together.
Here is the finished Brickwork quilt top! Now to layer it with batting and backing, quilt it, bind it, and label it. Not sure how to do all of that? You can check out our 2022 Basic Quilting Skills Series over on the right side of the blog for useful tutorials on
Of course, if you’re interested in learning more about Free Motion Quilting (FMQ), we just wrapped up a 7 part series about Beginner FMQ, which is also located over on the right side of the blog.
I want to thank my pal, Robin, for helping me with this tutorial – thanks, Robin!
Have fun making your very own Brickwork and I look forward to seeing your quilts on our VRD Facebook Page.
Well, that’s it for me. Take care and find a little time to quilt this week.
It’s been a long time since I jumped on here for a tutorial, but I finally got this one put together just for you!
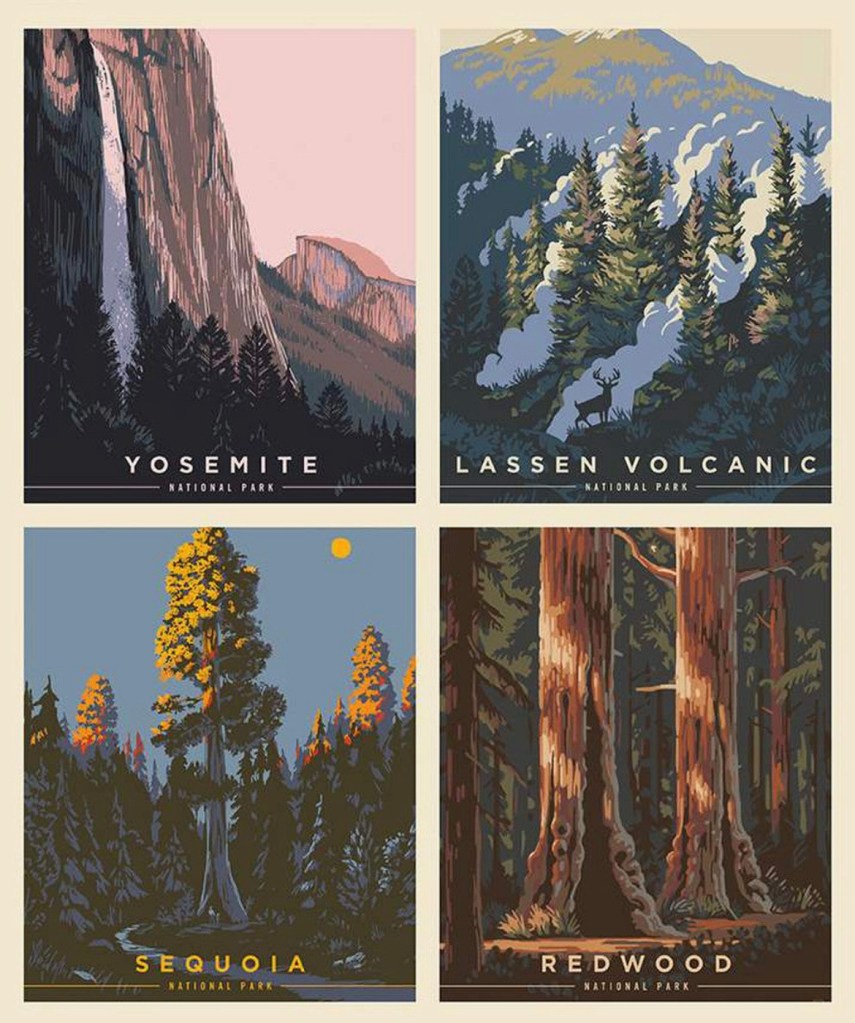
I was looking at some panels in the shop recently (to see my tour of the VRD shop, go HERE) to sew up into a quilt. I was SEW inspired by the National Parks panels and I LOVE that there are a couple of different choices. Have you seen these yet???
UtahCalifornia
You can find the Utah panel HERE and the California panel HERE.
We also have some awesome Rose Card patterns to showcase these great panels!
Both are fun and amazing patterns — of course, I might be a little biased, since one is my sister’s pattern and the other one is mine. LOL! 😁
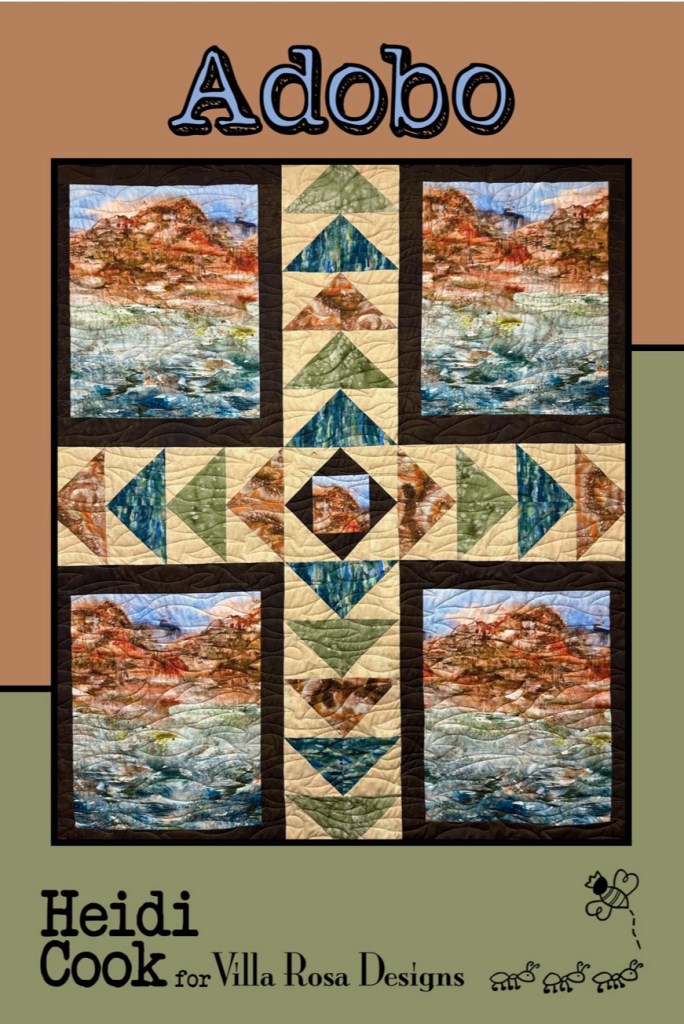
If you don’t already have these great patterns in your stash, you can find digital Picture Perfect HERE, digital Adobo HERE, print Picture Perfect HERE, and print Adobo HERE.
For today’s tutorial, though, I’m going to do Heidi’s pattern Adobo because I really want to use the Riley Blake Utah panel.
VRD Adobo Quilt Pattern Tutorial
GUESS WHAT????
You can sew along with me! We made up kits for today’s tutorial. Go grab your Utah Adobo kit HERE and we can sew together! How cool is that?
Your Adobo kit will include all the fabric for the top and binding as well as the pattern.
I wanted to make this Adobo quilt in all Riley Blake Designs (RBD) so I found some RBD fabrics that pulled out the colors from the panel — Poparazzi sand for the background, Poparazzi brown for the sashing, with Dapple orange, Blossom brown, and Blossom green for the Flying Geese.
Let’s get started!
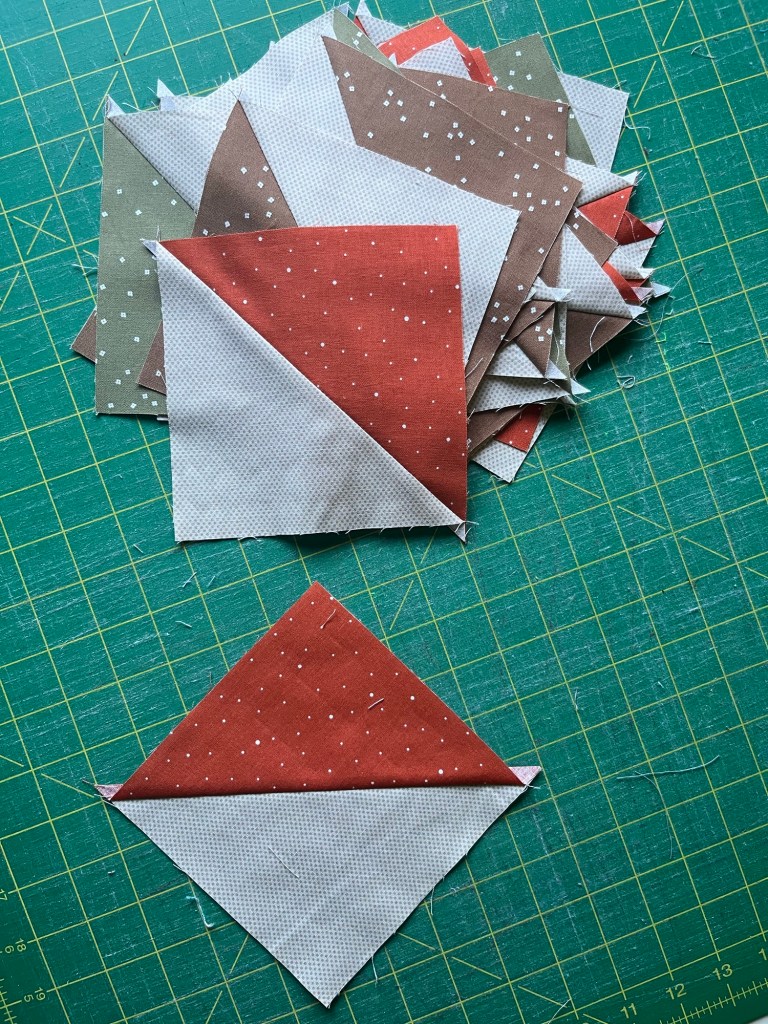
Cut the squares from the background and the coordinates. Pair up each coordinate square to a background square.
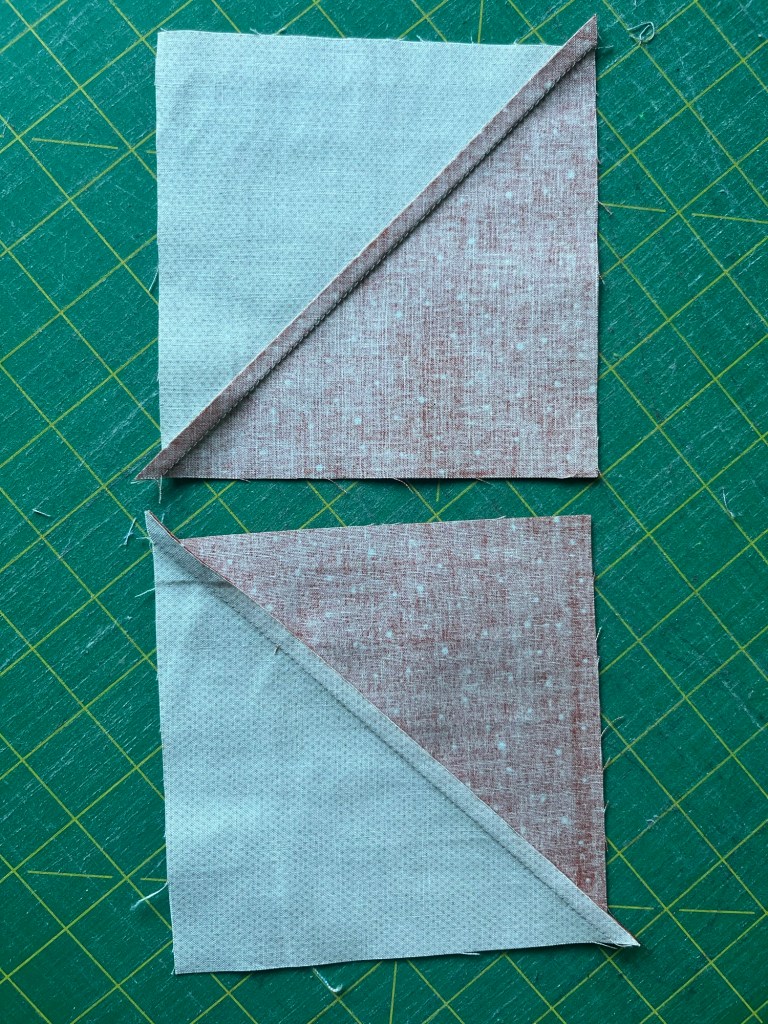
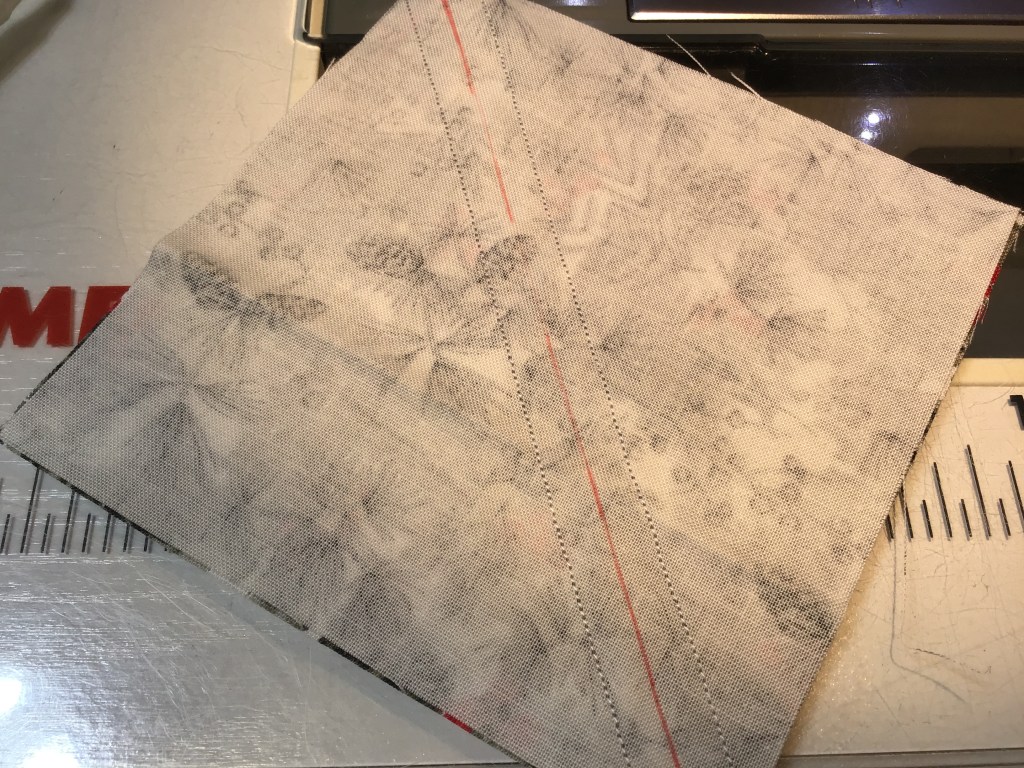
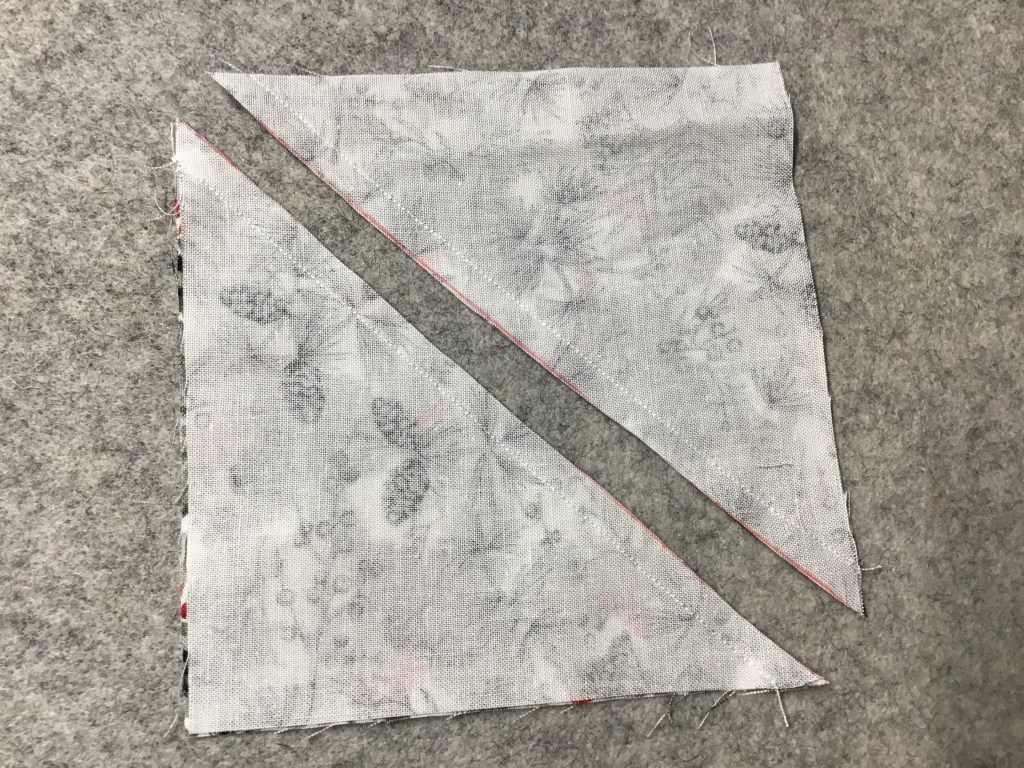
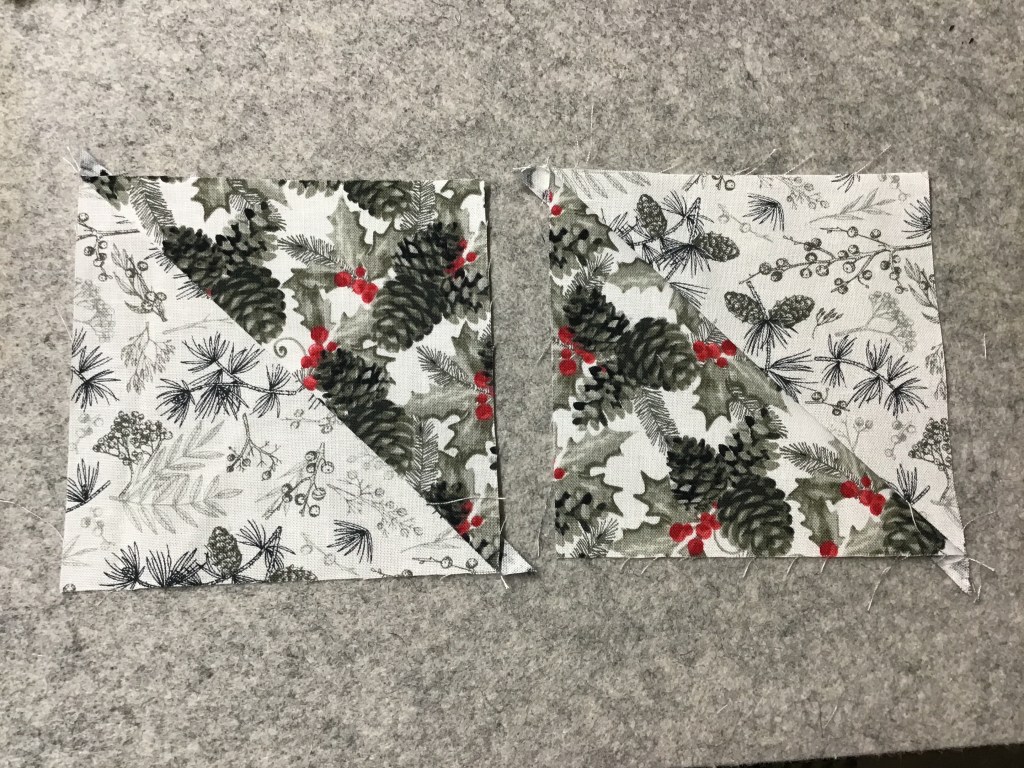
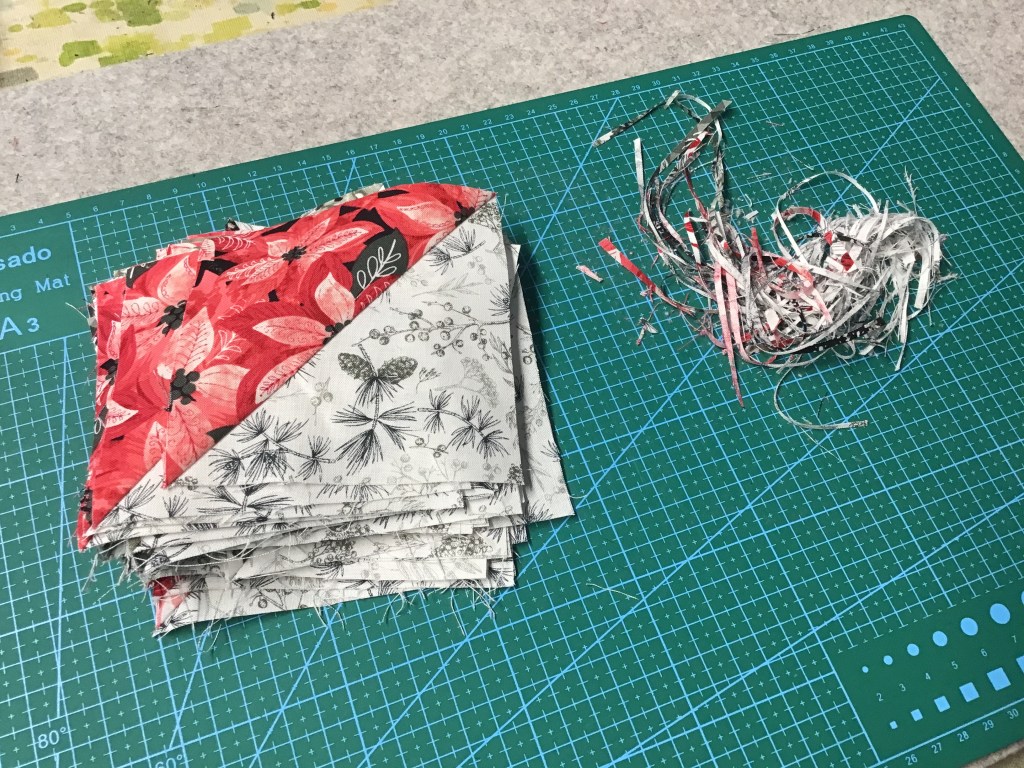
Make Half Square Triangles (HSTs) by drawing a diagonal line then sewing 1/4” on either side. Cut apart and press open. Don’t forgot to square up your HSTs if needed.
Tip from Heidi (who’s keeping an eye on me as I work on this tutorial) – Press half the seams of each color HST to the background and the other half to the color.
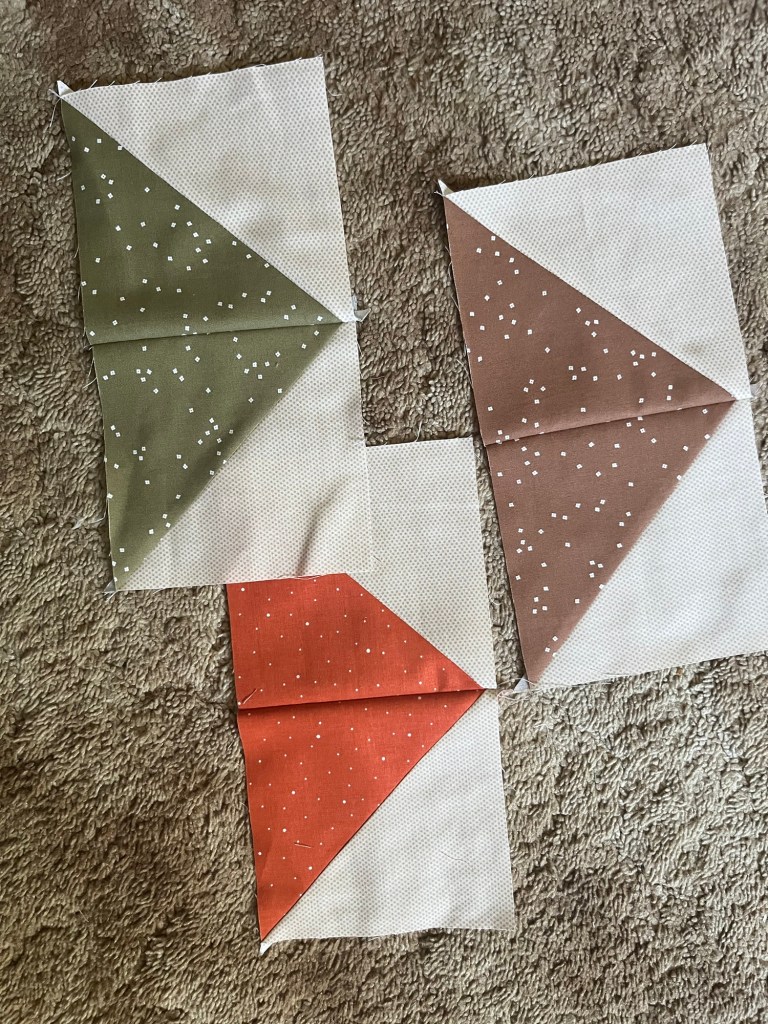
Now sew 2 matching HSTs together to make a Flying Geese Block A. If you pressed half of the HSTs to the colored fabric and the other half to the background, use one of each to make a Flying Geese Block A. Like magic, the seams will lock together! Great tip, Heidi!
Next we need to create a Flying Geese block for the sashing center. We’re going to use a slightly different technique for this one.
Layer a background square right sides together (RST) on the side of a rectangle sashing fabric. Draw a diagonal line from the bottom outside corner to the opposite top corner. Sew on the drawn line and cut 1/4″ away from the line. Repeat for the other side. Make 4 Flying Geese units.
Next sew background squares to the ends of 2 Flying Geese units.
Sew the 2 Flying Geese units to the sides of an orange square. Then sew the Flying Geese units with the background squares on the ends to the top and bottom. Make 1 Block B.
Molly’s Tip – If using your main print for the center square, cut it from the yardage after you cut your main print/panel C pieces.
Instead of using a main print, though, I’m using the Utah panels so we just need to cut them apart (make sure they are the right measurements – trim if needed).
If using a main fabric, cut the C pieces to the size listed on the pattern.
Next, cut the sashing and add them to sides first, then to the top and bottom. Make 4.
Lay out the main print/panel C pieces and the Flying Geese Block A’s so the Geese are flying away from the center. Sew together (please note that I added an extra background strip to the top and bottom of my quilt. Feel free to do the same, but you will need a little bit more background fabric).
Layer your quilt. Quilt it as desired. Bind it. And don’t forget your label!
TA DA! That’s it! Done! Eazy piezy!
I’m going to add one more little detail to my quilt — I’m going to embroider UTAH in the center square!
Here are some other fun Adobo quilts VRD has as kits. You can find them HERE.
Kitty The CatCall of the Wild
Thanks for stopping by and sewing with me!
Now let’s check out the new January VRD Rose Card patterns!
NEW January VRD Rose Card Patterns
I’m excited that I get to show the new patterns off today! Tricia usually does it, but today it’s my turn. Yay!
Here are the 5 main patterns.
Look! There are 2 panel quilt patterns this month – one using a 24″ panel and the other one uses a 36″ panel. Cool!
This set of patterns gives you a nice variety to add to your VRD Rose Card collection. You can get all 5 print patterns HERE (if you want digital patterns, you can order each pattern individually).
But wait — there’s more (Sorry, been wanting to say that)!
Tricia has a new table runner for you called Snowfall.
You can get the print Snowfall HERE or the digital Snowfall HERE.
And here’s our 11th Snack Mat, Woolly Mitten (just in case you’re keeping track, this is the next to the last one).
You can get the print Woolly Mitten Snack Mat HERE or the digital Woolly Mitten Snack Mat HERE.
We still have some kits available for this month’s patterns (if you know me, I’m all about kits). Get yours now before they’re gone cause they’re going fast.
Farm Fresh (with the Out of Farm’s Way collection)
Whew! What a crazy whirlwind the last few days here at Quilt Market have been! As I sit down to write this, Market is over and Festival is just beginning and I thought I’d share a little bit about my Market experience with you. So here goes.
Time to Travel
While Molly and Heidi were flying in from California and I was on my way from Pennsylvania last Thursday, Pat was already here in Houston. Pat spent the day hauling stuff from the van to the booth and running here and there to pick up shipments. Molly and Heidi’s plane was diverted which made them arrive a few hours late and my plane was early, so the three of us actually met at the airport.
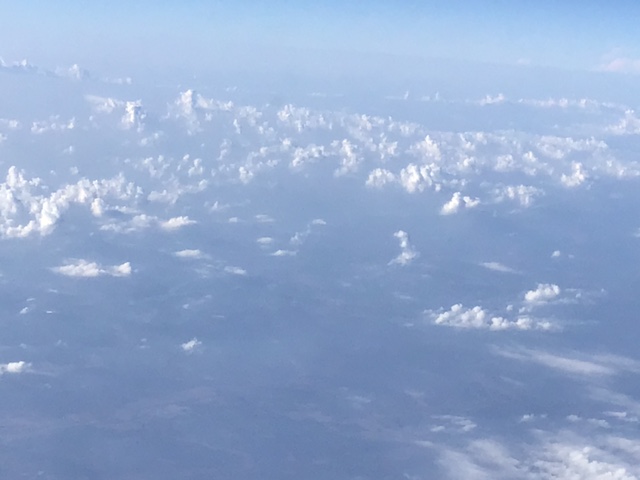
Check out these really cool clouds I saw from the plane. I’ve never seen clouds quite like this before with strange finger-like projections on the top of the clouds. You might need to zoom in on the photos to see the weirdness.
DID YOU KNOW?????? Snack Mats are a great accessory for plane travel — they are just the right size for the seat trays. What a great way to brighten up your flight (and keep things clean) as you enjoy the onboard snack and beverage. I discovered this quite by accident when I was finishing a bit of binding and laid my mat down on the table. Huh! Happy accident! You can find ALL of our VRD Snack Mats so far to date HERE.
Up to this point, everything had seemed so easy for me – too easy, I guess – as there ended up being an issue with Molly’s rental car so the three of us went to 2 different rental companies until we were finally on our way to the house Pat had rented. We dropped our stuff off at the house and headed for Wal Mart to grab what we needed. Wouldn’t you know it, but the closest Wal Mart wasn’t even a real Superstore because it lacked sections such as dairy and produce, so we ended up having to go to Randal’s to pick up our food items. Yikes!
We finally made it back to the house so we could settle in. Sheesh, I was totally worn out! Travel days can be like like that, can’t they?
Behind the Scenes at Marketand SEW Much More!
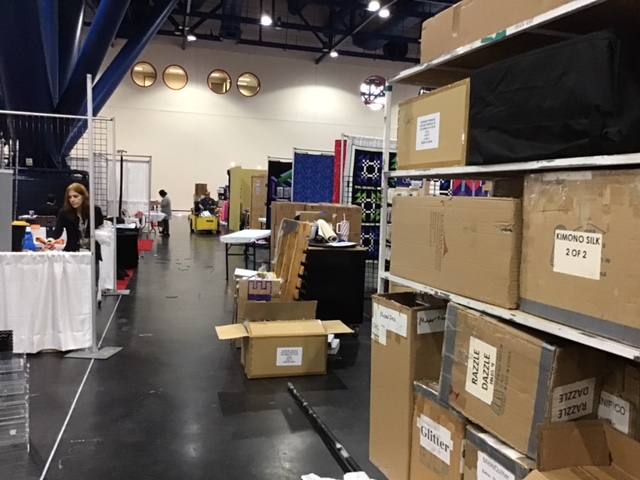
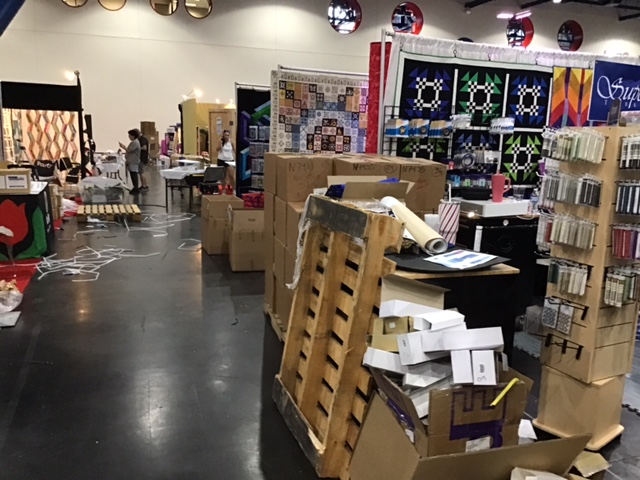
We headed to the Conference Center the next morning on Friday to get the booth set up for Quilt Market. This is definitely no easy task, let me tell you! First, you have to get everything inside so you can set up your booth. Luckily Pat had spent Thursday doing just that so we didn’t have to move much inside. Secondly, you have to navigate around all the other vendors’ stuff sitting in the aisles as they are also setting up their booths. Let me show you some photos of set up. Don’t forget the loaders and equipment, the trolleys and carts….
See what I mean??? These photos are looking up and down the aisle the VRD booth is located in.
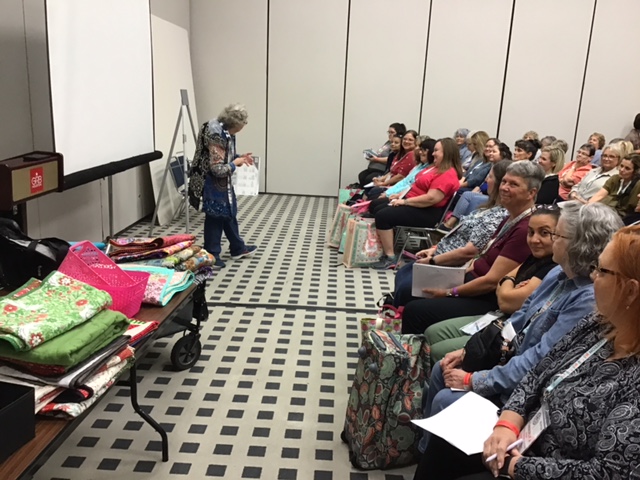
And here’s our VRD booth in the beginning stages. We had a Schoolhouse session at 1:55 PM, so we couldn’t do much with the quilts until afterwards. Schoolhouse sessions are basically mini break out lectures where vendors can share their current and upcoming products and programs.
I was thrilled that our quilting partners, Hoffman, were in the booth right beside us. It was great seeing my Hoffman pal, Sandy, again. Oops, I never did take any photos of their booth. Mea culpa…..
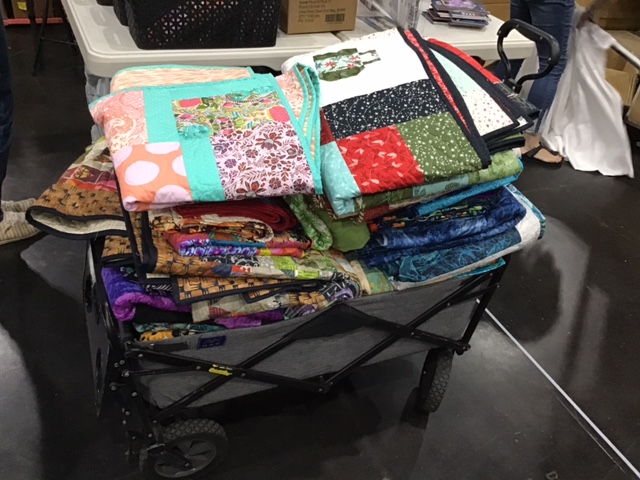
So, halfway through set-up, we took our cart of quilts (which you see above in the third photo) and headed up to the classroom assigned to us for our session.
WOWZER!
There ended up being well over 100 people in attendance to see what was new with Villa Rosa! And to see all the quilts, too! Amazingly, we showed every single one we brought upstairs. It was crowded and standing room only — just the way we like it. YAY!
Look at all those happy people!
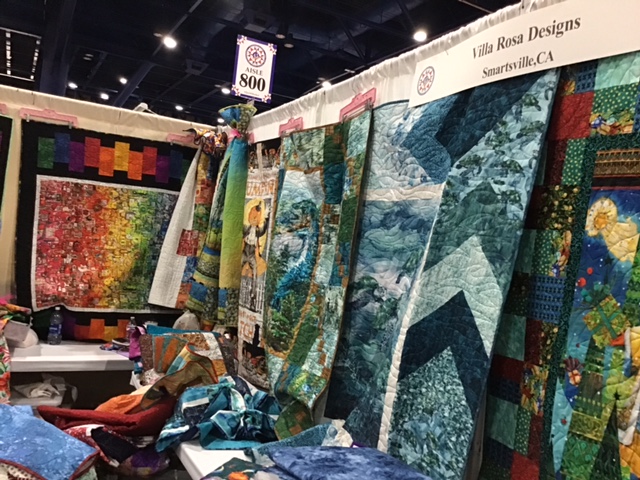
Then it was straight back to the booth to really get it set up. Molly and Heidi worked on hanging quilts. Pat and I kept working on Rose Cards. It was hustle time!
Finally, we were ready for the onslaught of eager shop owners on Saturday! It never fails to amaze and delight me when a disorganized space suddenly turns into a beautiful booth. Big SHOUT OUT to Molly and Heidi — they hung all the quilts, moved tables, helped Pat figure out the layout….
Me, I just try to stay out of the way and look pretty. LOL!
Quilt Market is On!
Saturday went incredibly fast as we were pretty much swamped all day. It took all 4 of us to man the booth. I just LOVE chatting with everyone and hearing their wonderful VRD stories and experiences. I didn’t get to grab any photos for you on Saturday, sorry.
Sunday was also pretty steady, but not the mobs like on Saturday. Molly and Heidi had some meetings at fabric companies to order new fabrics just for you! You’ll have to stay tuned to see what new fabrics are coming into the shop over the next year.
Here are some great photos Molly and Heidi wanted to share with you:
By the way, Molly promises to drop into the blog soon – she’s working on some new posts just for you. 🙂
Monday was my play day! Woohoo! When I wasn’t needed in the booth, I headed right down to the first aisle and enjoyed some great eye candy as I meandered my way through the aisles. I was such a slowpoke, though, because I kept stopping and chatting, but hey, that’s part of a show, isn’t it? After all the Markets I’ve been to now, I’ve developed lots of show friendships over the years, so it’s great to check in with folks and catch up.
Of course, I also love to meet new people, too.
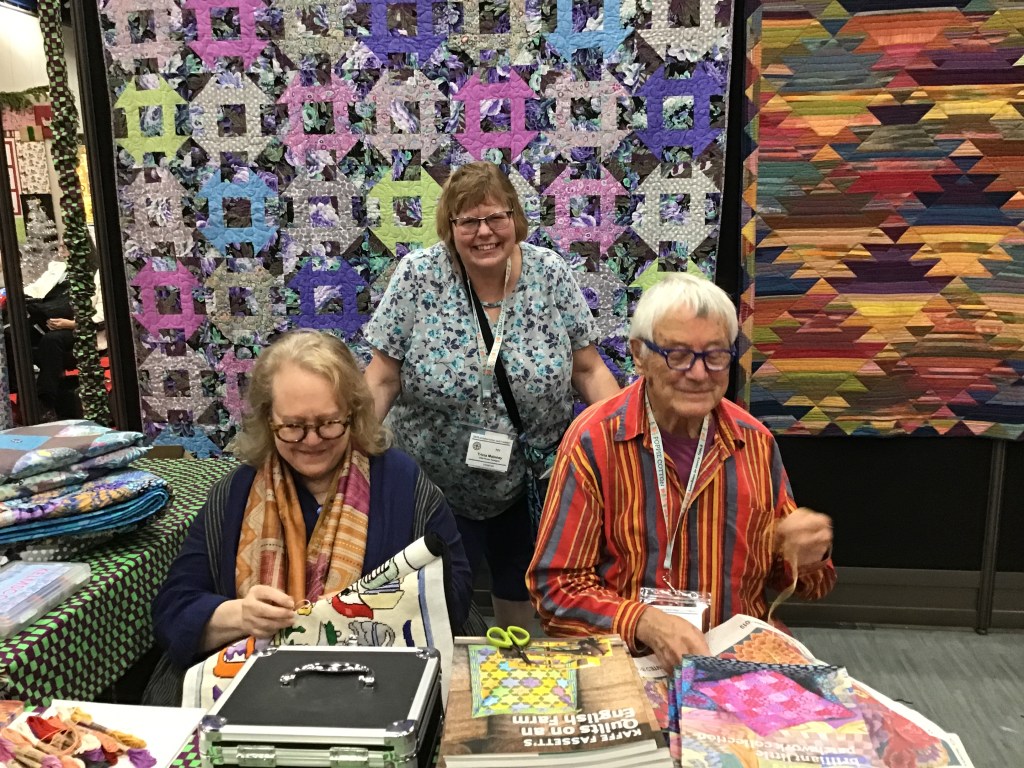
I even managed to get some photos with a few folks myself. Cool!
With Minki Kim, a Riley Blake designerWith Kaffe Fassett and LizaWith Brandon Mably
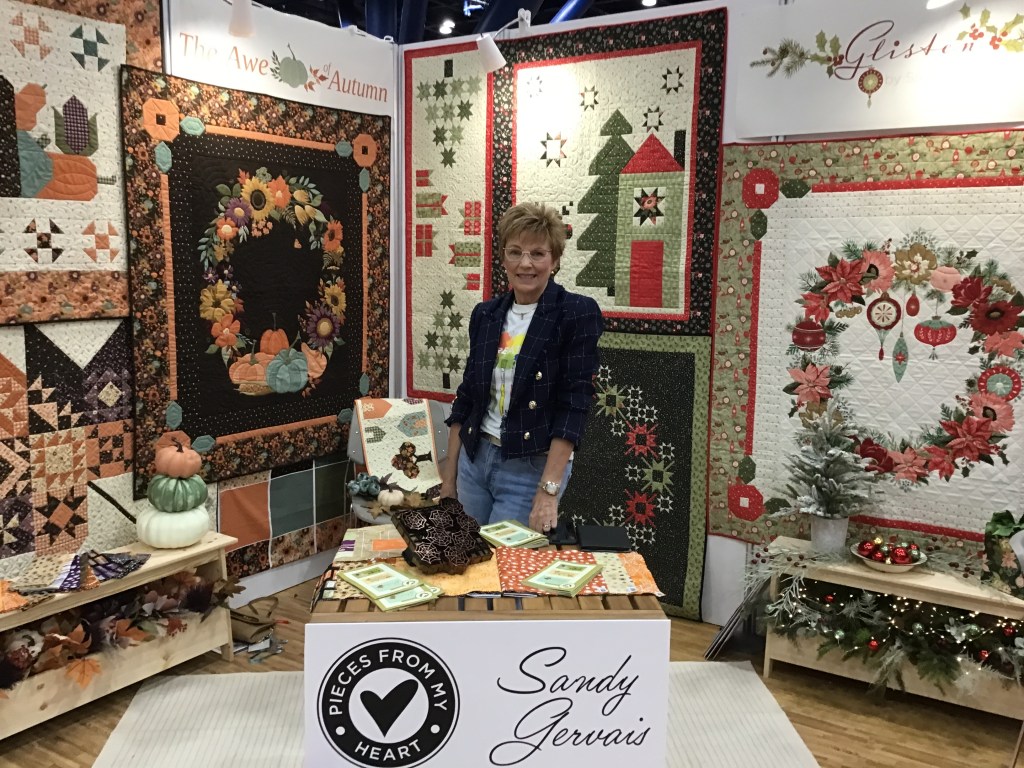
I stopped by and met some other great designers too. Sandy Gervais has been one of my all-time favorite fabric designers for a very long time, so it was great to meet her.
Monday was such a relaxed day, I didn’t feel like I had to hurry to see everything all at once. Surprisingly, I did actually get to see everything. Yay!
This is a wonderful felt board set – it’s a felt panel! – by Jennifer for her Created With Love fabric collection coming to shops in May 2025. There will even be a felt panel sew along in May, so watch for it!
I absolutely adore it!
When I was a Children’s Librarian at my local public library a few years ago, I led a Tuesday Toddler Time and we always did some kind of felt board activity. Oh, how the kiddos would have loved this set. It does come with a cute little book for storage and play, but you could use them on a large flannel board, too. If you have little ones in your life, you might want to watch when this collection comes out and grab the felt panel because it probably won’t last long.
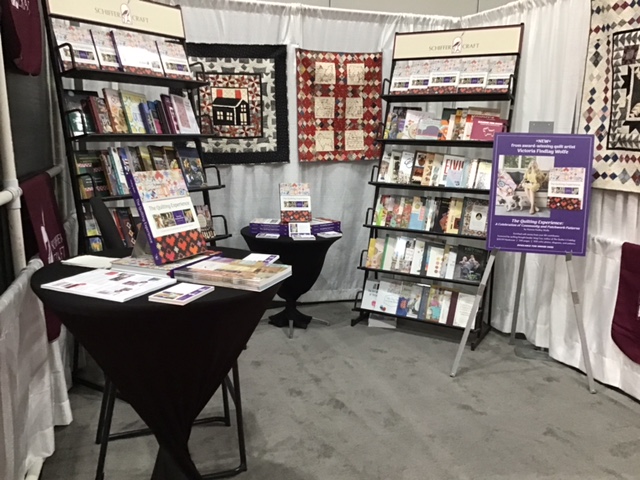
Schiffer Publishing booth
I wouldn’t be a very good book nerd if I didn’t show at least one photo with books, would I? There were 3 different publishers present this year. That was really great to see because since the Pandemic, book and magazine publishers have been slow to return to Market. Still no magazine publishers, though. Maybe next year.
Schiffer Publishing (the photo above) has always been my go-to publisher for amazing historical quilt books with an abundance of gorgeous photos. It was so nice to see my Schiffer pal, Joe, and catch up with him. I haven’t seen him at a show since before the Pandemic so it was great to see him.
C&T Publishing was there this year, too. In addition to being one of our 2024 Blog Hop participants and sponsors, they were my publisher for my book, I Love Precut Quilts!
Fox Chapel was there, too. They were also one of our awesome 2024 Blog Hop sponsors.
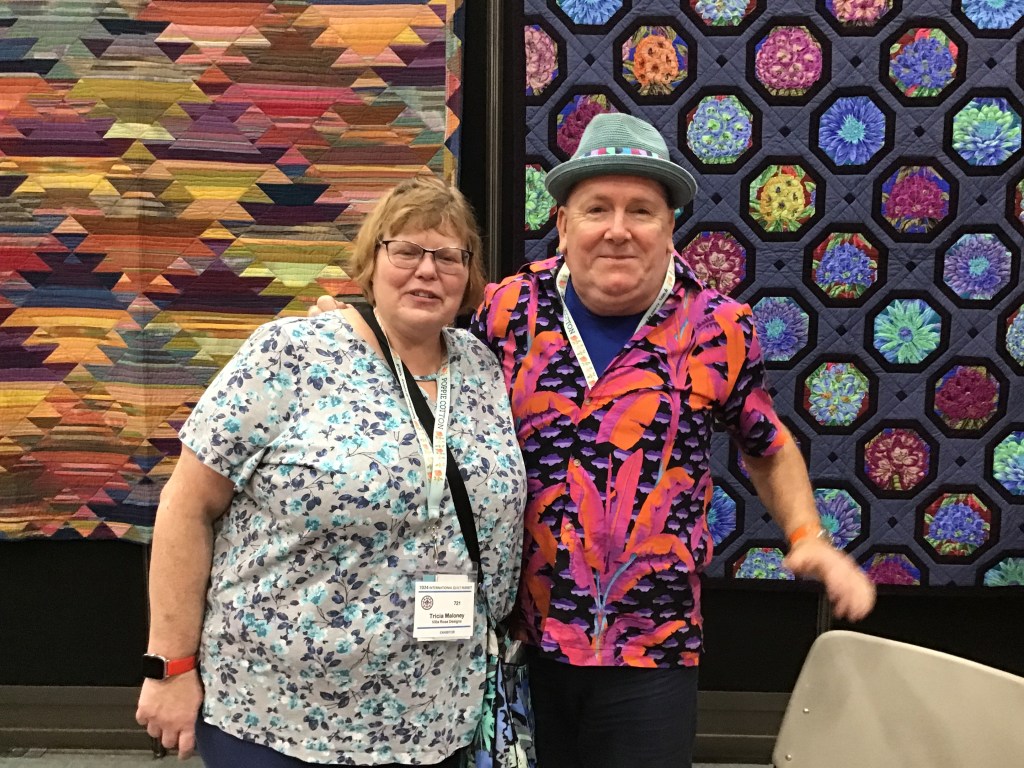
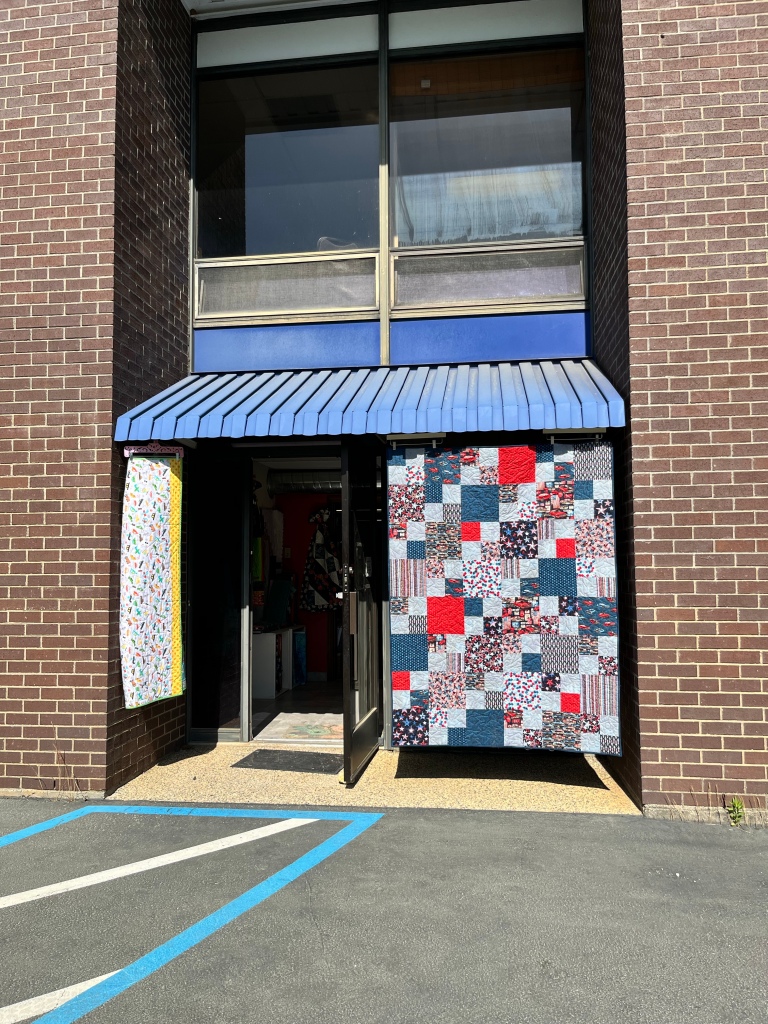
Next up is Quilt Festival! If you’re planning to attend, please please please come see us and introduce yourself — we would love to see you. You can find us at booth 721. I promise, we’ll have some great shopping for you – kits, patterns, fabric, and super fun fat quarter bundles! Wait until you see our amazing dump table.
See you there!
Well, looks like that’s it for me this week! Stay tuned for next week’s post all about Quilt Festival!
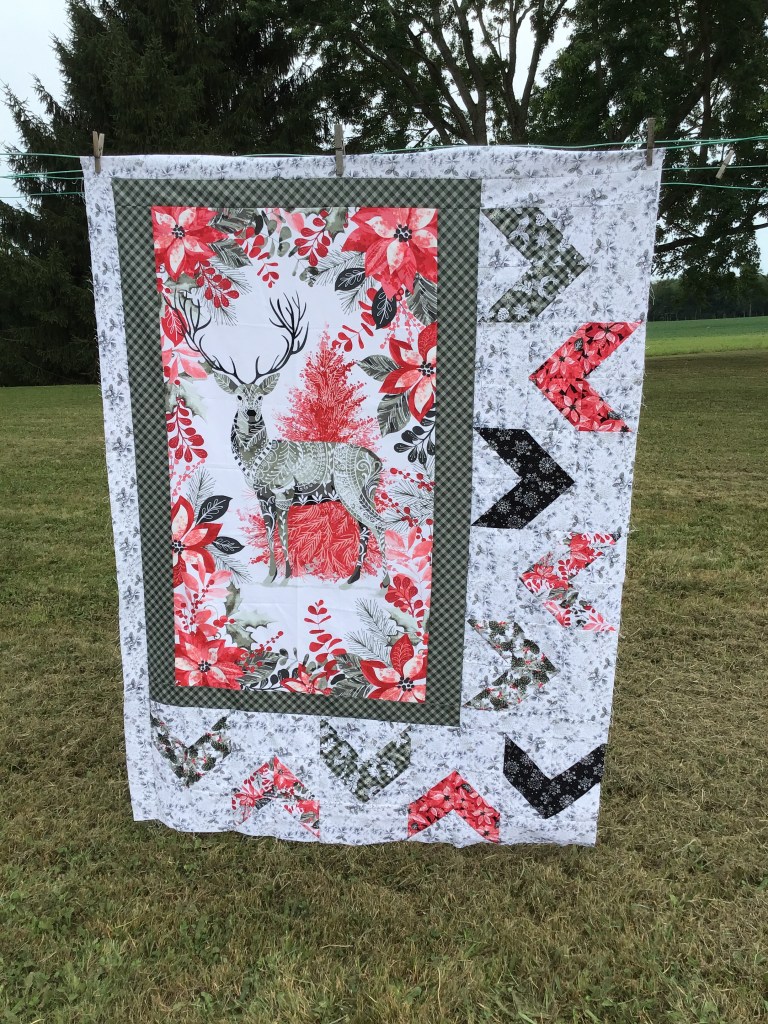
I’m going to get right to our tutorial today because you are going to LOVE LOVE LOVE today’s quilt! And I can’t wait to show it to you.
31 is our project du jour. It was designed by Molly Cook. You can go HERE to read an interview I had with Molly last year if you’d like to get to know her a little bit. Occasionally she pops onto the blog, but it’s been a while, so I’ll have to remind her she has an open invitation to hang out with us anytime she wants. Isn’t it fun to get to know your favorite VRD designers? I know, I know — I need to get my tush in gear and get some more interviews with our lovely designers, don’t I?
VRD 31 Quilt Tutorial
31 is a fabulous asymmetrical panel quilt design and looks great in pretty much any fabric collection!
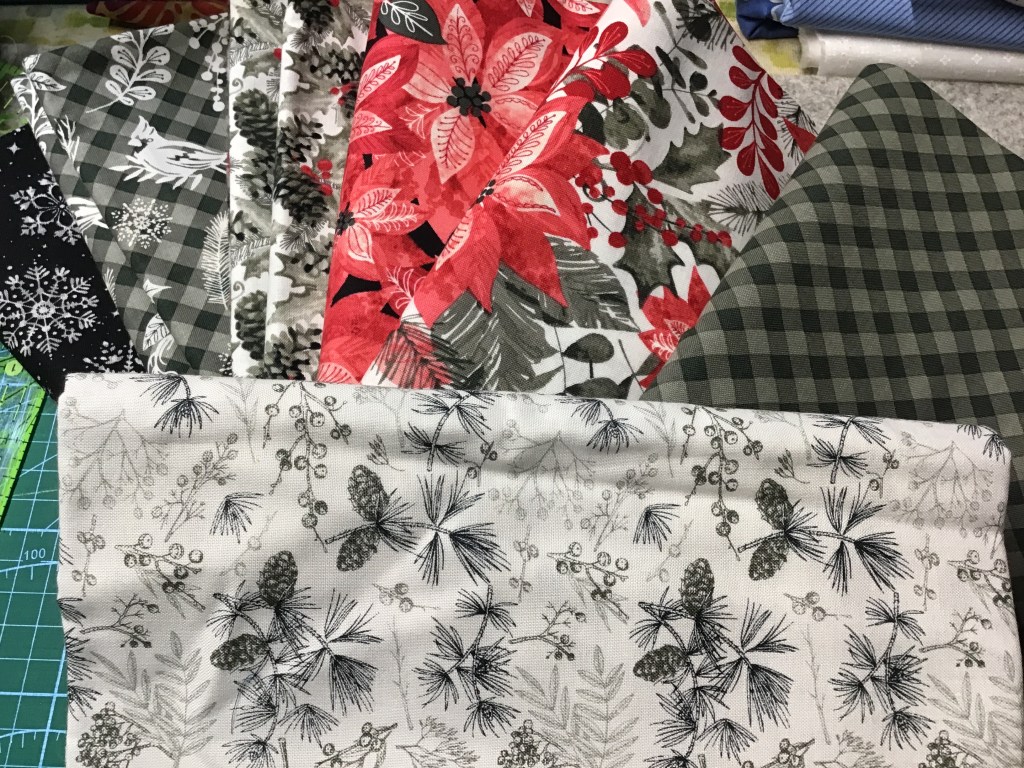
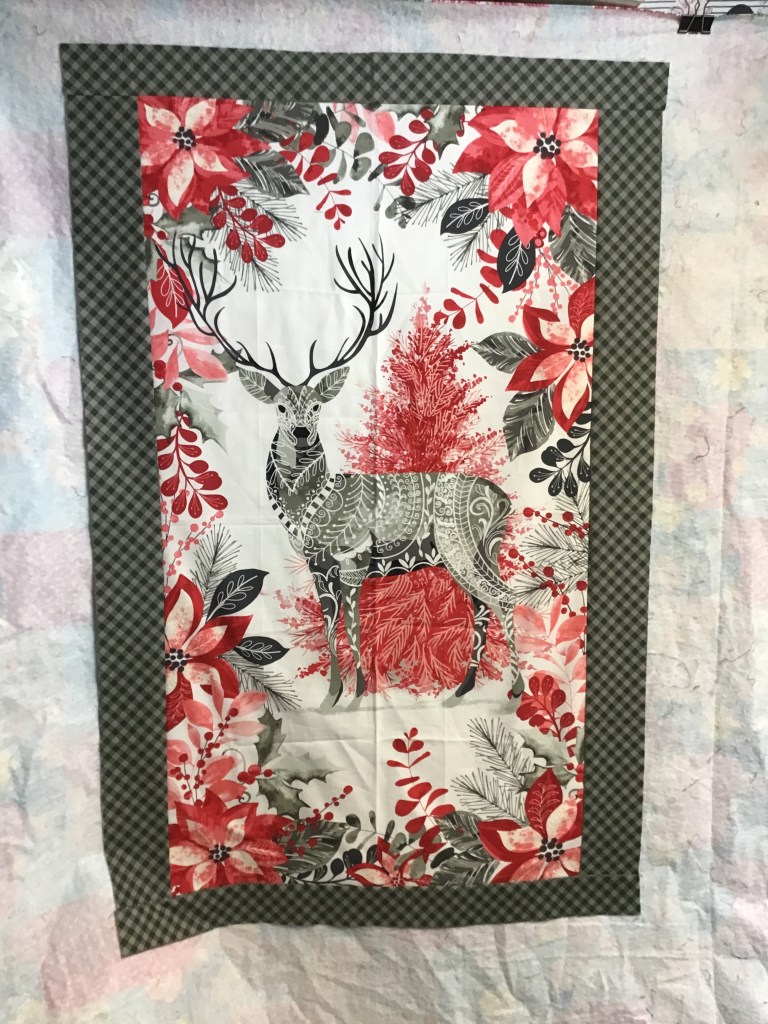
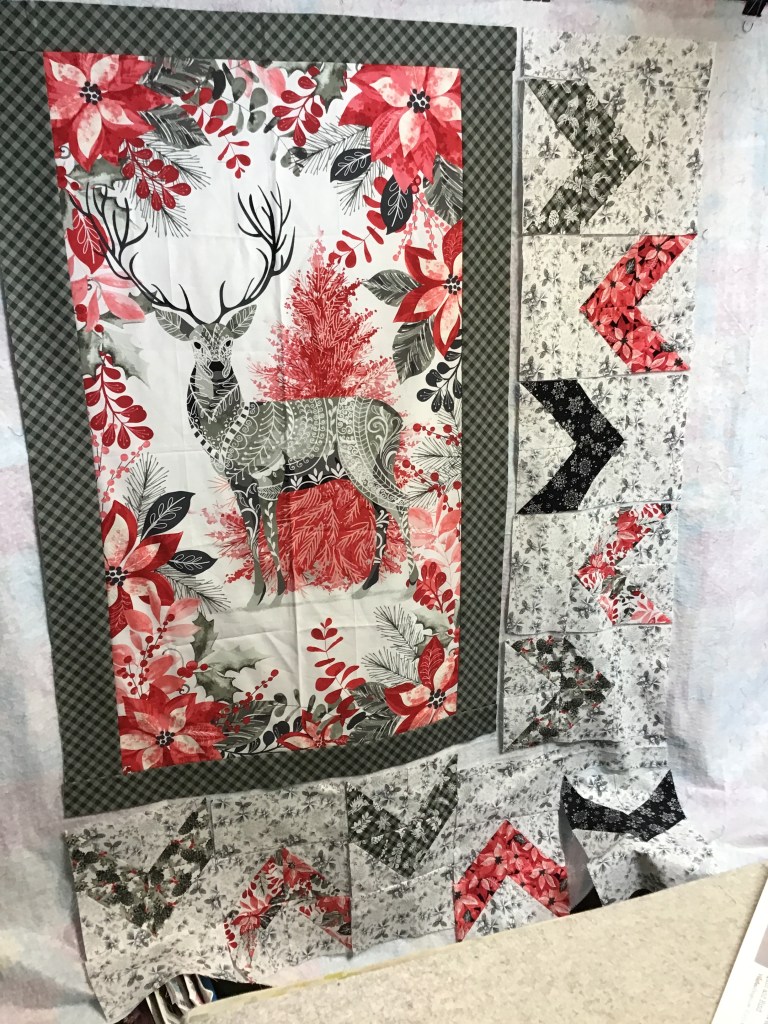
This week I’m continuing my “Christmas in July” theme. For this quilt, I’m using the new Holiday Style collection by Satin Moon for our quilting partner, Blank Quilting (in store now). This gorgeous collection is traditional (poinsettias) and modern at the same time (red, pink, black, white, and grey colorway)! Which is probably why I adore it. I’m not a huge fan of woodsy deer and bears and such, but the deer on the panel is lovely and delicate with a Scandi feel. The artwork is beautiful and invites a second and even a third look at all of the details.
And here are the companion fabrics I’m using for 31.
Let’s get to it!
The first thing we need to do is trim the panel to the correct size. I measured my panel and decided to completely remove the printed plaid panel border and start over from scratch. The problem I ran into once I removed the outer part was that my panel ended up a bit small. But never fear — that’s an easy fix we’ll talk about in just a minute.
Now to fix the size issue — I did the math and figured out I needed to add 1/2″ to my side border strips so my panel with the border would end up the correct size. Luckily, the pattern includes the figures to guide you through trimming your panel and adding the panel border. Take your time to make sure your panel with the border will be the right size before moving on.
Please note that if your panel with the border is too small, add another narrow border and then trim it to the correct measurements. Conversely, if your panel with the border is too big, simply trim it to the correct size.
Once I figured out the math for sure, then I cut my borders. I thought it was kind of funny to cut off the grey plaid on the panel only to replace it with a grey plaid border. Silly me, but now the math works out just right.
I sewed my side borders on first and then I sewed my top and bottom borders to the panel after that. And PRESTO! My framed panel was exactly the right measurement because I took the time to figure it out before I cut and sewed. Yay me!
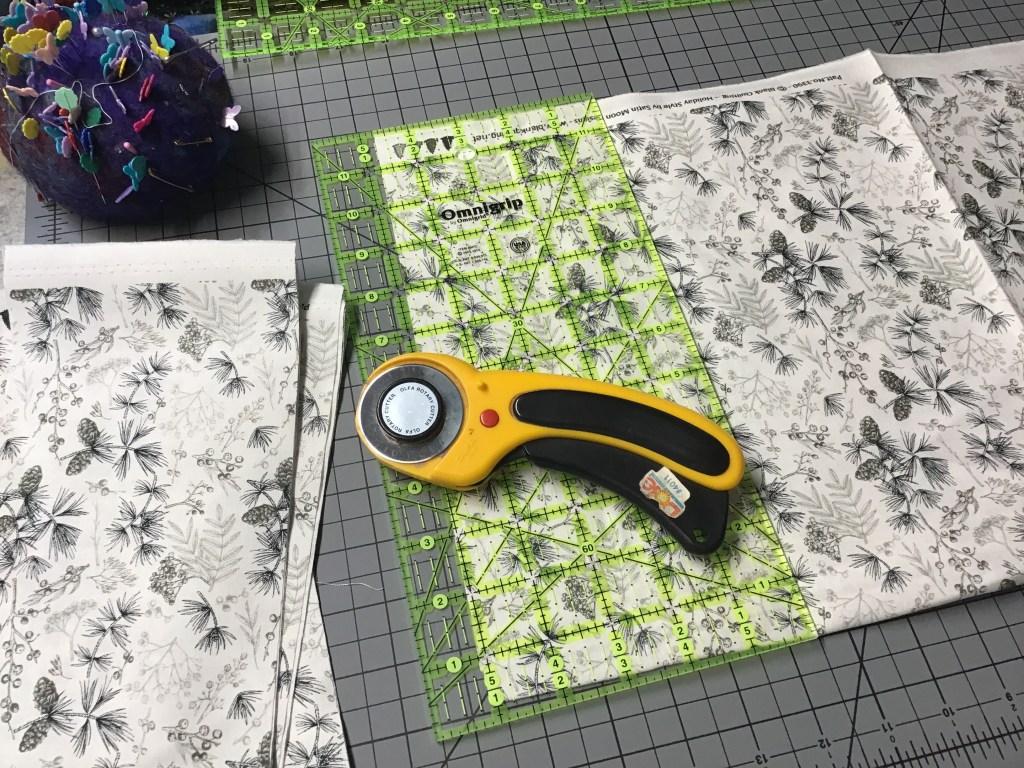
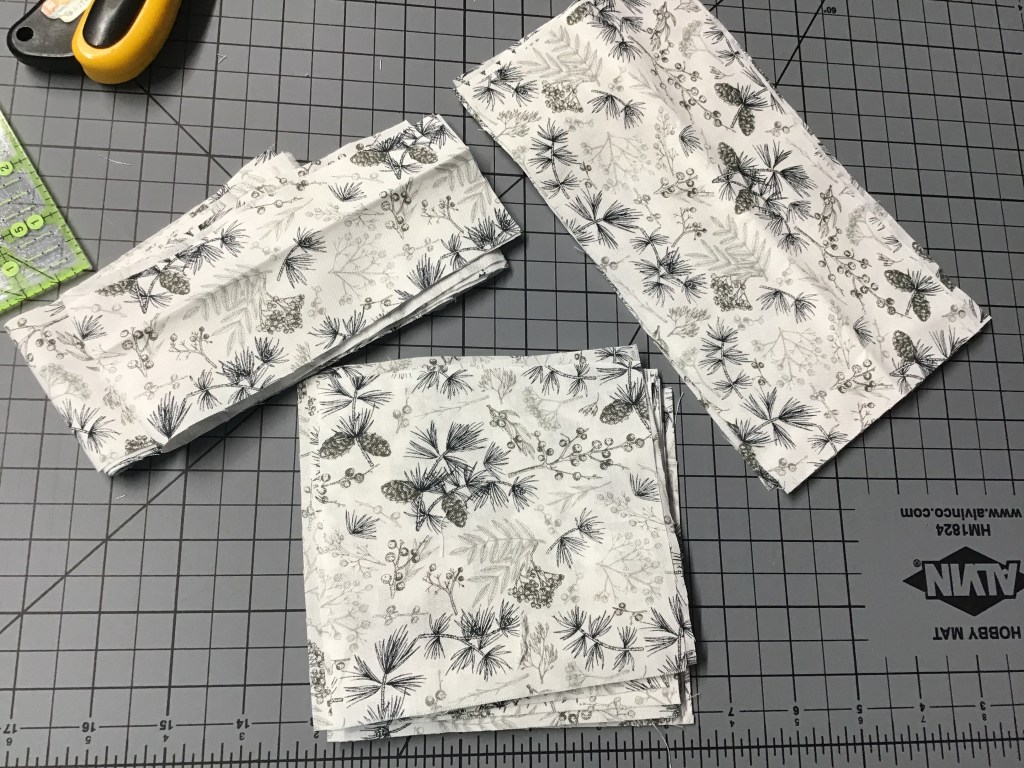
Now let’s cut the rest of the fabric for the quilt.
All set! Background and prints are cut and we’re ready to move on.
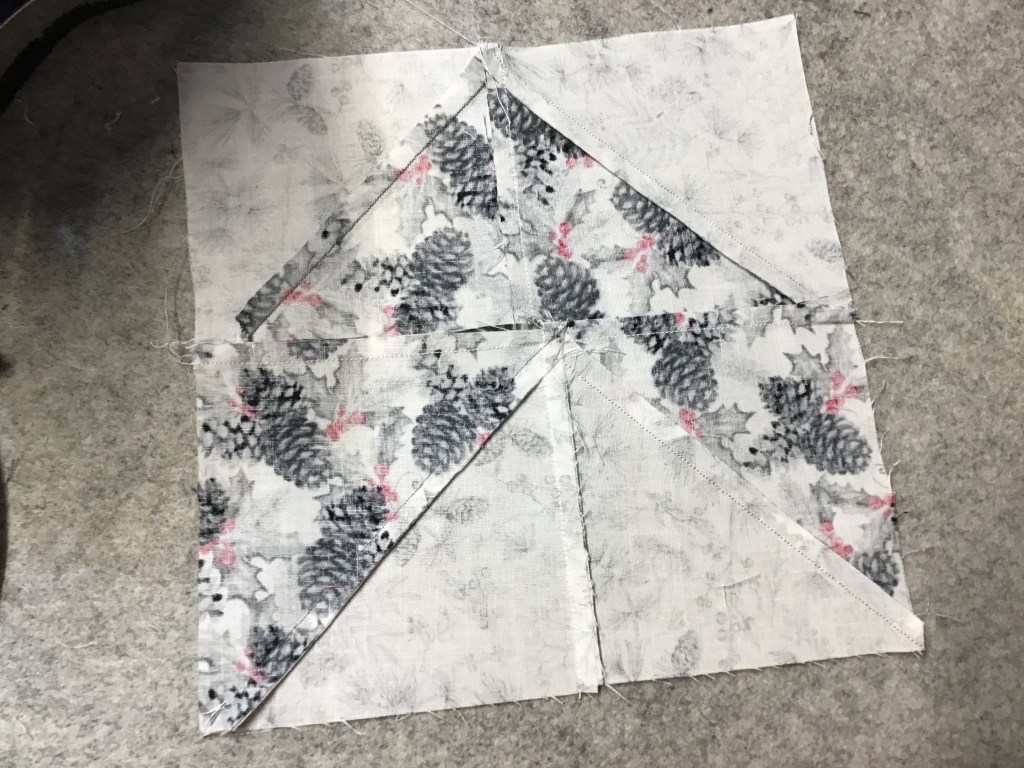
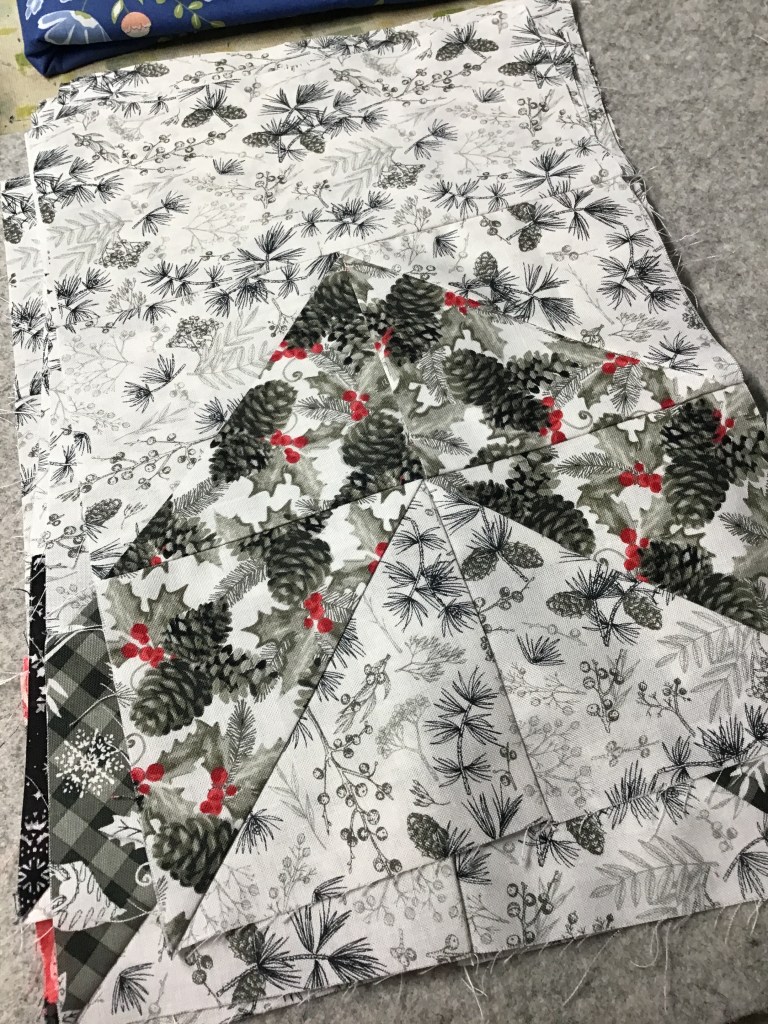
Time to make some Half Square Triangles (HSTs)! Believe it or not, but I really like making HSTs — probably because they are building blocks for so many different quilt block patterns.
Layer a background and a print square right sides together (RST) and draw a diagonal line from corner to opposite corner. Using your 1/4″ seam, sew on both sides of the line. Then cut on the line to make 2 HSTs. Easy piezy!
I like to chain piece all my HSTs before I head to my iron to press them. If you are able, press half of each print/background combination seams towards the background and the other half towards the print. This way your HSTs will nestle together, snug as a bug.
After you’ve pressed all of the HSTs, it’s time to square them up and cut off the little dog ears, if needed. I literally just trimmed off slivers to get them to the right size.
Have you ever tried a Bloc Loc ruler for squaring up/trimming your HSTs — there is a little diagonal channel that sits over your seam and keeps everything from moving or sliding around. Very clever ruler that does one thing and does it very well. Of course, there are lots of different square rulers on the market for squaring up HSTs and other blocks. What are your favorites?
Yippee! Now let’s sew our HST’s into Arrow (or Chevron) blocks. Sew 4 matching HSTs together into a Four Patch block, turning the HSTs as shown. This is where having 2 HST seams towards the background and 2 towards the print really comes in handy so that your seams nestle together and help you to have nicer points with less bulk.
Repeat to make all the Arrow blocks for the quilt. Then head over to the iron to give them a good press.
Now sew background rectangles to the top of the Arrow blocks.
Yay! On to one of my favorite parts (sometimes anyway….LOL!) — laying out and arranging the blocks. Now that I use a flannel-backed table cloth hung up in front of my fabric storage cubes, it’s a lot easier than it used to be when I laid my quilts out on a bed. Ugh! When I was a novice quilter (and a lot younger than I am now), I used to lay them out on the floor. Not anymore, thank you!
Lay out the quilt according to the pattern diagram, flipping the Arrow blocks as shown. I played around with my color placement and decided I liked the arrangement in the second photo the best.
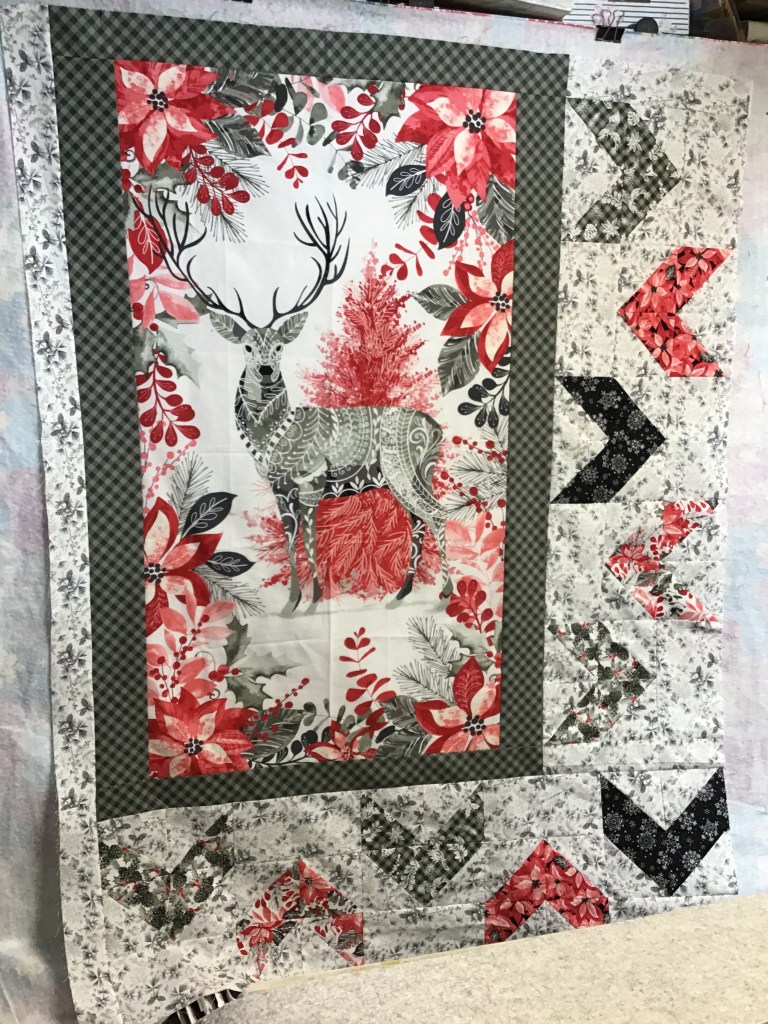
Next, let’s sew the blocks together on the right side of the panel. Please note you will need to add a background strip to the top and bottom of the section so that it will fit.
Okay, let’s sew the bottom row of blocks together and then sew the section to the bottom of the panel. Yes, the borders are added in a clockwise fashion instead of adding opposite sides at the same time.
Looking good! Let’s sew a background border strip to the left side next.
The top background border strip is last.
And here it! 31 is done! Isn’t it lovely??? The colors just glow, don’t they???
I am thinking about adding an outer border to make it a bigger throw quilt size, but haven’t quite decided yet. What do you think — should I add another border or finish it as is?
As I am writing this post, I have my 31 quilt top up on my flannel wall so I can just enjoy looking it at. It will stay there until I start my next summer tutorial.
I hope you are all staying warm and cozy, holed up in your sewing room making beautiful quilts! I am happy to say that I’ve been able to get some quilting in since the beginning of the year and thought I’d share a fun tutorial for a terrific small quilt, perfect as a baby quilt.
But before I get started with the actual tutorial, let me share a little bit about one of my favorite things about my job in the quilt industry. I actually wear many hats (don’t we all?) and one of the coolest ones is making sample quilts for fabric companies. Recently I whipped up this adorable Corners quilt featuring the Love and Learning collection by Hoffman. It’s a really sweet collection featuring a charming alphabet panel in your choice of light or dark background. I saw that darling collection and immediately thought it would look great in Molly Cook’s Corners Rose Card pattern.
Here is what the quilt looked like as a digital image before I actually made it:
Don’t you just love it? Yes, it has a little bit of pink in it, but don’t you think it would work for a boy or a girl? I do!
Anyway, I made a sample of this quilt for Hoffman and as I made it, I photographed the steps so I could create a new tutorial for the blog just for you, our loyal readers.
Do you have Molly’s Corners pattern yet? If not, you can get it as a physical pattern HERE or as a digital pattern HERE.
Let’s get started on our first quilt tutorial for 2024! Yay!
VRD Corners Quilt Tutorial
So the first thing you need to do is gather up your fabrics and your pattern. The first image shows the alphabet panel, the second image is the background and coordinates, and the last photo shows the binding, backing, and accent fabrics. Oh what fun!
After you’ve got your supplies together, then it’s time to cut each alphabet letter out of the panel one at a time. I don’t know if you can see in the first photo above, but each letter includes an item that begins with the specific letter as well as the item’s name.
Time to cut! I used a square ruler the size of the square called for in the pattern (or at least I thought I was). That way all I had to do was center each design and cut around all four sides of the ruler. Unfortunately the letters in the last row of the panel were wider than the rest and I ended up having to cut some of the designs a bit, but made sure the letter was not cut off.
OOPS! Then I realized my ruler wasn’t the right size. Luckily it was a bit bigger, so I could trim those squares down to the correct size.
Whew! Done with trimming down 26 squares. That took me a little while. Make sure you cut your squares to the correct size the first time!
Moving on……….
Next it’s time cut a bunch of strips and sew them together before we cut the units for the half frames. Sewing long strips together is not one of my personal favorite things to do. What’s your least favorite part of quilting?
Okay, the strips are sewn into pairs with a background strip sewn to a colored strip. Next let’s cut all of the units out of the strip sets. To create the corner unit for the block, you will have to sew a rectangle to the squares as in the second photo.
All right, now the hard part — to achieve the same layout as Molly’s sample quilt on the front of the pattern (see above), we will be making 4 versions of the same block.
For most of you, this won’t seem like a big deal, but there will be a few quilters who have trouble getting the right block orientation. Well, I am included in this group, definitely. Blame it on being a lefty for me.
I strongly urge you to use some kind of flannel board. Make one block at a time and place them in their proper order on your flannel board so you can more easily see the orientation of each block as you sew them together.
I did try sewing a group of blocks together using my usual speed sewing method, but that ended up being a disaster. I had to do a lot of ripping out and rearranging the pieces of my blocks. So, after that, I made one block at a time.
Once I had all my blocks up on my flannel board and double checked their orientation, I started sewing the blocks into rows and then sewed the rows together into the quilt center. I was holding my breath the whole time………
Once I knew I had conquered the center, it was time to add borders. I added the side borders first and then sewed the top and bottom borders on last.
Woohoo! The top is done! Time to layer, machine quilt, do binding, and add a label. Oh! My last thing to do will be shipping the quilt to where it needs to go. It will come back eventually…………
Have you made the Corners quilt before? Do you have any tips to share?
Update on Decluttering
Before I go, I wanted to give a little update on my decluttering project. I started with my cutting table first. Lately it’s been more of a storage surface than a cutting surface.
Holy moly! I found several groupings of fabrics paired with patterns as well as yardage and stacks of fat quarters. Some loose patterns, too. Ugh! Now I have to put the fabrics away and figure out where to house the projects. Decisions, decisions! This is why I avoid decluttering — I have way too much stuff and not enough space.
I need to start pulling stuff out I don’t love anymore and finding it all new homes. Time to start purging my stash or I will never ever find an organization system that works for me because you can only stack so many plastic crates. Well, I’m going to keep plugging away, so stop in next week to see what else I’ve accomplished.
I’m here to talk about one of my own favorite patterns, Lickety Split. I designed this fun and fast pattern using only 10 fat quarters and a background fabric. When I was sewing it up the first time, it went together really quick — hence the name “Lickety Split”.
There’s also a digital download pattern, too. You can find the digital pattern it HERE.
Today I’m using fabric from the Morning Light collection by Northcott, which features digital prints. They do a good job with their digital prints and the colors are just so beautiful. These are definitelymy colors — Northcott must have been thinking about me when they designed them. LOL!
Guess what??? We created Lickety Split kits just like my fabrics, above. You can find them HERE.
Or maybe you just want to grab some of your own Morning Light Fabrics? You can find the collection HERE at the VRD shop. Be warned — they’re going fast and when they’re gone, they’re gone. So get ’em while they’re hot!
Let’s get started!
Lickety Split Quilt Tutorial
So first things first (well, after you find your fabrics, of course), you need to cut out your rectangles. Grab your fat quarters, and cut them into strips. Then subcut the strips into rectangles. You’ll have a narrow strip leftover — you can use it in another project.
Next it’s time to cut your background pieces. I cut my big pieces first. Then I used the leftover background pieces to cut the smaller/narrower pieces.
Molly’s Tip: Go ahead and pair up your rectangles so the same 2 fabrics are sewn together in each block like I did.
Or scrap it up and be totally random! You do you!
Here, you can see how I stacked up my fat quarter rectangles with the background strips. Now I’m ready to take all my block pieces to my sewing machine. No need to get up and down to get fabrics, because they will all be right next to my machine.
Yay! Time for the fun part — sewing the blocks together! Make sure you sew the pieces all the same for each block or else you will have blocks going in all kinds of directions. Silly blocks!
Look! Here’s a block AND it went together Lickety Split!
Lay out your blocks, turning every other block sideways. The 1st, 3rd, and 5th rows will be the same layout while the 2nd, 4th, and 6th rows will be the same layout.
Sew your rows together and — TA DA — your Lickety Split top is done. Now it’s time to layer, quilt, and bind. And don’t forget your label!
Check out these other color combinations of Lickety Split. Which one is your favorite?
Anna Maria Horner collectionHoffman collectionWonderland by Keiki GokeWonder by Windham fabrics
Don’t forget to post your Lickety Split quilt pictures on our Facebook page. I can’t wait to see them!
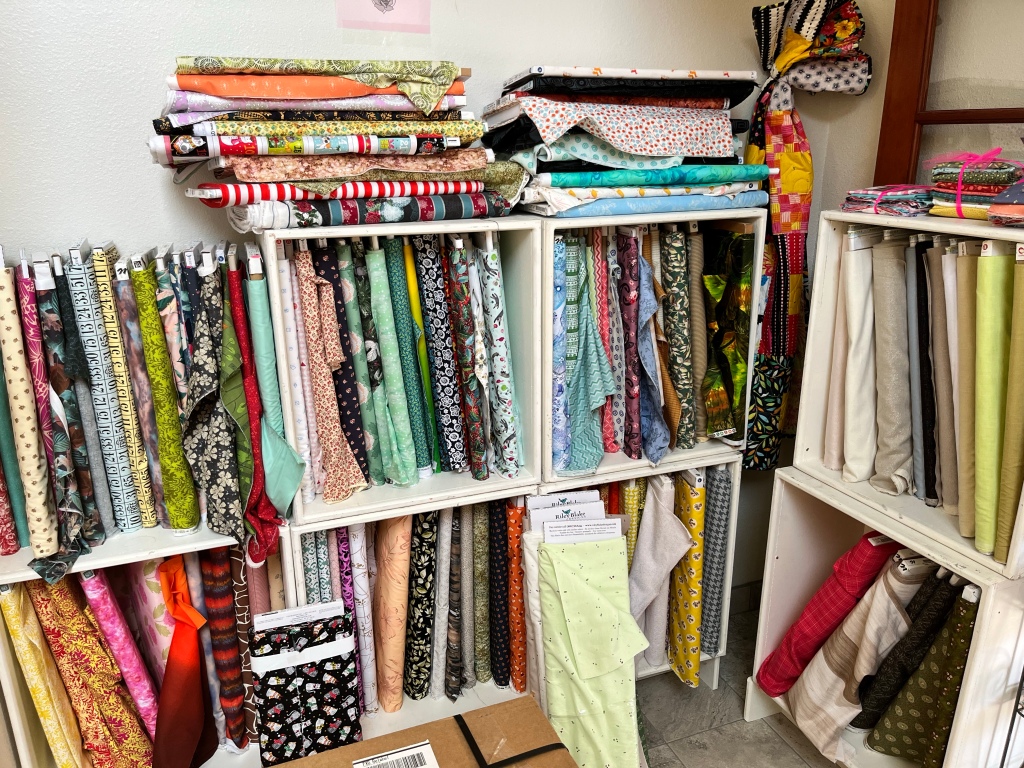
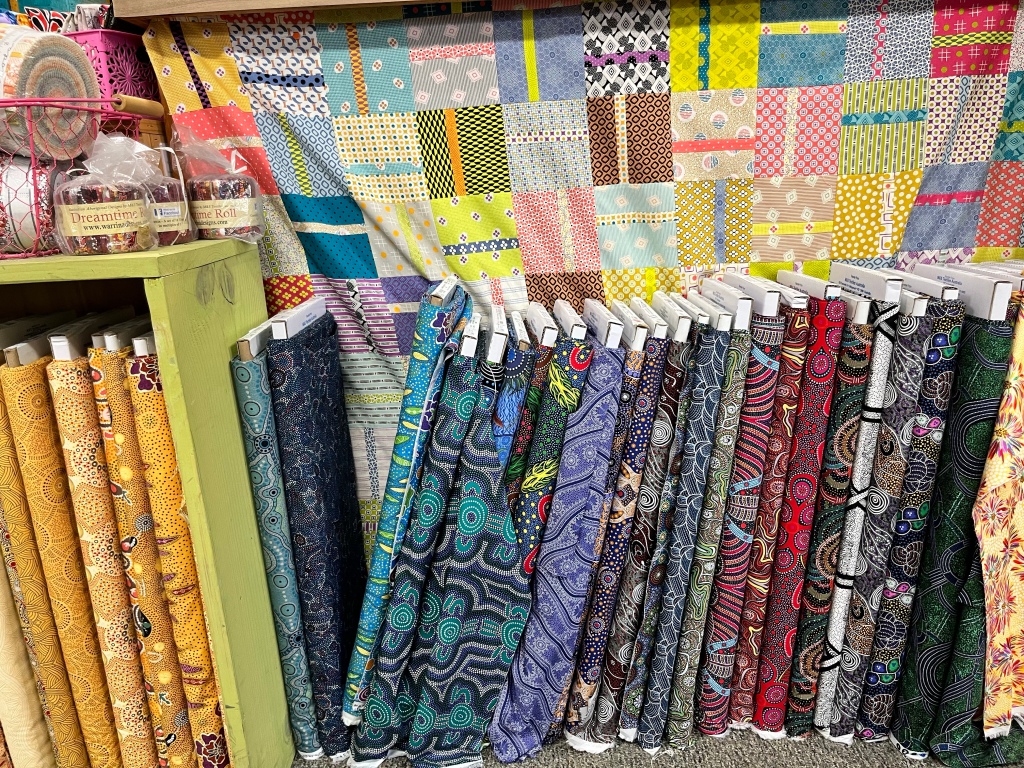
Hi everyone! Molly popping on to show you around the shop. Hold on tight, this might turn into a roller coaster ride!
Our quilt shop got started in a spacious 2 story building, just outside town near the air park, in 2019.
Remember when I said it was spacious? 4 years later and we are bursting at the seams — (no) pun intended.
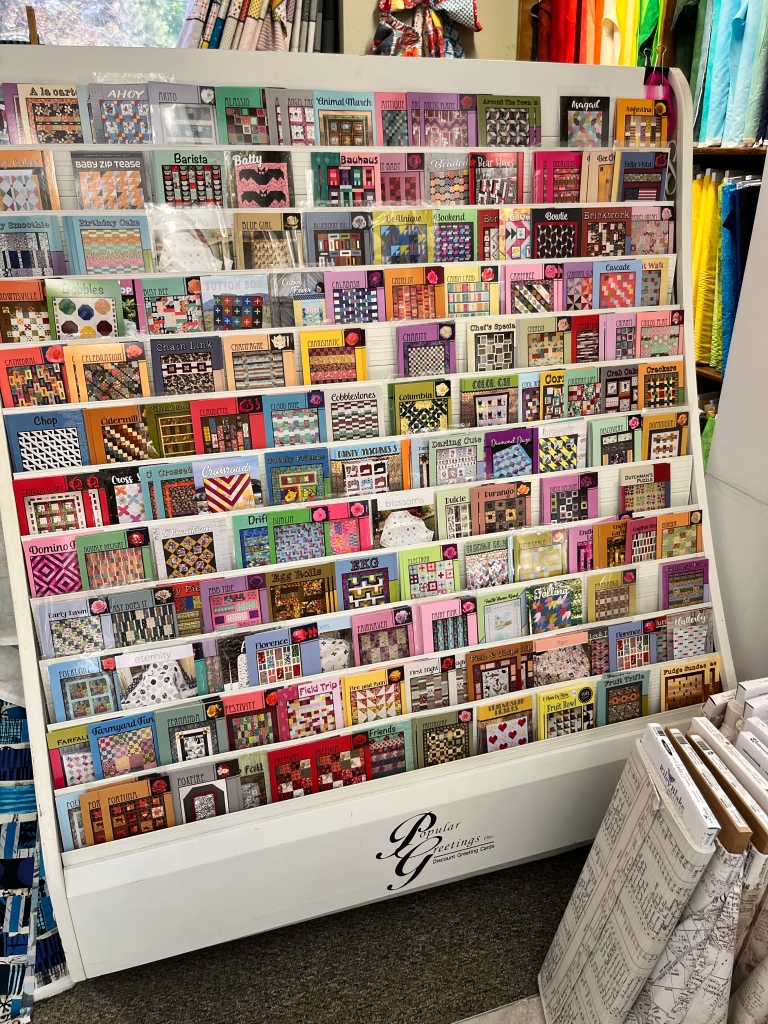
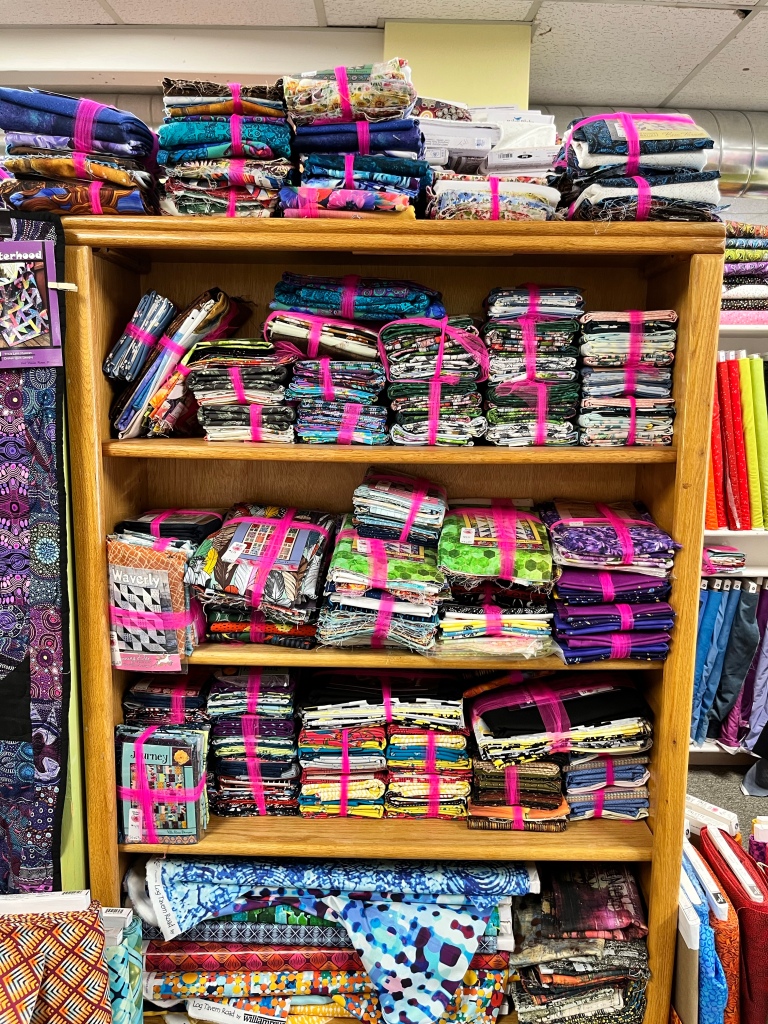
Where should we start our tour of the shop? How about the front door? Here we have all our VRD Rose Card patterns on 4 large racks — with well over 500 patterns, those racks are bursting!
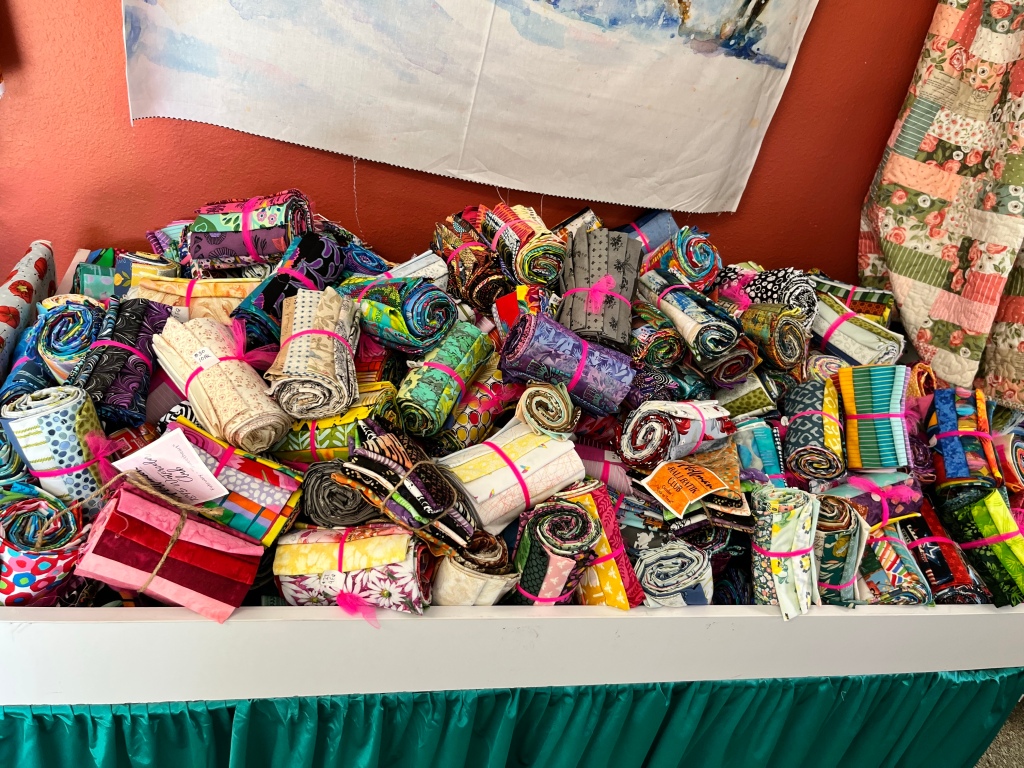
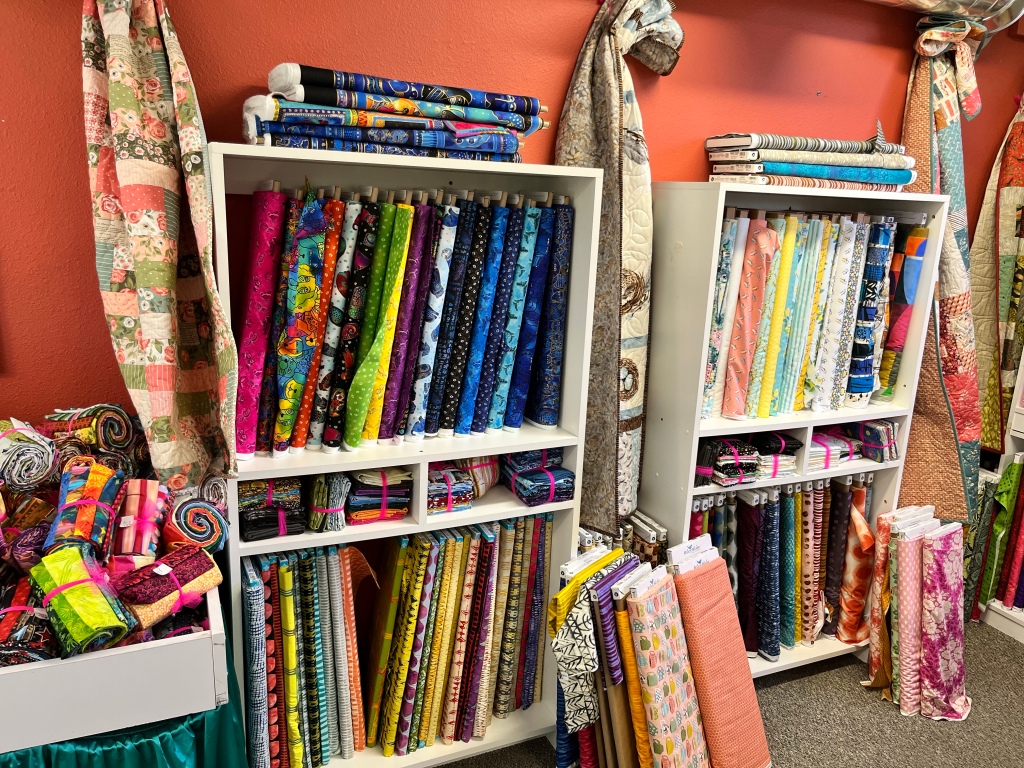
Nearby, we have a “dump” table where we toss FQ bundles that give you a taste of the fabric collections in the shop. Some of the bundles are also last chance bundles.
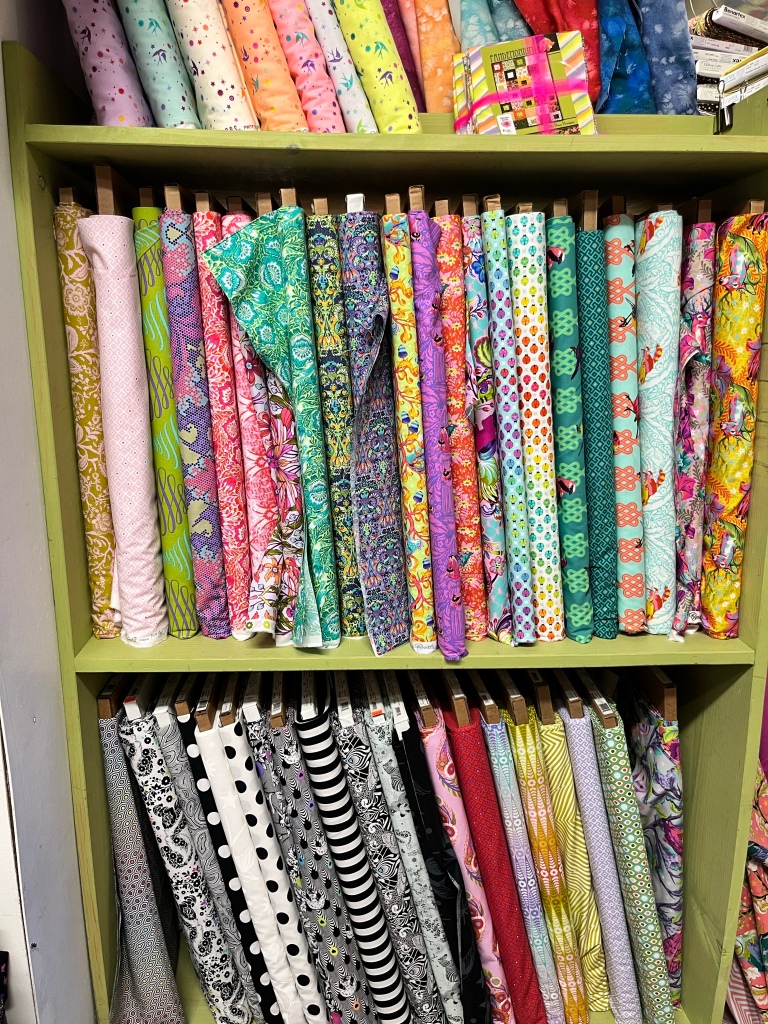
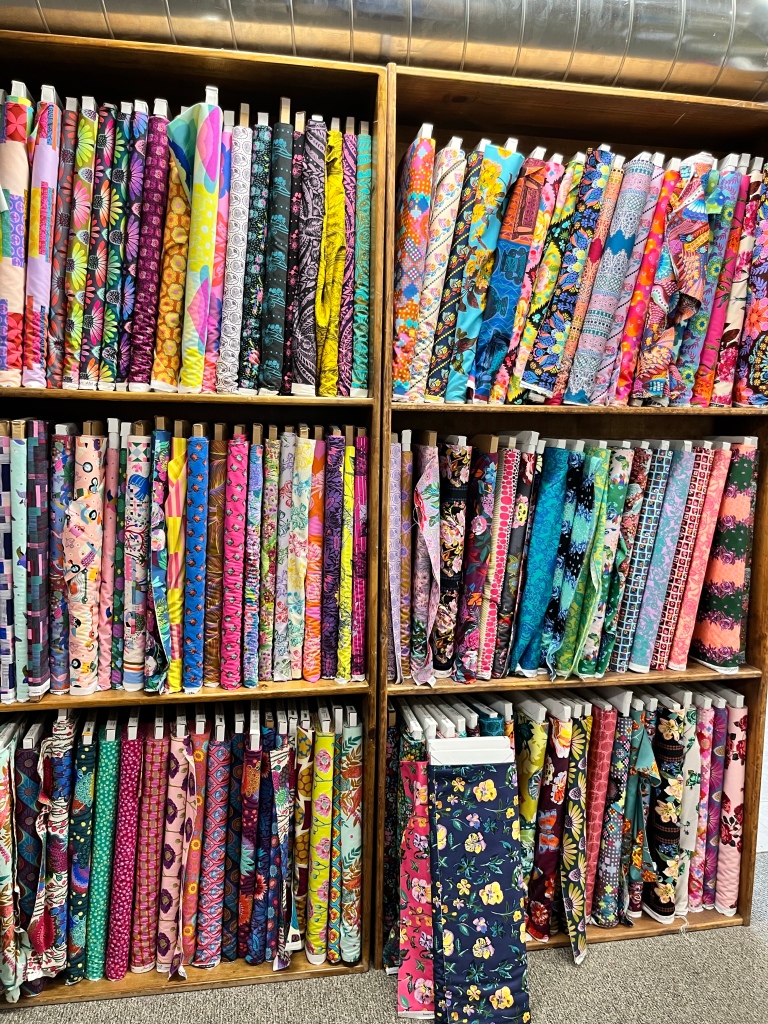
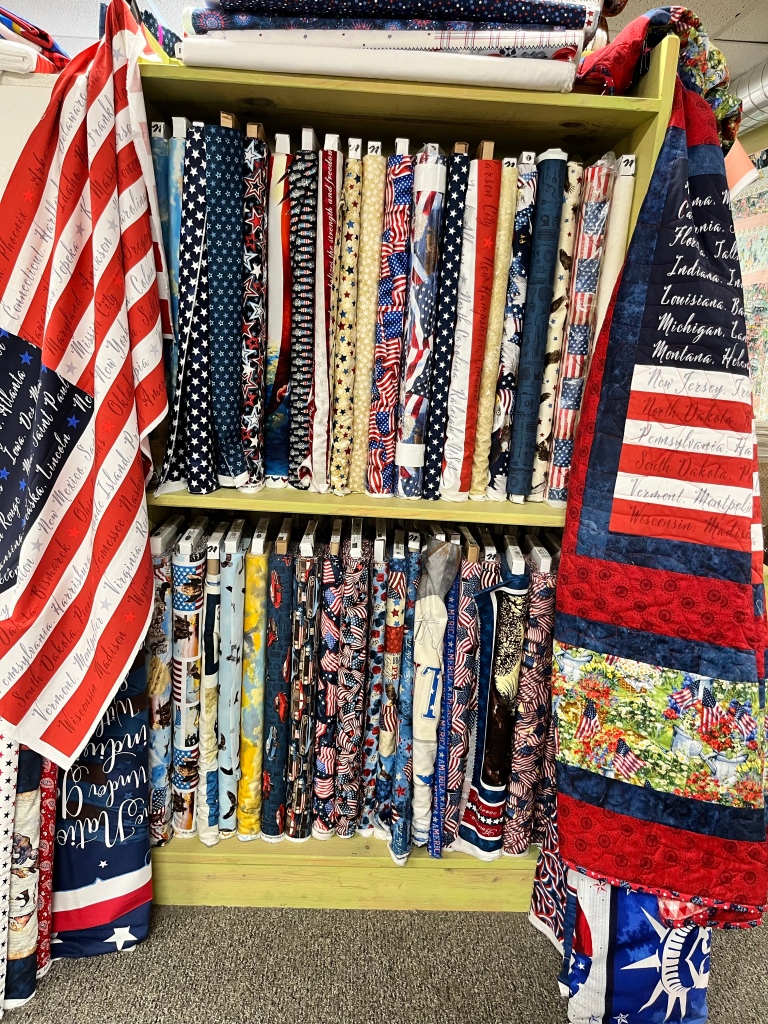
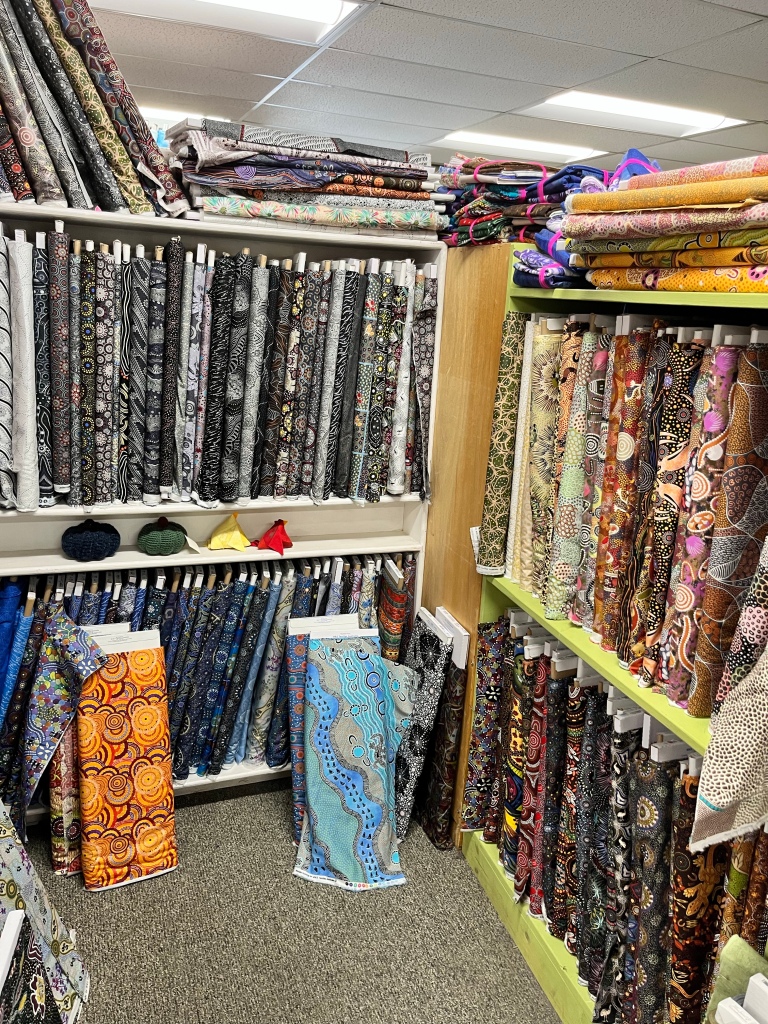
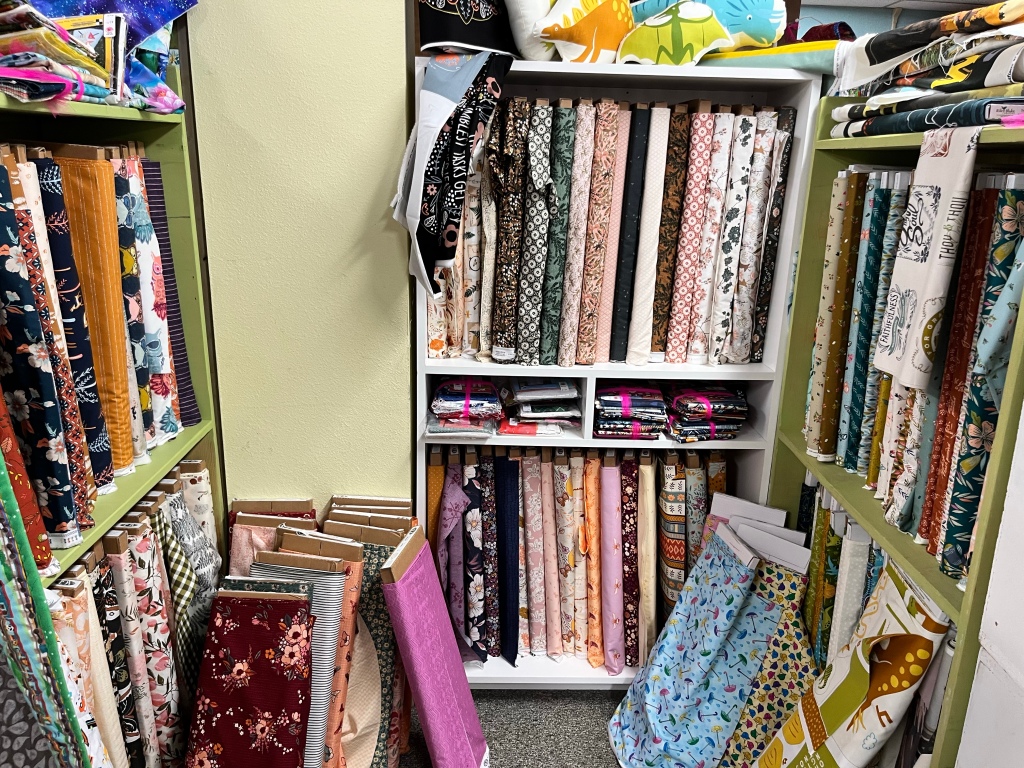
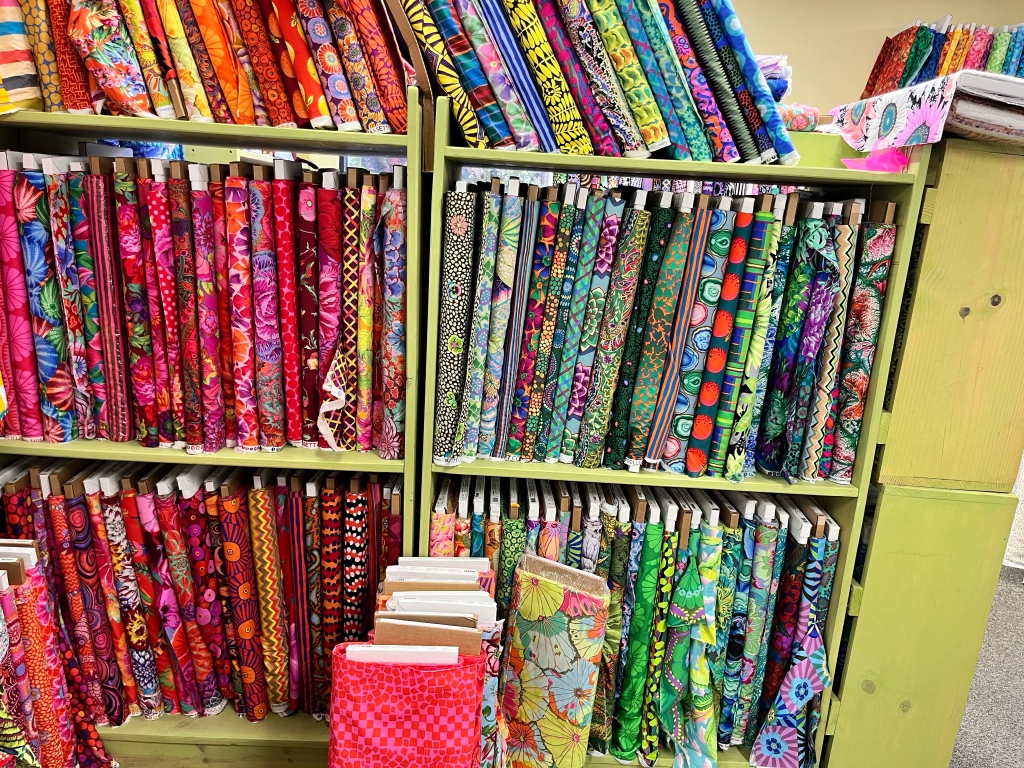
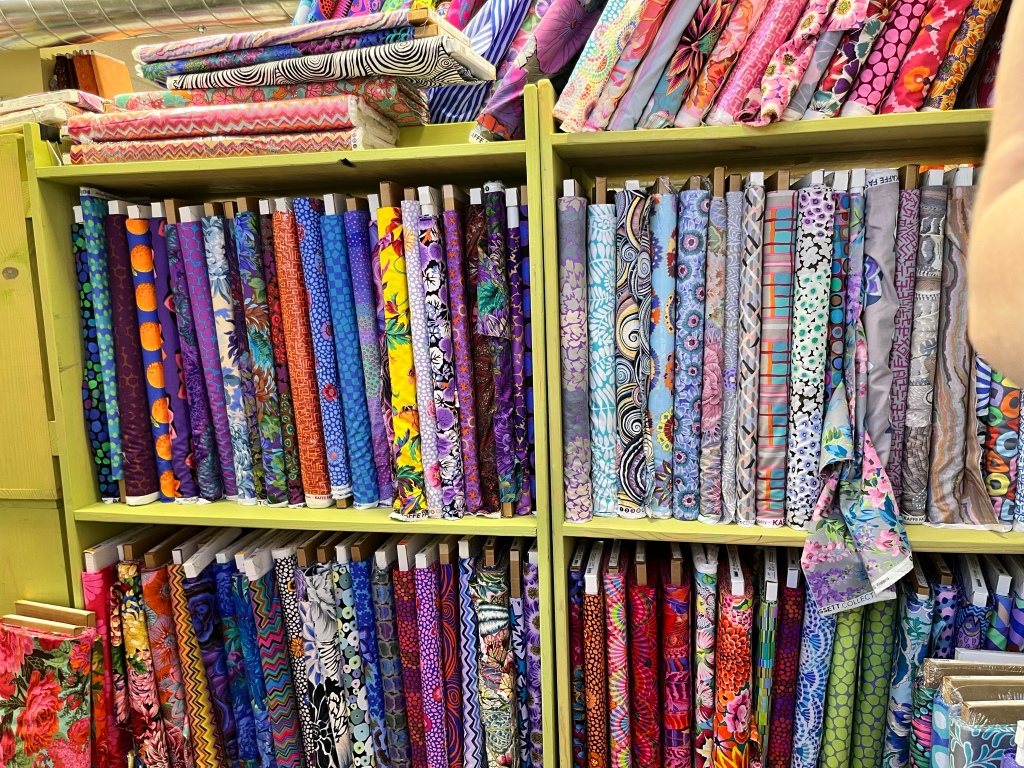
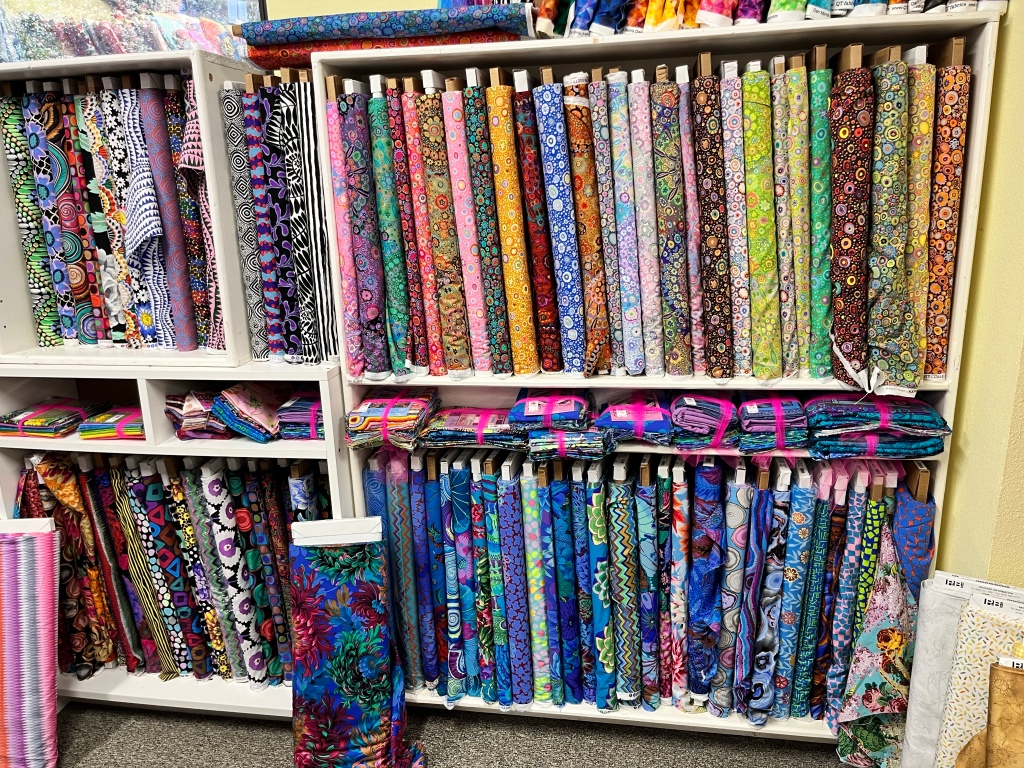
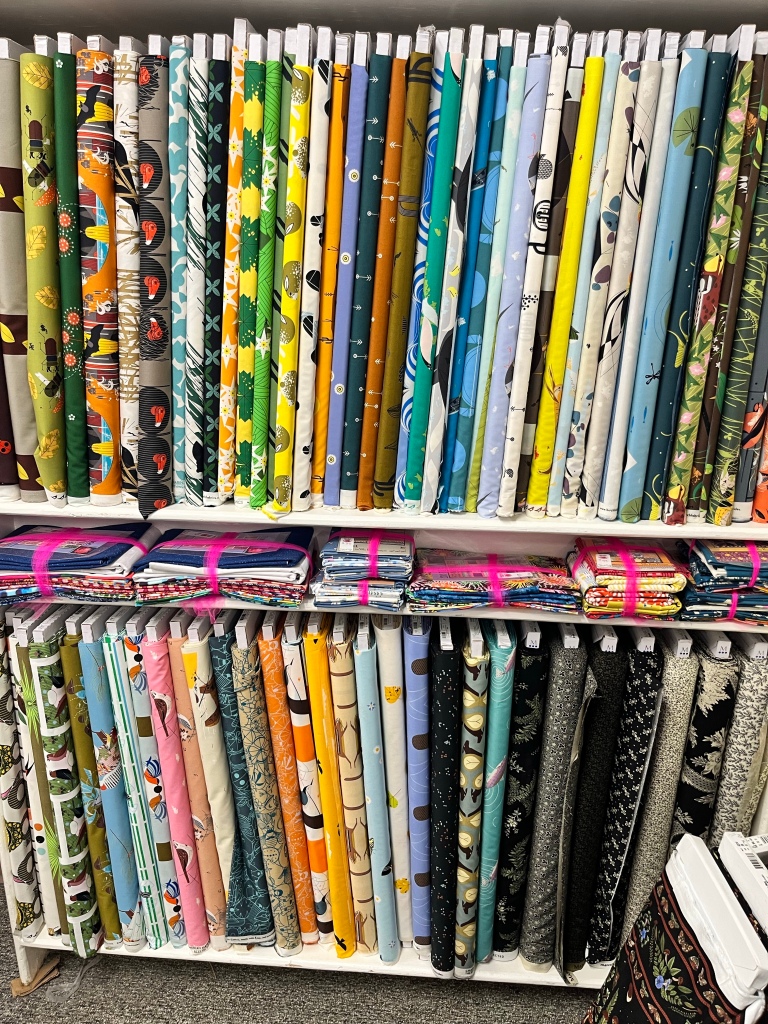
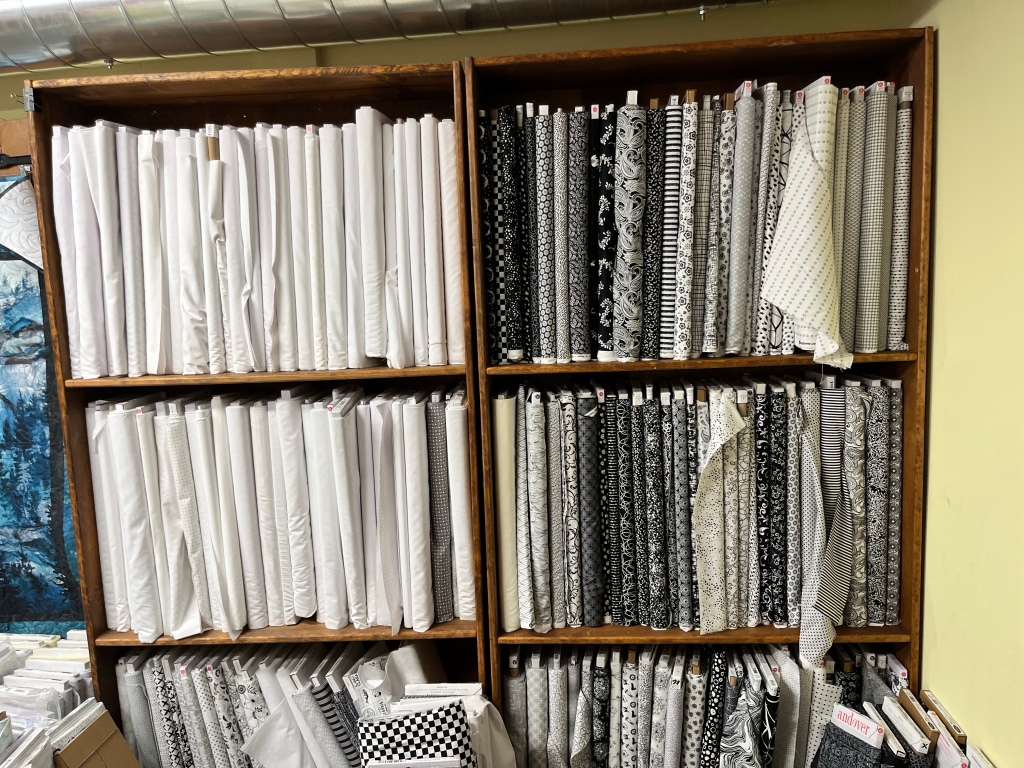
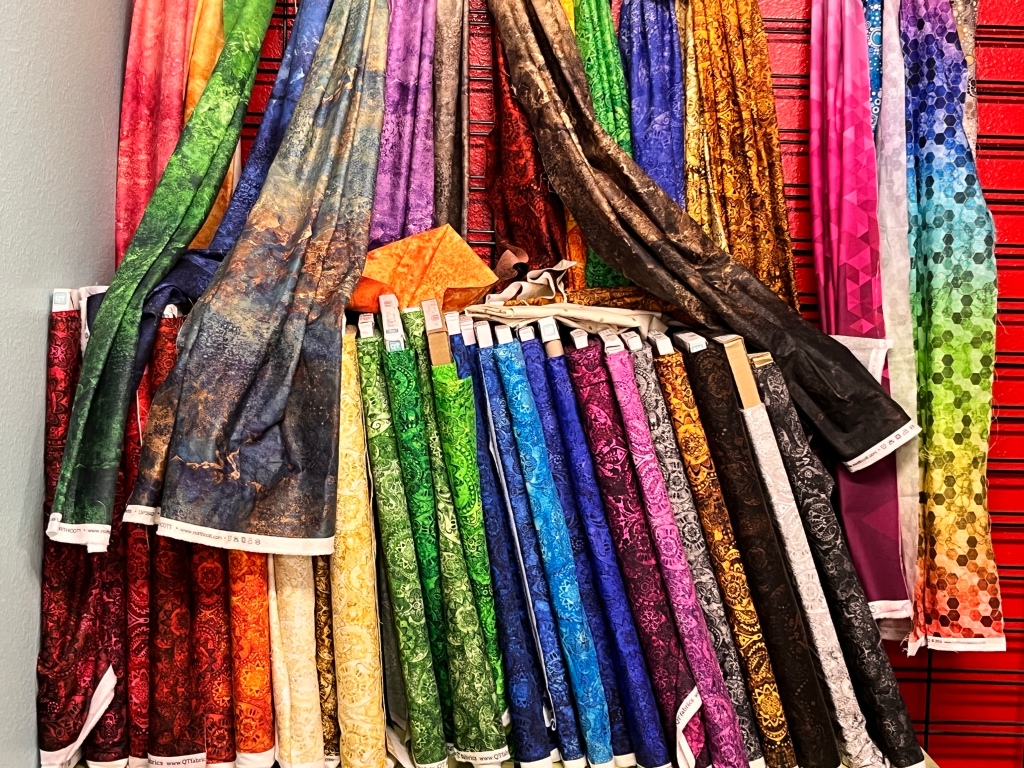
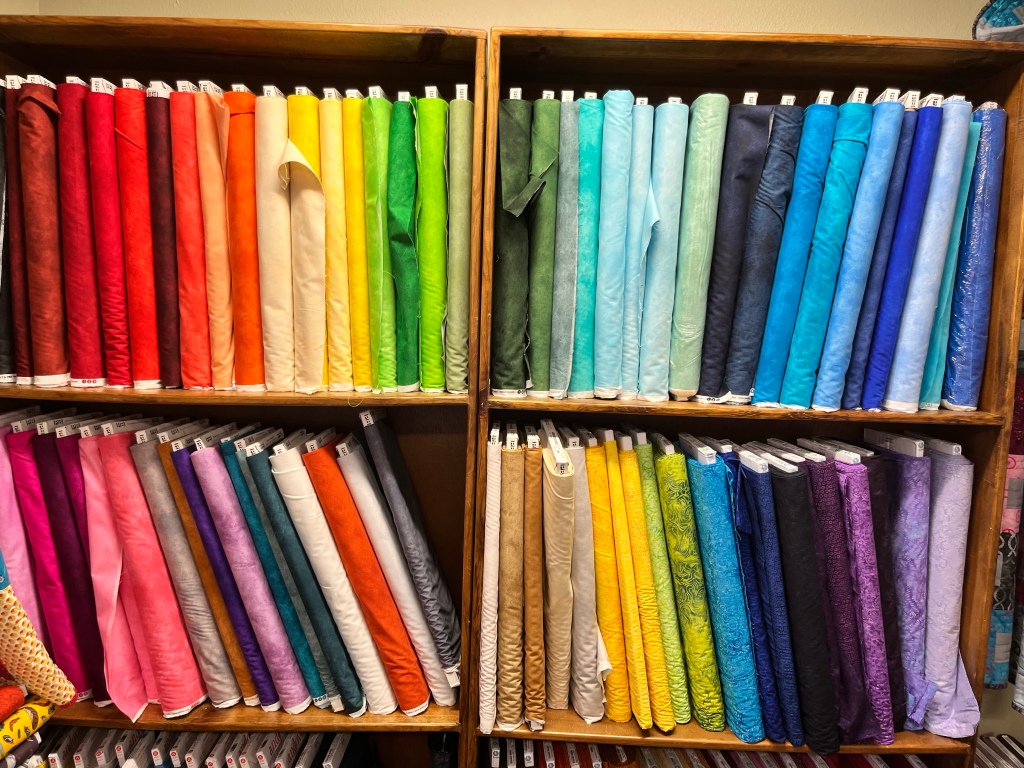
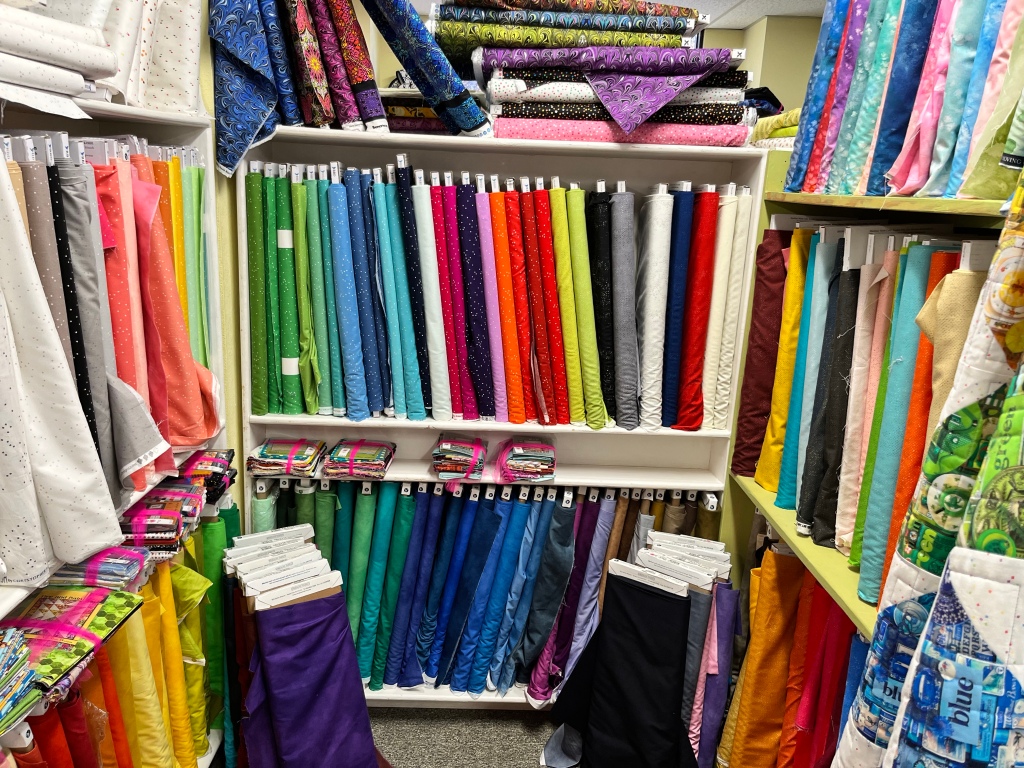
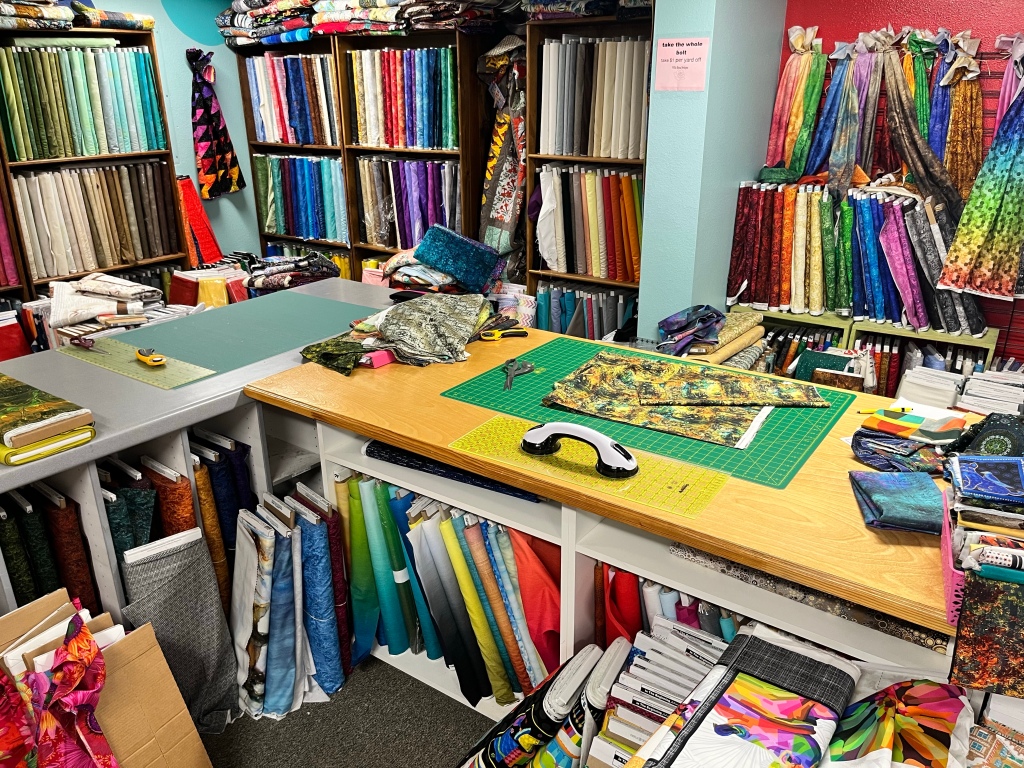
You still with me? Now we are moving into the main room in the shop where the fabric collections are mostly divided by designer: Tula Pink, Anna Marie Horner, Charley Harper, Art Gallery, Australian, Kaffe, 4th of July, Black & Whites, ombrés and of course our basics — Grunge, Palette, Canvas, Blossom, Spotted….
And to keep up with the “demand of cutting” we have 3 cutting boards— 2 are in the main room and 1 is in the side room. The side room area is mostly used for all your online order preperations.
Let’s head up the stairs and take a peek at our “employees only” area — Bonnie calls it “the scary place”. LOL! Upstairs has the same space as downstairs but that’s where the similarity ends. There are 2 long arms to quilt the many samples along with back stock and — of course — the area for the Facebook Live Sale on Friday nights.
Do you know about our Facebook Live events???
You can shop our quilt shop from the comfort of your home every Fry-day afternoon at 4 PM Pacific Time (7 PM Eastern Time). We’ll show you the latest patterns, kits, bundles, and collections as well as our latest markdowns. You can find more information about our Facebook Live Sales HERE.
Thanks everyone for joining me for the tour. Hope to see you at the shop soon — tell ‘em Molly sent you!
I am sew excited to be interviewing Molly Cook, who is not only a VRD designer, but also works at the Villa Rosa Designs quilt shop in Grass Valley, California. Molly is actually part of a designing trio called the Cook Family, which is made up of Molly, sister Heidi, and Mom Tamara.
Molly Cook, standing in front of a version of her Vineyard VRD Rose Card pattern.
Tricia: Hey Molly! Thanks for taking some time to chat on the blog today.
Molly: Hello!
Tricia: Ready?
Molly: Sure, let’s get to it.
Tricia: How did you meet Pat Fryer, the owner and “Rose Queen” of Villa Rosa Designs, or how did you become part of the VRD family of designers?
Molly: I met her at a guild meeting and she saw my show and tell that I designed by myself.
Tricia: How did you discover quilting? How long have you been quilting?
Molly: My Grandma started teaching her grandkids to sew around the age of 10, so I’ve been sewing for 11 years.
Tricia: What’s your favorite quilt block(s)?
Molly: Any block that’s simple! LOL!
Tricia: I hear you — I love easy blocks, too. How did you make the leap from being a quilter to becoming a quilt designer?
Molly: I’ve been sewing for community service for years. Working with what I had, I ended up improvising on patterns.
Tricia: That’s really cool, Molly! Can you tell us a little bit about your design process?
Molly: I just gather fabric and lay it out and see how things fit together.
Tricia: What is your favorite/least favorite part of the quilt-making process?
Molly: My favorite is designing patterns and sewing them together. My least favorite thing is binding.
Tricia: I totally agree with you. Binding is definitely my least favorite part of the quilt making process, too. What are your top 3 favorite quilting tools?
Molly: My top 3 quilting tools are my rotary cutter, my rulers, and my scissors.
Tricia: I’m not sure I can pick just three favorite tools! LOL! What are you working on now? Any new patterns in the works? Can you give us a sneak peek?
Molly: I have a couple of new patterns in the works. I’m working on writing them up and making them easy to understand.
Tricia: Here are Molly’s VRD Rose Card patterns to date. You can find them HERE.
Tricia: Wow, Molly! You are one prolific designer! And there’s lots of variety in your patterns. Do you have a favorite pattern that you’ve designed?
Molly: My favorite pattern would be Lickety Split, but Brickwork almost ties with it.
Tricia: What’s your favorite book?
Molly: I love Ted Dekker and Frank Peretti books.
Tricia: Type of music/musician?
Molly: Christian music.
Tricia: Movies and TV?
Molly: Lord of the Rings movies and I’m a Marvel Superhero girl!
Tricia: That’s so cool! What do you do when you’re not quilting/designing?
Molly: When I’m not quilting, you can find me reading a book, babysitting, or crocheting.
Tricia: You stay busy, don’t you? Do you have any advice to quilters who want to become quilt designers?
Molly: Just dive in. Find fabrics you like and go for it. Don’t start with a complex pattern — you won’t enjoy quilting if it’s got a lot of pieces or is hard to follow with all it’s instructions.
Tricia: That’s super advice, Molly! It’s been great chatting with you. Thanks sew much! We all look forward to seeing those new patterns you’re working on really soon.
Molly: Thank you for having me on the blog!
There you have it, Quilty Friends!
How cool is it to get to know the quilt designers behind your favorite VRD Rose Card patterns?
Awesome Applesauce! Molly is going to be our guest blogger next week while I take a few weeks to get my knee replaced and begin the recuperation process.
Well, that’s it for this week. Be sure to tune in next week to see what Molly has in store for you!
Gulp — other than shopping, I have yet to even get started. Oh wait! I put out a couple decorations in the living room and got the outside lights on. Hmm. That’s it.
Yikes! I’d better get moving, there’s only 10 days until Christmas…..
Recently, I wrapped up (pun intended) my 2022 Table Runner a Month class with a festive December Christmas party/class. What a lot of fun we had — we met an hour earlier than usual so we could do a pot luck lunch. YUM! I don’t know why, but quilting and food always go together. And chocolate — you have to have chocolate!
It was a soup and sandwich pot luck — we had 2 soups, sandwich wraps, meatballs, and an awesome assortment of everything else! Way too much food, but OH SO DELICIOUS! I tried my hand at potato soup. I ended up mashing 3 different recipes together. I made it on the stove top and then transferred it to a crock pot. I was amazed at how good it actually turned out, considering I’d never made potato soup this way before. In the past, I always started with a white sauce, but this time I started with chicken broth — I didn’t even have to add any flour — the starch in the potatoes thickened up the soup when I squashed them up with a spatula once they were soft. Of course, the cream cheese and shredded cheddar didn’t hurt any either! Here is one of the recipes I mashed up: Easy Potato Soup Recipe.
We did a 1 yard fabric exchange, too. For my group, that means we each brought the equivalent of about a yard of fabric in a gift bag or box (could be 4 fat quarters, 8 fat eighths, 1 charm pack, 2 half yards — you get the idea). To do the fabric exchange, we sat in a circle and played a Christmas game using a Right Left version of Frosty the Snowman.
Don’t know what a Right Left Gift Exchange is? You can go HERE for more information and 5 fun Right Left stories. Or just search “Right Left Christmas Game” on the Internet and you will get lots of different story options so you can choose your favorite! What I love about this game is that it doesn’t take a lot of time, you can do it with any size group, and no one’s feelings get hurt.
I also went over our December project and introduced the group to the Disappearing Nine and Four Patch blocks. Are you familiar with these? I just love all the different ways you can do them and how each time, your quilt looks completely unique even though you are using the same concept over and over. Lots of fun! If you are new to Disappearing Nine and Four Patch designs, you can go HERE for more information.
Our 2022 class was a Table Runner a Month theme this year (I try to choose a different theme or project each year). We began the class in March and met once a month through December. We skip January and February because those are usually the worst winter months in our area, but sometimes March and April can be worse than January and February. Oh, jolly Pennsylvania….. Each month in 2022, we made a different Villa Rosa Rose Card table runner pattern.
One of my quilty pals, Sherry, had been after me for a couple years to do a class on my VRD runners. I finally agreed to do a year of my VRD table runner Rose Cards for 2022 — it felt kind of weird to do an entire year of my own patterns, but Sherry was right — it turned out to be an awesome group/class.
Here is the list of the Rose Cards we did for 2022 (I added the links to the VRD website just in case you want to know more or purchase the patterns) —
Now for the fun! Here are photos of some of the table runners made by members of the group.
Awesome runners, aren’t they??? And these are only some of the numerous runners!
I love how each person showed their own styles, used their own fabrics, modified the design by adding or subtracting borders, made the runners smaller or larger or even a square, and even made some runners extra special by piecing extra fabric into the backing. These ladies are not only talented, they are a great group of people.
I was so inspired this year using my Villa Rosa patterns, we are going to do a Year of Panels and Novelties in 2023, using — you guessed it — Villa Rosa patterns.
Villa Rosa Designs has over 500 patterns in our VRD catalog, so I could seriously go for years without using the same pattern twice. How cool is that? Besides, VRD releases 5+ NEW patterns every month — that’s over 60 NEW patterns EACH YEAR.
You might wonder why I am taking so much time to talk about the Table Runner class, but it leads right into my next topic!
Perfect Last Minute Christmas Gift Ideas Quilters Can Make
Table Runners!
Yep — table runners are my go-to solution for a quick last minute handmade gift.
Let’s break this down:
Table Runners are….
quilts
handmade
a very personal gift
a lot faster to make than larger quilts
easy to personalize to the recipient
less expensive to make because they require small amounts of fabric
precut and stash-friendly
a great gift for practically anyone on your list
special
AWESOME!
Of course, any small quilt or project that can be finished quickly makes a great last minute gift — table runners, place mats, wall quilts, table quilts, doll quilts, mini quilts, pillows, and more.
Villa Rose Designs has got your back, I promise you!
A stack of VRD Rose Cards makes an amazing gift for yourself or your favorite quilty pals, too…..just sayin’……..
If you don’t have time to make a runner or other project before the holidays, consider gifting a quilt kit — pick a fun pattern and add the required fabrics for the top and binding. A kit for your fav quilty friend will give that person something new and fun to do during the winter months. Or gift a kit to a non-quilty person with a note saying you will complete it for them after the holidays.
However you do it, here are some great Villa Rosa Designs Rose Card patterns to inspire you:
Table Runners and Place Mats
Amen uses pre-printed panel squares or a theme fabric which means some of the work is already done for you before you even get started.
Griddle uses stash or scraps so there’s no need to head to the quilt shop (unless you really want to…).
Ripple Runner is super fast to make and finish. Short on time? Use a light, medium, and dark fabric instead of making it scrappy. Or go Christmas scrappy — what fun!
Season’s Greetings is a no-brainer — really. Don’t have fat sixths (12″ x 22″)? Dive into your scraps and stash instead!
Sugarplum is a super simple and cute pattern that goes together in a snap. 1 fat quarter and a bunch a scraps. Sew sew sew! Presto! DONE!
Let’s Eat is a fun set of place mats that uses pre-printed panel squares or a theme fabric which means of course that some of the work is already done for you.
Small Quilts
Baby Goose is a great versatile quilt at 42″ x 58″ and can be backed with only one width of fabric. It would take longer than a table runner to make, but it still goes very fast because the focal fabric does most of the work.
Cabin Fever is the perfect size for a baby quilt or a wall quilt or a small lap quilt AND it goes really fast.
Cat City for your favorite feline lover. Go HERE for a 2 Cat City quilt block mini cat quilt tutorial.
Dainty Machines has directions for multiple sizes, including a 26″ x 26″ mini quilt with 4 blocks. You can check out my interview with Sewl Sister HERE.
Did you know we have a whole VRD collection of Accessory Rose Cards? Accessories make great gifts for anyone and everyone. I’ll show you some of my favs, but you can click on the link above to see the whole collection.
I hope these great projects have not only inspired you but give you the desire to whip up those last minute holiday gifts. There’s still time, but you’d better hurry!