Quilting Partners · Rose Cards · Tutorials · villa rosa designs

VRD Stepped Quilt Tutorial

Happy Thursday to you!

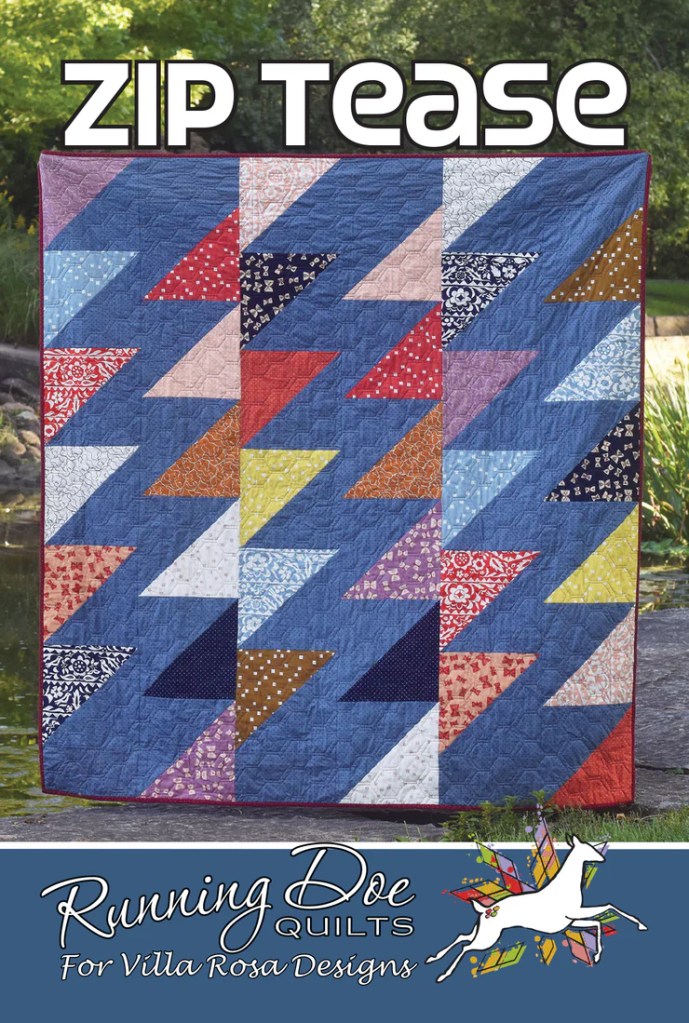
I’ve got a fun and happy quilt tutorial for you today – Stepped by Running Doe Quilts for Villa Rosa Designs.

But before we get into the tutorial – I have an AMAZING announcement for you!

Drum roll, please!

Cue the confetti! Or how about a balloon drop from the ceiling this time?

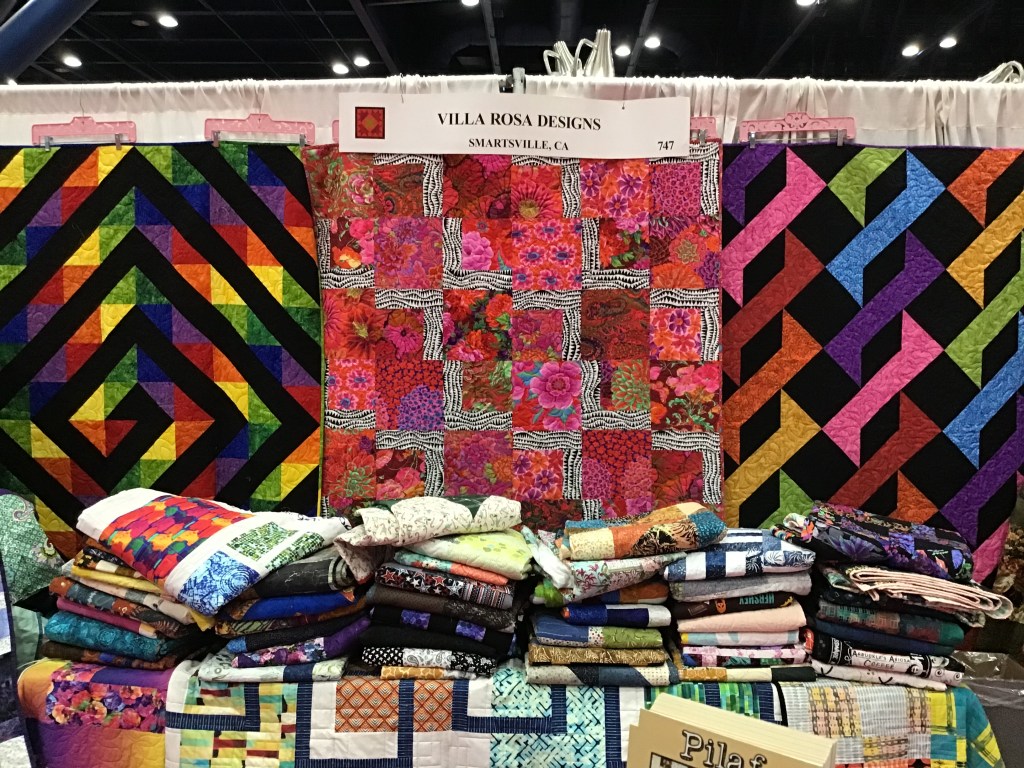
Our Rose Queen and owner, Pat Fryer, has done it again!

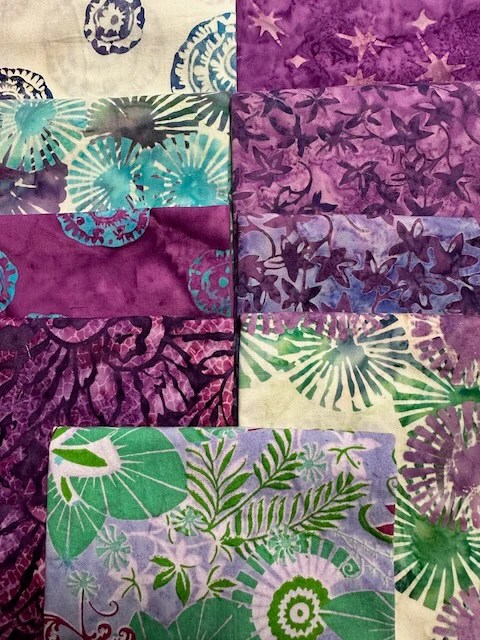
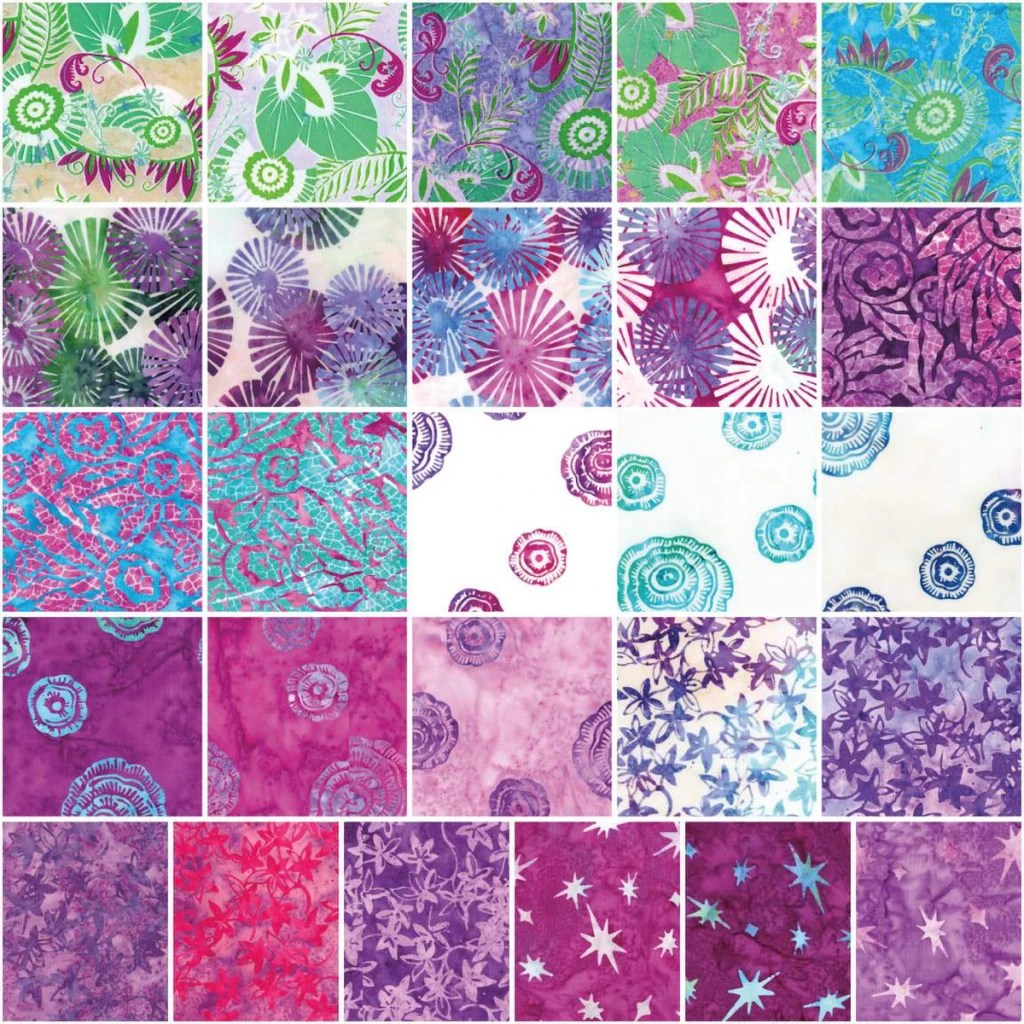
She has a new batik fabric collection with Riley Blake Designs coming this October!

It’s called Kalinda.

WOOHOO!

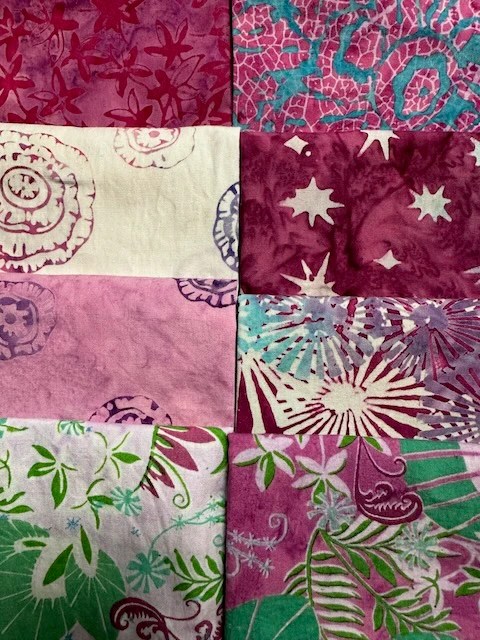
Here’s a sneak peak –

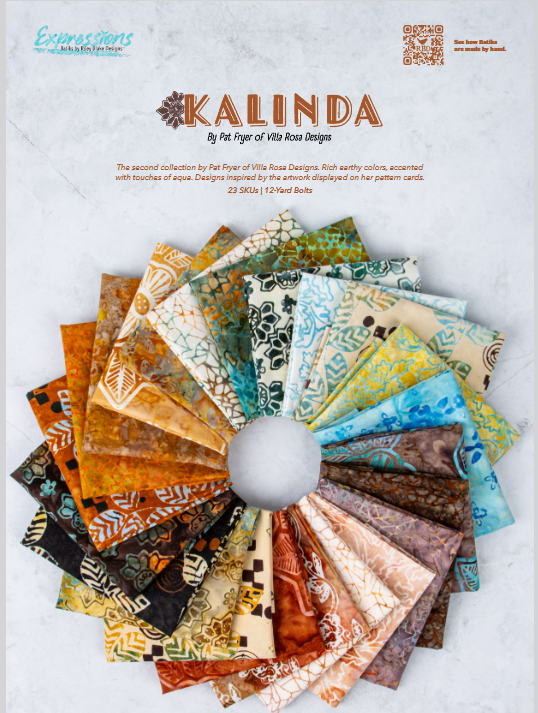
Kalinda is simply perfect for all your autumn projects! You can download the collection PDF with all the fabrics and skus below.

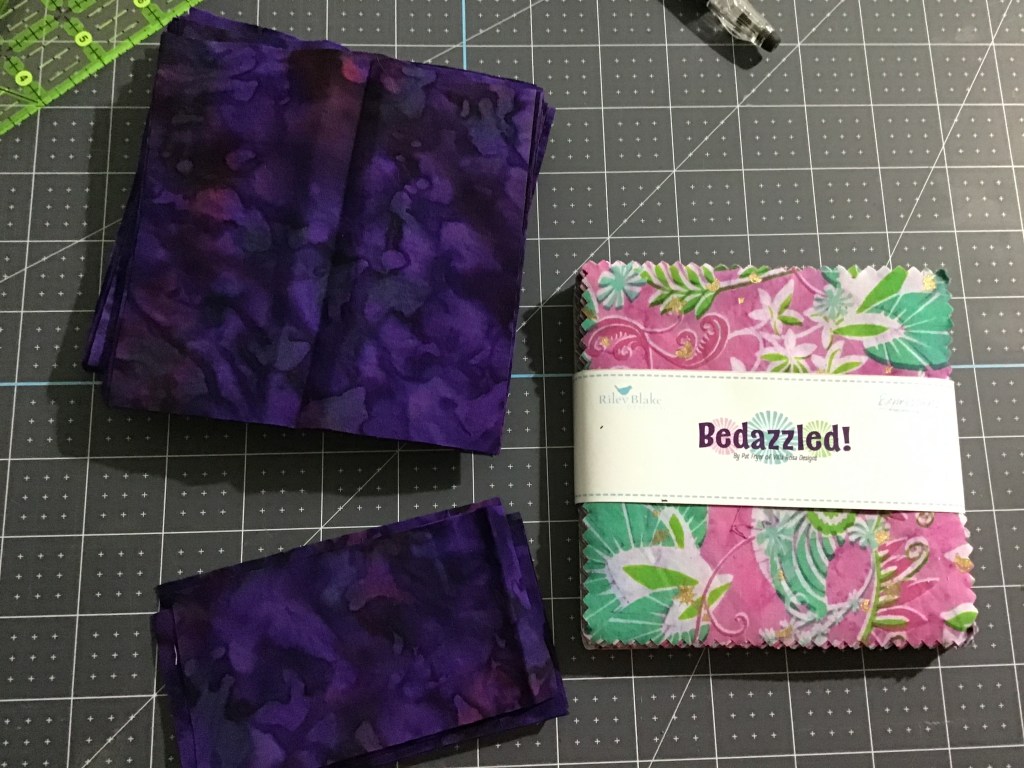
Guess what????? There will be another collectible pattern storage tin for the Kalinda collection, too! I can’t wait! I love love love my tin from Pat’s first collection, Bedazzled. I can’t wait to collect them all as she designs new collections in the future!

Mark your calendars for October – when Kalinda makes its debut. Don’t forget to ask your local quilt shop to order the collection if they haven’t already.

Now I’ve spilled the beans about Pat’s new collection, it’s time to jump into our tutorial.
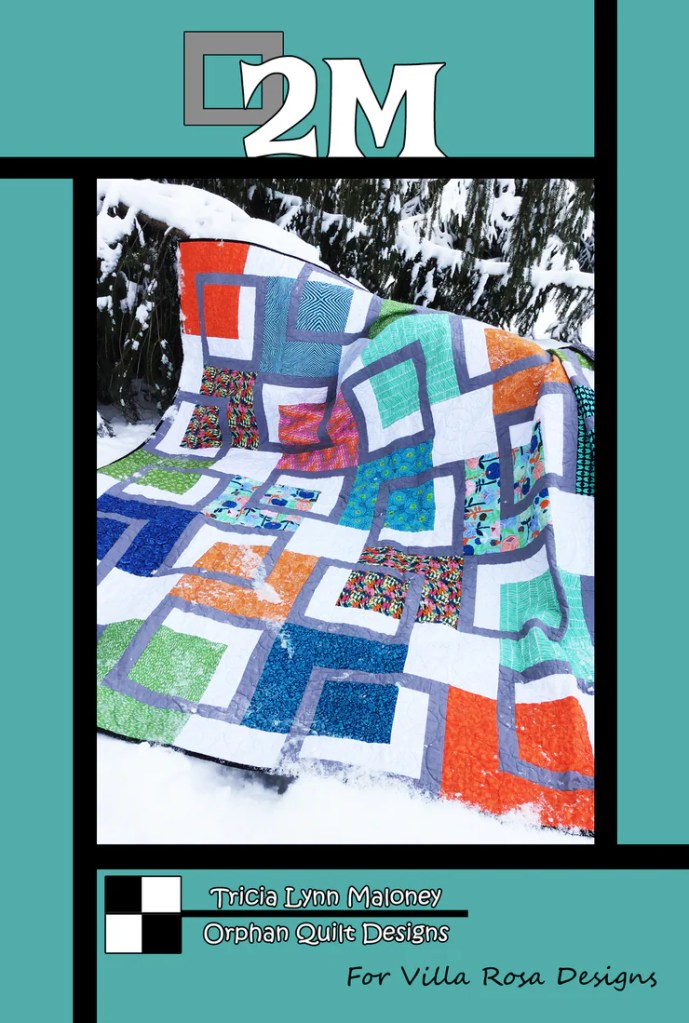
Stepped is a fun modern Rose Card pattern designed by Running Doe Quilts for Villa Rosa Designs. It is a large quilt, finishing at 66″ x 78″ and is fat quarter friendly – yay!

Get your digital pattern HERE or your print pattern HERE

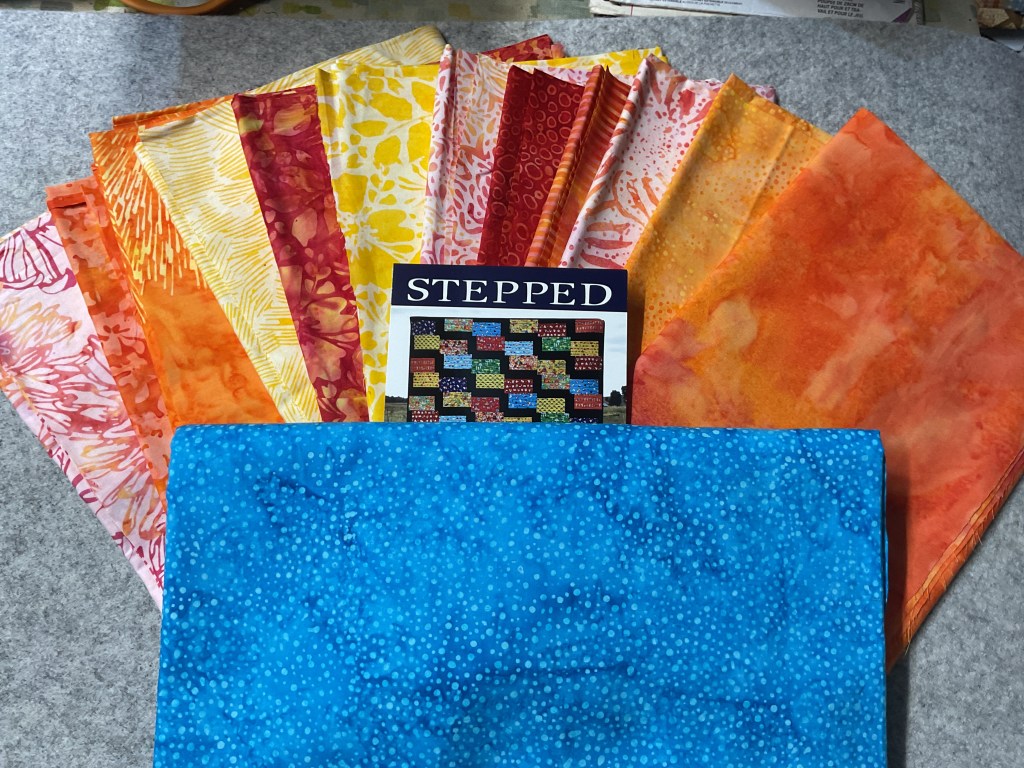
For this tutorial I chose a wonderful warm and sunny collection from our friends, Hoffman Fabrics, called Sunset Hour. I chose the bright blue as the frame and binding for a wonderful pop of color against the warm sunset tones.

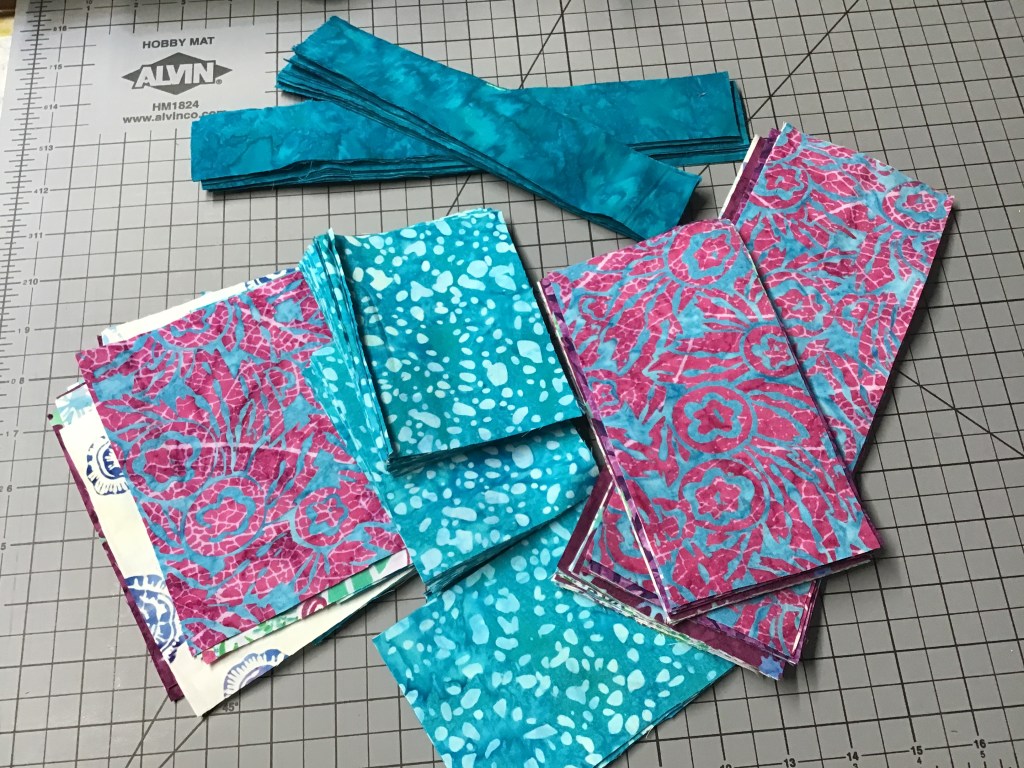
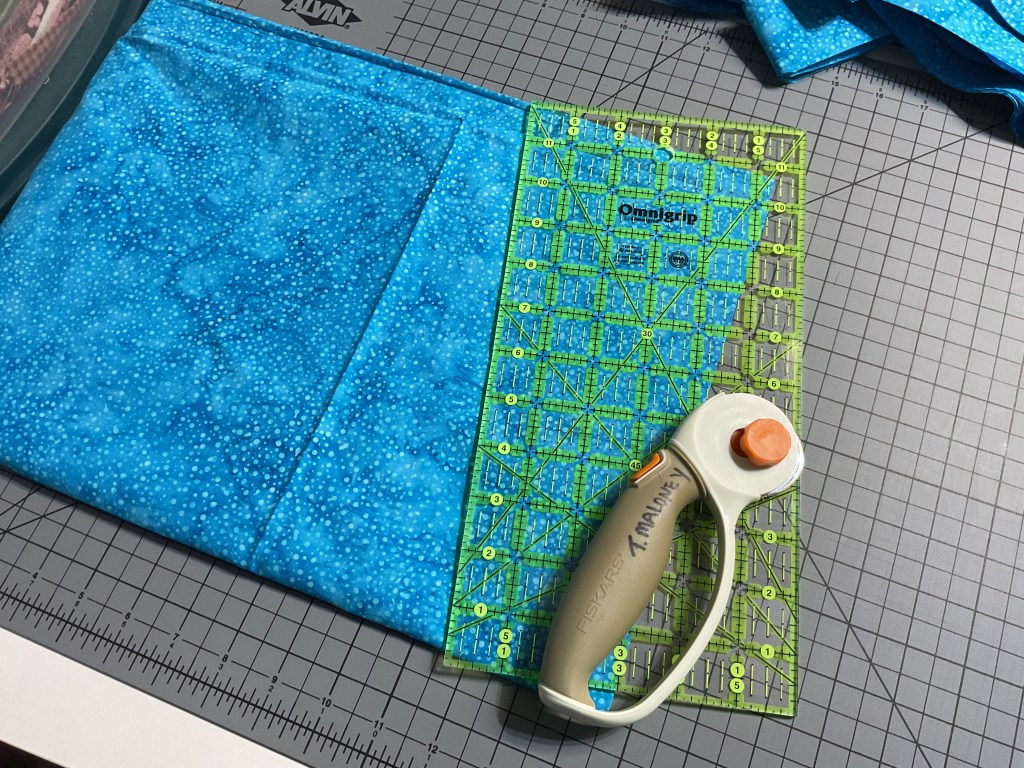
As usual, the first thing I’m going to do is cut the pieces for the blocks. Since this quilt doesn’t have a border (which is common for modern quilts, by the way), we don’t have to worry about that.

I’m wondering – do you cut your borders when you cut the fabric for the blocks or do you wait until after the center of the quilt is assembled? For me, I usually cut the border strips when I cut the block fabrics, but I don’t piece and cut the borders to size until after I finish the blocks.

Oops, let me get back to the cutting. LOL!

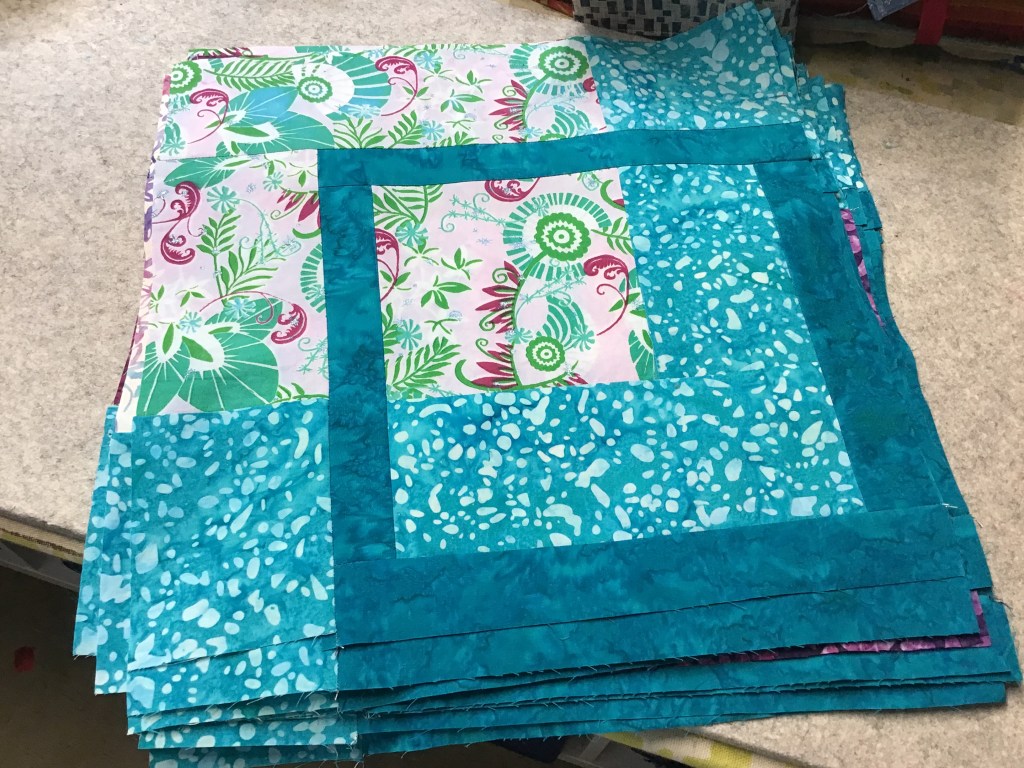
Here are all the pieces I need to make the whole quilt top. Isn’t that blue striking?

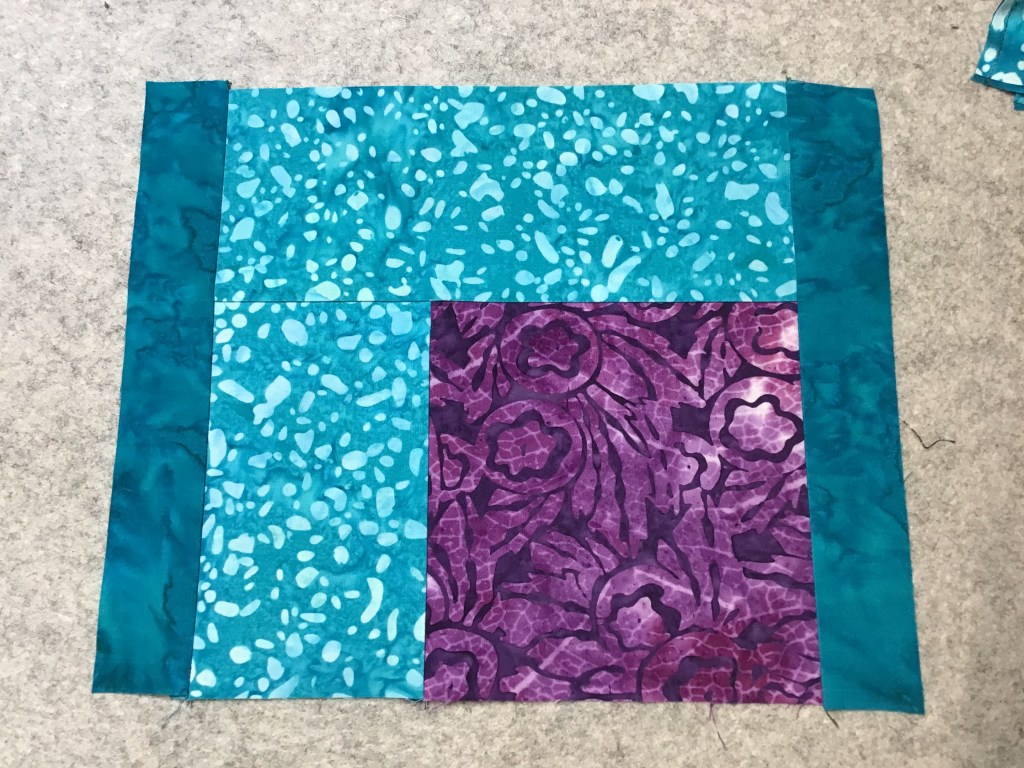
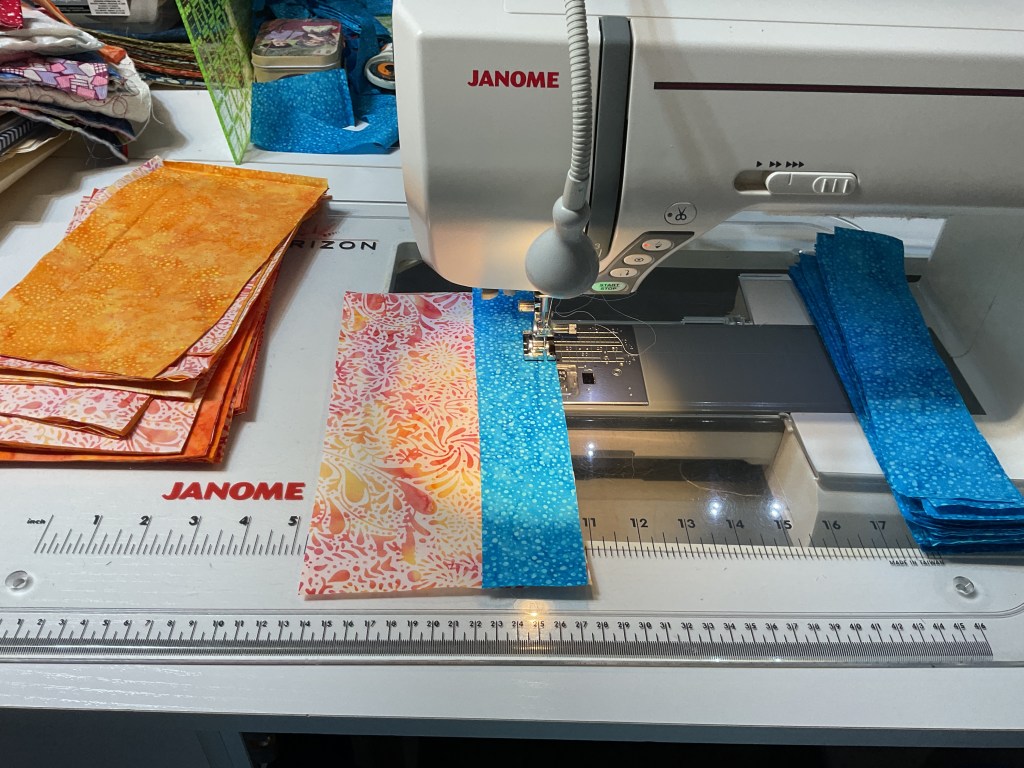
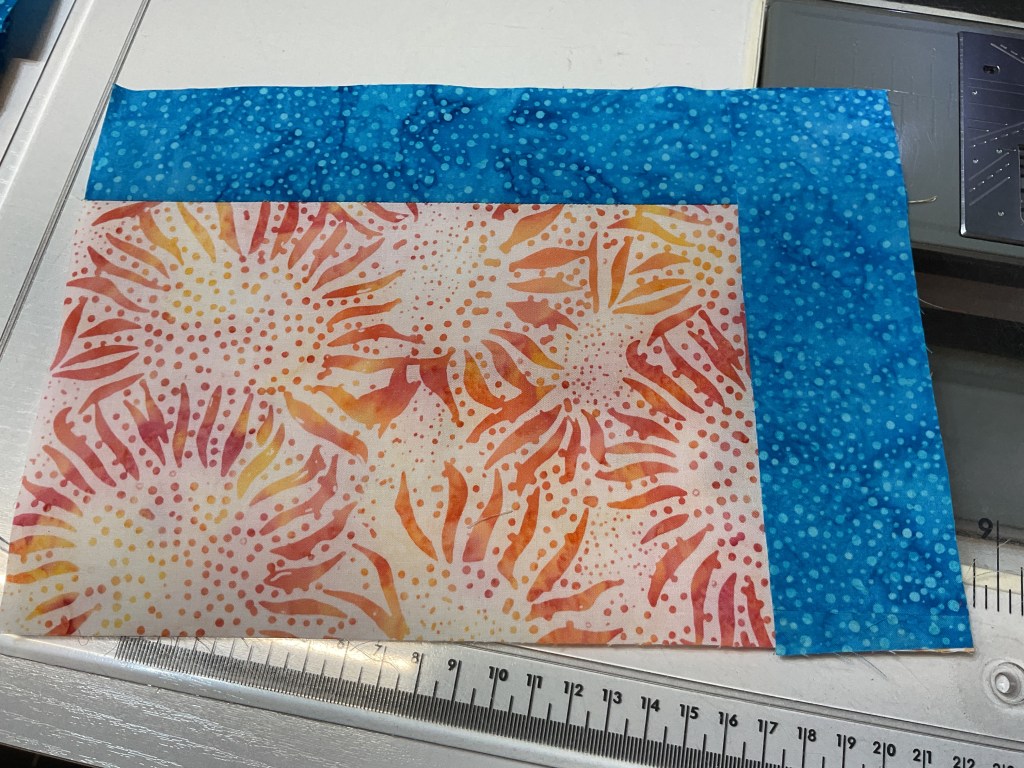
Now we’re ready to rock and roll at the sewing machine! The Stepped block goes together really quick (of course, it’s a VRD Rose Card pattern!). I like to put the large rectangle to my left and the blue frame strip to my right so I can grab a rectangle, place a frame strip on top, and zip it through the sewing machine. Then I repeat this same step for all the blocks, using chain piecing (meaning I’m not cutting the thread between blocks as I sew).

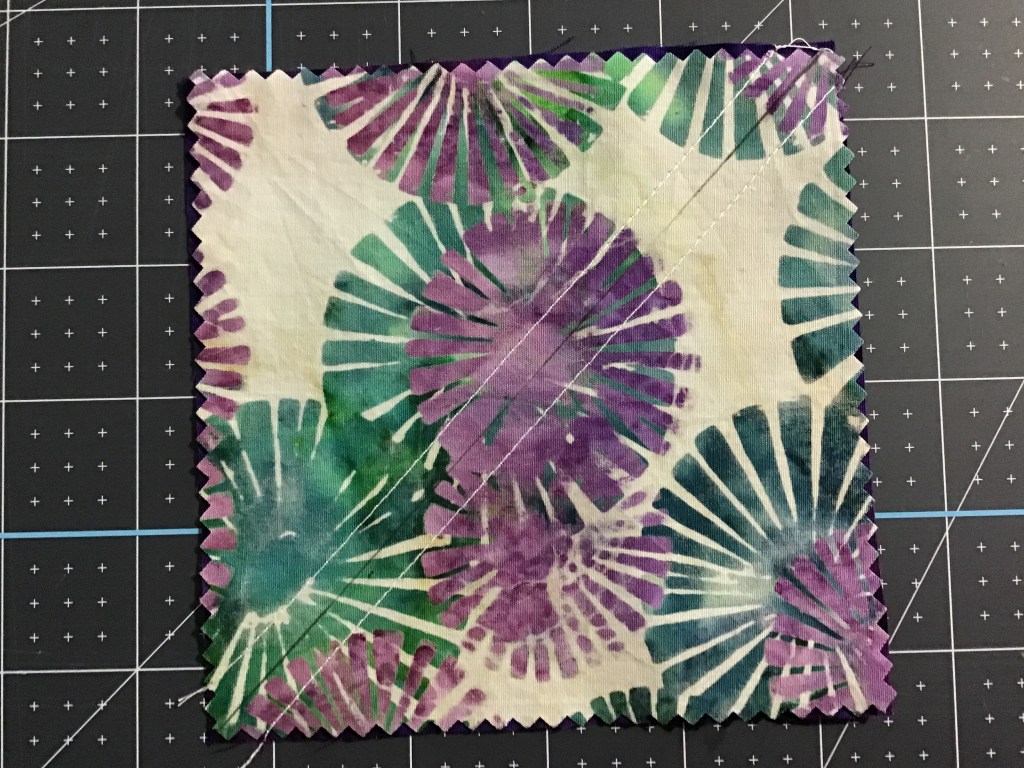
Working with batiks is lots of fun – you don’t usually have to worry about right or wrong sides because they are dyed the whole way through.

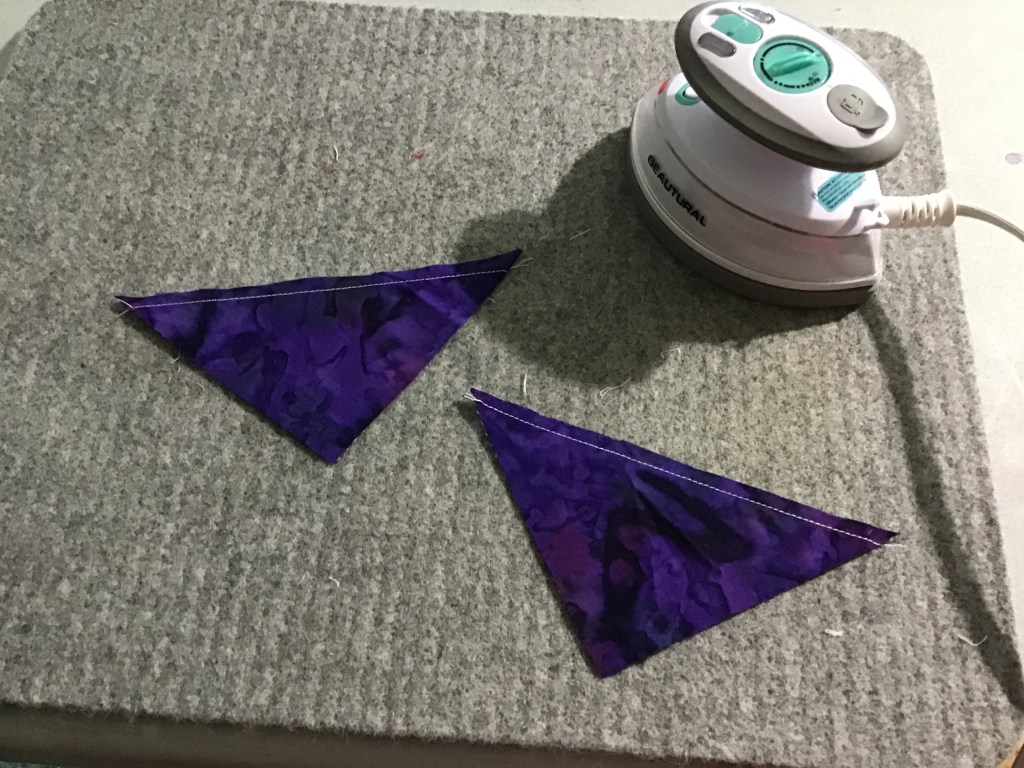
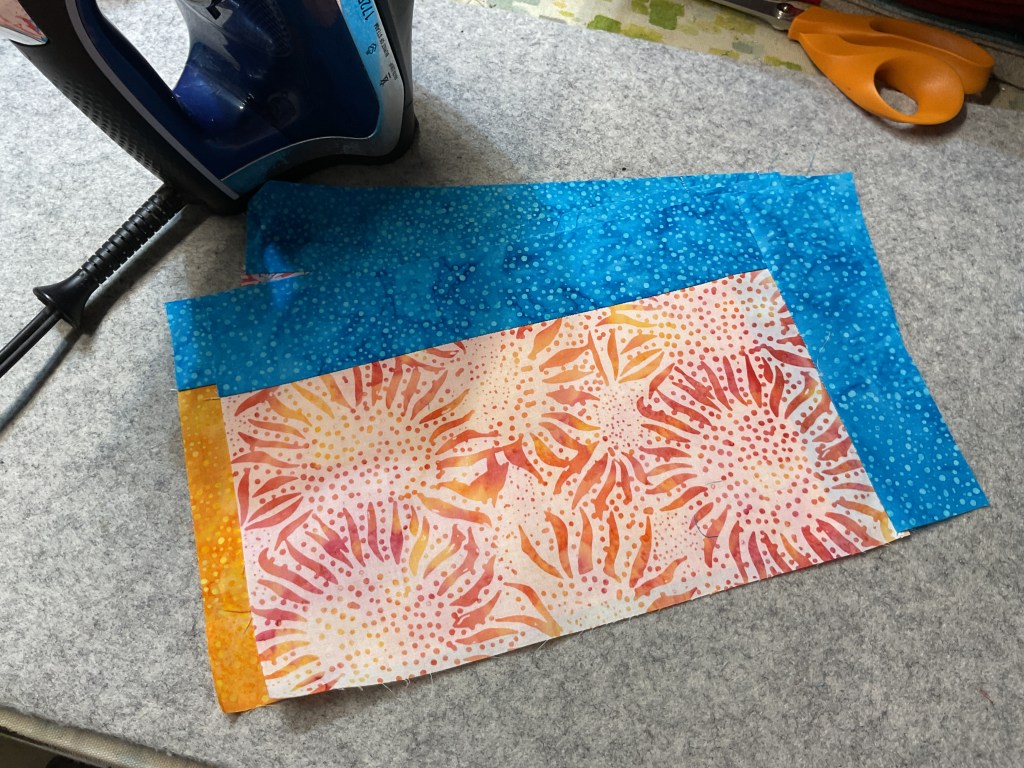
I could just flip the frame strip over, give it a finger press, and add the 2nd frame strip on, but I want my blocks to be nice and crisp, so I’m going to head to my ironing board to press the blocks before adding the 2nd frame strip.

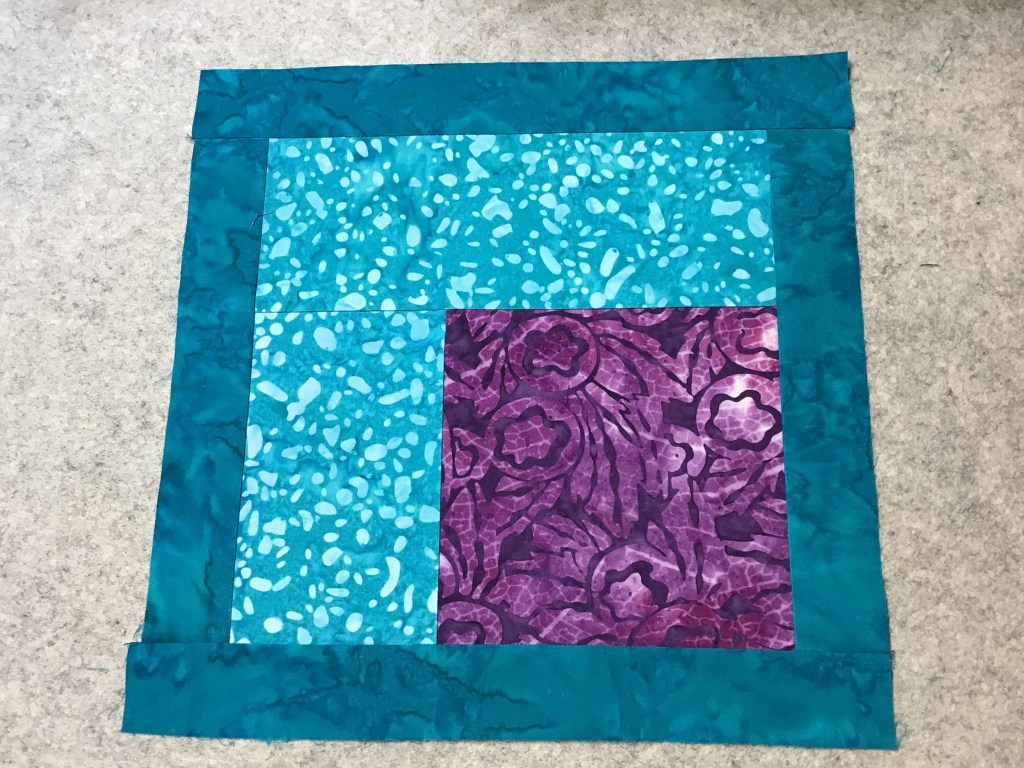
Now I’m ready to sew the 2nd frame strip on the side of each block. Easy piezy – just the way I like ’em!

Then it’s back to the iron to press the blocks one more time. I warn you – there are a lot of blocks! Seriously!

Next I’m heading to my flannel board, which is actually behind my pressing station, to lay out my blocks. SHHH! My flannel board is really a flannel backed tablecloth hung in front of my fabric storage wall. To hang it, I clip the tablecloth to the tops of my storage doors with big binder clips. That way, I can take it down whenever I need access to the fabric cubbies (these particular cubbies hold my yardage and fat quarters by color).

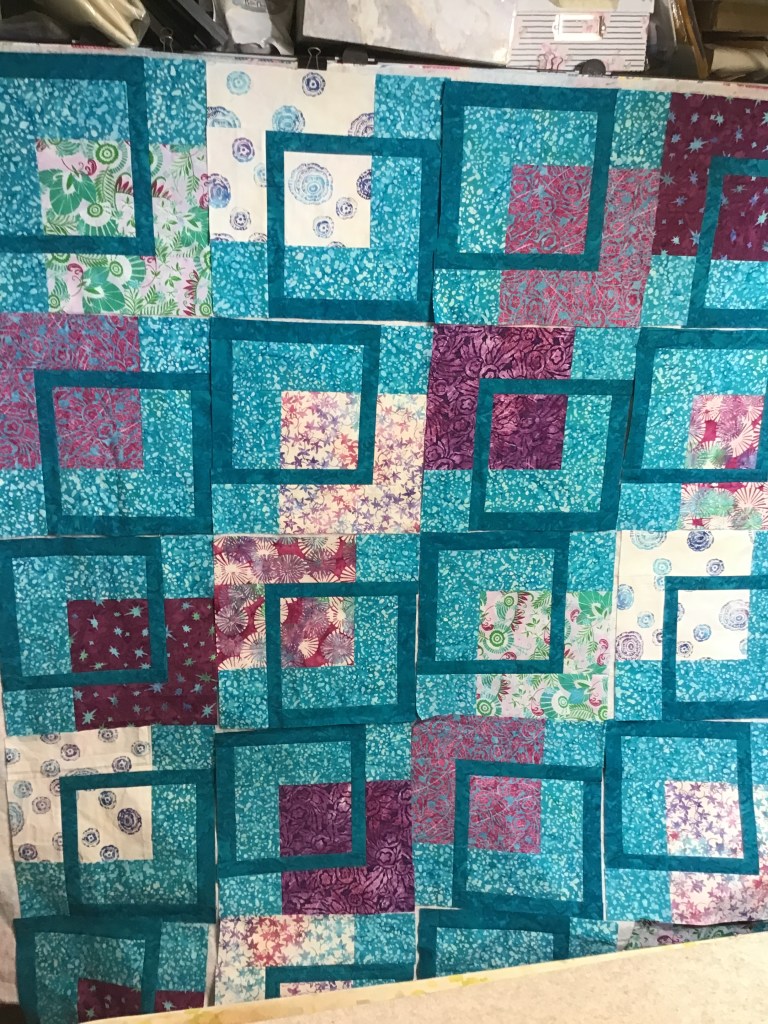
Now the fun begins. As I lay out the blocks, I’m moving them around to spread the colors and fabrics out over the whole quilt. Laying out your blocks is an important step in making a quilt because you don’t want all the same fabrics or colors clumped together in the same area by accident.

Yikes! I’m actually running out of flannel board for this quilt because it’s big, so I think I need to sew this section together before I can add the final 4 rows. Off to the sewing machine I go…..

All right, here’s the section sewn together. Sorry, just noticed in this photo, I have it turned upside down from the previous photos. Mea culpa.

Finally, I can lay out the final 4 rows and add them to the quilt top. Ugh, you can’t see the bottom section I just added because my ironing station is in the way. Did I mention this is a BIG quilt???

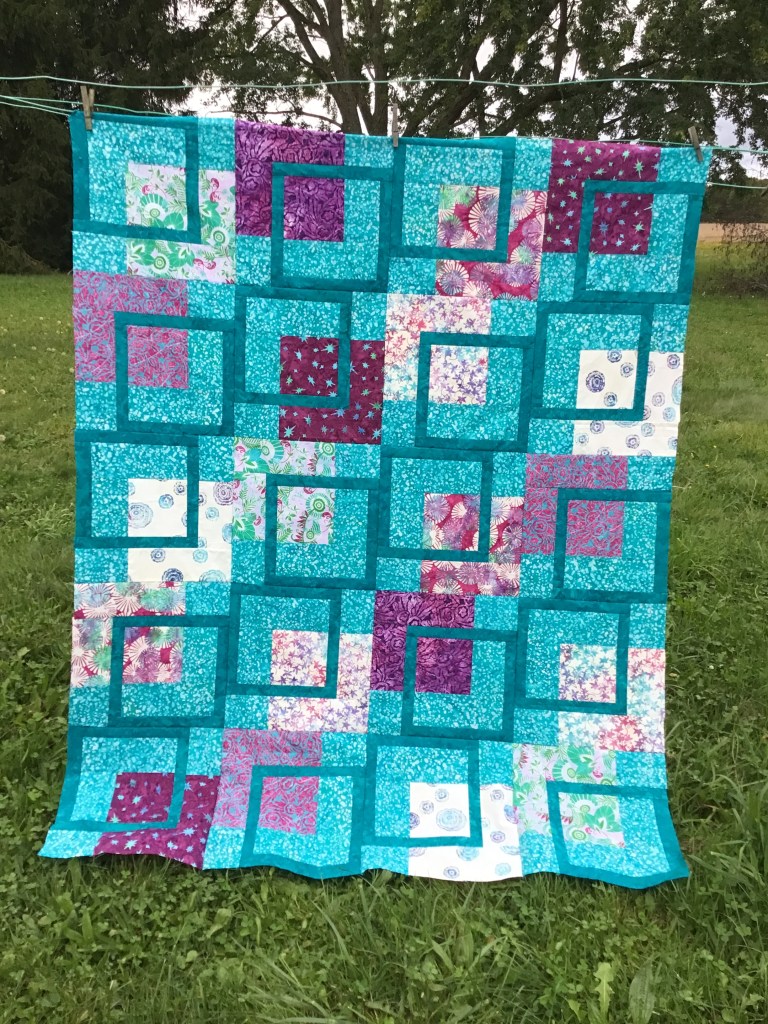
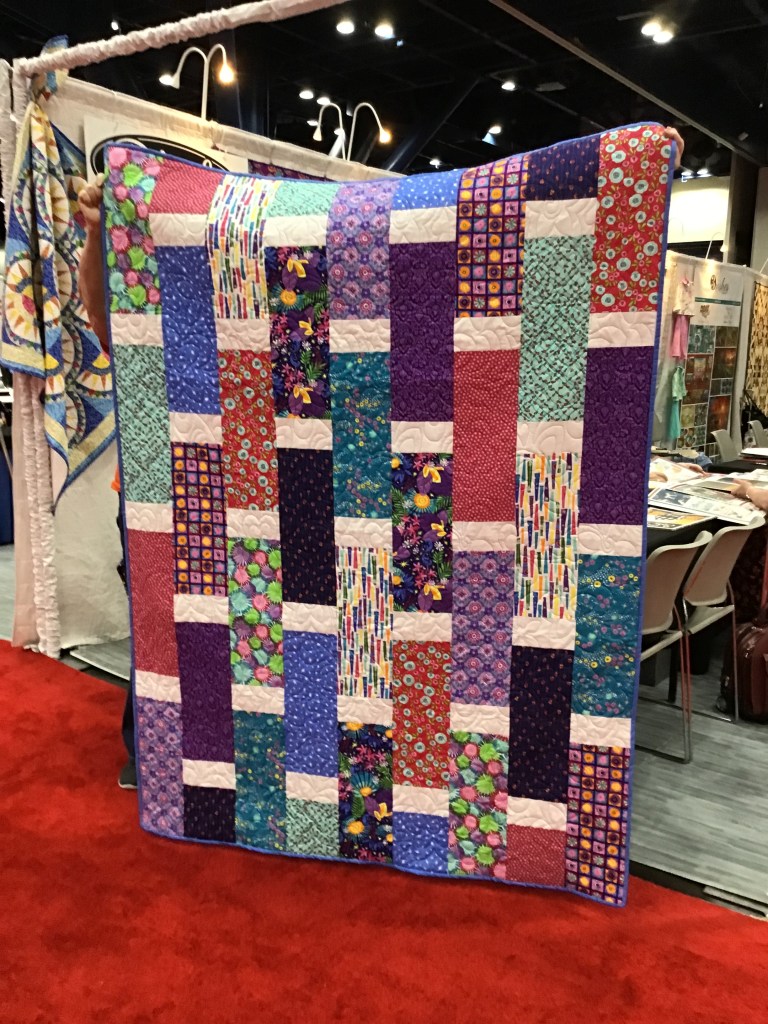
I know! Let’s go outside so I can show you the completed quilt top!

I LOVE the warm and sunny colors of the sunset and the blue plays nicely. I reminds me of photos of the sun setting over the ocean. I say photos as I’ve yet to actually see an ocean. Someday…….

OH! Rats!

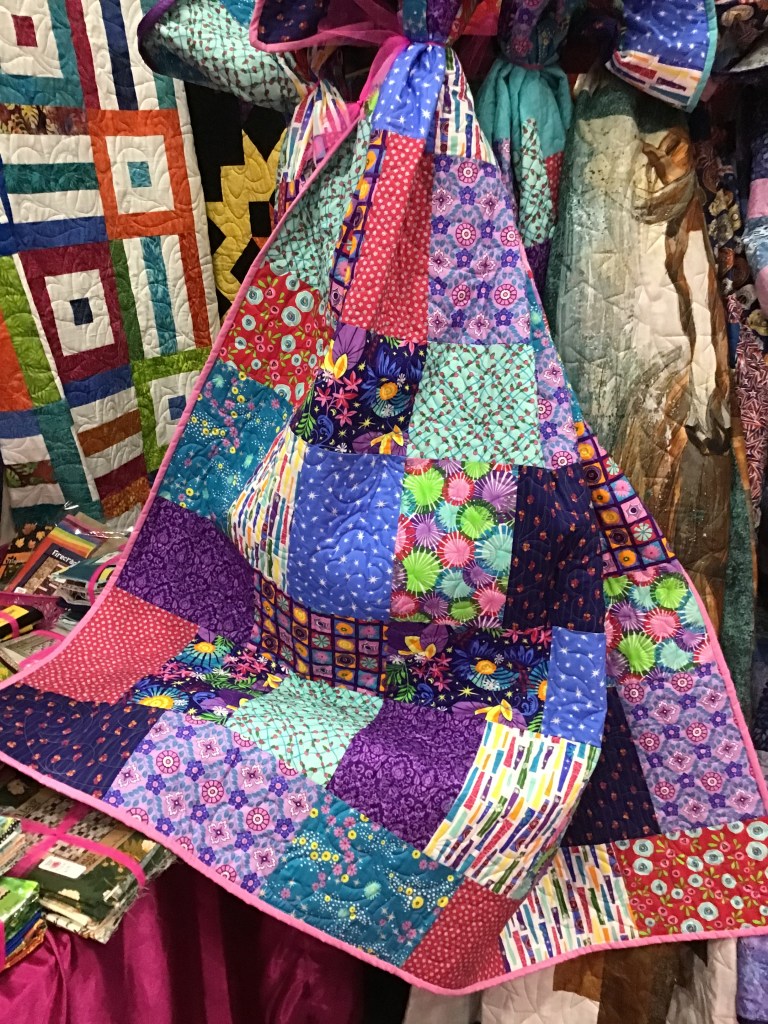
Take a look at the bottom of the quilt, I ended up with too much light colored fabrics bunched together. This happened because I couldn’t lay out the entire quilt on my flannel board all at once before I stitched the blocks together. ARGH!

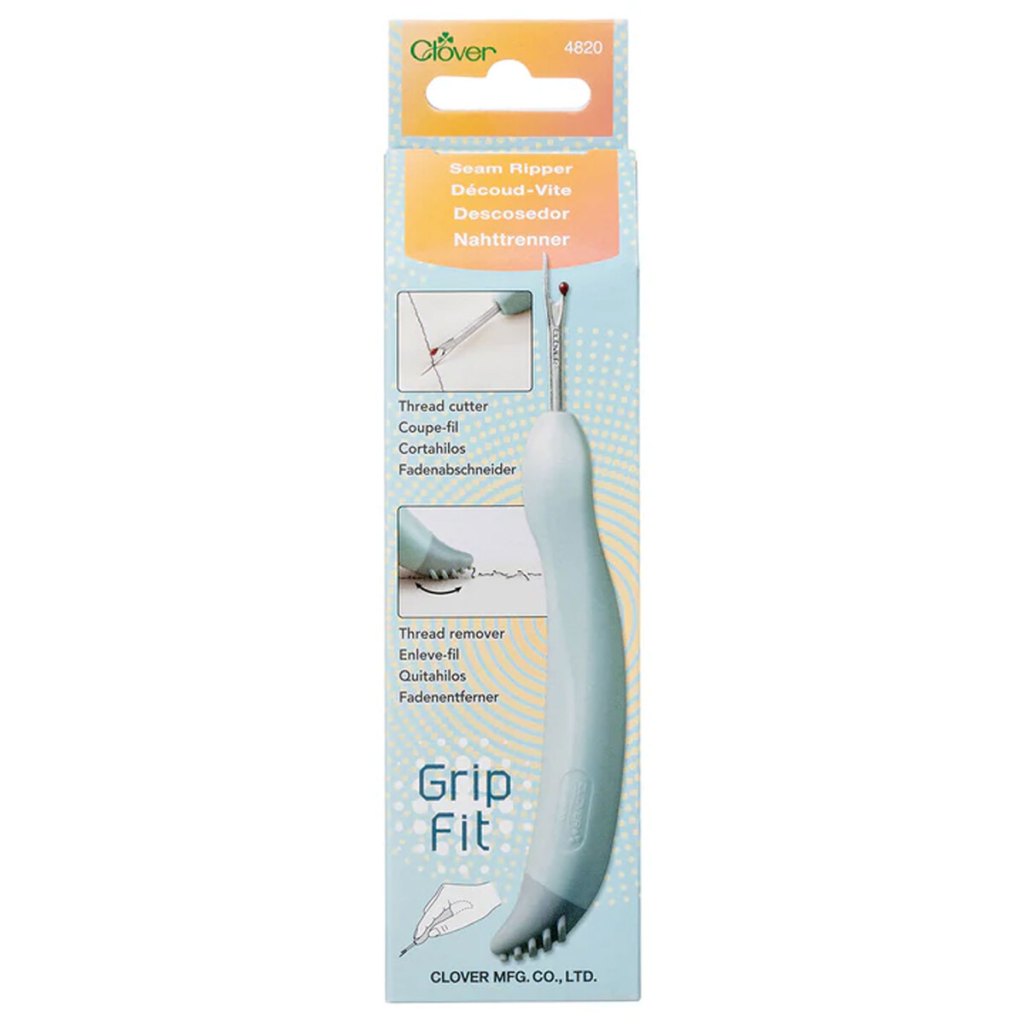
Looks like I will be doing some un-sewing with my trusty seam ripper sidekick, Jack. Then I can relocate some of those light blocks from the bottom towards the center. Sigh……definitely a project for another day. Sorry about that.

Have you ever made the Stepped quilt? If so, I’d love to see your quilts on our VRD Facebook group.

Well, that’s it for me. Have a great week! Find some time to do a little sewing this week. Or maybe some un-sewing……

Until next time –

Always,

Tricia @ VRD

Quilting Partners · Rose Cards · Tutorials · villa rosa designs

VRD 2M Junior Quilt Tutorial Featuring Pat Fryer’s New Fabric Collection, Bedazzled!

Happy Thursday to you!

It’s OFFICIAL! Throw the confetti! Toot your party horns! YEAH!

Pat’s NEW fabric collection for Riley Blake Designs, BEDAZZLED!, is finally here and we are all SEW excited!

To celebrate Pat’s new fabric collection, I’m sharing another great tutorial with you this week – 2M Junior.

Next week, we’ll dive right back into the Free Motion Quilting Series, I promise.

2M Junior is the little brother of 2M. Junior has the same block, only it’s a bit smaller so the quilt finishes as a throw quilt instead of a big bed-sized quilt like big brother 2M. It also uses a different block configuration, which gives it its own personality.

For the pattern cover quilt, I actually used samples of Bedazzled! and, boy, does it sparkle. And I mean that both figuratively and literally – don’t forget that Bedazzled! features glitter and glam. OHHHHH, SHINY!

Here’s another photo I took of 2M Junior.

Get your digital Junior HERE or print Junior HERE

I’m happy to say we have some kits made up for 2M Junior featuring Bedazzled! You can get your Bedazzled! 2M Junior kit HERE.

OH! I can’t forget big brother 2M, can I?

You may already know the story, but let me share it again. I designed 2M for my youngest niece, Morgan, as her high school graduation quilt. She asked for something modern. Yes, she loved it (and still does).

You can get your digital 2M pattern HERE or your print 2M pattern HERE

If you enjoyed the Baby Zip Tease tutorial last week also featuring Pat’s Bedazzled! collection, we now have kits for it, too. You can get your Baby Zip Tease kit HERE.

All right, back to our previously scheduled programming….2M Junior. Tehehe….

First thing we always do is gather up our fabrics for the project. The 2 teal batiks are from Riley Blake’s Expressions basics. And the fat quarters are, of course, from Pat’s Bedazzled! collection. Simply scrumptious, aren’t they???

Once I’ve gathered up my fabrics, I like to cut all the pieces out for the quilt before I begin sewing. Do you do that or do you cut your pieces as you go?

Okay, now we’re ready to sew!

Let’s add a background rectangle to the left side of a block center.

Next we need to sew a background rectangle to the top of the unit.

Then we’re going to sew accent strips to the sides and then to the top and bottom of the unit.

Now we are going to sew a background rectangle to the smaller block center rectangle and sew it to the bottom of the unit.

The next step is to sew another background rectangle to the longer block center rectangle and then sew it to the right side of the block. Our first block is done!

Easy Piezy, right? Now repeat to make the rest of the quilt blocks.

We’re going to lay out the blocks and move them around until we’re happy with how things look.

Warning – sometimes this step takes longer than actually making the quilt top (especially if it’s a VRD Rose Card pattern – they’re fast and fun, you know!). Yikes!

Okay, I like how the fabrics are distributed around the quilt now, so I’m going with this arrangement. Don’t you just love how the squares and boxes tumble down the quilt?

Hurry! Let’s sew the blocks together and then sew the rows together before any furry helpers make an appearance and rearrange the blocks when I blink.

And – guess what????? No borders on this one! Yippee!

It is my humble opinion that not all quilts need borders. What are your thoughts on borders?

Here’s another photo of the 2M Junior quilt top. Yummy, yummy, yummy!

Now the top is finished, it’s time to layer it with batting and backing (or fleece for a cozy back). Quilt it. And please, don’t forget your quilt label! DONE!

Need a little help with batting, backing, and layering everything together? VRD to the rescue! Check out this post from our Basic Quilting Skills for Beginners series, Basic Quilting Skills for Beginners: Batting, Backing, and Preparing a Quilt for Quilting. You can find all the lessons in the Beginner series over to the right of the blog, under the Blog Topics Heading or down further as a heading with the lessons listed below.

Once everything is layered together, then it’s time to quilt! Yay! And we are right in the middle of a new series for 2025 — Free Motion Quilting. Lucky You!

We interrupted the series for a couple weeks to celebrate Pat’s new collection with a few new tutorials, but next week, we’ll be moving on to Lesson 3 in the FMQ series.

If you missed the first couple FMQ lessons, you can find them below:

Lesson 1

Lesson 2

You can also find the different series we’ve done over on the right side of the blog, farther down, each under its own heading. Have fun checking them out!

Since last week’s post, we’ve added some more fun Bedazzled stuff to the shop (physical and online). Here’s the 411 –

Fat Quarter and Half Yard Bundles!

This group of 9 is called Lilac Mint

9 Fat Quarters HERE or 9 Half Yards HERE

This group of 8 is called Prismatic Bliss

8 fat quarters HERE or 8 half yards HERE

This group of 9 is called Stardust Splash

9 fat quarters HERE or 9 half yards HERE

BUT WAIT! There’s MORE!

We do have a few more kits available besides 2M Junior and Baby Zip Tease.

San Julian (light) kit HERE

San Julian (black) kit HERE

And here’s the San Julian Rose Card pattern. Please note that the pattern comes in each kit, so you don’t need to order it separately. I’m adding the links below, though, in case someone needs it by itself.

Get your digital San Julian pattern HERE or your print San Julian pattern HERE

You can find all the precuts, yardage, fat quarter bundles, kits, and the exclusive Bedazzled! Rose Card storage tin HERE.

And this is the Bedazzled Rose Card pattern that inspired the whole Bedazzled! collection.

Get the digital Bedazzled pattern HERE or the print Bedazzled pattern HERE

Whew! That was a lot today, wasn’t it? Thanks for celebrating Pat’s new fabric collection, Bedazzled!, with us here on the blog. I can’t wait to see your new Bedazzled! quilts on the VRD Facebook page soon.

Well, that’s it for me today. Remember, next week we’re jumping back into our Free Motion Quilting series.

Until then –

Always,

Tricia @ VRD

Quilting Partners · Rose Cards · Tutorials · villa rosa designs

Pat’s VRD Bedazzled Fabric Collection for Riley Blake Designs is HERE and VRD Baby Zip Tease Quilt Tutorial

Happy Thursday to you!

Yay! Yay! Yay!

Pat’s new fabric collection for Riley Blake Designs, BEDAZZLED!, is finally here!!!

I’m so sorry, but I have to pause our new Free Motion Quilting series so I can celebrate Pat’s new collection. I promise to continue our FMQ series in a couple weeks because I have 2 new tutorials to share, featuring Pat’s Bedazzled! collection.

Here she is – Pat Fryer, owner and Rose Queen of Villa Rosa Designs and designer for Riley Blake Designs

A yummy color-drenched batik collection with glitter accents because one can never have enough glitter!

Get the 5″ Stacker HERE

Get the 10″ Stacker HERE

Get the 2.5″ Rolie Polie HERE

Or you can find the Bedazzled fabric by the yard HERE

Although they aren’t ready yet, soon we will have kits for Baby Zip Tease in Bedazzled!, so check back soon. I’ll add the link HERE just as soon as it’s available.

BUT WAIT! There’s MORE!

There is one more piece to the collection – a one of a kind Bedazzled tin just the right size to store your VRD patterns! I’m not sure how many patterns it holds yet because I haven’t received my tin yet, but I’ll be sure to let you know when I find out. There’s no question about how to store your VRD Rose Card patterns now. Get yours ASAP, because I know they’ll sell out quickly.

Get the Bedazzled tin HERE

To celebrate Pat’s new fabric collection, here is the 1st of 2 new tutorials just for you!

Baby Zip Tease is a really fun and fast pattern that finishes 36″ x 38″, which is a nice size for a wall quilt or a baby quilt.

Get Baby Zip Tease digital HERE or print HERE

PSST! If you like Baby Zip Tease, you’ll love Zip Tease, which is a throw-sized version.

Get Zip Tease digital HERE or print HERE

I was at my pal, Robin’s house (Hi Robin!) the day I created this tutorial. We have sew days as frequently as we can. Robin has a lovely sewing room upstairs in her farmhouse with room for at least 2 people to sew.

In fact, I leave one of my sewing machines there all the time so I don’t have to drag one back and forth. Her husband, Rich (Hey Rich!), threatens to charge me rent. LOL!

Robin and her big kitty boy, Tigger. Tigger has a very important job — to hold down any project Robin tries to work on! LOL! Anyone else have one of these special furry helpers?

So let’s get started with our Baby Zip Tease tutorial!

Of course, the first thing we need to do is gather up our fabrics and cut what we need for the project. I’m using a 5″ stacker from Pat’s new Bedazzled! collection and a yummy Riley Blake Designs Expressions Batik basic.

Let’s make some Half Square Triangles (HSTs).

Photo 1: Layer a print square right sides together (RST) with a background square. Draw a diagonal line from one corner to the opposite corner.

Photo 2 and 3: Sew 1/4″ away from both sides of the line.

Photo 4: Cut apart on the drawn line.

Photo 5 and 6: Press open to make 2 HSTs.

Don’t stop now, go ahead and make the rest of the HSTs .

Square up and trim your HSTs. Cut off all the little “dog ears.”

At this point, you can sew your HSTs into rows and then sew the rows together. But where’s the fun in that???

I wanted to make sure the colors and fabrics were spread evenly throughout the quilt, so I put the HSTs up on Robin’s flannel wall and spent some time moving HSTs around to distribute colors and patterns. Argh! Sometimes this part of the process takes the most time.

This was actually a very important step for me because I kept turning the HSTs the wrong way. This was certainly one quilt project that being left-handed made more difficult. Of course, Robin pretty much just laughed at me every time I had to rotate a block in 90 degree increments until I got it going the right way. SHEESH!

Once I was happy with how it looked, it was time to sew the HSTs into rows. Finally!

Sigh…….I can’t tell you how many times I ended up turning a block on my way to the sewing machine. Time to unsew…….

What’s your favorite seam ripper? Mine is the Clover Ergonomic Seam Ripper seen in the photo below, but have you seen Clover’s latest seam ripper?

I just ordered one and I’ll let you know what I think after I try it out. If it’s as good as the one I already have, I’ll probably love it. Just sayin’……

Got that flipped HSTs fixed and survived sewing the blocks into rows – barely! Now it’s time to sew the rows together.

I’m really liking the cool zig zag effect! Let’s keep sewing those rows together! We are making progress!

YAY! Quilt top finished! Woohoo!

Now you get a chance to see how the fabrics of Bedazzled! play together. Aren’t they really great with the dramatic purple background fabric?

Next week I’ll have another Bedazzled quilt tutorial for you. The week after that we’ll continue on with our FMQ series. So please stay tuned!

Be sure to tune into our Fry-Day Live Sale tomorrow for more information and a closer look at the Bedazzled collection. You can find the Live Sale HERE on Fry-Day from 7-8 PM EST. You can also find the Live Sale on Facebook HERE.

See you there!

Until next week –

Always,

Tricia @ VRD

quilt market · Quilting Partners · Rose Cards · villa rosa designs

Quilt Market is Coming and a NEW Villa Rosa Fabric Collection

Happy Thursday to you!

It’s October! How’d that happen? I feel like this year has been too short and yet too long at the same time. Does that even make any sense? So much has happened this year, yet there is still so much to accomplish, and now there is only a few months to do it in. Oh brother……… (me, smacking my forehead).

I know I mentioned last week that Fall is my absolute favorite season and happily, October is my most favorite month. October in northwest Pennsylvania is simply beautiful! You can almost watch the leaves burst into shades of red, orange, yellow, and purple . Then after a grand showing of color for a little while, they simply hop off the tree branches and drift down to the ground. There is nothing better than walking through those piles of color, crunching as you go. Raking leaves into a big pile and jumping into it is still an option for me too. Of course, I adore the cool nights and warm days, which make me feel more energetic and eager to get back on track to get things done after the lazy hazy crazy days of a hot summer.

Did I mention the food of autumn (and October)??? Goodness! How could I forget that? Apples are huge in our area this time of year, in fact I even have a couple neglected apple trees in my backyard. I was able to rescue some good-sized apples, even if they weren’t perfect. Apple pie, apple crisp, apple cider, homemade applesauce………need I say more? And if you have apple cider, you simply must have donuts to go with it. I don’t know if this is a regional thing or common all over, but I have fond memories of Friday and Saturday night cider and donuts.

In my hometown, there is also a huge nighttime Halloween parade later in October. When I say huge, I mean HUGE! Every firetruck and queen/princess for miles takes part! As well as all the area marching bands. There are floats, too. It was always a fun time when I was a kid, snagging all the candy thrown from the parade participants. I must admit that the Zem Zem mini race cars always made me nervous when they were doing their routines, — I was always afraid they’d run over my feet when they drove so close to the curbs where all of us kids were sitting. And after the parade, it was time for — you guessed it! — cider and donuts. LOL!

October also brings Fall International Quilt Market (the professional event) followed by Quilt Festival (the retail event) in Houston, Texas. YAY! Although there’s a lot of work that goes into getting ready for Market, it’s so much fun and totally exhausting. For me, it’s the one time a year I actually get to work with Pat and the VRD gang in person, which makes it super important to be there so we can brainstorm, discuss ideas, and dream up fun new VRD events just for you.

This was the VRD Market booth in 2022
This was the VRD booth for Festival in 2023

I attended my first Quilt Market in 2010 when my very first quilt book, Orphan Block Quilts, was coming out. It was also where and when I first met Pat and fell in love with Villa Rosa Designs. My pal, Leslie (who I went with to Maryland back in August) went with me for that very first Market — basically she help my hand and provided me with training wheels, or…………simply moral support. LOL! Thanks, Leslie! I’ll never forget when we saw superstar Ty Pennington from HGTV, who was there to promote his first fabric collection. OMG! Women were practically throwing themselves at him. He had a security guard trying to protect him and they even had to bring in stanchions and ropes to help control the crowd of rowdy women. Ahhh, good times.

Last year I was really fortunate to be able to stay on for Quilt Festival (the retail event) after Market. That was my very first Festival experience, even though I’ve now been to enough Markets that I don’t even keep track anymore. I had an amazing time and I met such terrific folks at both Market and Festival.

I don’t really have any specific goals in mind for Market this year, except to work in the VRD booth and to just enjoy the experience. I do hope to meet some new industry professionals, to put a face to people I’ve only worked with online, and to catch up with some old friends — like my pals, the Springers, of Quilts of Mulberry Lane, who kindly gifted me with an antique quilt last year. You can read the Story of the Quilt that Followed Me Home HERE. I might even line up some new fun sponsors for our 2025 VRD Blog Hop.

Here’s our Pat’s RBD designer photo on the Riley Blake website.

There are 26 fabrics in the Bedazzled collection. Lots of purples and teals with hints of pink, jade, and blue. The fabric designs have a lot of movement and energy and the colors are just sooooooo rich. Of course, Bedazzled will be available in precuts — 5″ squares, 10″ squares, 2.5″ strips, and fat quarter bundles, so the collection will literally shine in lots and lots of VRD Rose Card patterns!

But wait……………….there’s more! There is a teeny tiny little extra detail that makes Bedazzled truly unique and special — it has bling! It isn’t called Bedazzled for nothing, you know. Tehehe. The main print has wonderful hints of sparkle and shine.

A close up of one of the main prints — can you see the gold stars and moons? That’s the sparkly bling!

Bedazzled will debut at Quilt Market later this month and is shipping to quilt shops in December, which is only a couple months for you to wait. Right now all of us at VRD are busy working on quilt samples to show off the Bedazzled collection for Quilt Market, so you will be seeing those soon, I promise. You will be SEW inspired! I’m also working on a couple new tutorials for you, which will go live towards the end of the month and into the beginning of November.

One of the things I’m most excited about Bedazzled is the collectible Bedazzled tin Riley Blake created for the collection. What makes this tin so special??? It will hold Villa Rosa Rose Card patterns! Yep. SERIOUSLY! A tin designed specifically for our Rose Cards. How many times have we talked about how to store our VRD Rose Cards right here on the blog and on the Facebook page?

Ridiculously, I am so in love with this tin already and I haven’t even seen one in person. Hmmm…..maybe Riley Blake will have one as part of their Bedazzled display. Guess we’ll have to wait until then to find out.

The collectible Bedazzled Rose Card tin. Isn’t it yummy???

Remember, Bedazzled is shipping to quilt shops in December. Of course, we’ll have it available at Villa Rosa Designs. Did you doubt we would? So, hang in there. December’s coming really really fast!

Well, that’s it for me. Time to get back to work on my Bedazzled sample quilts and tutorials. Stay tuned for updates coming soon.

Until next time —

Always,

Tricia @VRD

quilt market · Rose Cards · villa rosa designs

Welcome to International Quilt Market Fall 2022!

Hello Quilty Friends!

Happy Thursday to you!

Here it is — a little peak inside International Quilt Market by moi just for you.

I remember before I attended my first Fall Market in 2010, “Market” was a term that conjured up all kinds of quilt mystique. We talked about it in hushed voices tinged with awe. What exactly was it? How did you get to go? Why was it such a mystery?

Twelve years later and although the mystery has unraveled over the years, I am still amazed by every Quilt Market I attend.

This year was different from all the others — I came to Market with a whole new purpose. In the past, I either attended Market in order to promote my latest book or as an independent designer associated with a publisher or other business. This time I came as part of the Villa Rosa Designs team and would be working at the VRD booth for the first time. I really didn’t know what to expect, but I was so excited to go. I had a lot to learn and had great teachers in Pat, our “Rose Queen”, Bonnie who manages the retail shop in California, and Leann, Pat’s daughter and the VRD computer whiz.

So what exactly is International Quilt Market?

Since 1979, the show has been the trade show for the quilting and textile industries.

Market is a wholesale trade show, open only to credentialed attendees and those in the business. Here, you’ll be able to visit more than 1,000 booths to see all kinds of products both new and familiar ranging from fabrics, book, and patterns to sewing machines, notions, and supplies. You can also learn in dozens of Take & Teach classes and Business Seminars, and take that knowledge or class skills back home to your shop or business!

From the Quilts, Inc. website.

This year’s Houston Quilt Market might not have been as big as the last pre-pandemic Houston Market in 2019, but everyone there was excited and energized to be there.

Let me take you on a little tour of Quilt Market by visiting some of the booths and vendors.

First up, of course is our Villa Rosa Designs booth!

Nice, huh? All the quilts you see hung around the walls of the booth are all cover quilts for Rose Cards of the last 6 months. Oh! The table runners were there too — draped down on the table fronts. Bright, colorful, and fun! We even had fat quarters bundles and kits.

So many great shop owners/workers, designers, and lots of other folks in the industry stopped by to see the latest patterns and catch up. Everyone was so kind and excited about our Rose Card patterns. I met a lot of super people and really enjoyed chatting and talking Villa Rosa Designs with everyone.

When the booth wasn’t too busy, we all took turns going to appointments, meeting up with contacts, and walking the floor, seeing all the other booths, and checking out displays to see what was new and trending. Of course, when we were swamped, it was all hands on deck!

News Flash!

One of the things we were really excited to share with everyone who walked into the booth was our NEW Villa Rosa Designs fabric collection with Blank Quilting. The collection is called Xanadu. Yep, like the 1970’s movie. And the collection has a wonderful 70s feel that is fresh, fun, funky, and flirty with an updated color palette. It was designed by Pat’s sister, Nancy Lorene, who does most of the art for the Villa Rosa Designs Rose Cards. There are 12 completely different fabrics in the collection. It should be shipping to your local quilt shops in April 2023.

Here it is! Isn’t it great??? My absolute favorite piece is the one that looks like paper snippets (I love them all of course, but that one really sparks my imagination).

We were even able to make up a few quilts using Xanadu samples! The real fabrics are even better than the digital images.

I checked in with some of my favorite vendors and also met some new ones this year.

One of the first places I checked out was the “Toy Department,” Graphic Expressions, where you can find all kinds of fun, useful, and quirky little goodies.

My next stop was to see my old friends, the Springers at Quilts from Mulberry Lane. I met them at my first Quilt Market and at every one I’ve attended since, I make sure to stop to shop and catch up. They always have a great selection of antique quilts and textiles. This year they even had some feed sacks, but I was already familiar with the patterns, so I shopped through their antique quilt blocks and brought a great selection home with me.

It took me a little while to find the Swan Amity booth, but after the second attempt, I found them. Boy was I glad too! They were on my to-do list for Market because I needed a new pair of machine quilting gloves. I found their gloves when I attended Market in 2019 and I never quilt without them now, but after 3 years, my gloves are starting to show some wear (see my 3 year old pair on the left in the photo below). Swan Amity gloves are a lot like a leather golf glove with touchscreen fingertips and padded palms. Love them!

I had a great time shooting the breeze with the ladies at the Mary Ellen’s Best Press booth. Devi and the gang were so much fun! I personally can’t make a quilt without Best Press. My favorite scents are Peach and Citrus. What’s your favorite?

I stopped by the Hoffman California Fabrics booth and got the chance to meet up with Sandy, who I’ve been working with on some projects lately. It was so awesome to finally meet her! That’s one of my favorite things about Quilt Market — meeting people in person, especially if you’ve only been in contact with them through email.

At Market, the fabric companies display quilt samples featuring their upcoming collections so it’s a really good opportunity to see upcoming trends in fabric colors and quilt styles. Look at these gorgeous quilts on display at Hoffman.

I checked in with my pals at Choice Fabrics, too, and introduced them to Villa Rosa Design Rose Cards. Sorry, I never did get around to taking a photo of their booth, we were too busy gabbing! LOL!

I was on the lookout for new products and other cool stuff when I walked around the show.

I met Rosanna of Rosanna Diggs Embroidery. This was her first time at Quilt Market, showing off her great embroidery kits. The kits had absolutely everything in them you needed except scissors! And the designs were just adorable. The Hexagon quilt block kit grabbed my attention on the front table, so I stopped in the booth to say hi.

I stopped to visit with the designer, Lori, of From My Heart to Your Hands, to tell her how much I love her gorgeous miniature quilt patterns. I have collected quite a few of her Fat Quarter Quilting patterns, which have 9 mini quilts in each pattern pack. I love the mix of piecing and applique, although I’m definitely a piecer and not an appliquer — I still haven’t finished my first mini applique quilt from one of her patterns from years ago. I really loved her display of the mini quilts pinned with clothespins to clotheslines. So fun and eye catching! Wish I’d thought of it!

I visited with another pattern designer, Dawn, at the Sew Cherished booth. Her wool applique was simply amazing. Wool applique is something I really admire, but haven’t done much of it yet. Someday……

A new friend I met at lunch introduced me to the ladies at the booth next to hers, Trailhead Yarns. Their threads are truly amazing and there are so many colors to choose from — even variegated! I’m thinking I might want to try some Sashiko again sometime.

Everywhere I turned there were QUILTS, QUILTS, and more QUILTS! Here are some of the great quilts I spotted at Market.

Well, that just about wraps up my visit to International Quilt Market. I hope you enjoyed seeing what I saw. My head is swimming with visions of quilts and fabrics. Time to spend some quality time with my sewing machine.

Until next Thursday —

Sew. Laugh. Repeat.

Always,

Tricia @VRD