Rose Cards · Tutorials · villa rosa designs

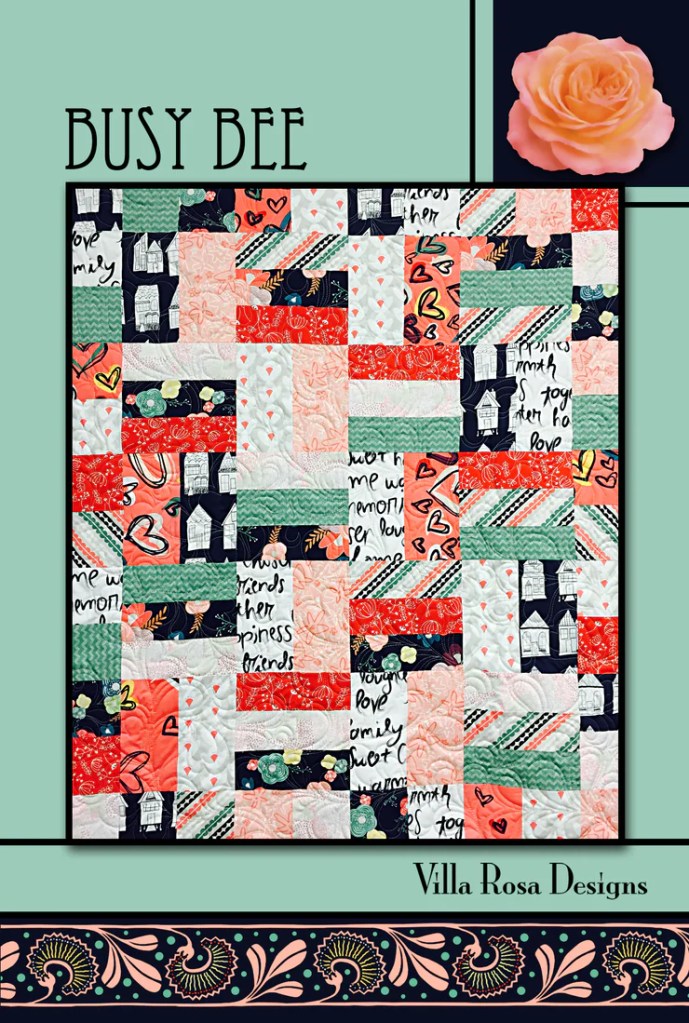
VRD Falling Quilt Tutorial

Happy Thursday to you!

Happy Fall!

A picturesque autumn scene featuring a cluster of bright orange pumpkins and a white pumpkin surrounded by hay bales and vibrant fall foliage.

Hard to believe it really is Fall now, but I know it’s here whether we’re ready or not. And I’m personally more than ready. We had such a hot and dry summer here in NW PA, so I’m eager for cooler weather.

Fall is definitely my very favorite season with its warm days and cool nights. All the gorgeous colors. The smells of the season. And the sounds. I truly love it all!

Another thing I love about Fall is that I start to feel more energized to get back to my many to-do lists. Summer definitely doesn’t inspire that in me. So now, it’s time to make plans to get things done. What is Fall to you?

I hope you’ve been enjoying our Jump into Fall quilt tutorials. Today’s project is beyond perfect for the season and I know you’re going to be excited to make this one.

Falling is truly a perfect project for this time of year, especially with all of the yummy fall fabrics at your local quilt shop and favorite online retailers. Falling is a pattern by Catherine, of Running Doe Quilts, who is one of our many talented VRD designers as well as a new VRD partner.

The quilt finishes at a generous 54″ x 72″ and goes together quickly with its oversized blocks and no borders (although you could easily add a border to make it bed-sized if you wanted to).

A colorful quilt featuring large, stylized leaf patterns in various shades, displayed outdoors against a backdrop of trees.

Get your digital pattern HERE or your print pattern HERE

Catherine even has kits available for the Falling quilt below – get yours HERE before they’re gone. Tell her Tricia sent you!

Quilt designed with colorful leaf patterns in orange, yellow, red, and blue fabrics, displayed outdoors against a rustic background.

Okay, time to get going on today’s tutorial.

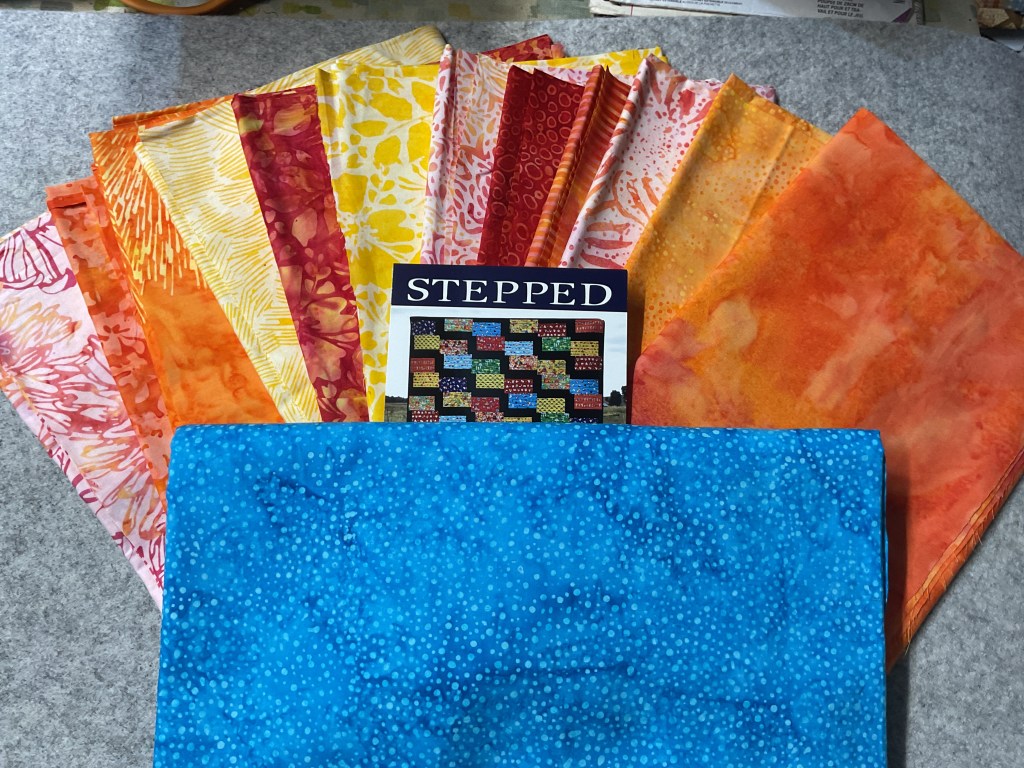
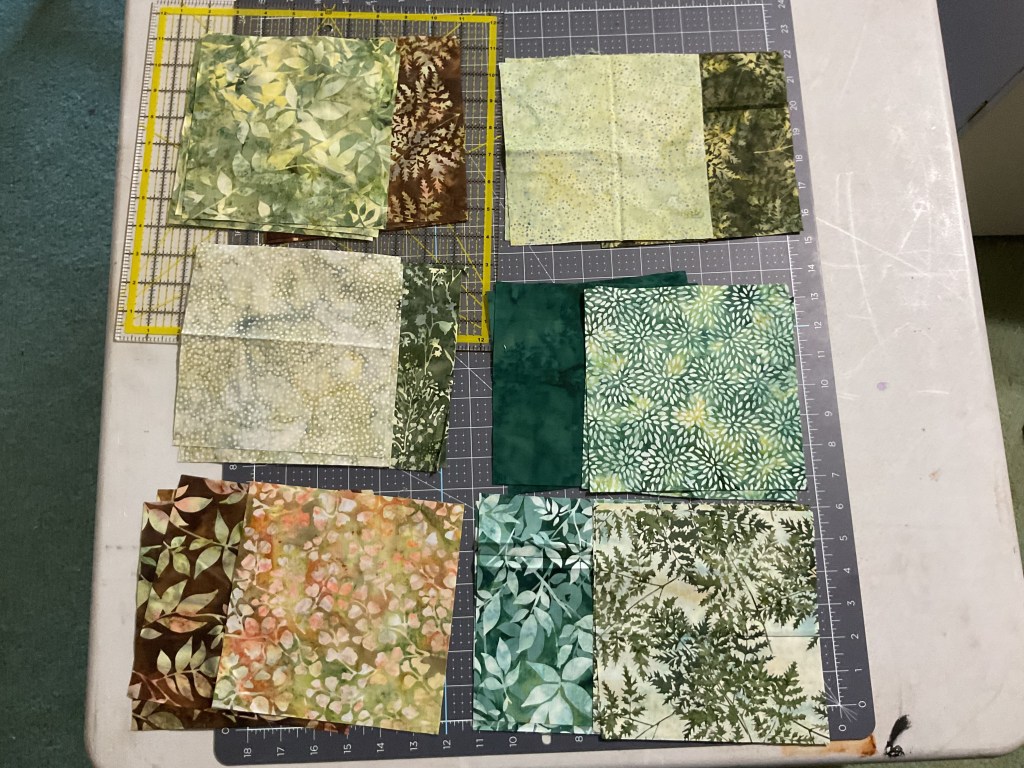
Of course, our first thing to do is gather up our fabrics. Today I’m using a lovely collection from Hoffman Fabrics called Sweet Breeze. It’s a great choice today as we end summer and slide into fall. Sadly, this is an older fabric collection and probably isn’t available anymore, but happily Jason Yenter has a gorgeous fall collection called Falling Leaves, you can find it HERE – I think his wonderful fabrics would make great Leaves.

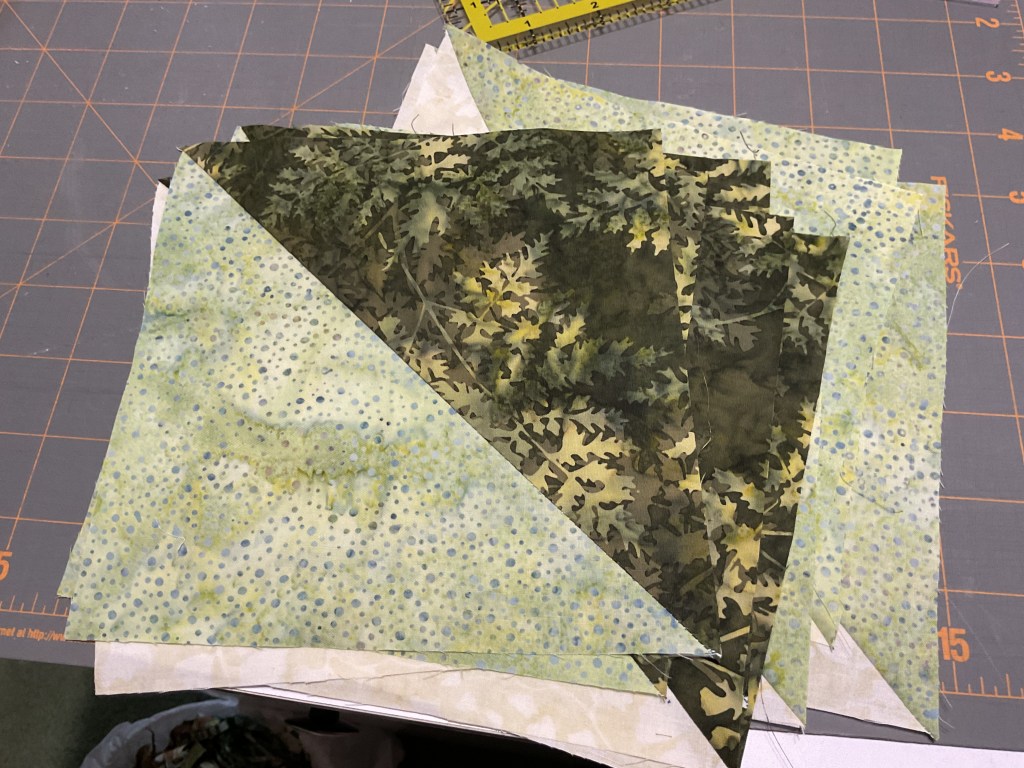
Here are our Sweet Breeze fabrics for today’s tutorial in lovely greens, a few browns, with a wee touch of orange.

Assorted fabric pieces in green, brown, and cream colors, featuring leaf patterns and textures, arranged neatly with a 'Falling' quilt pattern brochure on top.

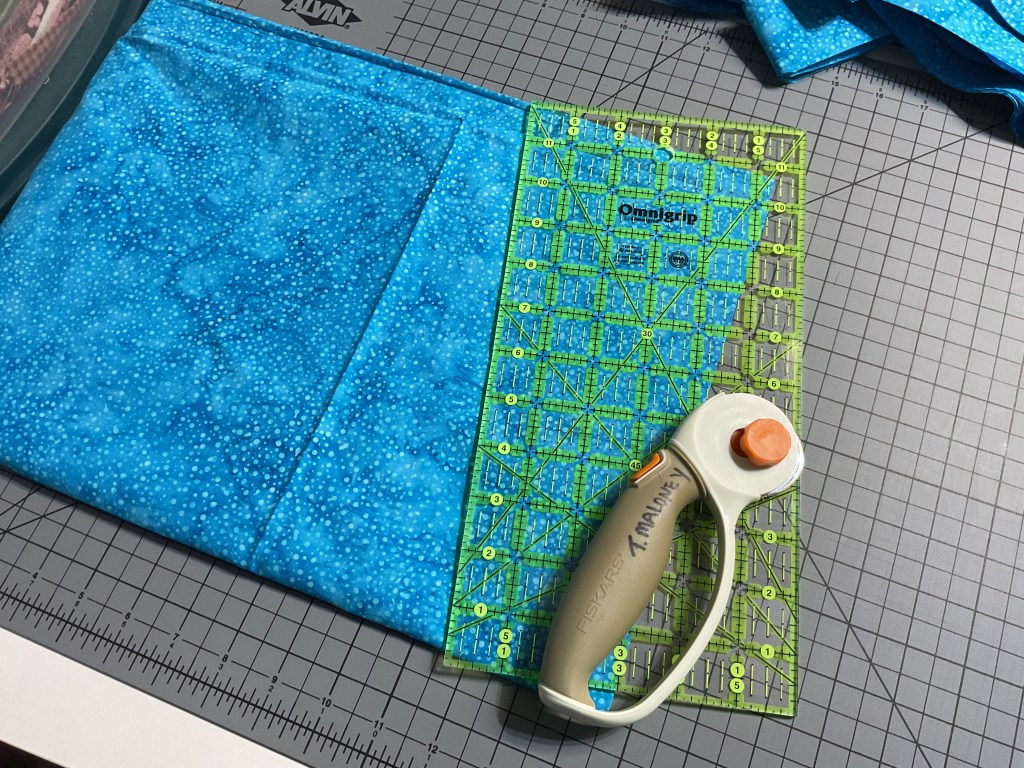
Let’s go ahead and cut out all the pieces we’ll need for Falling – the background, the Leaf fabrics, and the stems.

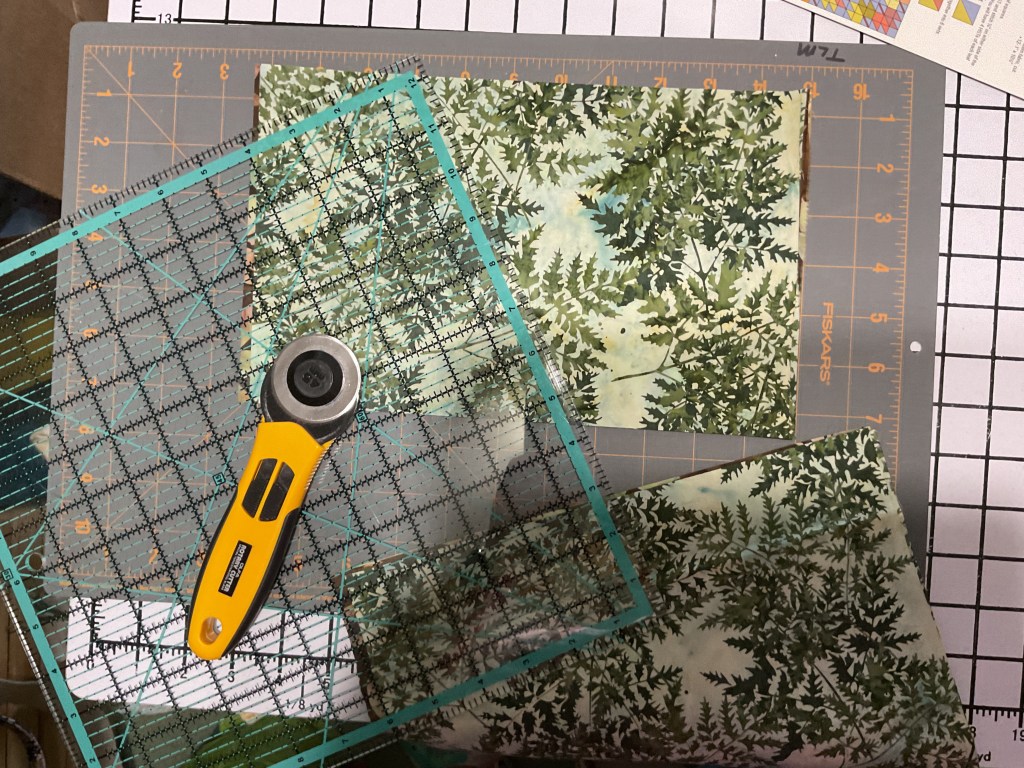
All right! All of our pieces are cut and ready to go.

A variety of fabric squares in green and beige tones on a cutting mat, with a brown strip of fabric positioned in the center.

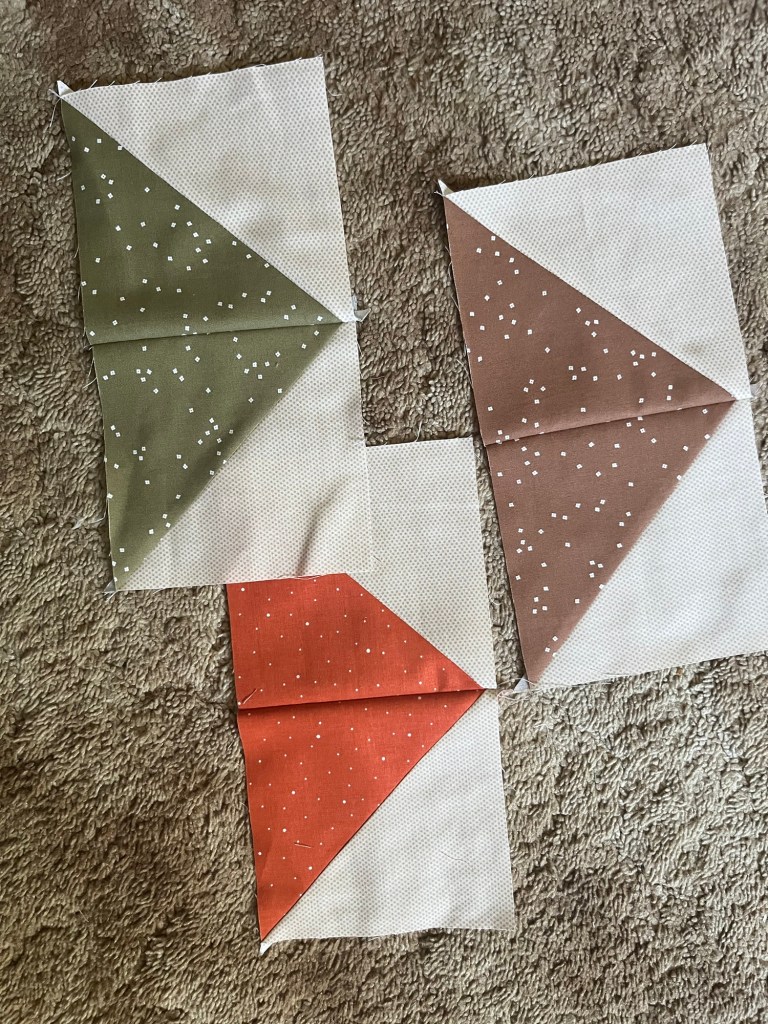
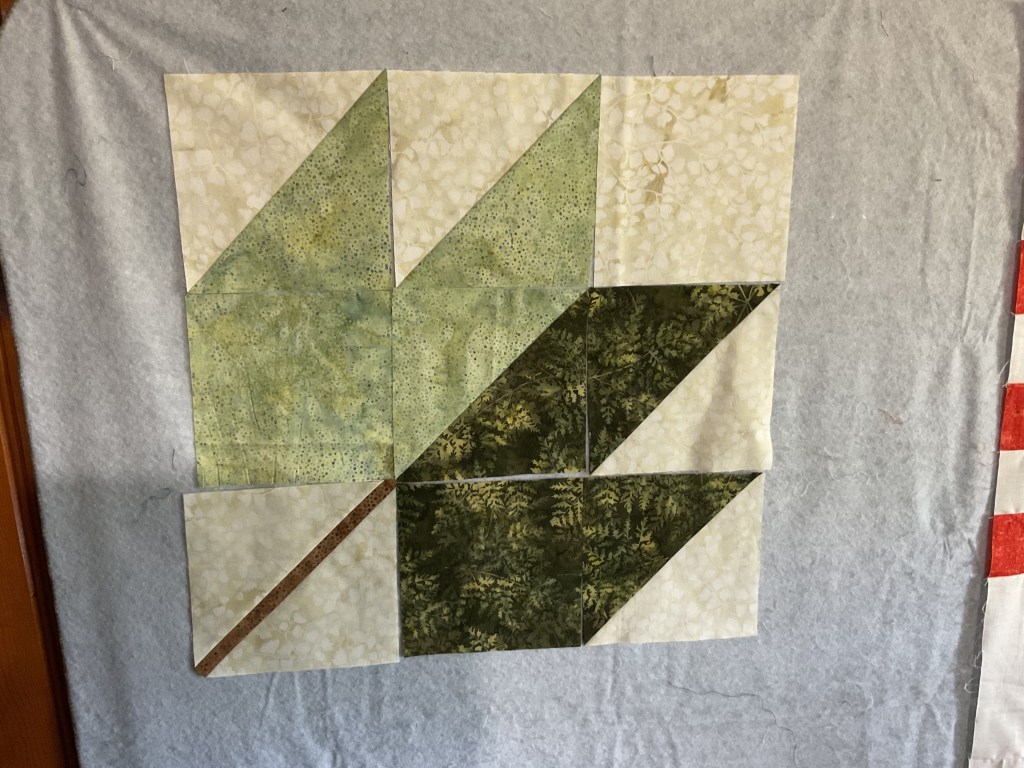
Next we need to pair up our Leaf fabrics as each of the 12 blocks in the quilt uses 2 fabrics. I really love Catherine’s take on the traditional Maple Leaf quilt block, don’t you? She split it down the center so her leaves are two-toned. And the blocks are very big, which adds to the graphic appeal of this quilt.

The pattern suggests making 2 of each Leaf fabric combination, but you can mix and match your fabrics to your heart’s desire if you want, of course. I’m going to stick to the original plan today.

A variety of fabric squares in shades of green and brown, arranged on a cutting mat, ready for a quilting project.

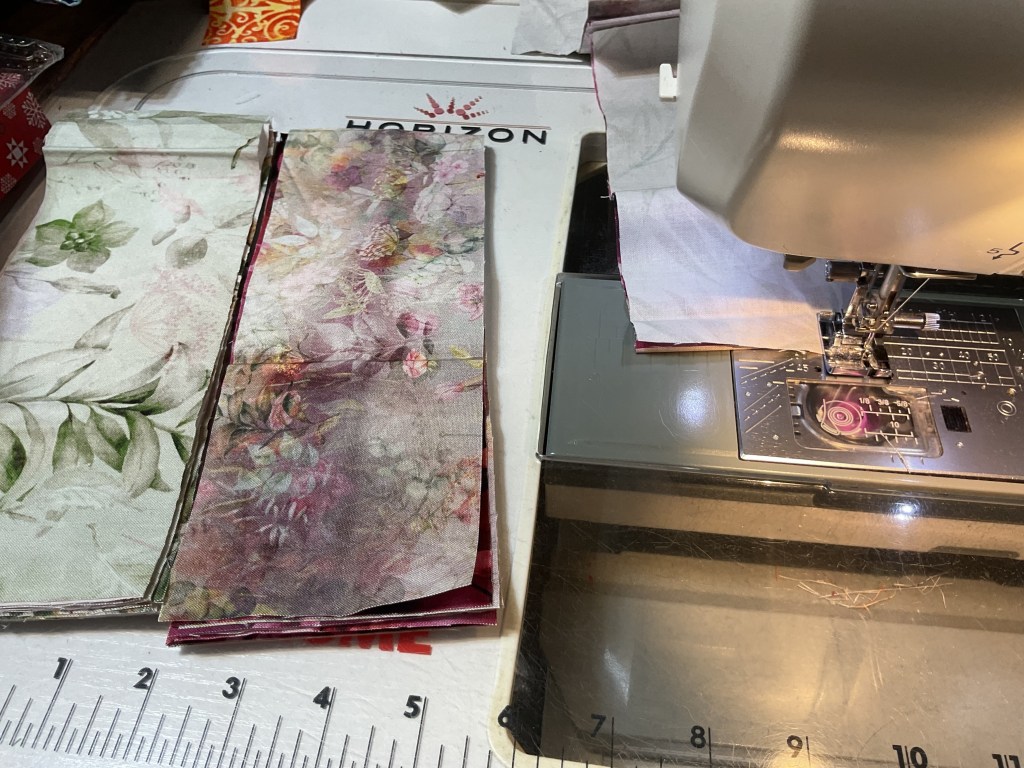
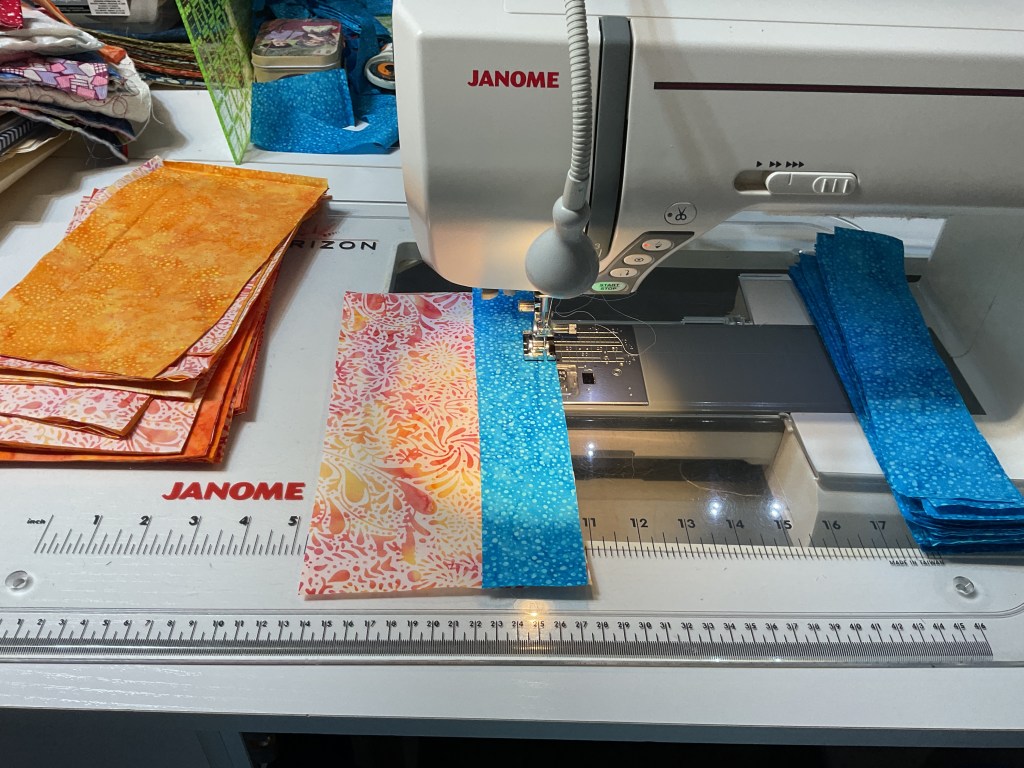
Now we’re ready to sew. We haves lots of Half Square Triangle (HST) units to make for the quilt. I’m going to make 2 matching Leaf blocks before moving on. I don’t want to get all mixed up!

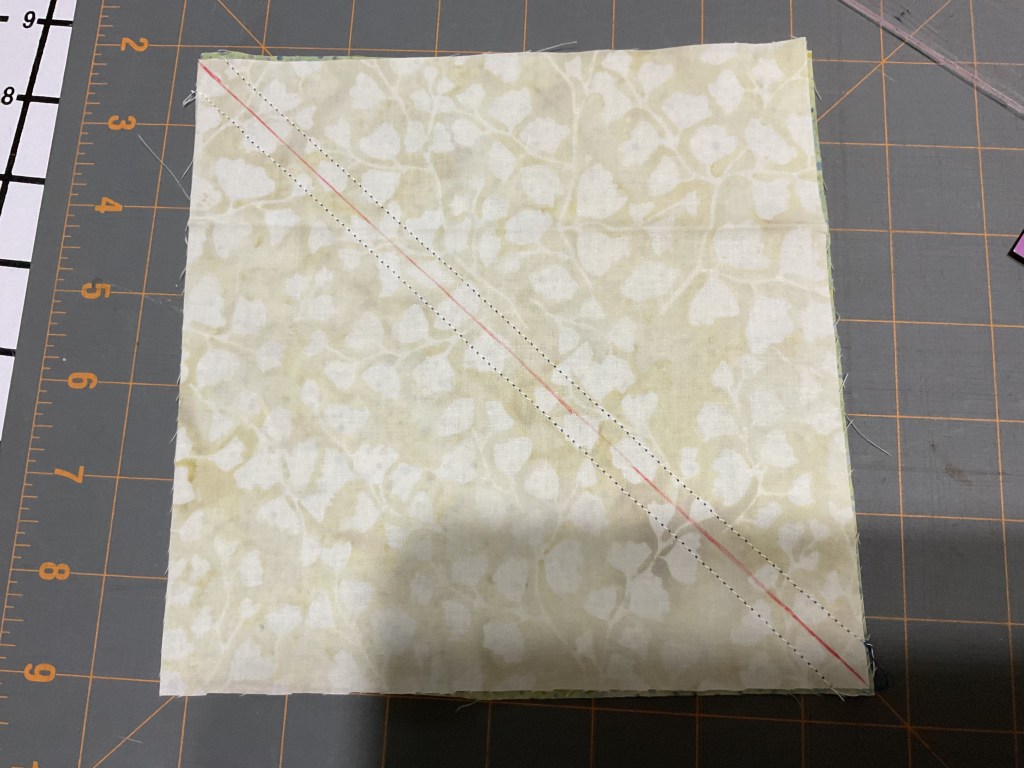
To make HSTs, the first thing you need to do is layer your squares right sides together (RST) and draw a diagonal line – I like to use FriXion erasable pens for marking my fabrics.

Then we’re going to sew 1/4″ away from both sides of our drawn line.

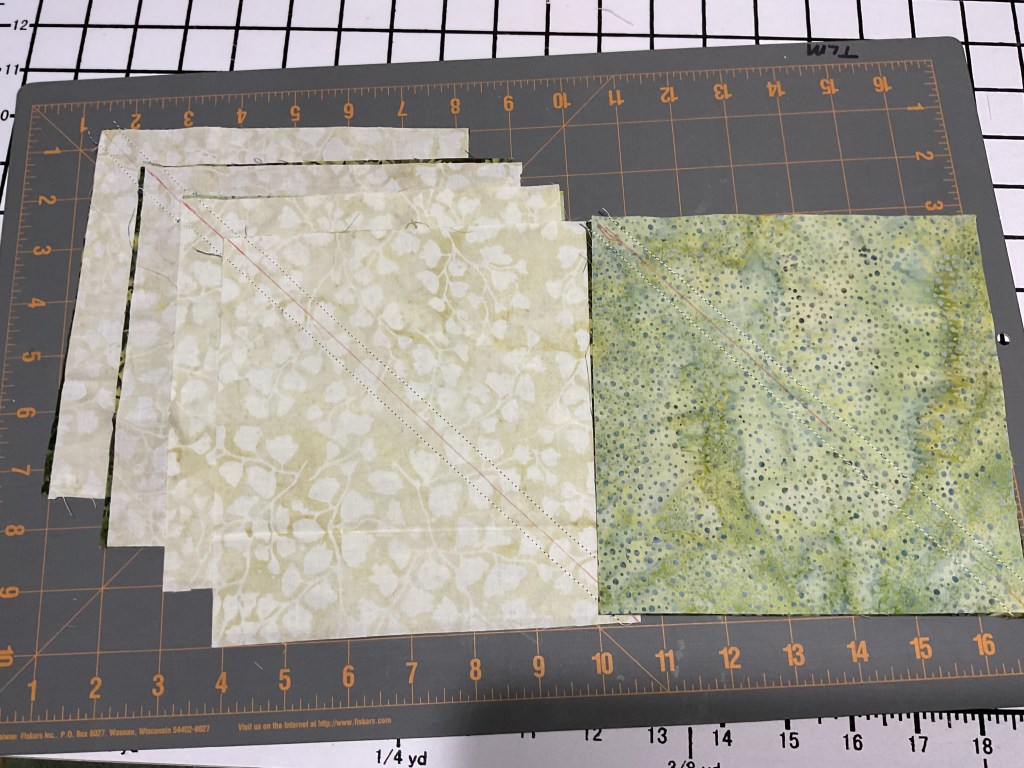
I went ahead and sewed all of the HSTs for my first 2 blocks at one time. Do likewise if you wish.

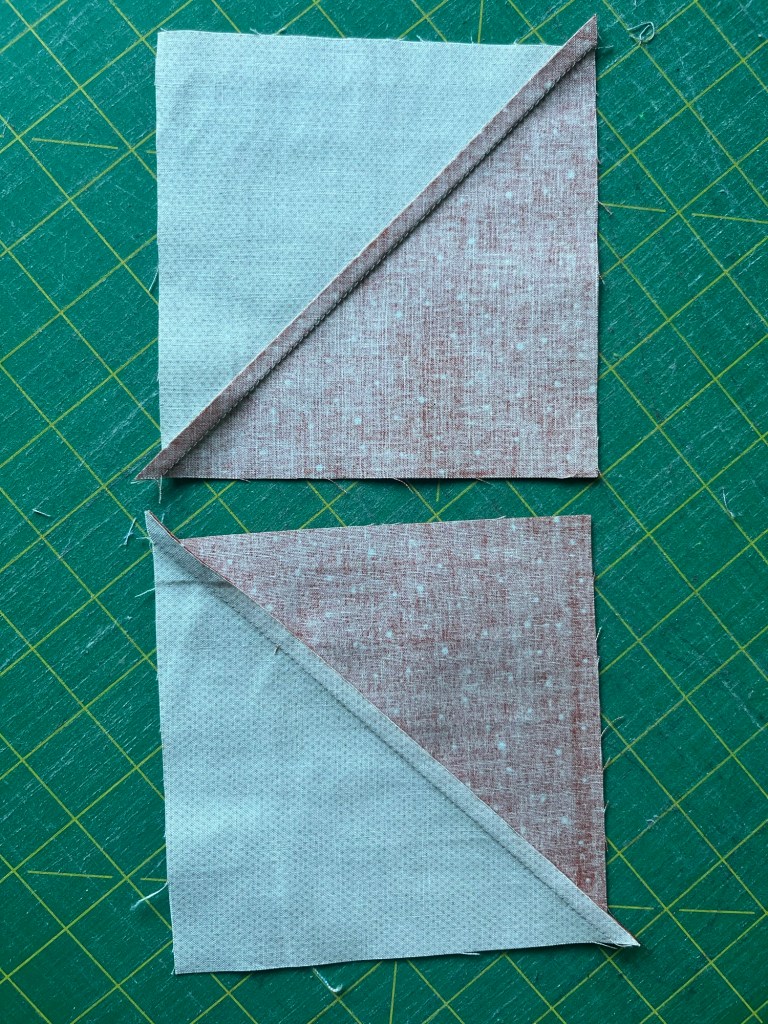
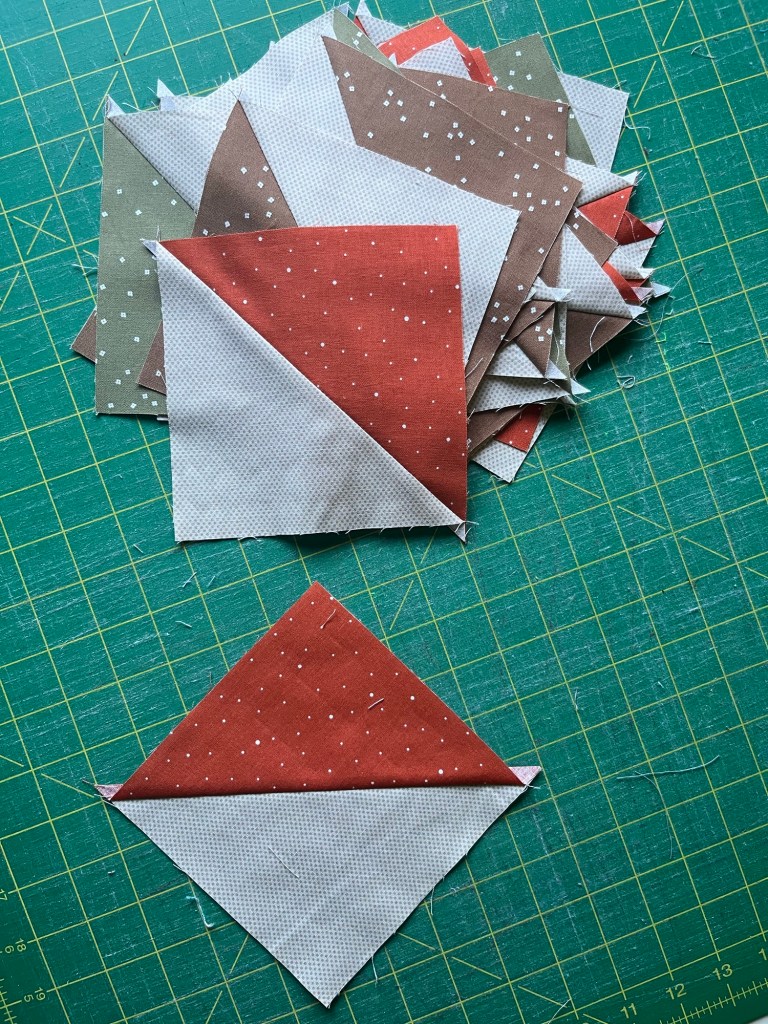
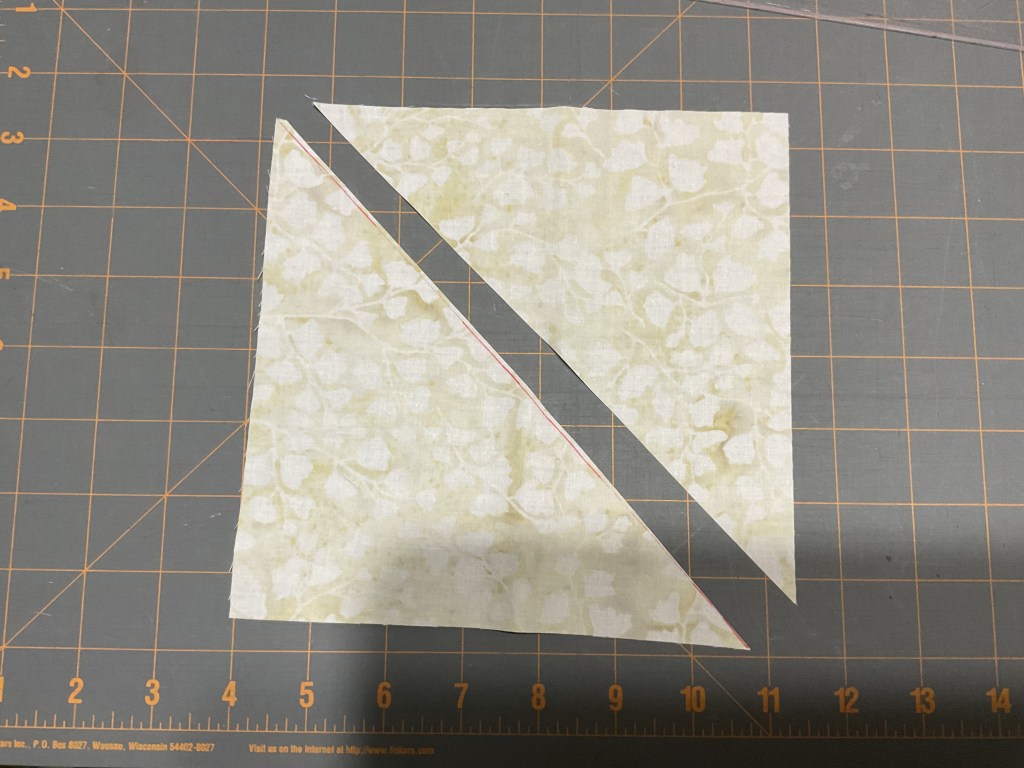
Next we need to cut on the diagonal lines which will give us 2 HSTs.

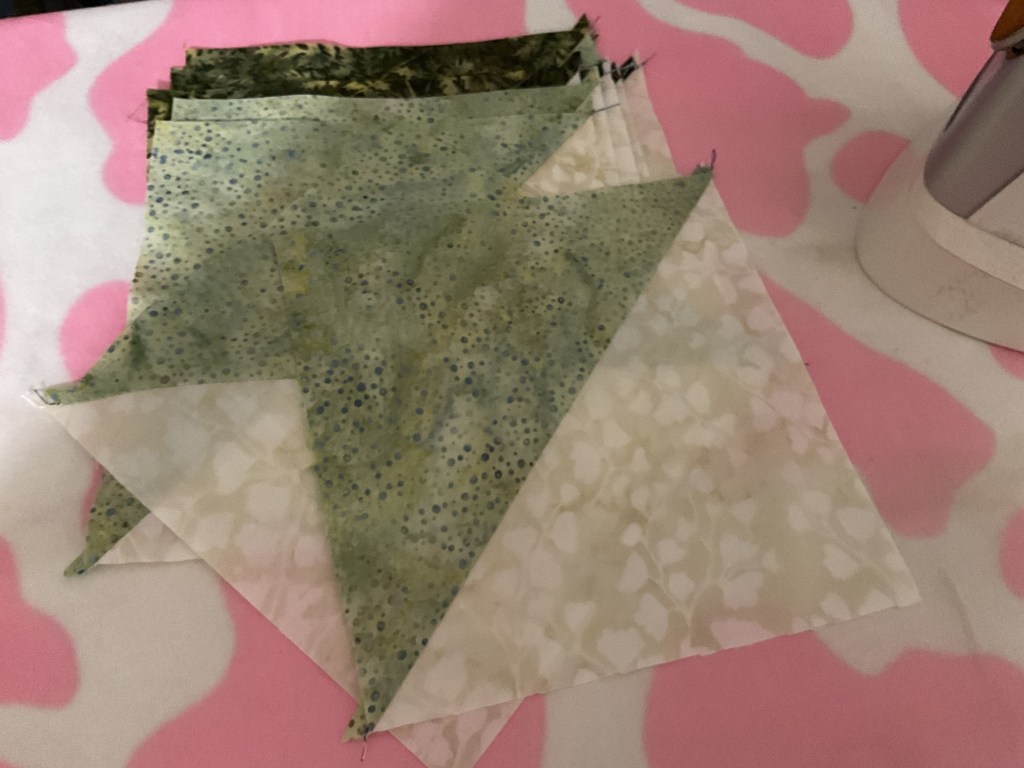
All right, let’s head over to the ironing board to press these HSTs open. Don’t forget to cut off the little dog ears on the corners so your piecing will be more accurate.

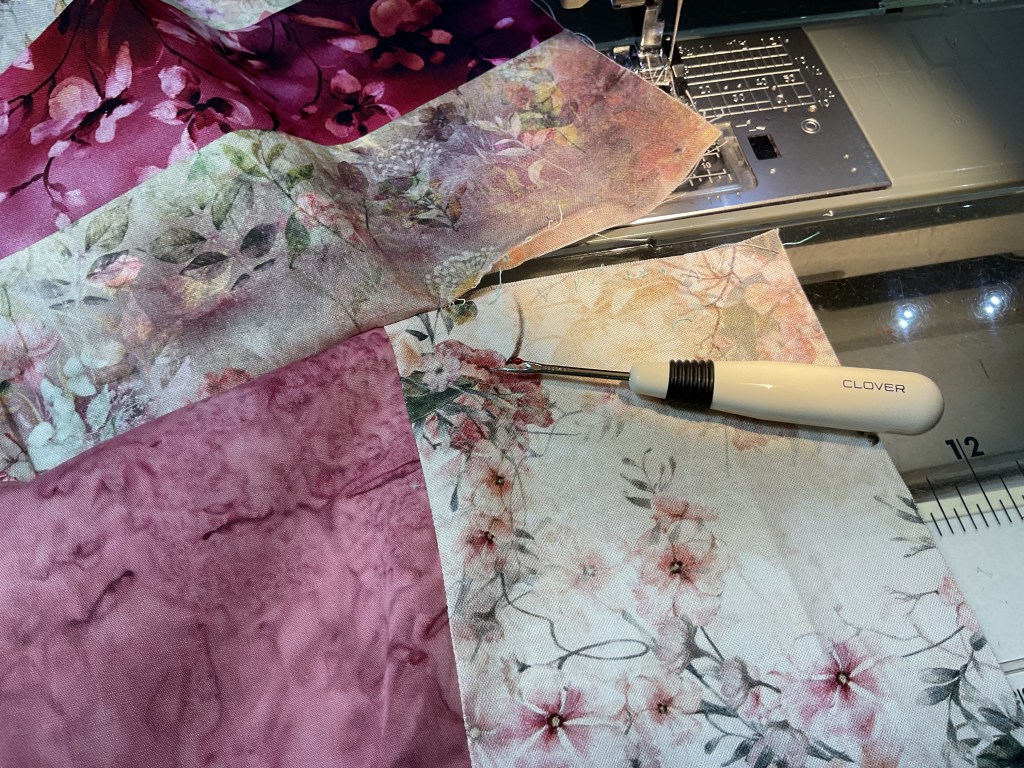
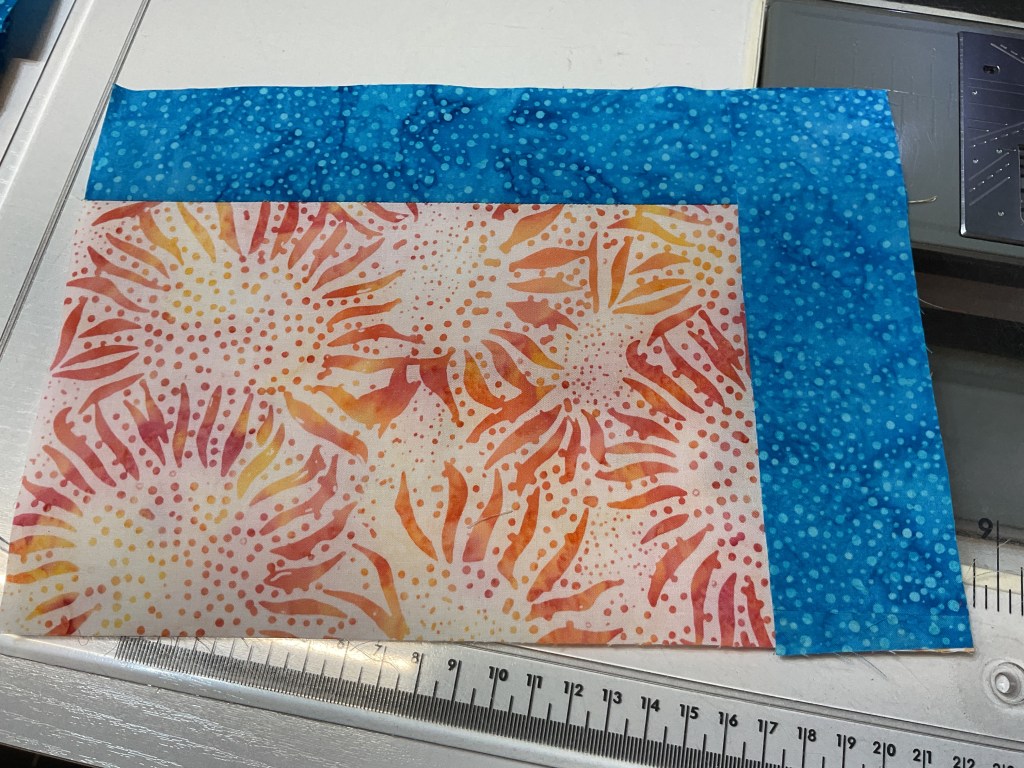
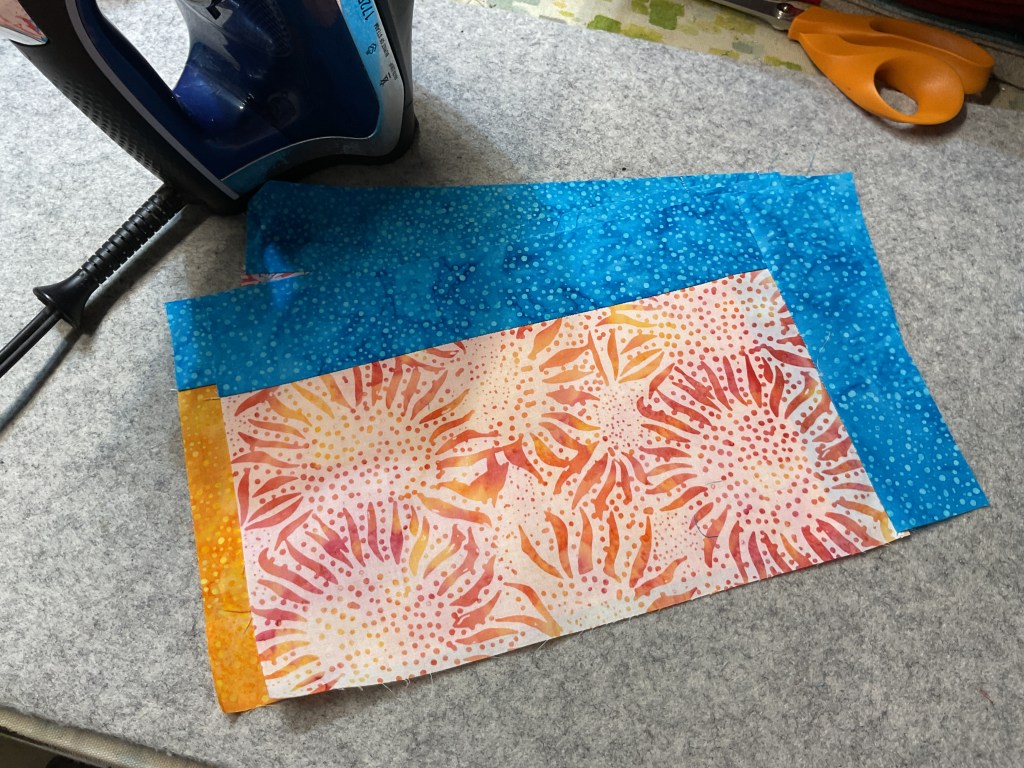
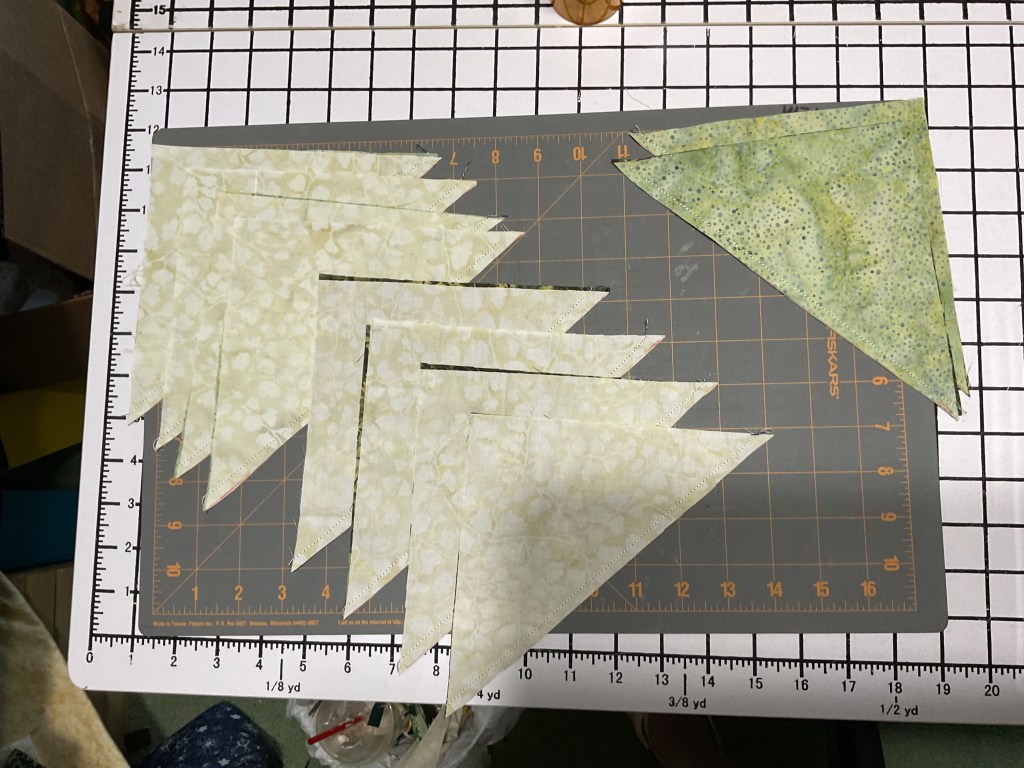
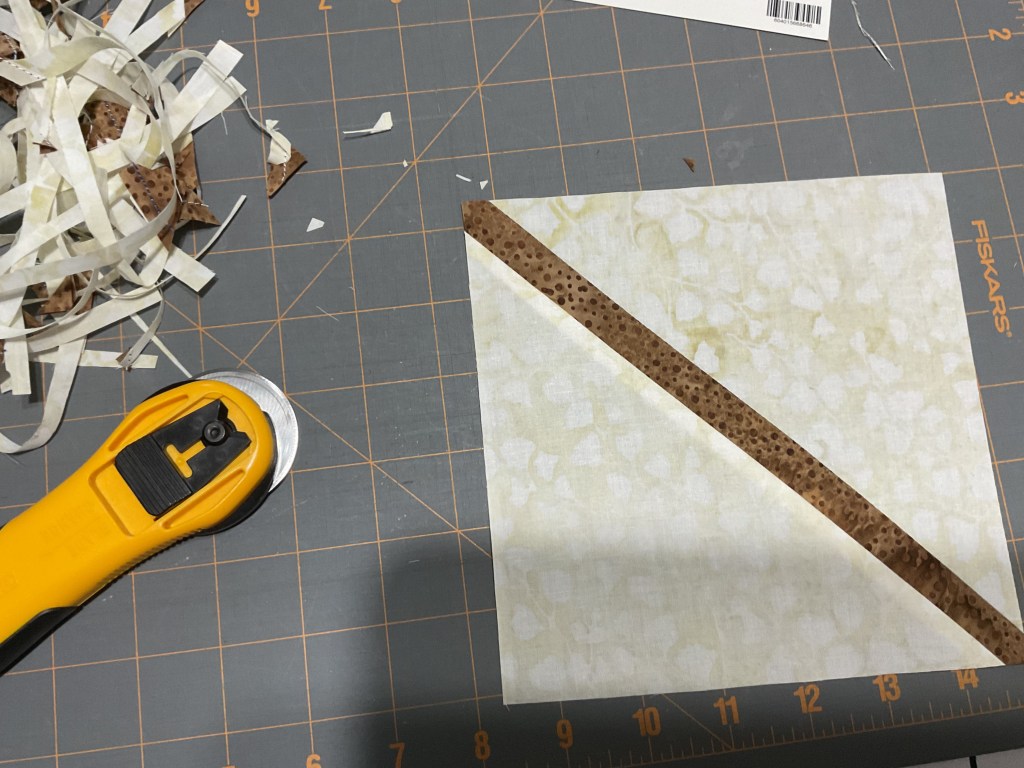
Let’s make the stems next. Cut your background square in half diagonally to make 2 triangles. Then we’re going to center and sew a stem rectangle between those 2 background triangles. I pressed my seams towards the stem so they wouldn’t show through my background fabric. We need to make 2 of these – 1 for each of our matching Leaf blocks.

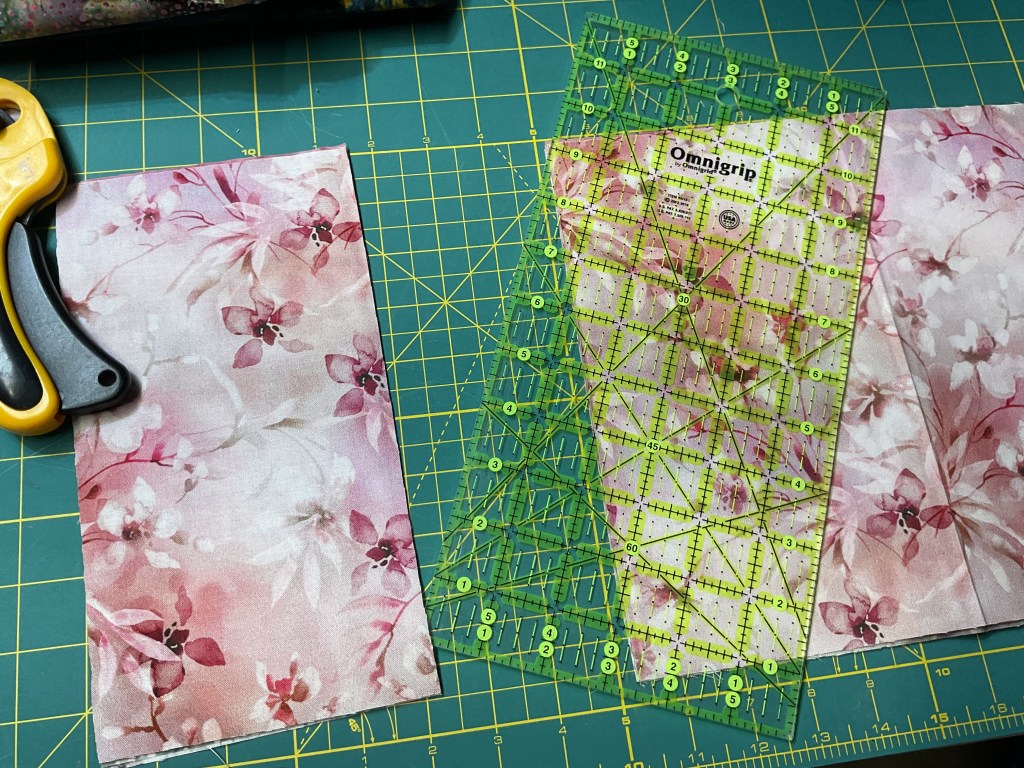
Before out stem units are finished, though, we need to trim them to the right size. Take your time when you do this step because you don’t want to miscut and make wonky stems.

Okay, now we’re ready to layout a block and sew it together. Once I’m happy with how the first block turned out, I’m going to make the second matching block. One Leaf pair done, 5 more pairs to go. Repeat the steps above to make 12 total Leaf blocks.

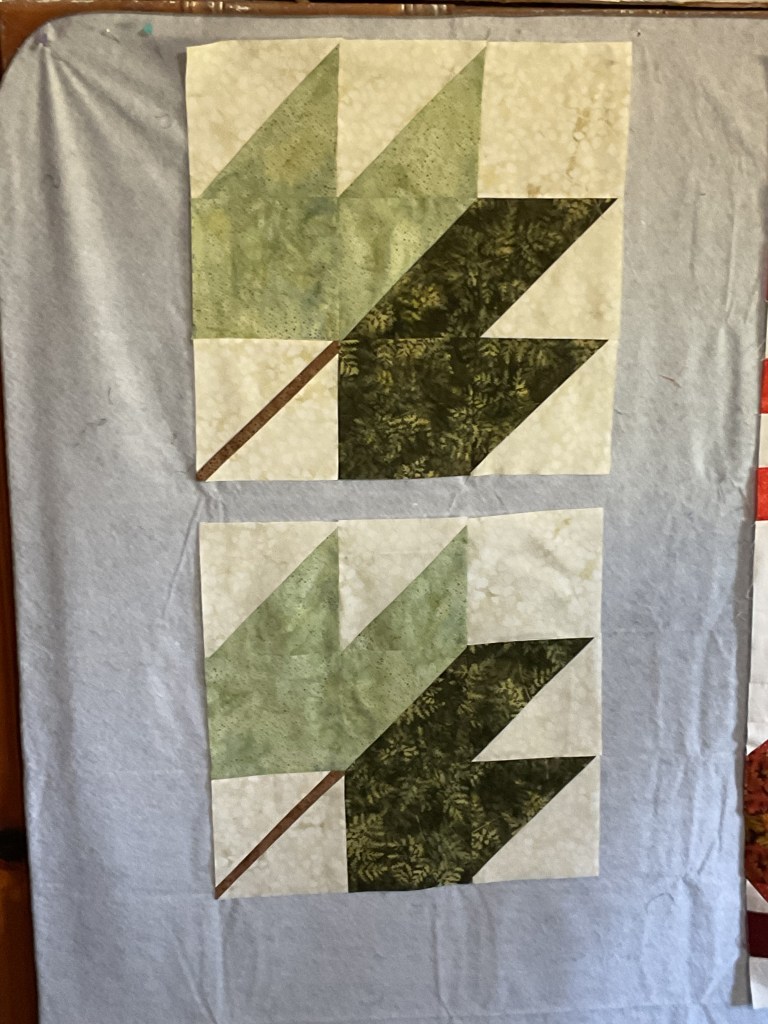
Woohoo! Here are my 12 Leaf blocks.

A pile of quilt blocks featuring various shades of green fabrics arranged in a leaf design, with a neutral background and some visible stitching.

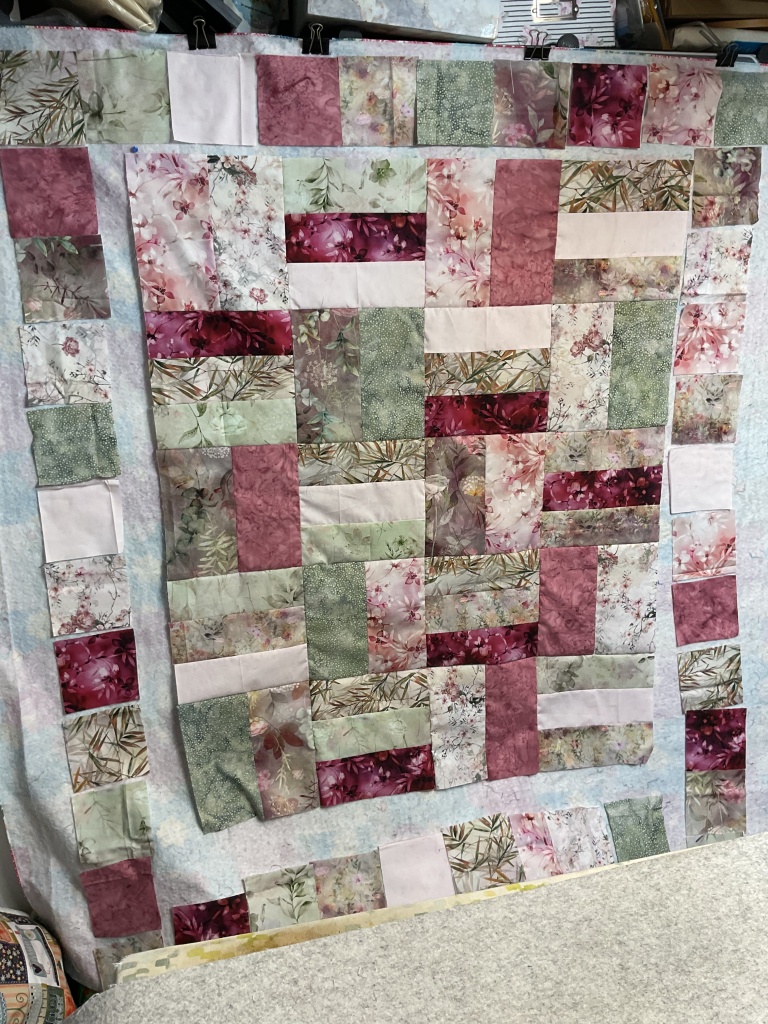
Now it’s time to arrange the blocks on my design wall. If you want your quilt to have the same movement as the Falling quilt on the cover of the pattern, you will need to flip and flop your blocks like Catherine’s. I only switched 1 or 2 blocks before I liked the arrangement. As you, know sometimes I spend more time arranging the blocks than actually making the quilt. But not today, yay!

You will want to take care while sewing your blocks together because sometimes you are sewing a point to a point. Careful pinning will help keep your points under control and will result in a cleaner and more accurately stitched quilt.

A colorful quilt featuring oversized leaf blocks in various shades of green, brown, and floral patterns arranged on a design wall.

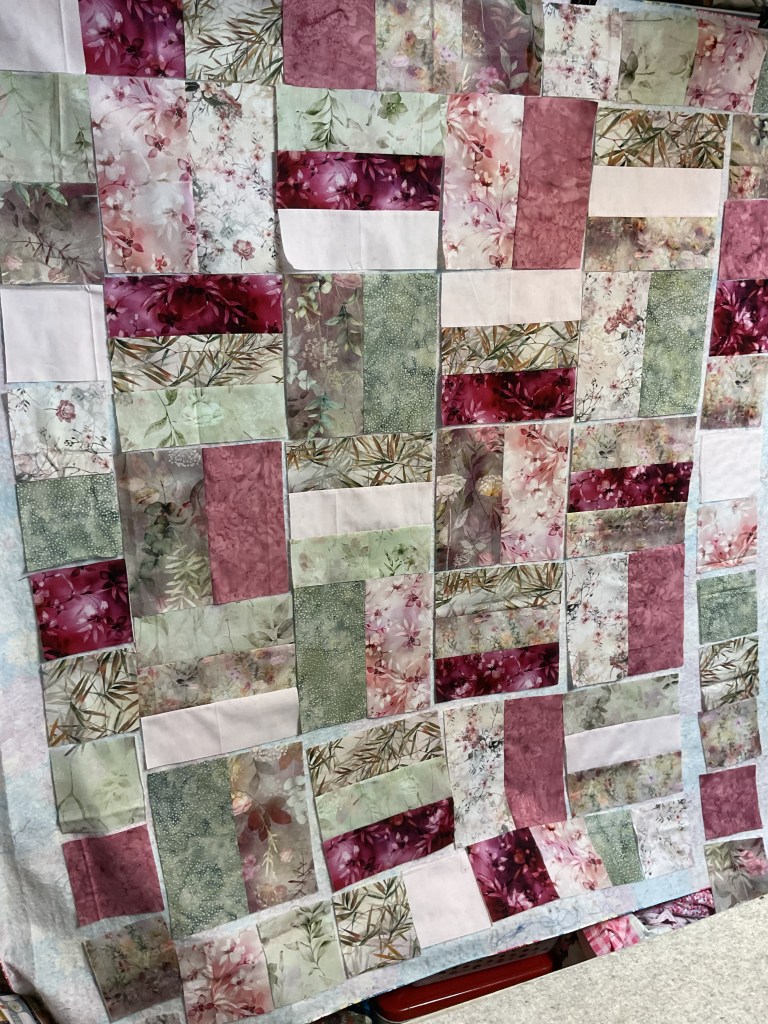
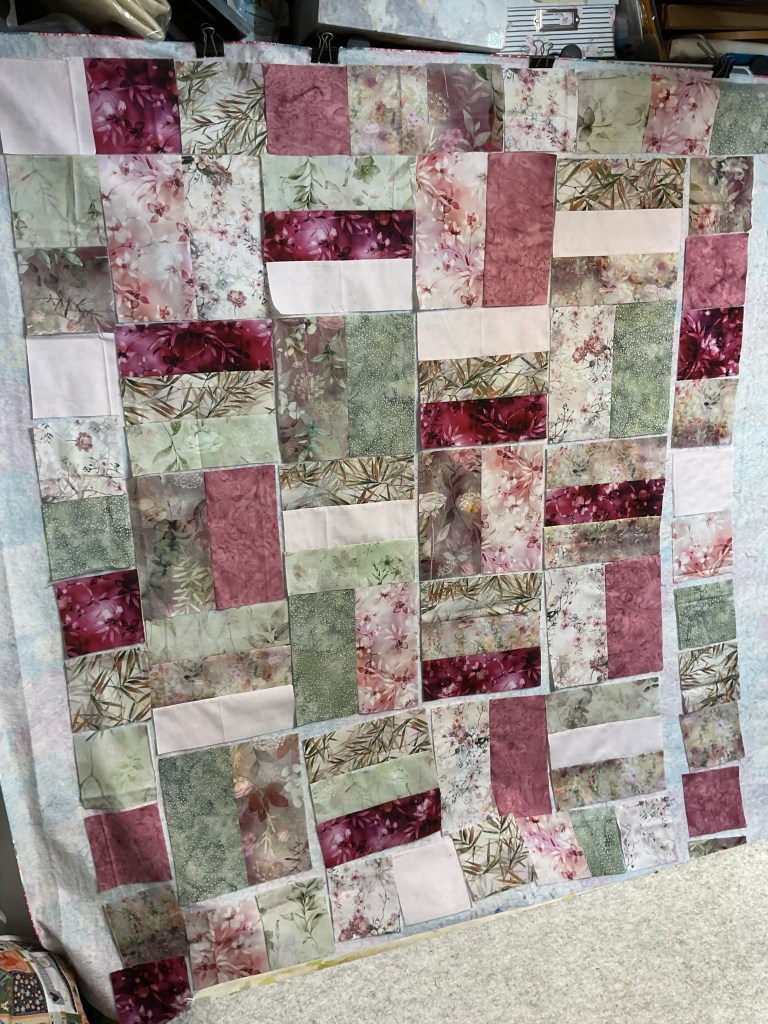
Next we are going to sew the blocks into rows and then sew the rows together to make the quilt top. Oops, this quilt is longer than my flannel wall, so I can’t show you the entire top yet. I told you it was a good sized quilt!

A quilt featuring a pattern of green and brown leaves arranged with a cream-colored background, showcasing various fabric textures and colors.

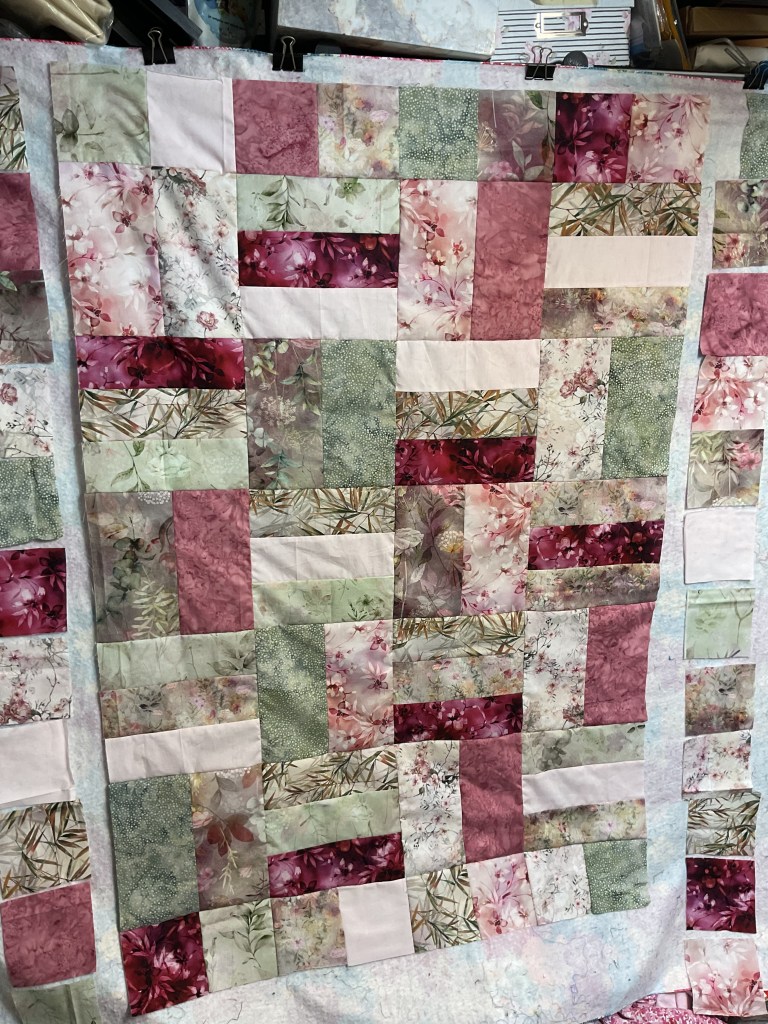
I just had to take my Falling flimsy outside to snap a photo in natural light so I could show you the entire top. Absolutely LOVE it! Can’t wait to finish it.

A quilt featuring large, stylized leaf patterns in various shades of green, brown, and orange, displayed outdoors on a clothesline with a grassy background.

To complete your quilt, layer it with batting and backing fabric (or fleece like I plan to). Quilt it. Bind it. And don’t forget your label!

Have you made a Falling quilt already? Or if you plan to make one this Fall, please share a photo on our VRD Facebook group – we’d all love to see them!

Well, that’s it for me – I’m heading back to my sewing machine to get some more sewing in.

Take care and I’ll see you right here next week.

Always,

Tricia @ VRD

Quilting Partners · Rose Cards · Tips and Tricks · Tutorials · villa rosa designs

VRD Busy Bee Quilt Tutorial and Hoffman’s New Fall 2025 Project Catalog

Happy Thursday to you!

Yep, it really is Thursday today. Bet I surprised a lot of you on Monday with our special VRD Announcement about upcoming changes (good ones, I promise you!). If you missed Monday’s VRD announcement, you can find it HERE.

Before I dive into this week’s inspirational quilt tutorial, I wanted to take a minute and share Hoffman’s Fall 2025 Project Catalog with you. I’m sure you’ve noticed I use a lot of Hoffman collections for our blog tutorials by now. We work closely with our friends over at Hoffman to inspire you by pairing new Hoffman fabrics and our easy breezy VRD Rose Card patterns.

Please enjoy the catalog and don’t forget to visit your local quilt shops to request these new upcoming Hoffman fabric collections and, of course, Villa Rosa Designs Rose Card patterns.

Lots of wonderful inspiration in this catalog, isn’t there? Which one(s) did you fall in love with and are adding to your “gotta make” list???

Now let’s make a quilt!

Are you ready for a super fun tutorial today? Busy Bee is an oldie, but a really great goodie! I know you’re gonna love it!

Colorful quilt design featuring various fabric patterns in shades of red, green, and navy, with a title 'BUSY BEE' and branding 'Villa Rosa Designs'.

Get your digital pattern HERE or your print pattern HERE

First things first, let me show you the fabric I’m using today for Busy Bee. You’ll notice right away that these fabrics don’t exactly have an autumn vibe going on, but I couldn’t resist these gorgeous fabrics when I was looking through my stack of quilt kits to choose my next victim….er, tutorial project. LOL!

Seriously, though, aren’t these fabrics divine??? This older Hoffman collection is called Blush Garden. It’s possible you still might find some bolts at your local quilt shop or at your favorite online shop, but somehow I doubt it as it’s just so yummy. Sorry……

Busy Bee is a fat quarter (FQ) pattern which means you only need FQs for the quilt top. No background, no borders. Busy Bee is stunningly simple and goes together like greased lightning!

A collection of colorful fabrics arranged on a sewing table, featuring various floral and abstract patterns, along with a pattern booklet titled 'Busy Bee.'
Psst! You might notice that my Busy Bee pattern looks different from the cover front above. Yep, my pattern is an older cover front. Sometimes we freshen up covers as fabric styles and trends change over the years.

Before we can get to the sewing, we have to cut our fabrics. You need to divide your FQs into 2 equal stacks.

With the first stack, we’re going to cut our FQs into strips and then into fat rectangles and squares.

Moving on to the second FQ stack, we’re gong to cut skinny rectangles and squares.

Here are all our pieces ready to sew. And that’s it for cutting for the whole quilt top. I just love patterns like this, don’t you?

A collection of quilting fabric pieces in shades of pink and floral patterns, accompanied by a Busy Bee quilt pattern booklet on a green cutting mat.

Time to sew!

We’re going to sew 2 assorted fat rectangles together to make Block 1. I divided them equally into 2 piles and set them to the left of my machine so I could just grab the 2 top rectangles and feed them through the machine to chain piece them. If I didn’t like the combination or had 2 of the same on top, I just grabbed another one off one of the piles. Sew simple.

Do you chain piece your pieces together? Chain piecing is when you keep feeding/sewing pieces together through your sewing machine without cutting the thread in between the units. It saves both time and thread.

Now for Block 2 – we’re going to sew 3 assorted skinny rectangles together to make a Triple Rail Fence block. Again, I divided my strips equally into 3 piles and put them to the left of my machine. First I sewed 2 rectangles together from 2 of the 3 piles, leaving the last pile for last. Then I added a 3rd rectangle to all the pairs, making sure each Rail Fence block had 3 different fabrics.

Time to head over to the ironing board to press all of my blocks flat.

All righty, all the blocks are sewn and pressed, so now we’re going to put them up on the design wall so we can play switcheroo until we’re happy with the block arrangement.

The layout is an easy one for because we’re just going to alternate the blocks.

Take a look at some of my swaps. See how the dark reds are accumulating at the lower right corner of the photo at the left. In the middle photo, I swapped some blocks around and it’s starting to look a bit better, but we’re not quite there yet. And then the photo at the right looks the best of all. Often, arranging the blocks takes longer than sewing the whole top together, especially if you’re making a Villa Rosa pattern!

Now that I’m happy with how the blocks look, we’re going to add a border of squares all the way around the blocks. Huh! Bet you were wondering what we were going to do with all those squares (besides add them to our 5″ square stash).

A colorful quilt top made of various fabric pieces in shades of pink, green, and white, arranged in a patchwork design.

Guess what?!? Now it’s time to swap the squares around until the quilt looks just right (are you feeling a little bit like Goldilocks, ??? LOL!).

Take a look at some of my swap outs below. You might wonder why I went ahead and laid out my border of squares before I sewed the blocks together for the quilt center. I was afraid to sew the blocks together in case I would need to tweak them again once I laid out the border squares.

A quilt top layout featuring various floral and patterned fabric pieces in shades of green, pink, and mauve, arranged in a patchwork design.

Okay, I’m happy with the blocks and outer squares layout, so I’m going to sew my blocks into rows and then sew the rows together.

The center of the quilt is now sewn together. OH NO! Somehow I flipped a block at the bottom right corner of the quilt center! Sheesh! How’d I manage to do that?!?

A partially completed quilt top featuring a variety of floral and patterned fabrics in shades of pink, green, and white, arranged in a block design on a light background.

Oh well, don’t panic! We can fix this. We have 2 options – either leave it alone and continue or else take a break to rip out the corner of the quilt and sew the blocks back together. Can you guess which option I chose?

Yup, time to grab my pal (and my enemy – I guess that makes him my frenemy, doesn’t it?), Jack the seam ripper. Do you have a favorite seam ripper? Mine is by Clover. In my humble opinion, it’s simply the best seam ripper ever. Don’t have this one? You can find it HERE. Let me know what you think.

A Clover seam ripper, displayed in packaging, designed for easily cutting threads.

Anyway, time to rip!

Ugh! Look at all the threads bits! Ripping out stitches is definitely NOT my favorite thing to do, but it’s necessary sometimes. And besides, Jack really enjoys himself when we do.

Close-up of several fabric pieces in shades of pink, with threads visible on one piece.

Now I can resew the block into the quilt. This time, I’m making sure it’s turned the right way.

Okay, disaster averted, thank goodness. I’m still not a fan of the mauve rectangle touching the dark red one, but unless I want to do a ton more ripping and resewing, I’ve decided I can live with it. What do you think? Should I have ripped out the other block, too?

Quilt top featuring an assortment of floral and patterned fabrics in shades of pink, green, and cream, laid out in a patchwork design.

Moving on……..time to sew my squares into rows and then I’ll sew them to the quilt center. Fingers crossed I don’t get any of them mixed up. I’m going to sew the top and bottom squares together first and then I’ll sew them to the top and bottom of the quilt center.

Next I’m going to sew the side border squares together and then I’ll sew them to the sides of the quilt center.

And here is the completed Busy Bee quilt top (or flimsy). Isn’t it really beautiful? LOVE LOVE LOVE these fabrics!

A completed quilt top featuring a patchwork design made of floral and textured fabric squares in shades of pink, green, and white, displayed against a light background.

Let’s take it outside in natural light to see the fabrics sparkle (instead of my dark sewing dungeon). Love it sew much! Can’t wait to finish this one.

A vibrant quilt displayed outdoors on a clothesline, featuring a patchwork design in shades of pink, green, and white.

Of course, after you get the flimsy finished, it’s time to layer it with batting and backing and quilt it. Then bind it and add a label. Hopefully soon.

Well, that’s it for me this week. Try to get a bit of sewing in this week.

See you next week!

Always,

Tricia @ VRD

Quilting Partners · Rose Cards · Tutorials · villa rosa designs

VRD Stepped Quilt Tutorial

Happy Thursday to you!

I’ve got a fun and happy quilt tutorial for you today – Stepped by Running Doe Quilts for Villa Rosa Designs.

But before we get into the tutorial – I have an AMAZING announcement for you!

Drum roll, please!

Cue the confetti! Or how about a balloon drop from the ceiling this time?

Our Rose Queen and owner, Pat Fryer, has done it again!

She has a new batik fabric collection with Riley Blake Designs coming this October!

It’s called Kalinda.

WOOHOO!

Here’s a sneak peak –

Kalinda is simply perfect for all your autumn projects! You can download the collection PDF with all the fabrics and skus below.

Guess what????? There will be another collectible pattern storage tin for the Kalinda collection, too! I can’t wait! I love love love my tin from Pat’s first collection, Bedazzled. I can’t wait to collect them all as she designs new collections in the future!

Mark your calendars for October – when Kalinda makes its debut. Don’t forget to ask your local quilt shop to order the collection if they haven’t already.

Now I’ve spilled the beans about Pat’s new collection, it’s time to jump into our tutorial.

Stepped is a fun modern Rose Card pattern designed by Running Doe Quilts for Villa Rosa Designs. It is a large quilt, finishing at 66″ x 78″ and is fat quarter friendly – yay!

Get your digital pattern HERE or your print pattern HERE

For this tutorial I chose a wonderful warm and sunny collection from our friends, Hoffman Fabrics, called Sunset Hour. I chose the bright blue as the frame and binding for a wonderful pop of color against the warm sunset tones.

As usual, the first thing I’m going to do is cut the pieces for the blocks. Since this quilt doesn’t have a border (which is common for modern quilts, by the way), we don’t have to worry about that.

I’m wondering – do you cut your borders when you cut the fabric for the blocks or do you wait until after the center of the quilt is assembled? For me, I usually cut the border strips when I cut the block fabrics, but I don’t piece and cut the borders to size until after I finish the blocks.

Oops, let me get back to the cutting. LOL!

Here are all the pieces I need to make the whole quilt top. Isn’t that blue striking?

Now we’re ready to rock and roll at the sewing machine! The Stepped block goes together really quick (of course, it’s a VRD Rose Card pattern!). I like to put the large rectangle to my left and the blue frame strip to my right so I can grab a rectangle, place a frame strip on top, and zip it through the sewing machine. Then I repeat this same step for all the blocks, using chain piecing (meaning I’m not cutting the thread between blocks as I sew).

Working with batiks is lots of fun – you don’t usually have to worry about right or wrong sides because they are dyed the whole way through.

I could just flip the frame strip over, give it a finger press, and add the 2nd frame strip on, but I want my blocks to be nice and crisp, so I’m going to head to my ironing board to press the blocks before adding the 2nd frame strip.

Now I’m ready to sew the 2nd frame strip on the side of each block. Easy piezy – just the way I like ’em!

Then it’s back to the iron to press the blocks one more time. I warn you – there are a lot of blocks! Seriously!

Next I’m heading to my flannel board, which is actually behind my pressing station, to lay out my blocks. SHHH! My flannel board is really a flannel backed tablecloth hung in front of my fabric storage wall. To hang it, I clip the tablecloth to the tops of my storage doors with big binder clips. That way, I can take it down whenever I need access to the fabric cubbies (these particular cubbies hold my yardage and fat quarters by color).

Now the fun begins. As I lay out the blocks, I’m moving them around to spread the colors and fabrics out over the whole quilt. Laying out your blocks is an important step in making a quilt because you don’t want all the same fabrics or colors clumped together in the same area by accident.

Yikes! I’m actually running out of flannel board for this quilt because it’s big, so I think I need to sew this section together before I can add the final 4 rows. Off to the sewing machine I go…..

All right, here’s the section sewn together. Sorry, just noticed in this photo, I have it turned upside down from the previous photos. Mea culpa.

Finally, I can lay out the final 4 rows and add them to the quilt top. Ugh, you can’t see the bottom section I just added because my ironing station is in the way. Did I mention this is a BIG quilt???

I know! Let’s go outside so I can show you the completed quilt top!

I LOVE the warm and sunny colors of the sunset and the blue plays nicely. I reminds me of photos of the sun setting over the ocean. I say photos as I’ve yet to actually see an ocean. Someday…….

OH! Rats!

Take a look at the bottom of the quilt, I ended up with too much light colored fabrics bunched together. This happened because I couldn’t lay out the entire quilt on my flannel board all at once before I stitched the blocks together. ARGH!

Looks like I will be doing some un-sewing with my trusty seam ripper sidekick, Jack. Then I can relocate some of those light blocks from the bottom towards the center. Sigh……definitely a project for another day. Sorry about that.

Have you ever made the Stepped quilt? If so, I’d love to see your quilts on our VRD Facebook group.

Well, that’s it for me. Have a great week! Find some time to do a little sewing this week. Or maybe some un-sewing……

Until next time –

Always,

Tricia @ VRD

Guest Bloggers · Rose Cards · Tips and Tricks · Tutorials · villa rosa designs

VRD Adobo Quilt Tutorial and NEW VRD January Rose Card Quilt Patterns

Happy Thursday!

Hi guys! Psst! It’s me, Molly!

It’s been a long time since I jumped on here for a tutorial, but I finally got this one put together just for you!

I was looking at some panels in the shop recently (to see my tour of the VRD shop, go HERE) to sew up into a quilt. I was SEW inspired by the National Parks panels and I LOVE that there are a couple of different choices. Have you seen these yet???

You can find the Utah panel HERE and the California panel HERE.

We also have some awesome Rose Card patterns to showcase these great panels!

Both are fun and amazing patterns — of course, I might be a little biased, since one is my sister’s pattern and the other one is mine. LOL! 😁

If you don’t already have these great patterns in your stash, you can find digital Picture Perfect HERE, digital Adobo HERE, print Picture Perfect HERE, and print Adobo HERE.

For today’s tutorial, though, I’m going to do Heidi’s pattern Adobo because I really want to use the Riley Blake Utah panel.

GUESS WHAT????

You can sew along with me! We made up kits for today’s tutorial. Go grab your Utah Adobo kit HERE and we can sew together! How cool is that?

Your Adobo kit will include all the fabric for the top and binding as well as the pattern.

I wanted to make this Adobo quilt in all Riley Blake Designs (RBD) so I found some RBD fabrics that pulled out the colors from the panel — Poparazzi sand for the background, Poparazzi brown for the sashing, with Dapple orange, Blossom brown, and Blossom green for the Flying Geese.

Let’s get started!

Cut the squares from the background and the coordinates. Pair up each coordinate square to a background square.

Make Half Square Triangles (HSTs) by drawing a diagonal line then sewing 1/4” on either side. Cut apart and press open. Don’t forgot to square up your HSTs if needed.

Tip from Heidi (who’s keeping an eye on me as I work on this tutorial) – Press half the seams of each color HST to the background and the other half to the color.

Now sew 2 matching HSTs together to make a Flying Geese Block A. If you pressed half of the HSTs to the colored fabric and the other half to the background, use one of each to make a Flying Geese Block A. Like magic, the seams will lock together! Great tip, Heidi!

Next we need to create a Flying Geese block for the sashing center. We’re going to use a slightly different technique for this one.

Layer a background square right sides together (RST) on the side of a rectangle sashing fabric. Draw a diagonal line from the bottom outside corner to the opposite top corner. Sew on the drawn line and cut 1/4″ away from the line. Repeat for the other side. Make 4 Flying Geese units.

Next sew background squares to the ends of 2 Flying Geese units.

Sew the 2 Flying Geese units to the sides of an orange square. Then sew the Flying Geese units with the background squares on the ends to the top and bottom. Make 1 Block B.

Molly’s Tip – If using your main print for the center square, cut it from the yardage after you cut your main print/panel C pieces.

Instead of using a main print, though, I’m using the Utah panels so we just need to cut them apart (make sure they are the right measurements – trim if needed).

If using a main fabric, cut the C pieces to the size listed on the pattern.

Next, cut the sashing and add them to sides first, then to the top and bottom. Make 4.

Lay out the main print/panel C pieces and the Flying Geese Block A’s so the Geese are flying away from the center. Sew together (please note that I added an extra background strip to the top and bottom of my quilt. Feel free to do the same, but you will need a little bit more background fabric).

Layer your quilt. Quilt it as desired. Bind it. And don’t forget your label!

TA DA! That’s it! Done! Eazy piezy!

I’m going to add one more little detail to my quilt — I’m going to embroider UTAH in the center square!

Here are some other fun Adobo quilts VRD has as kits. You can find them HERE.

Thanks for stopping by and sewing with me!

Now let’s check out the new January VRD Rose Card patterns!

I’m excited that I get to show the new patterns off today! Tricia usually does it, but today it’s my turn. Yay!

Here are the 5 main patterns.

Look! There are 2 panel quilt patterns this month – one using a 24″ panel and the other one uses a 36″ panel. Cool!

Rewey uses fat eighths, Pink Piece uses fat quarters, and Yorkshire uses half yards.

This set of patterns gives you a nice variety to add to your VRD Rose Card collection. You can get all 5 print patterns HERE (if you want digital patterns, you can order each pattern individually).

But wait — there’s more (Sorry, been wanting to say that)!

Tricia has a new table runner for you called Snowfall.

You can get the print Snowfall HERE or the digital Snowfall HERE.

And here’s our 11th Snack Mat, Woolly Mitten (just in case you’re keeping track, this is the next to the last one).

You can get the print Woolly Mitten Snack Mat HERE or the digital Woolly Mitten Snack Mat HERE.

We still have some kits available for this month’s patterns (if you know me, I’m all about kits). Get yours now before they’re gone cause they’re going fast.

Farm Fresh (with the Out of Farm’s Way collection)

Pink Peace (with the pink Tim Holtz fabrics)

Yorkshire (with the Elegance collection)

Yorkshire (with the Toil & Trouble Halloween collection)

Rewey (with Australian fabrics)

Well, that’s it from me. I can’t wait to see your Adobo quilts.

Until next time —

Later,

Molly