There’s a lot to do on today’s blog post, so let’s just jump in with both feet!
First, I want to congratulate our very own Cook family – Molly, Heidi, and mom Tamara – on taking on the former Villa Rosa Designs physical quilt shop. They’ve renamed the shop 3 Aunts Quilt Shop and you can find it HERE. Please extend them your congratulations!
6 Quilts in 6 Weeks Challenge
I am absolutely THRILLED that 20 intrepid quilters have joined in with me for the 6 Quilts in 6 Weeks Challenge. Please post your before photo (unfinished quilt top or pile of fabric with the pattern if you’re making new projects) and after photo (completed project, quilted and bound [if you are doing Accessory projects, it may not actually have quilting and/or binding and that’s okay]) on our VRD Facebook page or you can email them to me at tricia@villarosadesigns.com if you prefer.
Your before/after photos must be on the Facebook page or emailed to me by each Friday at midnight EST during the 6 Week Challenge.
If you have any questions, please drop me an email.
All right! Wanna see my finished project for Week 1????
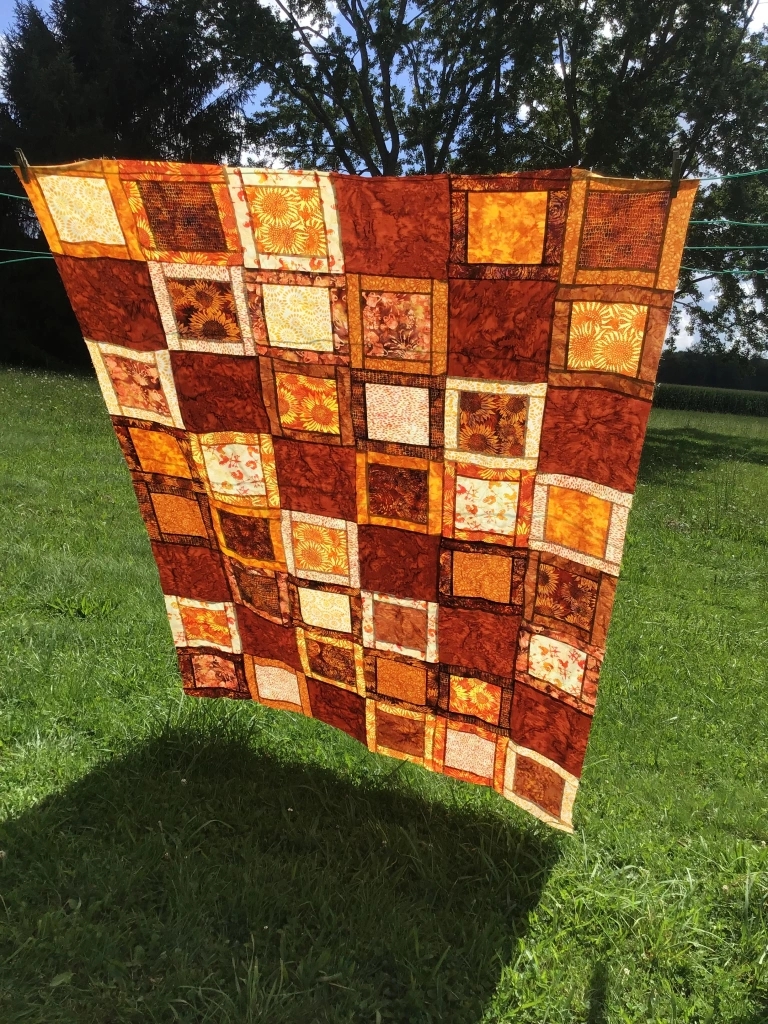
Here is my Before photo:
And here is my After photo:
This VRD quilt is the Alassio pattern. I did this one as a tutorial in August 2023 (when I first wrote this sentence I thought it was from last year, then I checked and found out it was from 2023 – yikes!) and it went into my UFO (unfinished Object) pile. I thought it would a great one to start out the Challenge because it has a lovely warm fall vibe with the yummy batiks from Hoffman. I backed the quilt with cozy orange fleece and free motion quilted it with an allover meander design. I added the binding and machine-stitched it down. I’m not the greatest at finishing binding by machine, but it sure does go a lot faster than doing it by hand. I then added my label to the back. As this isn’t one of my patterns, I added VRD and the name of the pattern to my label along with my name, city and state, and the year the quilt was finished. Even though I started it in 2023, I didn’t complete it until now, so 2025 goes on the label.
I’ve already picked my project to complete for Week 2, but you’ll have to wait until next week to see it.
Now it’s your turn – post your photos before midnight. I’ll keep track of everyone who has posted (or sent me) their before/after photos for each week. Then I’ll randomly select that week’s winner from those folks who completed their weekly challenge. Please bear with me as I line up the prizes as this past weekend was International Quilt Market and this week is Festival so many of the companies I work with are a bit preoccupied right now.
If you don’t post a before/after photo for a weekly Challenge or you miss the deadline, your name won’t go into that week’s prize drawing. And that’s okay because life gets busy. I’m not kicking you out of the challenge – just make sure to post your photos for the next week to get your name in the next week’s drawing. Easy peasy.
I want to encourage all of you as well as myself to finish projects, not to stress about them.
I hope I’ve answered any questions you might have had. If not, feel free to email me.
Now let’s take a look at the new October quilt patterns!
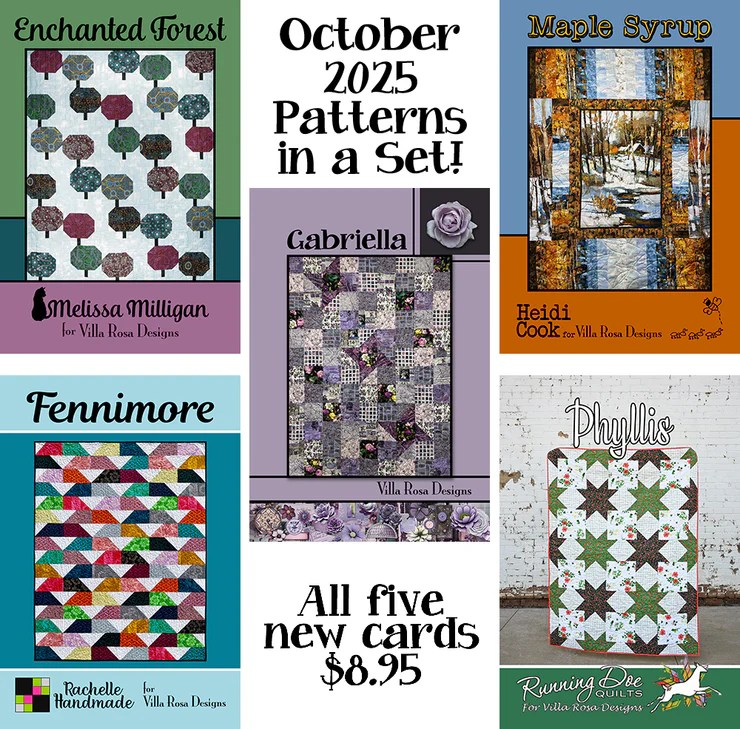
NEW October VRD Rose Card Quilt Patterns
As many of you already know, I just love the Thursday after the first Friday of every month because I get to show off our new patterns! If you’re new to Villa Rosa, you might not yet know that we offer at least 5 (but sometimes 6 or even 7) NEW patterns each and every month. It’s crazy, right? And nobody else does that, except VRD.
Enchanted Forest is Melissa’s new pattern just in time for Fall Quilting……or Spring…….or Summer. Her “happy trees” are right at home in any season! You can find a kit at Molly and Heidi’s newly named 3 Aunts Quilt Shop, HERE.
Gabriella is Pat’s newest Tim Holtz Palette quilt and features 3 lovely stars amongst the lavender and purple prints. 3 Aunts Quilt Shop still has kits available HERE.
Maple Syrup is Heidi’s latest foody quilt featuring a lovely panel and side borders of a coordinating printed stripe. 3 Aunts has kits in stock HERE.
Fennimore is Rachelle’s new modern pattern for October. It features a very interesting block. You can find Fennimore kits at 3 Aunts HERE.
Phyllis is Catherine’s October pattern and shows you a unique way to make the large star blocks. You can find 3 different kit options at Catherine’s shop, Running Doe Quilts, HERE.
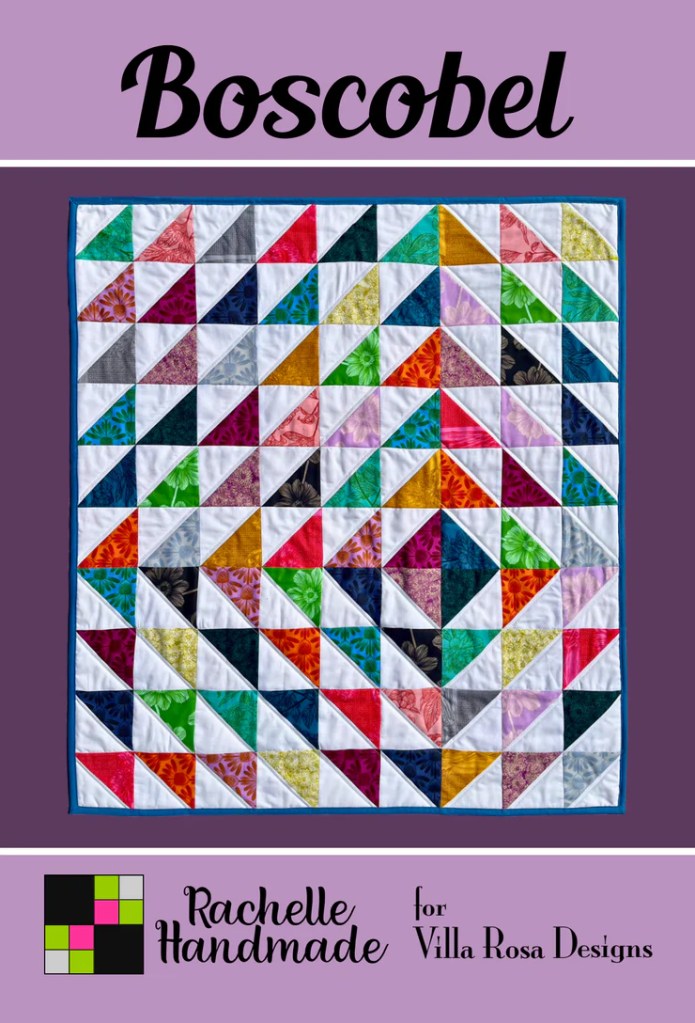
There’s one more quilt for this month and it’s a real fun one!
Boscobel is a small or wall quilt sized project by Rachelle. You can use the cut off triangles from Fennimore for this project or your favorite stack of 5″ squares. This small quilt would also make a great table quilt!
Yes, you probably noticed that yours truly did not have a new pattern for October. You’ll just have to wait for November!
I wanted to let you know that I’m still reading book 5 in the Quilt City series. The story is moving along swiftly, but I just haven’t had a lot of time to read this past week.
Well, it’s time for me to get back to my Challenge project for next week. Happy quilting to all of you!
See you right back here next week for more VRD fun and Week 2 of our 6 Quilts in 6 Weeks Challenge.
I don’t know if you are like me at all but I have a bunch of quilt tops — or flimsies, as they are often called in quilt jargon — piling up and I can’t work fast enough to make a dent in them. Part of the problem is that I have NEW quilts to make, so it’s hard to work backwards to finish the stack of flimsies that I have already made, but haven’t finished yet. It’s such a vicious cycle….
Recently, I started brainstorming some ideas to power through those unfinished tops while still working on my current and future projects. Today I thought I’d share my ideas with you. Feel free to leave a comment if you have ideas, too, because I’d love to hear them. Maybe if we all brainstorm together, we can combat the universal quilting problem of too many projects and not enough time.
Ideas to Finish Your Flimsies
Make a Plan of Action — Maybe it’s time for all of us quilters to go through our flimsies and look at them realistically — a very important first step so we know how many flimsies we really do have. How many of them can we really finish in a lifetime? Let’s be honest with ourselves here. Maybe divide them into 2 piles — the ones we think we might finish and the ones we won’t. Let’s keep only the ones we’ll actually finish and then write down a plan to get ‘em done. Soon that teetering stack of flimsies will be a thing of the past.
Share them — Since you’ve decided which flimsies you are going to complete and you’ve made a written plan to accomplish that, why not share those unwanted flimsies with quilty friends, fellow quilt guild members, quilters who make charity quilts, a church quilt group, or some other charitable organization. Then you can clear away those unloved flimsies without guilt and make someone else’s heart happy.
Take a Class — Maybe you don’t know how to machine quilt your own quilts. Why not learn how? Check out your local quilt shops or quilt guilds to find a machine quilting class. Or maybe you’ve always wanted to learn hand-quilting? What are you waiting for? Sign up for a class and get quilting those flimsies yourself!
Use fleece — I’ve talked about using fleece on the backs of my throw quilts before. Check out my post on quilting with fleece HERE. Using fleece on the backs of throw quilts makes them super cozy and lightweight. Fleece fabric is relatively inexpensive and batting isn’t even needed, which makes using fleece also economical. And don’t forget time-saving — you only have to layer your flimsy with a single layer of fleece, which takes less time than using both batting and backing. Just remember that fleece is very stretchy while your flimsy is not and you may need to adapt your quilting designs to manage the stretchiness.
Practice makes perfect — Just get those quilts layered with batting and backing and get quilting. Hand quilter? Set time aside every day to work on your hand quilting. Machine quilting? Use your flimsies as hands-on experience as you master free motion quilting! Start with table runners and smaller projects and work yourself up to larger projects as you feel more comfortable and your machine quilting skills improve. Wiggly lines and straight lines get the job done too.
Long Arm Quilting — Find a local long arm quilter and work together to create a plan to get your large flimsies quilted. Maybe you can swing getting one done every month or every few months, or…? Do whatever works for you, just keep working towards your flimsy-free goal.
Have a party — Enlist your friends and have a good old fashioned quilting bee, but instead of everyone working on the same quilt, ask each friend to quilt one of your smaller projects. Anything goes! Ask your friends to bring their sewing machines and you will have tables and extension cords at the ready and will provide all the munchies! When you ask your friends to help you, make sure you promise to help them finish their own flimsies.
Presto Change-o — Who says a quilt top has to continue its life as a quilt? Why not repurpose a flimsy (or more) into a snazzy jacket. A tote bag or purse? Pillows for the couch? Place mats? Or whatever else your little heart desires. Have some fun with your flimsies and turn them into finished projects.
Mix and Match — Speaking of chopping up your flimsies to make new projects, how about mixing and matches bits and pieces from different flimsies together into a new project?
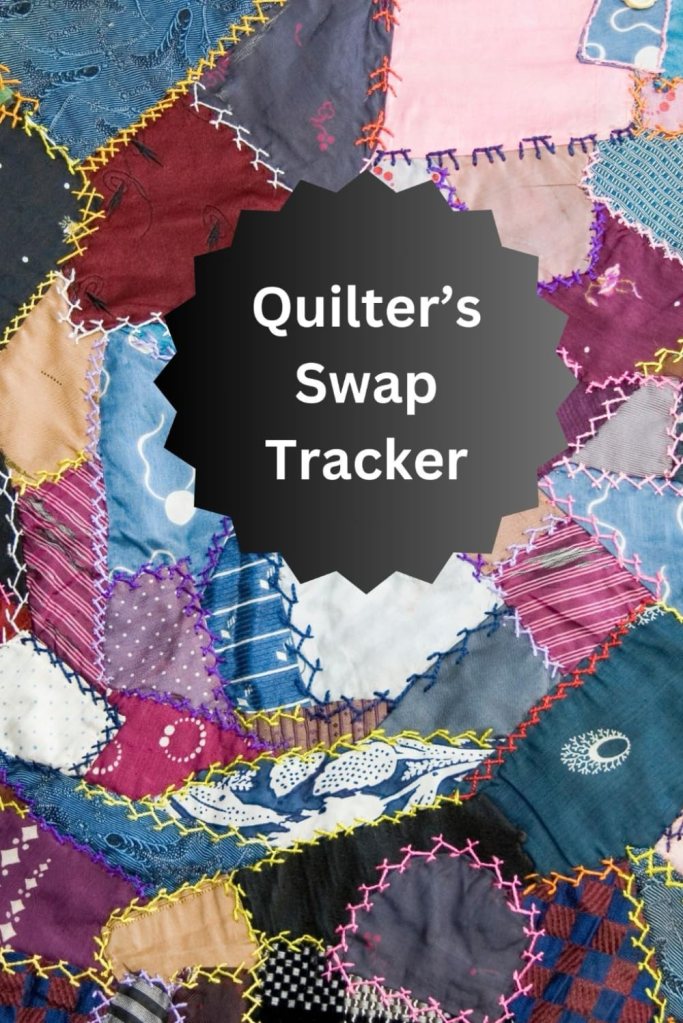
Host a Flimsy Swap — Gather up your quilt posse and have a fun flimsy swap. You might need to set some basic rules — the most important one that comes to mind for me would be that each participant must take as many flimsies as they bring for the swap, even if it means taking some of their own back home. Or limit the swap to one flimsy per person. Agree on a future date to have your new-to-you flimsies finished and have a quilt show of the completed projects. With snacks, of course. Then……..repeat. Often.
Take Me as I Am — Maybe you don’t machine or hand quilt. Maybe you just don’t have the money to send your quilts out to a long arm quilter. So why not enjoy those flimsies just as they are? Fold them over the rungs of an old ladder. Drape them over the couch. Use them as table covers in the dining room. Fold them prettily and stack them in an old jelly cupboard. Quilts love to be admired and enjoyed, even if they aren’t quite completed. Just remember to continue to work towards getting them done, one flimsy at a time.
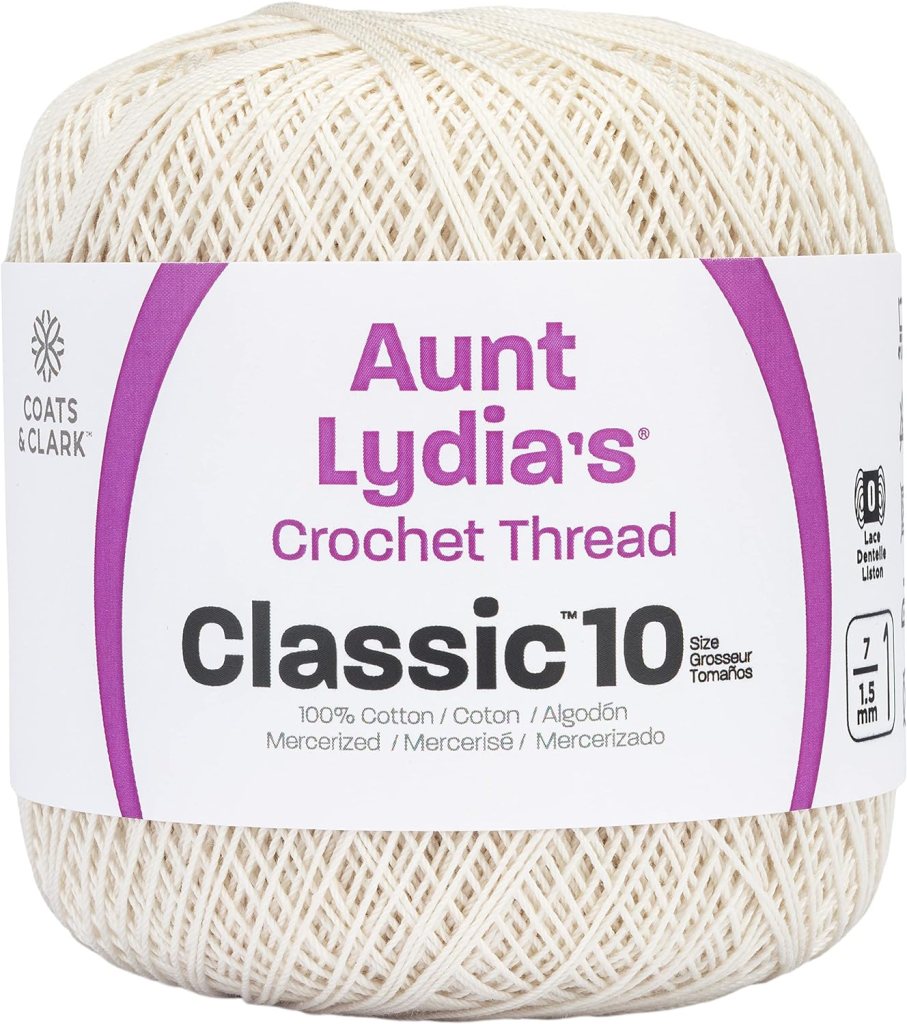
Tie ‘em Up — Have you ever tied a quilt? This is how I made my first five or six quilts way back when. I backed them with a sheet and used a thicker fluffier poly batting. I sewed the layers together envelope-style and then used cotton crochet thread with a long needle to tie my quilts. I tied double knots and trimmed my threads close because I really didn’t want a hairy quilt. I usually placed my knots at seam intersections to hide them a bit better. Tying worked great and I could finish a throw or bed-sized quilt in a day. This was, of course, before I taught myself to do free motion quilting. Just make sure to put in enough ties to keep the batting from shifting around.
Go Small — Maybe you love to make big bed quilts but can’t or won’t quilt them yourself or send them out to a long armer. My solution? Make them smaller! No one ever said you couldn’t cut up your quilt to make 2 or more smaller quilts! Maybe a big bed quilt could become a throw, a wall quilt, a table runner, a set of pillows? Bet you can manage those more easily! This is even a great way to create a new coordinated look for your space, too. Just think how fast you could whip up a stack of table runners or quilted scarves for Christmas gifts when you start with big quilt flimsies? Oh, the possibilities….
Swap skills — You’ll need some friends to help you out with this idea. Have a friend who likes to machine quilt? Swap skills with them! If they will machine quilt one of your quilts, you will clean their house, make cookies, bathe their dog, babysit the kids, or whatever skills you can barter with. Maybe you can swap skills with more than one friend or even a local long arm quilter. Write a list of the skills you are willing to barter before you talk to people about swapping your skills for machine quilting. Just keep it legal, clean, and safe please.
Make Toys — Why not find a brilliant collection of simple stuffed toy patterns you can make for kids and cut the pattern pieces out of your flimsies. Don’t have kids or grandkids? Donate your soft toys to a children’s hospital or other charitable institution. Lions, tigers, and bears….oh my!
Repurpose — Did you know you can repurpose your flimsies? This is kind of like Presto Change-o above, but with a little twist. What else can your flimsies be besides quilts? Maybe you can recover a side chair with a pieced top to create a unique one of a kind accent for your space. Or perhaps you could make dining chair seat covers? Time to think outside the quilt here — anything goes.
I hope these ideas will inspire you to dive into your own stack of flimsies and get them done. From quilts to decor to soft toys. Upholstered foot stools and lampshades. Pillows and table runners. There are sew many projects you can create with your stack of flimsies. Sew, what are you waiting for???
We’re going to jump right into our topic today — batting, backing, and preparing a quilt for quilting. There’s a lot to cover, so grab your cup of coffee and let’s get to it. I apologize in advance, but this post will be text-heavy. Sorry……..
Batting
If you’re new to quilting, you might not know what the filling inside of a quilt is called. Here in the USA, we call it “batting” or you might see it as “batt.” If you are in Europe or Canada, you might hear it called “wadding.” Whatever it’s called, we are talking about the layer between the top of the quilt and the back (or bottom layer) of the quilt.
If you’ve looked at batting options out there, you might be a little overwhelmed. There’s cotton, polyester, cotton/poly blends, wool, recycled, bamboo, natural, bleached, white, black, etc., etc. How do you know what batting is the best?
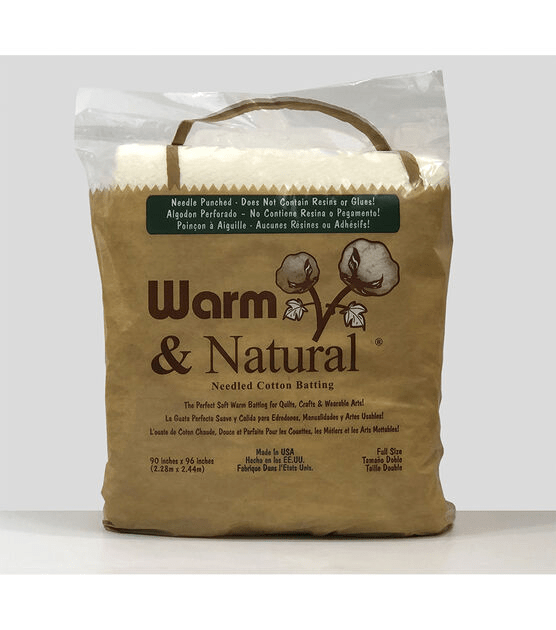
I’m here to to tell you that there isn’t only 1 “best” batting out there. A lot of what batting you choose depends on your project as well as your personal likes/dislikes or even possibly allergies. Classic favorites include: Warm and Natural, Hobbs, and Mountain Mist, but there are many more companies offering batting today.
Warm and Natural
Hobbs
Mountain Mist
So your best bet is to try some different samples of batting. Do you like the feel of cotton? Or a blend? Or polyester? Or silk? Or…? Which batting is easier to work with? Are there differences/similarities in the same fiber contents but different companies? If you’re going to quilt your own quilt, how does each sample quilt? Hand quilting or machine? Maybe you are tying your quilts?
Eventually, you will find the batting that you prefer and that’s probably the one you’ll use over and over again in your quilts. If you are interested in reading detailed articles about choosing quilt batting, there are LOTS on the Internet, just type “how do I choose quilt batting” into your favorite search engine and go from there.
What if the pattern I’m using doesn’t tell me how much batting to buy for my quilt?
I’m so glad you asked! You can figure out how much batting you will need with a simple formula.
1. You need to know how big the finished quilt will be ( be aware if you are adding or subtracting blocks or borders, your finished size might be different from the size listed on the pattern).
2. You will add 8 inches to both the length of the finished size and the width of the finished size.
Why 8 inches? Most professional quilters ask that your batting and backing be at least 4″ bigger on each side of your quilt top. If you are quilting the quilt yourself, you can sometimes get along with less, but it’s better to have too much batting and backing around the sides than not enough. If you are getting your quilt quilted by someone else, make sure to ask if 8 inches is enough for them, they may want more.
So, let’s do a few examples.
Quilt A is 57″ wide by 75″ long. Let’s add 8″ to each measurement for a total of 62″ x 83″ — this is the minimum batting size you need for your quilt.
Quilt B is 21″ wide by 52″ long. Let’s add 8″ to each measurement for a total of 29″ x 60″ — this is the minimum batting size for this table runner.
Great, but I can’t go to the quilt shop and buy exactly 62″ x 83″ or 29″ x 60″ of batting. So now what?
You can usually purchase batting by the yard or by the package at your favorite retailer. A yard of batting would be 36″ long by whatever width the batting is, which could range from 45″ – 120″!
Batting by the Yard
Okay, for Quilt A we need to buy a piece at least 62″ x 83″. At Quilt Shop X, we can buy batting that is 90″ wide, so that would be long enough if we turn the quilt sideways (83″ wide x 62″ long). Now what would be the closest yardage amount for 62″? 1.75 yards equals 63″. I would probably buy 2 yards of the 90″ wide batting, just to be on the safe side — it would give me 72″ x 90″, which is larger than what I need, so that’s good. Done.
Batting by the Package
Instead of batting by the yard, Quilt Shop Z offers a selection of prepackaged batting in different sizes. Here’s what you might find:
Craft – 34″ x 45″
Crib – 45″ x 60″
Throw – 60″ x 60″
Twin – 72″ x 90″
Full – 81″ x 96″
Queen – 90″ x 108″
King – 120″ x 120
Keep in mind that these measurements might be slightly different depending on the manufacturer.
Okay, for Quilt B our table runner, we need at least 29″ x 60″. Hmmm. A Crib or Throw size might work because they are both 60″, but that might be cutting it a little close, so I would probably go up to the next size, which is a Twin at 72″ x 90″. Of course, I will have leftover batting, but I can save that and use it for another project (or 2 or 3…).
Backing
Getting the correct size of backing for your project is pretty much the same process as I described above for quilt batting — you will want the backing to be at least 4″ bigger than the quilt top all the way around, or just add 8″ to the finished width and length of the quilt. Mostly, you’ll buy backing fabric by the yard, but there are more and more shops that are offering precut pieces of extra wide backing, usually in 2 or 3 yard pieces by the extra wide width, usually 108″, but you might find 120″ as well.
It’s really easy to figure out how much backing you need if you plan to buy the extra wide fabric. Buying extra wide fabric is a huge time and effort saver.
But, some of the time the fabric you want for the backing is the regular width of 42″ – 45″ wide.
How do I figure out how many yards of fabric to buy if the pattern doesn’t tell me?
A great question! Let’s use our Quilt A example from the Batting section.
Quilt A is 57″ wide by 75″ long. Let’s add 8″ to each measurement for a total of 62″ x 83″ — this is the minimum backing size you need for your quilt (we figure this just like the batting).
We know that a yard of fabric is 36″ long. The average width of regular-width quilt fabric on the bolt is about 44″ wide. But because fabric can vary a bit in width, I usually use 40″ as my width measurement.
For Quilt A — I know I need it to be at least 62″ x 83″. There are 2 main ways to piece a backing fabric together: vertical or horizontal, but sometimes one will work better than the other. In Quilt A, we will need to piece the backing vertically because horizontally there wouldn’t be enough fabric as 40″ + 40″ is only 80″ and we need at least 83″).
A vertically-pieced backing
Using the 40″ width, I would need 2 widths to get at least 62″ wide. I know I need at least 83″ for the length. So that means I would need to sew together 2 pieces of fabric each at least 40″ x 90″ (I chose 90 as it’s greater than 83″ and it’s 2.5 yards). So I would buy 5 yards of regular width fabric. Cut the 5 yards into two 2.5 yard pieces (90″) and sew them together down the middle using a 1/2″ seam (instead of a 1/4″ seam) to add some durability. Then press the seams open and press out the wrinkles and creases. DONE!
Here are my favorite tips for selecting backing fabric:
Use quilting weight fabric, just like what you used for your quilt top. Backing a quilt with a sheet may result in a stiff quilt that does not drape well.
Choose a backing fabric that compliments the front of your quilt.
Make sure the fabric for your backing is big enough.
Use a busy printed backing fabric as it will not only look really good on the back of your quilt, it also can hide the quilting stitches — this is particularly great when you are just starting out either hand or machine quilting.
In the first example, the black thread really sticks out like a sore thumb on the grey backing fabric. The thread and backing look fine together, but if you flipped over your quilt to the back, any mistakes or wobbles in the quilting would really jump out at you!
In the second example, the grey thread blends in more with the multicolored argyle backing fabric, which would help to hide or at least make less noticeable any mistakes or wobbles in your quilting.
5. One of my favorite places to find fabric for backing is in the discounted or clearance section, where you’re sure to find a selection of great quilting fabrics that are older and are being sold at a discount to make room for newer fabrics.
Preparing Your Quilt for Quilting
Now that we have our quilt top completed, we have batting that is 8″ wider and 8″ longer than our quilt top, and we have a busy backing fabric that is also 8″ wider and 8″ longer than our quilt top, it’s time to get it ready for quilting.
First you have to make some decisions before you go any further:
Hand quilting or machine quilting? (or perhaps tying the quilt?)
If hand quilting, are you doing it yourself?
If machine quilting, are you doing it yourself?
So, let’s say we have decided to send our Quilt A to Sally who is a reputable long arm machine quilter in the area.
You should ask the long arm quilter how to prepare your quilt for quilting, but here are some general suggestions:
Carefully press the top of the quilt and the backing of the quilt
Turn the quilt top so that the underside is up and trim any and all strings and threads
If your batting was folded or wadded up in a package, you may need to lay out the batting so the creases can relax. You can speed this up by tossing the batting into the dryer on low or air fluff (so it doesn’t shrink)
It wouldn’t hurt to press the quilt top and backing one more time, but be careful not to distort or stretch the quilt top
Sally the long arm quilter will load the backing, batting, and quilt top onto her frame and will quilt the layers together using whatever design the two of you decided upon. You may also be able to select the thread color you want used on your quilt. White, ecru, or grey are always safe choices, but colors like red, orange, pink, blue, or purple can really give your quilt that little extra something-something.
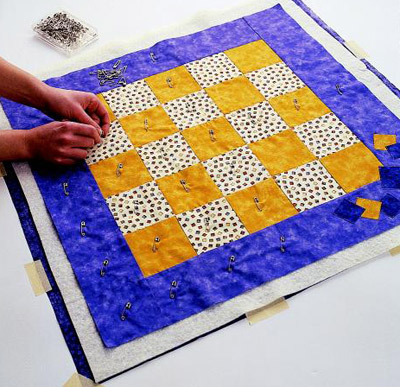
If you are going to quilt your quilt yourself, you will need to layer your backing, batting, and quilt top.
Lay your wrinkle-free backing fabric wrong side up on a flat surface. Tape the edges of the backing fabric down to the table, making adjustments until the backing fabric is perfectly smooth and flat without any wrinkles or bumps. You will need to stretch the backing gently to make it nice and flat, but be careful not to overstretch the backing as this can skew the fabric.
Center your batting on top of your backing and smooth it out until it is wrinkle-free.
Now center your quilt top right sides up on top of the batting. You should see at least 4″ of batting and backing around all the edges of the quilt top. Smooth your quilt top so it is perfectly flat with no bumps or wrinkles.
Using pins, a basting tool, or needle and thread, baste the 3 layers together. If pinning, place pins about every 4-5 inches (some quilters like their pins closer together and some like them farther apart). I like to pin across the center horizontally and vertically and then pin in diagonal lines from the center out to the corners. If needed, I add extra pins here and there. You can check out http://www.AllPeopleQuilt.comHERE for a good article about different ways to layer and baste your quilt.
Photo from AllPeopleQuilt.com
WHEW! I know this was a lot of information to absorb. You may need to read it more than once. LOL!
There are also lots of great resources about this topic online, in quilting books, and in the back of your favorite quilting magazines.