Rose Cards · Tutorials · villa rosa designs

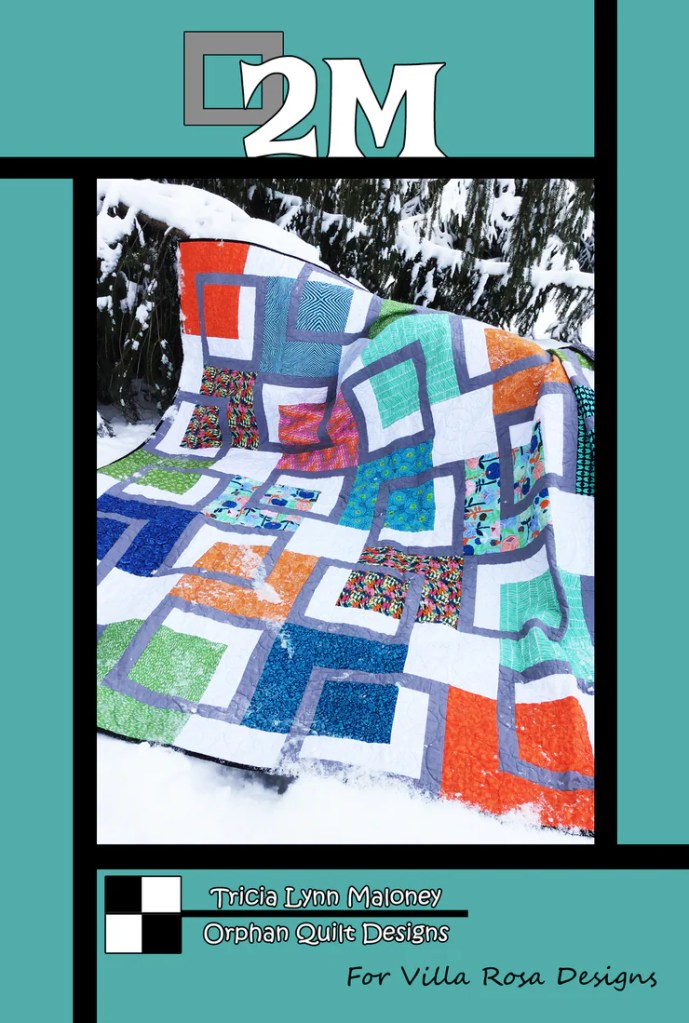
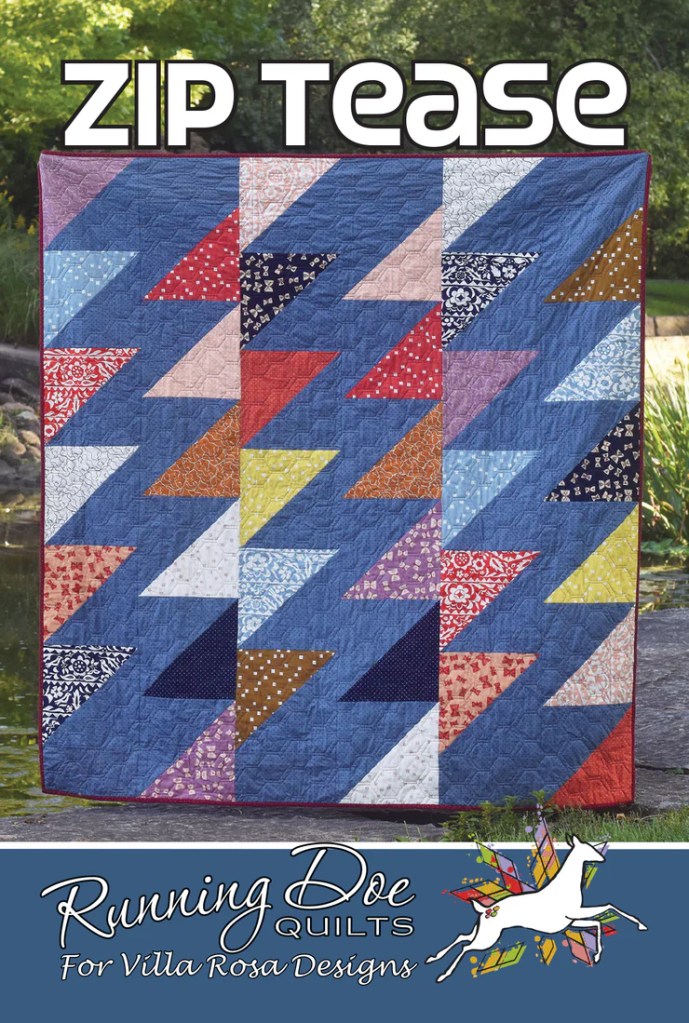
VRD Jubilee Quilt Tutorial

Happy Thursday to you!

Warm temps are here……..finally! Maybe a bit too much too fast, but I’ll take it! The sun is shining, the sky is blue, it’s actually warm in the upper 80s, but there’s a nice breeze to make the heat tolerable. Believe it or not, I’m sitting here in shorts and a t shirt as I write this blog post. Last week, I was wearing a fleece jacket and long pants. Oh, the difference a week can make. I hope you are having some nice weather wherever you are, too.

I thought we’d kick off the gorgeous weather here in my little corner of the world with a fun quilt tutorial.

Let’s make Jubilee today. It’s a super fast and fun fat quarter quilt and it’s a great option when you need a quilt in a hurry. Looks great in just about any fabric. Perfect for summer quilting. Make it in the afternoon and still have time for dinner and s’mores around the campfire in the evening.

A vibrant quilt titled 'Jubilee' featuring an assortment of patterned batik fabrics in earthy tones of brown, turquoise, and black, designed by Villa Rosa Designs.

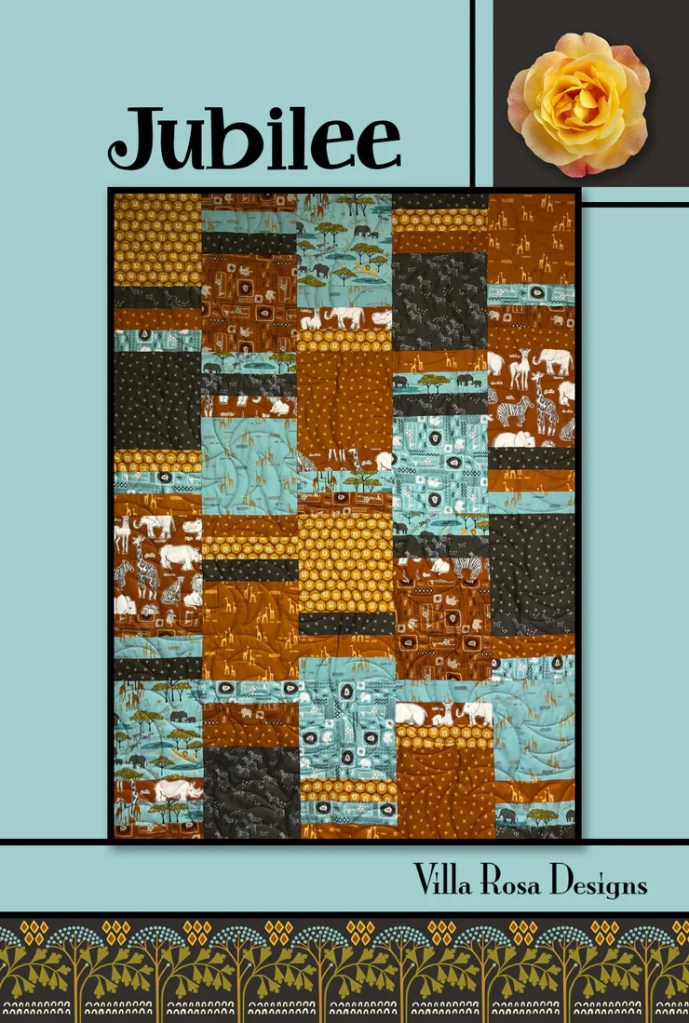
Get your digital Jubilee pattern HERE or your print Jubilee pattern HERE

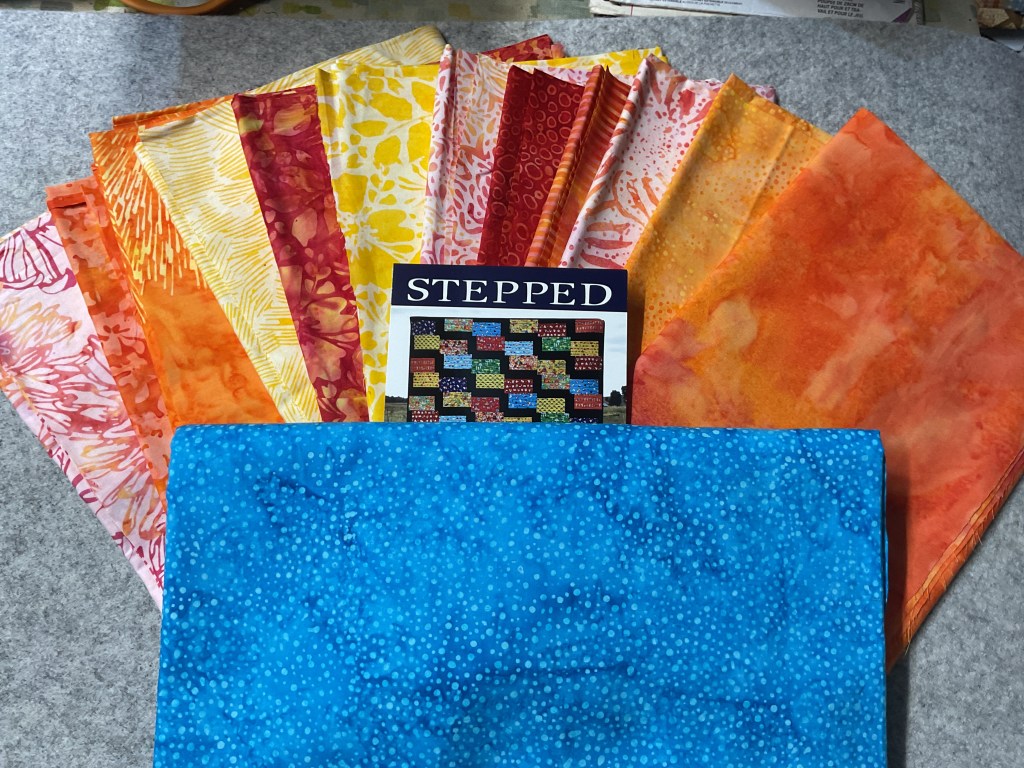
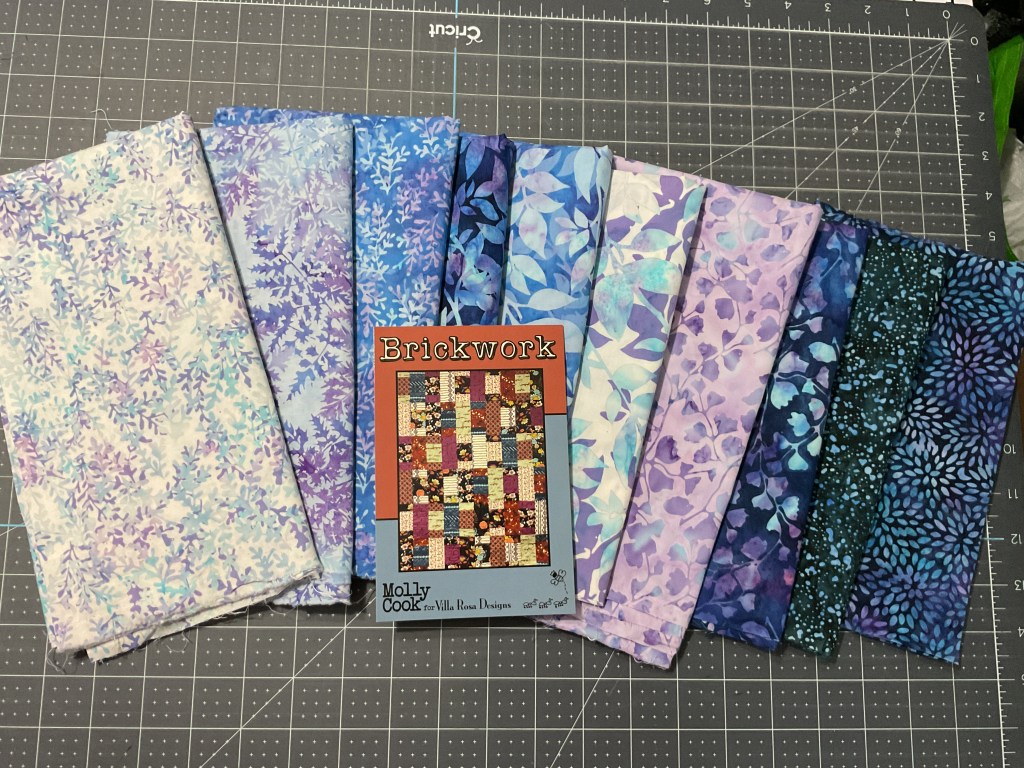
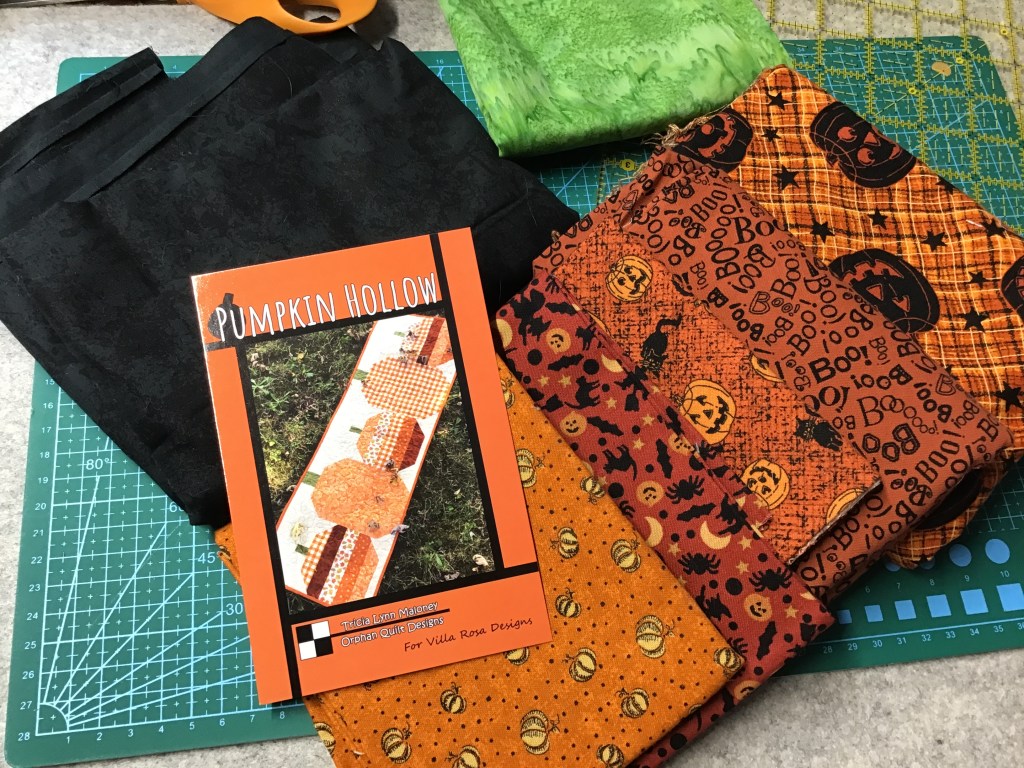
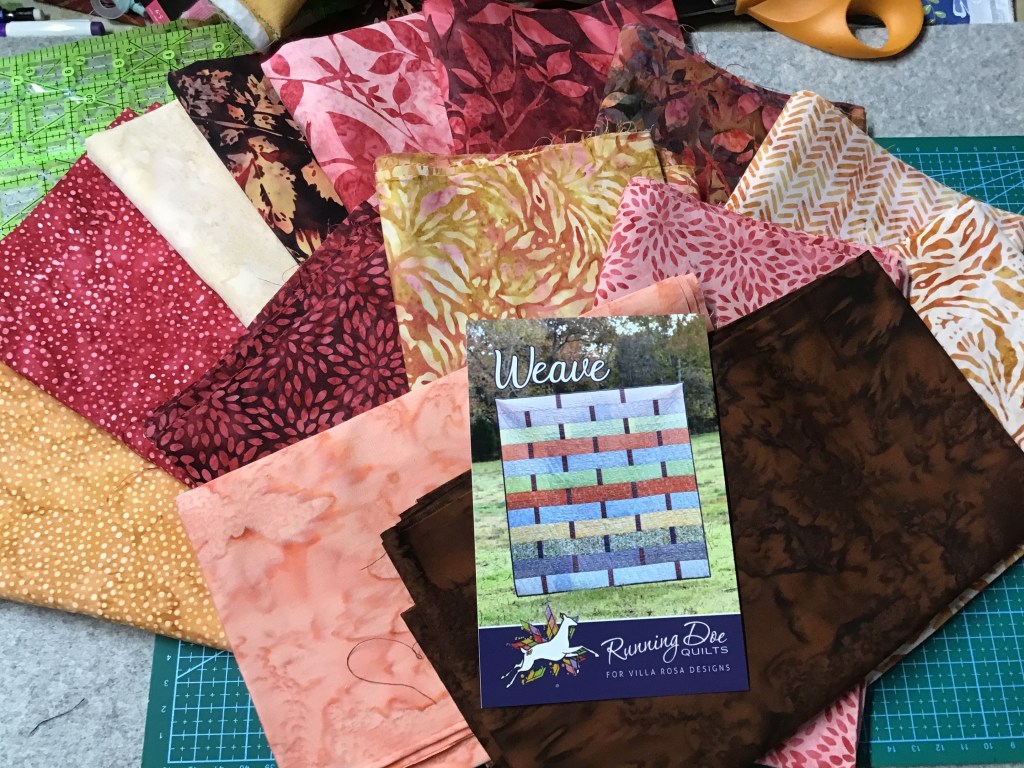
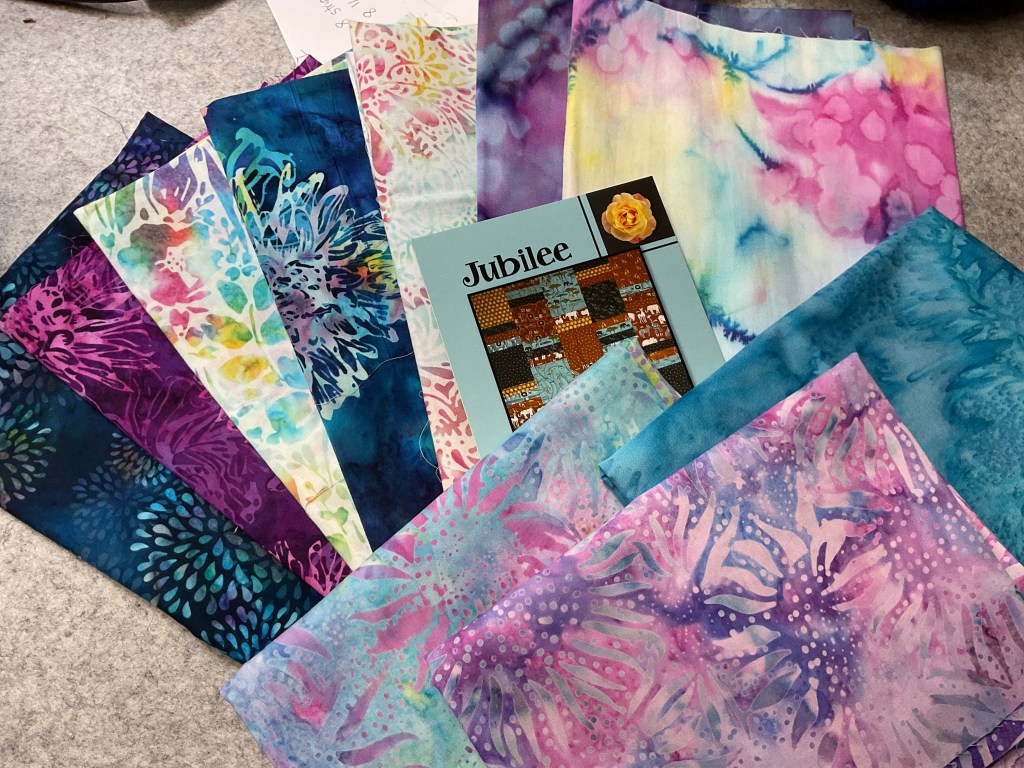
The first thing we need is fabric! YAY FABRIC!

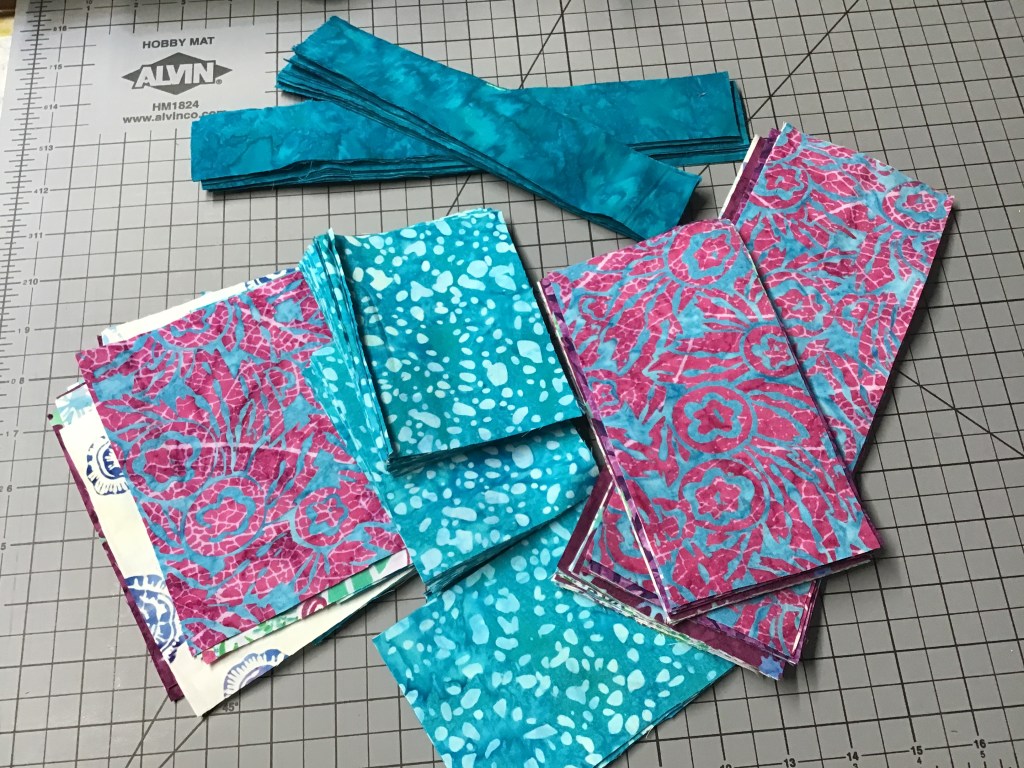
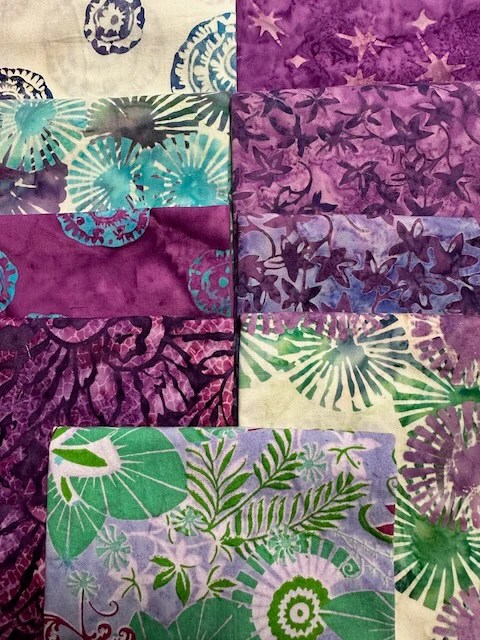
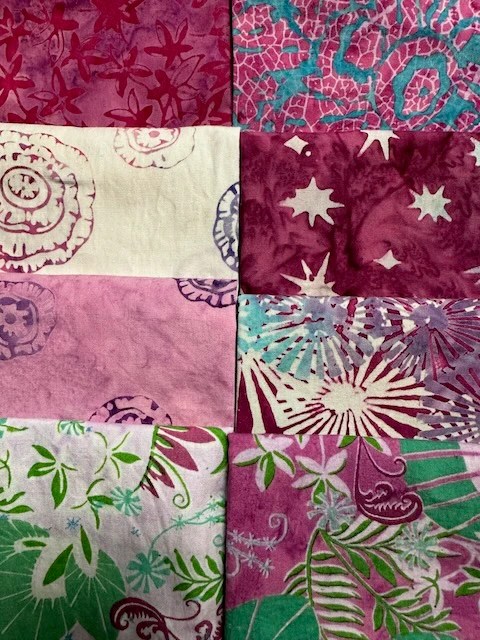
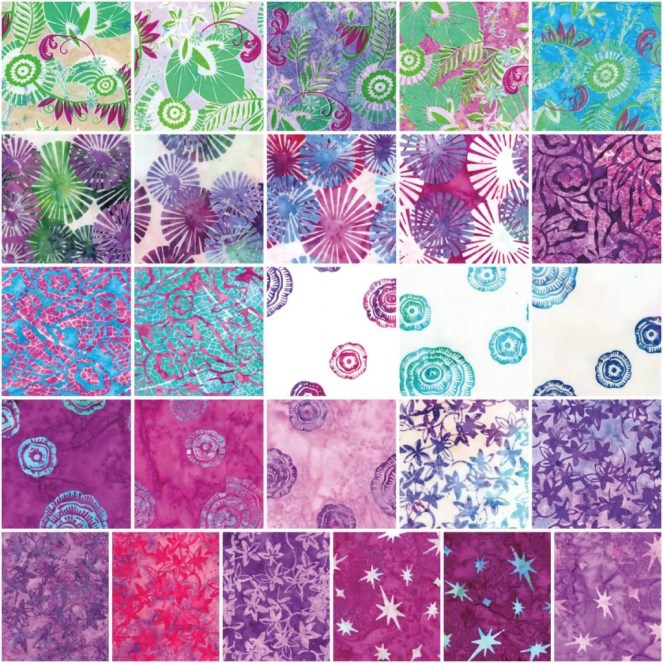
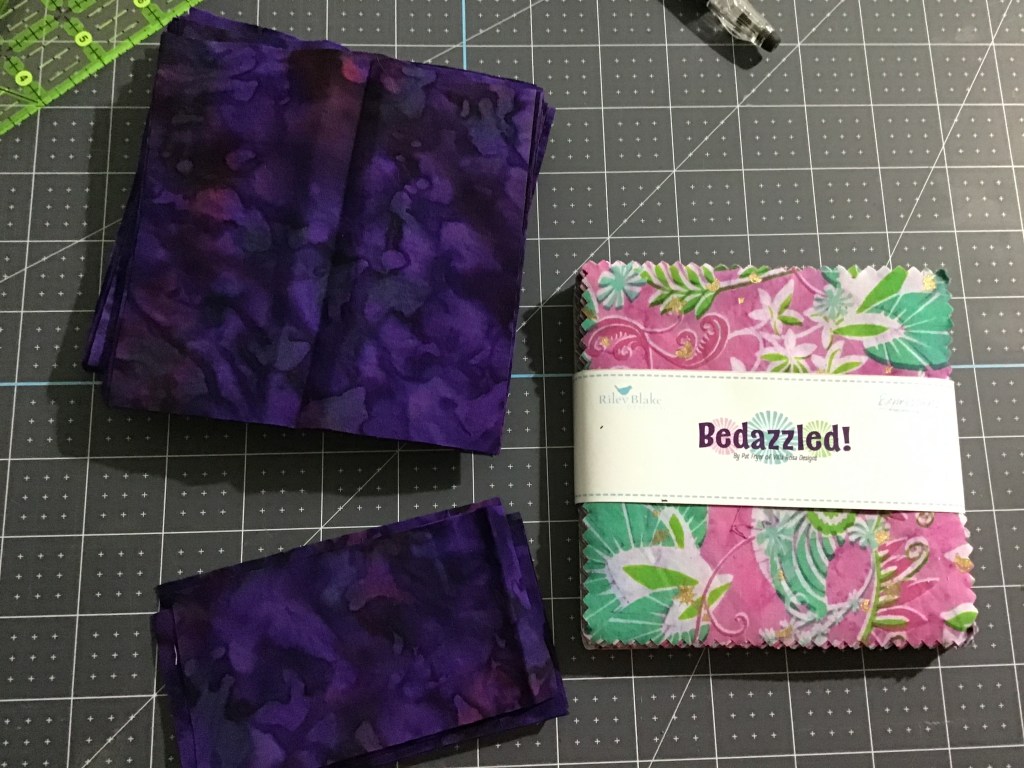
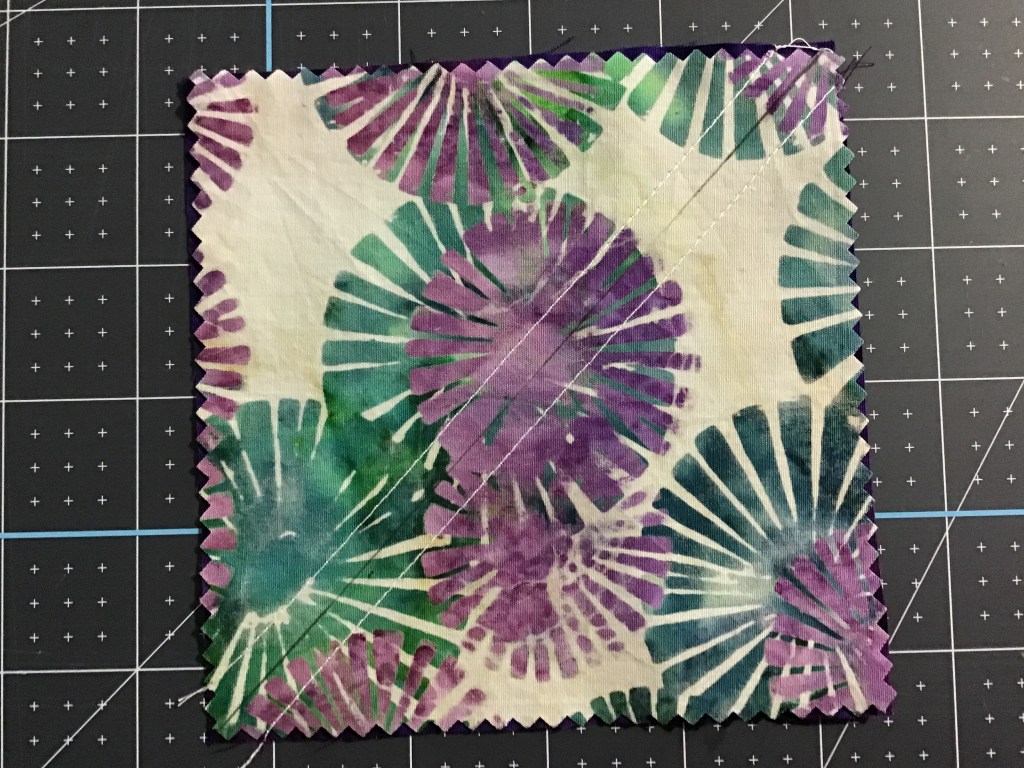
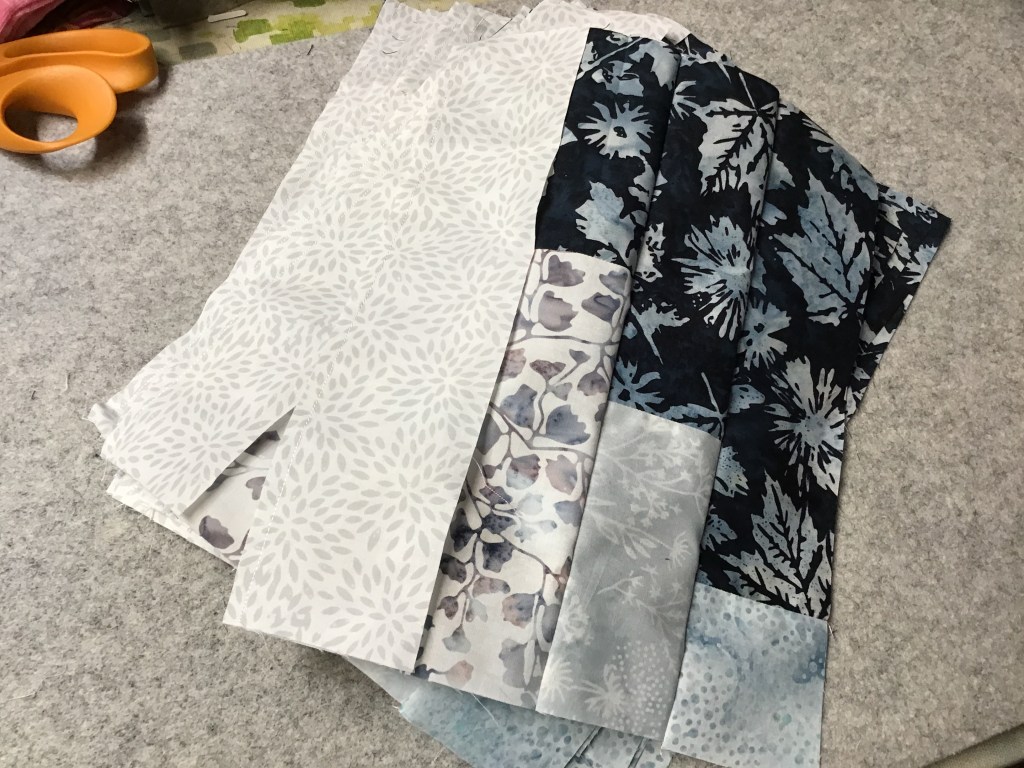
Today I’m using batiks from the Sweet Shoppe collection by our friends at Hoffman Fabrics. Aren’t these fabrics yummy? I can’t wait to see how the quilt turns out!

A collection of colorful batik fabrics arranged around a Jubilee quilt pattern, showcasing vibrant colors and intricate designs.

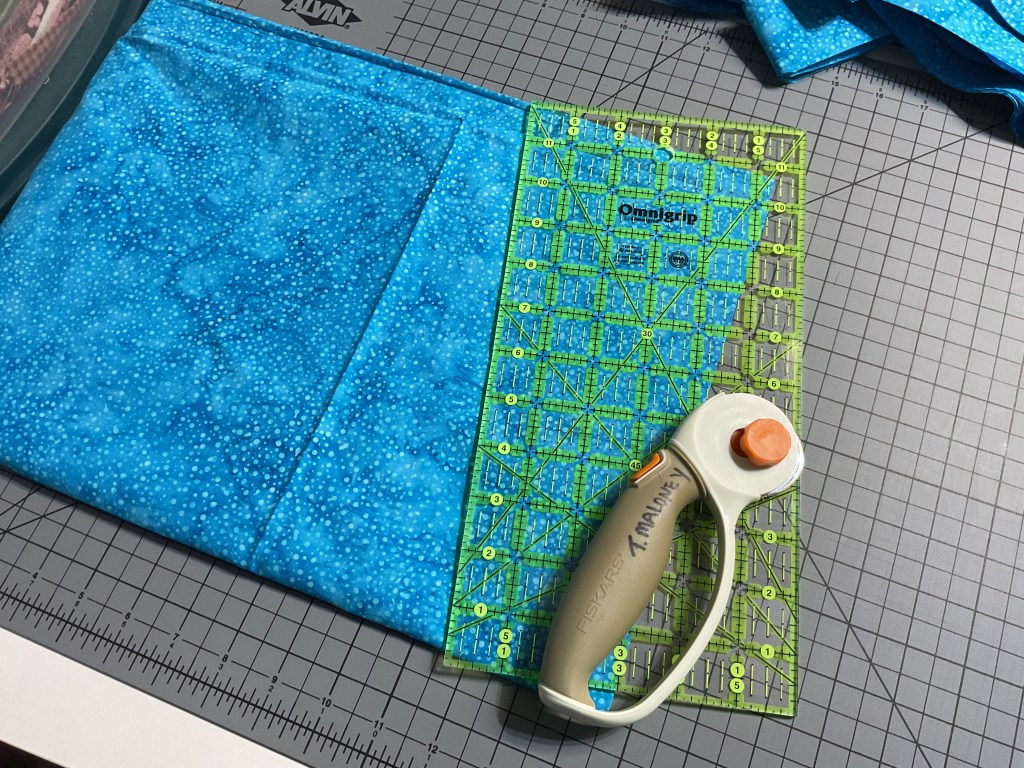
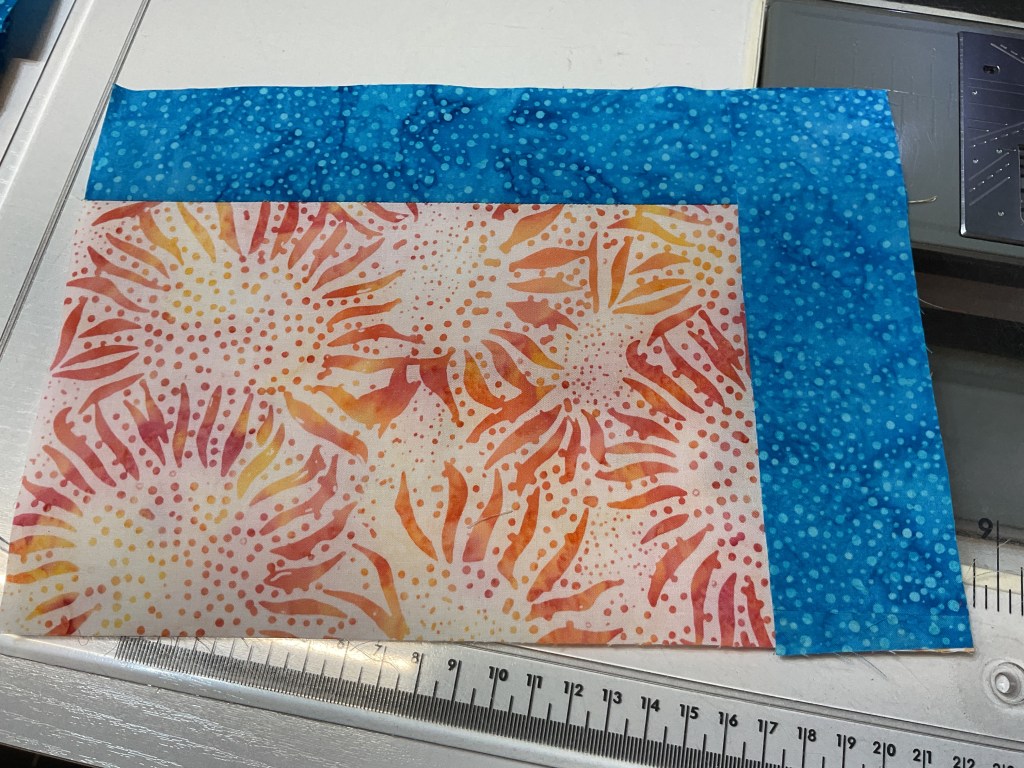
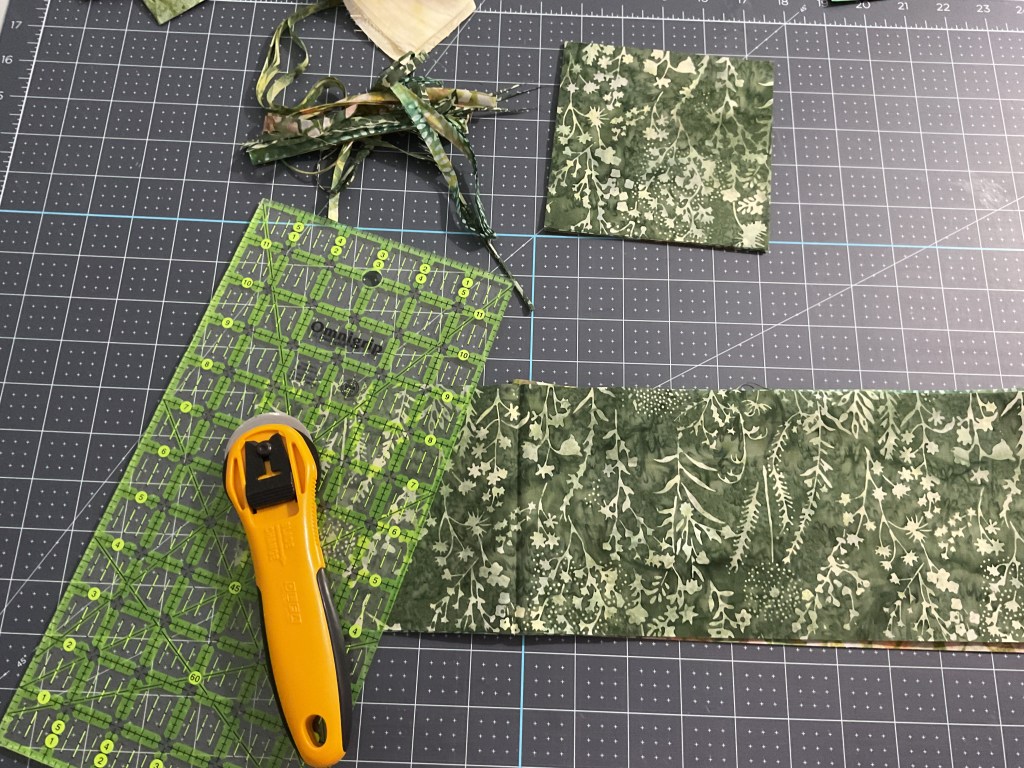
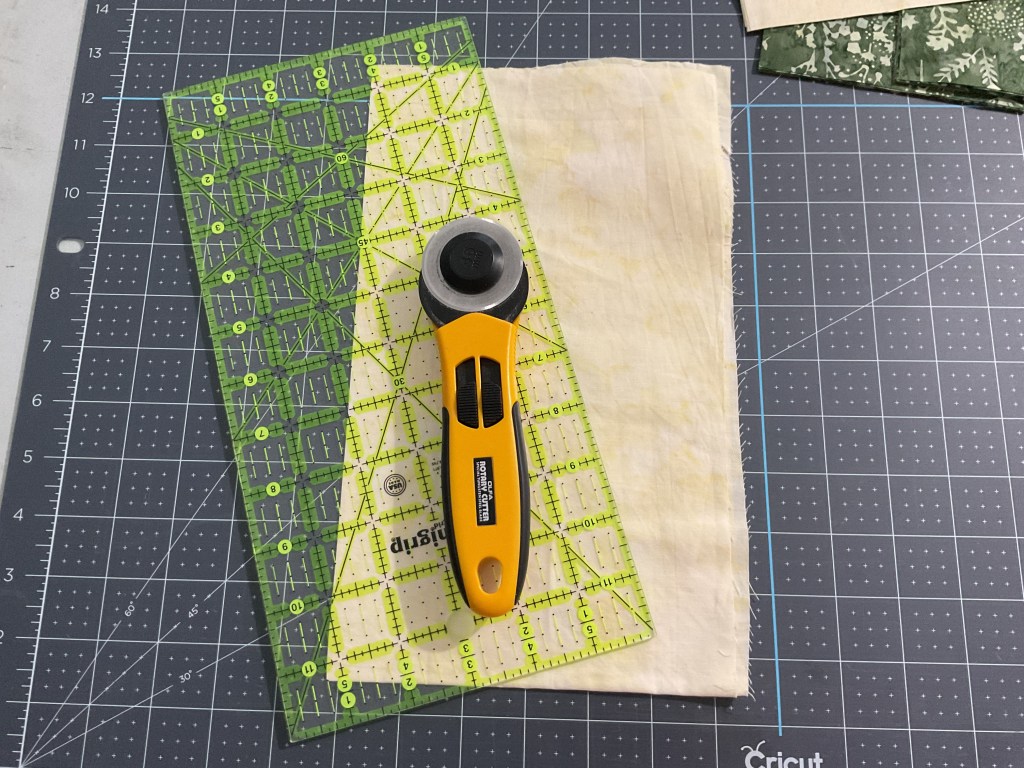
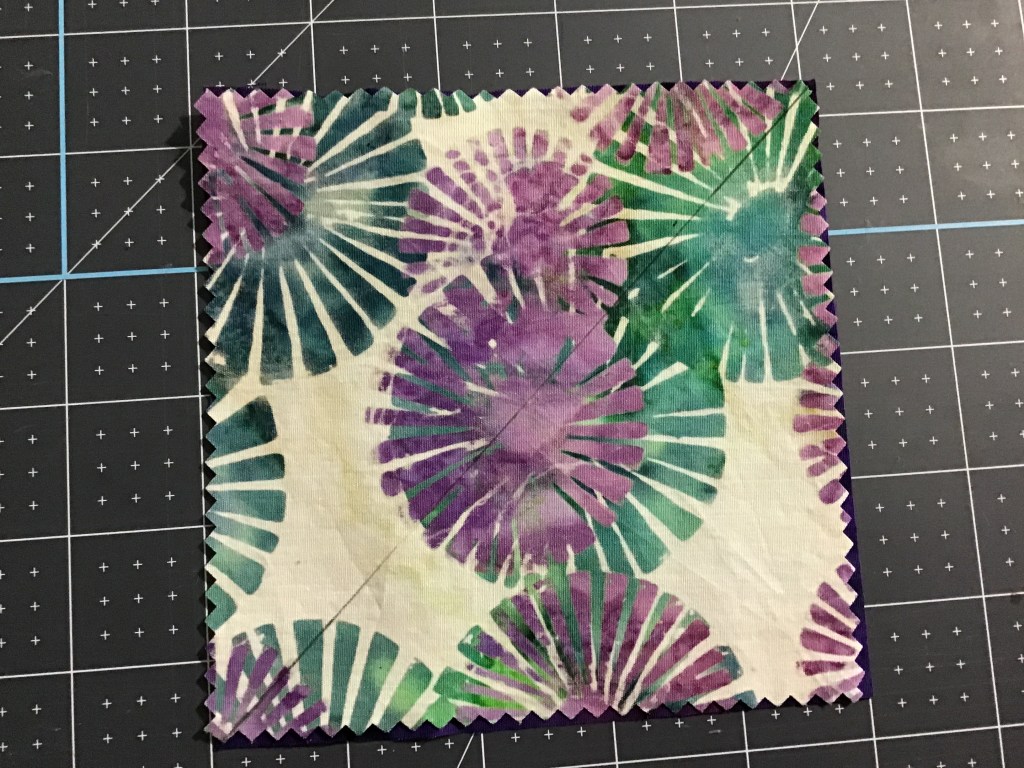
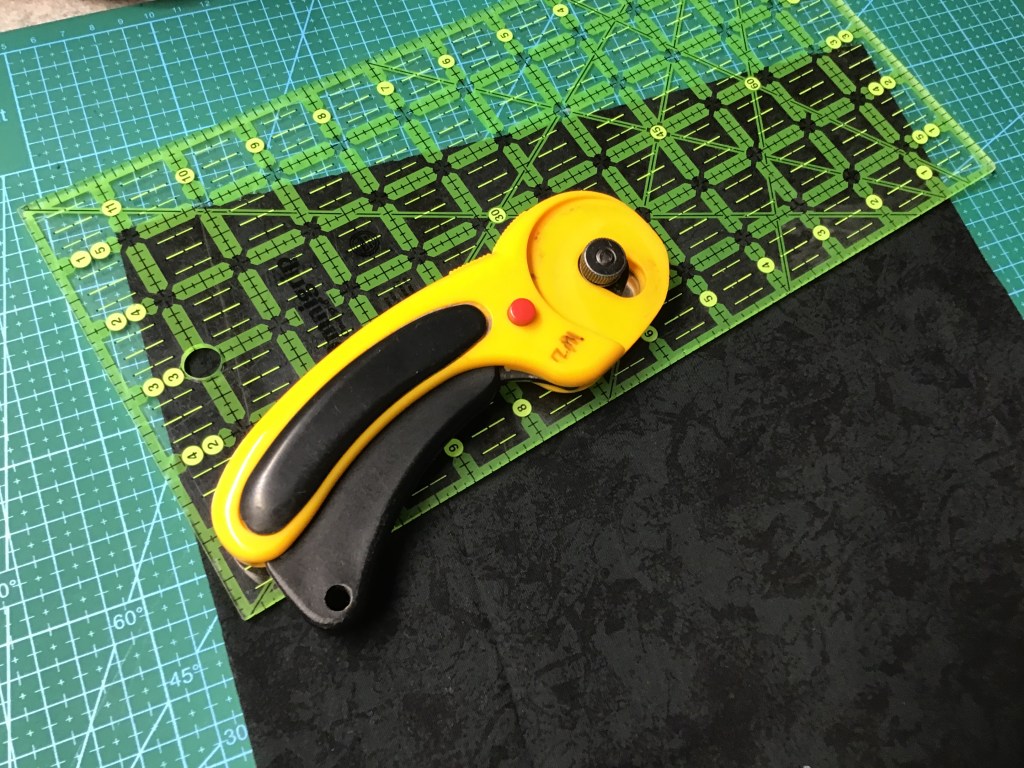
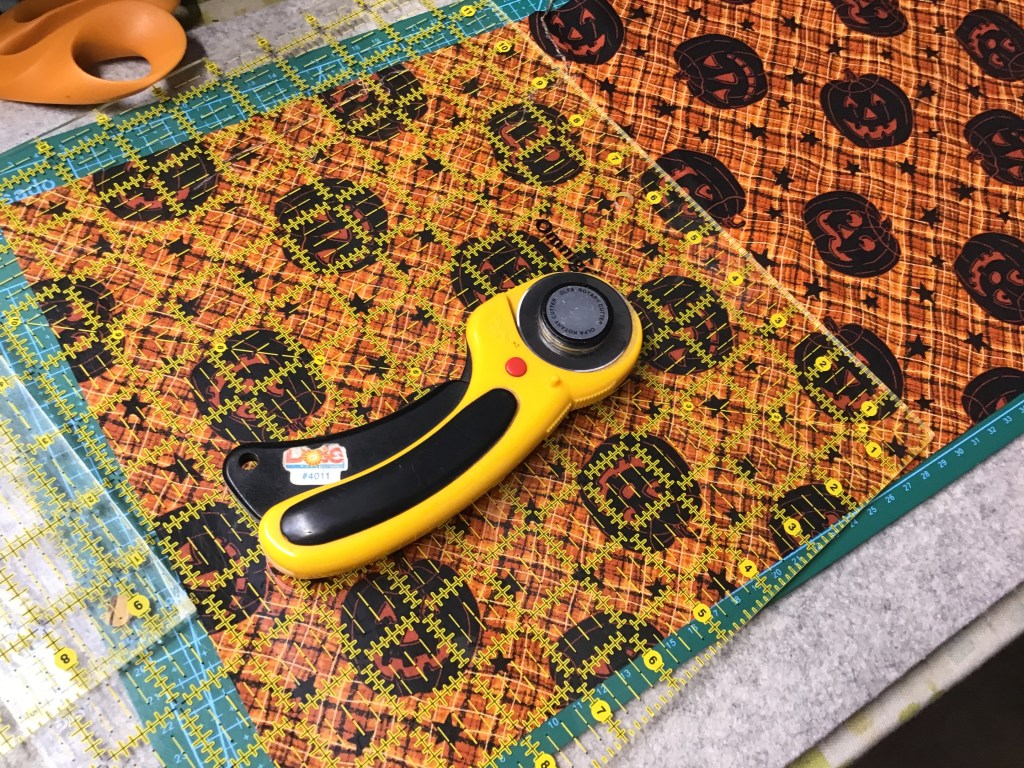
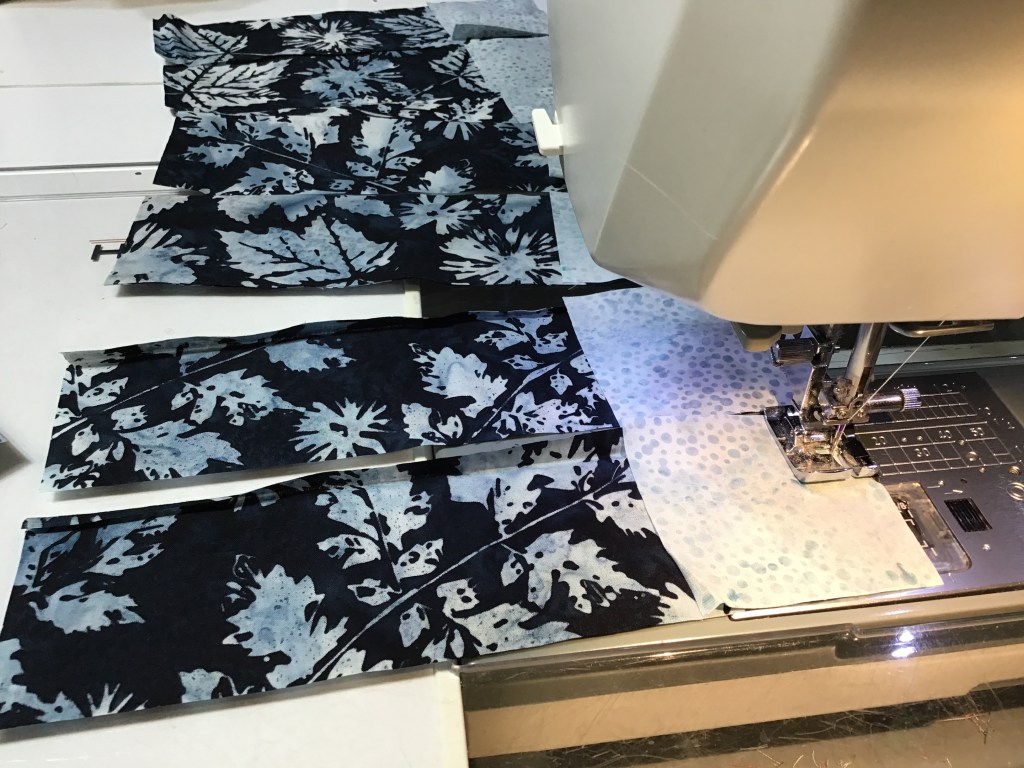
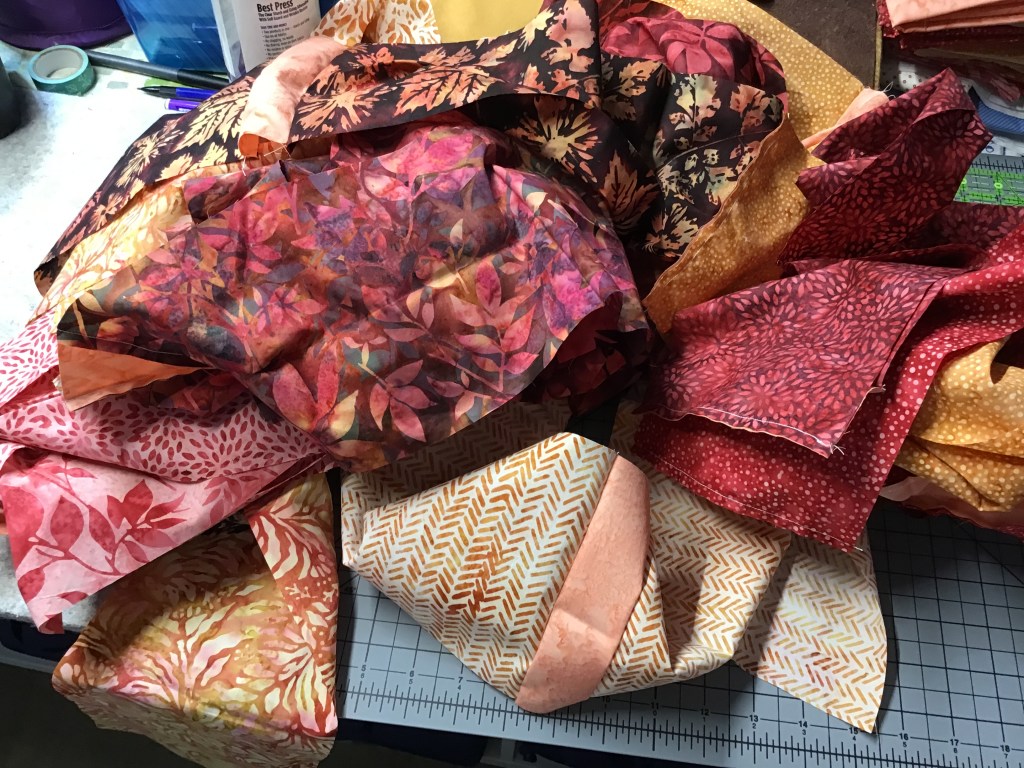
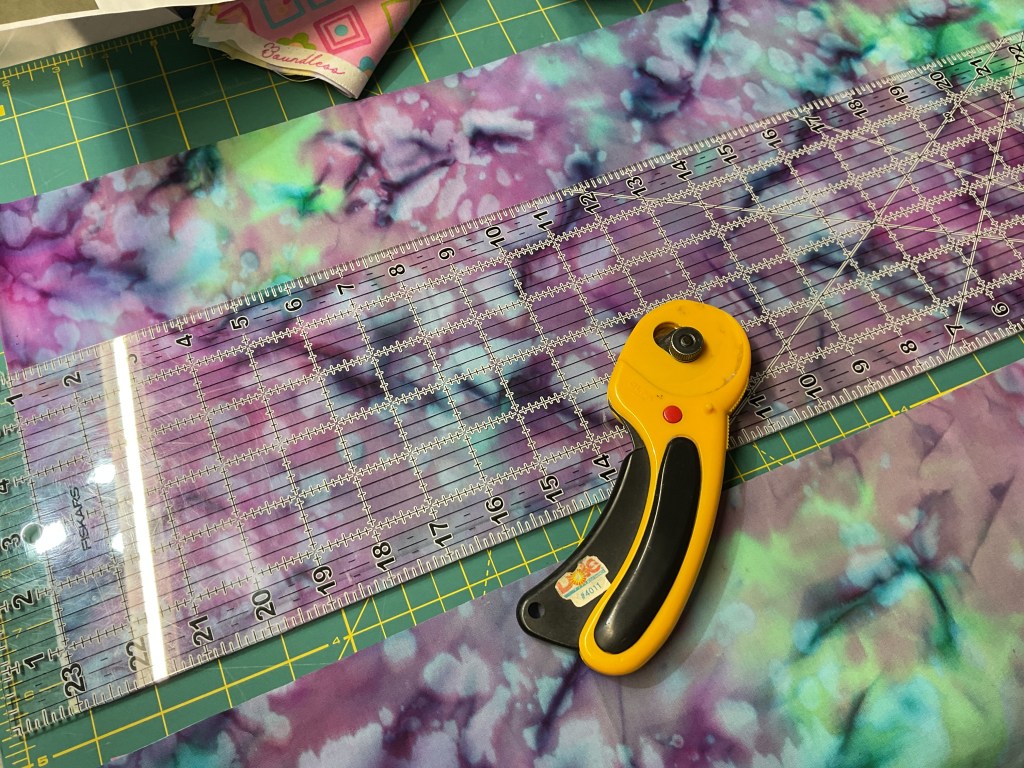
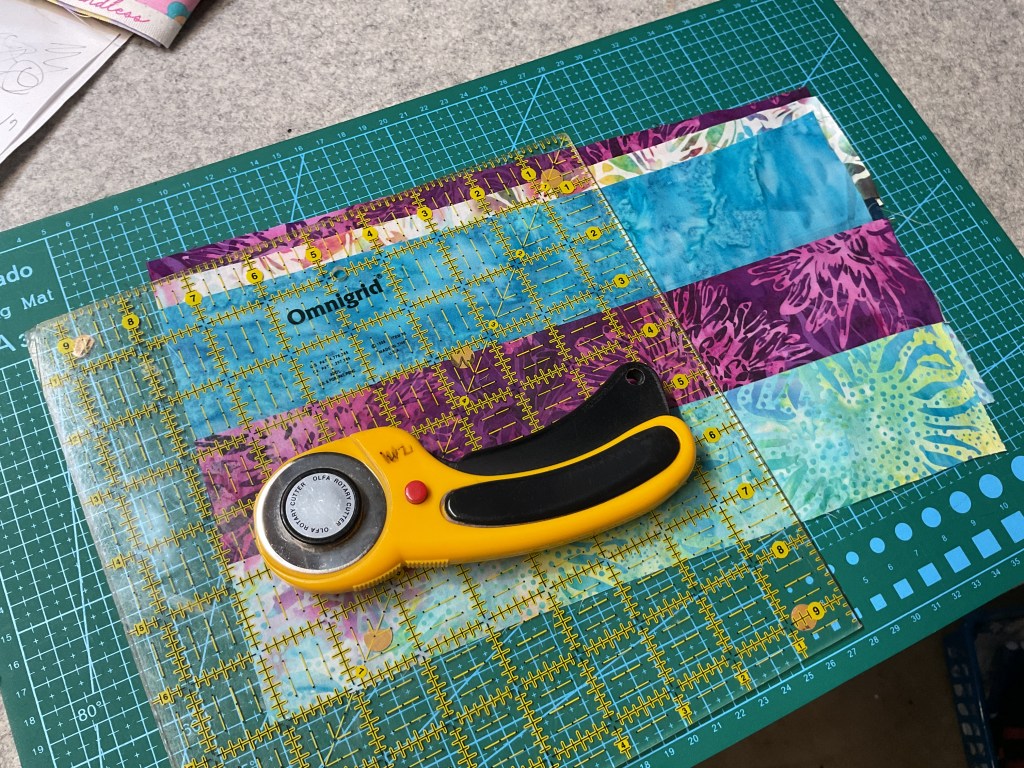
Of course, we need to do some cutting before we can sew. Let’s get to it.

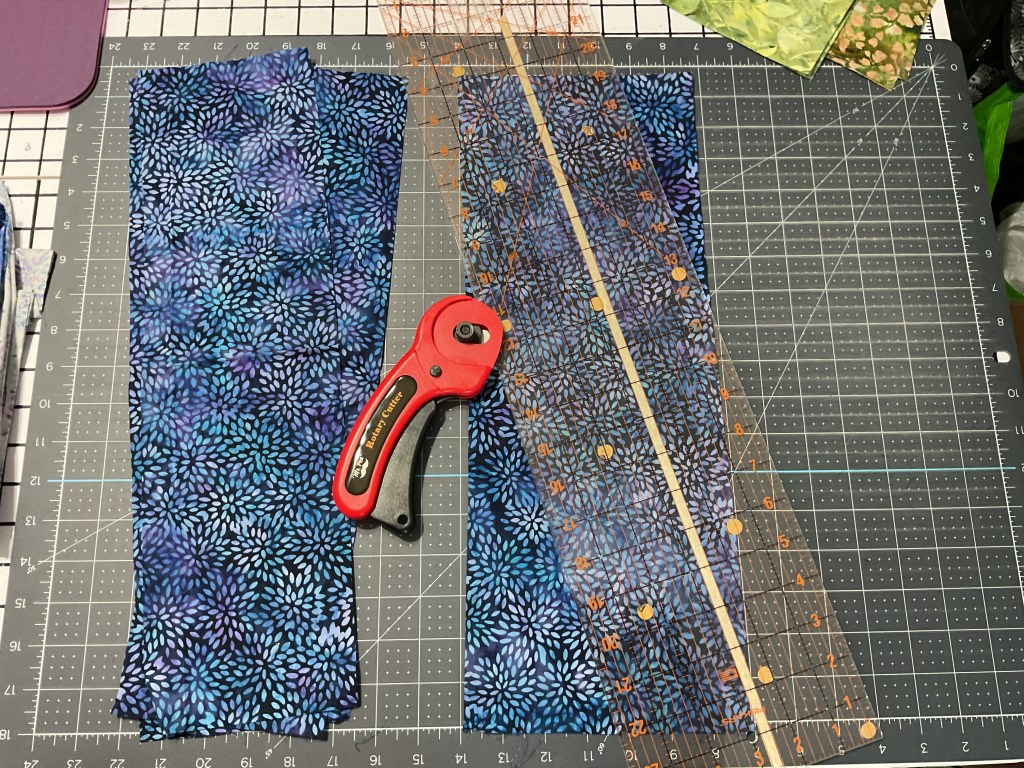
In the left photo, below, you can see how many layers I’m cutting at once. I find batiks to be great for layering for cutting as the fabric is finer. When I’m cutting thick or slippery fabrics, I only cut one layer at a time.

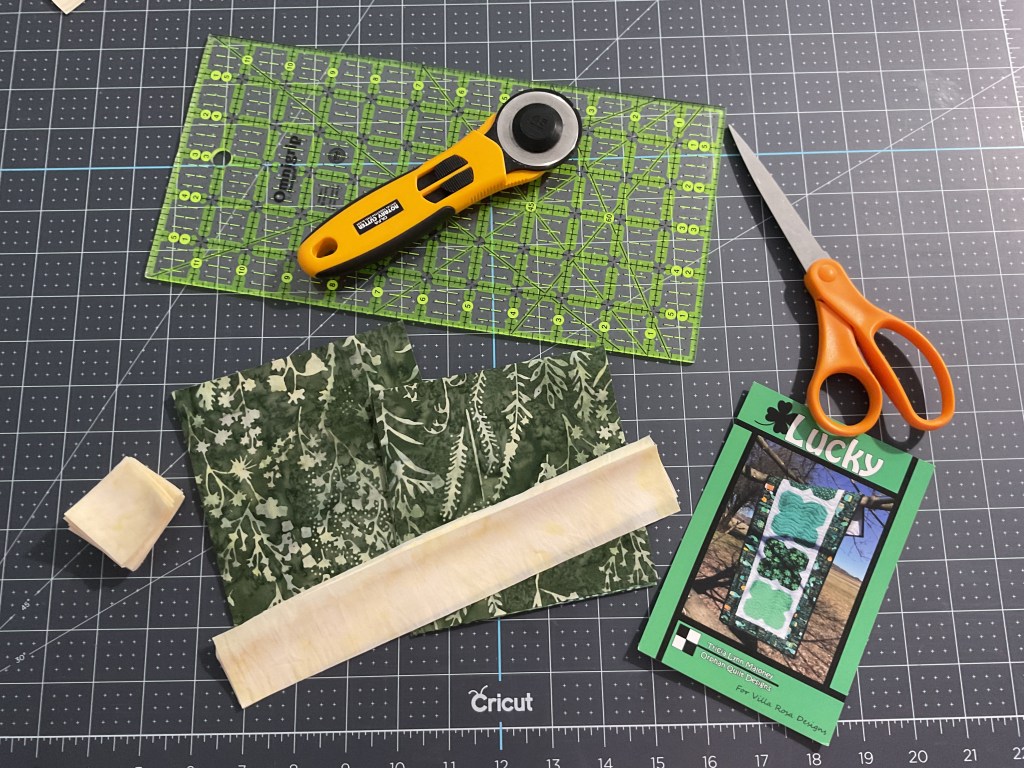
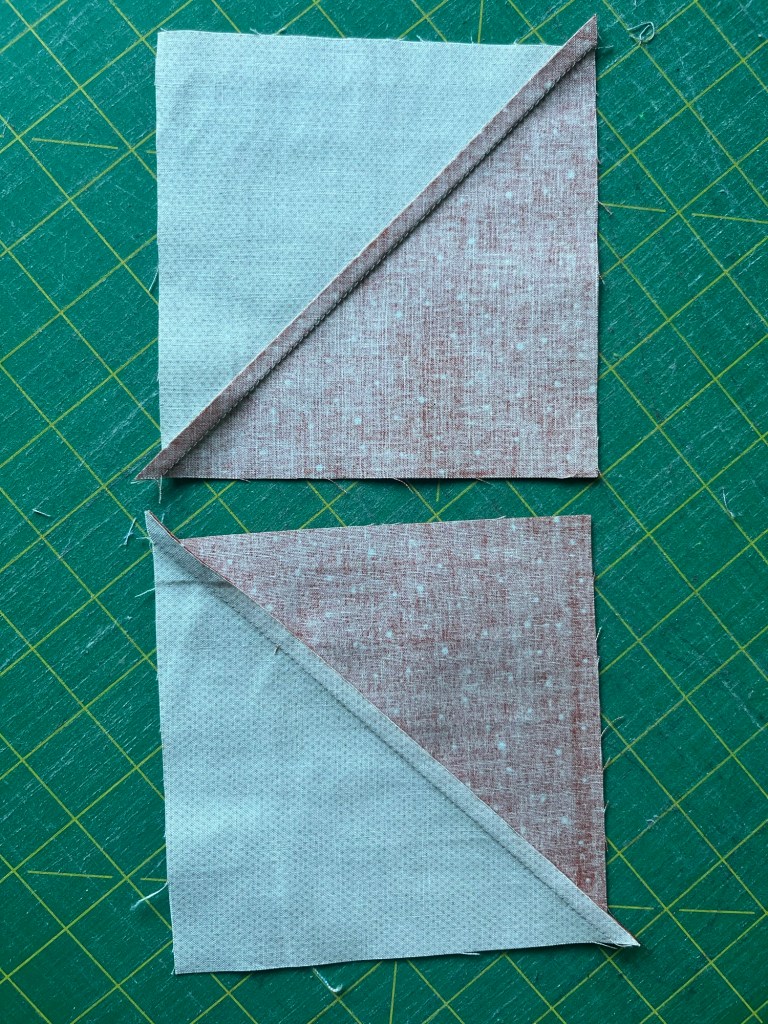
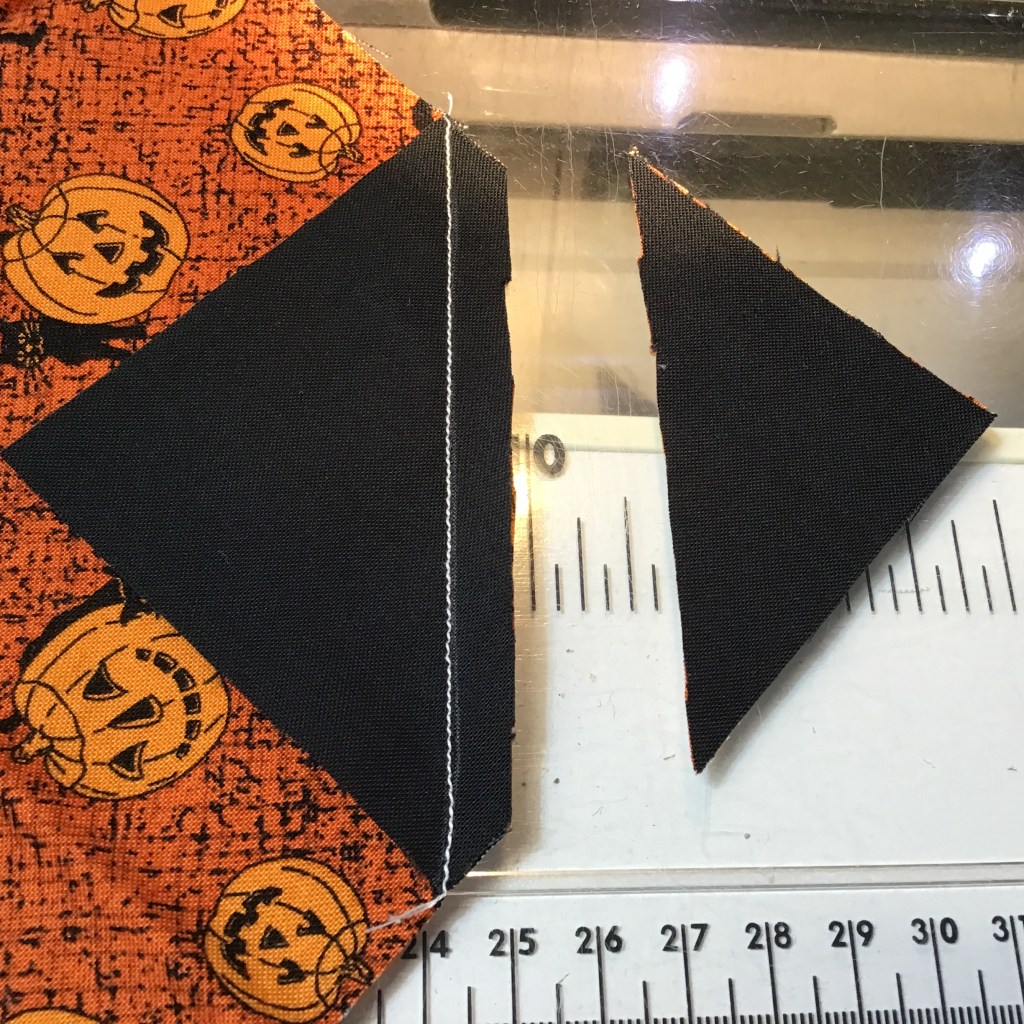
Let’s get the rest of the fabrics cut. For Jubilee, we only need 2 different shapes, which is one thing that makes this quilt go together so quickly. Wow! That was fast!

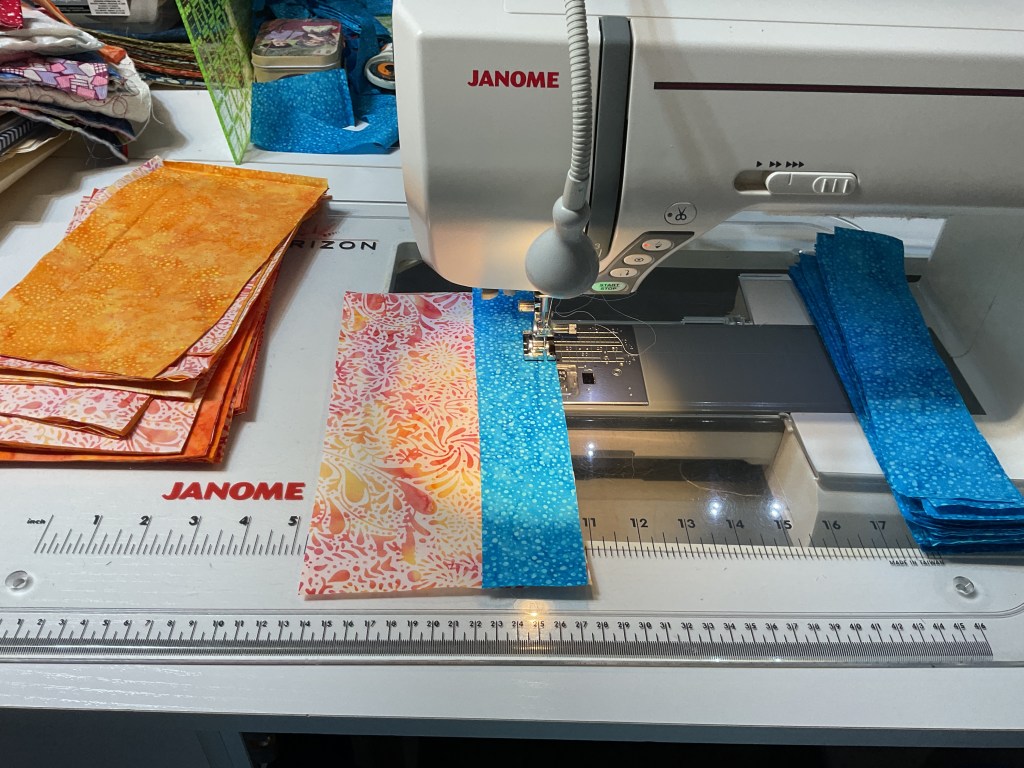
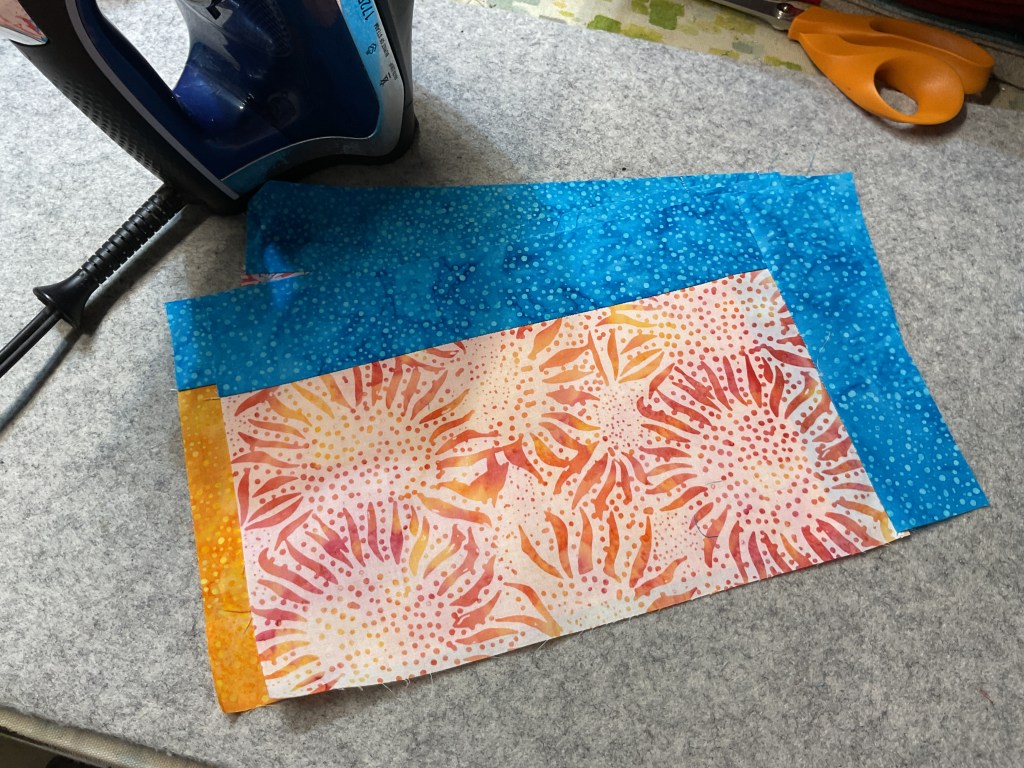
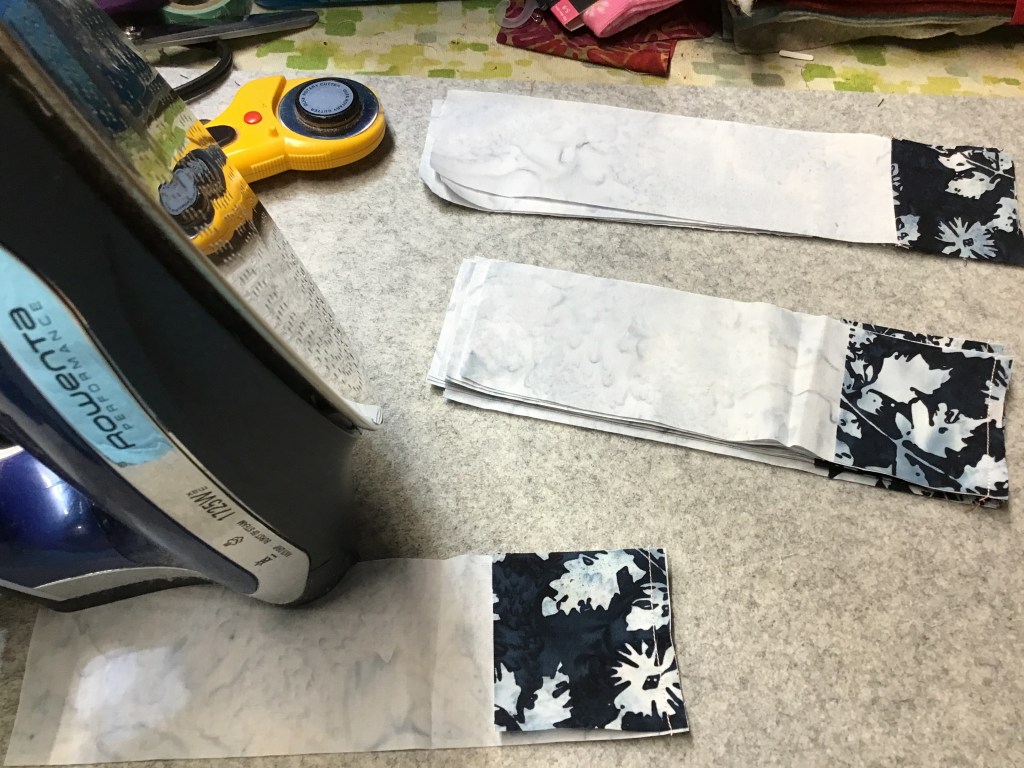
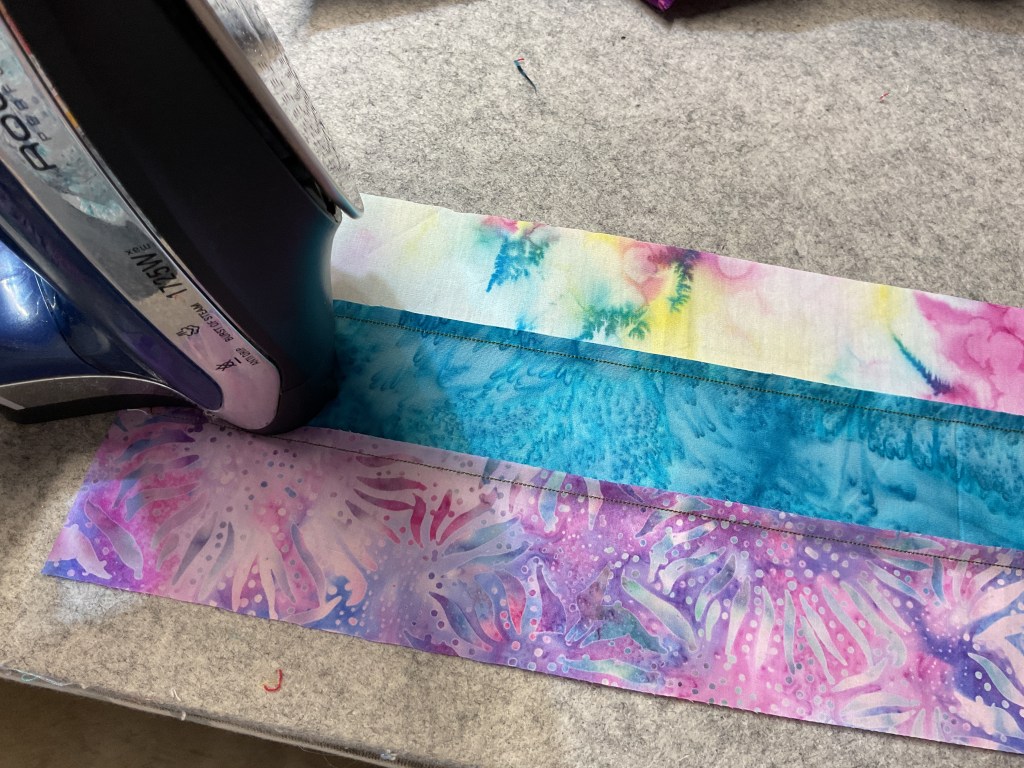
Time to start sewing the strips together so we can make strips sets and then we’ll cut the strip sets down into the block size we need.

I like to set all my strips to the left of my machine while I sew. Then I select strips randomly to sew together, making sure I don’t grab 2 of the same strip. We want these strip sets to be as scrappy as possible.

Once I’ve sewed 2 strips together for the required sets, I then go back and add the third strip to all of the sets. I find it more efficient to complete each step for all the pieces at once before moving onto the next step.

Sewing colorful fabric strips together at a sewing machine for a quilt project, with scissors nearby.

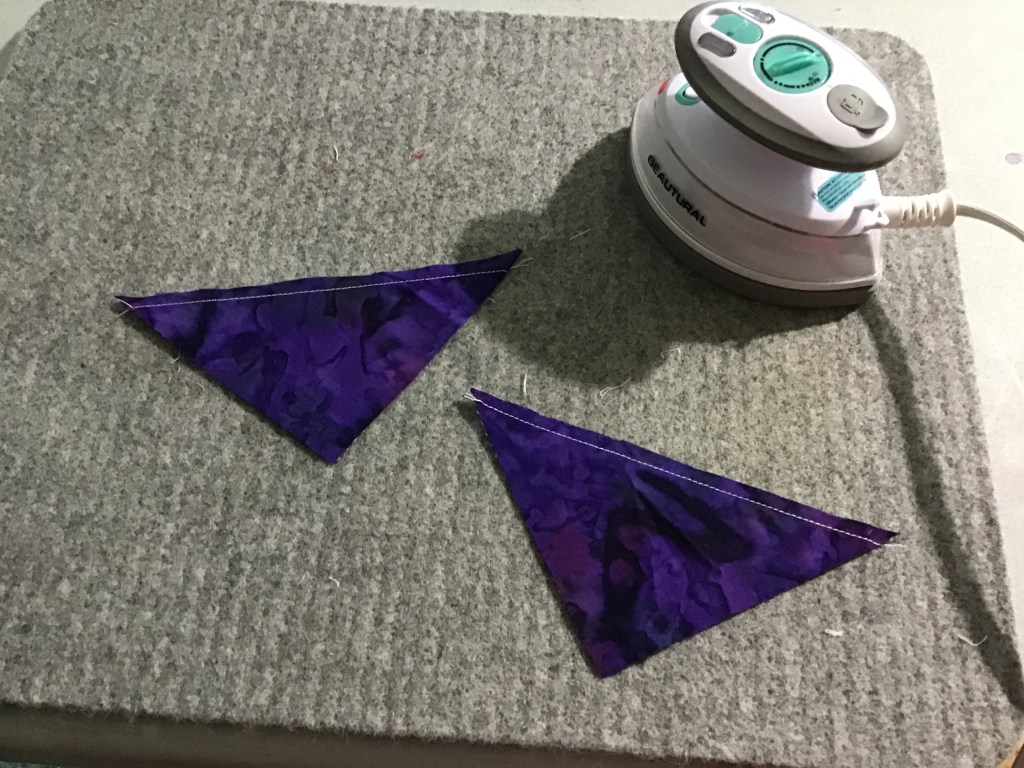
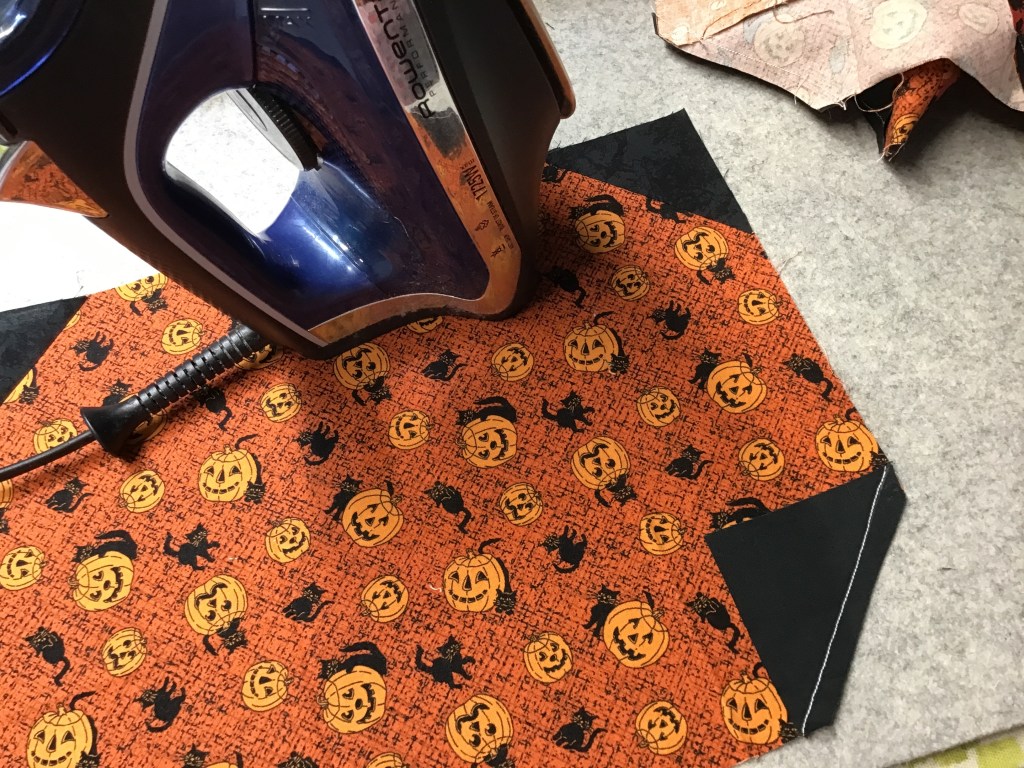
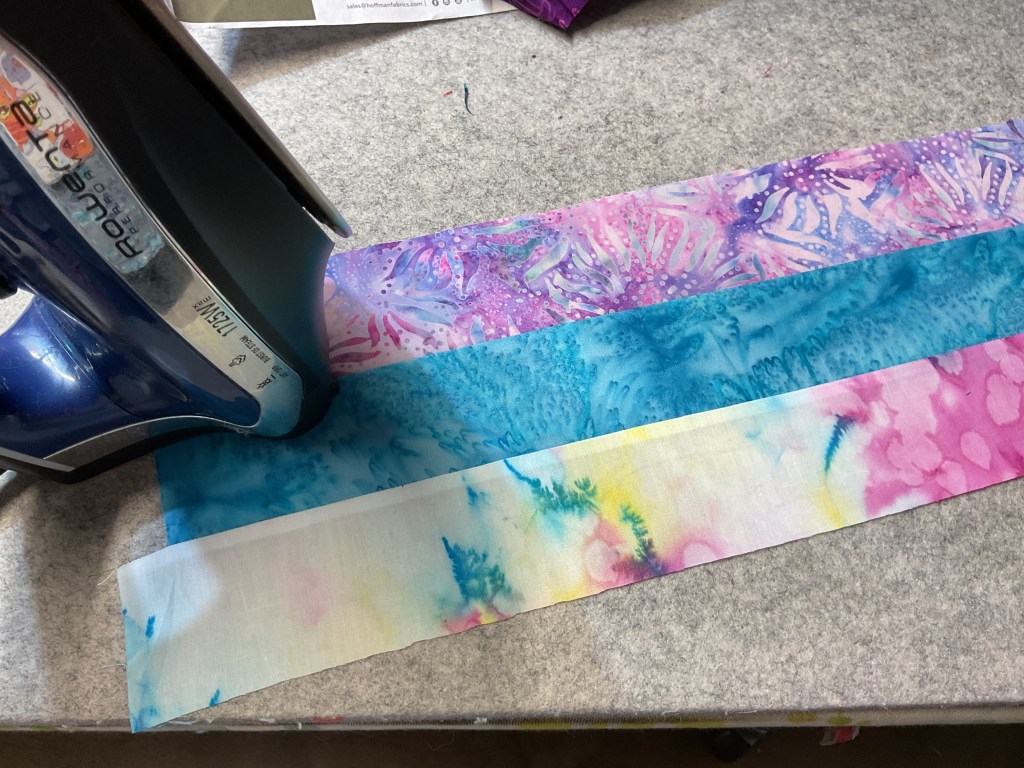
Once our strip sets are sewn together, it’s a good idea to press them before we begin cutting out the blocks.

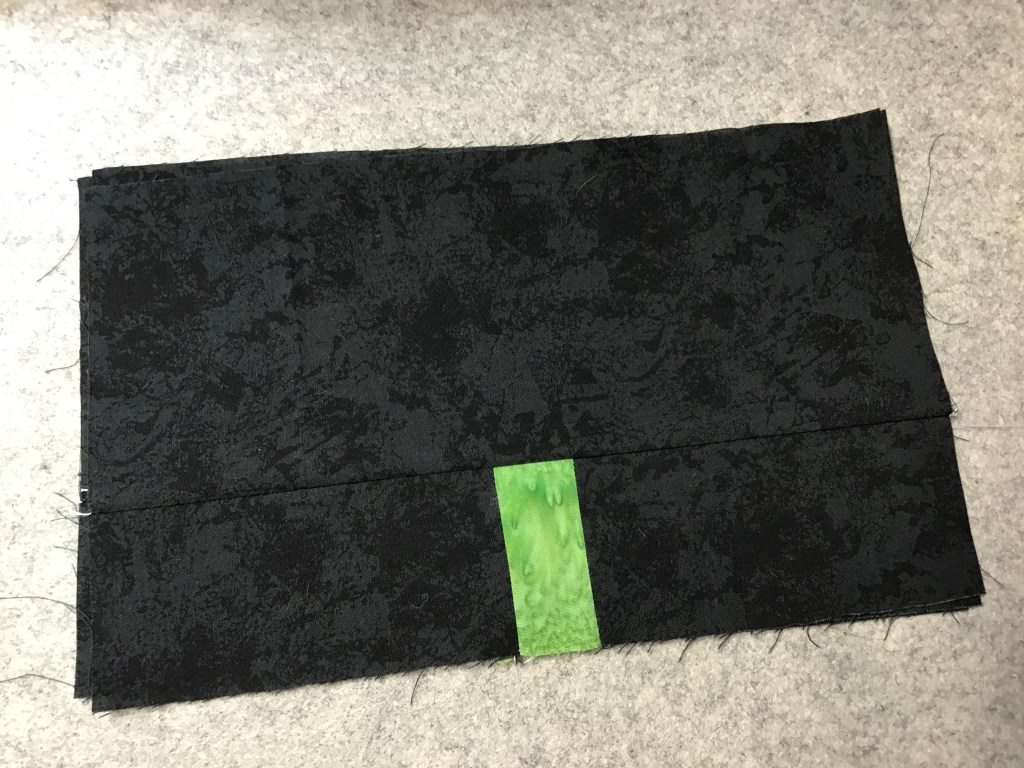
Do you struggle with which way to press your seams on the back of your blocks? Me too. More often than not I end up flipping the seams in the other directions when I go to assemble blocks. Oy vey!

The good news with Jubilee is that it doesn’t matter which way you press your seams because the blocks do not line up and the seam do not cross – another reason why Jubilee is quick as a wink.

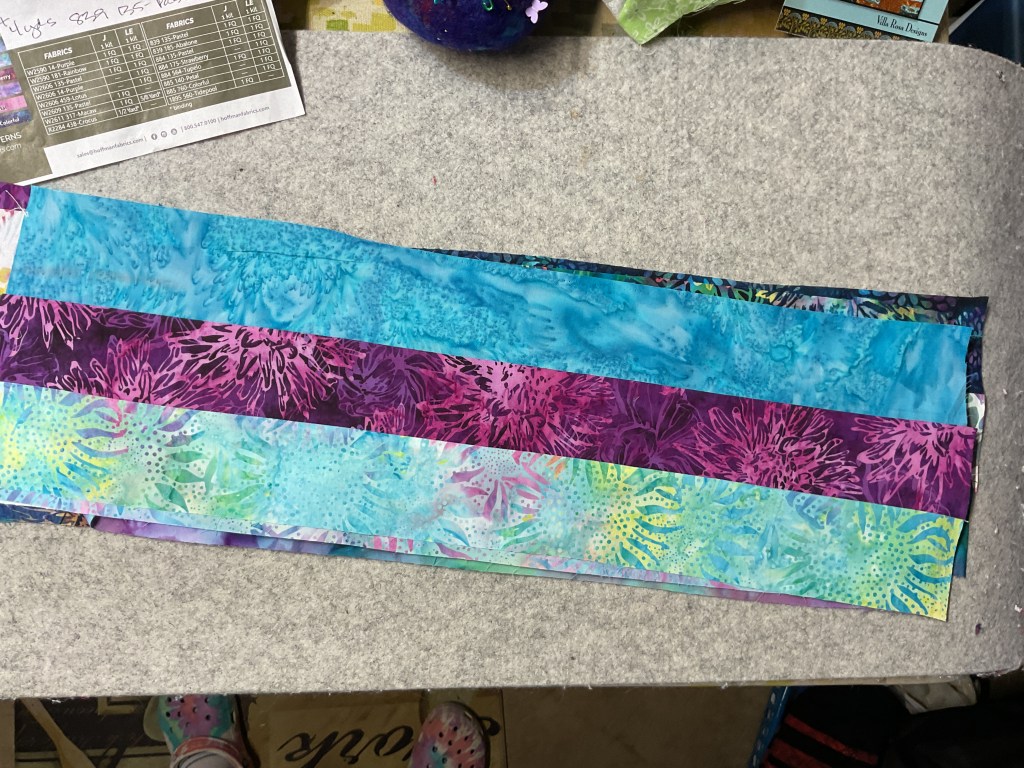
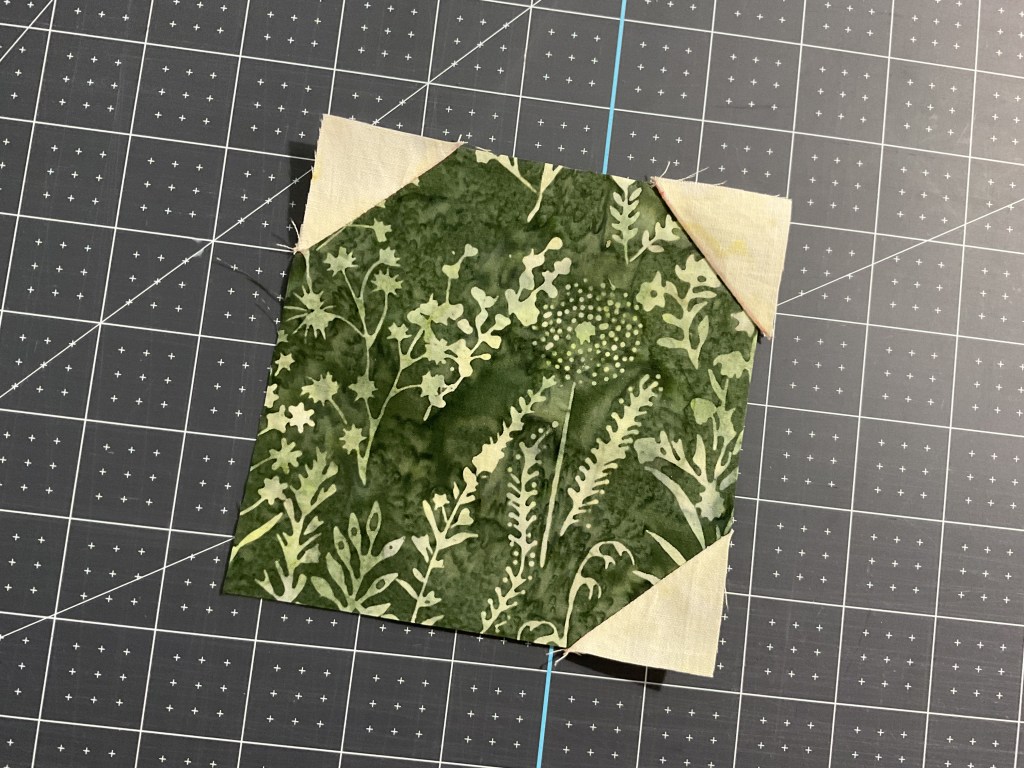
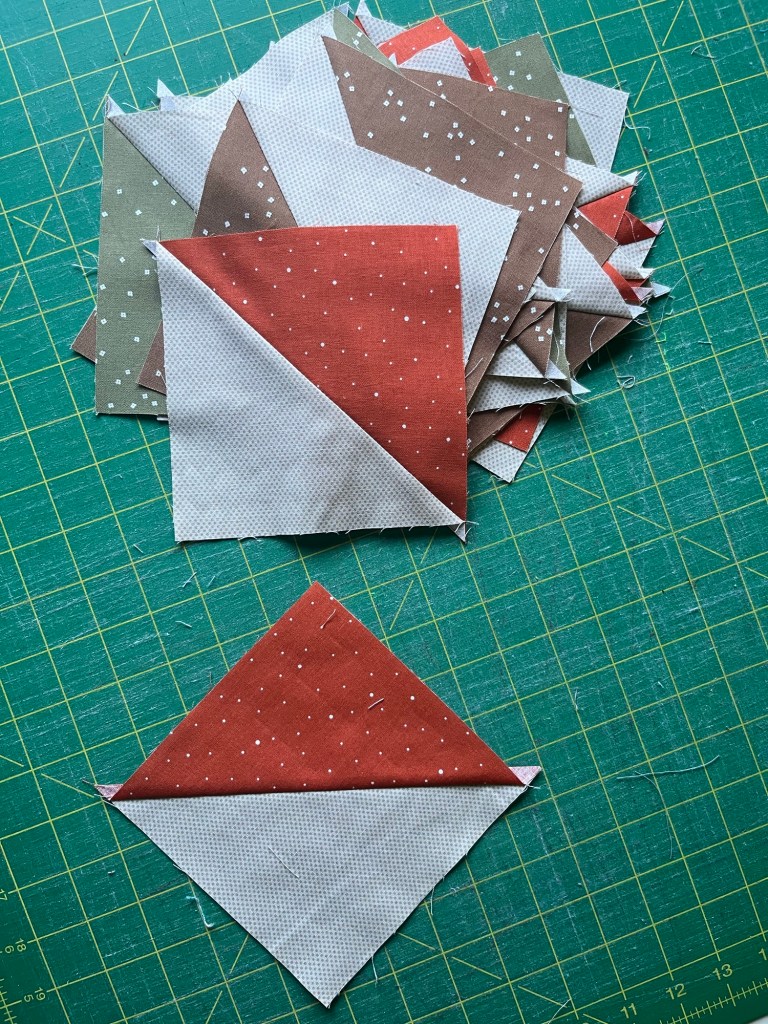
Next we need to cut our strippy blocks from our strip sets. I’m layering 3 strip sets on top of each other for cutting. To do this, I line then up on the left edge (or the right edge if you cut from that side), but I stagger them a bit top to bottom so the seams are not sitting right on top of each other because stacked seams make a big lump. It’s not a good idea to attempt to cut through lumpy seams or you might accidentally miscut something.

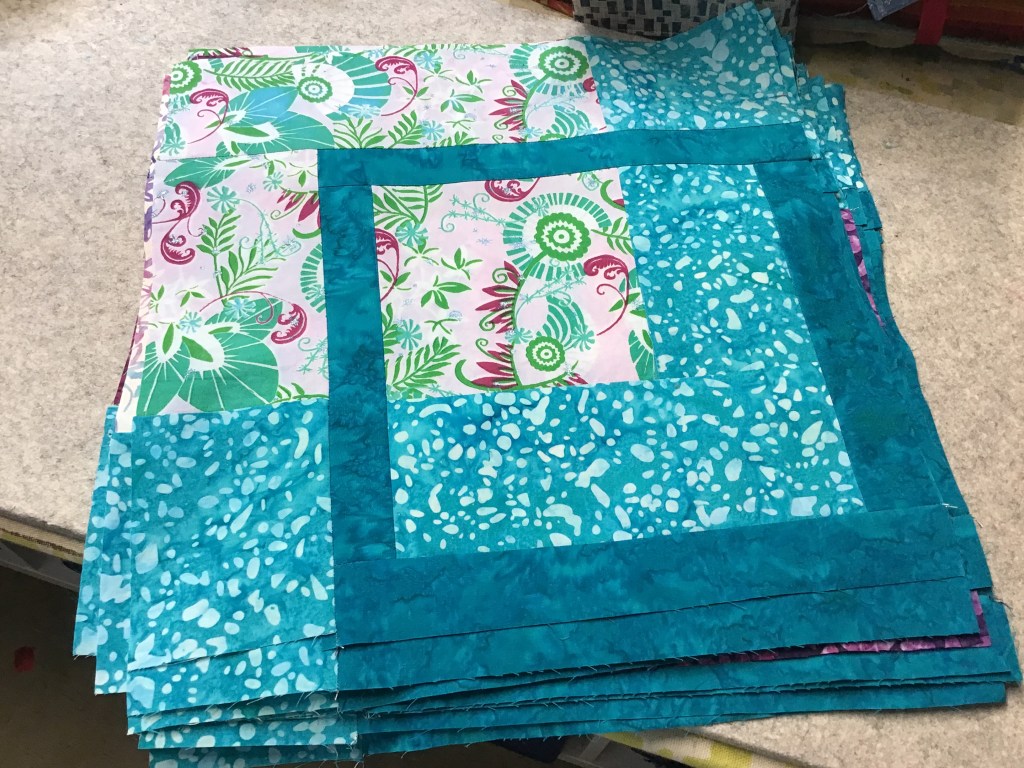
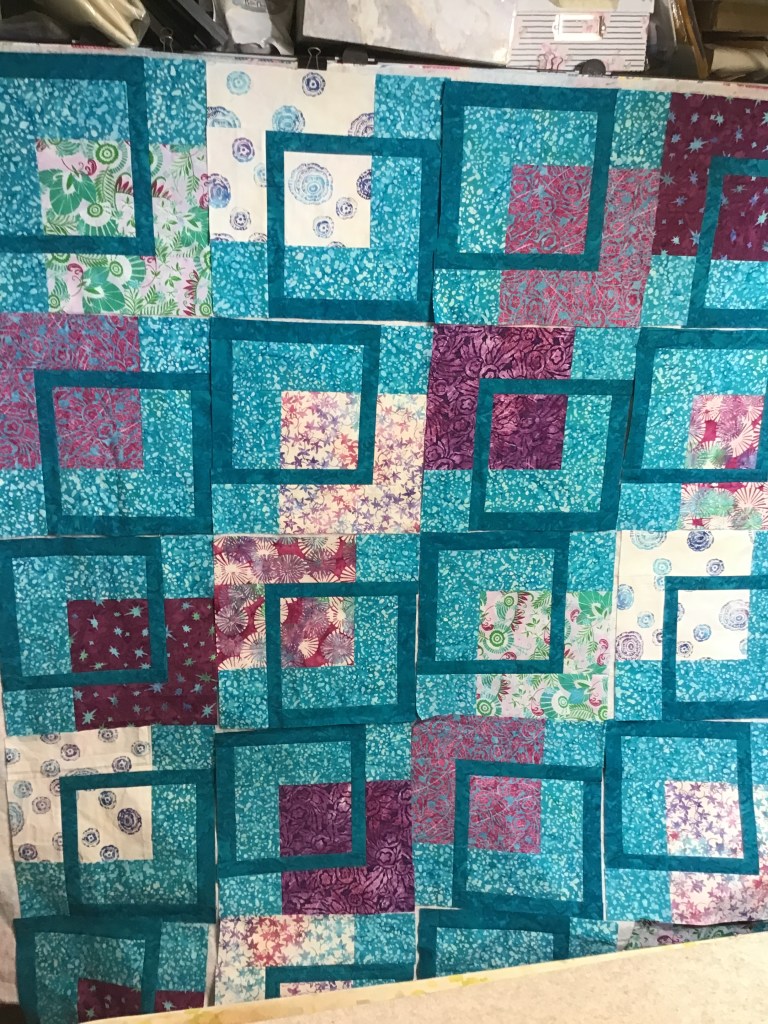
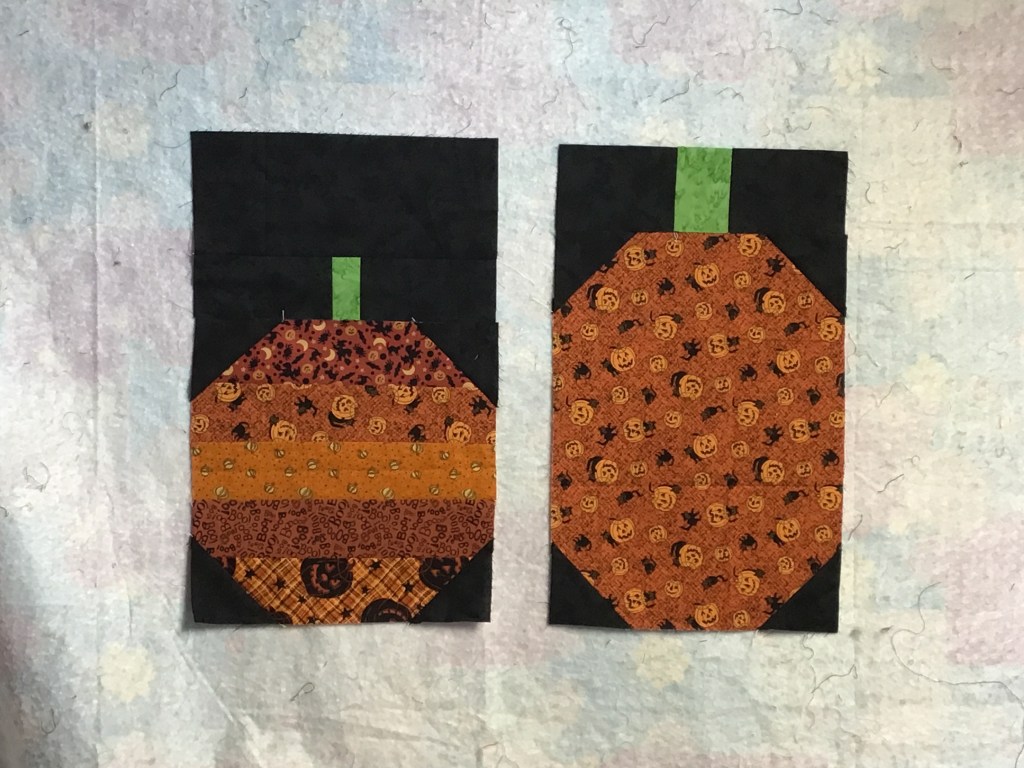
Awesome applesauce! All of the blocks are pressed, cut, and ready to go. Time to head to my flannel wall to lay them out.

A collection of colorful batik fabric pieces organized on a work surface, showcasing various floral and abstract patterns.

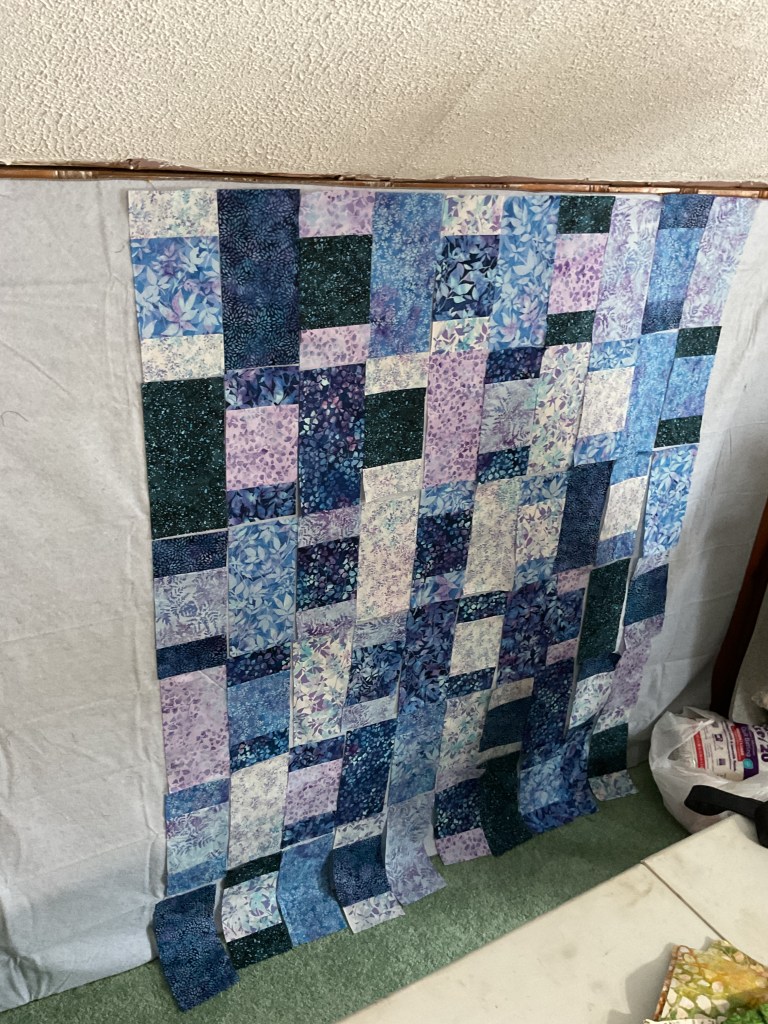
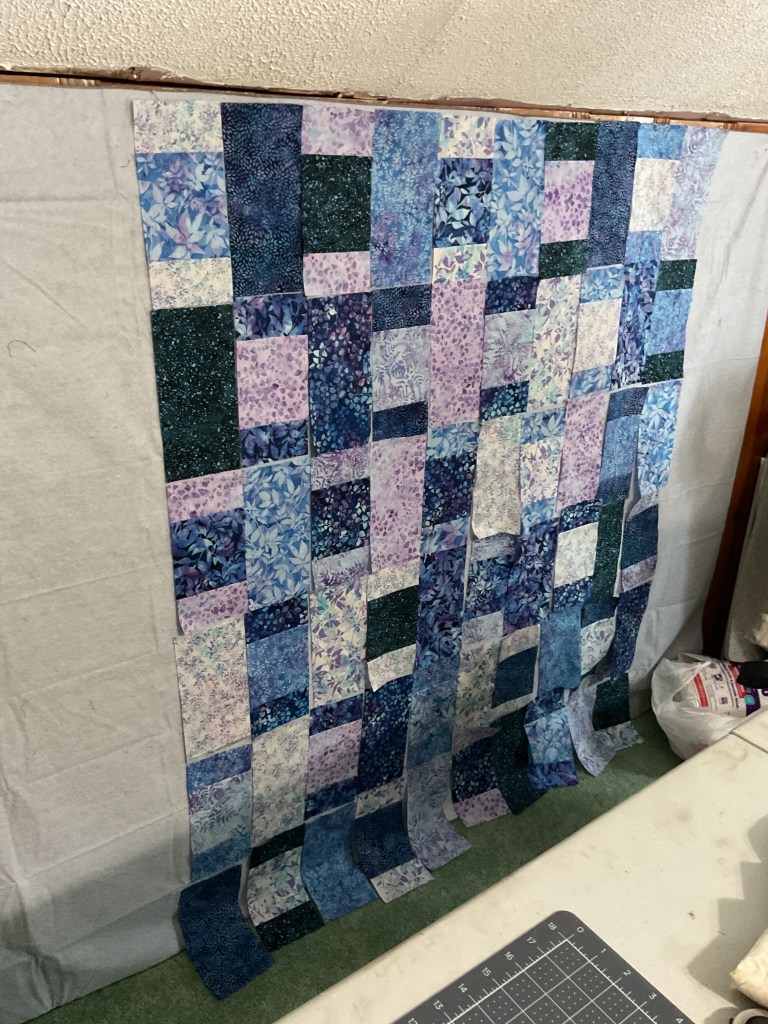
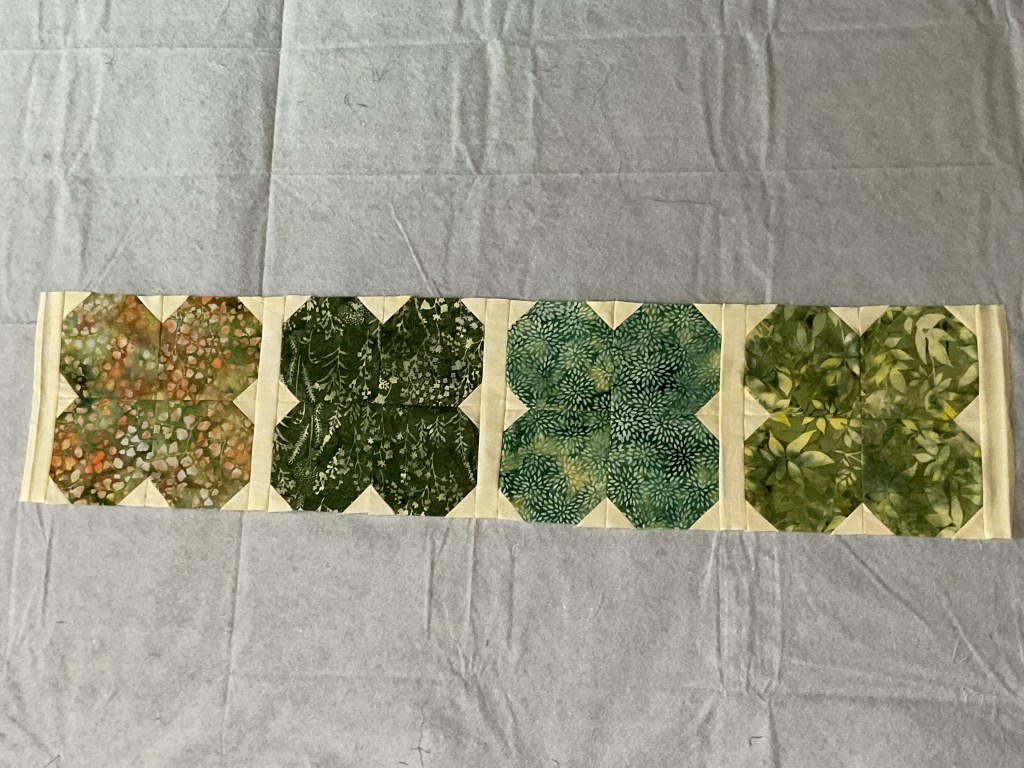
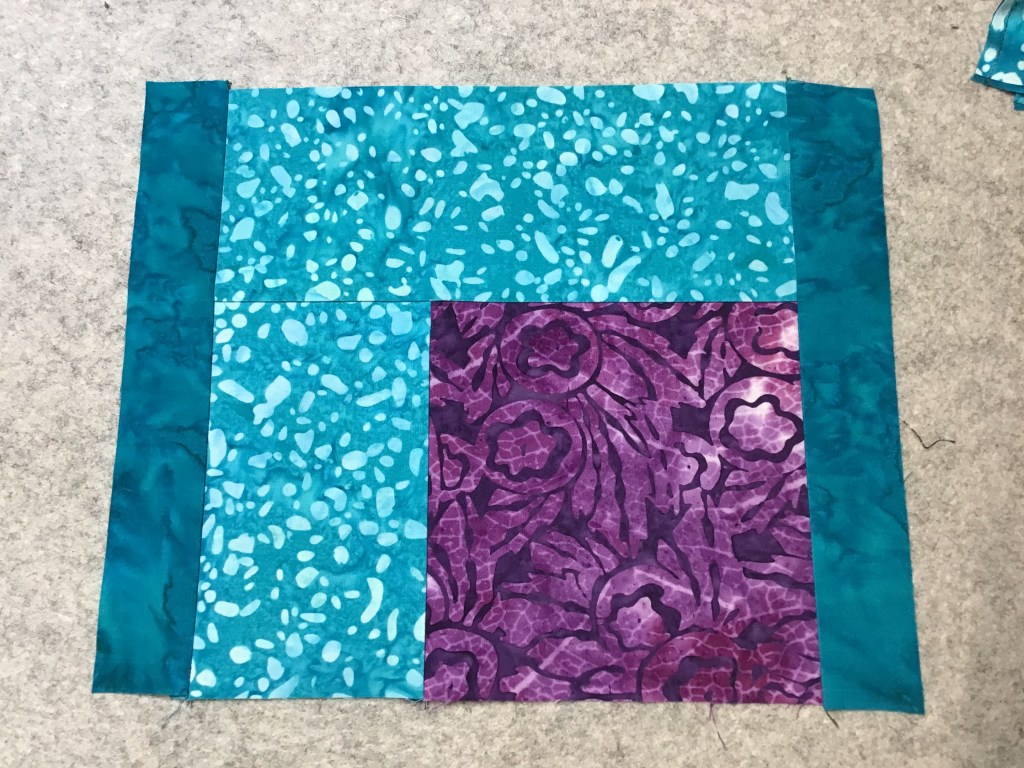
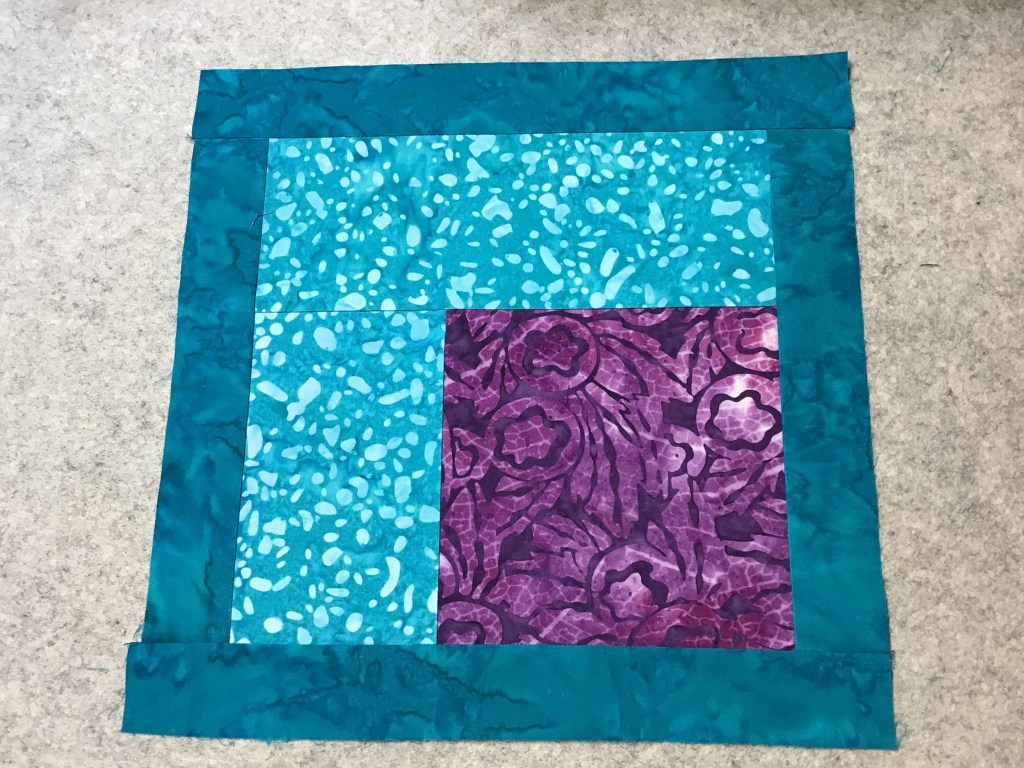
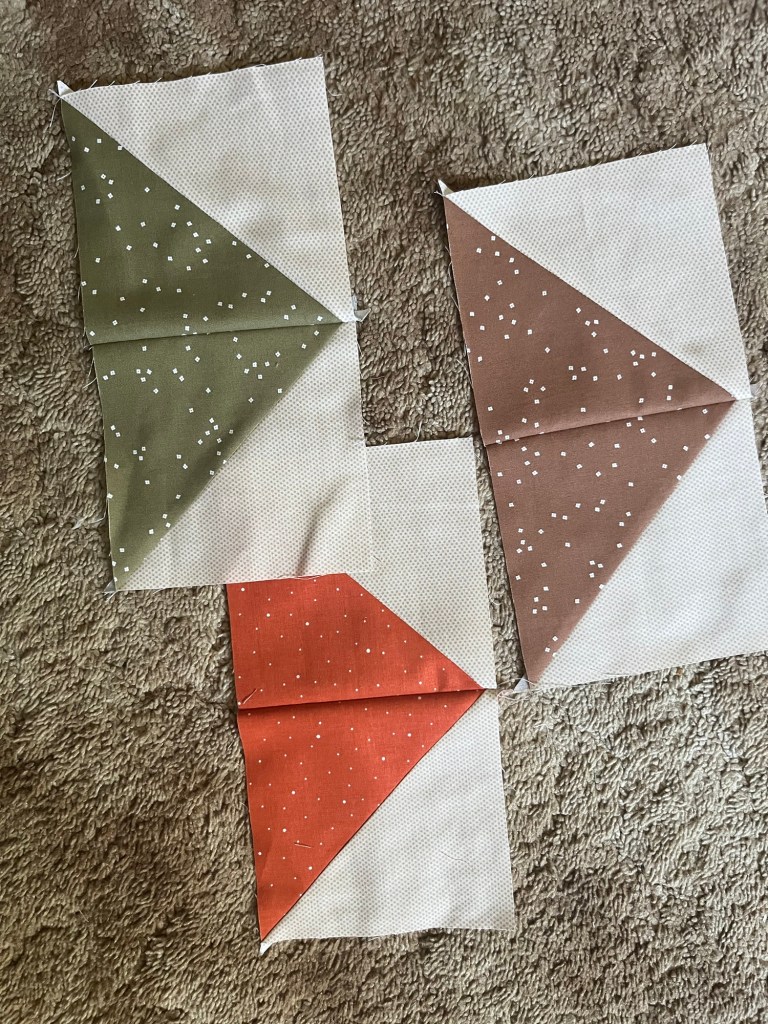
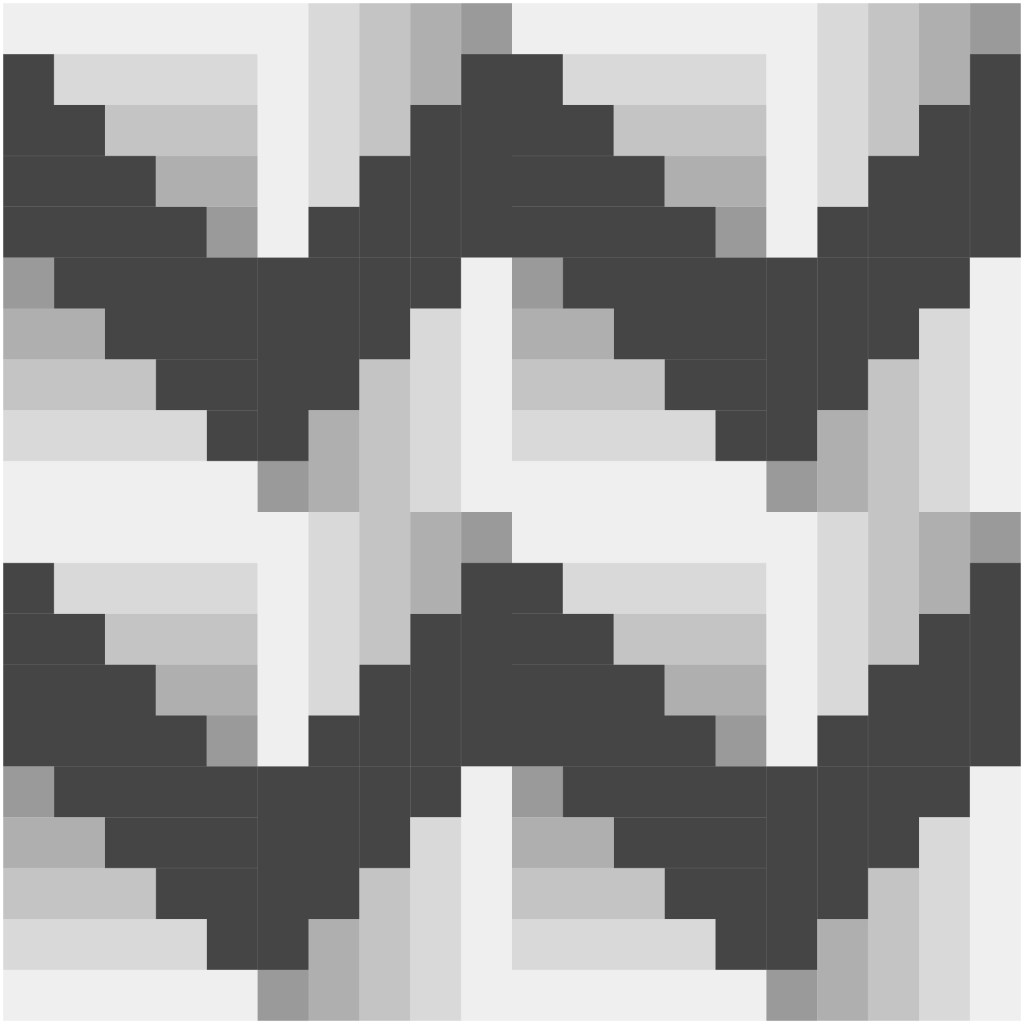
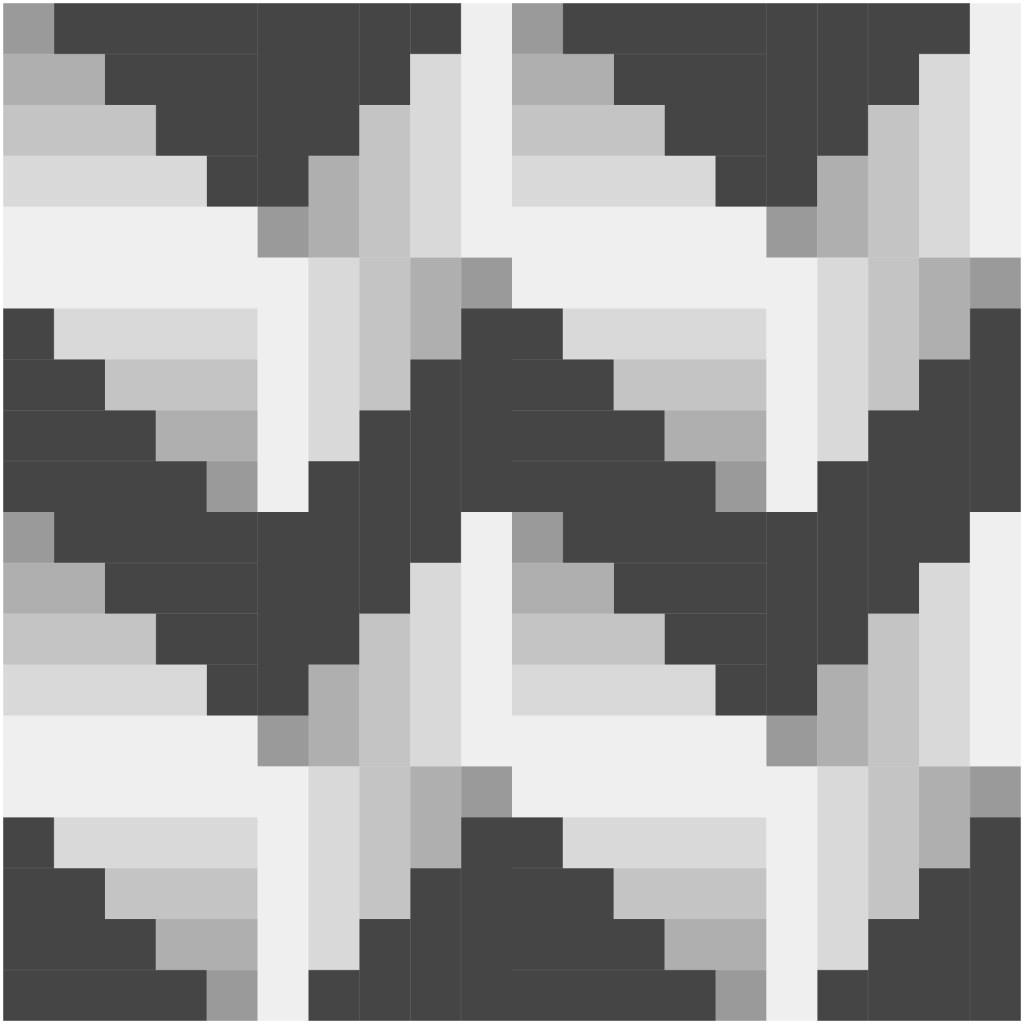
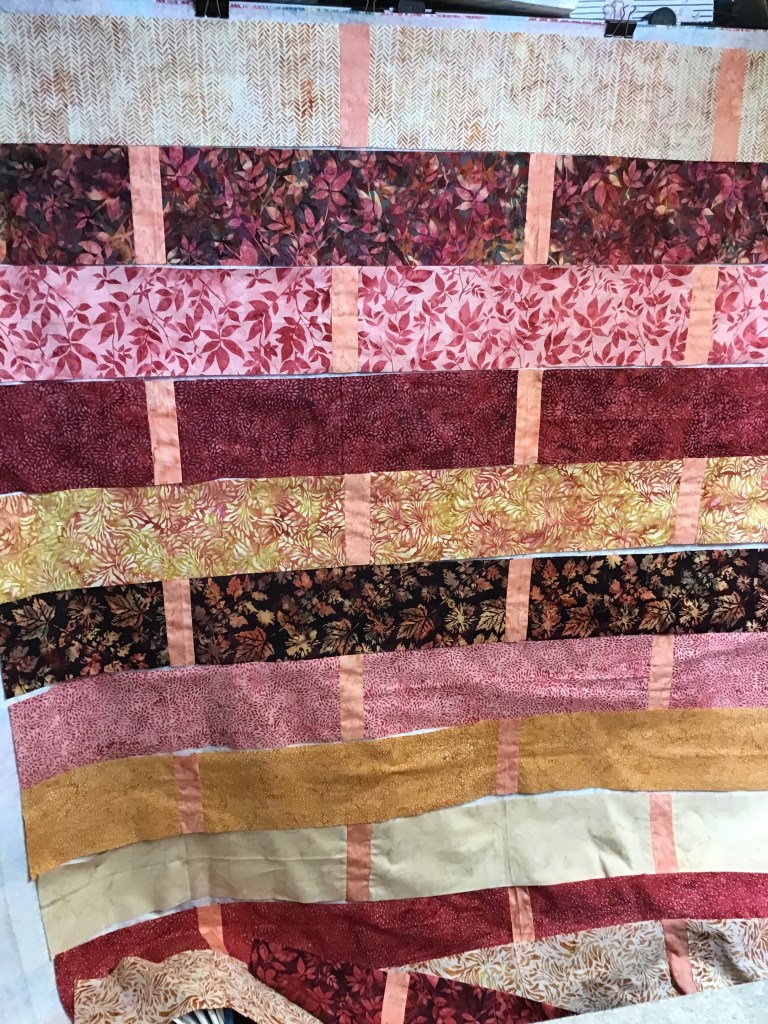
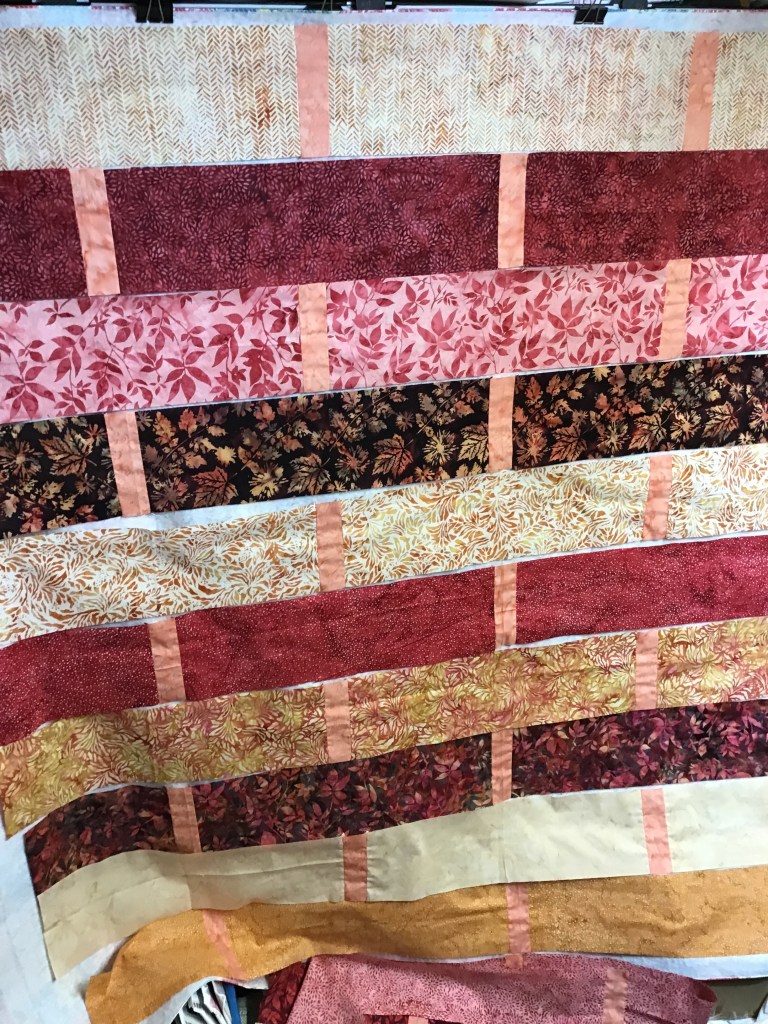
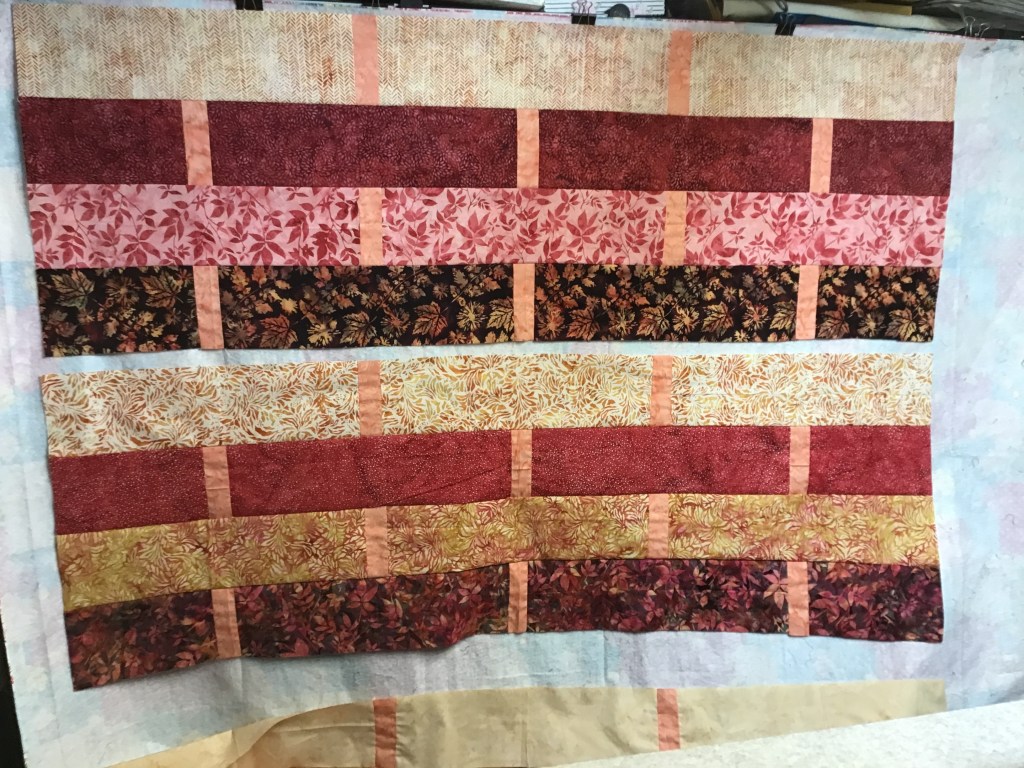
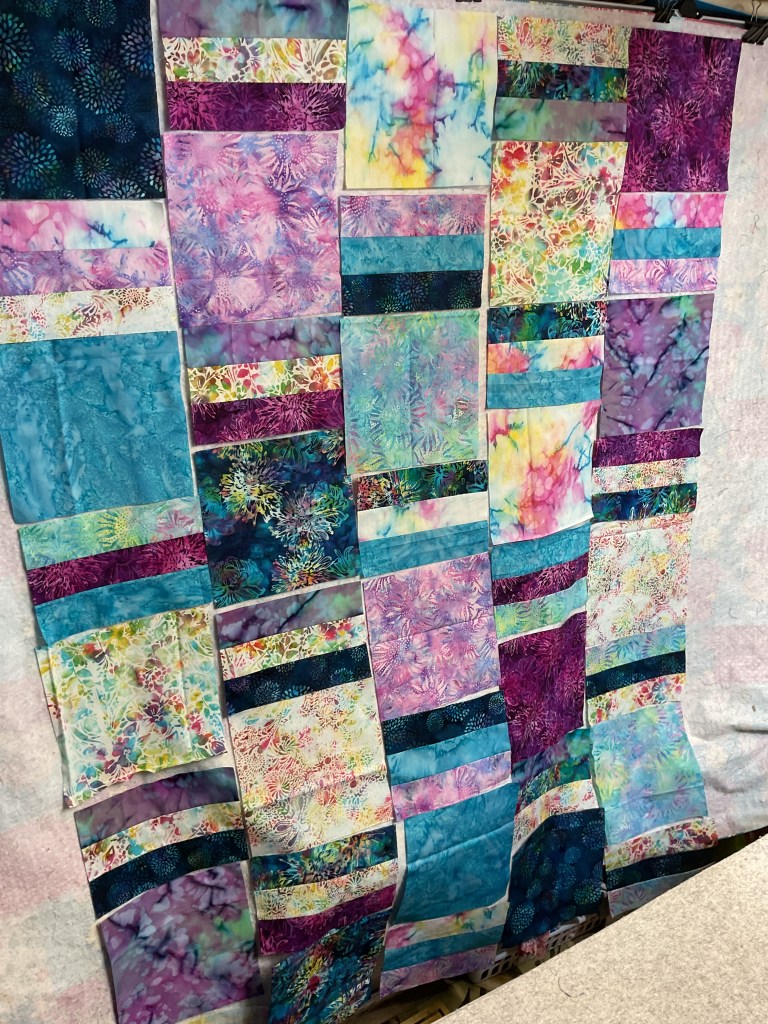
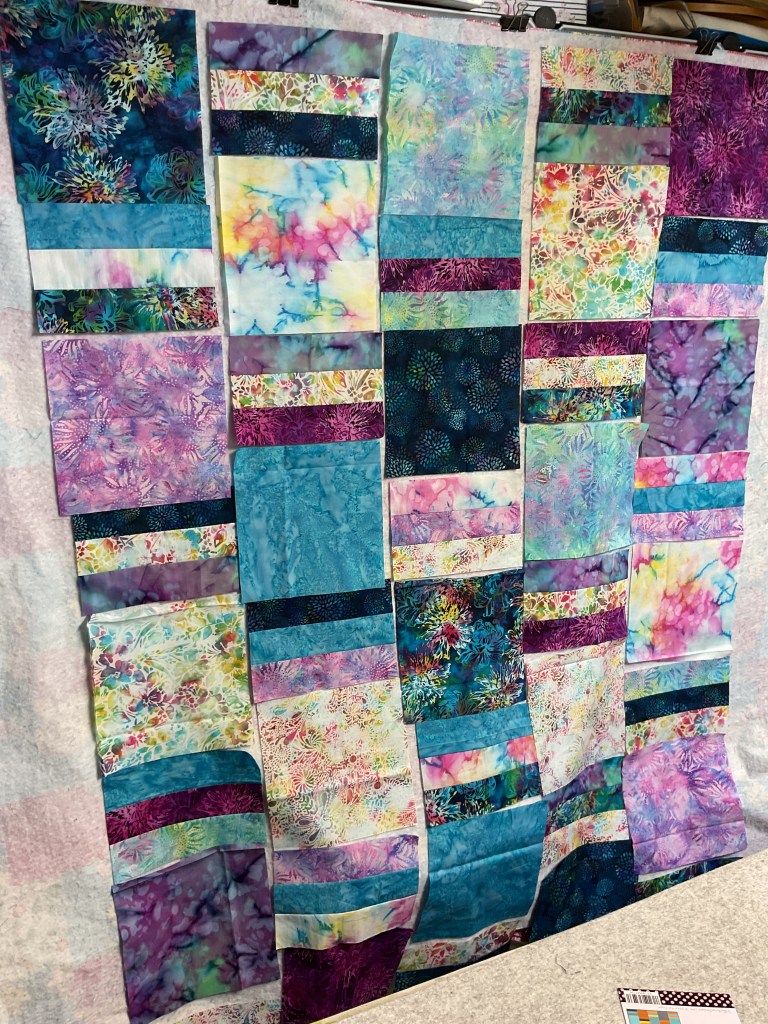
I’m going to put the blocks up, alternating the squares with the pieced blocks. I’m just going to slap the blocks up randomly and then I’ll shuffle them around to distribute both colors and fabrics until I find a layout that pleases me. When you are putting blocks together, what is your process?

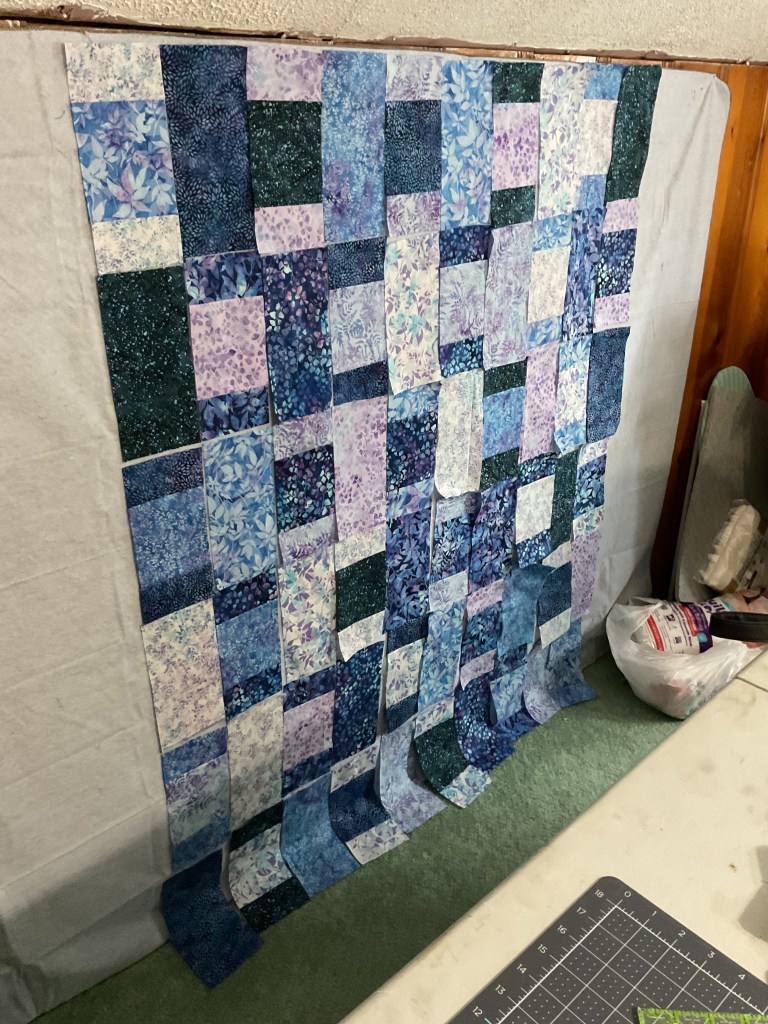
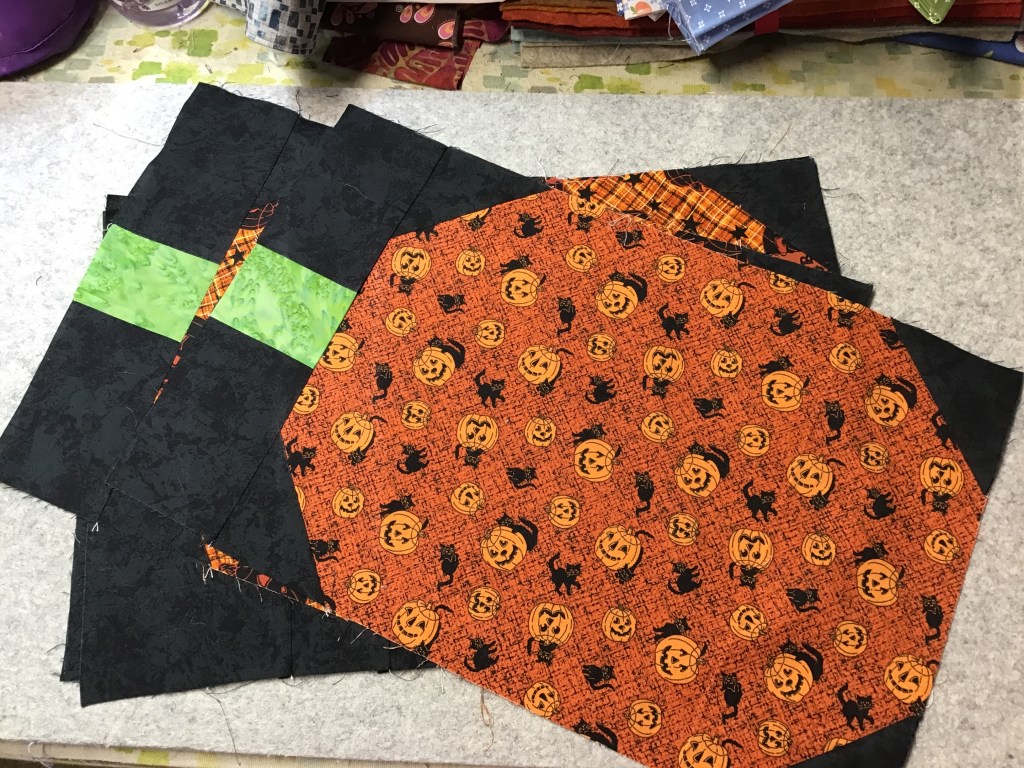
Below are 3 photos showing shuffled blocks. Sometimes this step takes longer than actually making the whole quilt top (eye roll here).

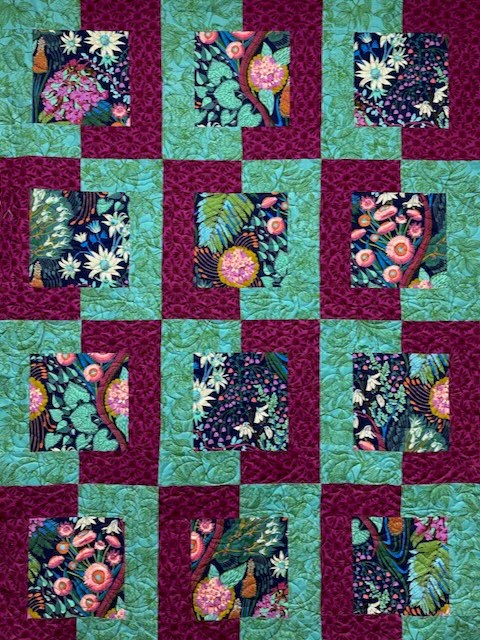
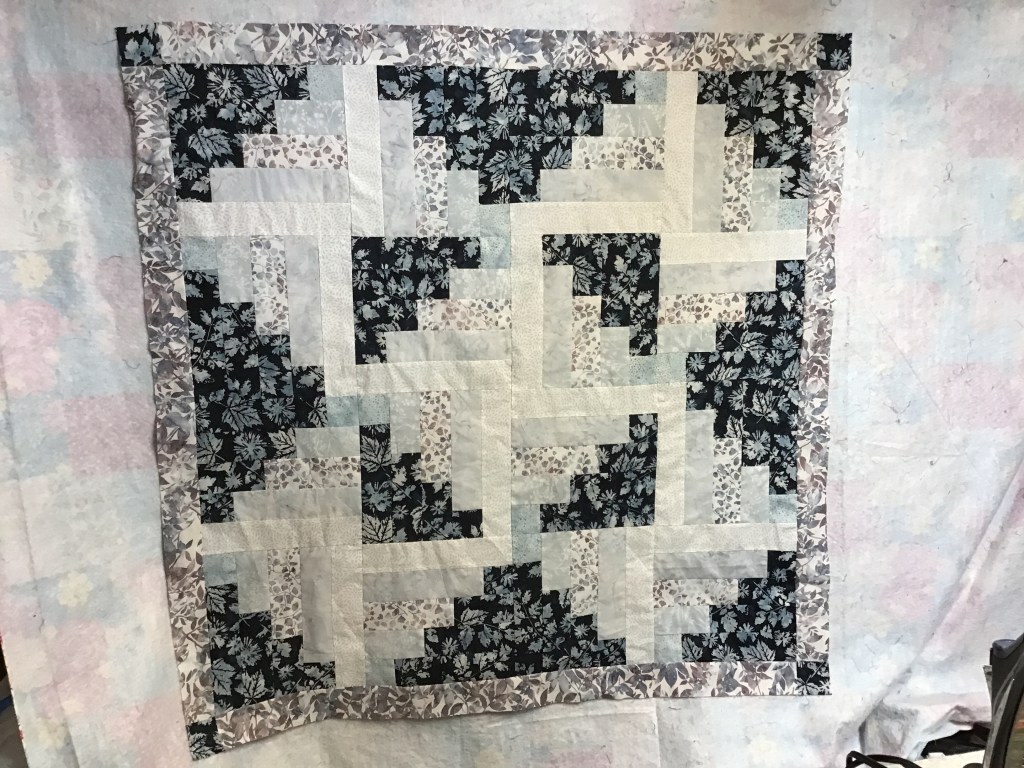
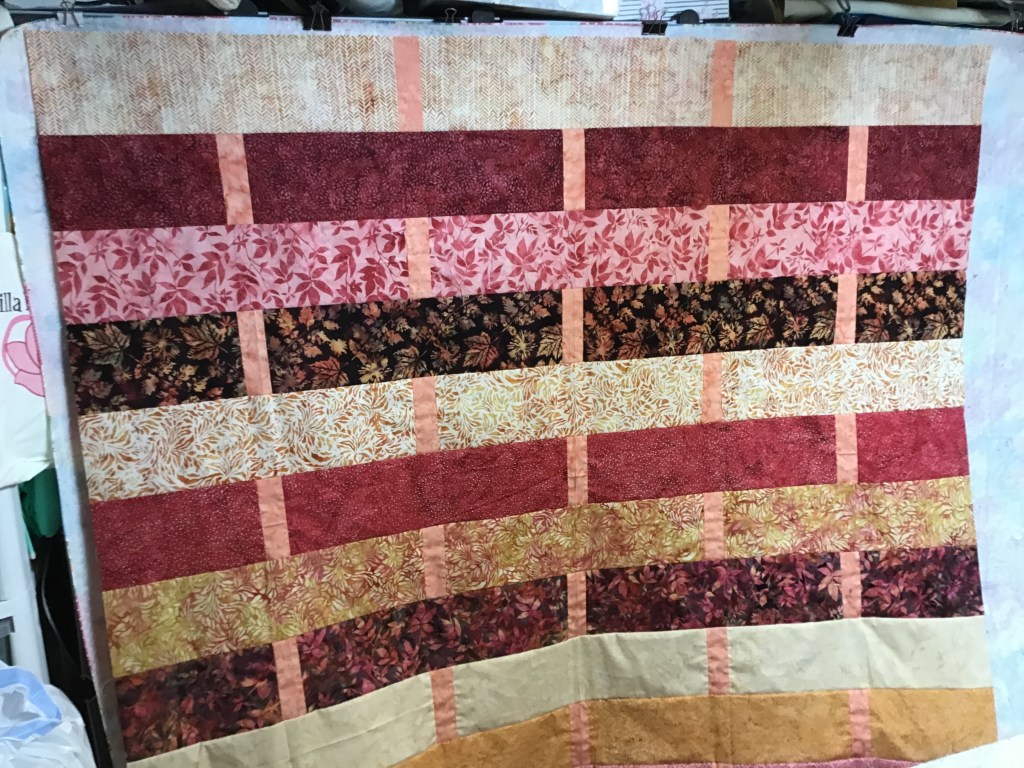
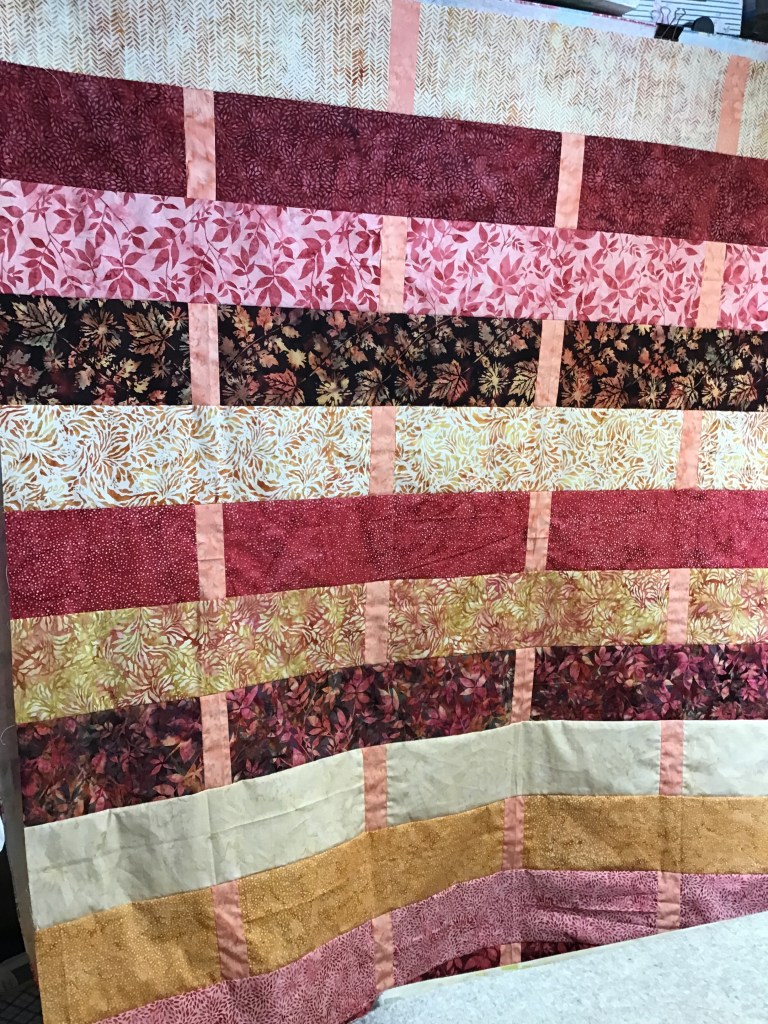
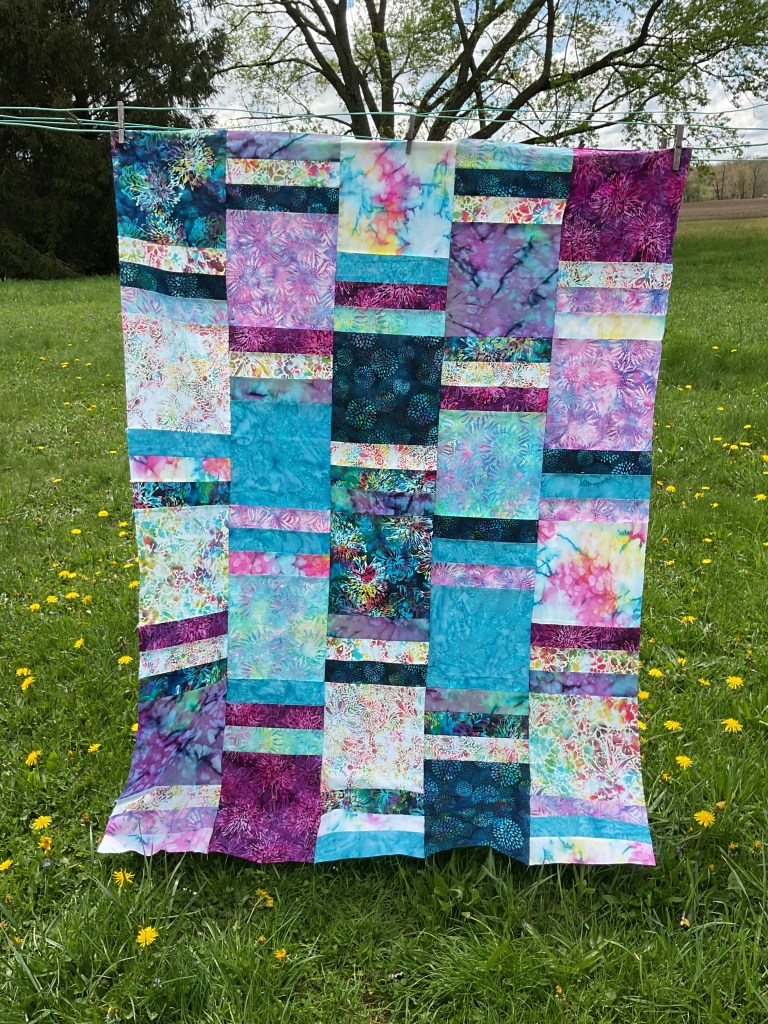
Here is my final layout.

A colorful quilt layout featuring various batik fabrics arranged in a vibrant pattern, showcasing different shapes and sizes of fabric pieces on a design wall.

Because the blocks don’t line up horizontally, we’re going to sew the blocks into columns and then sew the columns together.

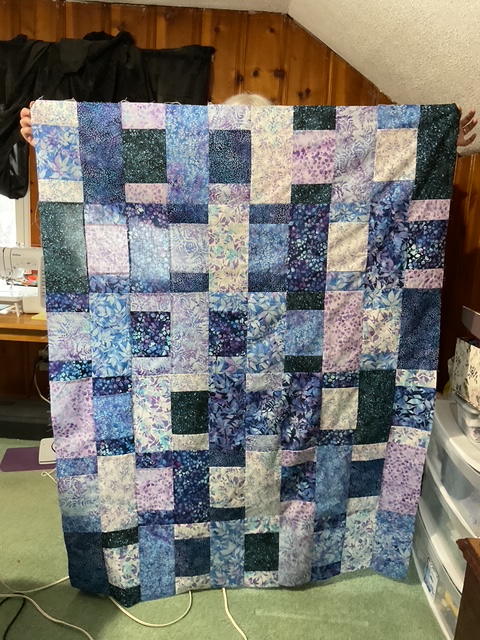
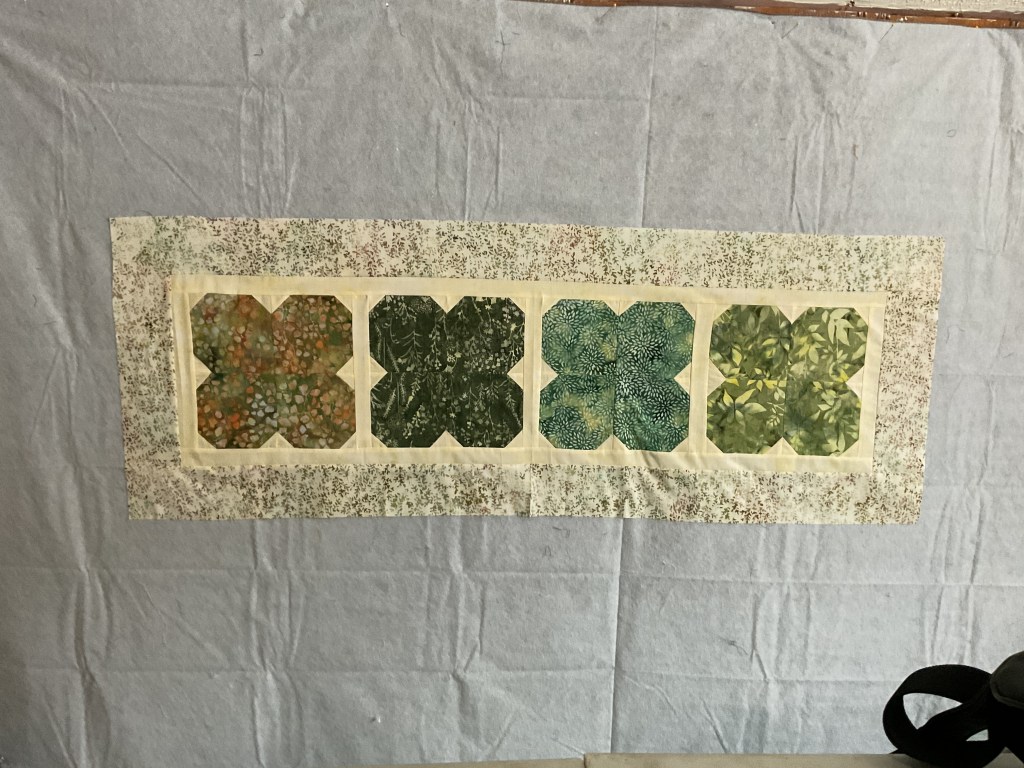
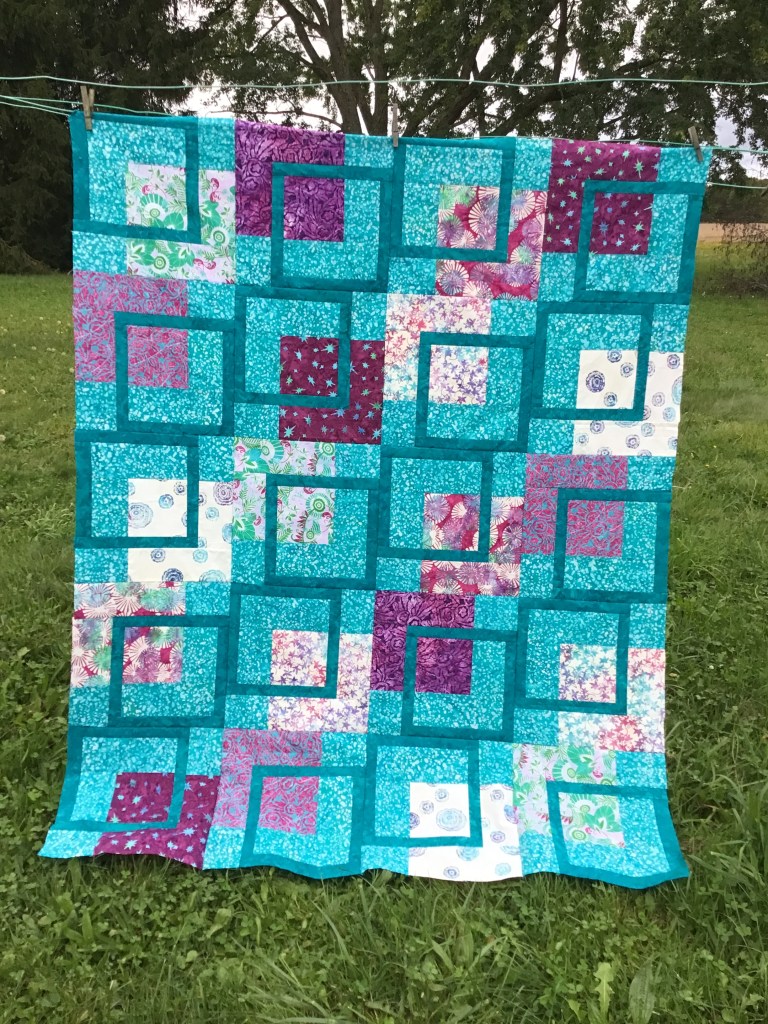
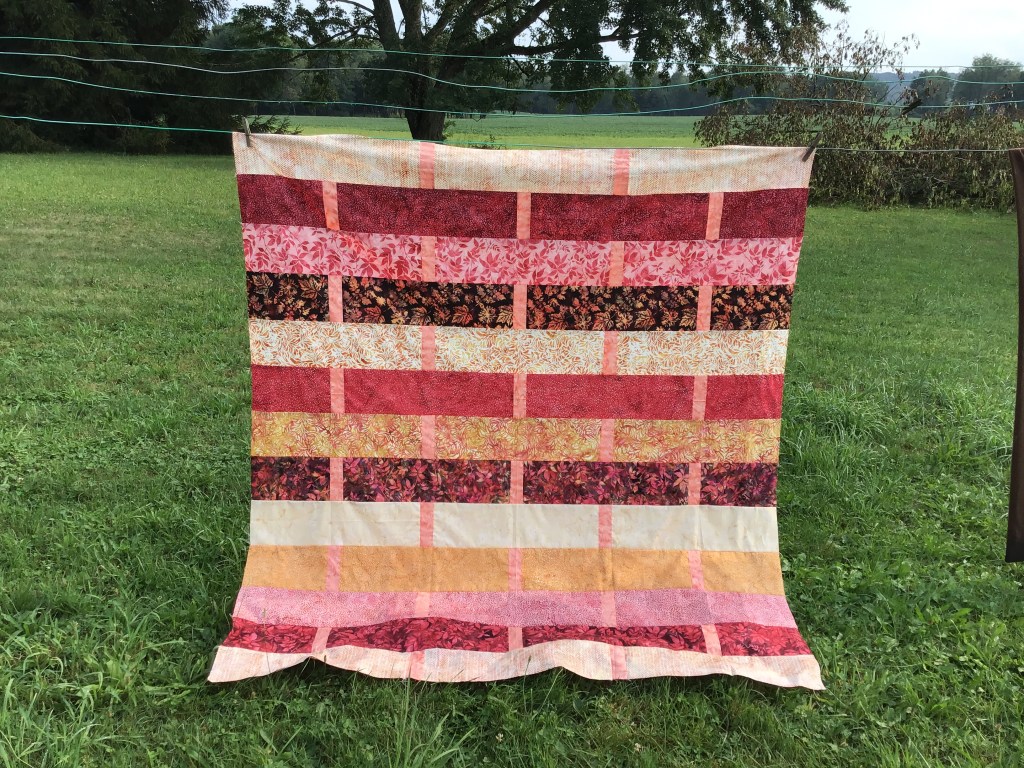
And done! Here is the finished quilt top. Isn’t it pretty? I love that the blocks are large so one can enjoy the beauty of the batik fabrics. It turns into a nice throw at 45″ x 60″, but it would be easy to make the quilt larger by adding a border or additional blocks.

A colorful quilt made with batik fabrics, hanging on a clothesline outdoors against a backdrop of green grass and trees.

Now I just have to layer, quilt, and bind it.

Looking for info on finishing your quilts? Check out these posts in our Basic Quilting Skills blog series:

Batting, Backing, and Preparing Your Quilt for Quilting

Quilt As Desired

Squaring Up Your Quilt

Binding 101

Label Your Quilt

Now I’m off to my sewing machine to work on more quilts. Hope you are too!

See you next week, same time same place —

Always,

Tricia @ VRD

Quilting Partners · Rose Cards · Tutorials · villa rosa designs

VRD Stepped Quilt Tutorial

Happy Thursday to you!

I’ve got a fun and happy quilt tutorial for you today – Stepped by Running Doe Quilts for Villa Rosa Designs.

But before we get into the tutorial – I have an AMAZING announcement for you!

Drum roll, please!

Cue the confetti! Or how about a balloon drop from the ceiling this time?

Our Rose Queen and owner, Pat Fryer, has done it again!

She has a new batik fabric collection with Riley Blake Designs coming this October!

It’s called Kalinda.

WOOHOO!

Here’s a sneak peak –

Kalinda is simply perfect for all your autumn projects! You can download the collection PDF with all the fabrics and skus below.

Guess what????? There will be another collectible pattern storage tin for the Kalinda collection, too! I can’t wait! I love love love my tin from Pat’s first collection, Bedazzled. I can’t wait to collect them all as she designs new collections in the future!

Mark your calendars for October – when Kalinda makes its debut. Don’t forget to ask your local quilt shop to order the collection if they haven’t already.

Now I’ve spilled the beans about Pat’s new collection, it’s time to jump into our tutorial.

Stepped is a fun modern Rose Card pattern designed by Running Doe Quilts for Villa Rosa Designs. It is a large quilt, finishing at 66″ x 78″ and is fat quarter friendly – yay!

Get your digital pattern HERE or your print pattern HERE

For this tutorial I chose a wonderful warm and sunny collection from our friends, Hoffman Fabrics, called Sunset Hour. I chose the bright blue as the frame and binding for a wonderful pop of color against the warm sunset tones.

As usual, the first thing I’m going to do is cut the pieces for the blocks. Since this quilt doesn’t have a border (which is common for modern quilts, by the way), we don’t have to worry about that.

I’m wondering – do you cut your borders when you cut the fabric for the blocks or do you wait until after the center of the quilt is assembled? For me, I usually cut the border strips when I cut the block fabrics, but I don’t piece and cut the borders to size until after I finish the blocks.

Oops, let me get back to the cutting. LOL!

Here are all the pieces I need to make the whole quilt top. Isn’t that blue striking?

Now we’re ready to rock and roll at the sewing machine! The Stepped block goes together really quick (of course, it’s a VRD Rose Card pattern!). I like to put the large rectangle to my left and the blue frame strip to my right so I can grab a rectangle, place a frame strip on top, and zip it through the sewing machine. Then I repeat this same step for all the blocks, using chain piecing (meaning I’m not cutting the thread between blocks as I sew).

Working with batiks is lots of fun – you don’t usually have to worry about right or wrong sides because they are dyed the whole way through.

I could just flip the frame strip over, give it a finger press, and add the 2nd frame strip on, but I want my blocks to be nice and crisp, so I’m going to head to my ironing board to press the blocks before adding the 2nd frame strip.

Now I’m ready to sew the 2nd frame strip on the side of each block. Easy piezy – just the way I like ’em!

Then it’s back to the iron to press the blocks one more time. I warn you – there are a lot of blocks! Seriously!

Next I’m heading to my flannel board, which is actually behind my pressing station, to lay out my blocks. SHHH! My flannel board is really a flannel backed tablecloth hung in front of my fabric storage wall. To hang it, I clip the tablecloth to the tops of my storage doors with big binder clips. That way, I can take it down whenever I need access to the fabric cubbies (these particular cubbies hold my yardage and fat quarters by color).

Now the fun begins. As I lay out the blocks, I’m moving them around to spread the colors and fabrics out over the whole quilt. Laying out your blocks is an important step in making a quilt because you don’t want all the same fabrics or colors clumped together in the same area by accident.

Yikes! I’m actually running out of flannel board for this quilt because it’s big, so I think I need to sew this section together before I can add the final 4 rows. Off to the sewing machine I go…..

All right, here’s the section sewn together. Sorry, just noticed in this photo, I have it turned upside down from the previous photos. Mea culpa.

Finally, I can lay out the final 4 rows and add them to the quilt top. Ugh, you can’t see the bottom section I just added because my ironing station is in the way. Did I mention this is a BIG quilt???

I know! Let’s go outside so I can show you the completed quilt top!

I LOVE the warm and sunny colors of the sunset and the blue plays nicely. I reminds me of photos of the sun setting over the ocean. I say photos as I’ve yet to actually see an ocean. Someday…….

OH! Rats!

Take a look at the bottom of the quilt, I ended up with too much light colored fabrics bunched together. This happened because I couldn’t lay out the entire quilt on my flannel board all at once before I stitched the blocks together. ARGH!

Looks like I will be doing some un-sewing with my trusty seam ripper sidekick, Jack. Then I can relocate some of those light blocks from the bottom towards the center. Sigh……definitely a project for another day. Sorry about that.

Have you ever made the Stepped quilt? If so, I’d love to see your quilts on our VRD Facebook group.

Well, that’s it for me. Have a great week! Find some time to do a little sewing this week. Or maybe some un-sewing……

Until next time –

Always,

Tricia @ VRD

Rose Cards · Tutorials · villa rosa designs

VRD Brickwork Quilt Tutorial

Happy Thursday to you!

Although it’s really March 26th as I write this post, it sure feels more like April Fool’s Day here in NW PA! Mother Nature is laughing loudly at us because this morning we woke up to a layer of snow on the ground. Of course, it’s already beginning to melt away as the temperature increases a bit, but it was certainly a deja vu moment. Just another crazy weather day….

So, I definitely think it’s a fitting day to do a new tutorial for you featuring a beautiful blue and lavender batik collection.

Brickwork is a super fun fast fat quarter quilt designed by our VRD designer, Molly Cook. Don’t know Molly? Check out an interview with Molly HERE.

Get your digital pattern HERE or your print pattern HERE

We do have a few different Brickwork kits available (sorry, not the fabrics used in this tutorial, though) – you can find the kits HERE

For this tutorial, we’re using yummy batik fabrics from the Hoffman collection Dragonflies at Dusk. I just love these gorgeous blues and lavenders – perfect for a snowy day like today.

Who am I kidding??? I just love the saturated colors, smooth hand, and interesting designs of batiks regardless of the weather outside. LOL!

Let’s get started with our cutting. If you feel comfortable layering a couple fat quarters with the right side facing up, the cutting goes super fast. But if you are only comfortable cutting one layer at a time, that works great too. You do you.

Next you need to pair up 2 matching smaller rectangles with a different larger rectangle. Sew the larger rectangle between the 2 matching smaller rectangles. This is a great block on which to practice your chain piecing skills.

Once you have all of the blocks pieced, head to the ironing board and press everything. It doesn’t matter how you choose to press these ones, just be consistent.

After pressing the blocks (sorry, for some reason I didn’t snap a photo of this step), we’re heading to the design wall (ie: a flannel-backed tablecloth – LOL!) to arrange our blocks.

Okay, now the real work begins – rearranging the blocks so we have a nice balance of colors and lights/darks. The funny thing is that sometimes this process takes longer than actually making the blocks added to the actual time spent sewing the blocks. Just take your time and keep arranging until you are happy with what you see.

This quilt did give us some challenges, though, because the fabrics looked either light or dark and we didn’t have a lot of medium values to balance things out.

Here are some photos showing subtle changes in block placement while we try to achieve a better balance of colors. Bear with us while we keep changing blocks around….

Finally! We found a pleasing block arrangement and then it was time to sew the blocks together into rows and then sew the rows together.

Here is the finished Brickwork quilt top! Now to layer it with batting and backing, quilt it, bind it, and label it. Not sure how to do all of that? You can check out our 2022 Basic Quilting Skills Series over on the right side of the blog for useful tutorials on

Batting, Backing, and Preparing a Quilt for Quilting

Quilt As Desired

Squaring Up Your Quilt

Binding 101

Label Your Quilt

Of course, if you’re interested in learning more about Free Motion Quilting (FMQ), we just wrapped up a 7 part series about Beginner FMQ, which is also located over on the right side of the blog.

I want to thank my pal, Robin, for helping me with this tutorial – thanks, Robin!

Have fun making your very own Brickwork and I look forward to seeing your quilts on our VRD Facebook Page.

Well, that’s it for me. Take care and find a little time to quilt this week.

Until next time –

Always,

Tricia @ VRD

Quilting Partners · Rose Cards · Tips and Tricks · Tutorials · villa rosa designs

NEW March VRD Rose Card Quilt Patterns and Lucky, a Quilt Tutorial for St. Patrick’s Day

Happy Thursday to you!

I trust you’re all having fun with your Free Motion Quilting (FMQ) practice. We’re going to take a quick break from our Beginner FMQ series this week because I have NEW March patterns to share as well as a fun table runner tutorial just in time for St. Patrick’s Day. We’re all Irish on St. Patrick’s Day, right?

Here are the new patterns for March – be prepared to be inspired….

Get the print set of all 5 patterns HERE.

The 5 main patterns are great, aren’t they?

Molly created a brand new St. Patrick’s Day throw-sized quilt called Clover Patch. I just love that she added a single Four Leaf clover to her quilt – can you find it in the Clover Patch?

Molly also created a second pattern this month called Jackknife. This clever block uses long quarters instead of fat quarters. We still have a few kits left, too, if you’re interested.

Get your Jackknife kit in Art Glass AbstrArt HERE.

Heidi wows with her new 24″ panel quilt pattern, Jerky. If you don’t already know, Heidi always gives her patterns a foodie name because she loves to cook.

Rachelle created a new modern pattern called Kenosha. I love the secondary design that happens in this striking quilt pattern.

Pat, our Rose Queen, has another fun and fast throw sized pattern for you called Zamora. If you didn’t know, Pat always names her quilts after a rose. Yep, Zamora is the name of a rose. Zamora only uses three main fabrics plus a binding fabric. Sew easy piezy. We still have a few Zamora kits left, too.

Get your Zamora in Indelible kit HERE.

We also have a new table runner pattern this month called Erin.

Get your digital Erin pattern HERE or your print Erin pattern HERE.

I’ve always wanted to make a green and white Double Irish chain for St. Patrick’s Day. I can now check that off my bucket list. The Double Irish chain looks complicated, but I promise you, it really isn’t when you break it down. Give it a try.

I guess I should have done a tutorial for today with Erin, but I’d already gotten Lucky stepped out and photographed before I even designed Erin. I’m sure I’ll do a tutorial for Erin sometime in the future – you’ll just have to stay tuned.

That being said, let’s move right along to our Lucky tutorial.

The first thing we’re going to do is gather up our fabrics.

I’m using a beautiful Hoffman batik collection called Forest Floor. Don’t you just love the greens? With a pop of orange? Love Love Love it!

The first photo shows the background and the greens for the blocks. The second photo shows the border and binding.

Grab your rotary cutter, board, and ruler and let’s start cutting out our pieces!

Now that our pieces are all cut out, let’s start sewing!

Layer a background square right sides together on the corner of a Clover square and draw a diagonal line from corner to corner. I love my Frixion Fineliner pens and my 1×6 little ruler for making my flippy corners and HSTs right at my sewing machine. What are your favorite tools for making yours?

Next we’re going to sew on the drawn line.

Let’s cut 1/4″ away from our drawn line. Did you knou can use these little cut off triangles for a scrappy little project? I’ve been saving mine for a long time, and have even started sewing them into HSTs, but I haven’t started making anything with them yet.

TIP: You might notice in the photo below that my seam is slightly to the right of the drawn line. This is actually on purpose because it gives a bit more room for the seam and my flippy corners are more precise. I learned this little trick from my quilty pal, Mary Lee. THANK YOU, Mary Lee!

Don’t forget to press that flippy corner open.

We’re not done yet! Go ahead and make flippy corners on 2 more corners of the Clover square.

Okay, now we’re talking! Let’s repeat these 3 flippy corners for the rest of the Clover squares while we’re at it.

Finally it’s time to make a Clover block. Yeah! Sew 4 matching Clover squares together with the 4th unpieced corners towards the center so they all meet for the middle of the Clover block. Such a pretty block!

Repeat to make a total of 4 Clover blocks. Don’t you just love that pop of orange???

The next thing we need to do is sew the 4 Clover blocks together with background strips in between the blocks and at each end.

Then we’re going to add top and bottom background borders. Lookin’ good!

Now it’s time to add the side outer borders and then the top and bottom outer borders. And DONE!

Yay! All that is left to do is layer it with batting and backing, quilt it, bind it, and label it.

I hope you enjoyed the Lucky runner tutorial and are super inspired by the new March patterns. Next week we are going to wrap up our Beginner Free Motion Quilting (FMQ) series by addressing borders.

Until next week –

Always,

Tricia @ VRD

Quilting Partners · Rose Cards · Tutorials · villa rosa designs

VRD 2M Junior Quilt Tutorial Featuring Pat Fryer’s New Fabric Collection, Bedazzled!

Happy Thursday to you!

It’s OFFICIAL! Throw the confetti! Toot your party horns! YEAH!

Pat’s NEW fabric collection for Riley Blake Designs, BEDAZZLED!, is finally here and we are all SEW excited!

To celebrate Pat’s new fabric collection, I’m sharing another great tutorial with you this week – 2M Junior.

Next week, we’ll dive right back into the Free Motion Quilting Series, I promise.

2M Junior is the little brother of 2M. Junior has the same block, only it’s a bit smaller so the quilt finishes as a throw quilt instead of a big bed-sized quilt like big brother 2M. It also uses a different block configuration, which gives it its own personality.

For the pattern cover quilt, I actually used samples of Bedazzled! and, boy, does it sparkle. And I mean that both figuratively and literally – don’t forget that Bedazzled! features glitter and glam. OHHHHH, SHINY!

Here’s another photo I took of 2M Junior.

Get your digital Junior HERE or print Junior HERE

I’m happy to say we have some kits made up for 2M Junior featuring Bedazzled! You can get your Bedazzled! 2M Junior kit HERE.

OH! I can’t forget big brother 2M, can I?

You may already know the story, but let me share it again. I designed 2M for my youngest niece, Morgan, as her high school graduation quilt. She asked for something modern. Yes, she loved it (and still does).

You can get your digital 2M pattern HERE or your print 2M pattern HERE

If you enjoyed the Baby Zip Tease tutorial last week also featuring Pat’s Bedazzled! collection, we now have kits for it, too. You can get your Baby Zip Tease kit HERE.

All right, back to our previously scheduled programming….2M Junior. Tehehe….

First thing we always do is gather up our fabrics for the project. The 2 teal batiks are from Riley Blake’s Expressions basics. And the fat quarters are, of course, from Pat’s Bedazzled! collection. Simply scrumptious, aren’t they???

Once I’ve gathered up my fabrics, I like to cut all the pieces out for the quilt before I begin sewing. Do you do that or do you cut your pieces as you go?

Okay, now we’re ready to sew!

Let’s add a background rectangle to the left side of a block center.

Next we need to sew a background rectangle to the top of the unit.

Then we’re going to sew accent strips to the sides and then to the top and bottom of the unit.

Now we are going to sew a background rectangle to the smaller block center rectangle and sew it to the bottom of the unit.

The next step is to sew another background rectangle to the longer block center rectangle and then sew it to the right side of the block. Our first block is done!

Easy Piezy, right? Now repeat to make the rest of the quilt blocks.

We’re going to lay out the blocks and move them around until we’re happy with how things look.

Warning – sometimes this step takes longer than actually making the quilt top (especially if it’s a VRD Rose Card pattern – they’re fast and fun, you know!). Yikes!

Okay, I like how the fabrics are distributed around the quilt now, so I’m going with this arrangement. Don’t you just love how the squares and boxes tumble down the quilt?

Hurry! Let’s sew the blocks together and then sew the rows together before any furry helpers make an appearance and rearrange the blocks when I blink.

And – guess what????? No borders on this one! Yippee!

It is my humble opinion that not all quilts need borders. What are your thoughts on borders?

Here’s another photo of the 2M Junior quilt top. Yummy, yummy, yummy!

Now the top is finished, it’s time to layer it with batting and backing (or fleece for a cozy back). Quilt it. And please, don’t forget your quilt label! DONE!

Need a little help with batting, backing, and layering everything together? VRD to the rescue! Check out this post from our Basic Quilting Skills for Beginners series, Basic Quilting Skills for Beginners: Batting, Backing, and Preparing a Quilt for Quilting. You can find all the lessons in the Beginner series over to the right of the blog, under the Blog Topics Heading or down further as a heading with the lessons listed below.

Once everything is layered together, then it’s time to quilt! Yay! And we are right in the middle of a new series for 2025 — Free Motion Quilting. Lucky You!

We interrupted the series for a couple weeks to celebrate Pat’s new collection with a few new tutorials, but next week, we’ll be moving on to Lesson 3 in the FMQ series.

If you missed the first couple FMQ lessons, you can find them below:

Lesson 1

Lesson 2

You can also find the different series we’ve done over on the right side of the blog, farther down, each under its own heading. Have fun checking them out!

Since last week’s post, we’ve added some more fun Bedazzled stuff to the shop (physical and online). Here’s the 411 –

Fat Quarter and Half Yard Bundles!

This group of 9 is called Lilac Mint

9 Fat Quarters HERE or 9 Half Yards HERE

This group of 8 is called Prismatic Bliss

8 fat quarters HERE or 8 half yards HERE

This group of 9 is called Stardust Splash

9 fat quarters HERE or 9 half yards HERE

BUT WAIT! There’s MORE!

We do have a few more kits available besides 2M Junior and Baby Zip Tease.

San Julian (light) kit HERE

San Julian (black) kit HERE

And here’s the San Julian Rose Card pattern. Please note that the pattern comes in each kit, so you don’t need to order it separately. I’m adding the links below, though, in case someone needs it by itself.

Get your digital San Julian pattern HERE or your print San Julian pattern HERE

You can find all the precuts, yardage, fat quarter bundles, kits, and the exclusive Bedazzled! Rose Card storage tin HERE.

And this is the Bedazzled Rose Card pattern that inspired the whole Bedazzled! collection.

Get the digital Bedazzled pattern HERE or the print Bedazzled pattern HERE

Whew! That was a lot today, wasn’t it? Thanks for celebrating Pat’s new fabric collection, Bedazzled!, with us here on the blog. I can’t wait to see your new Bedazzled! quilts on the VRD Facebook page soon.

Well, that’s it for me today. Remember, next week we’re jumping back into our Free Motion Quilting series.

Until then –

Always,

Tricia @ VRD

Quilting Partners · Rose Cards · Tutorials · villa rosa designs

Pat’s VRD Bedazzled Fabric Collection for Riley Blake Designs is HERE and VRD Baby Zip Tease Quilt Tutorial

Happy Thursday to you!

Yay! Yay! Yay!

Pat’s new fabric collection for Riley Blake Designs, BEDAZZLED!, is finally here!!!

I’m so sorry, but I have to pause our new Free Motion Quilting series so I can celebrate Pat’s new collection. I promise to continue our FMQ series in a couple weeks because I have 2 new tutorials to share, featuring Pat’s Bedazzled! collection.

Here she is – Pat Fryer, owner and Rose Queen of Villa Rosa Designs and designer for Riley Blake Designs

A yummy color-drenched batik collection with glitter accents because one can never have enough glitter!

Get the 5″ Stacker HERE

Get the 10″ Stacker HERE

Get the 2.5″ Rolie Polie HERE

Or you can find the Bedazzled fabric by the yard HERE

Although they aren’t ready yet, soon we will have kits for Baby Zip Tease in Bedazzled!, so check back soon. I’ll add the link HERE just as soon as it’s available.

BUT WAIT! There’s MORE!

There is one more piece to the collection – a one of a kind Bedazzled tin just the right size to store your VRD patterns! I’m not sure how many patterns it holds yet because I haven’t received my tin yet, but I’ll be sure to let you know when I find out. There’s no question about how to store your VRD Rose Card patterns now. Get yours ASAP, because I know they’ll sell out quickly.

Get the Bedazzled tin HERE

To celebrate Pat’s new fabric collection, here is the 1st of 2 new tutorials just for you!

Baby Zip Tease is a really fun and fast pattern that finishes 36″ x 38″, which is a nice size for a wall quilt or a baby quilt.

Get Baby Zip Tease digital HERE or print HERE

PSST! If you like Baby Zip Tease, you’ll love Zip Tease, which is a throw-sized version.

Get Zip Tease digital HERE or print HERE

I was at my pal, Robin’s house (Hi Robin!) the day I created this tutorial. We have sew days as frequently as we can. Robin has a lovely sewing room upstairs in her farmhouse with room for at least 2 people to sew.

In fact, I leave one of my sewing machines there all the time so I don’t have to drag one back and forth. Her husband, Rich (Hey Rich!), threatens to charge me rent. LOL!

Robin and her big kitty boy, Tigger. Tigger has a very important job — to hold down any project Robin tries to work on! LOL! Anyone else have one of these special furry helpers?

So let’s get started with our Baby Zip Tease tutorial!

Of course, the first thing we need to do is gather up our fabrics and cut what we need for the project. I’m using a 5″ stacker from Pat’s new Bedazzled! collection and a yummy Riley Blake Designs Expressions Batik basic.

Let’s make some Half Square Triangles (HSTs).

Photo 1: Layer a print square right sides together (RST) with a background square. Draw a diagonal line from one corner to the opposite corner.

Photo 2 and 3: Sew 1/4″ away from both sides of the line.

Photo 4: Cut apart on the drawn line.

Photo 5 and 6: Press open to make 2 HSTs.

Don’t stop now, go ahead and make the rest of the HSTs .

Square up and trim your HSTs. Cut off all the little “dog ears.”

At this point, you can sew your HSTs into rows and then sew the rows together. But where’s the fun in that???

I wanted to make sure the colors and fabrics were spread evenly throughout the quilt, so I put the HSTs up on Robin’s flannel wall and spent some time moving HSTs around to distribute colors and patterns. Argh! Sometimes this part of the process takes the most time.

This was actually a very important step for me because I kept turning the HSTs the wrong way. This was certainly one quilt project that being left-handed made more difficult. Of course, Robin pretty much just laughed at me every time I had to rotate a block in 90 degree increments until I got it going the right way. SHEESH!

Once I was happy with how it looked, it was time to sew the HSTs into rows. Finally!

Sigh…….I can’t tell you how many times I ended up turning a block on my way to the sewing machine. Time to unsew…….

What’s your favorite seam ripper? Mine is the Clover Ergonomic Seam Ripper seen in the photo below, but have you seen Clover’s latest seam ripper?

I just ordered one and I’ll let you know what I think after I try it out. If it’s as good as the one I already have, I’ll probably love it. Just sayin’……

Got that flipped HSTs fixed and survived sewing the blocks into rows – barely! Now it’s time to sew the rows together.

I’m really liking the cool zig zag effect! Let’s keep sewing those rows together! We are making progress!

YAY! Quilt top finished! Woohoo!

Now you get a chance to see how the fabrics of Bedazzled! play together. Aren’t they really great with the dramatic purple background fabric?

Next week I’ll have another Bedazzled quilt tutorial for you. The week after that we’ll continue on with our FMQ series. So please stay tuned!

Be sure to tune into our Fry-Day Live Sale tomorrow for more information and a closer look at the Bedazzled collection. You can find the Live Sale HERE on Fry-Day from 7-8 PM EST. You can also find the Live Sale on Facebook HERE.

See you there!

Until next week –

Always,

Tricia @ VRD

Guest Bloggers · Rose Cards · Tips and Tricks · Tutorials · villa rosa designs

VRD Adobo Quilt Tutorial and NEW VRD January Rose Card Quilt Patterns

Happy Thursday!

Hi guys! Psst! It’s me, Molly!

It’s been a long time since I jumped on here for a tutorial, but I finally got this one put together just for you!

I was looking at some panels in the shop recently (to see my tour of the VRD shop, go HERE) to sew up into a quilt. I was SEW inspired by the National Parks panels and I LOVE that there are a couple of different choices. Have you seen these yet???

You can find the Utah panel HERE and the California panel HERE.

We also have some awesome Rose Card patterns to showcase these great panels!

Both are fun and amazing patterns — of course, I might be a little biased, since one is my sister’s pattern and the other one is mine. LOL! 😁

If you don’t already have these great patterns in your stash, you can find digital Picture Perfect HERE, digital Adobo HERE, print Picture Perfect HERE, and print Adobo HERE.

For today’s tutorial, though, I’m going to do Heidi’s pattern Adobo because I really want to use the Riley Blake Utah panel.

GUESS WHAT????

You can sew along with me! We made up kits for today’s tutorial. Go grab your Utah Adobo kit HERE and we can sew together! How cool is that?

Your Adobo kit will include all the fabric for the top and binding as well as the pattern.

I wanted to make this Adobo quilt in all Riley Blake Designs (RBD) so I found some RBD fabrics that pulled out the colors from the panel — Poparazzi sand for the background, Poparazzi brown for the sashing, with Dapple orange, Blossom brown, and Blossom green for the Flying Geese.

Let’s get started!

Cut the squares from the background and the coordinates. Pair up each coordinate square to a background square.

Make Half Square Triangles (HSTs) by drawing a diagonal line then sewing 1/4” on either side. Cut apart and press open. Don’t forgot to square up your HSTs if needed.

Tip from Heidi (who’s keeping an eye on me as I work on this tutorial) – Press half the seams of each color HST to the background and the other half to the color.

Now sew 2 matching HSTs together to make a Flying Geese Block A. If you pressed half of the HSTs to the colored fabric and the other half to the background, use one of each to make a Flying Geese Block A. Like magic, the seams will lock together! Great tip, Heidi!

Next we need to create a Flying Geese block for the sashing center. We’re going to use a slightly different technique for this one.

Layer a background square right sides together (RST) on the side of a rectangle sashing fabric. Draw a diagonal line from the bottom outside corner to the opposite top corner. Sew on the drawn line and cut 1/4″ away from the line. Repeat for the other side. Make 4 Flying Geese units.

Next sew background squares to the ends of 2 Flying Geese units.

Sew the 2 Flying Geese units to the sides of an orange square. Then sew the Flying Geese units with the background squares on the ends to the top and bottom. Make 1 Block B.

Molly’s Tip – If using your main print for the center square, cut it from the yardage after you cut your main print/panel C pieces.

Instead of using a main print, though, I’m using the Utah panels so we just need to cut them apart (make sure they are the right measurements – trim if needed).

If using a main fabric, cut the C pieces to the size listed on the pattern.

Next, cut the sashing and add them to sides first, then to the top and bottom. Make 4.

Lay out the main print/panel C pieces and the Flying Geese Block A’s so the Geese are flying away from the center. Sew together (please note that I added an extra background strip to the top and bottom of my quilt. Feel free to do the same, but you will need a little bit more background fabric).

Layer your quilt. Quilt it as desired. Bind it. And don’t forget your label!

TA DA! That’s it! Done! Eazy piezy!

I’m going to add one more little detail to my quilt — I’m going to embroider UTAH in the center square!

Here are some other fun Adobo quilts VRD has as kits. You can find them HERE.

Thanks for stopping by and sewing with me!

Now let’s check out the new January VRD Rose Card patterns!

I’m excited that I get to show the new patterns off today! Tricia usually does it, but today it’s my turn. Yay!

Here are the 5 main patterns.

Look! There are 2 panel quilt patterns this month – one using a 24″ panel and the other one uses a 36″ panel. Cool!

Rewey uses fat eighths, Pink Piece uses fat quarters, and Yorkshire uses half yards.

This set of patterns gives you a nice variety to add to your VRD Rose Card collection. You can get all 5 print patterns HERE (if you want digital patterns, you can order each pattern individually).

But wait — there’s more (Sorry, been wanting to say that)!

Tricia has a new table runner for you called Snowfall.

You can get the print Snowfall HERE or the digital Snowfall HERE.

And here’s our 11th Snack Mat, Woolly Mitten (just in case you’re keeping track, this is the next to the last one).

You can get the print Woolly Mitten Snack Mat HERE or the digital Woolly Mitten Snack Mat HERE.

We still have some kits available for this month’s patterns (if you know me, I’m all about kits). Get yours now before they’re gone cause they’re going fast.

Farm Fresh (with the Out of Farm’s Way collection)

Pink Peace (with the pink Tim Holtz fabrics)

Yorkshire (with the Elegance collection)

Yorkshire (with the Toil & Trouble Halloween collection)

Rewey (with Australian fabrics)

Well, that’s it from me. I can’t wait to see your Adobo quilts.

Until next time —

Later,

Molly

Rose Cards · Tutorials · villa rosa designs

NEW VRD October Rose Card Quilt Patterns and a VRD Pumpkin Hollow Tutorial

Happy Thursday to you!

Guess what day it is????? The Thursday after the first Friday of the month. And you all know by now what that means — NEW PATTERNS!

Yay! I really love seeing the new patterns every month, they just make me feel SEW inspired. Do you know what I mean? And without further ado, here they are!

You can get the set of 5 print patterns HERE.

(If you are interested in digital patterns, you will need to purchase each pattern separately)

These 5 great patterns are a must-have for your growing Rose Card pattern collection! They include a delightful star quilt (Amelia), 2 panel quilts (Morning Spring and Surf & Turf), and 2 fun modern designs (Changing Lanes and Landina. I know I say this all the time, but the creativity of our VRD designers always amazes me. You rock, designers!

But wait We can’t forget this month’s Table Runner and Snack Mat can we???

Get the print pattern HERE or the digital pattern HERE

I designed the Pumpkin Spice pattern to showcase all those fantastic autumn fabrics out there we never want to chop up into little pieces! And who doesn’t love pumpkins — Log Cabin pumpkins. What a fun twist, huh? Depending on the fabrics you choose for Pumpkin Spice, this runner can decorate your table for both October and November. Just sayin’…..

Get the print pattern HERE or the digital pattern HERE

It just isn’t October with a cat or two, is it? My cats had to be grey because I actually have 2 grey cats. Pip is my senior citizen who is a 14 year old silver tabby with a very svelte figure. Griffin (or Griffy as I usually call him) is my 3 year grey tabby who is a real sweetie pie. My 2 year old shih tzu pup, Bailly, rounds out my little furry family.

Of course, you can make your kitties any colors you want — wouldn’t it be fun to make them look like your real cats, if you have any? I chose to use Halloween fabrics for the background and the binding, but you could make Christmas kitties or 4th of July kitties or any kind of kitties you desire.

Which pattern are you going to make first?

Speaking of fall sewing, I thought it would be fun to do a tutorial for my very first pumpkin runner pattern, Pumpkin Hollow. It’s been a popular pattern. Thank you! I’m thrilled you like it as much as I do. 🙂

I have really enjoyed seeing all the different Pumpkin Hollow runners folks have been posting on our VRD Facebook page. If you’re looking for inspiration for your Pumpkin Hollow runner, please stop by the Facebook page and I promise you’ll find awesome quilts there. And a lot of friendly helpful quilters.

One of my favorite Pumpkin Hollow runners so far had appliqued vines and leaves added to the pumpkin stems. What a lovely addition to my humble little pumpkin pattern. Just another reason I love our VRD Rose Card patterns — there are plenty of opportunities for you to add your own touches!

Get the print version HERE and the digital pattern HERE

Well, let’s get started on our tutorial!

Of course, the first thing we need to do is gather up our fabrics. I pulled out some pumpkin and Halloween fabrics from my stash for today’s tutorial. I must admit that I’m embarrassed to even tell you how long these fabrics have been lurking quietly in my stash (I’m not actually sure, to be truthful), but now it’s finally their time to shine. I bet you don’t have any fabrics like that in your stash, do you? LOL!

I chose a mottled black background to compliment these burnt orange fabrics with black accents. I tried a couple different colors, but black looked the best, so black it is. And the green batik was just hanging out on my cutting table from another project, so that was an easy choice.

Lime to get started with the cutting.

Now that I’ve cut my fabrics, I’m getting kind of excited to see how this runner will look when it’s finished. It will definitely be different from my original version, which had a light background (the one on the front of the pattern, above).

Let’s sew 5 strips together to make 3 small pumpkins. You can sew the strips for all 3 pumpkins in the same order or mix them up. I like to mix things up (wink, wink).

Time to sew some “flippy corners”! Yes, I am using the scientific name for this technique. You may have even noticed that lately I’m using that scientific term on my new patterns.

Layer a background square right sides together on the corner of a pumpkin. Draw a diagonal line. Sew on the line. Cut 1/4″ away from the line and press open. Now repeat this for all 5 pumpkins — the 3 strippy ones and the 2 tall single fabric ones.

Next we are going to prepare our pumpkins stems. Sew a background strip to each side of the stems. Keep in mind that the smaller pumpkin has a smaller stem, so don’t get the background pieces confused between the 2 sizes of pumpkins.

Wow! This is coming together so quickly.

Now add the top background rectangle to the small pumpkin stems.

Let’s sew the stems to the tops of the pumpkins. Sheesh! We’re almost done. Wow! It really does go together super fast.

Okay, I’m going to put my pumpkins up on my design wall and arrange them. For fun, I decided to make the strips on the center little pumpkin go up and down instead of side to side.

I like how it looks. Isn’t it fun? I’m going to sew the blocks together.

Easy piezy! Done! Now all that is left to do is layer it with batting and backing, quilt it, bind it, and slap a label on it.

My pal, Robin (BIG Shoutout to Robin!), has already made 2 Pumpkin Hollow runners.

Don’t you just love her teal background in the first one? It’s an awesome unexpected pop of color paired with her mostly lighter florals and leaves.

In contrast, her second one is very warm and cozy with traditional browns and oranges. Love the little bit of blue! Robin even added a narrow inner border and a fall outer border to finish things off. Psst! Adding borders makes your quilt larger without having to make more blocks.

Great job! Thank you for sharing your runners with us! For more Pumpkin Hollow inspirations, please visit our VRD Facebook page.

Now you’ll have to excuse me. I’ve got to get back to my super secret projects for Quilt Market. Shhhhhh…….. Hang in there, you’ll see them very soon, I promise!

Take care and happy quilting!

Until next week –

Always,

Tricia @VRD

Quilting Partners · Rose Cards · Tutorials · villa rosa designs

VRD Whirly Bird Quilt Tutorial

Hello Quilty Friends!

Happy Thursday to you!

I hope your summer is still going strong and you are getting to do the things on your summer bucket list.

This has been my busiest summer since before the Pandemic, that’s for sure. I’ve been doing things I haven’t done for years — gardening, the adult summer reading program at my local library (I even won a nice prize at the program potluck last week!), I’ve been to Presque Isle Park (Lake Erie) twice so far, made multiple trips to the big farmer’s market in Erie (PA), and even visited a relatively new local museum I’ve never been to before. Luckily, I’ve been making quilt tops for our Summer Tutorial series so I’ve even gotten in some fun sewing. Yay!

The only issue with my busy crazy summer is that I’ve been neglecting a lot of things at home and in my studio space. So I guess I’ll have a lot to catch up on this fall. Sigh………..

Artwork by moi

This Sunday, I’m even going on a summer road trip with my friend, Leslie — Hi Leslie! — to Maryland to visit our friend, Cathey — Hey Cathey!

Looks like we’re going to have a good old-fashioned quiltathon/quilt retreat like we used to do years ago at Chautauqua Institution (Chautauqua NY) during Quilting around Chautauqua every September (sadly, the amazing quilt weekend is no more….). The three of us along with our other quilty pal, Mary Lee — Hey Mary Lee! — would rent a cottage and start our quilt weekend on a Wednesday so we could have a quilt retreat as well as enjoy the show on Saturday and Sunday. Ahhhhh, those were the days.

I can’t wait to catch up with these gals because we’ve all kind of gone in different directions since Chautauqua.

I’ll tell you all about my adventures in next week’s post, so stay tuned until then.

Now let’s continue our Summer Tutorial series with an oldy, but a goodie — my pattern, Whirly Bird.

Today we’re going to have a little fun with Whirly Bird. Have you made this quilt yet? If so, please please please share it on our VRD Facebook page ’cause I’d really like to see them!

If not, it’s fun and fast (of course) and has a lot of room for creativity.

Get your print Whirly Bird HERE or your digital Whirly Bird HERE.

When I designed Whirly Bird, I really wanted to do a gradation quilt featuring black, grey, and white. It turned out to be a pretty cool quilt with a very modern feel, which was what I was going after.

Let’s change things up today by swapping the lights and darks! I think you’ll be really surprised when you see the finished top.

So let’s get this party started, shall we?

For today’s Whirly Bird, I am using the Touch of Grey collection by our quilting partner, Hoffman Fabrics. Yep, I’m sticking with a neutral theme for this version, but that’s really where the similarities end.

The charcoal fabric at the bottom of the photo will be my background fabric and the 5 light fabrics in the center at the top will be the gradation strips in the quilt. The border is on the left and the binding is on the right.

The first thing we’re gong to do is cut the fabrics according to the pattern, but swapping out the dark charcoal for the background (or light) fabric and the light greys for the graduated grey strips.

While I cut, I am organizing my pieces on a flannel board so that I have the correct background piece paired with the correct light grey strip. Want to make your own flannel board? You can find the tutorial HERE.

By arranging my pieces on my flannel board in order, I can simply take the board right to my sewing machine and start sewing immediately.

So let’s do that!

Let’s sew the charcoal background pieces to the corresponding light grey strips. This step went really fast because I used chain piecing for each pair for each block, stacked them back on my board, and then moved onto the next pair.

Moving right along, we’re going to head to the ironing board. I pressed my seams to the dark, but this doesn’t work perfectly all the time. So press your seams in a way that makes sense to you.

A note about pressing — I don’t usually give directions for pressing seams in tutorials and even on my patterns because every quilter has their own way of doing things. For me, I usually make those decisions on the fly as I sew. I usually do press to the dark, but sometimes I find that when sewing the the pieces of a block together, I have to flip my seams to the other side.

Wanna hear a joke — an old favorite of mine?????

Keep reading to find the answer. Tehehe!

After I pressed each strip pair, I put them back on my flannel board to keep things neat and tidy.

And….back to the sewing machine!

Next we are going to sew the pieced strips together into a block. One word of caution about having your pieces laid out on your flannel board — make sure you have them laid out in the right order or else your blocks won’t turn out the way you want them to. As a lefty, I sometimes have to double and triple check block or even quilt layouts before I sew the pieces together because it’s just too dang easy for me to flip things the wrong way.

I used chain piecing to sew the blocks together. This process went super fast as I made all the blocks at one time, one step at a time, without stopping to press in between.

Now, back to the ironing board to give these blocks a good press. I like to press the seams from the back first. Then I repress the block from the front, making sure everything is nice and flat.

Remember, we PRESS in quilting, we do not IRON. Need a little refresher on pressing vs. ironing? Check out a blog post about pressing techniques from our 2022 Quilting Basics series HERE.

Woohoo! The blocks are done and pressed — let’s arrange them on my design wall!

This is the same arrangement of blocks as in the original Whirly Bird quilt on the front of the pattern. Wow! What a difference when you swap the lights and darks out in this design! What do you think???

This is just one of many arrangements. Here are some other possibilities to give you food for thought when you make your own version of Whirly Bird.

I bet you could even come up with 1 or 2 more!

I decided to go with the original arrangement, so now let’s sew the blocks into rows and then sew the rows together.

LOVE LOVE LOVE IT! Especially the repeating little pop of grey print in the middle of the light grey tonal strips — yep, I planned that on purpose for added interest. 🙂 I really like how those center print strips flip up, down, and sideways in the blocks — it really does add a bit of a secondary design and helps move your eyes around the quilt.

Next up, we are going to add the border, although this quilt doesn’t have to have one — it would finish beautifully with a dark binding to frame the blocks. But, we’re adding a border.

Sew the sides on first and then add the top and bottom. For more added interest, I added dark fabric squares in the 4 outer corners. This is a little bit different than the original pattern, so let me tell you how I did it:

As this quilt is a square, I cut 4 borders the same length as my quilt top through the center and the same width as the pattern calls for as well as 4 squares. I sewed border strips to the sides of the quilt center. Next I sewed dark squares to both ends of the remaining 2 borders and then sewed them to the top and bottom of the quilt center. Easy piezy!

If you don’t want corner squares, though, simply cut and sew the borders like you normally would.

Here it is — my completed Whirly Bird quilt top. I really like how the dark corner squares connect to the dark block sections in all 4 corners.

What are your thoughts?

I’m planning to take this quilt with me to Cathey’s — I hope to get some machine quilting done. Fingers crossed……………

See you back here from Maryland next Thursday and I’ll tell you all about my trip. I hope Cathey’s hubby, Bryon, is doing all the cooking while we quilt, gab, laugh, and eat chocolate.

Until then —

Always,

Tricia @VRD

Rose Cards · Tutorials · villa rosa designs

New August Villa Rosa Rose Card Quilt Patterns and VRD Weave Quilt Tutorial

Happy Thursday to you!

It’s August??? It’s August! How did that happen??? It must have sneaked up behind me when I wasn’t looking….

The good news is that today is the Thursday after the first Friday of a new month! And guess what that means?

Yep, you got it! NEW PATTERNS!

Aren’t they awesome? Definitely something for everyone this month from panel quilts to modern quilts. I bet you’re already picking which ones you’re going to make, am I right? I must confess that Drizzle rather fascinates me and I am looking forward to giving it a try soon. Hmm, a new tutorial, perhaps? Or maybe several as all of the new patterns are great.

I know I probably say it every month, but our VRD designers keep surprising me with their innovative, fun, and easy to make patterns.

PSST! Here’s the good news — you can order a set of all 5 print patterns for $8.95 HERE. Sorry, but we do not offer digital sets of patterns at this time unless you sign up for a Pattern Club (see below for more info), but you can peruse all of our digital patterns (including our newest patterns this month) HERE.

But wait! There’s more! Tehehe — you knew I was going to say that.

We have a new table runner and snack mat for August, too.

Here is Honey, my most recent table runner pattern. It is quick and oh so satisfying because it uses many different fabrics. You can get the Honey print pattern HERE or the digital pattern HERE.

A lot of folks have already been asking about the fabric I used for the runner. It’s called Honey & Lavender by Deb Strain for Moda. It is available in quilt shops right now. As the runner uses fat eighths, you can find a fat eighth collection HERE just in case you can’t find it at your local quilt shop, because these fabrics seem to fly right off the shelves.

There’s also a new Snack Mat for August, too.

Awww! Isn’t this the cutest l’il watermelon slice? You can get the print snack mat pattern HERE or the digital snack mat pattern HERE.

Please forgive me for repeating myself, but as we have a lot of new subscribers and blog readers, I thought I’d remind all of you that you can get the new print patterns delivered right to your postal mail box every month if you live the USA.

If you want to get digital patterns every month, YOU CAN TOO!

All you have to do is follow one of the links to the appropriate Club form, below, and select “International” on the form in order to sign up to get digital pattern collections emailed to your inbox every month (you do not have to live outside the USA to sign up for digital patterns).

HERE you will find the form to fill out to sign up to receive the 5 main patterns each and every month (select “International” if you want the digital pattern sets).

OR

HERE you will find the form to fill out to sign up to receive the 5 main patterns in addition to table runners and/or accessory patterns (select “International” if you want the digital pattern sets).

Patterns always ship FREE, too. So what are you waiting for? Go ahead and sign up to get your monthly card sets delivered right to your doorstep or your email inbox. Never miss a new pattern!

I hope you enjoyed last week’s post, 11 Awesome Ways to Incorporate Quilts into Your Life. Now that you know what to do with your quilts beyond the basics, let’s make more quilts. YEAH!

Ready for another Summer Quilt Tutorial???

This being the last month of summer, I was in the mood for a late summer warm and sunny feeling quilt and I think you’ll agree that my version of Running Doe’s Weave quilt pattern certainly feels like an warm hazy lazy August afternoon.

You can get your own print Weave pattern HERE or the digital Weave pattern HERE.

Sit back and enjoy this Weave tutorial.

For my Weave quilt today, I am using fabric from the Garnet Glow Batik Collection by our quilting partners, Hoffman California-International Fabrics.

Did you happen see my Berry-Licious tutorial a while back? I used the same fabric collection for that table runner as I am using for Weave. You can check out the Berry-Licious Table Runner Quilt Tutorial HERE.

Okay, let’s get started!

First thing you need to do is decide how you will arrange your fabrics. As you will see later in the tutorial, I had 6 lighter fat quarters and 6 darker fat quilters so I decided to alternate my lights and darks. This decision influenced how I cut my rectangles because 6 fabrics are cut one way and the other 6 fabrics are cut a different way.

The rectangles are simple to cut with a basic 6″ or 6.5″ x 24″ ruler and an 18″ x 24″ cutting mat. Simply lay the fat quarter out on your mat with the 22″ side horizontal and the 18″ vertical. Cut strips according to the size in the pattern and then cut the strips into rectangles. I was able to comfortably layer 3 fat quarters at a time to cut — do likewise if you feel comfortable.

Did you know that if your rotary cutter starts skipping while you cut, it’s probably time to change your rotary blade?

After cutting all of your fat quarters into rectangles, go ahead and cut your accent fabric into rectangles, too.

Now it’s time to sew the accent strips between matching rectangles. There are actually 2 different rows, so make sure to keep your fabrics straight.

Then press your rows. The middle photo shows my pile of rows ready to get pressed (and maybe untangled! LOL!).

The great news is that it doesn’t really matter which way you press your seams because the seams are all offset when you sew the rows together. This is really great and makes Weave a beginner friendly project.

Just a quick tip — while I was pressing my rows, I folded each row in half and pressed a crease for the center of the row. That way, as I pin the rows together, I can match up the centers so my quilt will come out straight and not skewed or twisted.

The rows are finished, so let’s put the rows up on the design wall. My plan, as I mentioned above is the alternate lighter and darker strips. Huh. A few strips up on my design board and I’m already rearranging.

All the strips are up. Hmm. Not quite. Arrange some more. There are 12 rows in this quilt and I don’t like how the lights and darks are not completely balanced. Back to the drawing board……what can I do now?

Let’s try it again.

AHA! I know what I’m gong to do — I am going to add another light row to the bottom because I always find an odd number more pleasing than an . I have an extra fat quarter for the top row, which would give the illusion of a top/bottom border if they are the same as well as some leftover accent fabric. It would also give me some visual balance with lights at the top and bottom instead of a light at the top and a dark at the bottom. Let’s go with that!

I know it’s hard to visualize right now, but trust me that the extra light strip at the bottom makes all the difference!

If I make this again in the future, I don’t think I’ll try to alternate lights and darks — I think random would probably be easier to put together.

Whew — I wasn’t sure I’d ever figure it out, but boy oh boy, am I glad that I did! Time to sew the rows together before I change my mind.

Remember when I pressed a crease in the center of each row? Now I am going to match up the centers of each row and then smooth the rows all the way to the ends. I put a pin in my center crease, and lined up the outside edges.

See the pin in the second photo, perpendicular to the edge at the end of the row? I think that’s probably the most important pin in the whole pinning the layers process — I keeps the rows square and keeps the rows from sliding and skewing when I am sewing. Thanks, Pat P. for teaching this important little trick to me when I was a beginning quilter.

My plan is to sew the rows into pairs, sew the pairs into quads, and then sew the quads together. I will add the 13th row to the last quad (so it will actually have 5 strips in it before I sew it to the previous quad).

Yay! It too me less time to sew the rows together than it did for me to arrange the rows to my liking. Figures……..

Sorry, Weave is a bit too big for me to show you the whole thing on my design wall.

Let’s go outside!

Here it is — Miss America. Ummmm, maybe not. Seriously, though, here is my Weave quilt top.

I love the warm saturated colors! Maybe I should have picked a slightly darker accent, but I do like its subtlety. It really is a late summer sun-kissed quilt. Now I just need to get it layered so I can quilt it……

Well, I think that’s about it for me this week.

Until next Thursday —

Always,

Tricia @ VRD