Rose Cards · Tutorials · villa rosa designs

VRD Alassio Quilt Tutorial

Happy Thursday to you!

Yep, I am still in my fall quilt-making zone. Which is not a big surprise really because for the last couple weeks, here in NW PA, we’ve been having very fall-like weather. Today is quite cool with a high temperature only in the 60s and it feels really really chilly. Usually, August is in the 80s and even 90s occasionally. You know the “dog days” of summer? So the 60s is kind of a shock to the system. Our nights have even dipped down into the 40s a couple times. Just chalk it up to the ever-changing world of weird weather, I guess.

So in honor of our early autumn weather in August, I am going to show you how to make anther great Villa Rosa Designs Rose Card pattern, Alassio. Do you really have to use a fall-themed fabric collection like I am doing? Nope, not at all. This pattern will work beautifully with any fabric collection!

Get Alassio HERE

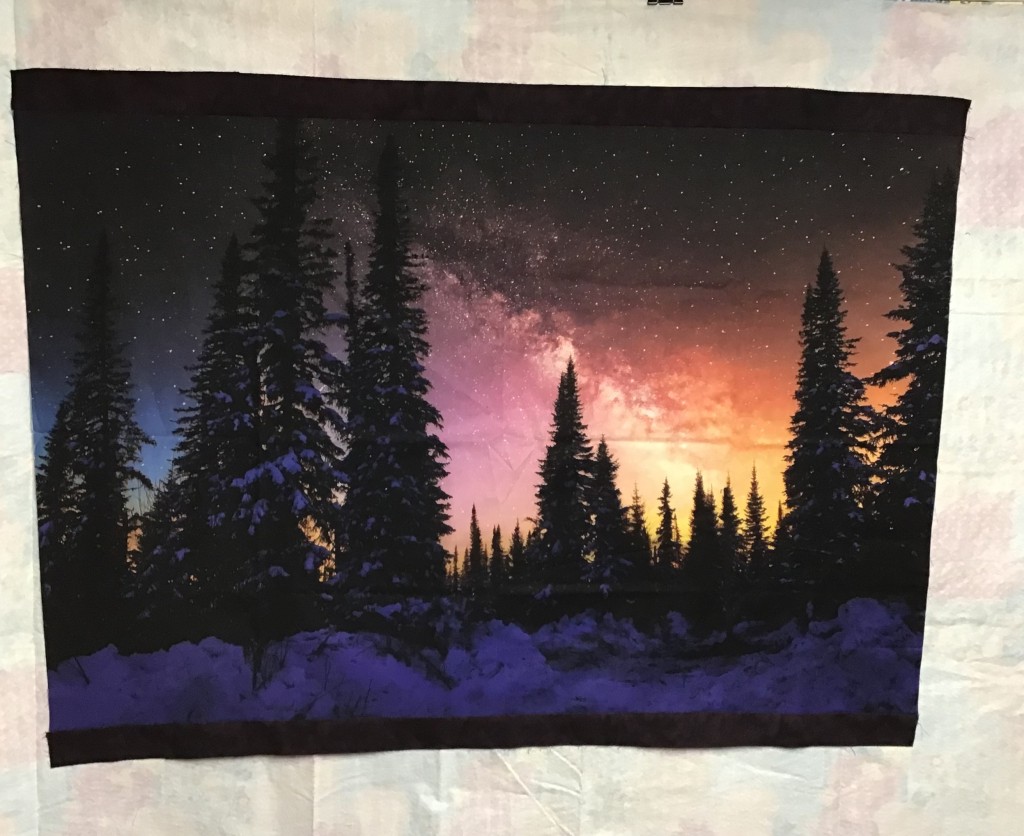
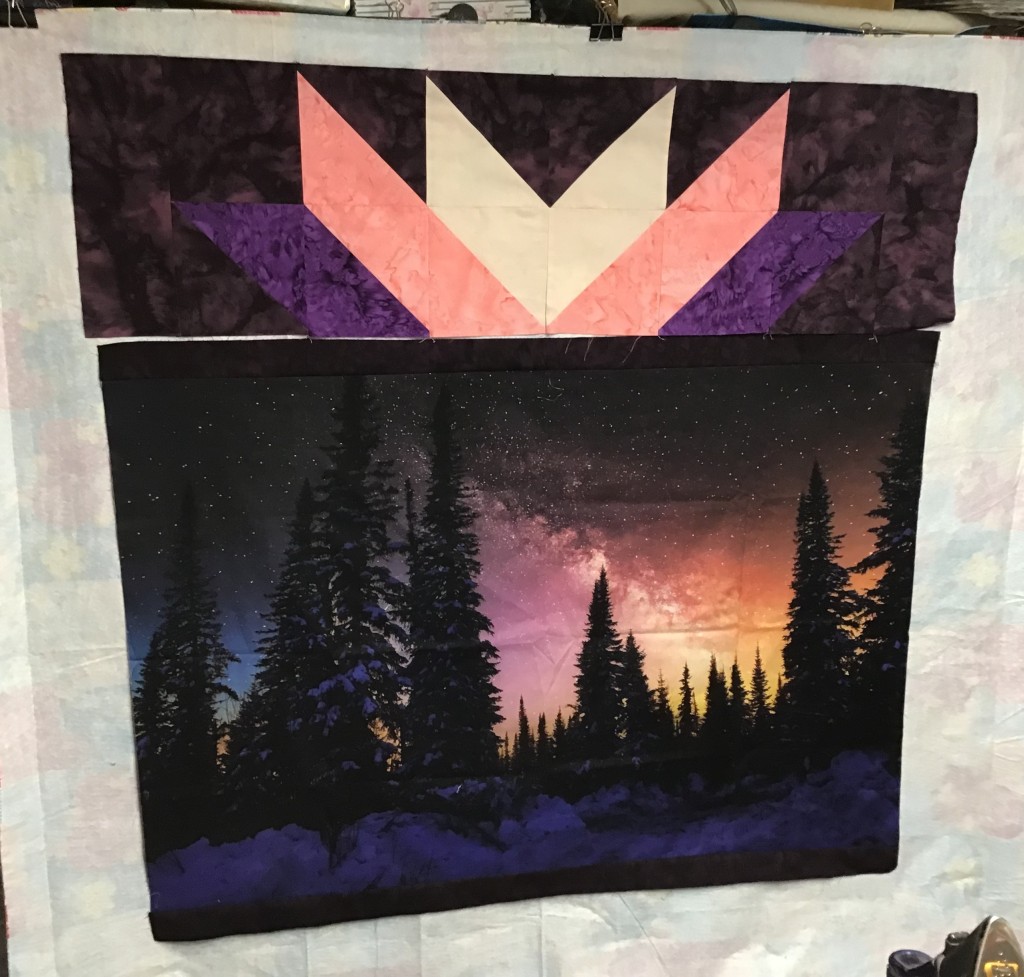
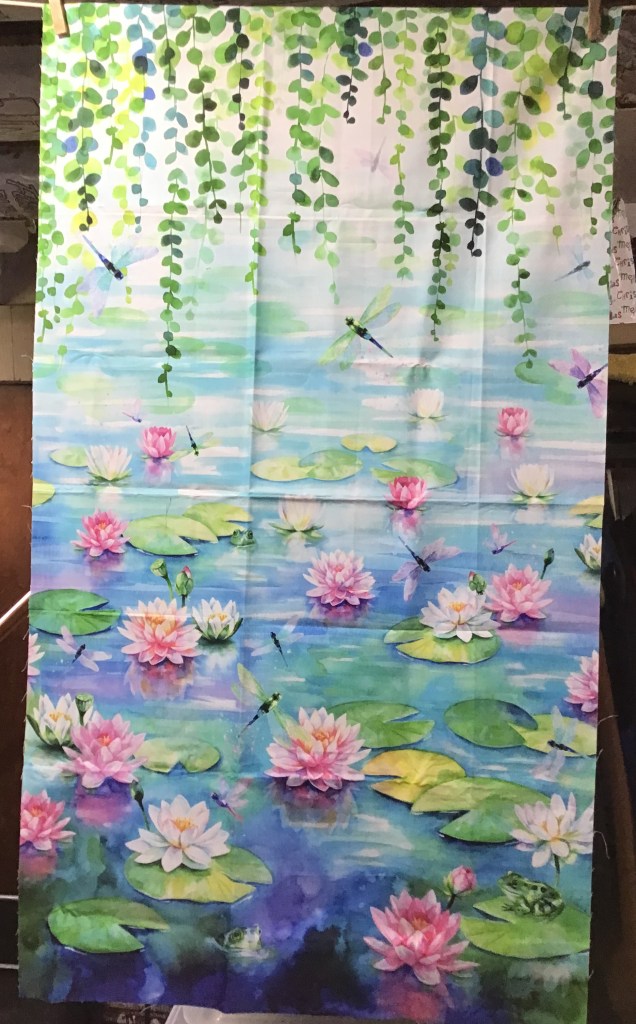
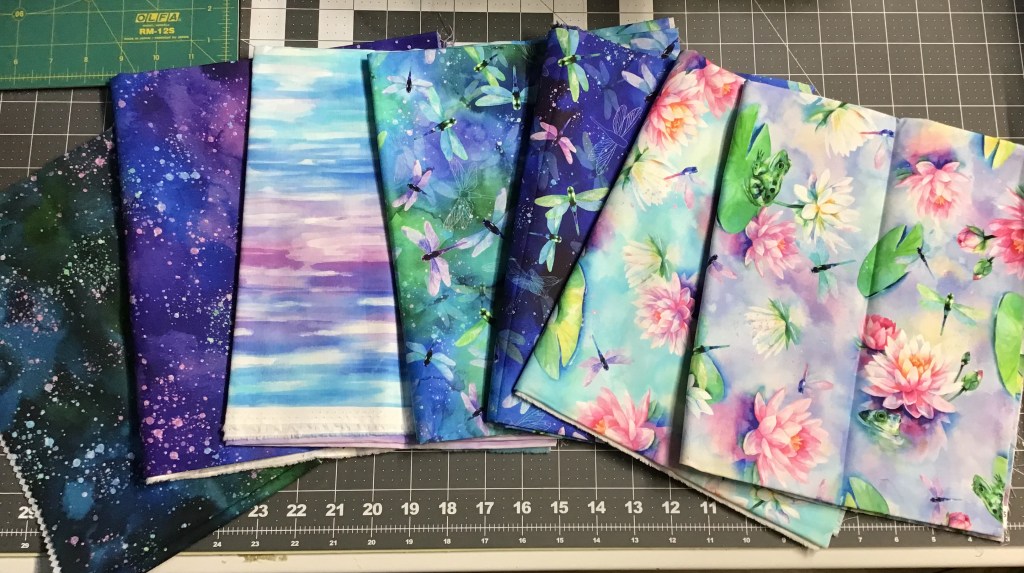
I made my Alassio quilt sample with the Hoffman All Things Spice batik collection and coordinating 1895 Watercolors batiks. Isn’t it sew yummy? I just want to crawl into those fabrics with a good book, a cup of cider, and a donut………

On that note, let’s make Alassio together!

  1. First, we need to cut out our background squares.

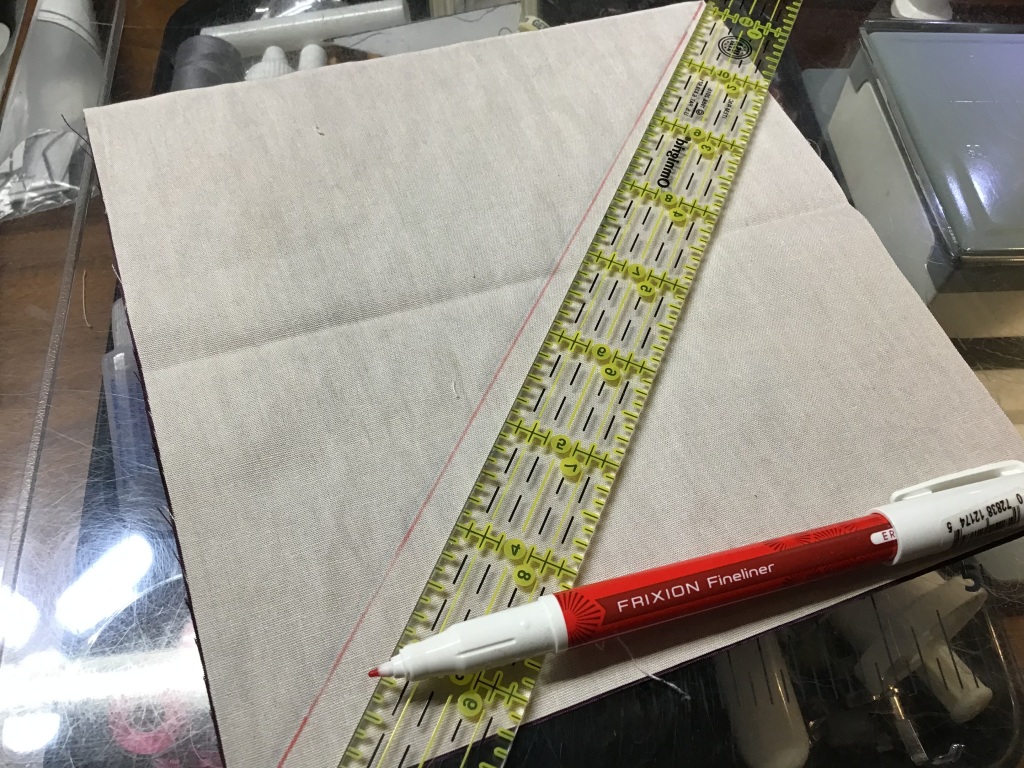
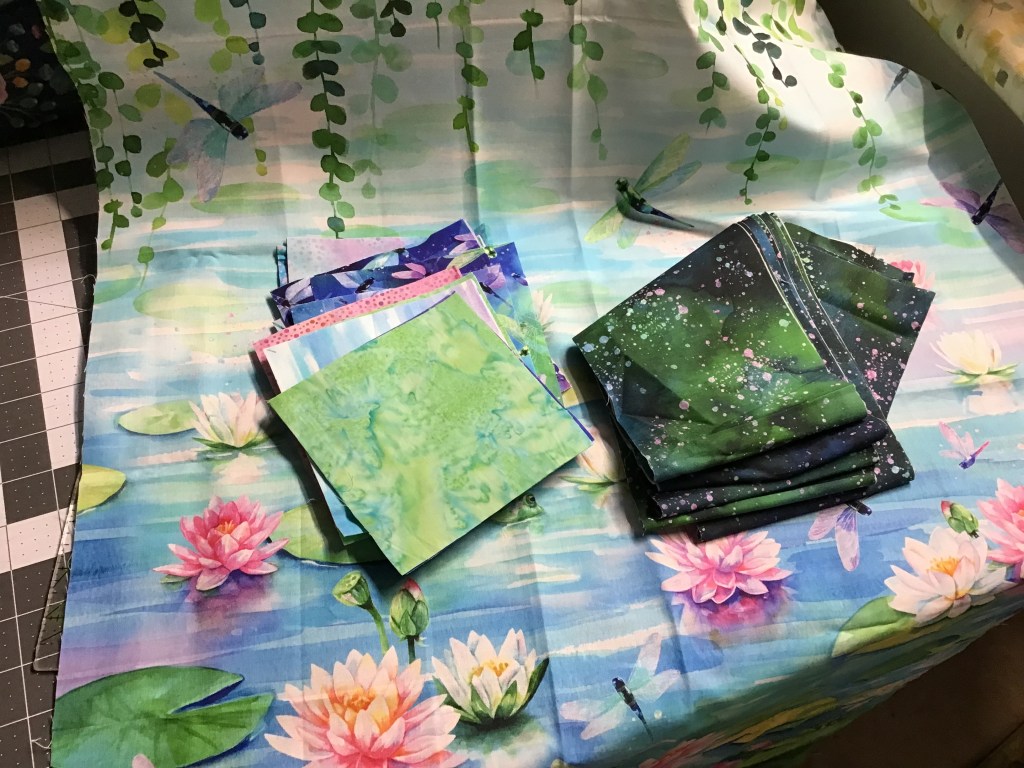
2. Next up is cutting the pieces for our framed blocks from our fat quarters. I like to stack my fabrics and cut 3 or 4 at a time. Do likewise if you want, but it’s perfectly fine to cut them one at a time, too.

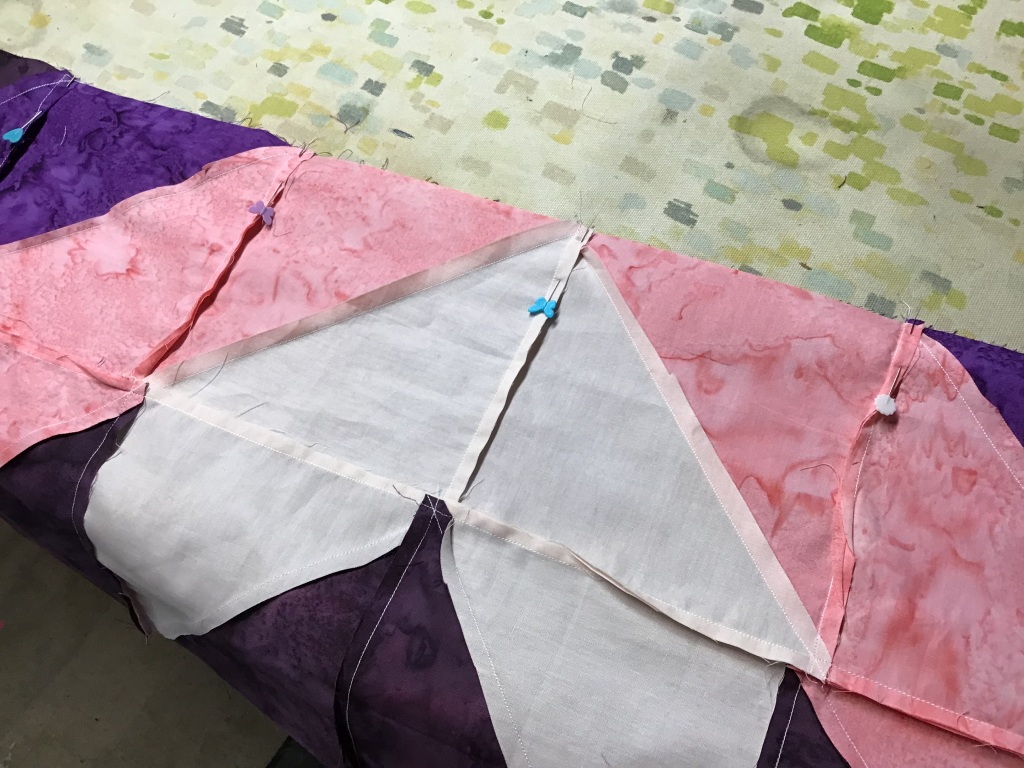
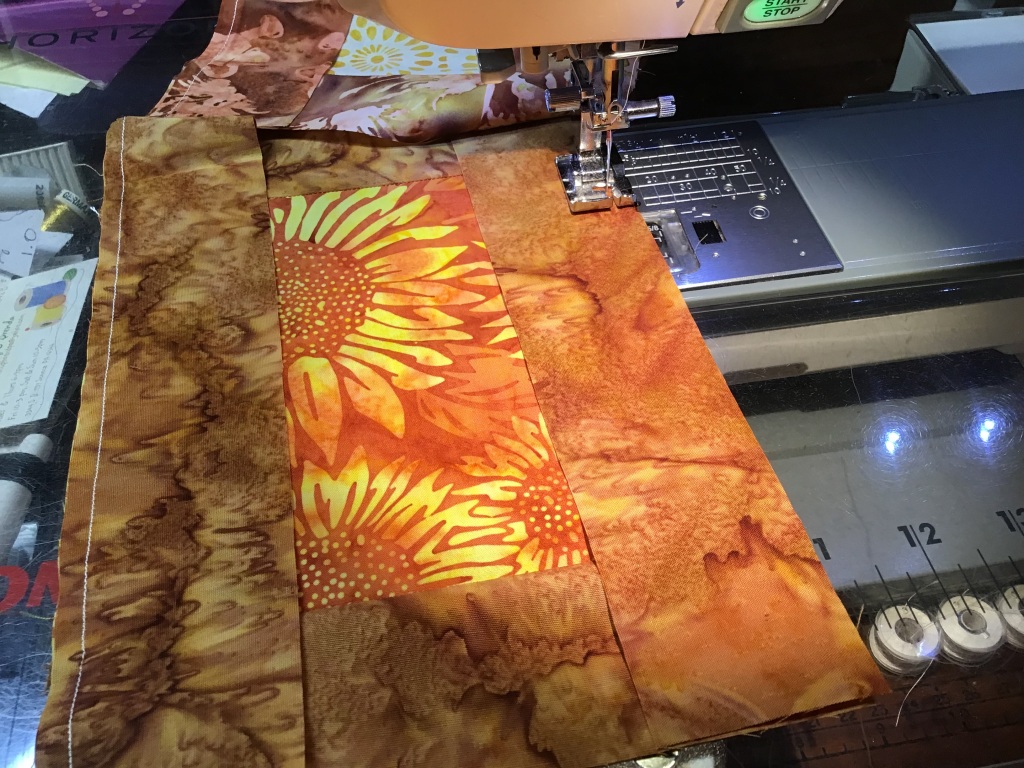
3. Moving right along, let’s mix and match our fabrics so each square will have a different fabric frame around it. And after that’s done, we’ll sew matching shorter strips to opposite sides of the squares.

4. Now we need to press our blocks so far before we add the long strips on the other sides of the center squares. I don’t normally do a lot of pressing when I’m making blocks but I do think pressing these blocks as you go results in crisper seams and better blocks.

5. Okay, now we’re ready to sew the long strips on the opposite sides of the center squares. Make sure the long strips match the strips you’ve already sewn onto the squares.

The again, who says your strips have to match — just sayin’…….

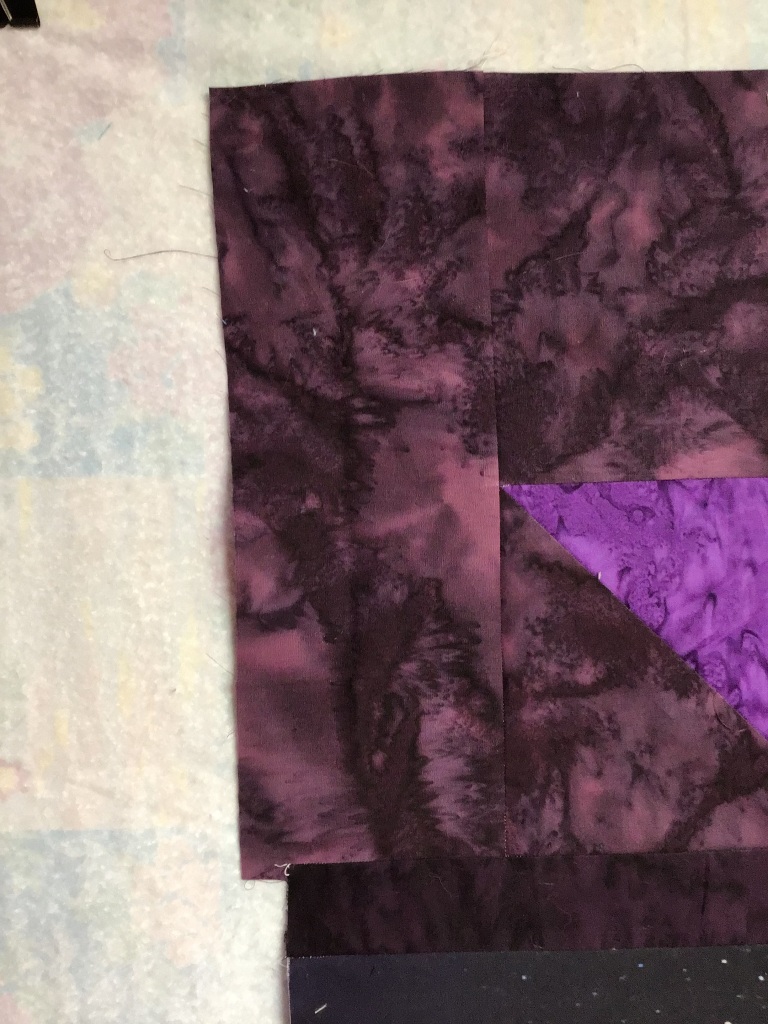
6. Head over to your iron again and press those blocks one more time — now our blocks done. That was fast, wasn’t it?

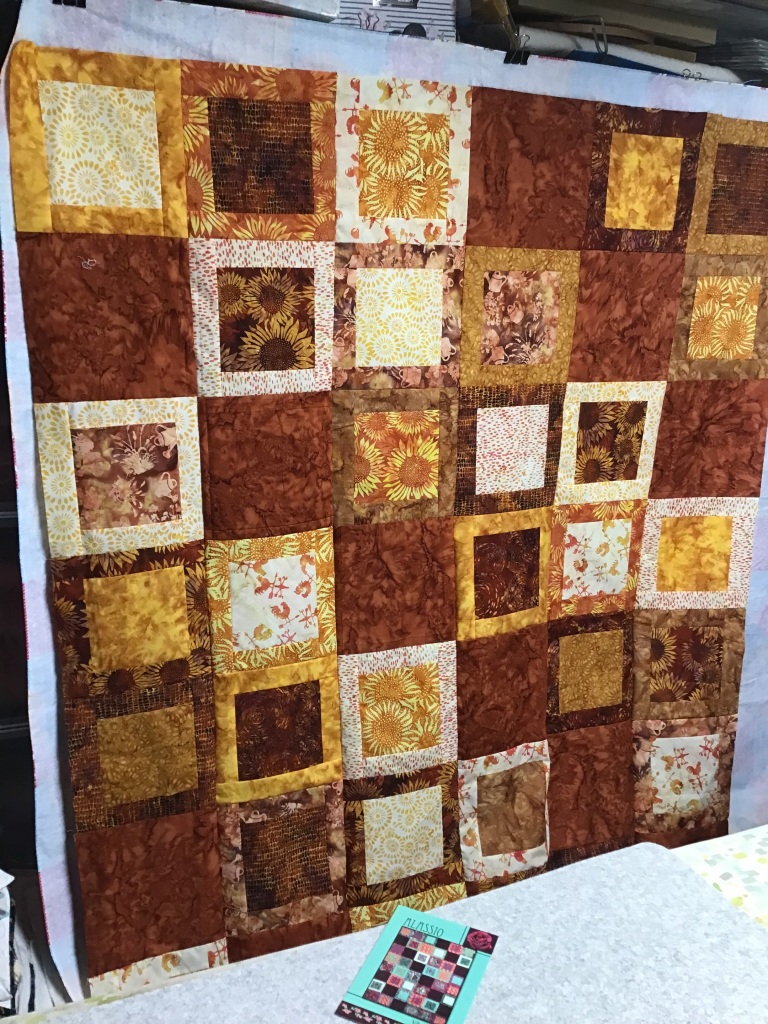
7. I just clipped my flannel-backed tablecloth up on my fabric storage cubes, which is my new design wall. I have to hang it sideways because it’s too long to hang up and down. And because this quilt is so big, I’m going to need to lay it out sideways, too. Fingers crossed that the tablecloth is long enough (or wide enough because it’s hung sideways) to lay out all the blocks.

How do you lay out your blocks before sewing them together? When I first started quilting, I used to lay my blocks out a cement floor. Yikes! Then for a really long time, I laid them out on a queen sized bed, which accommodated most of the quilts I made and saved some stress on my knees and my back. Now I have my very own portable design wall, otherwise known as a flannel-backed tablecloth. And it works great!

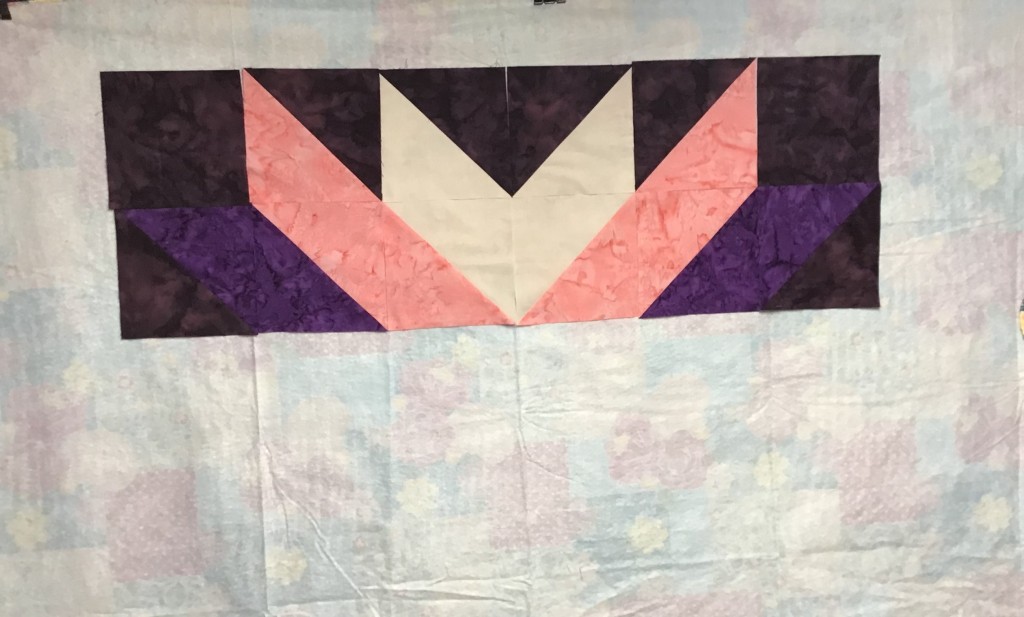
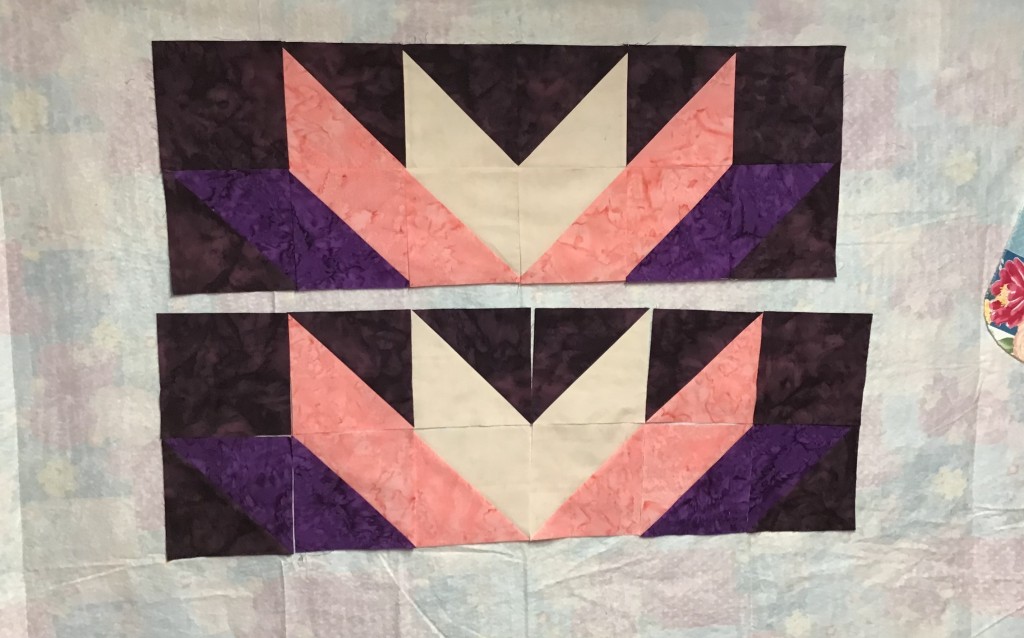
So, while we’re laying out the blocks according to the quilt diagram on the back of the pattern, go ahead and move the blocks around so fabrics and colors are well-distributed throughout the entire quilt.

Then once we’re satisfied with our layouts (yay — all the blocks fit on the flannel tablecloth!), it’s time to sew them into rows. Then we will sew the rows together. Quilt top done! Easy piezy!

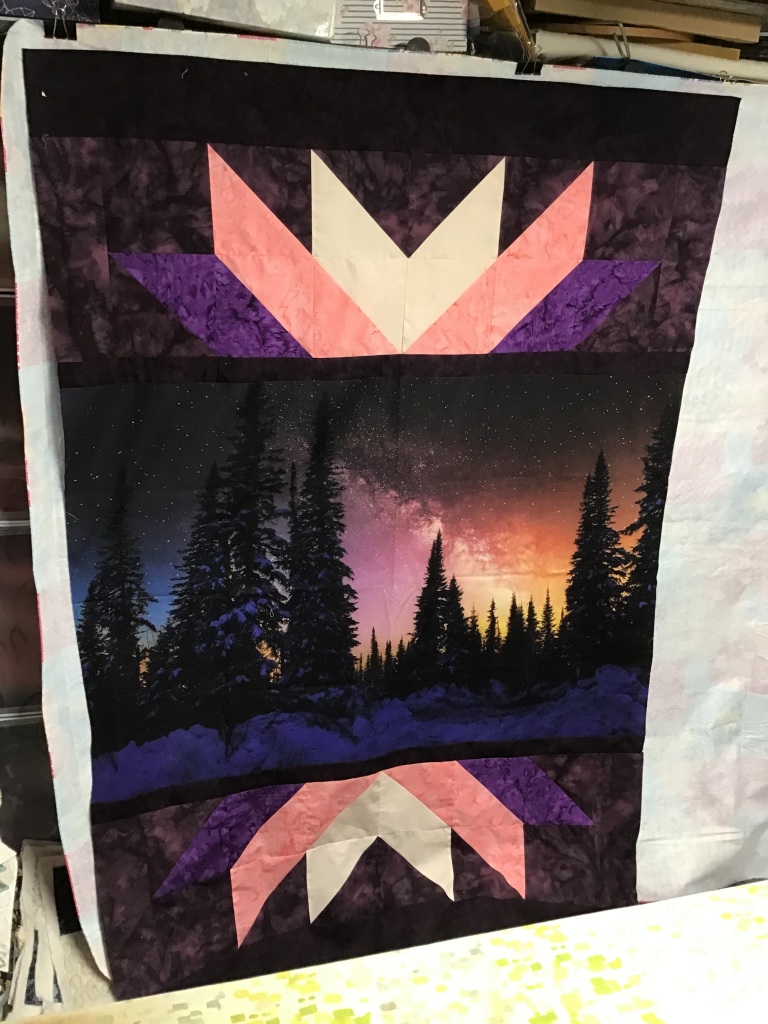
I am so pleased with how my Alassio top turned out! I can’t wait to get it layered with pretty autumn-themed fleece, machine quilted, bound, and labeled so I can start enjoying it right away!

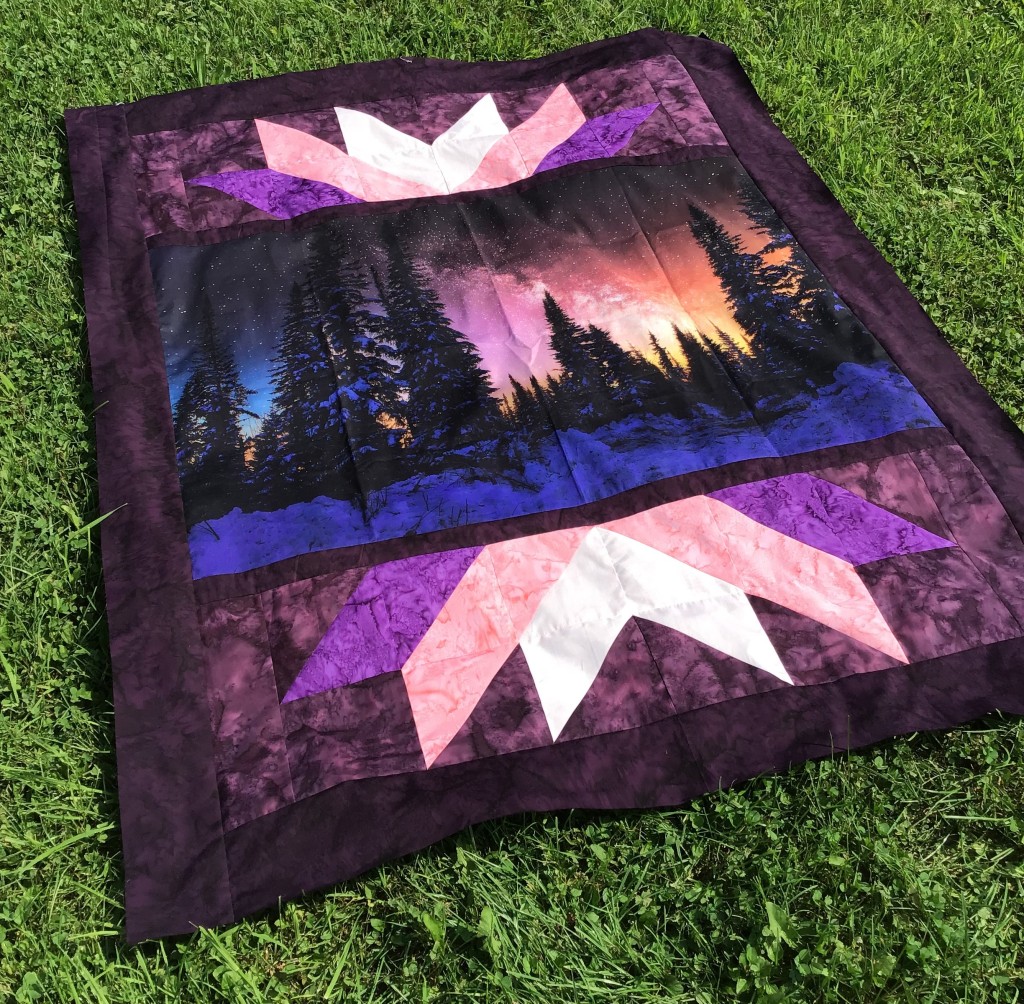
Alassio finishes faster because it doesn’t have a border, but if you want to make the quilt larger, you could add a border. It would look kind of like this:

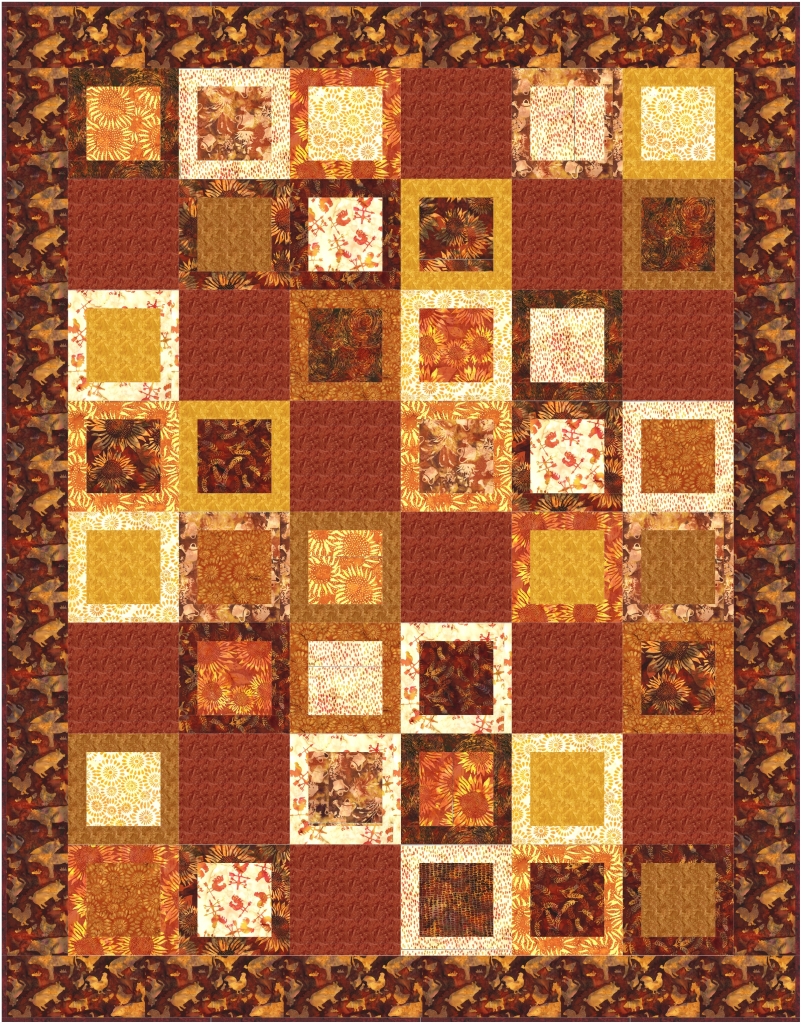
This version of Alassio features a 4 1/2″ finished border. With this border, Alassio would finish at 64″ x 82″, which fits a twin bed or makes a nice big comfy throw.

To make Alassio with the border, you need 1 1/4 yds for the border (cut 8 strips that are 5″ x WOF) and a total of 5/8 yard (cut 8 strips that are 21/2″ x WOF) for binding.

Isn’t this a great quilt? Bet you can’t make just one!

I’d love to see your Alassio quilts! You can share them on our Villa Rosa Designs Facebook group page.

Until next week —

Always,

Tricia

Panel Quilts · Quilting Partners · Rose Cards · Tutorials · villa rosa designs

VRD October Sky Panel Quilt Tutorial

Hello Quilty Friends!

Happy Thursday to you!

Today is a kind of blah day — raining off and on, overcast, and grey — not what I’d call a typical summer day at all. It’s been looking more fall-like here in NW PA. In fact, I was looking at one of the maple trees in the back yard yesterday and I actually saw the leaves starting to change on ends of several branches. As much I hate to see summer going, I do love autumn. What’s your favorite season?

As I’ve mentioned before, I get fall fabrics on my brain this time of year! Then I can’t wait to start making fall quilts. What better day than a dreary one to share an awesome FALL tutorial with you? And you can’t get more fall than October Sky!

Get October Sky HERE

Don’t let the name of the pattern fool you — you can use any kind of horizontal panel — any one your little hear desires. I’m not using actual fall fabrics for this quilt, but to me, it still feels like a fall quilt. I think it’s the jewel-tone colors. Take a look at these yummy fabrics from Hoffman California Fabrics, one of our quilting partners. The digital panel is called Nightshade and the fabrics are coordinating 1895 Watercolors batiks. Simply scrumptious!

Let’s get started!

1. Trim the selvages off your panel. Horizontal panels can vary slightly so it doesn’t hurt to do a quick measurement of your panel, then you’ll know how it compares to the pattern. You don’t really need these numbers right now, but if your panel is not as wide as the pattern, you will need to make a small adjustment a bit later in the construction process.

2. Cut your border strips for the top and bottom of the panel and sew them on.

3. Now we are going to cut out the squares for the pieced sections at the top and bottom of the panel. I just love these 1895 Watercolors batiks — they go with everything. The dark plum in front is my background.

4. Time to make some Half Square Triangles, or HSTs. Layer 2 squares right sides together, drawn a diagonal line from corner to opposite corner. Sew 1/4″ away from both sides of the drawn line. Cut apart on the drawn line and press open.

5. Having a flannel board — or in my case, the back of a flannel tablecloth clipped to my wall cube unit — to arrange the HSTs makes getting the arrangement right the first time much easier to accomplish.

6. Sew the HSTs together. Make 2 identical pieced sections. You will be flipping one upside down to sew t the bottom of the panel. It makes an interesting design even without the panel in the middle though, doesn’t it?

7. Refer back to your panel measurements. If your panel is not as wide as the panel measurement in the pattern, you may need to add a little extra width to the side background rectangles. To be on the safe side, I added an extra 1″ or so to the side rectangles just to make sure my pieced sections would be wide enough because my panel wasn’t quite the same size as the one listed in the pattern.

It’s okay if the side rectangles make the pieced sections a little wider than the panel — you can trim and square things up in a later step.

8. The most important part of this step is to find the centers of both the pieced sections and the panel. Then match those centers up before sewing because nobody wants off-center sunbursts! LOL!

Once you’re happy with your placement (I used pins to keep everything lined up just right), sew the pieced sections onto the panel. Lookin’ good!

9. Now it’s time to trim and square up the sides of the pieced sections. Ahhh! Much better!

10. Time to add top and bottom borders. I actually increased the width of my borders a couple inches to make the quilt just a little bit bigger as a throw. Do the same if you’d like. Just keep in mind, you might need more fabric if you increase the width of your borders.

11. Ready to add those side borders now? You will need to piece those side borders to make them long enough. VOILA! The top is done!

Since I couldn’t get the breeze to cooperate with me, I took another photo of the October Sky out flat. Gorgeous, isn’t it? The colors are so rich and yummy.

12. The next steps will be layering, quilting, binding, and labeling the quilt. And then….another VRD quilt DONE!

I hope you enjoyed this tutorial! I’d love to see your October Sky quilts — you can post them on our Facebook page HERE or drop me an email if you’d like. And there will be more fun VRD tutorials coming, so stay tuned!

Well, that’s it for me. See you next week!

Always,

Tricia

Panel Quilts · Quilting Partners · Rose Cards · Tips and Tricks · Tutorials · villa rosa designs

VRD Hillside Charm Quilt Tutorial and the NEW November Rose Card Patterns

Hello Quilty Friends!

Happy Thursday to you!

After talking about our VRD Rose Card patterns featuring quilt panels a couple weeks ago, I thought it would be fun to do a series of Panel Quilt Tutorials for you. You can find the Panel post HERE.

There’s no way I would be able to do ALL of the Rose Cards I featured in the Panel post, but I thought it would be fun to do some of my favorites. I hope these Panel Quilt tutorials will inspire you to reduce your own stash of panels by making quilts — what an unusual thing to do with fabric, right???

So let’s make Hillside Charm! I just really love this Panel pattern — it looks great with whatever panel and fabrics you use. Don’t have 5″ charm squares? Cut fat quarters, scraps, or even yardage into the number of squares you need. Want to make it bigger? Add another border? Want it smaller? Don’t add the extra border. LOVE LOVE LOVE Hillside Charm! You can buy the pattern HERE.

Right now we even have some great Hillside Charm kits for sale on the website — Halloween, Christmas and more — so check them out HERE.

Before we jump into the tutorial, I have to do a SHOUT OUT to Hoffman Fabrics and a big thank you to them for providing the fabrics for this Hillside Charm Quilt. The collection is called Wading with Water Lilies. Isn’t it beautiful? In addition to the gorgeous digitally-printed panel and coordinates, I also used some of the basics from the 1895 Watercolors collection and 885 Dot Batiks collection.

YAY! We have the panel and some of the coordinates on the website. You can find them HERE. Grab them now because when they’re gone, they’re gone!

The gorgeous panel. Just look at the amazing array of colors that digital printing can create!
These are the companion fabrics.
Here are the accents I used from 1895 and 885.

Now you’ve seen the fabrics, lets get to the tutorial!

Hillside Charm Tutorial

The first thing I did was trim the panel to the dimensions listed in the pattern. Sigh……I really hated cutting anything off this amazing panel but if I wanted to make the quilt, it had to be done. So I did it. I also cut out the squares and the strips. The pattern actually calls for a pack of charm squares, but since I didn’t have an actual charm pack, I went ahead and cut the squares I needed. I won’t have as much variety as I would have with a charm pack, but it will still be beautiful. Sometimes, less is more.

Next I sewed the side strips on to the panel. Then I sewed squares to the ends of the top and bottom strips before sewing them into the panel. It’s already taking shape. I’m really excited about this quilt — it is going to be really gorgeous!

Time to sew my charm squares into strips for the next border. I just had to make sure not to sew 2 of the same fabric side to side. Easy peasy.

Here you can see that I took the time to pin the pieced charm square strip to the framed panel. This is an important step because I don’t want my quilt to be a funny shape. Nope, I like ’em squared up as much as I can as I go along. And one of the best ways to do that is to match your centers and your ends and pin generously.

Yay! Let’s sew the pinned charm square side borders on. Sigh….I must admit I hate removing my pins as I sew and I am guilty of sewing over my pins. Mea culpa.

Here are the pieced charm square borders added to the sides. I am so excited how this quilt is coming together.

Now let’s add the top and bottom charm square pieced strips. Pin, pin, pin. Sew, sew, sew. I really like how the pieced border is giving the look of Four Patch blocks in the corners. Tricky, tricky!

More side borders to add. This time I have to be more careful with the placement of the squares so that I don’t accidentally line up 2 of the same fabric, especially since I’m not using as much variety as a charm pack would provide (although, nowadays there are lots of duplicates in a charm pack because fabric collections are a lot smaller than they used to be).

Here are my last borders — the top and bottom pieced borders. Now you can see the rectangles of the blue/green marbled fabric at each corner, mimicking the inner blue/green marbled inner border. Cool detail!

DONE!

I can’t wait to see your Hillside Charm Quilts! You can email your Hillside Charm photos me at tricia@villarosadesigns.com and I’ll share them on the blog and Facebook.

Thanks for sewing along with this tutorial. Stay tuned for another tutorial next week.

Wait! I can’t go yet without showing you the NEW November Rose Card patterns.

Check out these awesome new patterns. If you attended Quilt Market or Festival last week, you already had a sneak peak. Lucky you!

Oh look! Another Panel quilt! You can buy the November set of 5 Rose Cards HERE for $8.95.

This is my new table runner, Baskets, for this month:

You can buy the Baskets pattern HERE.

As always, shipping is free.

I hope you find a little time to get sewing because the Holidays are right around the corner and if you are like me, you have a long list of quilty gifts you want to make even though you know you’ll never get them all finished. The New November Rose Cards could help you jump start your holiday sewing! Just sayin’….

Until next Thursday —

Sew. Laugh. Repeat.

Always,

Tricia @VRD