Just Quilty Stuff · Quilting Partners · Rose Cards · villa rosa designs

NEW December VRD Rose Card Patterns, Rose City Sewing Grand Opening, and Holiday Gift Idea #4

Happy Thursday to you!

As I begin writing today’s post, I am sitting in the waiting area at my local Safelite getting a new windshield in my little red Jeep Compass, Sassy. This is her Christmas present (as well as for me). Luckily for me, Safelite has free wifi as well as TV tables so customers can work while they wait.

A snowy winter scene with a parking lot covered in snow and slush. In the background, trees are bare, and snow is falling gently from the gray sky.
This photo shows what it looks like right outside right now.

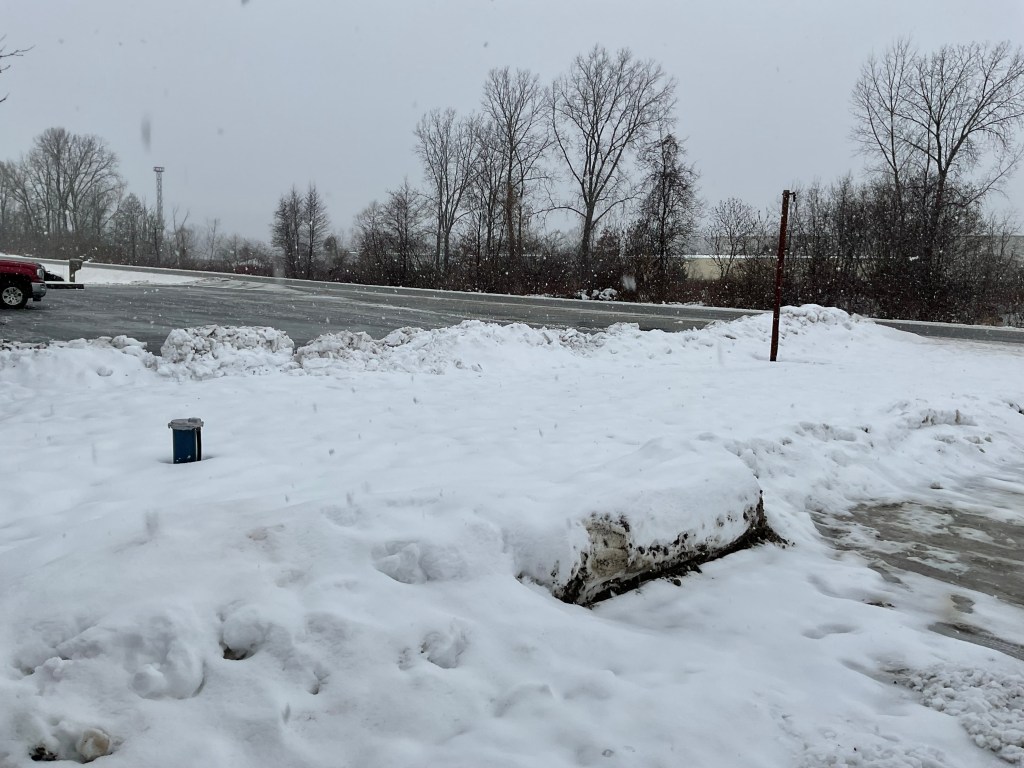
Welcome to Pennsylvania in winter – except, well, it isn’t really winter. Not yet, anyway. Huh. Mother Nature, what are you up to now?

It’s a really really ugly day today – we are getting a winter storm right now here in NW Pennsylvania. If I hadn’t had a couple important appointments, I would have happily stayed home today. The roads were pretty horrible on my way into town, slushy and slippery. It’s a very wet snow/slush mix because the temperatures are right around freezing. We may also get freezing rain. Then we’re going to get lake-effect snow on top of all of this as the temperatures drop.

Sadly, I didn’t see one snow plow on my way and several of the roads hadn’t been plowed (including in town). I was lucky if there was a little salt down the middle of the road. I drove really really slow today and I still managed to slide through an intersection. YIKES! But I’m here and Sassy is getting her new windshield. Hoefully the roads will be in better condition when I head home later.

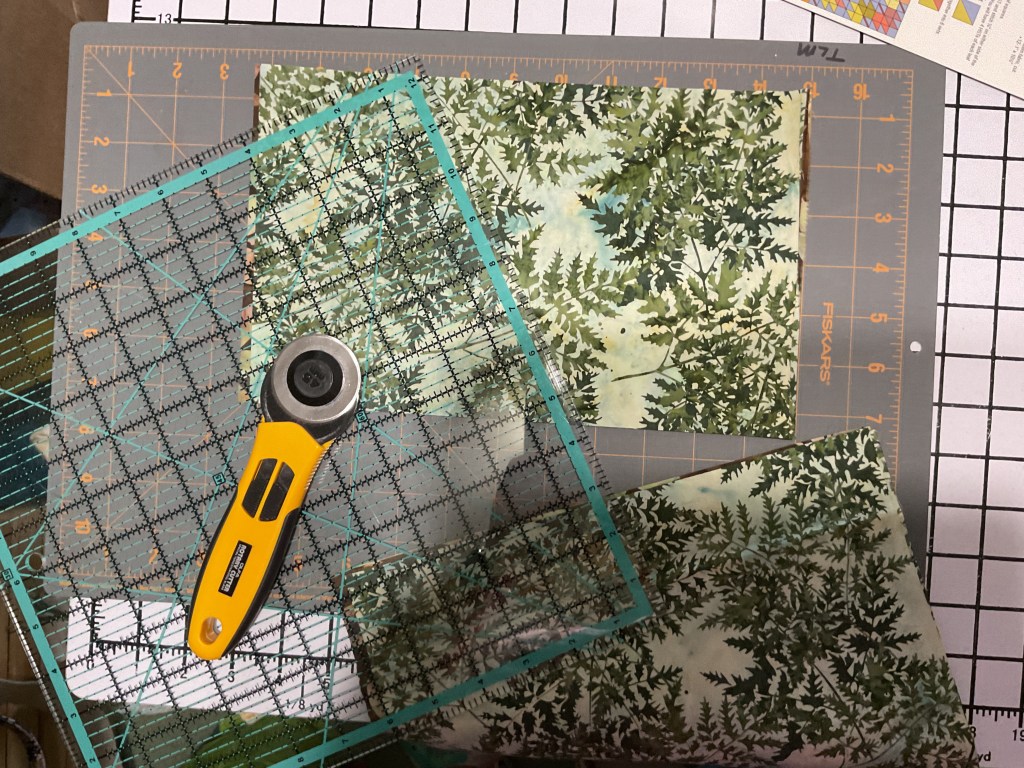
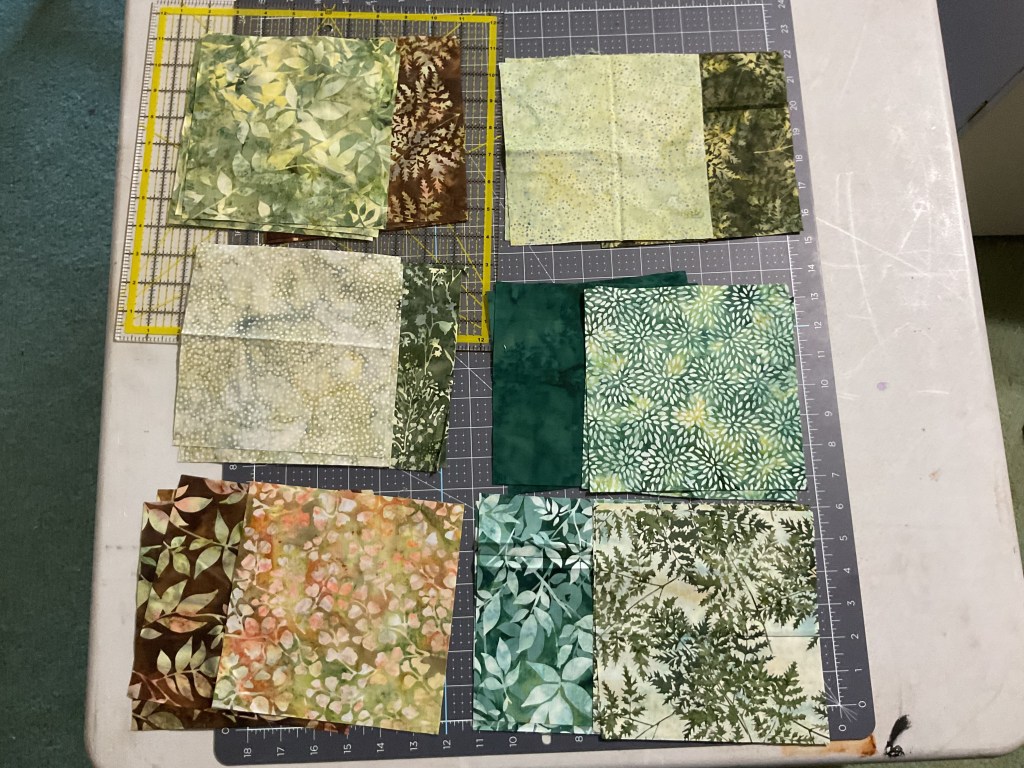
Enough about winter weather, let’s talk NEW PATTERNS!

Anyone know what today is???? It’s the Thursday after the first Friday of the month and that means………NEW PATTERNS! YAY!

Graphic showcasing five new quilt patterns for December 2025, including Autumn Leaves, Feline Friends, Fruit Cake, Caledonia, and Lending, with captions and designer names.

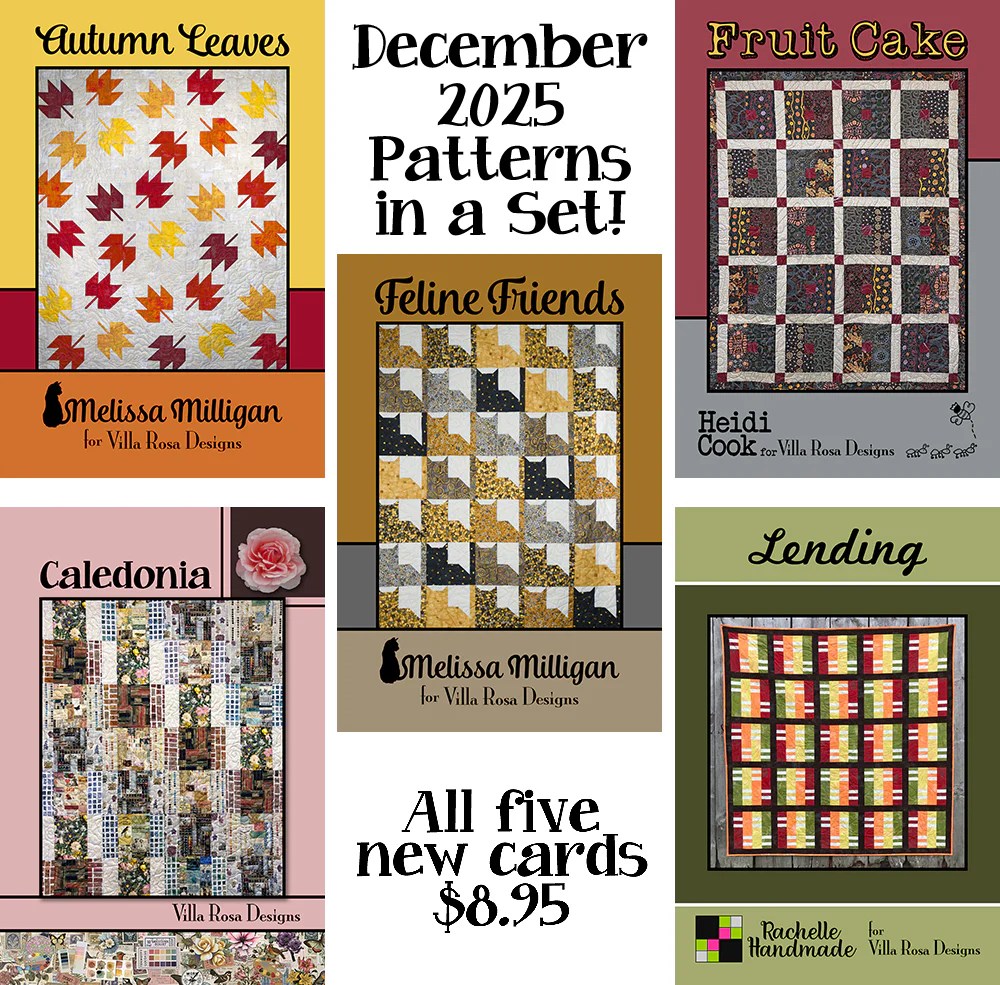
Get the set of 5 Print Patterns HERE

We have a nice cross-section of new patterns this month – something for everyone!

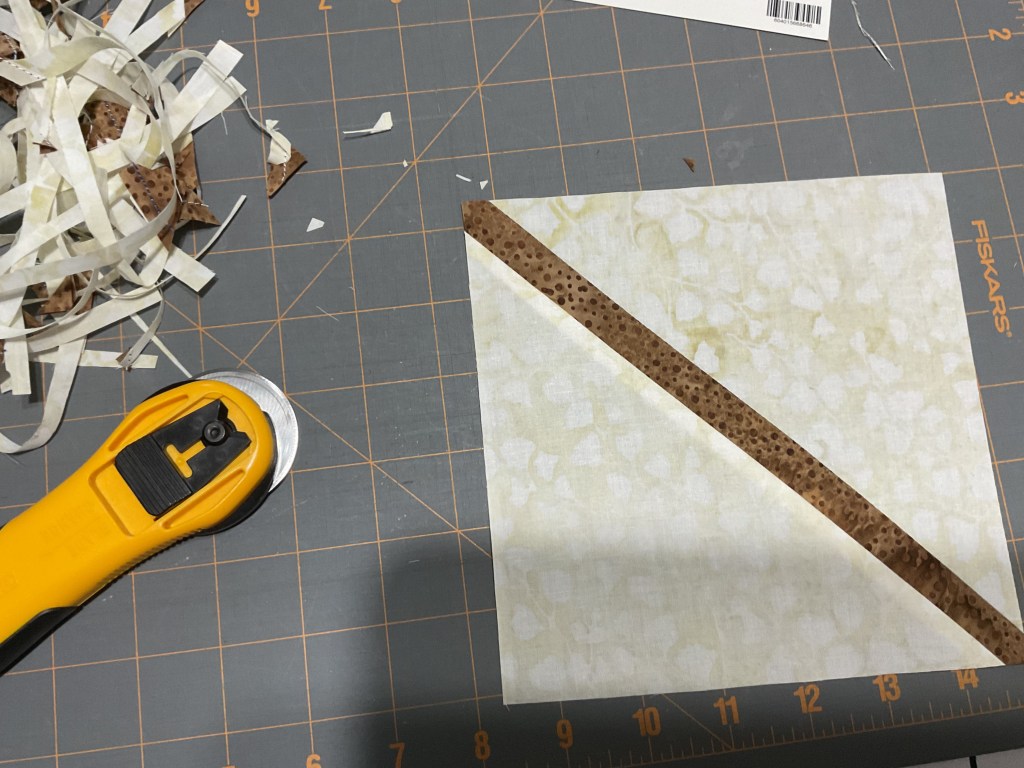
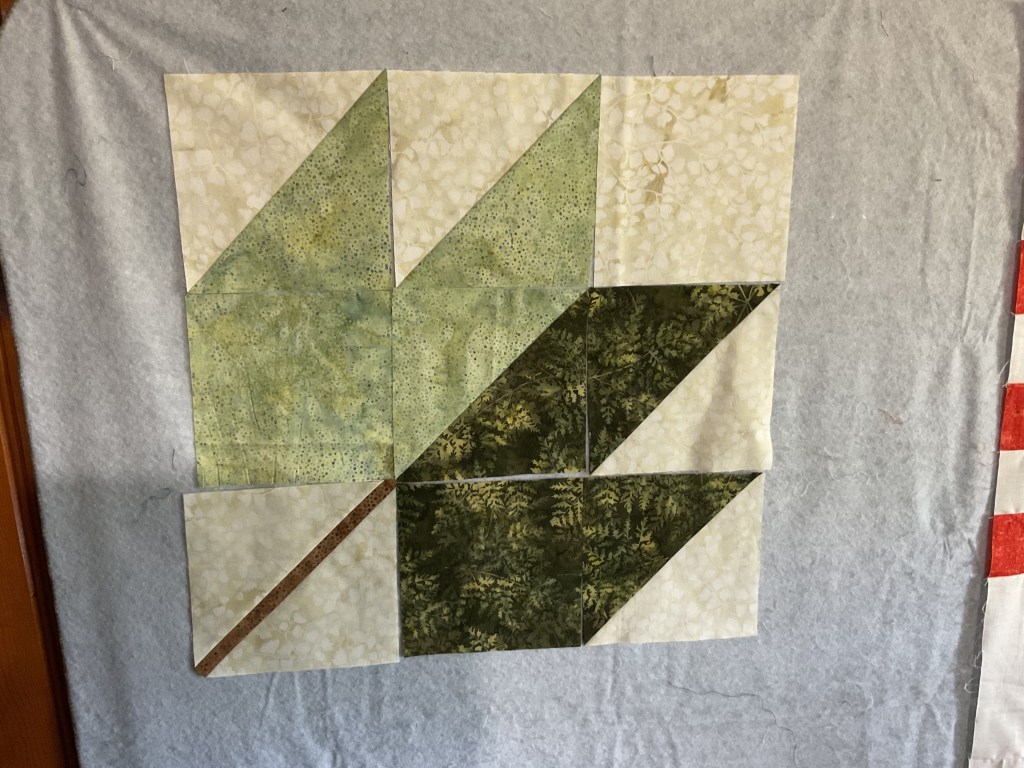
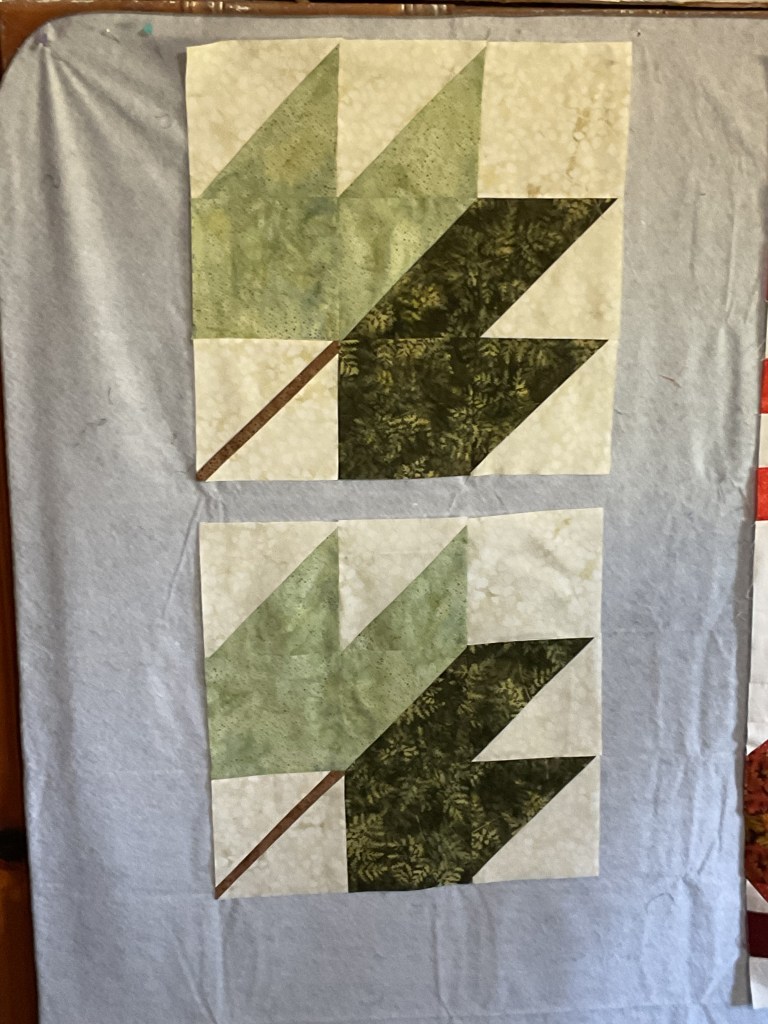
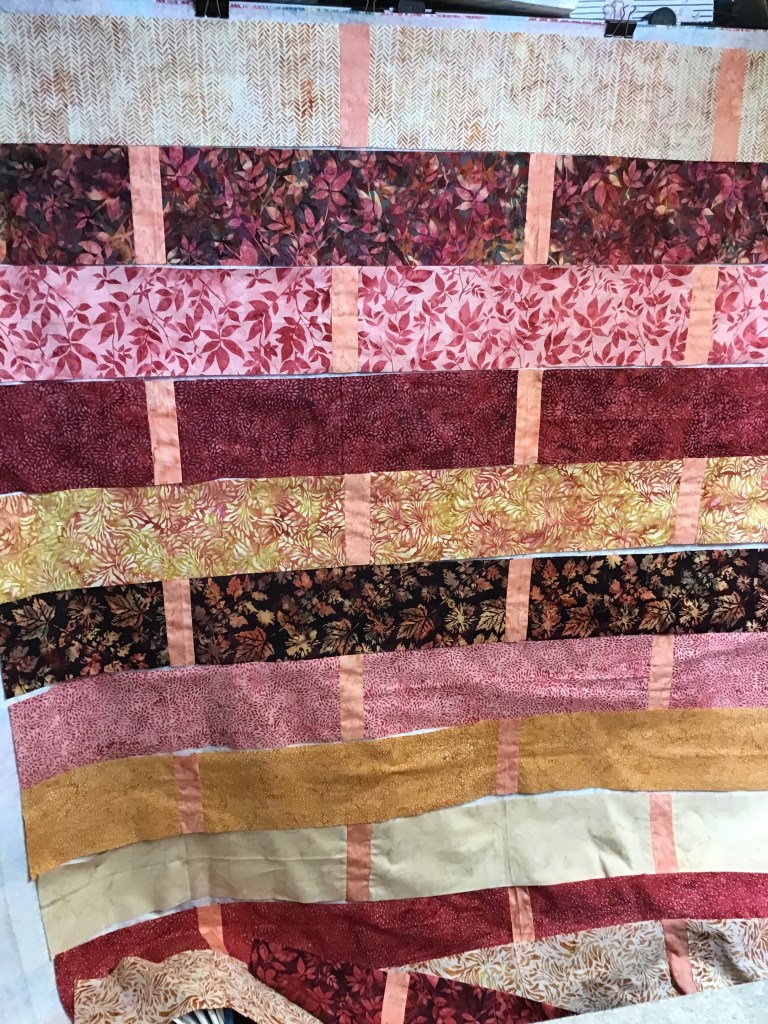
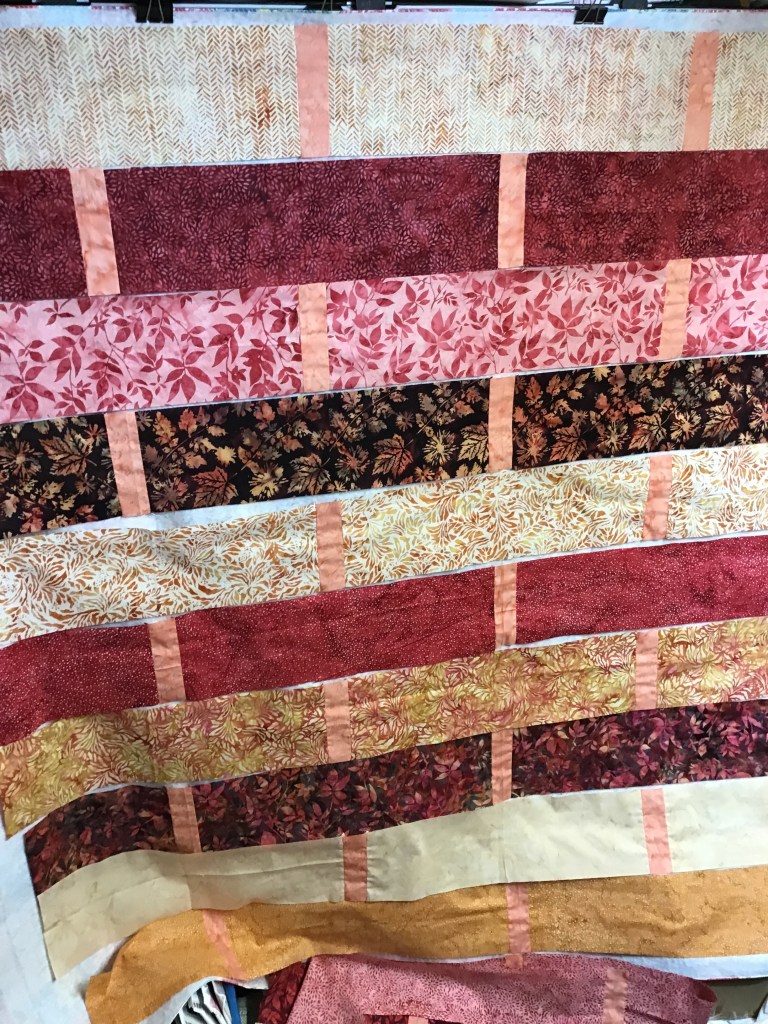
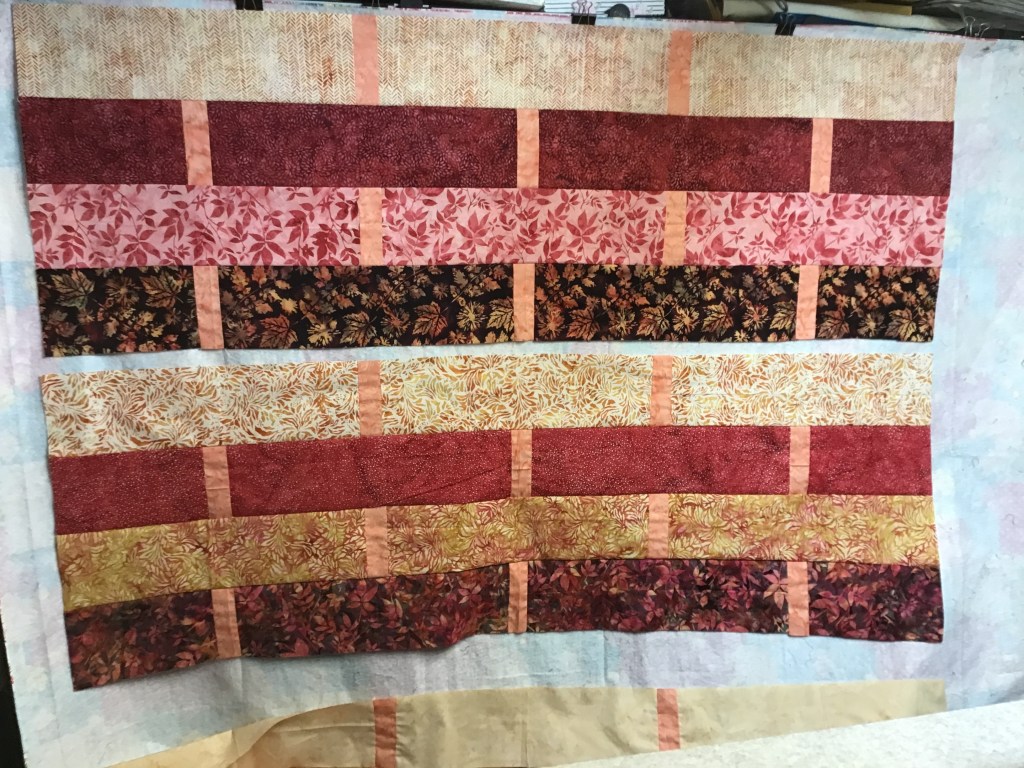
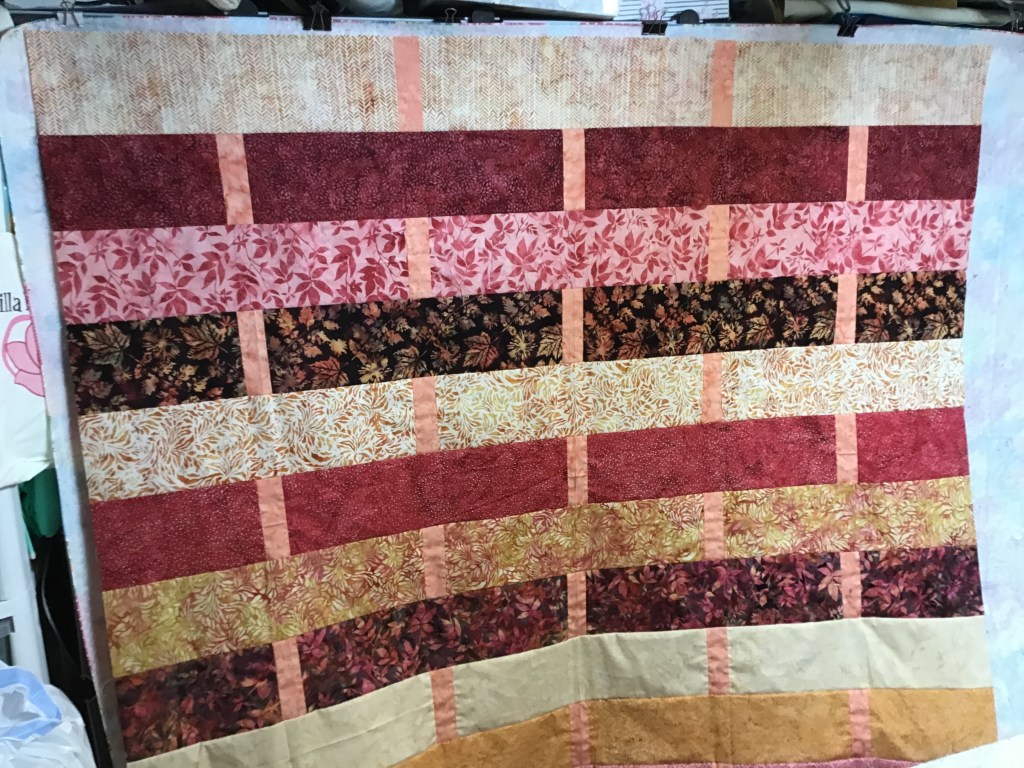
Melissa has 2 fun new patterns this month – Autumn Leaves and Feline Friends. Yay! We’ve even got kits for you.

A vibrant quilt featuring a variety of stylized leaf patterns in multiple colors set against a white background, showcasing autumn-inspired designs.

Autumn Leaves VRD kit in Madison One fabric HERE

A patchwork quilt featuring a design with cat shapes in black, gold, and white fabrics, arranged in a repeated pattern.

Feline Friends 3 Aunts kit in Klimt fabric HERE

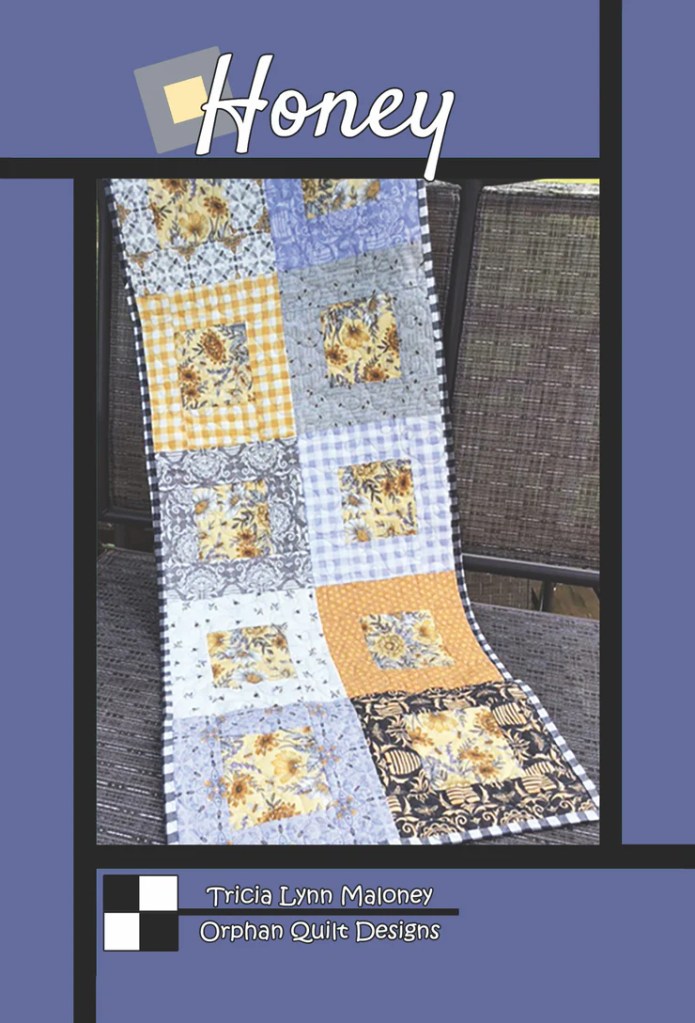
Heidi has a fun holiday pattern for you called Fruitcake.

Ahhh! I’m smiling right now, remembering the yearly fruitcake my Great Aunt Jule would send my family for Christmas when I was a kid. It was the one in the tin and I don’t remember if we ever actually ate it because it looked kind of scary and weird. LOL!

You can find Fruitcake kits featuring Australian prints (like the pattern cover quilt) over at 3 Aunts HERE.

Pat designed another fun and fast quilt called Caledonia, featuring Tim Holtz Palette fabrics. You can find a kit with the same fabrics you see on the pattern cover at 3 Aunts HERE.

Rachelle also has a new pattern for you this month called Lending. And of course, there’s a kit for you, too.

Colorful quilt featuring a patchwork design with blue, green, black, and grey fabric squares arranged in a grid pattern against a light pink background.

You can find the Lending VRD kit in Simply Primitive fabrics HERE.

But wait – there’s MORE!

We have 2 – yes that’s 2 – NEW Table Runners this month! Yippee!!

Heidi created this super fun and speedy runner that couldn’t be more festive – she calls it Heidi’s Ho Hos.

A holiday-themed table runner with 'HO HO HO' in red and green letters on a white quilted background, bordered with a candy cane-like striped pattern.

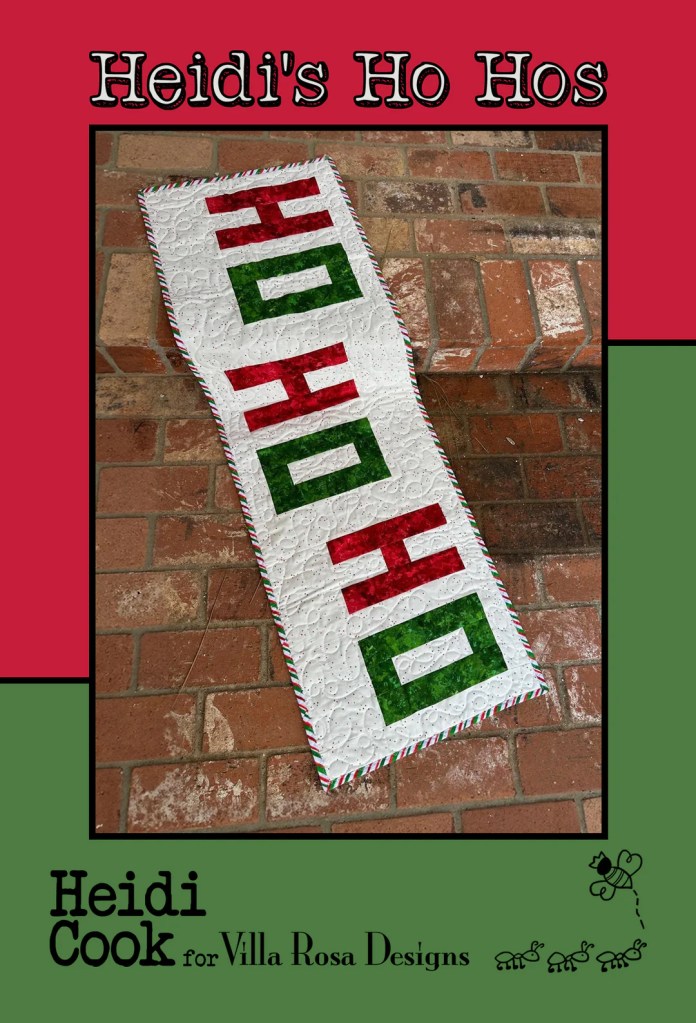
You can find the Digital Pattern HERE or the Print Pattern HERE.

There’s a 3 Aunts kit for Heidi’s Ho Hos featuring the same fabrics you see on the pattern front HERE.

And the second runner, Jingle, is by yours truly. I’m thinking Jingle would look great in any color combination. Right now, of course, I’m thinking of make a wintery blue and white one next. Hmmm….I wonder why. LOL!

A quilted table runner titled 'Jingle' featuring red, green, and patterned fabric, displayed outside in a snowy forest setting.

You can find the Digital Pattern HERE or the Print Pattern HERE

Speaking of different color combinations for Jingle, we have a VRD Jingle kit available featuring America fabric HERE. PSST! Maybe you can get a head start on 2026 and the 250th anniversary of the United States.

A vertical quilt runner featuring a pattern of alternating blue and red quilt blocks on a white background.

Seasonal and holiday table runners make such great gifts! Especially for that someone on your list who has everything and needs nothing – you know exactly who I’m talking about, we all have one. And guess what??? You still have enough time to make a runner or 2 before the big day – they are VRD patterns, after all.

Now that we’ve seen all of the new December patterns, I’ve got some great news to share.

Congratulations to Catherine and Pat and everyone at Rose City Sewing!!!

Graphic promoting the grand opening of Rose City Sewing with a sewing machine, a stylized deer, and roses, including event details: December 12-13, 10 AM - 4 PM, at 3401 GE Drive.

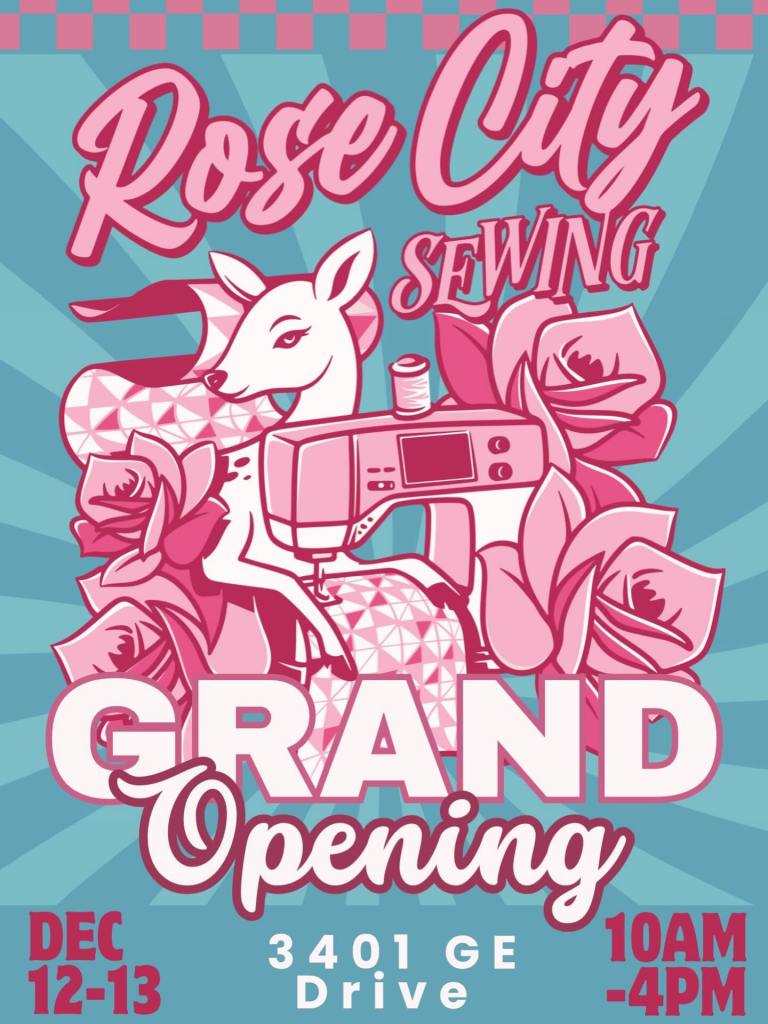
Our VRD designer and quilting partner, Catherine of Running Doe Quilts, announced that the new Rose City Sewing shop in Tyler, Texas will have its grand opening this weekend on December 12th and 13th. Rose City Sewing will also be the new Texas home of VRD. If you’re in the area, stop by and say hello – Pat will be there, too. Just tell ’em Tricia sent you!

I’m really enjoying searching for super cool Holiday Gift Ideas with a quilting theme. Whether it’s something for your quilting bestie, something you add to your Holiday Wish List, or something you even buy for yourself, it’s always fun to get some fresh ideas. And I’m happy to help.

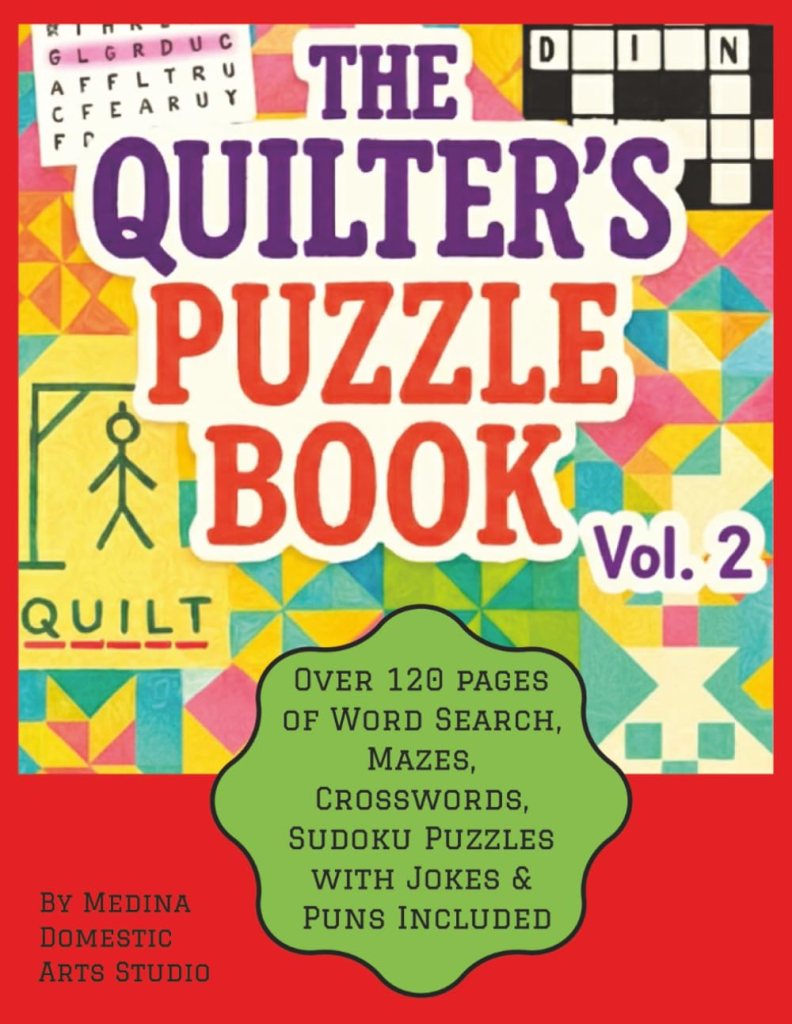
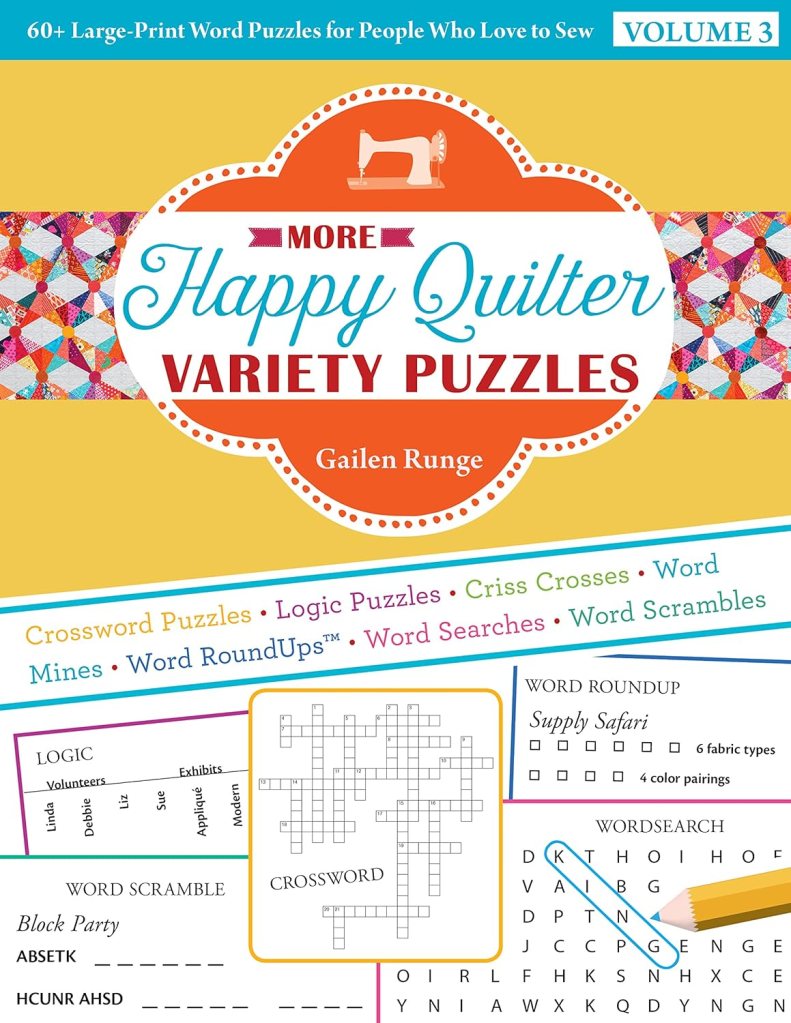
This week’s suggestion is something we can do that’s quilty when we can’t get to our sewing machines – quilty puzzle books! Here are some puzzle books I’ve enjoyed, I’ve gifted, or I’ve received as a gift.

Quilt Games Volume 1

Quilt Games Volume 2

The Quilter’s Puzzle Book Volume 1

The Quilters Puzzle Book Volume 2

Happy Quilter Variety Puzzles Volume 2

Happy Quilter Variety Puzzles Volume 3

Well, that’s it for me today. Stay warm and safe. And enjoy all the moments leading up to the Holidays.

See you next week!

Always,

Tricia @ VRD

Rose Cards · Tutorials · villa rosa designs

VRD Falling Quilt Tutorial

Happy Thursday to you!

Happy Fall!

A picturesque autumn scene featuring a cluster of bright orange pumpkins and a white pumpkin surrounded by hay bales and vibrant fall foliage.

Hard to believe it really is Fall now, but I know it’s here whether we’re ready or not. And I’m personally more than ready. We had such a hot and dry summer here in NW PA, so I’m eager for cooler weather.

Fall is definitely my very favorite season with its warm days and cool nights. All the gorgeous colors. The smells of the season. And the sounds. I truly love it all!

Another thing I love about Fall is that I start to feel more energized to get back to my many to-do lists. Summer definitely doesn’t inspire that in me. So now, it’s time to make plans to get things done. What is Fall to you?

I hope you’ve been enjoying our Jump into Fall quilt tutorials. Today’s project is beyond perfect for the season and I know you’re going to be excited to make this one.

Falling is truly a perfect project for this time of year, especially with all of the yummy fall fabrics at your local quilt shop and favorite online retailers. Falling is a pattern by Catherine, of Running Doe Quilts, who is one of our many talented VRD designers as well as a new VRD partner.

The quilt finishes at a generous 54″ x 72″ and goes together quickly with its oversized blocks and no borders (although you could easily add a border to make it bed-sized if you wanted to).

A colorful quilt featuring large, stylized leaf patterns in various shades, displayed outdoors against a backdrop of trees.

Get your digital pattern HERE or your print pattern HERE

Catherine even has kits available for the Falling quilt below – get yours HERE before they’re gone. Tell her Tricia sent you!

Quilt designed with colorful leaf patterns in orange, yellow, red, and blue fabrics, displayed outdoors against a rustic background.

Okay, time to get going on today’s tutorial.

Of course, our first thing to do is gather up our fabrics. Today I’m using a lovely collection from Hoffman Fabrics called Sweet Breeze. It’s a great choice today as we end summer and slide into fall. Sadly, this is an older fabric collection and probably isn’t available anymore, but happily Jason Yenter has a gorgeous fall collection called Falling Leaves, you can find it HERE – I think his wonderful fabrics would make great Leaves.

Here are our Sweet Breeze fabrics for today’s tutorial in lovely greens, a few browns, with a wee touch of orange.

Assorted fabric pieces in green, brown, and cream colors, featuring leaf patterns and textures, arranged neatly with a 'Falling' quilt pattern brochure on top.

Let’s go ahead and cut out all the pieces we’ll need for Falling – the background, the Leaf fabrics, and the stems.

All right! All of our pieces are cut and ready to go.

A variety of fabric squares in green and beige tones on a cutting mat, with a brown strip of fabric positioned in the center.

Next we need to pair up our Leaf fabrics as each of the 12 blocks in the quilt uses 2 fabrics. I really love Catherine’s take on the traditional Maple Leaf quilt block, don’t you? She split it down the center so her leaves are two-toned. And the blocks are very big, which adds to the graphic appeal of this quilt.

The pattern suggests making 2 of each Leaf fabric combination, but you can mix and match your fabrics to your heart’s desire if you want, of course. I’m going to stick to the original plan today.

A variety of fabric squares in shades of green and brown, arranged on a cutting mat, ready for a quilting project.

Now we’re ready to sew. We haves lots of Half Square Triangle (HST) units to make for the quilt. I’m going to make 2 matching Leaf blocks before moving on. I don’t want to get all mixed up!

To make HSTs, the first thing you need to do is layer your squares right sides together (RST) and draw a diagonal line – I like to use FriXion erasable pens for marking my fabrics.

Then we’re going to sew 1/4″ away from both sides of our drawn line.

I went ahead and sewed all of the HSTs for my first 2 blocks at one time. Do likewise if you wish.

Next we need to cut on the diagonal lines which will give us 2 HSTs.

All right, let’s head over to the ironing board to press these HSTs open. Don’t forget to cut off the little dog ears on the corners so your piecing will be more accurate.

Let’s make the stems next. Cut your background square in half diagonally to make 2 triangles. Then we’re going to center and sew a stem rectangle between those 2 background triangles. I pressed my seams towards the stem so they wouldn’t show through my background fabric. We need to make 2 of these – 1 for each of our matching Leaf blocks.

Before out stem units are finished, though, we need to trim them to the right size. Take your time when you do this step because you don’t want to miscut and make wonky stems.

Okay, now we’re ready to layout a block and sew it together. Once I’m happy with how the first block turned out, I’m going to make the second matching block. One Leaf pair done, 5 more pairs to go. Repeat the steps above to make 12 total Leaf blocks.

Woohoo! Here are my 12 Leaf blocks.

A pile of quilt blocks featuring various shades of green fabrics arranged in a leaf design, with a neutral background and some visible stitching.

Now it’s time to arrange the blocks on my design wall. If you want your quilt to have the same movement as the Falling quilt on the cover of the pattern, you will need to flip and flop your blocks like Catherine’s. I only switched 1 or 2 blocks before I liked the arrangement. As you, know sometimes I spend more time arranging the blocks than actually making the quilt. But not today, yay!

You will want to take care while sewing your blocks together because sometimes you are sewing a point to a point. Careful pinning will help keep your points under control and will result in a cleaner and more accurately stitched quilt.

A colorful quilt featuring oversized leaf blocks in various shades of green, brown, and floral patterns arranged on a design wall.

Next we are going to sew the blocks into rows and then sew the rows together to make the quilt top. Oops, this quilt is longer than my flannel wall, so I can’t show you the entire top yet. I told you it was a good sized quilt!

A quilt featuring a pattern of green and brown leaves arranged with a cream-colored background, showcasing various fabric textures and colors.

I just had to take my Falling flimsy outside to snap a photo in natural light so I could show you the entire top. Absolutely LOVE it! Can’t wait to finish it.

A quilt featuring large, stylized leaf patterns in various shades of green, brown, and orange, displayed outdoors on a clothesline with a grassy background.

To complete your quilt, layer it with batting and backing fabric (or fleece like I plan to). Quilt it. Bind it. And don’t forget your label!

Have you made a Falling quilt already? Or if you plan to make one this Fall, please share a photo on our VRD Facebook group – we’d all love to see them!

Well, that’s it for me – I’m heading back to my sewing machine to get some more sewing in.

Take care and I’ll see you right here next week.

Always,

Tricia @ VRD

Quilting Partners · Rose Cards · Tutorials · villa rosa designs

VRD Stepped Quilt Tutorial

Happy Thursday to you!

I’ve got a fun and happy quilt tutorial for you today – Stepped by Running Doe Quilts for Villa Rosa Designs.

But before we get into the tutorial – I have an AMAZING announcement for you!

Drum roll, please!

Cue the confetti! Or how about a balloon drop from the ceiling this time?

Our Rose Queen and owner, Pat Fryer, has done it again!

She has a new batik fabric collection with Riley Blake Designs coming this October!

It’s called Kalinda.

WOOHOO!

Here’s a sneak peak –

Kalinda is simply perfect for all your autumn projects! You can download the collection PDF with all the fabrics and skus below.

Guess what????? There will be another collectible pattern storage tin for the Kalinda collection, too! I can’t wait! I love love love my tin from Pat’s first collection, Bedazzled. I can’t wait to collect them all as she designs new collections in the future!

Mark your calendars for October – when Kalinda makes its debut. Don’t forget to ask your local quilt shop to order the collection if they haven’t already.

Now I’ve spilled the beans about Pat’s new collection, it’s time to jump into our tutorial.

Stepped is a fun modern Rose Card pattern designed by Running Doe Quilts for Villa Rosa Designs. It is a large quilt, finishing at 66″ x 78″ and is fat quarter friendly – yay!

Get your digital pattern HERE or your print pattern HERE

For this tutorial I chose a wonderful warm and sunny collection from our friends, Hoffman Fabrics, called Sunset Hour. I chose the bright blue as the frame and binding for a wonderful pop of color against the warm sunset tones.

As usual, the first thing I’m going to do is cut the pieces for the blocks. Since this quilt doesn’t have a border (which is common for modern quilts, by the way), we don’t have to worry about that.

I’m wondering – do you cut your borders when you cut the fabric for the blocks or do you wait until after the center of the quilt is assembled? For me, I usually cut the border strips when I cut the block fabrics, but I don’t piece and cut the borders to size until after I finish the blocks.

Oops, let me get back to the cutting. LOL!

Here are all the pieces I need to make the whole quilt top. Isn’t that blue striking?

Now we’re ready to rock and roll at the sewing machine! The Stepped block goes together really quick (of course, it’s a VRD Rose Card pattern!). I like to put the large rectangle to my left and the blue frame strip to my right so I can grab a rectangle, place a frame strip on top, and zip it through the sewing machine. Then I repeat this same step for all the blocks, using chain piecing (meaning I’m not cutting the thread between blocks as I sew).

Working with batiks is lots of fun – you don’t usually have to worry about right or wrong sides because they are dyed the whole way through.

I could just flip the frame strip over, give it a finger press, and add the 2nd frame strip on, but I want my blocks to be nice and crisp, so I’m going to head to my ironing board to press the blocks before adding the 2nd frame strip.

Now I’m ready to sew the 2nd frame strip on the side of each block. Easy piezy – just the way I like ’em!

Then it’s back to the iron to press the blocks one more time. I warn you – there are a lot of blocks! Seriously!

Next I’m heading to my flannel board, which is actually behind my pressing station, to lay out my blocks. SHHH! My flannel board is really a flannel backed tablecloth hung in front of my fabric storage wall. To hang it, I clip the tablecloth to the tops of my storage doors with big binder clips. That way, I can take it down whenever I need access to the fabric cubbies (these particular cubbies hold my yardage and fat quarters by color).

Now the fun begins. As I lay out the blocks, I’m moving them around to spread the colors and fabrics out over the whole quilt. Laying out your blocks is an important step in making a quilt because you don’t want all the same fabrics or colors clumped together in the same area by accident.

Yikes! I’m actually running out of flannel board for this quilt because it’s big, so I think I need to sew this section together before I can add the final 4 rows. Off to the sewing machine I go…..

All right, here’s the section sewn together. Sorry, just noticed in this photo, I have it turned upside down from the previous photos. Mea culpa.

Finally, I can lay out the final 4 rows and add them to the quilt top. Ugh, you can’t see the bottom section I just added because my ironing station is in the way. Did I mention this is a BIG quilt???

I know! Let’s go outside so I can show you the completed quilt top!

I LOVE the warm and sunny colors of the sunset and the blue plays nicely. I reminds me of photos of the sun setting over the ocean. I say photos as I’ve yet to actually see an ocean. Someday…….

OH! Rats!

Take a look at the bottom of the quilt, I ended up with too much light colored fabrics bunched together. This happened because I couldn’t lay out the entire quilt on my flannel board all at once before I stitched the blocks together. ARGH!

Looks like I will be doing some un-sewing with my trusty seam ripper sidekick, Jack. Then I can relocate some of those light blocks from the bottom towards the center. Sigh……definitely a project for another day. Sorry about that.

Have you ever made the Stepped quilt? If so, I’d love to see your quilts on our VRD Facebook group.

Well, that’s it for me. Have a great week! Find some time to do a little sewing this week. Or maybe some un-sewing……

Until next time –

Always,

Tricia @ VRD

Rose Cards · Tutorials · villa rosa designs

New August Villa Rosa Rose Card Quilt Patterns and VRD Weave Quilt Tutorial

Happy Thursday to you!

It’s August??? It’s August! How did that happen??? It must have sneaked up behind me when I wasn’t looking….

The good news is that today is the Thursday after the first Friday of a new month! And guess what that means?

Yep, you got it! NEW PATTERNS!

Aren’t they awesome? Definitely something for everyone this month from panel quilts to modern quilts. I bet you’re already picking which ones you’re going to make, am I right? I must confess that Drizzle rather fascinates me and I am looking forward to giving it a try soon. Hmm, a new tutorial, perhaps? Or maybe several as all of the new patterns are great.

I know I probably say it every month, but our VRD designers keep surprising me with their innovative, fun, and easy to make patterns.

PSST! Here’s the good news — you can order a set of all 5 print patterns for $8.95 HERE. Sorry, but we do not offer digital sets of patterns at this time unless you sign up for a Pattern Club (see below for more info), but you can peruse all of our digital patterns (including our newest patterns this month) HERE.

But wait! There’s more! Tehehe — you knew I was going to say that.

We have a new table runner and snack mat for August, too.

Here is Honey, my most recent table runner pattern. It is quick and oh so satisfying because it uses many different fabrics. You can get the Honey print pattern HERE or the digital pattern HERE.

A lot of folks have already been asking about the fabric I used for the runner. It’s called Honey & Lavender by Deb Strain for Moda. It is available in quilt shops right now. As the runner uses fat eighths, you can find a fat eighth collection HERE just in case you can’t find it at your local quilt shop, because these fabrics seem to fly right off the shelves.

There’s also a new Snack Mat for August, too.

Awww! Isn’t this the cutest l’il watermelon slice? You can get the print snack mat pattern HERE or the digital snack mat pattern HERE.

Please forgive me for repeating myself, but as we have a lot of new subscribers and blog readers, I thought I’d remind all of you that you can get the new print patterns delivered right to your postal mail box every month if you live the USA.

If you want to get digital patterns every month, YOU CAN TOO!

All you have to do is follow one of the links to the appropriate Club form, below, and select “International” on the form in order to sign up to get digital pattern collections emailed to your inbox every month (you do not have to live outside the USA to sign up for digital patterns).

HERE you will find the form to fill out to sign up to receive the 5 main patterns each and every month (select “International” if you want the digital pattern sets).

OR

HERE you will find the form to fill out to sign up to receive the 5 main patterns in addition to table runners and/or accessory patterns (select “International” if you want the digital pattern sets).

Patterns always ship FREE, too. So what are you waiting for? Go ahead and sign up to get your monthly card sets delivered right to your doorstep or your email inbox. Never miss a new pattern!

I hope you enjoyed last week’s post, 11 Awesome Ways to Incorporate Quilts into Your Life. Now that you know what to do with your quilts beyond the basics, let’s make more quilts. YEAH!

Ready for another Summer Quilt Tutorial???

This being the last month of summer, I was in the mood for a late summer warm and sunny feeling quilt and I think you’ll agree that my version of Running Doe’s Weave quilt pattern certainly feels like an warm hazy lazy August afternoon.

You can get your own print Weave pattern HERE or the digital Weave pattern HERE.

Sit back and enjoy this Weave tutorial.

For my Weave quilt today, I am using fabric from the Garnet Glow Batik Collection by our quilting partners, Hoffman California-International Fabrics.

Did you happen see my Berry-Licious tutorial a while back? I used the same fabric collection for that table runner as I am using for Weave. You can check out the Berry-Licious Table Runner Quilt Tutorial HERE.

Okay, let’s get started!

First thing you need to do is decide how you will arrange your fabrics. As you will see later in the tutorial, I had 6 lighter fat quarters and 6 darker fat quilters so I decided to alternate my lights and darks. This decision influenced how I cut my rectangles because 6 fabrics are cut one way and the other 6 fabrics are cut a different way.

The rectangles are simple to cut with a basic 6″ or 6.5″ x 24″ ruler and an 18″ x 24″ cutting mat. Simply lay the fat quarter out on your mat with the 22″ side horizontal and the 18″ vertical. Cut strips according to the size in the pattern and then cut the strips into rectangles. I was able to comfortably layer 3 fat quarters at a time to cut — do likewise if you feel comfortable.

Did you know that if your rotary cutter starts skipping while you cut, it’s probably time to change your rotary blade?

After cutting all of your fat quarters into rectangles, go ahead and cut your accent fabric into rectangles, too.

Now it’s time to sew the accent strips between matching rectangles. There are actually 2 different rows, so make sure to keep your fabrics straight.

Then press your rows. The middle photo shows my pile of rows ready to get pressed (and maybe untangled! LOL!).

The great news is that it doesn’t really matter which way you press your seams because the seams are all offset when you sew the rows together. This is really great and makes Weave a beginner friendly project.

Just a quick tip — while I was pressing my rows, I folded each row in half and pressed a crease for the center of the row. That way, as I pin the rows together, I can match up the centers so my quilt will come out straight and not skewed or twisted.

The rows are finished, so let’s put the rows up on the design wall. My plan, as I mentioned above is the alternate lighter and darker strips. Huh. A few strips up on my design board and I’m already rearranging.

All the strips are up. Hmm. Not quite. Arrange some more. There are 12 rows in this quilt and I don’t like how the lights and darks are not completely balanced. Back to the drawing board……what can I do now?

Let’s try it again.

AHA! I know what I’m gong to do — I am going to add another light row to the bottom because I always find an odd number more pleasing than an . I have an extra fat quarter for the top row, which would give the illusion of a top/bottom border if they are the same as well as some leftover accent fabric. It would also give me some visual balance with lights at the top and bottom instead of a light at the top and a dark at the bottom. Let’s go with that!

I know it’s hard to visualize right now, but trust me that the extra light strip at the bottom makes all the difference!

If I make this again in the future, I don’t think I’ll try to alternate lights and darks — I think random would probably be easier to put together.

Whew — I wasn’t sure I’d ever figure it out, but boy oh boy, am I glad that I did! Time to sew the rows together before I change my mind.

Remember when I pressed a crease in the center of each row? Now I am going to match up the centers of each row and then smooth the rows all the way to the ends. I put a pin in my center crease, and lined up the outside edges.

See the pin in the second photo, perpendicular to the edge at the end of the row? I think that’s probably the most important pin in the whole pinning the layers process — I keeps the rows square and keeps the rows from sliding and skewing when I am sewing. Thanks, Pat P. for teaching this important little trick to me when I was a beginning quilter.

My plan is to sew the rows into pairs, sew the pairs into quads, and then sew the quads together. I will add the 13th row to the last quad (so it will actually have 5 strips in it before I sew it to the previous quad).

Yay! It too me less time to sew the rows together than it did for me to arrange the rows to my liking. Figures……..

Sorry, Weave is a bit too big for me to show you the whole thing on my design wall.

Let’s go outside!

Here it is — Miss America. Ummmm, maybe not. Seriously, though, here is my Weave quilt top.

I love the warm saturated colors! Maybe I should have picked a slightly darker accent, but I do like its subtlety. It really is a late summer sun-kissed quilt. Now I just need to get it layered so I can quilt it……

Well, I think that’s about it for me this week.

Until next Thursday —

Always,

Tricia @ VRD