Free Quilt Blocks and Patterns · Just Quilty Stuff · Rose Cards · Tutorials · villa rosa designs

A Christmas Gift For You – A Little Holiday Quilt Pattern and Tutorial to Bring You Joy and Holiday Gift Idea #3

And Happy December!

A snowy forest scene featuring tall evergreen trees, with the word 'December' prominently displayed in the center.

Huh! I’m still trying to wrap my head around the fact that all of a sudden it’s December. Sew much to do and sew little time……

Don’t get me wrong, I’m really excited about December starting. My quilty cuz, Kim (Hey You!), and I both purchased Quilty Christmas Advent Boxes last year in 2024, but we were both a bit disappointed so we decided to create boxes for each other this year instead of hunting around to find another one we liked. What fun!

It’s been a blast picking out fun things for Kim. Of course, I panicked at the end of November because I wasn’t ready yet! LOL! But in a flurry of wrapping paper and covered in tape, I got all 25 items wrapped up and they all fit inside the box.

We met a a local restaurant on Saturday and exchanged our boxes. Kim’s box for me was a fun surprise – the goodies in the box were all stacked up (and wrapped in Christmas sloth paper) – they didn’t fit inside the box and were sticking out all over. Joy oh joy! She didn’t even bother with a lid. Oh my! What fun December is going to be – enjoying a little Christmas every day – both the giving and the receiving as well as the sharing.

In addition to Kim’s box, I also created a box for each of my parents. I had to hustle to get all of their goodies (that’s 50 gifts) wrapped in 1 day on December 1st before dinner so we could start our December tradition on the right day. Wow! I was so tired after all of the wrapping that I didn’t put numbers on everything like I should have. Oh well, Mom and Dad will just have to reach in and pull one out to open each day until Christmas Day instead of having to hunt through their boxes every day for the right number package. And by the way, everything fit nice and neat inside their boxes and the lids closed perfectly. Just sayin’, Kim…. LOL!!!

When I was trying to decide what to do this week on the blog, I had a brilliant idea – why not create a special little holiday quilt for you, our readers and VRD friends? Without you, there would be no VRD. We appreciate you each and every day. Thank you for loving VRD as much as we do.

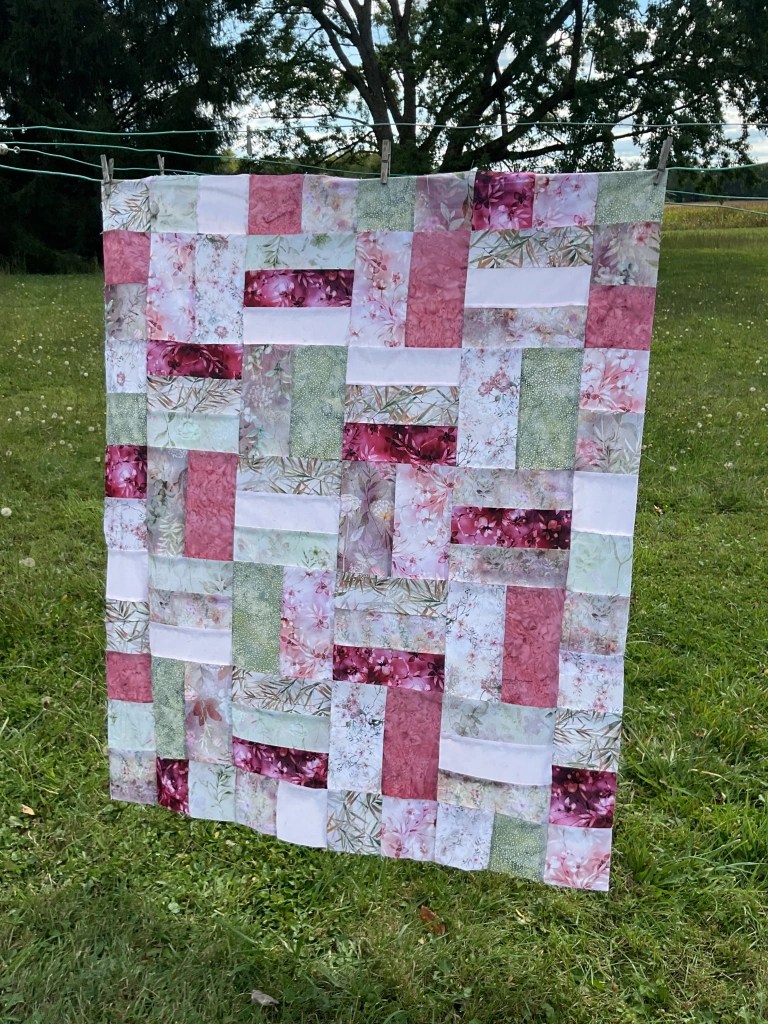
I decided to call the little quilt I created for you, Quilt Joy. It is a happy little thing and I am looking forward to quilting and binding it. I already have someone as the recipient.

So, let’s make a quilt together!

Quilt Joy Little Quilt Tutorial

Colorful patchwork quilt design featuring a grid pattern in red, green, and white.
Quilt Joy, a little quilt by Tricia Maloney, finishes at 24″ x 24″

Quilt Joy Free Pattern Download

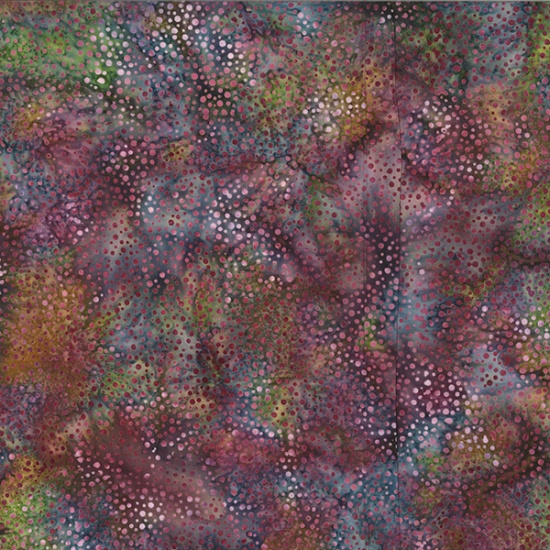
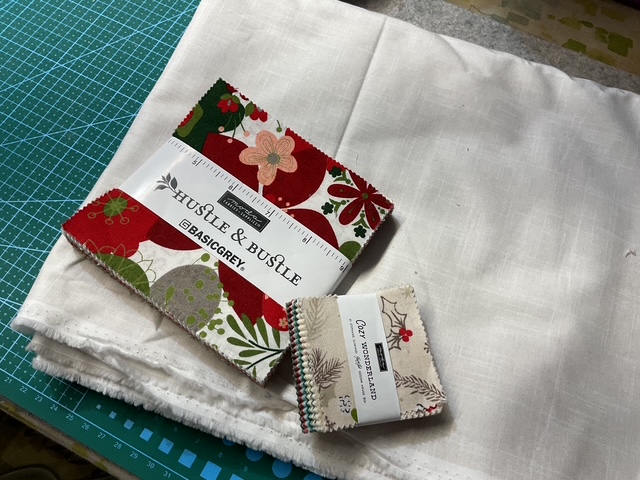
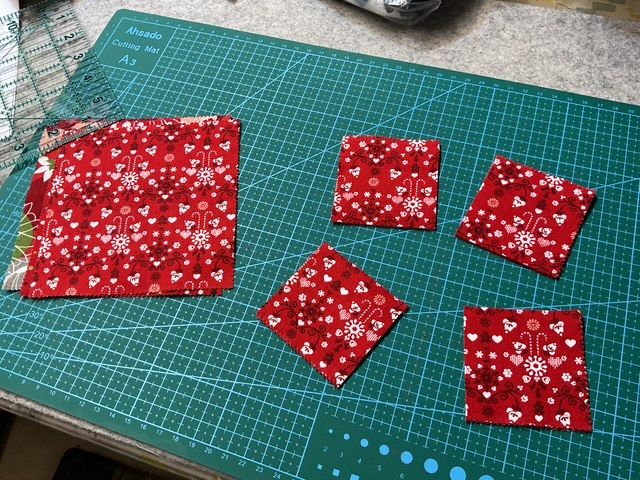
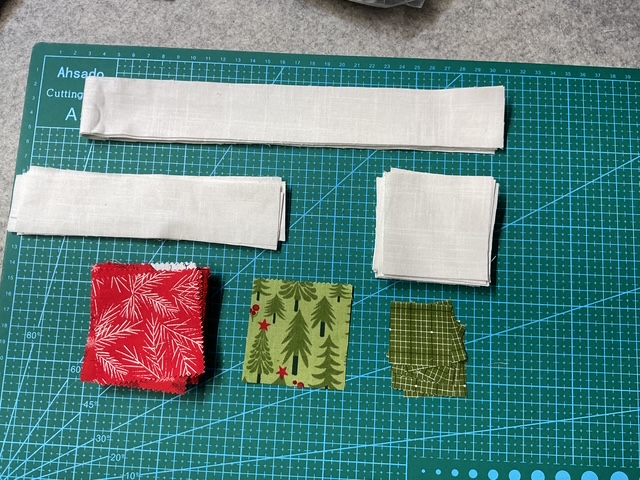
The first thing we need is our fabric, of course! For this little sweetie, I’m using a 5″ charm pack from my stash. Because I’ll need some more red, I’m adding a 2.5″ charm stack, too. And a background fabric. I’m going to make my little Quilt Joy in traditional red, green, and white, but you can make yours in any color combination or even really scrappy.

If you celebrate Hanukkah or Kwanza, you can totally use special colors for your celebrations.

I think I’ll make a blue, white, and silver one for January – but that’s getting a little ahead of myself, isn’t it?

A stack of fabric pieces including a charm pack with holiday patterns and a white fabric, placed on a green cutting mat.

Cutting doesn’t take much time at all! I promise. I cut my 5″ charm squares into 4 – 2.5″ squares. Zip Zap Zoop – done!

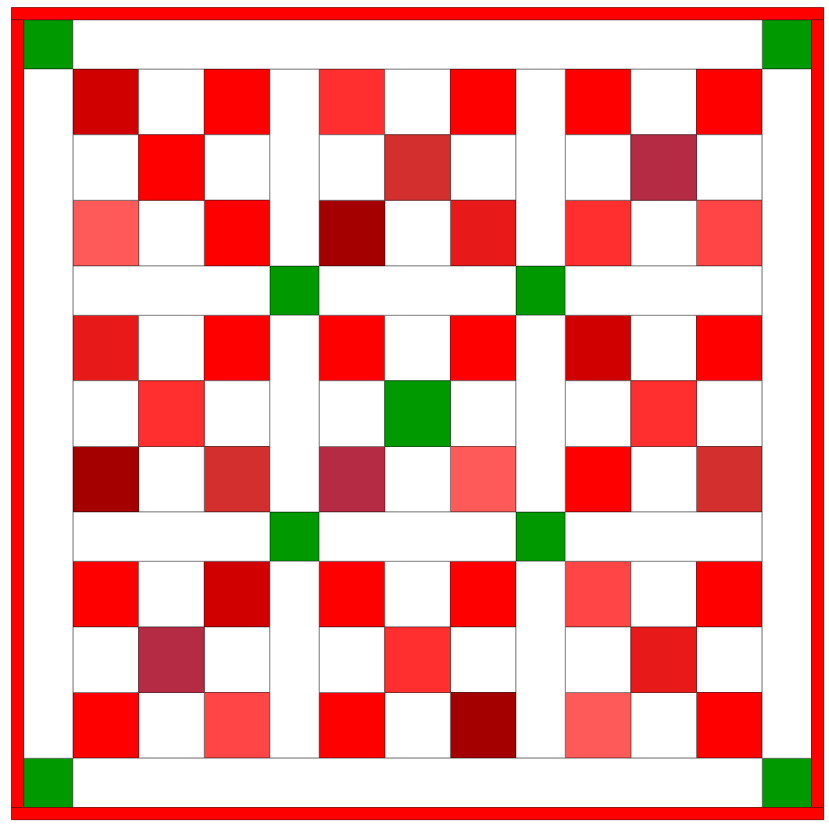
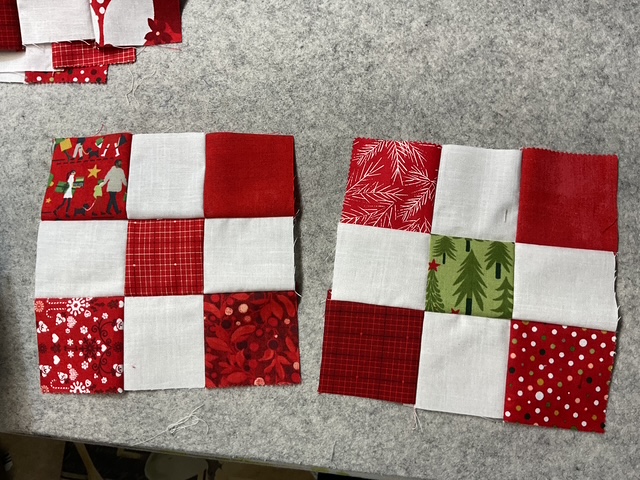
Now let’s make some Nine Patch blocks. Easy peasy.

A collection of red and white quilt blocks arranged on a crafting surface, showcasing various patterns and textures.

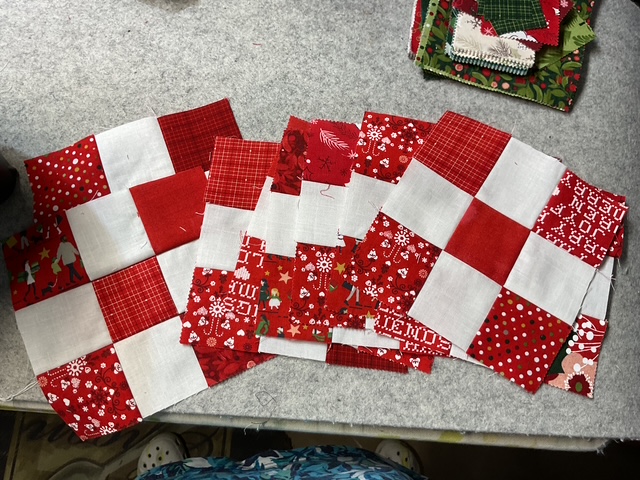
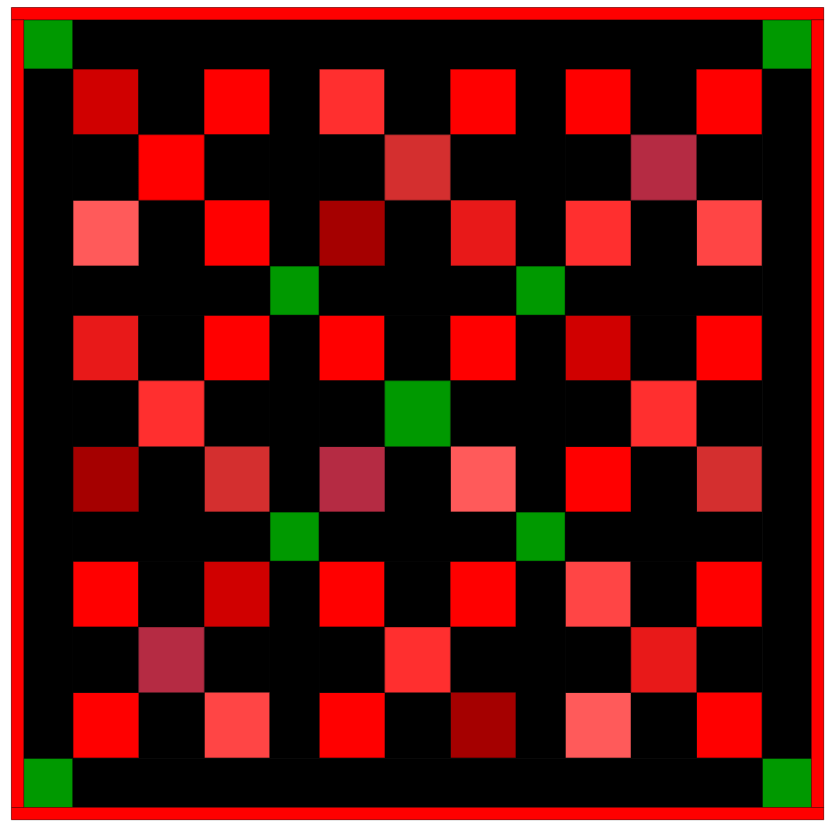
In one of my Nine Patch blocks, I added a green square in the center. This block will be in the center of my quilt.

Two completed Nine Patch quilt blocks featuring a mix of red and white fabrics, with one block incorporating a green Christmas tree print.

Okay, now let’s sew 3 blocks together with sashing in between the blocks. We need to make 3 rows.

Three rows of Nine Patch quilt blocks in red and white fabrics, featuring holiday patterns.

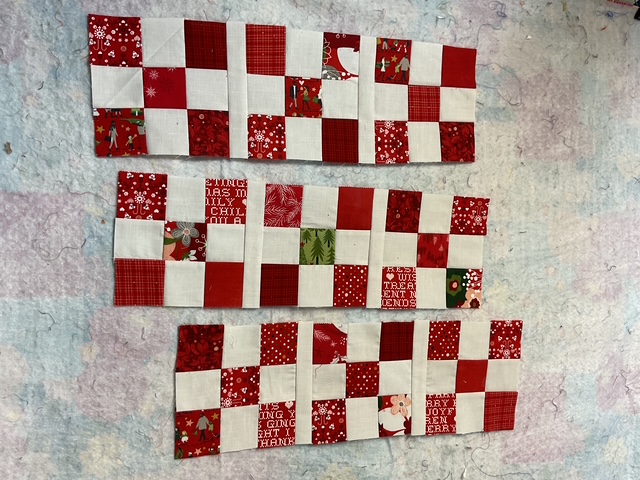
Next we need to use 3 sashing strips along with 2 green accent squares to make a sashing row. Make 2 rows.

Two strips of white fabric with green checkered patches sewn in the middle, resting on a light-colored fabric background.

Now we are going to sew the sashing rows between the block rows. Isn’t this looking sew sew cute???? I am just loving this little cutie!

A quilt block featuring a festive red and white nine-patch design with various Christmas-themed fabrics and green accent squares.

Add a border strip to each side of the quilt.

A patchwork quilt block featuring a grid pattern in red and white fabric, with various Christmas-themed prints and patterns.

Now sew a green accent square to each end of the 2 remaining borders. Then sew to the top and bottom of the quilt.

A patchwork quilt featuring red and white squares in a Nine Patch pattern, with seasonal holiday-themed fabrics.

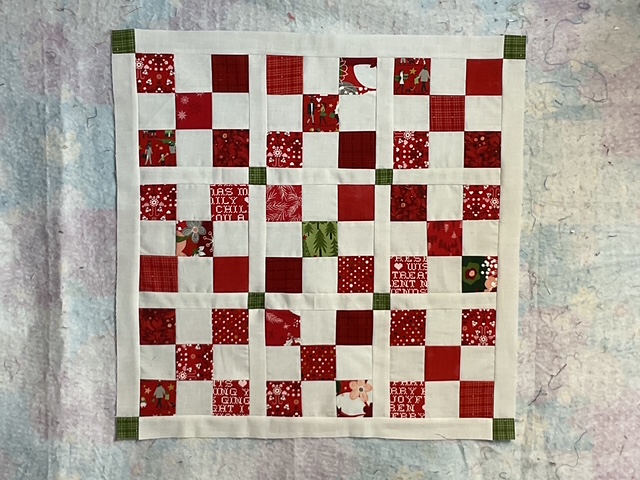
Isn’t it just too adorable for words???? And in the classic traditional of Villa Rosa Designs, you can put the quilt top together in a few hours, including the cutting.

Here’s Quilt Joy for our friends who celebrate Hanukkah:

A colorful quilt design featuring a grid pattern with alternating squares in shades of blue, yellow, and white.

And here’s Quilt Joy for our friends who celebrate Kwanza:

A colorful quilt pattern featuring red and green squares arranged in a checkerboard design, set against a black background with a red border.

Happy Happy December to You!

For the past few weeks, I’ve shared a fun gift idea at the end of the blog for you. My Holiday Pick this week – #3 – is hot off the press – literally!

A colorful collage showcasing 12 seasonal snack mat designs by Villa Rosa Designs, featuring various patterns and motifs suitable for different occasions throughout the year.

Get yours HERE

Many of you have been waiting for the collection of all 12 Seasonal Snack Mats from 2024/2025 to be released as a set and it is finally here – just in time for the Holidays! YAY! I am SEW excited!!!

Please note that at this time, it is only available as a print collection; however, each Snack Mat pattern is available individually as a digital pattern as well as a print pattern. Don’t forget – shipping is always free on patterns at VRD.

I hope you enjoy each and every day of December this year. Please take a few moments every day to enjoy the season.

See you right here next week for more VRD fun in December.

Always,

Tricia @ VRD

2025 6 Quilts in 6 Weeks Challenge · Rose Cards · Tutorials · villa rosa designs

6 Quilts in 6 Weeks Challenge – Week 3 and a Fun VRD Snack Mat Tutorial

How are you this fine October Thursday? My thoughts are definitely turning towards cozy quilts, good books, and hot tea right now as the October winds howl outside, swirling the leaves in mini cyclones around the yard.

I’ve been really enjoying our 6 Quilts in 6 Weeks Challenge and I hope you’ve been tuning in to the finished projects on our VRD Facebook page. If you signed up for the Challenge, please make sure to write that your before/after photos are for the 6 Quilts in 6 Weeks Challenge so we can all ooooh and ahhhh over your completed project (this also makes it easier for me to note who finishes a project each week during the Challenge).

I’ve heard that it takes about 30 days to build a new habit so if we finish 1 quilt each week for 6 weeks, hypothetically we are building a new habit. At least, that’s my hope, anyway. LOL!

Before we get much further, though, let’s all congratulate Mary Q as our Week 2 winner. Yay you, Mary! Keep up the great work!

I wonder who will be our Week 3 winner next week??? Maybe Y O U ????

For Week 3, I chose to complete one of my recent blog tutorial quilts from last month – Busy Bee. I was sew in love with the Hoffman digital fabrics I used for my tutorial that I just had to finish this one as part of the challenge. Busy Bee is fat quarter friendly and finishes at 45″ x 54″, which is a nice kids quilt, baby quilt, or small throw. If you want it bigger, you can easily add more blocks or an outer border (or both).

If you missed the Busy Bee tutorial, you can find it HERE.

A colorful quilt design titled 'Busy Bee', featuring various fabric patterns including floral, geometric, and handwritten text, set against a light green background. The quilt is bordered at the bottom with a decorative design and includes the logo 'Villa Rosa Designs'.

Don’t have Busy Bee yet?

Get your digital pattern HERE or your print pattern HERE.

Here’s my BEFORE photo:

A patchwork quilt hanging on a clothesline, featuring a mix of floral and patterned fabric squares in shades of pink, green, and white.

Here’s my AFTER photo:

A cozy quilt featuring a patchwork design with pink, green, and floral patterns, draped over a chair outdoors.

I backed my quilt with a lovely dusty rose textured fleece and free motion quilted the quilt with an allover meander design in a pretty pink thread.

I had a question recently on the blog about using fleece on the back of quilts, so I thought I’d address it here. I do not use batting when I use fleece on the back. I generally only use fleece on the backs of my throw quilts, although my quilty cuz, Kim, is using her fleece scraps on the back of her table runners and smaller projects, too. As for quilting a fleece backed quilt, I try to stay away from designs that cross over because the fleece is really stretchy and the quilt top isn’t (or at least it shouldn’t be) and crossing over lines potentially runs the risk of getting pleats and folds at intersections. I find wiggly line and meandering my designs of choice when quilting fleece backed quilts.

For more tips when quilting fleece, you can check out a blog post HERE from a few years ago.

The binding is Riviera, a Dot batik from our quilting partner, Hoffman , and it’s the absolute perfect finish. I stitched the binding on by machine again to save time. It turned out okay, but a few of my corners had minds of their own and were trying to do the salsa. Sheesh! I even had to rip one out and force it into submission. Corners can be so tricky!

A colorful batik fabric design featuring a blend of deep reds, purples, greens, and pinks with a dotted pattern throughout.
Riviera Dot batik from Hoffman

Now to decide which quilt to finish for Week 4……..

Recently, Chris from Needlepointers.com reached out to us to share a really fun idea and tutorial using our VRD Snack Mat patterns and I’m thrilled to share it with you. If you haven’t ever checked out Needlepointers.com, you should! Chris and her daughter Annette have been sharing craft tutorials and projects for the last 20 years on their website.

If you’re like me, you’re on the lookout for fun and fast Holiday gift ideas because the holidays are almost upon us. Snack Mats, of course, are an AWESOME quick and easy gift idea and as a bonus, each pattern makes 2 Snack Mats. You can find all the VRD Snack Mat patterns HERE. Snack Mat patterns are available in both digital and print formats.

Thanks, Chris, for sharing this GREAT IDEA with us!

Have you made anything fun using any of our VRD patterns and put together a tutorial online? We’d love to see it.

Please note that if you are thinking about creating a tutorial of your favorite VRD project (or you’ve done one already):

  1. You may show the front of the pattern, but never the back where the instructions are
  2. Do not give any cutting dimensions or measurements out verbally or in writing as part of your tutorial

Please keep in mind that all VRD patterns are protected by copyright law. Thank you for kindly respecting our VRD designers, their creativity, and their hard work.

Well, I’d better get to work on my Week 4 Challenge Project. I’ll show it off next week. You’d better get yours going, too.

See you then.

Have a great week. Get SEW much done!

Always,

Tricia @ VRD