Rose Cards · Tips and Tricks · Tutorials · villa rosa designs

July’s NEW Rose Card Patterns and VRD Crazy Stars Table Runner Tutorial

Hello Quilty Friends!

Happy Thursday to you!

BIG NEWS today! With last Friday’s release of our brand new July 2023 Rose Card patterns, we now have over 600 patterns in our catalog!!!

Put on your party hats! Cue the confetti! Blow that party horn!

WAY TO GO, VILLA ROSA DESIGNS!!!

LET’S CELEBRATE!!!

Here are July’s Brand New AWESOME AMAZING SPECTACULAR FANTASTIC Rose Card Patterns:

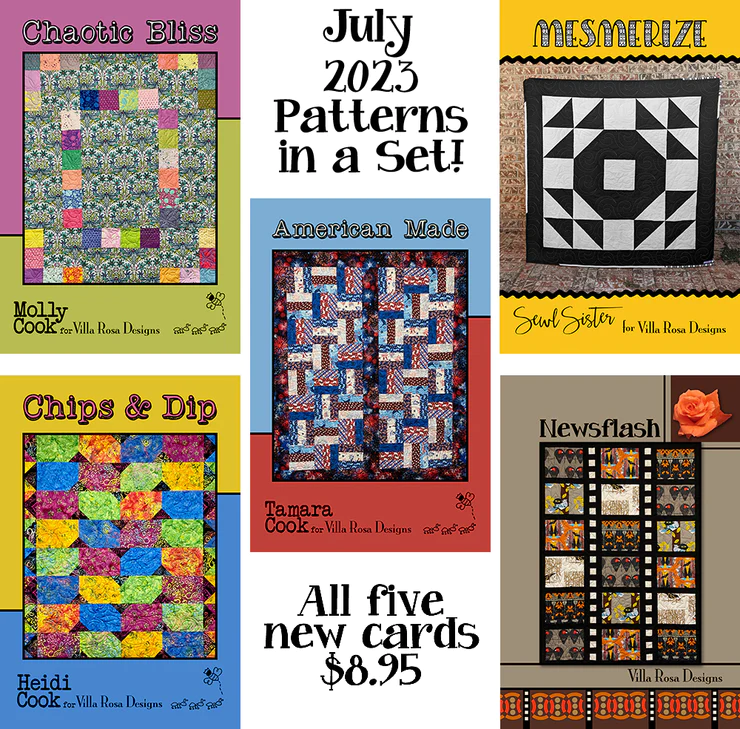
You can get all 5 regular patterns, above, for the special low price of $8.95 HERE.

BUT WAIT! THERE’S MORE!!!

This month, we have TWO NEW Table Runners! Wahoo!!!

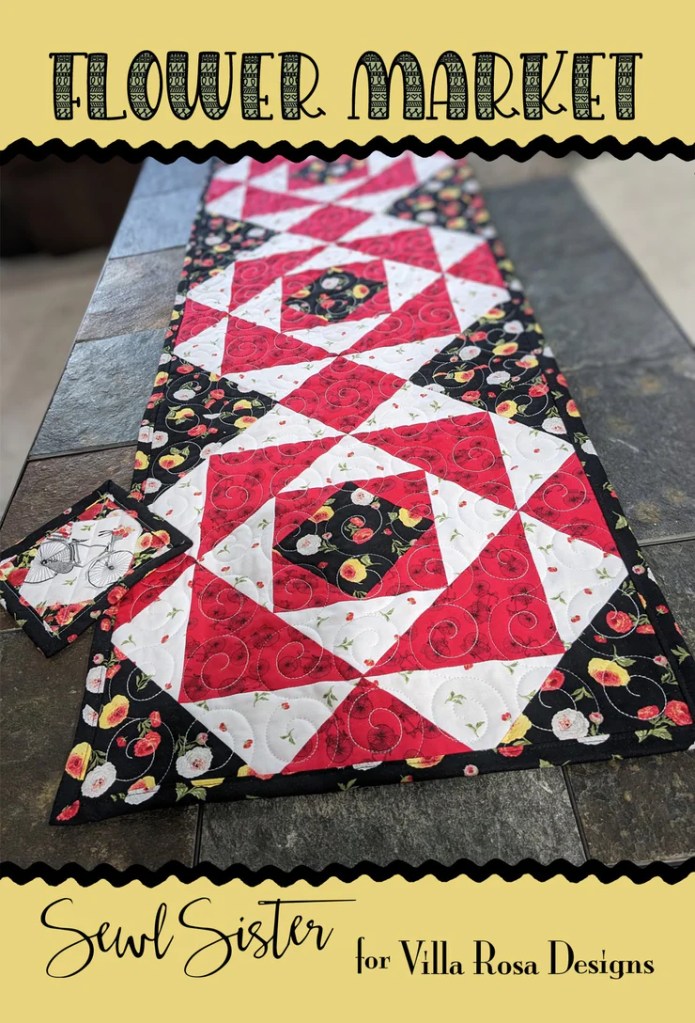
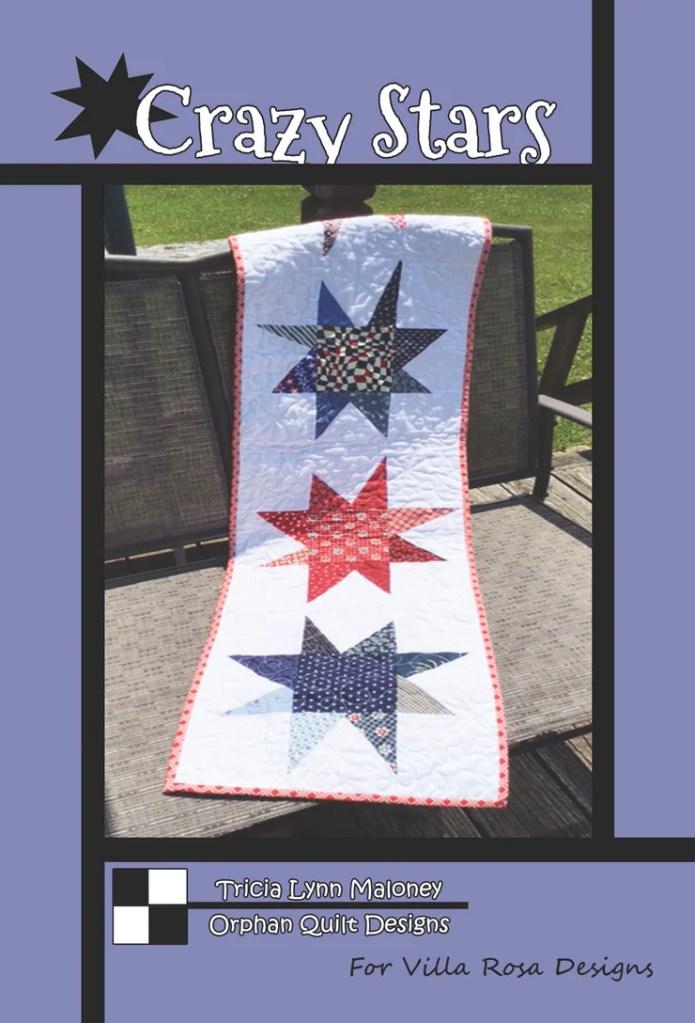
You can get Flower Market HERE and you can get Crazy Stars HERE.

Hey! Did you know you can get each month’s new Rose Card patterns delivered right to your mailbox???

You can go HERE to sign up to get the 5 regular patterns each month

Or,

You can go HERE to sign up to get the 5 regular patterns plus table runners each month.

And, don’t forget shipping for Rose Card patterns is always free.

VRD Crazy Stars Table Runner Tutorial

I thought it might be helpful to everyone if I did a tutorial of my new table runner, Crazy Stars. It was hard to figure out how to illustrate the pattern so it made sense. And, because I don’t trust my humble illustrations, I am going to show you step by step how to make the stars in Crazy Stars.

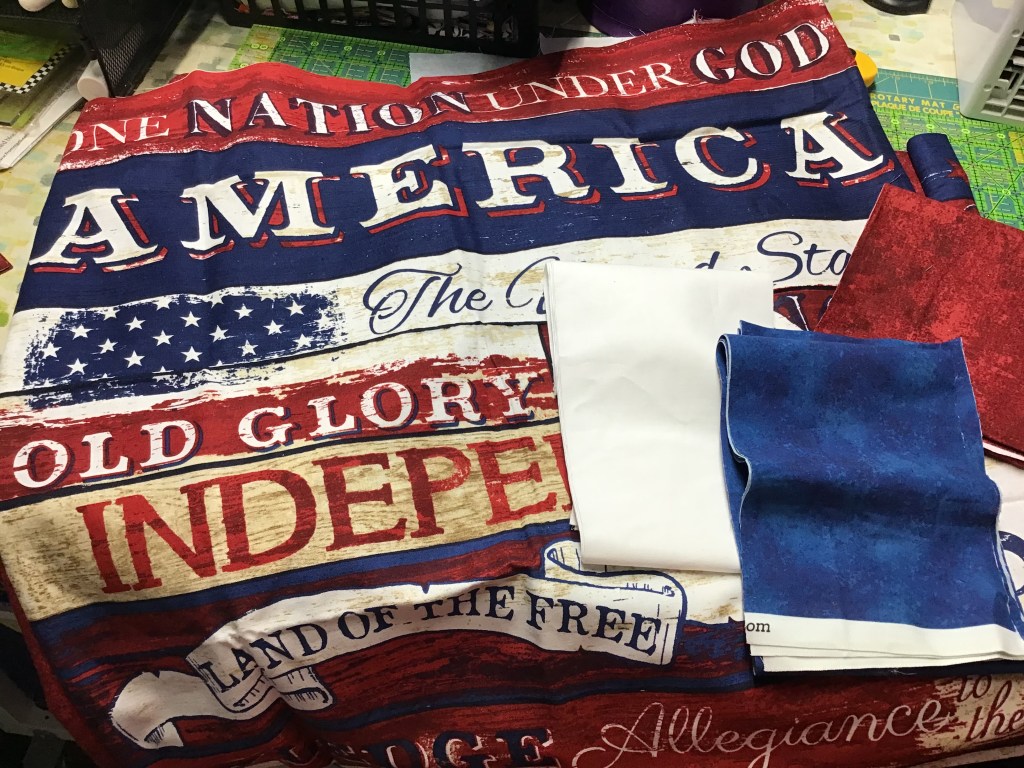
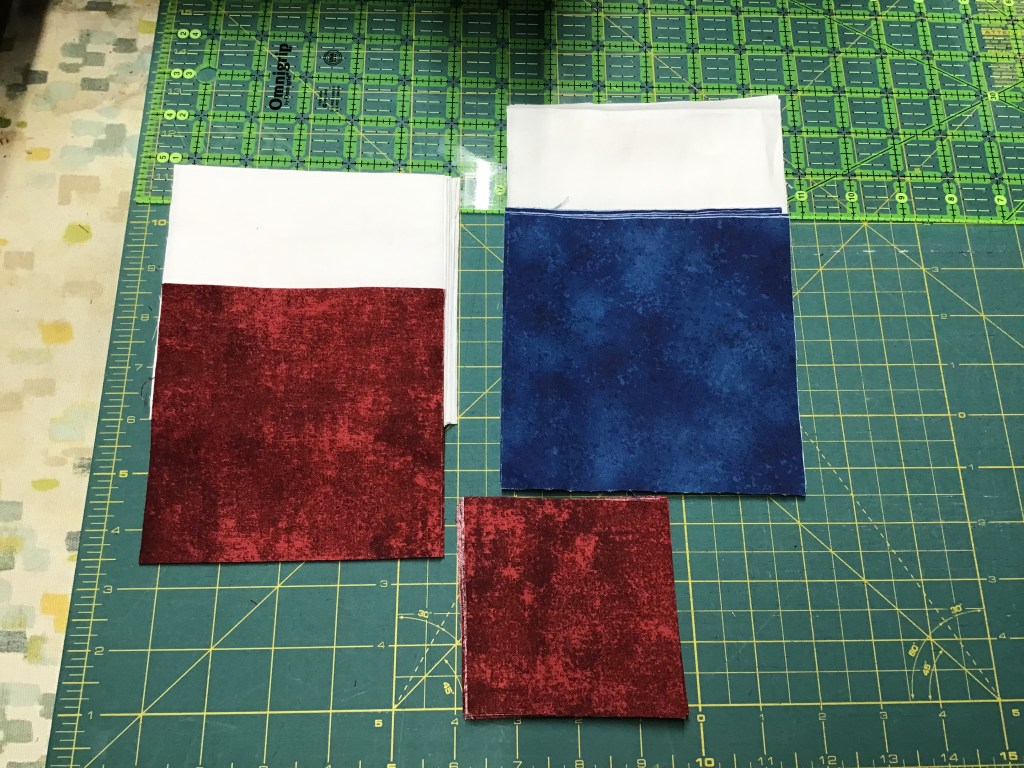
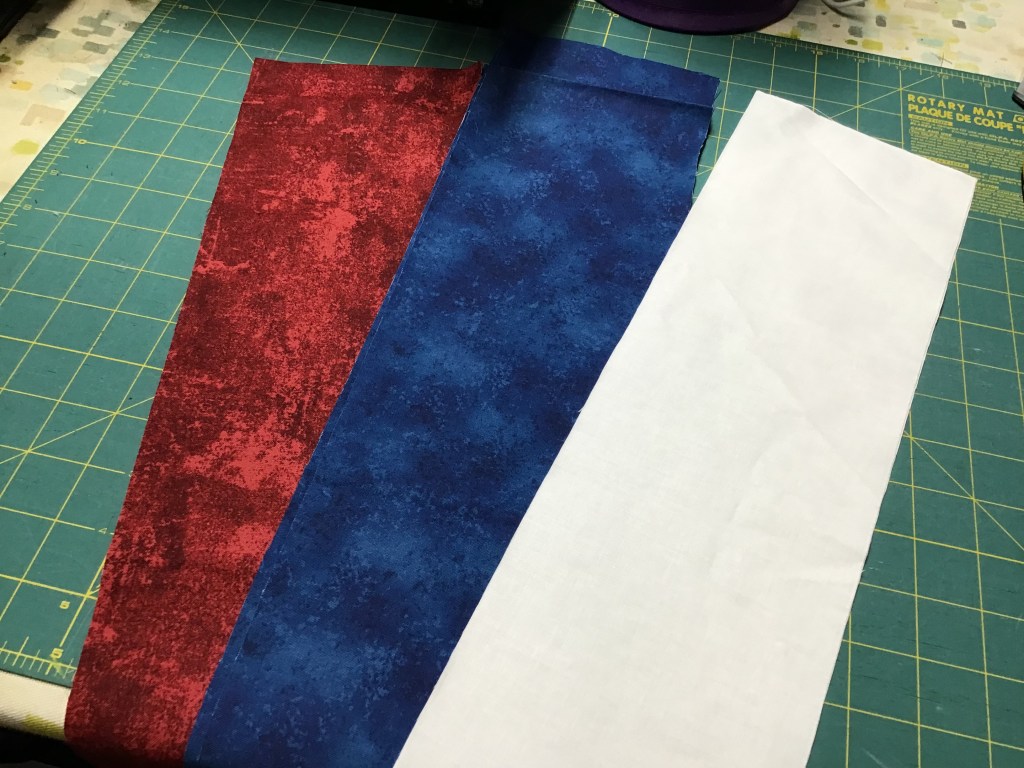
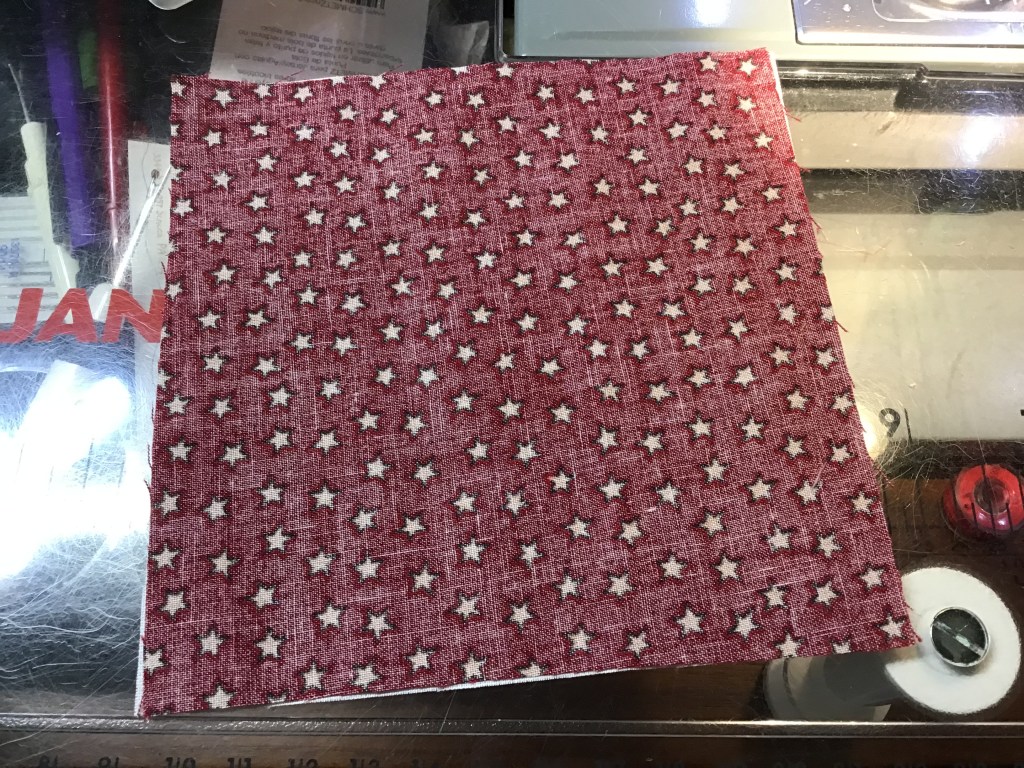
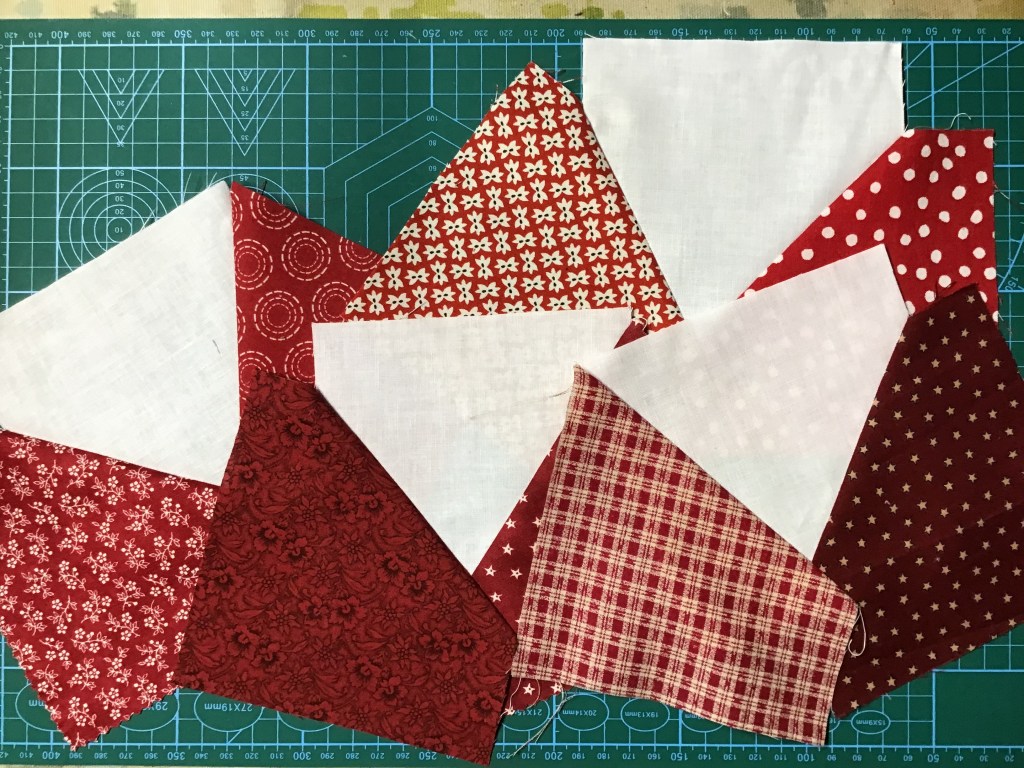
Step 1 The first thing you need to do is divide your charm squares into 4 stacks — one stack for each star. If you find that the colors end up a bit uneven, you can always add a few squares from your stash or even cut them from fat quarters or yardage.

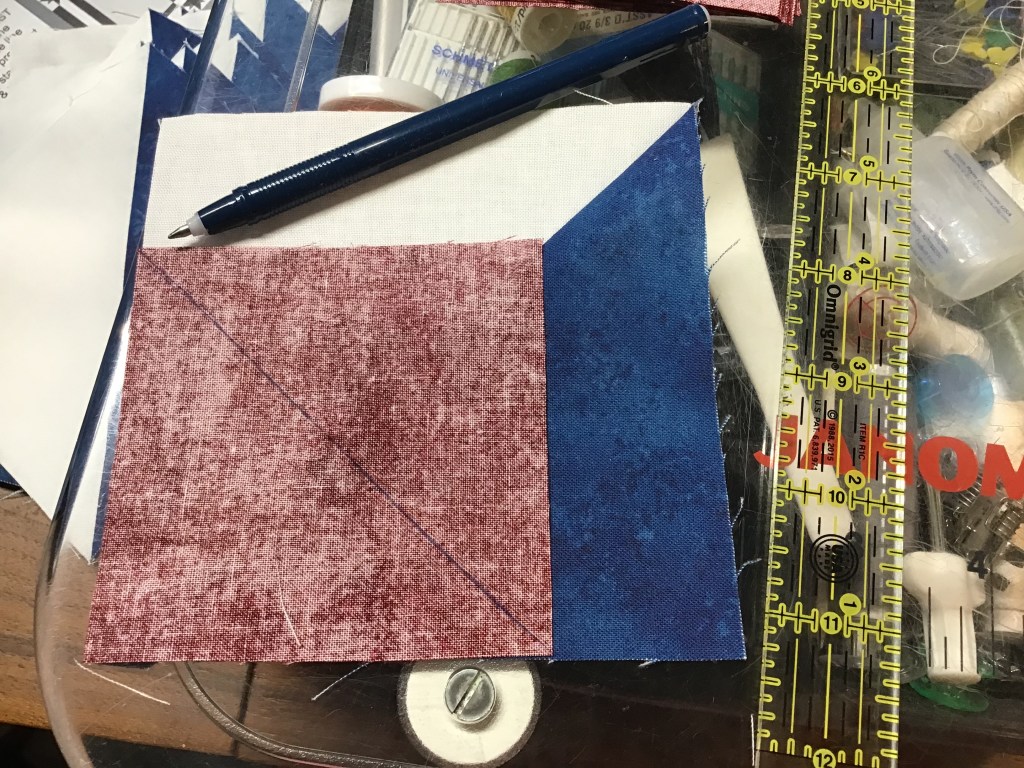
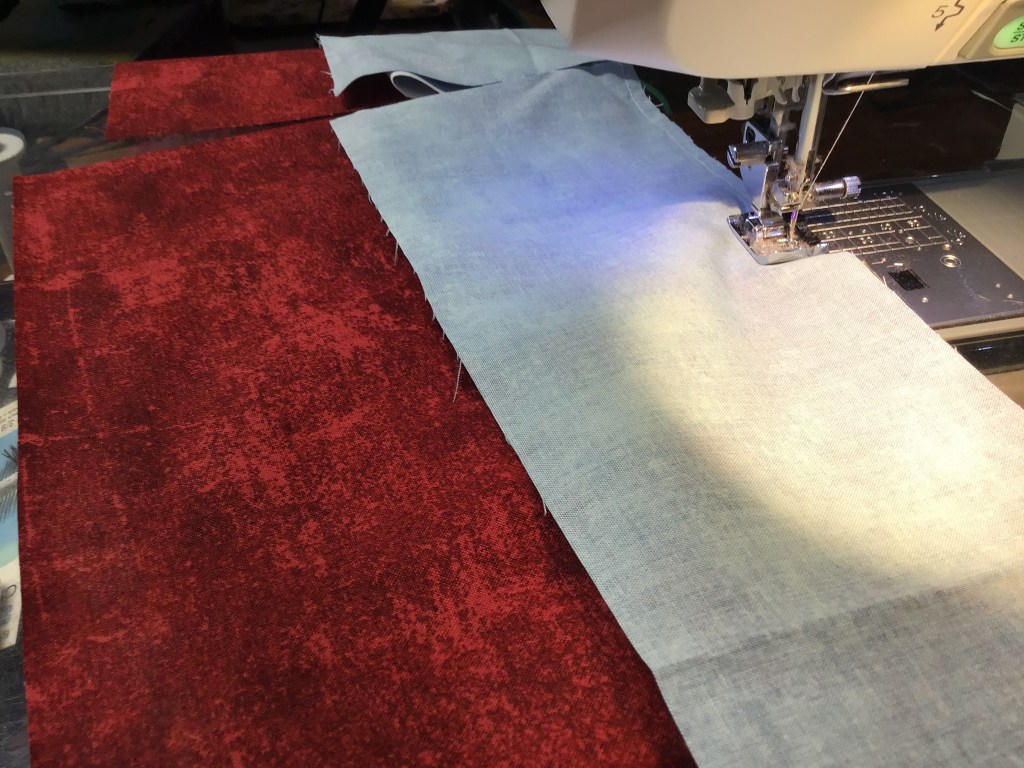
Step 2 Layer a print charm square right sides together on top of a background square.

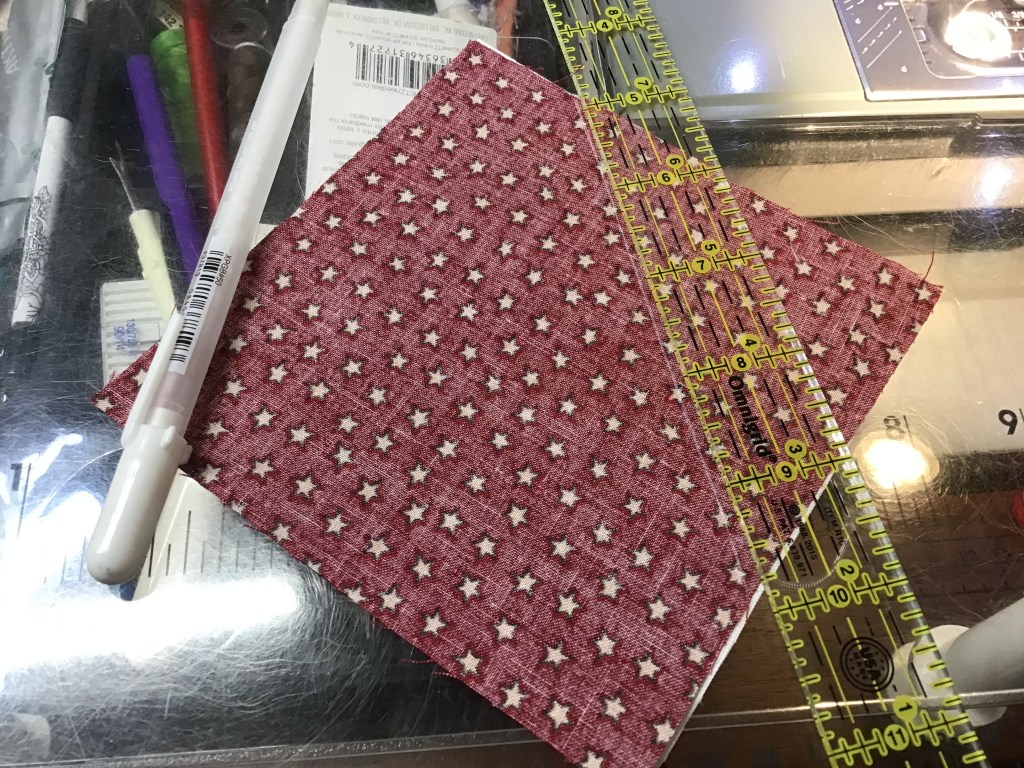
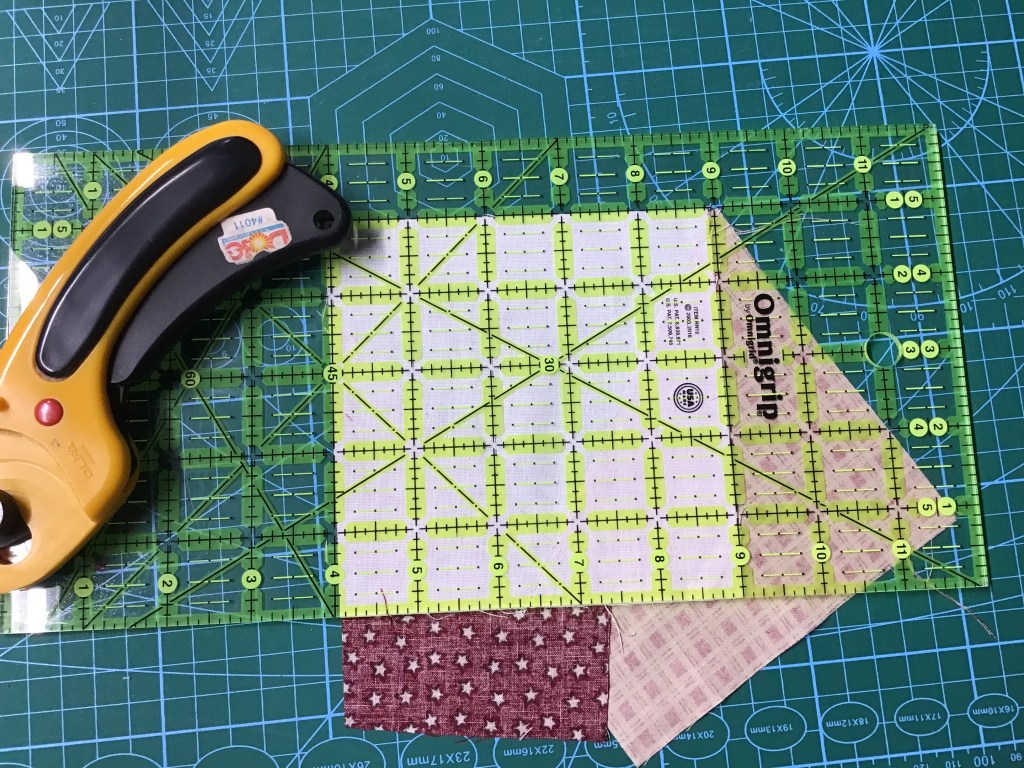
Step 3 Now the fun begins! Next use a ruler and draw a line from the bottom edge to the right edge. Place the ends of your diagonal line anywhere you’d like on those edges. Sew on the drawn line. Then open the unit and press towards the print square.

Step 4 Layer another print charm square right sides together on top of the background square. You will need to carefully line up the left and top edges. Please note you will see the right side of your first Star point square, just ignore it for now.

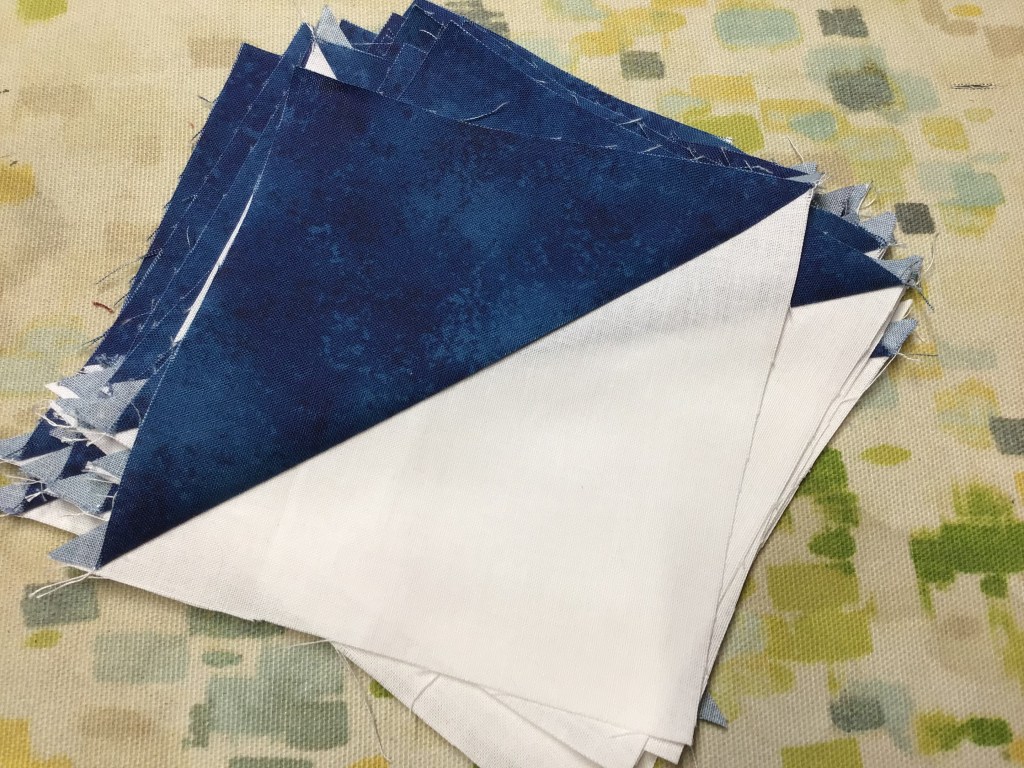
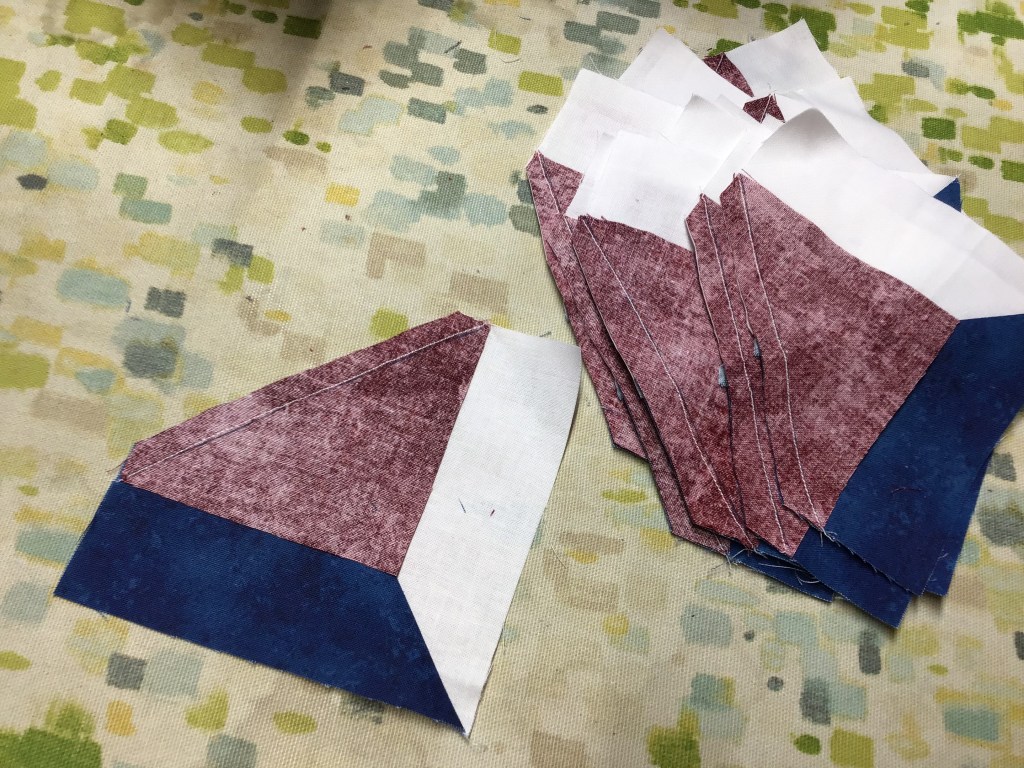
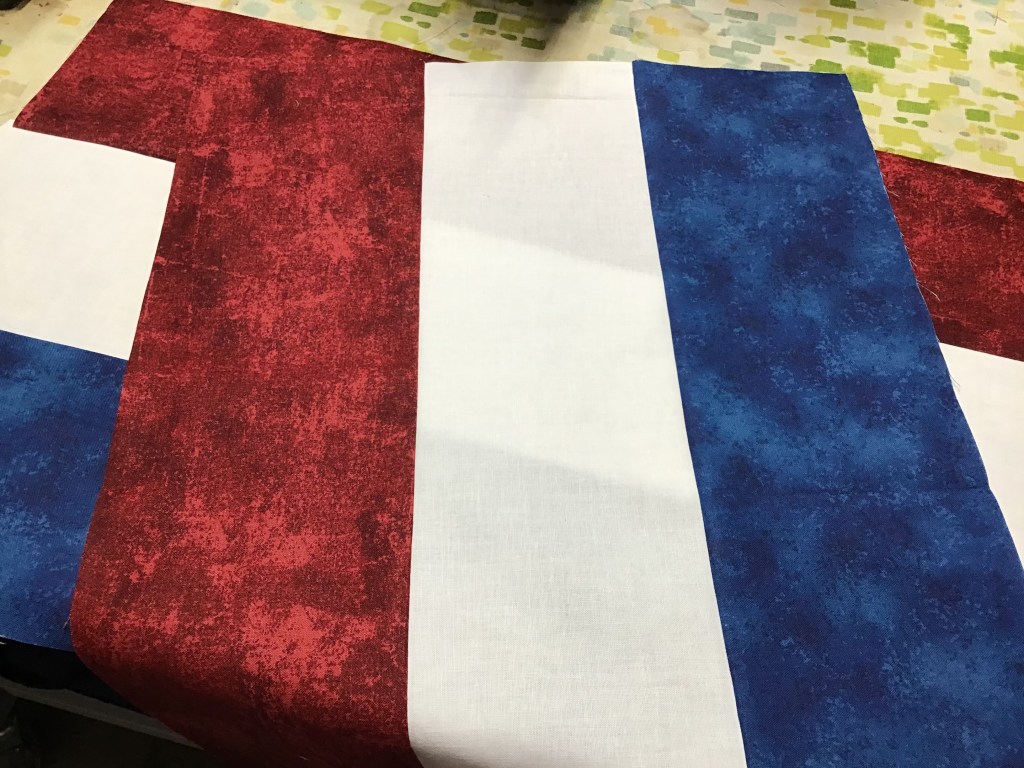
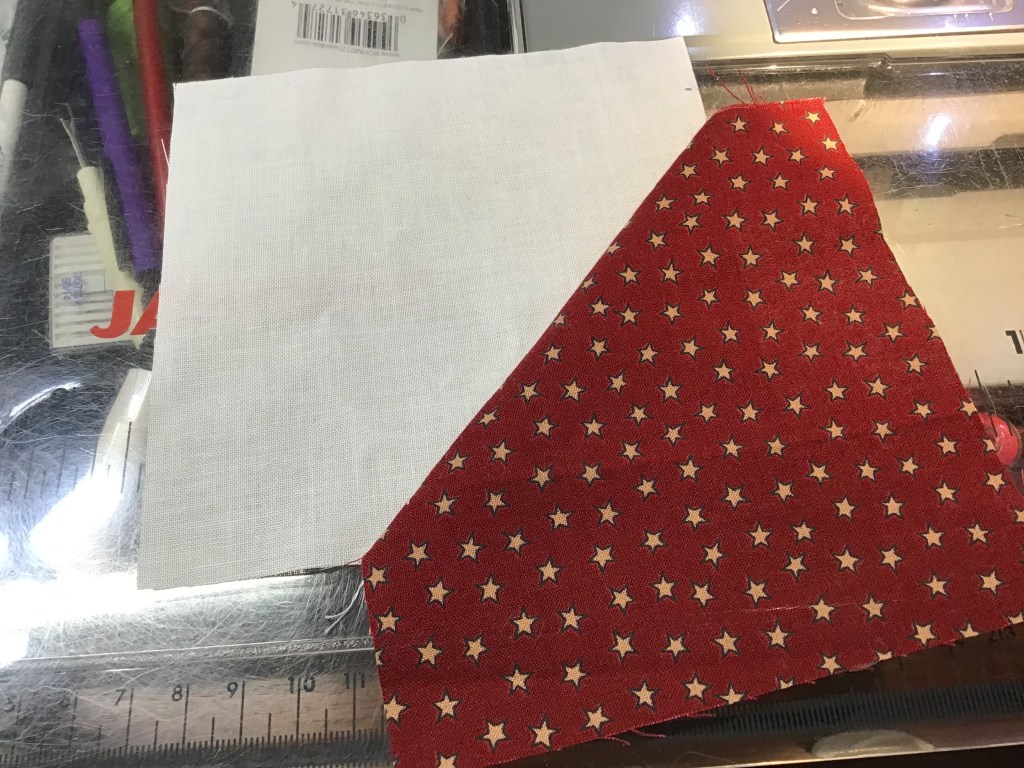
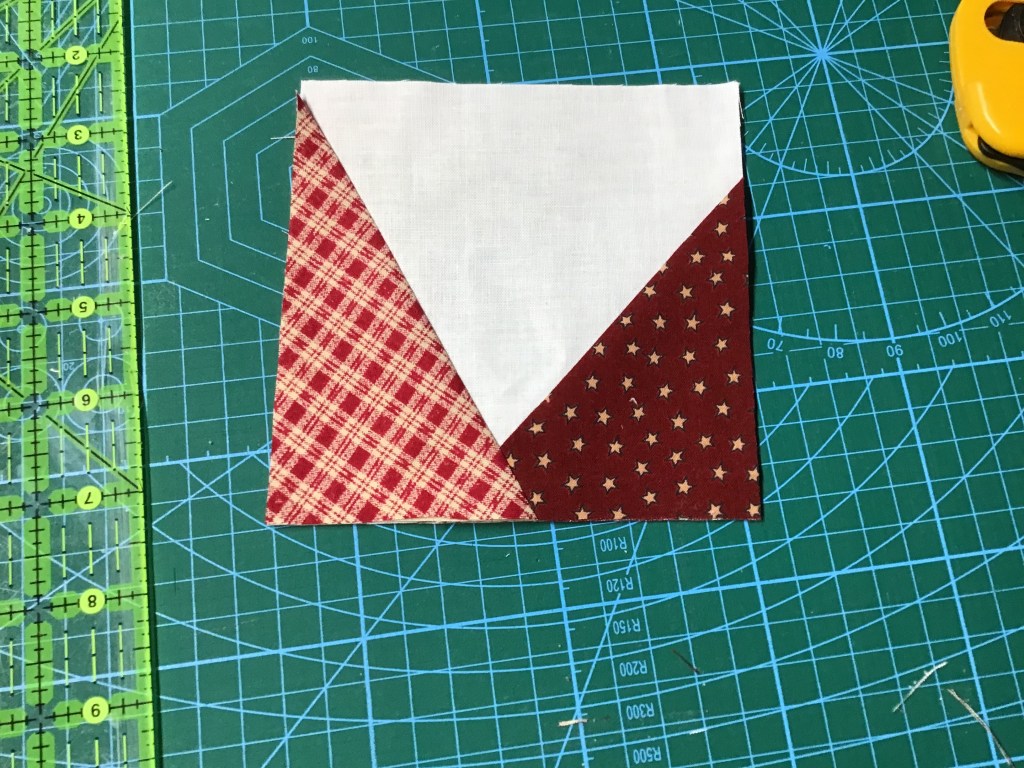
Step 5 Draw a diagonal line from the left edge to the bottom edge, while ignoring the print square on sticking out on the other side. Then open the unit and press. You will have a weird looking unit somewhat like the one in my photo, but your Star points might look different than mine because we probably started and stopped in different places along the edges.

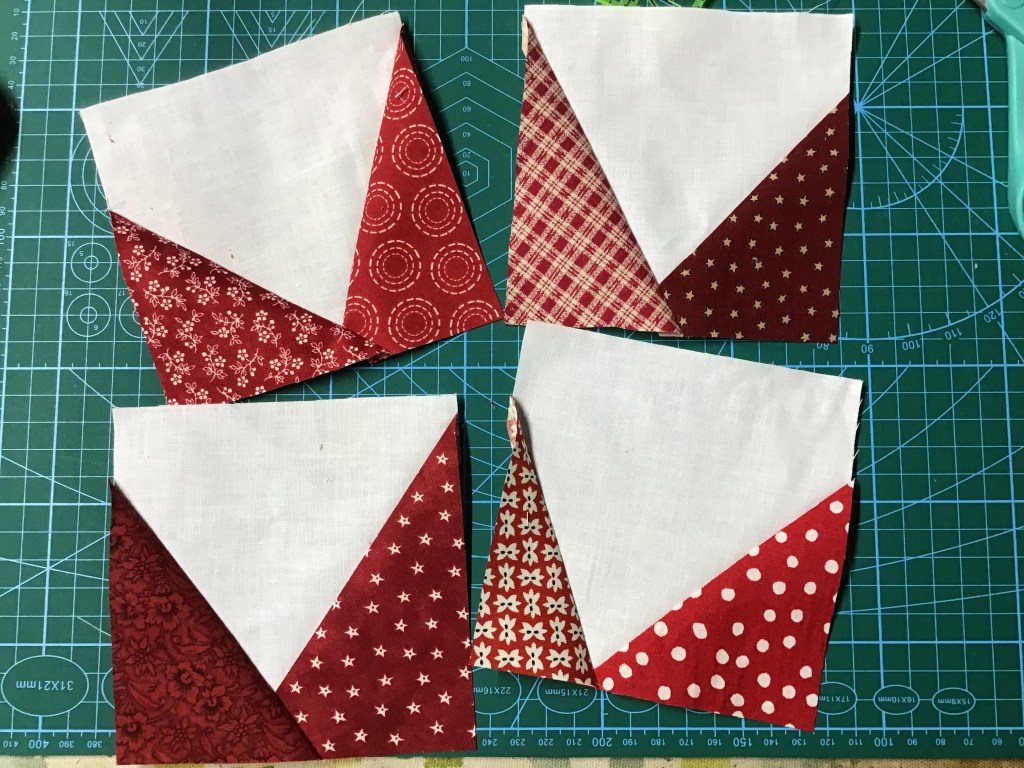
Step 6 Repeat steps 2-5 to make 4 Star point units for one Crazy Star block.

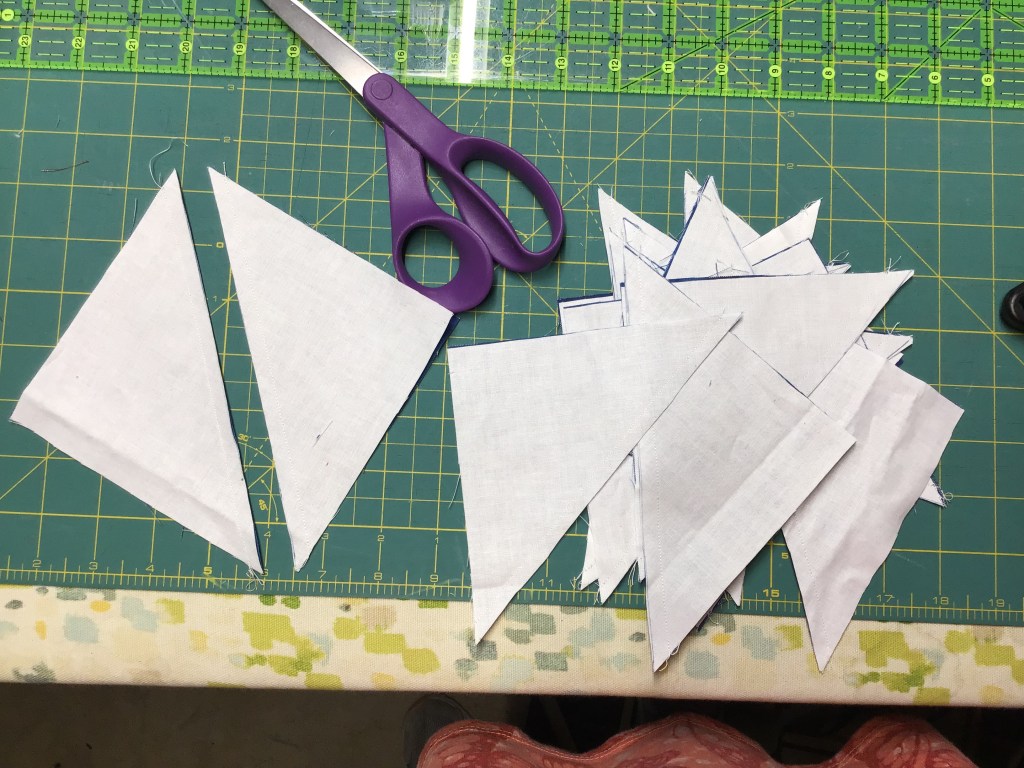
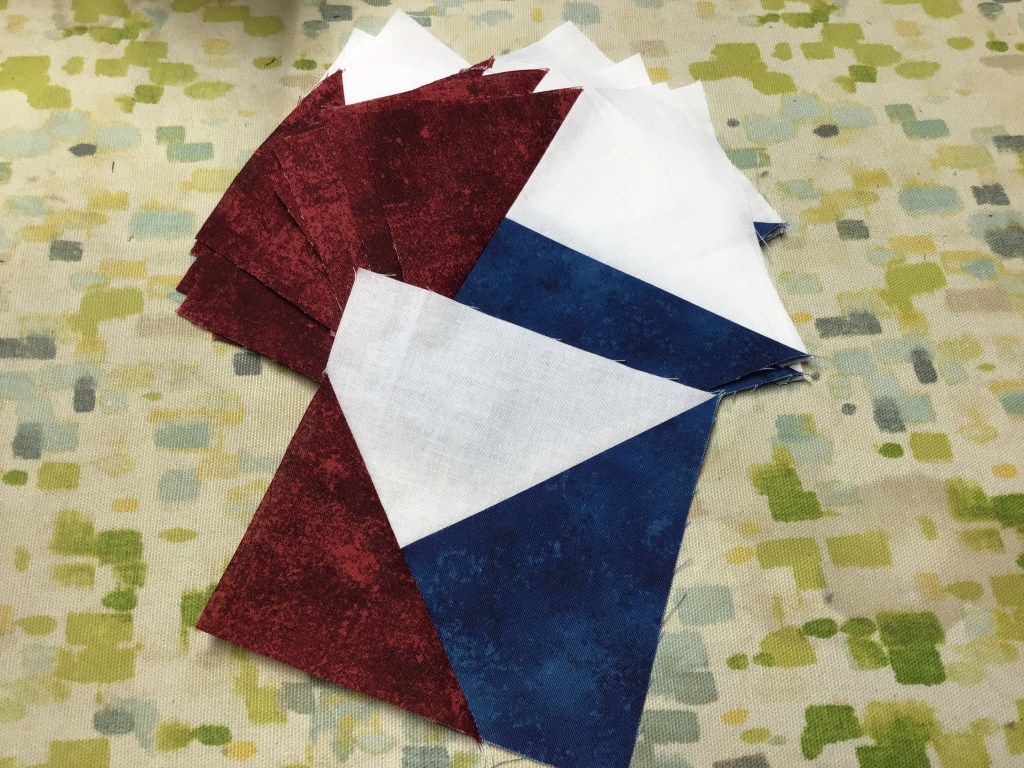
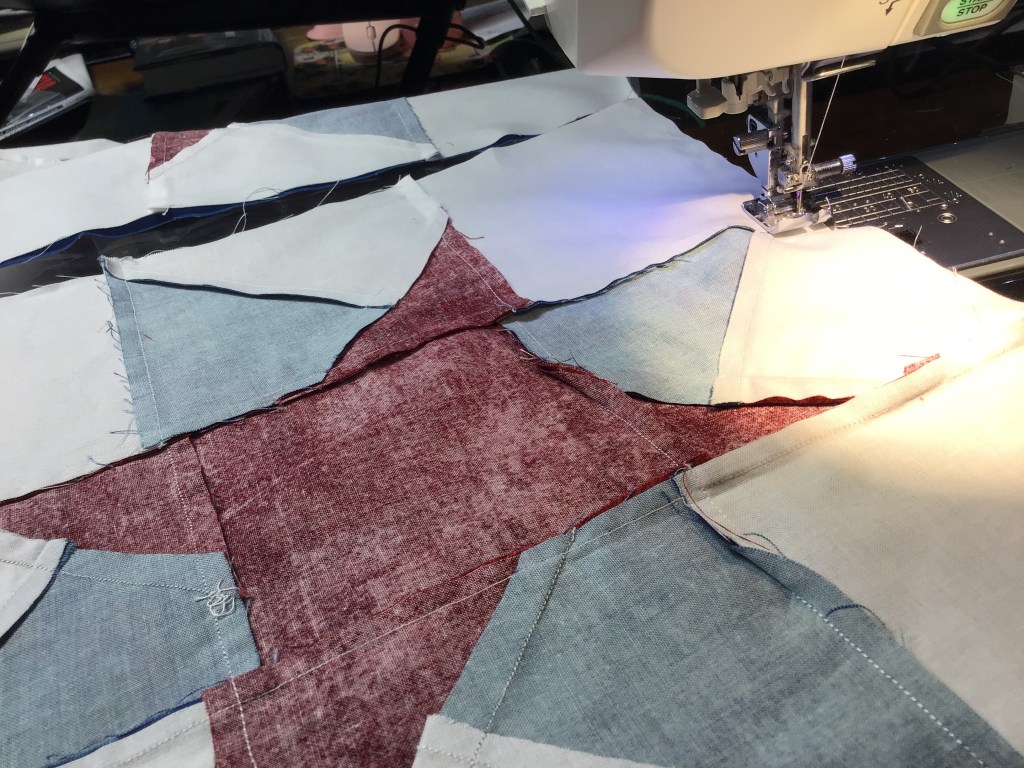
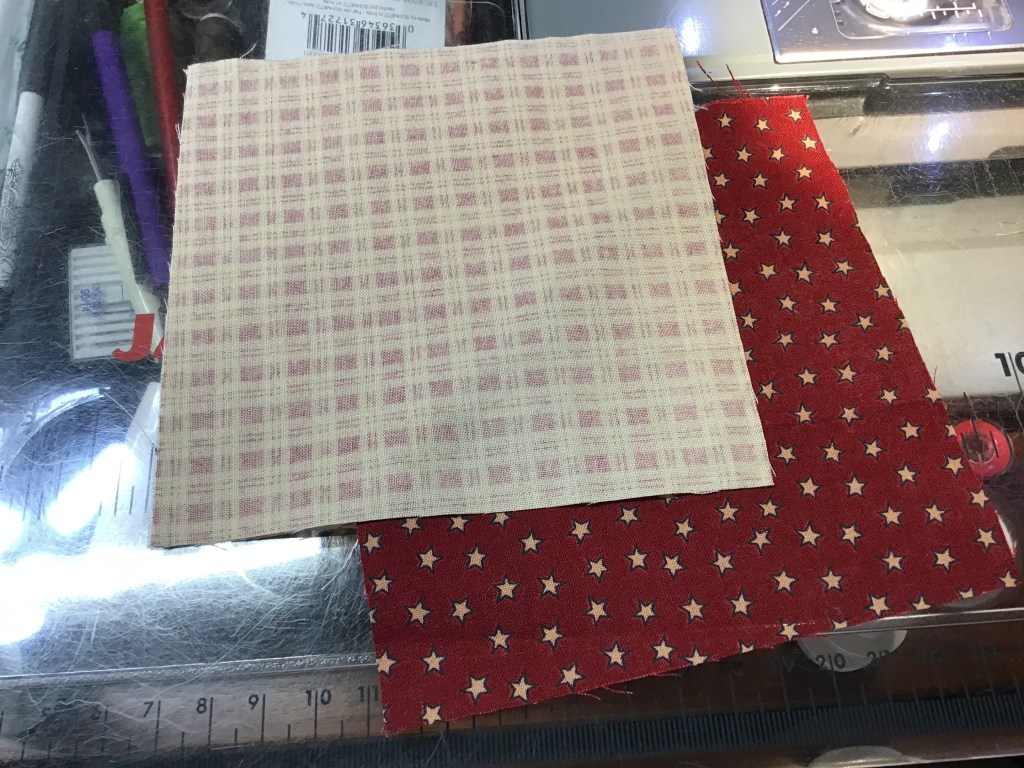
Step 7 Turn a Star point unit over so that it is right sides down and the back of the unit is facing up. Do you see your background square kind of in the middle of the 2 print squares? Use the background square as your template and cut away the excess Star point print fabrics beyond the background square. Turn the unit right sides up again and you now have a perfect Crazy Star point unit. Trim the other 3 Star point units as well.

Step 8 You can reduce the bulk in each unit if desired. Fold back a star point until you see your stitching. Cut away the excess background and Star point fabrics 1/4″ away from the seam. I used my cutter and a ruler over the seam to protect it while I cut that 1/4″ seam allowance. Open the unit again and do the same thing for the second Star point. Repeat for the other Star point units.

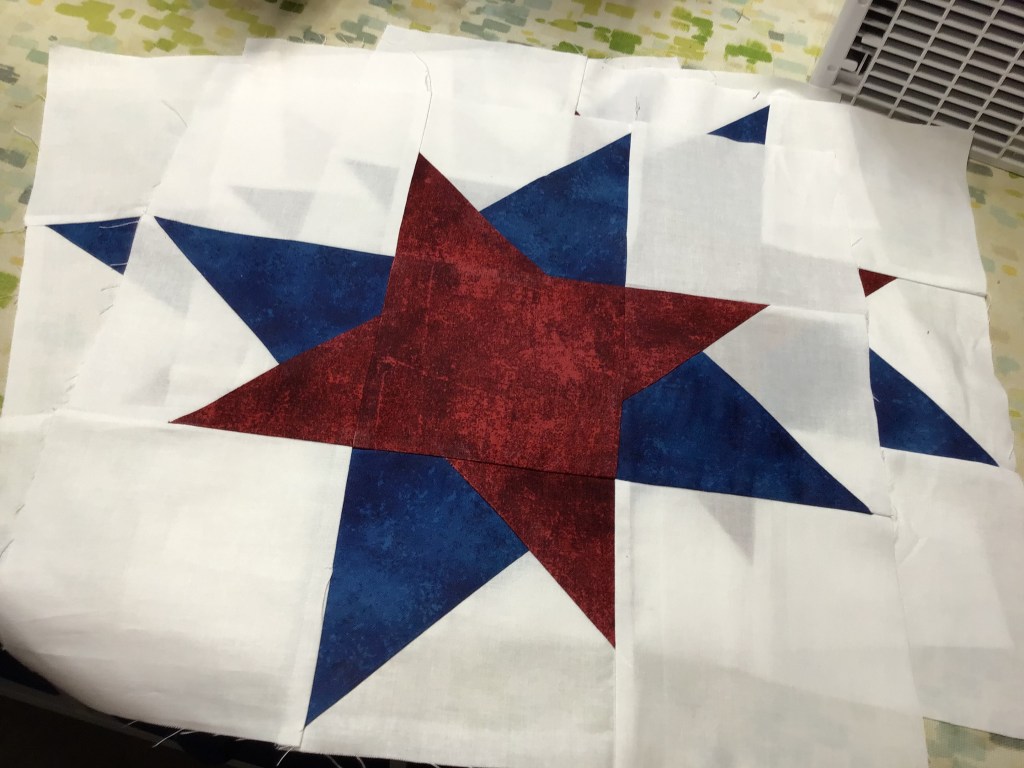
Step 9 Now you have a fun and funky set of Star points to make into one Crazy Star block.

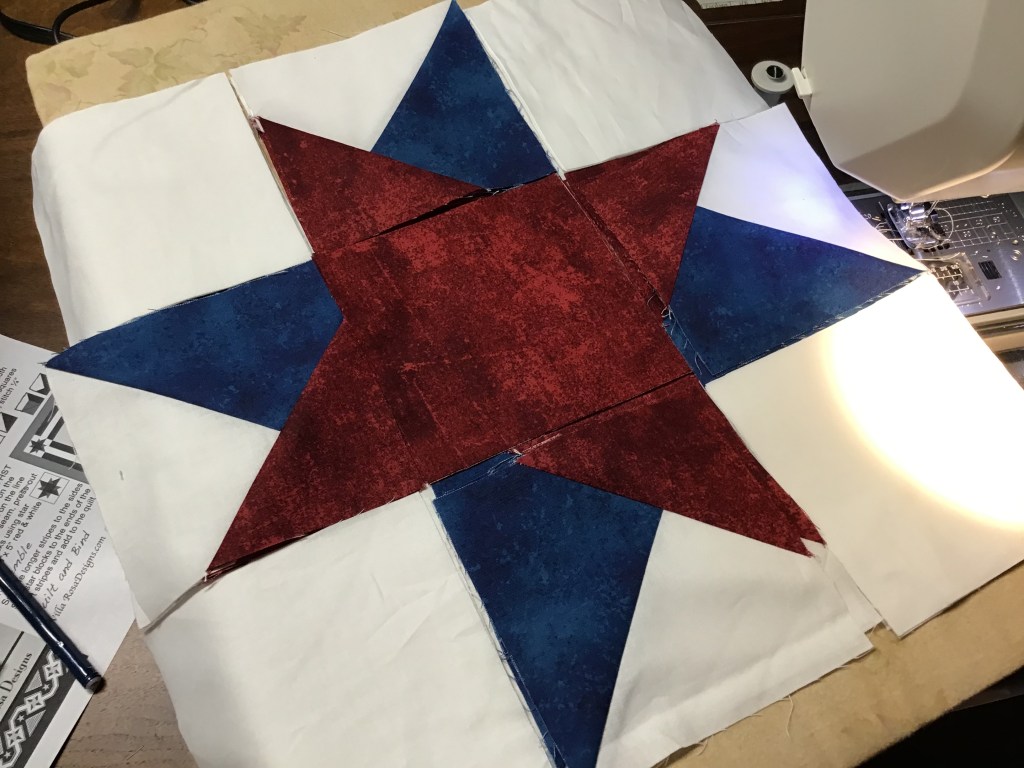
Step 10 Now it’s time to sew your Crazy Star block together like a Nine Patch. You will need 4 Star point units, 4 background squares for the corners, and a center print square.

Step 11 Repeat steps 2-10 to make a total of 4 Crazy Star blocks for the table runner.

Step 12 Then sew your Crazy Star blocks together into a row. You can twist and turn your blocks to see which star arrangement you like the best. Then layer your quilt, quilt it, and bind the edges. Don’t forget your label!

Well, that’s it for me. I hope this tutorial will make it a lot easier for you to put together your own Crazy Star Table Runners. Crazy Star blocks can be a lot of fun to make, so I hope you will give them a try.

Until next week —

Sew. Laugh. Repeat.

Always,

Tricia

Rose Cards · Tips and Tricks · Tutorials · villa rosa designs

VRD Daring Spirit Quilt Tutorial

Hello Quilty Friends!

Happy Thursday to you!

I hope you are having a great week — mine is just zooming by, hard to believe it’s Thursday already. Hopefully, you tuned in last week to our Designer Spotlight Interview with Sewl Sister’s Shankari Paradee, our newest designer here at Villa Rosa Designs. If not, you can find it HERE.

WOW! The weather has suddenly turned HOT HOT HOT here in northwestern Pennsylvania! WHEW! Typical July weather, I know, but I am never quite ready for super hot and humid. I live in a lovely green valley in the foothills of the Allegheny Mountains, but heat still happens.

You can’t see much of the hills because of all the green trees, but you can see a little bit to the right of the barn in the distance. Regardless, it’s beautiful country.

We’ve been having some very dry weather for the last couple weeks, though. Luckily we had a couple rainy days earlier in the week, which really helped all the plants and crops, but with the heat, everything is starting to droop again. I hope we get some more rain soon. I’ve been watering my little container garden, but the peppers look terrible and the cucumbers aren’t growing very fast. Argh! Rain, rain, rain………

The VRD Rose Queen, Head Elf, Grand Poobah, AKA “The Boss,” Pat, asked me if I would do a tutorial for Rose Card pattern, Daring Spirit.

The corner Star Blocks can be baffling and she gets a lot of questions about how to assemble them. I hope this helps!

You can buy the Daring Spirit Rose Card pattern HERE.

Daring Spirit Tutorial

This is such a great pattern! Of course it works well with ANY patriotic panel, but you could use just about any panel as long as you use coordinating fabrics. Maybe sometime, we’ll play around with other options besides patriotic, but for now, let’s focus on how to make the quilt.

On to the tutorial!

The first thing you need to do is choose your panel and your coordinating fabrics.

LOVE this panel!

Time to cut everything out. You don’t need to cut your panel to a specific size, but you should square it up and make sure all 4 sides are cut straight. Don’t skimp on this step. You might notice that your panel is skewed and doesn’t seem to be square. This is a very common problem with printed panels! What you need to do is pull the panel on both diagonals. Really. Hold each opposite corner in your hands and tug several times, pretty firmly. Repeat for the opposite diagonal. This should help your panel to straighten up! Repeat if you need to. Once you’ve gotten this step done, go ahead and trim the edges straight.

Okay, let’s measure our panel. Write down the length and the width, you’ll need these measurements later.

Time to cut our strips and squares, following the instructions.

Now let’s sew our side strips together and then sew them to the sides our panel.

There are 2 options here:

1. The pattern instructions call for you to make 4 sets of strips, then trim 2 sets to the length and 2 sets to the width. This works just fine.

2. But, I actually prefer cutting all the strips to the right length and width first (see the measurements you wrote down above). For me, this just makes more sense and I have found that the strips don’t get as curvy and wonky like they do when I try to sew long strips together and then cut them to size later. Also, the less you handle your cut pieces, the straighter they will stay.

Same result, different routes.

Anyway, here’s what the panel looks like with the side strips sewn on.

Yay! Time to make the corner Star blocks. I really like how these blocks are constructed — they are super clever and go together really well. Did you notice these stars are really Nine Patch blocks in disguise?!?

Layer a white and blue square right sides together (RST) with the edges lined up. Draw a diagonal line from one corner to the opposite corner. Pin if you like, I don’t. I use a Frixion pens and a 1″ wide ruler to do this step. I do it right at my sewing machine on my acrylic extension table.

Sew 1/4″ away from both sides of the drawn line. I draw a diagonal line on a pair of squares and then sew it on both sides of the line, then I repeat for however many squares I need to. It doesn’t seem to save time to draw all the diagonal lines before you sew them as the layers are going to shift on your way to your sewing machine, unless you use pins to hold them together.

Time to cut the squares apart on the drawn line to make 2 HSTs (half square triangles) or Triangle Squares. Cut all the squares apart on the drawn line.

Let’s press our HSTs open with the seam towards the blue fabric. Do you set your seams? This just means pressing your seams with the block closed before you press them with the block open. I was taught that it sets the stitches in the fabric which makes your seams nicer. I don’t know why it works, but it simply does. Don’t forget to take the time to trim off all the little ears that stick out beyond the corners. Don’t skip this step, because if you leave them there, they will skew your seams.

No, I hadn’t cut off the little ears yet when I took this photo, but you will notice in the next photo, the little ears are gone.

I think the next step is really cool! Layer a red square RST on a blue/white HST. Draw a diagonal line from corner to opposite corner (white to blue, NOT in the same direction as the seam for the HST, but across it).

Here’s where a lot of folks might get a little confused — this time, SEW ON THE LINE. We are making a “flippy corner,” not a HST.

I don’t know if you get direction-challenged like I do sometimes when quilting, but to keep myself from sewing on the wrong end or messing up my placement, I make a sample in order to see how I need to layer things and feed them into my machine. I have found that being left-handed sometimes makes it hard for me to manage directionality.

Moving on……once you have all your “flippy corners” sewn onto your HSTs, time to cut away the waste on the “flippy corners,” 1/4″ away from your sewing line.

We’re in the homestretch now! Go ahead and press your “flippy corner” HSTs. Set your seams, then press the seam allowance to the red.

That wasn’t too bad, was it????

Let’s sew our corner Star blocks together now, just like a Nine Patch block! I like to lay out my blocks on a small felt board (made from a flannel fat quarter, a firm piece of cardboard, and duct tape to hold the flannel taut). That way, I can sew the block together right at my sewing machine. Since I’m such a “Lazy Quilter” (this is what a lot of my pals call me, anyway), I actually layered all four of my blocks on my flannel board and I’ll just sew all 4 blocks together. Then I’ll press them after I sew them together.

And here are my four corner Star blocks all sewn and pressed. Aren’t they really pretty???

Now let’s finish putting the Daring Spirit quilt together.

Refer to the panel width measurement you wrote down earlier. Sew your top and bottom strips together and cut to this measurement. Now sew your Star blocks to each end of your strip sets. Make 2 — one for the top and one for the bottom. Press your strips carefully.

Sew your strips to the top and bottom of your quilt.

Quilt top DONE!

Now, quilt it. Bind it. And don’t forget your label!

Well, that’s it for this week. Stay cool!

Until next Thursday —

Sew. Laugh. Repeat.

Always,

Tricia @VRD