Hello Quilty Friends!
Happy Thursday to you!
Welcome to September! Now that fall and back-to-school is in full swing, we all need to turn our thoughts to MORE QUILTING! In order to help you get sewing again, today’s post is brimming over with quilty goodness.
First up is our brand new collection of September Rose Card patterns.
NEW September 2023 Rose Card Quilt Patterns
YAY! By now most of you know that I just love the Thursday after the first Friday of the month because that’s New Pattern Day here on the blog. So, here they are — Candies, Icing, Elsie May, Delphinium, and Jolie.
Every month the VRD designers never fail to create a new collection of wonderful quilt patterns. I am sew blessed to be part of this VRD family. Just looking at the new patterns every month, I get inspired and can’t wait to spend some quality time with my sewing machine.

You can get all 5 patterns HERE.
But wait……..there’s more! Here is my new September table runner, Carousel.
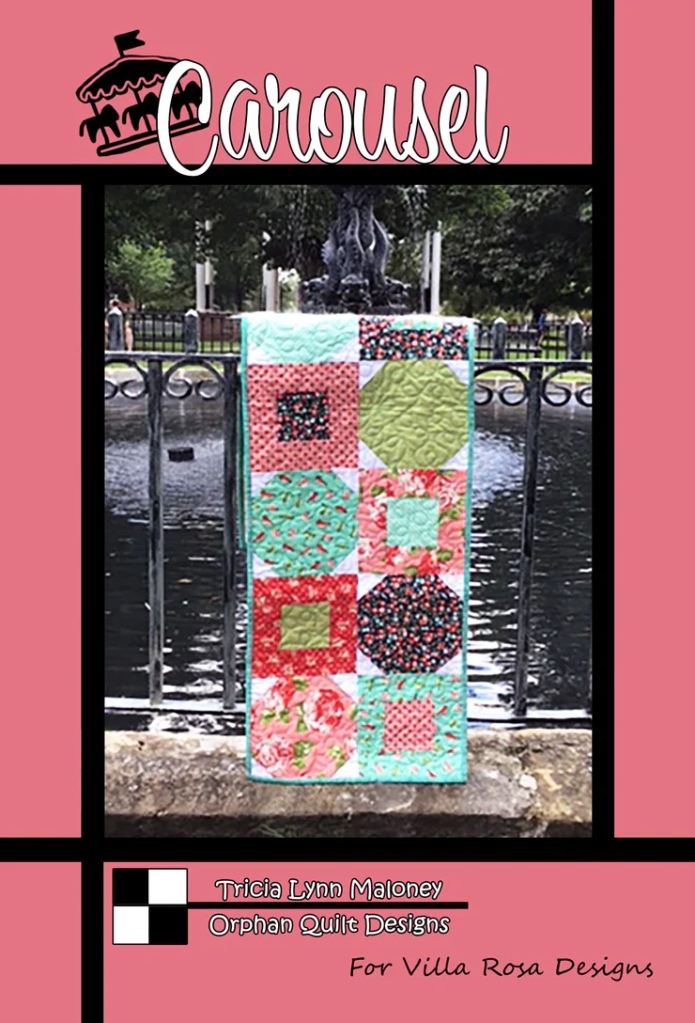
Get Carousel HERE
I’m not sure if you can really see the background fountain in the cover photo, above, but I took this photo at Diamond Park, a lovely tree-lined park in the heart of my hometown. The land for the Park was gifted to the city in 1795 (Meadville was founded in 1788) by the city founder, David Mead. This gorgeous fountain was then gifted and constructed in the park in 1863 by the Shippen family. It still stands and functions today, after being renovated a couple times through the years.

https://www.facebook.com/MeadvilleClub
Here’s a photo of the fountain with the park in the background. I didn’t even think to take any photos of the fountain itself when I was taking photos of Carousel. Silly me! Sorry for that. It truly is a beautiful fountain — and well over 150 years old.
As much as I’d like to keep talking history (another of my favorite things), we’d better keep moving or we’re never going to get to today’s tutorial. LOL!
Printable Fat Quarter List
Just this week, a new feature was added to the VRD website — a printable list of all the FAT QUARTER patterns in our VRD Rose Card catalog!
People and fabric companies have been asking for such a list for a while now. The fat quarter patterns on the list are thoughtfully organized by the number of fat quarters needed for each pattern — how ingenius! This awesome list will be updated monthly to include all new fat quarter patterns going forward, so the list will always be current and up-to-date. WOW!
You can find the printable list at the bottom of the website under Patterns (see the screenshot below). In fact, there is LOTS of stuff at the bottom of the website. If you’ve never scrolled down that far, you should. You might just be missing something good down there, like a directory of the tutorials on the blog, for example. Or maybe something important like Corrections.

you will find down there.
You can find the printable Fat Quarter Quilt List HERE.
Now on to our tutorial!
VRD Ebb Tide Tutorial
Keeping with our recent Fall fabric theme, I have another great VRD quilt tutorial for you today. You will want to add Ebb Tide to your collection of VRD Rose Cards if you don’t have it yet. So far, it’s the fastest and easiest VRD pattern I have made. It also looks great in any fabric, and can even handle large prints with ease. Ebb Tide will definitely become one of your go-to Rose Card patterns, if it hasn’t already.
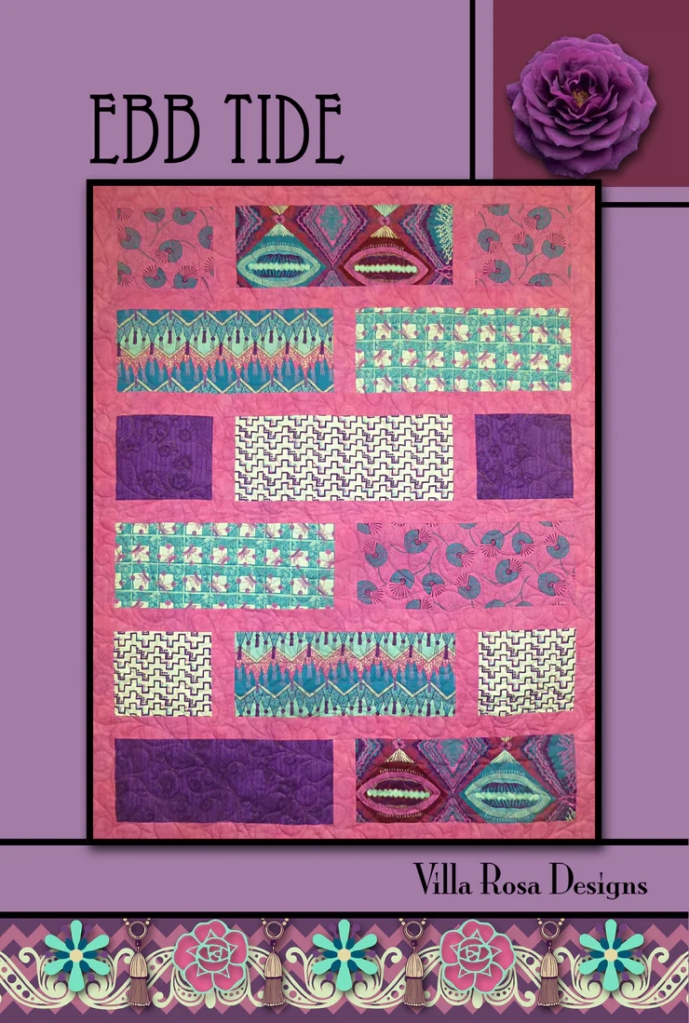
Get Ebb Tide HERE
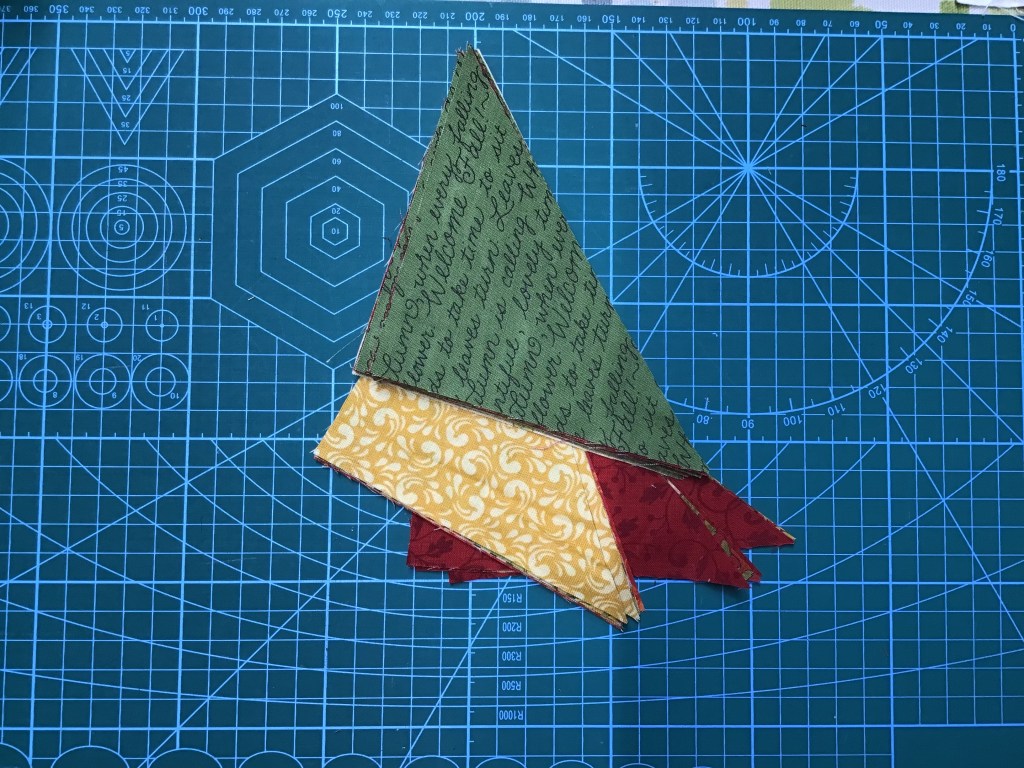
Today I’m working with Hoffman batiks again — more yummy luscious fall fabrics. Aren’t they beautiful??? This collection is appropriately called Shades of Autumn. Ask for it at your favorite quilt shop or retailer.
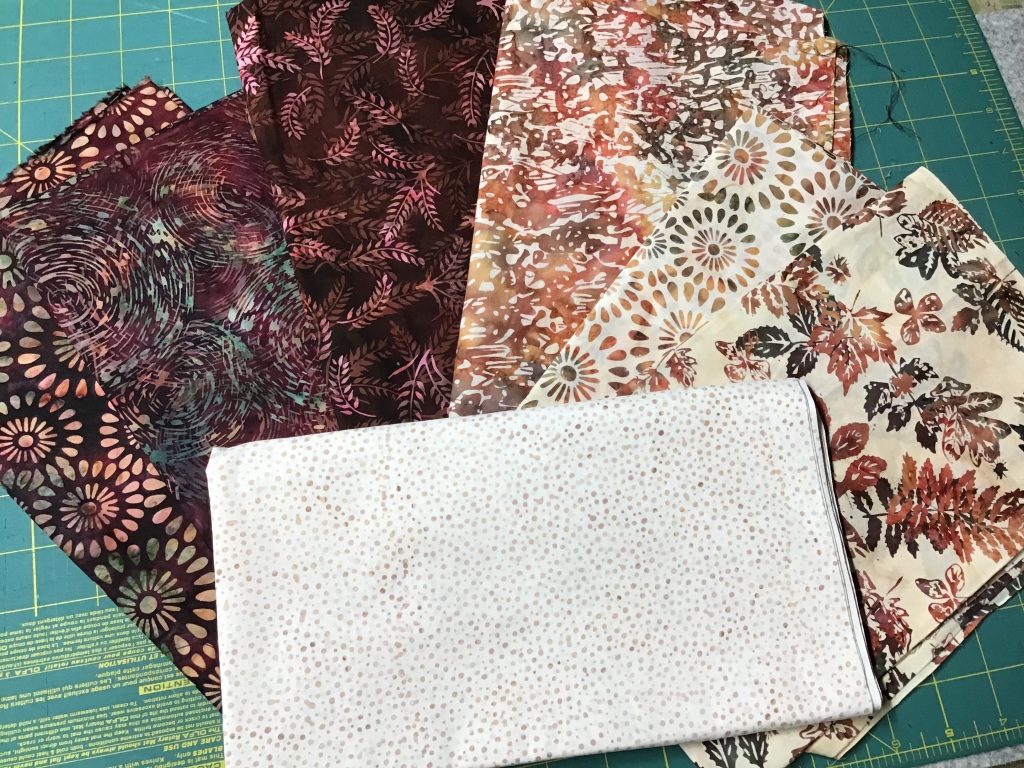
I want to point out a couple things about the fabrics I am using for Ebb Tide. It takes 6 fabrics plus a background. I chose 3 light fabrics and 3 dark fabrics. I liked the idea of a color-balanced quilt. Some other options might be to choose 6 medium or dark fabrics with a light background or 6 light fabrics with a medium or dark background. The fun thing about this quilt is that it really does go together lightening-fast and you’ll probably want to make more than, which will then give you more opportunities to play with different fabric options.
Let’s make Ebb Tide!
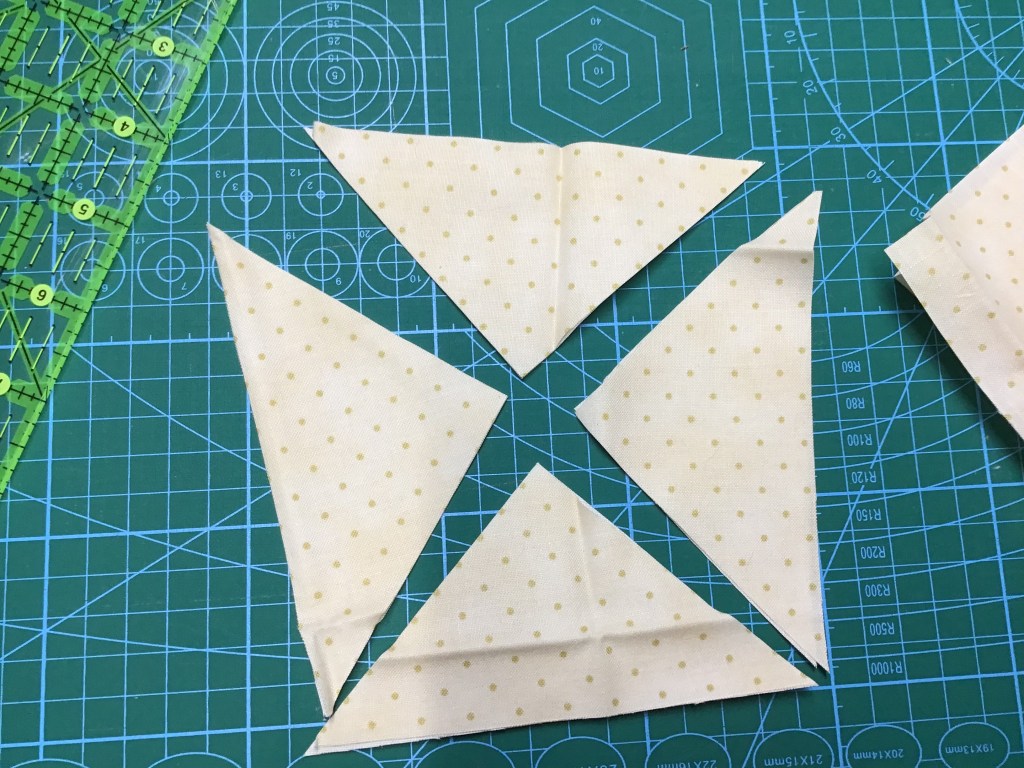
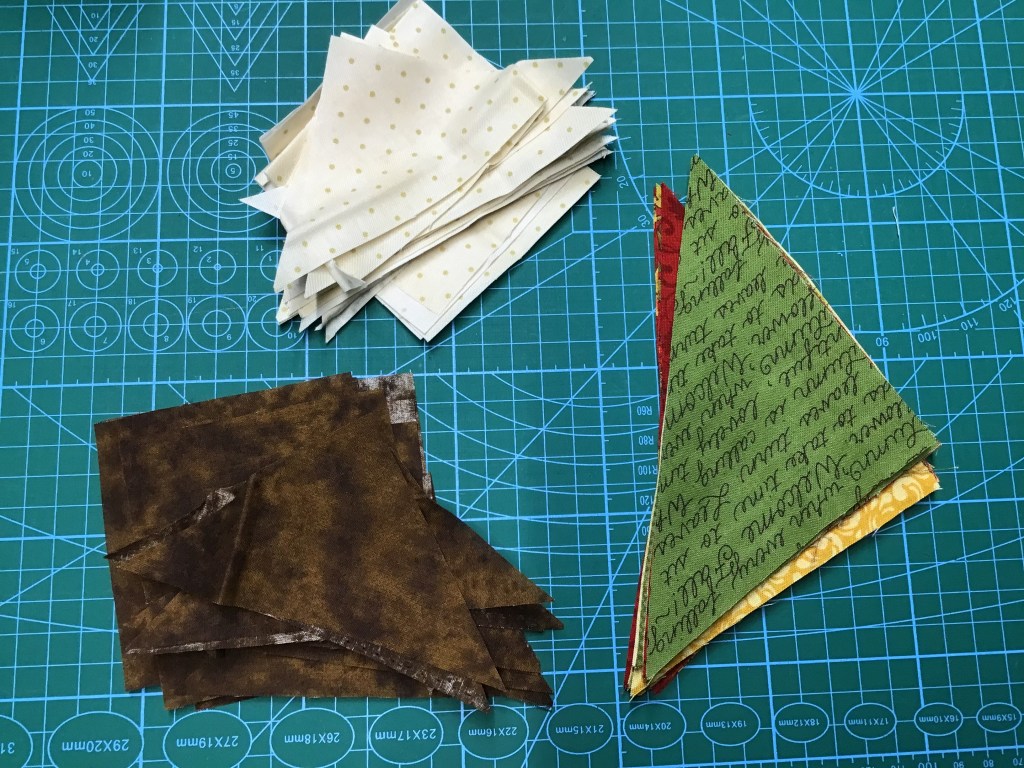
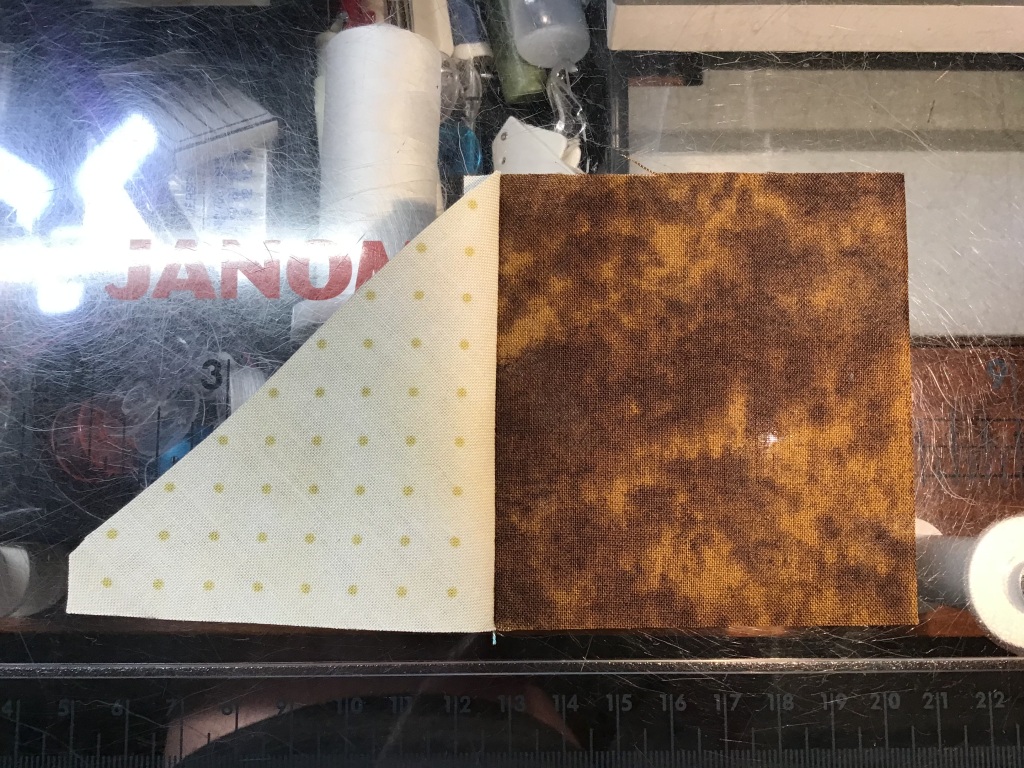
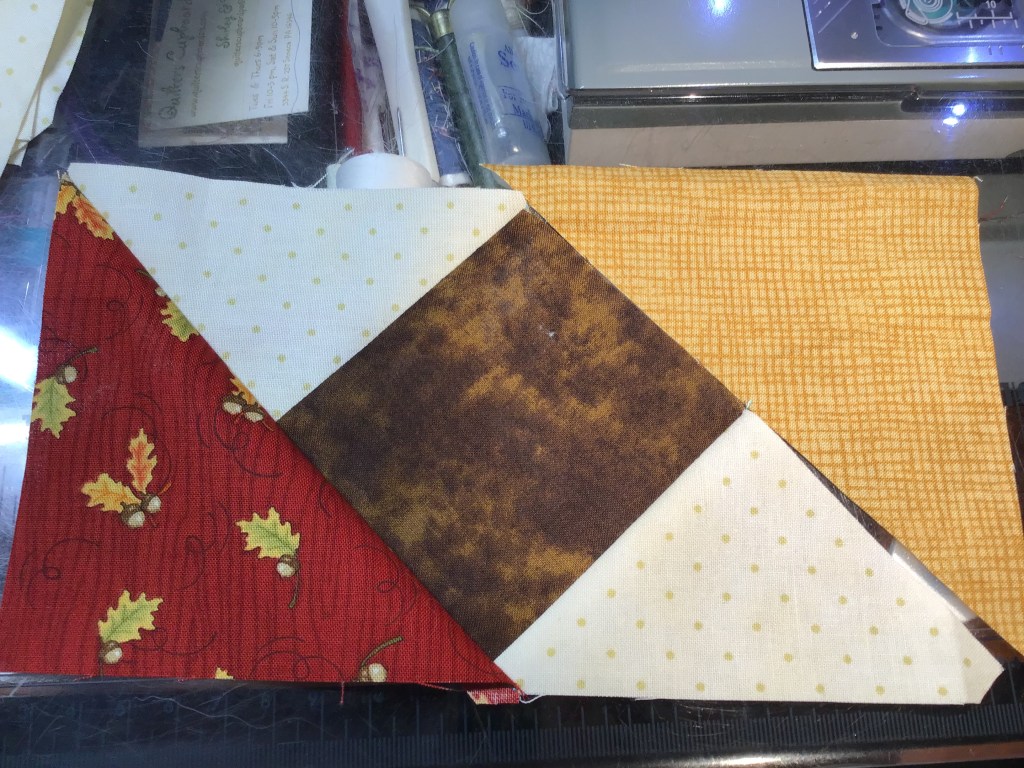
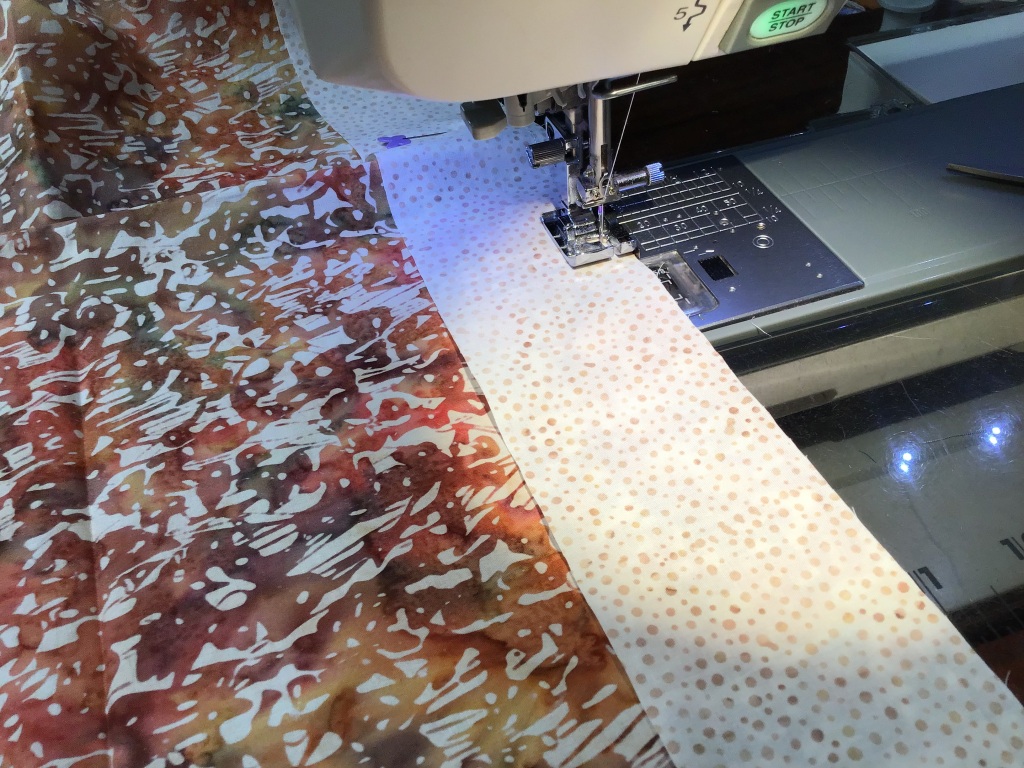
1. After you’ve gathered up your fabrics, it’s time to cut your pieces out. This doesn’t take very long, but keep in mind the pieces you cut out of the fat quarters will be large and you might need a bigger ruler. I used my 8 1/2″ x 24″ ruler to cut the rectangles out. This really helped to keep my cutting more accurate as I didn’t need to joggle multiple rulers around to get the wider strips. I also layered and cut three fabrics at a time, but don’t feel you have to layer your fabrics for cutting if you’re not comfortable doing that. Cutting one layer at time works just as well.
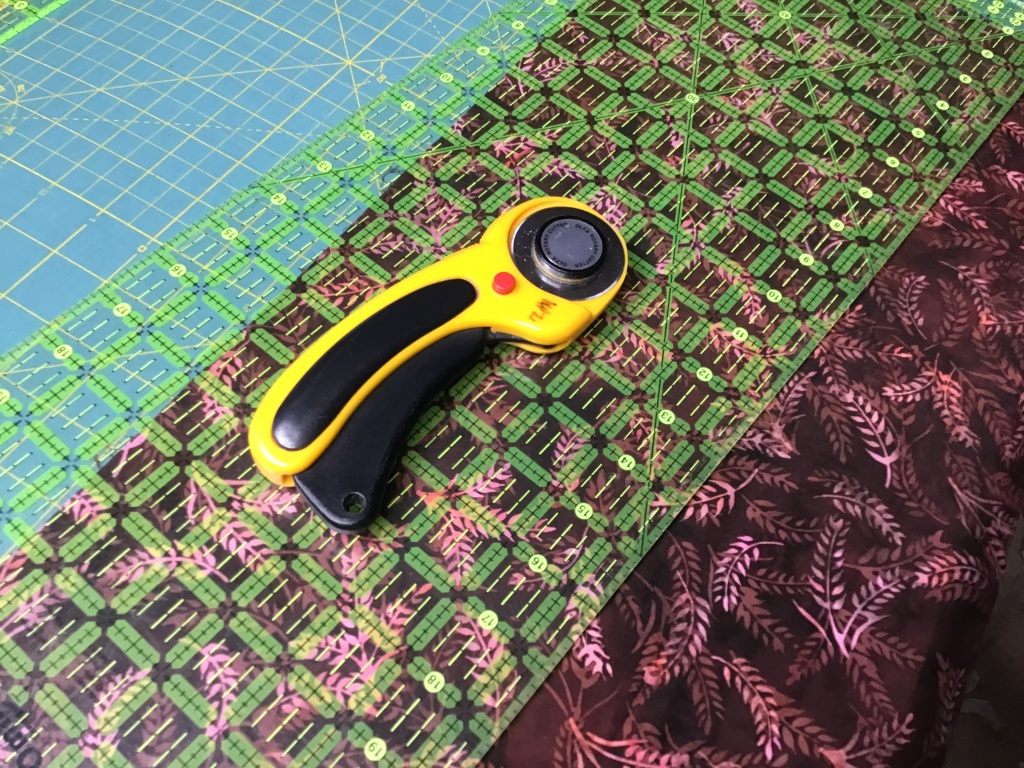
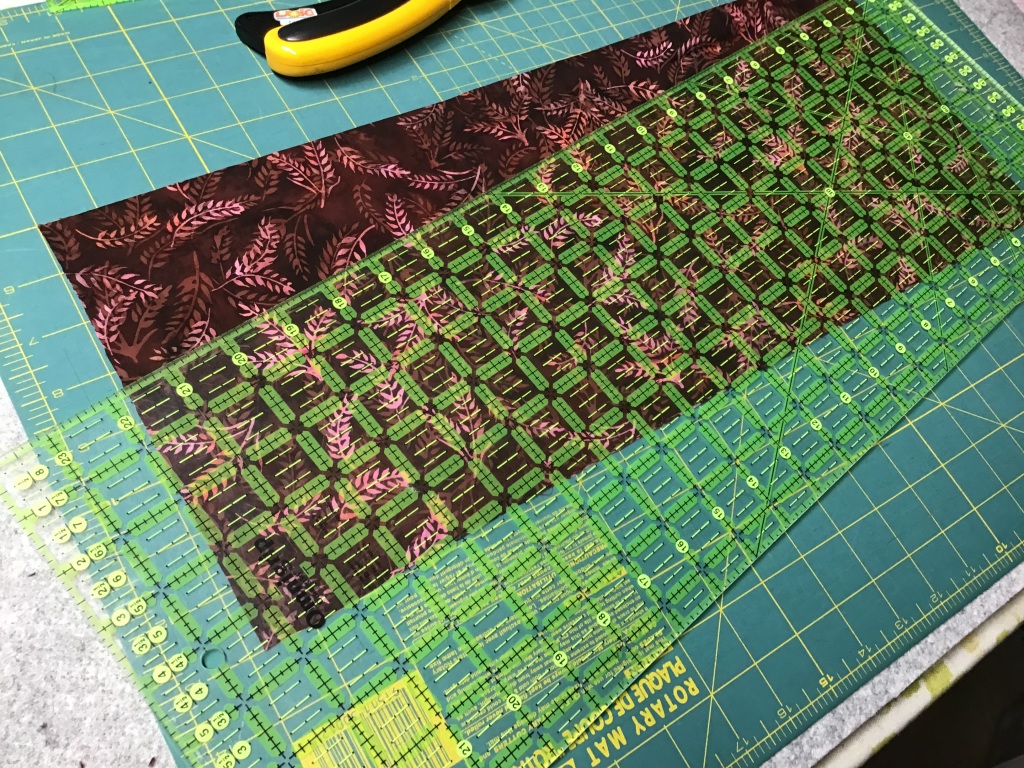
Don’t have an 8 1/2″ x 24″ ruler? You can find it HERE. You can find the my absolute favorite rotary cutter, the Olfa ergonomic cutter, HERE.
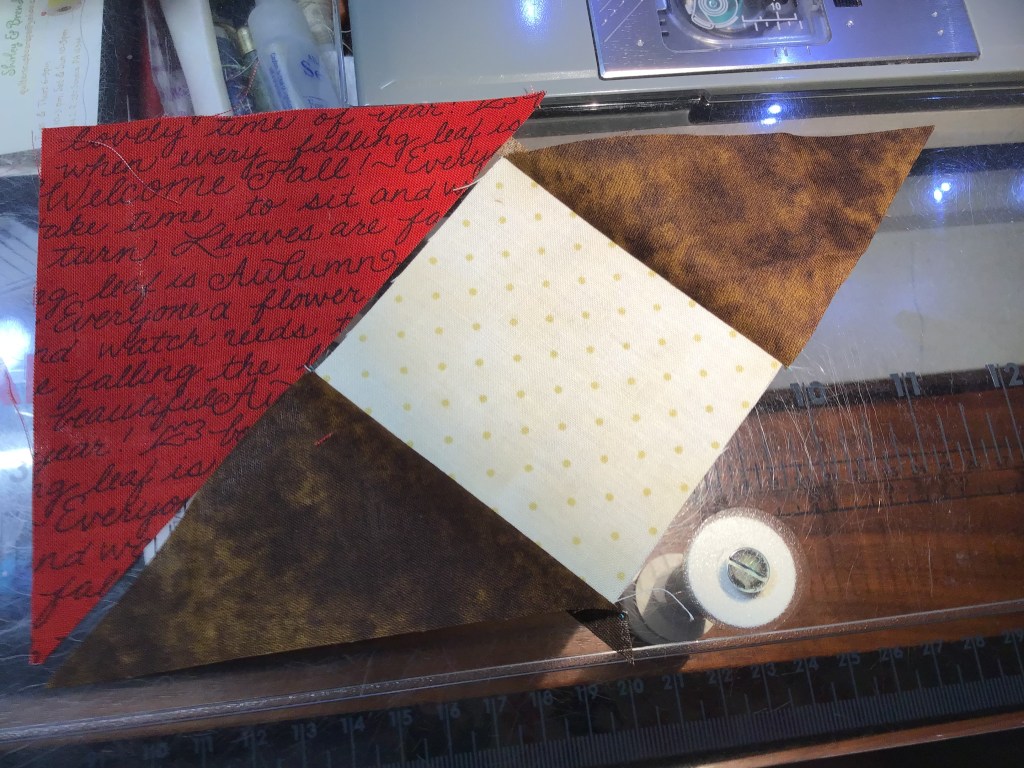
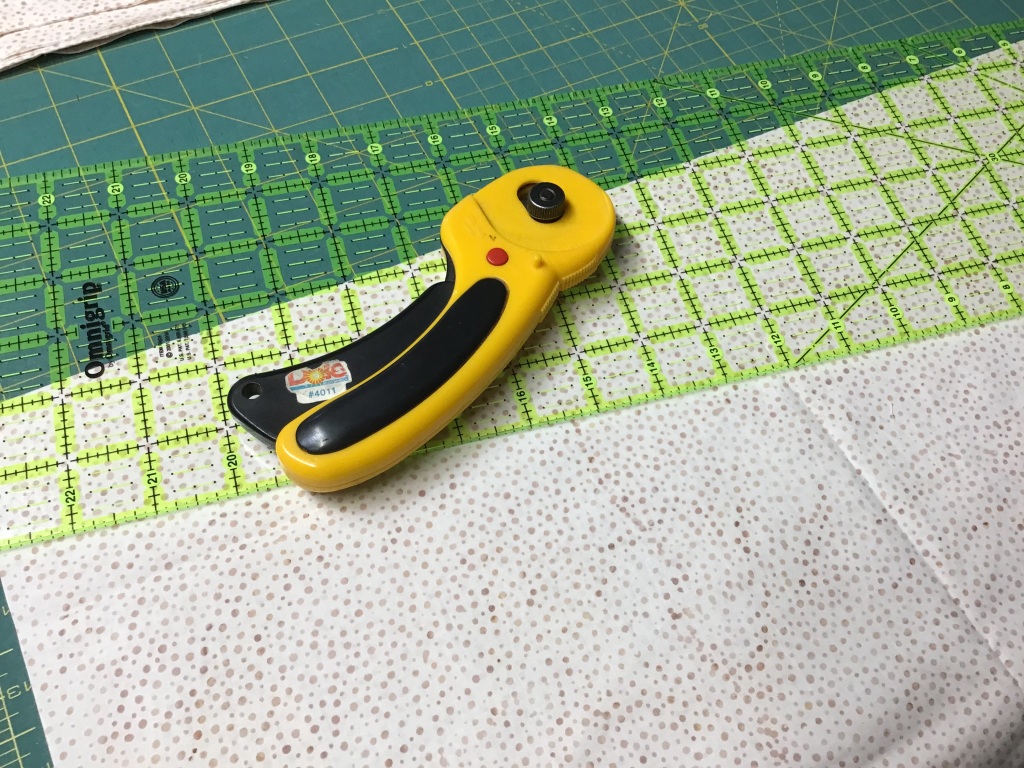
2. Now that my fat quarters are cut out, it’s time to cut the background pieces. For this part, I switched to a 2 1/2″ x 18″ ruler, which makes cutting my 2 1/2″ strips and rectangles a breeze. Don’t have a 2 1/2″ ruler? You can find it HERE.

3. I’m going to use my new handy-dandy design wall to lay the quilt out so I can arrange the fabrics before I sew everything together. The beauty of Ebb Tide is that because you aren’t piecing the quilt blocks, you can get right to laying out and arranging the entire quilt. Sew simple!
PSST! In case you didn’t know — my fancy-smancy design wall is actually a flannel-backed large rectangular table cloth clipped to the top of my fabric storage cubes doors with large binder clips. Here’s a great traditional plaid flannel backed table cloth that comes in multiple colors and sizes. What a HUGE improvement this has been for putting quilts together — so much easier than laying blocks out on the floor or on a bed to shuffle things around.
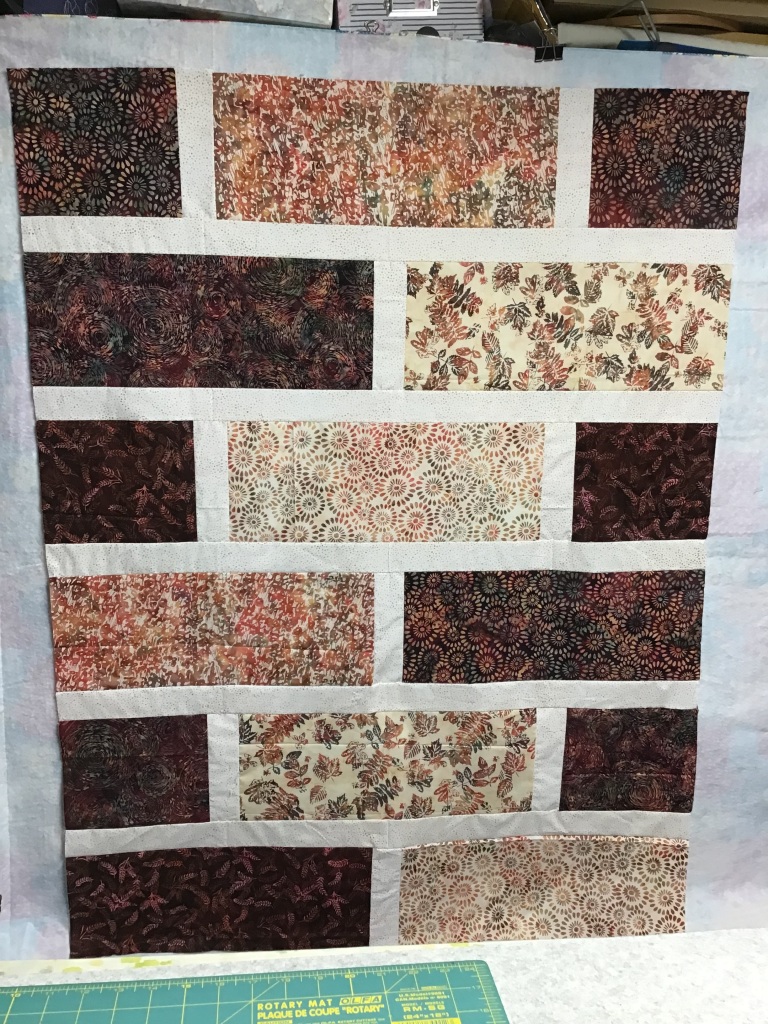
Here is my final layout for the Ebb Tide, not including the horizontal background strips in between each block row. What do you think of this layout? I really like how your eye travels down the quilt, following the light fabrics path, kind of like stepping stones.

4. Now that I’m happy with my layout, it’s time to sew the horizontal rows together. I just gathered one row at a time and took it right to my sewing machine (which is close to my flannel design wall). I sewed the large rectangles and the sashing strips together one row at a time, then I put the rows back on the flannel wall, so I didn’t get things mixed up as I worked.


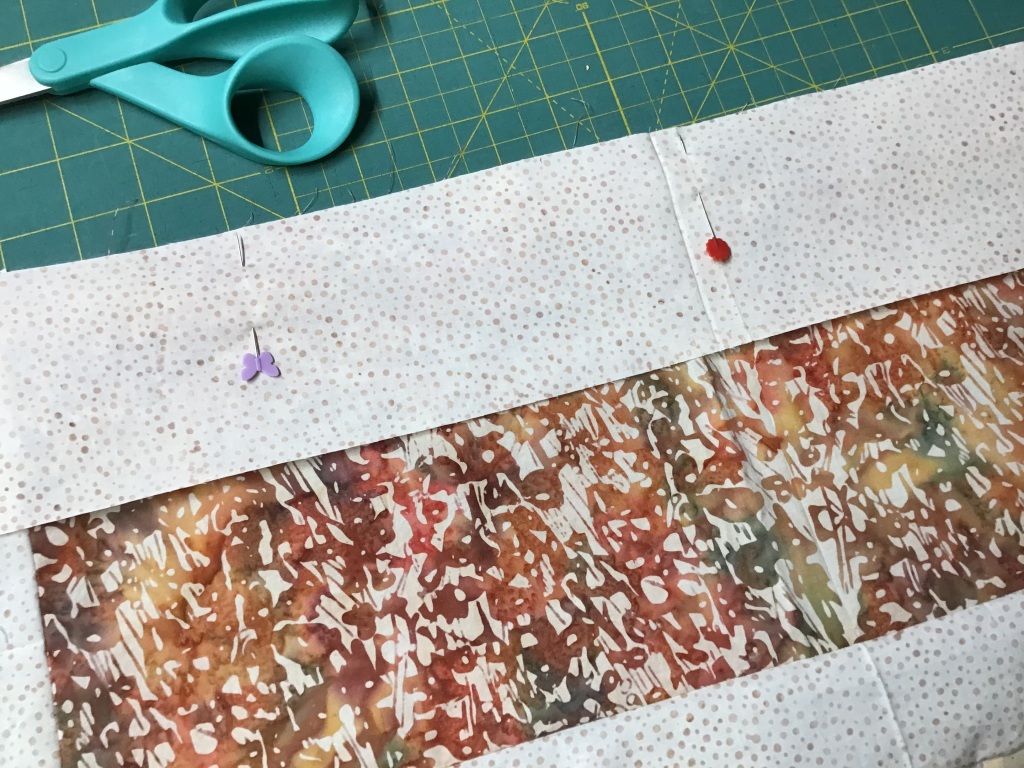
5. Now I’m ready to sew the long sashing strips in between the pieced rows. One last look to make sure I have the rows in the right order, and back to the sewing machine. I sewed the rows and sashing strips into sections and then sewed the sections together, that way I didn’t have to struggle with the growing quilt top with each row I added.

6. One more step and Ebb Tide will be done (or at least the quilt top will be done). Did you know that a quilt top is called a flimsy in quilt lingo? Isn’t that fun??? Sorry, I’m easily distracted — did someone say squirrel??? Tehehehe……..
Now that the quilt center is finished, let’s sew the top and bottom borders on. But before we do that, I need to cut my border strips to the right size. I like to lay my border strips across the center of the quilt, trimming the strips to the width of the quilt center. I use the center because the edges can sometimes stretch out. By cutting my strips to the center width, I can bring those stretchy edges back to square. I know this sounds weird, but trust me, it works.
Next I pin my borders to the quilt top. I start by matching the center of the border to the center of the side I’m sewing the border to ( I fold them in half to find the centers, making a crease at the true center). Then I match and pin the outside edges. After the edges, I straighten and smooth the quilt and border, adding more pins between the center and outside edges to keep everything in place while I sew. Finally, it’s time to sew them together, knowing that my borders will be flat and not waving all over the place.

7. The side borders are the last thing to sew to the quilt. They will need to be pieced so the border strips are long enough. For this quilt, I used a straight seam to sew the strips together, but sometimes I use a diagonal seam (I do this when fabrics are busy in order to hide my seam a little better).

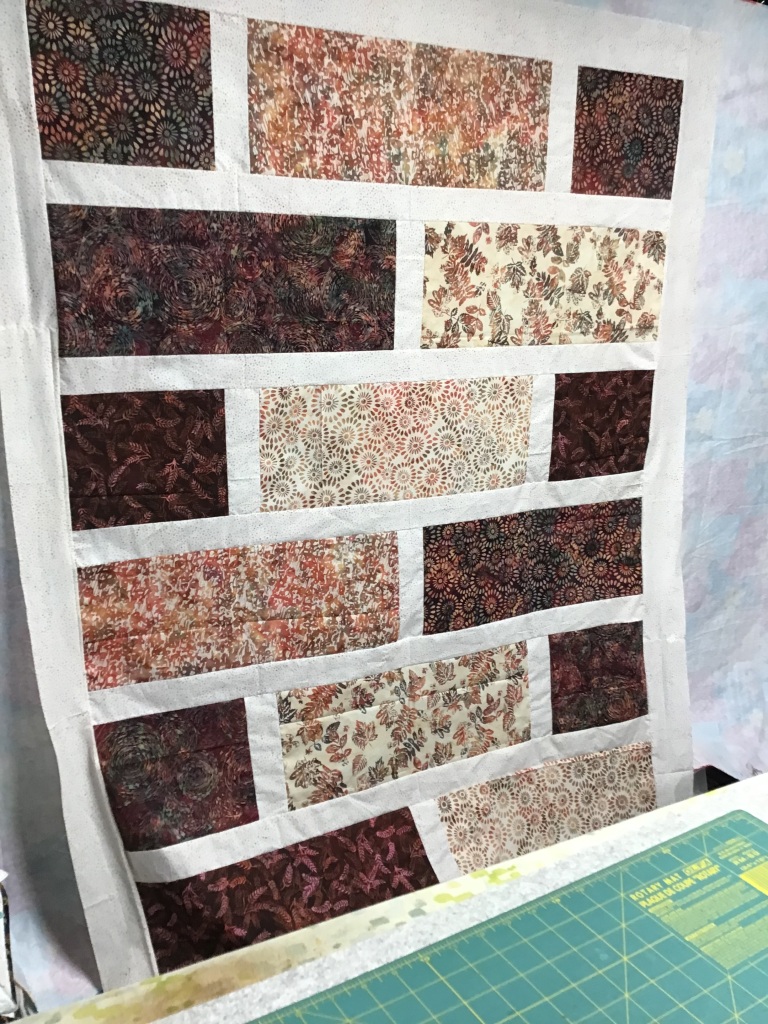
Yay! Ebb Tide is done. Eventually, I will back it with cozy fleece, machine quilt, bind, and label it. Hopefully sometime in the next 100 years. Ha!
By the way, I wanted to let you know that it took me about 2 hours to make the Ebb Tide flimsy — that included cutting the fabrics, laying it out, and doing the photography for this tutorial. I wonder how long will it take you to make it?
Here’s a “beauty” shot of my Ebb Tide flimsy — I really wanted to get a pretty picture with my Black-Eyed Susans. Sadly, the breeze wouldn’t cooperate with me, so the bottom of the flimsy kept blowing under the porch. Oh well…….

Thanks for sticking with me through the entire blog post, I know it was a long one, but I hope you enjoyed all of the quilty inspiration.
Take care and get quilting!
Until next week —
Sew. Laugh. Repeat.
Always,
Tricia