Happy November to you! We are now in the thick of the holiday season – are you ready? How many of you are participating in the 6 Quilts in 6 Week Challenge and getting a few handmade gifts completed for holiday giving? I must admit – not me. I’m just trying to make a dent in my VRD UFO quilt stack. I’m just so thrilled that I’ve already completed 5 unfinished projects. Yay me! I just need to keep it going after our lovely Challenge ends next week.
And our lucky Week 4 winner is ………….
Susan T.
Now let’s check out my Week 5 finish!
6 Quilts in 6 Weeks – Week 5
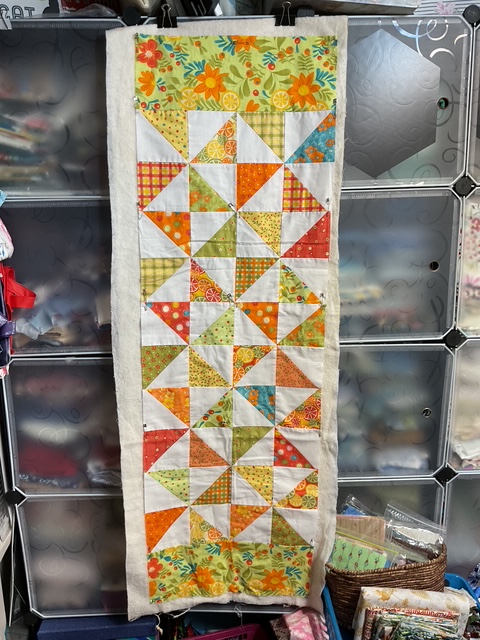
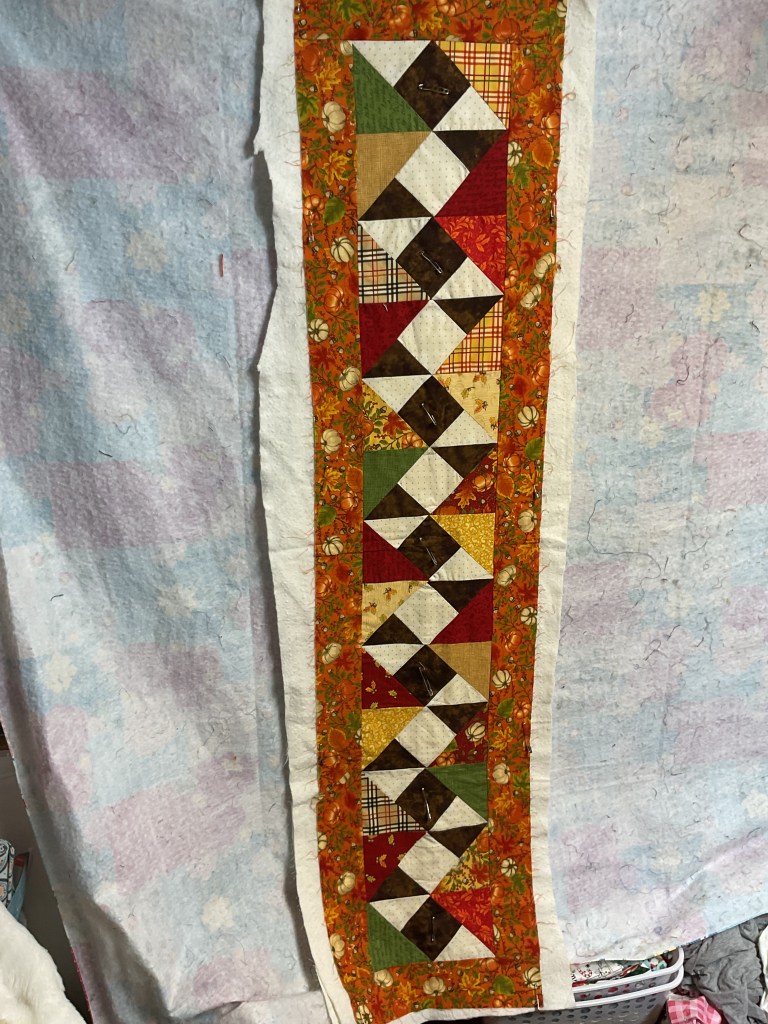
This past week has been a busy one, so for this week, I chose a table runner to complete. I had a fun summer version of Pinwheel Picnic ready and waiting. It was a sample I made for the VRD Table Runner a Month program my Friday Group (Hey Ladies!) did maybe 3 years ago.
Have you ever made Pinwheel Picnic? It’s a fun one that goes together quickly and finishes at 16″ x 48″. It uses 5″ squares, but you could also use your stash! And it’s easy to add extra blocks to make it longer if you wanted.
I used an older fun summery fabric collection with citrus fruit and flowers by designer Sandy Gervais.
My Before Photo –
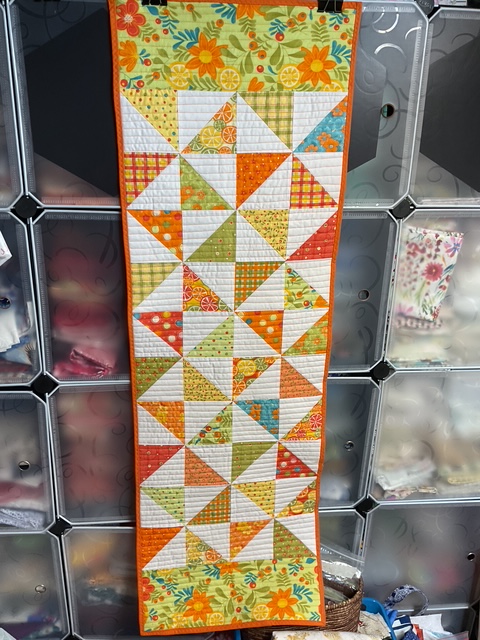
My After Photo –
I chose to quilt my runner with straight lines in orange thread about 1/2 inch apart. By no means are my lines actually straight, but I think it turned out pretty well. It will look even better once it’s washed and puckered. I stitched the quilting lines with my walking foot. The I used a solid orange for the binding and machine stitched it on with a yellow floral print for the back from my stash.
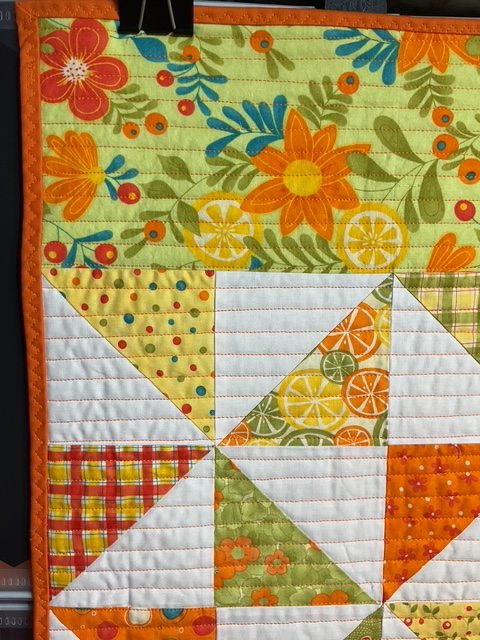
Here’s a close up of my quilting.
It really feels good to have 5 projects completed.
I can’t wait to show you what I found yesterday!
My Vintage Fabric Find
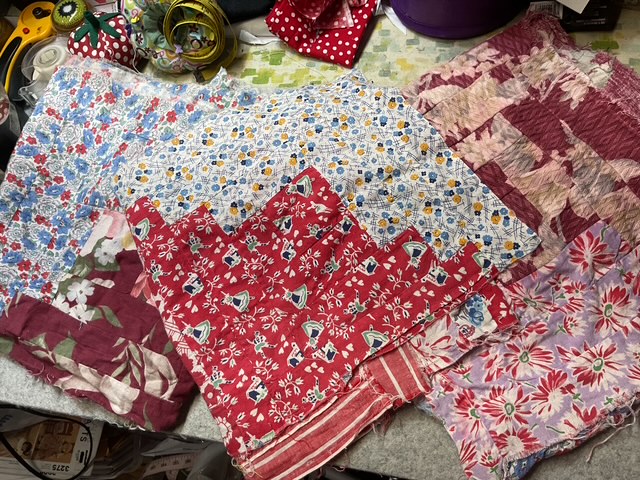
I connected to a quilter and antique quilt collector online who was relocating to Alabama. She had culled her antique textile collection before her move and I am the very lucky adopter of her leftovers. But these leftovers are fantastic! Let me show you what I got.
YIPPEE! When I emptied the plastic bags of goodies – they filled an entire laundry basket. Lynn told me she’d acquired her collection here and there, online and at antique shops, which is pretty much how my own textile museum – er, collection – has grown over the years. LOL!
There were lots of great quilt blocks, both in sets or as orphan blocks.
Some of you may know that my quilting roots started in auctions, museums, and antique fabrics long before I’d ever made my first quilt block. Back in 2010, after acquiring a local woman’s scrap bag, quilt blocks, quilts, and tops which spanned more than 100 years, I wrote my first quilt book, Orphan Block Quilts. It’s now out of print, but you can still find it as print copies or as a download.
During the pandemic, I found another love in textile history – feed sacks! So I was thrilled to find lots of feed sack pieces amongst my new textile finds as well as 3 sewn strips of Log Cabin blocks with even more feed sacks! Lucky me! Oh my! What treasures I am finding in my new basket of scraps!
I really enjoy documenting all the different patterns and designs of the feed sacks I find. I even started putting my examples into books (big surprise, right?). My first volume is available and eventually the second volume will be, too, as soon as I finish it.
Who knows? Maybe this new textile stash will inspire a new VRD pattern down the road. We shall see….
Well, that’s it for me today. I need to figure out which project I’ll be completing for next week’s Week 6 (and the last week) of our 6 Quilts in 6 Weeks Challenge. And then, I’m going to play in my new textile collection.
It’s hard to believe it’s Week 4 of our 6 Quilts in 6 Weeks Challenge already, isn’t it? How many of you have been following our VRD Project Finishers on our VRD Facebook page? I know I have! I really love how supportive everyone is on the VRD FB page, too, it’s a great place to hang out if you’ve never visited before.
I’m really hoping this “finish 1 project a week” concept will stick with me and I’ll continue after the Challenge is over because I literally have STACKS of flimsies (quilt tops) waiting impatiently to get quilted, bound, and finished. I think it would be a great accomplishment for me (or any of you) to shrink those stacks of unfinished projects before the end of the year.
Wouldn’t it be awesome to jump into 2026 with a plethora of new project ideas without the guilt of that sad stack of unfinished projects sitting there, judging us? Besides, finishing projects will make more room in our quilting spaces for new projects!
Okay, how about our Week 3 Challenge winner now (selected using a random number generator)?
Congrats to Robin M!
Prizes for our Weeks 1-3 winners will be in the mail shortly, so enjoy your quilty surprises sponsored by our good friends over at QT Fabrics. Thank you, QT!
Now we’re ready to jump into our Week 4 Challenge!
6 Quilts in 6 Weeks Challenge Week 4
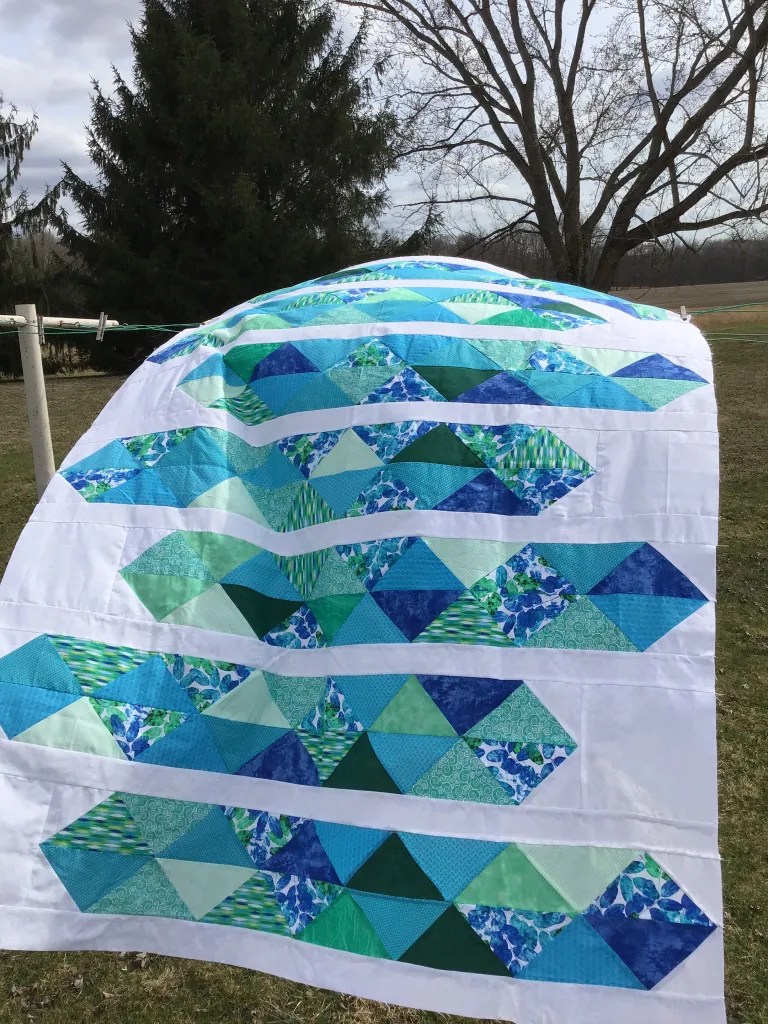
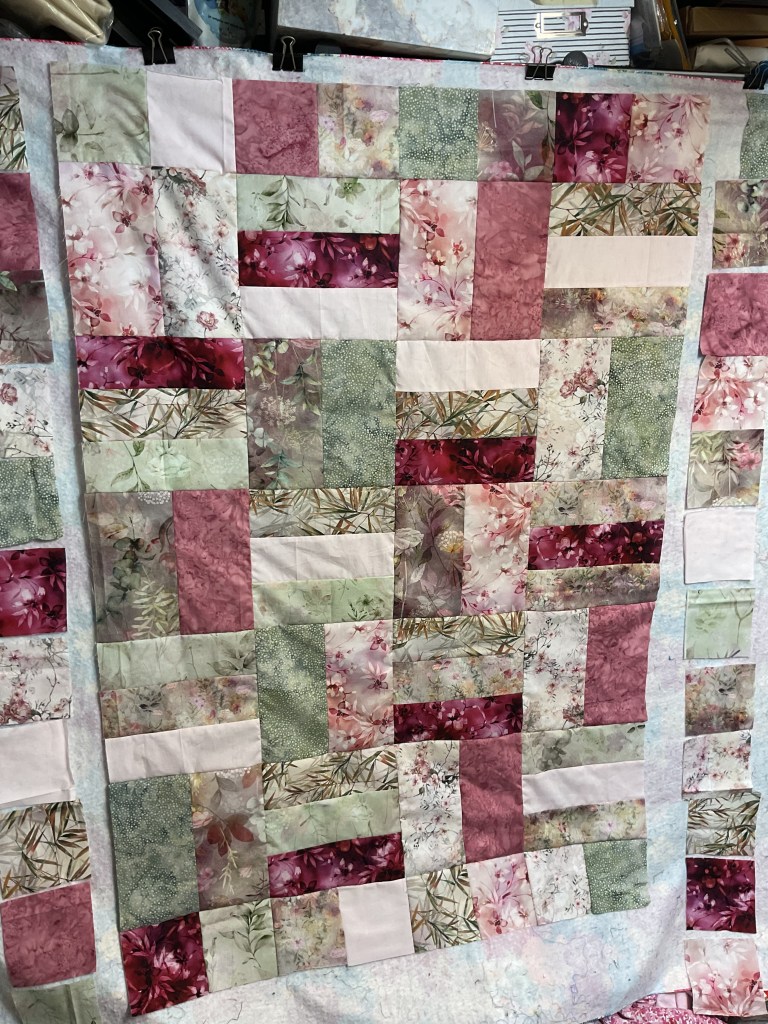
My finish this week was a really fun one – Helix by our talented VRD designer, Molly Cook. Have you ever tried this pattern before? Helix is fat quarter friendly and finishes at a nice 50″ x 66″. You could add a border all around to make it larger if you wanted to.
It is definitely a more challenging project – I would consider it more intermediate/advanced. There’s a lot of matching points and seam intersections in this one. The finished quilt is gorgeous, though, with its eye-catching geometry. A very cool quilt.
When I searched for this tutorial on the blog, I discovered – gasp! – it was from 2023! Huh. How time flies! You can find the Helix tutorial HERE.
If you’ve never made this one before, I really do suggest you check out the tutorial because all those intersecting points can be a challenge if you’ve never done them before.
Here’s my BEFORE photo:
Apparently when I took the photo back in 2023, it was a really windy day!
And here is my AFTER photo:
See the interesting plaid markings showing through the quilt (the sun was behind the quilt when I snapped the photo)? That is courtesy of the fun blue/teal plaid fleece on the back. Yep, another fleece-backed throw with no batting – just the way I like ’em! Fleece-backed throws are perfect all year around as they are lightweight yet cozy and soft.
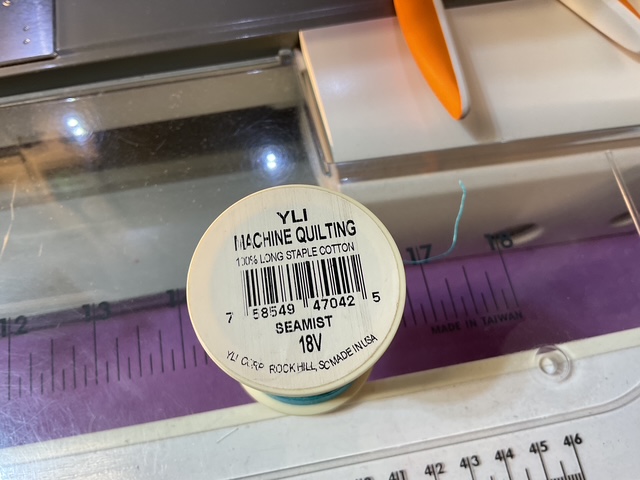
I’m really pleased with how this quilt turned out. The crisp white background was the perfect companion to set off all of the blues, greens, teals, and turquoises. I quilted it with my usual allover meander, but this time I used a very subtle variegated thread, Seamist by YLI. I thought, why not? My Helix has a lot of white space so I thought the variegated thread in blues and teals (I swear there’s a bit of green and lavender, too) would really compliment the quilt. I love how it turned out, but the thread color variations were very very subtle.
I found a blue fabric in my stash that had narrow white lines to give it a subtle plaid look for the binding. I machine stitched the binding on to save time and it definitely went better than last week – my corners were much neater on this one. And of course, I added my label dated 2025, even though I started the quilt in 2023. It’s the end that counts, not the beginning.
Yay! Another finish from my towering stack of UFOs. Hmmm. Which one will I finish next?
Quilting Cats
I’m going to change the subject in honor of National Cat Day (October 29th).
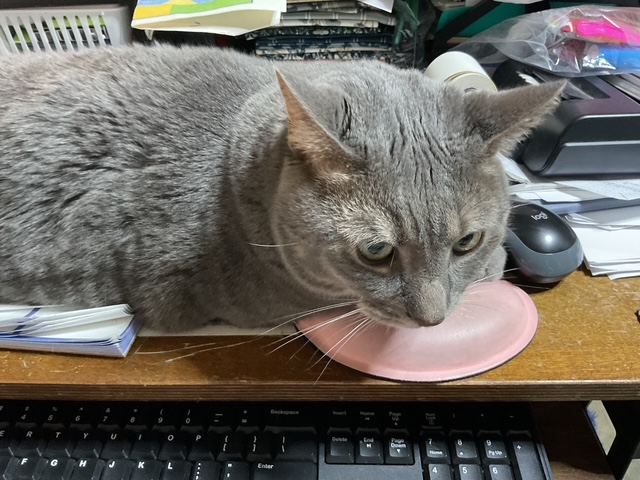
How many of you have a kitty partner in crime when quilting (or knitting, crocheting, garment sewing, crafting, etc.)?
Right now as I type this post, my furry buddy, Griffin (age 4), is sprawled across my desk. Only recently has he started doing that again. I love it, but sometimes we end up playing tug o’ war over my mouse pad area. LOL! He really really likes to stretch out pretty much across my whole desk top. Sometimes when I’m trying to use my mouse (which I do A LOT), Griffy will claim my mouse pad and mouse (and sometimes my hand) as his. Silly boy. Of course, as he sprawls over my desk, he knows I just can’t resist scratching him in his favorite spots. Smart boy!
Here’s my handsome Griffy. You can see that he has control of the mouse pad in the photo. ARGH! We take turns winning our game of tug o’ war. LOL!
I have another cat, Pip, but at 15, she doesn’t come downstairs to my studio dungeon anymore. She is our upstairs diva. Then there’s Bailly, my 3 year old Shih Tzu. She’s a heartful, but also a handful. And she thinks she’s a cat.
So Happy National Cat Day to you and your furry feline companions. Maybe they’ll help you (or hinder you, depending on their mood) get your project finished for next week’s Week 5 of our 6 Quilts in 6 Weeks Challenge.
See you right here next week for more VRD fun and Week 5 of our 6 Quilts in 6 Weeks Challenge.
How are you this fine October Thursday? My thoughts are definitely turning towards cozy quilts, good books, and hot tea right now as the October winds howl outside, swirling the leaves in mini cyclones around the yard.
I’ve been really enjoying our 6 Quilts in 6 Weeks Challenge and I hope you’ve been tuning in to the finished projects on our VRD Facebook page. If you signed up for the Challenge, please make sure to write that your before/after photos are for the 6 Quilts in 6 Weeks Challenge so we can all ooooh and ahhhh over your completed project (this also makes it easier for me to note who finishes a project each week during the Challenge).
I’ve heard that it takes about 30 days to build a new habit so if we finish 1 quilt each week for 6 weeks, hypothetically we are building a new habit. At least, that’s my hope, anyway. LOL!
Before we get much further, though, let’s all congratulate Mary Q as our Week 2 winner. Yay you, Mary! Keep up the great work!
I wonder who will be our Week 3 winner next week??? Maybe Y O U ????
6 Quilts in 6 Weeks Challenge Week 3
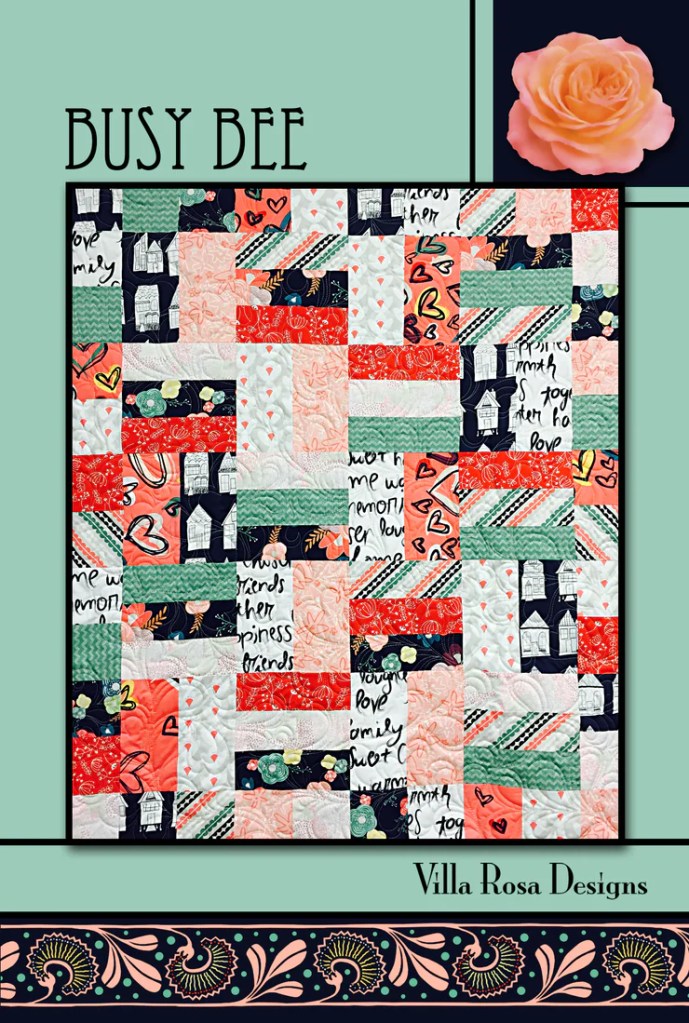
For Week 3, I chose to complete one of my recent blog tutorial quilts from last month – Busy Bee. I was sew in love with the Hoffman digital fabrics I used for my tutorial that I just had to finish this one as part of the challenge. Busy Bee is fat quarter friendly and finishes at 45″ x 54″, which is a nice kids quilt, baby quilt, or small throw. If you want it bigger, you can easily add more blocks or an outer border (or both).
If you missed the Busy Bee tutorial, you can find it HERE.
I backed my quilt with a lovely dusty rose textured fleece and free motion quilted the quilt with an allover meander design in a pretty pink thread.
I had a question recently on the blog about using fleece on the back of quilts, so I thought I’d address it here. I do not use batting when I use fleece on the back. I generally only use fleece on the backs of my throw quilts, although my quilty cuz, Kim, is using her fleece scraps on the back of her table runners and smaller projects, too. As for quilting a fleece backed quilt, I try to stay away from designs that cross over because the fleece is really stretchy and the quilt top isn’t (or at least it shouldn’t be) and crossing over lines potentially runs the risk of getting pleats and folds at intersections. I find wiggly line and meandering my designs of choice when quilting fleece backed quilts.
For more tips when quilting fleece, you can check out a blog post HERE from a few years ago.
The binding is Riviera, a Dot batik from our quilting partner, Hoffman , and it’s the absolute perfect finish. I stitched the binding on by machine again to save time. It turned out okay, but a few of my corners had minds of their own and were trying to do the salsa. Sheesh! I even had to rip one out and force it into submission. Corners can be so tricky!
Riviera Dot batik from Hoffman
Now to decide which quilt to finish for Week 4……..
FUN VRD Snack Mat Tutorial
Recently, Chris from Needlepointers.com reached out to us to share a really fun idea and tutorial using our VRD Snack Mat patterns and I’m thrilled to share it with you. If you haven’t ever checked out Needlepointers.com, you should! Chris and her daughter Annette have been sharing craft tutorials and projects for the last 20 years on their website.
If you’re like me, you’re on the lookout for fun and fast Holiday gift ideas because the holidays are almost upon us. Snack Mats, of course, are an AWESOME quick and easy gift idea and as a bonus, each pattern makes 2 Snack Mats. You can find all the VRD Snack Mat patterns HERE. Snack Mat patterns are available in both digital and print formats.
Thanks, Chris, for sharing this GREAT IDEA with us!
Have you made anything fun using any of our VRD patterns and put together a tutorial online? We’d love to see it.
Please note that if you are thinking about creating a tutorial of your favorite VRD project (or you’ve done one already):
You may show the front of the pattern, but never the back where the instructions are
Do not give any cutting dimensions or measurements out verbally or in writing as part of your tutorial
Please keep in mind that all VRD patterns are protected by copyright law. Thank you for kindly respecting our VRD designers, their creativity, and their hard work.
Well, I’d better get to work on my Week 4 Challenge Project. I’ll show it off next week. You’d better get yours going, too.
How are you this fine Thursday? Getting some quilts finished, I hope?
I’ve been having a great time checking out the finished quilts for Week 1 of our 6 Quilts in 6 Weeks Challenge. It’s almost like, in 1 week, I’ve completed a lot of quilts! Yay! But I didn’t actually have to do all the work. To me, that’s a perfect scenario!
So, if you finished a quilt for Week 1, pat yourself on the back and get ready to repeat this week!
And our Week 1 drawing winner is…………… Jill S.
Want to get in on the action? It’s not too late – just email me at tricia@villarosadesign.com to join for the remaining 5 Weeks of the Challenge.
I knew I wasn’t going to have a lot of extra time this week, so I decided to tackle one of my table runners UFOs for Week 2, Steppin’ Up.
Don’t have Steppin’ Up yet?
Get your digital pattern HERE or your print pattern HERE
My Before Photo (layered and ready to quilt):
My After Photo (Done and Done!):
I made this Autumn version of Steppin’ Up a few years ago when my Friday Quilt group did a whole year of VRD Table Runners. Of course, I made the top as a class sample and never finished it. I don’t remember the name of the collection anymore as the fabrics were left over from another project from way back when. Of course, if you want to make an Autumn version yourself, now’s the time to gather up a gorgeous selection of warm fall fabrics.
I backed it with a neutral backing fabric and a layer of thin cotton batting. I free motion quilted it with an allover loop design (one of my absolute favorite designs which also quilts up really fast – you can see how I do loops HERE). I machine stitched the brown tonal binding on and guess what – it actually turned out pretty well. Last, of course, I added a label.
Have you ever made Steppin’ Up? It’s a really fun one if you haven’t. You can actually arrange the blocks in a lot of different ways to make your runner your way.
So, what are you finishing for Week 2? You have until Friday at midnight to email or post your before/after photos of your Week 2 projects to be entered in our Week 2 drawing.
October VRD Accessory Challenge
Speaking of my Friday group, this past week for our October meeting, we had a group challenge reveal – VRD Accessory patterns. Have you ever made any of our really fun Accessory patterns? You can find all of them HERE. I’m excited to tell you that we are going to be adding NEW Accessory patterns going forward. In fact, I’m working on a few ideas right now.
So, my quilty pals rose to the October Accessory Challenge. Check out their makes, below. Of course, they all rolled their eyes at me when I started snapping pictures because they just knew I was going to show off their projects on the blog. Sorry, not sorry…….
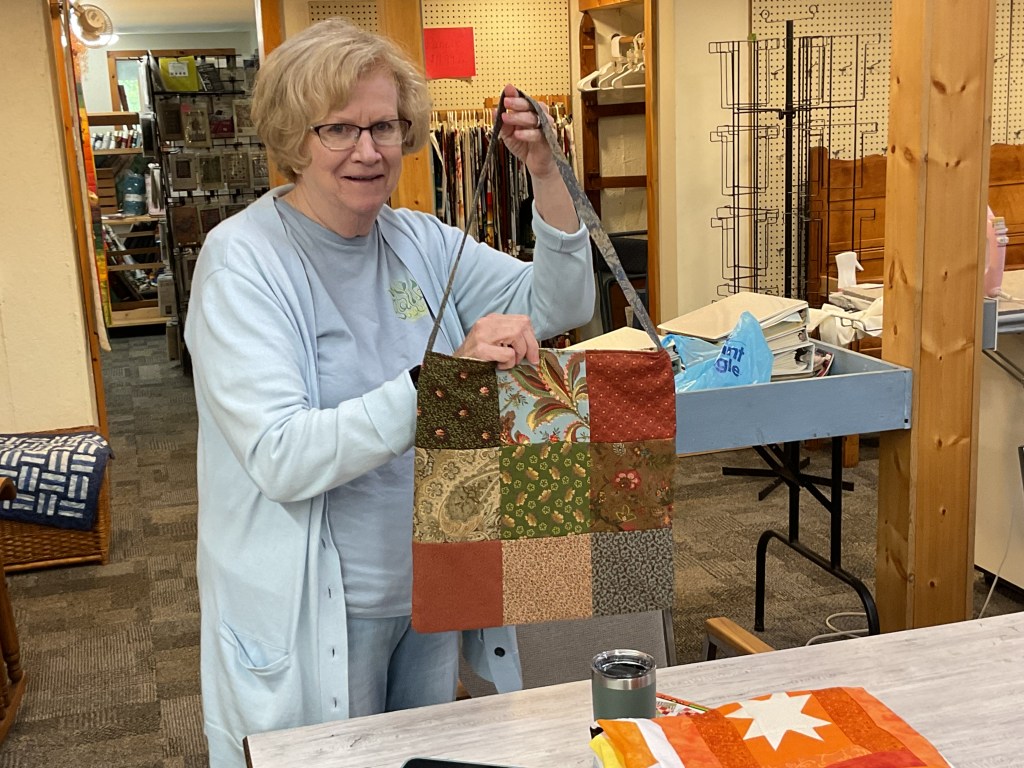
Gaynel made the Olivia Jane pattern. Gaynel discovered that Olivia Jane was the perfect tote to hold a 12”x 12” rotating cutting mat.
Mary Lee made Catrina Jane, a 2 Pocketed VRD Rose Card Pattern Keeper. You can’t tell in this photo which shows the inside, but her outside fabric is a really cool African batik, which is more like an embossed fabric than the usual batiks we are familiar with.
Robin made the Dinner Party Place Mats. She did alter them a bit by making 4 identical mats instead of swapping the fabrics in each place mat. Find the digital pattern HERE or the print pattern HERE.
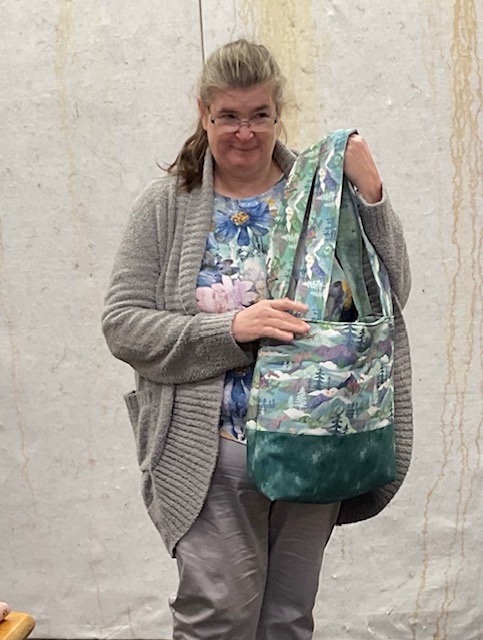
Donna made not only 1, but 4 tote bags using the Tabitha Jane pattern. Here is the one she made herself. The other 3 will be holiday gifts. Good thinking, Donna!
There would no way at all I could choose a favorite from their projects because in my book, they are all winners because they finished their projects, so everyone got to pick out a fat quarter as a prize.
I hope these fun Accessory projects will inspire you to make some of your own – HEY! You could even make some as part of our 6 Quilts in 6 Weeks Challenge – we have 4 more weeks to go yet. You could make some great holiday gifts, or maybe a little something something for yourself.
Okay, time to get back to work on your Challenge projects. And mine too.
There’s a lot to do on today’s blog post, so let’s just jump in with both feet!
First, I want to congratulate our very own Cook family – Molly, Heidi, and mom Tamara – on taking on the former Villa Rosa Designs physical quilt shop. They’ve renamed the shop 3 Aunts Quilt Shop and you can find it HERE. Please extend them your congratulations!
6 Quilts in 6 Weeks Challenge
I am absolutely THRILLED that 20 intrepid quilters have joined in with me for the 6 Quilts in 6 Weeks Challenge. Please post your before photo (unfinished quilt top or pile of fabric with the pattern if you’re making new projects) and after photo (completed project, quilted and bound [if you are doing Accessory projects, it may not actually have quilting and/or binding and that’s okay]) on our VRD Facebook page or you can email them to me at tricia@villarosadesigns.com if you prefer.
Your before/after photos must be on the Facebook page or emailed to me by each Friday at midnight EST during the 6 Week Challenge.
If you have any questions, please drop me an email.
All right! Wanna see my finished project for Week 1????
Here is my Before photo:
And here is my After photo:
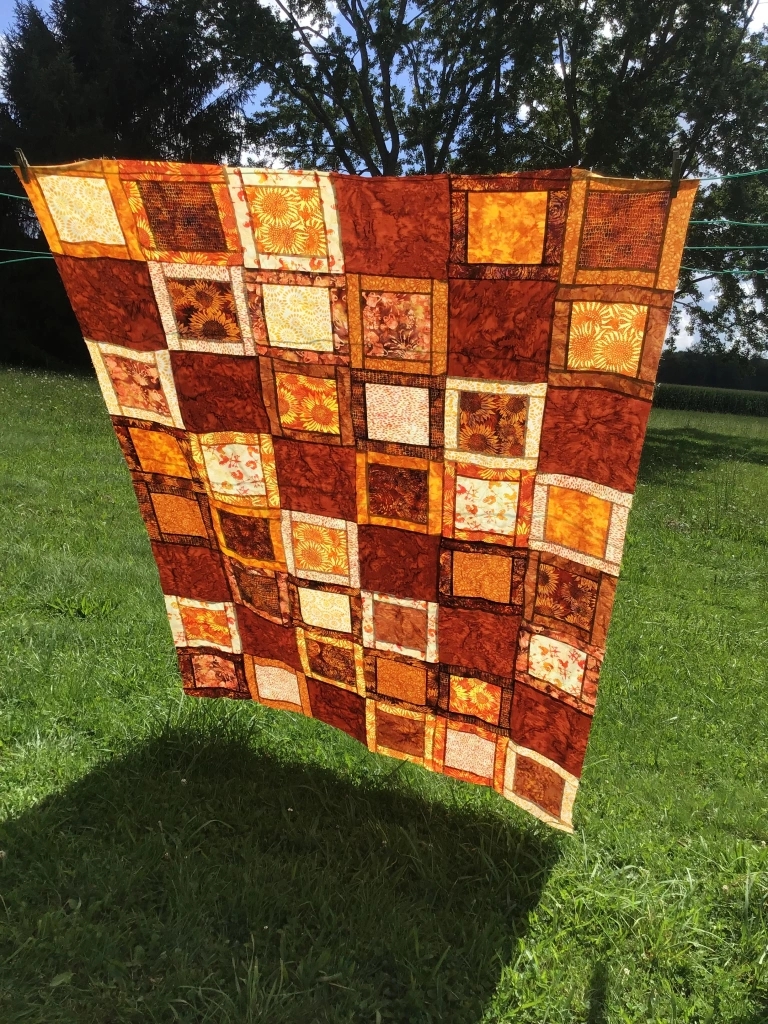
This VRD quilt is the Alassio pattern. I did this one as a tutorial in August 2023 (when I first wrote this sentence I thought it was from last year, then I checked and found out it was from 2023 – yikes!) and it went into my UFO (unfinished Object) pile. I thought it would a great one to start out the Challenge because it has a lovely warm fall vibe with the yummy batiks from Hoffman. I backed the quilt with cozy orange fleece and free motion quilted it with an allover meander design. I added the binding and machine-stitched it down. I’m not the greatest at finishing binding by machine, but it sure does go a lot faster than doing it by hand. I then added my label to the back. As this isn’t one of my patterns, I added VRD and the name of the pattern to my label along with my name, city and state, and the year the quilt was finished. Even though I started it in 2023, I didn’t complete it until now, so 2025 goes on the label.
I’ve already picked my project to complete for Week 2, but you’ll have to wait until next week to see it.
Now it’s your turn – post your photos before midnight. I’ll keep track of everyone who has posted (or sent me) their before/after photos for each week. Then I’ll randomly select that week’s winner from those folks who completed their weekly challenge. Please bear with me as I line up the prizes as this past weekend was International Quilt Market and this week is Festival so many of the companies I work with are a bit preoccupied right now.
If you don’t post a before/after photo for a weekly Challenge or you miss the deadline, your name won’t go into that week’s prize drawing. And that’s okay because life gets busy. I’m not kicking you out of the challenge – just make sure to post your photos for the next week to get your name in the next week’s drawing. Easy peasy.
I want to encourage all of you as well as myself to finish projects, not to stress about them.
I hope I’ve answered any questions you might have had. If not, feel free to email me.
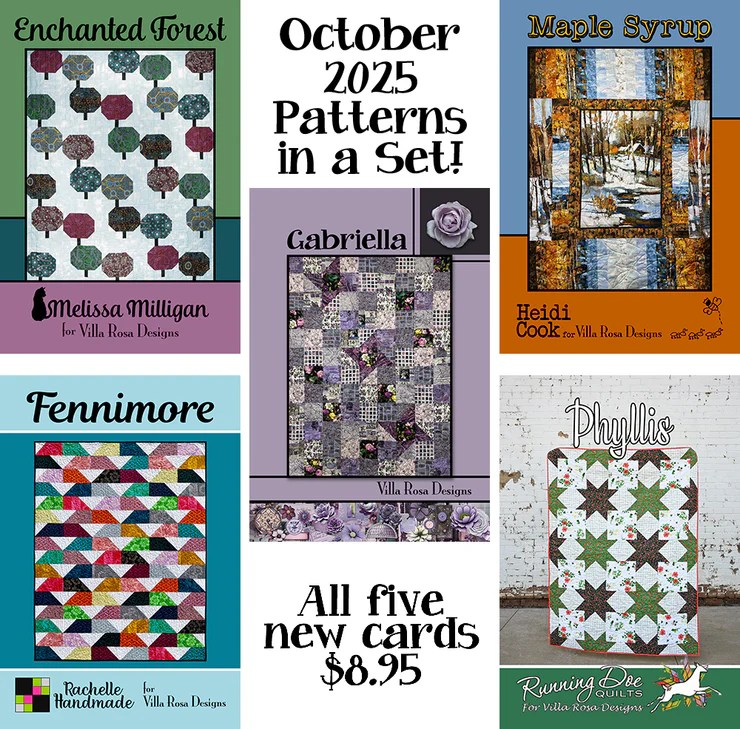
Now let’s take a look at the new October quilt patterns!
NEW October VRD Rose Card Quilt Patterns
As many of you already know, I just love the Thursday after the first Friday of every month because I get to show off our new patterns! If you’re new to Villa Rosa, you might not yet know that we offer at least 5 (but sometimes 6 or even 7) NEW patterns each and every month. It’s crazy, right? And nobody else does that, except VRD.
Enchanted Forest is Melissa’s new pattern just in time for Fall Quilting……or Spring…….or Summer. Her “happy trees” are right at home in any season! You can find a kit at Molly and Heidi’s newly named 3 Aunts Quilt Shop, HERE.
Gabriella is Pat’s newest Tim Holtz Palette quilt and features 3 lovely stars amongst the lavender and purple prints. 3 Aunts Quilt Shop still has kits available HERE.
Maple Syrup is Heidi’s latest foody quilt featuring a lovely panel and side borders of a coordinating printed stripe. 3 Aunts has kits in stock HERE.
Fennimore is Rachelle’s new modern pattern for October. It features a very interesting block. You can find Fennimore kits at 3 Aunts HERE.
Phyllis is Catherine’s October pattern and shows you a unique way to make the large star blocks. You can find 3 different kit options at Catherine’s shop, Running Doe Quilts, HERE.
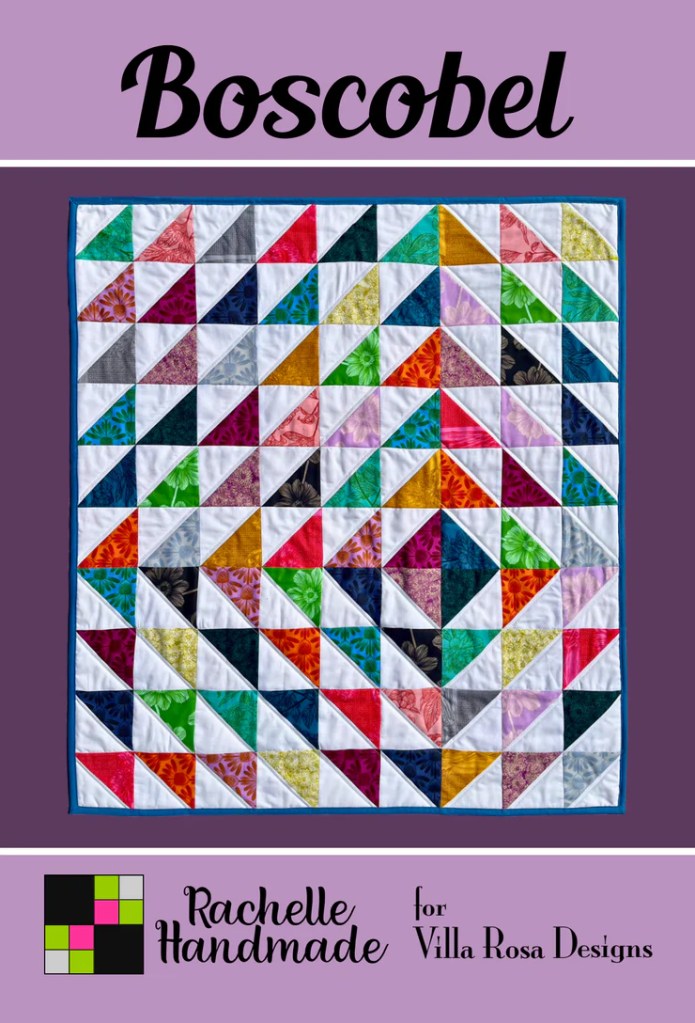
There’s one more quilt for this month and it’s a real fun one!
Boscobel is a small or wall quilt sized project by Rachelle. You can use the cut off triangles from Fennimore for this project or your favorite stack of 5″ squares. This small quilt would also make a great table quilt!
Yes, you probably noticed that yours truly did not have a new pattern for October. You’ll just have to wait for November!
I wanted to let you know that I’m still reading book 5 in the Quilt City series. The story is moving along swiftly, but I just haven’t had a lot of time to read this past week.
Well, it’s time for me to get back to my Challenge project for next week. Happy quilting to all of you!
See you right back here next week for more VRD fun and Week 2 of our 6 Quilts in 6 Weeks Challenge.
I hope you all enjoyed the last month or so of new VRD quilt tutorials to help you jumpstart your Fall quilting. I certainly did, but now I’ve added 6 more quilts to my unfinished quilt stack. Oh no! I think that stack is going to topple over any day now, unless I do something quick! How about you? Do you have a stack of VRD quilts waiting to be finished?
If you missed any of the recent VRD tutorials, you can find the links below:
With my teetering stacks of unfinished quilt tops (or flimsies), I decided some kind of serious intervention was required. What if I challenge myself to complete one quilt a week? What if I make myself accountable by posting a before and after photo each week?
It sounds a little daunting to me, but I’m up for a new challenge this fall. After all, in the last 6 weeks, I made 6 new flimsies, so maybe I should make a plan to finish them, right?
Now to decide how many weeks I think I can manage…….hmmm, how about 6 weeks? Sounds reasonable, I think. I hope. Fingers crossed.
The Dates:
Week 1 – 10/9
Week 2 – 10/16
Week 3 – 10/23
Week 4 – 10/30
Week 5 – 11/6
Week 6 – 11/13
The Rules:
Each week for 6 weeks, I will post a photo of the unfinished top as well as a photo of the finished quilt (quilted and bound [by hand or machine]) on the blog and on the VRD Facebook page.
All quilt tops must be VRD patterns – this is the VRD blog, after all.
No size requirements (I have flimsies from snack mats up to large throw quilts).
Wanna join me in this challenge?
Send me your name and email address at tricia@villarosadesigns.com to officially join the challenge and be eligible for weekly prizes. Your name and email will only be used for this Challenge, I promise you.
Each week, I’ll draw a name from those participants who posted before/after photos to win a little quilty surprise. Might be from me or from one of our lovely quilting partners.
Before/After photos must be posted by each week’s date, listed above, so your name goes into the weekly drawing.
This Challenge is open to all, but please note that International winners will receive a selection of digital patterns.
PSST! You can even use the next six weeks to make a NEW VRD quilt each week if you want – hey, maybe you don’t have any unfinished VRD tops just sitting around. So go ahead – pick your favorite VRD pattern and get moving. Wouldn’t this be a great opportunity to get some of your Christmas sewing done early???
I think that’s all the important info.
So who’s with me? Send me your info and I’ll add you to my participant list. Then get sewing! And don’t forget to have some fun!!!
Now that our Challenge is LIVE, let’s take a break for some reading. Am I procrastinating already? Maybe…..
Great Quilt Mystery Reads
Mysteries are my favorite book genre, and recently while I was perusing available mystery ebooks at my online library to find my next read, I found a promising title called Quilt City Murders by Bruce Leonard, so I decided to give it a try. Here’s a brief description from Amazon:
Quilter Hadley Carroll thinks her life can’t get any worse after being demoted from reporter to newspaper courier and having her fiancé, Matt Ackerman, dump her without explanation. But then, while chucking a sack of newspapers into the Ohio River in Paducah, Kentucky—known as Quilt City—she finds Matt’s body snagged under the transient dock. She knows she’ll never find peace if she doesn’t figure out why he left her and who killed him, so she gets to work. As QuiltWeek Paducah, the largest quilting event in the world, approaches, then fills the small town with 30,000 textile connoisseurs, quilters turn up dead. Paducah’s mayor tries to instill calm as citizens panic, protests flare up, and visiting quilters flee by the thousands. Despite grieving the loss of Matt, Hadley perseveres, strengthened by her troubled upbringing and aided by her weekly quilting group. She uses her investigative skills and impressive intellect to solve the murders, to bring peace back to her hometown, and to get a good night’s sleep—finally.
I was intrigued by the cover as well as how a male author would approach quilting. And it won a Best Mystery Award in 2022 from NIEA, which stands for The National Indie Excellence Award. I checked it out.
It took me a few chapters to get into it, but when everything started to roll, I simply could not put it down and I raced right to the end – whoa! Reading this book was like being on a train picking up speed while going downhill, seriously!
The characters surprised me by how realistic and well-rounded they were. I especially connected to the narrator, Hadley Carroll, because she is an imperfect character with a lot of baggage, just like the rest of us. And of course, Hadley has a dog named Trapunto (don’t you just LOVE this name???). As well as a quirky weekly quilt group.
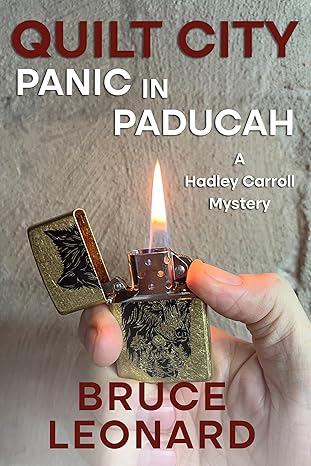
Such a good read, so I couldn’t wait to check out book 2, Panic in Paducah. Even better than the first book! Actually held my breath in a few places, not kidding. Love how the characters keep surprising me, just like real people. I also find Hadley’s personal struggles to be realistic, especially when we all live in a world of imperfect people.
Then I couldn’t wait to check out book 3 – Measure Once, Cut Twice
Oh no! Things just keep getting more and more complicated for Hadley in the third book. And Hadley is under more pressure than ever before as she races to help everyone with everything without losing herself to the chaos.
And then I went on to read Book 4 – Proving a Negative. Only the first 3 books were available at the online library, so I eagerly downloaded Book 4 and 5 from Amazon. I just finished this book yesterday and it was an amazing read, just like the first 3. I burned right through it in a couple days, reading every spare minute I could – the past few days have been busy ones, too, with me driving parents to their appointments here and there.
I will say each book is getting more intense than the previous one, which is probably why I can’t put them down. I’m really hooked. The author, Bruce Leonard, is fantastic! I love how quilting is woven into the story, but the story isn’t necessarily centered around quilting. I find the story lines to be realistic and relevant. And I absolutely love how the characters are evolving in each book.
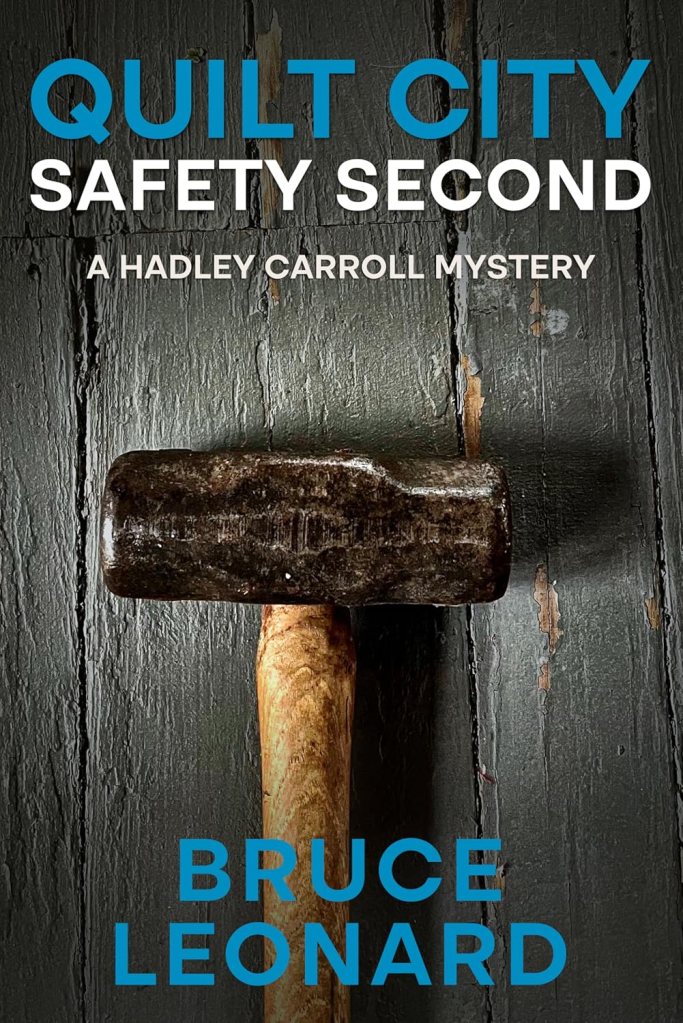
Up next is Book 5 – Safety Second. This is the 5th out of 5 books, so I’m not sure if it’s the final book in the series or else just the most current. I hope the author continues writing for this series, because it’s really one of the best I’ve read for a while and I’ve read A LOT of mystery books over the years (if you didn’t know, I was a librarian for 11 years).
I probably won’t start it today because I’m writing the blog and doing work stuff today, but hopefully tomorrow I’ll be able to dive back into Hadley’s Paducah. Now that I’m starting Book 5, the characters are like old friends and I can’t wait to see what everyone will be up to in Book 5. If this is the final book of the series, I wonder if Hadley will get her happily ever after…….or not.
Look for these books at your local library, ask for them through Interlibrary loan at your local library, purchase them at your favorite bookseller, or use the Amazon links above.
By the way…….there’s even a companion Cookbook – Quilt City Cookbook. What fun! I haven’t ordered it yet, but I probably will after I finish Book 5, Safety Second. I love that the cookbook is even talked about in the books as Hadley writes it and then utilizes the recipes.
Hard to believe it really is Fall now, but I know it’s here whether we’re ready or not. And I’m personally more than ready. We had such a hot and dry summer here in NW PA, so I’m eager for cooler weather.
Fall is definitely my very favorite season with its warm days and cool nights. All the gorgeous colors. The smells of the season. And the sounds. I truly love it all!
Another thing I love about Fall is that I start to feel more energized to get back to my many to-do lists. Summer definitely doesn’t inspire that in me. So now, it’s time to make plans to get things done. What is Fall to you?
I hope you’ve been enjoying our Jump into Fall quilt tutorials. Today’s project is beyond perfect for the season and I know you’re going to be excited to make this one.
VRD Falling Quilt Tutorial
Falling is truly a perfect project for this time of year, especially with all of the yummy fall fabrics at your local quilt shop and favorite online retailers. Falling is a pattern by Catherine, of Running Doe Quilts, who is one of our many talented VRD designers as well as a new VRD partner.
The quilt finishes at a generous 54″ x 72″ and goes together quickly with its oversized blocks and no borders (although you could easily add a border to make it bed-sized if you wanted to).
Catherine even has kits available for the Falling quilt below – get yours HERE before they’re gone. Tell her Tricia sent you!
Okay, time to get going on today’s tutorial.
Of course, our first thing to do is gather up our fabrics. Today I’m using a lovely collection from Hoffman Fabrics called Sweet Breeze. It’s a great choice today as we end summer and slide into fall. Sadly, this is an older fabric collection and probably isn’t available anymore, but happily Jason Yenter has a gorgeous fall collection called Falling Leaves, you can find it HERE – I think his wonderful fabrics would make great Leaves.
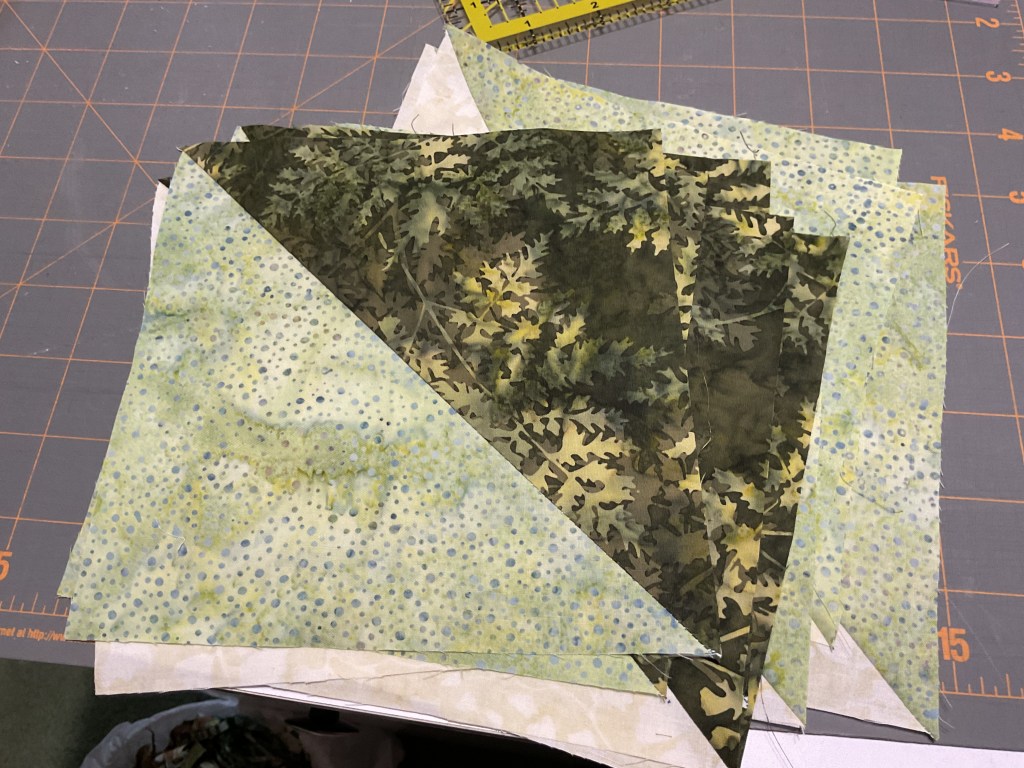
Here are our Sweet Breeze fabrics for today’s tutorial in lovely greens, a few browns, with a wee touch of orange.
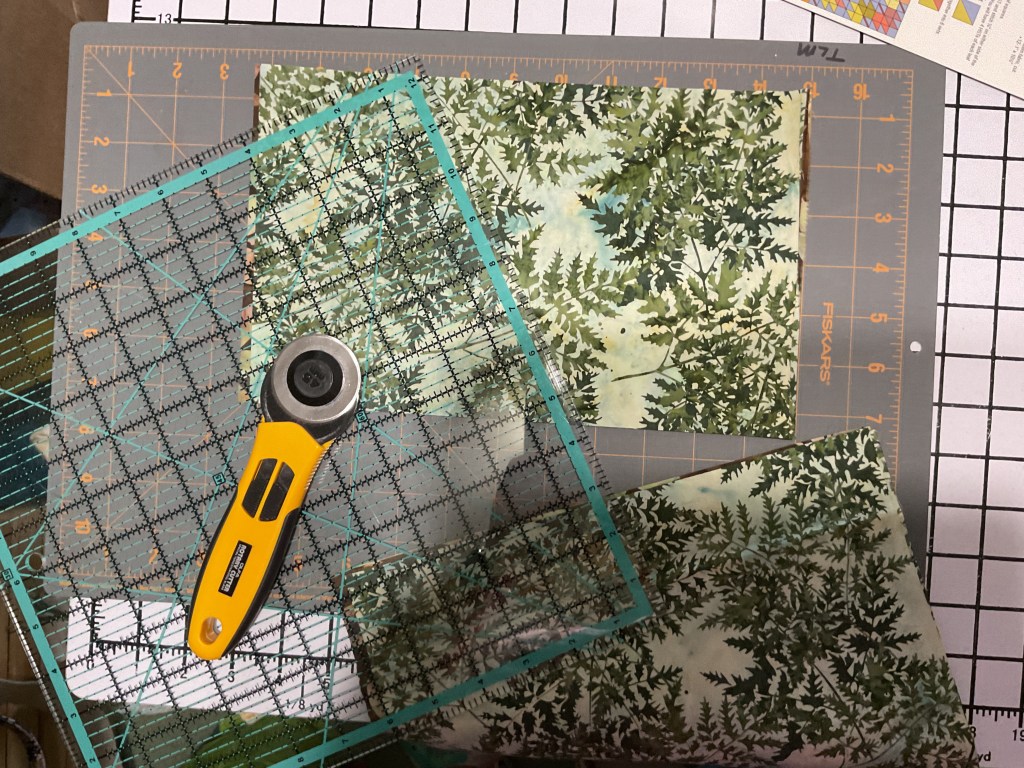
Let’s go ahead and cut out all the pieces we’ll need for Falling – the background, the Leaf fabrics, and the stems.
All right! All of our pieces are cut and ready to go.
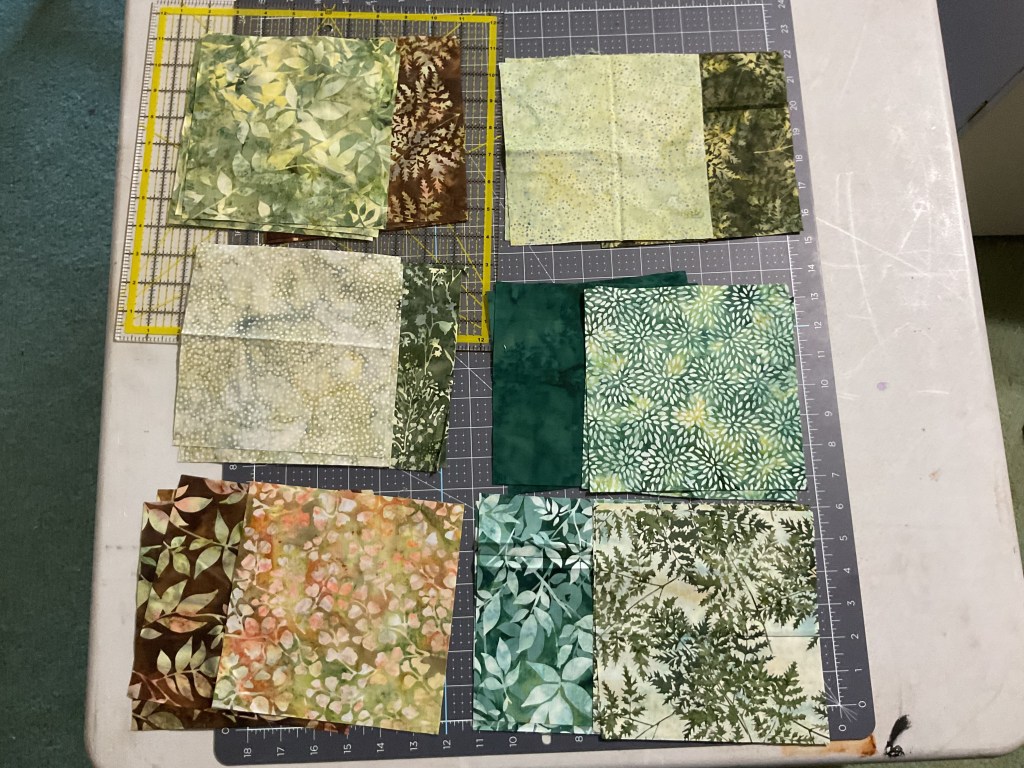
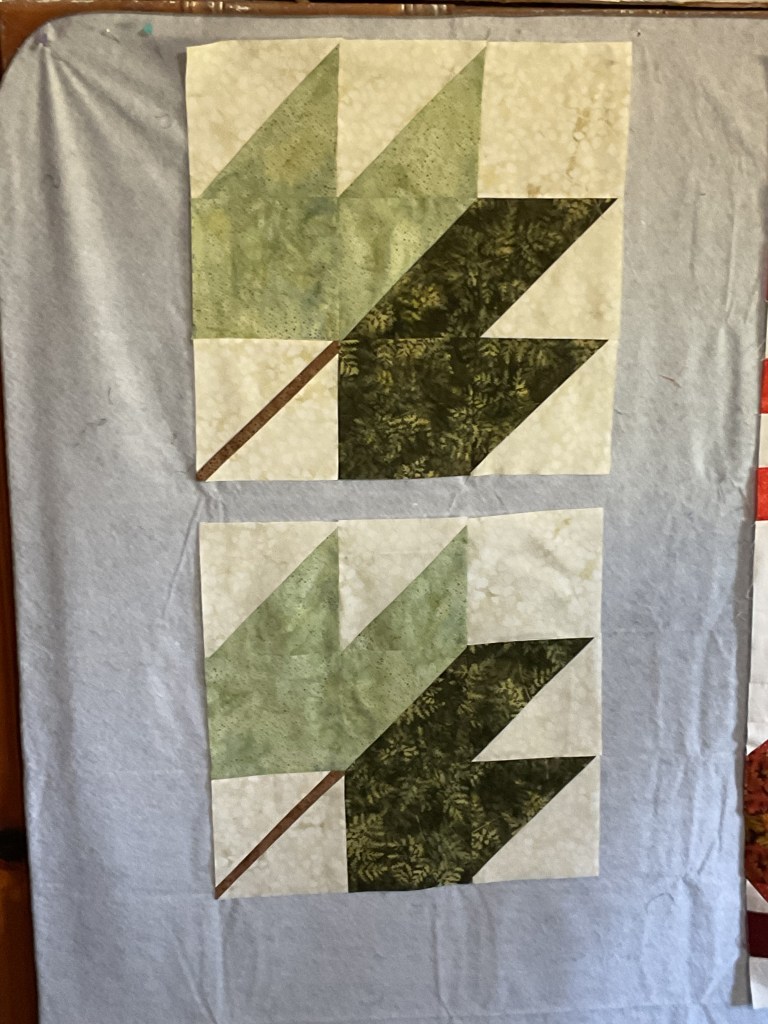
Next we need to pair up our Leaf fabrics as each of the 12 blocks in the quilt uses 2 fabrics. I really love Catherine’s take on the traditional Maple Leaf quilt block, don’t you? She split it down the center so her leaves are two-toned. And the blocks are very big, which adds to the graphic appeal of this quilt.
The pattern suggests making 2 of each Leaf fabric combination, but you can mix and match your fabrics to your heart’s desire if you want, of course. I’m going to stick to the original plan today.
Now we’re ready to sew. We haves lots of Half Square Triangle (HST) units to make for the quilt. I’m going to make 2 matching Leaf blocks before moving on. I don’t want to get all mixed up!
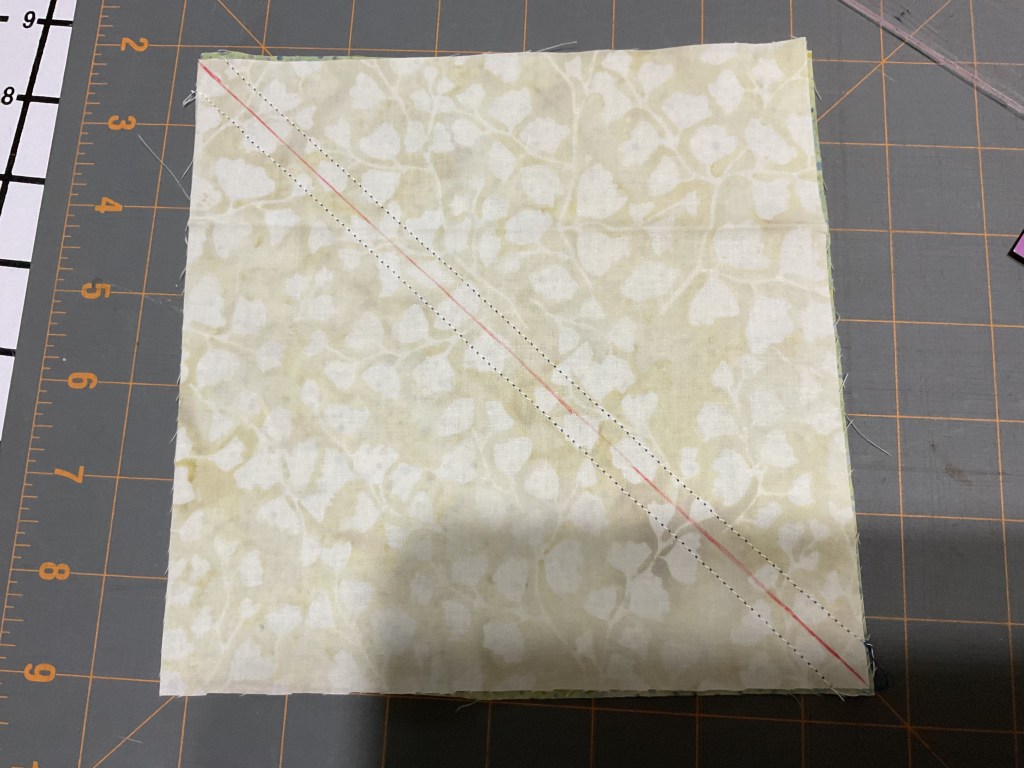
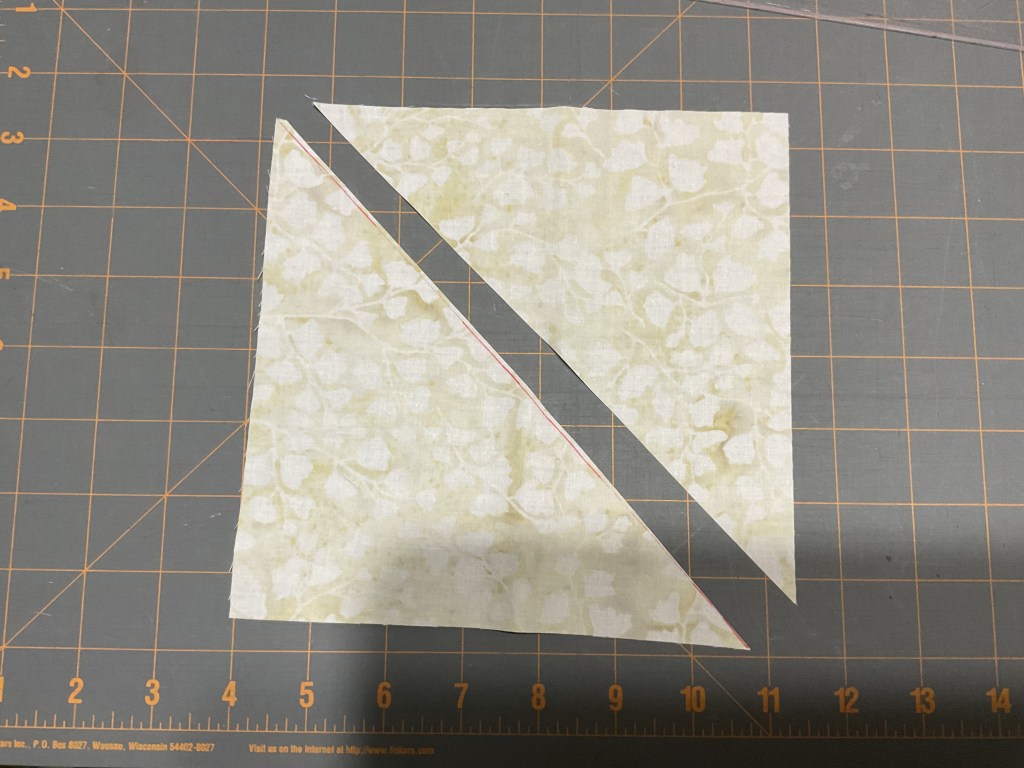
To make HSTs, the first thing you need to do is layer your squares right sides together (RST) and draw a diagonal line – I like to use FriXion erasable pens for marking my fabrics.
Then we’re going to sew 1/4″ away from both sides of our drawn line.
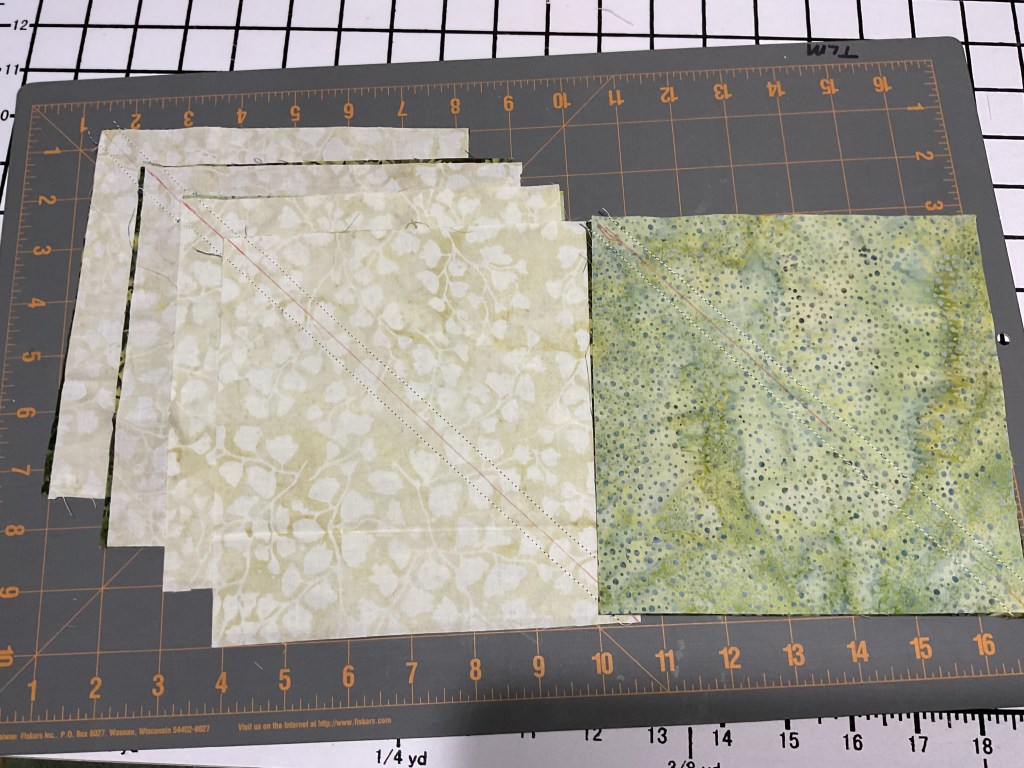
I went ahead and sewed all of the HSTs for my first 2 blocks at one time. Do likewise if you wish.
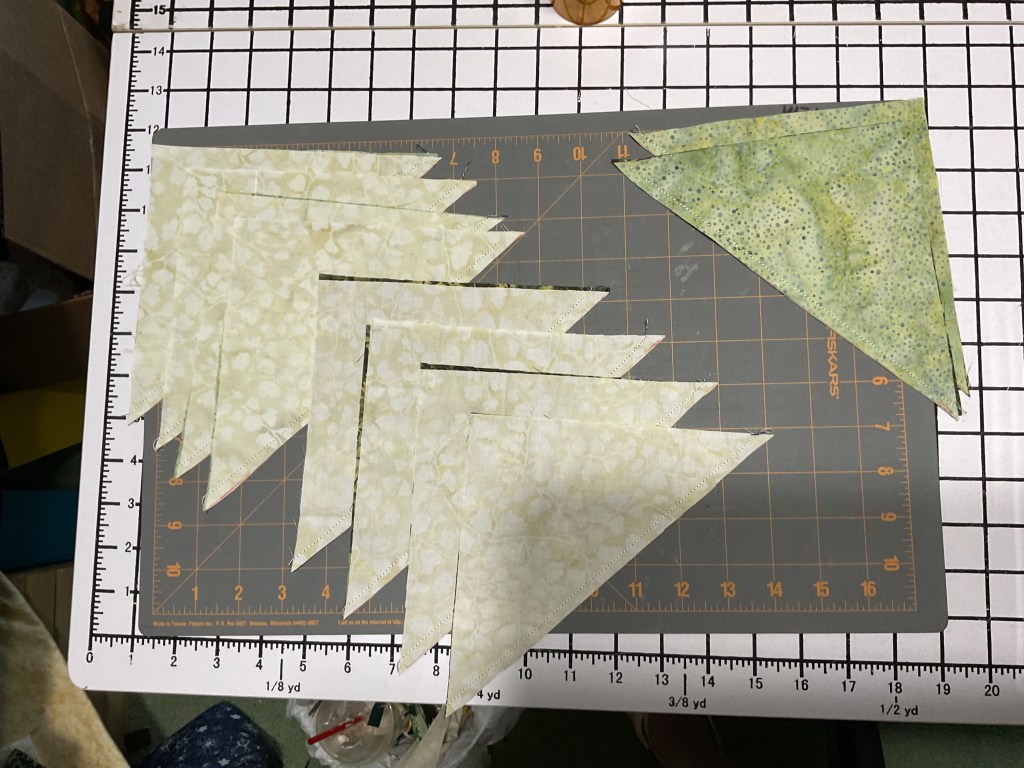
Next we need to cut on the diagonal lines which will give us 2 HSTs.
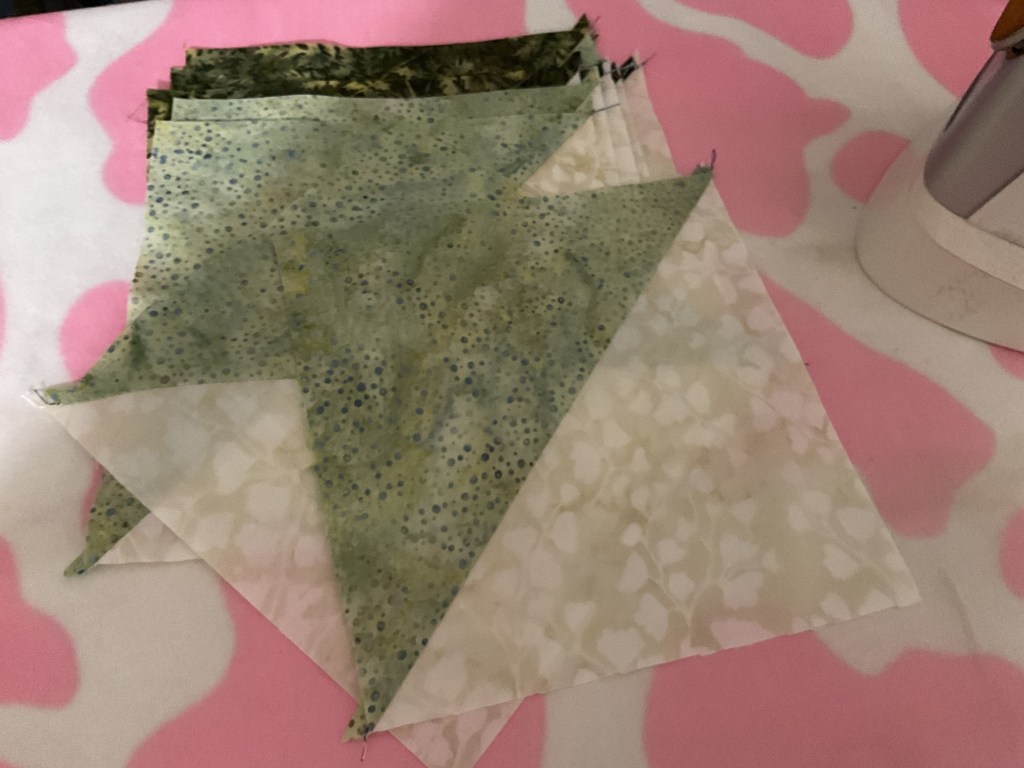
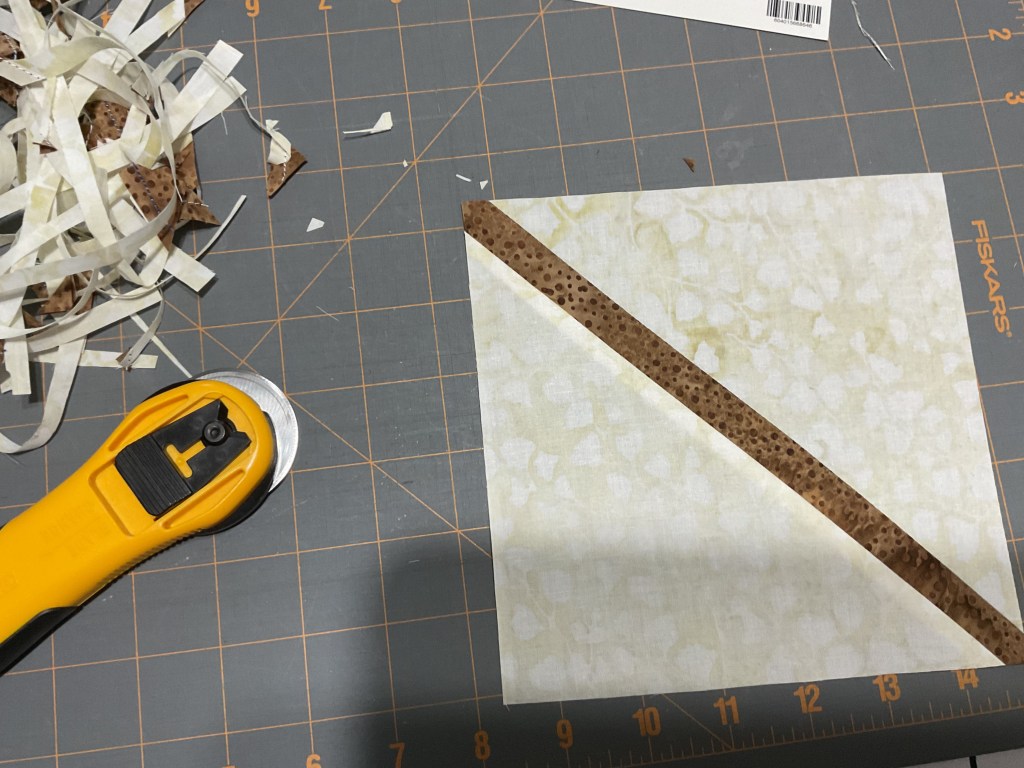
All right, let’s head over to the ironing board to press these HSTs open. Don’t forget to cut off the little dog ears on the corners so your piecing will be more accurate.
Let’s make the stems next. Cut your background square in half diagonally to make 2 triangles. Then we’re going to center and sew a stem rectangle between those 2 background triangles. I pressed my seams towards the stem so they wouldn’t show through my background fabric. We need to make 2 of these – 1 for each of our matching Leaf blocks.
Before out stem units are finished, though, we need to trim them to the right size. Take your time when you do this step because you don’t want to miscut and make wonky stems.
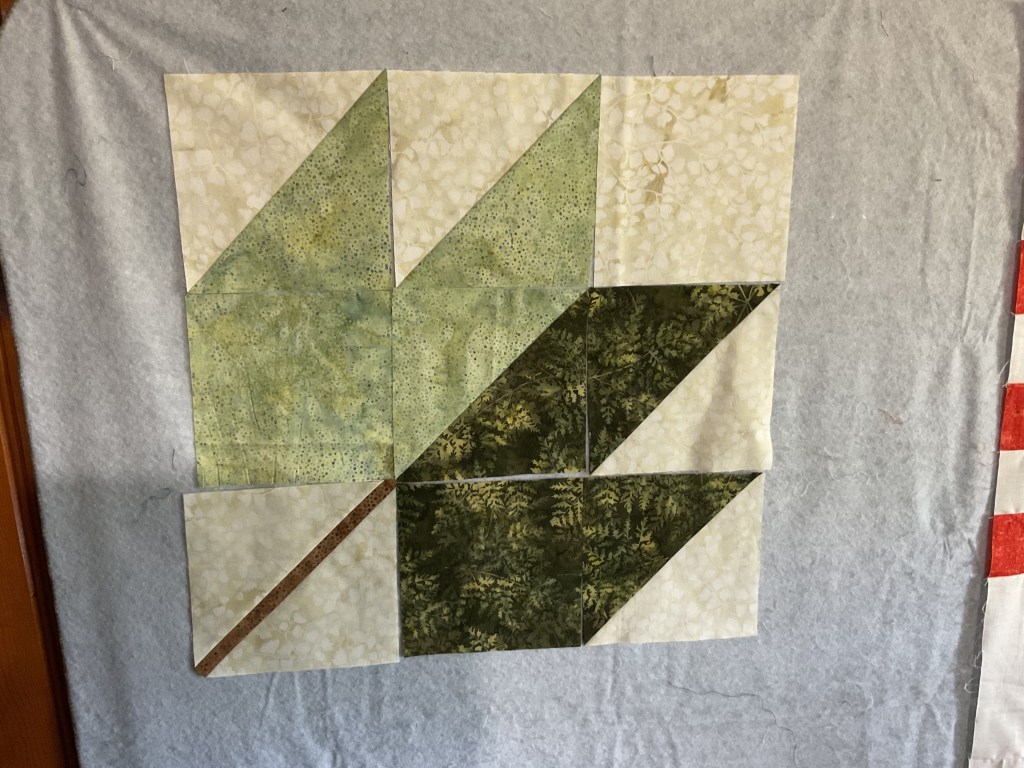
Okay, now we’re ready to layout a block and sew it together. Once I’m happy with how the first block turned out, I’m going to make the second matching block. One Leaf pair done, 5 more pairs to go. Repeat the steps above to make 12 total Leaf blocks.
Woohoo! Here are my 12 Leaf blocks.
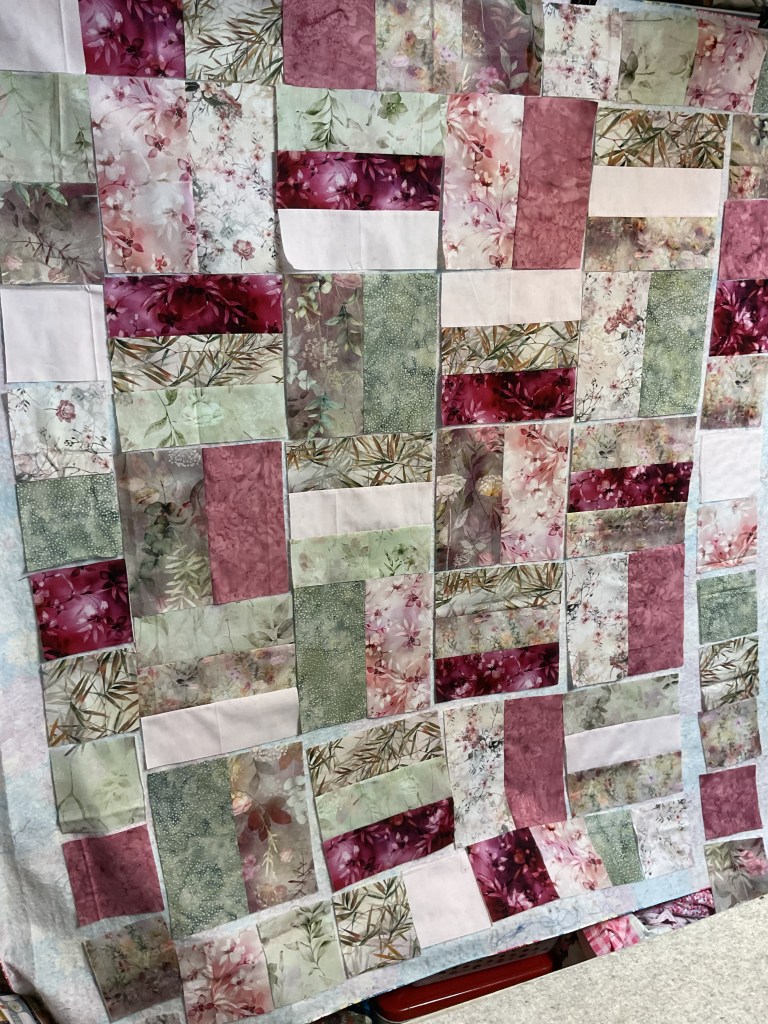
Now it’s time to arrange the blocks on my design wall. If you want your quilt to have the same movement as the Falling quilt on the cover of the pattern, you will need to flip and flop your blocks like Catherine’s. I only switched 1 or 2 blocks before I liked the arrangement. As you, know sometimes I spend more time arranging the blocks than actually making the quilt. But not today, yay!
You will want to take care while sewing your blocks together because sometimes you are sewing a point to a point. Careful pinning will help keep your points under control and will result in a cleaner and more accurately stitched quilt.
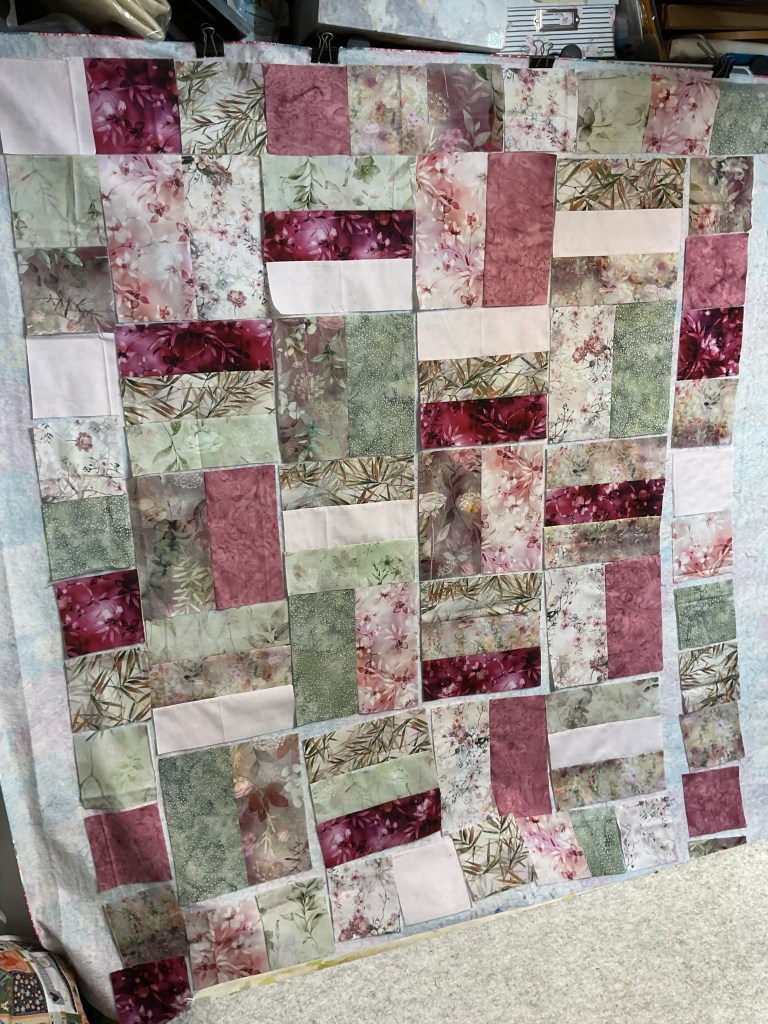
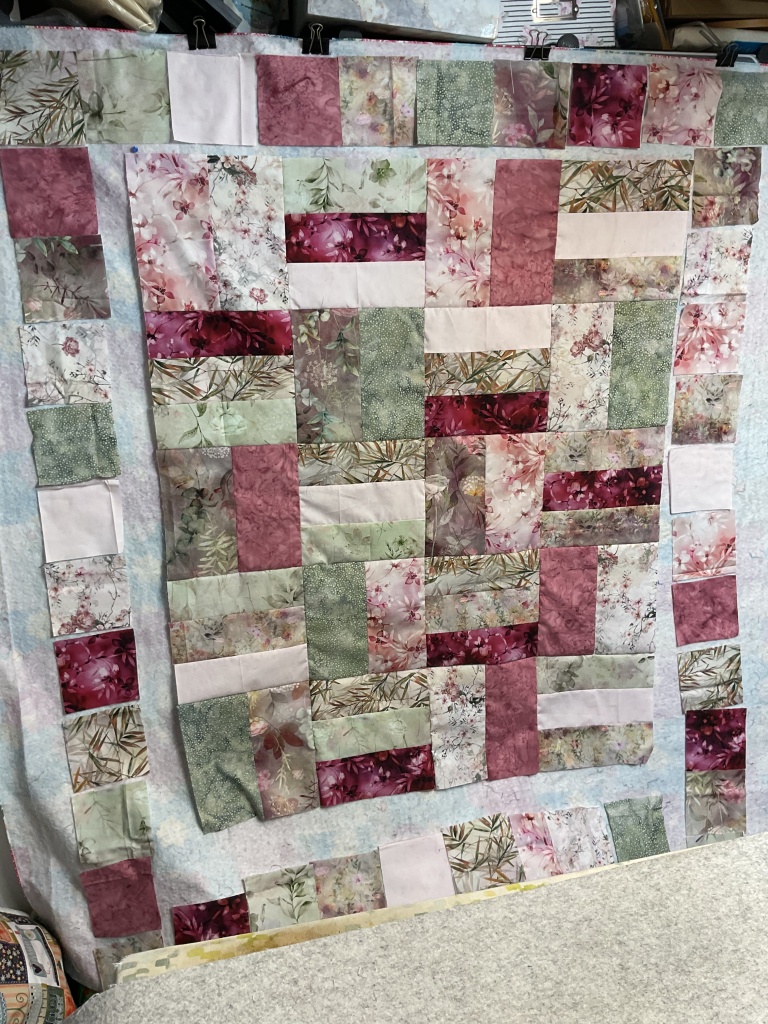
Next we are going to sew the blocks into rows and then sew the rows together to make the quilt top. Oops, this quilt is longer than my flannel wall, so I can’t show you the entire top yet. I told you it was a good sized quilt!
I just had to take my Falling flimsy outside to snap a photo in natural light so I could show you the entire top. Absolutely LOVE it! Can’t wait to finish it.
To complete your quilt, layer it with batting and backing fabric (or fleece like I plan to). Quilt it. Bind it. And don’t forget your label!
Have you made a Falling quilt already? Or if you plan to make one this Fall, please share a photo on our VRD Facebook group – we’d all love to see them!
Well, that’s it for me – I’m heading back to my sewing machine to get some more sewing in.
Yep, it really is Thursday today. Bet I surprised a lot of you on Monday with our special VRD Announcement about upcoming changes (good ones, I promise you!). If you missed Monday’s VRD announcement, you can find it HERE.
Before I dive into this week’s inspirational quilt tutorial, I wanted to take a minute and share Hoffman’s Fall 2025 Project Catalog with you. I’m sure you’ve noticed I use a lot of Hoffman collections for our blog tutorials by now. We work closely with our friends over at Hoffman to inspire you by pairing new Hoffman fabrics and our easy breezy VRD Rose Card patterns.
Please enjoy the catalog and don’t forget to visit your local quilt shops to request these new upcoming Hoffman fabric collections and, of course, Villa Rosa Designs Rose Card patterns.
Lots of wonderful inspiration in this catalog, isn’t there? Which one(s) did you fall in love with and are adding to your “gotta make” list???
Now let’s make a quilt!
VRD Busy Bee Quilt Tutorial
Are you ready for a super fun tutorial today? Busy Bee is an oldie, but a really great goodie! I know you’re gonna love it!
Get your digital pattern HERE or your print pattern HERE
First things first, let me show you the fabric I’m using today for Busy Bee. You’ll notice right away that these fabrics don’t exactly have an autumn vibe going on, but I couldn’t resist these gorgeous fabrics when I was looking through my stack of quilt kits to choose my next victim….er, tutorial project. LOL!
Seriously, though, aren’t these fabrics divine??? This older Hoffman collection is called Blush Garden. It’s possible you still might find some bolts at your local quilt shop or at your favorite online shop, but somehow I doubt it as it’s just so yummy. Sorry……
Busy Bee is a fat quarter (FQ) pattern which means you only need FQs for the quilt top. No background, no borders. Busy Bee is stunningly simple and goes together like greased lightning!
Psst! You might notice that my Busy Bee pattern looks different from the cover front above. Yep, my pattern is an older cover front. Sometimes we freshen up covers as fabric styles and trends change over the years.
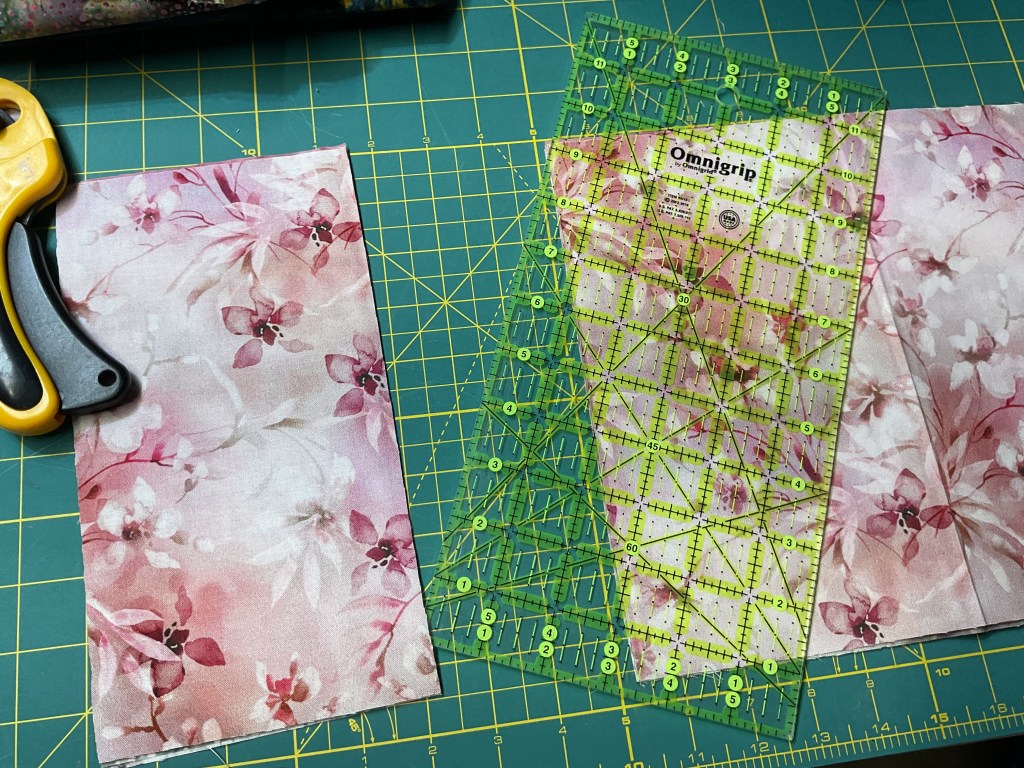
Before we can get to the sewing, we have to cut our fabrics. You need to divide your FQs into 2 equal stacks.
With the first stack, we’re going to cut our FQs into strips and then into fat rectangles and squares.
Moving on to the second FQ stack, we’re gong to cut skinny rectangles and squares.
Here are all our pieces ready to sew. And that’s it for cutting for the whole quilt top. I just love patterns like this, don’t you?
Time to sew!
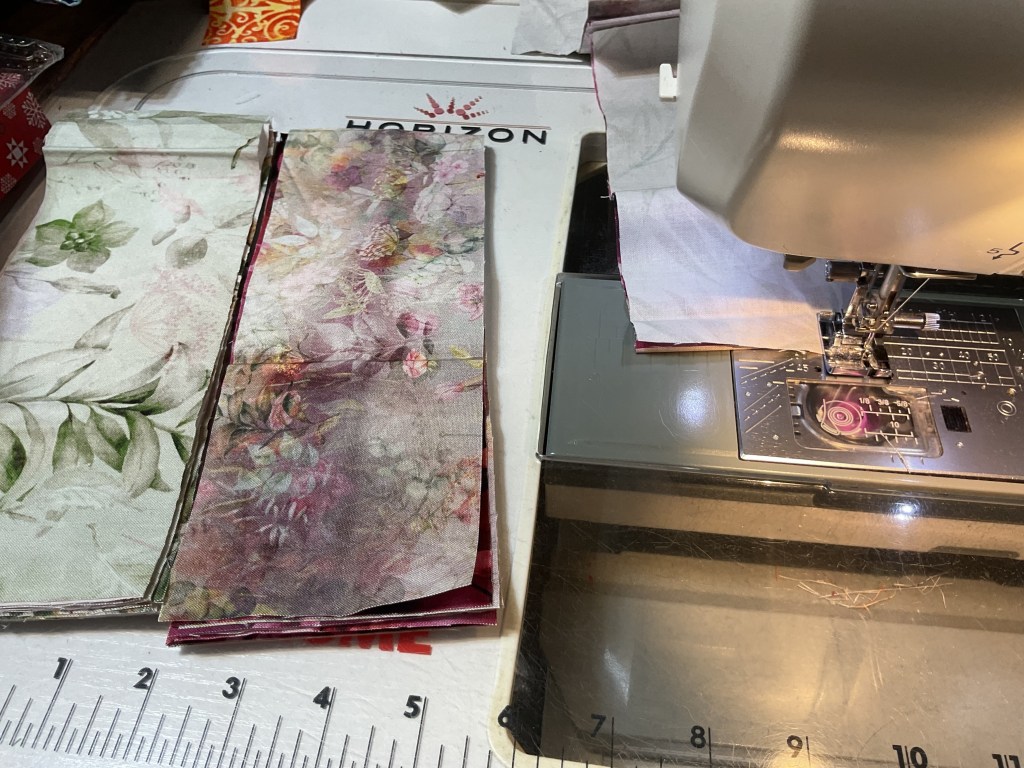
We’re going to sew 2 assorted fat rectangles together to make Block 1. I divided them equally into 2 piles and set them to the left of my machine so I could just grab the 2 top rectangles and feed them through the machine to chain piece them. If I didn’t like the combination or had 2 of the same on top, I just grabbed another one off one of the piles. Sew simple.
Do you chain piece your pieces together? Chain piecing is when you keep feeding/sewing pieces together through your sewing machine without cutting the thread in between the units. It saves both time and thread.
Now for Block 2 – we’re going to sew 3 assorted skinny rectangles together to make a Triple Rail Fence block. Again, I divided my strips equally into 3 piles and put them to the left of my machine. First I sewed 2 rectangles together from 2 of the 3 piles, leaving the last pile for last. Then I added a 3rd rectangle to all the pairs, making sure each Rail Fence block had 3 different fabrics.
Time to head over to the ironing board to press all of my blocks flat.
All righty, all the blocks are sewn and pressed, so now we’re going to put them up on the design wall so we can play switcheroo until we’re happy with the block arrangement.
The layout is an easy one for because we’re just going to alternate the blocks.
Take a look at some of my swaps. See how the dark reds are accumulating at the lower right corner of the photo at the left. In the middle photo, I swapped some blocks around and it’s starting to look a bit better, but we’re not quite there yet. And then the photo at the right looks the best of all. Often, arranging the blocks takes longer than sewing the whole top together, especially if you’re making a Villa Rosa pattern!
Now that I’m happy with how the blocks look, we’re going to add a border of squares all the way around the blocks. Huh! Bet you were wondering what we were going to do with all those squares (besides add them to our 5″ square stash).
Guess what?!? Now it’s time to swap the squares around until the quilt looks just right (are you feeling a little bit like Goldilocks, ??? LOL!).
Take a look at some of my swap outs below. You might wonder why I went ahead and laid out my border of squares before I sewed the blocks together for the quilt center. I was afraid to sew the blocks together in case I would need to tweak them again once I laid out the border squares.
Okay, I’m happy with the blocks and outer squares layout, so I’m going to sew my blocks into rows and then sew the rows together.
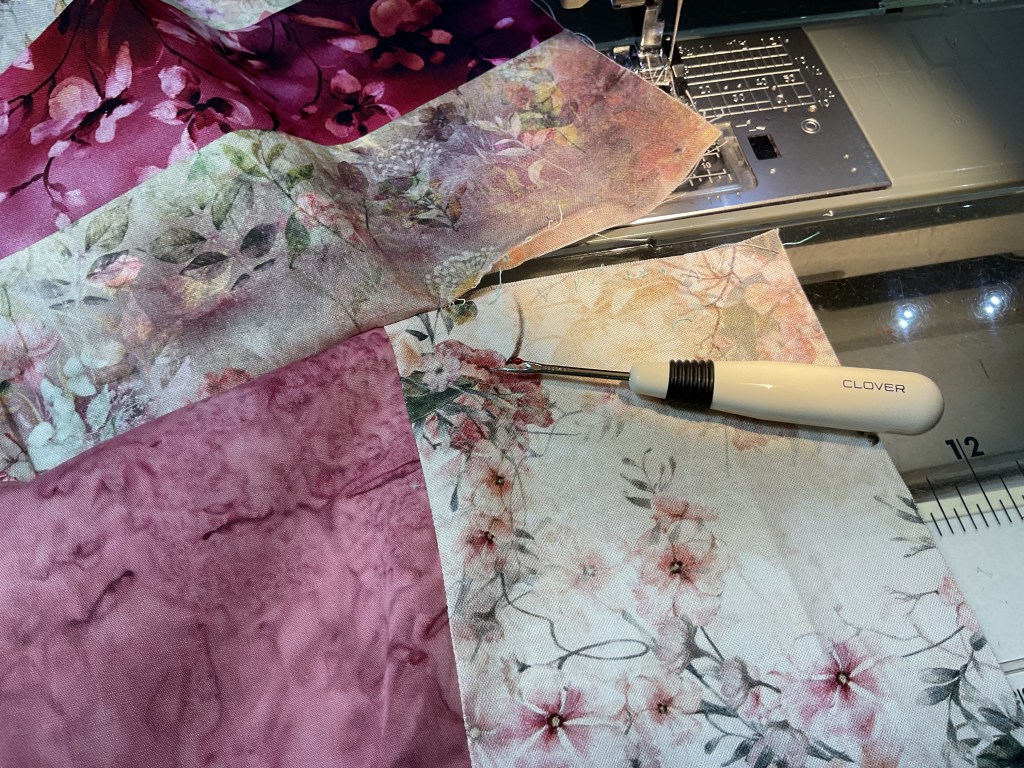
The center of the quilt is now sewn together. OH NO! Somehow I flipped a block at the bottom right corner of the quilt center! Sheesh! How’d I manage to do that?!?
Oh well, don’t panic! We can fix this. We have 2 options – either leave it alone and continue or else take a break to rip out the corner of the quilt and sew the blocks back together. Can you guess which option I chose?
Yup, time to grab my pal (and my enemy – I guess that makes him my frenemy, doesn’t it?), Jack the seam ripper. Do you have a favorite seam ripper? Mine is by Clover. In my humble opinion, it’s simply the best seam ripper ever. Don’t have this one? You can find it HERE. Let me know what you think.
Anyway, time to rip!
Ugh! Look at all the threads bits! Ripping out stitches is definitely NOT my favorite thing to do, but it’s necessary sometimes. And besides, Jack really enjoys himself when we do.
Now I can resew the block into the quilt. This time, I’m making sure it’s turned the right way.
Okay, disaster averted, thank goodness. I’m still not a fan of the mauve rectangle touching the dark red one, but unless I want to do a ton more ripping and resewing, I’ve decided I can live with it. What do you think? Should I have ripped out the other block, too?
Moving on……..time to sew my squares into rows and then I’ll sew them to the quilt center. Fingers crossed I don’t get any of them mixed up. I’m going to sew the top and bottom squares together first and then I’ll sew them to the top and bottom of the quilt center.
Next I’m going to sew the side border squares together and then I’ll sew them to the sides of the quilt center.
And here is the completed Busy Bee quilt top (or flimsy). Isn’t it really beautiful? LOVE LOVE LOVE these fabrics!
Let’s take it outside in natural light to see the fabrics sparkle (instead of my dark sewing dungeon). Love it sew much! Can’t wait to finish this one.
Of course, after you get the flimsy finished, it’s time to layer it with batting and backing and quilt it. Then bind it and add a label. Hopefully soon.
Well, that’s it for me this week. Try to get a bit of sewing in this week.
Yep – you’re right, it’s not Thursday yet, but I had some important information to share with you about Villa Rosa Designs and it couldn’t wait until our usual Thursday post.
Please read on –
Moving Along
Pat Fryer is making changes – all toward scaling back her personal work load and concentrating on the Villa Rosa patterns.
California fabric shop and online fabric store –
All of the fresh new fabrics will be handed off to Heidi and Molly Cook. The location is the same and all of the good things will be there. They have a new name – 3 Aunts Quilt Shop. The website 3AuntsQuiltShop.com will be live October 1. There will be links on the VillaRosaDesigns.com website and in our newsletters. All of Villa Rosa Designs patterns will be available at the shop and on 3AuntsQuiltShop.com. 3 Aunts Quilt Shop will carry on as the California home of Villa Rosa Designs. Great things are in store!
VillaRosaDesigns.com –
The website will continue to have all of the Villa Rosa Designs patterns, and will still have close-out fabric and kits. There is much remaining inventory after years of buying and overbuying fabric.
Pat and company [me included!] are going to be adding much more in the way of videos, tutorials, challenges, social sharing. Let’s keep Villa Rosa Designs quilting and connected!
The new Texas home of Villa Rosa Designs –
A new East Texas location is opening in October. The location is a partnership between Pat of Villa Rosa Designs and Catherine of Running Doe Quilts. Running Doe Quilt Shop is expanding there – more machines, more fabric and notions, more classes. Running Doe’s new shop will be renamed Rose City Sewing. The location will have all of the Villa Rosa patterns available, along with close-out Villa Rosa fabrics. Great things are in store!
Wholesale Operations –
Austin, TX is still home to Villa Rosa Designs administration and print shop. Leann Fryer handles operations, web design, programming, wholesale ordering, and special orders. Wholesale orders for quilt shops can be placed on VillaRosaWholesale.com.
Pattern Shipping –
Central Missouri houses the patterns. Eric Aitken fills pattern orders – wholesale and retail. Nancy Aitken heads our art department from there.
With all these moves, Villa Rosa Designs continues to be scattered over 3 states. Centralizing contacts – phone and emails – will be a challenge we hope to simplify.
Contacts –
3 Aunts Quilt Shop – Molly Cook, Heidi Cook 3auntsquiltshop@gmail.com 530-509-5133 530-798-8506 530-755-6467 3AuntsQuiltShop.com 12438 Loma Rica Dr., Ste. A Grass Valley CA 95945
I hope you are enjoying this collection of VRD quilt tutorials to inspire you to leap back into quilting this fall. May these tutorials nudge you into making a quilt for someone special or maybe just for yourself.
We’ve got lots to do today, so let’s get moving.
First up, it’s the Thursday after the first Friday of the month, and you know what that means – NEW PATTERNS! Talk about fall inspiration!!!
Here’s the new collection of 5 VRD Rose Cards for September. Aren’t they super???
(Patterns are also available individually both as print and digital versions)
Awestruck by Molly uses 5″ squares and finishes at 44″ x 60″. There are kits still available HERE featuring Tula’s True Colors collection while they last. Totally loving the name!
Melissa wows us with her Pumpkin Parade throw quilt. It uses yardage (or your stash!) and finishes at 45″ x 56″. We still have a few kits left HERE featuring Riley Blake Seasonal fabrics, so grab one before they’re gone.
Pat is back this month with her latest Tim Holtz Palette quilt pattern, Edwina, featuring the Indigo Palette. Edwina finishes at 45″ x 60″ and is fat quarter friendly. Kits are still available, but going fast, so get yours HERE.
Besties is my new throw-sized quilt pattern this month. It’s fat quarter friendly and finishes at 48″ x 64″. We have kits featuring Anna Maria’s Iconic collection (see below) still available HERE.
Besties in the Iconic Collection
Viroqua is Rachelle’s latest smashing mod pattern. It finishes at 42″ x 48″ and uses half yards and yardage (stash friendly!). There are kits still available HERE featuring Windham’s Sketchbook 21 collection (see below).
Viroqua in the Sketchbook 21 collection (please disregard the 2 mistakes where we turned the HSTs the wrong way – it’s getting fixed as we speak)
Last, but certainly not least is this month’s new table runner, Beachcomber. I’m sorry I missed the deadline boat last month with this fun runner, but I think it’s not too late to have just a wee bit more summer before it’s officially autumn on September 22nd.
You can really use just about any fabric collection or your stash for this fun and clever runner. Beachcomber finishes at 18″ x 54″ and uses yardage. Autumn? Halloween? Thanksgiving? Christmas? And the list goes on. Have you ever thought about making a 2 sided runner with 2 different seasons….here’s your chance!
Get your digital Beachcomber pattern HERE or your print pattern HERE.
Now we’ve covered all of the new September patterns, which one will you make first?
OH! One last little thing about the new patterns – Melissa’s new Pumpkin Parade throw quilt is a fabulous companion to our best-selling Pumpkin Hollow table runner.
Get your Pumpkin Hollow digital pattern HERE or print pattern HERE.
All right, moving on, let’s dive into this week’s quilt tutorial – Cinnamon Stix.
VRD Cinnamon Stix Quilt Tutorial
Cinnamon Stix is a great pattern for a favorite fabric collection. You can use a stripe or even a seasonal/novelty fabric in the long strips, so it’s really versatile. Then simply add your coordinating fabrics for the Stix, a sashing, and border. Cinnamon Stix is fat quarter friendly and finishes at a nice 46″ x 63″.
Get your Cinnamon Stix digital pattern HERE or your print pattern HERE.
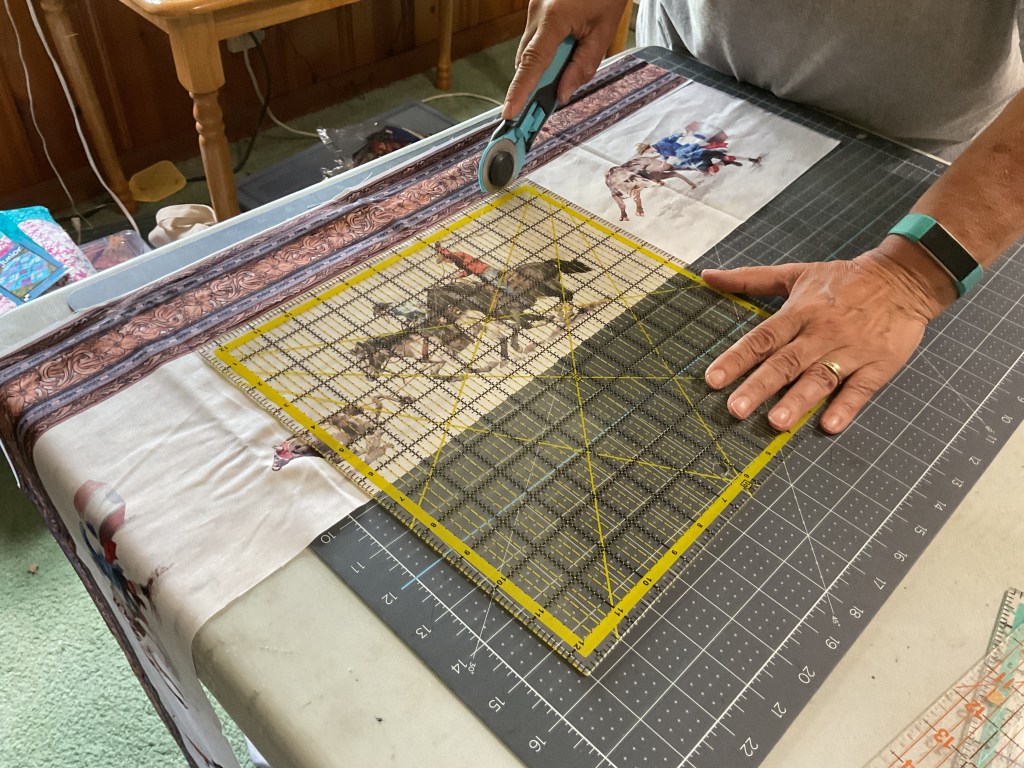
I promised you a few weeks ago that I was going to have another quilt featuring Hoffman’s Rodeo Dreams digital collection – well, here it is! Today we’re using the border stripe in the collection along with fun coordinates, including a few batiks.
First up, we’re going to cut out the Stix for the 3 pieced Stix rows.
Once we’ve gotten all of the Stix cut, we’re going to slap them up on the design wall so we can arrange and rearrange them until we’re happy with the fabric placement.
Heads up – because the Stix are cut different widths, each row might look a bit different, depending on how you arrange your Stix.
Now we’re happy with how the Stix rows look, so it’s time to sew them together. I like to sew them into pairs, then sew the pairs into quads, and so on until all the pieces are stitched together into a row. Then repeat for the next 2 rows.
Okay, all the Stix are sewn together into 3 rows. Lookin’ good!
Next let’s work on prepping and cutting the Rodeo border stripe fabric. My pal (and cousin), Robin, is helping me out with this tutorial today – we’re working on it in her sewing room.
Hey Robin!
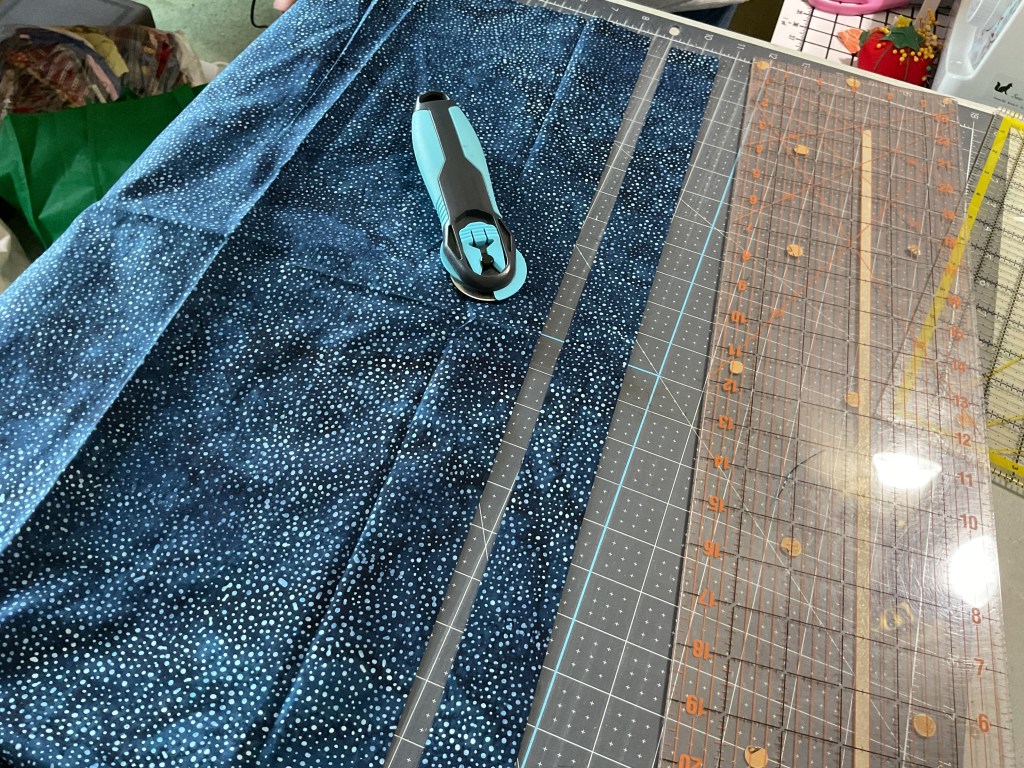
Once the stripe is cut, we’re going to work on cutting the narrow sashing, which is this gorgeous blue 885 Dot batik. LOVE IT!
Let’s sew the sashing to both sides of our pieced Stix rows.
Now we’re going to lay out the sashed Stix rows with the stripe. My tip is to find the center of the sashed Stix row and the center of the border stripe. Then match and pin the centers together and pin outward towards the ends to keep the quilt nice and square. We’re ready to sew the rows together. And then we need to add sashing all the way around as our first border.
Yay! The center of the quilt is finished. Easy peasy!
Okay, time to cut the final border, which is a wonderful red bandana print from the Rodeo Dreams collection. Then we’re going to sew it to the quilt. Yay!
And here it is – the finished Cinnamon Stix quilt top in Rodeo Dreams. Isn’t it really fun???
Here it is outside for a straight-on shot. It was really breezy so we ended up taking the photo in front of one of Robin’s hubby’s farm toys so it blocked the wind, instead of in front of the old barn (our first choice). Thank you Mary Lee and Robin for holding the quilt and fighting the wind for me. Perfect!
I bet you’re already thinking about border stripes in your stash (or something new at your local quilt shop) to use in this fun and fast VRD pattern. We’d love to see your Cinnamon Stix quilts on our VRD Facebook page.
Now that the top (or flimsy) is done, it’s time to layer it with batting and backing, quilt it, bind it, and lastly add a label. Eventually…..
Stay tuned next week for another great VRD tutorial.