Hello Quilty Friends!
Happy Thursday to you!
Do you have any big plans for Labor Day weekend, the unofficial end to summer? I don’t, I’m just hoping to get a little sewing in. LOL! For me, sewing and quilting are a vacation. Of course, I just had my lovely visit to Colton’s Point last week (if you missed my blog post about Colton’s Point, you can find it HERE) and I’m still feeling the positive vibes from my trip which is why I just want to sew, sew, sew.
Last week I promised you one final Summer Quilt Tutorial, so read on. After the tutorial, let me share some tips for photographing your own quilts.
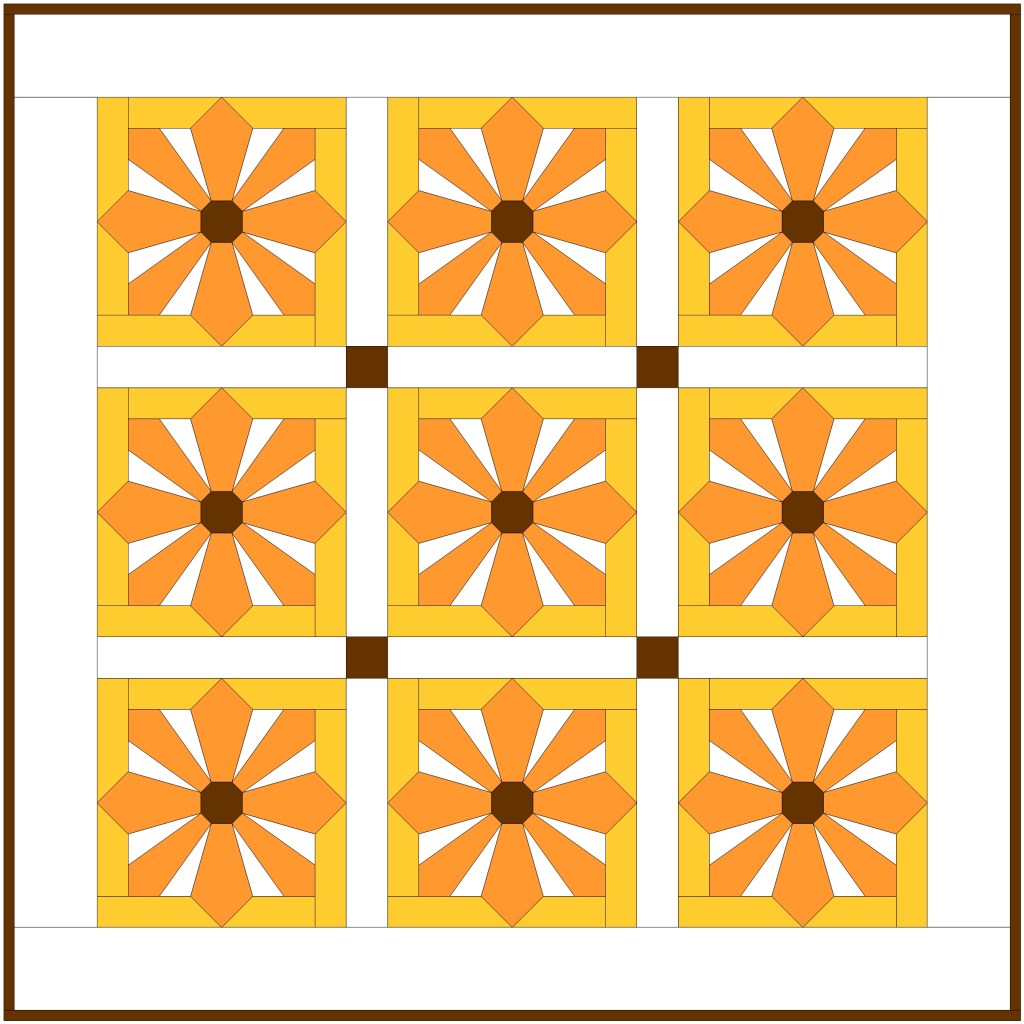
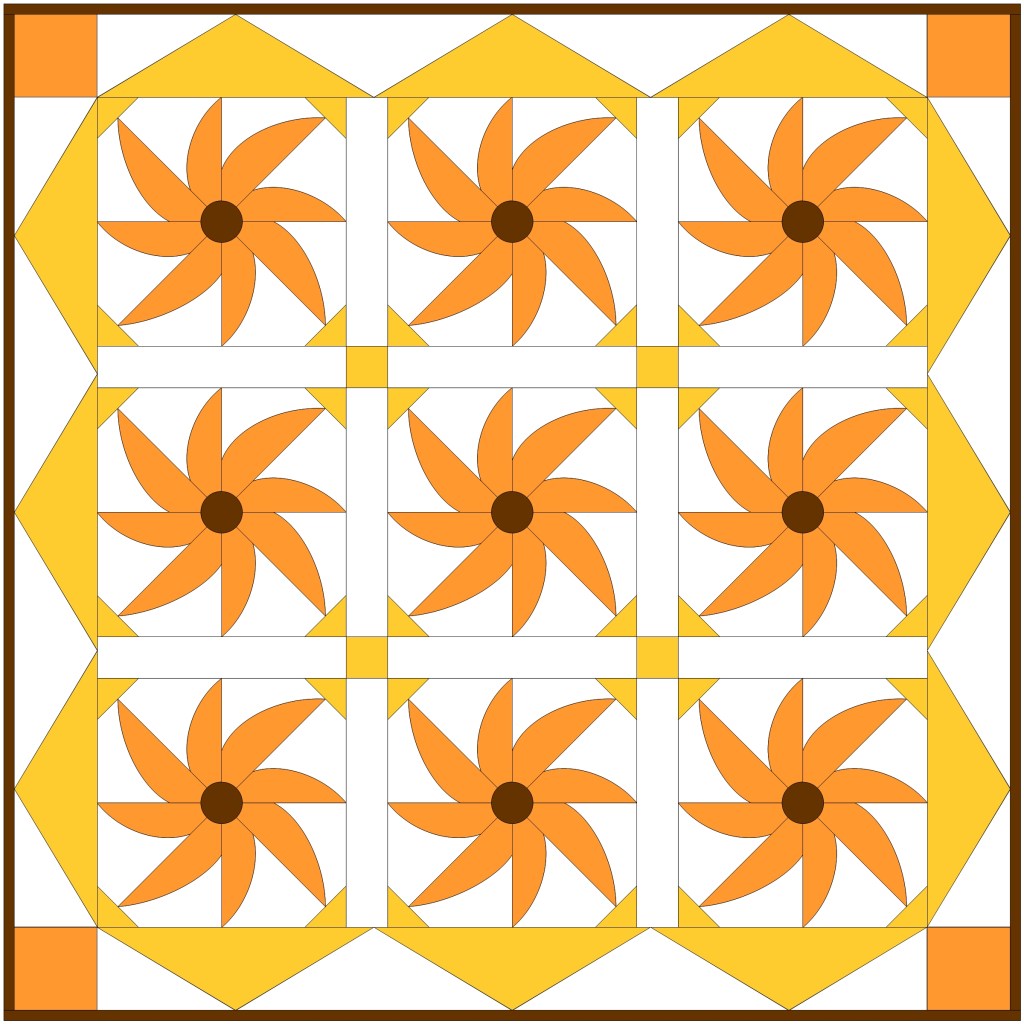
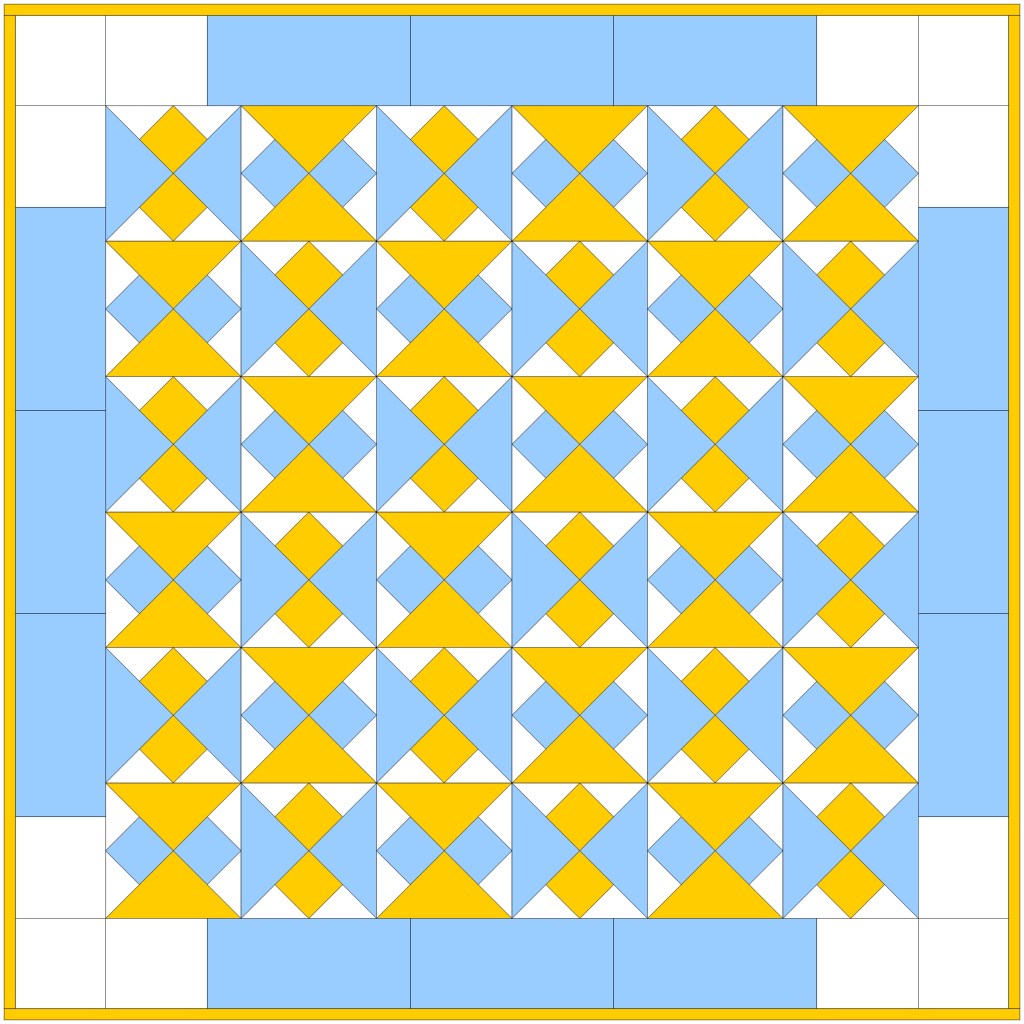
VRD Discovery Quilt Tutorial
I’ve been wanting to make Discovery for a long time now, but I just haven’t picked out my fabrics and made it yet So, when I found these adorable fall fat quarters, I couldn’t resist — Discovery it was. In fact, I gave a set of these cute fat quarters to each of my friends, Cathey and Leslie, along with the the Discovery pattern and chocolate, of course. I was hoping they might be inspired to make their Discovery quilts, too, but alas, Cathey and Leslie each had their own projects to work on.
I have found the Discovery pattern really lends itself to novelties and large print fabrics. I’ll bet you have large prints as well as novelties that you have no idea what to do with and you just don’t want to cut them up, losing the fabric design. I feel your pain. I have tons of these fabrics lurking amongst my overloaded shelves, as well. But we are in luck because the Discovery patterns welcomes these hard-to-please novelties and large prints.
If you haven’t added Discovery to your VRD Rose Card collection yet, you really should. It’s a very versatile size at 44×62 which can be used as a baby quilt, a large wall quilt, or even a lap quilt. If you want it bigger, simply add more borders. Did I mention that this quilt almost sews itself together? It truly is that fast!

Get your print Discovery HERE or your digital Discovery HERE.
So, let’s get started on our tutorial for today!
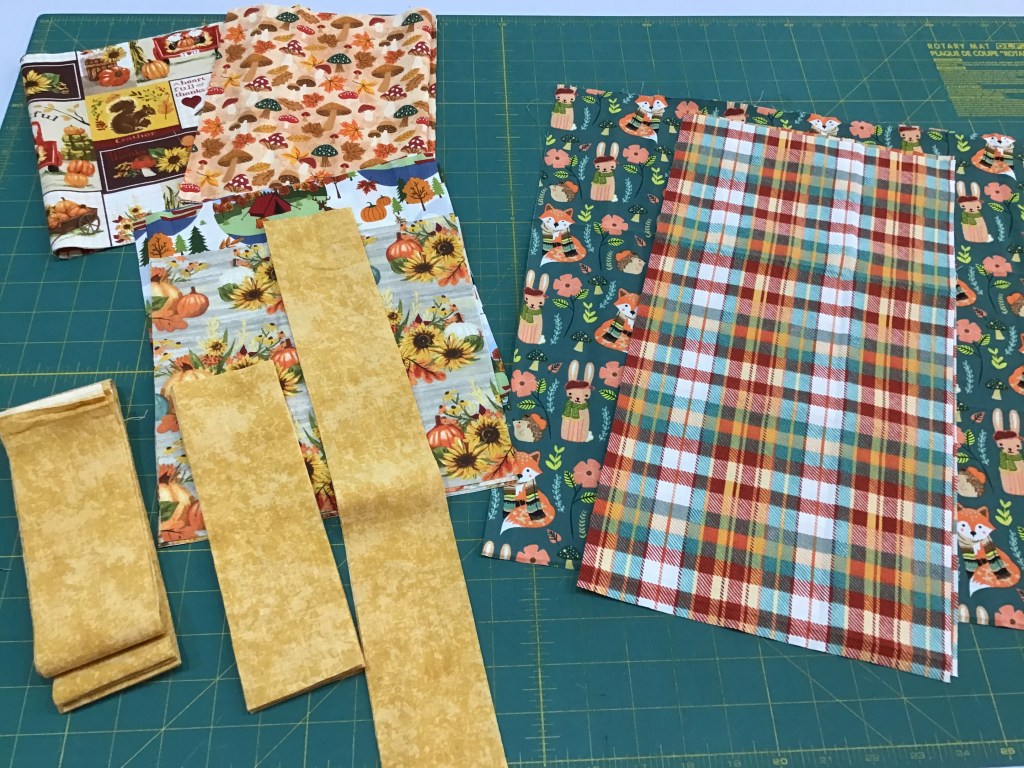
Here are my cute fall fabrics, as you can see most of them are novelties and several are large prints. I chose to use a light gold tonal straight out of my stash. I just LOVE LOVE LOVE the plaid and the teal forest animal print is adorable.
I challenge you to make your own Discovery quilt right out of your stash, too, and then to share it on our VRD Facebook group.

The first thing to do is decide where you want each fabric to live in the quilt. I suggest choosing your favorite for the center and working your way from there.
The second thing, of course, is to cut out all of the pieces. The cutting for this quilt is surprisingly quick with such large pieces. I do suggest you make sure your fabrics are laid out according to the pattern and that you double check the measurements before you cut. Speaking from my own experience (which I did not photograph, sorry), if you make a cutting mistake, you’ll probably have to substitute a different fabric or piece some scraps together (which I ended up doing).
You know the saying, “measurement twice and cut once”? It applies just as much to quilting as it does woodworking.


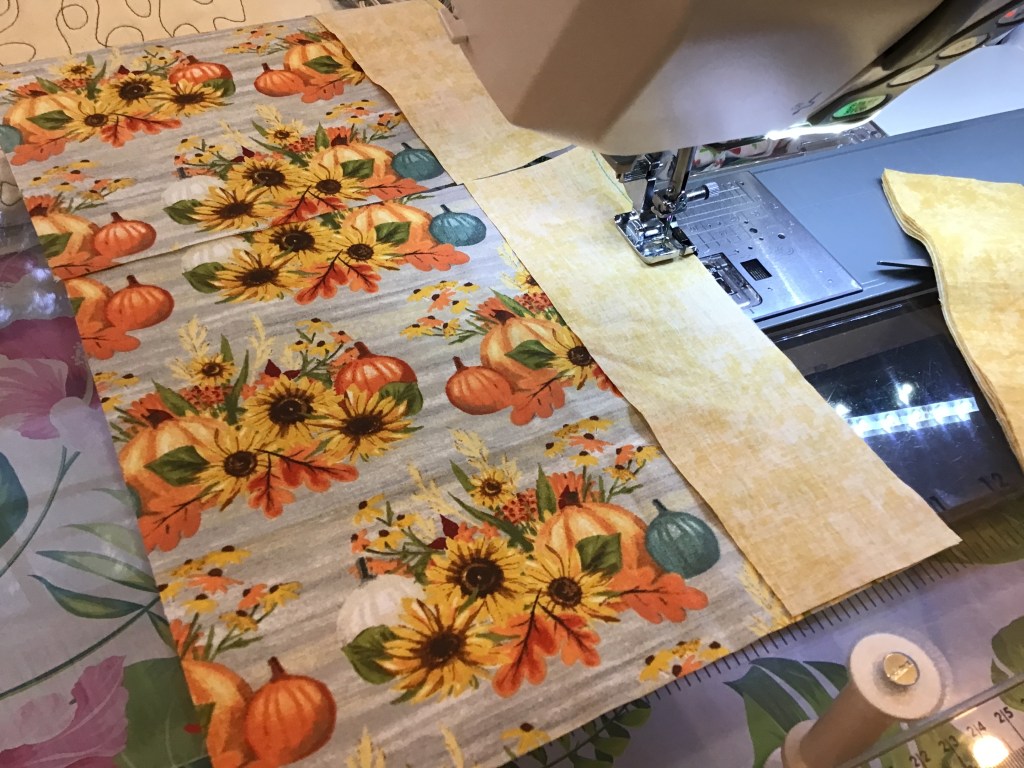
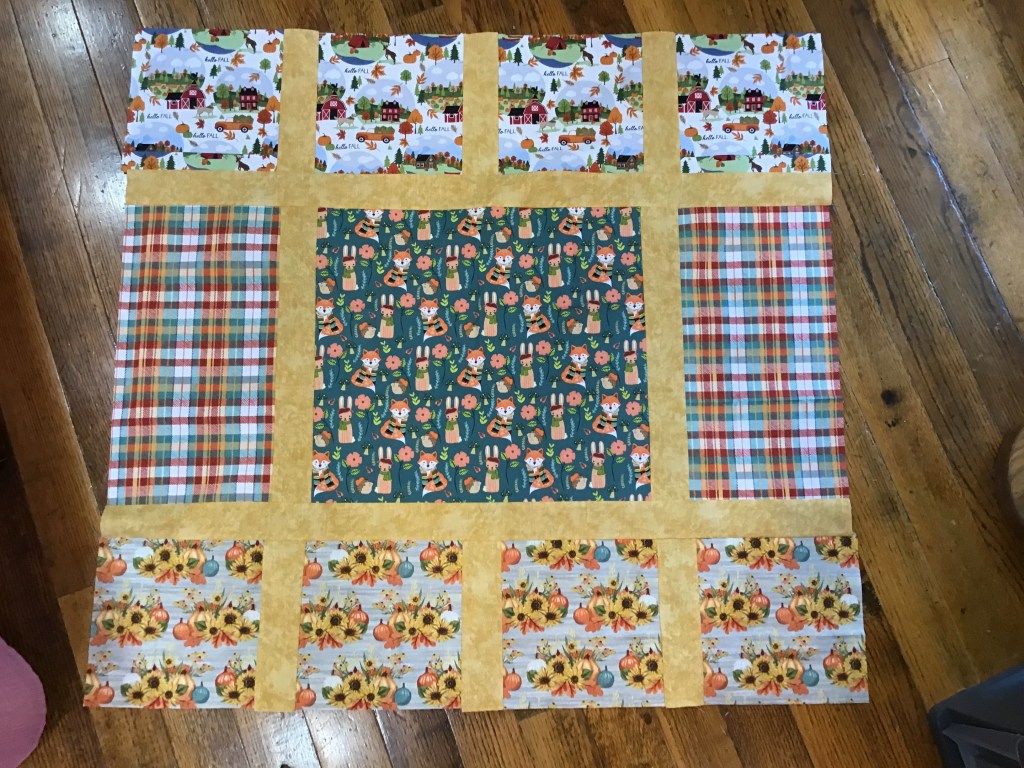
All right, moving on. Let’s sew background strips to the sides of the center square. I pressed my seams towards the background fabric.
Yep, you knew I was going to pick the teal forest animal print for the center, didn’t you?

Now sew rectangles to each side of the center unit. I pressed the seams towards the background strips.
Of course it was going to be the plaid! Was there any doubt in your mind?
Huh. I really like how this is already looking — the plaid is just too fun and the teal forest animal print is really cute.

Next let’s sew background strips to the top and bottom of the unit. Again, I pressed the seams towards the background strips.
This is going really fast, isn’t it?

I chose similar-feeling fabrics for the top and bottom rows in the hopes of balancing the quilt. Do likewise if you want, but don’t be afraid to mix things up.
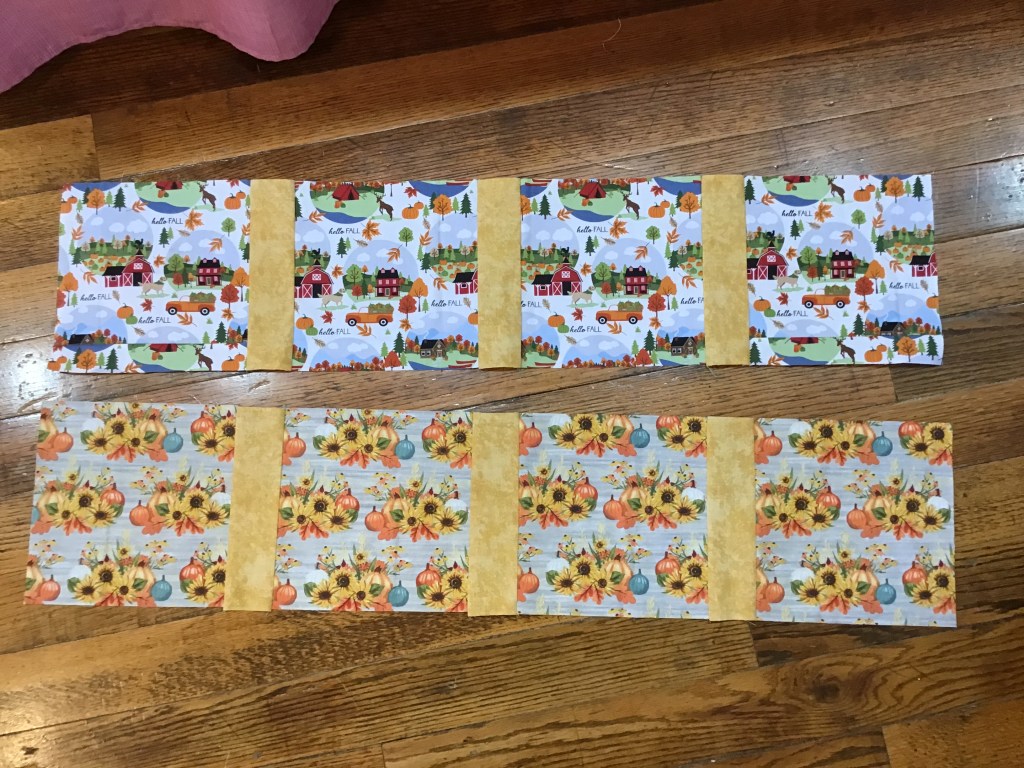
Sew 3 background strips between the 4 small squares. Make one row for the top and one for the bottom of your center unit. I pressed my seams towards the background strips.
Sew a pieced square strip to the top and the other one to the bottom of the quilt center.
Then sew the pieced rows to the top/bottom of the quilt center. Of course, I pressed my seams towards the background strips.
Sew background strips to the top and bottom of the quilt center and press the seams towards the background strips.
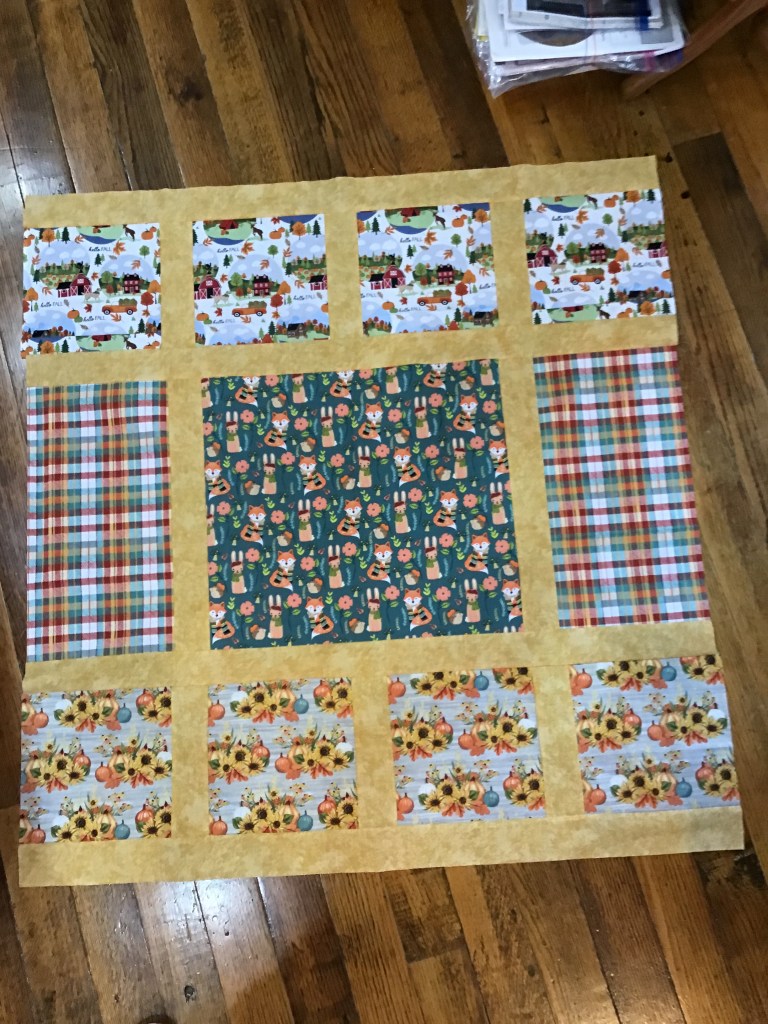
Sew a background strip between 2 matching rectangles. I pressed my seams towards the background fabric.
Make one pieced rectangle row for the top and one for the bottom of the quilt center.
Decide which pieced rectangle row will go on the top and which one on the bottom. Then sew the pieced rectangle rows to the quilt center, pressing your seams towards the background strips.
I hardly broke a sweat sewing this together so far. How about you? Can you believe how fast the center of the quilt came together?
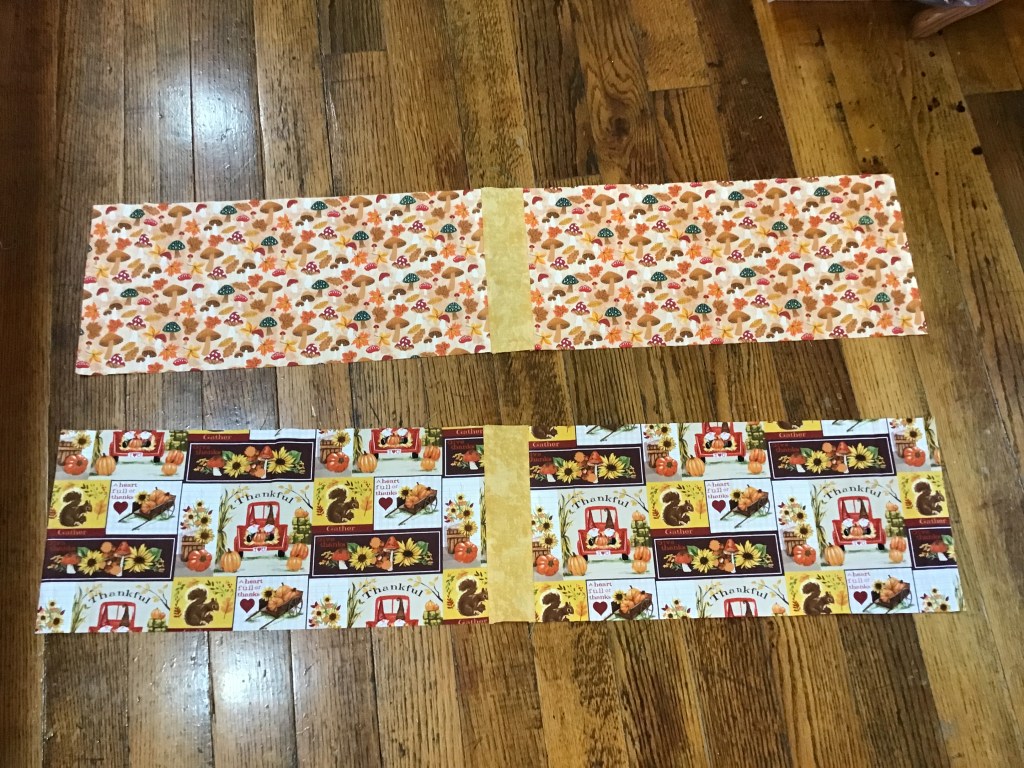
Now let’s add some borders. Go ahead and sew the top and bottom borders on first and press the seams towards the background strip.

Then add the side borders. You will need to piece your strips so you have the right length.
Sew the borders to the sides of your quilt and —
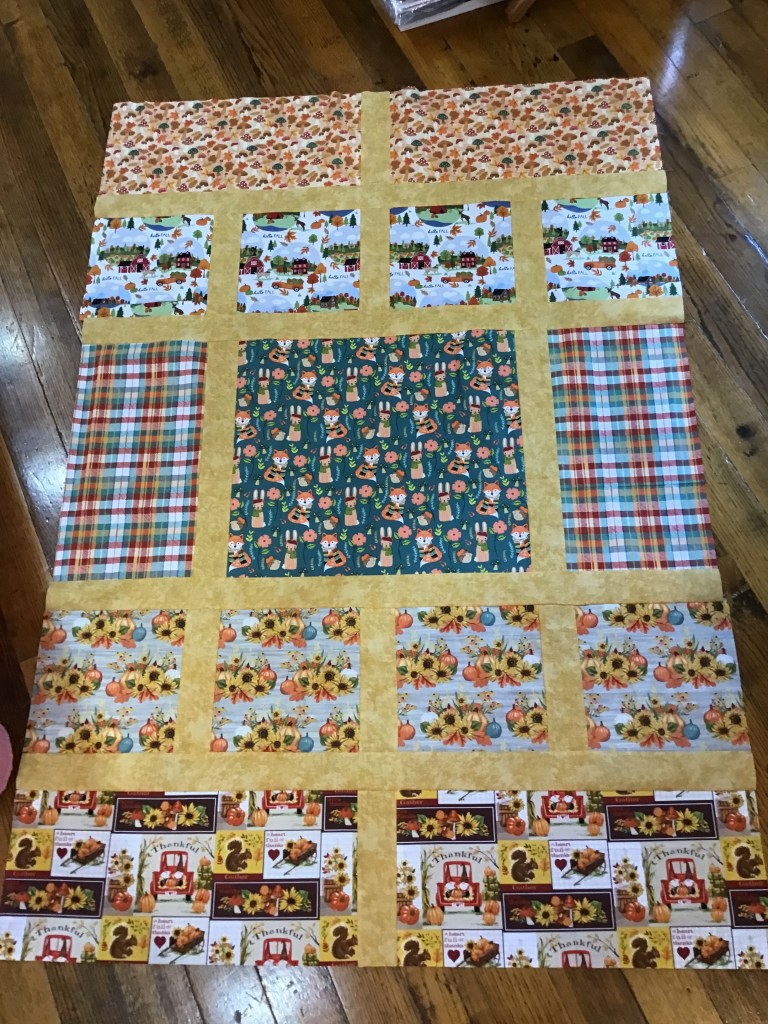
VOILA!
Top done! Lickety Split! Just like that!
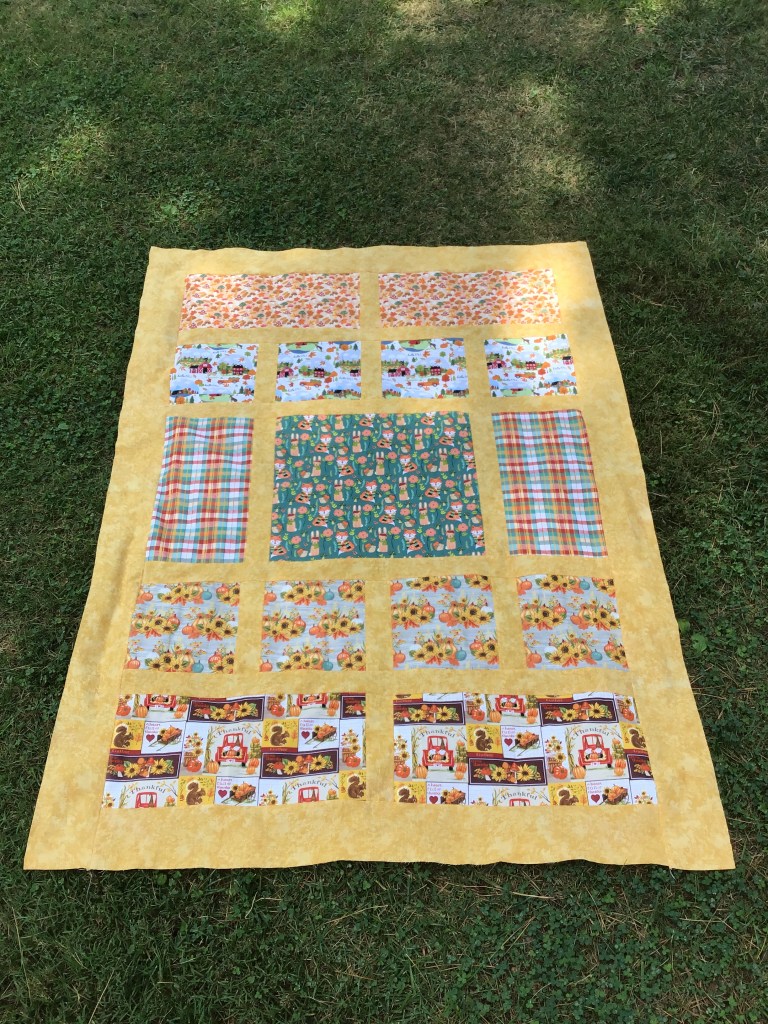
I just love how my Discovery quilt top turned out! It’s really fun. And really cute with those whimsical fall fabrics. I’m thinking maybe a teal binding to finish it off after I quilt it. Or maybe orange? What do you think?
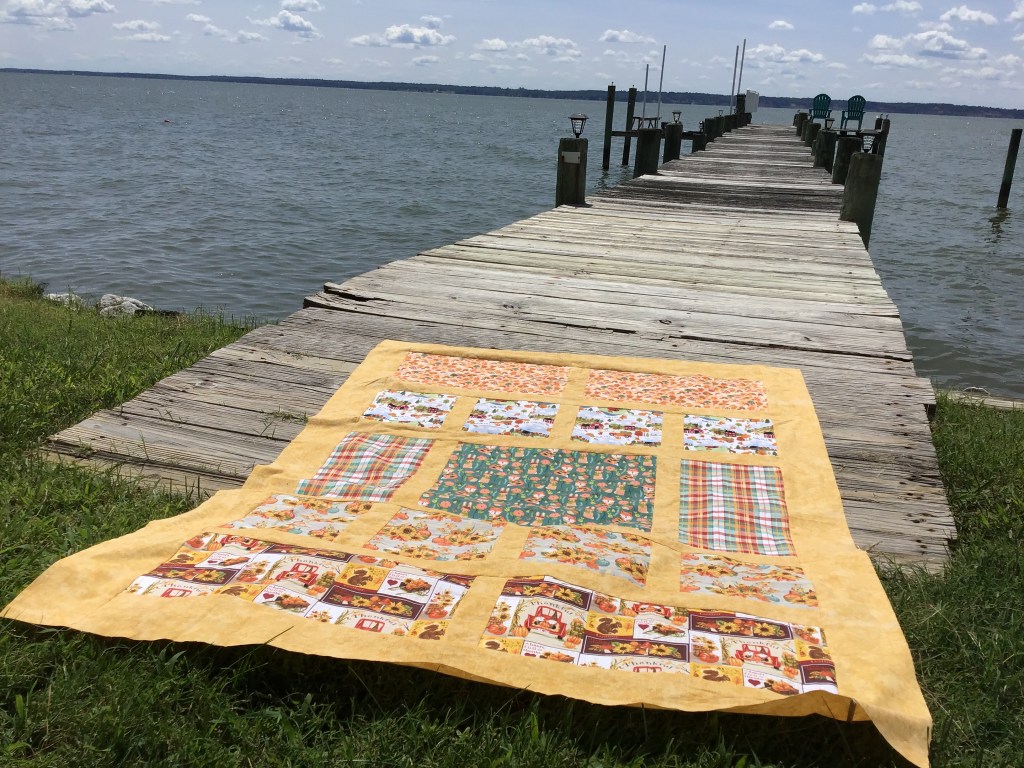
Here’s a photo of my Discovery quilt top down on the pier on the Potomac at Colton’s Point. It was a little breezy and my quilt top just wouldn’t stay still. If it had been a completed quilt, it probably wouldn’t have been fluttering around while I tried to take a photo. I was actually afraid to take it farther out on the pier lest the breeze catch it and I lost it in the river.
Here is one of my favorite photos again — the one I took on the picket fence in front of Cathey’s cottage.
As pretty as it is — almost a postcard — it would look even better if the quilt was finished already. Maybe the next time I go, I can recreate this photo with the finished quilt.

By no means am I a professional photographer — strictly amateur — but I have learned some things that have improved my photos over time and I am happy to share them with you because you really should be taking photos of your quilts.
Why? You might ask.
Some reasons include:
- Documenting your work
- For insurance purposes
- To show your work to others without hauling crates of quilts around with you
- For a quilt show or contest, if it’s required
And I bet you could come up with your own reasons for photographing your quilts, too.
Here are my tips. I hope they will inspire you to try your hand at photographing your own quilts if you are not already doing so.
8 Tips for Photographing Your Quilts
- Use natural light — I prefer taking my quilt photos outside. My indoor lighting and space are not the best, so outside it is for the most part. I will even take quilts outside in the middle of winter to take photos.
- Get creative with backdrops and props — sometimes I take a quilt to a different location, but mostly I utilize what is in and around my yard — trees, grass, flowers, rocks, the roof of my car, an old tractor, weathered wood porch, a railing, a fence, or whatever I can come up with.
- Keep it simple — limit the amount of distractions in your photo, keep the focus on your quilt.
- Add a little extra — I like to incorporate natural details in my photos when I can, but I still want the focus to be on my quilt.
- Take photos from different angles — I like to do this and then later I can chose the best one because sometimes a straight-on shot doesn’t show a quilt to its best advantage.
- Ask for help — Sometimes you just need an extra hand or even a pair of hands to hold up a quilt. Don’t be afraid to ask in order to avoid frustration and failure.
- More is better — I end up taking a lot more photos of a quilt than I will ever use, that way I can pick out my favorite(s) and delete the rest. And believe me, I delete A LOT of images.
- Practice — It takes a lot of practice to achieve the results you really want when photographing your quilts, so be patient with yourself and just keep practicing.
Well, that’s it for me this week. Have a wonderful and safe Labor Day weekend. Wish me luck with my sewing….
Until next time —
Sew. Laugh. Celebrate. Repeat.
Always,
Tricia @VRD