I will keep this post short and sweet so you can get back to your family and friends. And pie, don’t forget the pie. With lots and lots of whipped topping. Yum!
You can find my FREE Pieced Turkey Quilt Block Tutorial from 2022 HERE.
Let’s jump right in!
For the month of December, I thought it would be fun to do a VRD Sew Along with some of our Accessory Rose Cards. Are you familiar with our accessory patterns? They are quick and fun small projects to use up your stash…..or an excuse to head to your local quilt shop and buy more fabric just for these great little projects. You can find all of our current accessory patterns HERE.
They make great last-minute gifts you can whip up in a hurry for family and friends……or even just for yourself. Who doesn’t love an excuse to do some holiday sewing in December, when everything is so fast-paced? We all need to slow down a little bit and get a touch of sewing in, don’t you think? And you may just be seeing more smaller accessory patterns coming in 2024 — think mug rugs, bags, place mats, pillows, and more.
Speaking of 2024, we certainly have some exciting things coming for Villa Rosa Designs! Watch for our second Fast and (Even More) Fun Blog Hop coming in January/February 2024. I am still working on the dates right now, so stay tuned….
So, let’s keep this post moving!
Accessory Sew Along
What’s a Sew Along, anyway? It’s simply an opportunity for quilters and sewists to sew the same projects together from wherever they are. The magical Internet makes it so easy for us to sew together without getting together physically. We will all sew the same project each week and post our photos on the Villa Rosa Designs Facebook group. Sounds like fun, doesn’t it?
I have selected 5 patterns for us to make together for the month of December. Here are the dates and the projects along with the links to purchase the patterns at Villa Rosa Designs. Maybe you have a few already and only need certain ones. If so, just follow the individual links to the patterns you need below OR you can grab the whole set of 5 patterns for the special price of $8.95 HERE. Don’t forget — shipping is always free for patterns!
All 5 patterns for the Sew Along for $8.95!
What are you waiting for? Get your patterns now and start organizing your fabric for each of the projects so we can SEW ALONG together, starting next Thursday, December 2nd.
I hope you’ll join us for some much-needed sewing fun in December! And ask a quilting/sewing friend, so you can double your fun! If you haven’t joined our Facebook group, please do so now — that way we can all post photos of our Sew Along projects, give each other high fives, and oohh and aahh over each other’s fabric choices for each project! You can find our FB group HERE.
And don’t forget to subscribe to the blog so your weekly Villa Rosa Quilts blog posts will be delivered right to your email inbox. How easy is that???
Here’s to a December filled with sewing and giving. Love and laughter. And cookies. We must have cookies….
See you next Thursday for our first Sew Along project — Amanda Jane!
I’m still in Quilt Market/Festival mode and boy, have I got some goodies to show you today, including another slide show of quilts! I’d like to point out that this demonstrates how far-reaching and important Quilt Market and Festival really are — it literally takes weeks to “unpack” your brain afterwards. That can include looking through literature from companies, sifting through all your goodies, contacting new contacts, making connections about orders or new projects, and so much more. I am most definitely still decompressing from Market and Festival. Whoah! Squirrel……….
American Quilt Study Group Display
One of my favorite quilt displays at Market and Festival this year was by the American Quilt Study Group (AQSG). The display had a wonderful title — “Every Quilt Tells a Story”. It was a really interesting display with quilt examples ranging from the 1850’s up to circa 1980 — that’s one really broad stroke in quilt history! Some of my favorites on display were the double knit polyester quilts, believe it or not! I’ve always wanted to adopt a double knit quilt because the whole idea of working with such fabric always fascinated me.
As many of you know, my personal roots in quilt-making began with collecting antique and vintage textiles long before I taught myself to quilt after I graduated from college. I came to quilting through the side door, so to speak. Quilting, for me, was a perfect merger of my love of the antique and vintage as well as history and textiles. And OH THE STORIES our quilts could tell us….
So, this display was very near and dear to my heart. I even managed to be in the right place at the right time and participated in a quilt walk talk. It was great to hear more about each quilt as well as the collector/owner.
And while I was there, I even joined AQSG! I’m excited to learn more about my own textile collection and to see how I can contribute to the AQSG existing body of knowledge. You can learn more about the AQSG (and how to join) HERE.
Without further ado, here’s the slide show showing the quilts I was particularly drawn to. Again, please note the quilt information is the slide after the quilt.
Pretty awesome, huh? Which one was your favorite?
Speaking of antique and vintage quilt stuff, let me show you some of my favorite finds at Market and Festival.
Favorite Market and Festival Finds
Probably my most special find was Harold the antique quilt with the opened feed bags for a backing. Did you miss my story, “The Quilt that Followed Me Home”? You can find it HERE.
Then there’s the HUGE collection of antique and vintage Orphan blocks I found at 3 different antique quilt vendors — Quilts From Mulberry Lane, Tenny Roche Vintage, and Legacy Quilts . I can’t wait to play around with these….
Speaking of antique and vintage quilty stuff, I also found this incredible piece of Hawaiian quilting at the Lavender and Old Lace Co booth. It is hand-appliqued and completely hand-quilted. Maybe it was going to be a pillow square? Who knows? There probably isn’t any way to find out how old it is because it’s a solid red on muslin, but it definitely isn’t recent. It had a wide red silky blanket binding applied with some kind of fusible product all around the edges. The blanket binding pulled right off, but it did leave some red staining here and there. Ho hum, just part of the piece’s history. I plan to square it up, bind it in a vintage red fabric, add a hanging sleeve on the back, and a label. I don’t know the name of the block yet, but I will enjoy doing some research into Hawaiian quilting.
Of course, I had loads of fun shopping in our very own VRD booth! Being that I live in PA and the VRD quilt shop is located in CA, it was kind of like visiting the shop (at least a mini mobile one). I grabbed a couple kits I’d had my eye on — Pascali and Picture Perfect.
It’s your lucky day, too — we still have kits left for both patterns!
Or maybe you’d just like Molly’s Picture Perfect pattern? Physical Picture Perfect HERE, digital Picture Perfect HERE
I spent time during Festival helping Molly and Heidi to keep the half and full yards of fabric organized in the plastic bins. I had never seen (or felt) the Charley Harper fabrics up close and personal before now. The fabric was so smooth and silky and the images so colorful and crisp!
Of course, after handling it for days, I just had to take my first Charley Harper fabrics home. It was hard to decide which fabrics to start with, so I ended up putting together a winter collection, a fall collection (’tis the seasons…..), and the last photo shows 2 random prints I fell in love with. It was really fun to mix and match the prints from different collections together. I am looking forward to creating a new VRD pattern (you know, in the next 50 years or so) using my Charley Harper fabric finds.
Pat, our VRD Rose Queen, has used Charley Harper fabrics in a couple patterns already, Newsflash and Jolie. Of course, the kits are long gone, but you can still get the patterns — physical Newsflash HERE or digital Newsflash HERE and physical Jolie HERE or digital Jolie HERE. And you can shop our VRD Charley Harper fabrics HERE.
Charm Squares and Fat Quarters, oh my!!! What more can I say???
PSST! The fat quarter rolls were from our VRD booth, you can see our VRD bundles HERE.
Have you ever been to Phoenicia in Houston? It’s an amazing specialty grocery store through the park and a block away from the Convention Center. Totally worth the short walk. Specialty grocery just doesn’t do the store justice — it’s a restaurant, coffee shop, bakery, meat and fish store, fresh foods, international foods, hot foods, cold foods, salad bar, fresh fruits/vegs, wine and beer, gifts, and so much more. I haven’t been here since 2019. I had so much fun wandering the aisles upstairs and down. I found some great goodies to take home for my family and even some special stuff for myself. I LOVE Turkish Delight. Have you ever tried it? I go all the way to Houston to find my favorite Koska brand from Turkey. And there were even some new flavor combinations, too!
Here I am sitting out front at one of the little bistro tables enjoying a S’mores cappuccino ( light on the coffee, heavy on the chocolate) and an amazing chocolate eclair. Yum!
Speaking of food, I get really excited to go to Quilt Market (and now Festival) just to have one of the most amazing Texas-sized stuffed baked potatoes. Yep, you heard me right — baked potatoes. I’m talking butter, brisket, cheese, BBQ sauce, sour cream, real bacon, and chives. Yum yum yummy! You can’t beat it for the most filling lunch ever. It’s not cheap, but it’s oh so satisfying.
Here I am digging into my tater……
So grab your own ginormous potato next year at the Food Court and tell ’em Tricia from PA sent you. I think they should keep a world map and a USA map on display (and color in the countries/states) to show all the places where potato lovers come from. Just sayin’……..
When I went to Houston, I took along a little hand-sewing wool felt project for the airport and on the plane. Of course, while I was taking everything in, I was drawn into the wool booth, Yellow Creek Quilt Designs — blame it on the Gnome piece that reached out and grabbed me. Ha Ha! Of course, I bought the pattern for the Gnomes well as a few others. And at another booth, Penny Lane Primitives, I bought this adorable snowman candle mat kit.
Well, I guess that’s it for me this week. I’ve got to get back to work on our upcoming 12 Quilts of Christmas collection! Stay warm and get quilting! And get some rest so you’re ready to first eat turkey next week then shop until you literally drop.
Here I sit at the Hobby airport grabbing some lunch while I wait for my flight back to good ol’ Pennsylvania. Wow! What an awesome Quilt Market and Festival! I am so excited to get back to my studio and get to work on new projects — my head is just exploding with inspiration and ideas.
I did figure out how to get Harold the quilt home — I bought a duffel bag at WalMart since I’d only brought one suitcase and “2 bags fly free.” The only problem with the duffel is that with only Harold in it, it was kind of empty so I just had to shop for awesome cool stuff at Festival to fill it up so Harold wouldn’t be lonely on the trip home. So sad, huh? I’ll be showing you some of my favorites in next week’s post, so stay tuned……
Now let me show you our NEW VRD Rose Card patterns for November.
NEW November Villa Rosa Designs Rose Card Quilt Patterns
Yay! It’s the Thursday after the first Friday of the month and you know what that means — NEW PATTERNS!
Aren’t they great??? As always, you can get the set of 5 regular patterns for the special price of $8.95 HERE.
We’re happy to welcome our newest Villa Rosa Designs designer — Deanne Moore of Creative Sewlutions. Most of you are probably already familiar with her classic Oh Henry pattern — Deanne selected the most popular size for her Rose Card Oh Henry pattern. Find the kit, featuring fabric from Wild Wander, HERE. And Deanne’s other new pattern, Messages is just tons of fun, isn’t it?
Peking Duck is an awesome pattern by Heidi to showcase those gorgeous large prints you just cannot cut up. I’m thinking Charley Harper fabrics would look great in her pattern, what do you think?
Molly’s fast and fun pattern Underline would also look great with larger prints or novelties paired with an accent. This is a good size for a kid’s quilt. You can find the kit HERE.
And don’t forget Farmhouse Blues, my new November pattern. I was sew inspired by the blue and white Moda collection, Blueberry Delight, that I just had to design a quilt around it. I had the most fun photographing it on my Dad’s vintage tractor. I think this is one of my best cover photos ever.
Here’s the original uncropped photo for the Farmhouse Blues cover. Definitely one of my favorite covers ever!
Molly created a sample using the red, white, and blue collection, Patchwork Americana by P&B. You can find the kit HERE.
Molly’s version of Farmhouse Blues, available as a kit.
I’m sorry that we don’t have a table runner for this month — there just wasn’t enough time to get everything ready and to press before Market and Festival. We will have a runner coming for December, though, so hang in there.
Now let’s get back to Quilt Market and Festival!
Quilts of Quilt Market and Festival
During Festival, I was able to spend quite a bit of time enjoying the quilts on display. Oh my goodness, talk about amazing and inspiring! I was really blown away with the creativity and skill. Truly amazing! Pair all of the quilts with all of the shopping and you have an amazing experience. If you haven’t attended Festival, I really urge you to go to one sometime, you won’t be sorry. I do suggest that you plan for at least 2 days, although staying for the entire show would be awesome. There is absolutely no way you can see and experience everything in just one day. It really is sensory overload, so a couple days is a must so you don’t get too overwhelmed.
Anyway, I thought I’d share some of the amazing quilts on display. In the image after each quilt, I’ve included the maker information. Please enjoy my little slide show!
Well, that’s it for me this week. I hope you stop in next week for another little slide show and my favorite finds from Quilt Market and Festival. Until then, spend some quality time with your sewing machine!
As I sit and write this post, sadly, Quilt Market is over. I must apologize that I did not pop onto the blog to talk about anything going on here at Market in Houston, TX. But it just all went so fast!
Working in the VRD booth was lots of fun! I just loved chatting with folks when they stopped by the booth and I spent a lot of time hustling to pack up patterns (we all did!). And time just zipped by. By the end of each day, I put on well over 10,000 steps and I was plumb worn out.
I also must admit that I only took maybe 2 photos during the whole of Quilt Market. Sad, sad, sad, I know. It’s okay, you can roll your eyes at me, I don’t mind….
Here’s a photo of Market looking down from the second floor back in the good ol’ days before the Pandemic.
Here’s an old photo of the VRD booth from 2018. This year’s booth was set up a little different, but still had all the same components — current quilts on display, fat quarter bundles and kits, and our patterns (of course).
One of the very best things about Quilt Market is getting out there and networking with real people. It was great meeting lots of new folks and catching up with people I work with online so we could actually meet face to face.
Of course, it’s also a great time to connect with old friends. I had lunch with my pal Cathey Laird from Cathey Marie Designs. Catherine of Running Doe Quilts (one of our VRD designers) stopped by — it was so nice to see her again. I also met our newest VRD designer, Deanne Moore of Creative Sewlutions. An old quilt guild friend, Sondra Raby of Art Quilts by Design, was here doing demos and I at least got to say hi as she was running off for her next demo. I caught up with Christa Watson of Christa Quilts, a favorite machine quilter, author, and fabric designer and Vanessa Goertzen of Lella Boutique, who is also a fabric designer and author. This is what Quilt Market is all about — meeting people and making connections. If you ever have the opportunity to attend a Quilt Market, I totally say “Go For It” — you won’t be sorry.
Although Market is over, the good news is that we’re rolling right into Quilt Festival and I promise to take lots of photos, including of the VRD booth, too. If you’re coming to Quilt Festival here in Houston, TX, don’t forget to stop and shop at our Villa Rosa Designs booth #801. You won’t believe the “dump” table which is piled sky high with fat quarter bundles. Oh. My. Goodness. It’s a quilter’s paradise.
A smiling Molly!Kits, kits, and more kits. And quilts! Oh my!Majestic Bundle Mountain — AKA, the “Dump” table.Here’s our VRD Rose Queen, Pat.Bolts just waiting for you at the booth.Kits, kits for everyone!
One of the coolest things about Festival, besides that it’s my first one, is that I finally get to meet Villa Rosa Designs designers Molly and Heidi Cook (it’s Heidi’s first Festival too) in person! Yay! Oh, the mischief we could get into together…. Sigh…..poor Pat.
And here’s a really funny thing — my friend, Gaynel, from my neck of the woods, is coming to Festival on Friday. What a long way for us to come just to meet for lunch, huh? LOL!!!
Now, let’s move on to some awesome announcements we made at Market about what’s NEW at VRD!
Villa Rosa Designs NEWS
I am happy to share some great new stuff coming soon with Villa Rosa Designs with you!
Designer News
Kate Griffin will be returning to Villa Rosa Designs. Some of her wonderful patterns are coming out of retirement, so stay tuned for more information….
Deanne Moore, designer of Creative Sewlutions patterns, is joining the VRD Family! Check out her 2 patterns coming in November, Oh Henry and Messages. You can visit Deanne’s website HERE.
New Pattern Collections
Coming in November, we will have 2 brand new exclusive 12 pattern collections!
We are delighted to announce we are partnering with the Quilts of Valor Foundation to bring you a collection of existing VRD patterns that meet the size requirements for QOV quilts. A portion of every sale will be donated to QOVF.
We will also be offering a brand new “12 Quilts of Christmas” pattern collection just in time for the 2023 holidays! This collection will feature 12 new holiday patterns for projects ranging from table runners to place mats to throw quilts and more featuring designs of many of our wonderful VRD designers.
Coming in 2024
Back by popular demand!
Coming in January/February 2024, we will host our second Fast and Even More Fun Blog Hop. More information to follow soon!
The Quilt that Followed Me Home
You know the saying — “what happens at Quilt Market (or wherever you are), stays at Quilt Market”? Nope, not this time — this story is meant to be shared.
Every time I attend a Quilt Market, the first place I literally visit besides our Villa Rosa Designs booth is Quilts from Mulberry Lane and my friends Carolyn and Don Springer. You can visit their website HERE.
I think I met these dear folks way back at my first Market in 2010 when my first book, Orphan Block Quilts, debuted (psst — this was also when I met Pat Fryer, our VRD Rose Queen, and you know how that turned out).
As most of you know by now, I personally LOVE antique and vintage quilt and textile stuff, so of course I found my way to Mulberry Lane. Anyway, when I stopped to check in with Carolyn and Don, they couldn’t wait to tell me about this interesting quilt that had found its way to them. The quilt had opened feed bags on the back of it and one of the bags was still very easy to read. They knew of my love for feed sacks and knew I’d be interested. Sadly, there was no provenance.
It really warmed my heart that they thought of me! They are such kind people. Don showed me the quilt back first. What an interesting find, for sure. I’d heard of people using opened feed bags for utility purposes such as quilt backs, sheets, underwear, etc., but I’d never really seen it in person. Until now. Then Don finally showed me the front and it had humble Snowball blocks in plaid and stripe shirtings with a few Indigos thrown in for good measure set side by side. I’m thinking perhaps circa 1920’s-1930’s. As a reference point, I have my grandpa’s Nine Patch quilt which was made by his mother when he was a young man and it also features shirtings and such. Very similar quilts. Also as a reference, printed design feed sacks weren’t available until the late 1930’s.
It definitely needed a good bath, but Don said they were concerned about washing it because of the printing on the back feed bags and they were concerned it might fade or wash out. It’s well-loved with typical wear and tear and could use a new binding. But all in all, this quilt still has a lot of love to give.
The Springers gifted this quilt to me. I was so so touched by their desire to put this quilt into the hands of someone (me) who would love and cherish it. We named him Harold (I have a quirky habit of naming everything).
Then the weather turned chilly here in Houston and Harold fulfilled his purpose once again and warmed me during the cooler nights — I definitely did not bring any cooler weather clothing with me (by the way, Wednesday morning we had 8 inches of snow on the ground at home in Pennsylvania — way way too early). Thank you Harold! And thank you to my dear friends, the Springers, for their kind generosity.
Now to figure out how best to get Harold back home to Pennsylvania….
I did grab a few quilt blocks and feed sacks from the Springers, too. Adding to my stash, of course because one can never have enough stash. I bought the blocks because they had feed sack fabrics or other interesting vintage fabrics in them.
Here I come, Quilt Festival!
See you next Thursday right here. Same place, same time —
As you read this post today, I am on my way to International Quilt Market in Houston, TX. Yay! I’ve been so psyched recently as well as frantic because I’m always afraid I’m going to forget something important. Whew! I will admit that I’m not an easy traveler. Most of the time I overpack and I overthink. I’d like to be more spontaneous but sadly, I don’t think that’s in my genes.
Although I’ve been to Quilt Market more times than I can count now, this year’s Fall Market is going to be a first for me because I am staying for both Market and Quilt Festival, which follows right after Market. I’ve never been to a Festival, so I am doubly excited for this trip! Houston, here I come!
International Quilt Market is the trade show part for companies, shops, and industry professionals while Quilt Festival is the retail show for everyone with tons of vendors, classes, and beaucoup shopping!
Right now I’m in the packing phase, so I packed all the clothes I thought I’d need. Well, silly me, now it’s time to cut that down by 25% or 33% if I can manage so I have room for other essentials. Thank goodness Pat, our VRD Rose Queen, rents a house with a laundry! Thanks, Pat!
I’ll be taking my laptop along for the first time on the plane, so that’s a new experience too which made it necessary for a brand new travel laptop bag on wheels with extra space for clothes and such. Sigh….by my estimation, I should be done packing sometime next week — you know, a week after I leave. LOL!
Are you headed to Quilt Market or Quilt Festival in Houston? If so, we all hope to see you there. Please stop by our Villa Rosa Designs booth and visit — we’d love to meet you in person and tell you about some exciting new things coming for Villa Rosa Designs.
You can find Villa Rosa Designs at Booth #803 on the show floor.
We have a Schoolhouse Session scheduled for Session 13, 4:40-5:10 PM in Room 362D. Gosh, I hope the room is big enough — it was standing room only last year.
You can find Villa Rosa Designs at Booth #801 on the show floor.
Don’t forget to stop by the blog next week for more Quilt Market Adventures! And who knows? Maybe I’ll pop in at the blog sometime before next Thursday….
Jelly Roll Quilt Races
Have you ever participated in a Jelly Roll Race? Jenny Doan of Missouri Star Quilt Company (MSQC) did an awesome video years ago which started a massive Jelly Roll Race response. You can find Jenny’s video below if you’ve never seen it.
A couple friends and I were reminiscing about the fun Jelly Roll Races we had way back then (Jenny’s video came out in 2012). Our group actually raced another group in Chicago! Twice! So not only were we racing against each other to finish first, we were racing as a group to finish before the Chicago group! Wow! That was so awesome — I swear my sewing machine was smoking! That conversation sparked our interest in having another Jelly Roll Race (or maybe more). So I asked my local quilt shop owner here in PA, Gail, if we could do it again. She agreed, of course.
So while I’m flying from Pittsburgh to Houston, you can enjoy some great Jelly Roll quilt tops (flimsies) made recently at our super fun Jelly Roll Race events.
As you’ll see in the photos, every top looks entirely different! Individual fabric choices — choice of straight seams, angled seams, or even posts to sew the strips together — adding a border or not — horizontal strips or vertical — all of these things make each Jelly Roll quilt unique.
Drum roll please!
Here’s our newest and fastest Speed Queen, Donna, with a smokin’ hot 36 minutes to make her quilt top! She was one determined quilter!
Pretty Christmas fabrics, Donna!
Our Runner Up was Jill with a not too shabby (wink, wink) 38 minutes — Jill was our original Speed Queen from our races way back when.
Love the neutrals, Jill!
The best thing about a Jelly Roll Race, is the fact that everyone really is a winner regardless of their finishing times because each participant gets a throw-sized quilt in a short amount of time! Here are the rest of the quilts in no particular order.
Kim’s favorite colors!Sherry went stash scrappy!Timing is everything, isn’t it? Phyllis was one of the original Chicago ladies way back when and she just so happened to be visiting her sister, Mary Lee, when we had our first Jelly Roll Race. Coincidence???Mary Lee added posts between her strips. Isn’t that cool?
Two quilters even participated twice. Weren’t they smart? That way they each made 2 quilt tops in record time. Good thinking, Lisa and Robin!
Great job, Lisa! And she’s a beginner!She turned this one on its side because it had a few extra strips in the roll. Neat variation, huh?Robin’s Autumn throw sure is cozy, isn’t it?Another stash scrappy flimsy!
Donna added a border and even finished her flimsy and showed it off at our next gathering! Way to go, Donna!
Not only are you our current Speed Queen, Donna, you’re also the Fastest Finisher!
Phyllis (who went home to Chicago before this photo) and Mary Lee added borders onto their tops to make them larger and plan to use fleece on the backs. Great idea! (Psst! Did you miss my post about quilting with fleece? You can find it HERE.)
There you have it! Looks like a lot of fun, doesn’t it? Go ahead — I dare you to ask your local quilt shop to host a Jelly Roll Race. And don’t forget to check out the selection of Jelly Rolls while you’re there!
Did you know that Villa Rosa Designs (both the online shop and the physical shop) have a nice selection of Jelly Rolls and other precuts? You can see them HERE. We also have lots of VRD Rose Card patterns just for Jelly Rolls — you can find those HERE.
One more photo…….
Although I didn’t actually race as I was the “host”, I did complete my own Jelly Roll top, using a fun Christmas strip set. Sigh, now to get this one finished……….
Yup, that’s me grinning like a crazy quilter from behind my Jelly Roll flimsy.
Speaking of quilt tops, I hope you had the chance to read last week’s post about finishing flimsies. If you missed it, you can find it HERE (or just keep scrolling down).
Hope to see you at the Villa Rosa Designs booth at Market and Festival as well as our Schoolhouse Session at Market. Just tell ’em Tricia sent you….
I don’t know if you are like me at all but I have a bunch of quilt tops — or flimsies, as they are often called in quilt jargon — piling up and I can’t work fast enough to make a dent in them. Part of the problem is that I have NEW quilts to make, so it’s hard to work backwards to finish the stack of flimsies that I have already made, but haven’t finished yet. It’s such a vicious cycle….
Recently, I started brainstorming some ideas to power through those unfinished tops while still working on my current and future projects. Today I thought I’d share my ideas with you. Feel free to leave a comment if you have ideas, too, because I’d love to hear them. Maybe if we all brainstorm together, we can combat the universal quilting problem of too many projects and not enough time.
Ideas to Finish Your Flimsies
Make a Plan of Action — Maybe it’s time for all of us quilters to go through our flimsies and look at them realistically — a very important first step so we know how many flimsies we really do have. How many of them can we really finish in a lifetime? Let’s be honest with ourselves here. Maybe divide them into 2 piles — the ones we think we might finish and the ones we won’t. Let’s keep only the ones we’ll actually finish and then write down a plan to get ‘em done. Soon that teetering stack of flimsies will be a thing of the past.
Share them — Since you’ve decided which flimsies you are going to complete and you’ve made a written plan to accomplish that, why not share those unwanted flimsies with quilty friends, fellow quilt guild members, quilters who make charity quilts, a church quilt group, or some other charitable organization. Then you can clear away those unloved flimsies without guilt and make someone else’s heart happy.
Take a Class — Maybe you don’t know how to machine quilt your own quilts. Why not learn how? Check out your local quilt shops or quilt guilds to find a machine quilting class. Or maybe you’ve always wanted to learn hand-quilting? What are you waiting for? Sign up for a class and get quilting those flimsies yourself!
Use fleece — I’ve talked about using fleece on the backs of my throw quilts before. Check out my post on quilting with fleece HERE. Using fleece on the backs of throw quilts makes them super cozy and lightweight. Fleece fabric is relatively inexpensive and batting isn’t even needed, which makes using fleece also economical. And don’t forget time-saving — you only have to layer your flimsy with a single layer of fleece, which takes less time than using both batting and backing. Just remember that fleece is very stretchy while your flimsy is not and you may need to adapt your quilting designs to manage the stretchiness.
Practice makes perfect — Just get those quilts layered with batting and backing and get quilting. Hand quilter? Set time aside every day to work on your hand quilting. Machine quilting? Use your flimsies as hands-on experience as you master free motion quilting! Start with table runners and smaller projects and work yourself up to larger projects as you feel more comfortable and your machine quilting skills improve. Wiggly lines and straight lines get the job done too.
Long Arm Quilting — Find a local long arm quilter and work together to create a plan to get your large flimsies quilted. Maybe you can swing getting one done every month or every few months, or…? Do whatever works for you, just keep working towards your flimsy-free goal.
Have a party — Enlist your friends and have a good old fashioned quilting bee, but instead of everyone working on the same quilt, ask each friend to quilt one of your smaller projects. Anything goes! Ask your friends to bring their sewing machines and you will have tables and extension cords at the ready and will provide all the munchies! When you ask your friends to help you, make sure you promise to help them finish their own flimsies.
Presto Change-o — Who says a quilt top has to continue its life as a quilt? Why not repurpose a flimsy (or more) into a snazzy jacket. A tote bag or purse? Pillows for the couch? Place mats? Or whatever else your little heart desires. Have some fun with your flimsies and turn them into finished projects.
Mix and Match — Speaking of chopping up your flimsies to make new projects, how about mixing and matches bits and pieces from different flimsies together into a new project?
Host a Flimsy Swap — Gather up your quilt posse and have a fun flimsy swap. You might need to set some basic rules — the most important one that comes to mind for me would be that each participant must take as many flimsies as they bring for the swap, even if it means taking some of their own back home. Or limit the swap to one flimsy per person. Agree on a future date to have your new-to-you flimsies finished and have a quilt show of the completed projects. With snacks, of course. Then……..repeat. Often.
Take Me as I Am — Maybe you don’t machine or hand quilt. Maybe you just don’t have the money to send your quilts out to a long arm quilter. So why not enjoy those flimsies just as they are? Fold them over the rungs of an old ladder. Drape them over the couch. Use them as table covers in the dining room. Fold them prettily and stack them in an old jelly cupboard. Quilts love to be admired and enjoyed, even if they aren’t quite completed. Just remember to continue to work towards getting them done, one flimsy at a time.
Tie ‘em Up — Have you ever tied a quilt? This is how I made my first five or six quilts way back when. I backed them with a sheet and used a thicker fluffier poly batting. I sewed the layers together envelope-style and then used cotton crochet thread with a long needle to tie my quilts. I tied double knots and trimmed my threads close because I really didn’t want a hairy quilt. I usually placed my knots at seam intersections to hide them a bit better. Tying worked great and I could finish a throw or bed-sized quilt in a day. This was, of course, before I taught myself to do free motion quilting. Just make sure to put in enough ties to keep the batting from shifting around.
Go Small — Maybe you love to make big bed quilts but can’t or won’t quilt them yourself or send them out to a long armer. My solution? Make them smaller! No one ever said you couldn’t cut up your quilt to make 2 or more smaller quilts! Maybe a big bed quilt could become a throw, a wall quilt, a table runner, a set of pillows? Bet you can manage those more easily! This is even a great way to create a new coordinated look for your space, too. Just think how fast you could whip up a stack of table runners or quilted scarves for Christmas gifts when you start with big quilt flimsies? Oh, the possibilities….
Swap skills — You’ll need some friends to help you out with this idea. Have a friend who likes to machine quilt? Swap skills with them! If they will machine quilt one of your quilts, you will clean their house, make cookies, bathe their dog, babysit the kids, or whatever skills you can barter with. Maybe you can swap skills with more than one friend or even a local long arm quilter. Write a list of the skills you are willing to barter before you talk to people about swapping your skills for machine quilting. Just keep it legal, clean, and safe please.
Make Toys — Why not find a brilliant collection of simple stuffed toy patterns you can make for kids and cut the pattern pieces out of your flimsies. Don’t have kids or grandkids? Donate your soft toys to a children’s hospital or other charitable institution. Lions, tigers, and bears….oh my!
Repurpose — Did you know you can repurpose your flimsies? This is kind of like Presto Change-o above, but with a little twist. What else can your flimsies be besides quilts? Maybe you can recover a side chair with a pieced top to create a unique one of a kind accent for your space. Or perhaps you could make dining chair seat covers? Time to think outside the quilt here — anything goes.
I hope these ideas will inspire you to dive into your own stack of flimsies and get them done. From quilts to decor to soft toys. Upholstered foot stools and lampshades. Pillows and table runners. There are sew many projects you can create with your stack of flimsies. Sew, what are you waiting for???
Tricia here again. I hope you all enjoyed Molly’s Lickety Split tutorial last week. If you missed it, you can find it HERE.
Today is the Thursday after the first Friday of the month. You know what that means — NEW PATTERNS! YAY! I can’t tell you how much I love showing off our latest patterns. I know I always say it, but our family of designers amazes me every month with their inspiring designs. Sigh, I just wish I could make every single quilt…
New October VRD Rose Card Patterns
Throw the confetti! Blow the trumpets! Here they are!
Aren’t they great??? You can get the October set of 5 patterns for the discounted price of $8.95 HERE. So go, what are you waiting for? Tehehehe……
And here’s my October table runner, Ghosties! Who doesn’t need a ghost table runner for Halloween??? I used Hoffman 1895 Watercolors and 885 Dot Batiks. I love how it turned out, but I find my ghosts ended up kind of reminiscent of the ghosts on Pac Man. Hmmmmm. Do you remember Pac Man in the 1980’s? Oops, I’m dating myself, aren’t I?
Oh well, here’s Ghosties!
You can get the pattern for Ghosties HERE. It’s also available as a digital pattern HERE.
No kits available, sorry.
Can’t wait to see all your cute little Ghosties! Did you know that in old Transylvania, a group of ghosts was called a “ghossling? And in old European books, supposedly a group of ghosts was called a “tilling.” Apparently there really isn’t an official name for a group of ghosts, but some current options include a “fright” of ghosts or even a “haunting.” Just a little Halloween trivia fun for you. Who doesn’t need a little trivia in their life?
By the way, did you know that a group of crows is called a “murder”????????
I haven’t done a VRD Rose Card theme list for a while, so thought it was time for Fall-themed patterns. Enjoy!
Fall VRD Rose Card Patterns
There’s been a nip in the air recently and the leaves are changing colors. I just love Fall. The colors, the sounds, the smells. Fall is definitely here. Check out this apple barrel of VRD Rose Cards.
Wow! This group was a lot bigger than I thought it would be. I hope you made it all the way through! If you did, snaps to you!
One of the reasons I really like creating a themed list of patterns is because it helps me to get more familiar with our VRD patterns and our designers. And, of course, I can introduce you to patterns you might not have seen before. Because, let’s face it — with over 600 patterns in print, it’s kind of hard to keep track of every single one!
So, my question to you is — how many of these patterns do you already have? And how many are you going to add to your growing VRD Rose Card collection? Finally, how many of these quilts have you or will you make?
I’m here to talk about one of my own favorite patterns, Lickety Split. I designed this fun and fast pattern using only 10 fat quarters and a background fabric. When I was sewing it up the first time, it went together really quick — hence the name “Lickety Split”.
There’s also a digital download pattern, too. You can find the digital pattern it HERE.
Today I’m using fabric from the Morning Light collection by Northcott, which features digital prints. They do a good job with their digital prints and the colors are just so beautiful. These are definitelymy colors — Northcott must have been thinking about me when they designed them. LOL!
Guess what??? We created Lickety Split kits just like my fabrics, above. You can find them HERE.
Or maybe you just want to grab some of your own Morning Light Fabrics? You can find the collection HERE at the VRD shop. Be warned — they’re going fast and when they’re gone, they’re gone. So get ’em while they’re hot!
Let’s get started!
Lickety Split Quilt Tutorial
So first things first (well, after you find your fabrics, of course), you need to cut out your rectangles. Grab your fat quarters, and cut them into strips. Then subcut the strips into rectangles. You’ll have a narrow strip leftover — you can use it in another project.
Next it’s time to cut your background pieces. I cut my big pieces first. Then I used the leftover background pieces to cut the smaller/narrower pieces.
Molly’s Tip: Go ahead and pair up your rectangles so the same 2 fabrics are sewn together in each block like I did.
Or scrap it up and be totally random! You do you!
Here, you can see how I stacked up my fat quarter rectangles with the background strips. Now I’m ready to take all my block pieces to my sewing machine. No need to get up and down to get fabrics, because they will all be right next to my machine.
Yay! Time for the fun part — sewing the blocks together! Make sure you sew the pieces all the same for each block or else you will have blocks going in all kinds of directions. Silly blocks!
Look! Here’s a block AND it went together Lickety Split!
Lay out your blocks, turning every other block sideways. The 1st, 3rd, and 5th rows will be the same layout while the 2nd, 4th, and 6th rows will be the same layout.
Sew your rows together and — TA DA — your Lickety Split top is done. Now it’s time to layer, quilt, and bind. And don’t forget your label!
Check out these other color combinations of Lickety Split. Which one is your favorite?
Anna Maria Horner collectionHoffman collectionWonderland by Keiki GokeWonder by Windham fabrics
Don’t forget to post your Lickety Split quilt pictures on our Facebook page. I can’t wait to see them!
I’m sew excited you stopped by today! After doing those fall quilt tutorials a few weeks ago, I am trying to now get them all quilted before I dive into making more quilt tops (my projects seem to be multiplying daily). Do you quilt your own quilts or do you send them out to a long arm quilter? If you do your own quilting, do you hand or machine quilt?
My Machine Quilting Journey
I started machine quilting right after I learned to do patchwork almost 25 years ago. Of course, first I tried to “stitch in the ditch” but I found I couldn’t manage to actually stay in the ditch. Ho hum……
I did try a little hand quilting on my very first quilt, which I lovingly call “Big Ugly”, but my stitches were so big, I could’ve probably caught my toe in them. LOL!
Eventually I heard about a relatively newfangled thing called free motion quilting (FMQ). I was a new enough quilter that I wasn’t afraid to try it. Of course, back then free motion quilting was frowned upon and free motion quilters tried for a hand quilted look by using invisible monofilament thread to hide their machine stitching. The invisible thread back then was like thin fishing line — yuck! But I still slogged through — learning how to free motion quilt with a basic sewing machine on which I had to cover the feed dogs with tape or an index card because the feed dogs didn’t drop. And don’t forget that fishing line (today’s invisible thread is so so much better than back then)! Regardless of the challenges, I kept free motion quilting. And I was hooked!
After I had some quilts under my belt and I upgraded to a little better sewing machine where I could actually drop the feed dogs — it had a needle-down function too, I switched to using the same thread I pieced with — 100% cotton. I experimented with different threads and manufacturers for a while to see what I liked the best, or maybe more accurately what threads my sewing machine liked the best. Then I discovered King Tut variegated thread by Superior Threads. WOW! What fun it was quilting with variegated thread! I grabbed up every variegated thread spool I found, which was especially fun when I went on shop hops and quilting bus trips with my quilty pals.
The only real problem I found working with those yummy variegated threads was that sometimes I lost the thread on the quilt because the thread color matched the quilt exactly. Then it kind of looked like I skipped part of the quilting design. Oh well, nothing’s perfect.
This was when I moved back to working with solid 100% cotton threads. Now I have a small six drawer unit on wheels with all my spools of thread organized by color or type. And yes, the top drawer even has my collection of variegated threads. My drawer unit is the Helmer unit from Ikea.
Helmer image from Ikea
Free Motion Quilting on Fleece
Today I have a fun little video for you with some great tips for free motion quilting a quilt top backed with fleece fabric (you know — the fleece you make tied blankies with or comfy pj pants out of?). I began free motion quilting on fleece long before even Minky was popular as a quilt backing. I guess I was ahead of my time a little bit. Of course, back then, folks kind of looked at me funny when I showed off my free motion quilted quilts backed with fleece. Boy, they didn’t know what they were missing!
There is nothing like curling up with a fleece-backed quilt. Be aware that I don’t put batting in my fleece-backed throw quilts. Nope, not at all. Skipping the batting makes my fleece-backed throw quilts very cozy and super floppy — which I love! Have you ever tried machine quilting with fleece on the back of your quilt?
A friend of mine, Cheryl, who is a free motion long arm quilter, took my quilting on fleece idea even further — she layers 2 pieces of fleece and free motion quilts them together to make a one of a kind textured throw blanket. Maybe you’ll try this too.
Now — on with the show!
Oops! I see in the video that I actually did cross over some lines. Mea culpa! Luckily, I didn’t get any mischief happening on the back of my quilt. I should haven stuck with my first choice of orange thread instead of the medium chestnut brown, which blended in too much on the quilt top. LOL!
Go HERE for the Alassio tutorial. Or HERE to purchase the Alassio pattern.
Go HERE to read our VRQ post, Quilt as Desired, which is all about machine quilting and is part of our Basic Skills for Quilters Series on the blog.
I hope you enjoyed this little video. Now that I know how to create one and upload it, you might just find more little videos here. You’ll have to stay tuned to find out.
Nope, sorry, no quilt tutorial this week. I finally realized I’d better take a little break from piecing and get to some machine quilting before I completely drowning in unfinished quilt tops. LOL!
Another week has just zoomed by and I cannot believe that Fall officially arrives on Saturday. I am totally enjoying the cooler nights and warm days we’ve been having around here. I’ve also been doing a little more cooking for dinner and even some baking. While out enjoying the weather the other day, I strolled back to our crazy overgrown dwarf apple trees which are like 15 feet tall. I was pleasantly surprised that there are some decent apples up in the trees even as the leaves are starting to fall off. We’ve never really treated them and they’ve never been pruned to my knowledge — hence the “overgrown” part — and the deer and bugs have been helping themselves. But there are still some nice sized apples. Now I have to add some apple picking this weekend because I’m thinking of making some crockpot applesauce and freezing it for this winter. Yum! There’s nothing like homemade applesauce in the winter.
Of course, all I really want to do right now is to make quilts. Lots and lots of quilts. So let’s dive right into a great list of quilting helpers!
Quilter’s Toolbox Ideas to Improve Your Quilting
I’ve recently added a couple new things to my studio that have been real game changers for me. So I thought I’d take a little time to share with you those new things as well as some of my old favorites. These tools have saved me time, improved my accuracy, and even just made quilting more fun. You can find them at your local quilt shop or favorite online retailer.
Wool Pressing Mat
Image from Amazon
I know wool pressing mats aren’t really new, but they are new to me. For the last several years, fellow quilt guild members have been extolling the benefits of using one when pressing fabrics, blocks, and quilts. I listened politely, nodded, and promptly forgot about them. I even won a handmade knitted felted wool mat, but then never used it. Sometimes it can take a while for me to warm up to a new idea. Silly, I know, but true.
Anyway, fast forward to this summer. It was an impulse Prime Day purchase, but I splurged and bought a wool pressing mat. I figured, what the heck? Maybe it would work for me because I find pressing so tedious.
WOW! I cannot tell you what a difference a wool mat makes when pressing. My blocks don’t slide around or stretch and the warmth underneath makes pressing quicker and easier with less work for better results. All I can say is I don’t know why it took me so long to try it out!
My wool mat is narrow and long and almost fits the length of my ironing board. Now I wish I would have gotten one a little bit wider, though, as my ironing board is a generous 24″ x 60″. But it did come with a nice case so I can roll up my wool mat and take it with me.
Machine quilting gloves are an oldy but a goody in my quilting toolbox as I’ve been using them almost as long as I have been free motion quilting. All quilters have their own favorites and I am no different. I’ve used other brands of gloves over the years like Machingers and Grabaroos, but my favorite favorite gloves for the last four or five years are the Swan quilting gloves by Amity Studios. I found Swan Gloves quite by accident at International Quilt Market before the Pandemic hit. My first pair lasted through the Pandemic and other than maybe being a bit worn, they are still good. I did purchase a new pair last year at Market, just in case.
These gloves are different from any other quilting gloves I’ve ever used — they are leather and built kind of like a golfer’s glove with the ring finger and pinky cut out. You can use your touchscreen electronics while wearing them. I can even change my sewing machine needle and load a bobbin without taking them off. The Swan gloves seem to really help me to control my quilt sandwich while free motion quilting, which makes my quilting more controlled and my designs that much better. I have also found that Swan gloves fit me well (they come in different sizes), especially with the velcro wrist adjustment, and they last longer. My best suggestion to anyone interested in quilting gloves is to try different styles until you find the perfect ones for you.
Thimbles
Image from Amazon
Do you use a thimble when you do hand-sewing? For the longest time, I didn’t. Over my 25+ years as a quilter, I’ve tried a lot of different thimbles and none of them ever fit just right, so I chose not to use a one at all. Then one day, I found the perfect thimble for me. It fit just right. It felt just right. It’s called the Nimble Thimble.
The Nimble Thimble is a soft leather thimble with a metal disk in the tip to protect your finger from needle pricks. And it has an open slot on top for your fingernail, which is a big plus for finger comfort. It comes in different sizes and because it’s leather, it molds to the shape of your finger. If it stretches out, you can wet it down, put it on, let it dry and it will once again conform to your finger. The funny thing about this thimble for me, is that sometimes I even forget I’m wearing it.
1/4″ Quilting Foot with Guide
Image from Amazon
I’ve had a 1/4″ machine foot with a guide for piecing ever since I bought my first Janome sewing machine way back when. It came as part of the bonus quilting feet set. It looked kind of strange, but I found that when I tried it out as a relatively new quilter, my 1/4″ seam was a lot more accurate and consistent. Count me in! No more tape on my sewing machine to eyeball a 1/4″ seam.
If you’re looking for a 1/4″ foot for your machine, your best bet is to visit your sewing machine dealer and ask for the 1/4″ foot with a guide that goes with your sewing machine. There are generic ones out there if you can’t find one that matches your sewing machine, but you need to get the correct shank-type one for your machine — check your sewing machine manual to find out whether your machine has a low shank, high shank, or slant shank.
Mini Design Board
There are lots of different portable design boards out there for taking with you to classes or retreats. These humble boards can make sewing individual quilt blocks with lots of pieces a lot easier to sew together. I just lay out a quilt block on my board and then I can take my block on the board right to my sewing machine, then I can easily see how the pieces go together while I am assembling the block.
It’s pretty easy to make your own board and it only takes a few items you might already have hanging around in your sewing room. You need a piece of sturdy cardboard in your desired size and a piece of flannel fabric big enough to wrap around to the back of the cardboard. Pull the flannel taut and use heavy duty duct take to secure the flannel wrapped around to the back of the cardboard. I have had my DIY design board for maybe 15 years and I still use it often. My friend Mary Lee, brought sturdy pieces of cardboard to one of our quilting classes years and years ago, which we covered with a flannel fat quarter. Once in a while, I do have to tighten up the fabric around the heavy duty cardboard and retape it on the back, but that’s about it for maintenance.
Of course, if you’re not into DIY, you can find portable design boards at your favorite quilt shop or online retailer. Or Etsy! You can even repurpose a child’s felt board, if you have one of those in your home!
DIY Flannel Design Wall
If you’ve been following along recently with the fall quilt tutorials, you’re probably already familiar with my new flannel design wall. Sure, you can buy a fancy-smancy design wall, but you really don’t need to. A square or rectangle flannel-backed table cloth works just as well.
I never had the ability to hang a flannel board of any kind in my dungeon studio, but after purchasing tall storage cube units with doors for my fabrics last year, I can now clip my tablecloth to the tops of the doors using large binder clips. Then when I’m done using my flannel-backed tablecloth, I can just fold it up and stash it out of the way.
Sewer’s Aid
Image from Amazon
Have you ever tried Sewer’s Aid? I learned about this little gem one time at a quilt guild gadget night years ago and I’ve been using it ever since. Some days when I am machine quilting, my thread just keeps breaking, no matter what I try. Re-threading? Change the bobbin? Adjust my tension? And still my thread keeps breaking. That’s when I grab my little bottle of Sewer’s Aid and I run beads of the liquid up and down my spool of thread. I repeat this every time I change my bobbin. And the thread stops breaking. Sewer’s Aid helps the thread to run smoothly through the machine by reducing friction, which then reduces breakage. Hand quilters have known about Sewer’s Aid much longer than us machine quilters. Happily, it works for both.
Seam Ripper
Image From Amazon
As you sew, so shall you rip. This means you’d better have a good sharp reliable seam ripper that fits comfortably in your hand because chances are, you will use it a lot (sadly). I actually have several of the same seam ripper — one at my machine, one at my cutting mat, one upstairs in my sewing stand in the living room, and possibly another one lurking in my bedroom.
My absolute most favorite seam ripper is the Clover Ergonomic Seam Ripper. Have you ever tried this one? It works for both right and left handed rippers (I’m a lefty, so that’s an important consideration for me), it’s balanced nicely, and it fits comfortably in the palm of my hand. I won’t say that ripping out stitches is a favorite activity of mine (who can?), but having my trusty Clover seam ripper does make the ripping just a little bit more comfortable.
Curved Basting Pins
Image from Amazon
I’m a bit old school sometimes when it comes to quilting (yes, I see you rolling your eyes). I still pin my quilts before I machine quilt them, even after 25+ years of quilting. You know the old adage — if it ain’t broke, then don’t fix it? I don’t have anywhere big enough to layout a quilt in order to spray the layers together. And I don’t relish the idea of getting spray all over everything, possibly including my fur babies Griffin, Pip and Bailly. Definitely not a good idea for me. So, I am a pinner. And I love my curved basting pins!
Curved pins come in several sizes, but my favorites are the big 2″ size 3 ones. I’m not a heavy pinner but I do find that these larger pins are easier to work with than the smaller ones. You do have to remove the pins as you machine quilt, but that just becomes part of the process. Do you close your pins in between quilts? I don’t, that way I save opening and closing them 2 times. There’s also a nifty tool called a Kwik Clip, which helps you to open and close safety pins so your fingers don’t get sore. Old school can still be cool, don’t you know???
Olfa Ergonomic Rotary Cutter
Image from Amazon
There are so so many different kinds of rotary cutters out there these days, but when I started quilting there were only a few available. I started out with a Fiskars “Classic Loop” rotary cutter but when the Olfa ergonomic rotary cutter started showing up in shops, I fell in love. It was comfortable for me as a lefty and I liked knowing that the blade popped back in when I let go of the cutter. Since finding the Olfa Ergonomic cutter, I’ve never used any other.
Seriously, the cutter I use every day is still my very first Olfa Ergonomic cutter — it’s more than 20 years old and still going strong! Sadly, the little spring broke earlier this year and I thought I would finally have to replace my beloved cutter, but my Dad found a great solution for me — he suggested I take a little spring out of a different cutter and put it into my Olfa cutter. It worked like a charm! I have the old style yellow one, but now they come in other colors — even magenta! Maybe I should upgrade…..
These 10 tools have really made a difference in my quilting and they help me to be a better and happier quilter. My best advice to all quilters is:
Don’t assume what works for me is going to work for you — try out as many different versions of the same tool to find the one that works the best for you.
This list is just to give you a starting point.
I went to my local quilt shop earlier today and pinned 3 more quilts — ouch! I’m running out of curved pins! LOL! Well, I’d better get back to machine quilting all these quilt tops.
Have a great week and I’ll see you right here on the VRD blog next Thursday!


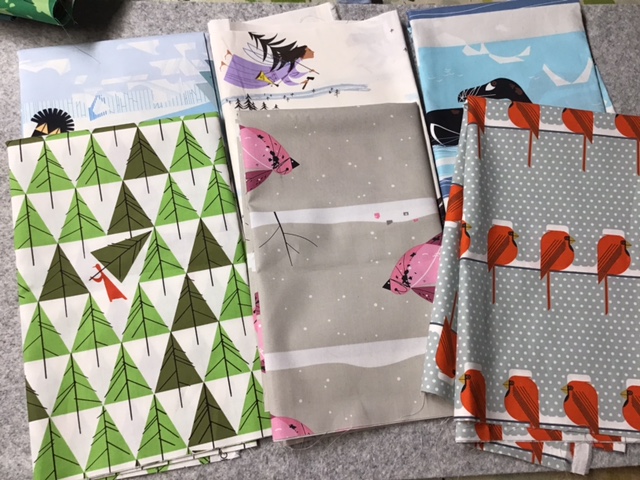


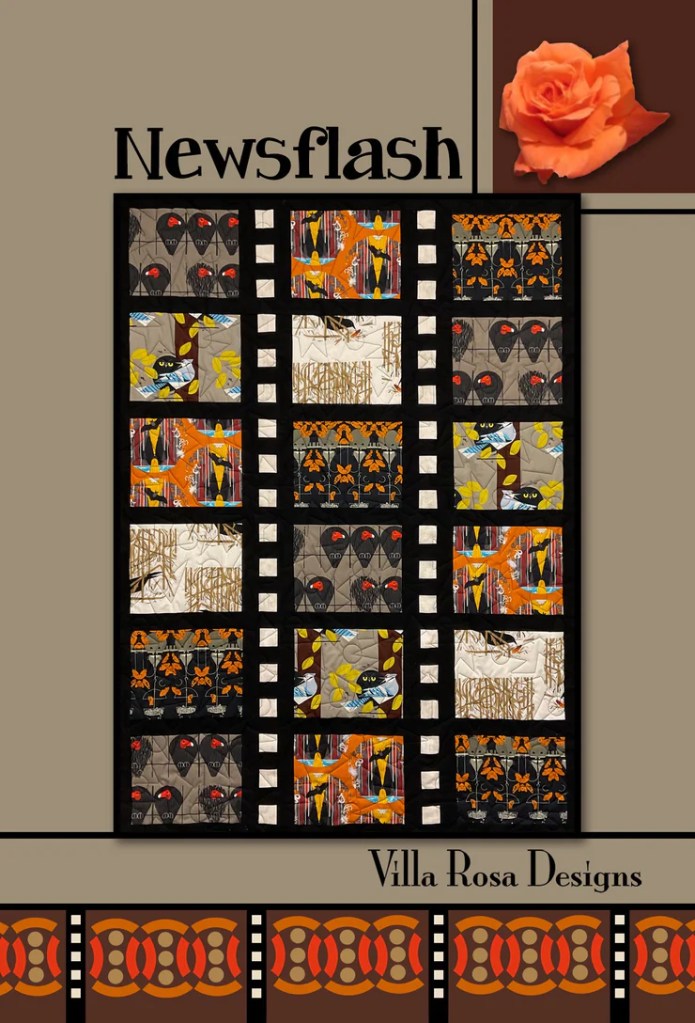

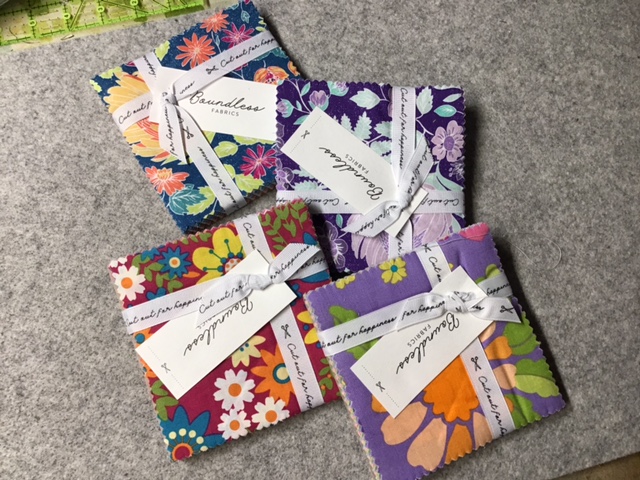

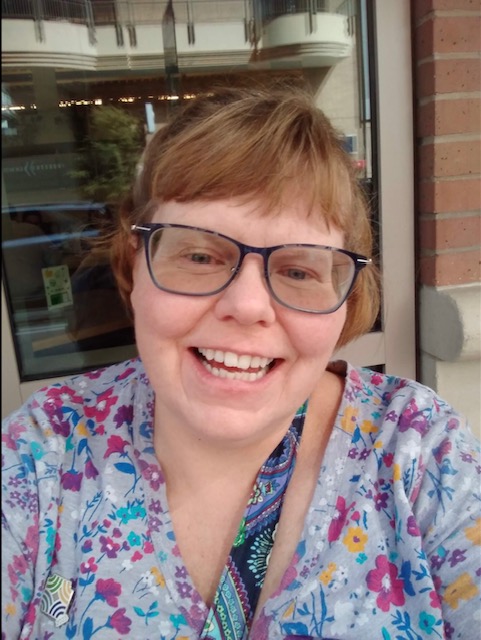
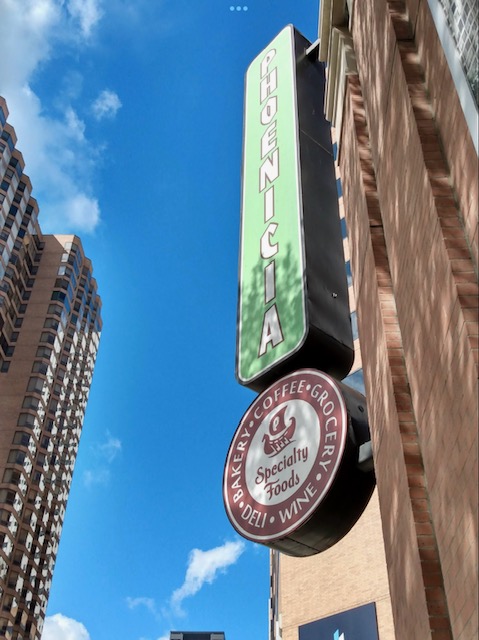
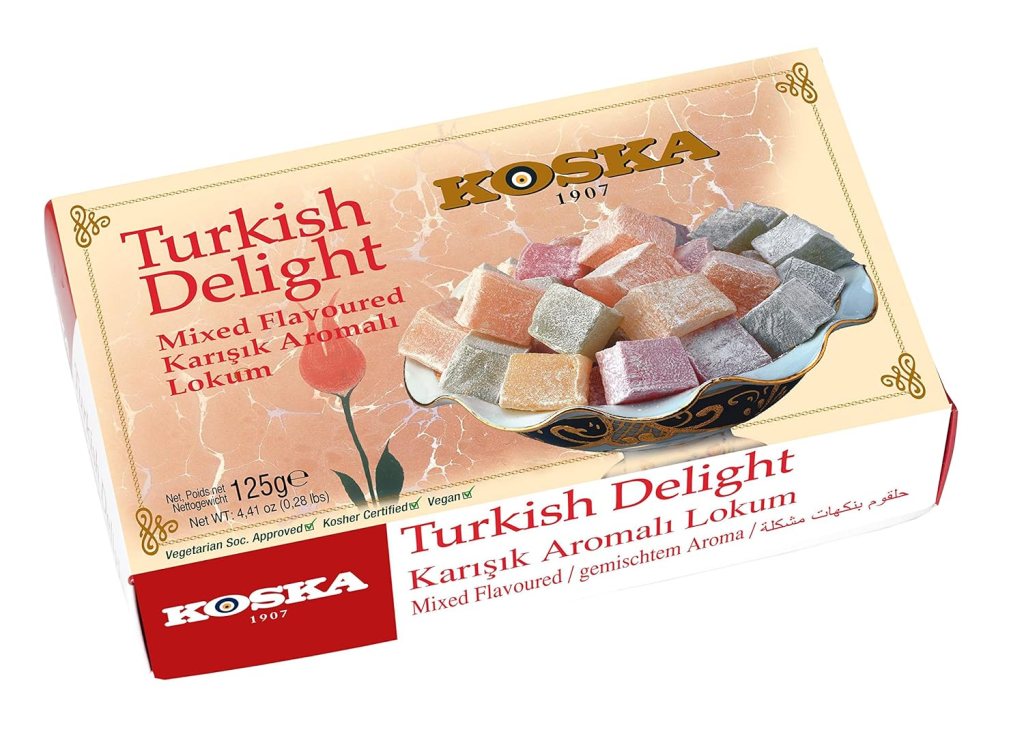

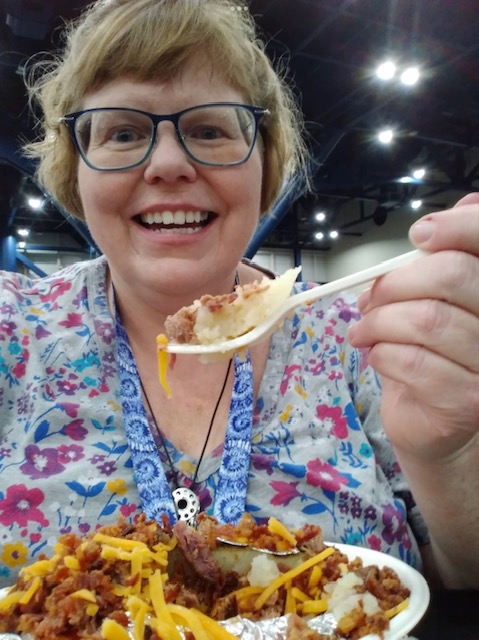

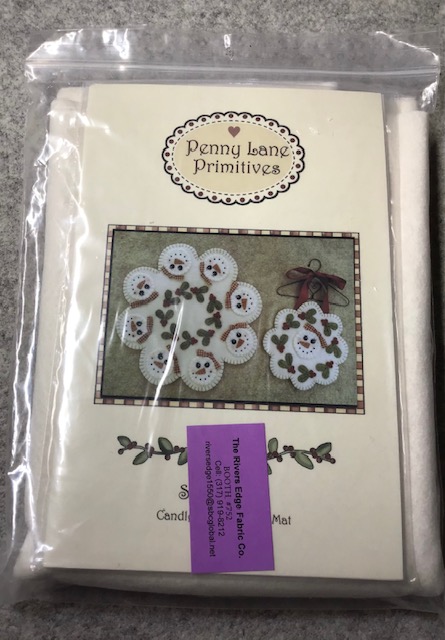


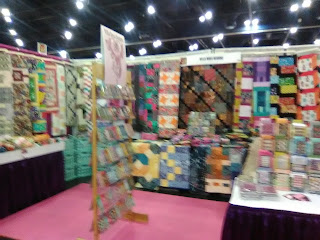


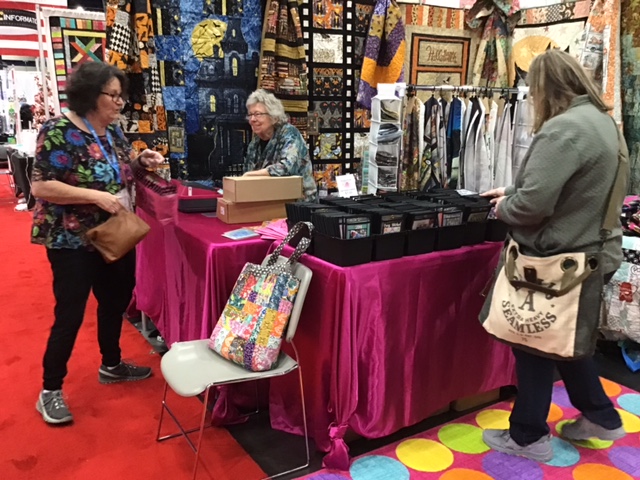

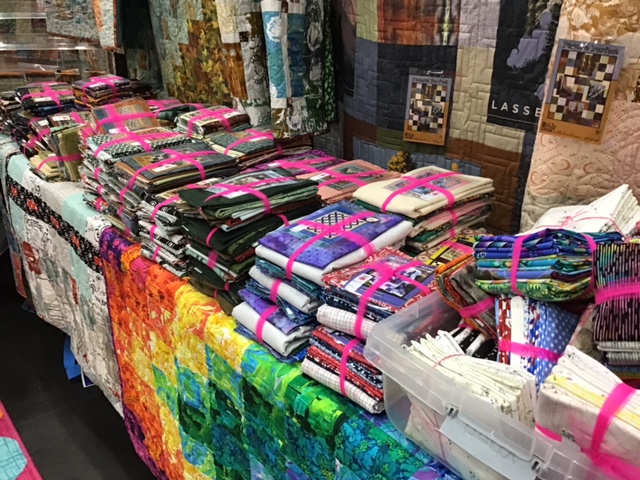


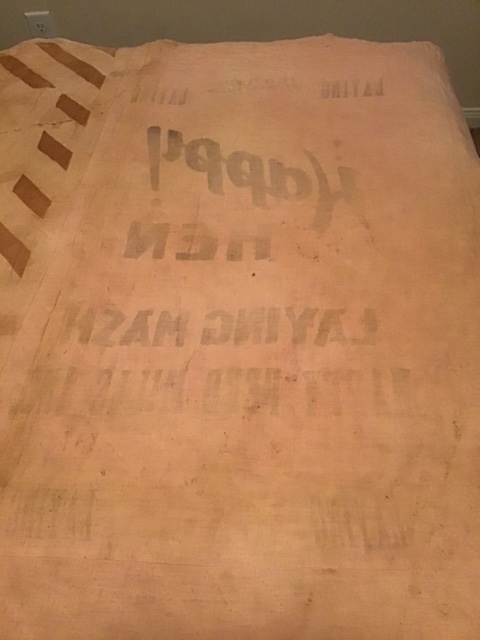


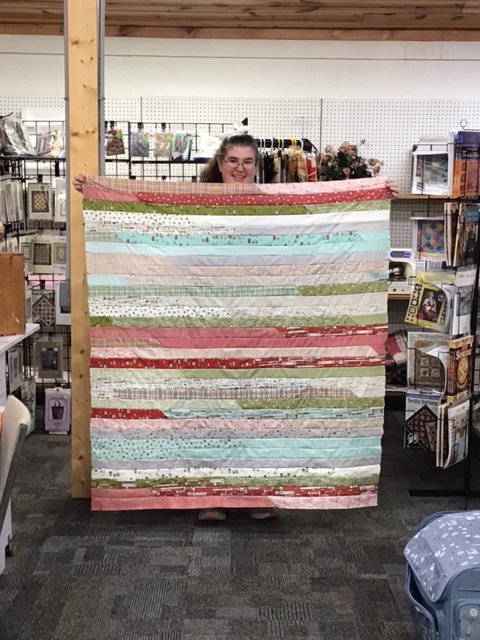
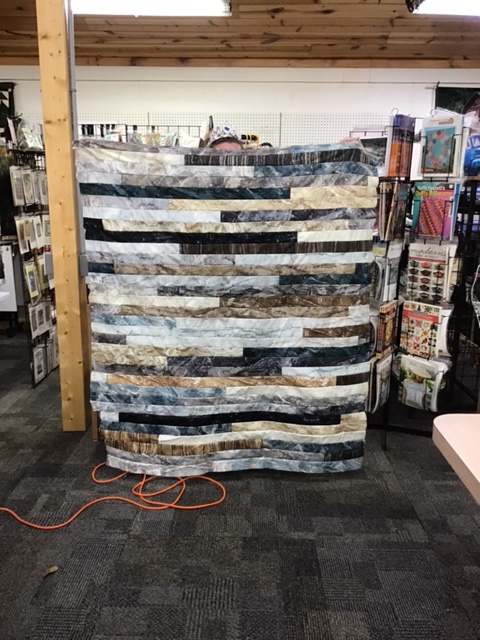


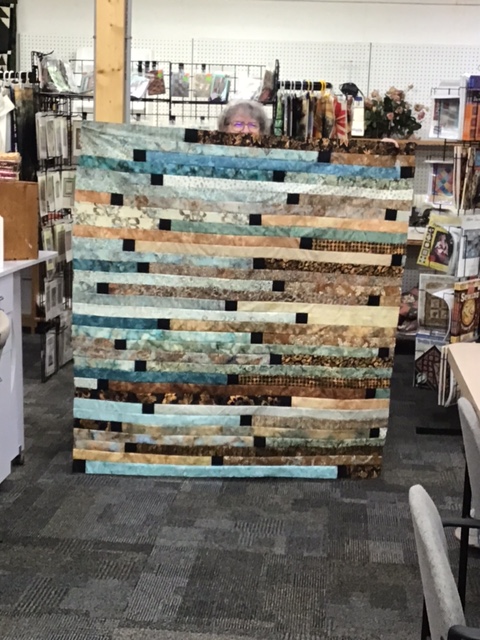
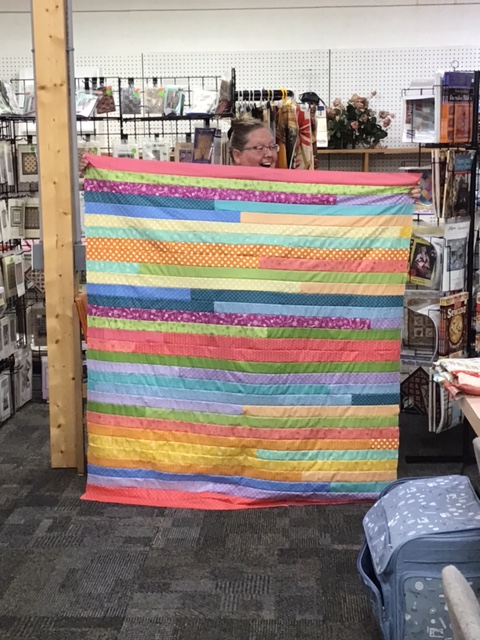

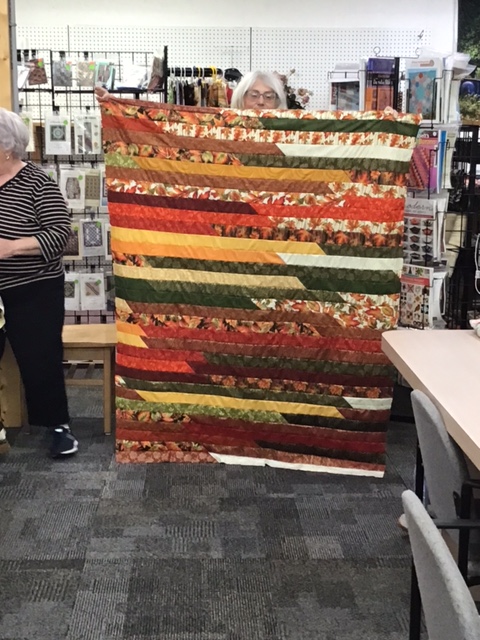


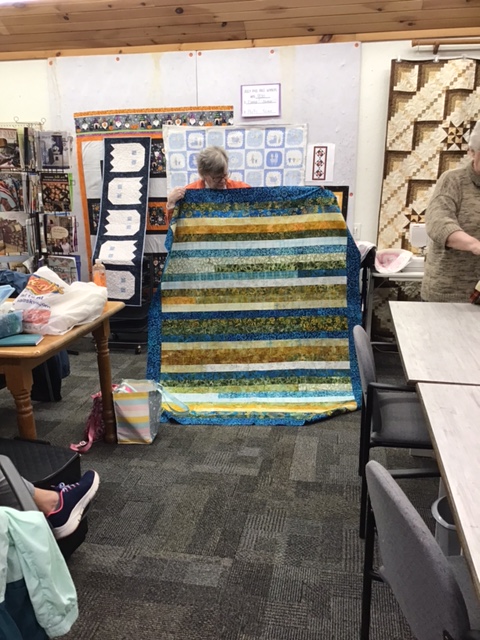
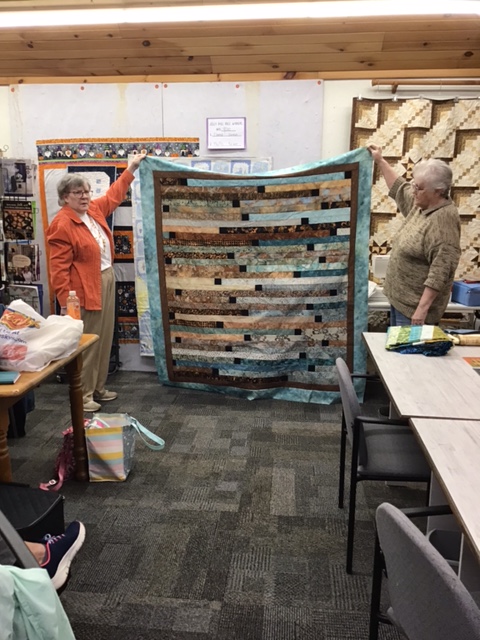
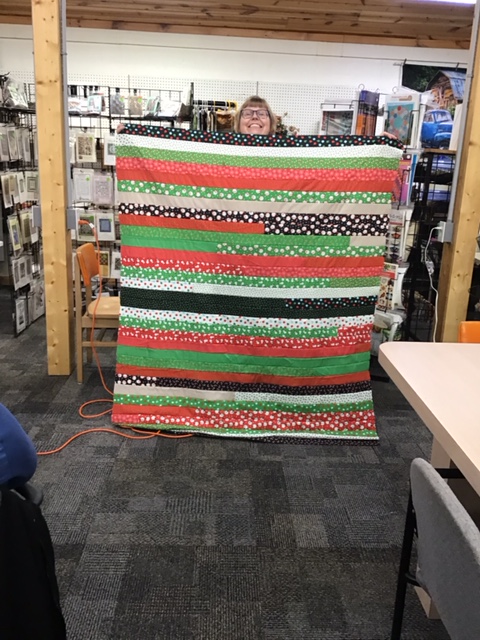


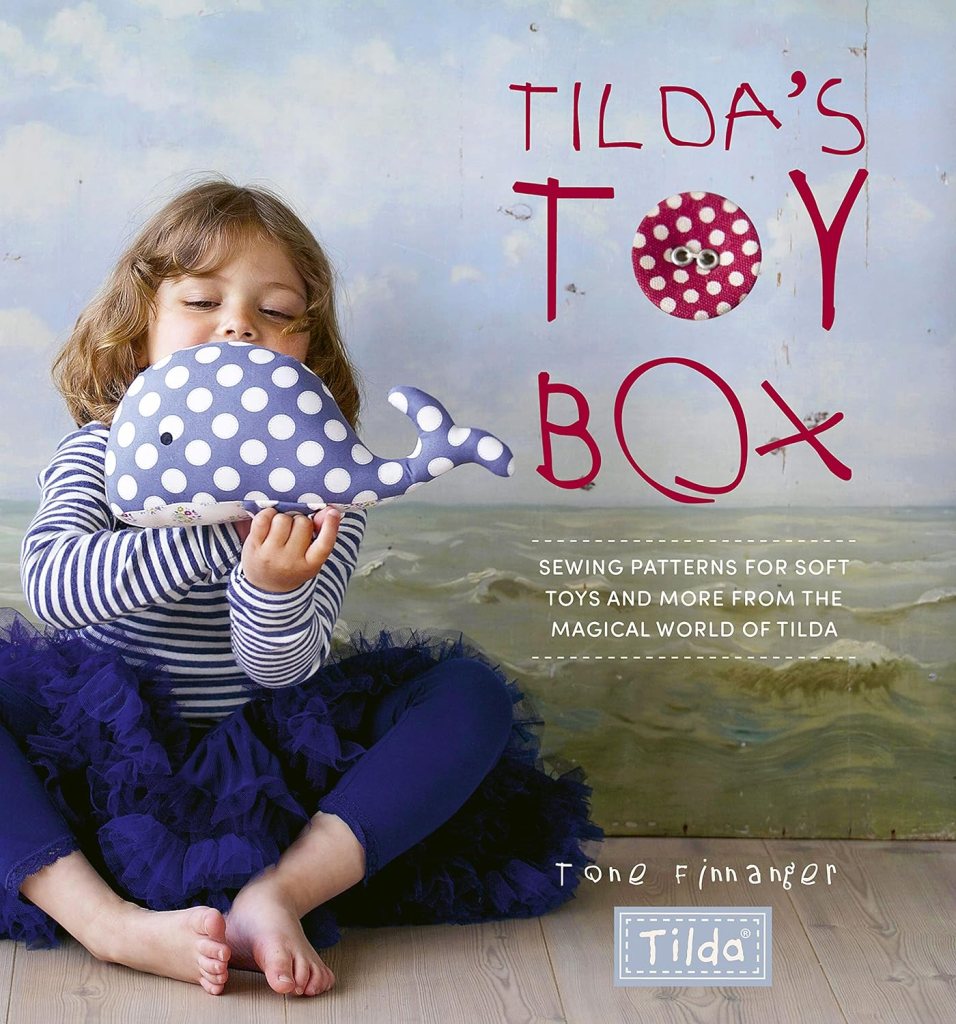


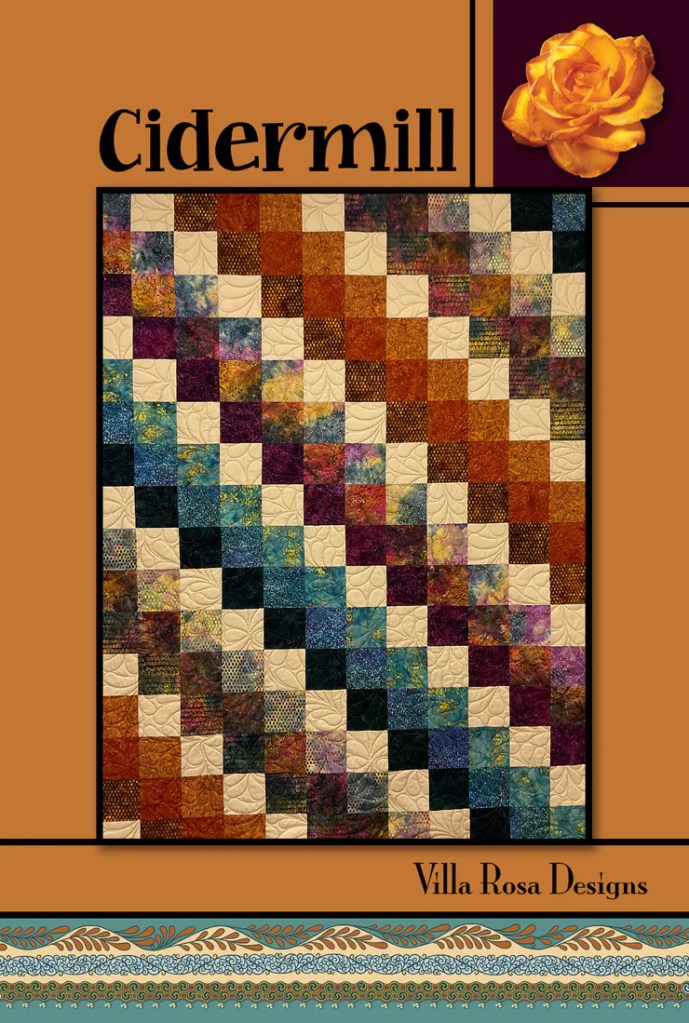
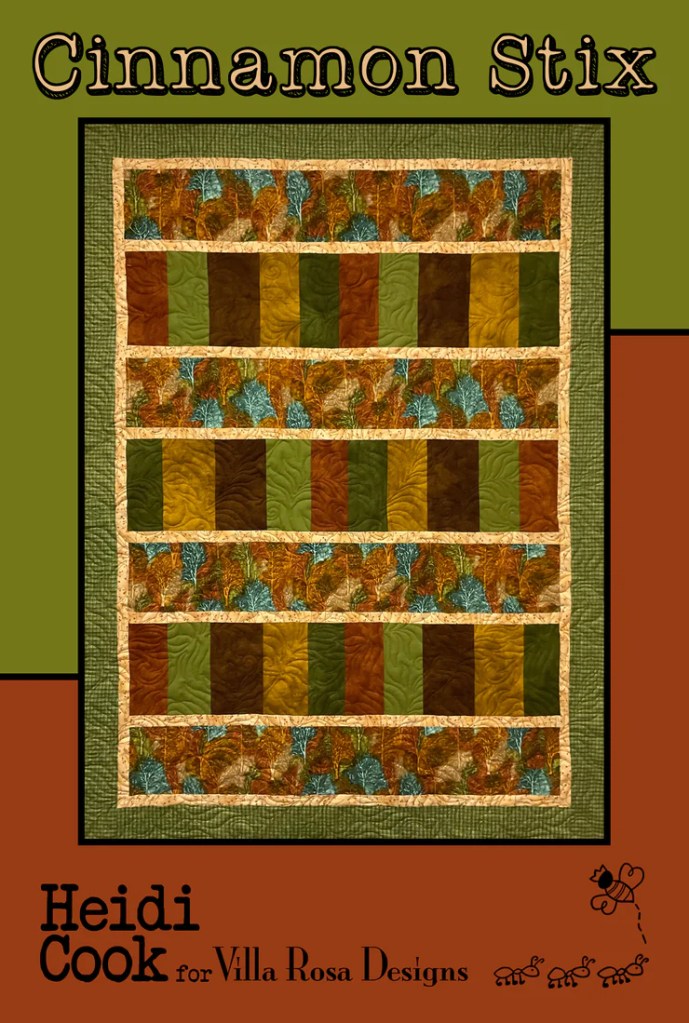
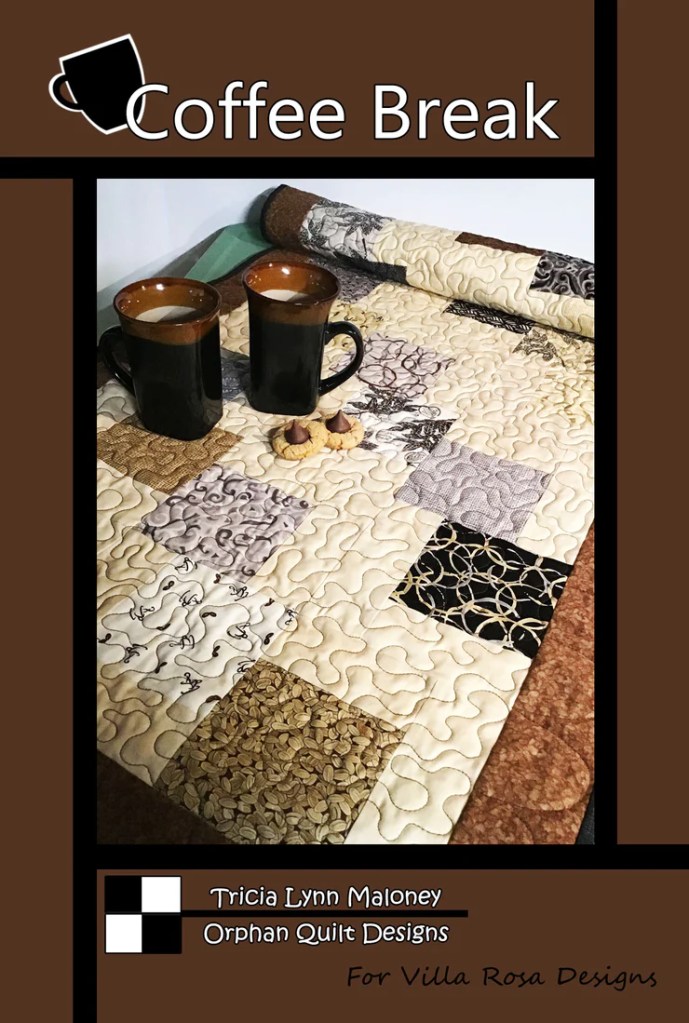


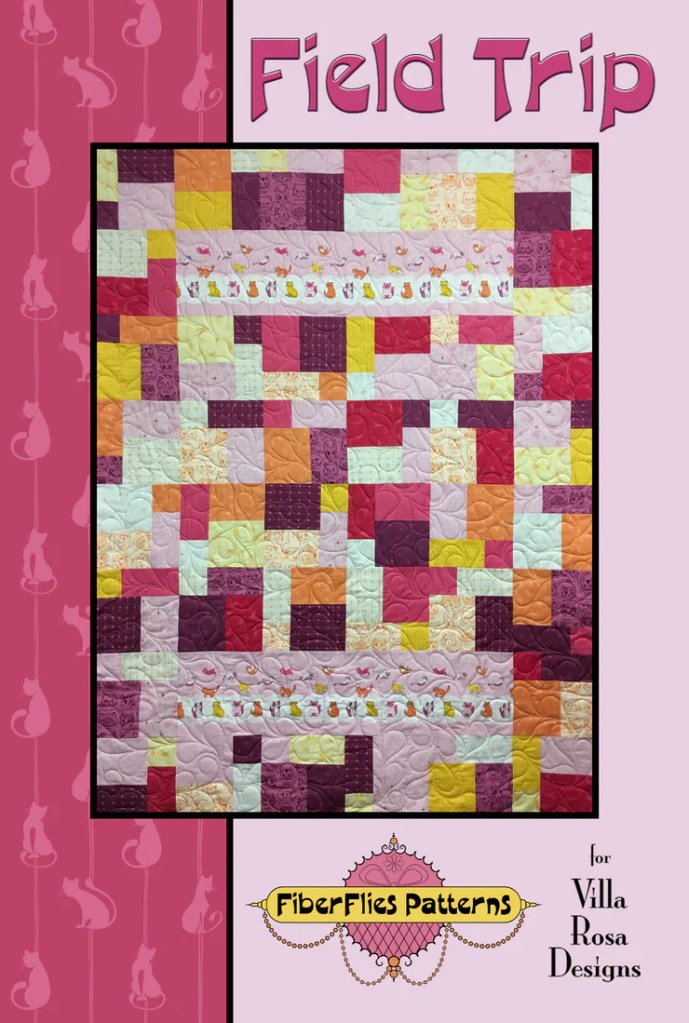


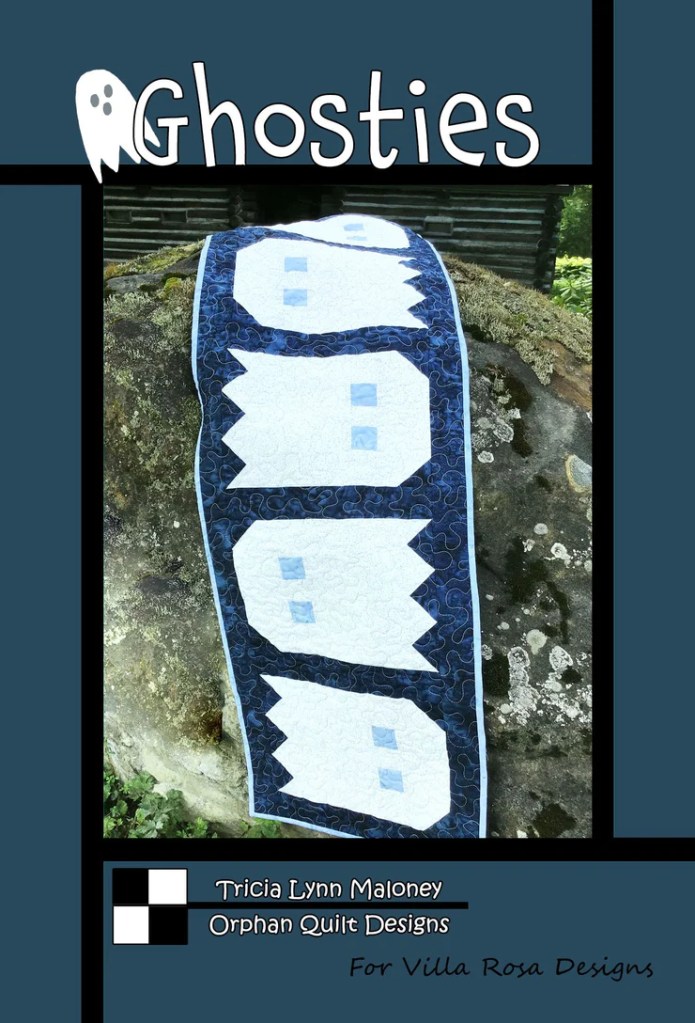


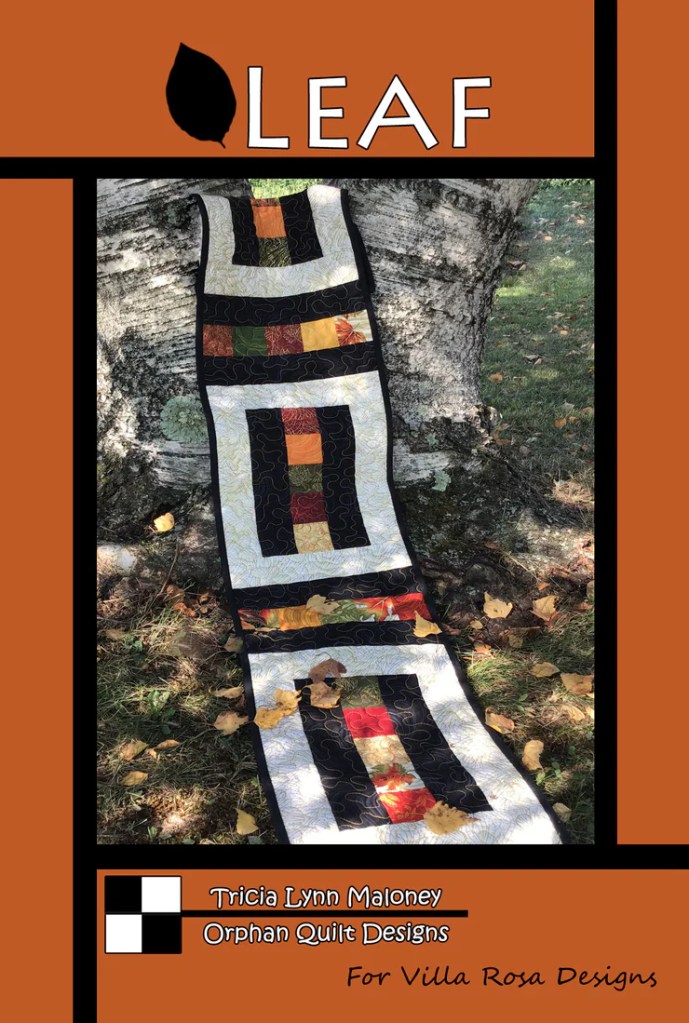


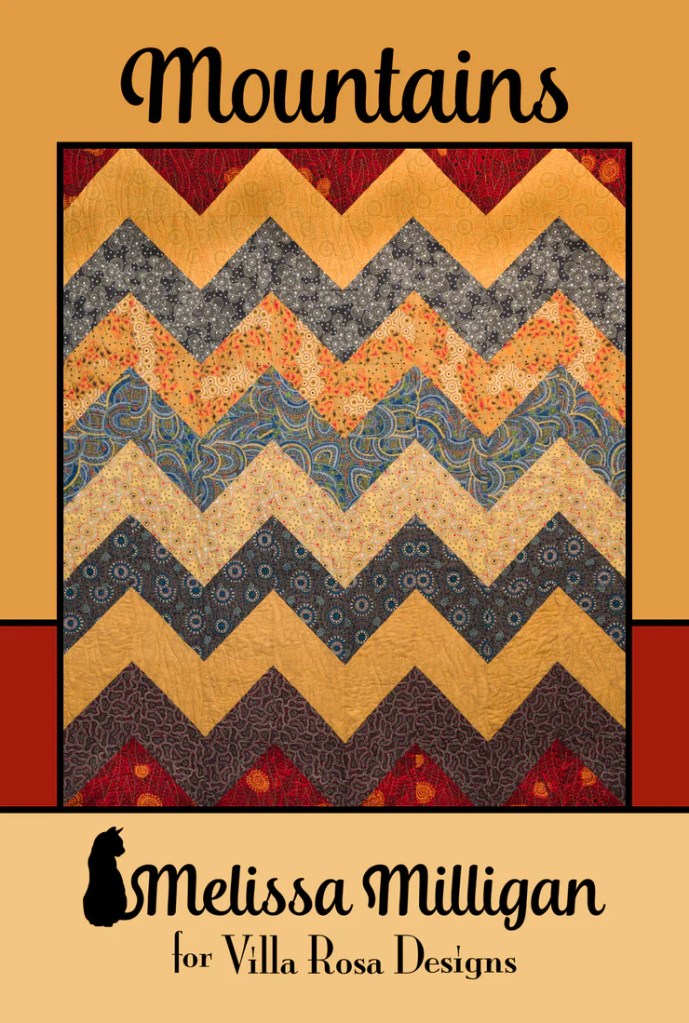

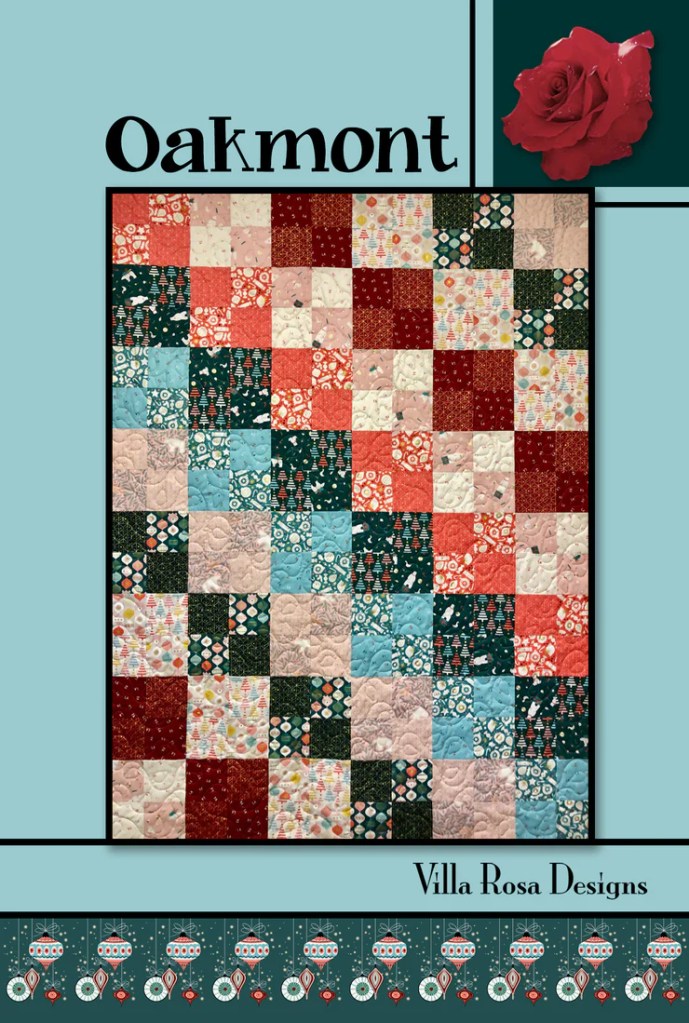
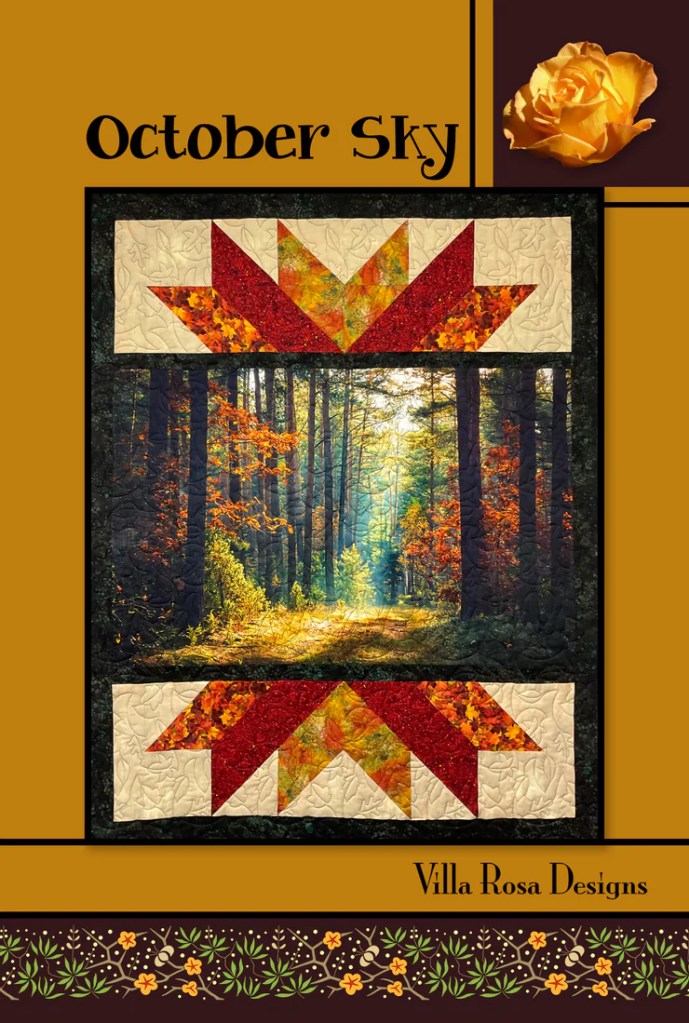

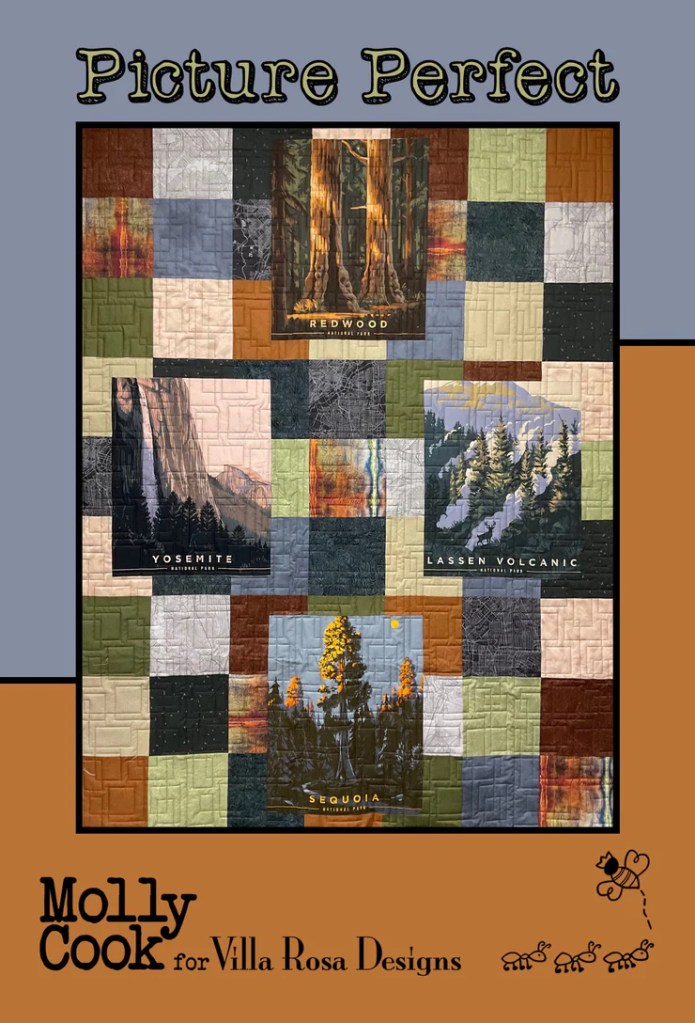


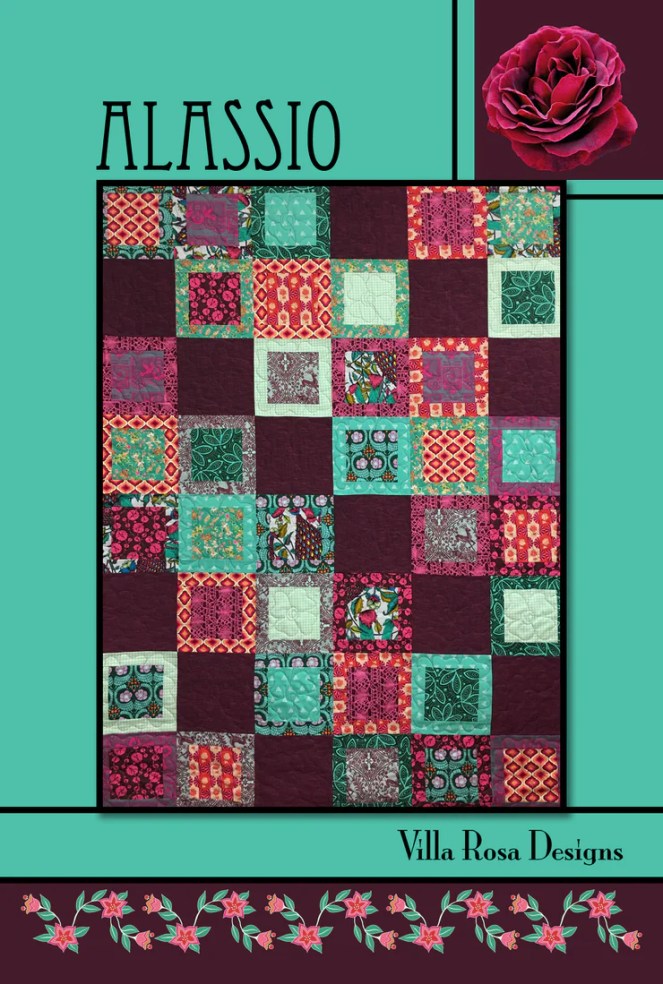
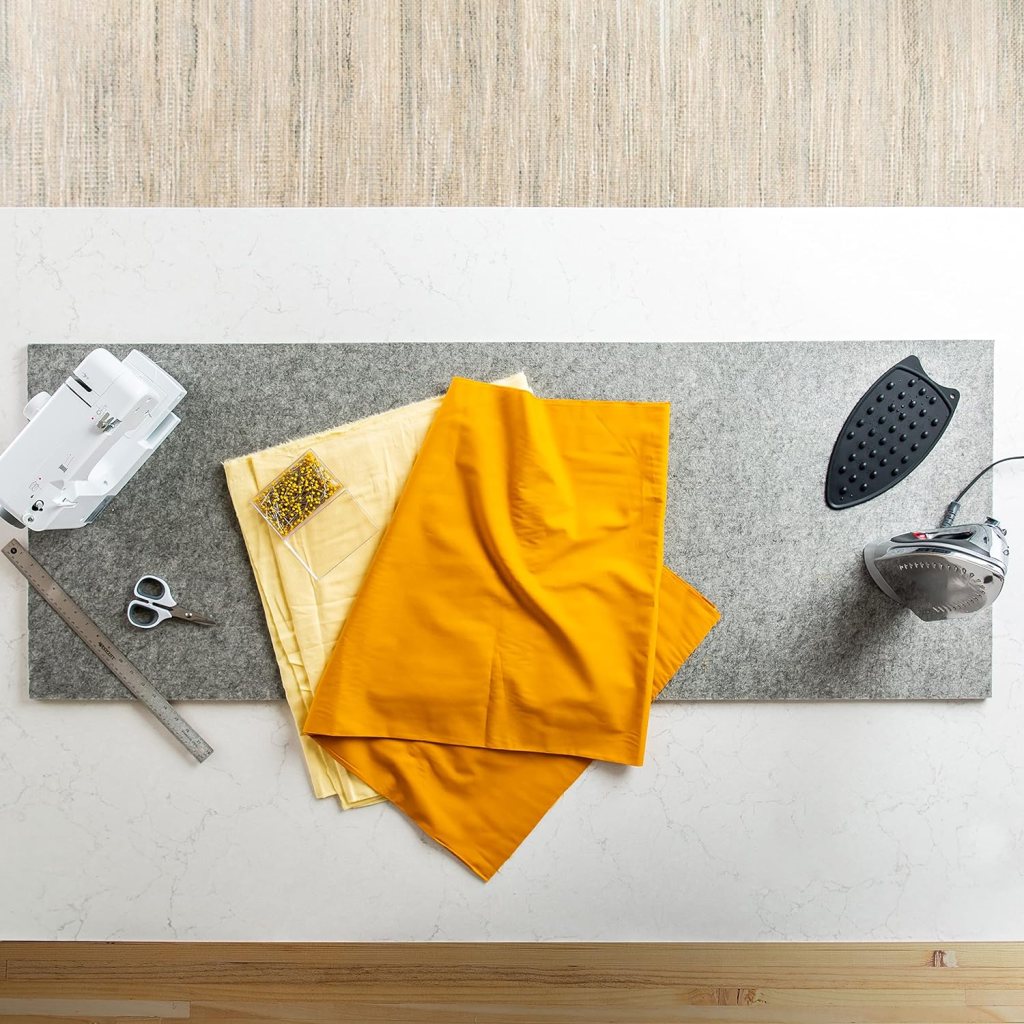


 Image From Amazon

