Quilting Partners · Rose Cards · villa rosa designs

Hanging Out with our Quilting Partners!

Happy Thursday to you!

I thought it would be fun to share with you some behind-the-scenes VRD stuff. I know I’ve mentioned our quilting partners before and you can see a list of our partners along the right side of the blog along with links. Today I thought it would be cool to show you some of the projects we’ve been doing with our partners.

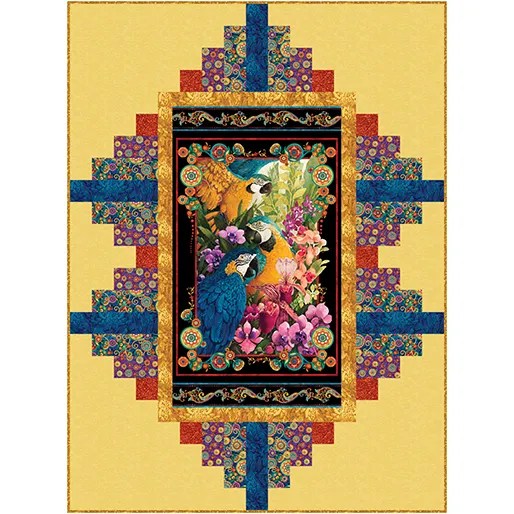
We’ve been working with Hoffman for a while now and I’m excited to share a recent Hoffman catalog where you can find some of our Villa Rosa Designs Rose Card patterns featured. Check out Addison and Bee’s Knees on page 18 and Beaded and Cross Stitched on page 21, all in the CongoBay collection by designer McKenna Ryan.

You can check out our Villa Rosa Designs collection of Hoffman fabrics available on our website HERE.

Here are the links to the featured patterns:

Addison

Bee’s Knees

Beaded

Cross Stitched

And you can visit Hoffman fabrics HERE. Check out the fabrics in the CongoBay collection HERE.

The new Fall catalogs will be coming soon, so stay tuned. Don’t forget to ask for Hoffman Fabrics at your local quilt shop.

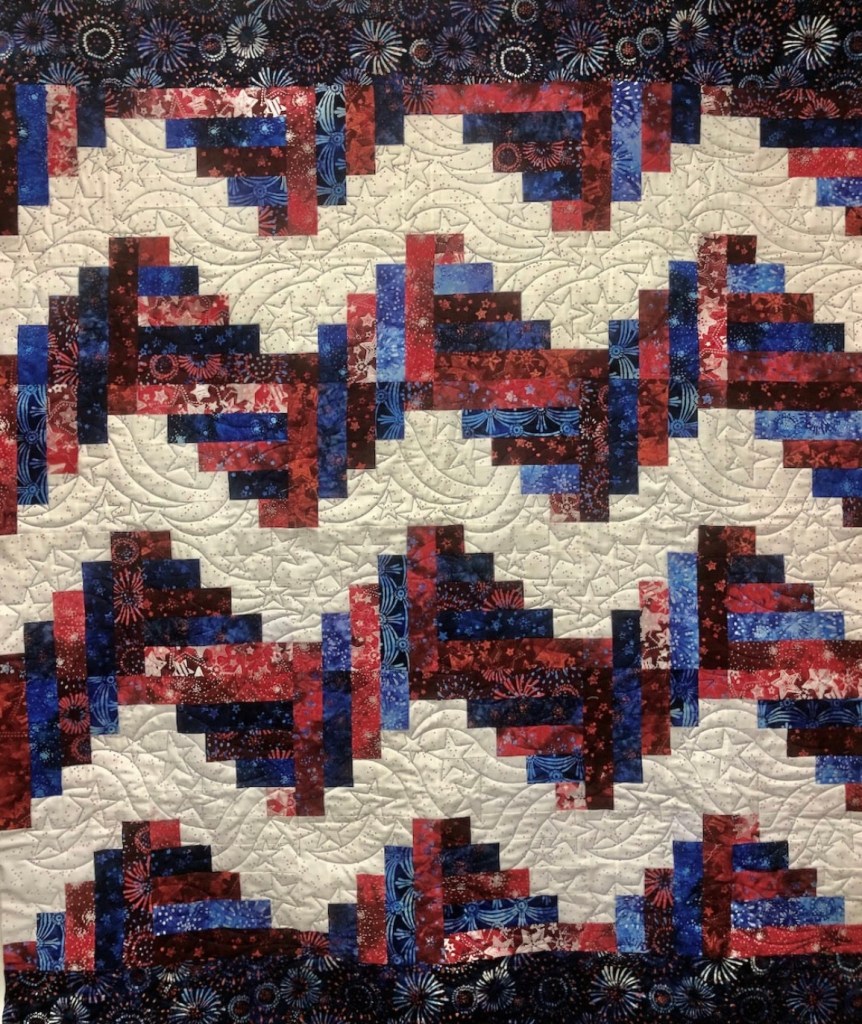
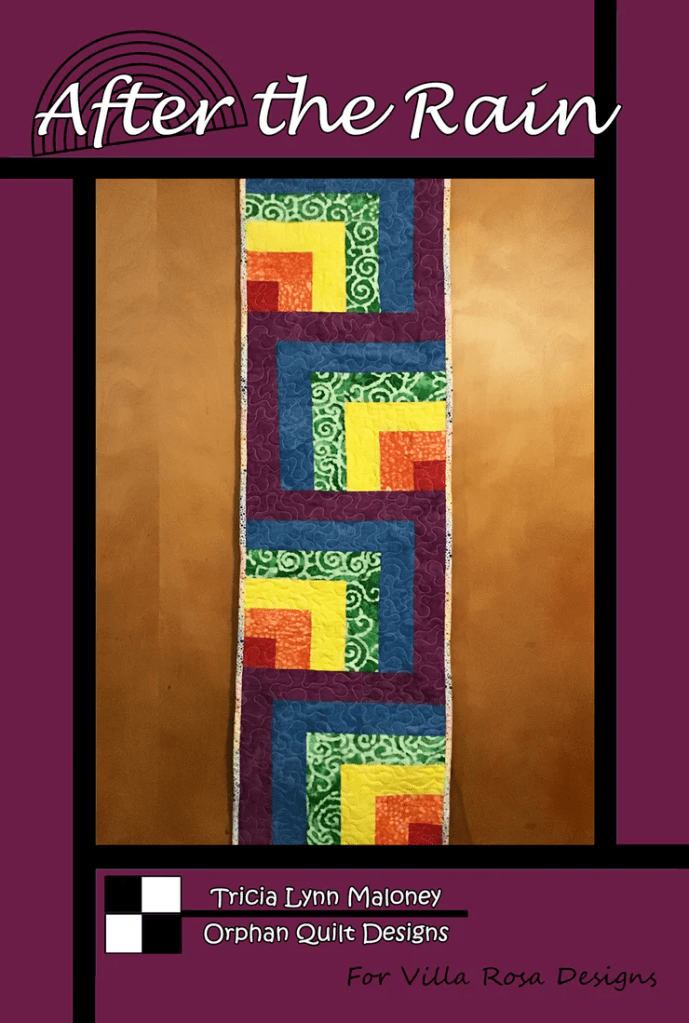
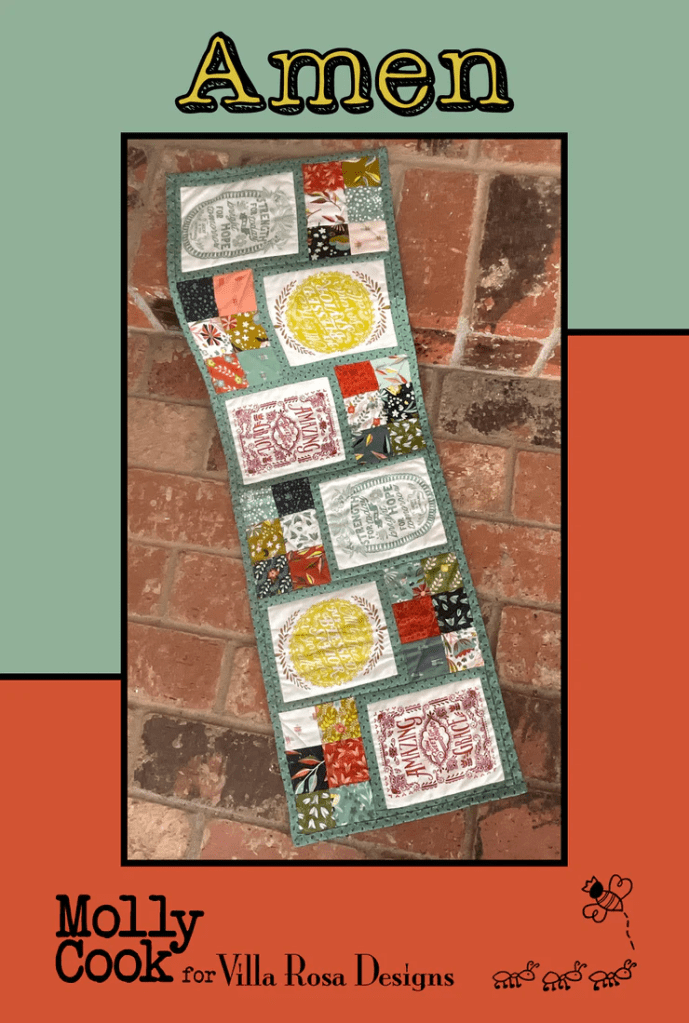
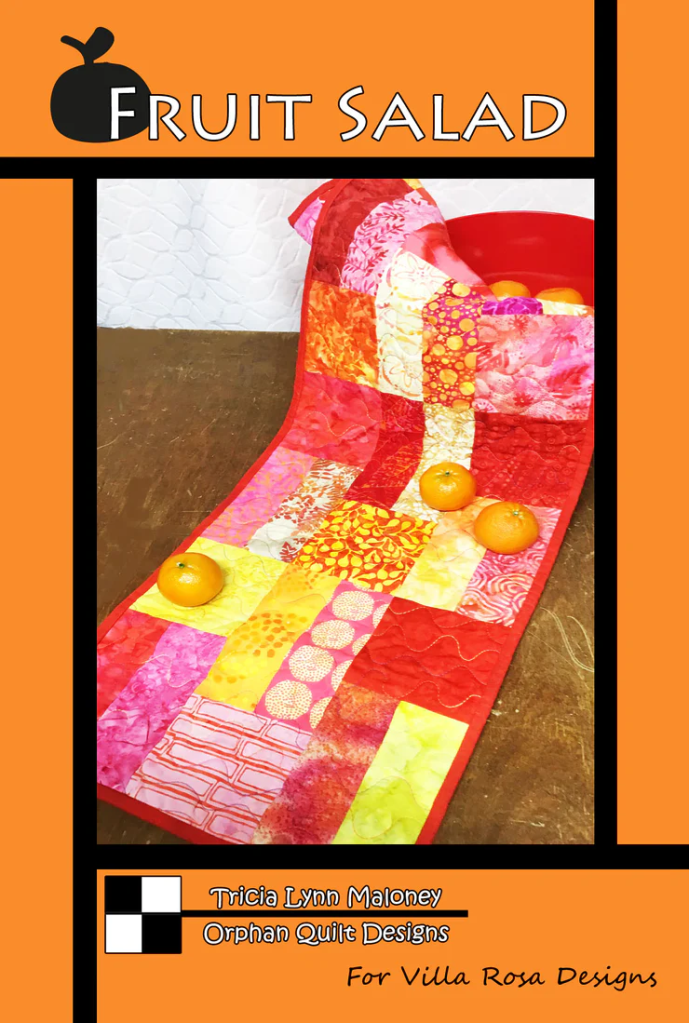
We’re working on a new and exciting project with FreeSpirit! And I’m thrilled to say it’s available at your local quilt shops right now! Here are the 4 VRD patterns featured with the Tim Holtz Abandoned Spark Pack. This Spark Pack includes a set of 10 fat quarters and you can use any of the 4 VRD patterns with the Spark Pack. How cool is that???

Here’s the vido showing the quilts and talking about Spark Packs.

You can get all 4 quilt patterns for $7.50 HERE and can shop our VRD Tim Holtz fabrics HERE.

You can visit FreeSpirit Fabrics HERE and get to know Tim Holtz and his collections HERE.

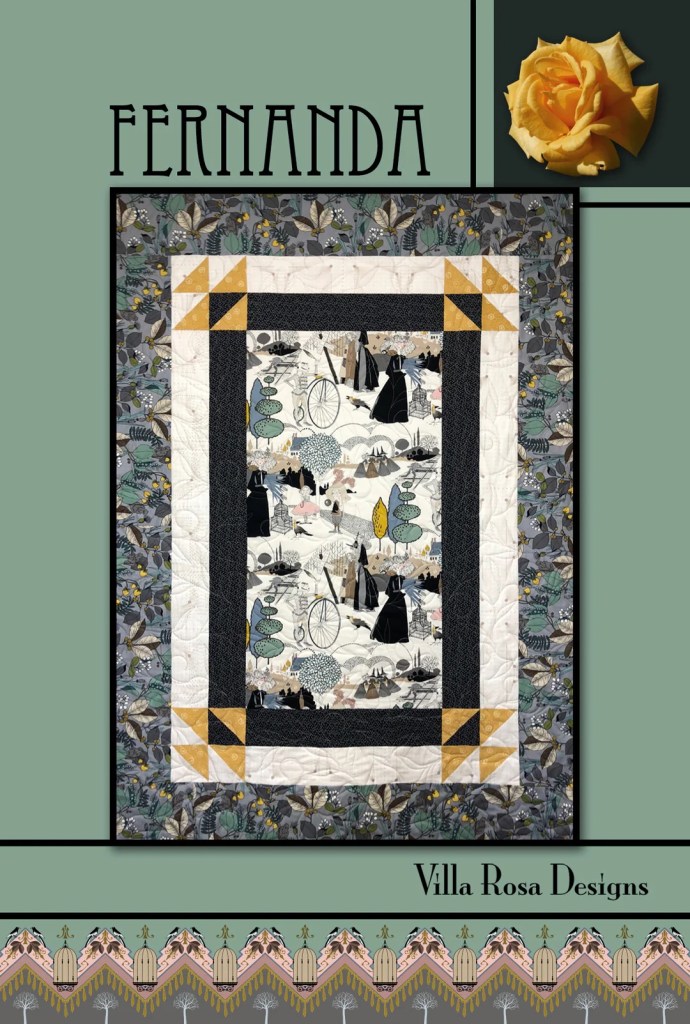
We’ve been working with Keepsake Quilting, to pair their fabric collections with our Rose Card patterns to make great kits. You can check out their current catalog to see our Fernanda pattern paired with the Hocus Pocus collection to create an awesome Halloween quilt kit on page 11.

You can find the Hocus Pocus Fernanda kit HERE.

There are many other VRD Rose cards available at Keepsake Quilting, so make sure you check out their current offerings HERE.

You can find our Rose Card pattern Fernanda HERE.

Recently, we’ve been pairing some of the new Blank Quilting fabric collections with our Rose Card patterns. What a lot of fun it is working closely with fabric companies to use our patterns to make their fabrics shine. Or maybe it’s using their new fabric collections to make our patterns shine? I think it’s a little of each. LOL! Anyway you look at it, it’s a win-win for everyone!

Check out these awesome quilts featuring fabric collections from Blank Quilting.

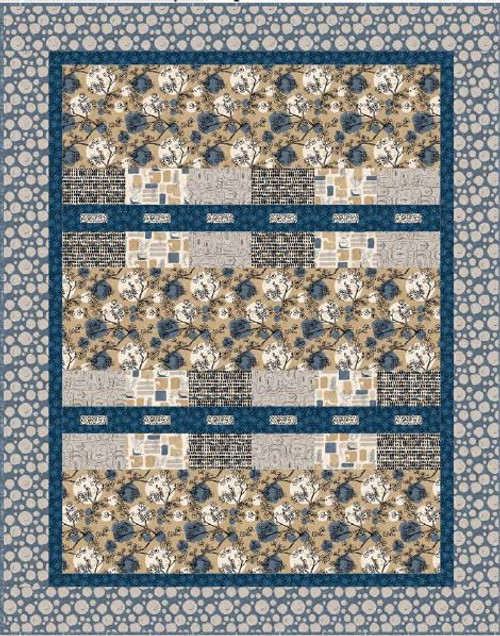
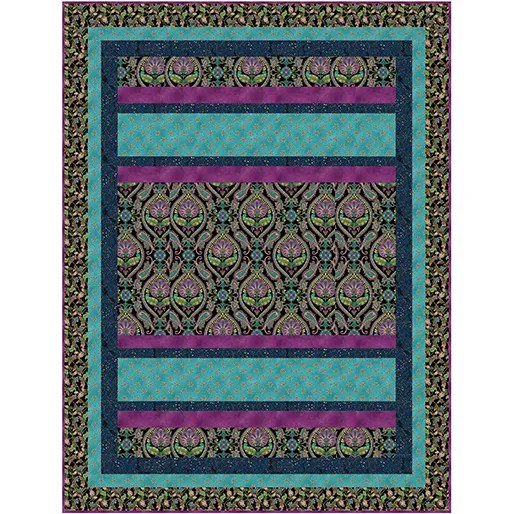
Al a Carte in Modern Abstraction

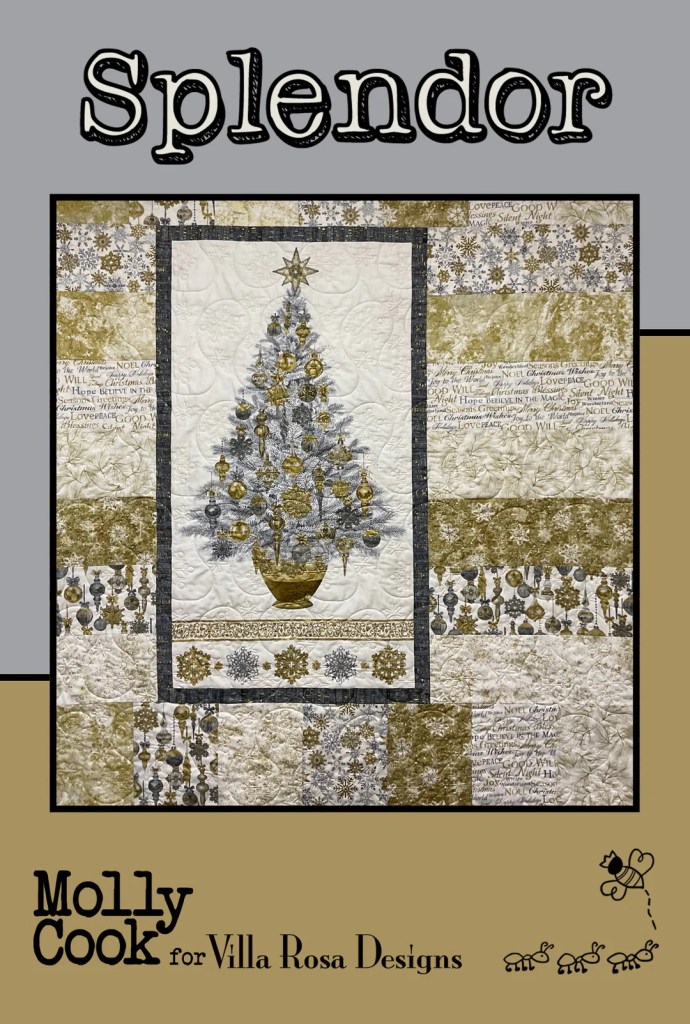
Splendor in Modern Abstraction

You can check out Blank Quilting’s Modern Abstraction fabrics HERE.

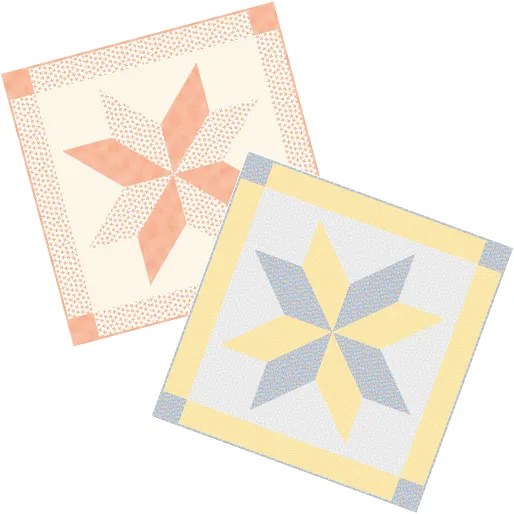
Bedazzled in Whimsy Daisical 2

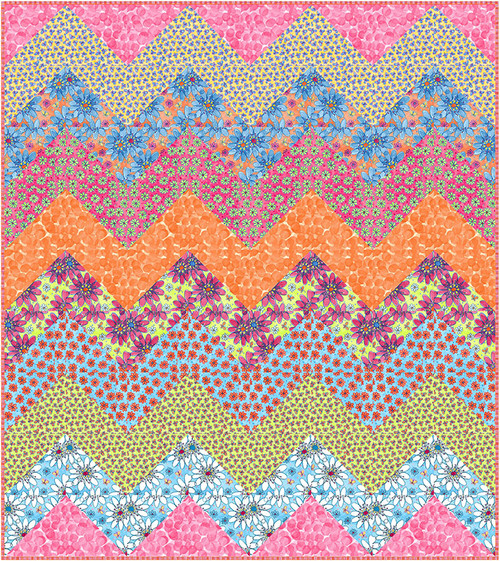
Mountains in Whimsy Daisical 2

You can check out Blank Quilting’s Whimsy Daisical 2 fabrics HERE or visit the Blank Quilting website for more info HERE.

Studio E is a fairly new quilting partner and we’re really glad to be working together! Like with Blank Quilting, we’ve been pairing some of our patterns with their new collections. Check out these awesome quilts!

Foxfire in Squeeze the Day

Check out Squeeze the Day HERE.

Eazy Piezy in Pollen Nation

Gingersnap in Pollen Nation

Check out the Pollen Nation fabrics HERE.

You can check out all the great Studio E fabrics HERE.

We’ve been working with Benartex this year and it’s been really fun matching up our patterns to their fabrics. Here are some of our collaborative designs:

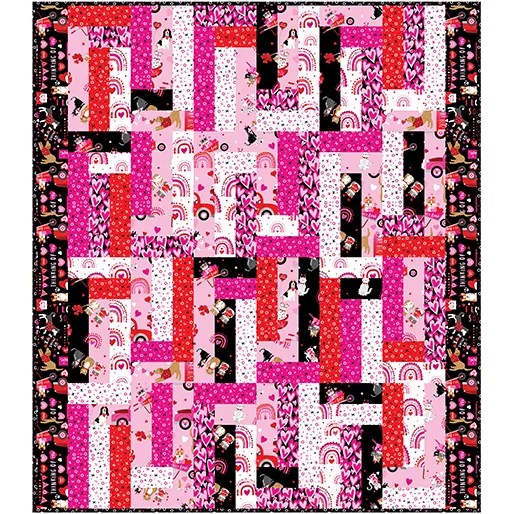
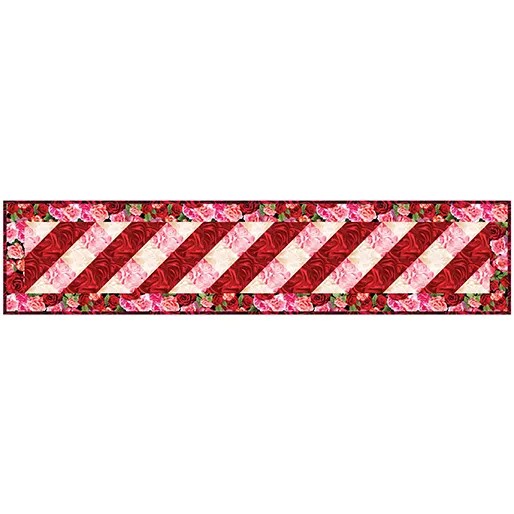
Grand Prize in A Heart Led Life

Waverly in A Heart Led Life

2M in Bali Tropical Retreat

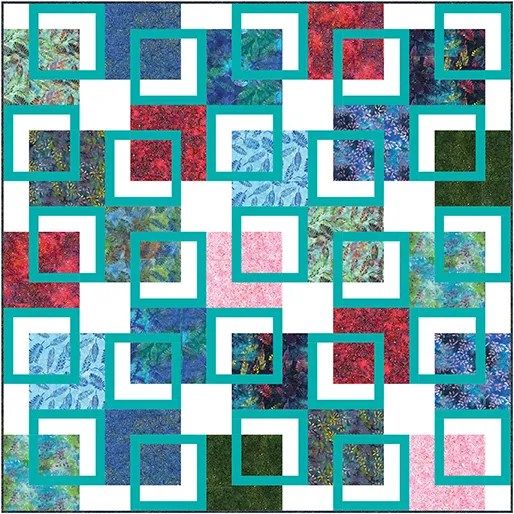
Geneva in Bali Tropical Retreat

Dulcie in Bali Tropical Cove

Folklore in Bali Tropical Cove

Biscotti in Barnyard Rules

Candy Land in Barnyard Rules

Fish and Chips in Barnyard Rules

Planters (purchase)

Planters in Barnyard Rules

Gingersnap in Begins with Mum

Magic Show in Begins with Mum

Gingersnap in Cherry Hill

Discovery in Chillin’ and Grillin’

Pumpkin Pie in Chillin’ and Grillin’

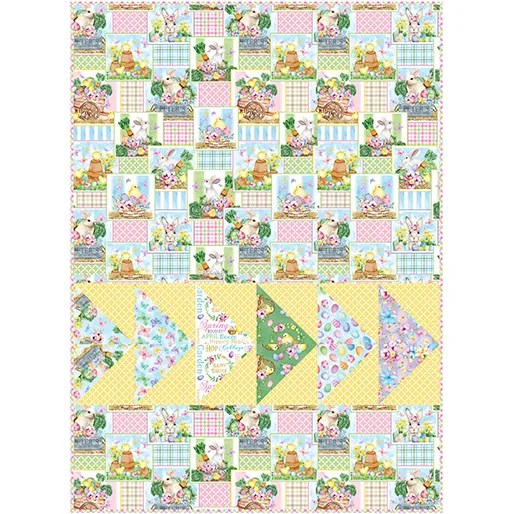
Baby Goose in Cottontail Farms

Busy Bee in Cottontail Farms

Cherish in Enjoy the Ride

Cool Water in Enjoy the Ride

Foxfire in Enjoy the Ride

Kaleidoscope in Enjoy the Ride

Hartford in Gilded Feathers

Snow Ruby in Gilded Feathers

Lollipop in Happy Heart

Painted Moon in Happy Heart

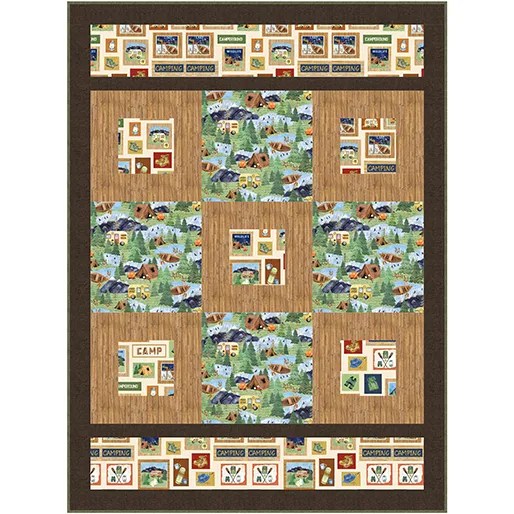
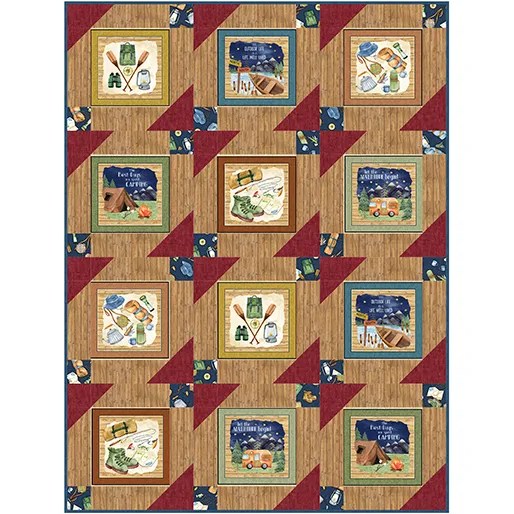
Liberty Bell in Live, Love, Camp

Ahoy in Live, Love, Camp

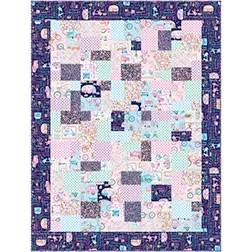
Bear Hugs in Love You Fur-Ever

Kit and Caboodle in Love You Fur-Ever
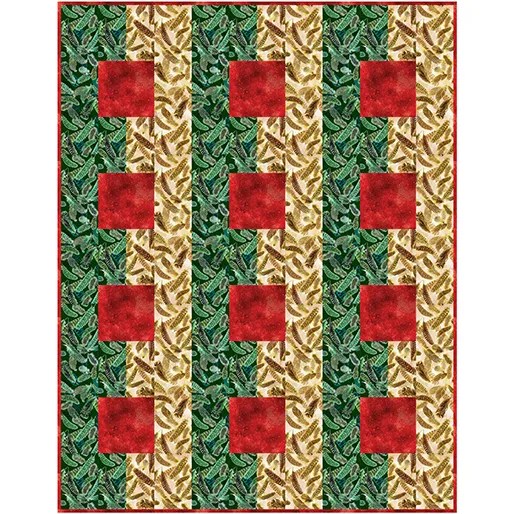
Biscotti in Love Ewe More

Eazy Piezy in Love Ewe More

Grand Prize in Parrot Habitat

San Julian in Rooville

White Cloud in Rooville

Alassio in Sail Away

Fernanda in Sail Away

Ripple Runner in Sail Away

Estrella in Shangri-La

Honor in Shangri-La

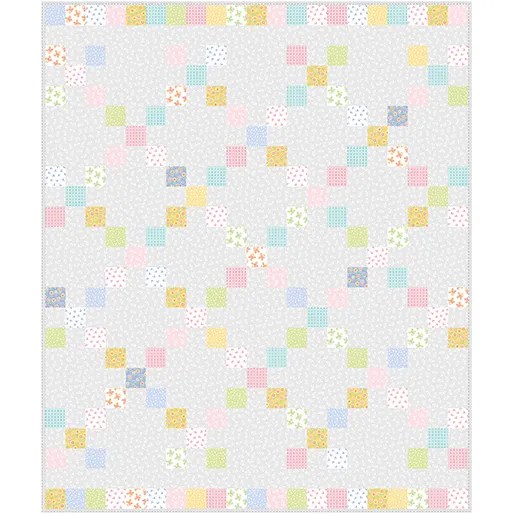
Carnival Glass in Simply Blessed

Daybreak in Simply Blessed

Discovery in Simply Blessed

Playdate in Simply Blessed

Double Delight in Transparency

Lattice in True Romance

Beatrice in Venetian Marble

Cidermill in Venetian Marble

Addison in Whispering Lilies

You can visit Benartex HERE.

And please don’t forget to ask for these wonderful fabrics at your local quilt shop as well as our Villa Rosa Designs Rose Cards. Support your local quilt shops! If you don’t ask, you local shop owner doesn’t know, so ask away!

Just keep quilting!

Until next week —

Always,

Tricia

Rose Cards · Tutorials · villa rosa designs

NEW VRD Rose Cards for August and a VRD Rose Card Tutorial for Steppin’ Up

Happy Thursday to you!

Boy, do I have some fun things to share with you this week! Like NEW PATTERNS, for one. And a NEW TUTORIAL for this month’s table runner pattern, Steppin’ Up. So buckle up and get ready for some VRD fun!

First up is our New August Villa Rosa Designs Rose Card patterns! Check ’em out!

What a great variety of patterns, don’t you think? You can order all five Rose Cards HERE for the super low price of $8.95.

Here’s my latest table runner Rose Card pattern — Steppin’ Up. Isn’t it fun?

You can get the Steppin’ Up Rose Card HERE.

Keep reading for a tutorial for Steppin’ Up as the blocks are a tad tricky.

Don’t forget that we also offer digital patterns for most of our Rose Cards patterns. This is great if you’re a techie quilter or if you live outside the USA. You can find individual digital patterns HERE, unfortunately there aren’t any of the card sets as digital bundles.

There are even some great kits still available for the NEW August Rose Cards —

Marsala

Circus Time

Sorry, but kits for Steppin’ Up, Mira Costa, and Pots and Pans are already out of stock at the moment, so make sure you check back later.

All right! Let’s get to our Steppin’ Up tutorial.

Since I’ve been wanting to do something with an autumn theme (Yes, Gaynel, you were right!), I grabbed some great prints out of my stash. I think you’ll really like how Steppin’ Up looks with a seasonal twist. I’m now thinking Christmas might be fun, too….

Step 1: Time to gather up your fabrics for Steppin’ Up. For the cover runner, I chose fun brights with black and white, but for this version I chose a brown tonal and a cream dot to go with my fall fabrics. The most important thing in selecting fabric for this runner is to have high contrast between the light and the dark.

Step 2: Go ahead and trim your print squares and then cut your print squares into triangles. Cut on one diagonal to make 2 triangles out of each square.

Step 3: Now it’s time to cut our light fabric into squares and then cut the larger squares on both diagonals to make 4 smaller triangles out of each larger square.

Oops! I just looked over at the pattern beside me and I see I did the dark first and then the light in the directions and when I did the tutorial steps, I did the light first followed by the dark. Mea culpa! I hope switching the order of the light and dark won’t confuse anyone….

Step 4: Next we’re going to cut the dark fabric into 2 different sized squares and cut each larger square on both diagonals so we get 4 smaller triangles from each square.

Step 5: Yay you! All your fabrics are cut for the blocks. I don’t usually cut my border strips until after I’ve pieced the center. That way, I can measure my quilt just in case my measurements might be a tad different than the designer who wrote the pattern.

BLOCK 1

Step 6: Let’s make Block 1. I’m going to break this into smaller steps so it’s a bit easier to follow.

Image A. See how my light triangle is sitting up against my dark square with the slanted side (the hypotenuse) facing towards the top left? Once your pieces look like this, then carefully flip the brown square over on top of the triangle with the right sides together.

Image B and C. Go ahead and sew along that straight side using your 1/4″ seam. Open up the unit and press (I usually just finger press as I’m assembling a block).

Image D and E. Now we’re going to sew a light triangle to the right side of the dark square. Once your pieces look like this, then go ahead and carefully flip the triangle over on top of the brown square, with the right sides together. Go ahead and sew using your 1/4″ seam.

Image F. Open the unit and press. Repeat for the rest of your dark squares and light triangles.

Step 7: Here’s my favorite part of assembling these rectangular blocks — sewing the print triangles on! This really makes the blocks a lot more fun.

Image A and B. Turn your Block 1 unit on its side like you see in the photo. Choose a print triangle and place it on the left as shown. Carefully flip the unit over on top of the triangle, lining up the bottom straight edge (you should have about a 1/4″ triangle overhang at the top). Sew using your 1/4″ seam. Open and press.

Image C and D. Go ahead and repeat for the right side.

Image E. Here is a completed Block 1.

BLOCK 2

Step 8. Are you ready to make Block 2? This time we are using light squares and dark triangles. The placement of the triangles is different than in Block 1.

Image A and B. Notice how the dark triangle is laid out for Block 2 with the slanted side pointing to the bottom left. Once your pieces look like this, go ahead and flip your light square over on top of your dark triangle, with right sides together. Sew using your 1/4″ seam. Open the unit and press.

Image C. Lay a dark triangle on the right side of the light square as shown. Then flip the dark triangle over on top of the light square, with right sides together. Sew using your 1/4″ seam.

Image D. Oops! Take a look at the bottom unit in the photo — I sewed the right dark triangle on wrong. Oh dear….time to unsew and try it again.

Image E. Got it right the second time. Open the unit and press. Repeat for the rest of your light squares and dark triangles.

Step 9: Now let’s get Block 2 finished! Grab the rest of your print triangles.

Image A and B. Turn the Block 2 unit on its side and place a print triangle on the left. Flip the unit over on top of the print triangle, right sides together, and lining up the edge. Sew using your 1/4″ seam. Open and press.

Image C. Repeat for the right side. Open and press.

Image D. YAY! Block 2 is now done.

Step 10: Yay! You made it through the hardest part of putting this runner together. Now it’s time to alternate Blocks 1 and 2, arranging them until you are satisfied. Once you like what you see, sew your blocks together. (A few of my blocks were AWOL when I snapped this photo, but I found them in a couple minutes — they didn’t get very far.)

Step 11: Measure your quilt through the center horizontally and cut 2 border strips to this length, piecing your strips together as needed. Then sew the borders on the long sides of the runner. (My errant blocks were added to the end before I sewed on the long borders.)

Step 12: Now measure your runner through the center vertically and cut 2 border strips to this measurement. Sew the borders to the short sides of the runner.

Step 13: Layer, quilt, and bind your table runner. Don’t forget your label.

Step 14: Enjoy!

Interested in more VRD tutorials? You can check out our tutorials to date on the blog HERE.

Until next week —

Always,

Tricia

Just Quilty Stuff · Quilt Stories · Rose Cards · villa rosa designs

A Sisterhood of Quilters Who Can’t Get Enough Villa Rosa Design Rose Card Patterns

Happy Thursday!

Week after week, I’ve been showing the wonderful, fast, and fun to make Villa Rosa Designs Rose Card patterns. Patterns are great, but I got to thinking it would be fun to share photos of some of these rockin’ Rose Card patterns with you.

I have an amazing group of quilters that LOVE LOVE LOVE VRD Rose Card patterns. We meet once a month at our local quilt shop from March through December — we skip January and February because winters here in NW PA can be a little unpredictable. We call it a class, but it’s more like a quilt slumber party every month with friends, snacks, and quilts. If you’re a VRD enthusiast and you have friends who are also hooked on Rose Cards, then why haven’t you created your own VRD group??? Just sayin’….

Let me tell you about my VRD group. We’ve actually had this group going for a really long time. In the past, we did sampler quilts, small projects, rulers, and many other topics. We’ve always welcomed new quilters into our midst and most return to the group year after year.

There are so many things I love about this group of women. They welcome newbies in and take them under their wings. Everyone helps everyone. We share quilting tips and tricks as well the joys and sorrows of our lives. We laugh, eat, and catch up every month. When I was laid up after getting my knee replacement, one of the group even stepped up and led the June project. I am humbled and inspired by this group of strong women. We are so much more than simply a “class” — we are a sisterhood of quilters.

Last year (2022) after a couple years of requests by several in the group, I finally agreed to do a year of Rose Cards. So in 2022, we did a “Year of Table Runners”. It was a lot of fun and really whetted everyone’s appetites for more. So for this year (2023) we are doing a “Year of Panels and Novelty Fabrics”.

I thought it would be fun to share some of the incredible work being made by these extraordinary women. So here’s to my ladies — Mary Lee, Sherry, Gaynel, Robin, Kim, Lisa, Anita, Debbie, Jean, Donna, Missi, and our fearless shop owner, Gail.

Sit back and enjoy the quilt show!

Belle Amie

Coffee Break

Dapper

Ice Jam

Lattice

Leaf

Peppermint & Holly

Pinwheel Picnic

Unfurled

Whirly Bird

Amen

Bohemia

Daring Spirit

Hypnotized

Let’s Eat

Splendor

Rose Card projects yet to come — Baby Goose, October Sky, and Season’s Greetings

I really hope you enjoyed these wonderful wonderful quilts! And I hope you find inspiration to make and finish your own Villa Rosa Designs Rose Card quilts. Or maybe try a new VRD pattern…..

Keep on quilting and I’ll see you next week!

Always,

Tricia

Just Quilty Stuff · Rose Cards · villa rosa designs

Summertime Quilting and a Little English Paper Piecing (EPP)

Hello Quilty Friends!

Happy Thursday!

Quilting in the summer. Do you find it as hard to do as I do? Do you get the summer sewing blues or are you a year-round quilting dynamo?

For me, I start off just fine in May and June, but by July, I’m just not into it anymore. That is until September rolls around, then I can’t wait to fire up my machine and sew, sew, sew with all those wonderful rich autumn fabrics. Over the years, I’ve discovered that I’m basically a three-seasons quilter.

The good news is, there are lots of ideas to keep us sewing all through the summer.

Quiltalongs

Have you thought about joining a Quiltalong? I know that many start in the summer and continue into the fall while others start in January. Check with your local quilt shop, if they don’t have some kind of summer sewalong, there are lots online. Just search for “summer quiltalong” online to see what you find. 🙂

Summer Classes

While you’re at your local shop, why don’t you see what classes they are offering for the summer? Maybe there will be something really fun you can do. Don’t forget that quilt shops are usually air conditioned too which makes sewing a lot more comfortable.

The reason I mention air conditioning is that my basement dungeon studio isn’t air conditioned. I have to rely on a couple fans to move the air around. This does not help me feel motivated to sew, instead it makes me feel motivated to take a nap. LOL!

I really don’t think summertime is the time of year to work on big projects, unless you really have to. It’s better to stick to smaller projects so that you can fit your quilting around your summer activities and still finish some of your projects. Place mats, table runners, wall quilts, pot holders, mug rugs and more are wonderful summer projects. You could even work on some small items for Christmas gifts, if you were so inclined.

Here are some of our smaller Villa Rosa Designs Rose Cards, perfect for summer sewing:

Get Mary Jane HERE

Get Amanda Jane HERE

Get Tabitha Jane HERE

Get Let’s Eat HERE

Get Slice of Summer HERE

Get Berry-Licious HERE

There are tons more fun and fast Villa Rosa Designs Rose Card patterns HERE.

Shop Hops

Shop Hops are often in the summer, so make sure you join your local Hop. You won’t regret it. Take a friend or two and make it a quilting buddy adventure.

Maybe your local shop is sponsoring a bus for the Shop Hop? If so, don’t hesitate — ride the bus. Then you can just focus on having fun and no one has to worry about driving or navigating or getting lost.

It’s a good idea to have a list of things you are looking for with on a Shop Hop or you will find yourself tempted by every pretty thing you see.

Take Along Projects — English Paper Piecing (EPP)

Maybe you do a lot of traveling in the summer. Do you have a take a small sewing project along? My favorite go-to project for travel is my Hexies. Are you familiar with Hexies?

Hexies are (of course) fabric pieces cut into a hexagon shape that you sew together. You can sew Hexies together by machine, but that is definitely NOT for beginners. Sewing hexagons together by hand, now, that’s something most people can do. Have you ever tried it?

There are several different ways to sew Hexies, but I like to use the English Paper Piecing (EPP for short) technique to sew my Hexies together.

Here’s a great video tutorial by quilter Carolina Moore about the basics of English Paper Piecing:

I couldn’t find her book Learn to English Paper Piece from the video, so I am guessing it’s out of print now, but I was excited to see that she has a brand new Paper Piecing book coming out next month in August! Woohoo!

You can pre-order Carolina’s new book HERE.

EPP really is a great project to take along with you when you’re on the go. The supplies can fit in a small bag — wouldn’t it be super cute to make a little bag for your EPP out of EPP??? Depending on your bag, it might actually slip down into your purse or tote too. You can even take them with you on that Shop Hop you’re going on!

The supplies you need for EPP are pretty simple and easy to find. You probably already have most of them lurking in your sewing area:

  1. Paper or plastic templates in your desired shape/size
  2. Fabric shapes that are larger than your paper pieces
  3. Thread, needle, thimble
  4. Small scissors
  5. (Optional) Fabric glue stick if you are going to glue your Hexies like in Carolina’s video
  6. Something to store your supplies in

These Hexie paper templates are currently my favorite find:

Get your 1 1/2″ Hexie papers HERE.

Do you see the hole in the center of the paper Hexie? Do you know what that hole is for? Snaps to you if you do! If not, let me tell you about it.

When you place your paper Hexie in the center of your fabric hexagon shape, you can use a straight pin in that hole to hold the paper Hexie on the fabric so the paper templates doesn’t slide as you work you way around the paper Hexie, either sewing or gluing the edges. One time I bought a set of paper templates without the holes, and boy did I regret it — I ended up punching a hole in each and every one in the package. Sadly, my hole punch wasn’t exactly big enough so my holes are all off center, which means that sometimes I run into my center straight pin while sewing around the Hexie. Ugh, not fun.

Once upon a time, when everyone was going wild for Hexies, Moda and other fabric companies were making precut fabric Hexies. They weren’t hard to come by back then and totally sped the EPP process up because you didn’t have to cut out the Hexies — you just started sewing. Sadly, you don’t find them around very often anymore. Bummer.

Here’s a precut pack from Kona cottons, if you’re interested. I found them HERE.

English Paper piecing isn’t just for Hexies, though. You can use the technique to sew lots of other shapes, too. And when you mix and match different shapes together, you can create some amazing EPP quilt blocks!

You could try Pentagons

Or Elongated Hexies, which are kind of funky —

Maybe you’re more into Octagons

Who wouldn’t want to make some Dresden Plates

These are just a few of the fun EPP shapes out there. So, you’ll probably never get bored with EPP unless of course you’re trying to make a California King Size quilt entirely by hand with EPP. Good luck, you crazy quilter, you!

Me, I keep things simple and only do Hexies. Those other shapes scare me! LOL! Mostly I make small projects with my Hexies like small table mats, runners, and other little things.

I do have a doll quilt I made with small Hexies (I don’t know what I was thinking, really). I think they are 1/2″ Hexies, by the way. Because it was my take-along project, it literally took me years to make the top. I think I started it in 2010? But that’s okay, I don’t usually have any specific deadlines for my EPP projects.

I’ve been trying to hand quilt my little Grandmother’s Flower Garden quilt now (for years…) but let me tell you, hand quilting is really not my thing. Not at all. I bow down to all of you hand quilters out there.

It’s funny but I have many little bags and boxes with EPP Hexies all ready to grab and go. Maybe a little excessive, but then again, I always have an EPP project….or two….or three going and ready so I can just grab it, pop it in my bag and off I go. Below you can see the EPP bag I am sew in love with right now! My quilting pal, Mary Lee, made this great zip bag for my birthday after I hinted very strongly. LOL! Thanks, Mary Lee!

It’s an byannie.com pattern — Double Zip Gear Bag 2.0. You can find the pattern HERE.

Sigh…..if only that ginormous bed quilt would magically fit into a cute little bag so I could tote it around and finish the binding….

Well, that’s it from me. Stay cool and keep on quilting this summer!

Until next week —

Sew. Laugh. Repeat.

Always,

Tricia

Just Quilty Stuff · villa rosa designs

14 Ways to Motivate Yourself Out of Your Quilting Slump

Hello Quilty Friends!

Happy Thursday!

I’m sitting here thinking that I’m long overdue for some quality time with my sewing machine. Of course, my recent knee replacement has put a lot of things on hold for the last 7 weeks, but every day I’m doing more and more. Just last week, I gingerly tackled the 13 steps from the first floor of the house to the basement, where my dungeon quilting studio lives. Piece of cake! Now I feel like I can take on the world!

Sewing and quilting — here I come! I even fired up my machine for a little sewing R&R. How about that? I’ve got SO many things I want to make, but now I’m wondering where to start??? In a way, you could say I’ve been in a kind of sewing slump. Maybe you can relate?

So, I started thinking about things that would motivate me back into quilting and sewing. And I thought I’d share my list with you. Please note that I added lots of fun links in this post.

1. Get Your Sewing Machine Serviced

This may seem like a no-brainer, but I bet a lot of you haven’t done this for a long time. There’s nothing like getting your machine back and it”s bright and shiny just like when you first bought it. You really should get your machine serviced at least every couple years, but if you are a heavy sewist/quilter, every year is better. Have you ever seen how much fuzz thread makes when you sew? Where do you think it goes — right down into your machine. This fuzz can harm your machine if it isn’t removed regularly.

2. Organize, Clean, and Purge Your Sewing Space

Put things away. Donate what you don’t want. Dust. Clean. Fold your fabrics neatly. Purge your stuff and only keep what you need and really want. Channel your own inner Marie Kondo….

Get the book that started it all!

Or maybe this one’s more your style:

Get Organizing Solutions…..

3. Rearrange Your Sewing Space

After you’re done organizing, cleaning, and purging your sewing area, try rearranging it to give it a fresh look and maybe make it function more efficiently for your needs. You might need to recruit helpers to move large or heavy items around.

A great book to help you make your dream space into a reality!

4. Upgrade your Sewing Space

Maybe some new paint, flooring, a new rug? Or a really amazing sewing table. What would really motivate you to spend more time in your space?

Look at this cool country rug I found! It looks like a quilt!

Check it out!

5. Visit Your Local Quilt Shops or Go on a Shop Hop

Sometimes finding a new fabric or fat quarter bundle or set of Charm Squares can inspire you to get back to sewing and quilting. I also just find walking in the door of my 2 local shops to be inspiring! All the colors, fabrics, samples, precuts, and chaos really speaks to me.

Have you ever tried a Shop Hop? If you’re not sure what a Shop Hop is, let me tell you about it. A Shop Hop is a group of quilt shops usually in one area (but it could also be an online shop hop with shops all over). The participating shops choose a time frame. You may need to get a special Shop Hop passport to participate. There are usually special sales, snacks, and prizes! A Shop Hop is also a great way to do something really fun with your best quilting friends, which is inspiring all by itself.

6. Buy a New Book or Pattern

While you’re at the quilt shop, pick up a new book or pattern that you find exciting and inspiring. Maybe something that just came out and you’ve never seen before….

I bought this one right when it came out. It’s got some great projects AND you can even use your stash. Get the book HERE.

7. Buy Yourself a New Gadget, Ruler, Notion, or Even Something Silly

This is similar to buying a new book or pattern, but a bit different too. Maybe making a Double Wedding Ring quilt is on your bucket list. What are you waiting for? It’s time to buy a set of templates and just get started. Maybe you can sign up to take a class at your local shop?

Double Wedding Ring Templates

Or maybe you’re dying to get one of those adorable little retro PINK drink fridges on Amazon for your sewing space so you don’t have to keep running to the kitchen? Go for it!

Retro Mini Drink Fridge

8. Fill in Your VRD Rose Card Collection

You know you want to…..how many Rose Cards do you have? How many do you need to complete your collection? WAHOO! Villa Rosa just hit the over 600 Rose Cards in print (or digital of you prefer), so you’d better get cracking.

You can order physical Rose Cards HERE or digital download Rose Cards HERE.

9. Organize Your Rose Cards

I know we’ll talked about storing and organizing your Rose Cards before. If you haven’t done that yet, let me tell you that it is a very satisfying process. I LOVE seeing my Rose Cards all happily nestled in their plastic storage boxes (like recipe boxes) in perfect order alphabetical order. Things are starting to get a little tight in my 3 boxes, so I’m thinking it’s time to add a 4th box and spread them out a little bit.My boxes are all clear, but now they come in fun colors!

Get yours HERE.

Haven’t organized your cards yet? Then feel free to check out these posts for ideas:

Squeezing in More Quilting Time and Rose Card Storage

My Go-To VRD Rose Card Quilt Patterns and My VRD Rose Card Storage Update

10. Schedule Sewing Time with Your Bestie

I really like the peace and quiet of working by myself, but there is nothing as awesome as having a sewing day (or even a week end) with your quilting buds. You could all work on your own projects, or for a lot more fun — choose a project that you all can make, using your own fabrics. You’ll be amazed at how different your projects look when they are finished, even though you all used the same pattern.

11. Go on a Quilting Retreat

A quilting retreat is a lot like sewing with your bestie, only on a bigger scale. I used to love going on week end retreats, but I found I didn’t sleep well in a different bed. So, these days, daytime retreats would be more my style so I can sleep nights in my own bed.

12. Host a Fabric and/or a UFO Exchange

Looking to freshen up your stash without breaking the bank? Why don’t you organize a UFO or fabric exchange with a group of friends or even your quilt guild. It takes a little organizing and some simple rules — for example, you must take home as many items as you bring. But what fun everyone will have!

13. Start With a Small Project — Pillow, Doll Quilt, Wall Quilt, Table Runner, Place Mats, Etc.

Most folks don’t want to jump into a big project when they’ve taken a bit of a hiatus from quilting. Try something small!. We have great table runner patterns and really fun accessory patterns, too. You might be wondering what accessories are because it’s kind of an ambiguous word. Well, our VRD accessory patterns include aprons, pillows, bags, scarves, purse essentials and more.

Find all our table runners HERE

Find all our accessory patterns HERE.

14. Make Something for Someone Else

Sometimes, you just need to make something for someone else to find your quilting groove again. You could make a quilt for a loved one or a friend or even a favorite pet. You could also put your quilting skills (and maybe quilt stash) to work to help a charitable organization. There are literally tons of organizations who would be delighted to receive a quilt from you that they can gift to someone or perhaps raffle off to raise funds for a specific project.

Here is a list of charities to get you started. I know there are a lot more, so if you don’t see your favorite organization, please give us the information by leaving a comment on this post. Thank you.

Quilts of Valor Foundation

Quilts of Honor

Project Linus

Quilts for Kids

Wrap Them in Love

Quilts Beyond Borders

Ronald McDonald Charities

Victoria’s Quilts

The Giving Quilt, Inc.

Operation Shower

Wrap a Smile Quilts

Binky Patrol

My Very Own Blanket

Sleep in Heavenly Peace

AZ Blankets for Kids

Quilts of Compassion

Well, that’s it for me today. I’m going to try to sneak off to my quilting studio and spend some quality time with my sewing machine….

Until next week —

Sew. Laugh. Repeat.

Always,

Tricia

Rose Cards · Tips and Tricks · Tutorials · villa rosa designs

July’s NEW Rose Card Patterns and VRD Crazy Stars Table Runner Tutorial

Hello Quilty Friends!

Happy Thursday to you!

BIG NEWS today! With last Friday’s release of our brand new July 2023 Rose Card patterns, we now have over 600 patterns in our catalog!!!

Put on your party hats! Cue the confetti! Blow that party horn!

WAY TO GO, VILLA ROSA DESIGNS!!!

LET’S CELEBRATE!!!

Here are July’s Brand New AWESOME AMAZING SPECTACULAR FANTASTIC Rose Card Patterns:

You can get all 5 regular patterns, above, for the special low price of $8.95 HERE.

BUT WAIT! THERE’S MORE!!!

This month, we have TWO NEW Table Runners! Wahoo!!!

You can get Flower Market HERE and you can get Crazy Stars HERE.

Hey! Did you know you can get each month’s new Rose Card patterns delivered right to your mailbox???

You can go HERE to sign up to get the 5 regular patterns each month

Or,

You can go HERE to sign up to get the 5 regular patterns plus table runners each month.

And, don’t forget shipping for Rose Card patterns is always free.

VRD Crazy Stars Table Runner Tutorial

I thought it might be helpful to everyone if I did a tutorial of my new table runner, Crazy Stars. It was hard to figure out how to illustrate the pattern so it made sense. And, because I don’t trust my humble illustrations, I am going to show you step by step how to make the stars in Crazy Stars.

Step 1 The first thing you need to do is divide your charm squares into 4 stacks — one stack for each star. If you find that the colors end up a bit uneven, you can always add a few squares from your stash or even cut them from fat quarters or yardage.

Step 2 Layer a print charm square right sides together on top of a background square.

Step 3 Now the fun begins! Next use a ruler and draw a line from the bottom edge to the right edge. Place the ends of your diagonal line anywhere you’d like on those edges. Sew on the drawn line. Then open the unit and press towards the print square.

Step 4 Layer another print charm square right sides together on top of the background square. You will need to carefully line up the left and top edges. Please note you will see the right side of your first Star point square, just ignore it for now.

Step 5 Draw a diagonal line from the left edge to the bottom edge, while ignoring the print square on sticking out on the other side. Then open the unit and press. You will have a weird looking unit somewhat like the one in my photo, but your Star points might look different than mine because we probably started and stopped in different places along the edges.

Step 6 Repeat steps 2-5 to make 4 Star point units for one Crazy Star block.

Step 7 Turn a Star point unit over so that it is right sides down and the back of the unit is facing up. Do you see your background square kind of in the middle of the 2 print squares? Use the background square as your template and cut away the excess Star point print fabrics beyond the background square. Turn the unit right sides up again and you now have a perfect Crazy Star point unit. Trim the other 3 Star point units as well.

Step 8 You can reduce the bulk in each unit if desired. Fold back a star point until you see your stitching. Cut away the excess background and Star point fabrics 1/4″ away from the seam. I used my cutter and a ruler over the seam to protect it while I cut that 1/4″ seam allowance. Open the unit again and do the same thing for the second Star point. Repeat for the other Star point units.

Step 9 Now you have a fun and funky set of Star points to make into one Crazy Star block.

Step 10 Now it’s time to sew your Crazy Star block together like a Nine Patch. You will need 4 Star point units, 4 background squares for the corners, and a center print square.

Step 11 Repeat steps 2-10 to make a total of 4 Crazy Star blocks for the table runner.

Step 12 Then sew your Crazy Star blocks together into a row. You can twist and turn your blocks to see which star arrangement you like the best. Then layer your quilt, quilt it, and bind the edges. Don’t forget your label!

Well, that’s it for me. I hope this tutorial will make it a lot easier for you to put together your own Crazy Star Table Runners. Crazy Star blocks can be a lot of fun to make, so I hope you will give them a try.

Until next week —

Sew. Laugh. Repeat.

Always,

Tricia

Guest Bloggers · Rose Cards · Tips and Tricks · Tutorials · villa rosa designs

VRD Gallant Rose Card Quilt Tutorial

Hello Quilty Friends!

Happy Thursday to you!

PSST!

Hey, it’s me, Molly! I’m stealing the blog from Tricia this week!

I hope everyone had a fun (and safe) 4th of July!

You know, every year around this time, with patriotic things everywhere, I start thinking about Quilts of Valor. I know, making QOV quilts is something you can do any time of year, but when those brand new red/white/blue fabric collections start rolling in, it’s kinda like a screaming billboard to make a patriotic quilt.

So as we are unpacking the red, white, and blue collections here in the shop (want to see what the VRD shop in CA looks like? Go HERE), Gallant was calling my name (yelling?) to make it from one of these awesome new patriotic collections.

Get Gallant HERE.

Gallant was designed by our very own Tricia to meet the criteria for a Quilt of Valor quilt. The quilt on the cover of the Gallant Rose Card was presented to her cousin, Lisa, in 2022 at a family reunion QOV presentation.

You can read the blog post about the QOV presentation HERE.

Tricia’s cousin Lisa being presented with her Quilt of Valor.

So let’s get started! You will be amazed at how many different ways you can arrange the Gallant blocks — you can make this quilt over and over and you’ll never get bored.

VRD Gallant Quilt Tutorial

Making the Blocks

Gallant calls for red and blue fat quarters along with a background and an accent fabric for the top and bottom border to help make the size perfect for a Quilt of Valor (check out QOV quilt requirements HERE). Sounds easy enough, right?

After a lot of deliberation, I decided to use fabrics from the Liberty collection by Robert Kaufman and “Blossom on White Uncle Sam” fabric by Riley Blake for the background. Isn’t that a perfect background name for our quilt? LOL!

It didn’t take long to cut all the pieces for the blocks. And while I was cutting, I organized my pieces by color and size to make it easier to sew.

After you have all your pieces cut out, it’s time to get sewing!

Get ready, because these blocks almost sew themselves! Hah!

Lay out your A B C D cut pieces to make each block easier to sew. You can stack up all the A’s, B’s, C’s, and D’s like I did below — this will make things go even faster.

Now sew the four pieced strips together into one unit –ABCD. Then add the last red strip to the side of D. Make 36 blocks. Like I said before, they go together really fast!

Laying Out the Blocks

Now on to the most fun part of making Gallant!

Seriously, there are so many layouts for these blocks that it was hard picking the one I liked best. (The first photo on the top left is the layout Tricia chose for her Gallant quilt.)

Here is the layout I went with:

Finish Your Quilt

Sew your blocks together in your chosen layout. Warning! Shuffling the blocks around can be very addictive. LOL!

Finally, add the borders to the top and the bottom of the quilt.

Quilt and bind.

And don’t forget your label.

DONE!

Now find someone to gift your Gallant quilt to!

A Quilt Challenge for You

Did you like the fabrics I chose for my Gallant quilt? If so, I’m going to challenge you to make a Gallant quilt to gift to your favorite veteran or to your local Quilts of Valor organization!

We have Gallant quilt kits HERE at the shop, featuring the same fabrics as my quilt. So grab your Gallant kit and make your own quilt.

How many different layouts can you create with your blocks???

By the way, we always LOVE seeing what you do with our VRD patterns and kits, so if you are on our VRD Facebook page, please post a picture of your Gallant quilt!

If you’re not hanging out with us on Facebook, you should be! LOL!

That’s all for now.

Until next week —

Sew. Laugh. Give. Repeat.

Later,

Molly

Just Quilty Stuff · Rose Cards · villa rosa designs

Villa Rosa Designs Rose Card Patterns — Table Runners All Through the Year

Hello Quilty Friends!

Happy Thursday!

Here we are at the end of June with Independence Day sneaking up on us. I just realized that I need to start thinking about Christmas projects if I’m going to give any handmade gifts or quilts for the holidays this year. One of my favorite gifts to give are table runners.

I seem to remember a blog comment one time asking for a blog post about table runners. So I thought I’d share with you a rundown of our VRD Table Runner Rose Card Patterns arranged all through the year.

Wouldn’t it be fun to start a tradition of gifting a series of table runners to a special loved one or friend (or maybe even yourself!?!)? Maybe you’d only do one for each season. Or maybe you’d do the full 12 months. Whether you’d gift one every holiday, every month, every Christmas, or just because –imagine the delight of the recipient!

Isn’t that one of the biggest joys of quilt-making — the giving?

Let’s take a tour through the year with Villa Rosa Table Runners.

January

Get Blizzard HERE

Get Ice Jam HERE

Get Snow Goose HERE

Get Winter Branches HERE

February

Get Love Notes HERE

Get Smitten HERE

March

Get Clover HERE

Get Lucky (the pattern) HERE

April

Get After the Rain HERE

Get Amen HERE

Get Fly Away HERE

Get Lil’ Umbrellas HERE

May

Get Bloom HERE

Get Flora HERE

Get Macarons HERE

Get Nana’s Aprons HERE

Get Pretty Posies HERE

June

Get Berry-Licious HERE

Get Blissful HERE

Get Blueberry Cobbler HERE

Get Fruit Salad HERE

Get Goody Goody Gumdrops HERE

Get Penny Candy HERE

Get Pinwheel Picnic HERE

July

Get Cotton Candy HERE

Get Firecracker HERE

Get Sew Charmed HERE

Get Unfurled HERE

August

Get Cabana HERE

Get Slice of Summer HERE

Get Sunny Day HERE

September

Get Coffee Break HERE

Get Housewarming HERE

Get Leaf HERE

MAPLE GROVE

Get Maple Grove HERE

Get Mod Tiles HERE

October

Get Bat Dance HERE

Get Cake Day HERE

(I included Cake Day for October since my birthday is in October! LOL!)

Get Harvest HERE

Get Pumpkin Hollow HERE

November

Get Baskets HERE

Get Griddle HERE

Get Let’s Eat! HERE

December

Get Blessings HERE

Get Gift Wrapped HERE

Get Merry Trees HERE

Get Peppermint & Holly HERE

Get Season’s Greetings HERE

Get Sugarplum HERE

I hope you enjoyed this curated selection of VRD Table Runners arranged by months of the year. Maybe these runners will inspire you like they’ve inspired me. I’m thinking “Table Runners Through the Year” would be a really fun trunk show or guild program. What do you think? Something to add to my to-do list?

Well, that’s it for me this week.

Until next Thursday —

Sew. Laugh. Repeat.

Always,

Tricia @VRD

Rose Cards · villa rosa designs

Our 20 Best Selling Wholesale VRD Rose Card Patterns Right Now

Hello Quilty Friends!

Happy Thursday!

With 595 (Yes, I actually counted them. LOL!) Rose Card patterns currently in our VRD catalog, I thought it would be fun to show you our top selling Rose Cards. Please keep in mind these are the top patterns on our Wholesale website, which means these are the Rose Cards being purchased by your local quilt shops, online shops, and other retailers. Interestingly enough, this list changes constantly, so by the time this post launches, this list will most likely have been updated. Just sayin’………

I wonder how many of these top sellers you already have in your Rose Card collection? Scroll through the list and let’s find out!

Get Sisterhood HERE

Get Pumpkin Hollow HERE

Get Solar Flare HERE

Get Grand Prize HERE

Get October Sky HERE

Get Liberty HERE

Get Cat City HERE

Get Dainty Machines HERE

Get 2M HERE

Get Splendor HERE

Get San Julian HERE

Get Fernanda HERE

Get Hillside Charm HERE

Get Daring Spirit HERE

Get Firecracker HERE

Get Hypnotized HERE

Get Quilters Palette HERE

Get Slice of Summer HERE

Get Notches HERE

Get Pumpkin Patch HERE

Soooooo, how many of these top sellers do you have? Me, I have all of them, of course. LOL! I provided the link under each pattern cover to make it easy for you to purchase the ones you don’t have yet. Remember, Rose Card patterns retail for $2 and shipping is free for patterns.

Now I’m curious — how many of these awesome Rose Card patterns have you actually made? So far, I’ve made Sisterhood, Pumpkin Hollow, Cat City blocks, 2M, Splendor, Hillside Charm, Daring Spirit, Firecracker, Hypnotized, and Slice of Summer. Of course, some of these are my own VRD patterns, so I already have a head start. LOL!

We’ve even done tutorials here on the blog for several of these patterns too:

Splendor

Hillside Charm

Daring Spirit

Hypnotized

Cat City block

If you are a retailer, these Rose Cards are the patterns that are the Wholesale VRD hot sellers right now and you should have these for sale in your shop. Just making a suggestion…….

You can find the VRD Wholesale website HERE.

Well, that’s it for me this week. Don’t forget to grab these Rose Card top selling patterns because you can never have enough Rose Cards. They really are like candy without calories — all 595 of them!

Until next Thursday —

Sew. Laugh. Collect Rose Cards. Repeat.

Always,

Tricia @VRD

Designer Spotlights · Rose Cards · villa rosa designs

VRD Designer Spotlight Interview with Heidi Cook

Hello Quilty Friends!

Happy Thursday!

I hope you all enjoyed last week’s photo tour of the Villa Rosa Quilt Shop with guest blogger Molly Cook. I certainly did as I’ve never seen the shop in person. Thanks, Molly! We look forward to you popping in on the blog again soon!

I’m happy to say I’m now a few weeks post knee replacement surgery and my knee is doing great. It’ll be a little while before I go bowling or line dancing, but I’m on the mend now.

Today I am excited to interview Heidi Cook, who is one third of the Villa Rosa Designs Cook Family designer trio, along with sister, Molly and Mom, Tamara.

Tricia: Hi Heidi! Thanks for taking the time to do an interview for the blog!

Heidi: Sure, glad to help out.

Tricia: Tell us about yourself.

Heidi: I live in Nevada County, California and I’m the youngest of 4 kids. And we were all home-schooled.

Tricia: Wow, that must have kept your Mom really busy. Anything else?

Heidi: I raised pigs for 5 years for our local Nevada County Fair.

Tricia: Cool, I was in the 4-H here in PA, but it was a cooking 4-H. Boy, that was a long time ago! LOL! Where/how did you meet Pat Fryer, Rose Queen and owner of Villa Rosa Designs?

Heidi: I met Pat at our local quilt guild.

Tricia: When did you learn to sew/quilt?

Heidi: I started sewing at age 9 when I joined the Junior Quilters through our local quilt guild and I started sewing for community service.

Tricia: 9 years old? WOW! So you’ve been sewing for quite a while, then?

Heidi: Yep, 18 years.

Tricia: I know you and Molly sew, but how about your other 2 siblings? Do they sew, too?

Heidi: The oldest, Naomi, started sewing first and she works at a fabric shop in Arkansas. My brother, who is between Molly and me, sewed till he got married.

Tricia: Wow! That is amazing! How long did you sew before designing your own quilts and patterns?

Heidi: I started designing my own quilts with scraps but it was officially about 8 years before I actually came out with my own patterns.

Tricia: What’s your favorite part of quilting/designing?

Heidi: Picking out the fabric, of course! LOL!

Tricia: Yep, that’s definitely one of my favorites too! What about your least favorite?

Heidi: Cutting it out.

Tricia: Do you have a favorite pattern from those you’ve designed?

Heidi: No! They are all my children — how could I pick just one as my favorite — they are all my favorites.

Tricia: Here are Heidi’s VRD Rose Card patterns to date. You can find them HERE.

Tricia: Wowzer, Heidi! You certainly have a lot of quilt patterns! And I see a theme in all their names — food. Am I guessing right that you like to cook?

Heidi: You guessed right! LOL! I not only cook, but I love to garden too!

Tricia: What else do you do when you’re not quilting or sewing?

Heidi: I like to play coed softball and keep score for the senior softball league.

Tricia: Any advice for quilters who want to become quilt designers?

Heidi: Graph paper is your best friend!

Tricia: Just so you know, dear readers, Heidi is a big part in prepping for the shows whether it’s the Facebook live sale or the quilt shows. Thanks, Heidi! It’s been great getting to know you better and we all look forward to your upcoming “foody” Rose Card patterns.

Heidi: Thanks for having me!

What fun to get to know another of our amazing VRD Designers! Take care and don’t forget to scoop up some of Heidi’s delicious patterns!

Until next Thursday —

Sew. Laugh. Repeat.

Always,

Tricia @VRD