
Hello Quilty Friends!
Happy Thursday to you!
Nope, sorry, no quilt tutorial this week. I finally realized I’d better take a little break from piecing and get to some machine quilting before I completely drowning in unfinished quilt tops. LOL!
Another week has just zoomed by and I cannot believe that Fall officially arrives on Saturday. I am totally enjoying the cooler nights and warm days we’ve been having around here. I’ve also been doing a little more cooking for dinner and even some baking. While out enjoying the weather the other day, I strolled back to our crazy overgrown dwarf apple trees which are like 15 feet tall. I was pleasantly surprised that there are some decent apples up in the trees even as the leaves are starting to fall off. We’ve never really treated them and they’ve never been pruned to my knowledge — hence the “overgrown” part — and the deer and bugs have been helping themselves. But there are still some nice sized apples. Now I have to add some apple picking this weekend because I’m thinking of making some crockpot applesauce and freezing it for this winter. Yum! There’s nothing like homemade applesauce in the winter.
Of course, all I really want to do right now is to make quilts. Lots and lots of quilts. So let’s dive right into a great list of quilting helpers!
Quilter’s Toolbox Ideas to Improve Your Quilting
I’ve recently added a couple new things to my studio that have been real game changers for me. So I thought I’d take a little time to share with you those new things as well as some of my old favorites. These tools have saved me time, improved my accuracy, and even just made quilting more fun. You can find them at your local quilt shop or favorite online retailer.
Wool Pressing Mat
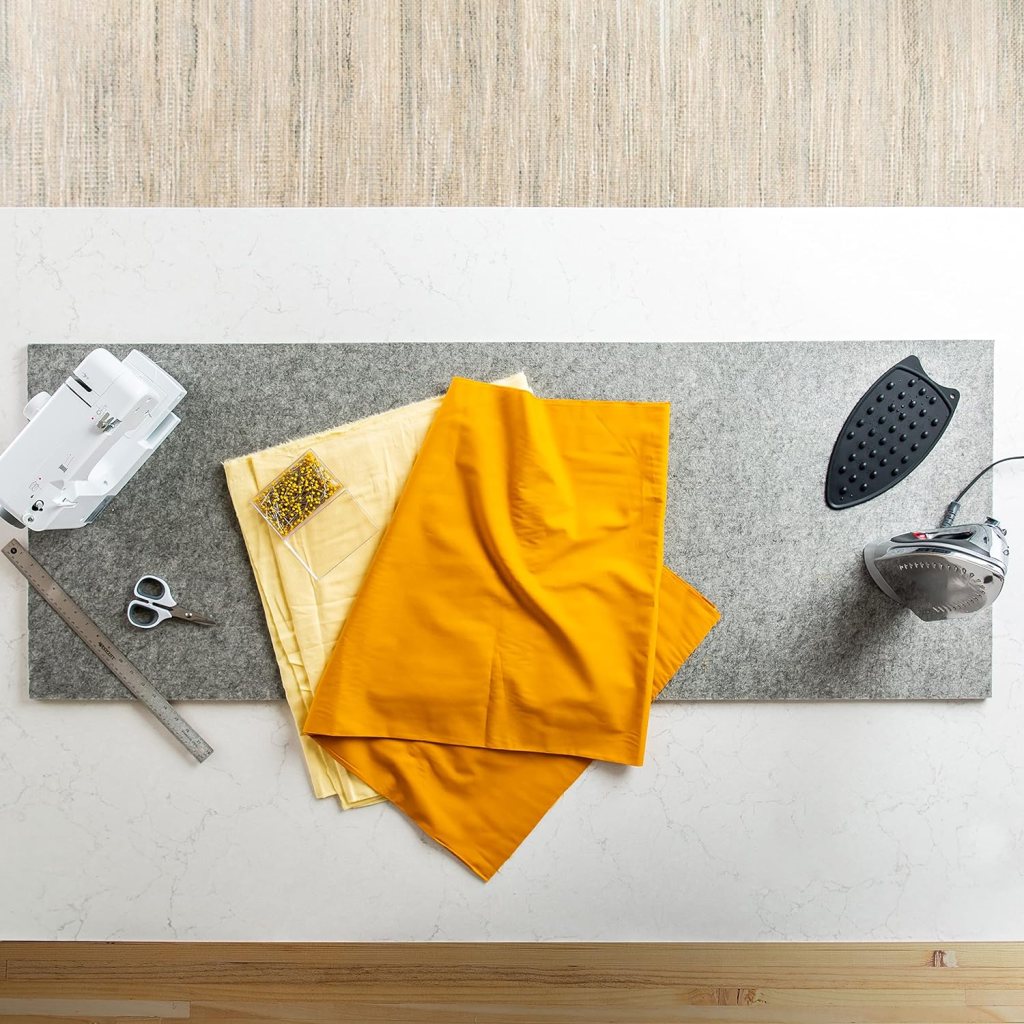
I know wool pressing mats aren’t really new, but they are new to me. For the last several years, fellow quilt guild members have been extolling the benefits of using one when pressing fabrics, blocks, and quilts. I listened politely, nodded, and promptly forgot about them. I even won a handmade knitted felted wool mat, but then never used it. Sometimes it can take a while for me to warm up to a new idea. Silly, I know, but true.
Anyway, fast forward to this summer. It was an impulse Prime Day purchase, but I splurged and bought a wool pressing mat. I figured, what the heck? Maybe it would work for me because I find pressing so tedious.
WOW! I cannot tell you what a difference a wool mat makes when pressing. My blocks don’t slide around or stretch and the warmth underneath makes pressing quicker and easier with less work for better results. All I can say is I don’t know why it took me so long to try it out!
My wool mat is narrow and long and almost fits the length of my ironing board. Now I wish I would have gotten one a little bit wider, though, as my ironing board is a generous 24″ x 60″. But it did come with a nice case so I can roll up my wool mat and take it with me.
Machine Quilting Gloves

Machine quilting gloves are an oldy but a goody in my quilting toolbox as I’ve been using them almost as long as I have been free motion quilting. All quilters have their own favorites and I am no different. I’ve used other brands of gloves over the years like Machingers and Grabaroos, but my favorite favorite gloves for the last four or five years are the Swan quilting gloves by Amity Studios. I found Swan Gloves quite by accident at International Quilt Market before the Pandemic hit. My first pair lasted through the Pandemic and other than maybe being a bit worn, they are still good. I did purchase a new pair last year at Market, just in case.
These gloves are different from any other quilting gloves I’ve ever used — they are leather and built kind of like a golfer’s glove with the ring finger and pinky cut out. You can use your touchscreen electronics while wearing them. I can even change my sewing machine needle and load a bobbin without taking them off. The Swan gloves seem to really help me to control my quilt sandwich while free motion quilting, which makes my quilting more controlled and my designs that much better. I have also found that Swan gloves fit me well (they come in different sizes), especially with the velcro wrist adjustment, and they last longer. My best suggestion to anyone interested in quilting gloves is to try different styles until you find the perfect ones for you.
Thimbles

Do you use a thimble when you do hand-sewing? For the longest time, I didn’t. Over my 25+ years as a quilter, I’ve tried a lot of different thimbles and none of them ever fit just right, so I chose not to use a one at all. Then one day, I found the perfect thimble for me. It fit just right. It felt just right. It’s called the Nimble Thimble.
The Nimble Thimble is a soft leather thimble with a metal disk in the tip to protect your finger from needle pricks. And it has an open slot on top for your fingernail, which is a big plus for finger comfort. It comes in different sizes and because it’s leather, it molds to the shape of your finger. If it stretches out, you can wet it down, put it on, let it dry and it will once again conform to your finger. The funny thing about this thimble for me, is that sometimes I even forget I’m wearing it.
1/4″ Quilting Foot with Guide

I’ve had a 1/4″ machine foot with a guide for piecing ever since I bought my first Janome sewing machine way back when. It came as part of the bonus quilting feet set. It looked kind of strange, but I found that when I tried it out as a relatively new quilter, my 1/4″ seam was a lot more accurate and consistent. Count me in! No more tape on my sewing machine to eyeball a 1/4″ seam.
If you’re looking for a 1/4″ foot for your machine, your best bet is to visit your sewing machine dealer and ask for the 1/4″ foot with a guide that goes with your sewing machine. There are generic ones out there if you can’t find one that matches your sewing machine, but you need to get the correct shank-type one for your machine — check your sewing machine manual to find out whether your machine has a low shank, high shank, or slant shank.
Mini Design Board

There are lots of different portable design boards out there for taking with you to classes or retreats. These humble boards can make sewing individual quilt blocks with lots of pieces a lot easier to sew together. I just lay out a quilt block on my board and then I can take my block on the board right to my sewing machine, then I can easily see how the pieces go together while I am assembling the block.
It’s pretty easy to make your own board and it only takes a few items you might already have hanging around in your sewing room. You need a piece of sturdy cardboard in your desired size and a piece of flannel fabric big enough to wrap around to the back of the cardboard. Pull the flannel taut and use heavy duty duct take to secure the flannel wrapped around to the back of the cardboard. I have had my DIY design board for maybe 15 years and I still use it often. My friend Mary Lee, brought sturdy pieces of cardboard to one of our quilting classes years and years ago, which we covered with a flannel fat quarter. Once in a while, I do have to tighten up the fabric around the heavy duty cardboard and retape it on the back, but that’s about it for maintenance.
Of course, if you’re not into DIY, you can find portable design boards at your favorite quilt shop or online retailer. Or Etsy! You can even repurpose a child’s felt board, if you have one of those in your home!
DIY Flannel Design Wall

If you’ve been following along recently with the fall quilt tutorials, you’re probably already familiar with my new flannel design wall. Sure, you can buy a fancy-smancy design wall, but you really don’t need to. A square or rectangle flannel-backed table cloth works just as well.
I never had the ability to hang a flannel board of any kind in my dungeon studio, but after purchasing tall storage cube units with doors for my fabrics last year, I can now clip my tablecloth to the tops of the doors using large binder clips. Then when I’m done using my flannel-backed tablecloth, I can just fold it up and stash it out of the way.
Sewer’s Aid

Have you ever tried Sewer’s Aid? I learned about this little gem one time at a quilt guild gadget night years ago and I’ve been using it ever since. Some days when I am machine quilting, my thread just keeps breaking, no matter what I try. Re-threading? Change the bobbin? Adjust my tension? And still my thread keeps breaking. That’s when I grab my little bottle of Sewer’s Aid and I run beads of the liquid up and down my spool of thread. I repeat this every time I change my bobbin. And the thread stops breaking. Sewer’s Aid helps the thread to run smoothly through the machine by reducing friction, which then reduces breakage. Hand quilters have known about Sewer’s Aid much longer than us machine quilters. Happily, it works for both.
Seam Ripper
 Image From Amazon
As you sew, so shall you rip. This means you’d better have a good sharp reliable seam ripper that fits comfortably in your hand because chances are, you will use it a lot (sadly). I actually have several of the same seam ripper — one at my machine, one at my cutting mat, one upstairs in my sewing stand in the living room, and possibly another one lurking in my bedroom.
My absolute most favorite seam ripper is the Clover Ergonomic Seam Ripper. Have you ever tried this one? It works for both right and left handed rippers (I’m a lefty, so that’s an important consideration for me), it’s balanced nicely, and it fits comfortably in the palm of my hand. I won’t say that ripping out stitches is a favorite activity of mine (who can?), but having my trusty Clover seam ripper does make the ripping just a little bit more comfortable.
Curved Basting Pins

I’m a bit old school sometimes when it comes to quilting (yes, I see you rolling your eyes). I still pin my quilts before I machine quilt them, even after 25+ years of quilting. You know the old adage — if it ain’t broke, then don’t fix it? I don’t have anywhere big enough to layout a quilt in order to spray the layers together. And I don’t relish the idea of getting spray all over everything, possibly including my fur babies Griffin, Pip and Bailly. Definitely not a good idea for me. So, I am a pinner. And I love my curved basting pins!
Curved pins come in several sizes, but my favorites are the big 2″ size 3 ones. I’m not a heavy pinner but I do find that these larger pins are easier to work with than the smaller ones. You do have to remove the pins as you machine quilt, but that just becomes part of the process. Do you close your pins in between quilts? I don’t, that way I save opening and closing them 2 times. There’s also a nifty tool called a Kwik Clip, which helps you to open and close safety pins so your fingers don’t get sore. Old school can still be cool, don’t you know???
Olfa Ergonomic Rotary Cutter

There are so so many different kinds of rotary cutters out there these days, but when I started quilting there were only a few available. I started out with a Fiskars “Classic Loop” rotary cutter but when the Olfa ergonomic rotary cutter started showing up in shops, I fell in love. It was comfortable for me as a lefty and I liked knowing that the blade popped back in when I let go of the cutter. Since finding the Olfa Ergonomic cutter, I’ve never used any other.
Seriously, the cutter I use every day is still my very first Olfa Ergonomic cutter — it’s more than 20 years old and still going strong! Sadly, the little spring broke earlier this year and I thought I would finally have to replace my beloved cutter, but my Dad found a great solution for me — he suggested I take a little spring out of a different cutter and put it into my Olfa cutter. It worked like a charm! I have the old style yellow one, but now they come in other colors — even magenta! Maybe I should upgrade…..
These 10 tools have really made a difference in my quilting and they help me to be a better and happier quilter. My best advice to all quilters is:
Don’t assume what works for me is going to work for you — try out as many different versions of the same tool to find the one that works the best for you.
This list is just to give you a starting point.
I went to my local quilt shop earlier today and pinned 3 more quilts — ouch! I’m running out of curved pins! LOL! Well, I’d better get back to machine quilting all these quilt tops.
Have a great week and I’ll see you right here on the VRD blog next Thursday!
Until then —
Sew. Laugh. Repeat.
Always,
Tricia @ VRD

I never knew.
LikeLike
Happy quilting, Ernestine!
LikeLike
Another helpful tip – if you have more than one small wool pressing mat, it can be used as a mini design wall. I bought a cheap tabletop easel and have used it with the wool mat to demonstrate block designs at our quilt group, and as a mini design wall.
LikeLike
Thanks for sharing, Wendy, that’s a super great tip!
LikeLike