
Hello Quilty Friends!
Happy Thursday to you!
I’ve been thinking of some ways I can move forward in 2024 with my goals (Did you miss last week’s post? You can find it HERE). I’ve been seriously thinking about how to get my studio in order, which is definitely part of my 2024 Goals. I wouldn’t be surprised if you have the same thoughts, so let’s brainstorm some ideas together!
For some unknown reason, I never seem to get time to actually clean up, organize, and declutter my space. I truly believe there are little pixies who come to my studio at night and have wild parties because there’s no way that I’m making this mess. LOL!
I think I just need to take a couple days (or years) — maybe a week end — to focus entirely on my studio. Whew! That’s going to be a challenge, though, because I try to cram as much as I can into each day — you know what I mean? To focus completely on one task for a week end would be totally foreign to me. Sigh….I don’t know why 24 hours just isn’t enough time to get everything done every day…….
Now, don”t freak out, but I’m going to show you some pictures of my studio. I’m totally embarrassed to show you any photos of my space, but maybe if I do, then it will motivate me to make improvements. So here goes!
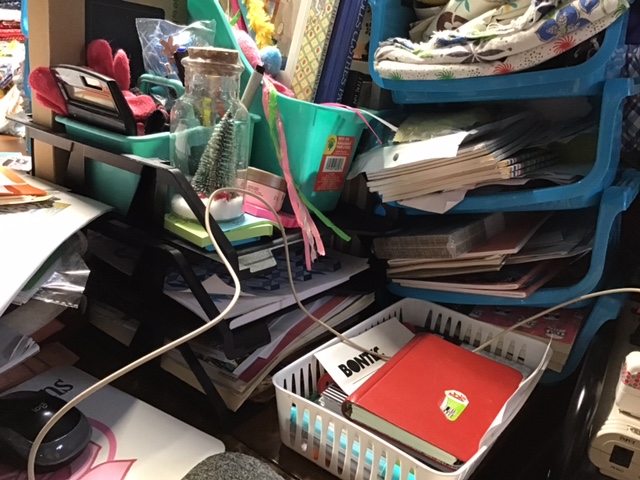
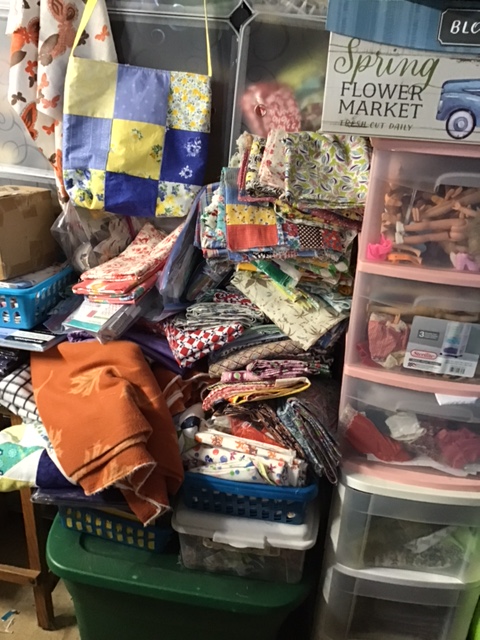

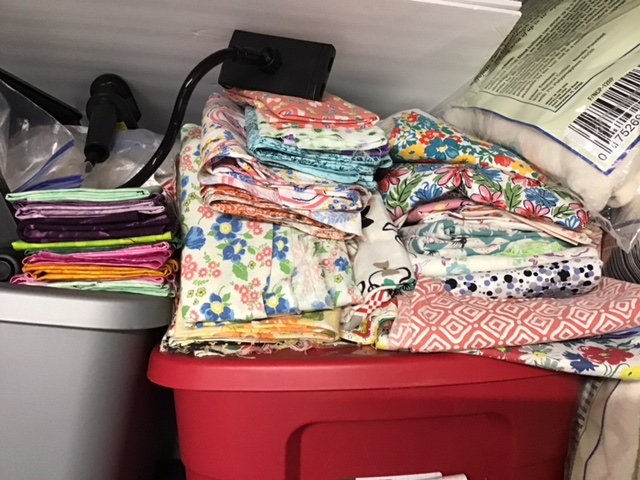

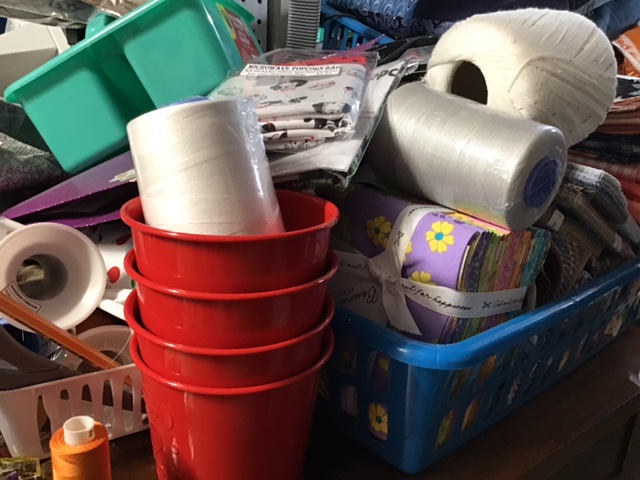
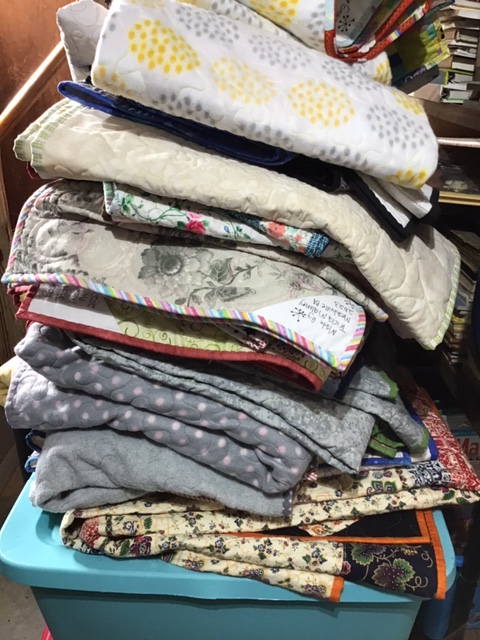
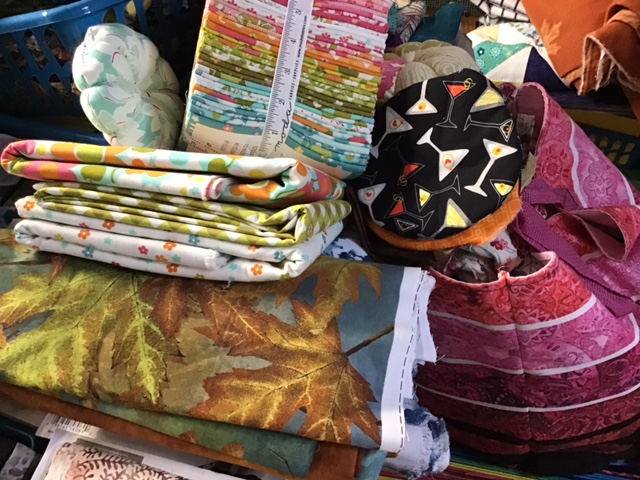
Okay, there it is — my very messy studio. Gulp! I am really embarrassed, but hopefully looking at these photos will motivate me to make some changes because obviously my current organizing system at isn’t working for me. Part of my problem is way too many quilts and way too much fabric — there just isn’t enough room for everything. That means it’s time to purge. Scary……..
Before I dive into this huge undertaking, I think I need a game plan. So here are 11 ideas to help get our sewing spaces ready for a new year of sewing! I bet you can come up with even more ideas so please share your thoughts in the comments.
Fabric and Supplies
1. Look at Your Stash: Take some time to go through your fabric stash and see what you really have. Sort your stuff into categories such as color, material, or project type. Maybe this will give you a better idea of what you have to work with.
2. Donate or Sell: If you come across fabrics that no longer spark joy or that you haven’t used in years, consider donating them to a local charity or selling them online. This way, someone else can put them to good use and that fabric isn’t just collecting dust. If you sell stuff, you will have extra space and extra money. Win-win!
3. Proper Storage: Invest in storage solutions that work for your needs. Clear plastic bins, shelves, or even hanging organizers can help keep everything neat and accessible. Be creative! What do you already have that you can use? Shop second hand. Psst! One of my favorite places to get bins and such is my local Dollar Tree store.
4. Label Everything: When storing your fabrics and supplies, labeling containers can be a lifesaver. It helps avoid the hassle of rummaging through everything when searching for specific items.
5. Streamline Notions: Just like with fabrics, it’s important to go through your sewing notions as well (buttons, zippers, threads, etc. ). Get rid of any duplicates or items that are no longer usable.
6. Keep Favorites Visible: If there are fabrics that inspire you every time you see them, make sure they’re easily visible in your workspace so they don’t get forgotten!
7. Pegboards: Hanging tools on pegboards is a great idea! Not only does it keep everything organized, but it also makes things easy to find whenever you need them. Pegboards come in various sizes and can be customized to fit your specific needs.
Clutter-free Surfaces
1. Clean Your Sewing Table: Start by giving your sewing table a good wipe down. Dust off any debris or lint that might have accumulated, and use some mild cleaning solution to get rid of any stubborn stains or spills.
2. Clutter-Free Work Surface: Take a look at your work surface and remove any unnecessary items that may be cluttering it up. This could include scissors, pins, scrap fabric, or anything else that doesn’t need to be there while you’re working. Yeah, according to my photos, this is definitely something I need to do ASAP!
3. Organize Your Cutting Table: If you have a cutting table, make sure it’s well-organized so you can find what you need when cutting fabrics. Consider using storage bins or containers for keeping your rulers, rotary cutters, and other cutting tools neatly in one place.
4. Tidy Sewing Desk: Keep your sewing desk tidy. Small storage compartments or jars can help keep everything organized while still being easily accessible.
Storage Ideas for Your Thread Collection
1. Wall-Mounted Thread Rack: A wall-mounted thread rack is not only functional but also adds a decorative touch to your sewing room. It keeps your thread spools where you can find them and is even visually appealing (think arranging your thread in rainbow order!).
2. Drawer Dividers: Use drawer dividers to create separate compartments for spools of thread or other sewing sundries.
3. Bobbin Rings or Holders: Keep your bobbins organized by using bobbin rings or holders. These handy accessories prevent tangling and make it easy to see the color of each bobbin at a glance.
4. Clear Plastic Boxes: Invest in clear plastic boxes with compartments specifically designed for storing spools of thread. These boxes are often stackable, making them perfect for maximizing storage space in your sewing room. And we all need that, don’t we???
Sewing Zones
1. Cutting area: This is where you’ll prep your fabrics before diving into the fun part of sewing. Make sure you have enough space for a cutting table or mat where you can spread out your materials comfortably. Consider adding storage for rulers, rotary cutters, and fabric scissors nearby to keep everything within arm’s reach.
2. Sewing stations: These are dedicated spaces where your sewing machines will live. Make sure that each station has enough room for the machine itself along with any additional equipment like sergers or embroidery machines that you may use. I’m hoping to set up a second sewing station in my space so I can have a friend or two sew with me in my studio.
3. Pressing station: Having a designated area for pressing fabrics is crucial in achieving professional-looking results. Set up an ironing board or invest in a sturdy pressing table that suits your needs. Keep essentials like irons, water spray bottles, and pressing tools nearby so that you don’t have to hunt them down every time.
Patterns
1. Purge: Bring all your patterns to the same place and decided which ones to keep and which ones to donate, sell, or discard.
2. Categorize by pattern type: One way to organize your sewing patterns is by grouping them together by topics. For example, you could have sections for bags, jackets, toys, accessories, quilts, pillows, etc. You could even subdivide categories into smaller groups like quilts could be subdivided into bed quilts, throw quilts, wall quilts, runners, etc. Grouping patterns with the same topics together will make finding what you’re looking for a lot easier when starting a new project.
3. Sort by difficulty level: If you have patterns that vary in complexity, maybe organizing them based on their difficulty level would work for you. You can have separate sections for beginner-friendly patterns and more advanced ones.
4. Use binders or folders: To keep your sewing patterns neat and easily accessible, consider storing them in binders or folders with clear sleeves or pockets. This allows you to flip through the pages without damaging the patterns and also makes it simple to locate specific designs. If you use clear sleeves and only put one pattern in each sleeve, you won’t have to pull out the pattern to see the fabric requirements (if they are listed on the back of the pattern).
5. Label everything: Don’t forget to label so that you can quickly identify what’s inside your boxes, baskets, drawers, or binders without having to search through every single one.
Books and Magazines
1. Purge: gather up all your books and magazines in one place and decide what to keep and what to donate, sell, or discard.
2. Alphabetical order: If you have a collection of books related to sewing techniques or reference guides, alphabetizing them can make finding specific information a breeze.
3. Subject-based organization: Another option is to group your books based on their topic such as applique, paper piecing, hand quilting, machine quilting, etc. Once you’ve gathered your books and you start to look through them, you’ll get a good sense of what categories you can divide them into.
4. Get control of your magazines: sort them by year or by magazine name. Or maybe tear out the patterns you want to keep and pass the rest of the magazine onto someone else.
Scrap Fabric 101
1. Scrap Fabric Bins: Transform old shoe boxes or plastic containers into storage bins for your fabric scraps. You can label them by color or sizes/shapes, making it easy to find what you need for future projects.
2. Fabric Scrap Garland: Turn your fabric scraps into a colorful garland by cutting them into strips and tying them onto a string or ribbon. Hang it up as decoration in your craft room or use it to jazz up a plain wall.
3. Scrap Quilts: Need I say more???
4. Fabric Covered Storage Boxes: Give plain cardboard boxes a makeover by wrapping them with scrap fabric using glue or double-sided tape. These stylish storage solutions are perfect for organizing smaller items like buttons, ribbons, and beads. Covered cereal boxes make great magazine and pattern storage!
5. Scrap Fabric Wreaths: Use wire wreath frames as the base and tie on small pieces of fabric all around until the frame is completely covered. This DIY wreath ad
6. Bags and totes: Use your scraps to make bags and totes in a multitude of sizes and shapes. Bags and totes can used to store projects, take on the go, use in place of plastic grocery bags, and much more.
7. Rag Rugs: Cut fabric scraps into strips and weave them together to make colorful rag rugs for your home decor. It’s an eco-friendly way to repurpose those leftover materials!
8. Pincushions: Imagine the possibilities!
Cleaning Habits and Routines
1. Start with a clear workspace: Before you begin sewing, take a few minutes to clear off your work area. Put away any tools or materials that are not in use, so you have plenty of room to work. Sounds like a good habit to start, doesn’t it?
2. Wipe down surfaces: Dust and debris can accumulate quickly in a sewing room, so it’s important to regularly wipe down your surfaces. Use a damp cloth or disinfectant wipes to keep things clean and hygienic.
3. Empty the trash regularly: Don’t let the scraps of fabric or discarded thread pile up next to you as you sew. Make it part of your routine to empty the trash bin frequently, keeping your space neat and tidy.
4. Organize your supplies: Invest in some storage containers or bins for all of your sewing supplies such as thread spools, bobbins, scissors, etc. Having designated spots for everything will make it easier for you to find what you need and to maintain an organized space.
5. Vacuum or sweep the floor: Fabric lint can easily accumulate on the floor around your sewing area, so give it a good vacuum or sweep every now and then to keep things looking fresh.
Better Lighting
1. Natural Light: Place your sewing table near a window to take advantage of natural light during the day.
2. Task Lighting: Invest in good task lighting options, such as adjustable desk lamps or floor lamps with flexible necks. This will help you focus light directly on your sewing machine or work area, reducing eye strain.
3. LED Bulbs: Consider using LED bulbs as they are energy-efficient and provide bright, white light that mimics natural daylight. They also last longer than traditional incandescent bulbs.
4. Overhead Lighting: Ensure that you have adequate overhead lighting in the room to provide general illumination when needed. Choose fixtures with adjustable brightness settings so you can control the intensity based on your needs.
5. Multiple Light Sources: Use multiple light sources around your sewing room to minimize shadows and ensure even illumination across your work area.
6. Dimmers or Smart Bulbs: Installing dimmers or using smart bulbs that allow easy adjustment of brightness levels.
An Ergonomic Sewing Room
1. Your Sewing Chair: Look for one that provides good back support and has adjustable height options. This way, you can ensure proper posture while you work your creative magic.
2. Adjustable Cutting Table: It’s important to have a surface at a comfortable height so that you don’t strain your back or shoulders while cutting fabric. Look for tables with height-adjustable legs or consider using risers to customize the height according to your needs.
3. Sewing Machine Height: Make sure your sewing machine is set up at the right height for optimal comfort. You don’t want to be hunching over or straining your neck while working. Adjust the table or use additional supports if needed.
Make Your Space Your Space
1. Inspiration boards: These are fantastic for keeping your creative juices flowing. You can pin up fabric swatches, color palettes, sketches, and anything else that inspires you. It’s like having a visual brainstorming session right in front of you! Plus, it adds a lovely touch to your sewing room decor.
2: Artwork: Hang up some beautiful prints or paintings that speak to your soul. Maybe vintage sewing illustrations, artistic photographs of sewing machines, or framed inspirational quotes about quilting. Surrounding yourself with art that speaks to you will definitely lift your spirits while you work.
3. Special Keepsakes: Why not add some special keepsakes to your space? Maybe display a vintage thimble collection passed down from generations of skilled sewists in your family? Or use an antique jar as storage for small notions? Adding these personal touches adds character to your space and keeps those precious family memories alive.
I hope these ideas will help jump-start your journey of taking back your sewing space!Stay tuned and I’ll tell you more about my own journey in future posts.
VRD UPDATES
Just a few quick update on our recent projects:
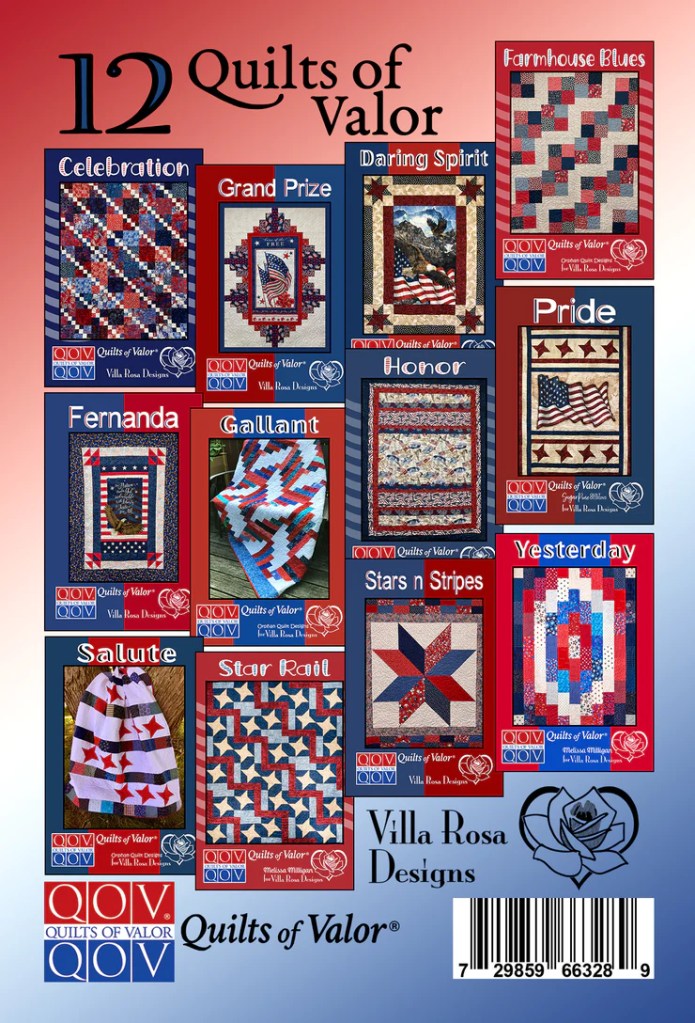
12 Quilts of Valor Pattern Collection
The Quilts of Valor VRD Collection is finally available — you can get it HERE. You will definitely want to add this pattern collection to your Quilts of Valor patterns because all 12 quilts meet the QOVF size requirements. Additionally, a portion of the sales will be donated to the QOVF. You can visit the QOVF HERE.
12 Quilts of Christmas
I’m sorry we didn’t get this collection out in time for the 2023 Holidays, but you can be sure it’ll be out in plenty of time for Christmas in July 2024! Woohoo!
VRD Blog Hop
You bet we’re still having our 2nd VRD Blog Hop in 2024. We’ve just bumped it a little later in the year to March 2024. Stay tuned…….we’ll have more information coming soon.
I can’t think of any other updates right now, did I forget anything?
Well, that’s it for me this week. Fingers crossed that I squeeze in some time in the next week to begin taking back my studio from those wild partying pixies!
Sew. Laugh. Declutter. Repeat.
Always,
Tricia @ VRD

Please don’t be embarrassed! I learn more about how well a person’s space works for them from a real-life photo than from perfectly staged right after a declutter, re-organize, clean up session photos. Make no mistake – I think a room with all matching furniture, pretty bins, and perfectly stacked fabrics IS pretty, but if it doesn’t work well for a person…it becomes not-fun to be in it. Thank You for showing the Before photos of your room, and the list of tips.
LikeLike
Thanks for your thoughts! I am happy to say I’ve started clearing one surface with a teetering pile of fabric and patterns already. Now to organize and put away the fat quarters, yardage, projects, and patterns………
LikeLike
My sewing room looks a lot like yours. I’ve done the plastic bins for projects (hubby built me a wall in the closet to hold the plastic bins) and I’ve gone thru the patterns and organized them (took me 3 days). I’ve done other stuff, too, but I just have WAY too much fabric and WAY too many projects. I need to start giving away some of those projects that I won’t ever get to.
LikeLike
I am with you, Cheryl! I need to start letting things go to make room for new fabric and projects.
LikeLike