
Hello Quilty Friends!
Happy Thursday to you!
I hope your summer is still going strong and you are getting to do the things on your summer bucket list.
This has been my busiest summer since before the Pandemic, that’s for sure. I’ve been doing things I haven’t done for years — gardening, the adult summer reading program at my local library (I even won a nice prize at the program potluck last week!), I’ve been to Presque Isle Park (Lake Erie) twice so far, made multiple trips to the big farmer’s market in Erie (PA), and even visited a relatively new local museum I’ve never been to before. Luckily, I’ve been making quilt tops for our Summer Tutorial series so I’ve even gotten in some fun sewing. Yay!
The only issue with my busy crazy summer is that I’ve been neglecting a lot of things at home and in my studio space. So I guess I’ll have a lot to catch up on this fall. Sigh………..
Road Trip

This Sunday, I’m even going on a summer road trip with my friend, Leslie — Hi Leslie! — to Maryland to visit our friend, Cathey — Hey Cathey!
Looks like we’re going to have a good old-fashioned quiltathon/quilt retreat like we used to do years ago at Chautauqua Institution (Chautauqua NY) during Quilting around Chautauqua every September (sadly, the amazing quilt weekend is no more….). The three of us along with our other quilty pal, Mary Lee — Hey Mary Lee! — would rent a cottage and start our quilt weekend on a Wednesday so we could have a quilt retreat as well as enjoy the show on Saturday and Sunday. Ahhhhh, those were the days.
I can’t wait to catch up with these gals because we’ve all kind of gone in different directions since Chautauqua.
I’ll tell you all about my adventures in next week’s post, so stay tuned until then.
Now let’s continue our Summer Tutorial series with an oldy, but a goodie — my pattern, Whirly Bird.
VRD Whirly Bird Quilt Tutorial
Today we’re going to have a little fun with Whirly Bird. Have you made this quilt yet? If so, please please please share it on our VRD Facebook page ’cause I’d really like to see them!
If not, it’s fun and fast (of course) and has a lot of room for creativity.

Get your print Whirly Bird HERE or your digital Whirly Bird HERE.
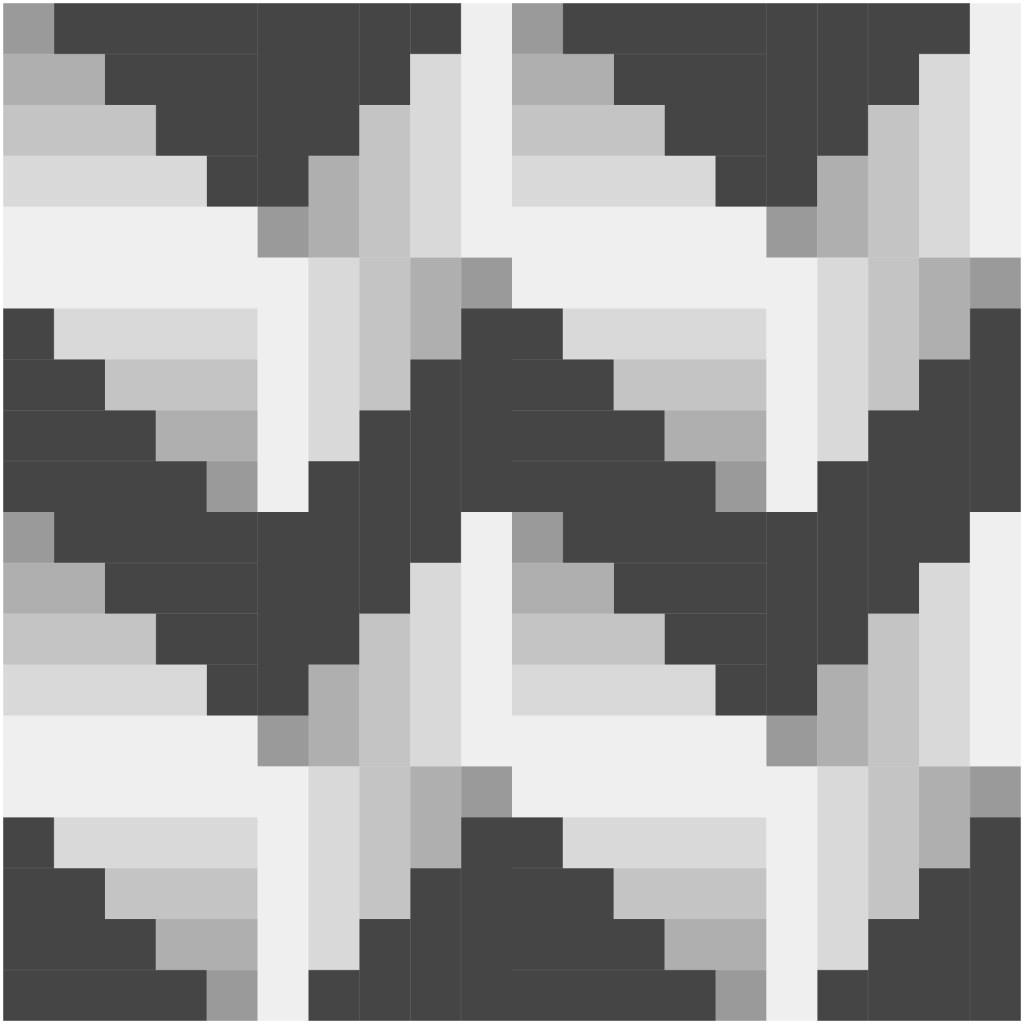
When I designed Whirly Bird, I really wanted to do a gradation quilt featuring black, grey, and white. It turned out to be a pretty cool quilt with a very modern feel, which was what I was going after.
Let’s change things up today by swapping the lights and darks! I think you’ll be really surprised when you see the finished top.
So let’s get this party started, shall we?
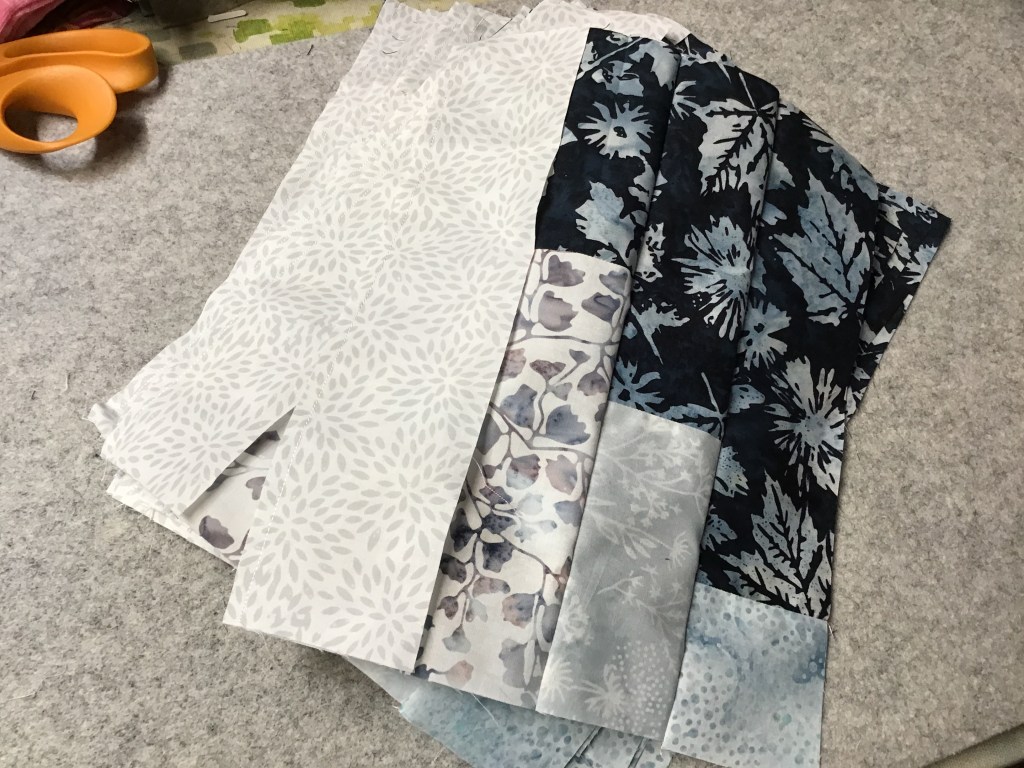
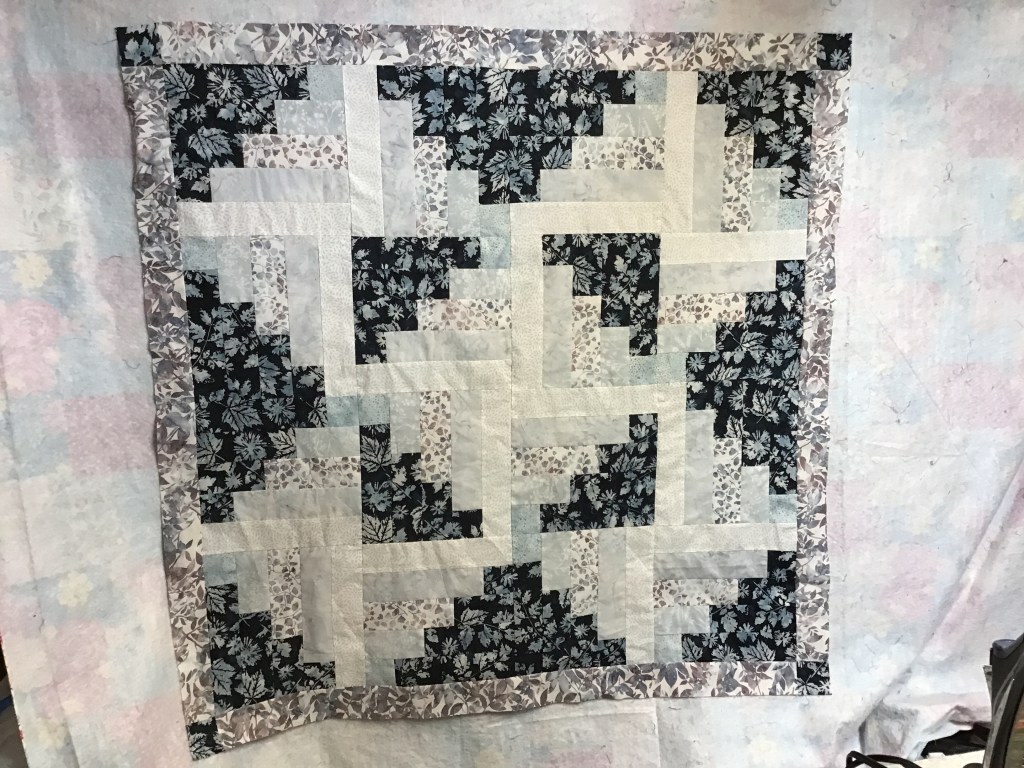
For today’s Whirly Bird, I am using the Touch of Grey collection by our quilting partner, Hoffman Fabrics. Yep, I’m sticking with a neutral theme for this version, but that’s really where the similarities end.
The charcoal fabric at the bottom of the photo will be my background fabric and the 5 light fabrics in the center at the top will be the gradation strips in the quilt. The border is on the left and the binding is on the right.

The first thing we’re gong to do is cut the fabrics according to the pattern, but swapping out the dark charcoal for the background (or light) fabric and the light greys for the graduated grey strips.
While I cut, I am organizing my pieces on a flannel board so that I have the correct background piece paired with the correct light grey strip. Want to make your own flannel board? You can find the tutorial HERE.
By arranging my pieces on my flannel board in order, I can simply take the board right to my sewing machine and start sewing immediately.


So let’s do that!
Let’s sew the charcoal background pieces to the corresponding light grey strips. This step went really fast because I used chain piecing for each pair for each block, stacked them back on my board, and then moved onto the next pair.
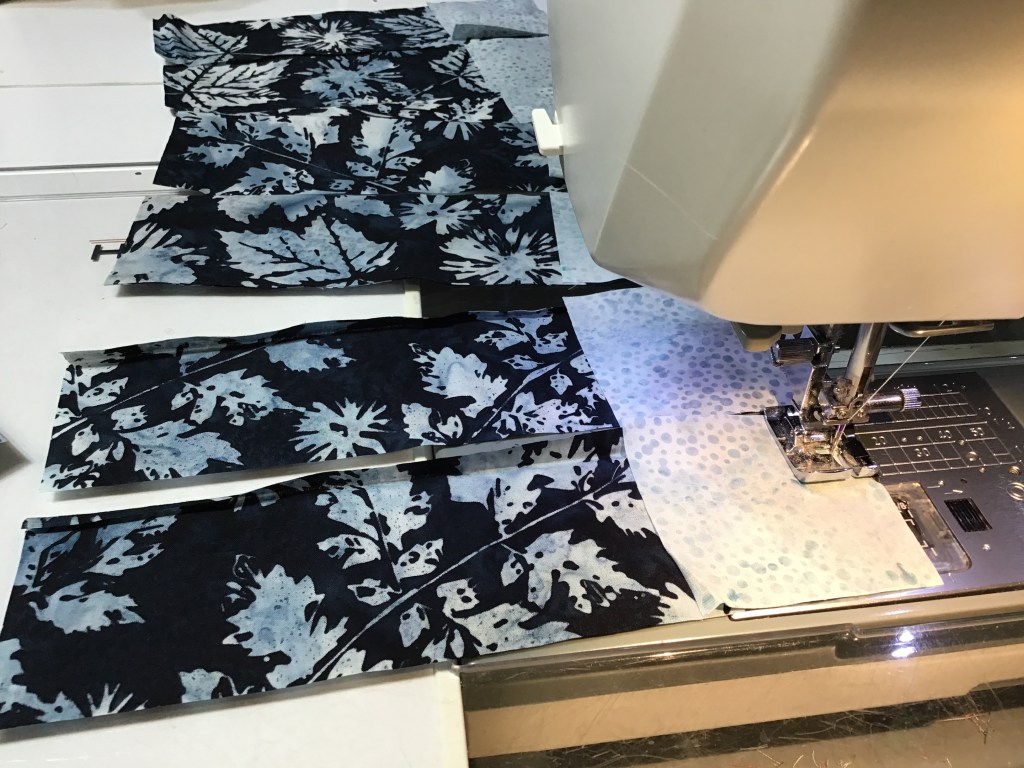

Moving right along, we’re going to head to the ironing board. I pressed my seams to the dark, but this doesn’t work perfectly all the time. So press your seams in a way that makes sense to you.
A note about pressing — I don’t usually give directions for pressing seams in tutorials and even on my patterns because every quilter has their own way of doing things. For me, I usually make those decisions on the fly as I sew. I usually do press to the dark, but sometimes I find that when sewing the the pieces of a block together, I have to flip my seams to the other side.
Wanna hear a joke — an old favorite of mine?????
What has a light side, a dark side, and holds the whole universe together???
Keep reading to find the answer. Tehehe!
After I pressed each strip pair, I put them back on my flannel board to keep things neat and tidy.
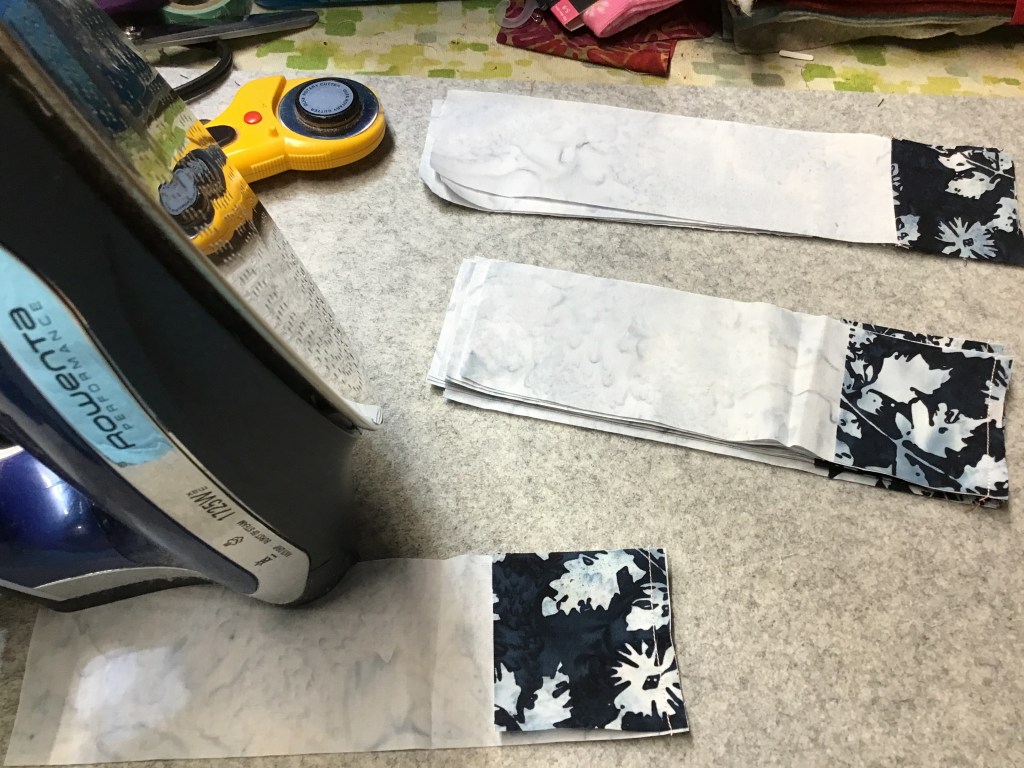

And….back to the sewing machine!
Next we are going to sew the pieced strips together into a block. One word of caution about having your pieces laid out on your flannel board — make sure you have them laid out in the right order or else your blocks won’t turn out the way you want them to. As a lefty, I sometimes have to double and triple check block or even quilt layouts before I sew the pieces together because it’s just too dang easy for me to flip things the wrong way.
I used chain piecing to sew the blocks together. This process went super fast as I made all the blocks at one time, one step at a time, without stopping to press in between.
Now, back to the ironing board to give these blocks a good press. I like to press the seams from the back first. Then I repress the block from the front, making sure everything is nice and flat.
Remember, we PRESS in quilting, we do not IRON. Need a little refresher on pressing vs. ironing? Check out a blog post about pressing techniques from our 2022 Quilting Basics series HERE.


Woohoo! The blocks are done and pressed — let’s arrange them on my design wall!
This is the same arrangement of blocks as in the original Whirly Bird quilt on the front of the pattern. Wow! What a difference when you swap the lights and darks out in this design! What do you think???

This is just one of many arrangements. Here are some other possibilities to give you food for thought when you make your own version of Whirly Bird.


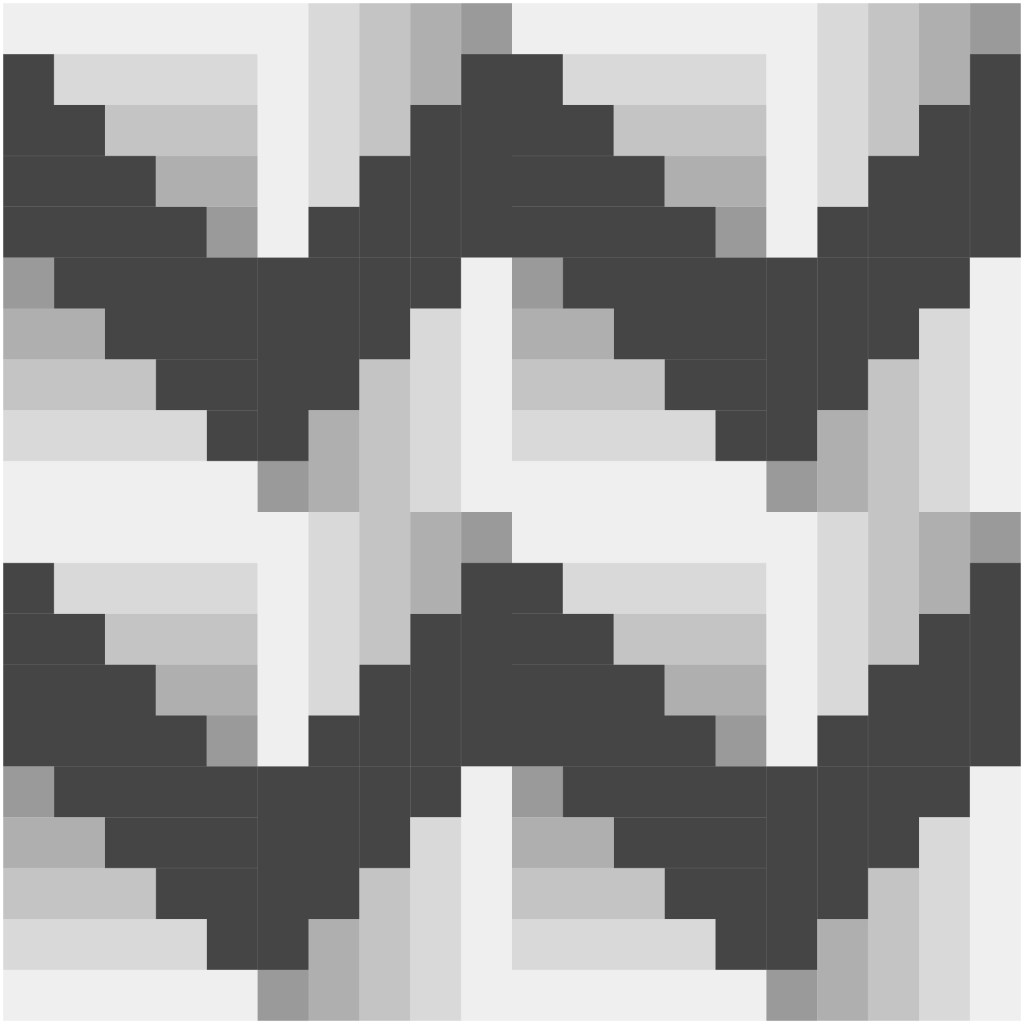


I bet you could even come up with 1 or 2 more!
I decided to go with the original arrangement, so now let’s sew the blocks into rows and then sew the rows together.
LOVE LOVE LOVE IT! Especially the repeating little pop of grey print in the middle of the light grey tonal strips — yep, I planned that on purpose for added interest. 🙂 I really like how those center print strips flip up, down, and sideways in the blocks — it really does add a bit of a secondary design and helps move your eyes around the quilt.

Next up, we are going to add the border, although this quilt doesn’t have to have one — it would finish beautifully with a dark binding to frame the blocks. But, we’re adding a border.
Sew the sides on first and then add the top and bottom. For more added interest, I added dark fabric squares in the 4 outer corners. This is a little bit different than the original pattern, so let me tell you how I did it:
As this quilt is a square, I cut 4 borders the same length as my quilt top through the center and the same width as the pattern calls for as well as 4 squares. I sewed border strips to the sides of the quilt center. Next I sewed dark squares to both ends of the remaining 2 borders and then sewed them to the top and bottom of the quilt center. Easy piezy!
If you don’t want corner squares, though, simply cut and sew the borders like you normally would.
Here it is — my completed Whirly Bird quilt top. I really like how the dark corner squares connect to the dark block sections in all 4 corners.
What are your thoughts?
I’m planning to take this quilt with me to Cathey’s — I hope to get some machine quilting done. Fingers crossed……………
DUCT TAPE!!!
See you back here from Maryland next Thursday and I’ll tell you all about my trip. I hope Cathey’s hubby, Bryon, is doing all the cooking while we quilt, gab, laugh, and eat chocolate.
Until then —
Sew. Laugh. Party On. Repeat.
Always,
Tricia @VRD

Beautiful quilt!
LikeLike
Thanks, Jocelyn. It’s a fun one!
LikeLike
Cute finish!!! Enjoy your roadtrip with quilty friends! Looking forward to hearing about it!!!
LikeLike
Hey Nancy! Thank you! I’m very excited to go to Maryland and get away for a couple days.
LikeLike
I like the arrangement you decided on! That light print almost looks “lacy” in the photos. Beautiful quilt, and thanks for the tutorial.
LikeLike
Thanks Texasquiltgirl! It’s a fun design with a lot of different options.
LikeLiked by 1 person