
Hello Quilty Friends!
Happy Thursday to you!
I’m excited to continue on our Beginner Free Motion Quilting adventure! Put your seat belt on and get ready to ride!
I hope you had a chance to read last week’s post, which was a lot of information about things to know before you start. You can find Lesson 1 HERE.
Please note that I’m adding the FMQ series to the right side of the screen under the Blog Topic section so that it’s easy to find each lesson as they get posted.
Lesson 2 – Let’s Doodle!
All right! In Lesson 2, we’re going to DOODLE! Yep, that’s right! DOODLE!
Whenever I taught a Beginner FMQ class, I started out with doodling on a dry erase board. I actually bought a class set of boards which came with felt erasers and even markers, which was super for a class with 4-12 students.

Any kind of dry erase board works – you don’t have to buy a special classroom set (unless you plan to teach FMQ – LOL!). You can even find dry erase boards and dry erase markers at your local Dollar Tree store. So if you don’t already have one, they are easy to find and relatively inexpensive to purchase.
Just make sure you are using real dry erase markers (not sharpies!) on your board or else you won’t be able to erase it and use it over and over.
You might wonder why I’m starting off with doodling and not just jumping right into FMQ on the sewing machine.
Doodling gives you the opportunity to develop eye hand coordination and to build muscle memory. Believe it or not, but doodling really does help when you are starting out with FMQ. If you’ve practiced the movements on your board, they will come easier and more quickly when you are working with your sewing machine.
Besides, doodling is fun and relaxing. You can do it while watching TV, during the commercials, listening to your favorite audiobook, or even while waiting at the doctor’s office! AND you have the ability to erase your doodling whenever you want to. Yay!
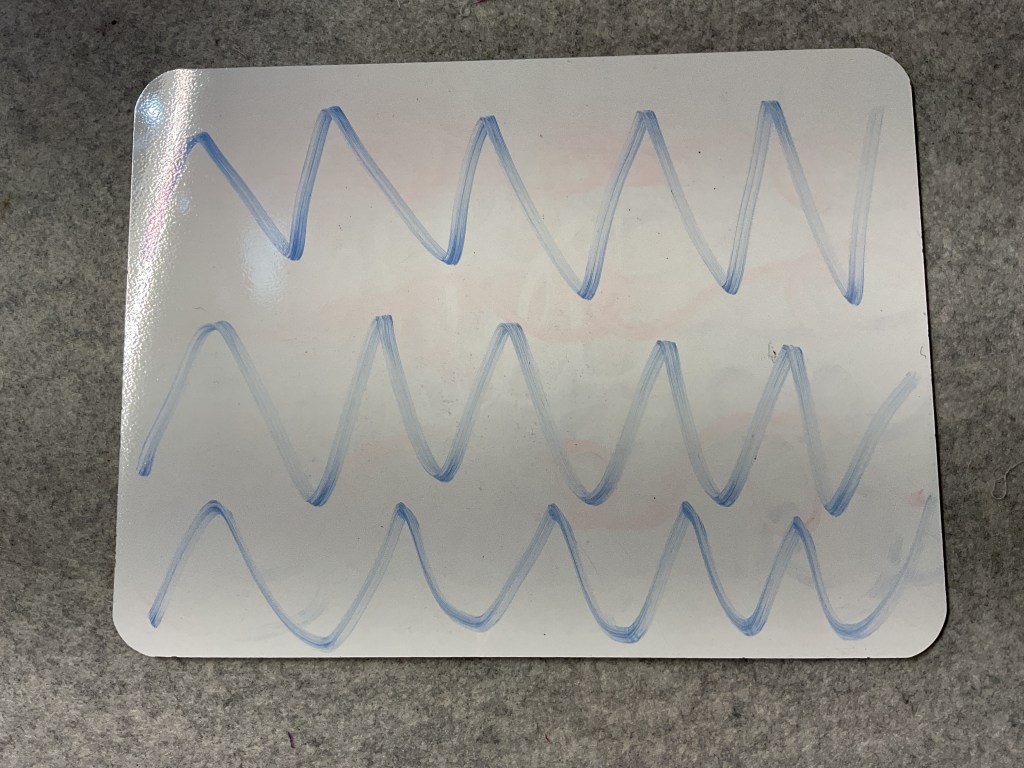
Zigzags
Let’s start out with some fun zigzags. Zigzags will help us to feel comfortable moving across the board and going up and down at the same time. Like hills and valleys. V’s and W’s. Give it a try. Make sure to connect each shape/letter with the next one.
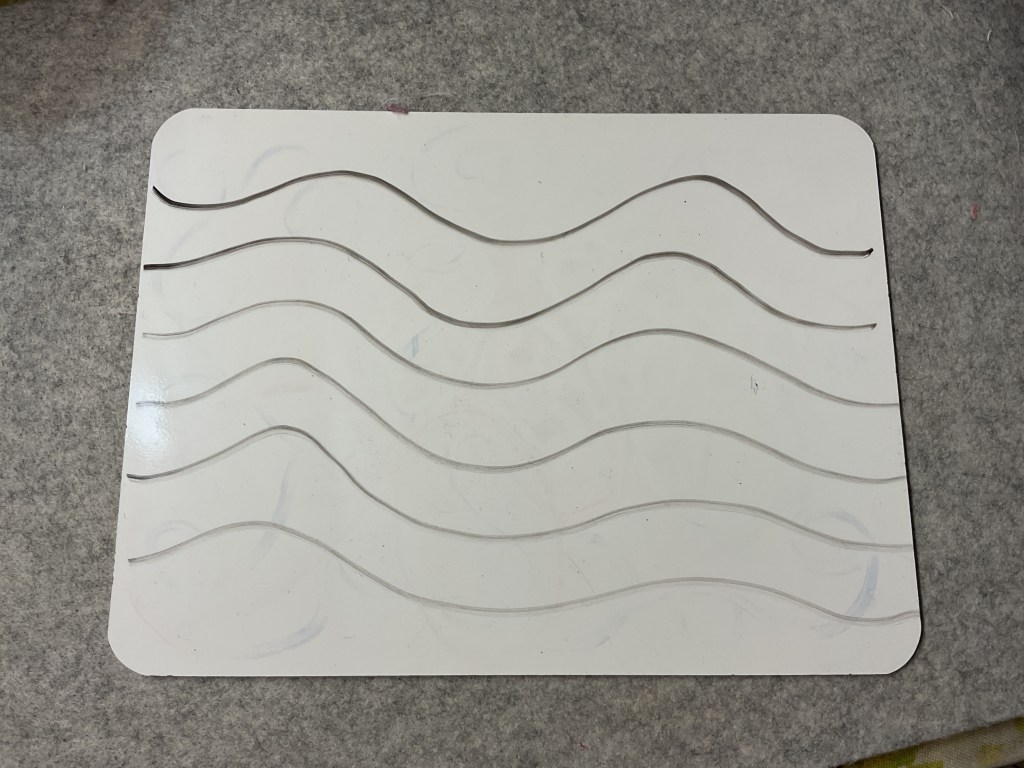
Curves and Waves
Let’s practice some gentle curves and waves on our boards just to get a feeling for the smooth movement. Don’t overthink this, just relax and glide across the board. If desired, you can even practice these motions in the air with your hands and arms. I’ve always been a big proponent of “air writing.”

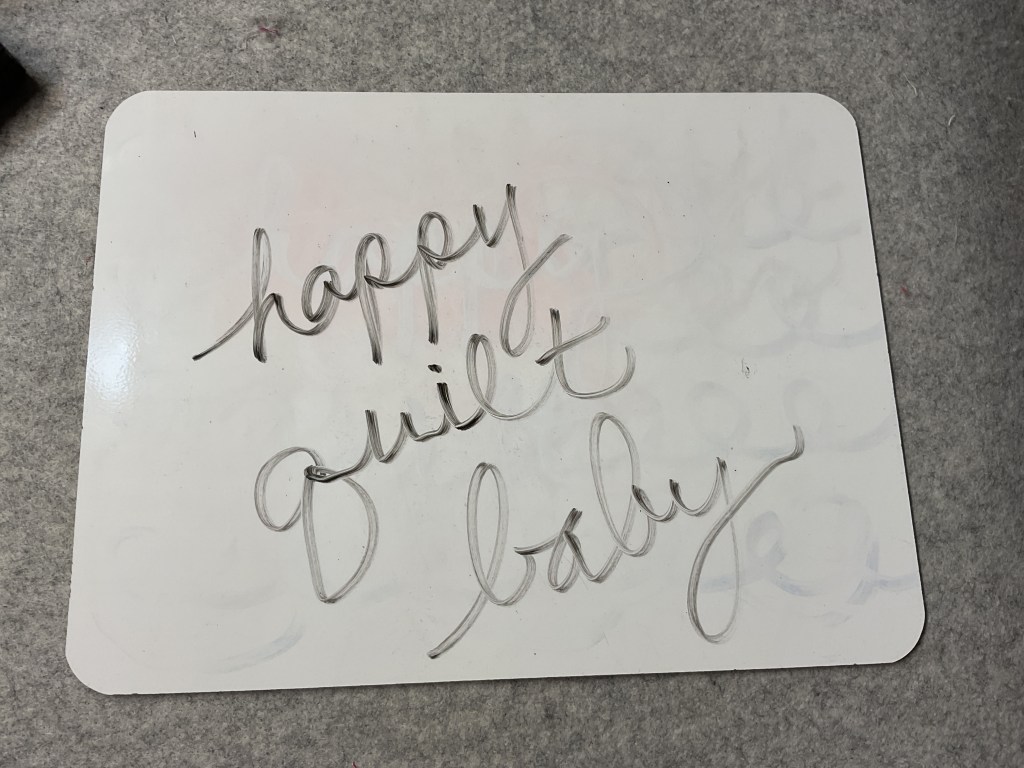
ABC’s
Now let’s try some cursive writing! Believe it or not, but lowercase cursive letters are great practice for FMQ! Seriously! Make sure you are connecting the letters together. I find that the faster I write the alphabet in cursive, the better it looks. Don’t think about the shape of each letter – you already know it – just write it.

Go ahead and write your name in all lowercase cursive letters. You know you want to! Try some other words, too. Just remember to connect the letters together. Feel free to have some fun like I did with my name when I dotted my i’s and crossed my t.

Okay, now we’re going to focus on the cursive lowercase “E” (e) and the lowercase “L” (l). Just keep connecting them together.
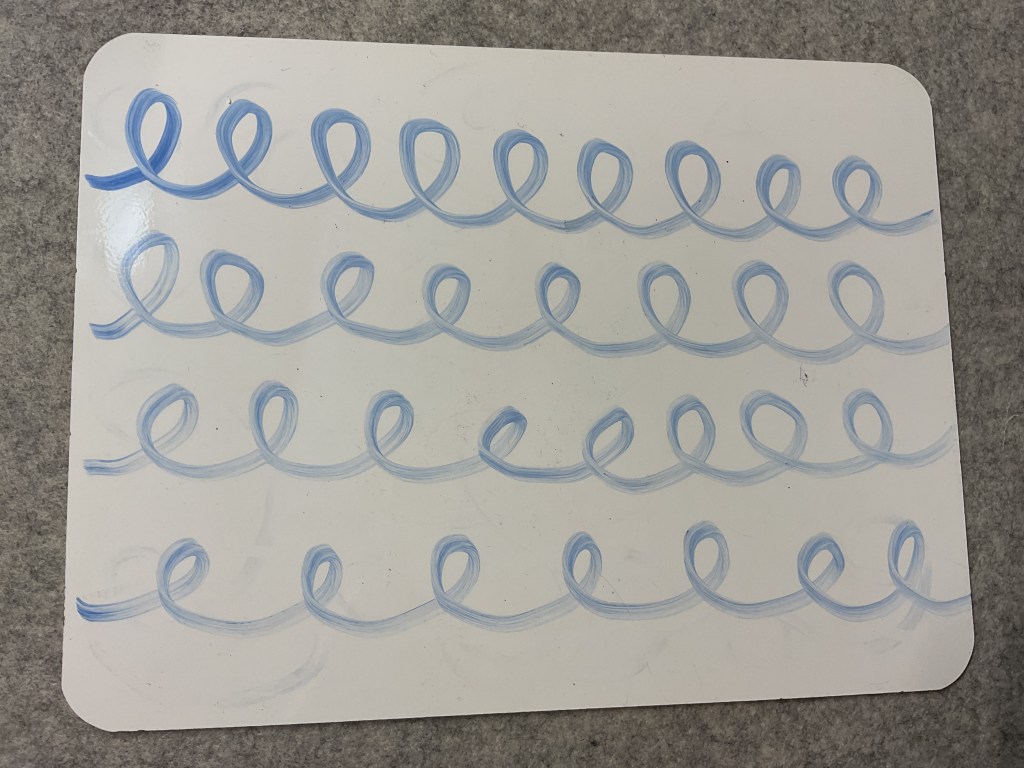
After you are comfortable making e’s and l’s, I want you to try alternating the loops. This may be challenging for some of you, but keep doodling until you feel more comfortable with this. Doodle, doodle, doodle.

We definitely want to alternate the loops, or else we’ll get something like this. Yikes! The idea is to move across the board and fill in the white space, not to make clouds and weird flowers.

Once you’ve got alternating the loops reasonably down, we’re ready to add more movement to this design. This time we’re going to move our loops up, down, and across the board while alternating the loops (yep, all at the same time!) so we can fill up the white space.
Try not to overthink things here. Don’t stress yourself out if things aren’t perfect – we’re not going for perfection here. I find the faster I go, the better it looks. Remember, you can keep erasing it and trying again.

Loops!
Wohoo! Pat yourself on the back! You are making loops!
Loops are one of my favorite and best go-to designs. AND it’s the design I start out with when I teach FMQ! Go you!
I’ve found Loops to be more beginner friendly for most people. Being able to cross over your lines gives you a little more feeling of control. I have found, though, that perhaps 1 in 10 quilters have a hard time mastering loops – mainly the alternating of them – so those folks I encourage to move on to stippling/meandering.
Have you ever taken a beginner FMQ class where the teacher starts you out with stippling/meandering? I bet there are a lot of you who felt really frustrated because you couldn’t master the design and may have even quit trying to master FMQ after that class.
Well, I’m here to tell you that –
YES, YOU CAN MASTER FMQ!
So “let’s start at the very beginning, a very good place to start” (kudos if you can name the movie, the song, and the actress for this quote).
And the very beginning is making loops!
I hope you’ll spend a little time doodling this week because next week for Lesson 3, we are going to start working with our machines and our Loopy design. I’d love to see your doodles in the comments or on our VRD Facebook page.
Until next time –
Sew. Laugh. Doodle. Repeat.
Always,
Tricia @ VRD

The video link doesn’t appear here and also didn’t work on the email today. Thank you for doing these lessons on free motion quilting.
LikeLike
Thanks for letting me know. I tried everything I could to fix it, but ended up removing the damaged video. I hope to have another video next week. Thanks again.
LikeLike