I hope you’re ready to dive right back into our Quilt Block Basics mini series! This week, we’re going to talk about Quarter Square Triangles (QSTs). So, what exactly is a QST?
A QST is made up of 4 triangles sewn together into a square. Those are Isoceles triangles for you math people out there. LOL!
You might have heard of this as an Hour Glass unit. Barbara Brackman, quilt historian extraordinaire, and Electric Quilt call it Four X. What other names have you heard this unit called?
I guess in a way, you could even consider it to be a type of a Four Patch, but calling it a QST helps to differentiate it from the classic Four Patch, below, which is made up of 4 squares.
Let’s look at some quilt blocks with QSTs! Some are old favorites and some may be new to you.
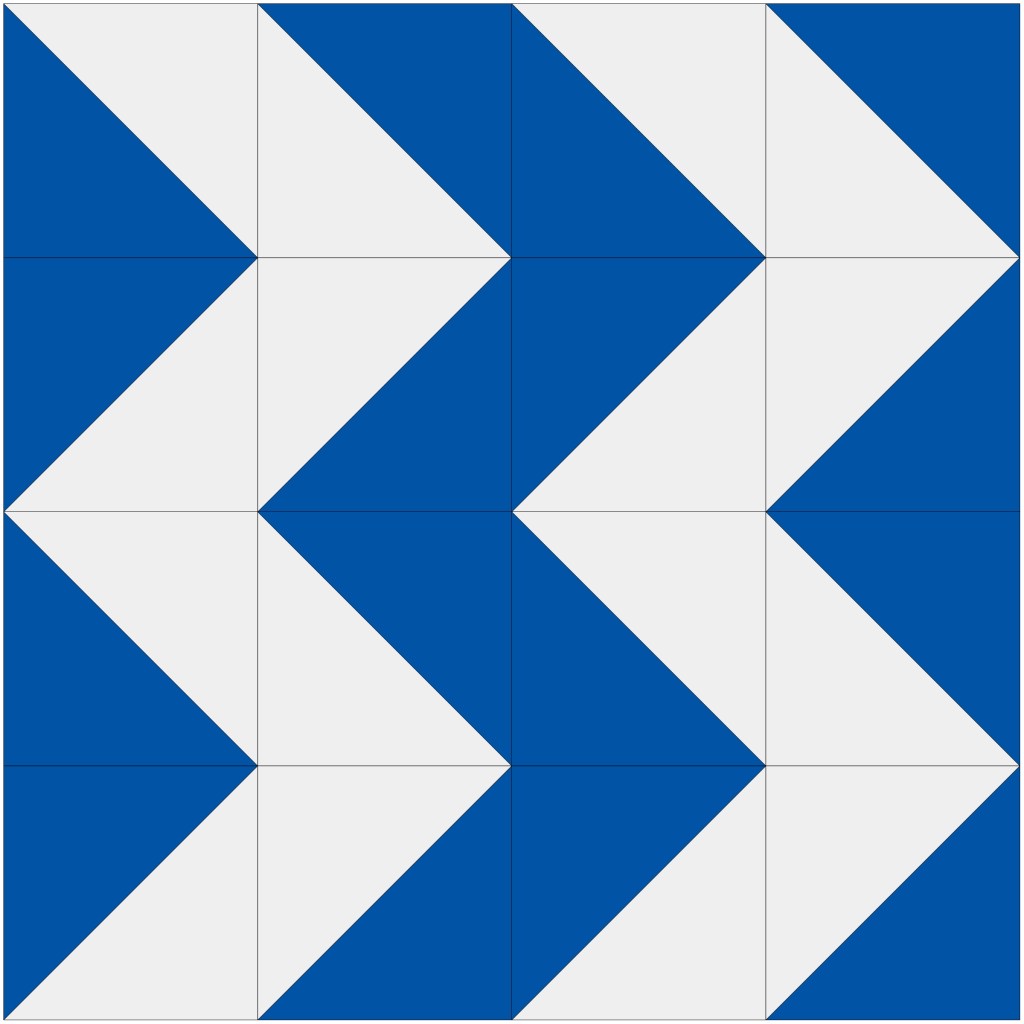
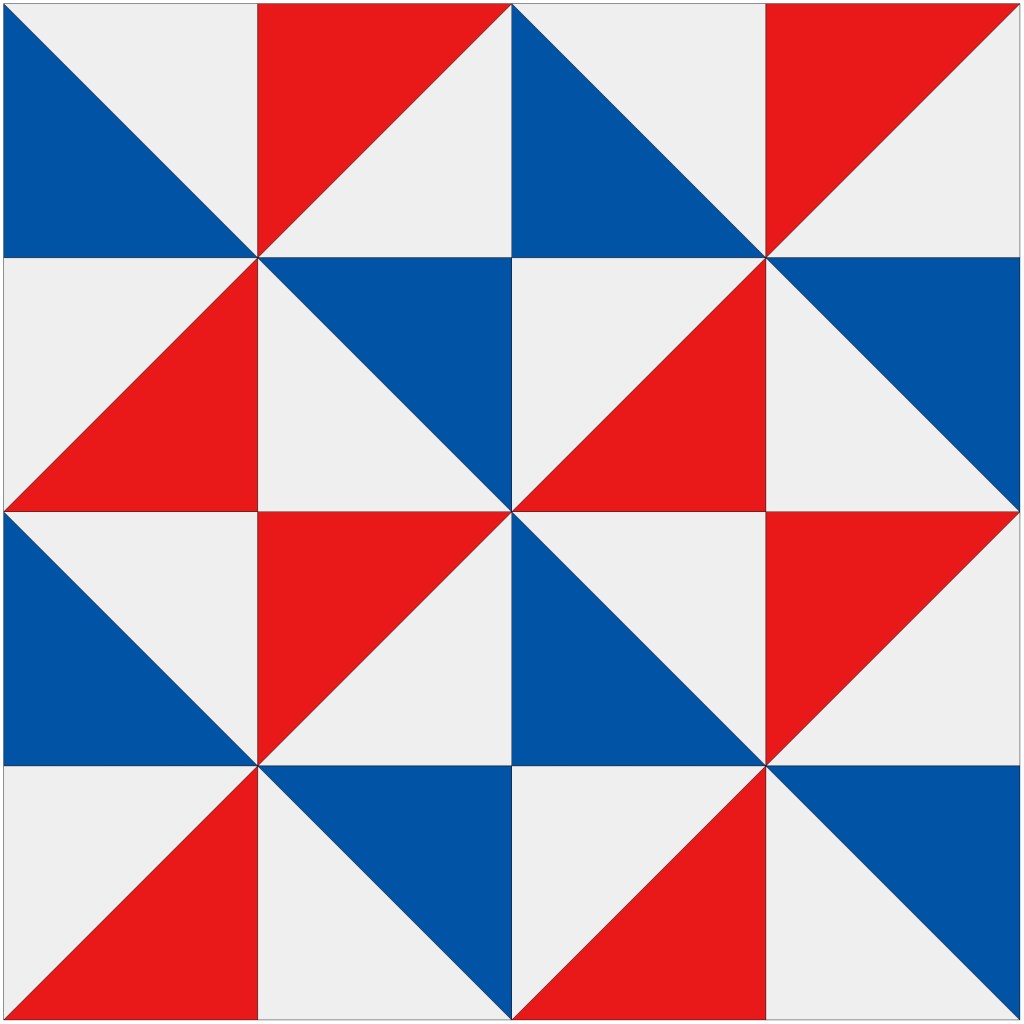
Card TrickElectric FanFlying XLondon RoadsOhio StarReverse X
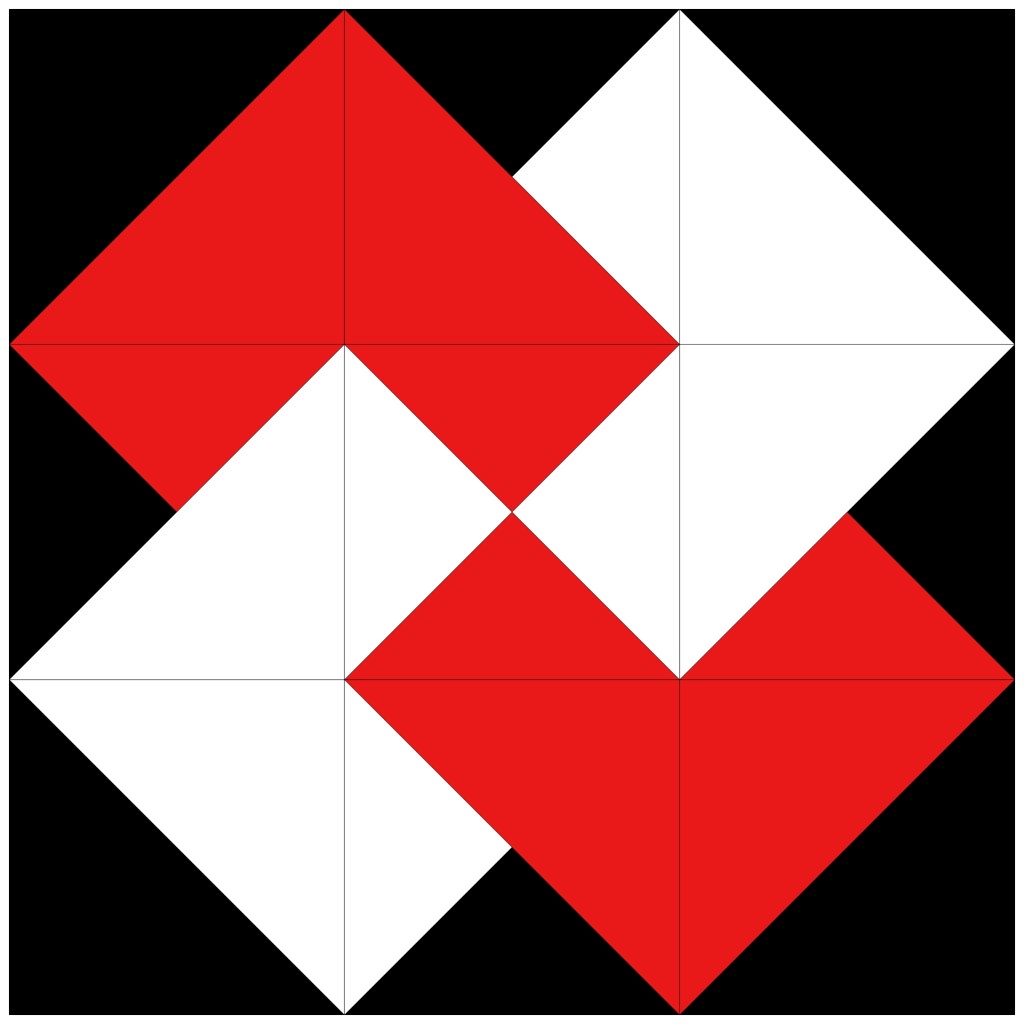
How to Make a Quarter Square Triangle
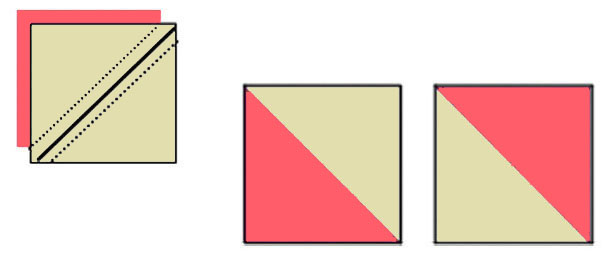
Layer 2 squares the same size, right sides together.
Draw a diagonal line from one corner to the opposite corner.
Sew 1/4″ away from both sides of the line.
Cut on the drawn line and open each unit to make 2 HSTs. (What????? HSTs???? Wait — we’re not done yet!)
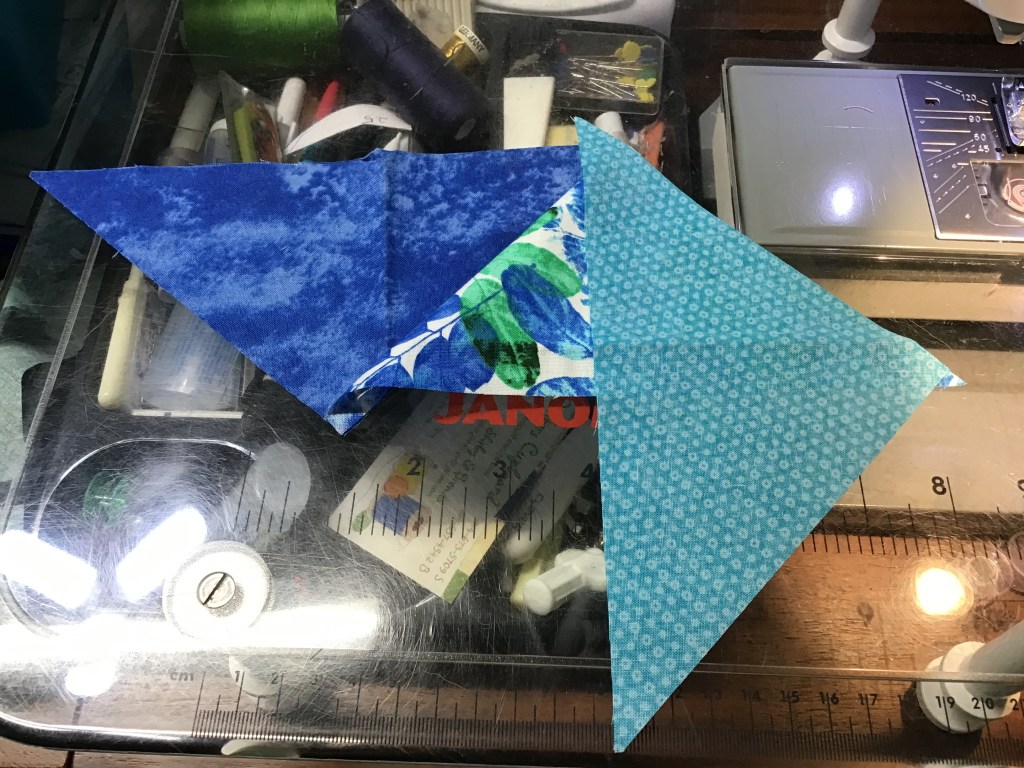
Layer the HSTs right sides together so that the light triangle is on top of the dark triangle and vice versa.
Draw a diagonal line from corner to opposite corner, perpendicular to the already-sewn seam.
Sew 1/4″ away from both sides of the line.
Cut on the drawn line and open each unit to make 2 Quarter Square Triangles!
You may have noticed that I didn’t include any measurements for cutting the squares. Well, that was intentional. Just like HSTs, there is a magic math formula to figure out the size of squares you need to cut based on what your desired finished size will be (no charts to lose!).
YAY MATH!
And the magic number for QSTs is…..drum roll please………1 1/4.
Yep, that’s it. Add an extra 1 1/4″ to your finished size and your QSTs to get the right size.
So…………
If you want 4″ finished QSTs — then cut your squares 5 1/4″.
Want 8″ finished QSTs? Then cut your squares 9 1/4″.
What about 1″ finished QSTs? Cut the squares 2 1/4″.
That’s it, folks. Isn’t quilt math delightful?
Seriously, I would have loved geometry way back when if my high school geometry teacher had taught me quilt math instead of writing proofs to prove a square was “squarular”. Sigh…….yes, I know — that’s not really a word, but in my humble opinion, it should be……..triangles are triangular and rectangles are rectangular so why aren’t squares squarular????
Okay, enough of that! Don’t get me started on the vagaries of the English language. LOL!
Instead, let’s look at some great Villa Rosa Designs Rose Card patterns that feature QSTs.
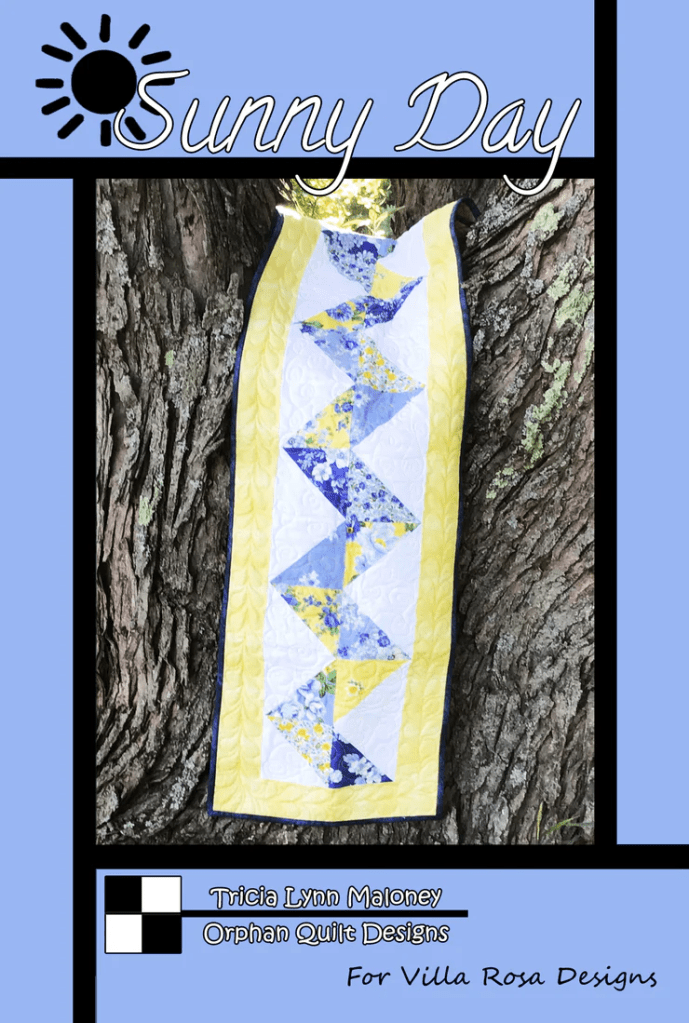
It’s a fine spring day here in Pennsylvania! Clear blue skies and temperatures in the 70s. Things are greening up and blooming. But Mother Nature isn’t done with her shock treatment yet as next week will be back in the 30s and 40s again. Go figure! Ho hum…..this is spring in northwestern PA.
Last week I started a new mini series on Quilt Block Basics — did you miss my post about Half Square Triangles? If so, you can check it out HERE.
I will be getting back to the Quilt Block Basics mini series next week, but this Thursday is the Thursday following the first Friday of the month, so I am excited to debut our brand new April 2023 VRD Rose Card patterns! Yay! Definitely one of my favorite posts every month!
I know I’ve said this more than once (probably more like a million times) but there isn’t another pattern company out there who produces as many new patterns every year as Villa Rosa Designs. We put out at least 5 new patterns a month — add to thatour usual 1 (and sometimes 2) new table runner pattern(s) each month and that figures out to be an average of 72 new quilt patterns a year! Mind-boggling, isn’t it???
We have the most awesome quilt designers here at VRD (not that I’m biased or anything) and together we make the impossible possible.
Revisiting Copyright for Quilters
Recently a reader asked some thought-provoking questions on the blog and I wanted to share her questions with you. Thanks, Mindy, for giving me permission to share your comments.
Mindy wrote the following after reading my post about The Copyright Question for Quilters (go HERE to read the Copyright post):
Can I ask one thing that comes up often with this discussion? How do you feel about second-hand selling of your patterns or having the pattern donated to a guild or other “library” type situation? I sat in on a lecture years ago at Quilt Market by two copyright lawyers and it was my understanding that this was illegal, but I have recently heard some pattern designers don’t mind and would rather the pattern be used than thrown away. What are your thoughts if you don’t mind me asking?
SIGH……. If only understanding copyright law and practicing it were straightforward and simple. But to understand copyright law, you basically need a copyright lawyer to explain things in a way you can understand. That being said, copyright law is even confusing for the professionals as they often don’t agree with each other. So if lawyers can’t agree on what copyright law is and how it applies, then how are we — the quilters and the designers — supposed to understand it?
And you need to understand copyright so that you can practice it. Such a conundrum.
What do I think?
Please note these are my personal opinions as a quilter and designer.
Guild Lending Libraries
I have belonged to quilt guilds for a long time and yes, one of my guilds did have a library of quilt books (not patterns) that guild members could check out and borrow. I don’t remember when exactly, but the guild library was dissolved years ago and the books were donated to a used book sale at a local library. I think it ended up being dissolved because the collection took up a lot of space in our storage locker and it wasn’t being used by the guild members. Part of the problem, I suspect, was that the lending library wasn’t updated and weeded out regularly in order to keep the collection current and relevant to the interests of the guild members.
I think libraries — any kind of libraries — are wonderful amazing incredible things!
Let’s consider public, school, and university libraries — they purchase one or more copies of a book or magazine and not even allow — but encourage — people to borrow these materials free with their library card. Is this an infringement of copyright law? I don’t think so — most authors, myself included, want to see their books in libraries.
How is a quilt guild lending library any different? Really? Of course, I am talking books here, not patterns, but what is a quilt book but a collection of quilt patterns? In my opinion, as long as the book or pattern was purchased legally at some point, it is a good thing to pass it along to someone else. (This does not mean making a photocopy of a book or pattern and giving to your best friend, but passing along the original book or pattern.) I am always pleased to see books find their way to someone who will love them.
Additionally, most folks are conscious about recycling and trash disposal — isn’t it better to pass along a book or pattern to another who will find enjoyment or enlightenment from the book/pattern instead of adding more trash to landfills? To me, there’s nothing more devastating than someone throwing away a perfectly good book.
Secondhand Selling
The selling of secondhand goods is HUGE all over the world. Secondhand sellers have existed far longer than copyright laws have. The secondhand selling of goods is a big part of any economy, so I am not sure how that corresponds to copyright when you’re talking about books and patterns.
If selling secondhand books, patterns, and other types of publications was an infringement of copyright law, then how can sellers resell goods on eBay, Amazon, Etsy, and the like? What about at the Goodwills and Salvation Army stores? What about the used book sales at your local library? Or garage sales, yard sales, flea markets, antique shops, and others? Why aren’t we all thrown in jail or fined for buying or selling secondhand goods?
Where would we be as a world without the secondhand sales industry? Wouldn’t this increase our already out of control issues with garbage and landfills? Wouldn’t it put A LOT of people out of work?
For me, personally, I am all for supporting the secondhand sales industry for many reasons —
It reduces waste
It helps people to afford goods that they need
It can help someone else in some way (whether it’s the actual information in a book/pattern or that the sale of the item supports a charity)
Secondhand sales (and the searching of desirous items) can be a lot of fun
It employs people, and can provide/supplement income
An “old” item to you might be a “new” item to someone else
It is a form of recycling
This topic makes me think about the old saying “Use it up, wear it out, make it do, or do without” and the more modern version — “Reuse. Reduce. Recycle.”
What are your thoughts on guild libraries and secondhand selling of quilt books and patterns?
Thank you again, Mindy, for bringing up these topics. I am curious to see what others’ thoughts are. Any copyright professionals out there who can weigh in on this discussion?
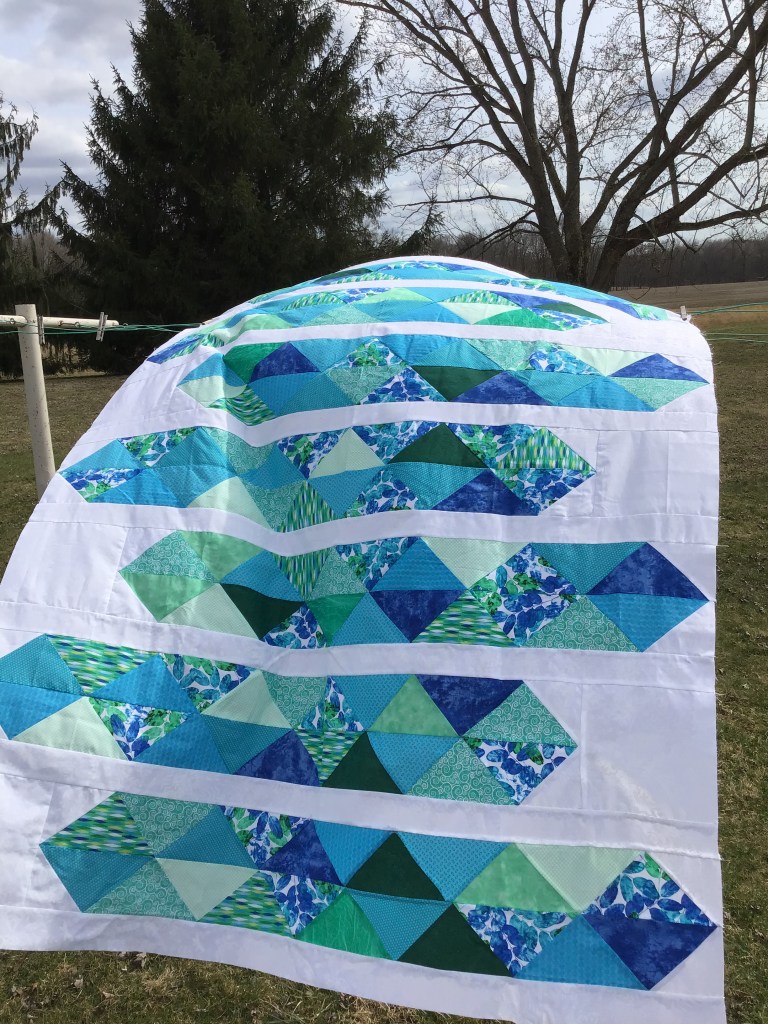
Before I dive right into HSTs, I want to show off my completed Helix quilt top. Yes, I finished it! I really like the finished top, although I wish my points had turned out better. What do you think?
I didn’t have enough background left to add side strips, but that was okay, it will be fine as long as I’m careful when I sew the binding on because I don’t want to cut off the triangle points.
Quilt Block Basics
Lately I’ve been feeling very creative — maybe the change in the weather? I’ve been churning out new quilt designs on my EQ8 (Electric Quilt) software and I will never have enough time to make them all, I’m afraid. While I was working on all these new designs, I started thinking about the smaller units that make up quilt blocks and I thought — AHA!!! That’s a great topic for the blog!
So, welcome to a new VRQ mini-series, all about the smaller units that make up our favorite quilt blocks.
The first unit I want to talk about is the Half Square Triangle.
Half Square Triangles (HSTs)
Half Square Triangles or HSTs are one of the most common building blocks for a pieced quilt block. Sometimes you see HSTs called Triangle Squares or Half Square Triangle squares or blocks. I like to keep things simple when I write instructions and I consistently use Half Square Triangles or HSTs.
You can find HSTs in simple blocks such as:
Friendship Star (Left) Pinwheel (Center) Shoofly (Right)
Or in more complex blocks like:
Bear’s Paw (Left) Mosaic #10 (Center) Old Maid’s Puzzle (Right)
One of my most favorite things is playing around with the parts of my blocks to create new block designs when I’m designing. I like to change colors, switch lights and darks, and change the orientation of the units within a block in order to create something new and different. EQ8 makes this sew easy to do.
To show you what I mean, let’s play with the Mosaic # 17 block, which is all HSTs and gives us lots of room to play!
Let’s change the orientation of the HSTs:
Now let’s add another color in the mix:
Let’s try change the orientation, too:
Okay, okay, I’d better stop here or I’m going to lose my writing focus and create another stack of quilt designs I will never have time to make! LOL!
I think you can see how much fun it is to play with HSTs. Imagine what happens when you add other building block units with the HSTs………but that is a post for another day.
Half Square Triangle Assembly
There are many different ways to make HSTs — just check on YouTube, Pinterest, or your favorite quilting magazine.
I am going to show you my favorite method here — this is the method I use in my quilt instructions.
Layer 2 squares together, right sides together (RST).
Draw a diagonal line from 1 corner to the opposite corner.
Sew 1/4″ away from both sides of the drawn line.
Cut the HSTs apart on the drawn line. Open to make 2 HSTs.
I bet you noticed I didn’t use any dimensions for my fabric squares. That was intentional. As I’ve said many times, quilting is all about math (check out my ode to quilting and math HERE).
HSTs are no different! You can use this construction method to make any size HST. You just have to know a teeny tiny magical math secret!
To figure out how big to cut your squares, you need to add 7/8″ to your finished dimensions! Really, that’s all you need to remember. You don’t need to refer to a cutting chart, you just need to remember 7/8″. (Please note that 7/8″ may not work for all HST methods.)
Here are some examples:
I want my HST’s to finish at 3″, so I need to cut my squares 3 7/8″.
5″ finished? Cut 5 7/8″ squares.
12″ finished HSTs……….cut 12 7/8″ squares.
Easy peasy!YAY MATH!Thank you, Mrs. Hank (my high school math teacher)!
HST VRD Rose Card Patterns
We have a wonderful collection of HST pattern sin our VRD catalog. It’s a L O N G list, so hang in there until the end of the post.
Whew! We had some crazy weather here in NW PA over the last week end. Hail, heavy rain, wild wind gusting into the 60s [MPH]…..trees down all over the place in my area, but luckily no serious injuries. Our electricity was out for over 24 hours, a friend of mine just got her electricity back on on Wednesday — it went off on Saturday!
I personally found the lack of electricity, no running water, and zero Internet very difficult — I hadn’t realized how much I took those things for granted. It’s not a bad idea to have a “lights out” crate with things to do in such as case. Not too mention extra batteries, water, lanterns, nonperishable food, blankets, etc.
Dear friends, I hope you and your loved ones are all safe and sound.
It’s been a while since I’ve done a tutorial, so let’s make a quilt!
I’ve been wanting an excuse to do Molly’s Helix Rose Card pattern. From the first moment I saw this pattern, I was intrigued. I told my good friend Mary Lee about Helix (I knew she would love it!). DANG! She bought it before I did at one of our two local quilts shops, Homespun Treasures. I was so jealous — I had only seen it online when I blogged about the new patterns in February — so I made up an excuse to go to the quilt shop and get one for myself (not that I really need an excuse). LOL!
I dove into my stash of fat quarters to find the perfect fabrics for Helix — deciding on a scrappy collection of blues, greens, and turquoises with a white on white floral background. One thing I really love about our VRD patterns is the ability to actually use the fabrics in my stash without having to run to the quilt shop every time I turn around — which is not a bad thing to do by any stretch of the imagination. Instead, I can jump right into my project right now. Besides, when I shop in my stash, sometimes I find things I had forgotten all about and I get excited about another idea or project before I’ve even finished the one I’m working on.
Quilting, for me, is never boring!
Okay, so my fabrics are gathered and I’m ready to go!
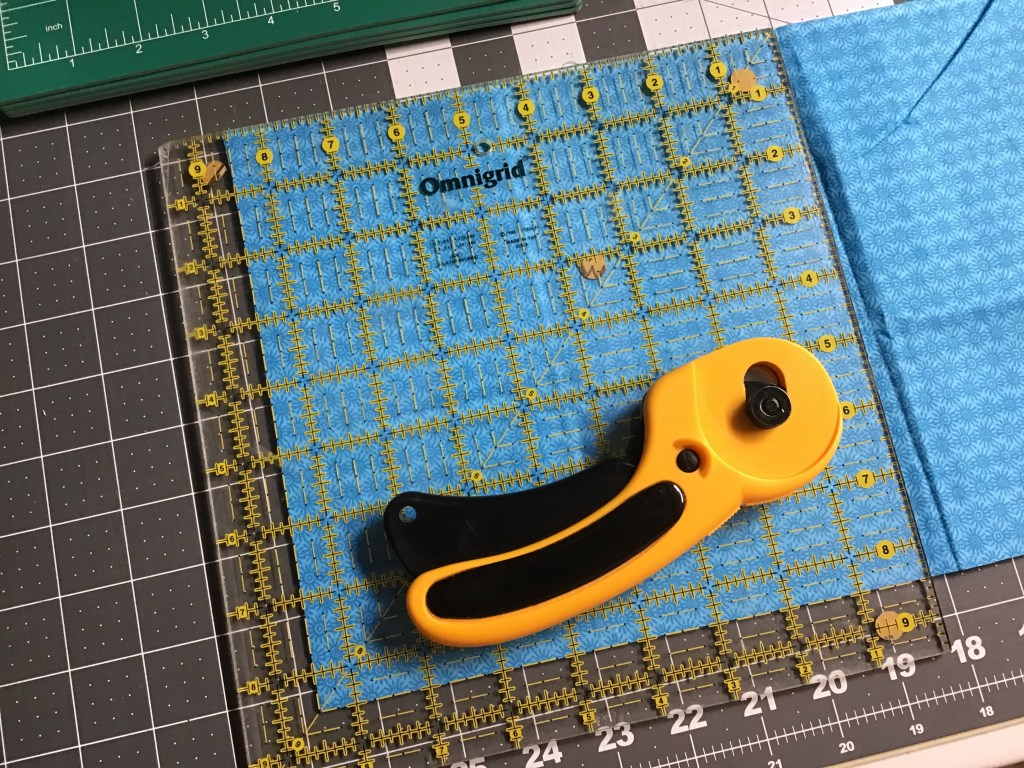
Cutting
I layered a couple fat quarters on top of each other for cutting, but if you are not comfortable with that, go ahead and cut each fat quarter individually. Making a quilt is not about who finishes first — it’s about the journey (unless you are participating in a Jelly Roll Race).
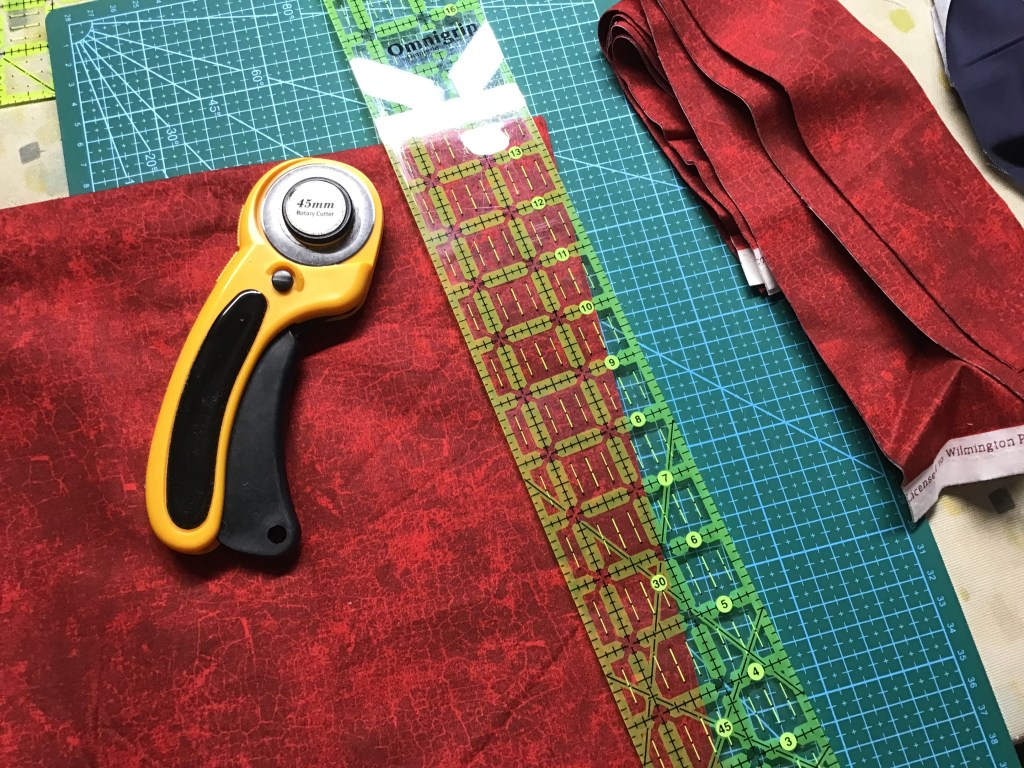
Here you can see my fat quarters (FQs) stacked up and I am ready to make my first cut. I just cut the top edge straight and I’m ready to find the right measurement on my ruler so I can cut the strip.
Here I have cut my wide strip.
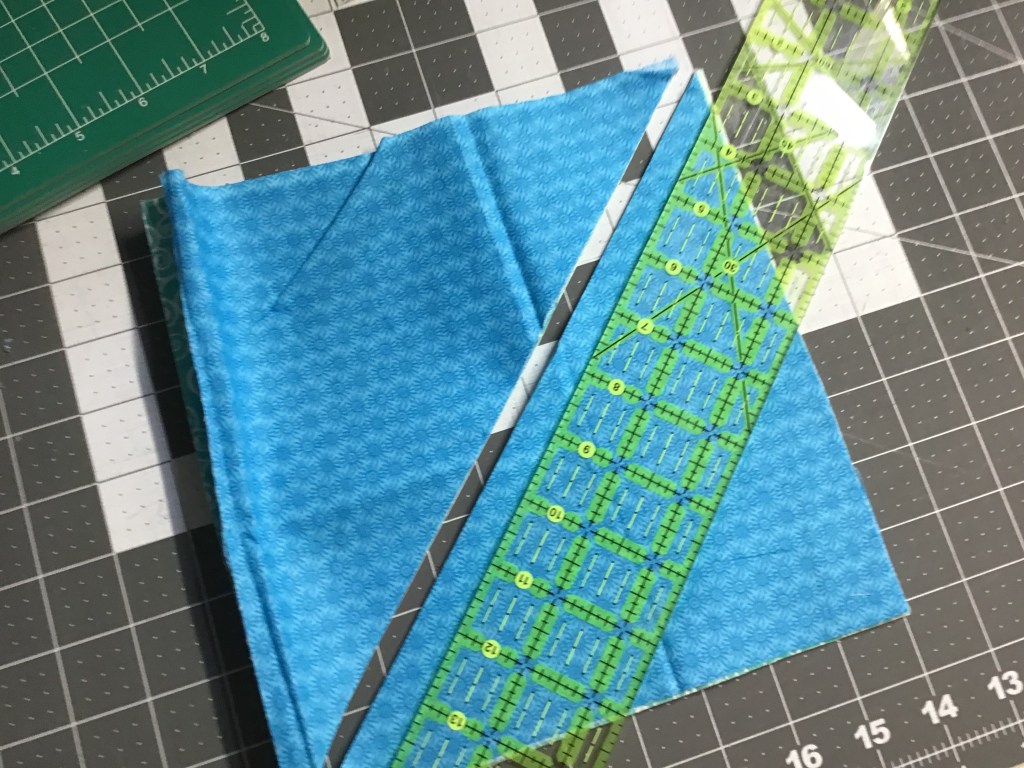
Next I am going to cut large squares from my wide strip. I will get 2 squares from each strip. But wait….there’s more! (You know I LOVE saying this!) We are not done cutting our squares yet!
Time to cut these big squares in half diagonally. I had to switch rulers because my ruler wasn’t long enough so I grabbed my 2.5×18 ruler for cutting diagonally.
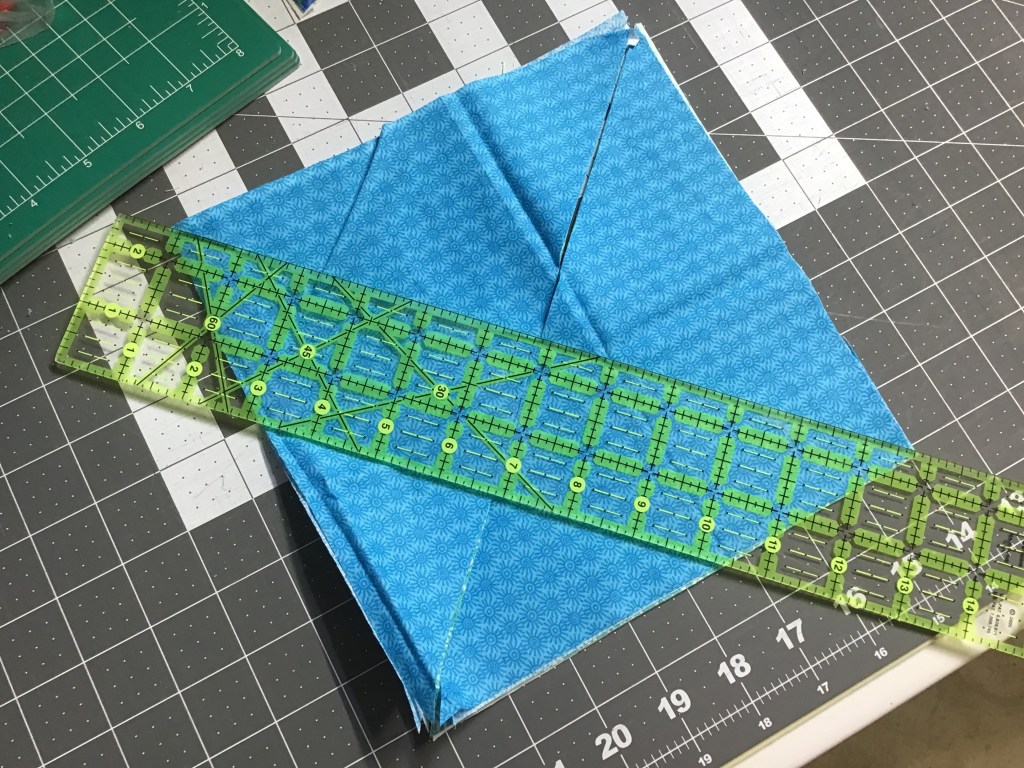
Don’t move those triangles — we are still not done cutting!
With my diagonally-cut triangles still together, I am going to cut on the other diagonal too — that way I get 4 smaller triangles from each block. Caution — these smaller triangles each have 2 bias edges, so treat them gently and handle them as little as possible to minimize distortion and stretching.
TIP: Do you see that blue, green, and turquoise leafy print triangle on top of my triangle stack in the 3rd photo? That was my “inspiration” piece for selecting the other FQs for this quilt project. I often choose a fabric with multiple colors in it to pull together fabric from my stash or scraps. Heck, I even do that in the quilt shop. This is definitely one of my favorite ways to gather a group of fabrics together for a project.
In addition to the FQ triangles, you need to cut some background — triangles, squares, and strips.
Sewing
Hmmmmm. I think we’re finally ready to do some sewing. Yay!
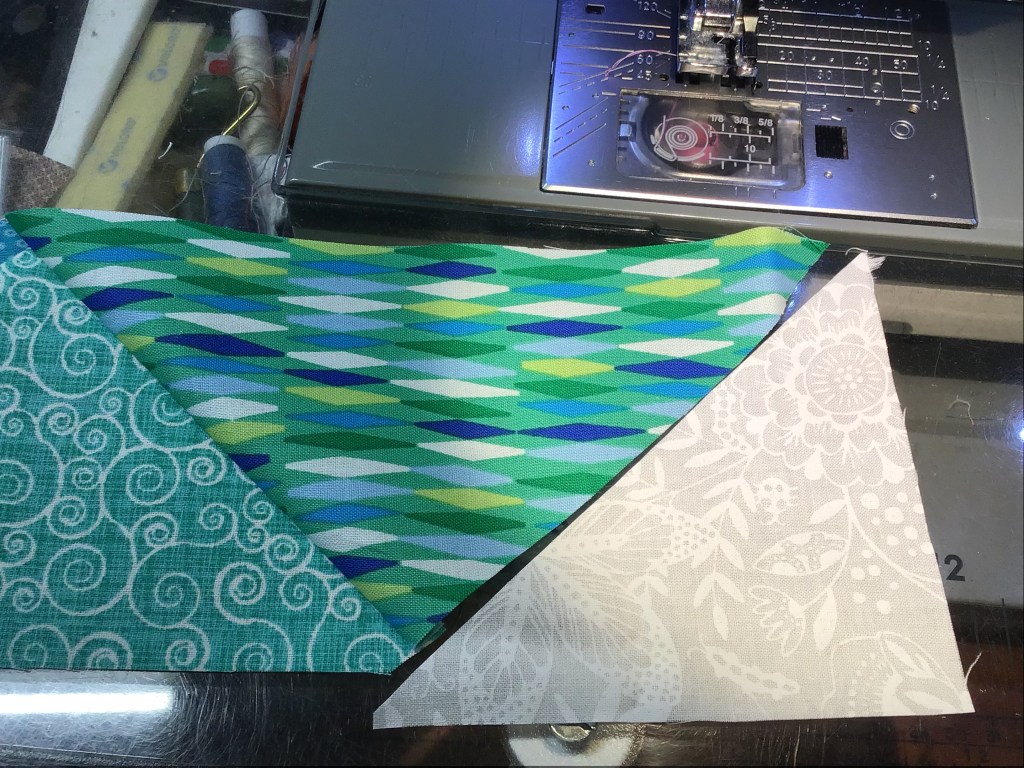
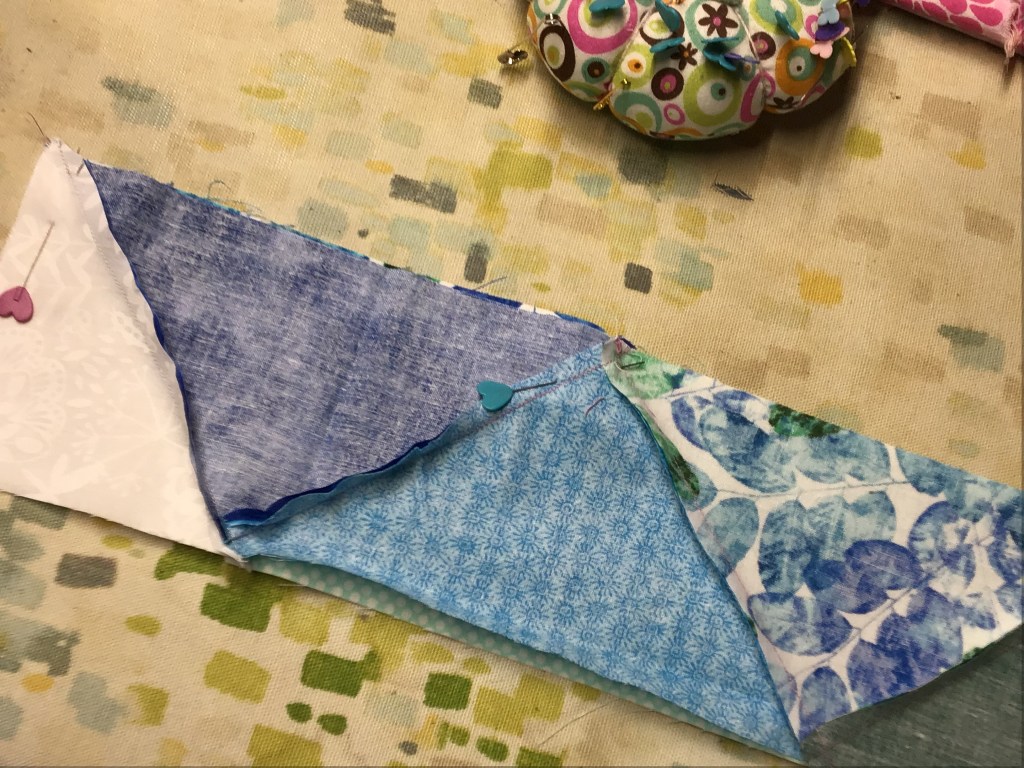
Let’s take 2 print triangles and lay them side by side, one pointing down and one pointing up.
Now let’s flip the right side triangle (leaf print) on top of the left triangle (blue tonal), right sides together (RST). Line up the edge with about a 1/4″ of the blue tonal peeking up above the leaf print and the leaf print should be overhanging the blue tonal about a 1/4″ at the bottom. Pin to keep them from sliding if you want to, but I find if I do the layering right at my sewing machine, I don’t need to pin them together.
Sew along the edge with your 1/4″ seam.
Don’t forget to trim the little overhanging triangles (around here, we call them “dog ears” [don’t ask me why…..]). Practice doing this as you go along so you don’t forget. Open the unit. Nice!
I don’t recommend pressing if you can comfortably avoid it — these triangles have 2 out of 3 bias edges and you don’t want them to stretch and distort. Better to wait until you have all the triangles sewn together into a row before pressing.
Pick another triangle and lay it next to the unit we just sewed together.
Flip that triangle over on top of the second triangle with RST. Line up the edges and slide the top triangle down a little bit so you see about 1/4″ of the triangle underneath peeking out above the top triangle and the top triangle extends about 1/4″ beyond the bottom of the triangle underneath.
You might be scratching your head and wondering what’s up with this silly “slide it down so you see about 1/4″ of the triangle underneath peeking out above the top triangle and the top triangle extends about 1/4″ beyond the bottom of the triangle underneath” business. I have 2 words (kind of) for you — 1/4″ seam. Sliding the top triangle down 1/4″ accommodates the 1/4″ seam we sew with so that the pieces will line up straight. Don’t believe me — try it! Lay your triangle as exactly on top of each other as you can and sew them together with your 1/4″ seam.
Aha! Told you so!
Sorry, not sorry — I don’t get to say that very often…….
Okay, let’s get back to our project.
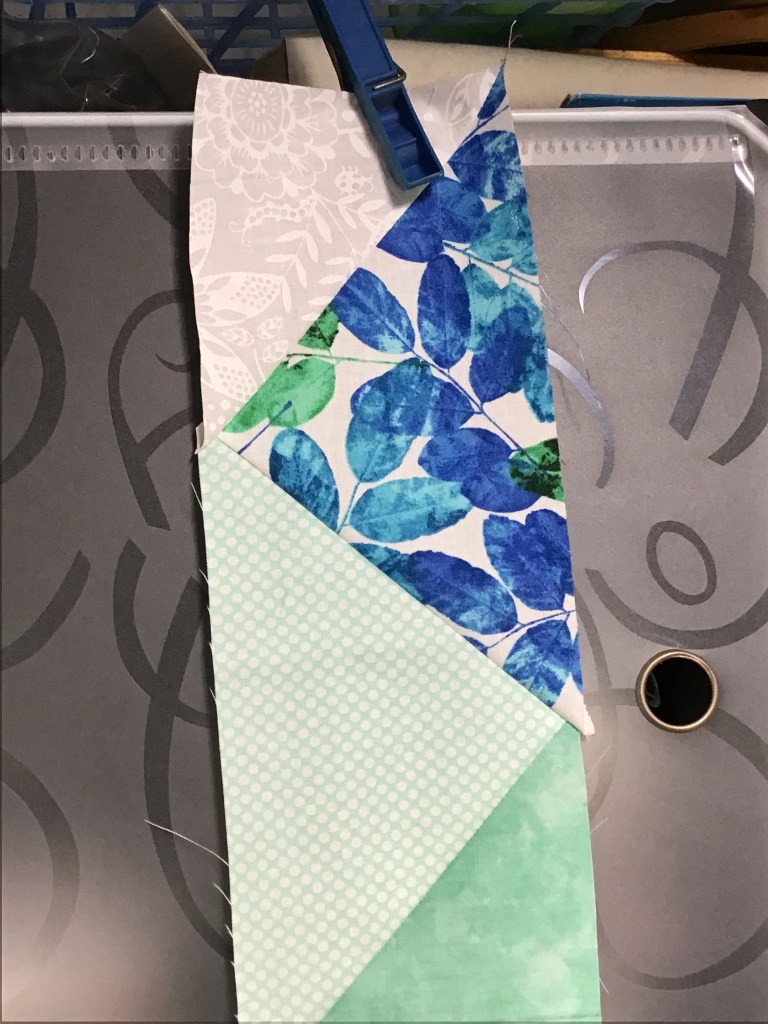
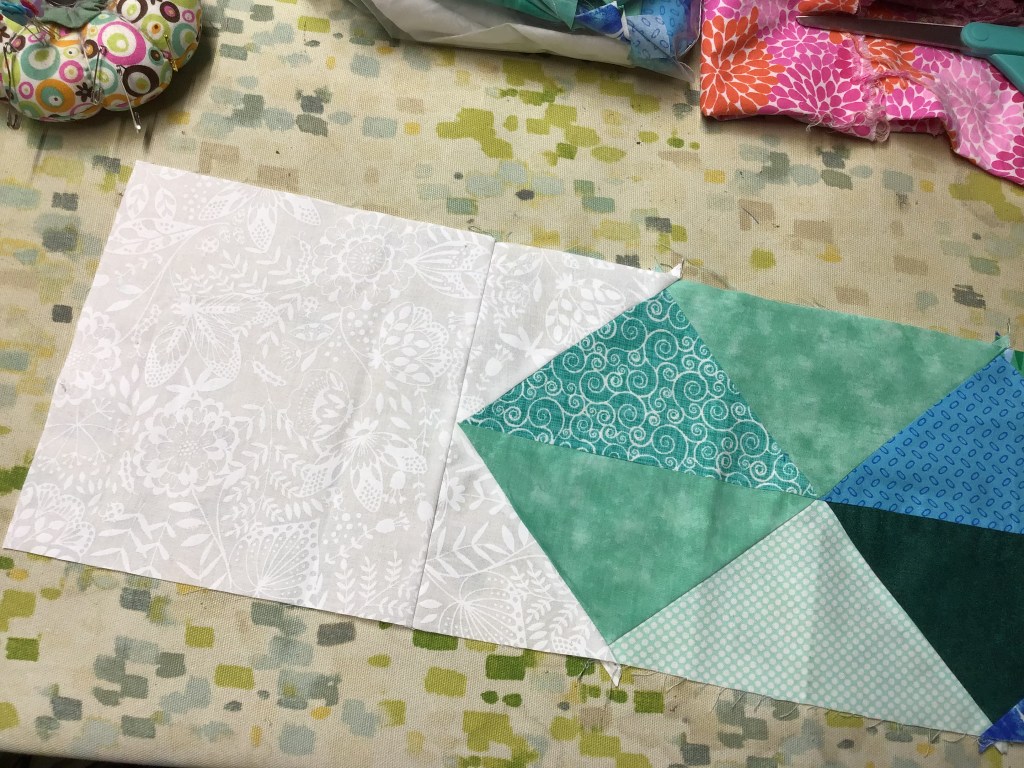
Sew the triangle to the unit with your 1/4″ seam. Trim the dog ears and open the unit. 3 triangles done………5 million to go!
Sew a total of 11 triangles together to make half of a Helix row.
Yay! Now let’s lay out and sew small white triangles to each end of our triangle strip.
Looking good!
Time to sew 11 more triangles together. Don’t forget to cut off those dog ears. Then sew background triangles to each end.
Here’s the tricky part next — we are going to sew the 2 half rows together to make one Helix row. Yikes! Grab your pins, because you’re going to need them.
I found this part very challenging — I was all thumbs lining up the 2 rows. I crossed my fingers (and my toes, too) and hoped that I had lined things up well enough and that my points would meet. Pin heavily — you will be sewing over seam intersections with a lot of bulk and your fabric is going to want to shift.
Ugh…..I am not pleased with how my points lined up (or didn’t), especially on one of them where I wasn’t even in the ballpark! I might have to do a little unsewing to correct this section.
I pressed the row after sewing it all together. My seams were willy-nilly all over the place on the back instead of nestling neatly like they usually do for me. Frustrating.
I pressed the long center seam open to help reduce the bulk.
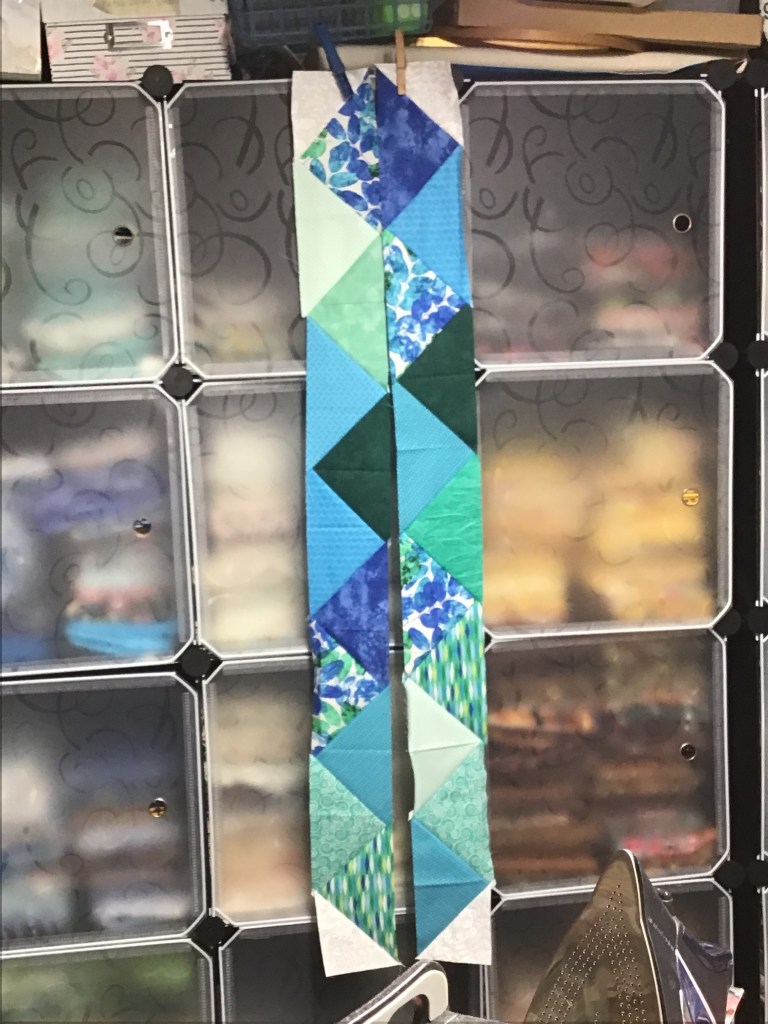
Repeat these steps to make a total of 7 Helix rows.
Here are 2 of mine so far.
Look! Look! Look! I got all 7 of my Helix rows done. They are completed, but I am not 100% happy with how they turned out. I even tried another method of sewing the triangles together, but that didn’t make things any better — it must be me (frowny face here).
My suggestions to you are to sew slowly and line things up carefully — this project requires a good deal of accuracy for everything to come out well.
Here are my rows hanging off my fabric storage cubes.
The next step is to sew one square to an end of each of the 7 Helix rows. I do really like the colors, even if the piecing isn’t fantastic……
These squares work to offset the rows once we assemble them with the background strips, which just so happens to be our next step.
Now let’s add a background spacing strip. You will have to piece strips together to get the correct length — I cut 1 strip into 3 equal pieces and then sewed a 1/3 piece onto the end of a full width strip. Then I measured through the center of a Helix row and cut my strip to that measurement. Next I matched the ends and the centers of my Helix row and my background strip, pinning everything in place.
I sewed the strip to the Helix row using my 1/4″ seam. Then I pressed my seam towards the background strip.
Now to sew more Helix rows and background strips together!
Here are my first 2 rows sewn together with a background strip in between. So far, I am pleased with the fact that my rows are the same length, even if I mangled my triangle points here and there. Sigh…..
Let’s sew on more rows and background strips! Woohoo! I am on a roll!
Too bad I am not going to finish this quilt top before this blog post has to be finished. Sorry, folks, I’ve been working on it for three days, but I didn’t realize how long sewing the triangles was going to take me. I would have started it sooner, but we no electricity over the weekend.
I promise to add a photo of the completed top ASAP. By the way, I think I might add background strips on the sides of the quilt top if I have enough background left. I have found through previous experience that I do not like triangle points at the outside of my quilts (because I chop them off with the binding).
Well, that’s it for me — it’s after midnight (EST) now and I am getting tired. Time for bed….
Until next Thursday —
Sew. Laugh. Sleep. Repeat.
Always,
Tricia @VRD
Helix Update
Yay! I finished the quilt top a few days later. Now to layer, quilt, and bind it. And, of course, add a label!
Now that it’s officially spring, I am starting to feel that old familiar seasonal “spring cleaning” itch. I definitely feel more motivated right now to actually do a little purging and clutter control in my home and, naturally, in my studio, too. Maybe the longer daylight hours are helping too.
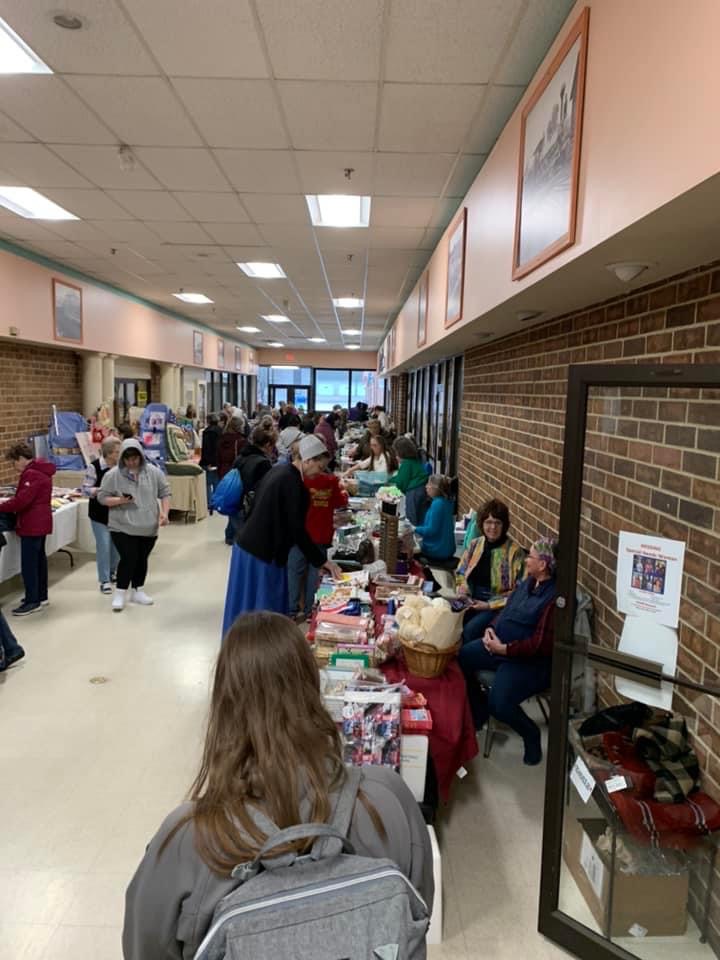
One of my local quilt shops, Fox’s Sew and Vac (BIG SHOUT OUT to all my Foxy friends!), provides a wonderful reason to clean out my constantly expanding stash. Every year, Fox’s sponsors a “Fabric Yard Sale,” usually in February or March. Of course, we missed a couple years due to the Pandemic, but this year’s sale was the biggest I’ve ever participated in!
So, what exactly is a “Fabric Yard Sale”?
Fox’s Sew and Vac is located in one of our shopping malls and they are able to reserve the hallway outside their shop entrance to host their “Fabric Yard Sale.” Due to space limitations, they only have a certain number of vendor spaces, but this year they were able to accommodate 20 vendors! I was lucky to be one of the last vendors before spaces were gone. They charged a very reasonable fee for a space and another small fee for a table. You can bring your own tables, which I have done in the past, but it is so much easier these days to just pay the extra fee and have a table there waiting for me as well as a chair or two.
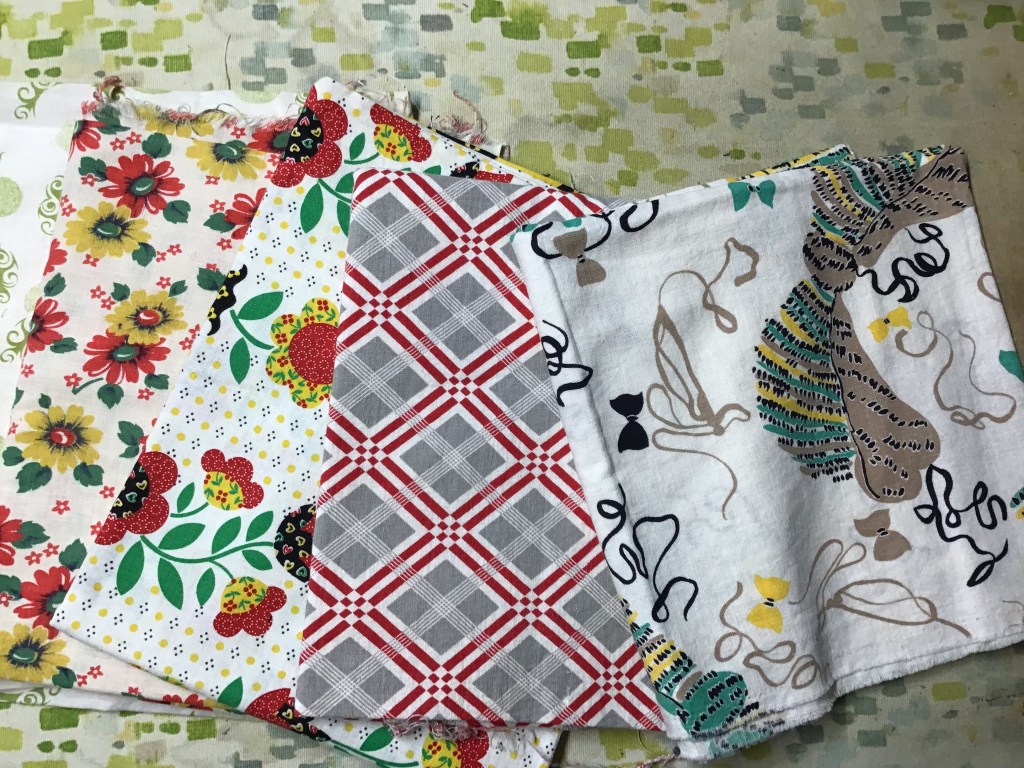
Once I signed up this year — which was later than I normally would due to a time conflict that was cancelled in the end — I got to work sorting through my fabrics, precuts, notions, patterns, books, and whatever else I had hanging around. I measured my yardage, rolled and wrapped it with a rubber band and added a piece of masking tape with the fabric amount and the price (hey, I used what I had on hand). I went through my fat quarters and organized them into baskets. I even readied a basket of vintage feed sack quarters to take along in case anyone was looking for vintage fabrics. I also gathered a selection of books and patterns.
Here’s a photo of some of my stuff headed to the sale. My style is Early Flea Market, of course. LOL!
My friend Mary Lee (Hey Mary Lee!) shared my space with me. Her stash management program is very different from my “it looks like a flea market threw up” chaos — when she finds a pattern that she likes, she makes her own quilt kits by gathering up all the fabrics for the pattern along with the pattern itself. Then she puts everything in the same bag. This way, when she’s ready to make something new, Mary Lee just has to grab a “kit” and start cutting and sewing. Anyway, Mary Lee weeded her kit collection out and parted with a group of kits she decided she wasn’t ever going to make.
All too soon, set up day for the sale arrived. We were able to set up on Thursday and the sale ran both Friday and Saturday. After we carted everything inside and started laying out our table, we discovered that an 8 foot table wasn’t big enough to lay everything out in an orderly fashion. Things were a little jumbled on our table, but that was okay. Sorry, but I never even thought of taking photos….
Late Friday morning, the sale was swamped! Really! Every table had people crowded around. Then it thinned out and we all started shopping each other’s stuff. Sigh…..occupational hazard.
These 3 photos are courtesy of Fox’s Sew and Vac, and show happy shoppers looking for great deals on fabric and such.
Here’s my list of info for you if you are planning to participate in a Fabric Yard Sale:
The more vendors, the less $$ you will make.
As you sell, so shall you buy…..
You need to price your items competitively or you will be taking home what you brought (plus whatever you bought)
Bring some kind of table covering — even if your table looks like Early Flea Market (like mine did), a table covering under your items just makes it look nicer. Use quilts if you can as they are, naturally, attention-grabbers.
Bring lots of small bills ($1s and $5s, mostly) for change and be prepared to change a $20 when someone wants a fat quarter for $1.
Bring plastic shopping bags to put purchases in.
It’s best to have another person with you, but if you have to do your sale alone, make sure someone stops to give you a lunch break. Of course, the folks at Fox’s were happy to watch our tables so we could dash to the bathroom (and maybe grab a yard of fabric we spied across the hallway).
Packing your fabrics, patterns, books, and other items in plastic bins, baskets, and crates makes moving things in and out and keeping your table organized a lot easier than having yardage and fat quarters spilling all over the place.
Bring something to do when things aren’t busy. I always bring a couple magazines, a book, a quilt with binding to be hand-stitched, or even my EPP hexies. Of course, you’re bound to make some new friends and rediscover some old pals, so expect lots of chatting and laughing going on.
Bring something to drink and a snack or two — chocolate is always a good choice.
I am guilty of #2 on my list above…….but not as guilty as some, I will say. Here are my awesome finds:
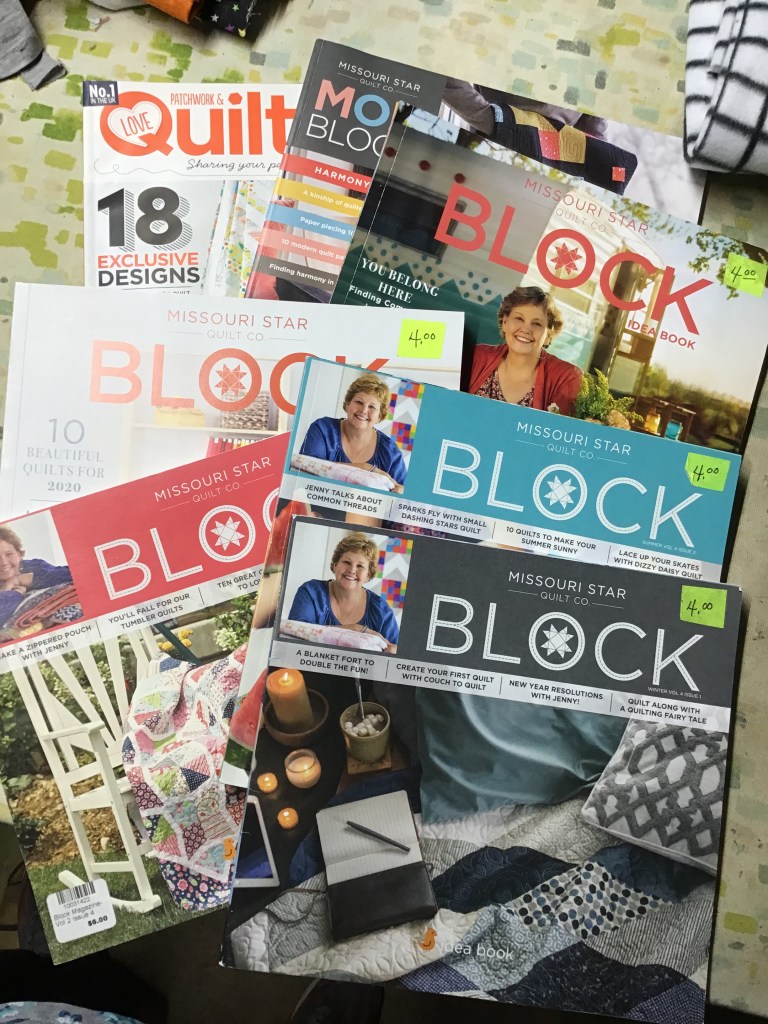
Mostly I stuck to fat quarters, but I did buy a couple larger pieces. I also got a great deal on a stack of Block magazines. And, believe it or not, but one of the other vendors had whole vintage feed sacks for sale. I bought 5. Shhhhh……don’t tell anyone my deep dark secrets.
I can definitely see my studio looking a little better without all the stuff I pulled out and had piled and stacked anywhere I could find a little space until the sale. When the Fabric Yard Sale was over, I sorted my stuff and decided to donate about half of what I brought home to my local Humane Society secondhand shop. Now to find somewhere to store the stuff I decided to keep (at least for now) as well as the new stuff I brought home. Again — occupational hazard.
Fabric Yard Sales are just an excuse for quilters to gather, share ideas, catch up, make new friends, laugh and gossip. Oh, yes — they also keep quilting fabrics and supplies in circulation.
Well, that’s it for me today. Good luck with your own Spring Cleaning.
Wow! What a difference a week can make! Last week the sun was shining and the temperature was above average here in PA. Today, there’s something like 5 inches on the ground and this morning it was a balmy 14 degrees. We had a nor’easter come up the coast yesterday. Here in PA, we were were only on the fringe of the storm, but we still got something like 5 inches of snow and the cold temps.
Yay winter.
No, not really. Mother Nature sure likes to play tricks on us, doesn’t she?
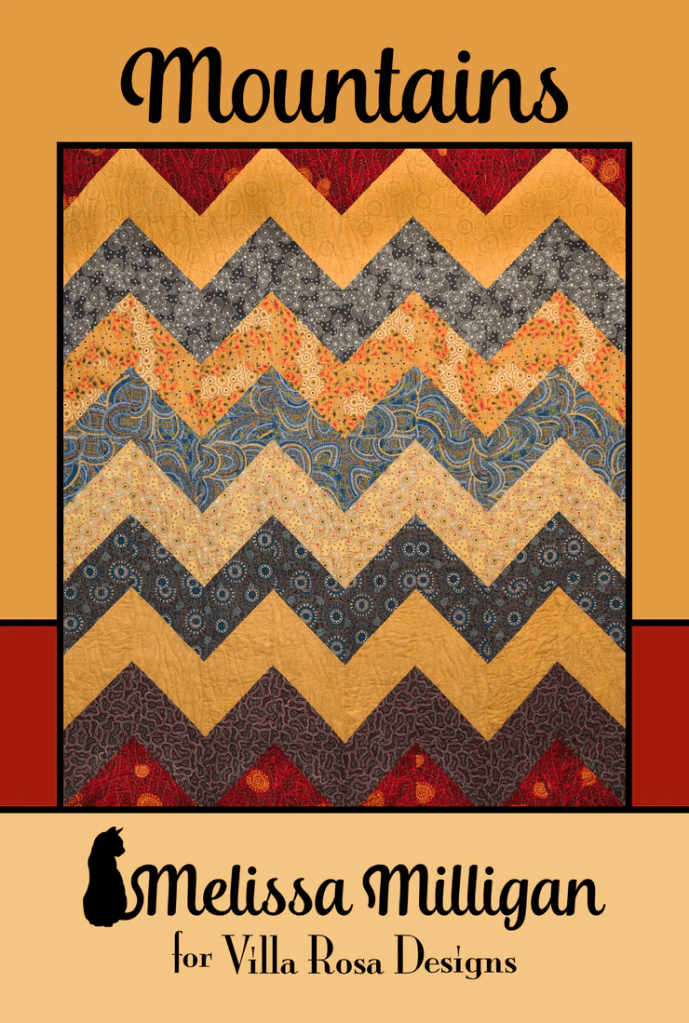
When it’s cold like this, I think about burrowing under a quilt and reading a good book, how about you? That got me thinking about our VRD Rose Card patterns and I wondered how many big quilt patterns we actually had. You know the ones I mean — throws big enough to share and quilts large enough for beds.
Well, I’m happy to tell you that Villa Rosa Designs really does have bed-sized quit patterns. This might be a surprise for many of you because a lot of our patterns are smaller quilts and throws, but we DO have big quilt patterns.
In addition to the snuggling under a quilt wish today, I know a lot of folks right now who have weddings coming up this year and as you know, quilts make one of the BEST wedding gifts. Table runners and wall quilts are great gifts if you know the happy couple’s taste and decorating scheme, but most quilters want to make big quilts as gifts for newlyweds.
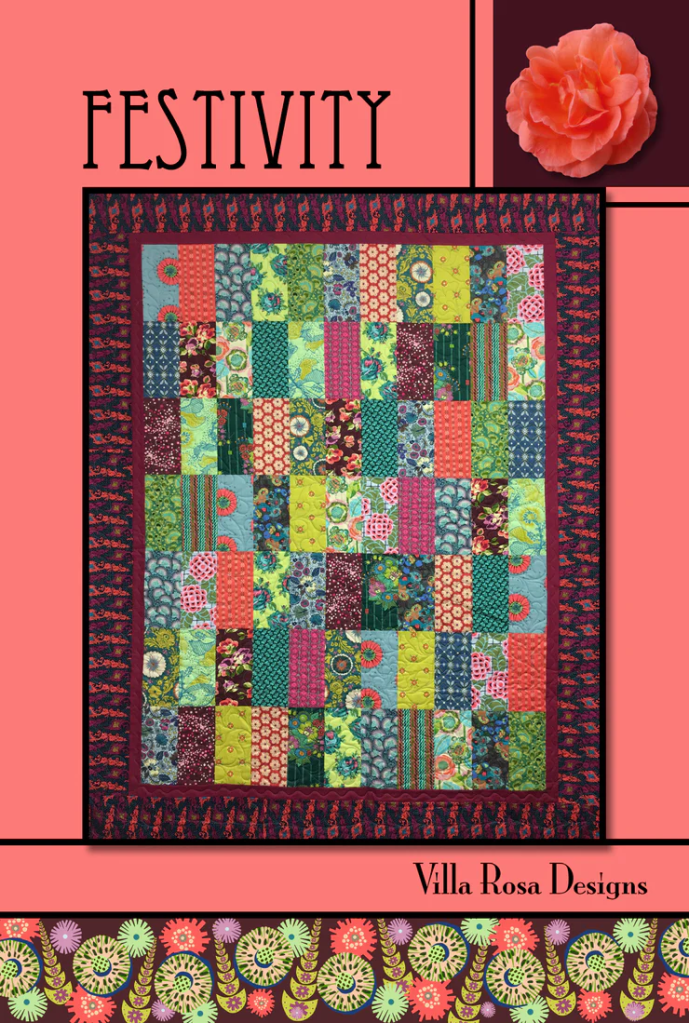
What exactly constitutes a “big quilt”? This term probably means something different to every quilter, but for this list I chose dimensions 60″ x 80″ or larger as my criteria.
Here is my curated list of VRD Rose Card BIG QUILT patterns:
2M
This quilt finishes at 80″ x 80″ or you can add a border to make it 88″ x 88″. I am thrilled to say this pattern is one of our best sellers (and also one of my designs). Let me tell you the story behind 2M — I designed and made this quilt for my niece for her high school graduation. Her name is Morgan Madison — 2M. Nifty, huh?
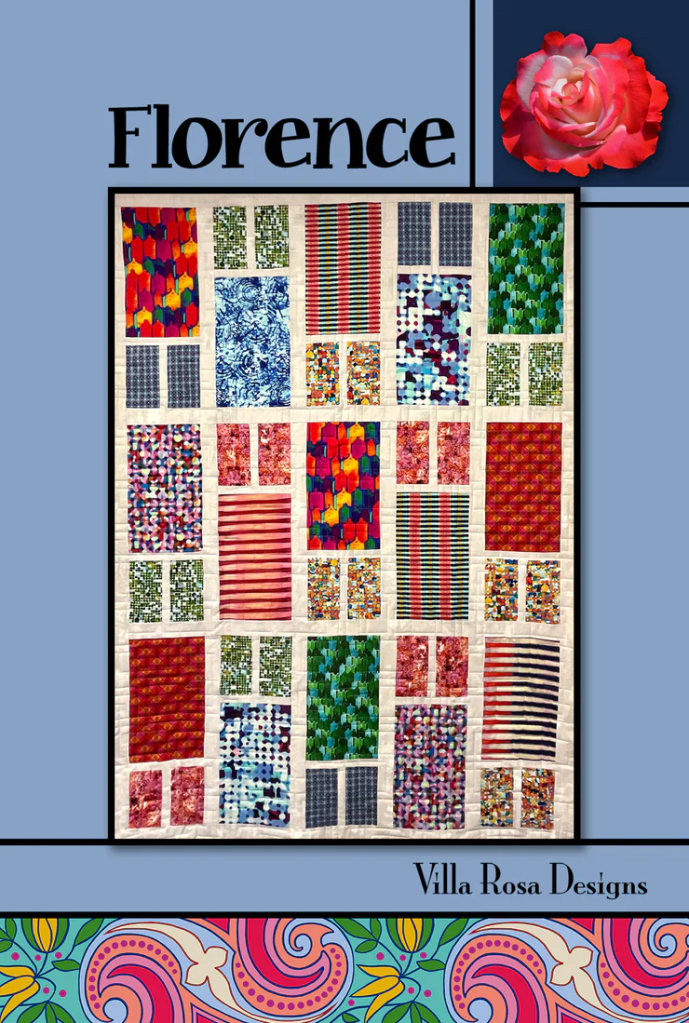
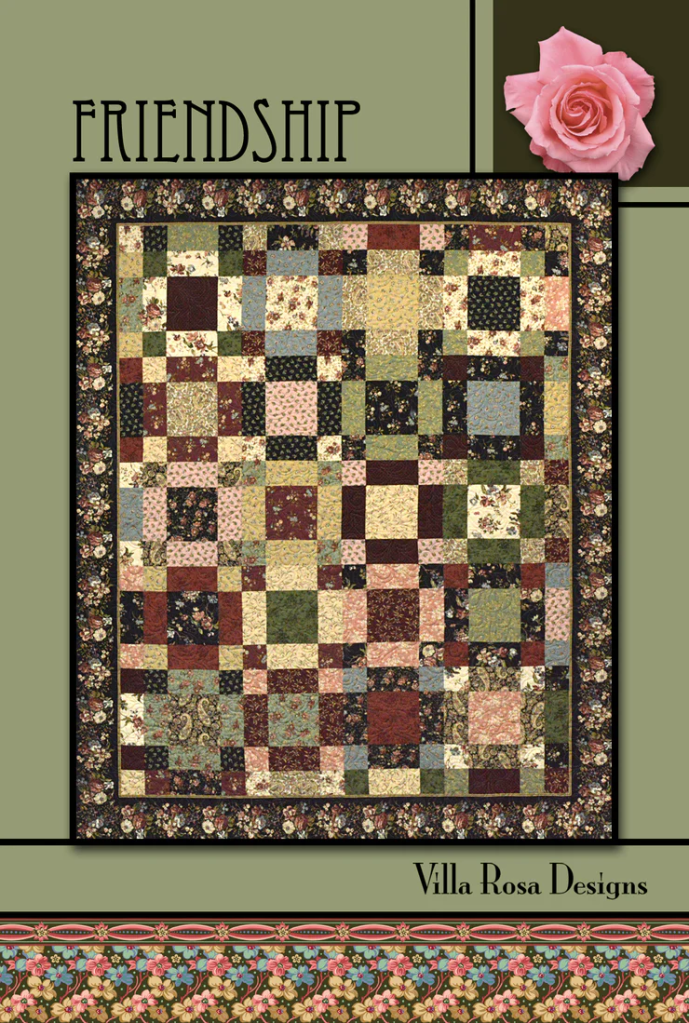
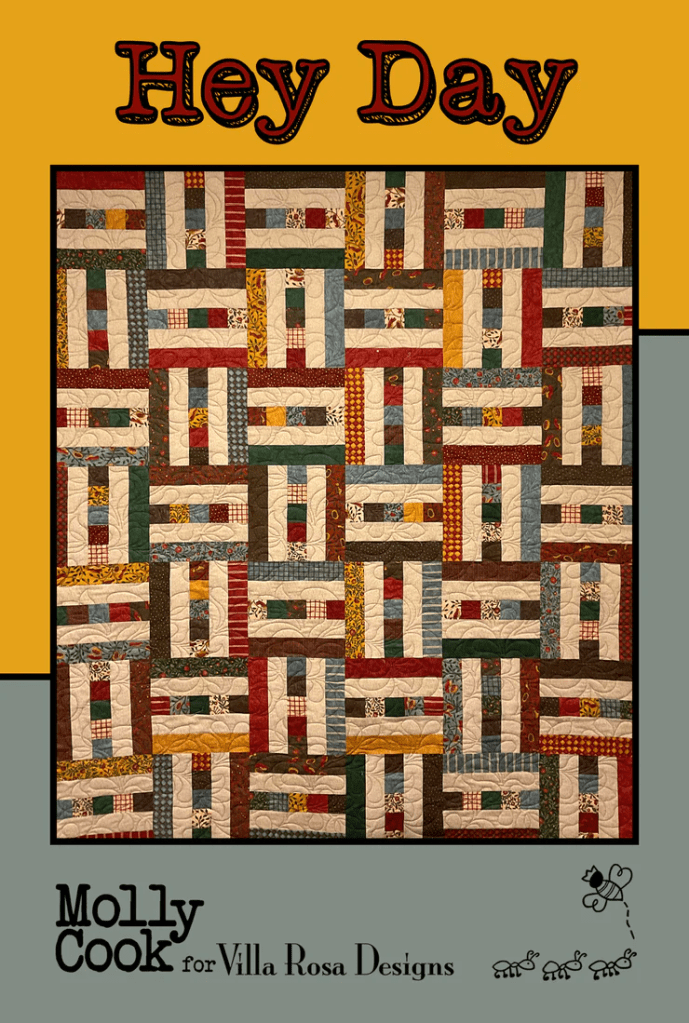
Here’s another great quilt pattern to feature your stash of large prints, finishing at 64″ x 80″. It will fit a twin bed and it goes without saying that Celebration makes a nice-sized quilt for 2.
This quilt finishes at 63″ x 81″ when you add the optional border. It will fit a twin bed and makes a nice big throw, too. Check out our blog tutorial for Daring Spirit HERE.
This quilt features your favorite collection of 10″ squares and finishes at 63″ x 79″ (hey, it’s almost 80″ long). It makes a great throw and will probably work on a twin bed, too.
This fun panel quilt finishes at 62″ x 80″. With its wide border, you have lots of room to show off your hand or machine quilting. It is big enough for a twin bed and it makes a wonderful large throw quilt for 2.
This quilt finishes at 63″ x 81″, but if you add the optional border, it will be 67″ x 85″. It will fit a twin bed as well as make a large throw quilt.
Grab your favorite 2 1/2″ strip set and whip this fun quilt up in no time! It finishes at 60″ x 80″, which will fit a twin bed and it makes a nice sized throw quilt to snuggle under together.
This quilt is just as fun as its name and measures a nice 66″ x 82″. It will fit a twin bed and also make a terrific throw for a pair of Entomologists.
Here’s another modern quilt pattern great for using your large prints. It measures 64″ x 80″, which makes it great for a twin bed or as a comfy quilt for 2 to wrap up in together.
This quilt is perfect for a collection of fun and bright prints and finishes at 65″ x 85″ with the added border. Share this one with your favorite sweetie or use it on a twin bed.
This graphic modern quilt is our largest pattern offering at 90″ x 90″. This will fit a queen bed or it makes a quilt big enough for the whole family to cuddle under.
This quilt features a unique modified 4 Patch block and measures 64″ x 88″ with the optional border. It will fit a twin bed and make a wonderful quilt for 2.
The sun is shining right now, melting the unexpected snow we got overnight, but at least it was only a couple inches and it should be gone tomorrow. Here in PA, we’ve had a relatively mild winter so far this year, but in California, where the Villa Rosa Designs quilt shop is located and where owner/Rose Queen, Pat, lives, there has been loads of snow and rain!
BRRRRRR!
The VRD shop was closed for more than a week! No electricity — no Internet! One of the shop workers couldn’t even get into her own home! It’s been that bad, really! Maybe you’ve been affected by all the bad weather out there, too.
Fabric orders are backed up, so please be patient as everything gets up and running again at the VRD shop and everyone is working as quickly as they can to get your orders put together. Thanks for your understanding.
NEW VRD March 2023 Rose Cards
On a happy note, it’s my favorite Thursday of the month — you know the one following the first Friday when the new VRD cards are released. Yay!
Drum roll, please!
Wow! Lot’s of fun, huh? You can order the set of 5 March Rose Cards HERE. (Psst — cards are not shipped from the shop in CA, so Rose Card orders are not affected by the storms on the West Coast).
And here is March’s new table runner pattern, Lucky!
I featured the Luck of the Gnomes fabric collection from Benartex, one of our newest Quilting Partners, in this runner. You can take a look at the whole collection HERE .
Check with your local shops as it should already be available.
Grab your March patterns if you don’t have them yet and get quilting — what are you waiting for???
Maybe you need some new fabric inspiration? Hmmmmm……???
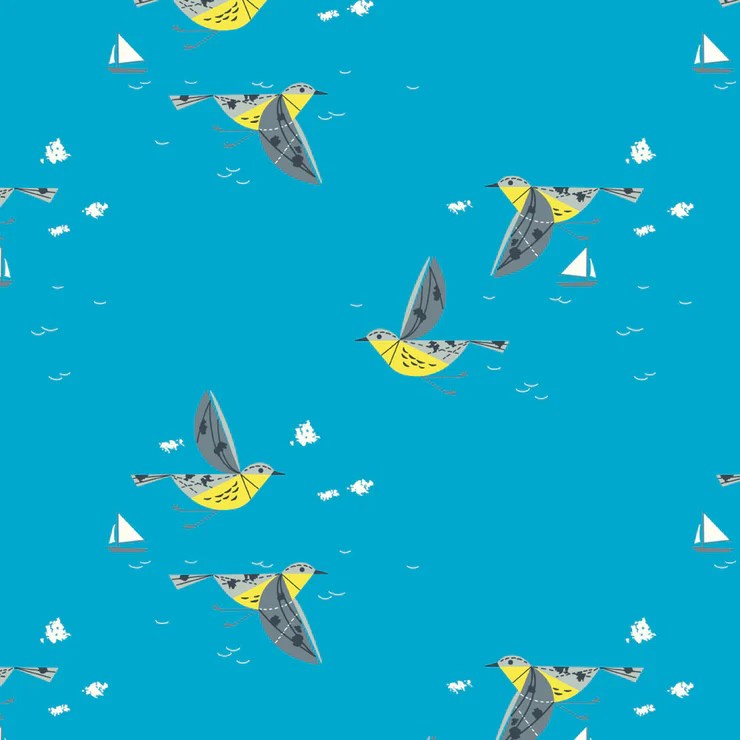
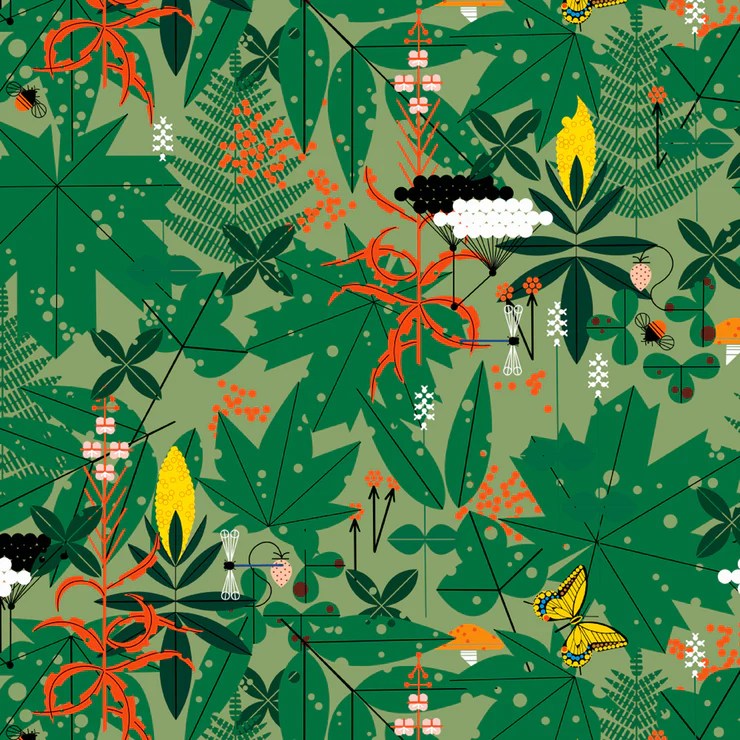
Charley Harper Fabrics
Pat mentioned to me the other day when we were discussing QuiltCon, that the Charley Harper fabrics had been received well. And I was like — what are Charley Harper fabrics??!!?? I do so dislike not knowing something so I immediately went to the shop website, www.villarosadesigns.com, to see what “Charley Harper” was. And — WOW — did I get excited by what I saw.
Here are some of my favorites:
Aren’t they wonderful? Edgy and mid century modern? Rich saturated colors? Simple yet complex at the same time???
After perusing the Charley Harper fabrics available at VRD, I just had to look up some more information. Who or what was Charley Harper?
Charley Harper was born in West Virginia where he grew up on a farm. He attended the Cincinnati Art Academy and even taught there for years. He was considered a “modernist wildlife artist” and he died in 2007.
I asked myself how I had never heard of Charley Harper. I did not take any art classes in college or grad school, but I find it sad I never stumbled upon this amazing artist.
How fortunate for us that Birch Fabrics has brought Charley Harper’s incredible artwork to the quilting community.
Don’t forget to check out the Charley Harper fabrics available at Villa Rosa Designs HERE! Stock up now on these amazingly beautiful designs because they are sure to go fast. Just sayin’…….
I don’t know about you, but a surprising number of people I know are expecting new babies in their families in the near future. It’s a bummer I don’t have anyone in my family expecting because there is nothing more wonderful than making a baby quilt for a new little bundle of joy.
This topic got me thinking about Villa Rosa Designs and our baby quilt patterns. I decided that it would be fun to share our awesome VRD Rose Card baby quilt patterns with you, just in case you have someone expecting a new little one and you need to whip up a baby quilt.
And if you don’t have any babies on the way in your family right now, it’s never a bad idea to have one or two baby quilts tucked away for the future…. Just sayin’.
I went through ALL of our VRD Rose Card patterns and found sew many patterns that would be appropriate as a baby quilt. Whoa! I found way more than I was expecting to. Be warned there A LOT of baby quilt patterns here.
By no means is this a complete list of any Rose Card patterns that would work for baby quilts, this is just a list that I pulled together based on the name of the pattern, the size, and the fabrics of the quilt on the front of the pattern.
I divided the patterns by each VRD designer in alphabetical order (thank you to all of my English teachers through the years!) and even included a link in case you are interested in adding any of the patterns to your Rose Card collection. I got your back (wink, wink…).
I hope you enjoy these wonderful baby quilt patterns — it’s a long list.
See a quilt you like but not interested in (or need to) make a baby quilt sized quilt? It’s sew simple to make the quilt larger by adding a border, another row, or more blocks. Just remember to increase the fabric requirements so you don’t run short on fabric.
Bring on the Baby Quilts!
Cook Family Designs
Corners
A fun quilt with room to add your own novelty print squares! Finishes at 39″ x 46″. You can find the pattern HERE.
Cuddly Friends
Great use of a fun panel! This sweetie finishes at 45″ x 53″ and you can buy the pattern HERE.
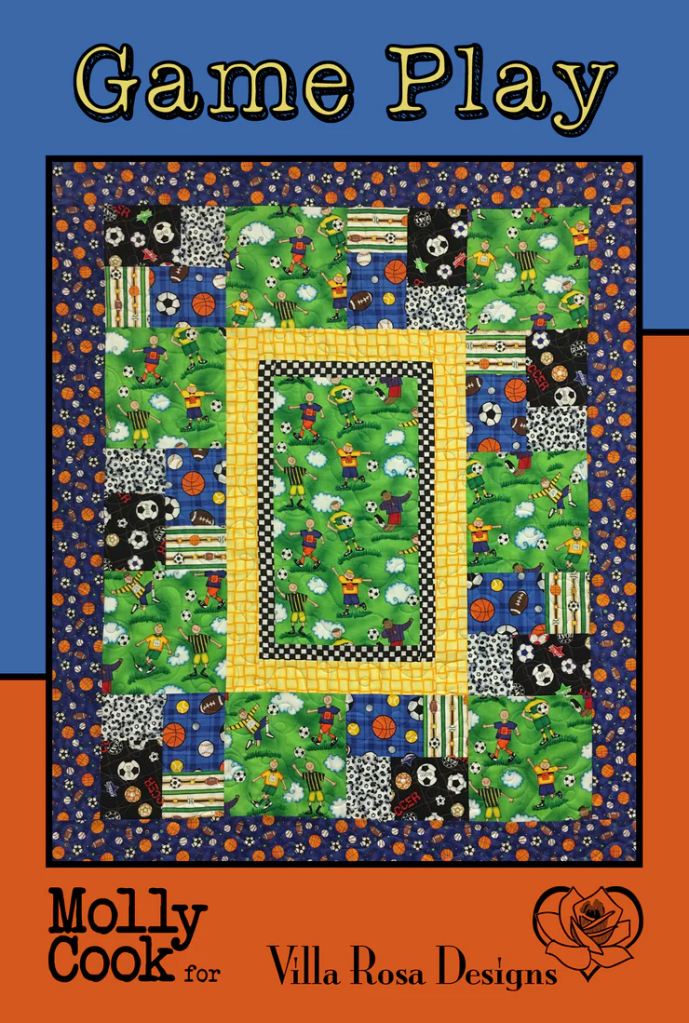
Game Play
This cutie really scores! Use a novelty collection….or not. Finishes at 38″ x 46″ and you will find the pattern HERE.
Puppy Love
Grab your fav panel and a stack of coordinating 5″ squares! This quilt goes together really fast and finishes at 45″ x 54″. Buy the pattern HERE.
Sew Cute
Big printed squares and 4 Patch blocks make this baby quilt easy peasy to put together. It finishes at 45″ x 60″. Grab the pattern HERE.
Storybook
A fun way to feature a fabric book in quilt format! This quilt finishes at 48″ x 51″ and you can find the pattern HERE.
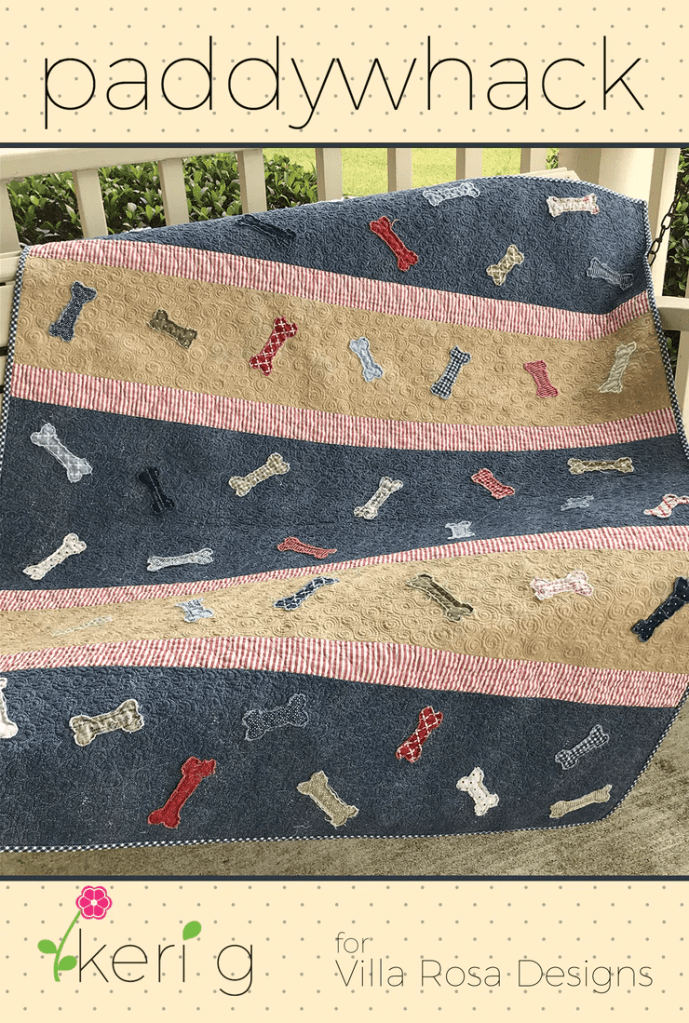
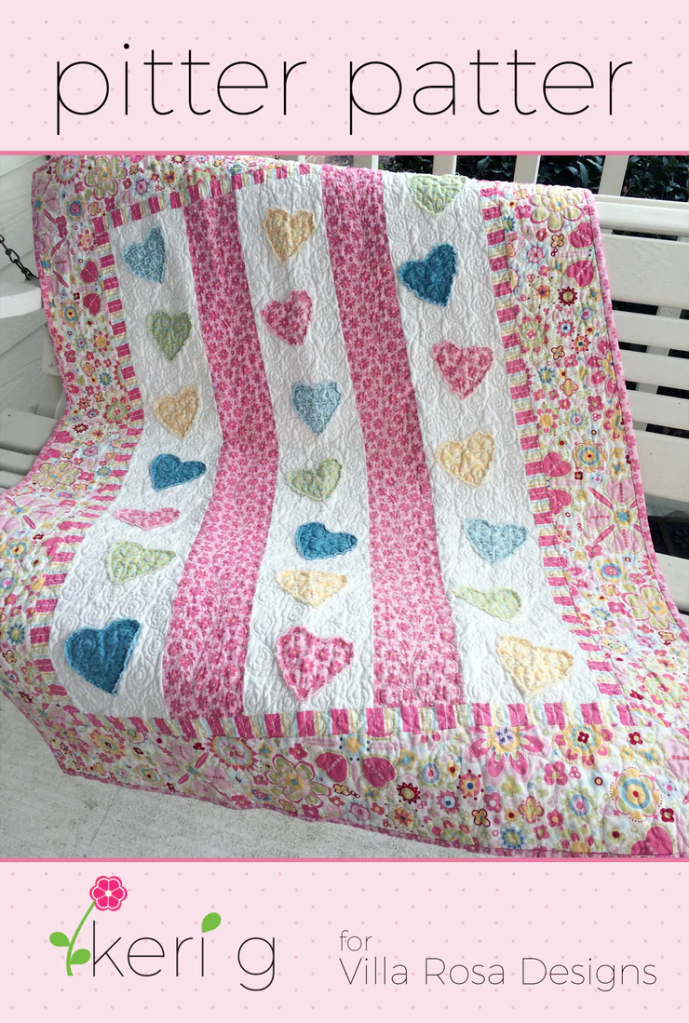
Keri G
Paddywhack
Try your hand at something new — raw edge applique! This cutie finishes at 42″ x 52″. Purchase the pattern HERE.
Pitter Patter
This little sweetie features raw edge applique hearts and finishes at 40″ x 54″. Get the pattern HERE.
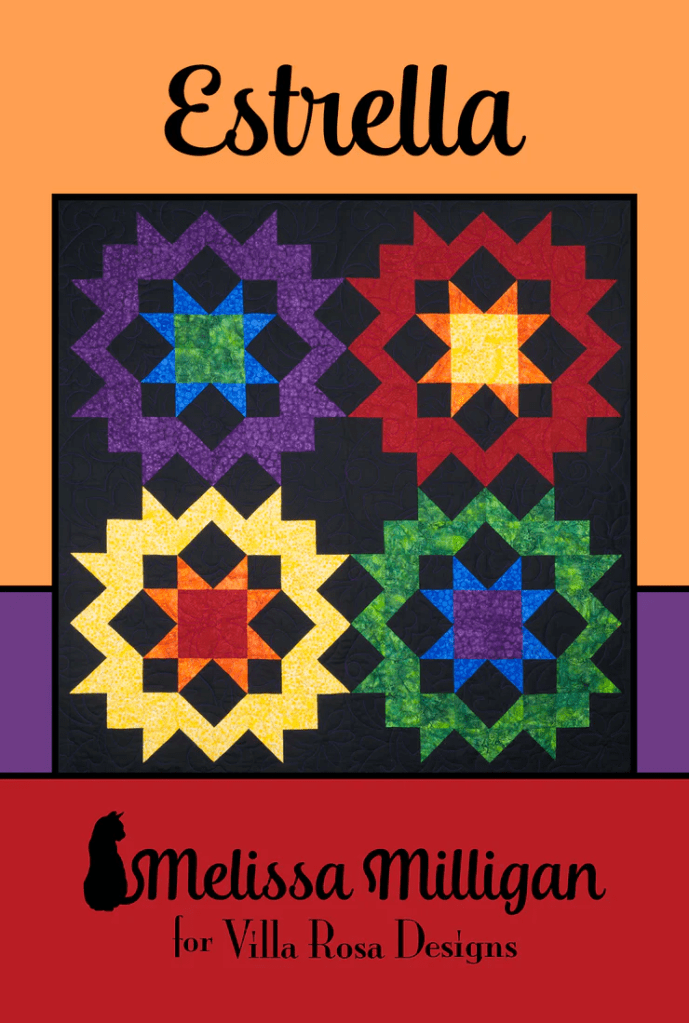
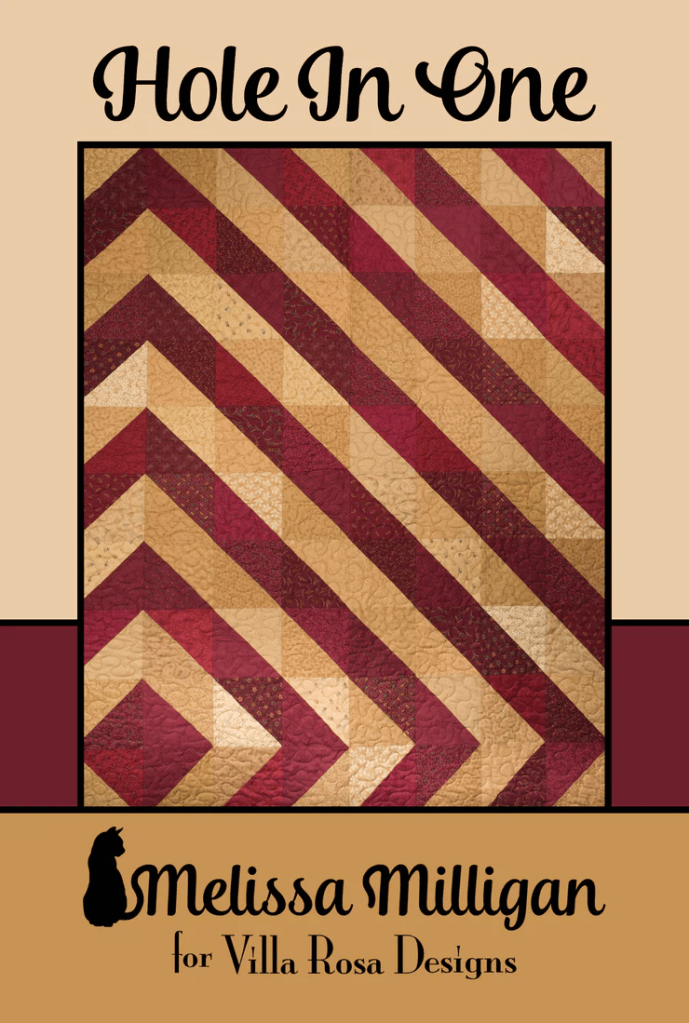
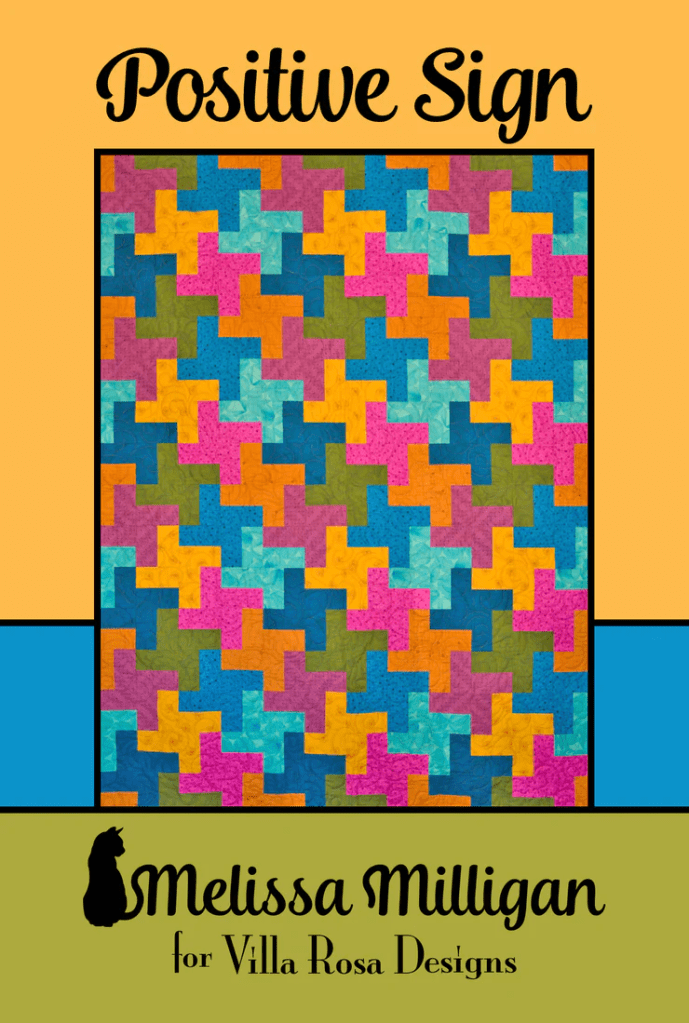
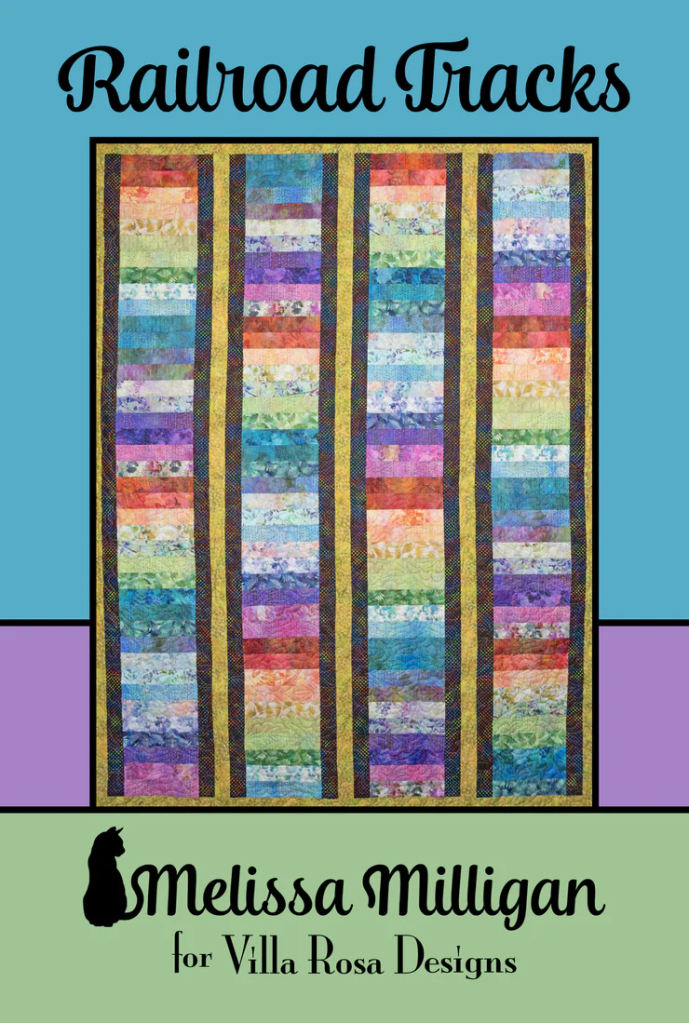
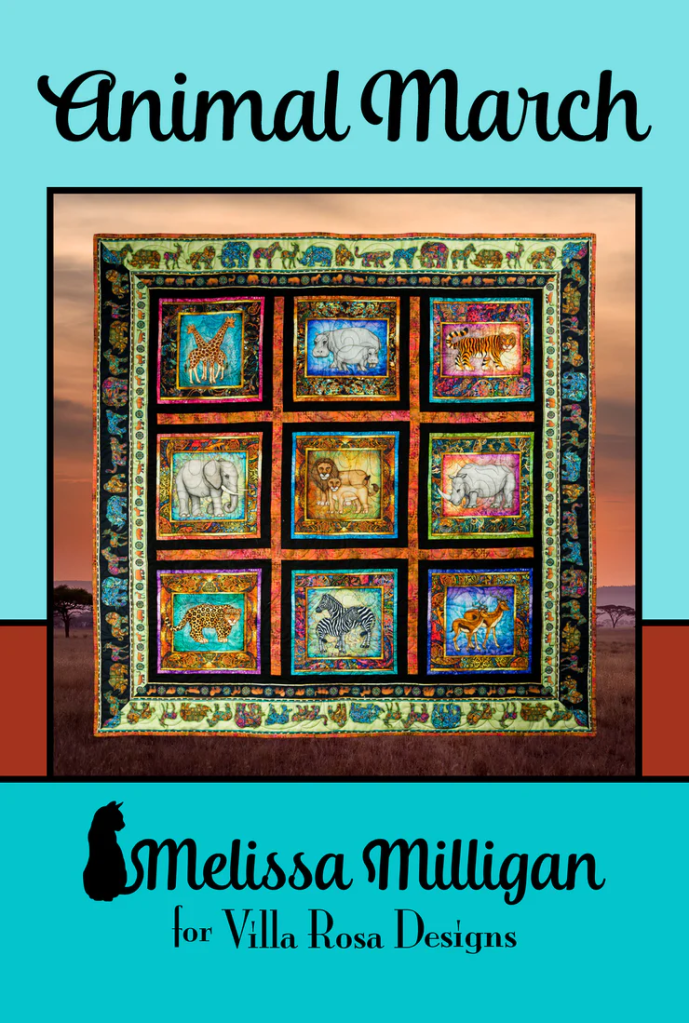
Melissa Milligan
Animal March
This nice-sized quilt uses novelty fabric or a panel with printed squares. It finishes at 51″ x 51″. Find the pattern HERE.
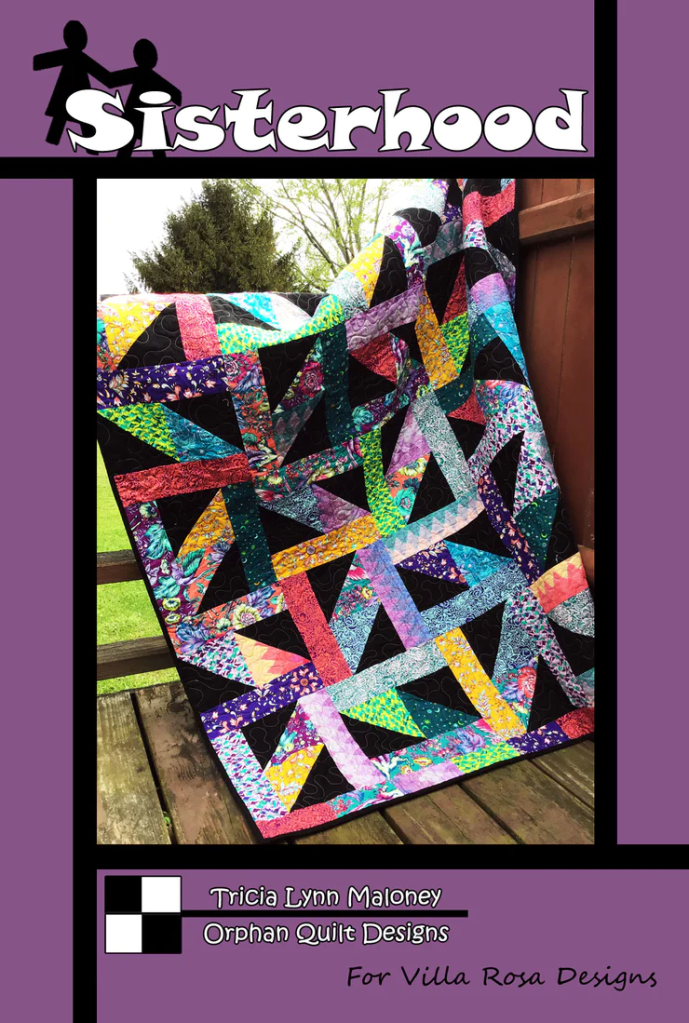
Orphan Quilts (moi)
Baby Cakes
This fun quilt uses a handful of 10″ squares along with some companion fabrics and finishes at 42″ x 53″. You can buy the pattern HERE.
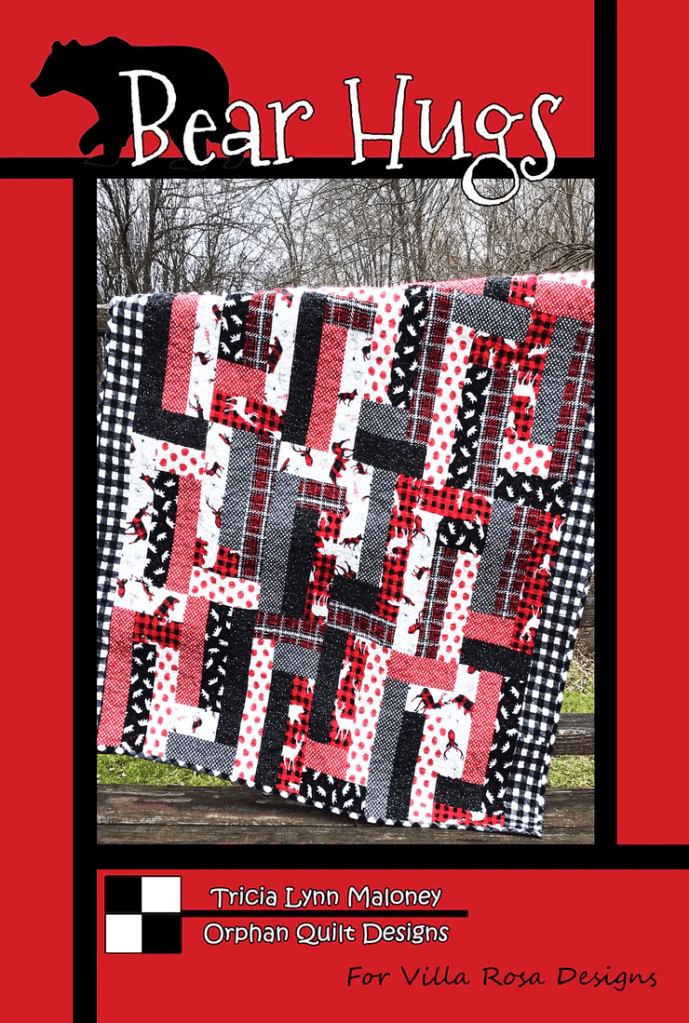
Bear Hugs
This farmhouse style baby quilt requires a bundle of fat quarters and a border and finishes at 42″ x 48″. Find the pattern HERE.
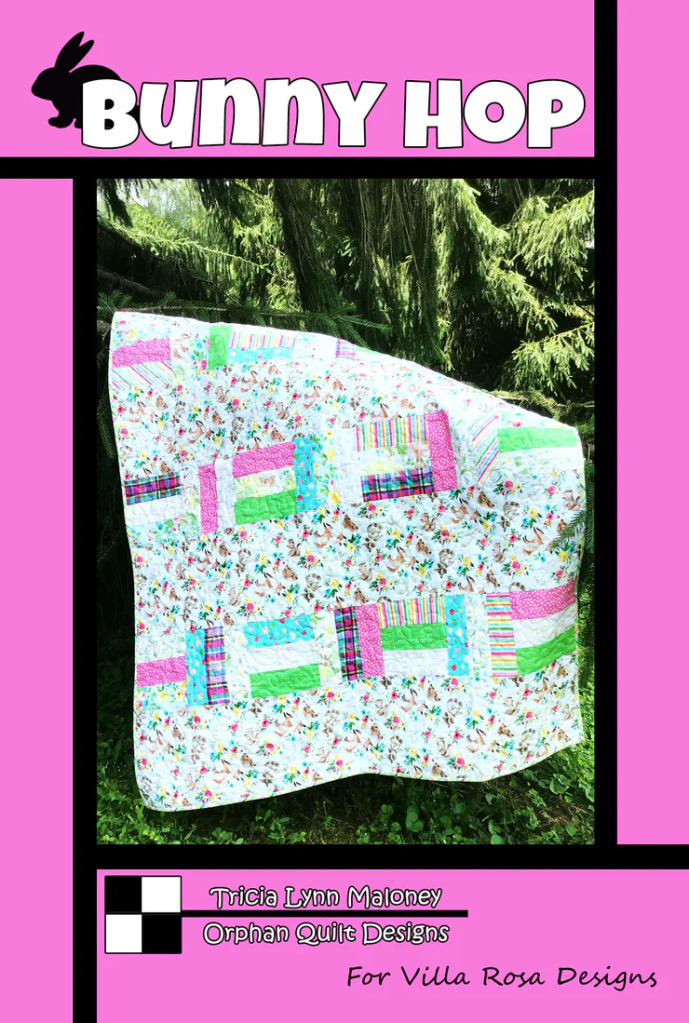
Bunny Hop
This adorable quilt is quick as a wink to make up using a novelty print and some strips. It finishes at 42″ x 50″. Get the pattern HERE.
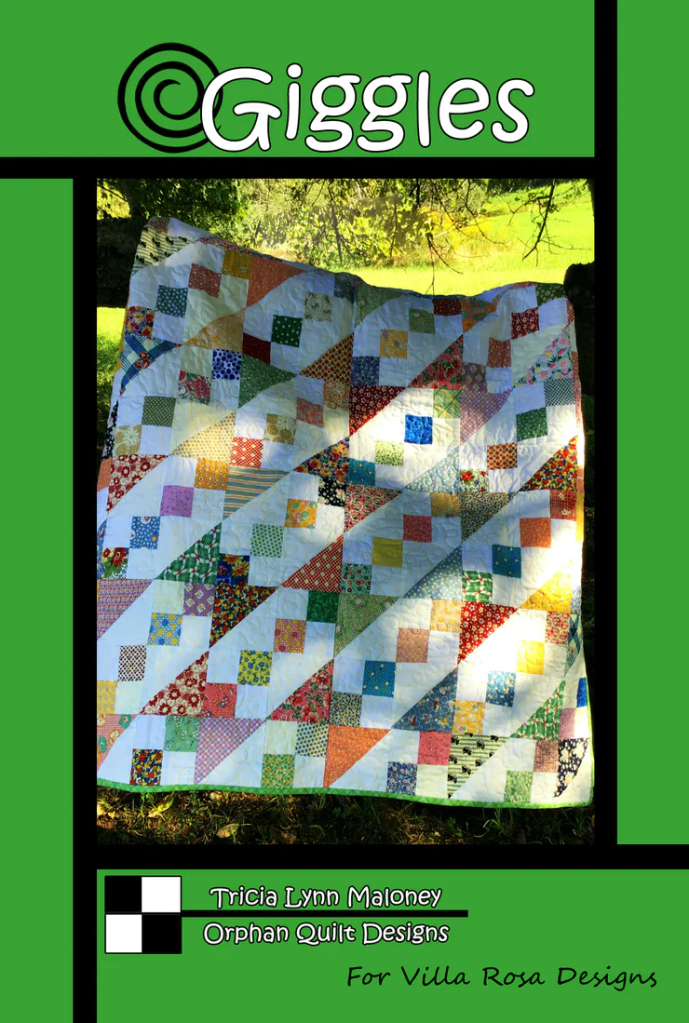
Giggles
The name of this quilt just makes me smile! It finishes at 40″ x 48″ and uses 5″ squares. You can buy the pattern HERE.
Lollipop
This quilt can be a real stash buster or you can use packs of mini charms. It finishes at 42″ x 50″. Pattern available HERE.
Nursery Rhymes
Big pieces make this quilt large print friendly and it finishes at 39″ x 52″. You can find it HERE.
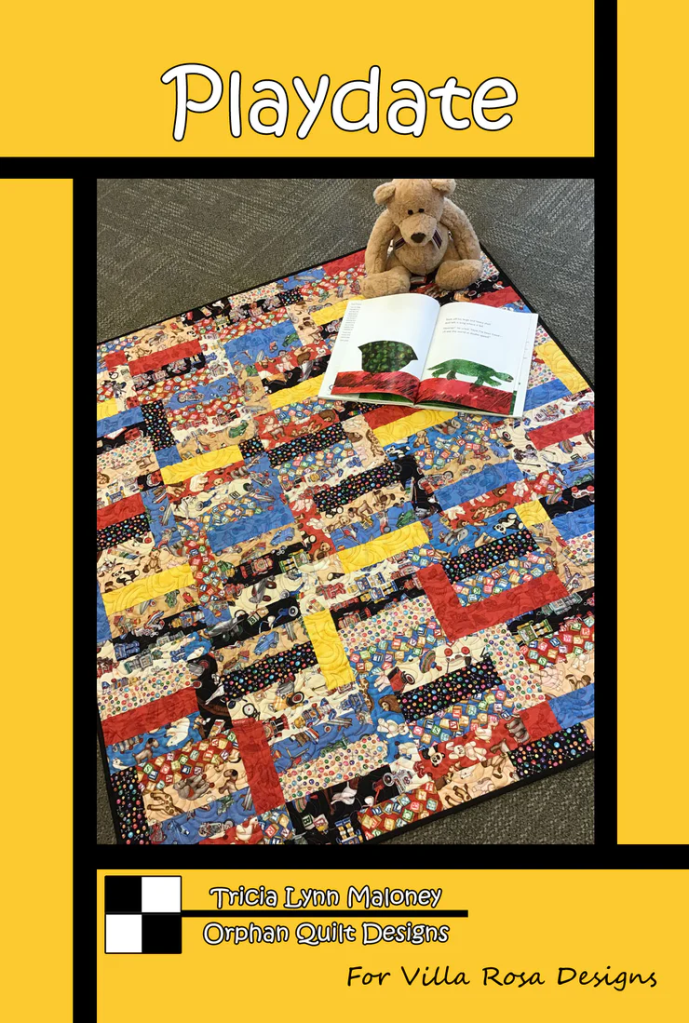
Playdate
Primary colors are always a great choice for a baby quilt! This one goes together fast, uses a collection of 2 1/2″ strips, and finishes at 40″ x 52″. Get the pattern HERE.
Simple Simon
This is probably the quickest baby quilt I’ve ever designed. Pick your novelty print, sprinkle in some coordinating strips, sew a few seams, and done! It finishes at 42″ x 48″. Grab the pattern HERE.
Tic Tac Toad
Don’t you just love the name of this quilt??? It is just as fun to make as the name and fat quarter friendly too! The quilt finishes at 48″ x 48″. You can find the pattern HERE.
Tumblebug
I chose to make this quilt with sweet pastel strips, but any style or colors will work great for this baby quilt. It finishes at 40″ x 52″. Get the pattern HERE.
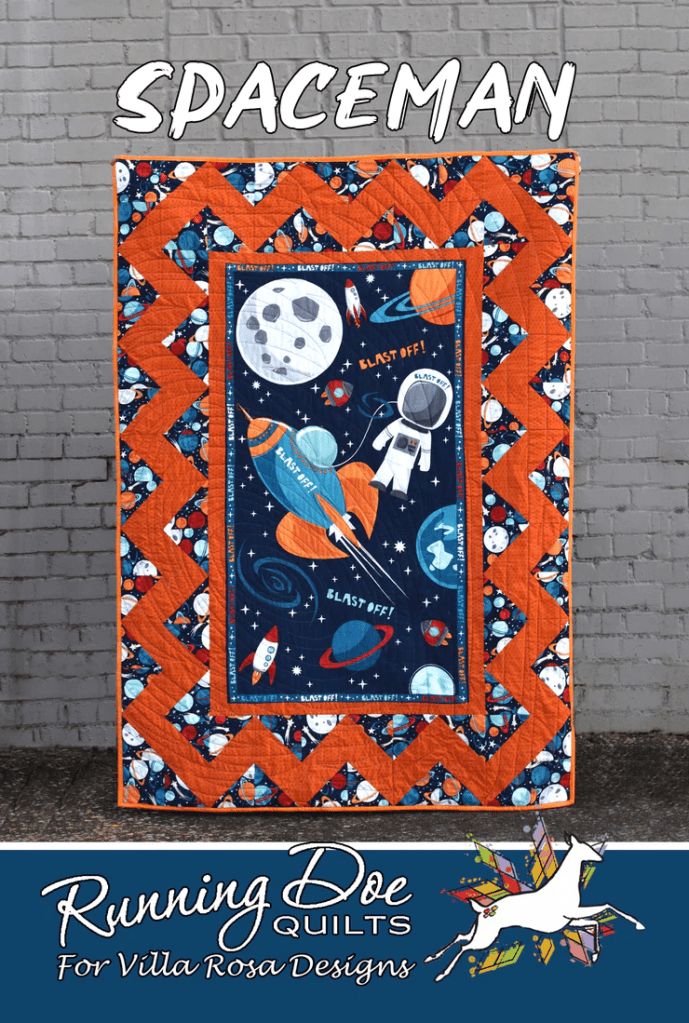
Running Doe
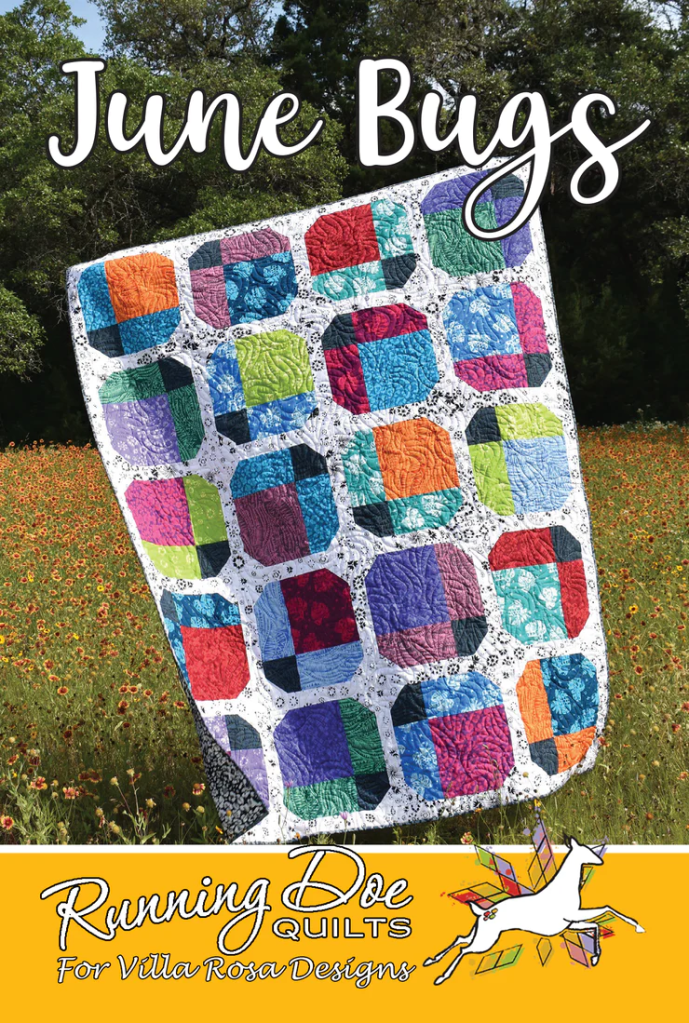
Baby Goose
This is one of my favs — a great way to use an awesome novelty or large print! It finishes at 42″ x 48″ and you can find it HERE.
Cabin Fever
Think modern farmhouse for this sweet baby quilt which finishes at 37″ x 47″. Buy the pattern HERE.
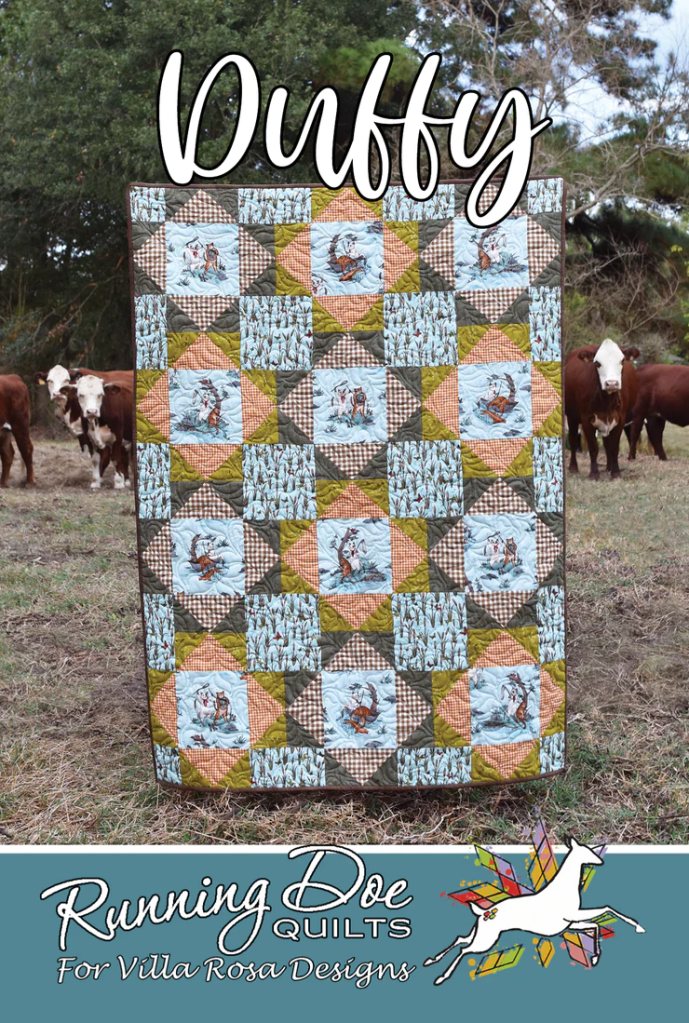
Duffy
This adorable quilt features a focal fabric and some coordinating half yards. It finishes at 36″ x 48″. Grab the pattern HERE.
Luv Ya
Hearts are so appropriate for a bold baby quilt! This one finishes at 45″ x 63″ and you can find the pattern HERE.
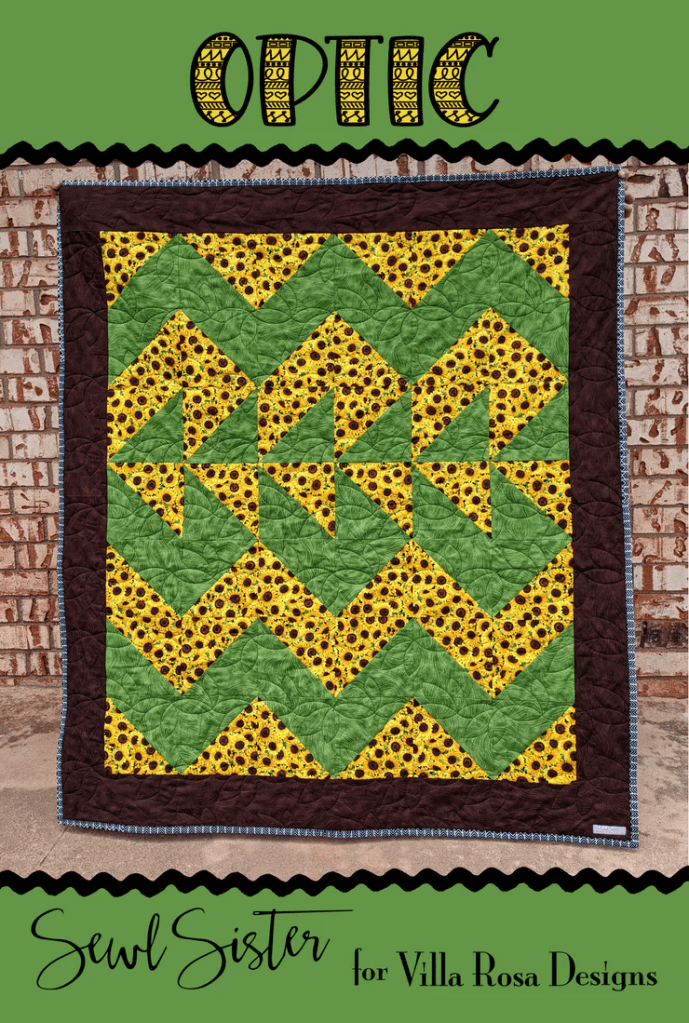
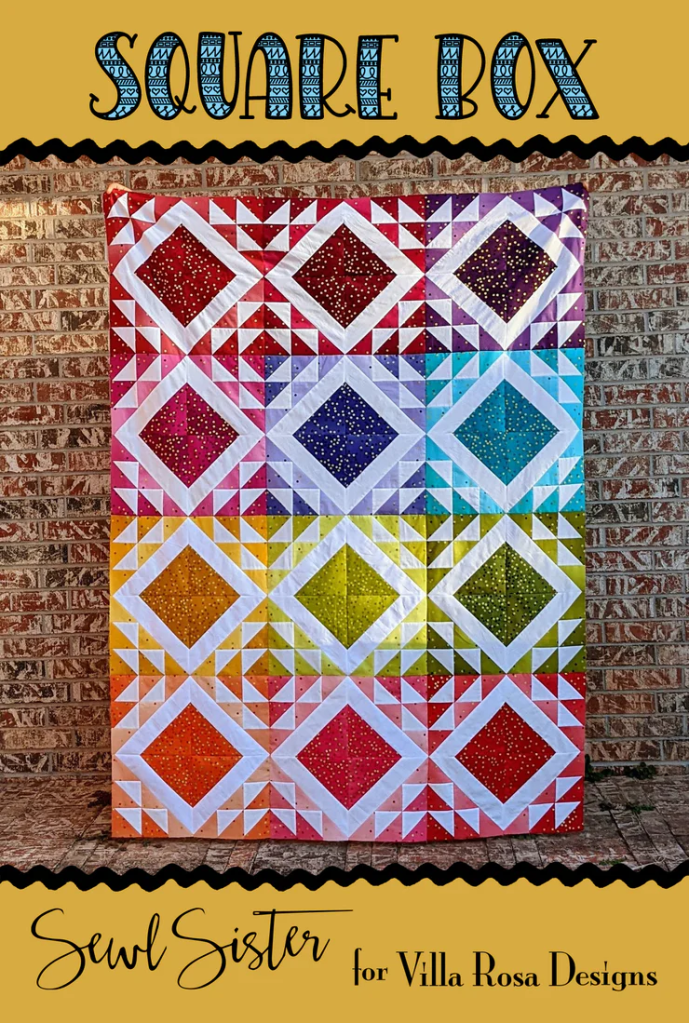
Sewl Sister
Color Cat
A fun little quilt for a baby with a furry sibling or two…. It finishes at 32″ x 48″. You could make the quilt a bit larger by adding another row of cats or even a larger border, just remember to buy additional fabric. Find the pattern HERE.
Villa Rosa Designs
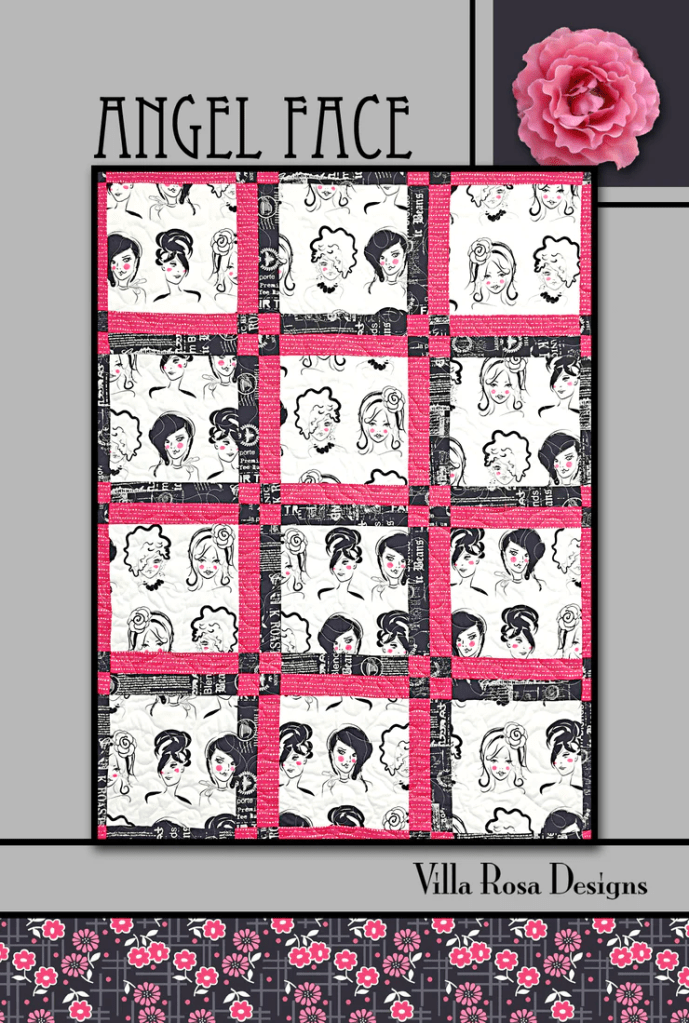
Angel Face
Babies are truly a gift from Heaven! This fast-to-make quilt frames big blocks made with your favorite novelty fabric. It finishes at 38″ x 50″ and you can get the pattern HERE.
Be My Baby
Fat quarter friendly and quick to make, this quilt finishes at 43″ x 44″. You can buy the pattern HERE.
Busy Bee
Use that fat quarter bundle we all know you’ve been hoarding to sew up this fun quilt that finishes at 45″ x 54″. Get the pattern HERE.
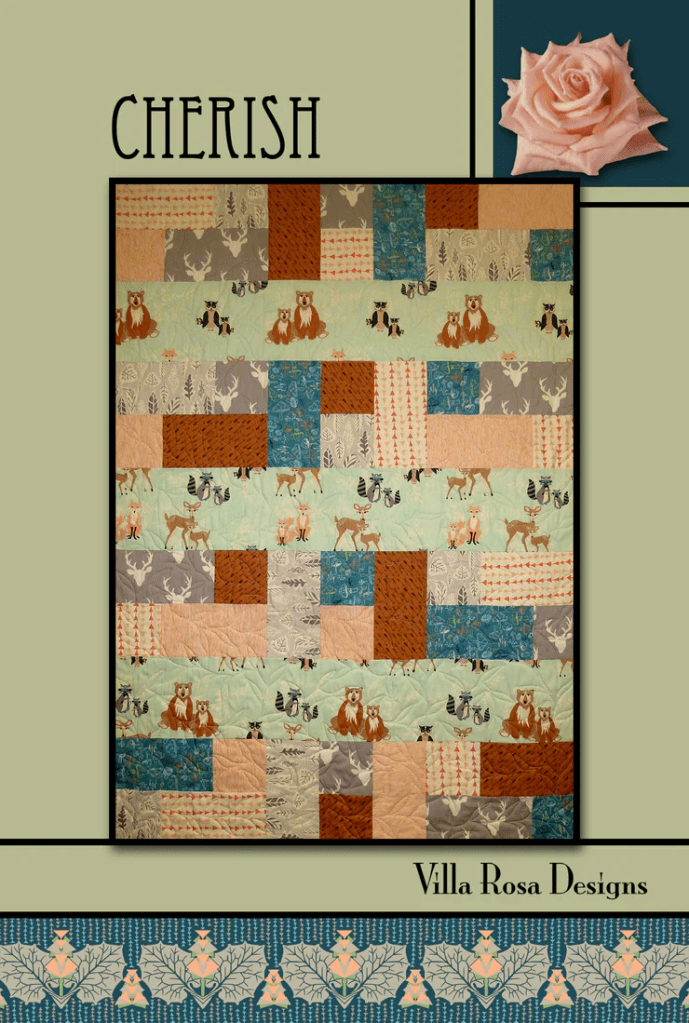
Cherish
Here’s another sweet baby quilt featuring a theme fabric and a handful of fat quarters. It finishes at 41″ x 57″. Purchase the pattern HERE.
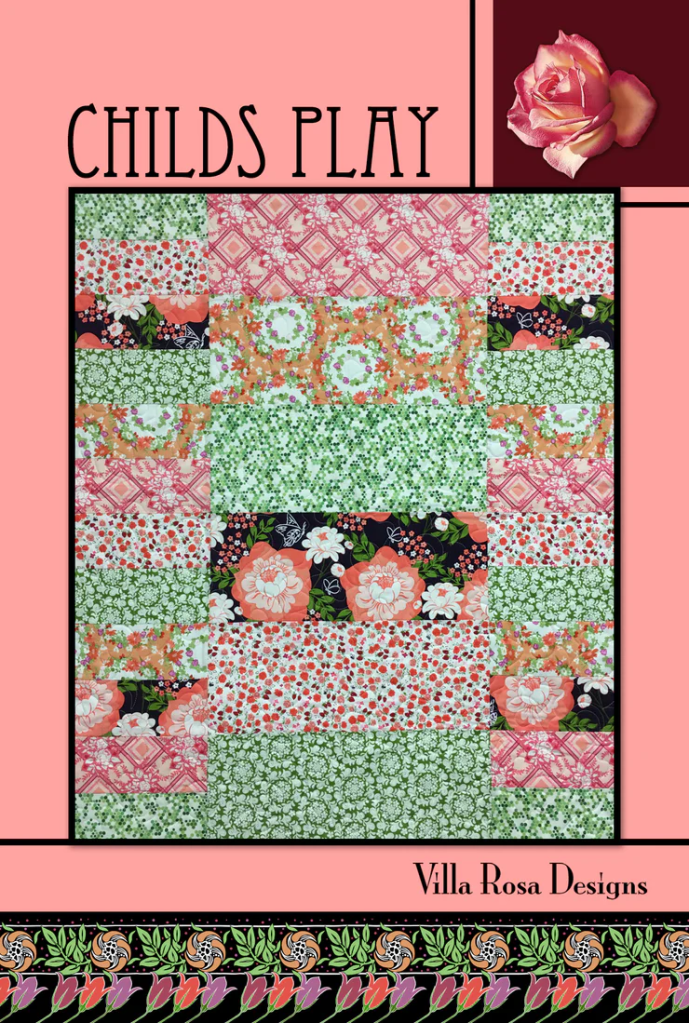
Child’s Play
Large pieces and fat quarters make this pattern a keeper! This quilt finishes at 39″ x 45″. Find it HERE.
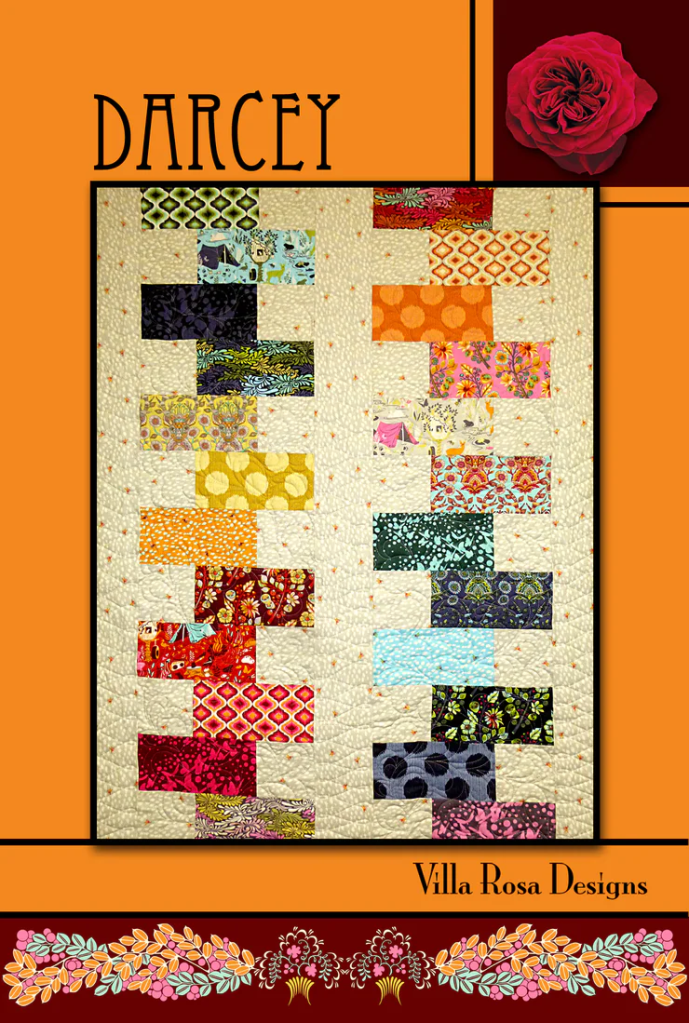
Darcey
A fun little quilt using 10″ squares. It finishes at 42″ x 54″ and you can buy the pattern HERE.
Emma Grace
Another cutie! This quilt uses 5″ squares and finishes at 40″ x 45″. Get the pattern HERE.
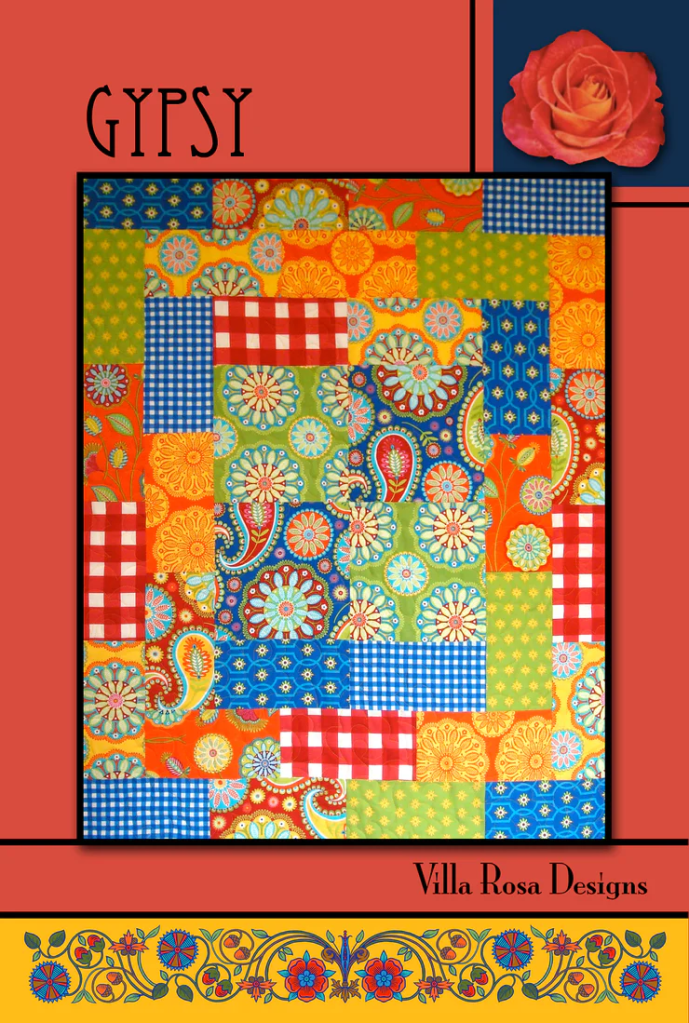
Gypsy
A pack of 10″ squares will make 2 of these baby quilts — fraternal twins! The quilt finishes at 47″ x 56″ with the optional border. Get the pattern HERE.
Happy Child
Some fat quarters and a few coordinates are all you need to put this fun quilt together! It finishes at 43″ x 56″ and you can buy the pattern HERE.
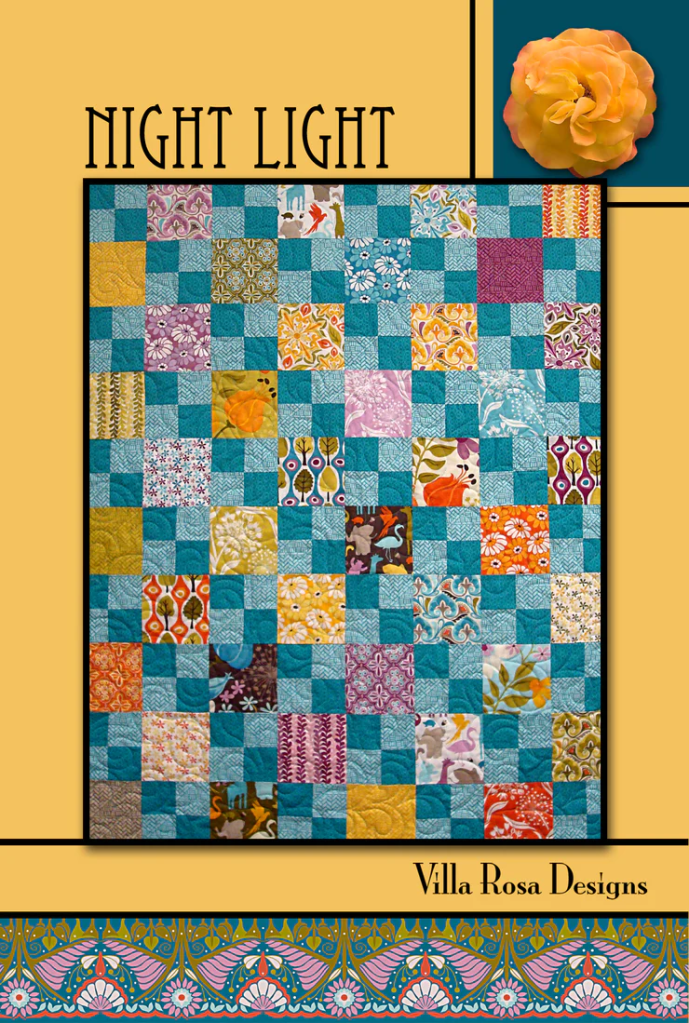
Night Light
Four Patch blocks and 5″ squares make this quilt not only fun but fast. It finishes at 36″ x 45″. Grab this cutie HERE.
What a great collection of quilts!
Any one of them would make a sweet baby quilt for a special little one either now or down the road. Hopefully, you’ve got some great ideas for whipping up a few baby quilts for gifting now or stashing away for the future.
Another week has zoomed by and I am not getting anything accomplished! Or at least it feels that way. We’ve had some lovely February weather here in northwest Pennsylvania and I’m getting those “Spring into Spring” feelings when I want to clean, sort, and organize everything! Hah! I wish I could find an extra 2 hours in every day to get started on that ginormous undertaking, but I do need to sleep at least a few hours every night. You would think working from home, I’d have so much extra time to work on stuff, but sadly that is not the case for me. ARGH!
I want to start with my studio because it kind of looks like a fabric store/flea market threw up. I totally serious here. One of my local quilt shops hosts a “fabric yard sale” every year and I think it’s time to get signed up for it! I wasn’t planning on it this year because of a few time conflicts, but now those conflicts have been postponed, so I am calling today to get my space reserved. Even with less time than usual to prepare, this will inspire me to do some purging in my fabrics and such.
What do you do when your studio gets taken over by fabric, notions, patterns, books, rulers, scraps, and everything else?
VRD Blog Hop Grand Prize Winners
Okay, you’ve all been waiting to hear who won the 2 Grand Prize boxes from the Blog Hop.
Drum roll please………….
Congratulations to:
Joy from Oregon
and
Charlene from Georgia
Here’s a photo from the blog hop showing some of the fun quilting goodies in the boxes:
As for the rest of the prizes, they are being shipping out this week, so if you are a winner and you haven’t received your prize yet, you should have it shortly.
Wow! I think I’ve gone through 3 rolls of tape preparing all the packages! But you know what? I smile while I put on the labels because I know how much each winner is going to enjoy their prize from the Blog Hop.
VRD Bella Vista Panel Quilt Tutorial
Recently, I decided to make a special quilt for a cousin of mine who is having some rough times. I knew I wanted to use a panel because panel quilts go together so quickly, so I thought I’d give our new Bella Vista pattern a go.
This is a fabulous pattern for those horizontal panels. Sometimes it can be hard to find a pattern that uses this type of panel, so Bella Vista is a great pattern to have up your sleeve. It also works with ANY style of horizontal panel and can work with different sizes, too, as long as you measure as you go instead of cutting everything out first.
Don’t want to use a panel? You could replace that section of the quilt with blocks, appplique, or even a novelty fabric. Just keep in mind, you might have to do a little math. Yay math! Love math!
Looking for a panel to jump-start a new project? You can go HERE and check out Villa Rosa’s large selection of panels.
Let’s get started on our quilt project!
So, the first thing I did was gather up my fabrics. My cousin loves eagles so I chose this flying eagle panel and a coordinating eagle print along with a light grey (I decided not to use the medium grey you see in the photo) texture, red tonal, and a blue tonal for the binding. My plan will be to back this quilt with fleece to make a cozy quilt for my cuz, so it will be like wrapping him up in a warm hug when he needs one.
Quilts are one of the BEST forms of therapy for folks going through tough times in their lives, wouldn’t you agree?
You all know how much I love The Quilts of Valor Foundation and the impact they are making one quilt at a time. To learn more about the Quilts of Valor Foundation, go HERE.
My cousin does not have a military background, but he loves red, white, and blue and is very patriotic, so an eagle quilt will be a good fit for him.
Now I have all the fabrics ready, it’s time to get going on this quilt project. The first thing I’m going to do is trim off the selvedges on the panel. This panel is bigger than the dimensions of the panel in the pattern, but I don’t really need to cut it down. Instead, I will measure as I go before I cut my fabrics.
Here I am cutting the red strips for the first border.
Next I measured the panel through the center horizontally. Those who know me won’t be surprised when I share this little Lazy Quilter hint about measuring. Tehehe……
I don’t use a ruler or a measuring tape. Nope, not at all to measure when I’m putting a quilt together. Instead I use my fabric or border strip or whatever I’m sewing together in order to get the right measurement. I’m a pretty consistent quilter, so this works well for me. I will say that this technique may not work for everyone, so use it at your own risk. LOL!
I folded my panel in half horizontally and laid it on my flat surface. I smoothed it all out nice and flat with the edges even. Then I gathered up my border strips which were already sewn end to end to make longer strips. These will be sewn to the top and bottom as per the directions.
I carefully laid the border strips out along the folded center. Then I smoothed the strips and lined up the edge of the strip to the edge of the panel. I usually put a pin at the edge to keep things from sliding around. Finally, I took a deep breath and cut the border strips to the width of the panel. I repeat this process all over again for the side borders, too, except that I use the vertical center to measure with, instead of the horizontal. I hope this makes sense…….
Now let’s sew the border strips onto the top and bottom of the panel.
Let me tell you how I do that, too, because I have another little trick up my sleeve.
First, I find the middle of the panel and the middle of the strip, match them up, and put a pin in the centers. Next I smooth the border strip along the edge of the panel and pin the outside, matching up the edges of the strip to the panel edges. I also put a pin at the bottom outside edge of the strip in a horizontal fashion (see this trick in the photo below on the left side). This helps to keep the strip square to the panel. Such a simple little thing can really make a difference. I learned this tip from an experienced quilter when I a beginner.
Then I add some more pins between the center and the ends before I head to the sewing machine.
Here is the panel with the first red border sewn onto all four sides. Don’t you just love the cool framed and matted effect of the printed borders in brown and navy around the edge of the panel.
So far, so good. Let’s keep moving.
I cut my second border strips using the light grey fabric. Next, I sewed 2 strips together to make a longer border strip. I decided to sew my border strips together with a straight seam instead of doing a diagonal seam for this project. It’s quicker and has less fabric waste, but mainly the tonals will hide the straight seam. I like to press my seam open to reduce the bulk. (I did the same with the first red border, but didn’t do a photo of it.) Take a look at the last photo in this group and you can hardly see on the front side of the border strip where I sewed the seam.
Now to measure the grey border strips against the panel just like I did above with the first red border. Time to pin, pin, pin. Then sew, sew, sew. Oops, sewing over my pins………
Here’s the quilt so far with the first red border and the second grey border on all four sides. Looking good!
Now I’m going to add the third border, which only goes on the top and bottom of the quilt.
You know, if you wanted to, you could sew the next borders together before sewing the border strip sets to the top and bottom of the quilt center. Just sayin’…….
Anyway, let’s add the top and bottom red borders.
I can’t believe how big this quilt is getting to be! It will be a really nice size when it’s finished.
I think for the eagle print border strip and the last red border, I am going to sew the strips together and then sew the border strip sets to the top and bottom of the quilt center. I wish I would have done this when I sewed the previous red border to the top and bottom (as I hinted to all of you, above, which was really after the fact). I think it would have been a bit easier. Did I mention this quilt is getting big? LOL.
I had to be careful when I was sewing the eagle print strips together into a longer border strip because it is directional and I didn’t want my eagles flying in different directions. There’s just something wrong with eagles flying backwards……
Then I had to watch when I was sewing the outer red border strips to the eagle print border strips because of the eagle print’s directionality — I really didn’t want my eagles flying upside down when I sewed them to the quilt center.
So if you are working with a directional fabric, take your time and double check placement before you sew, that way you don’t have to rip out your stitches.
Okay, the border strips are sewn together and now I need to sew them to the panel quilt. Again, I have to make sure I’m sewing the right border strip set to the right part of the quilt, or my eagles will be belly up. Deep breath….here goes!
YAY! All the eagles are flying straight and true! I am so relieved about that.
(Psst. In the bottom right corner of the above photo, you can see prizes in priority mailers getting ready to be mailed — they took over my comfy chair in my studio!)
Here’s a couple more photos of the finished Bella Vista top. I headed outside for these photos, even though it was a bit breezy. I just love to see quilts swaying in the breeze on a clothesline on a nice day, don’t you? Right now I can close my eyes and smell the clean fresh outside smell of quilts (and laundry) hung outside to dry on a breezy spring or summer day. Ahhhhhhh.
I mentioned above that my plan was to back this quilt with cozy fleece. When I put fleece on the back of a quilt, I do not use batting because it makes the quilt too heavy and too thick. I will most likely machine quilt it simply, probably with a large meander. I have learned over the years, that when quilting fleece, it’s not a good idea to cross over lines when you are machine quilting because fleece stretches and the cotton fabric on the front of the quilt doesn’t stretch like that. I definitely don’t want bunchy areas and pleats on the back of my quilt.
I’ll have to head over to one of my local quilt shops so I can use the tables in the classroom to layer and pin this quilt. Of course, I’ll probably do a spot of shopping while I’m there…………. Sorry, not sorry.
I hope you all had a special Valentine’s Day this week. Flowers……candy…..dinner out……chocolate…….and maybe fabric………you deserve the best!
When I was thinking about some possible blog topics the other day, the idea popped into my head that you might be interested in reading about how I organized the Blog Hop. Maybe you’re a blogger and you’re thinking about setting up a Hop or maybe you’re just curious. So I thought, why not tell you how the Blog Hop developed.
I also wanted to take a moment to let everyone know that prizes are being shipped out as I write this, so if you were a Hop winner, you should be receiving your prize soon. I thank you for your patience, the logistics of shipping out so many prizes has been kind of overwhelming. The biggest issue, has been figuring out how to do the shipping as I am located in Pennsylvania (I have the Sponsor Prizes) and Villa Rosa Designs is located in California (they have the quilts and the Rose Card Sets). I just wanted to point out that depending on which prize you won, the return address on your package may not be from Villa Rosa Designs in California. Crazy, crazy, crazy…….
Grand Prize Winners
I know you’ve all been waiting for the Grand Prize Winners but only 1 winner has responded to the email I sent, so sadly we will have to wait until next week to announce the 2 Grand Prize winners.
Getting Started
I got the idea to have a VRD Blog Hop last year when I was brainstorming new ideas for Villa Rosa. I talked to Pat, our Rose Queen, and she thought the idea sounded interesting and gave me the green light to go ahead with the project.
The first thing I did was look at the calendar. I chose 2 possible weeks — one in November 2022 and the other in January 2023. I really considered the November dates, but was afraid there wouldn’t be enough time to get everything done so I finally decided to go with the January dates as it gave me more time to put things together and it would be something quilters could look forward too as January can be a month when we’re stuck inside with the winter blahs.
Before I’d totally decided on January 2023 for the Blog Hop, I started contacting some bloggers who had participated in a Blog Hop I did on my personal blog, Quilt With A View, when my I Love Precut Quilts book launched in 2016.
I knew I also wanted to invite some quilting companies to join our Hop because we ( VRD) partner with a lot of different companies, but I was disappointed that there weren’t as many companies out there with active blogs as I had thought would be. But, that was okay, I did reach out to some of my contacts and found some willing companies to join the Hop.
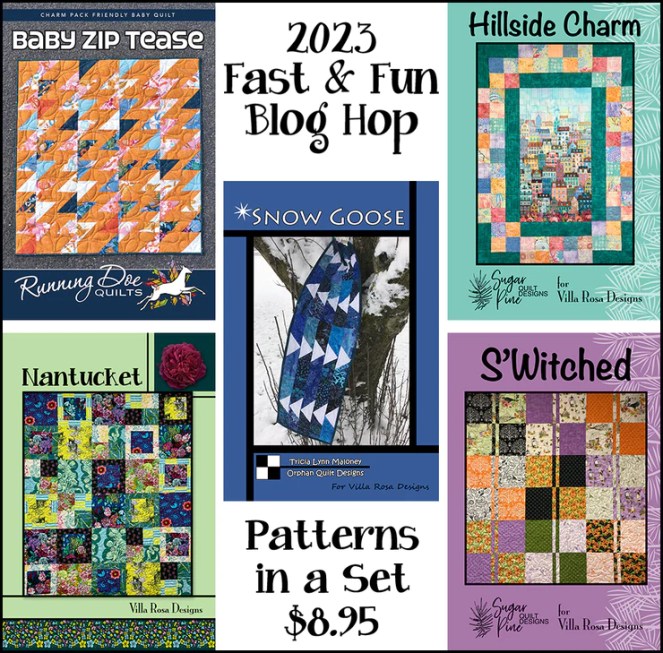
At Quilt Market in October 2022, we took a little time to select 5 Rose Card patterns to feature for the Hop. There were 3 of us and it really didn’t take too long. I had already decided I wanted to use patterns that used different precuts and were of different sizes, too, because it was my intention that the participating bloggers would select one of the 5 patterns, make at least the quilt top, and share it on their post for the Hop.
So, we selected a table runner which used 2 1/2″ strips, a small quilt using 5″ Charm squares, a throw quilt that used 10″ squares, a fat quarter quilt, and a panel quilt. I also wanted to make sure that at least one of the projects would be big enough to meet the minimum size requirements for a Quilts of Valor Quilt. QOV quilts can be a minimum of 55″ x 65″ up to a maximum of 72″ x 90″ with an average size of 60″ x 80″. (For more information about the Quilts of Valor Foundation, go HERE.) You might wonder why this was so important to me — I had a couple of reasons, actually:
The Quilts of Valor Foundation was participating in the Blog Hop
QOV is an organization that is close to my heart.
Here are the patterns we chose for the Blog Hop Collection, you can go HERE if you haven’t ordered your set yet.
Meanwhile, Bernie of Needle and Foot, who was one of my original bloggers from my 2016 Book Launch Hop, helped me connect to more blogger friends of hers. So did my friend, Joy of Am I Shouting Yet?. And as more bloggers jumped into the Hop, they in turn suggested even more bloggers who might be interested in joining in the fun. Yay!
I had decided already that I wanted the Blog Hop to last for 7 days, so I knew I was going to need a lot of bloggers to participate. I planned that the VRD blog, Villa Rosa Quilts, would start the Hop on a Thursday and would close the Hop a week later on a Thursday. So that really only gave me 5 days to fill, but I wasn’t sure if anyone would want to blog on a Sunday…….
After years of inactivity, I decided last year to get my person blog, Quilt With a View, up and running again because I really wanted to participate as an individual blogger in the Hop, too. So I decided that I would post on Sunday. I asked the bloggers if anyone wanted a specific day of the week, and I worked hard to create a Blog Hop schedule to accommodate my participating bloggers. Bloggers who didn’t have any preference were placed around those who wanted specific days.
Somehow, it all seemed to come together and suddenly I had a tentative Blog Hop schedule. By this time, I had chosen January19-26 for the Hop because this gave the bloggers enough time to make their projects.
Sponsors
Now that the Hop was shaping up, it was time for me to reach deep into my pocket and pull out my quilt industry contacts so that I could ask for sponsors and prizes. I even talked to some folks at Quilt Market and later reconnected with them about the Hop.
At first, asking for Sponsors and prizes was difficult for me because it didn’t come naturally, but I think it got a little easier by the end. Some of the companies I contacted never even responded to my request That was okay, really, because the awesome companies who did respond made our Blog Hop something amazing!
I know all of you really enjoyed the amount of prizes for the Blog Hop and I was really excited that I was able to gather them all up from our generous sponsors for you! But I think I overdid it a little bit. My studio has been overflowing with piles of prizes for weeks now, although the piles are finally dwindling as I am getting the shipping figured out and packages in the mail. As I mentioned above, there have been some logistical issues for shipping that I hadn’t counted on and we’ve had to get a little creative in our shipping solutions.
Going forward, if we do another Blog Hop, I would like to connect with some International quilting company sponsors who might be willing to ship those prizes internationally. This was suggested by one of our Blog Hop participants and after I thought about it, I can see how this would make the Blog Hop even more fun for everyone.
My Takeaway on the Blog Hop
I personally learned A LOT during this Blog Hop. And I’m not just talking about figuring out shipping and such.
I learned a lot about the kindness and generosity of the international quilting community. And yes, it is a community. The comments were kind. The stories made me smile and even laugh. Folks weren’t just trying to win prizes — they genuinely took the time to read the blog posts and to interact not just with the bloggers but with each other.
Quilters really are the most amazing people!
It is my opinion that if the world was run by quilters, the world would be a happier and more colorful place!
Thank you for being part of our very first Villa Rosa Designs Fast & Fun Blog Hop.
Will we do it again?
Probably, but you’ll have to stay tuned down the road to find out when.
Right now, I just need to reclaim my favorite comfy chair in my studio which is still stacked with packages waiting to be shipped.