
Hello Quilty Friends!
Happy Thursday to you!
Whew! We had some crazy weather here in NW PA over the last week end. Hail, heavy rain, wild wind gusting into the 60s [MPH]…..trees down all over the place in my area, but luckily no serious injuries. Our electricity was out for over 24 hours, a friend of mine just got her electricity back on on Wednesday — it went off on Saturday!
I personally found the lack of electricity, no running water, and zero Internet very difficult — I hadn’t realized how much I took those things for granted. It’s not a bad idea to have a “lights out” crate with things to do in such as case. Not too mention extra batteries, water, lanterns, nonperishable food, blankets, etc.
Dear friends, I hope you and your loved ones are all safe and sound.
It’s been a while since I’ve done a tutorial, so let’s make a quilt!
I’ve been wanting an excuse to do Molly’s Helix Rose Card pattern. From the first moment I saw this pattern, I was intrigued. I told my good friend Mary Lee about Helix (I knew she would love it!). DANG! She bought it before I did at one of our two local quilts shops, Homespun Treasures. I was so jealous — I had only seen it online when I blogged about the new patterns in February — so I made up an excuse to go to the quilt shop and get one for myself (not that I really need an excuse). LOL!

You can buy the Helix pattern HERE.
I dove into my stash of fat quarters to find the perfect fabrics for Helix — deciding on a scrappy collection of blues, greens, and turquoises with a white on white floral background. One thing I really love about our VRD patterns is the ability to actually use the fabrics in my stash without having to run to the quilt shop every time I turn around — which is not a bad thing to do by any stretch of the imagination. Instead, I can jump right into my project right now. Besides, when I shop in my stash, sometimes I find things I had forgotten all about and I get excited about another idea or project before I’ve even finished the one I’m working on.
Quilting, for me, is never boring!
Okay, so my fabrics are gathered and I’m ready to go!
Cutting
I layered a couple fat quarters on top of each other for cutting, but if you are not comfortable with that, go ahead and cut each fat quarter individually. Making a quilt is not about who finishes first — it’s about the journey (unless you are participating in a Jelly Roll Race).
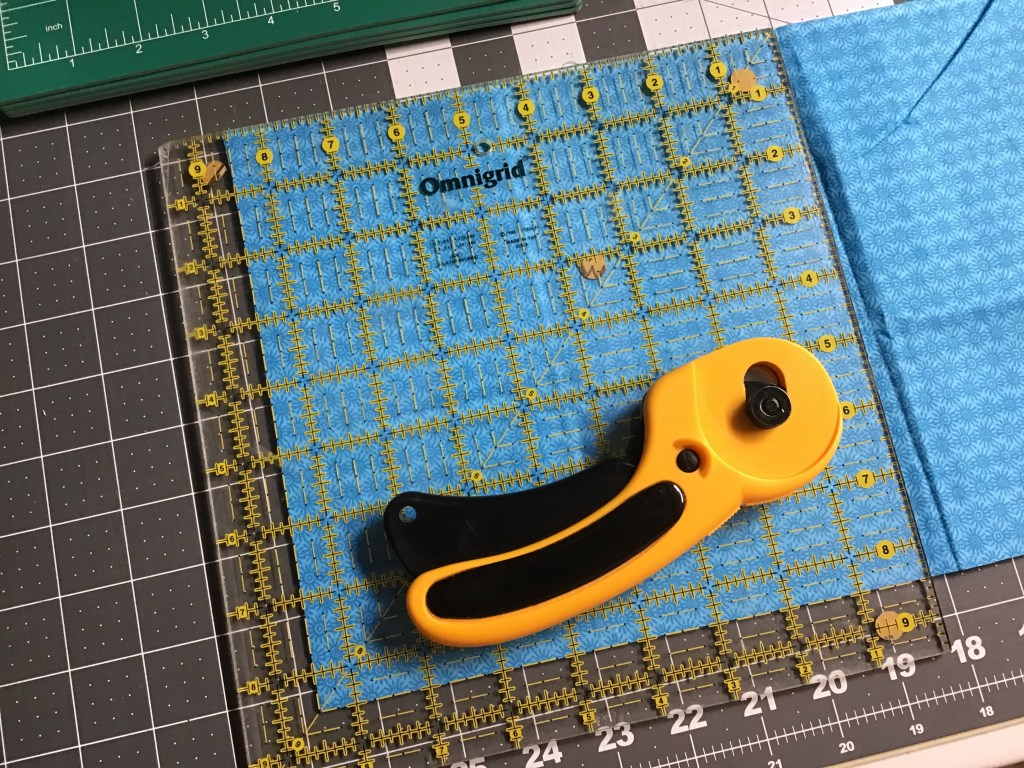
Here you can see my fat quarters (FQs) stacked up and I am ready to make my first cut. I just cut the top edge straight and I’m ready to find the right measurement on my ruler so I can cut the strip.

Here I have cut my wide strip.

Next I am going to cut large squares from my wide strip. I will get 2 squares from each strip. But wait….there’s more! (You know I LOVE saying this!) We are not done cutting our squares yet!

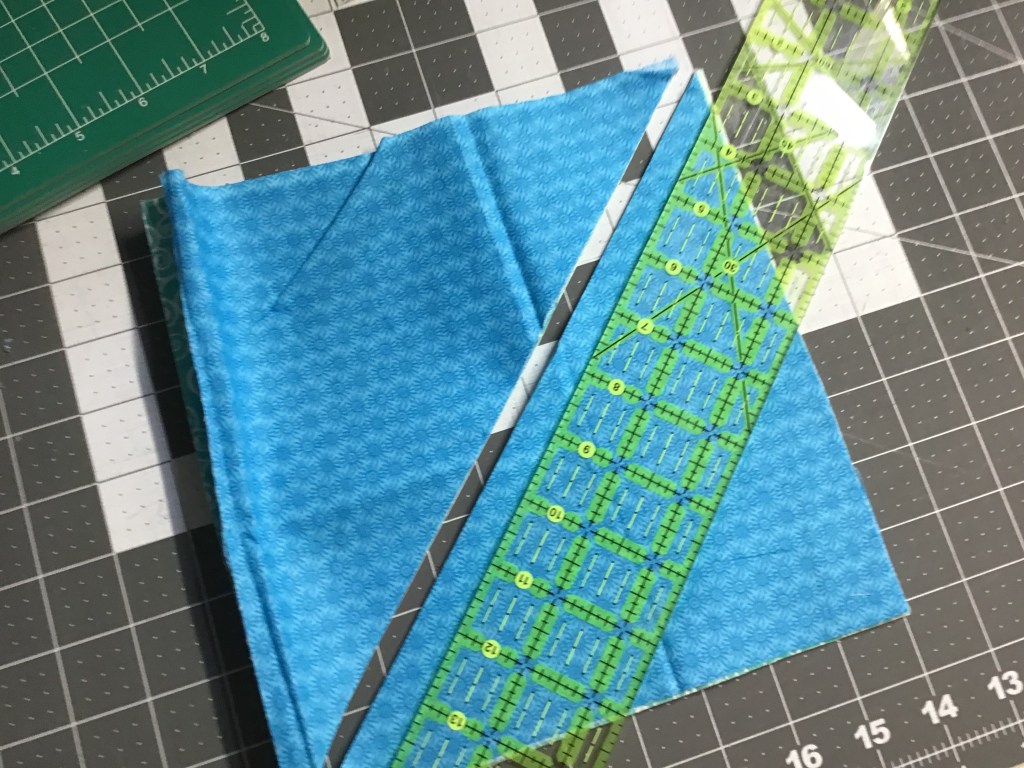
Time to cut these big squares in half diagonally. I had to switch rulers because my ruler wasn’t long enough so I grabbed my 2.5×18 ruler for cutting diagonally.
Don’t move those triangles — we are still not done cutting!

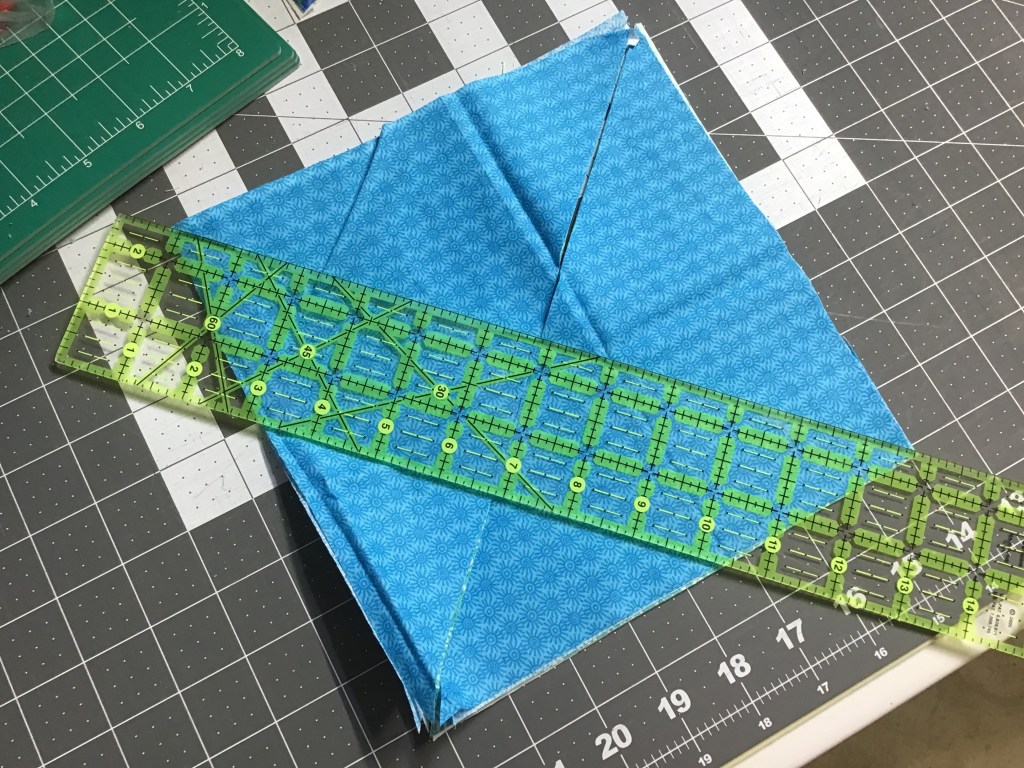
With my diagonally-cut triangles still together, I am going to cut on the other diagonal too — that way I get 4 smaller triangles from each block. Caution — these smaller triangles each have 2 bias edges, so treat them gently and handle them as little as possible to minimize distortion and stretching.


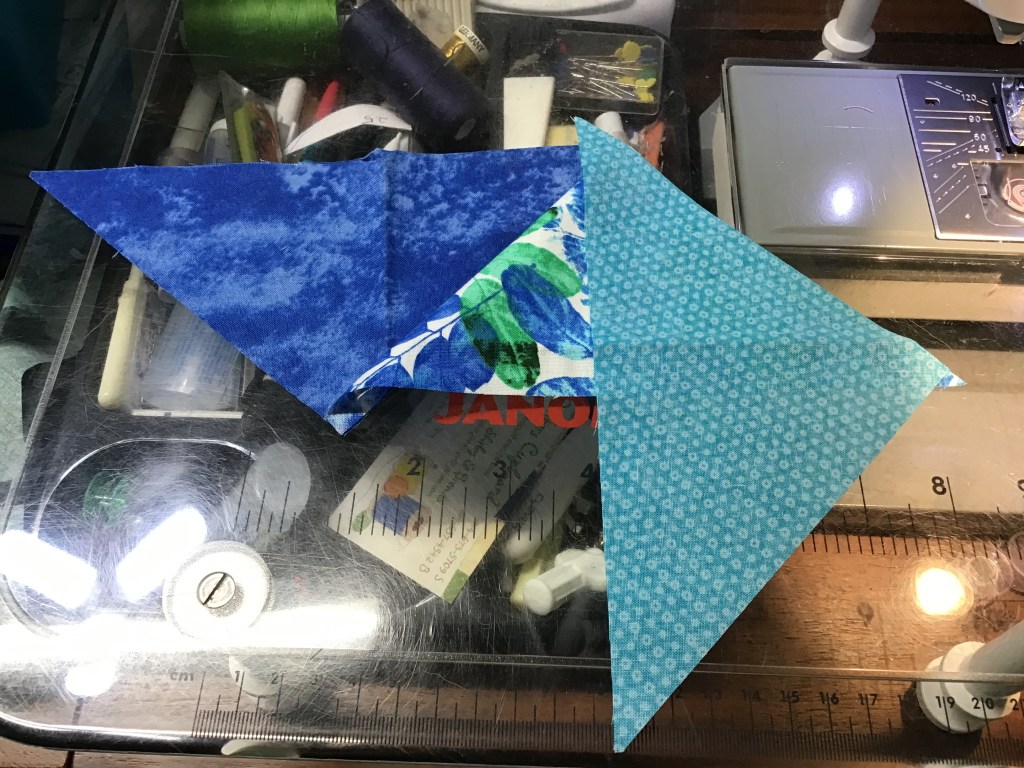
TIP: Do you see that blue, green, and turquoise leafy print triangle on top of my triangle stack in the 3rd photo? That was my “inspiration” piece for selecting the other FQs for this quilt project. I often choose a fabric with multiple colors in it to pull together fabric from my stash or scraps. Heck, I even do that in the quilt shop. This is definitely one of my favorite ways to gather a group of fabrics together for a project.
In addition to the FQ triangles, you need to cut some background — triangles, squares, and strips.

Sewing
Hmmmmm. I think we’re finally ready to do some sewing. Yay!
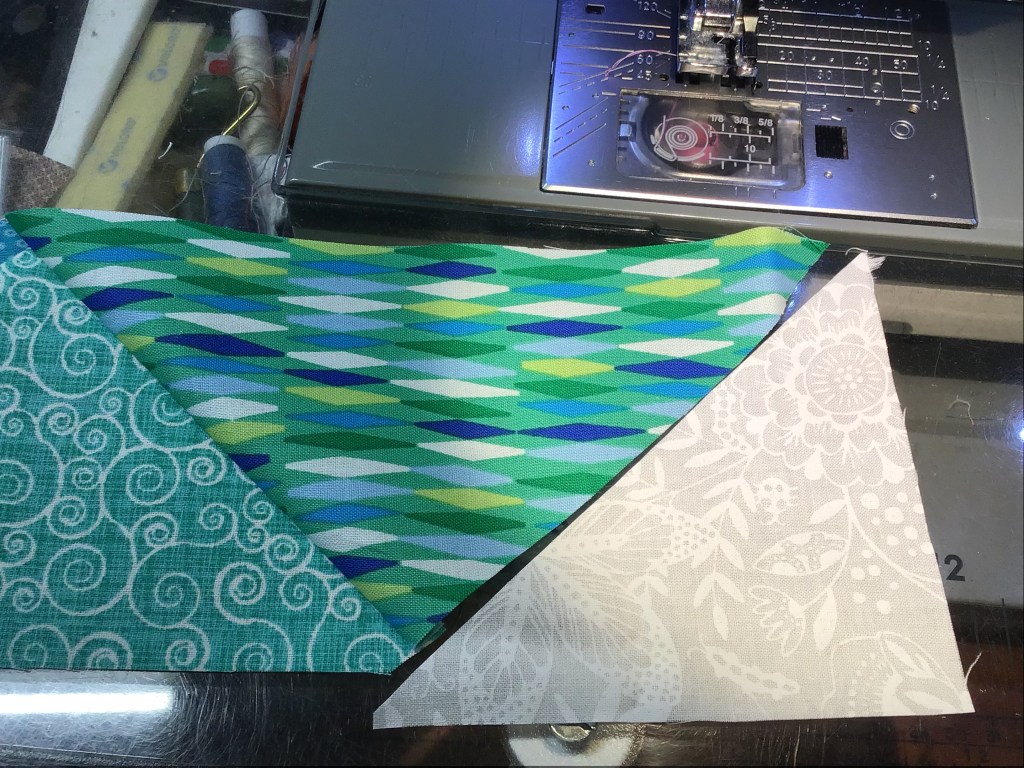
Let’s take 2 print triangles and lay them side by side, one pointing down and one pointing up.

Now let’s flip the right side triangle (leaf print) on top of the left triangle (blue tonal), right sides together (RST). Line up the edge with about a 1/4″ of the blue tonal peeking up above the leaf print and the leaf print should be overhanging the blue tonal about a 1/4″ at the bottom. Pin to keep them from sliding if you want to, but I find if I do the layering right at my sewing machine, I don’t need to pin them together.

Sew along the edge with your 1/4″ seam.

Don’t forget to trim the little overhanging triangles (around here, we call them “dog ears” [don’t ask me why…..]). Practice doing this as you go along so you don’t forget. Open the unit. Nice!
I don’t recommend pressing if you can comfortably avoid it — these triangles have 2 out of 3 bias edges and you don’t want them to stretch and distort. Better to wait until you have all the triangles sewn together into a row before pressing.

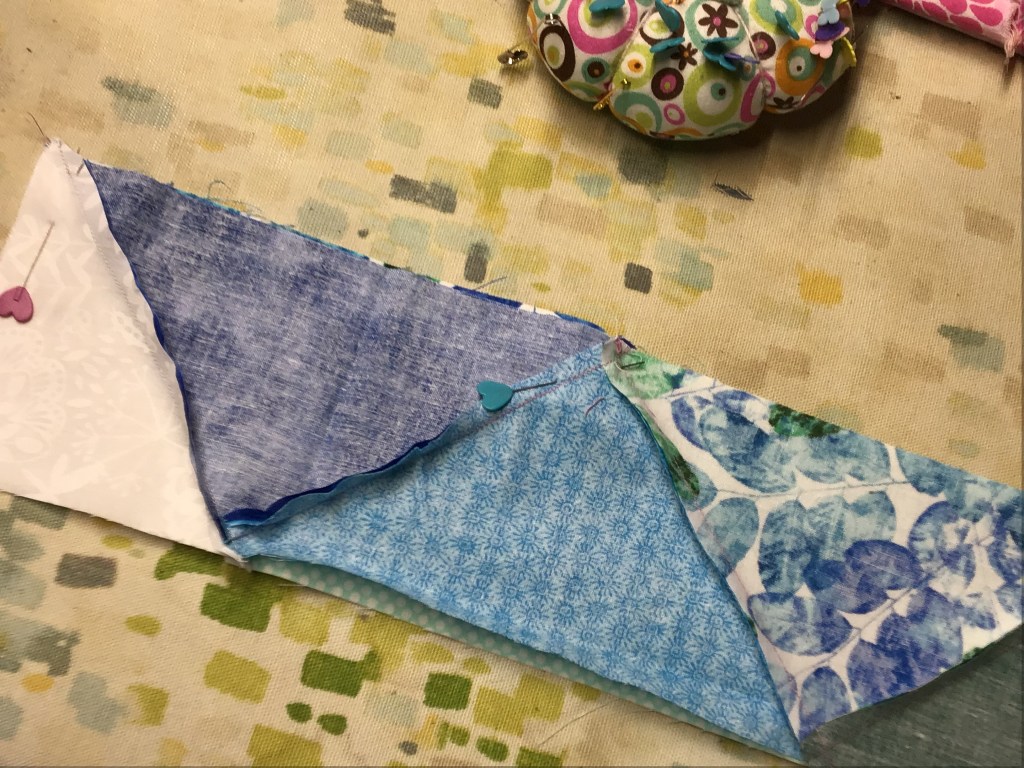
Pick another triangle and lay it next to the unit we just sewed together.

Flip that triangle over on top of the second triangle with RST. Line up the edges and slide the top triangle down a little bit so you see about 1/4″ of the triangle underneath peeking out above the top triangle and the top triangle extends about 1/4″ beyond the bottom of the triangle underneath.
You might be scratching your head and wondering what’s up with this silly “slide it down so you see about 1/4″ of the triangle underneath peeking out above the top triangle and the top triangle extends about 1/4″ beyond the bottom of the triangle underneath” business. I have 2 words (kind of) for you — 1/4″ seam. Sliding the top triangle down 1/4″ accommodates the 1/4″ seam we sew with so that the pieces will line up straight. Don’t believe me — try it! Lay your triangle as exactly on top of each other as you can and sew them together with your 1/4″ seam.
Aha! Told you so!
Sorry, not sorry — I don’t get to say that very often…….
Okay, let’s get back to our project.
Sew the triangle to the unit with your 1/4″ seam. Trim the dog ears and open the unit. 3 triangles done………5 million to go!


Sew a total of 11 triangles together to make half of a Helix row.

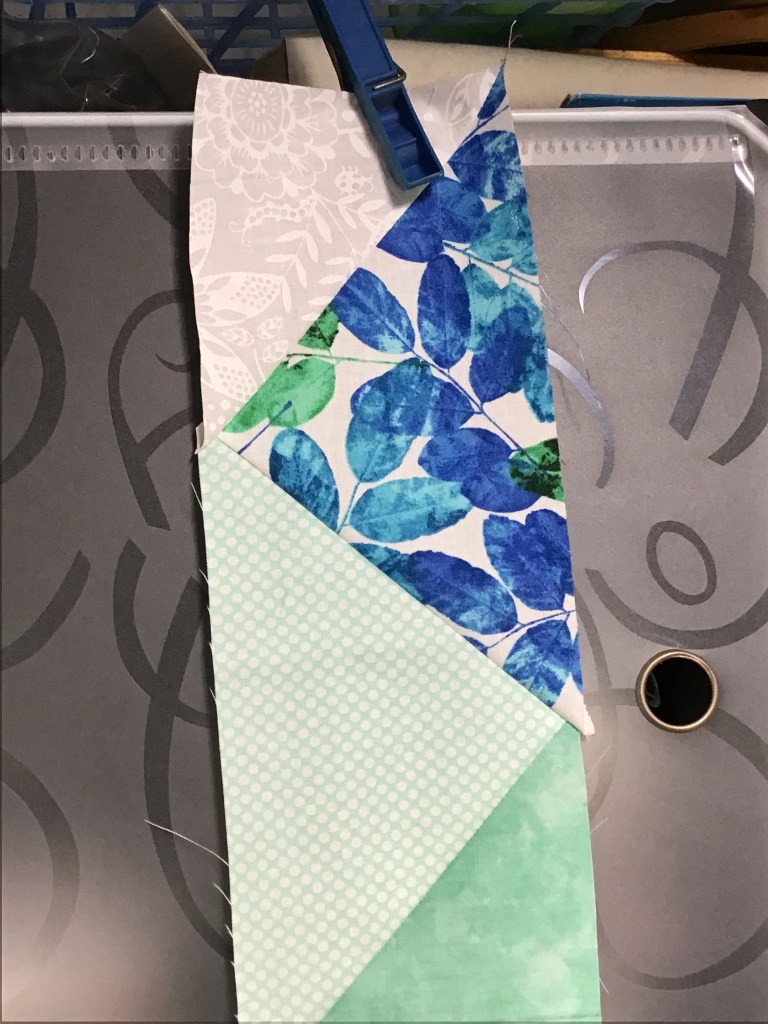
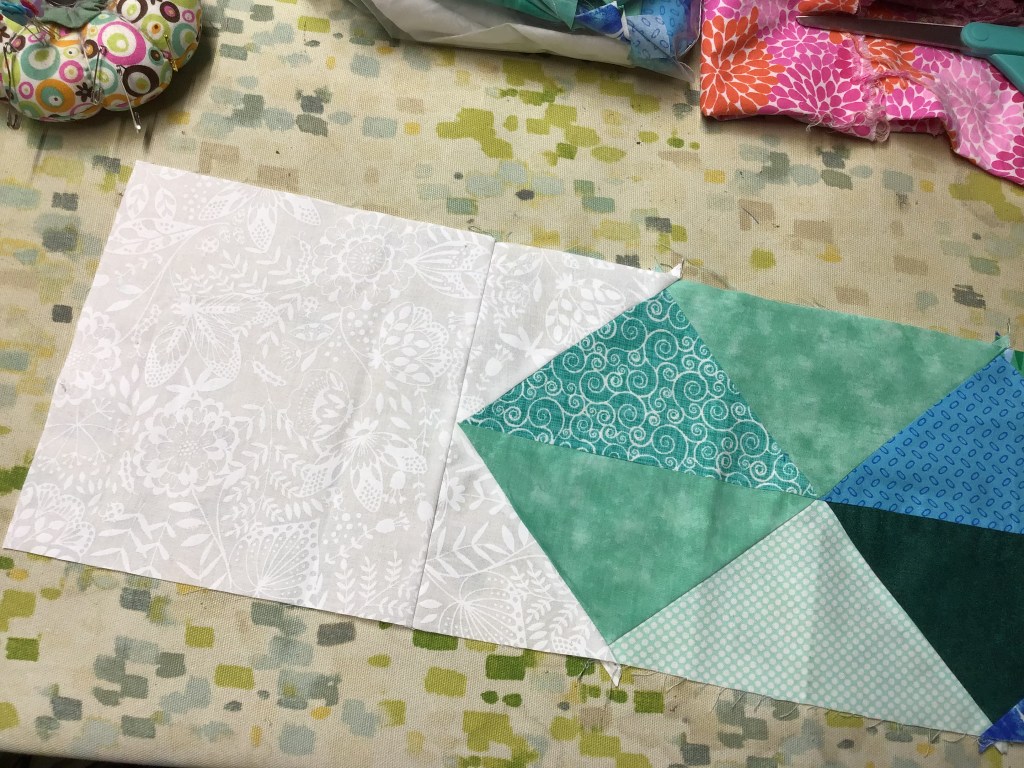
Yay! Now let’s lay out and sew small white triangles to each end of our triangle strip.
Looking good!

Time to sew 11 more triangles together. Don’t forget to cut off those dog ears. Then sew background triangles to each end.
Here’s the tricky part next — we are going to sew the 2 half rows together to make one Helix row. Yikes! Grab your pins, because you’re going to need them.
I found this part very challenging — I was all thumbs lining up the 2 rows. I crossed my fingers (and my toes, too) and hoped that I had lined things up well enough and that my points would meet. Pin heavily — you will be sewing over seam intersections with a lot of bulk and your fabric is going to want to shift.
Ugh…..I am not pleased with how my points lined up (or didn’t), especially on one of them where I wasn’t even in the ballpark! I might have to do a little unsewing to correct this section.
I pressed the row after sewing it all together. My seams were willy-nilly all over the place on the back instead of nestling neatly like they usually do for me. Frustrating.
I pressed the long center seam open to help reduce the bulk.

Repeat these steps to make a total of 7 Helix rows.
Here are 2 of mine so far.

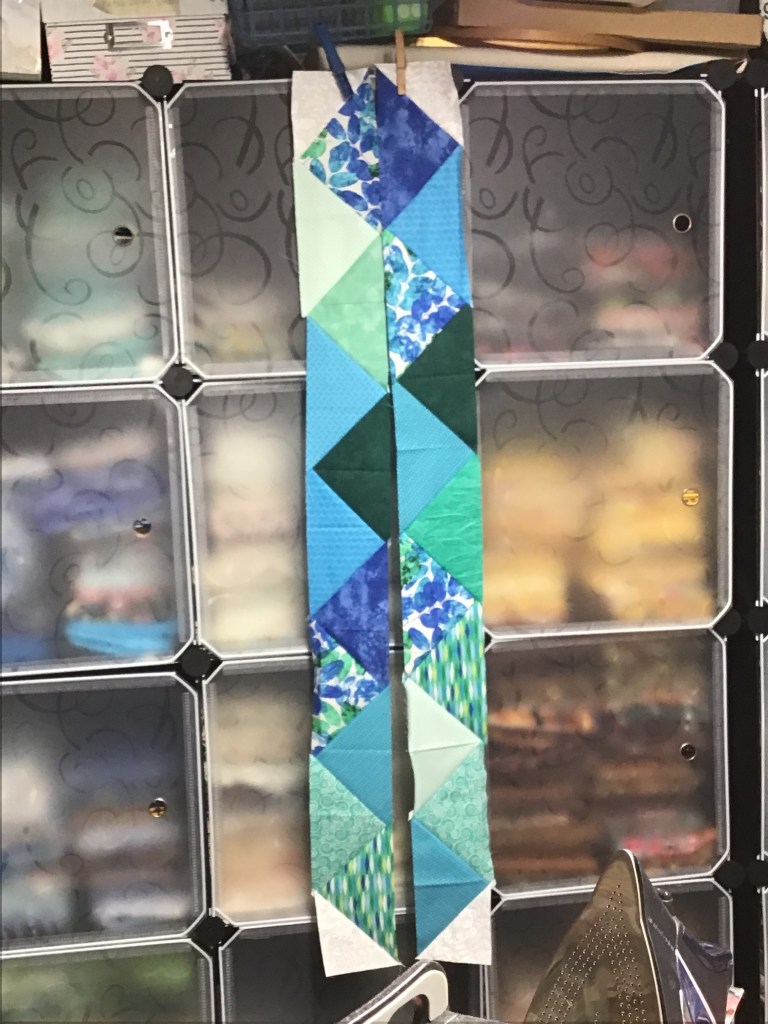
Look! Look! Look! I got all 7 of my Helix rows done. They are completed, but I am not 100% happy with how they turned out. I even tried another method of sewing the triangles together, but that didn’t make things any better — it must be me (frowny face here).
My suggestions to you are to sew slowly and line things up carefully — this project requires a good deal of accuracy for everything to come out well.
Here are my rows hanging off my fabric storage cubes.

The next step is to sew one square to an end of each of the 7 Helix rows. I do really like the colors, even if the piecing isn’t fantastic……
These squares work to offset the rows once we assemble them with the background strips, which just so happens to be our next step.
Now let’s add a background spacing strip. You will have to piece strips together to get the correct length — I cut 1 strip into 3 equal pieces and then sewed a 1/3 piece onto the end of a full width strip. Then I measured through the center of a Helix row and cut my strip to that measurement. Next I matched the ends and the centers of my Helix row and my background strip, pinning everything in place.
I sewed the strip to the Helix row using my 1/4″ seam. Then I pressed my seam towards the background strip.


Now to sew more Helix rows and background strips together!
Here are my first 2 rows sewn together with a background strip in between. So far, I am pleased with the fact that my rows are the same length, even if I mangled my triangle points here and there. Sigh…..

Let’s sew on more rows and background strips! Woohoo! I am on a roll!
Too bad I am not going to finish this quilt top before this blog post has to be finished. Sorry, folks, I’ve been working on it for three days, but I didn’t realize how long sewing the triangles was going to take me. I would have started it sooner, but we no electricity over the weekend.
I promise to add a photo of the completed top ASAP. By the way, I think I might add background strips on the sides of the quilt top if I have enough background left. I have found through previous experience that I do not like triangle points at the outside of my quilts (because I chop them off with the binding).

Well, that’s it for me — it’s after midnight (EST) now and I am getting tired. Time for bed….
Until next Thursday —
Sew. Laugh. Sleep. Repeat.
Always,
Tricia @VRD
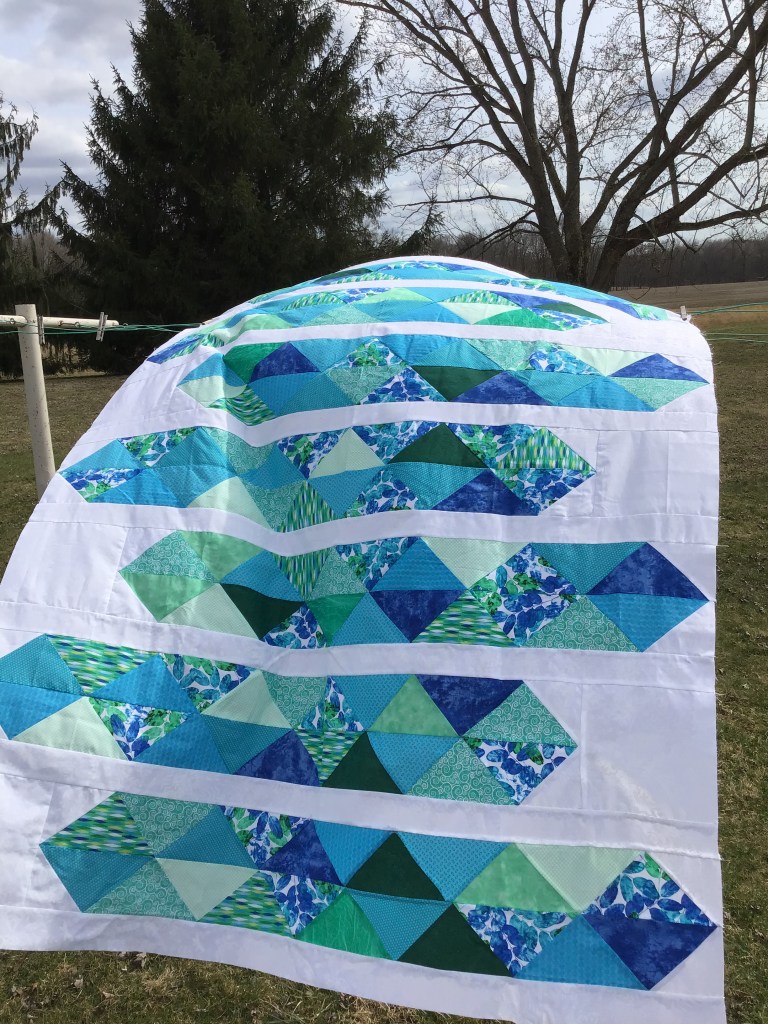
Helix Update
Yay! I finished the quilt top a few days later. Now to layer, quilt, and bind it. And, of course, add a label!

Nice colors and fabrics you chose.
LikeLike
Thanks, Cheryl! I’ve really been into blues to greens lately for some reason……
LikeLike
Let me look into things and I will get back to you.
LikeLike
Love the tutorial! I have that pattern. I will get in my stash just like you.
LikeLike