Quilting Partners · Rose Cards · Tips and Tricks · Tutorials · villa rosa designs

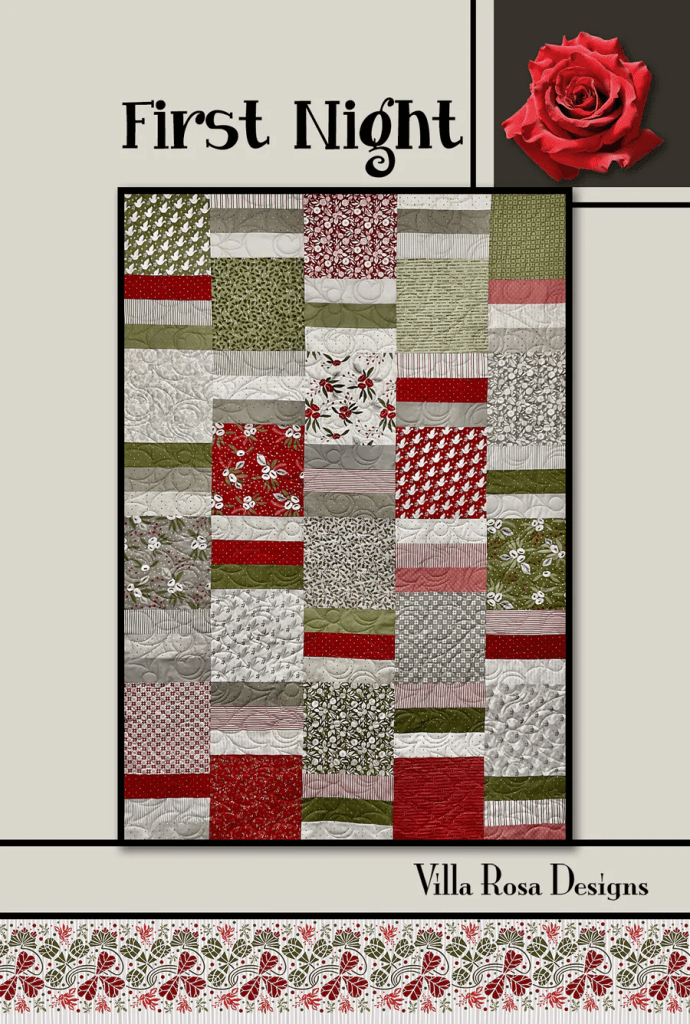
NEW March VRD Rose Card Quilt Patterns and Lucky, a Quilt Tutorial for St. Patrick’s Day

Happy Thursday to you!

I trust you’re all having fun with your Free Motion Quilting (FMQ) practice. We’re going to take a quick break from our Beginner FMQ series this week because I have NEW March patterns to share as well as a fun table runner tutorial just in time for St. Patrick’s Day. We’re all Irish on St. Patrick’s Day, right?

Here are the new patterns for March – be prepared to be inspired….

Get the print set of all 5 patterns HERE.

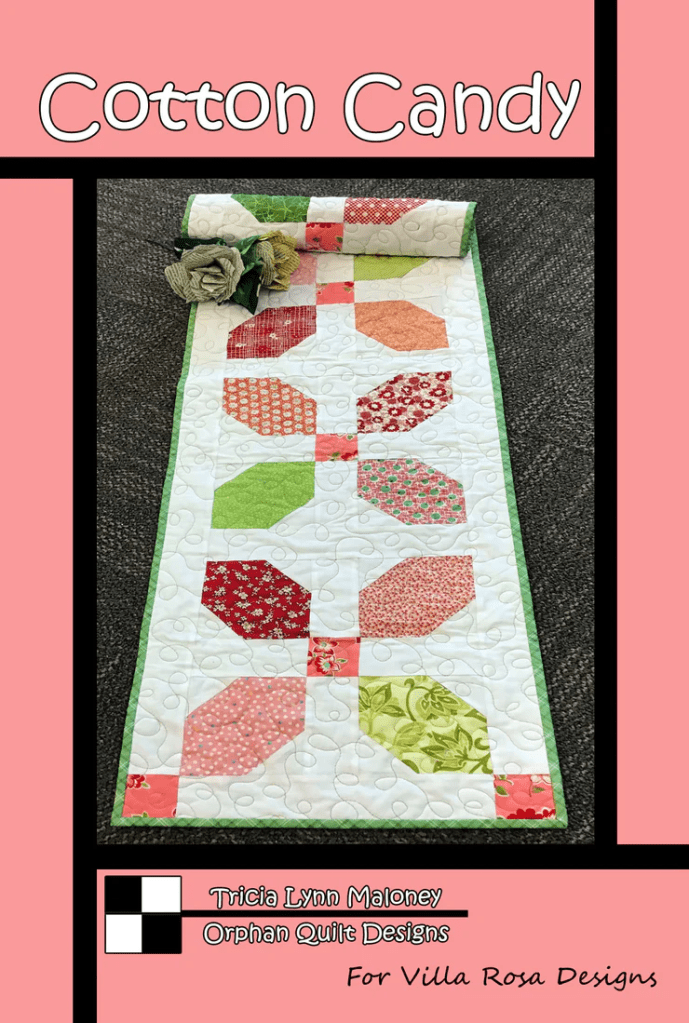
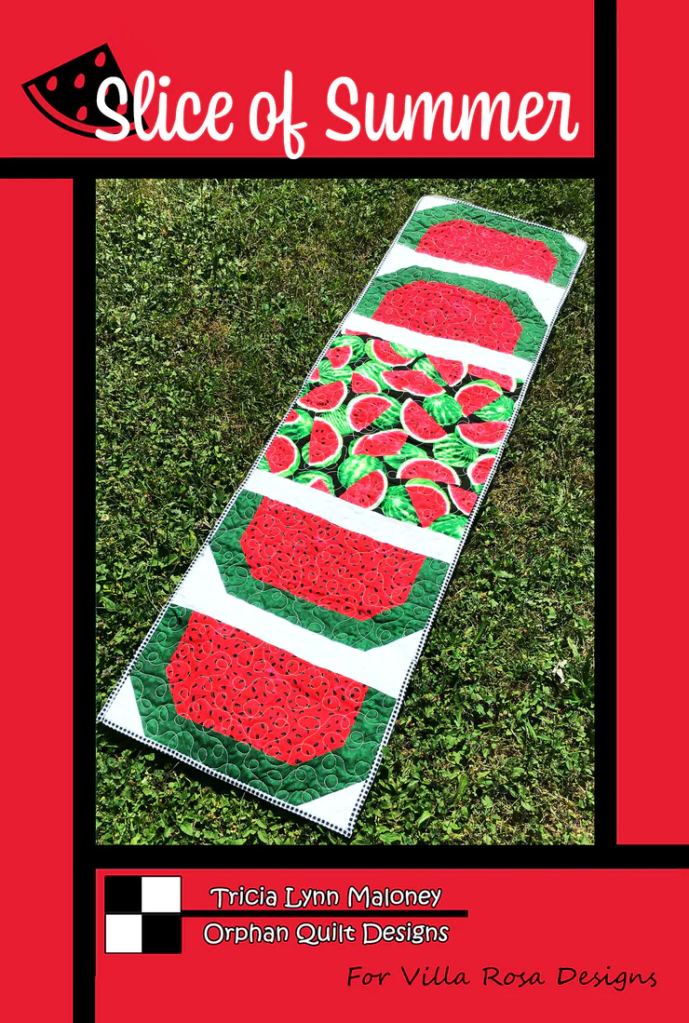
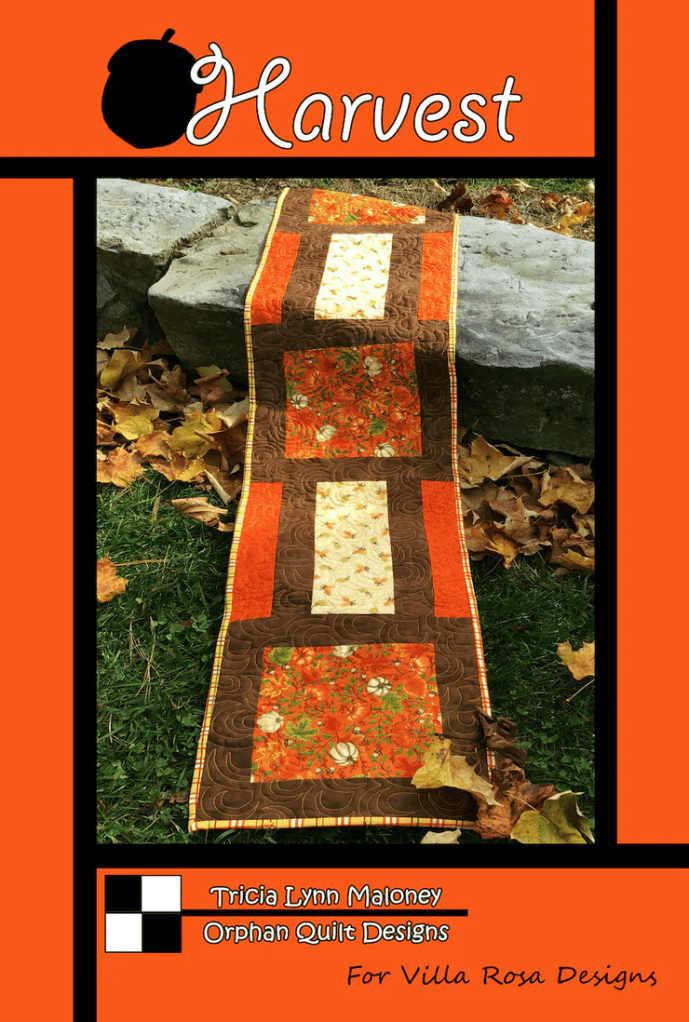
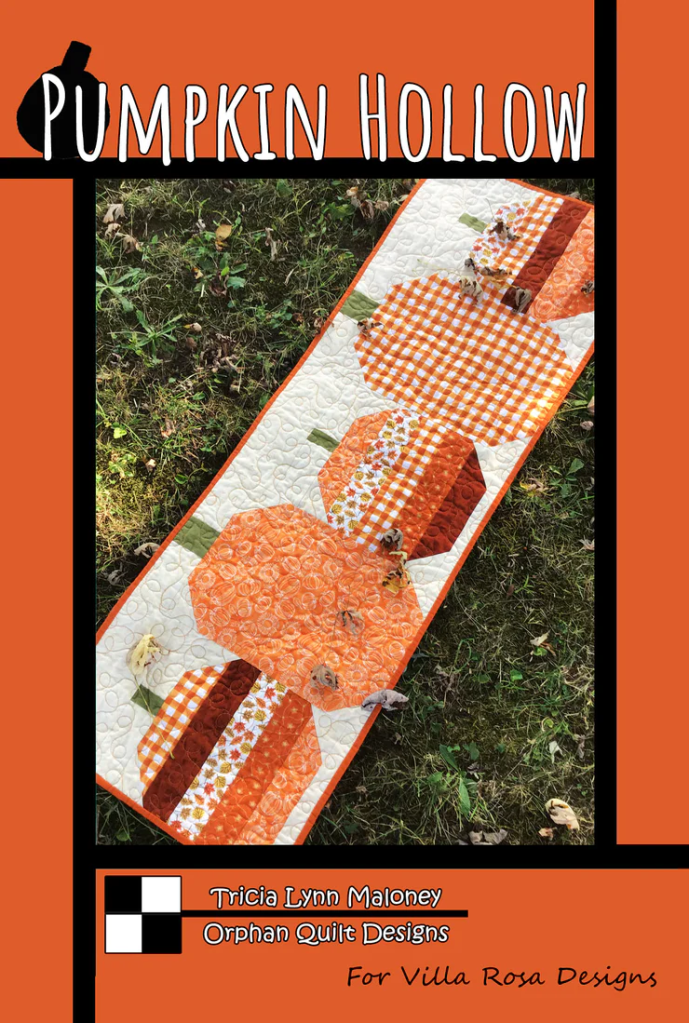
The 5 main patterns are great, aren’t they?

Molly created a brand new St. Patrick’s Day throw-sized quilt called Clover Patch. I just love that she added a single Four Leaf clover to her quilt – can you find it in the Clover Patch?

Molly also created a second pattern this month called Jackknife. This clever block uses long quarters instead of fat quarters. We still have a few kits left, too, if you’re interested.

Get your Jackknife kit in Art Glass AbstrArt HERE.

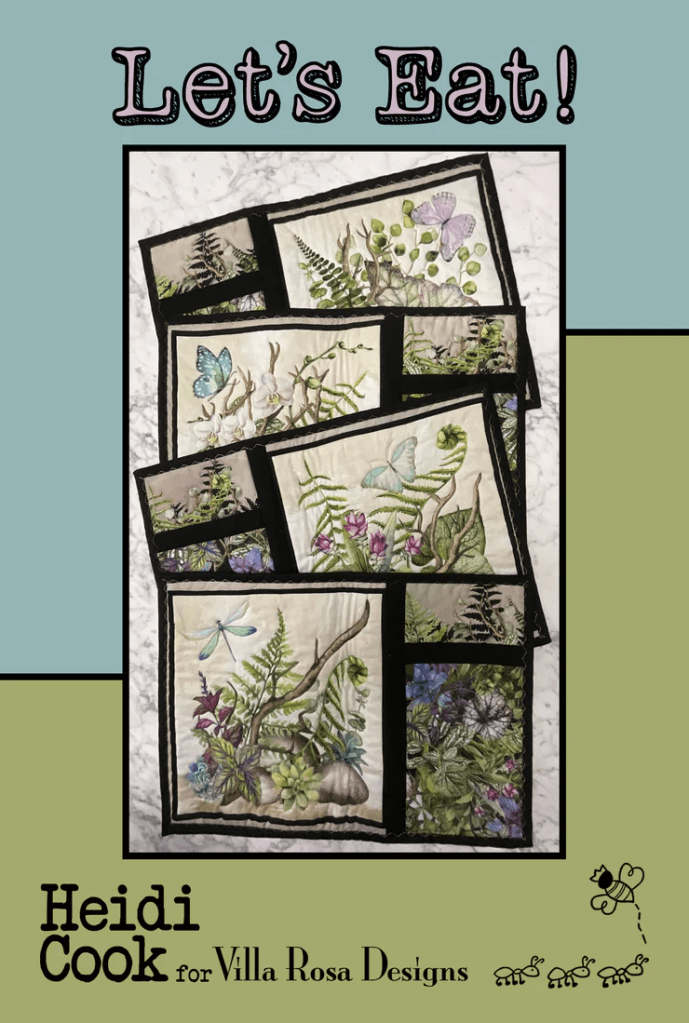
Heidi wows with her new 24″ panel quilt pattern, Jerky. If you don’t already know, Heidi always gives her patterns a foodie name because she loves to cook.

Rachelle created a new modern pattern called Kenosha. I love the secondary design that happens in this striking quilt pattern.

Pat, our Rose Queen, has another fun and fast throw sized pattern for you called Zamora. If you didn’t know, Pat always names her quilts after a rose. Yep, Zamora is the name of a rose. Zamora only uses three main fabrics plus a binding fabric. Sew easy piezy. We still have a few Zamora kits left, too.

Get your Zamora in Indelible kit HERE.

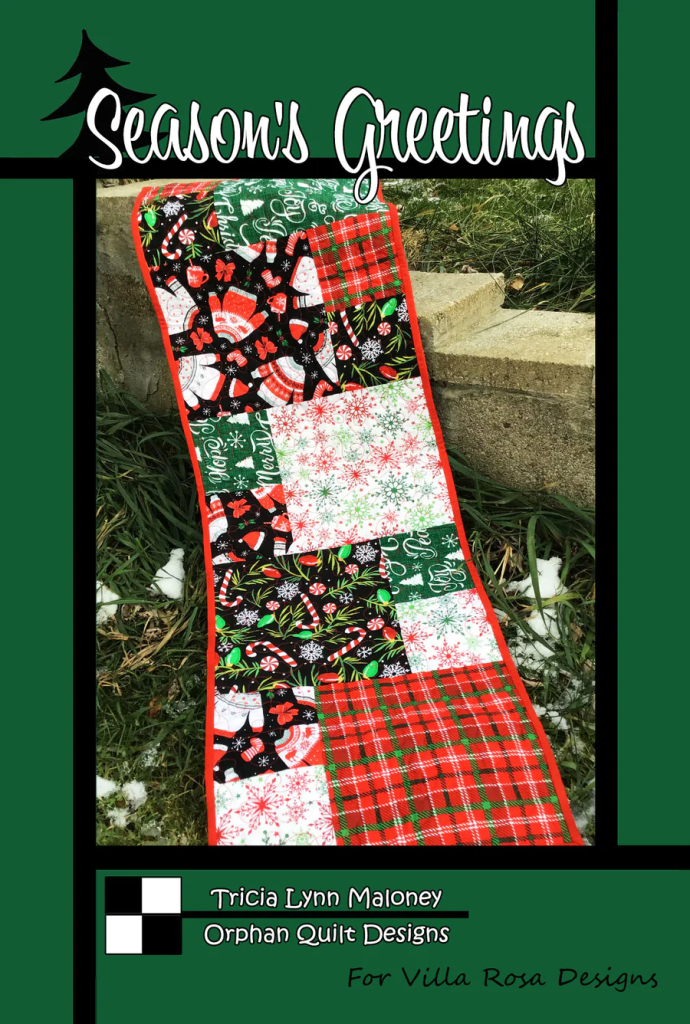
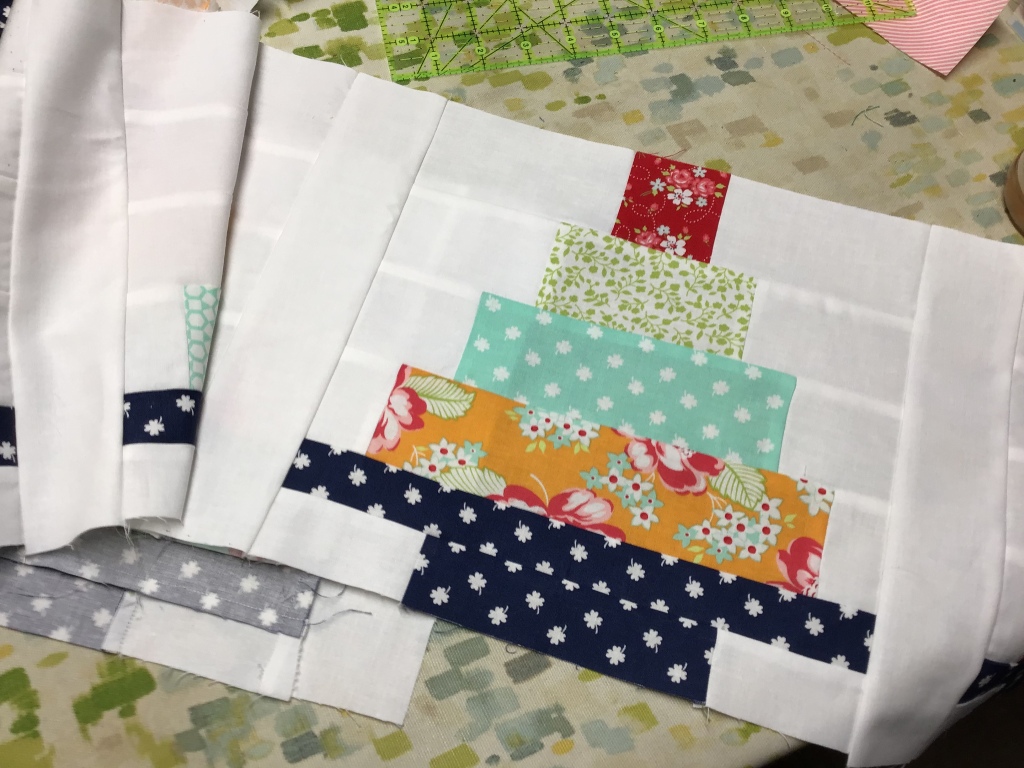
We also have a new table runner pattern this month called Erin.

Get your digital Erin pattern HERE or your print Erin pattern HERE.

I’ve always wanted to make a green and white Double Irish chain for St. Patrick’s Day. I can now check that off my bucket list. The Double Irish chain looks complicated, but I promise you, it really isn’t when you break it down. Give it a try.

I guess I should have done a tutorial for today with Erin, but I’d already gotten Lucky stepped out and photographed before I even designed Erin. I’m sure I’ll do a tutorial for Erin sometime in the future – you’ll just have to stay tuned.

That being said, let’s move right along to our Lucky tutorial.

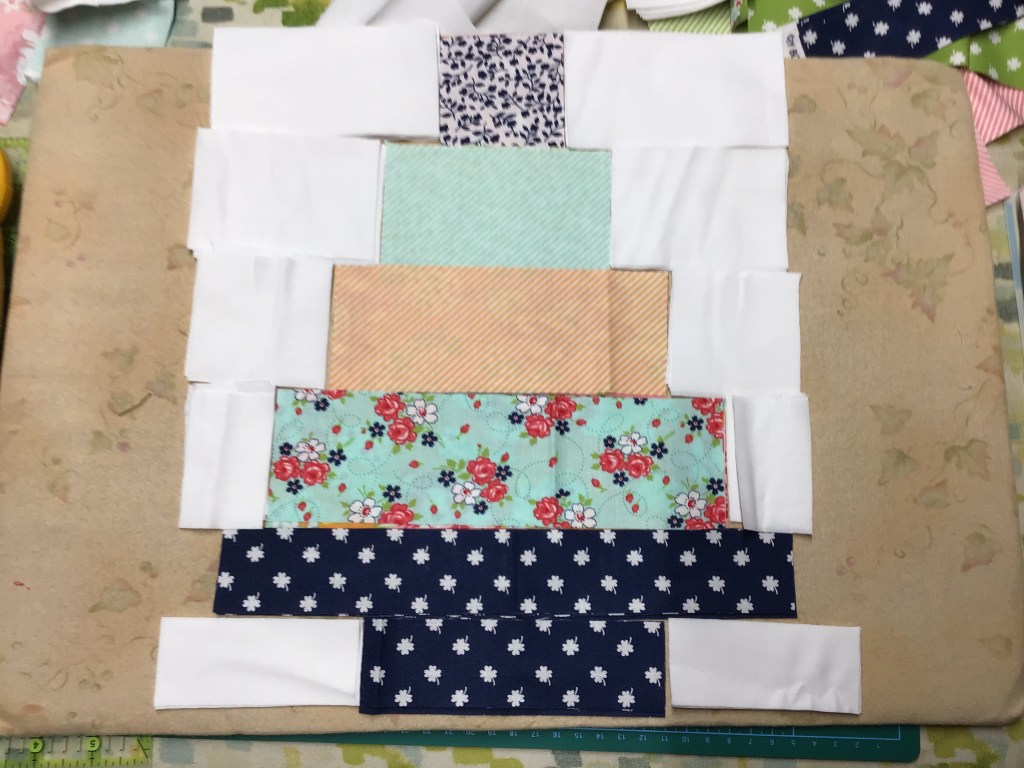
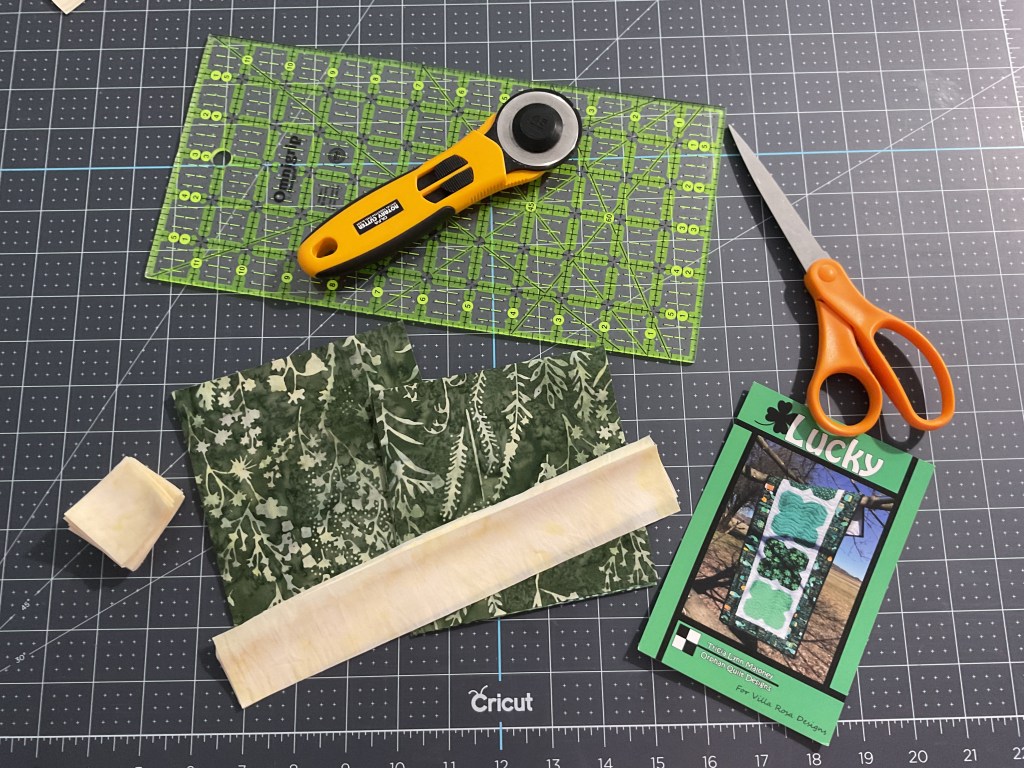
The first thing we’re going to do is gather up our fabrics.

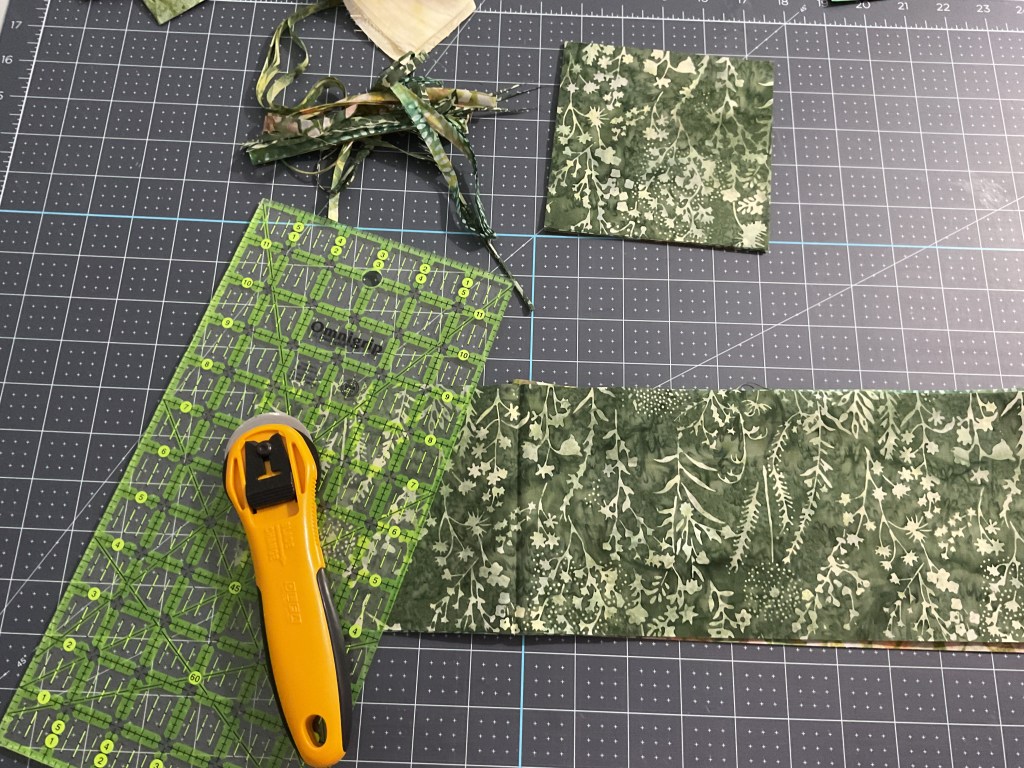
I’m using a beautiful Hoffman batik collection called Forest Floor. Don’t you just love the greens? With a pop of orange? Love Love Love it!

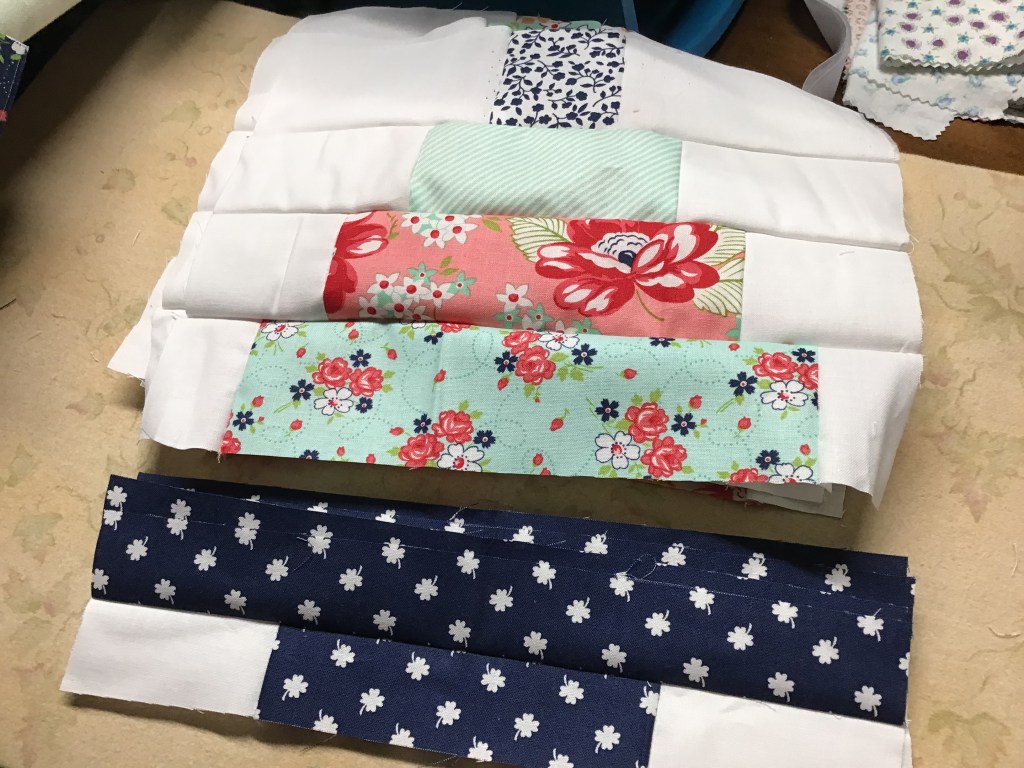
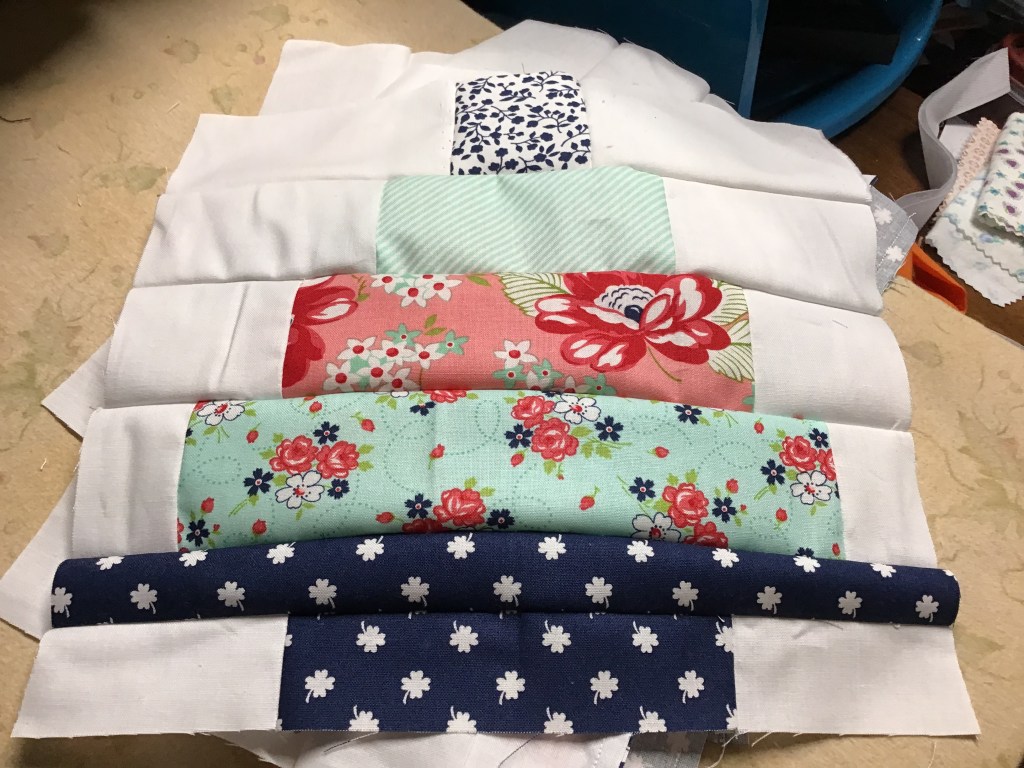
The first photo shows the background and the greens for the blocks. The second photo shows the border and binding.

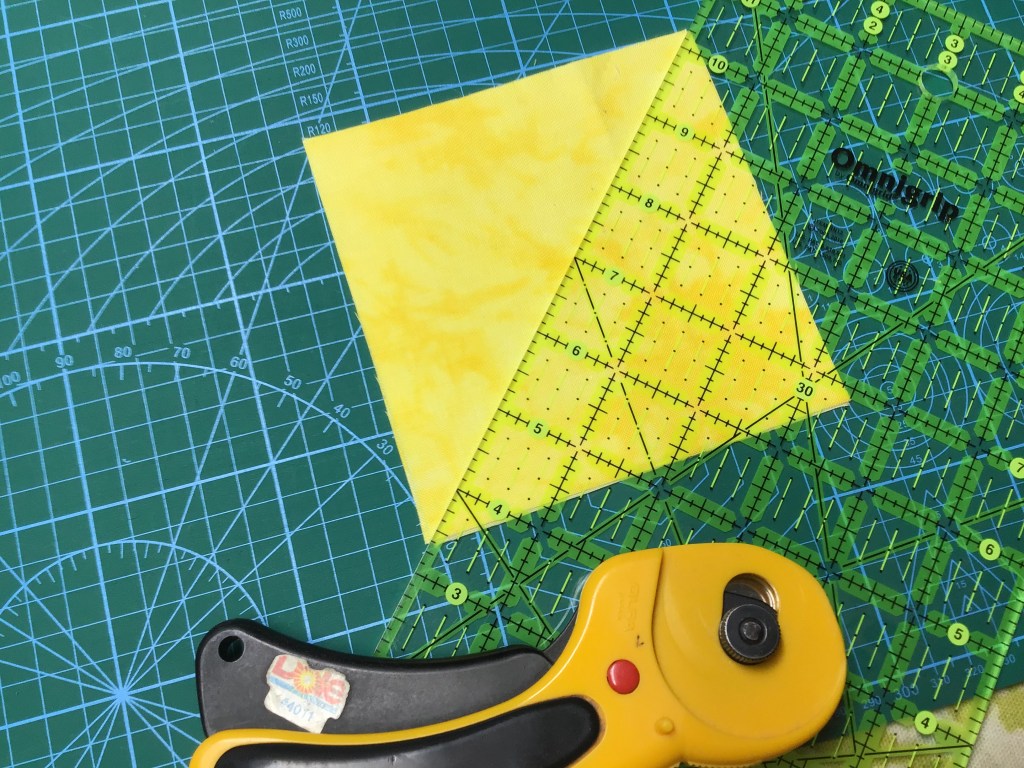
Grab your rotary cutter, board, and ruler and let’s start cutting out our pieces!

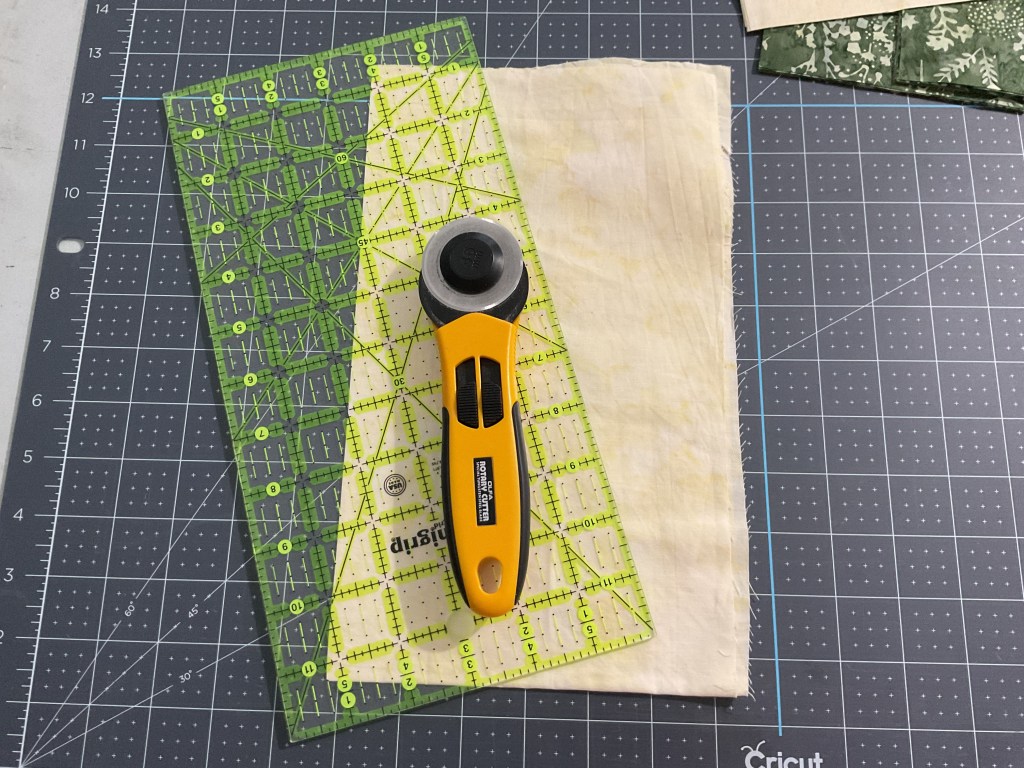
Now that our pieces are all cut out, let’s start sewing!

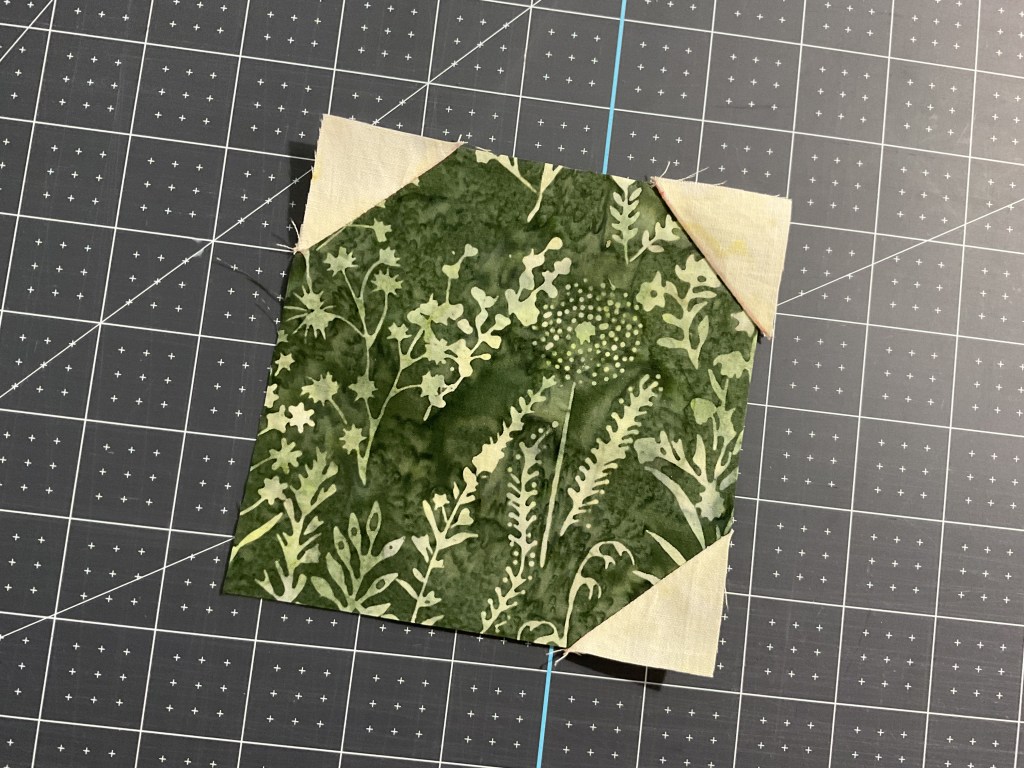
Layer a background square right sides together on the corner of a Clover square and draw a diagonal line from corner to corner. I love my Frixion Fineliner pens and my 1×6 little ruler for making my flippy corners and HSTs right at my sewing machine. What are your favorite tools for making yours?

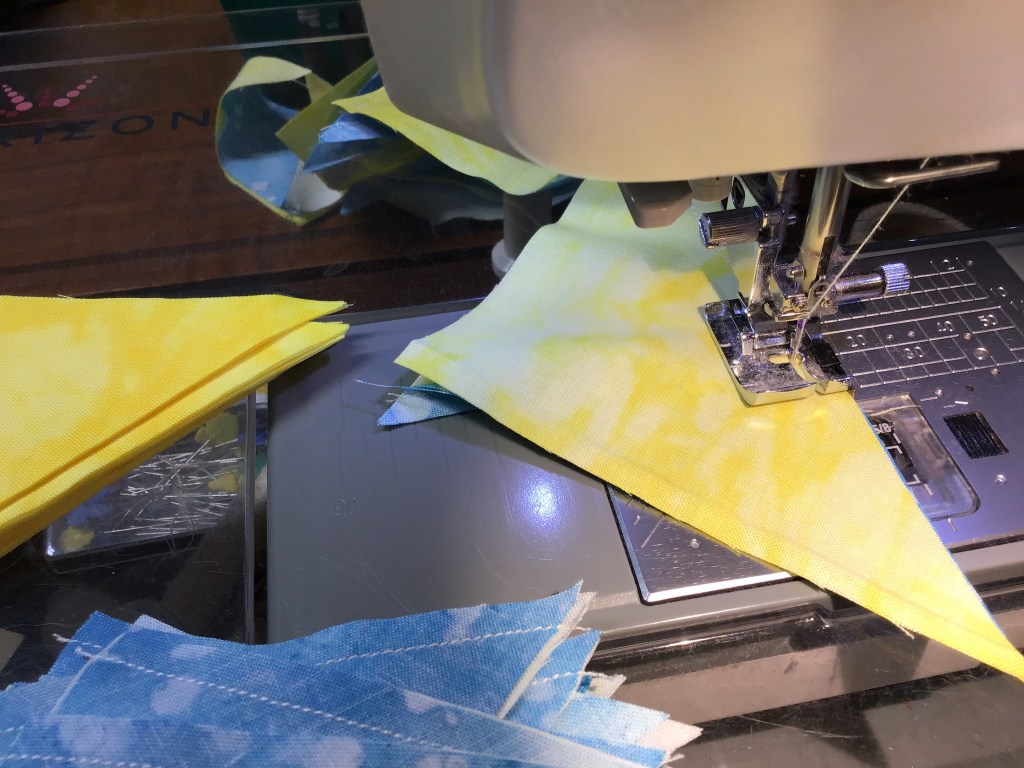
Next we’re going to sew on the drawn line.

Let’s cut 1/4″ away from our drawn line. Did you knou can use these little cut off triangles for a scrappy little project? I’ve been saving mine for a long time, and have even started sewing them into HSTs, but I haven’t started making anything with them yet.

TIP: You might notice in the photo below that my seam is slightly to the right of the drawn line. This is actually on purpose because it gives a bit more room for the seam and my flippy corners are more precise. I learned this little trick from my quilty pal, Mary Lee. THANK YOU, Mary Lee!

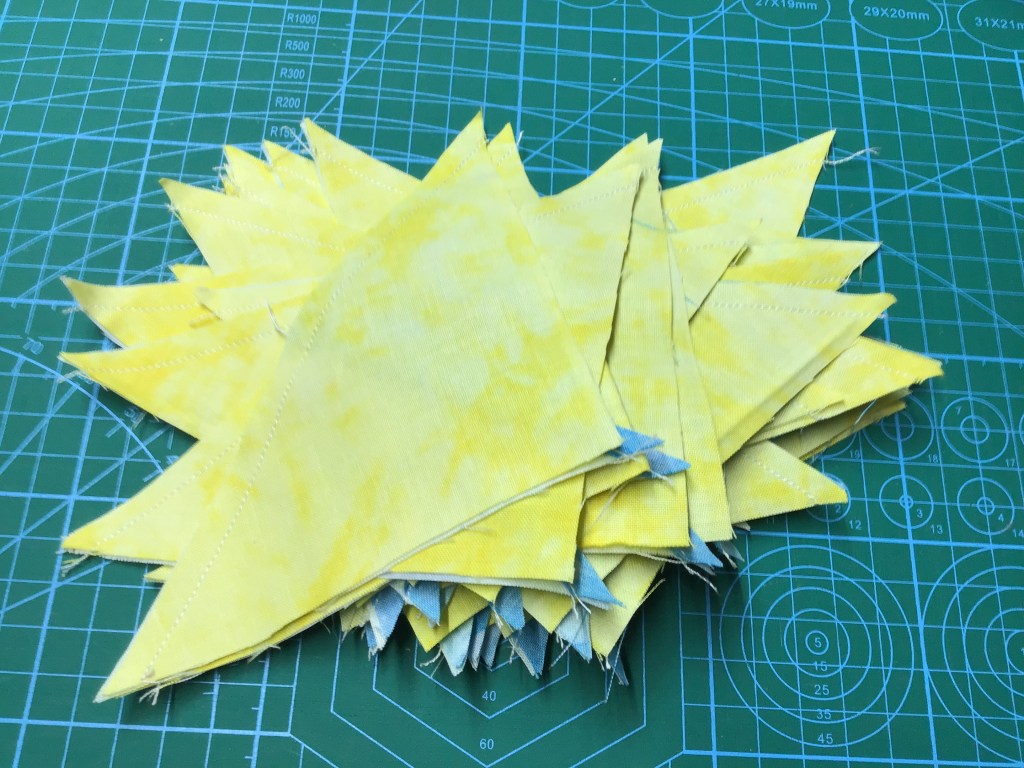
Don’t forget to press that flippy corner open.

We’re not done yet! Go ahead and make flippy corners on 2 more corners of the Clover square.

Okay, now we’re talking! Let’s repeat these 3 flippy corners for the rest of the Clover squares while we’re at it.

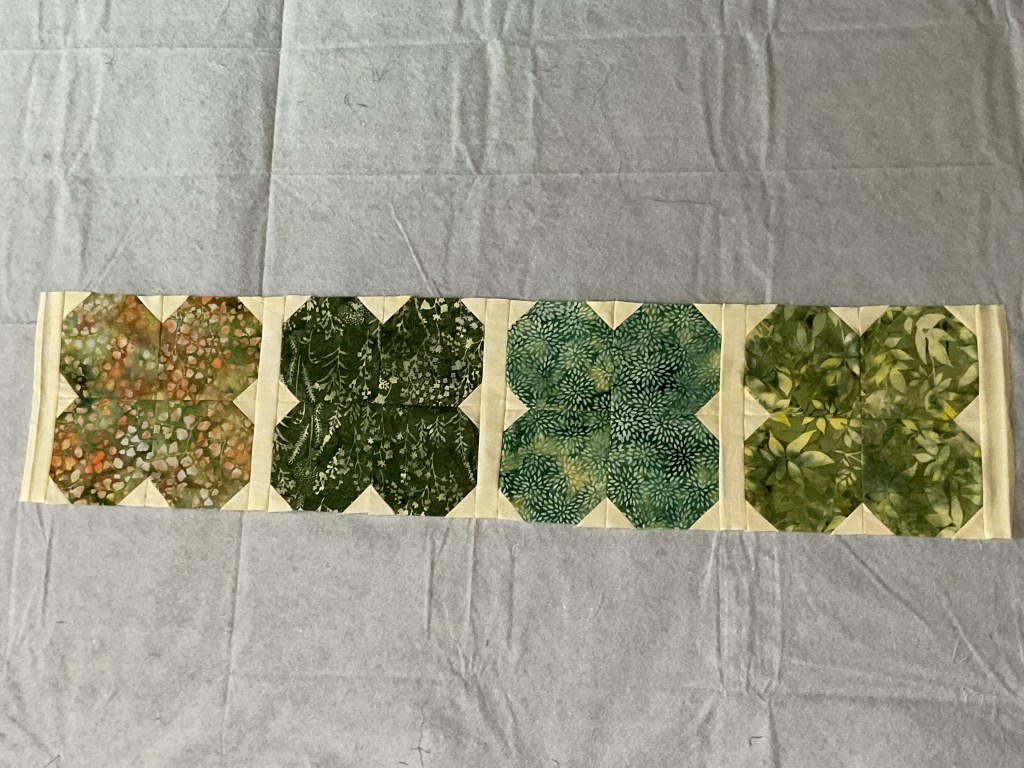
Finally it’s time to make a Clover block. Yeah! Sew 4 matching Clover squares together with the 4th unpieced corners towards the center so they all meet for the middle of the Clover block. Such a pretty block!

Repeat to make a total of 4 Clover blocks. Don’t you just love that pop of orange???

The next thing we need to do is sew the 4 Clover blocks together with background strips in between the blocks and at each end.

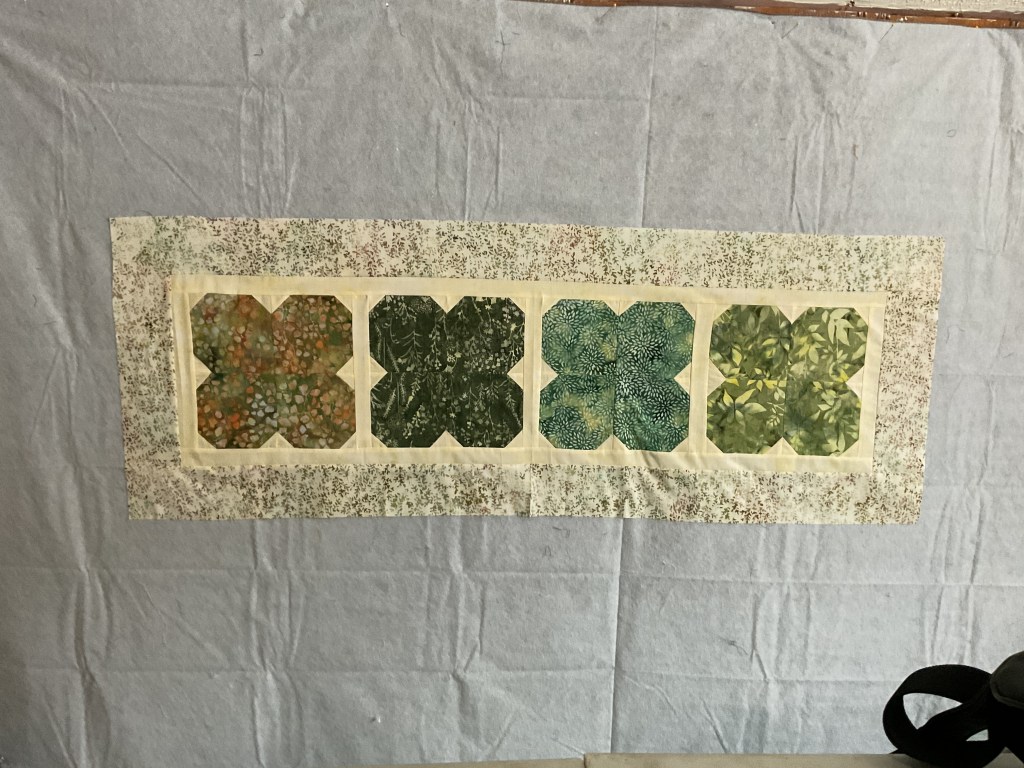
Then we’re going to add top and bottom background borders. Lookin’ good!

Now it’s time to add the side outer borders and then the top and bottom outer borders. And DONE!

Yay! All that is left to do is layer it with batting and backing, quilt it, bind it, and label it.

I hope you enjoyed the Lucky runner tutorial and are super inspired by the new March patterns. Next week we are going to wrap up our Beginner Free Motion Quilting (FMQ) series by addressing borders.

Until next week –

Always,

Tricia @ VRD

Rose Cards · Tutorials · villa rosa designs

VRD Lattice Table Runner Quilt Tutorial

Happy Thursday to you!

Photo by Jim Strasma on Unsplash

I hope you get the chance to enjoy some patriotic FUN FOOD and FIREWORKS! And please don’t forget to pause a moment to reflect on how the United States of America got here.

Last Friday, my quilty pal, Robin (Hey Robin!), and I did a road trip down to Pittsburgh to pick up my new gently-used sewing cabinet, which I found for sale online. Robin drove her truck because there wasn’t any way my new cabinet would fit into my Jeep. LOL!

I didn’t know who the maker was from the photos online, but it was exactly what I needed to upgrade my own sewing space! My current cabinet was an older Pfaff (maybe made by Arrow) — truly a gorgeous solid wood cabinet with a hand-operated machine lift and 4 drawers, but what it lacked was an extension on the back which would have made machine quilting A LOT easier for me. My new-to-me cabinet has 2 drawers in the sewing table along with a separate 3 drawer rolling caddy AND AN EXTENSION TABLE! Woohoo! And it’s white, my favorite finish. It really is my dream cabinet! Lucky me!

When the owner’s very kind patient husband loaded it into the truck, we discovered that it was a Koala Quiltmate III, which isn’t manufactured anymore. Fine with me, it’s perfect just the way it is.

After the cabinet was securely covered and literally tied into the back of the truck, Robin and I headed on to Ikea, where we, of course, had Swedish meatballs for lunch. Unfortunately, Ikea was right in the middle of updating a lot of their spaces for fall, so there weren’t as many “rooms” on display as usual. Bummer. But we had loads of fun just looking around at the rooms that were still on display and checking out the marketplace downstairs with all those awesome goodies. Do you have Ikea stuff in your sewing space? What item(s) do you use the most? I love there colorful carts and little drawer units on wheels.

After Ikea, we headed back home. On the way, we talked about how on earth we were going to get my cabinet off the truck and into my sewing dungeon. Robin ended up calling in reinforcements (her hubby and son — THANK YOU Rich and Ryan!) to help get the cabinet off the truck at my house and then my Dad and I rolled out my current cabinet and then rolled my new cabinet into my dungeon sewing room. It wasn’t as easy as it sounds, but it’s there now AND it fit through the doorway, which was a relief…… Thank goodness it had wheels!

Now I have the wonderful and awful task of cleaning out and rearranging my space so that I can have the extension up for machine quilting. I’ve been looking for a reason to begin my major studio clean up and purge. I now have a BIG reason and motivation to get things organized and cleaned up. Wish me luck. If you don’t hear from me next week, assume I’m buried under my stash and call the quilt police for me, okay?

Let’s get onto our next Summer Tutorial project — Lattice!

Lattice is a fun table runner with a really cool woven effect. You only need 3 fabrics — light, medium, and dark along with a coordinate for your border.

You can get the print Lattice pattern HERE or the digital Lattice pattern HERE.

My original sample for the pattern was made with one of my favorite color combinations — red, white, and black. Just love how striking it is! Today’s Lattice runner will be in summery blue and yellow. Just goes to show you that Lattice is a flexible pattern and looks great in a lot of different fabric combinations and styles.

Here are my fabrics for Lattice. The large print was on the sale rack at my local quilt shop and the yellow, blue, and background fabrics are from my stash.

Time to cut these pretty fabrics.

Once we cut the background fabric (white in the pattern) and the dark (black in the pattern) fabric into squares, we’ll need to cut them on both diagonals to make small triangles.

Next we need to cut the medium fabric (red in the pattern) into squares. This time, cut on only one diagonal to make large triangles.

Here are our triangles ready to go. That’s all we need to make ALL the blocks! Easy peasy!

Let’s sew the background and dark small triangles together. We need to sew a background and a dark triangle together along the shortest straight side, as shown in the 1st image so that they will make a larger triangle. Once we’ve stitched all the small triangles together, it’s time to give them a gentle press with the iron — be careful not to stretch this unit by pressing too hard because of the bias edges.

FYI — this unit is technically half of a Quarter Triangle Square (QTS).

Now let’s sew the large medium triangles to the pieced triangle units from above. Our blocks are coming together!

Next up is pressing our blocks and then snipping off those annoying little dog ears. Sure, you could just leave them, but I have found that snipping them off makes for more accurate sewing.

These blocks actually have a name — they are called Y Blocks. My friend, Cathey of Cathey Marie Designs (Hey Cathey!), is completely crazy about this block and all of its design possibilities. She loves it so much, she even created her own ruler, called the Y Block Ruler, which creates 4 identical units at the same time as well as a series of Y Block patterns. If you ever stop by her website, tell her Tricia sent you. LOL!

Now let’s sew our blocks together, 13 across by 2 down, turning them as shown below to get the Lattice effect.

But wait! There’s more. As I mentioned above, the Y Block is a really cool block with lots of design potential. So, let’s rearrange the blocks a bit to see what we get.

Which one is your favorite? They are all quite interesting, but my favorite is still the original Lattice layout. 🙂

Once you’ve decided on your setting and you’ve sewn your blocks together, it’s time to add the border. Sew borders to the short ends first and then sew borders to the long sides.

Sorry about the weird lighting – this was taken in my sewing dungeon.

As you can see, I haven’t had a chance to machine quilt this runner yet. Just as soon as I can get my space rearranged and my new sewing cabinet all set up, I’ll be catching up on my stack of projects waiting to be quilted. YAY!

Well, I guess that’s it for me. Feel free to get back to your July Fourth Festivities now! Save some watermelon for me!

Until next time —

Always,

Tricia @ VRD

Just Quilty Stuff · Rose Cards · villa rosa designs

Villa Rosa Designs Rose Card Patterns — Table Runners All Through the Year

Hello Quilty Friends!

Happy Thursday!

Here we are at the end of June with Independence Day sneaking up on us. I just realized that I need to start thinking about Christmas projects if I’m going to give any handmade gifts or quilts for the holidays this year. One of my favorite gifts to give are table runners.

I seem to remember a blog comment one time asking for a blog post about table runners. So I thought I’d share with you a rundown of our VRD Table Runner Rose Card Patterns arranged all through the year.

Wouldn’t it be fun to start a tradition of gifting a series of table runners to a special loved one or friend (or maybe even yourself!?!)? Maybe you’d only do one for each season. Or maybe you’d do the full 12 months. Whether you’d gift one every holiday, every month, every Christmas, or just because –imagine the delight of the recipient!

Isn’t that one of the biggest joys of quilt-making — the giving?

Let’s take a tour through the year with Villa Rosa Table Runners.

January

Get Blizzard HERE

Get Ice Jam HERE

Get Snow Goose HERE

Get Winter Branches HERE

February

Get Love Notes HERE

Get Smitten HERE

March

Get Clover HERE

Get Lucky (the pattern) HERE

April

Get After the Rain HERE

Get Amen HERE

Get Fly Away HERE

Get Lil’ Umbrellas HERE

May

Get Bloom HERE

Get Flora HERE

Get Macarons HERE

Get Nana’s Aprons HERE

Get Pretty Posies HERE

June

Get Berry-Licious HERE

Get Blissful HERE

Get Blueberry Cobbler HERE

Get Fruit Salad HERE

Get Goody Goody Gumdrops HERE

Get Penny Candy HERE

Get Pinwheel Picnic HERE

July

Get Cotton Candy HERE

Get Firecracker HERE

Get Sew Charmed HERE

Get Unfurled HERE

August

Get Cabana HERE

Get Slice of Summer HERE

Get Sunny Day HERE

September

Get Coffee Break HERE

Get Housewarming HERE

Get Leaf HERE

MAPLE GROVE

Get Maple Grove HERE

Get Mod Tiles HERE

October

Get Bat Dance HERE

Get Cake Day HERE

(I included Cake Day for October since my birthday is in October! LOL!)

Get Harvest HERE

Get Pumpkin Hollow HERE

November

Get Baskets HERE

Get Griddle HERE

Get Let’s Eat! HERE

December

Get Blessings HERE

Get Gift Wrapped HERE

Get Merry Trees HERE

Get Peppermint & Holly HERE

Get Season’s Greetings HERE

Get Sugarplum HERE

I hope you enjoyed this curated selection of VRD Table Runners arranged by months of the year. Maybe these runners will inspire you like they’ve inspired me. I’m thinking “Table Runners Through the Year” would be a really fun trunk show or guild program. What do you think? Something to add to my to-do list?

Well, that’s it for me this week.

Until next Thursday —

Sew. Laugh. Repeat.

Always,

Tricia @VRD

Quilting Partners · Rose Cards · villa rosa designs

NEW March 2023 Villa Rosa Designs Rose Card Patterns and Charley Harper Fabrics

Hello Quilty Friends!

Happy Thursday to you!

The sun is shining right now, melting the unexpected snow we got overnight, but at least it was only a couple inches and it should be gone tomorrow. Here in PA, we’ve had a relatively mild winter so far this year, but in California, where the Villa Rosa Designs quilt shop is located and where owner/Rose Queen, Pat, lives, there has been loads of snow and rain!

BRRRRRR!

The VRD shop was closed for more than a week! No electricity — no Internet! One of the shop workers couldn’t even get into her own home! It’s been that bad, really! Maybe you’ve been affected by all the bad weather out there, too.

Fabric orders are backed up, so please be patient as everything gets up and running again at the VRD shop and everyone is working as quickly as they can to get your orders put together. Thanks for your understanding.

NEW VRD March 2023 Rose Cards

On a happy note, it’s my favorite Thursday of the month — you know the one following the first Friday when the new VRD cards are released. Yay!

Drum roll, please!

Wow! Lot’s of fun, huh? You can order the set of 5 March Rose Cards HERE. (Psst — cards are not shipped from the shop in CA, so Rose Card orders are not affected by the storms on the West Coast).

And here is March’s new table runner pattern, Lucky!

I featured the Luck of the Gnomes fabric collection from Benartex, one of our newest Quilting Partners, in this runner. You can take a look at the whole collection HERE .

Check with your local shops as it should already be available.

By the way, you can get the Lucky pattern HERE.

Grab your March patterns if you don’t have them yet and get quilting — what are you waiting for???

Maybe you need some new fabric inspiration? Hmmmmm……???

Charley Harper Fabrics

Pat mentioned to me the other day when we were discussing QuiltCon, that the Charley Harper fabrics had been received well. And I was like — what are Charley Harper fabrics??!!?? I do so dislike not knowing something so I immediately went to the shop website, www.villarosadesigns.com, to see what “Charley Harper” was. And — WOW — did I get excited by what I saw.

Here are some of my favorites:

Aren’t they wonderful? Edgy and mid century modern? Rich saturated colors? Simple yet complex at the same time???

After perusing the Charley Harper fabrics available at VRD, I just had to look up some more information. Who or what was Charley Harper?

I discovered that the Charley Harper Art Studio has a website: www.charleyharperartstudio.com. So I checked it out.

Charley Harper was born in West Virginia where he grew up on a farm. He attended the Cincinnati Art Academy and even taught there for years. He was considered a “modernist wildlife artist” and he died in 2007.

Photo from http://www.charleyharperartstudio.com

I asked myself how I had never heard of Charley Harper. I did not take any art classes in college or grad school, but I find it sad I never stumbled upon this amazing artist.

How fortunate for us that Birch Fabrics has brought Charley Harper’s incredible artwork to the quilting community.

Don’t forget to check out the Charley Harper fabrics available at Villa Rosa Designs HERE! Stock up now on these amazingly beautiful designs because they are sure to go fast. Just sayin’…….

Well, that’s it for me this week!

Take care and I’ll see you next Thursday!

Until then —

Sew. Laugh. Repeat.

Always,

Tricia @ VRD

Rose Cards · villa rosa designs

Villa Rosa Designs Holiday Themed Rose Card Quilt Patterns

Hello Quilty Friends!

Happy Thursday to you!

Can you believe it’s December 22nd???

I can’t! I feel like it should still be sometime in June. Where did 2022 go? I’d like to find it, please, so I can get more done before the end of the year. LOL!

This post is going to be shorter than usual because I have to get back to wrapping, baking, and decorating the tree as I am sure many of you are also trying to do.

Of course you already know that you can turn any of our Rose Card patterns into holiday quilts just by using holiday-themed fabrics, but did you know we have some actual holiday-themed Rose Cards?

I know, I know — it’s too late to whip up a new quilt for the holidays, but you can always start early for next year (after this Christmas, of course).

Let me show you. I bet this time next year, we’ll have even more holiday-themed patterns to add to this list, so stay tuned in December 2023 because I know our family of designers is already cooking up a bunch of new patterns for you to enjoy for 2023.

Holiday-Themed Rose Cards

Fa La La says Christmas — what more can I say??? Go HERE to buy the pattern.

First Night is a fast to make pattern using 10″ squares. I just had to include it in this Holiday pattern list because not only does it makes me think of the 12 Days of Christmas, but it also makes me think of the 8 Nights of Hanukkah if you use blue, gold, and white fabrics. Go HERE to buy the pattern.

Gift Wrapped is one of our new December patterns. And it’s a real cutie! Go HERE to buy the pattern.

Happy Hollies is also a new December pattern and is perfect for your modern holiday celebration. Go HERE to buy the pattern.

Merry Trees is a jolly table runner that will bring a smile to your face. Go HERE to buy the pattern.

Peppermint & Holly is sure to be your new holiday classic runner. Go HERE to buy the pattern.

Season’s Greetings will decorate your table with holiday cheer. Go HERE to buy the pattern.

Splendor is a reminder of all the happy shiny-bright memories of this holiday season and holiday seasons yet to come. Go HERE to buy the pattern.

Background Image by Freepik

Well, that’s it for now. We here at Villa Rosa Designs wish the Happiest of Holidays to All and to All a Good Night.

Until next Thursday —

Sew. Laugh. Repeat. And Celebrate with Those You Love.

Always,

Tricia @VRD

Rose Cards · villa rosa designs

A Quilty Christmas Party and Perfect Last Minute Christmas Gift Ideas Quilters Can Make

Hello Quilty Friends!

Happy Thursday to you!

Today is December 15th — 10 days until Christmas!

Are you ready yet?

Gulp — other than shopping, I have yet to even get started. Oh wait! I put out a couple decorations in the living room and got the outside lights on. Hmm. That’s it.

Yikes! I’d better get moving, there’s only 10 days until Christmas…..

Background Image by Freepik

December Quilt Class Christmas Party

Recently, I wrapped up (pun intended) my 2022 Table Runner a Month class with a festive December Christmas party/class. What a lot of fun we had — we met an hour earlier than usual so we could do a pot luck lunch. YUM! I don’t know why, but quilting and food always go together. And chocolate — you have to have chocolate!

It was a soup and sandwich pot luck — we had 2 soups, sandwich wraps, meatballs, and an awesome assortment of everything else! Way too much food, but OH SO DELICIOUS! I tried my hand at potato soup. I ended up mashing 3 different recipes together. I made it on the stove top and then transferred it to a crock pot. I was amazed at how good it actually turned out, considering I’d never made potato soup this way before. In the past, I always started with a white sauce, but this time I started with chicken broth — I didn’t even have to add any flour — the starch in the potatoes thickened up the soup when I squashed them up with a spatula once they were soft. Of course, the cream cheese and shredded cheddar didn’t hurt any either! Here is one of the recipes I mashed up: Easy Potato Soup Recipe.

We did a 1 yard fabric exchange, too. For my group, that means we each brought the equivalent of about a yard of fabric in a gift bag or box (could be 4 fat quarters, 8 fat eighths, 1 charm pack, 2 half yards — you get the idea). To do the fabric exchange, we sat in a circle and played a Christmas game using a Right Left version of Frosty the Snowman.

Don’t know what a Right Left Gift Exchange is? You can go HERE for more information and 5 fun Right Left stories. Or just search “Right Left Christmas Game” on the Internet and you will get lots of different story options so you can choose your favorite! What I love about this game is that it doesn’t take a lot of time, you can do it with any size group, and no one’s feelings get hurt.

I also went over our December project and introduced the group to the Disappearing Nine and Four Patch blocks. Are you familiar with these? I just love all the different ways you can do them and how each time, your quilt looks completely unique even though you are using the same concept over and over. Lots of fun! If you are new to Disappearing Nine and Four Patch designs, you can go HERE for more information.

Our 2022 class was a Table Runner a Month theme this year (I try to choose a different theme or project each year). We began the class in March and met once a month through December. We skip January and February because those are usually the worst winter months in our area, but sometimes March and April can be worse than January and February. Oh, jolly Pennsylvania….. Each month in 2022, we made a different Villa Rosa Rose Card table runner pattern.

One of my quilty pals, Sherry, had been after me for a couple years to do a class on my VRD runners. I finally agreed to do a year of my VRD table runner Rose Cards for 2022 — it felt kind of weird to do an entire year of my own patterns, but Sherry was right — it turned out to be an awesome group/class.

Here is the list of the Rose Cards we did for 2022 (I added the links to the VRD website just in case you want to know more or purchase the patterns) —

March — Ice Jam

April — Belle Amie

May — Pinwheel Picnic

June — Unfurled

July — Whirly Bird

August — Lattice

September — Leaf

October — Dapper

November — Peppermint & Holly

December — Coffee Break

Now for the fun! Here are photos of some of the table runners made by members of the group.

Awesome runners, aren’t they??? And these are only some of the numerous runners!

I love how each person showed their own styles, used their own fabrics, modified the design by adding or subtracting borders, made the runners smaller or larger or even a square, and even made some runners extra special by piecing extra fabric into the backing. These ladies are not only talented, they are a great group of people.

I was so inspired this year using my Villa Rosa patterns, we are going to do a Year of Panels and Novelties in 2023, using — you guessed it — Villa Rosa patterns.

Villa Rosa Designs has over 500 patterns in our VRD catalog, so I could seriously go for years without using the same pattern twice. How cool is that? Besides, VRD releases 5+ NEW patterns every month — that’s over 60 NEW patterns EACH YEAR.

You might wonder why I am taking so much time to talk about the Table Runner class, but it leads right into my next topic!

Perfect Last Minute Christmas Gift Ideas Quilters Can Make

Table Runners!

Yep — table runners are my go-to solution for a quick last minute handmade gift.

Let’s break this down:

Table Runners are….

  1. quilts
  2. handmade
  3. a very personal gift
  4. a lot faster to make than larger quilts
  5. easy to personalize to the recipient
  6. less expensive to make because they require small amounts of fabric
  7. precut and stash-friendly
  8. a great gift for practically anyone on your list
  9. special
  10. AWESOME!

Of course, any small quilt or project that can be finished quickly makes a great last minute gift — table runners, place mats, wall quilts, table quilts, doll quilts, mini quilts, pillows, and more.

Villa Rose Designs has got your back, I promise you!

A stack of VRD Rose Cards makes an amazing gift for yourself or your favorite quilty pals, too…..just sayin’……..

If you don’t have time to make a runner or other project before the holidays, consider gifting a quilt kit — pick a fun pattern and add the required fabrics for the top and binding. A kit for your fav quilty friend will give that person something new and fun to do during the winter months. Or gift a kit to a non-quilty person with a note saying you will complete it for them after the holidays.

However you do it, here are some great Villa Rosa Designs Rose Card patterns to inspire you:

Table Runners and Place Mats

Amen uses pre-printed panel squares or a theme fabric which means some of the work is already done for you before you even get started.

Griddle uses stash or scraps so there’s no need to head to the quilt shop (unless you really want to…).

Ripple Runner is super fast to make and finish. Short on time? Use a light, medium, and dark fabric instead of making it scrappy. Or go Christmas scrappy — what fun!

Season’s Greetings is a no-brainer — really. Don’t have fat sixths (12″ x 22″)? Dive into your scraps and stash instead!

Sugarplum is a super simple and cute pattern that goes together in a snap. 1 fat quarter and a bunch a scraps. Sew sew sew! Presto! DONE!

Let’s Eat is a fun set of place mats that uses pre-printed panel squares or a theme fabric which means of course that some of the work is already done for you.

Small Quilts

Baby Goose is a great versatile quilt at 42″ x 58″ and can be backed with only one width of fabric. It would take longer than a table runner to make, but it still goes very fast because the focal fabric does most of the work.

Blue Girl — just 3 fabrics….

Cabin Fever is the perfect size for a baby quilt or a wall quilt or a small lap quilt AND it goes really fast.

Cat City for your favorite feline lover. Go HERE for a 2 Cat City quilt block mini cat quilt tutorial.

Dainty Machines has directions for multiple sizes, including a 26″ x 26″ mini quilt with 4 blocks. You can check out my interview with Sewl Sister HERE.

Mod Tiles and Mod Tiles Too — got charm squares???

Fun Stuff

Did you know we have a whole VRD collection of Accessory Rose Cards? Accessories make great gifts for anyone and everyone. I’ll show you some of my favs, but you can click on the link above to see the whole collection.

Olivia Jane — a Charm Square Patchwork Tote

Savannah Jane — Cool pieced scarf. Add a fleece backing to make it cozy for winter.

Belinda Jane — Pillow Sham

Petula Jane — Roll & Go Place Mat and Napkin

Emmalina Jane — Eyeglass Case

I hope these great projects have not only inspired you but give you the desire to whip up those last minute holiday gifts. There’s still time, but you’d better hurry!

Well, that’s it for this week.

Until next Thursday —

Sew. Laugh. Repeat. And SEW some more.

Always,

Tricia @VRD

Rose Cards · Tips and Tricks · Tutorials · villa rosa designs

A Little Gardening and Cake Day Quilt Block Assembly Tips

Hello Quilty Friends!

Happy Thursday to you! I hope you all are having a wonderful summer so far.

My summer just got a whole lot better! Just recently my family got in gear and finally got our little back porch raised garden planted. And our flowers, too. We may be running a little behind, but I have hopes that in late summer/early fall we’ll be enjoying some fresh veggies picked right out of our little garden pf goodness. If it goes well, next year we are going to add a second raised bed garden.

I used to be an avid gardener way back when, but gave up the year I planted my garden twice and the critters ate everything before it even had a chance to grow. That was it.

But now I’m excited to try container gardening. Besides, ”container gardening” sounds so trendy, don’t you agree?

Cake Day Quilt Block Assembly Tips

I thought I’d share a quick tutorial on how I put the Cake Day table runner quilt block together along with some of my favorite piecing tips.

Cake Day Table Runner Rose Card Pattern

You can get your own Cake Day Table Runner Rose Card pattern HERE.

Often, I prefer to cut out all my pieces for the blocks before I start sewing. I find this is usually quicker than cutting and sewing one block at a time.

Here you can see the pieces all laid out in the right order (all four blocks are stacked) on a flannel board and then I can simply take everything to my sewing machine. This works well if you have to stop in the middle and come back to your project later. Everything stays right where you left — unless of course, you have gremlins or leprechauns or some other little mischievous creatures running around your sewing room when you are not looking.

I have also found that laying out and stacking the pieces in order makes sewing them together faster and easier because I don’t have to stop and figure out where each piece goes.

With all the pieces cut and laid out right sides up, sewing them together is a breeze, especially when I chain-stitch the units one right after the other without cutting my thread in between the units.

Nope! No need to head to my ironing board after clipping the thread between the units, I just kept sewing and chain-stitched the other side too.

I have discovered that the less I press as I’m putting together quilt blocks, the less the blocks stretch or get distorted, which of course improves the accuracy of my sewing.

In the next photo you can see I have the left side background sewn to the Cake print rectangles. Now it’s time to sew the right side.

All right! All the units are sewn together and I’ve clipped the threads between them. I made double sure I layered the units again exactly the same as when I started — we’re ready for the next step.

Again, I’m going to ignore my iron (it must be getting lonely). Time to sew the units together. More chain piecing.

Want to know what happens when I get to seams (remember I haven’t done any pressing at this point)? I’ve already decided which way I wanted my seams to go so as I sew, I hold them down and keep on sewing. Pedal to the metal!

In this next photo you can see I sewed the top unit to the second unit. We’re on a roll — let’s keep sewing.

Okay, we’re almost there! I sewed the rest of the units all together and presto — all 4 of our blocks are now complete and I didn’t even have to get up from my sewing machine.

All right, all right, I relented and finally pressed my blocks — my iron was getting a little dusty from disuse.

Voila! Here is a finished Cake Day block. It’s a cutie, isn’t it?

My 4 blocks are now ready to assemble into a runner. There are sew many possibilities for this runner — birthdays, weddings, showers, parties, and the list goes on and on.

Any day can be a “Cake Day.” What’s yours?

Until next Thursday —

Sew. Laugh. Repeat.

Always,

Tricia @VRD