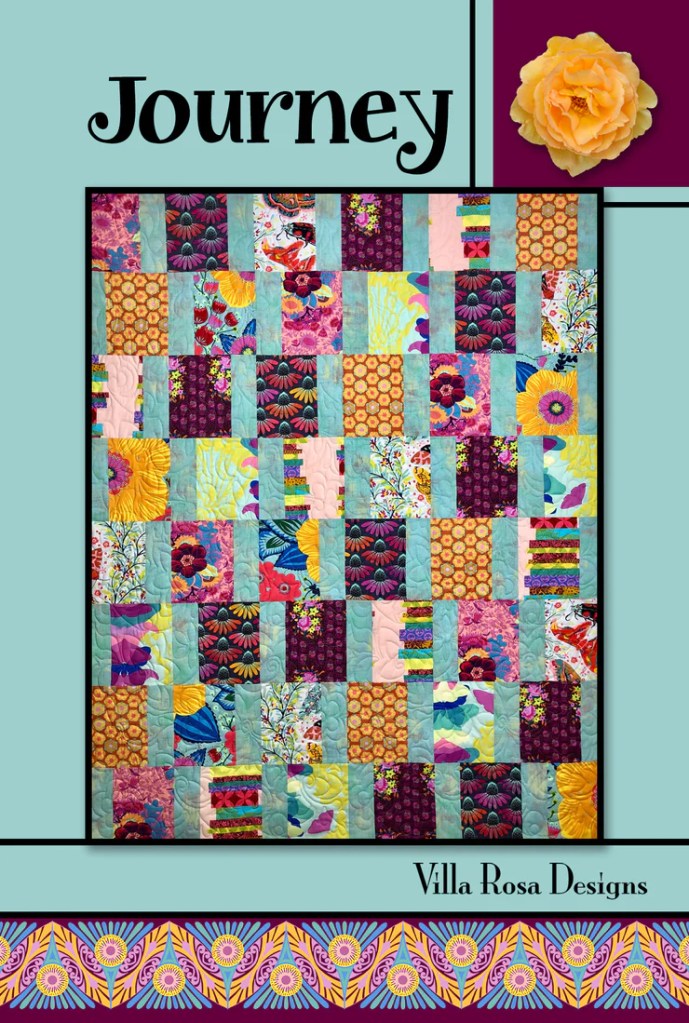
Aren’t they amazing??? I am so itching to make the Eclipses quilt by Creative Sewlutions before we have the Eclipse in April because I live in one of the viewing areas to see the total eclipse. Our local hotels are already booked up for the event.
Oh my gosh! I haven’t ordered my special viewing glasses yet. I’d better get on that, huh?
But wait — there’s more! Of course there is, right?
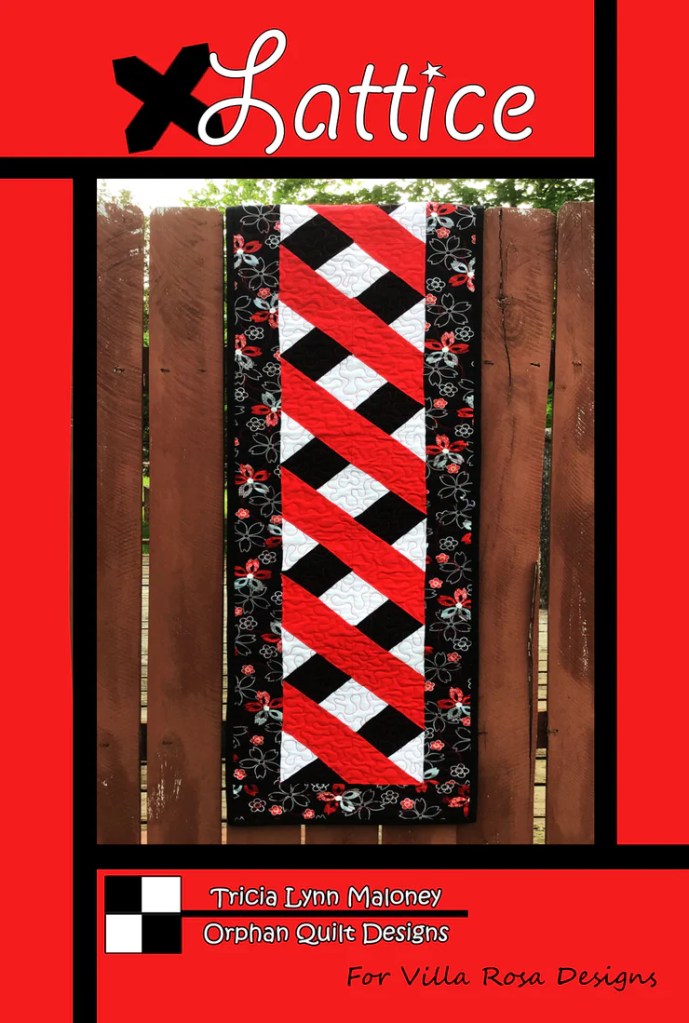
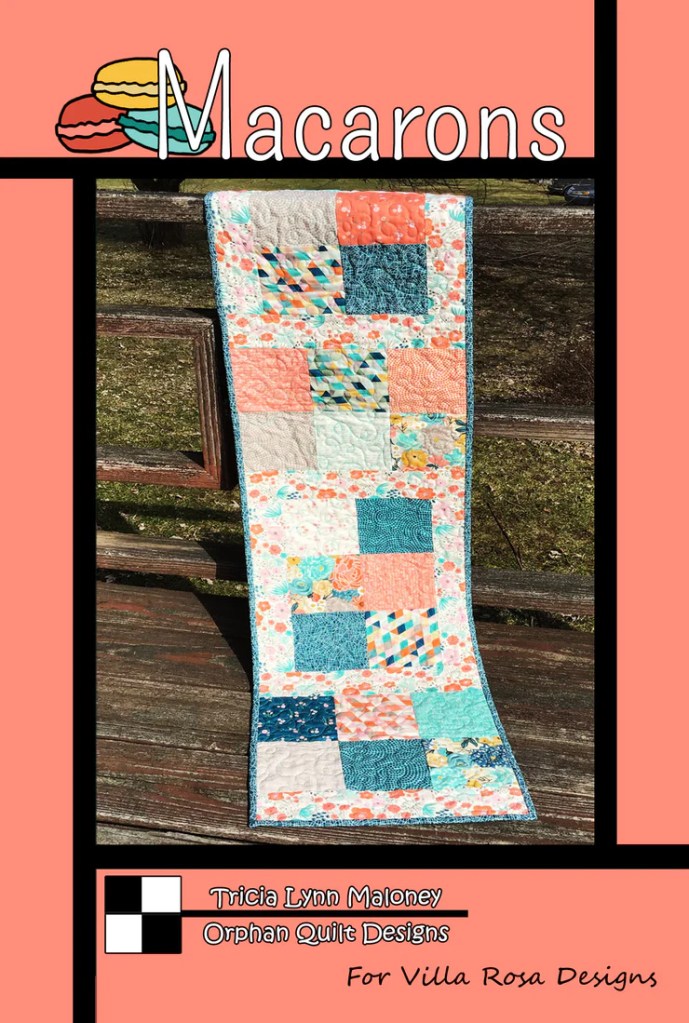
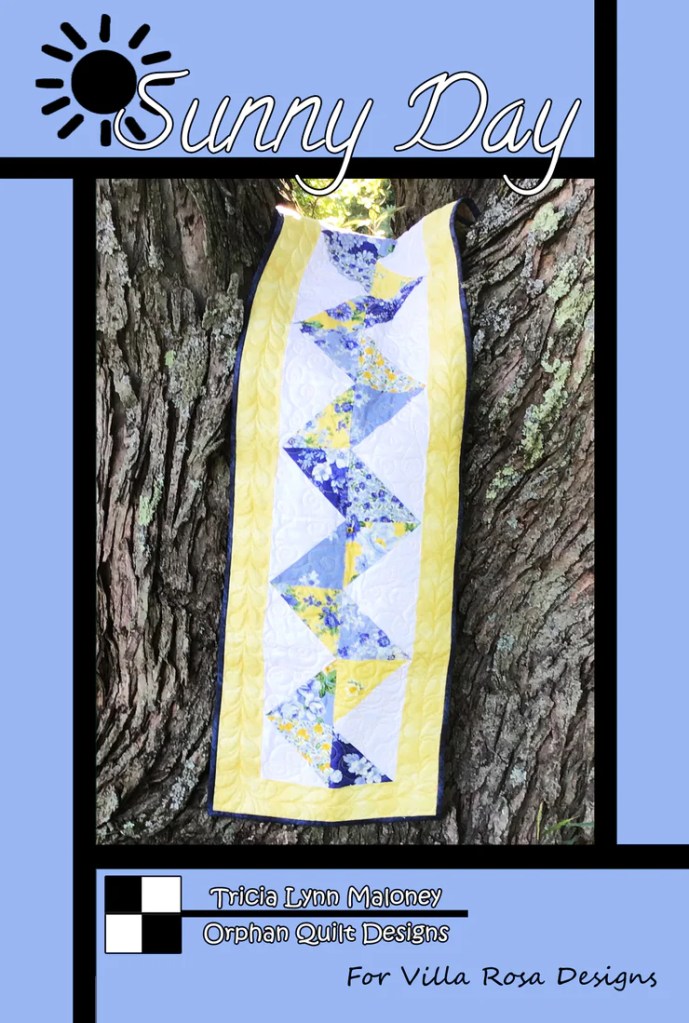
This month we have a cute new runner designed for your special fabrics you do not want to cut up.
We also have a snack mat this month perfect for those mugs of celebratory drink and green snacks on St. Patrick’s Day. Remember when I mentioned last year that in 2024, we’d be adding some new Accessory patterns? Well, here’s the first one. It’s super cute and quick to make up and you can use some of that St. Patrick’s Day fabric you’ve been hoarding.
Can’t wait to see your Shamrock Snack Mats on our Facebook group, so get ’em made and post those pics!
So…….which pattern are you going to make first? Me, definitely Eclipses. I know — let’s do that one as a tutorial after we wrap up the Blog Hop!
Now, let’s talk about the Blog Hop. You know, March 14th is next Thursday. Gulp! I just hope I’m ready. Are you ready? It’s going to be super amazing.
VRD Fast & More Fun Blog Hop
Are you getting excited??? The Villa Rosa Designs Fast & More Fun Blog Hop is literally just around the corner!!! It all starts right here next Thursday, March 14th!
Gather up all your quilty friends and family and join in on all the Blog Hop fun together! There are lots of prizes up for grabs, including quilt pattern sets, books, precuts from fat quarters to 5″ squares, and more.
This year, we also have 4 — count ’em — 4 very awesome Grand Prizes for you to register for on all of the Blogs. You’ll have to wait until March 14th to see them, though! Yep, I’m a tease…. (wink, wink)
Below, please find a list of our super fabulous Bloggers. Check them out and see what they’re all about.
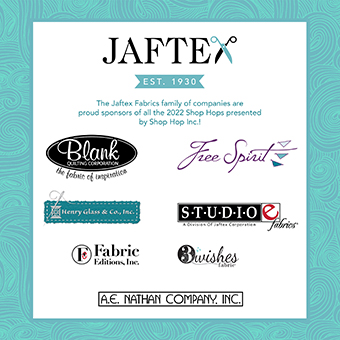
Of course, this Blog Hop wouldn’t be possible without all of our fantastic super generous Blog Hop Sponsors. A great big THANK YOU HUG goes out to each of our Sponsors!
Mark your calendars for next Thursday’s Blog Hop kick off post — you won’t want to miss it. There are so so many prizes just waiting to be won. You just might be a winner. But you can’t win if you don’t join us on our Blog Hop adventure.
I’ll see you right here bright and early on March 14th for the kick off of our Fast & More Fun Blog Hop!
Mother Nature sure has been trying hard to confuse us up here in NW Pennsylvania! We’ve had temps in the 60’s! Can you believe it? I wouldn’t, except I’ve been reading the temp on the thermometer. Yesterday, I even had peepers (tree frogs) on my basement window in the rain. This is WAY too early for the little dears to be awake! I’m wondering what Mother Nature has in store for us in March and April. Who knows? Maybe we’ll have snow in June?!?
I’ve been on a quilting roll since my curated list of Spring VRD Rose Card patterns a couple weeks ago (you can find the post HERE if you missed it). So I wanted to do another tutorial this week. I reached into my magic project crate and pulled out Pacific Grove.
But first, let’s chat about the upcoming Blog Hop!
Villa Rosa Designs Blog Hop March 14-21
Well, it’s now officially 2 weeks until our VRD Fast & More Fun Blog Hop, which kicks off right here on March 14th. I hope you’re getting excited about it.
Prizes keep coming in — it’s like Christmas around here! Except it’s not for me at all, instead — it’s ALL FOR YOU.
So far we have 2 AWESOME Grand Prizes lined up. Nope, I’m not going to show them to you yet. You’ll have to wait until March 14th for our Blog Hop kickoff post. Everything will be explained at that time, I promise.
We now have 26 bloggers participating in the Hop. And who knows? Maybe more if anyone comes late to the party.
Remember, the fun begins March 14th right here on the Villa Rosa blog. So make sure you stop by and hop along with us for the week.
Okay, now let’s get to the quilt tutorial!
VRD Pacific Grove Quilt Tutorial
I’ve been wanting a reason to make Pacific Grove for a while now. I’ve always thought the quilt on the cover of the pattern looked like a work of art. What do you think? Wouldn’t it look amazing framed and hung on a wall? On my wall???
Finally, today is the day to finally make my very own Pacific Grove work of art.
Get your own Pacific Grove physical pattern HERE or a digital pattern HERE.
Special thanks to Hoffman for providing the fabrics for this tutorial.
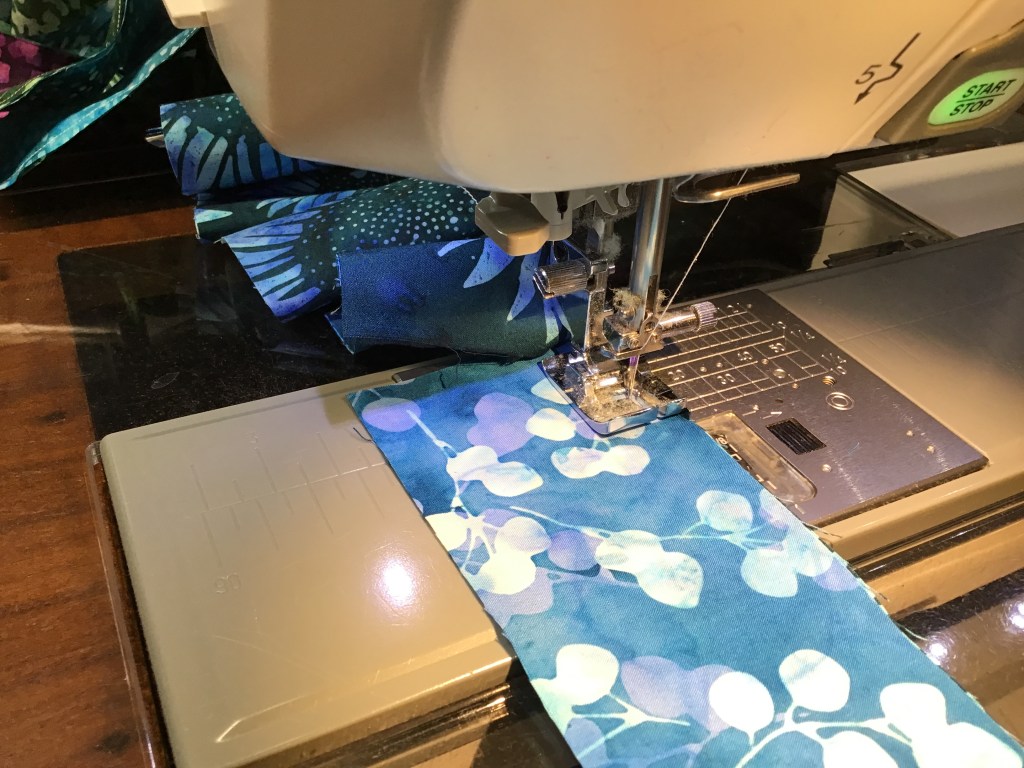
Before we get started, I do want to say that digital prints can be a little finicky so it’s important to start with a new sharp needle in your machine. If you use pins when you sew, make sure they’re sharp. Why? Because you don’t want to break any threads. Take a look at this photo. Do you see area inside the red circle? See the 2 broken threads? You don’t want this to happen to your quilt because it will probably be visible on the front, not just on the back. Lucky for me, this was in the seam allowance. Whew!
So, let’s get start by cutting the main print and the background fabric. I kind of don’t want to cut this lovely fabric up, but I know it will look fabulous in the Pacific Grove pattern.
Now that the pieces are cut and ready to sew, it’s time to assemble 2 side units. Easy piezy!
Next up is putting together the center of the quilt. I really like how this quilt is coming together into vertical rows. That makes it really simple to put together. And I’m not having to match up a bunch of seams. Yay!
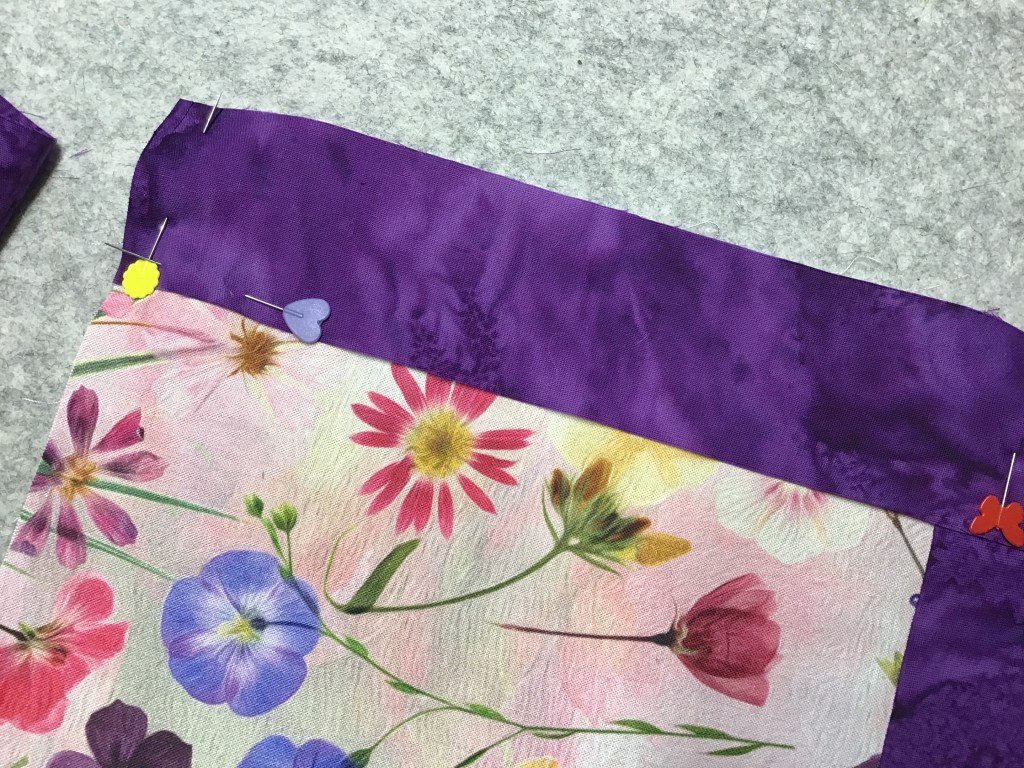
Now that the sides and the center are made, I’m going to work on the purple background strips. Here you can see in the first photo how I creased the center of the side strip and the center of the sashing strip. Then I matched those creased centers and put a pin right there. After I found the centers, I went to the outside edges and lined them up. You’ll see in the second photo that not only do I place a vertical pin, I also place an horizontal pin . That horizontal pin helps to keep my strips straight instead of bowing as I sew (I learned this little trick a long time ago from a quilter friend when I was a new quilter). After the center and the outsides are pinned, I always add a few more pins in between to keep everything from shifting when I sew.
Yay! Here you can see the design taking shape now that I’ve sewed the purple strips to the sides of the quilt center.
Next I’m gong to sew the side units to the center. Again, I will crease and match my centers. I think it’s looking really lovely with these digital prints.
Time to add purple background strips to the sides. It has a bit of an Art Deco feel to it, doesn’t it? Or maybe a stained glass window?
Time to sew background strips to the top and bottom of the quilt. Isn’t it looking amazing???
The borders are next up. What’s cool about this pattern is that you add the top and bottom borders on first before the side borders. When I did the purple strips, I added the sides first. But it does make sense to do it this way because it uses the fabric more efficiently — you don’t have to piece the top and bottom borders if you add them first. Ingenious!
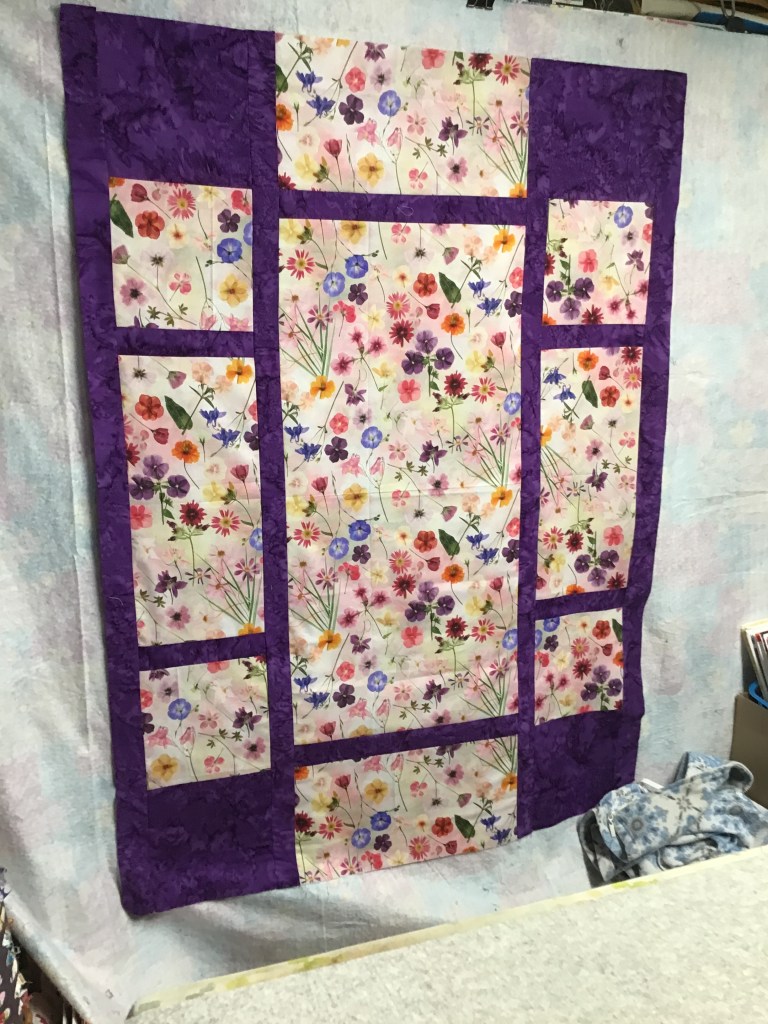
Here is the finished quilt top. It looks like an Art Deco stained glass window garden to me!
With so much open space, I’m just itching to starting machine quilting it, but that will have to wait for a while, I’m afraid.
Duet Quilt Tutorial Update
Last week I was debating whether to add a border or not to my Duet quilt top. Then I took a deep breath and just added that outer border. I chose a light batik because Duet felt a bit dark to me. The binding will frame it all nicely — it’s dark blue.
TWO WEEKS TO GO AND COUNTING DOWN……..until the Blog Hop. Get ready.
I hope you were as inspired as I was after seeing my curated Spring VRD Rose Card pattern list last week. If you missed the post, you can find it HERE. I was SEW inspired, that I used a new blog quilt tutorial as an excuse to make a pretty new quilt top. (Nah, you’re right — I didn’t really need an excuse. LOL!)
But, first, let’s talk a little bit about our upcoming VRD Blog Hop!
VRD Blog Hop March 14-21
Oh my gosh! The Hop is only weeks away. I hope I’m ready in time. Of course, I’ll be ready on time.
I thought I’d tell you a little bit about some of prizes that are coming in for the Hop from our awesome event Sponsors.
Here’s a glimpse of the goodies that have arrived so far! I can’t wait to send them off to the winners. Maybe you’ll be a winner this year. All you have to do is visit all of the blog posts each day to register for prizes! Lucky you! Yippee!
I am also happy to share that our International friends will have a lot more variety this year for prizes as several of our Sponsors are able to ship directly to you. I’m getting really excited about the Hop. I hope that you are too. Don’t forget to tell a friend…..or two about it (or everyone you know!) so they can Hop right along with you.
Be right here on March 14th for the kickoff to our week-long Blog Hop in celebration of Villa Rosa Designs and all of our bloggers and sponsors. Be here or be square (yeah, you knew I was going to say that.).
Okay, now let’s make a quilt!
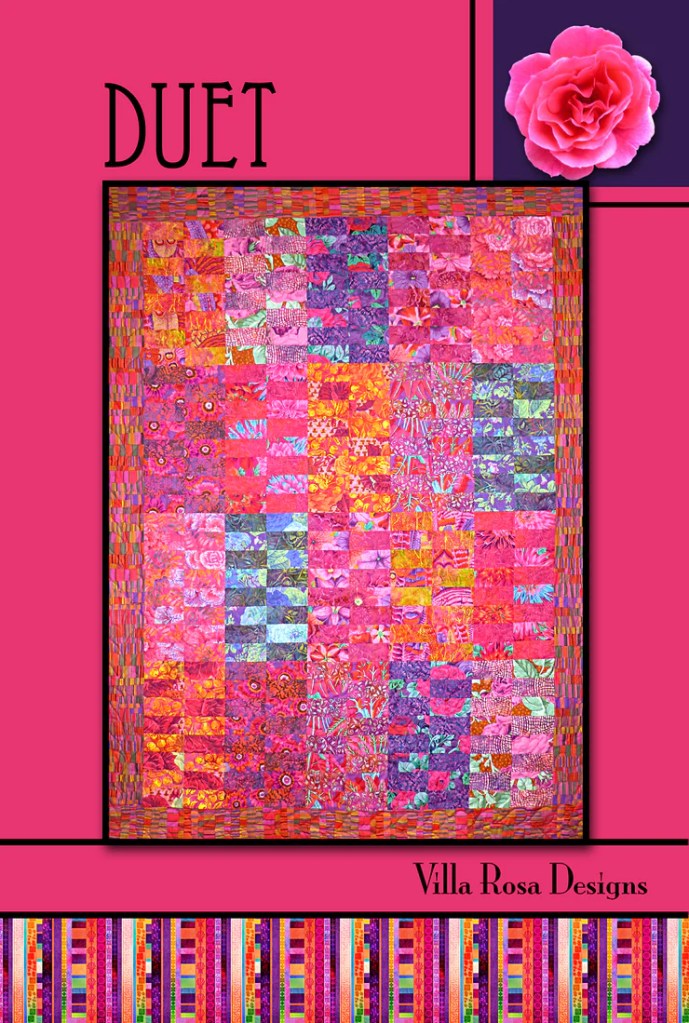
VRD Duet Quilt Tutorial
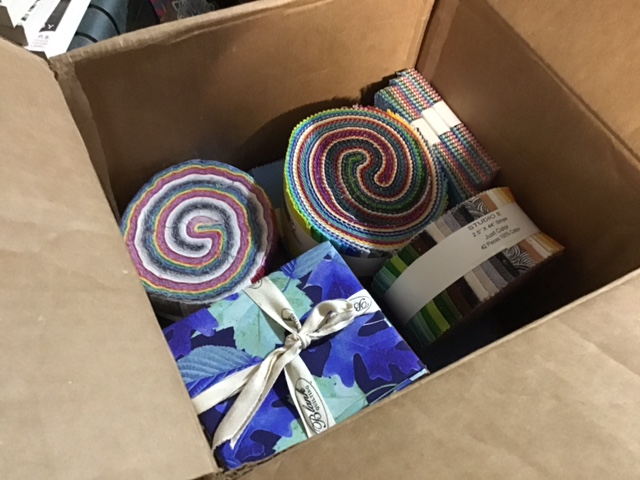
After last week’s post, I just kept telling myself I had to do a new quilt tutorial for the blog. So I dove into my big magic crate of project kits and pulled out a Bali Pop to make Duet.
You can get your own physical Duet pattern HERE or a digital pattern HERE.
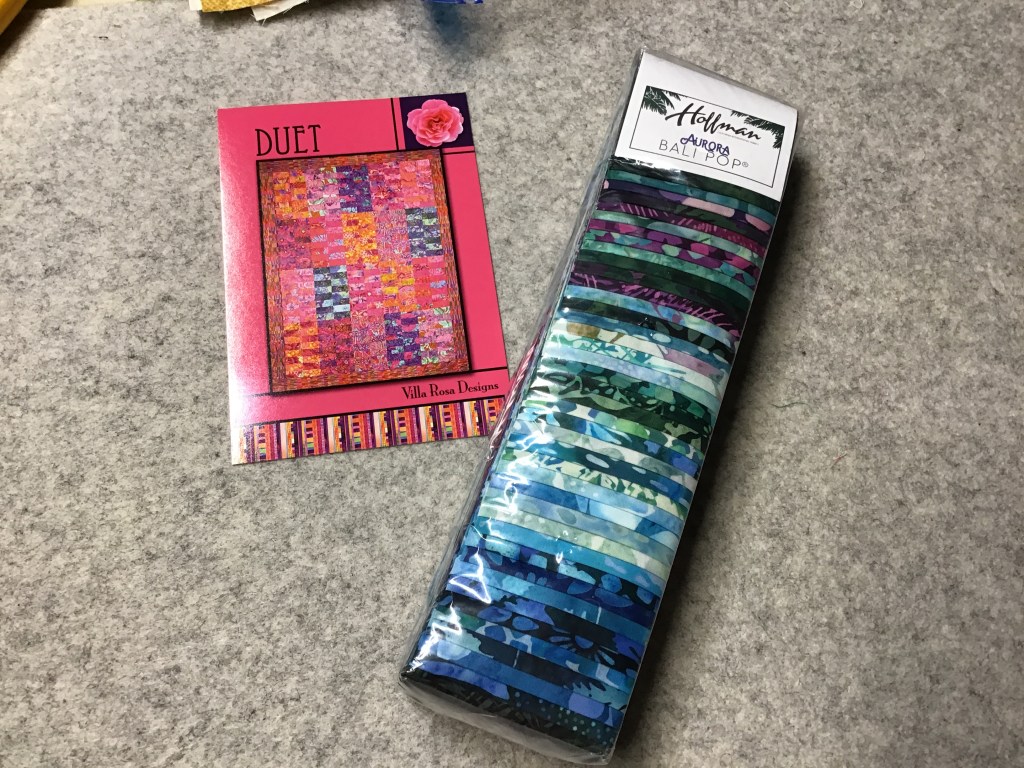
I’m really loving this Aurora Bali Pop for Duet. Isn’t it just so yummy with blue, green, teal, purple and all the shades in between. Special thanks to Hoffman for providing the fabric for this project.
Sadly, we don’t have the Aurora Bali Pop in stock at the VRD online shop, but we do have other great options you can use to make this quilt. You can check out our 2 1/2″ strip sets HERE.
Let’s get started!
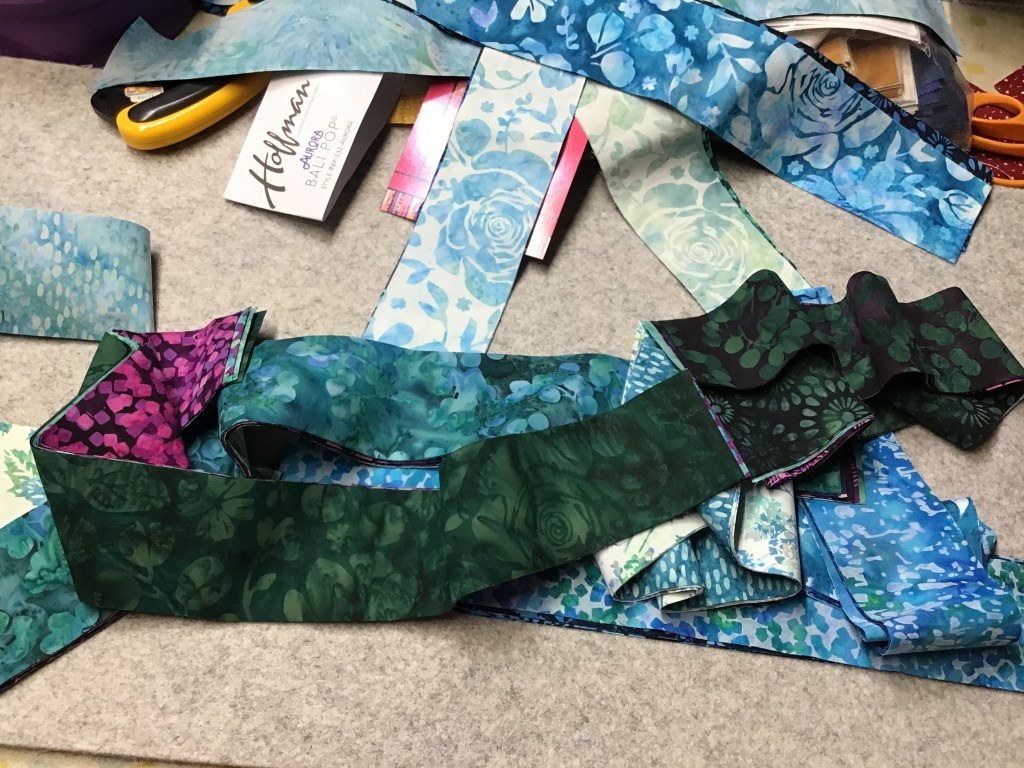
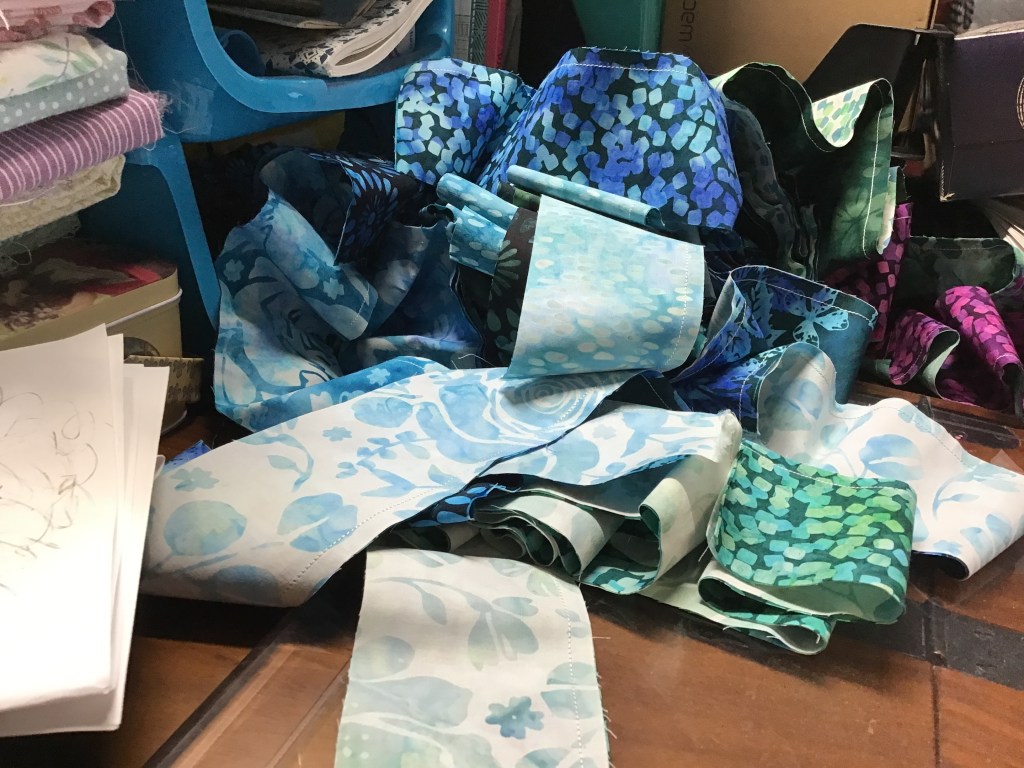
The first thing I did was pair up my strips. You’d think it would be easy to do this — pair a dark with a light — but most strip sets do not have an equal number of each. So that meant I had to use the mediums as either a light paired with a dark or as a dark paired with a light. Here you can see my tangle of strips as I pair them up. And you can see my unique way of keeping my pairs together by stacking them at different angles. Sometimes I don’t know where my ideas come from. And I don’t really care as long as they work.
Happily, this strange stack did actually work and I took it to my sewing machine to sew my paired strips together. At the machine, right before I stitched each pair, I cut the strips in half. Or you could cut them in half after you sew them together. I chose to do it first because I really don’t enjoy sewing long strips together. Then I sewed and sewed using the assembly line approach until I had all the pairs sewn together. Check out my tangle of sewn strips in the second photo. Yikes!
Now that my strip pairs are all sewn together, it’s time to sew the 2 matching strip sets into a quartet. No, they really weren’t tied up in knots. I just started at one end and kept working my way through the assembly line, sewing one quartet together after another. Surprisingly, it was a pretty speedy process.
Woohoo! All those quartets are sewn and now I’m going to press the seams on each strip set going in the same direction. This will actually save me some time in a couple of steps.
I really love sewing with batiks. Now.
HOnestly, I’ve come late to the batik party, but I’m here now and that’s what counts. For a long time, my friends Mary Lee and Leslie, were always ooh-ing and awe-ing over the latest batiks while I was always like — okay, pretty fabric.
I’ve learned since then that batiks truly are a joy to sew with. They are smooth and supple, even crisp. And the colors — oh my goodness!
I have found that I do need a brand new needle when I’m sewing a batik project (yes, I know I should start every project with a brand new needle……). Batiks have a much tighter weave and a higher thread count than regular cottons. I have found that a used needle pokes holes in the fabric and may even break threads whereas a sharp needle kind of glides between the fibers. Food for thought……..
Let’s press!
Now all of my quartets are pressed, it’s time to cut the units. Do you stack your pieced strip units for cutting? I do, and here’s a technique I learned a long time ago — stagger the strips when you layer then so that seams are not sitting on top of each other. Cutting is a lot easier and more accurate when you are not trying to cut through a big lump of seams.
I stacked 4 quartets on top of each other when I cut the units. Then I just picked up the units from each quartet and stacked them together. It was kind of like dealing playing cards, in a way. Then I stacked up the units, keeping each quartet together. Easy piezy! Now back to the machine for more sewing!
Next I’m going to take 2 matching units and sew them end to end, making sure that the alternating fabrics are consistent. Then I will sew the second set of units exactly the same way as the first one.
Because I pressed all my seams in each quartet the same direction, sewing the units together is really easy as the seams matched up and nestled together (awwww! They’re so sweet!) when I layered them right sides together.
Quick! Sew, sew, sew!
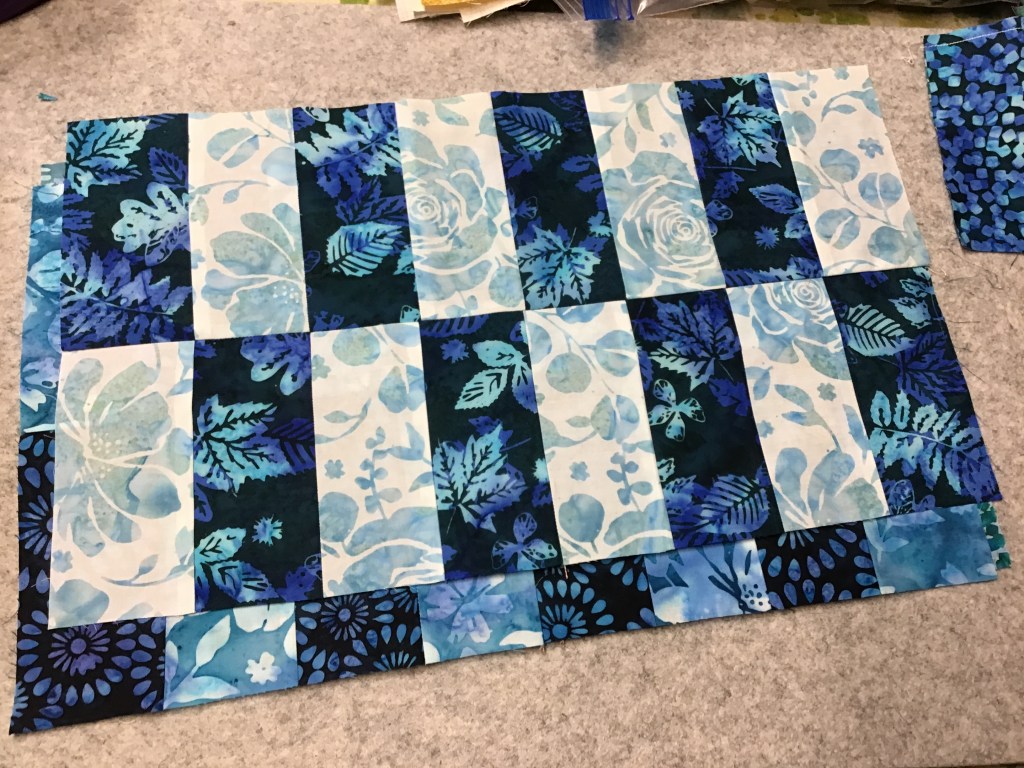
Yay! Time to finish the blocks! I am going to sew the 2 units from the same quartet together side by side, flipping a unit so the 2 fabrics alternate completely throughout the block. 19 more to go….
Blocks all done! I’m going to press them one more time and then it’s time to do the block shuffle on my flannel board.
Okay, here’s my final block arrangement. The purples and the lights were a challenge to find a way to lay them out so everyone was happy. What do you think?
Back to the sewing machine to sew the blocks into rows and the rows together to make the quilt top.
I’m very pleased with how Duet turned out. I’m considering about adding a border to make it larger. Hmm, methinks I need to think about this a while longer….
Like a lot of our VRD patterns, Duet worked up quickly and I would say it’s probably a one day project to make the quilt top. It’s great to have some one day projects tucked away in your back pocket to pull out when you need a quilt in a hurry. I hope Duet will be one of them for you.
Well, that’s it for me today. One marathon quilt in a day is enough for me for now.
After our balmy winter weather last week, today I woke up to find snow on the ground. Not a lot, but enough to remind me that it is still winter. Then my mind immediately turned towards quilting for spring which always makes me feel sunny. So, I thought to myself, why not do a collection of spring VRD Rose Card patterns to get a dose of vitamin D along with a lot of inspiration? Maybe you need this little shot of sunshine right now, too.
Spring VRD Rose Card Quilt Patterns
Below you will find a wonderful eclectic collection of Spring-inspired projects curated just for you. I have included a link beneath each image so you can easily grab new-to-you physical Rose Cards. As always, there is NO SHIPPING on patterns!
For our international friends, I am here is a link to our digital Rose Card collection, where you will find most of the patterns in a download and print format: Digital Patterns.
After all these glorious Spring-inspired Rose Card patterns, I’m ready to head to my machine and start making a little spring for myself here in my dungeon — er….sewing room.
How about you? Betcha can’t pick just one….
Have a great week and don’t forget about our upcoming Blog Hop March 14th-21st.
Get ready for a fantastic time. Oh yeah — there will be prizes, too!
Here in NW PA, things are looking like spring! Punxatawney Phil (the Groundhog) did not see his shadow on February 2nd, which (hopefully) means an early spring. I started seeing some signs of spring even before Groundhog Day — on January 31st, I saw a groundhog awake and out of its hole. Next we started seeing some of our spring birds returning — starlings and bluebirds. We haven’t seen any robins in our yard yet, but other folks in our area have already seen them. Yes, we’ll probably see more snow before spring is completely sprung, but in the meantime I will enjoy winter days filled with sun and warmer temperatures.
Of course, true to living in NW PA, we did have a few weeks of very cold and snowy weather, but right now, we are enjoying the lack of snow and the sunshine with daytime temperatures in the 40’s with a few 50’s thrown in just to tease us. I hope you are just as fortunate as I am in the weather department right now. With all the sun, though, I am wanting to be outside to enjoy it, not down in my dungeon studio/office. Oh, the conundrums of nice weather……
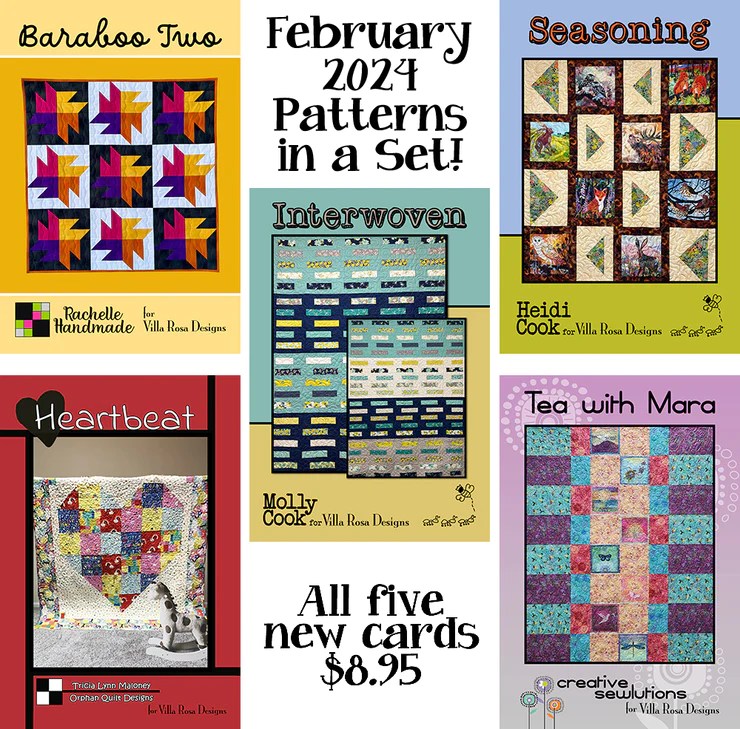
On another note, do you know what day it is today??? It’s the first Thursday after the first Friday of the month which means NEW VRD Rose Card Patterns for February!
NEW VRD February Rose Card Patterns
YAY! Who doesn’t love NEW PATTERNS? Especially new patterns EVERY MONTH? And we’ve got some great new ones just for you this month, including several from our new designers Rachelle Handmade and Creative Sewlutions.
You can grab your set of February Rose Cards HERE for the special price of $8.95.
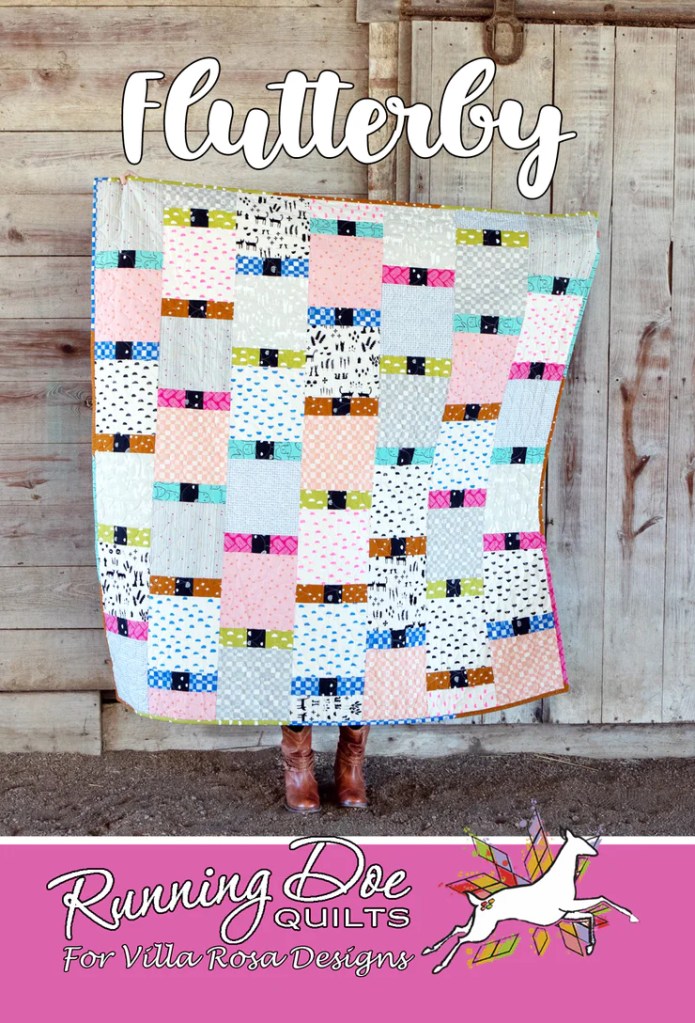
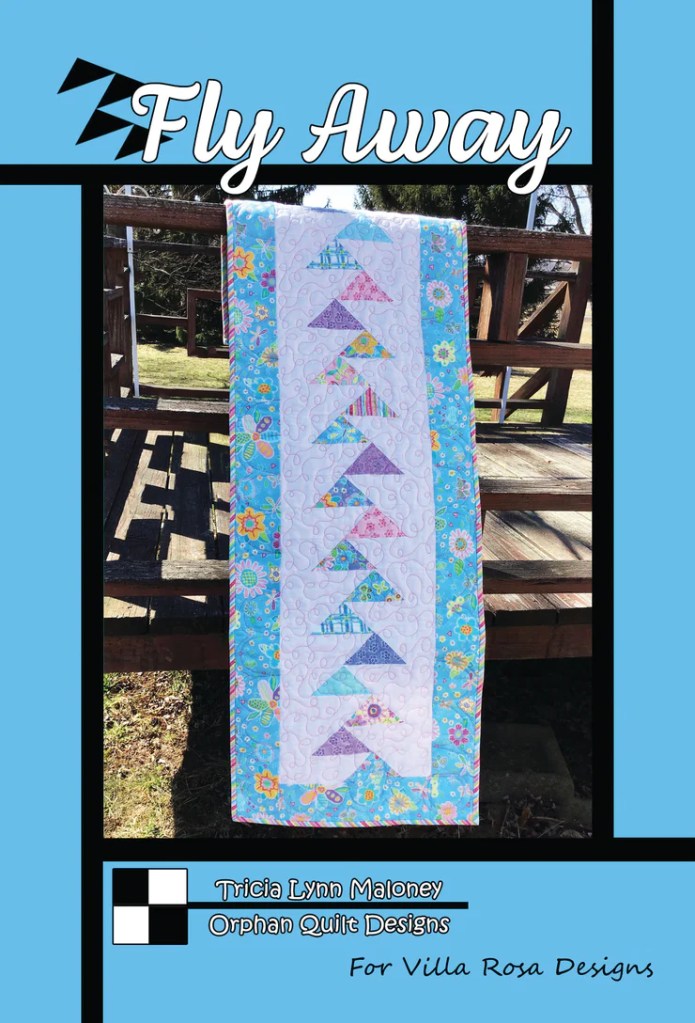
We also have 2 — count ’em — 2 table runners this month! One from Rachelle Handmade and one from yours truly.
What a great collection of patterns, don’t you think? Lots of variety AND different styles to appeal to just about every quilter. Which one are you going to make first this month?
Quilts of Valor National Sewing Day
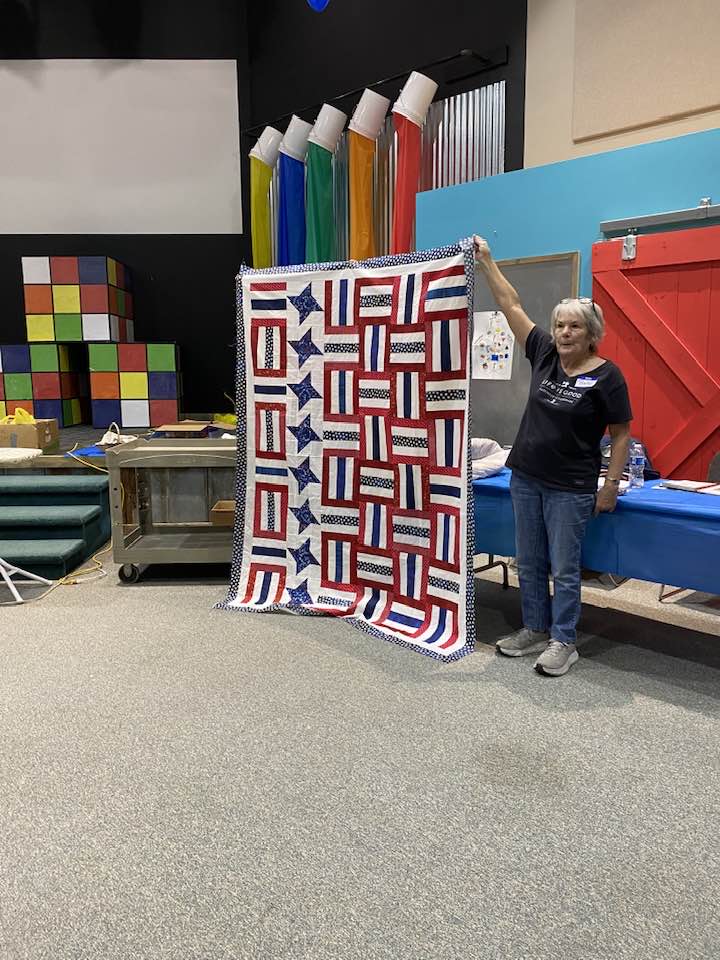
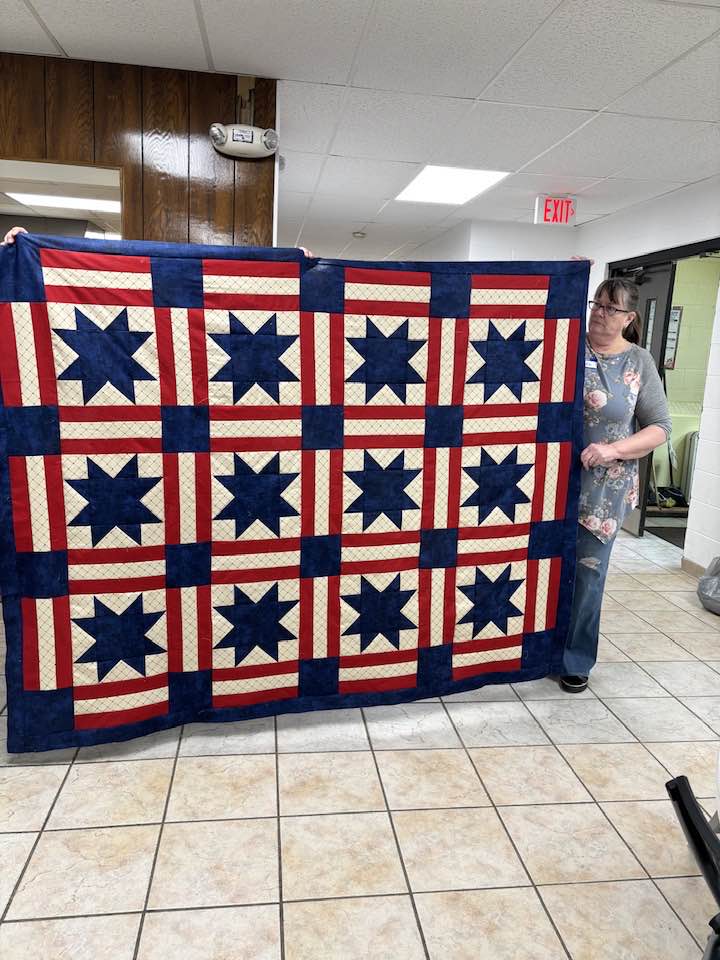
As I mentioned last week, I had signed up to attend my local QOV group, PA Stitcher’s of Valor’s National Sew Day event. Our event was actually 2 days, Friday and Saturday, instead of just Saturday. This meant we could get even more sewing in. But with 2 days of sewing, I still didn’t get my project completely finished. I should have looked over the pattern a little bit more and pre-made my almost 200 Half Square Triangles (HSTs) before the actual sew days. Then I probably could have gotten my project finished. Hey, I was just pleased that I got all the pieces cut out. And I did get the 12 blocks sewn together, so now all I have to do is sew the blocks together and add the 2 borders.
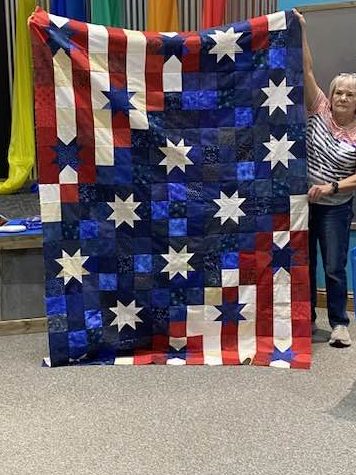
I pretty much spent the first day just making HSTs. My cuz and pal, Robin and I switched projects for a while that first day because her machine was giving her some issues and she was having a hard time sewing her blocks together (Yes, Robin made her quilt blocks ahead of time. Good thinking, Robin!). So she worked on my HSTs while I sewed her blocks together. Group effort, definitely! Robin’s top was finished the first sewing day.
Here’s Robin’s top. Very patriotic, isn’t it?
OH NO! I think I switched blocks in the upper right corner….do you think it looks weird???
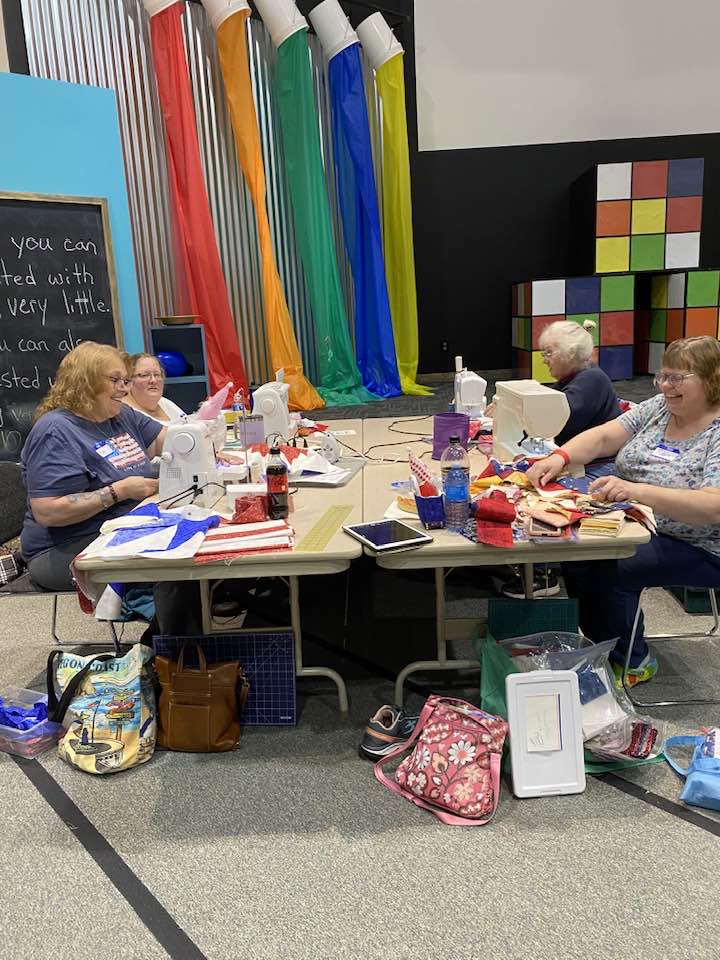
Here I am with my “cuz crew” — Kim (left front), Lisa (left back), and Robin (right back) laughing and sewing the day away! I am the person on the right in the front — you know, the one with all the mess. LOL! That’s just how I roll, I guess.
Here’s Kim sewing her big HSTs while Lisa is reading her pattern.
Here I am (front) with Robin (back) sewing happily along while we chat and laugh. You can see my cute little gnome sewing buddy on the table beside my machine. Notice my mess isn’t too bad as this was taken on the first day and the photo above was from Saturday (insert eye roll here).
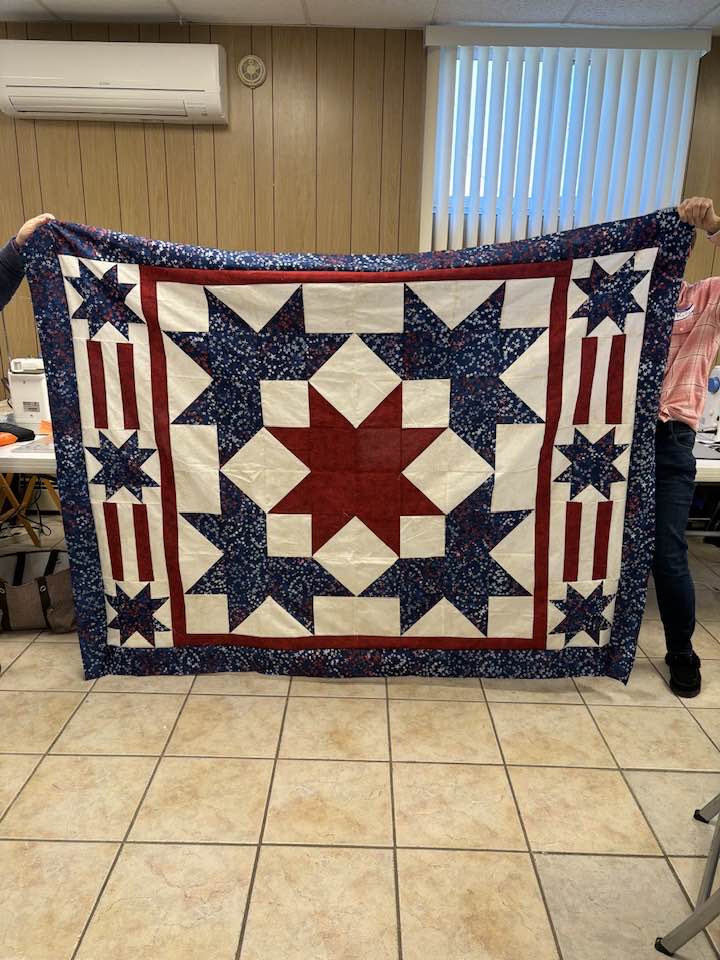
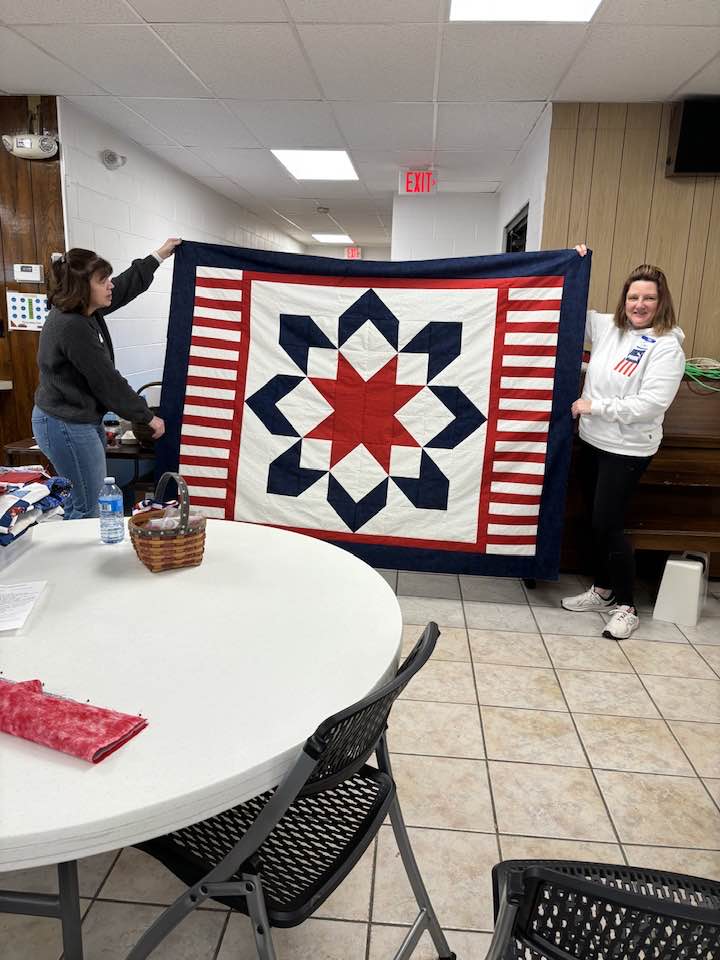
We had a total of 60 quilters in 2 locations over 2 day! Some of the sewers were able to get a project finished, or brought ones to donate that they had already finished. Here are some of the gorgeous quilts and tops turned in over the weekend.
Hats off to Collene, our fearless leader for PA Stitchers, who organized such an amazing sewing event! Lunch was donated both days and there was plenty of snacks to keep us going at full speed. One of the things I loved the best about the event was lending a hand to each other when we needed some help. It wasn’t a race and there was always time to take a break and wander around, seeing what each other were working on. I am smiling while I think about the experience. I look forward to doing it again soon.
Our local PA Stitchers group meets once a month to work on quilts for QOV. Such a worthy cause — I’m so glad I have skills that can help others. Please contact your local QOV group and get involved — there are so many veterans and active military personnel who need to be covered by a special quilt. So get involved!
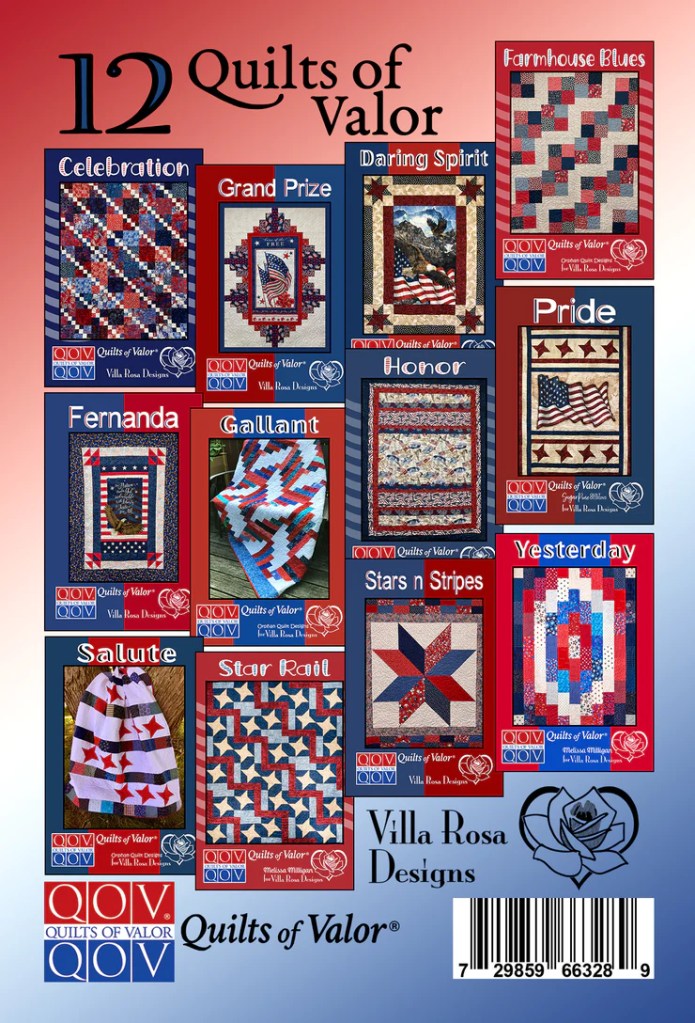
And don’t forget to grab your own set of our brand new 12 Quilts of Valor collection HERE. These 12 quilts will give a lot of different options for making your Quilts of Valor quilts, including multiple options for your patriotic panels! All the patterns fit the size requirements for a QOV quilt and a portion of the sales will be donated to the QOVF.
Well, I think that’s it for me today. I hope you enjoyed the quilt photos from our National Sew Day weekend for QOV. Don’t forget to find your local organization and get involved.
I hope you are all staying warm and cozy, holed up in your sewing room making beautiful quilts! I am happy to say that I’ve been able to get some quilting in since the beginning of the year and thought I’d share a fun tutorial for a terrific small quilt, perfect as a baby quilt.
But before I get started with the actual tutorial, let me share a little bit about one of my favorite things about my job in the quilt industry. I actually wear many hats (don’t we all?) and one of the coolest ones is making sample quilts for fabric companies. Recently I whipped up this adorable Corners quilt featuring the Love and Learning collection by Hoffman. It’s a really sweet collection featuring a charming alphabet panel in your choice of light or dark background. I saw that darling collection and immediately thought it would look great in Molly Cook’s Corners Rose Card pattern.
Here is what the quilt looked like as a digital image before I actually made it:
Don’t you just love it? Yes, it has a little bit of pink in it, but don’t you think it would work for a boy or a girl? I do!
Anyway, I made a sample of this quilt for Hoffman and as I made it, I photographed the steps so I could create a new tutorial for the blog just for you, our loyal readers.
Do you have Molly’s Corners pattern yet? If not, you can get it as a physical pattern HERE or as a digital pattern HERE.
Let’s get started on our first quilt tutorial for 2024! Yay!
VRD Corners Quilt Tutorial
So the first thing you need to do is gather up your fabrics and your pattern. The first image shows the alphabet panel, the second image is the background and coordinates, and the last photo shows the binding, backing, and accent fabrics. Oh what fun!
After you’ve got your supplies together, then it’s time to cut each alphabet letter out of the panel one at a time. I don’t know if you can see in the first photo above, but each letter includes an item that begins with the specific letter as well as the item’s name.
Time to cut! I used a square ruler the size of the square called for in the pattern (or at least I thought I was). That way all I had to do was center each design and cut around all four sides of the ruler. Unfortunately the letters in the last row of the panel were wider than the rest and I ended up having to cut some of the designs a bit, but made sure the letter was not cut off.
OOPS! Then I realized my ruler wasn’t the right size. Luckily it was a bit bigger, so I could trim those squares down to the correct size.
Whew! Done with trimming down 26 squares. That took me a little while. Make sure you cut your squares to the correct size the first time!
Moving on……….
Next it’s time cut a bunch of strips and sew them together before we cut the units for the half frames. Sewing long strips together is not one of my personal favorite things to do. What’s your least favorite part of quilting?
Okay, the strips are sewn into pairs with a background strip sewn to a colored strip. Next let’s cut all of the units out of the strip sets. To create the corner unit for the block, you will have to sew a rectangle to the squares as in the second photo.
All right, now the hard part — to achieve the same layout as Molly’s sample quilt on the front of the pattern (see above), we will be making 4 versions of the same block.
For most of you, this won’t seem like a big deal, but there will be a few quilters who have trouble getting the right block orientation. Well, I am included in this group, definitely. Blame it on being a lefty for me.
I strongly urge you to use some kind of flannel board. Make one block at a time and place them in their proper order on your flannel board so you can more easily see the orientation of each block as you sew them together.
I did try sewing a group of blocks together using my usual speed sewing method, but that ended up being a disaster. I had to do a lot of ripping out and rearranging the pieces of my blocks. So, after that, I made one block at a time.
Once I had all my blocks up on my flannel board and double checked their orientation, I started sewing the blocks into rows and then sewed the rows together into the quilt center. I was holding my breath the whole time………
Once I knew I had conquered the center, it was time to add borders. I added the side borders first and then sewed the top and bottom borders on last.
Woohoo! The top is done! Time to layer, machine quilt, do binding, and add a label. Oh! My last thing to do will be shipping the quilt to where it needs to go. It will come back eventually…………
Have you made the Corners quilt before? Do you have any tips to share?
Update on Decluttering
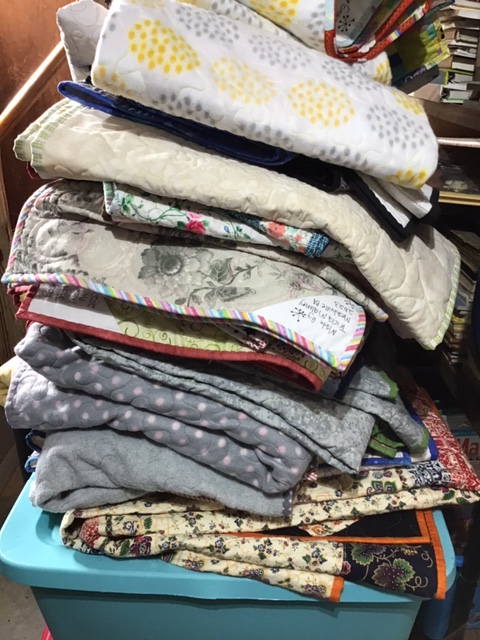
Before I go, I wanted to give a little update on my decluttering project. I started with my cutting table first. Lately it’s been more of a storage surface than a cutting surface.
Holy moly! I found several groupings of fabrics paired with patterns as well as yardage and stacks of fat quarters. Some loose patterns, too. Ugh! Now I have to put the fabrics away and figure out where to house the projects. Decisions, decisions! This is why I avoid decluttering — I have way too much stuff and not enough space.
I need to start pulling stuff out I don’t love anymore and finding it all new homes. Time to start purging my stash or I will never ever find an organization system that works for me because you can only stack so many plastic crates. Well, I’m going to keep plugging away, so stop in next week to see what else I’ve accomplished.
I’ve been thinking of some ways I can move forward in 2024 with my goals (Did you miss last week’s post? You can find it HERE). I’ve been seriously thinking about how to get my studio in order, which is definitely part of my 2024 Goals. I wouldn’t be surprised if you have the same thoughts, so let’s brainstorm some ideas together!
For some unknown reason, I never seem to get time to actually clean up, organize, and declutter my space. I truly believe there are little pixies who come to my studio at night and have wild parties because there’s no way that I’m making this mess. LOL!
I think I just need to take a couple days (or years) — maybe a week end — to focus entirely on my studio. Whew! That’s going to be a challenge, though, because I try to cram as much as I can into each day — you know what I mean? To focus completely on one task for a week end would be totally foreign to me. Sigh….I don’t know why 24 hours just isn’t enough time to get everything done every day…….
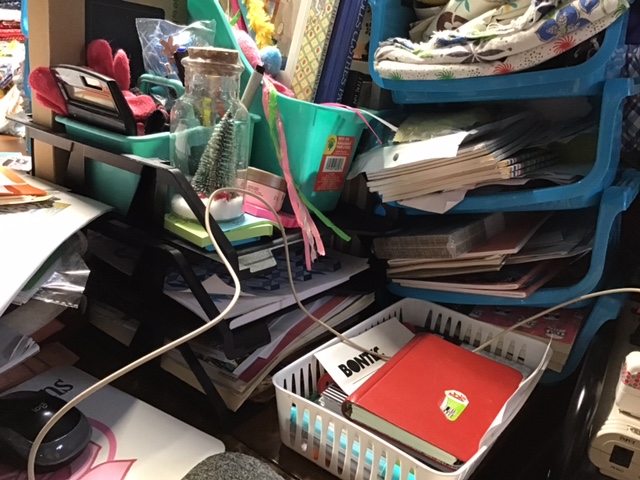
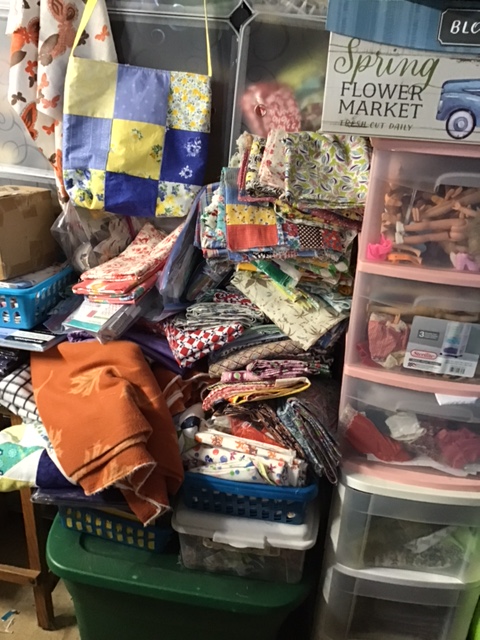
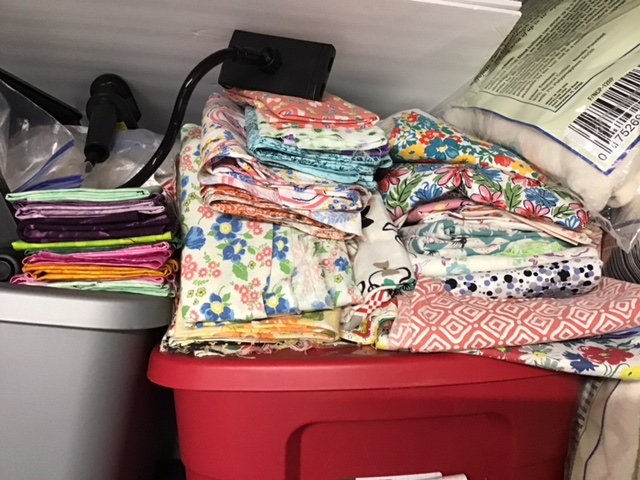
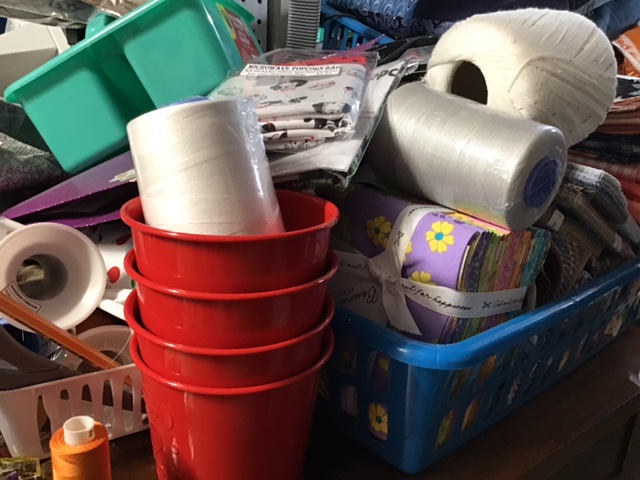
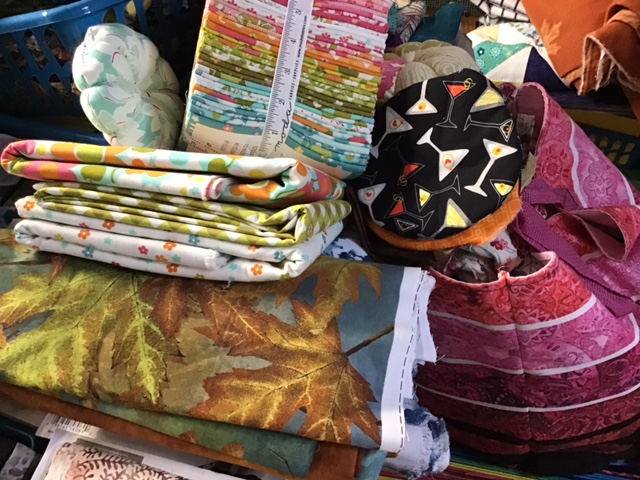
Now, don”t freak out, but I’m going to show you some pictures of my studio. I’m totally embarrassed to show you any photos of my space, but maybe if I do, then it will motivate me to make improvements. So here goes!
Okay, there it is — my very messy studio. Gulp! I am really embarrassed, but hopefully looking at these photos will motivate me to make some changes because obviously my current organizing system at isn’t working for me. Part of my problem is way too many quilts and way too much fabric — there just isn’t enough room for everything. That means it’s time to purge. Scary……..
Before I dive into this huge undertaking, I think I need a game plan. So here are 11 ideas to help get our sewing spaces ready for a new year of sewing! I bet you can come up with even more ideas so please share your thoughts in the comments.
Fabric and Supplies
1. Look at Your Stash: Take some time to go through your fabric stash and see what you really have. Sort your stuff into categories such as color, material, or project type. Maybe this will give you a better idea of what you have to work with.
2. Donate or Sell: If you come across fabrics that no longer spark joy or that you haven’t used in years, consider donating them to a local charity or selling them online. This way, someone else can put them to good use and that fabric isn’t just collecting dust. If you sell stuff, you will have extra space and extra money. Win-win!
3. Proper Storage: Invest in storage solutions that work for your needs. Clear plastic bins, shelves, or even hanging organizers can help keep everything neat and accessible. Be creative! What do you already have that you can use? Shop second hand. Psst! One of my favorite places to get bins and such is my local Dollar Tree store.
4. Label Everything: When storing your fabrics and supplies, labeling containers can be a lifesaver. It helps avoid the hassle of rummaging through everything when searching for specific items.
5. Streamline Notions: Just like with fabrics, it’s important to go through your sewing notions as well (buttons, zippers, threads, etc. ). Get rid of any duplicates or items that are no longer usable.
6. Keep Favorites Visible: If there are fabrics that inspire you every time you see them, make sure they’re easily visible in your workspace so they don’t get forgotten!
7. Pegboards: Hanging tools on pegboards is a great idea! Not only does it keep everything organized, but it also makes things easy to find whenever you need them. Pegboards come in various sizes and can be customized to fit your specific needs.
Clutter-free Surfaces
1. Clean Your Sewing Table: Start by giving your sewing table a good wipe down. Dust off any debris or lint that might have accumulated, and use some mild cleaning solution to get rid of any stubborn stains or spills.
2. Clutter-Free Work Surface: Take a look at your work surface and remove any unnecessary items that may be cluttering it up. This could include scissors, pins, scrap fabric, or anything else that doesn’t need to be there while you’re working. Yeah, according to my photos, this is definitely something I need to do ASAP!
3. Organize Your Cutting Table: If you have a cutting table, make sure it’s well-organized so you can find what you need when cutting fabrics. Consider using storage bins or containers for keeping your rulers, rotary cutters, and other cutting tools neatly in one place.
4. Tidy Sewing Desk: Keep your sewing desk tidy. Small storage compartments or jars can help keep everything organized while still being easily accessible.
Storage Ideas for Your Thread Collection
1. Wall-Mounted Thread Rack: A wall-mounted thread rack is not only functional but also adds a decorative touch to your sewing room. It keeps your thread spools where you can find them and is even visually appealing (think arranging your thread in rainbow order!).
2. Drawer Dividers: Use drawer dividers to create separate compartments for spools of thread or other sewing sundries.
3. Bobbin Rings or Holders: Keep your bobbins organized by using bobbin rings or holders. These handy accessories prevent tangling and make it easy to see the color of each bobbin at a glance.
4. Clear Plastic Boxes: Invest in clear plastic boxes with compartments specifically designed for storing spools of thread. These boxes are often stackable, making them perfect for maximizing storage space in your sewing room. And we all need that, don’t we???
Sewing Zones
1. Cutting area: This is where you’ll prep your fabrics before diving into the fun part of sewing. Make sure you have enough space for a cutting table or mat where you can spread out your materials comfortably. Consider adding storage for rulers, rotary cutters, and fabric scissors nearby to keep everything within arm’s reach.
2. Sewing stations: These are dedicated spaces where your sewing machines will live. Make sure that each station has enough room for the machine itself along with any additional equipment like sergers or embroidery machines that you may use. I’m hoping to set up a second sewing station in my space so I can have a friend or two sew with me in my studio.
3. Pressing station: Having a designated area for pressing fabrics is crucial in achieving professional-looking results. Set up an ironing board or invest in a sturdy pressing table that suits your needs. Keep essentials like irons, water spray bottles, and pressing tools nearby so that you don’t have to hunt them down every time.
Patterns
1. Purge: Bring all your patterns to the same place and decided which ones to keep and which ones to donate, sell, or discard.
2. Categorize by pattern type: One way to organize your sewing patterns is by grouping them together by topics. For example, you could have sections for bags, jackets, toys, accessories, quilts, pillows, etc. You could even subdivide categories into smaller groups like quilts could be subdivided into bed quilts, throw quilts, wall quilts, runners, etc. Grouping patterns with the same topics together will make finding what you’re looking for a lot easier when starting a new project.
3. Sort by difficulty level: If you have patterns that vary in complexity, maybe organizing them based on their difficulty level would work for you. You can have separate sections for beginner-friendly patterns and more advanced ones.
4. Use binders or folders: To keep your sewing patterns neat and easily accessible, consider storing them in binders or folders with clear sleeves or pockets. This allows you to flip through the pages without damaging the patterns and also makes it simple to locate specific designs. If you use clear sleeves and only put one pattern in each sleeve, you won’t have to pull out the pattern to see the fabric requirements (if they are listed on the back of the pattern).
5. Label everything: Don’t forget to label so that you can quickly identify what’s inside your boxes, baskets, drawers, or binders without having to search through every single one.
Books and Magazines
1. Purge: gather up all your books and magazines in one place and decide what to keep and what to donate, sell, or discard.
2. Alphabetical order: If you have a collection of books related to sewing techniques or reference guides, alphabetizing them can make finding specific information a breeze.
3. Subject-based organization: Another option is to group your books based on their topic such as applique, paper piecing, hand quilting, machine quilting, etc. Once you’ve gathered your books and you start to look through them, you’ll get a good sense of what categories you can divide them into.
4. Get control of your magazines: sort them by year or by magazine name. Or maybe tear out the patterns you want to keep and pass the rest of the magazine onto someone else.
Scrap Fabric 101
1. Scrap Fabric Bins: Transform old shoe boxes or plastic containers into storage bins for your fabric scraps. You can label them by color or sizes/shapes, making it easy to find what you need for future projects.
2. Fabric Scrap Garland: Turn your fabric scraps into a colorful garland by cutting them into strips and tying them onto a string or ribbon. Hang it up as decoration in your craft room or use it to jazz up a plain wall.
3. Scrap Quilts: Need I say more???
4. Fabric Covered Storage Boxes: Give plain cardboard boxes a makeover by wrapping them with scrap fabric using glue or double-sided tape. These stylish storage solutions are perfect for organizing smaller items like buttons, ribbons, and beads. Covered cereal boxes make great magazine and pattern storage!
5. Scrap Fabric Wreaths: Use wire wreath frames as the base and tie on small pieces of fabric all around until the frame is completely covered. This DIY wreath ad
6. Bags and totes: Use your scraps to make bags and totes in a multitude of sizes and shapes. Bags and totes can used to store projects, take on the go, use in place of plastic grocery bags, and much more.
7. Rag Rugs: Cut fabric scraps into strips and weave them together to make colorful rag rugs for your home decor. It’s an eco-friendly way to repurpose those leftover materials!
8. Pincushions: Imagine the possibilities!
Cleaning Habits and Routines
1. Start with a clear workspace: Before you begin sewing, take a few minutes to clear off your work area. Put away any tools or materials that are not in use, so you have plenty of room to work. Sounds like a good habit to start, doesn’t it?
2. Wipe down surfaces: Dust and debris can accumulate quickly in a sewing room, so it’s important to regularly wipe down your surfaces. Use a damp cloth or disinfectant wipes to keep things clean and hygienic.
3. Empty the trash regularly: Don’t let the scraps of fabric or discarded thread pile up next to you as you sew. Make it part of your routine to empty the trash bin frequently, keeping your space neat and tidy.
4. Organize your supplies: Invest in some storage containers or bins for all of your sewing supplies such as thread spools, bobbins, scissors, etc. Having designated spots for everything will make it easier for you to find what you need and to maintain an organized space.
5. Vacuum or sweep the floor: Fabric lint can easily accumulate on the floor around your sewing area, so give it a good vacuum or sweep every now and then to keep things looking fresh.
Better Lighting
1. Natural Light: Place your sewing table near a window to take advantage of natural light during the day.
2. Task Lighting: Invest in good task lighting options, such as adjustable desk lamps or floor lamps with flexible necks. This will help you focus light directly on your sewing machine or work area, reducing eye strain.
3. LED Bulbs: Consider using LED bulbs as they are energy-efficient and provide bright, white light that mimics natural daylight. They also last longer than traditional incandescent bulbs.
4. Overhead Lighting: Ensure that you have adequate overhead lighting in the room to provide general illumination when needed. Choose fixtures with adjustable brightness settings so you can control the intensity based on your needs.
5. Multiple Light Sources: Use multiple light sources around your sewing room to minimize shadows and ensure even illumination across your work area.
6. Dimmers or Smart Bulbs: Installing dimmers or using smart bulbs that allow easy adjustment of brightness levels.
An Ergonomic Sewing Room
1. Your Sewing Chair: Look for one that provides good back support and has adjustable height options. This way, you can ensure proper posture while you work your creative magic.
2. Adjustable Cutting Table: It’s important to have a surface at a comfortable height so that you don’t strain your back or shoulders while cutting fabric. Look for tables with height-adjustable legs or consider using risers to customize the height according to your needs.
3. Sewing Machine Height: Make sure your sewing machine is set up at the right height for optimal comfort. You don’t want to be hunching over or straining your neck while working. Adjust the table or use additional supports if needed.
Make Your Space Your Space
1. Inspiration boards: These are fantastic for keeping your creative juices flowing. You can pin up fabric swatches, color palettes, sketches, and anything else that inspires you. It’s like having a visual brainstorming session right in front of you! Plus, it adds a lovely touch to your sewing room decor.
2: Artwork: Hang up some beautiful prints or paintings that speak to your soul. Maybe vintage sewing illustrations, artistic photographs of sewing machines, or framed inspirational quotes about quilting. Surrounding yourself with art that speaks to you will definitely lift your spirits while you work.
3. Special Keepsakes: Why not add some special keepsakes to your space? Maybe display a vintage thimble collection passed down from generations of skilled sewists in your family? Or use an antique jar as storage for small notions? Adding these personal touches adds character to your space and keeps those precious family memories alive.
I hope these ideas will help jump-start your journey of taking back your sewing space!Stay tuned and I’ll tell you more about my own journey in future posts.
VRD UPDATES
Just a few quick update on our recent projects:
12 Quilts of Valor Pattern Collection
The Quilts of Valor VRD Collection is finally available — you can get it HERE. You will definitely want to add this pattern collection to your Quilts of Valor patterns because all 12 quilts meet the QOVF size requirements. Additionally, a portion of the sales will be donated to the QOVF. You can visit the QOVF HERE.
12 Quilts of Christmas
I’m sorry we didn’t get this collection out in time for the 2023 Holidays, but you can be sure it’ll be out in plenty of time for Christmas in July 2024! Woohoo!
VRD Blog Hop
You bet we’re still having our 2nd VRD Blog Hop in 2024. We’ve just bumped it a little later in the year to March 2024. Stay tuned…….we’ll have more information coming soon.
I can’t think of any other updates right now, did I forget anything?
Well, that’s it for me this week. Fingers crossed that I squeeze in some time in the next week to begin taking back my studio from those wild partying pixies!
I hope January is off to a good start for you. I’ll bet you have some great quilting plans for this year. Me too! In fact, I am already getting started on some. Yay!
What about New Year’s Resolutions? Do you make any? If you do, how hard is it for you to keep them?
I don’t really make “Resolutions” anymore because they’ve always been so specific and of course, that just set myself up for failure — sigh…….I guess I’m just not disciplined enough. So, instead of Resolutions, I make “Goals” for the New Year. The great thing about Goals over Resolutions for me is that my goals are not carved in stone and can change over time, can become completely irrelevant, or even get carried over into the next year. Know what I mean?
That being said, here are my Goals so far for the New Year:
Eat more healthfully and get more active
De-clutter, downsize, and organize
Finish more projects
Use my stash more efficiently
Save more money
Stick to a regular daily work schedule
Find more time for creativity
Change what I can and accept what I cannot change
Be kind
I find that if I actually write my Goals down and review them once in a while, then I am more likely to accomplish them, or at least break them down into smaller steps so I am working my way towards the finish line. I keep a list of my Goals (written in pencil) in the front of my yearly planner. Sometimes I add more Goals throughout the year, change a Goal completely or even erase it if it no longer makes sense to me. Basically, I think it really all boils down to beginning and maintaining new habits.
Speaking of the New Year, it’s the Thursday after the first Friday of the month, which means NEW Rose Card Quilt Patterns! Yay!
January 2024 VRD Rose Card Quilt Patterns
January’s patterns are awesome, aren’t they? Lucky you, you can get the set of 5 patterns for the special price of $8.95 HERE.
Please join me in warmly welcoming our newest designers, Rachelle of Rachelle Handmade and Deanne of Creative Sewlutions! Welcome Rachelle and Deanne! Hopefully soon, we’ll have Designer Spotlights here on the blog so everyone can get to know the two of you better.
Yep, there’s a new table runner pattern for Janaury, too. It’s called Snowberry and you can get it HERE.
Did you know you can get the New Rose Card patterns delivered right to you mailbox every month? You can sign up to get just the 5 monthly patterns HERE or you can get the 5 monthly patterns plus table runner(s) HERE.
But wait — there’s MORE!
If you missed last week’s blog post, I debuted our very special NEW Collection of patterns in partnership with the Quilts of Valor Foundation (QOVF). The collection features 12 Rose Card patterns that meet the size requirements for a QOV quilt. And of course, they are FAST and FUN patterns!
You can get the collection of 12 QOV patterns for the amazing price of $14.95 HERE. AND, a portion of the sales will be donated to the QOVF. It’s a win-win-win for you, for the QOVF, and for Villa Rosa Designs!
This collection of QOV patterns is sew inspiring that I challenge you to get together with a group of your quilty pals and make some quilts to donate to your local QOV organization. You can check HERE to find your closest QOV chapter. Maybe you’ll join and support the QOVF’s mission to get quilts into the hands of veterans and active service members.
Quilting Together
I know I’ve talked about getting together with your quilt posse before, but with a brand new year, it’s time to make some plans to quilt together. Quilting together is not a new idea at all, our grandmothers and their grandmothers gathered together to make quilts as well as to work on hand-sewing projects. Quilting circles were very popular during the Civil War, while women and girls did their part for the war effort by sewing for the soldiers, often their fathers and sons, neighbors and friends. My point is that quilting together is an important part of quilting and sewing and has been for generations.
This vintage photo shows a group of women hand-quilting a Double Wedding Ring quilt in the 1930’s or 1940’s. See the young lady at the end on the left, she’s a lefty like me. Just sayin’!
Here are some great benefits we get when we quilt together:
Social Connection, Community, and Friendship
Sharing and Collaboration
Learning New Skills
Improving Existing Skills
Teaching Others
Self Esteem and Confidence
Stress Relief and Relaxation (for some quilters, anyway)
Quilt Guilds are a continuation of the quilting bees and sewing circles of the past. I’ve been a member of the Free Spirit Quilters for quite some time now. And I know I’ve talked about my Friday Quilt Class/Group here on the blog before and how important those ladies are to me. Additionally, I have several friends (yes, I have friends [eye roll here]) with whom I get together to sew. It might be hand-sewing hexies while watching tennis or mysteries on TV or sewing all day in a friend’s newly set-up quilt room. And as part of my decluttering, downsizing, and organizing goal, I hope to get a second workspace set up in my studio so I can have a friend over to quilt with me in my space, too.
When I was a Girl Scout a long time ago, I can remember singing the song “The More We Get Together.” Do you remember this song?
I hope your New Year is off to a great start! I’m excited about all the cool stuff we’ve got planned for Villa Rosa Designs for 2024. All you need to do is stay tuned here on the blog. :)
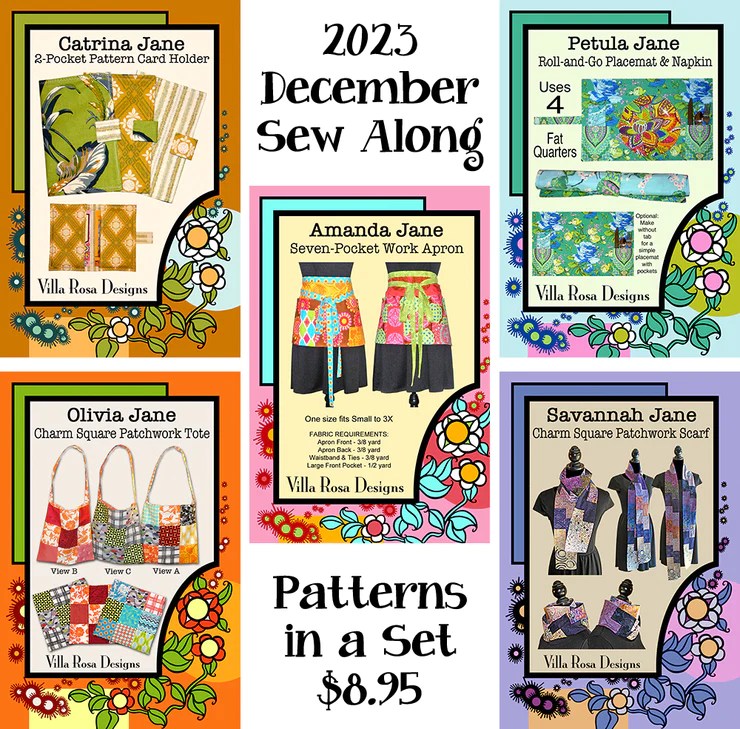
Last week we wrapped up our 5 week December Accessory Sew Along (SAL). I hope you enjoyed the series, even if you didn’t get a chance to make your projects yet. As promised, I added links to the SAL along the right side of the blog along with a link to the collection. You can find the December SAL section right under our Quilting Partners. Now you can participate in the 2023 December SAL whenever it works for you. I hope you do because the projects are fast and lots of fun. Feel free to add your own touches to make them your own. I am looking forward to seeing your finished projects on our VRD Facebook page.
We are absolutely thrilled to kick off 2024 with the debut of our 12 Quilts of Valor Rose Card Pattern Collection in partnership with the Quilts of Valor Foundation (QOVF)!
It took a little more time to finish the collection than we had originally anticipated, but here it is — a super way to start off the new year! Yay!
We are partnering with the Quilts of Valor Foundation to help get more quilts made and into the hands of veterans and active service members. Each of the 12 quilts in the collection meet the size requirements for a Quilts of Valor quilt. AND, a portion of the sales will be donated to the Quilts of Valor Foundation!
If you’re a follower of the blog, then you already know how near and dear my local Quilts of Valor chapter, PA Stitchers of Valor, is to my heart. I’m SEW PROUD to say that the founder and leader of my local group, Collene Munn, was recently honored as a 2023 Difference Maker. You can read the article HERE.
Here is Collene’s overview of the past year on the PA Stitchers of Valor Facebook page:
2023 was a great year for PA Stitchers of Valor, we celebrated our 6th Anniversary with the Quilts of Valor Foundation in April and awarded our 500th Quilt of Valor in May and our 600th Quilt of Valor in November! We have been busy but have been honored to recognize almost 140 Veterans in one year!! We have help[ed] start a new group in Andover/Ashtabula Ohio and have another one looking to join after the first of the year in [the] Franklin/Oil City area. We have lost a few members due to these new groups starting but are happy for both of them. I am excited to see where 2024 takes us! If interested in joining or helping our group in any way please reach out to me. Happy New Year PA Stitchers of Valor thank you for a great year!!!
— Collene Munn, 1 January 2024
Thank you, Collene, for everything that you do!
And thank you to everyone who gives their time, supplies, and skills to recognize and honor our veterans and service members with a Quilt of Valor.
You can get involved!
Here’s How:
Find your local or closest organization HERE. There are 577 chapters in the United States, so chances are there’s one near you. Become a member and volunteer.
Get your VRD 12 Quilts of Valor Collection for an amazing $14.95 HERE. Remember, all 12 quilts meet the size requirements for a Quilt of Valor quilt and a portion of every sale is donated to the QOVF.
Make a quilt and donate it to your local chapter. Make sure you read the quilt requirements are HERE.
REPEAT!
National Sew Day is February 3rd, so ask around your area to find out where you can help make quilts for QOV. My local chapter will have 2 different locations this year for Friday and Saturday. I’m making plans to be there.
Oh My Goodness! It’s 4 days until Christmas Day. Wow! That’s so hard to wrap my head around. I hope you are more ready for the holidays than I am……I am so far behind now, I don’t know how everything is going to get done unless I forgo sleep until the 25th….
Happily, our December Sew Along gives me the chance to slow down a little bit and enjoy sewing something really fun.
I am sorry, but it’s probably a little late to join in the fun of our December Sew Along at this point as we are now on Week 4 out of 5 weeks. However, you can still order the set of 5 Accessory patterns HERE and do the SAL at your own pace as I will add the December SAL along the right side of the blog so you can find the individual posts easily.
If you missed the December Sew Along projects so far, you can find them here:
Olivia Jane is one sassy lady! Variety is the spice of her life. She has too many interests and hobbies to count and makes these cute patchwork totes in multiples just to keep her life organized. They are quick and fun and Olivia Jane can use charm square packs, fat quarters, and even her scraps and stash to whip up these great little totes. Each bag that she makes in truly one of a kind! Olivia Jane keeps a few bags empty so she she can take them shopping, antiquing, to her quilt guild meetings, to knitting club, or to her multiple book clubs. Whew! Trying to keep up with Olivia Jane is a difficult task for all her friends. To thank her besties for everything they do for her, this year Olivia Jane is making these fun bags for everyone. Of course, she started them early in the year so she would be ready for holiday gift-giving. Just one more to go.....
Your Sew Along Challenge this week is to make your very own Olivia Jane tote bag.
That’s right — this week, for Week 4 of our December Sew Along, you need to have your pattern pack in hand. Grab your supplies and create your own one of a kind unique Charm Square Patchwork Tote Bag.
Please make sure to join us on the Villa Rosa Facebook page to share your project this week and to check out the projects of your fellow VRD enthusiasts. The “social connection” is what makes sew alongs SEW much fun! Show us your fabrics! Any tips or hints for construction? Anything you need help with or don’t understand? Did you customize your project? Maybe you’re making 10 of them for Christmas! Please share because we ALL want to see your Sew Along “sew and tells.”
Villa Rosa Designs Facebook Page — you can use this link to take you to the VRD Facebook page. Make sure you are signed into your Facebook account and on the VRD page you can “like” us to join in the fun. The more folks that join in, the more fun it will be!
Before we get to my Olivia Jane tote bag, I wanted to talk a little bit about the pattern. Olivia Jane is a great pattern to add your own touch or to use your own finishing techniques. The pattern even gives you 3 different options for sewing your squares together! The tote works up quickly and it’s fun to play around in your charm squares and stash — we all need a reason to dive back into our own stashes, right? Or, head to your local quilt shop and gather up a beautifully-coordinated collection of fabrics to use for your tote bag. Whatever you do, Olivia Jane will be right by your side.
One of the cool things about bag-making is that there are a lot of different techniques to explore as well as a lot of different ways to get to the same end results. If you’re reading between the lines here, what I’m really saying is that I don’t follow directions very well — Mea Culpa….
Tricia’s Olivia Jane Sew Along Project
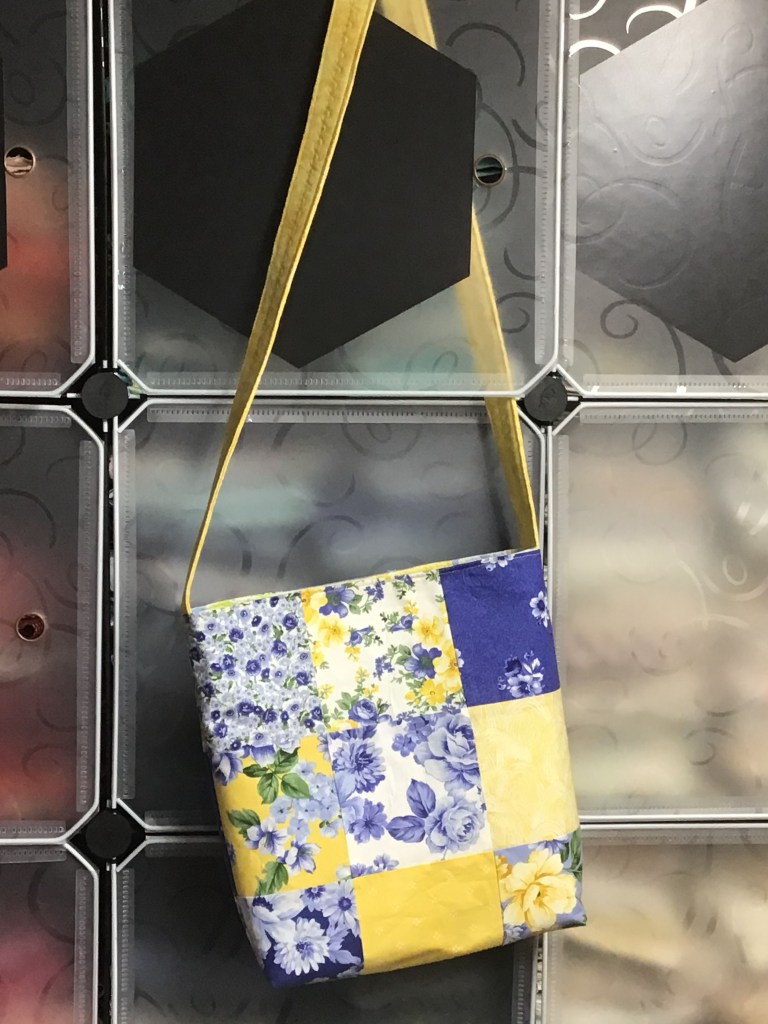
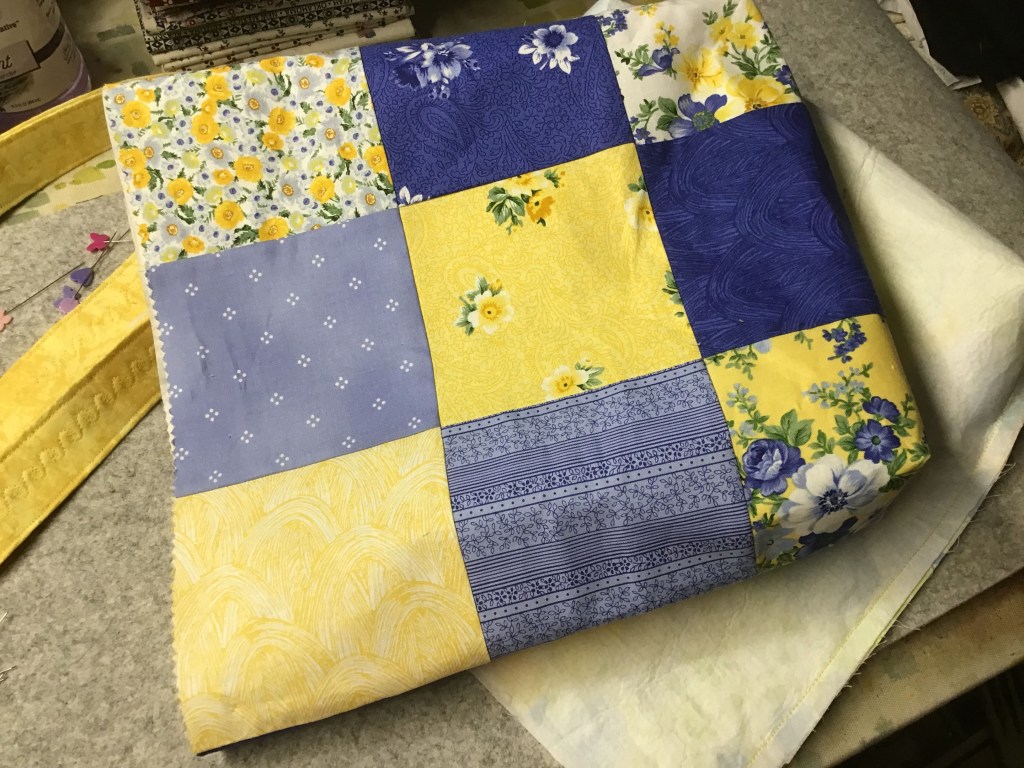
Here is my finished Olivia Jane tote! I just love how it turned out. Isn’t it adorable??? This would be a great tote for carrying books to/from the library, going to quilt guild meetings, or whatever. With its open top design, though, I wouldn’t use it as a purse because my wallet and personal items wouldn’t be secure. But beyond that, anything goes!
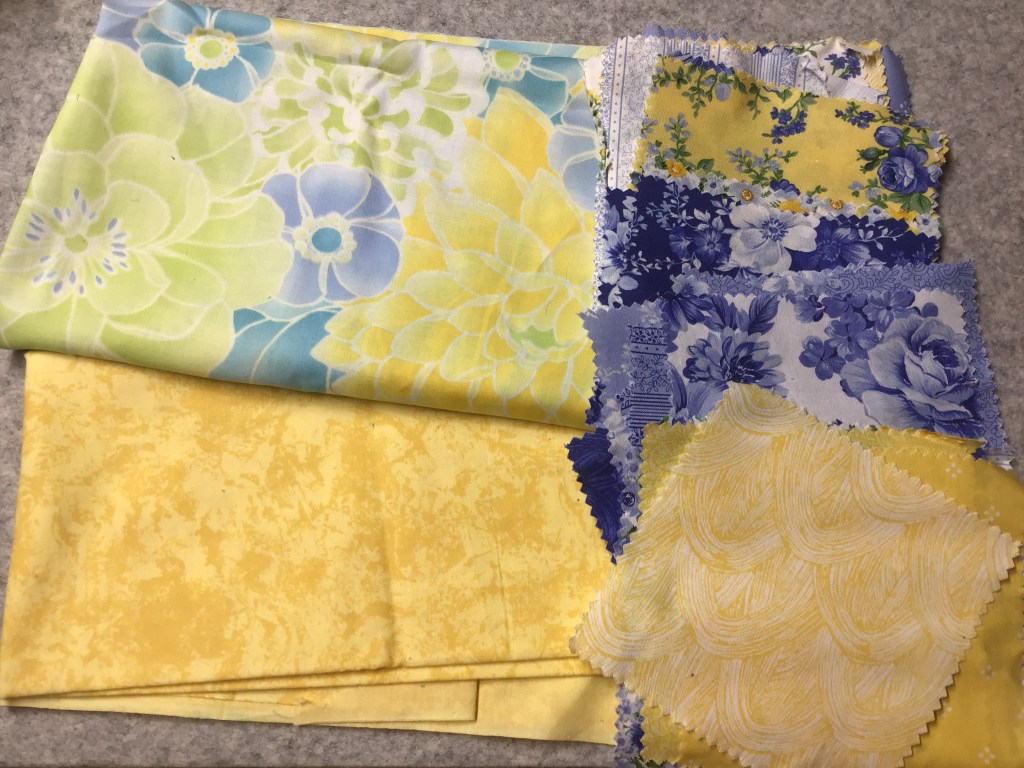
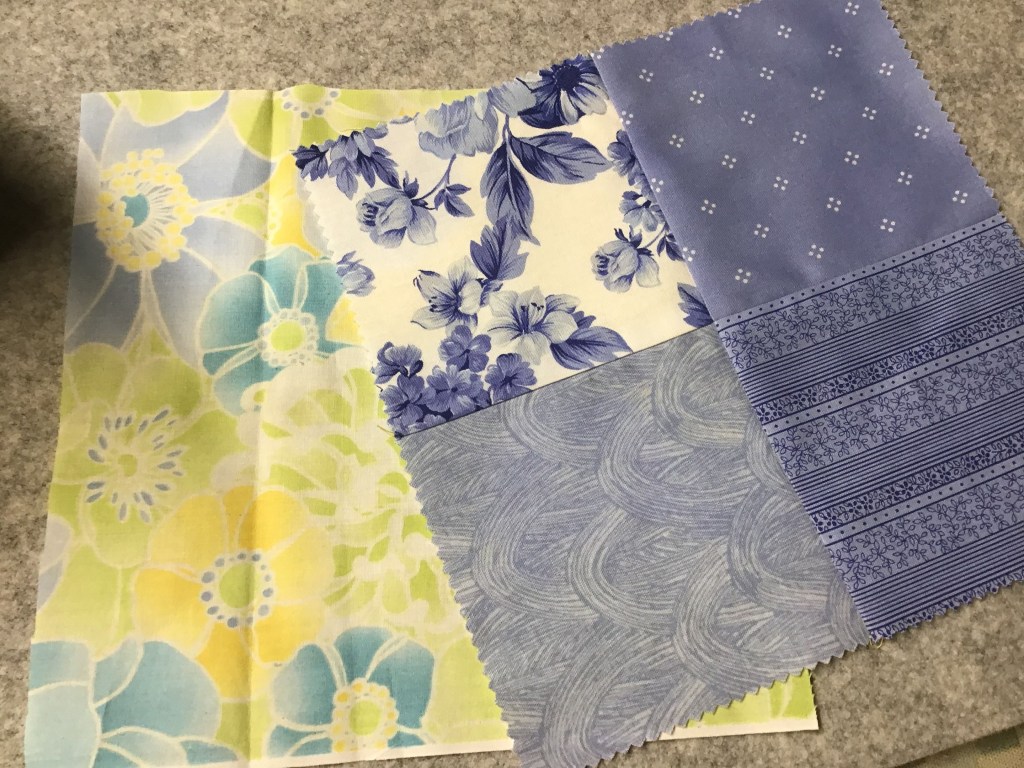
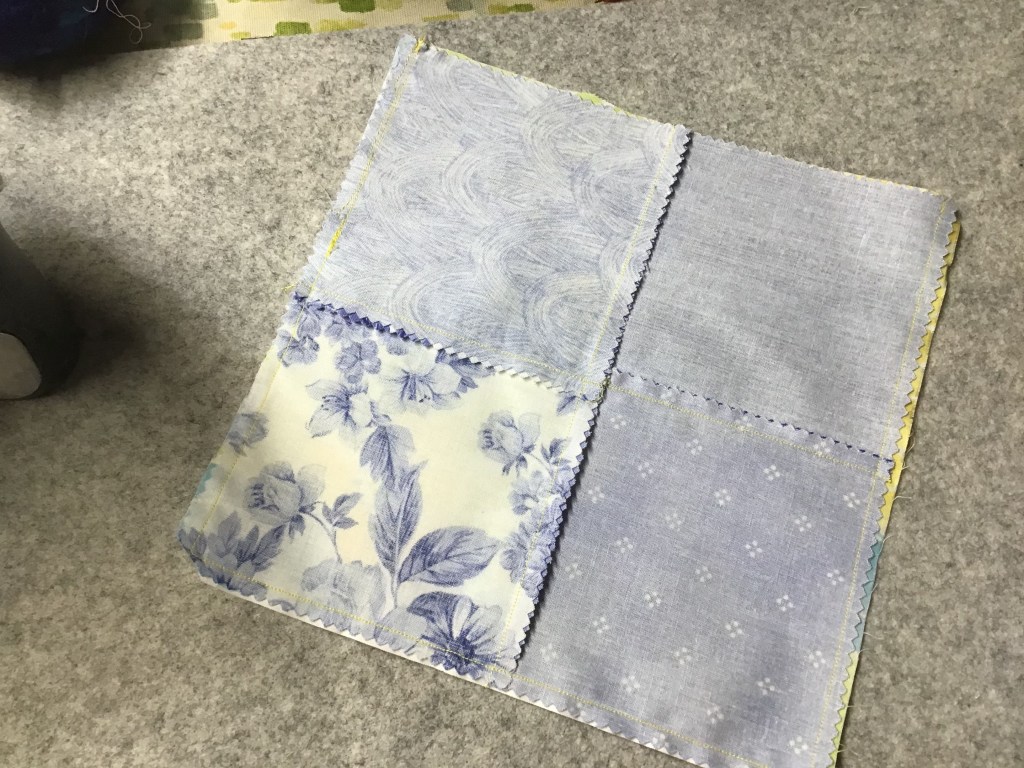
Here are my fun and sunny fabrics! I looked through my stash of partial charm packs and this blue and yellow one begged to be used. I added the leftover floral print for the lining and the tonal yellow for the strap. Ready to go!
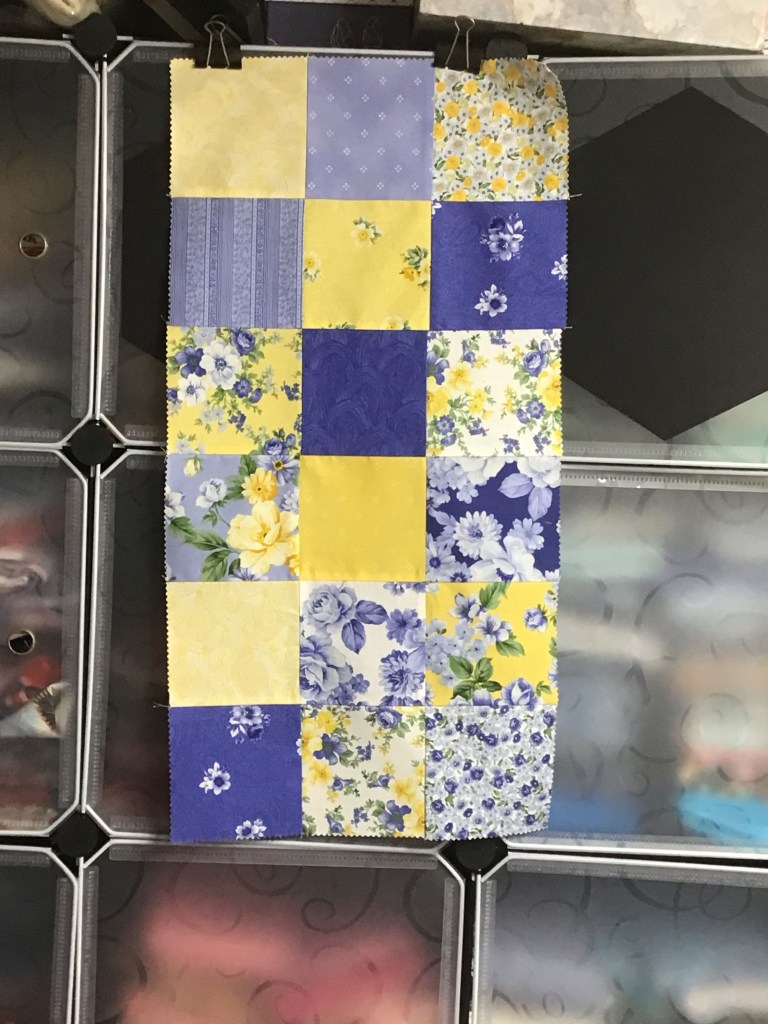
The first thing I did was to sew my charm squares together. I chose to alternate my blue and yellow squares. Do likewise of you want or not. It’s your tote! Don’t forget to read over the pattern because it gives 3 different variations for the charm square arrangement on the front of the tote.
Shhhh, but I deviated from the pattern a little bit. I decided that I wanted a sturdier tote that would hold up to what I usually put in my tote bags like books and sewing projects on the go. I added a layer of Pellon Decor Bond, which is my favorite fusible interfacing for bags and totes. I fused Decor Bond to the back side of my charm square bag front, my lining fabric, and the strap. I really like this product because it gives my bags and totes body so they stand up without wilting. Love that.
Another option would be to add a layer of batting in your tote to give it a little bit more body. But wait — there’s more! Other possibilities include Soft and Stable foam from byAnnie’s, Flex-Foam from Pellon, or Bosal’s In-R-Form Plus fusible foam stabilizer.
Another adaptation I made was to add an inside pocket because you can never have enough pockets!
I sewed 4 leftover charm squares together into a Four Patch block. Then I sewed the pieced pocket front right sides together with a same-size square of leftover lining fabric. I sewed around both sides and the bottom, leaving the top open. Then I turned my pocket right sides out and pushed out the corners. I pressed it well, folded the top edge down, and folded it down again to encase the raw edges. This little trick gives you a sassy little strip of fabric at the top of your pocket.
Next I measured about 2″ up from the center bottom of the lining fabric and centered my pocket on the lining. (Yup, that’s a friction pen I’m using to mark my lines on the lining fabric. With a quick press of my iron, the lines will disappear!) Finally, I sewed around both sides and the bottom of the pocket. Done! Now I have a place for a bottle of water or my keys or a small notebook…or whatever fits. LOL!
I also added a little fun to my strap by using one of the gazillion fancy stitches on my sewing machine. I stitched this really cute spiral design down the center of my strap. It actually helps to keep the strap from stretching; however, it looks like a fancy-shmancy embellishment.
Adding little details like this to any bag or tote raises the bar for its uniqueness. Little details like this are also the difference between a 2nd place and a first place finish at your local fair or show. Just sayin’……
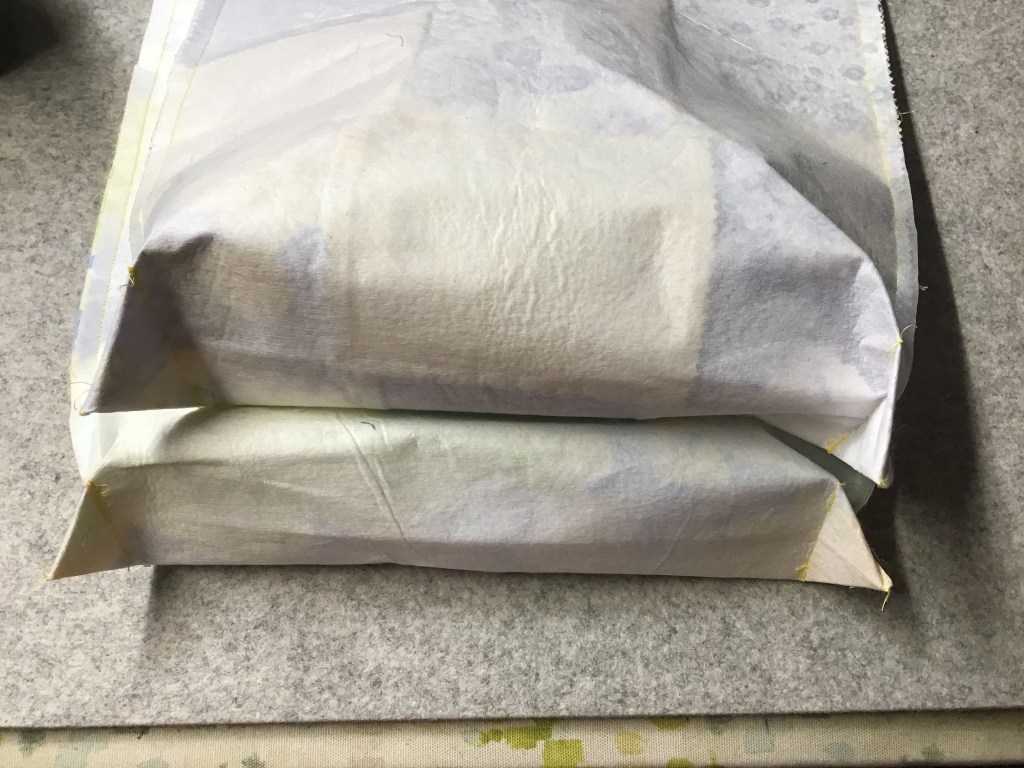
The last thing I did to change up Olivia Jane was to box the corners of the bottom of my bag. This gave my bag a flat base so it could stand up, which works better for me and my stuff.
Boxed corners aren’t hard to do. First you make sure the inside of the lining or bag is on the outside and then fold the bottom of your bag so that the side seams create a point like you see in the first photo above. I decided to use 1.5″ as my measurement for making my boxed corners because I didn’t want to make the bag much smaller in size. In the second photo you see my Frixion pen line, which is measured 1.5″ from the point. Then simply sew on the line, back-stitching at each end. Repeat for both sides of the lining fabric as well as the the corners of the charm square bag front. Some people trim away the waste triangle at each side, but I leave them there to add a little extra support to the bottom of my bag.
There are actually lots of other things you can do or add to your Olivia Jane tote to make yours individual to you. You could add a flap and magnetic snap, velcro, or a button to secure the top of the bag. You could add more pockets — even on the front and back of the tote. Make 2 straps instead of just one or use ready-made bag handles as another option. Make the strap(s) longer or shorter to suit your needs. Make the bag bigger by adding more charm squares — just remember to make the lining fabric the same size. Another idea would be to use batting on the inside of your bag and practice your free motion quilting to quilt the front of the bag and the batting together. All of these options make bag-making really fun because you can start with the same pattern and end up with totally different bags.
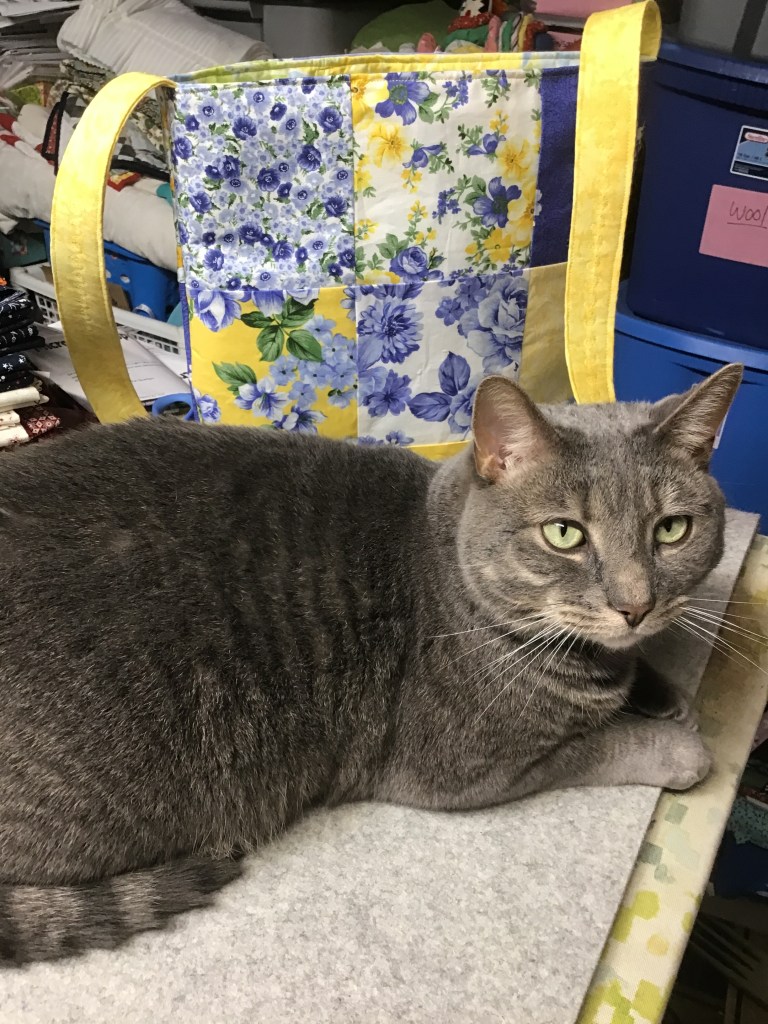
My sewing partner….Griffin. He’s the studio supervisor, of course!
Okay, now it’s your turn! I hope you will enjoy making your Olivia Jane tote!
Time to get your Patchwork Tote made this week (between Thursday December 21at and Thursday December 28th) and share it on the VRD Facebook page. I’ll see you there and I can’t wait to see what you make and hear your Olivia Jane sewing story! Let’s add where you’re from, too! It’s lots of fun to see where all our VRD friends hail from!
See you next Thursday for Week 5 of our December Sew Along.
(PSST! If you’re one of those work ahead kind of folks — our Week 5 project is Petula Jane which will officially begin next Thursday, December 28th. Feel free to have at it, but please don’t post any of your photos or progress on Petula Jane until after next week’s blog post. Between now and then, let’s focus on Olivia Jane. Thank you!)