2025 Let's Design a Quit Together Series · Quilt Play · Quilting Partners · Tips and Tricks

Let’s Design a Quilt: The Drunkard’s Path Block

Happy Thursday to you!

What’s shakin’? Me, just sitting here thinking about which quilt block we’re going to feature today to wrap up our Design a Quilt series. I’m kind of bummed that today’s the final post in this series, but it is true that all good things must come to an end. That makes sense, because, if they didn’t then we would never have the opportunity to find new good things.

I’ve also been thinking about how you, dear readers, can utilize what we’ve covered in this series. The biggest thing that occurs to me, of course, is designing your own quilts using common quilt blocks. Common quilt block designs (like Nine Patch, Irish Chain, Four Patch, Sawtooth Star, etc., etc.) would most likely be considered in the public domain.

Want to find public domain quilt block designs? Just Google it! Pretty much all quilt block designs (and everything else in print) from publications before 1923 are considered public domain. Another idea is to look up quilt block history to see if the blocks were used before 1923. You can also invest in a quilt block reference or 2.

My favorite reference is Barbara Brackman’s Encyclopedia of Pieced Quilt Patterns.

Cover of the book 'Encyclopedia of Pieced Quilt Patterns' compiled by Barbara Brackman, featuring various quilt block designs.

For those of you who may not have heard of Barbara Brackman – she is probably the most well-known quilt historian in the USA, if not the world. Her book is meticulously researched and includes a reference section with original publications for the blocks in the book. Believe me, you will never run out of inspiration – there are over 4000 blocks in the book!

Another oldie but goodie block reference is The Romance of the Patchwork Quilt in America by Carrie A. Hall and Rose G. Kretsinger. This book was published in 1935 and is actually in the public domain itself. It includes A LOT of old pieced and appliqued quilt blocks and quilts along with historical notes. You might be able to find a used copy as its out of print, or I’ve included a link to an e-book version above.
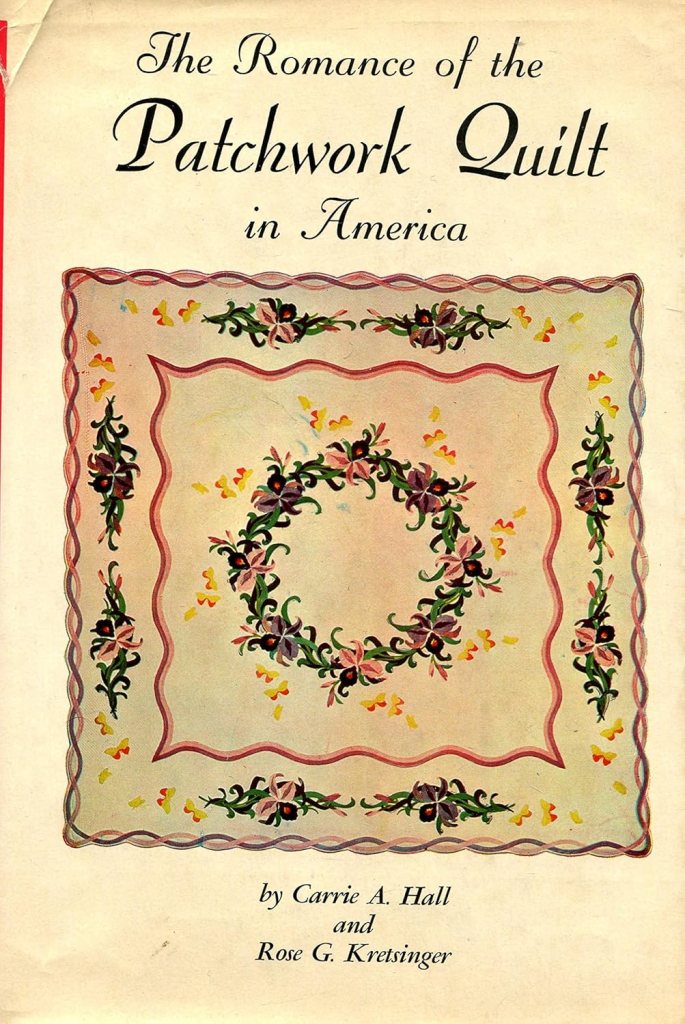
Cover of 'The Romance of the Patchwork Quilt in America' featuring floral designs and decorative borders.

What does all this mean, really?

If you want to sell quilts, the best way to do that is to design your own instead of using someone’s copyright-protected pattern, which, as we’ve previously explored, has the potential to cause you legal issues down the road.

Want to be a quilt designer?

Create/sell your own patterns?

Design quilts for quilt magazines?

Write a quilt book?

Easy peasy, use public domain/common quilt blocks to create your own designs. Then your designs would be copyright protected, too.

Huh. Kind of mind-blowing, isn’t it? That doing something so simple – and FUN! – can become your own copyright-protected work.

Just something for you to think about….

Let’s move on to today’s block: Drunkard’s Path.

Here is a basic Drunkard’s Path block unit.

A basic Drunkard's Path quilt block unit featuring a red semicircle on a white background.

The Drunkard’s Path block has a very interesting and rich history with roots in ancient Egypt. The block was popular with the Underground Railroad and the Women’s Temperance movement in the US. For a more and detailed history, please check out this article on the AccuQuilt blog: A History of the Drunkard’s Path Quilt Patterns.

Today, we are going to explore some of the interesting ways you can arrange this humble block unit, add sashing or not, and using color to tweak the design.

Before we can design a Drunkard’s Path quilt, we need to explore some of the many many different Drunkard’s Path variations. Believe me, these ideas are just the tip of the iceberg.

Here are a few books to explore more Drunkard’s Path designs.

Cover of the book '65 Drunkard's Path Quilt Designs' by Pepper Cory, featuring multiple quilt designs in various colors and patterns.
Get the book HERE
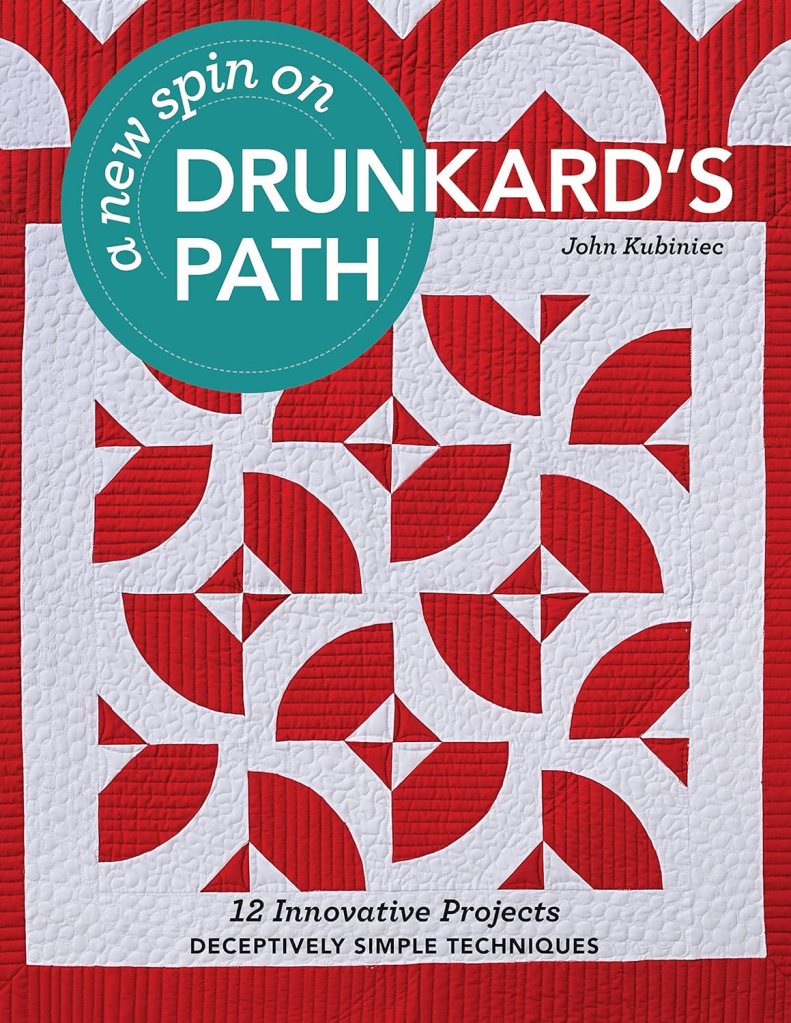
Book cover of 'A New Spin on Drunkard's Path' by John Kubiniec, featuring a quilt design in red and white with a pattern of curved shapes and geometric accents.

Get the book HERE

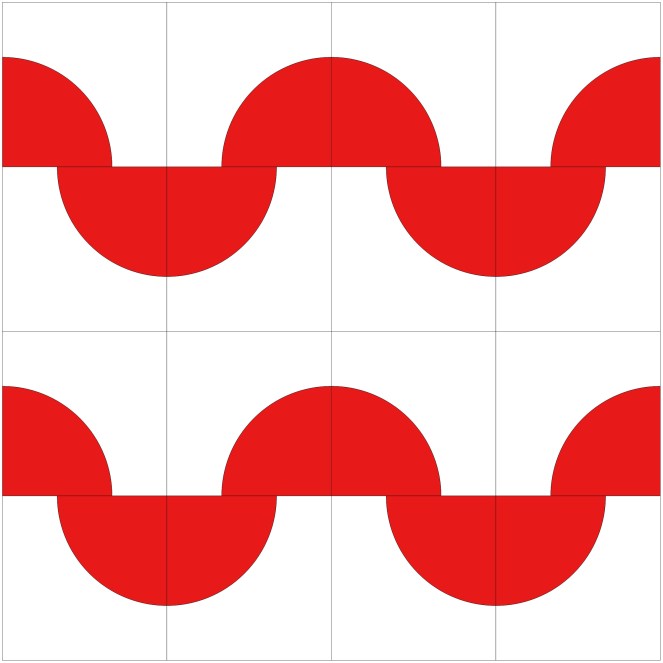
Here are different ways to arrange the units in a 2 x 2 layout. Which one is your favorite?

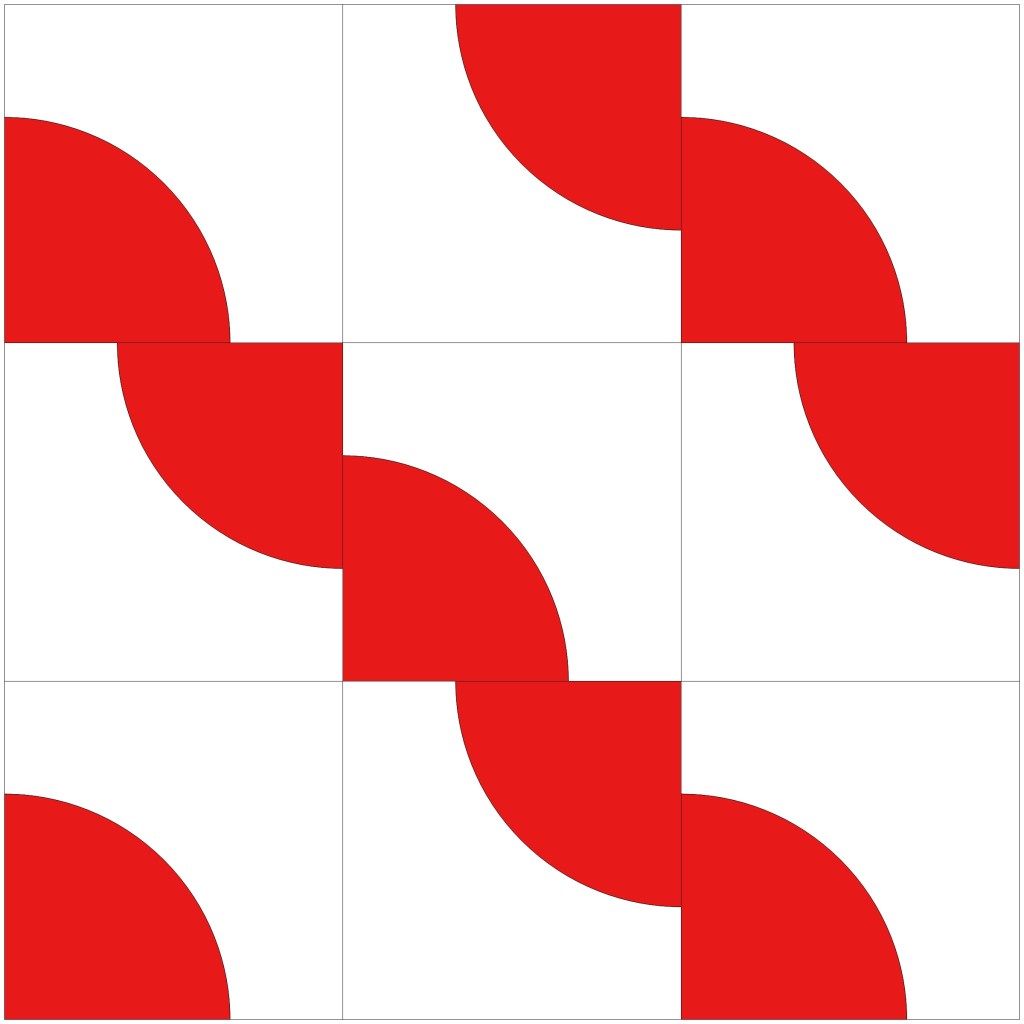
Okay, let’s try a 3 x 3 grid.

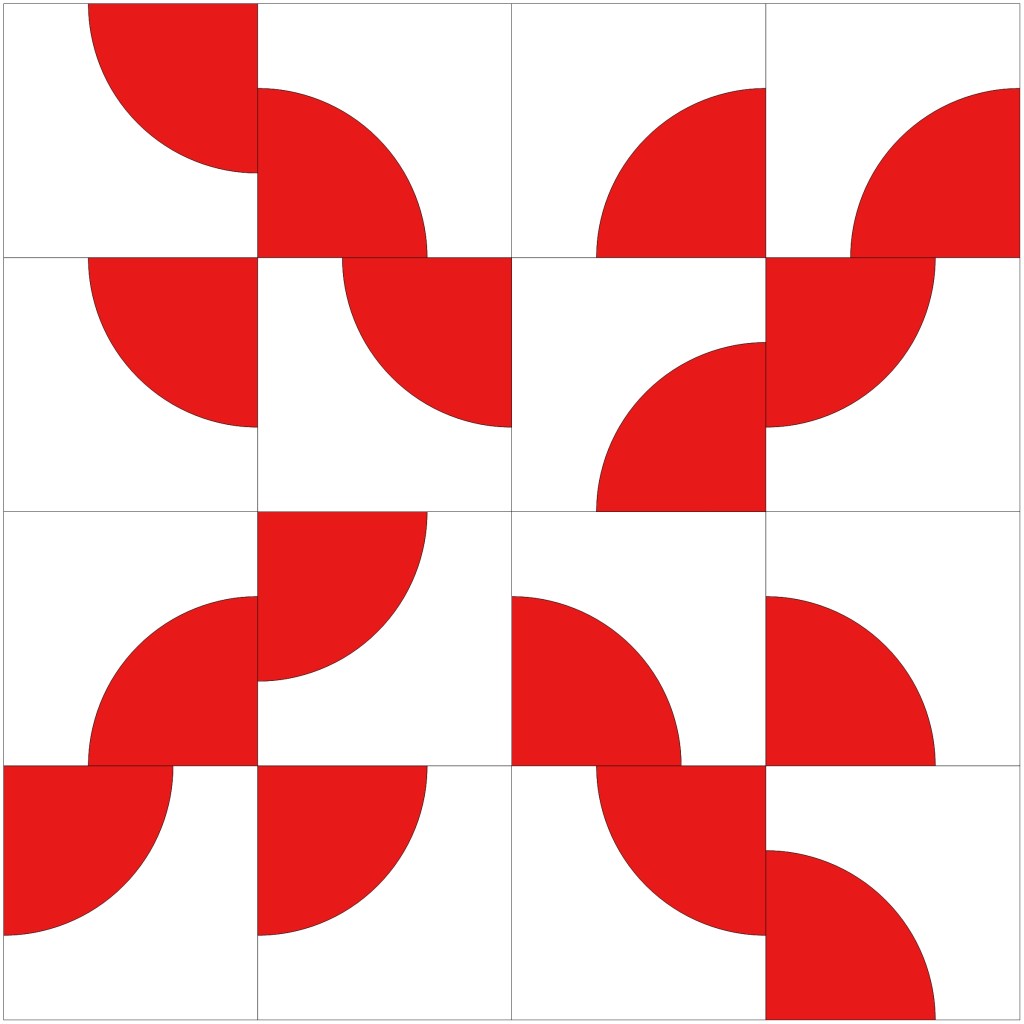
Now let’s see what a 4 x 4 grid looks like.

So I think you get the idea about the endless possibilities of the Drunkard’s Path block unit. Why don’t you try a 5 x 5 grid or a 6 by 6 grid to see what you can create?

Now let’s play with the color arrangement by swapping reds and whites in order to create new and different designs from the ones above.
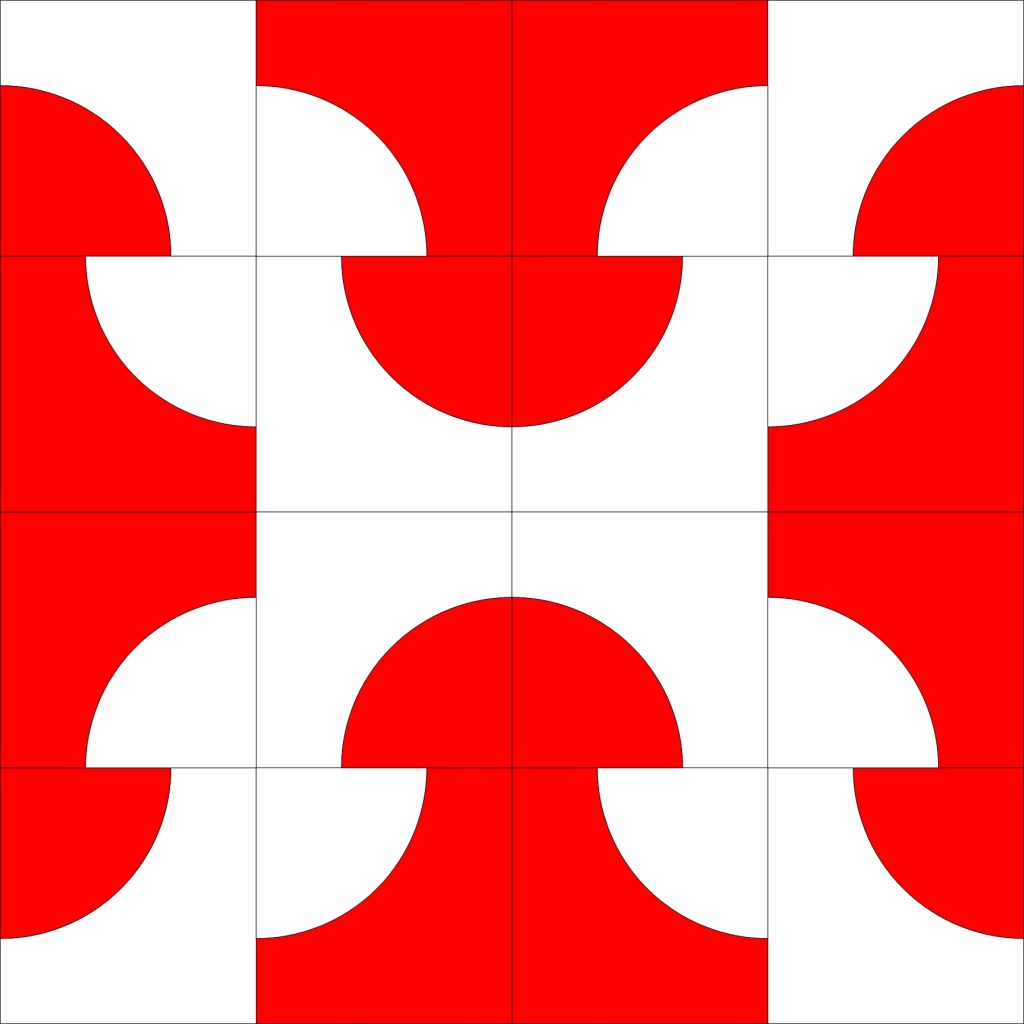
Let’s add more colors to our blocks, shall we? That way we can get even more interesting variations. You can see how adding more color can change a block design or even add a secondary design. Never underestimate the power of adding more color.
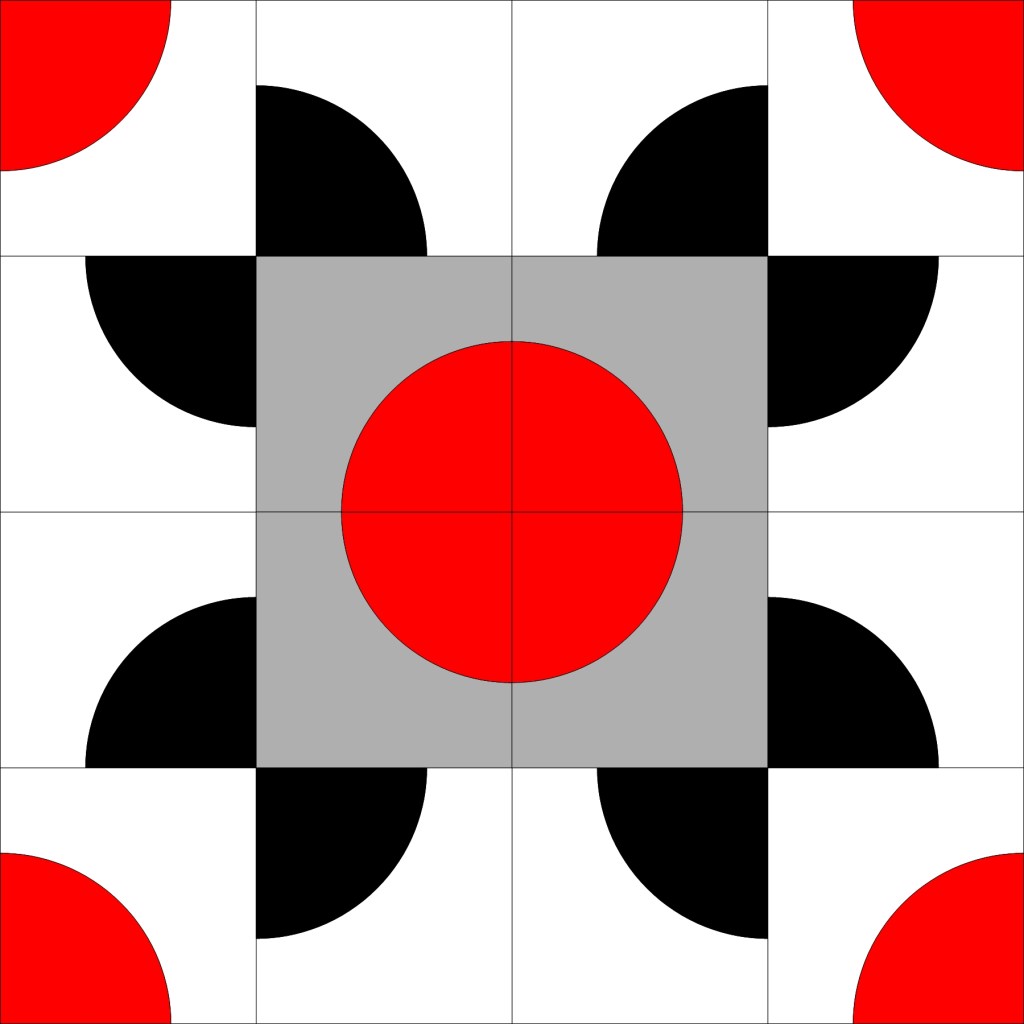
Okay, now it’s time to create quilt designs using some of the variations above! Let’s start with this bird variation.

A quilt block design featuring a Drunkard's Path pattern with red and white curved sections arranged in a 2x2 layout.

I like this bird quilt arrangement very much, but I don’t love how all the birds are facing the same way.
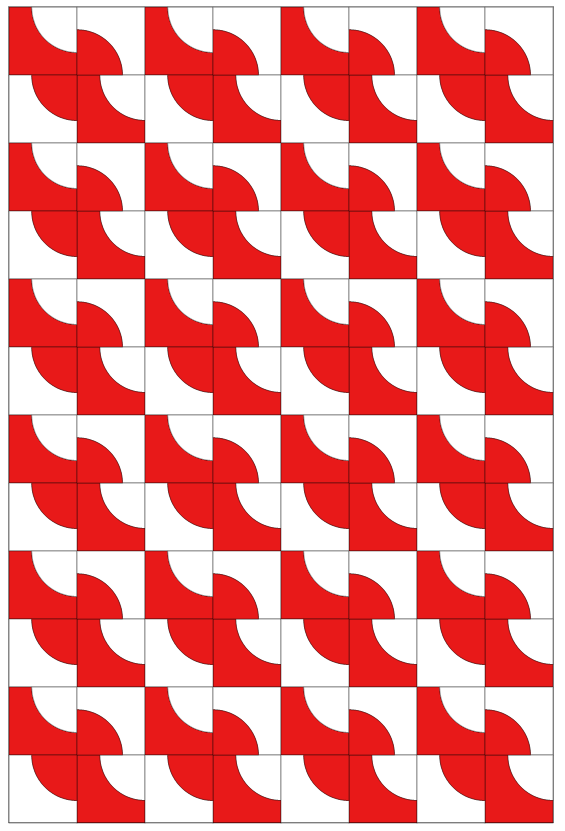
A quilt design featuring a repeating Drunkard's Path block pattern, alternating between red and white colors.

Let’s turn the birds in different directions. Hmmm. I only see a small difference here. Let’s keep going.
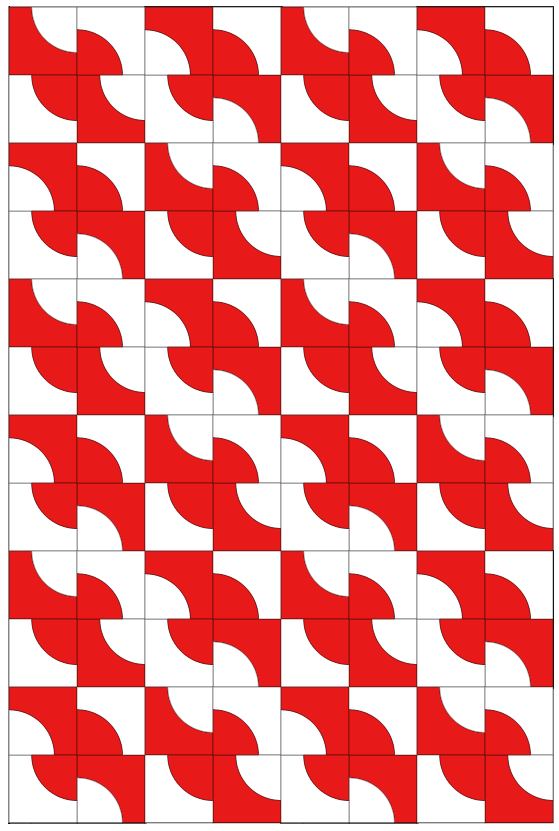
A digital quilt design featuring the Drunkard's Path block in a repeating pattern of red and white colors.

Better with sashing and sashing squares, but I’m still not too excited by it.
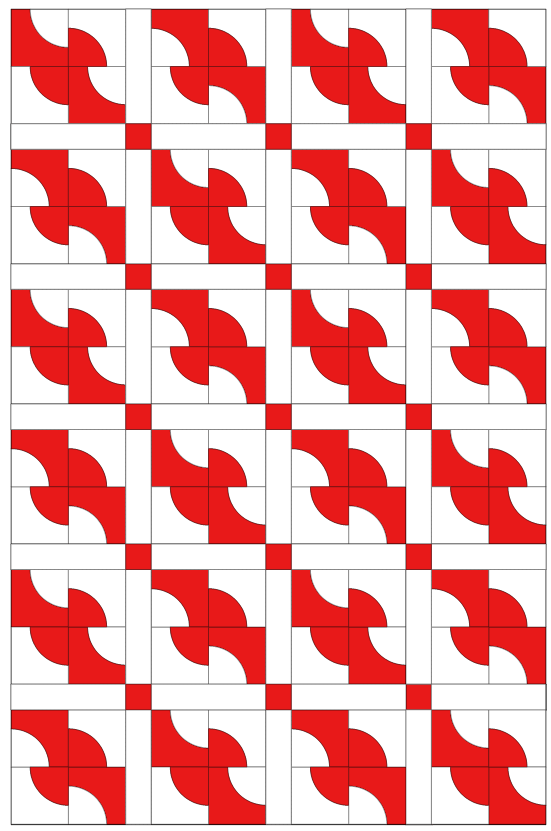
A quilt design featuring a repeated Drunkard's Path block pattern in red and white colors arranged in a grid layout.

Okay, let’s remove the sashing and turn the birds some more to see what happens. AHA! Yes, this is more like it.

A quilt design featuring a Drunkard's Path block arrangement with alternating red and white shapes, creating a dynamic pattern.

I think we can call this a finished design. Let’s add some fabric. It would definitely make a bold 2 color quilt as long as you have strong contrast between the colors like the red and white example above. But let’s add more than 2 colors.

Yup, this one rocks. I’m using fabrics from QT’s American Spirit collection. I took a chance and flip flopped the fabrics in the centers and it really sets this design off.

A quilt design featuring the Drunkard's Path block, arranged in a repeating pattern with red, blue, and cream fabrics, creating a visually appealing layout.

Now let’s try a different Drunkard’s Path block variation from above.

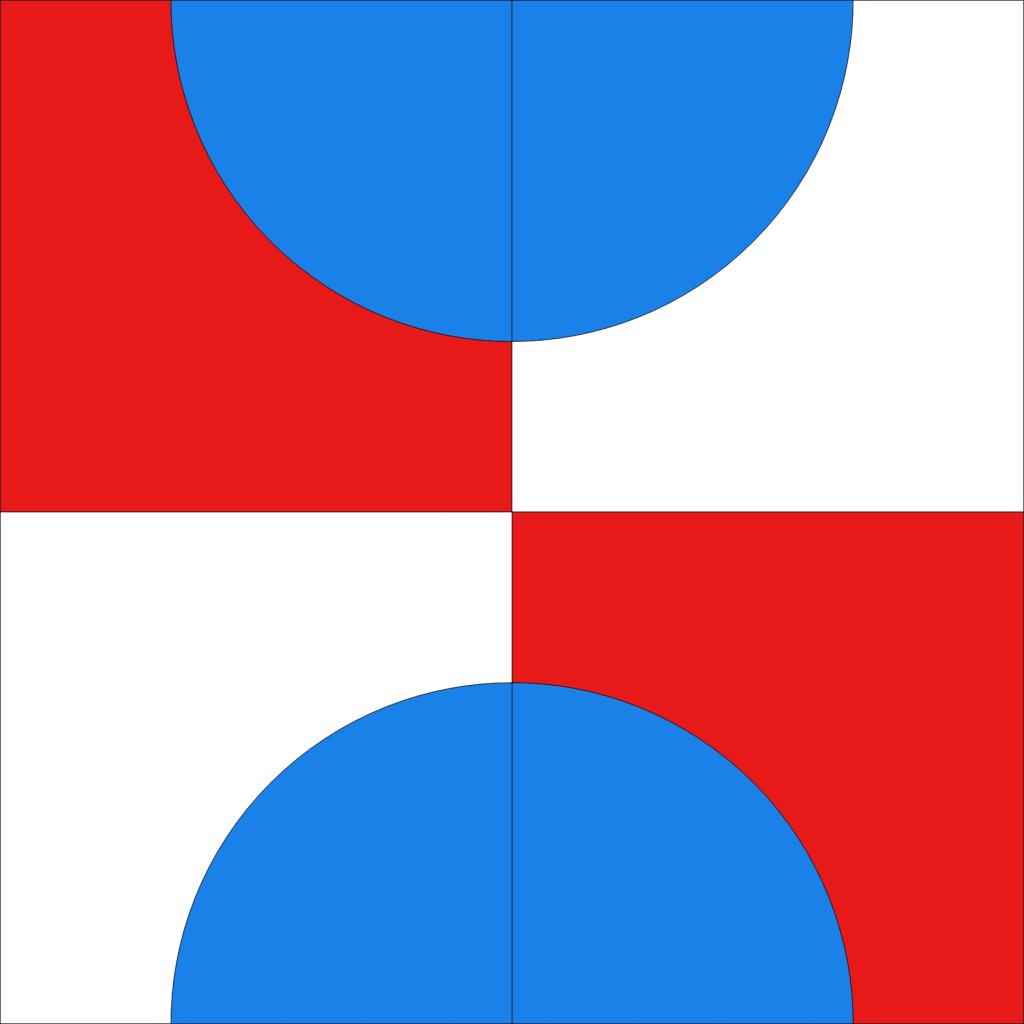
A quilt block design featuring a circular blue shape in the top left and bottom right sections, against a backdrop of alternating red and white squares.

I like this interesting block arrangement, especially with the checkerboard behind the blue circles. Very 3-D. But I bet we can tweak it to change it from an okay quilt to a WOW quilt.
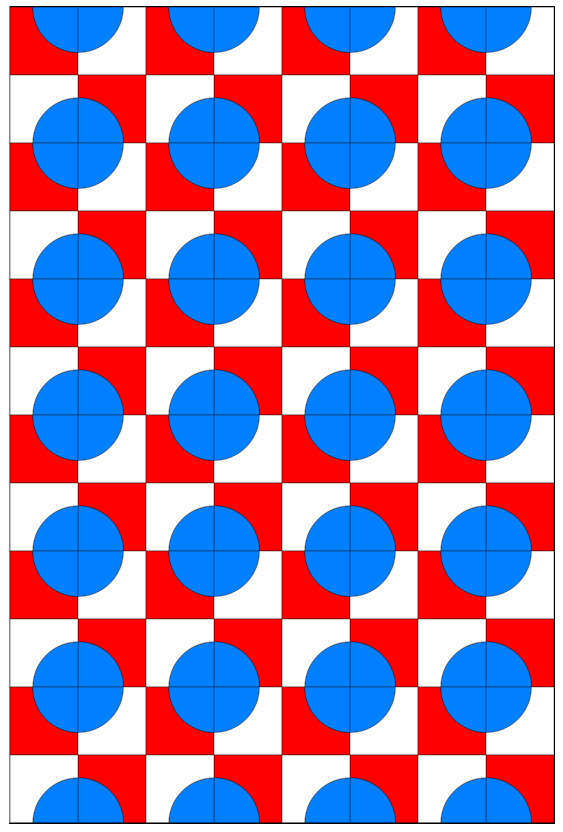
A quilt design featuring a checkered pattern with red and white squares and blue circles in the center.

Just a quick turn of some blocks and we get this design with lots of movement. Kind of fun, huh?

A quilt design featuring a repeating pattern of red, white, and blue blocks with circular shapes in blue and white against a red background.

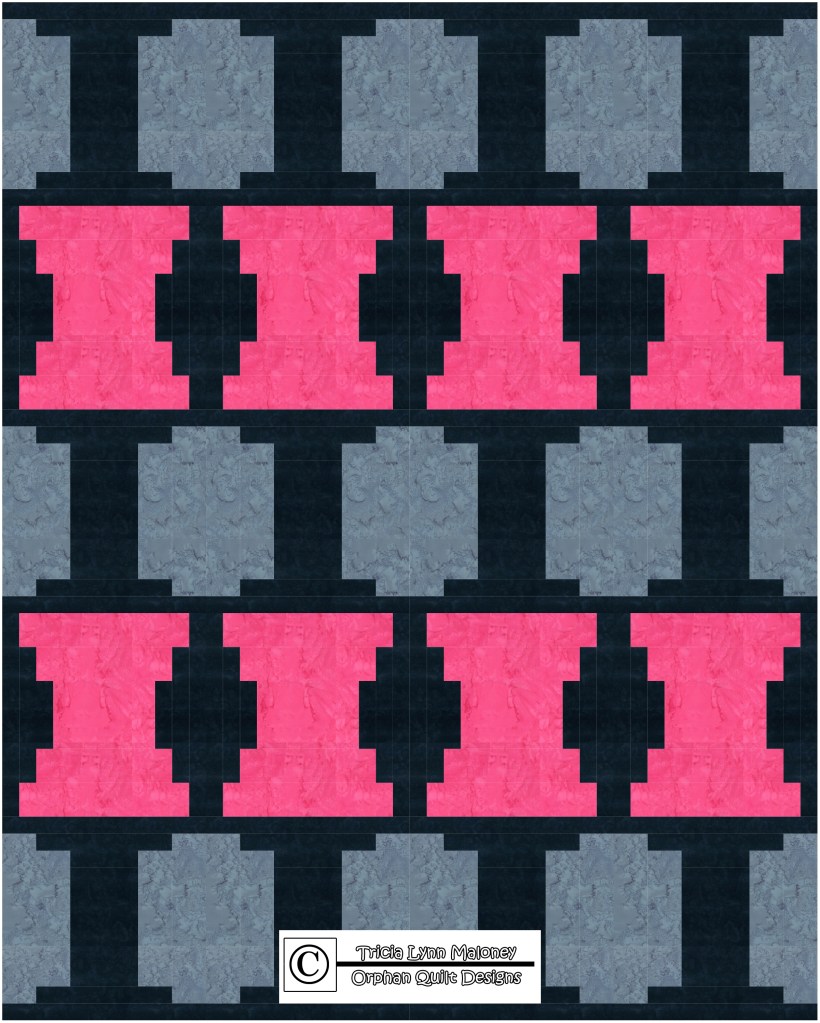
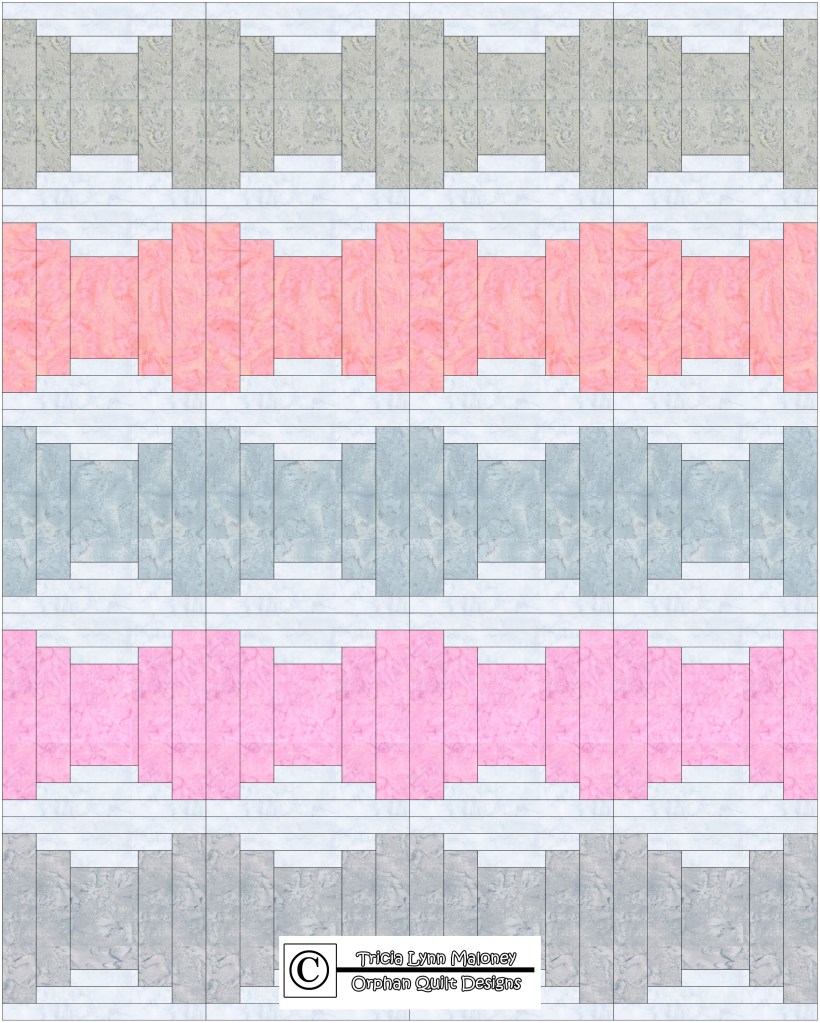
Let’s add some fabric to this one. Can’t wait to see it! Here’s a selection of yummy Hoffman batiks. This super mod design has a lot going for it!
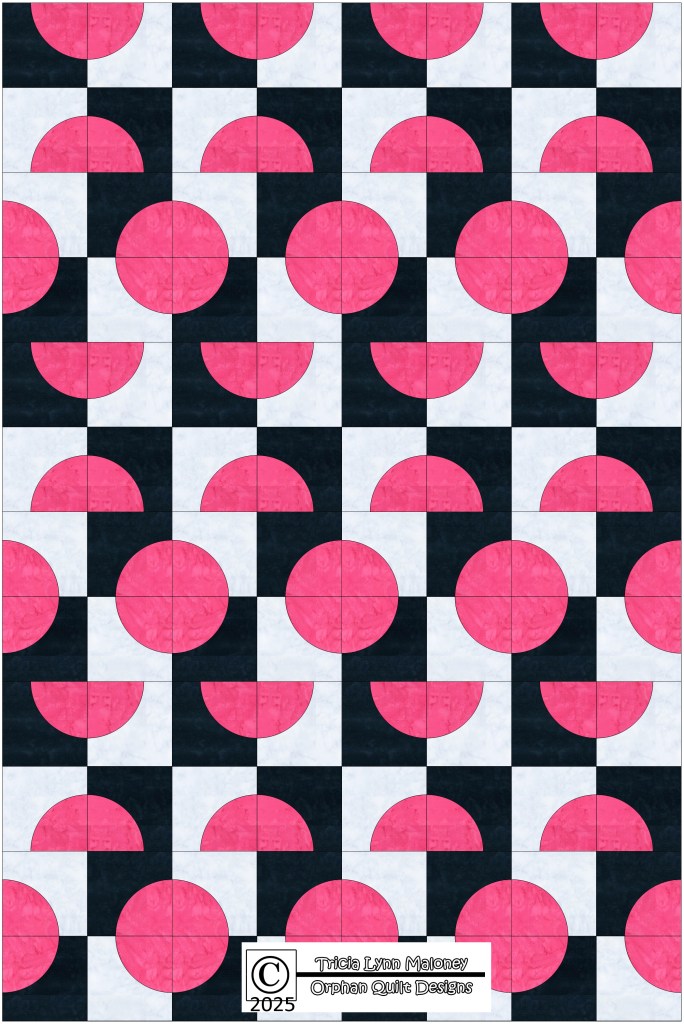
A quilt design featuring a repeating pattern of pink circles on a black and white grid background, with a copyright notice for Tricia Lynn Maloney, Orphan Quilt Designs.

Let’s play with another block.

A quilt block design featuring a central gray square surrounded by red circles and black curved shapes on a white background.

All right, let’s see what this block looks like in a quilt. Gosh, I’m really liking this one. It reminds of a tile floor. But I think we can tweak it a bit to make it outstanding.

A colorful quilt pattern featuring alternating blocks with red circles and black shapes on a white background, arranged in a grid format.

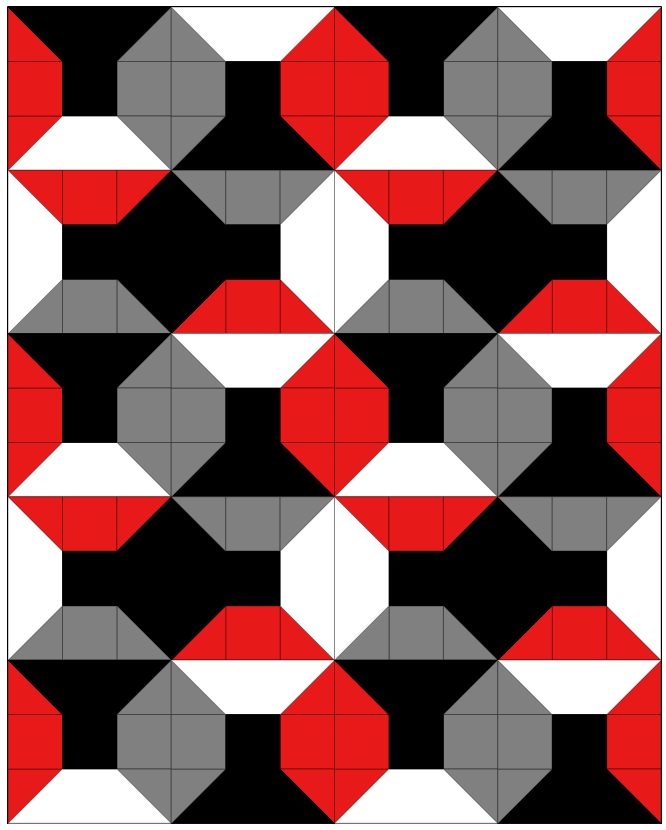
YES! This is the finished design. Adding sashing and sashing squares was just the tweak I needed, which added a wonderful secondary design.

A colorful quilt design featuring a repeated Drunkard's Path block layout with black, red, gray, and white colors.

Yippee! Time to add fabric! I think this design is spectacular!
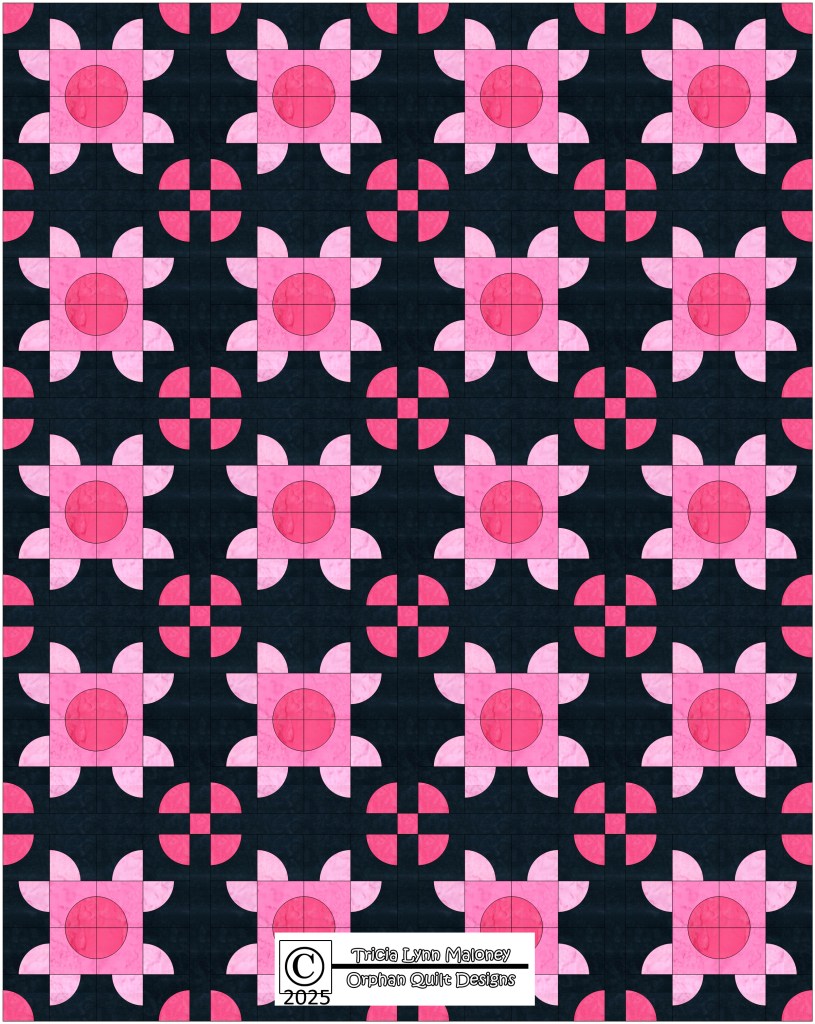
A quilt design featuring pink floral blocks and circular motifs on a dark background.

Let’s do one more!

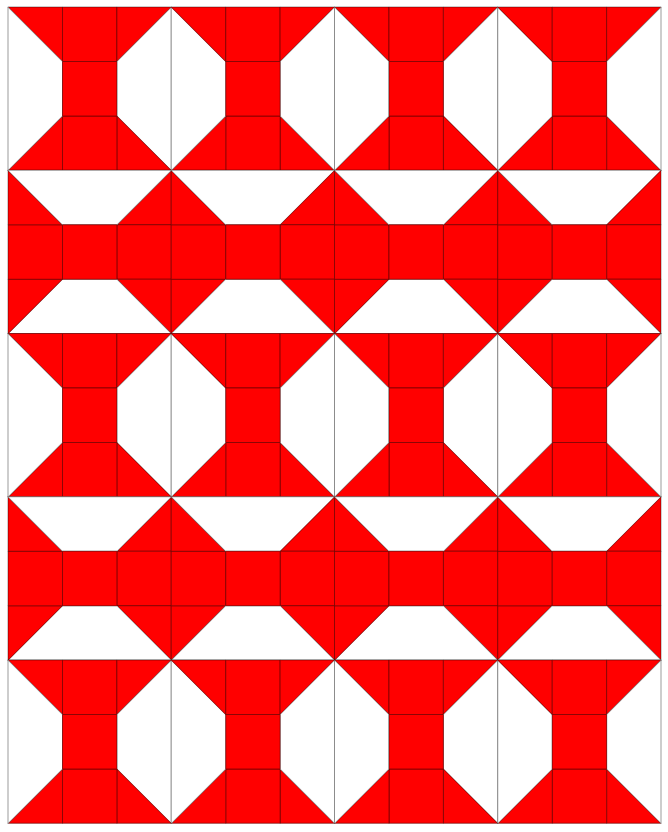
A graphic illustration of a Drunkard's Path quilt block design featuring a red circle, black and white geometric shapes.

Let’s see how this variation plays in a quilt. I really like this design – it makes me think of Halloween bats flying in front of a full moon. But I think we can tweak it a bit more.

A quilt design featuring a repeating pattern of the Drunkard's Path block, showcasing red, black, white, and gray colors arranged in a grid layout.

Let’s try sashing again. Sometimes this is the way to go and sometimes it isn’t. This one improves with sashing, definitely! I love the diagonal movement the design has now. What do you think?
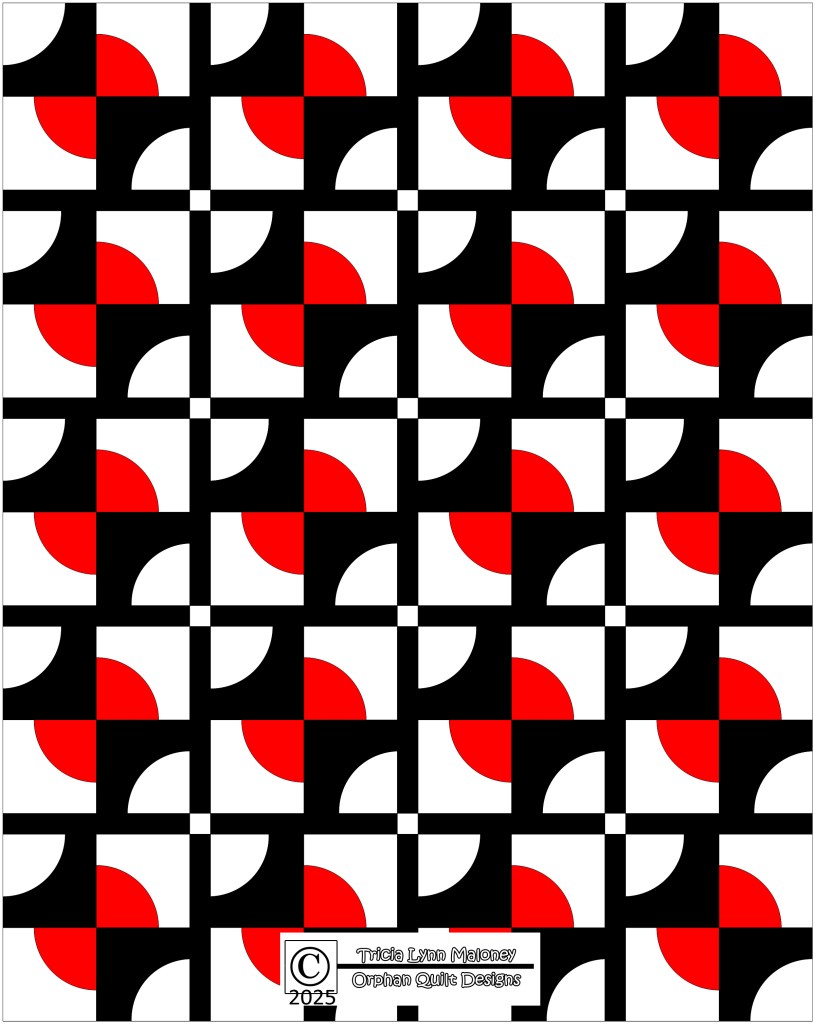
A geometric quilt design featuring alternating black, white, and red blocks with curved patterns, arranged in a checkerboard layout.

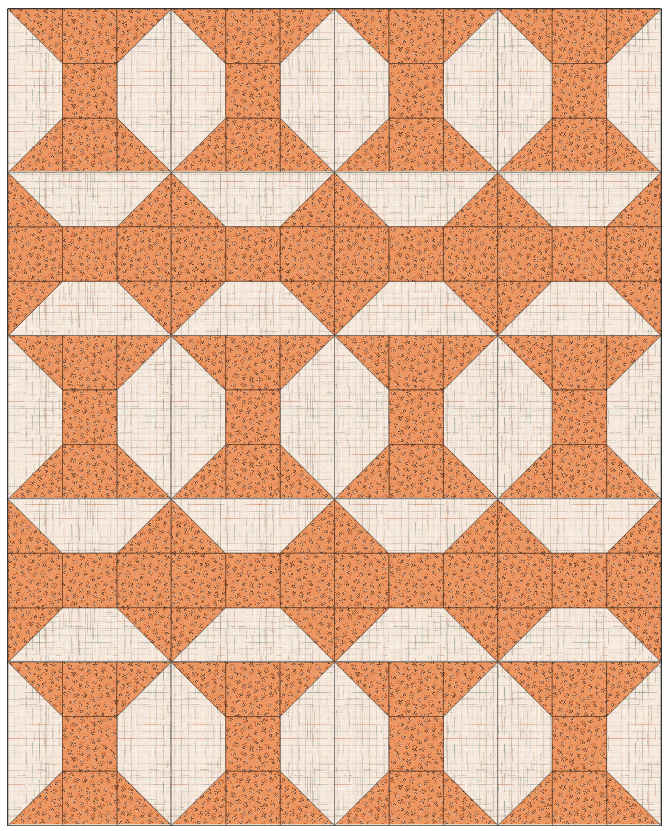
Only thing left to do is to add FABRIC! I’m using assorted Hoffman batiks again and I played up the Halloween moon idea by making the background grey like twilight. Totally loving this!

A quilt design featuring a repeating pattern of Drunkard's Path blocks in gray and dark blue with orange accents, arranged in a grid layout.

Sadly, that wraps up our 5 part Let’s Design a Quilt series. I have had SEW much fun with this series. I hope you did too. I can envision adding more to this series down the road. Maybe I will focus on on-point quilt designs….

If you missed any posts in the series, you can find them all right here:

Playing with Nine Patch Blocks

Playing with the Spool Block

Playing with the Courthouse Steps Block

Playing with the Sawtooth Star Block

Playing with the Farmer’s Daughter Block

See you next week – time for some new VRD tutorials to jumpstart your Autumn quilting when the kiddos go back to school.

Until then –

Always,

Tricia @ VRD

2025 Let's Design a Quit Together Series · Quilt Play · Quilting Partners · Rose Cards · Tips and Tricks · villa rosa designs

NEW VRD Patterns for August and Let’s Design a Quilt: The Farmer’s Daughter Block

Happy Thursday to you!

Welcome! We have lots of fun stuff to do this week, so we’re just going to dive right in.

First up, today is the Thursday after the first Friday, which means – NEW PATTERNS! Yay!

Collage of five quilt pattern covers titled 'August 2025 Patterns in a Set!' featuring designs named Grated, Lady Banks, Jolene, Jasper, and Snap Shot. Each cover showcases different quilt designs and colors.

Get your print pattern set HERE.

I know I say it every month, but our VRD designers are totally outstanding! Every month, they exceed the previous month’s designs. Let’s take a look at each pattern this month.

Grated by Heidi

Colorful quilt design titled 'Grated' by Heidi Cook for Villa Rosa Designs, featuring a variety of fabric patterns arranged in a grid layout.

Grated uses a stack of fat sixths (which are between a fat eighth and a fat quarter, measuring 12″ x 21″) or 10″ squares. This is a big quilt measuring 65″ x 75.” There are still kits available, which feature Klimt fabrics like the pattern cover. You can get your Grated kit, which includes the pattern, HERE.

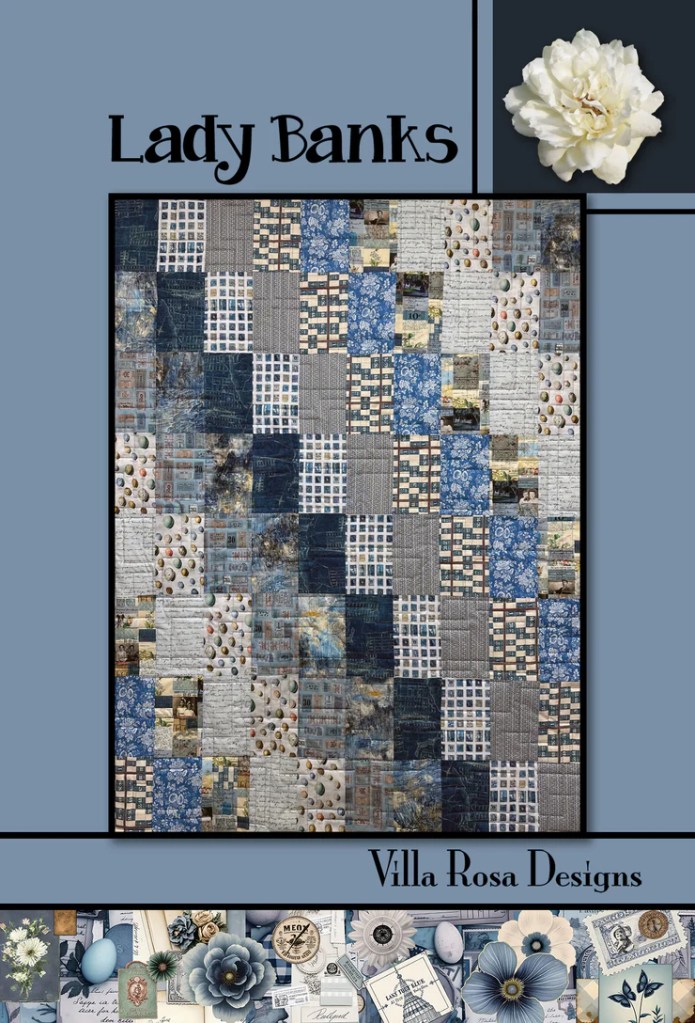
Lady Banks by VRD (Pat)

A quilt design titled 'Lady Banks' featuring a patchwork of various blue and grey fabrics, set against a light blue background. The quilt consists of squares and rectangles with floral and textured patterns. The design is framed by a dark border with the names 'Lady Banks' and 'Villa Rosa Designs' displayed prominently.

If you are following along with the Tim Holtz Palette collections then Lady Banks is for you. It features the blue palette and finishes at 45″ x 60″. You can find the kit (including the pattern) HERE.

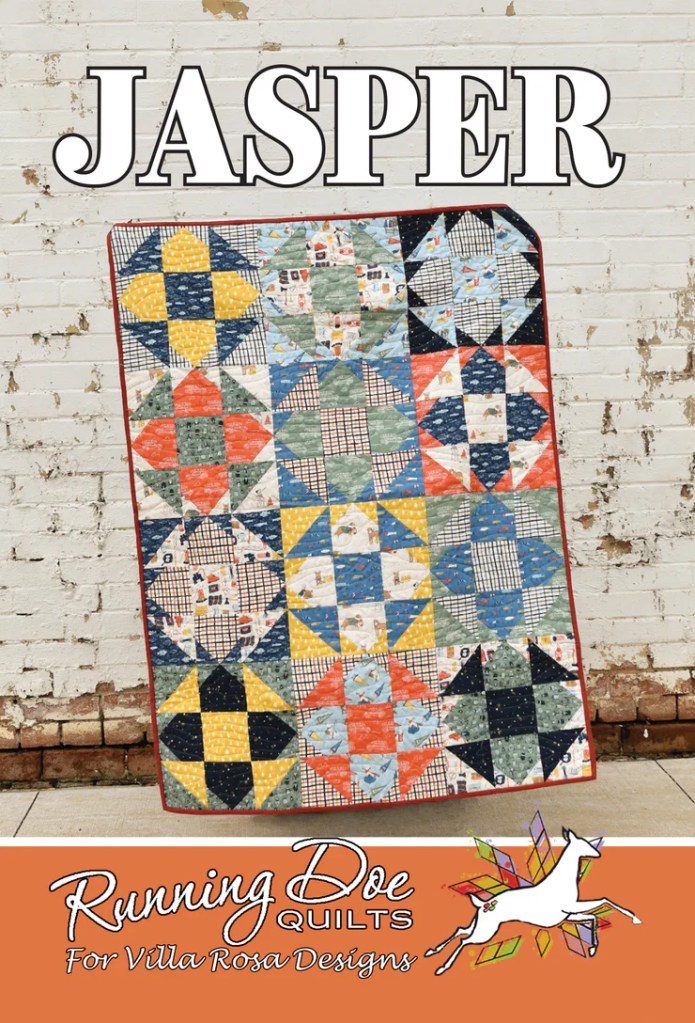
Jasper by Running Doe Quilts (Catherine)

A colorful quilt named 'Jasper' featuring a variety of patterns in blue, green, yellow, and red fabric blocks, displayed against a brick wall background.

Catherine is back with 2 new mod patterns this month! Jasper is FQ friendly and finishes at 36×48, which makes a nice baby quilt or lap quilt. You can find the kit HERE featuring the Camp Canine collection at Running Doe Quilts.

Jolene by Running Doe Quilts (Catherine)

A colorful quilt named 'Jolene' featuring a pattern of alternating squares and checkered designs in shades of pink, green, and yellow, displayed against a textured white wall.

Jolene is Catherine’s second quilt this month. It uses FQs and finishes at a generous 63″ x 84″. You can find the kit HERE at VRD featuring the Thirty-One collection or HERE at Running Doe Quilts featuring the Camp Canine collection.

Snap Shot by Molly

Quilt design titled 'Snap Shot' featuring images of wildlife, including deer and a bear, with a mix of earthy colors and fabric patterns.

Snap Shot is another one of Molly’s creative panel quilts. It is FQ friendly and finishes at a nice 45″ x 54″, which could be a wall quilt or a throw. Sorry, but VRD is out of Snap Shot kits already.

Apologies, but there is no table runner this month. Stay tuned for next month’s runner!

SEW, which NEW pattern are you going to make first?????

Now let’s turn our thoughts to our ongoing Quilt Design series.

Colorful quilt block design featuring a central orange square surrounded by red, blue, yellow, and green pieces in a symmetrical pattern.

Here is the traditional Farmer’s Daughter block. According to Barbara Brackman, this block was first published in Clara Stone’s 1906 booklet, Practical Needlework: Quilt Patterns, which was part of a needlework booklet series by C. W. Calkins & Co. in Boston. Of course, like most quilt patterns, it was probably being made long before it was published. One of our readers suggested this block last week and I just couldn’t resist it. Thank you, dear reader! I hope I do the block justice for you!

Yikes! See how the four corners of the block feature set-in seams? Well, the first change to this block we are going to make is to change the four corners to be much friendlier by using Half Square Triangles (HSTs) instead of set-in pieces. Ahhhh! That’s more like it!

A colorful quilt block design featuring a central red square surrounded by blue triangles and yellow squares, with green squares at the corners.

Now we’re ready to play — er, design! Let’s put Farmer’s Daughter blocks in a quilt. Huh! When you set the blocks side to side, you lose the block and a whole new design emerges. Pretty cool!

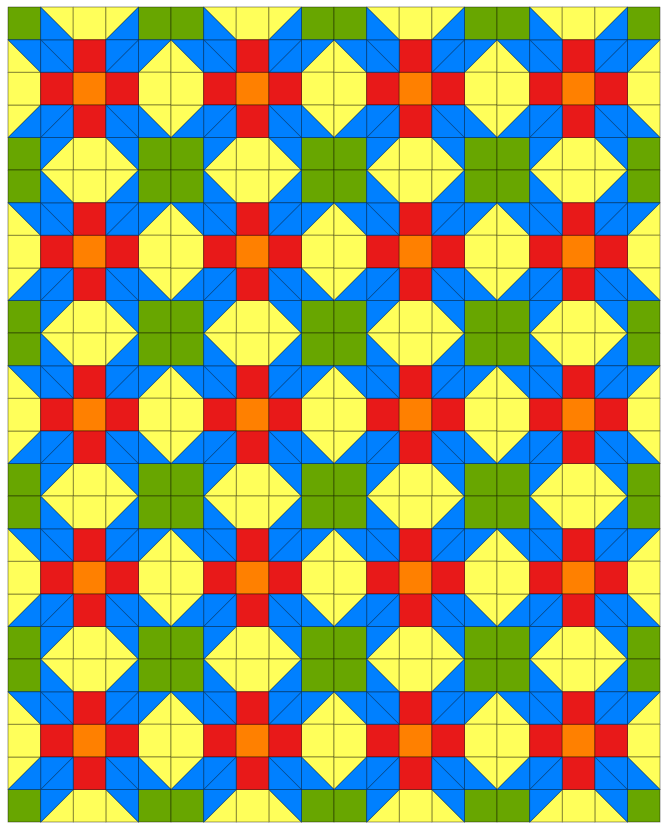
Colorful quilt design featuring a geometric pattern with star and diamond shapes in red, blue, green, yellow, and orange.

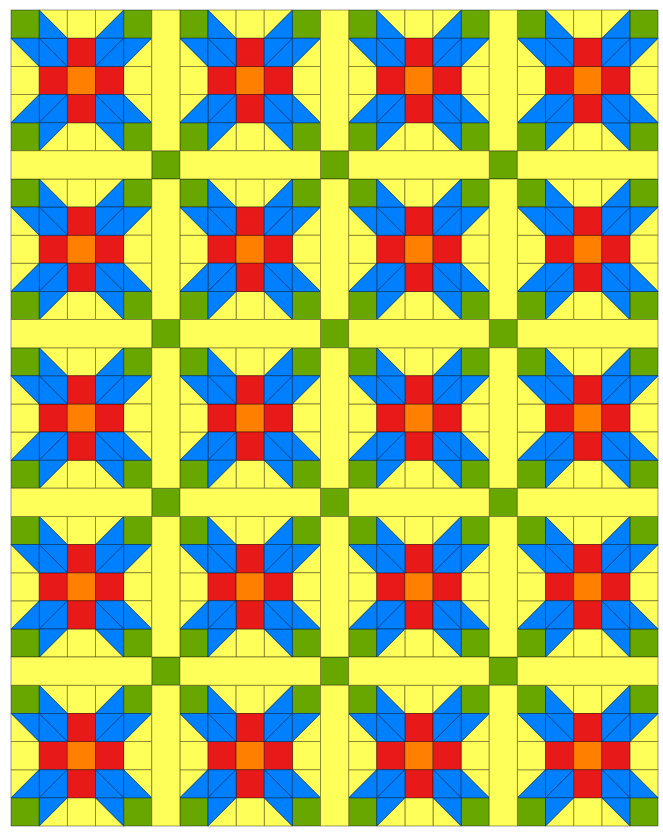
Now let’s add some sashing to see what that looks like. Neat-o! Sashing shows off the block. I just love the secondary design where the block corners (with the green squares) meet the sashing squares. Both designs have a lot of movement already and I haven’t done anything except the HSTs.

A colorful quilt design featuring a repeating star pattern with red, blue, orange, and green shades set against a yellow background.

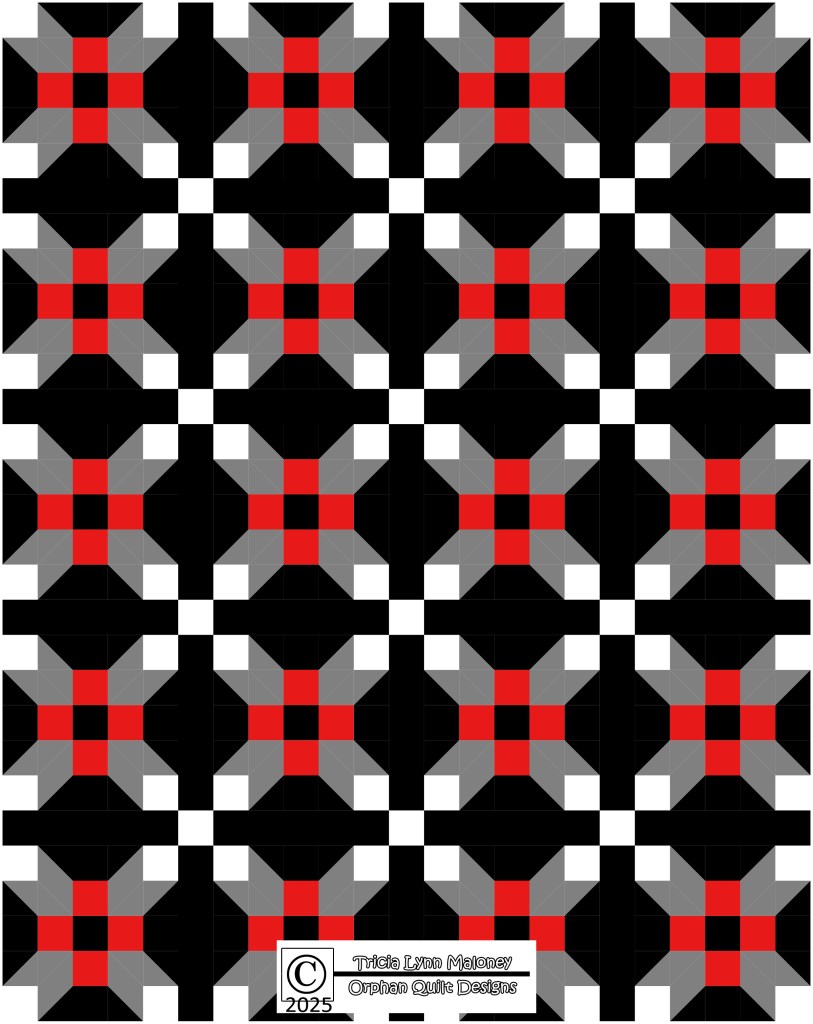
Wowzer! Look what happens when I change the colors to black, grey, white, and red. I’d call this a finished design right now, wouldn’t you???? It almost has a 3D effect. Cool beans!

A quilt design featuring blocks with star-like shapes in red, gray, and white against a black background, creating a geometric pattern.

Here’s the same design, but I changed the red to white. Holy cow, Batman! It’s really eye-catching and the black negative space is just itching for some really cool machine quilting.

A quilt design featuring alternating blocks composed of black, white, and gray geometric patterns, arranged in a grid layout.

Here’s the same design again, but I changed the grey to red. Oh my! It just about leaps off the screen. Just by playing around with the colors.

This is only ONE of sew many reasons why I love my Electric Quilt 8 software. I can tweak some tiny little thing and if I don’t like it, I can go back or keep tweaking. If you haven’t ever tried EQ8, you really should. It is a total game changer for quilters everywhere!

A quilt design featuring a bold pattern of alternating red and black shapes arranged on a black background, with white squares creating a checkered effect. The design includes intricate geometric shapes that resemble a stylized star or flower.

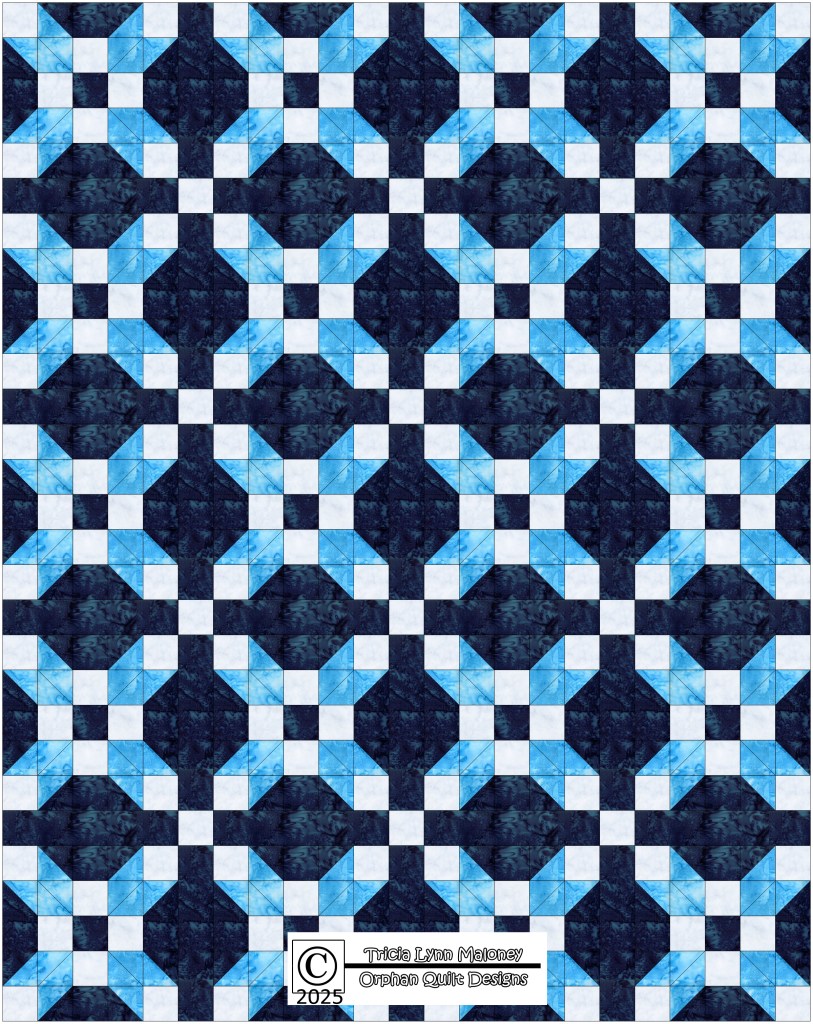
Now let’s add some fabric. I’m using lovely blue batiks from Hoffman’s 1895 Watercolors collection. That’s the one! LOVE IT!

That’s a wrap for this design!

A quilt pattern featuring interconnected blue and white blocks set against a dark background, creating a geometric design.

But wait! We’re not done yet. Let’s go back to the block and split the corner sections into 2 colors, instead of just 1 color. I also changed the center square to blue, which gives it an interesting pinwheel design in the center.

A colorful quilt block design featuring a star shape with blue, red, and yellow triangles, set on a white grid background.

Let’s see what it looks like in a quilt. Hmmm. Not very interesting. At least not yet.

A quilt design featuring a repeating star pattern with red, blue, and yellow colors on a white background.

Let’s add some sashing. I’m gong to introduce black for the sashing squares. Better, but no way near finished. Let’s keep going.

Quilt design featuring a repeating star pattern with red, blue, yellow, and white colors, arranged in a grid with black sashing.

Let’s flip the black and white for the sashing and sashing squares. WHOAH! I am loving this sashing idea – it is incredibly graphic! But now we need to tweak the blocks some more.

A colorful quilt design featuring a repeating pattern of star blocks in red, blue, yellow, and white, set against a black background. The blocks are arranged in a grid with alternating black and white sashing.

Before we work on the blocks some more, it needs a border to frame it. It just looked a bit unfinished without it, don’t you think?

A quilt design featuring a grid of colorful star blocks on a black background, incorporating blue, red, yellow, and white fabrics.

That’s it! Okay, on to the blocks. Let’s swap the blue and yellow in the 4 corners back to 1 color, red. And change the blue center to white so it repeats the white sashing square. I love how graphic it is. Your thoughts?

Quilt design featuring a repeating pattern of star blocks in red and white against a black background, with a modern geometric layout.

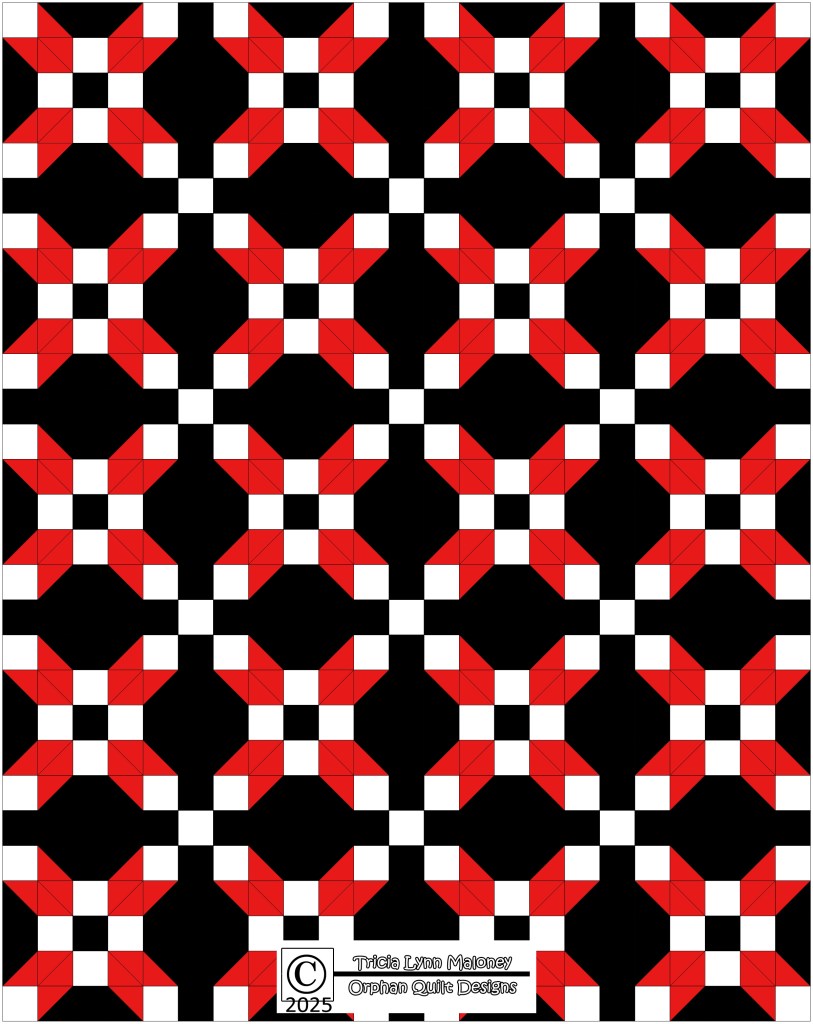
One more tweak. Let’s change the center square in the blocks to black. Yup! That’s it! Love the plus sign in the center of the blocks! This design has a clean modern look yet it feels traditional, too. It is totally the best of both worlds.

A patterned quilt design featuring alternating red and white blocks on a black background, showcasing a geometric star motif.

All right! Let’s add some fabric. Again, I’m using batiks from Hoffman’s 1895 Watercolors collection. I did make one more tweak by changing the sashing squares to match the plus signs. Don’t you just love it in pinks? The black has a slight bluish tinge for added interest. Again, it has a bit of a 3D effect. Done and done!

A vibrant quilt design featuring a repeating star pattern in pink and purple hues, set against a dark blue quilt background with white borders separating each star.

Do you remember where we started? A Classic Farmer’s Daughter block.

How far we came just by changing the colors, playing with the fabric placement, and adding sashing/border.

How are you going to explore these ideas with your quilts???

A colorful quilt block design featuring a central orange square surrounded by red squares and blue triangle sections, with green and yellow corner pieces.

Well, that’s it for me for our 4th week in our Let’s Design a Quilt Series. If you missed any posts, you can catch up here:

Playing with Nine Patch Blocks

Playing with the Spool Block

Playing with the Courthouse Steps Block

Playing with the Sawtooth Star block

Sadly, next week we are going to wrap up our Quilt Design series. Next we’re going to do some new tutorials, just for you. Sew stay tuned!

See you on the flip side!

Until then –

Always,

Tricia @ VRD

2025 Let's Design a Quit Together Series · Just Quilty Stuff · Quilt Play · Tips and Tricks

Let’s Design a Quilt: Playing with the Courthouse Steps Block

Happy Thursday to you!

Are you ready to play with another quilt block? Yippee! Me too. This really is SEW much fun for me to do and I think it’s also helping me to think more “outside the box.” I’ve definitely noticed more designs popping into my head lately. 🙂

If you’ve missed our Quilt Design Series so far, you can catch up:

Playing with Nine Patch Blocks

Playing with the Spool Block

I was a little disappointed that no one was brave enough to suggest a quilt block in the comments on last week’s blog post. Please consider letting me know what your favorite block is or another block suggestion to design with as I’m planning to do this mini series on designing for a few more weeks. Do you really want me to have all the fun of picking out all the blocks?

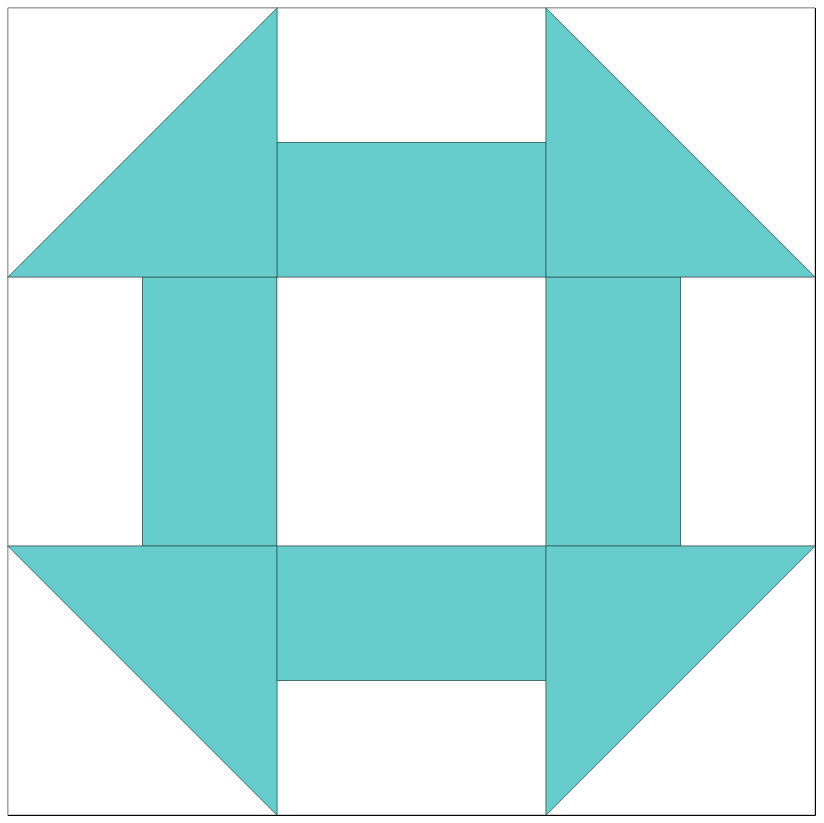
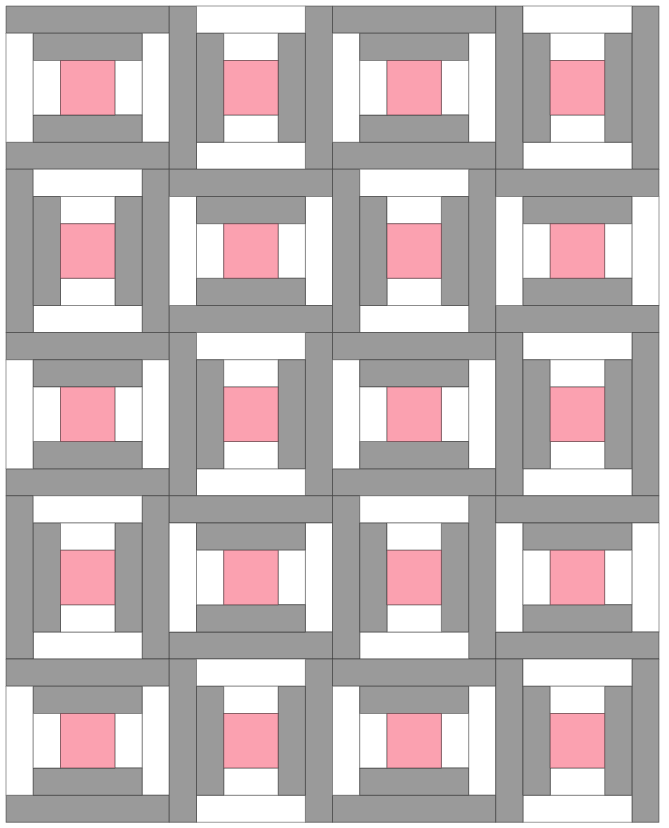
So I asked my quilty pal, Mary Lee (Hey Mary Lee!) for a block suggestion. She thought for a few seconds and then suggested either Churn Dash or Courthouse Steps. I thought both were good options. Churn Dash (image 1, below) is another Nine Patch variation while Courthouse Steps (image 2, below) is a variation of a traditional Log Cabin block. Because we’ve already done 2 Nine Patch blocks, I zoomed in on her Courthouse Steps suggestion and immediately began to wonder what we could do with it.

A digital illustration of a Courthouse Steps quilt block design featuring a central square surrounded by rectangles and triangles in a light teal color.
Image 1 – Churn Dash block, also known as Hole in the Barn Door and Monkey Wrench
A quilt block design featuring a central pink square with gray and white rectangles surrounding it, arranged to create a geometric pattern.
Image 2 – Courthouse Steps block

Since I’m going to focus on the Courthouse Steps block today, I’m assigning all of you readers “homework” — see what you can do with the Churn Dash block (image 1, above).

You can share your “homework” on our Facebook Page, in the comments (although I’m not sure if you can upload images), or you can email them to me at tricia@villarosadesigns.com.

I’d love to share your ideas on next week’s blog or upcoming posts if we have a big response. I hope you will take a little time and play – er, I mean design a quilt – along with me. Hand drawn, EQ, or Adobe images are great, please use a .jpg or .pdf format atat no more than 300 dpi.

Who knows????? There might even be a prize or 2…. US and International friends can play along, so go get started – right after you finish reading this post, that is.

Let’s learn a bit about the Courthouse Steps block. As I mentioned earlier, it’s a variation of a Log Cabin block. According to Barbara Brackman in the Encyclopedia of Pieced Quilt Patterns, it was originally called White House Steps and appeared in print circa 1890 in the first Ladies’ Art Company catalog, which included 272 patterns. White House Steps was block #221. Of course, that doesn’t mean the block just suddenly appeared in the 1890’s. rather, that was the first known version in print. Quilters may have been making the block much sooner than the 1890’s.

A Courthouse Steps quilt block design featuring a central pink square surrounded by alternating gray rectangles.
White House Steps block
A graphic representation of the Courthouse Steps quilt block, featuring a central pink square surrounded by alternating gray and white rectangles.
Courthouse Steps block

The Courthouse Steps block we are familiar with today uses color a bit differently than the White House Steps version, above. Interestingly enough, “Courthouse Steps” isn’t even mentioned in Barbara Brackman’s book. I wonder if it’s a regional term used for the block? Does anyone know this block by another name? Just curious. I did find the block in Electric Quilt 8 software (which is based on Barbara Brackman’s book), but it is considered a foundation pieced block and does not include any historical information.

Doing a quick Internet search, I discovered a post on Suzy Quilts about Courthouse Steps blocks with a touch of history and wonderful examples of Gee’s Bend quilts. Check it out HERE.

Alright! Ready to get designing???

So, here’s our block again. Take a good look at it – what do you see? A central square with rectangles radiating from the center square both horizontally and vertically. That’s it! Simple, but very effective, very geometric, and very graphic.

Illustration of a Courthouse Steps quilt block design featuring a central pink square surrounded by gray and white rectangles.
Courthouse Steps block

Let’s put the blocks side by side with all of the blocks going the same direction. Okay, this is fun. And it would make an awesome scrappy quilt, wouldn’t it?

A digital mockup of a Courthouse Steps quilt block design featuring pink squares, grey and white rectangles arranged in a geometric pattern.

Let’s turn the blocks sideways and see if we get something different. Pretty much the same thing, just different direction.

Pattern design of the Courthouse Steps quilt block featuring alternating shades of gray, pink centers, and white accents in a geometric layout.

Let’s alternate every other block next. Huh. Better. Definitely more movement in this one, wouldn’t you agree? I almost detect a bit of a curvy look happening, which is interesting with a square block.

A quilt design featuring alternating Courthouse Steps blocks in shades of gray, pink, and white arranged in a grid pattern.

Now I think I’d like to see what happens when I group the blocks in 4’s. That’s interesting.

A digital quilt design featuring multiple Courthouse Steps blocks arranged in a grid pattern with a mix of gray, white, and pink colors.

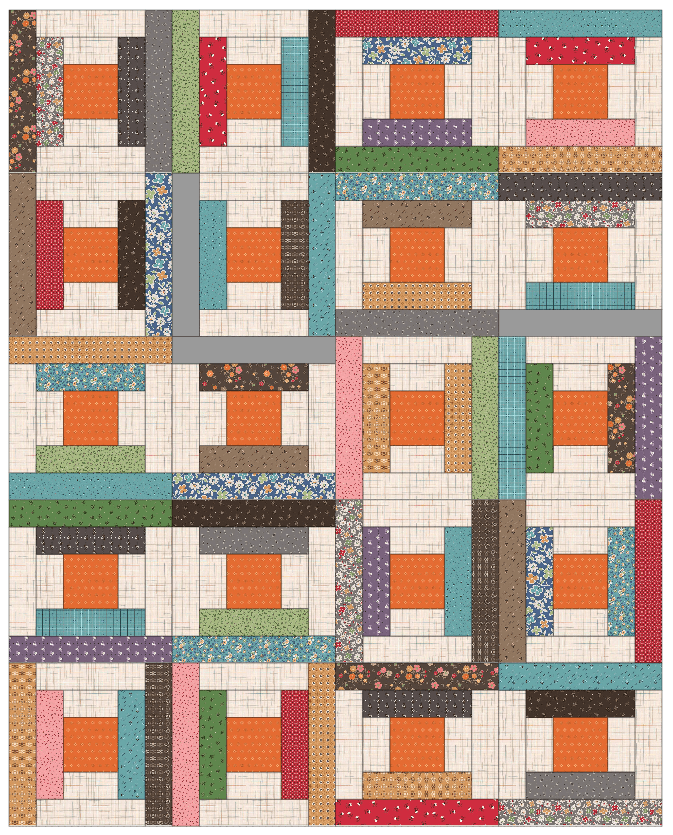
Let’s add fabric to see what happens, shall we? I’m using Lori Holt’s warm and homey Riley Blake collection, Autumn. I can almost smell the apple pie…..

A patchwork quilt featuring a Courthouse Steps block design with a variety of colorful fabrics arranged in a grid layout.

I want to tweak the blocks one more time. In this example, I turned alternating rows which then gave me an interesting boxed effect in rows 2 and 4.

A colorful quilt design featuring the Courthouse Steps block, showcasing a mix of fabrics in varying patterns and colors arranged in a geometric layout.

Whoah! Stop the bus! Here was the basic idea behind my VRD Rose Card pattern, Boxed In (hence the name), although it’s not totally the same. I wasn’t even thinking about any of our VRD patterns when playing with Courthouse Steps, but – there it is. LOL!

A quilt design titled 'Boxed In' by Tricia Lynn Maloney, showcasing a colorful patchwork pattern with various fabrics arranged in geometric blocks on a table.

Get your digital pattern HERE or your print pattern HERE

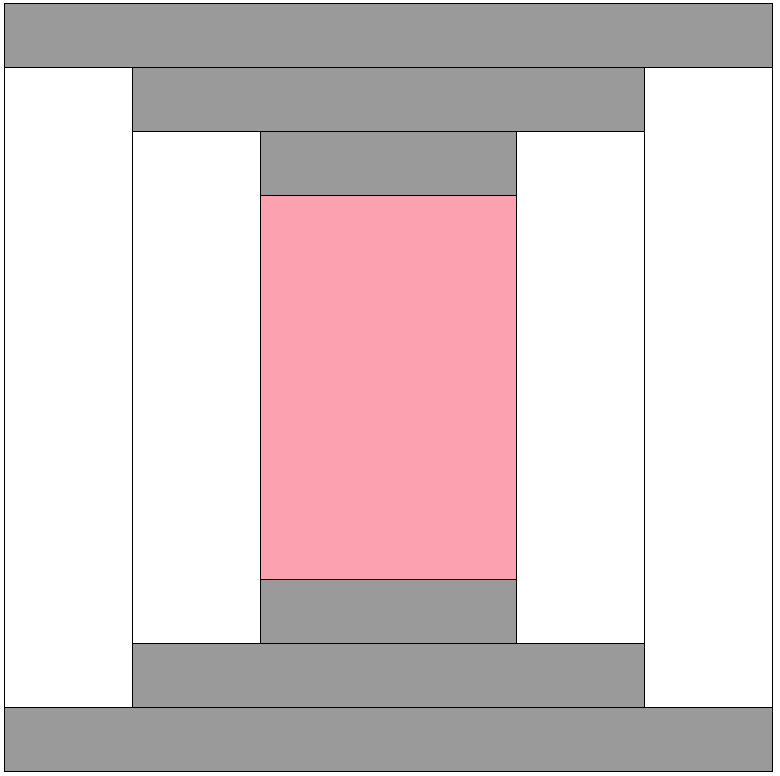
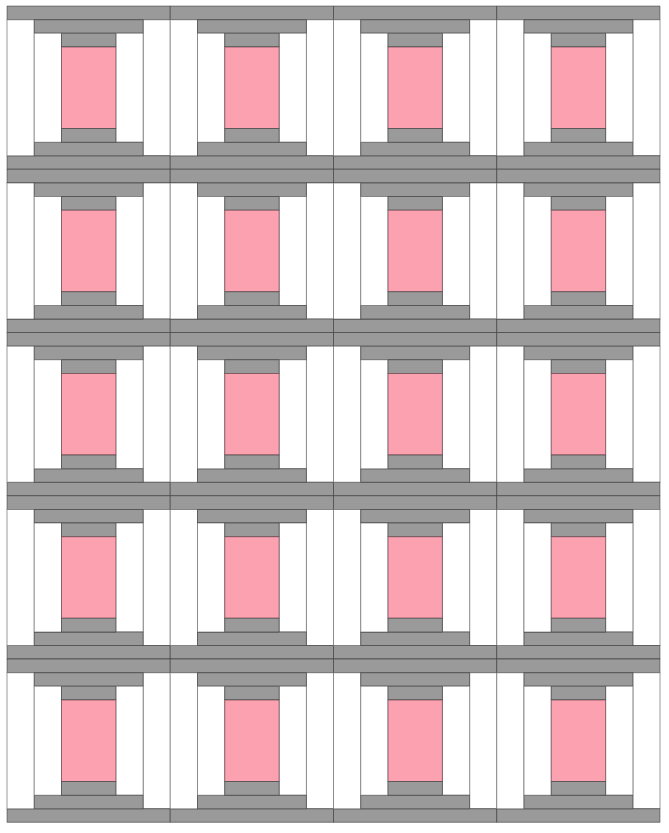
Okay, let’s go back to our Courthouse Steps block and tweak it a little bit by changing the width of some of the rectangles. I left the side rectangles the same, but I made the top and bottom rectangles narrower.

Diagram of the Courthouse Steps quilt block design featuring a central pink square surrounded by gray rectangles.

Let’s use the first setting from above to see how the blocks plays in a design. I really think this looks pretty cool and it reminds me of paper lanterns.

A digital representation of a Courthouse Steps quilt block design featuring a central pink square surrounded by white and gray rectangles, arranged in a grid layout.

Let’s tweak the color a little bit. Again, I’m using a couple prints from Lori Holt’s Autumn collection. WOW! What a mod yet classic 2 color quilt! Love it!

A digital quilt design featuring a Courthouse Steps block layout in brown and turquoise colors, arranged in a grid pattern, with a light grid background.

Cool! Check out this block arrangement! It’s the same layout as our previous 2nd design, above.

A quilt design featuring a Courthouse Steps block pattern in brown and light blue color scheme.

Hmmm. I just don’t feel that’s it totally complete yet, so let’s add another fabric to see what happens. In this example, I’m using some lovely Hoffman 1895 Watercolors batiks. Love it!

A quilt design featuring a central pink pattern framed by dark and light gray rectangles, creating a geometric composition.

Just….one….more….tweak. As you can see, designing a quilt can get kind of addicting. Yup. But, I think you’ll agree with me that this is the final design. I changed the block directions a bit, changed the black centers to grey, changed the black background to a light grey and added more fabrics from Hoffman.

I think it’s perfect now.

A digital quilt design showcasing alternating blocks of the Courthouse Steps pattern in shades of pink and gray, framed by light blue fabric strips.

There’s not much else I can say………except I’m very satisfied with this final design. Seriously. Sometimes it takes just one more try to get where you want to. And I’m not just talking about quilt design, you know.

What would you do to tweak the Courthouse Steps block to create your own design?

Don’t forget to do your homework for next Thursday! I’ll see what I can find in the prize department while you play with the Churn Dash quilt block to see what you can come up with.

Ta! Ta!

Until next time –

Always,

Tricia @ VRD

2025 Let's Design a Quit Together Series · Quilt Play · Tips and Tricks · villa rosa designs

Let’s Design a Quilt: Playing with the Spool Block

Happy Thursday to you!

What a fun blog post last week! It was great to share a little bit about my quilt design process with you. It was such fun, we’re doing it again this week, but with a different quilt block.

Before even starting this post, though, I must admit I cheated a bit and began playing with this week’s quilt block. Let me tell you – it never fails to amaze me how a simple block can create such amazing designs.

Here’s last week’s post if you missed it:

Playing with Nine Patch Blocks

Are you ready? Let’s design a quilt together!

According to Barbara Brackman’s Encyclopedia of Pieced Quilt Patterns, this specific Spool block appeared in the book, Polly Prindle’s Book of American Patchwork Quilts by Alice Gammell in 1973. Of course, it wasn’t really a new block in 1973, but this simplified Nine Patch version appeared in Polly Prindle’s. Previous versions included set-in seams as well as 4 small Spools in a single quilt block. Today, though, we’re going to start with Polly Prindle’s version.

A quilt block design featuring a 3x3 layout with red and cream colors, showcasing a Spool block pattern with alternating triangles and squares.

As you can see, our Spool Block is a Nine Patch block with a 3×3 layout. Of course, we’ve added some Half Square Triangles (HSTs) to create the Spool shape.

The first thing we’re going to do is to simply our Spool block by using flippy corners instead of HSTs for the top and bottom of the spool. This tweak would actually save time when piecing the blocks for a quilt without changing the overall design. And we all know that saving time is golden in the quiltmaking process. The tweak also cleans up the look of the block by removing some of the seams.

A diagram of a Spool quilt block featuring a 3x3 layout with red and white fabric sections.

Let’s see what a quilt looks like using just this block, shall we? This design shows the blocks all pointing in the same direction. Hmmm. I like it, but I think we’re just getting started with the Spool block today.

A quilt design featuring a repeating pattern of red and white spool shapes arranged in a grid layout.

Let’s try alternating the block directions. Better, but not there yet.

Patchwork design featuring a grid of red and white spool quilt blocks arranged in a 3x3 layout.

Next up – let’s alternate block direction by row. Better and better! I really like the play between the different block directions. Reminds me a little bit of the vertical and horizontal strips I added to last week’s classic Nine Patch block.

Quilt design featuring a repetitive pattern of spool blocks in red and white.

Let’s add some fabrics to this one. I’m using a few prints from Moda’s Acorn Hollow collection. This layout definitely has some potential. I’m not usually a big fan of 2 fabric quilts, but I am liking the crispness of the design with only the 2 fabrics.

A quilt layout featuring a Spool block design in a 3x3 arrangement with orange and white color scheme.

Okay, let’s go back to our Spool block again. Instead of it being a 2 color block, let’s make it a 4 color block with a black center.

Colorful spool block design featuring a central black square surrounded by sections in red, orange, blue, and green.

Huh. Intriguing. Let’s see how it looks in a quilt. This is the same layout as our first red/white layout above. What a difference color can make!

Now let’s alternate the block directions. This is the second red/white layout above.

Colorful quilt design featuring a repeated Spool block pattern, arranged in a grid format with red, orange, green, blue, and black elements.

I like it, but with so many colors, you kind of lose the interesting design. Let’s back off on colors a little bit by adding more neutrals. Not loving it, but I do like the diagonal thing happening.

Colorful quilt design featuring a repeating block pattern with red, blue, black, white, and yellow sections arranged in a grid layout.

Not quite what I was expecting. Let’s tweak the colors some more. I’m going to use red, black, white, and grey which is one of my favorite colorways when I’m trying to perfect a design. I like working with these colors because of the strong contrast. I also changed the center square to black, so I get an interesting black shape in the blocks now – kind of looks like a megaphone to me.

A quilt design featuring a pattern of interlocking Spool blocks arranged in a 4x4 grid, showcasing vibrant colors of red, black, white, and grey.

Let’s rearrange the blocks to see what happens. This is interesting. It has a lot of movement.

Colorful quilt design featuring a repeating pattern of red, black, gray, and white shapes arranged in a geometric layout.

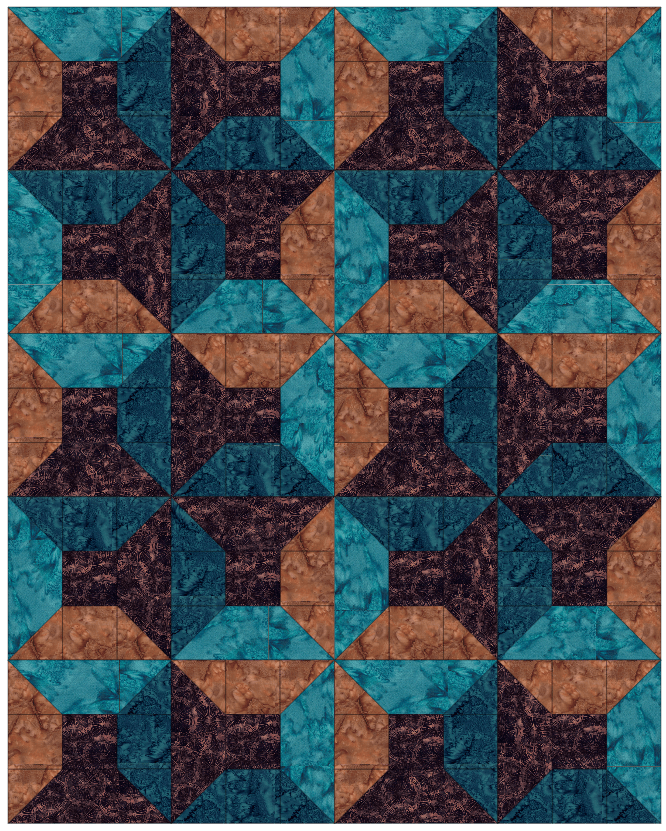
Let’s add some fabric now to see what it looks like. Here it is in 4 Hoffman batiks. I like it – it has a woven effect which keeps my eye moving over the design.

A quilt design featuring a Spool block layout, showcasing a combination of dark brown, teal, and light brown fabrics arranged in a repeating pattern.

Let’s play with the block arrangement a little bit more. I think there’s another better option still out there. We just have to play a bit until we get there. Almost there.

A quilt design showcasing multiple Spool blocks arranged in a 4x4 grid, featuring a combination of brown, teal, and dark purple fabrics.

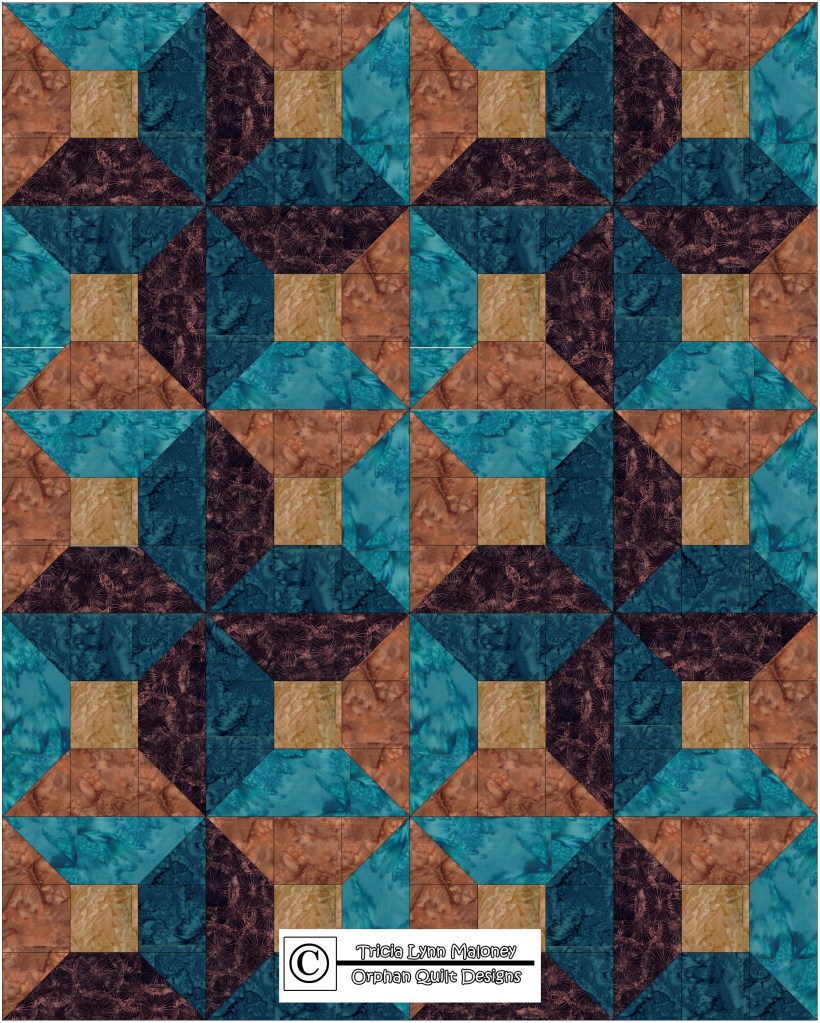
I think it needs just one more thing tweaked. I’m going to reintroduce the 5th fabric in the block for the center squares. Yup! Got it. This is the one! A beautiful finished design! LOVE the 3-D effect. Lots of movement. Tons of interesting things going on.

Quilt design featuring a repeating Spool block layout in shades of teal, brown, and black, displaying a 3x3 pattern with various fabrics.

Do you remember where we started? A simple Spool block.

Quilt design featuring alternating red and white diamond shapes arranged in a grid pattern.

An here’s where we ended. Still a simple Spool block, but so much more!

A vibrant quilt design featuring a Spool block layout, with a mix of teal, brown, and dark purple fabrics arranged in a grid pattern.

Isn’t quilt design a fascinating journey? For me, it’s a lot of “what if?” questions. Also, I’m not afraid to make something really ugly – I can always delete it, right? And sometimes “something ugly” just needs another tweak or 2 to become something amazing.

I hope you give designing a try. I think you’ll be surprised at how fun it it. Whether you use graph paper and a pencil or Electric Quilt 8 software, I think you can come up with something that’s truly your own, something you love.

Stay tuned next week for another fun quilt design adventure! Any suggestions on a simple quilt block you’re just dying to see turned into an interesting quilt design? Leave a comment and tell me!

Until next week –

Always,

Tricia @ VRD

Quilting Partners · Rose Cards · Tips and Tricks · Tutorials · villa rosa designs

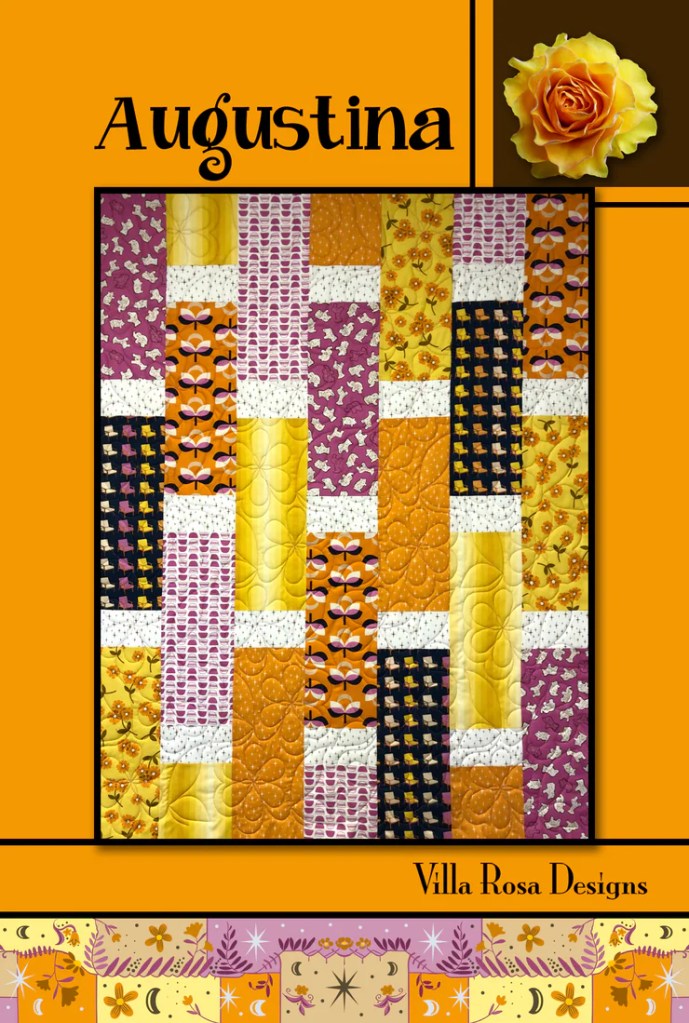
VRD Augustina Quilt Tutorial – Perfect Summer Project

Happy Thursday to you!

WHEW! If you’re like me, you are having a heatwave right now. 90’s every day. It even hit 100 on the thermometer on Monday! YIKES! I’m sooooo not ready for these temps. It’s like we went straight from 50’s to 90’s in a couple weeks.

90’s are definitely not normal for this time of year here in northwestern Pennsylvania. AND we have high humidity to go with the heat which makes me want to just melt into a puddle on the ground every time I have to step outside. I literally had to scramble on Sunday to get the window AC units in, but we’re all good now. I just don’t want to go outside anymore.

A woman in a floral dress appears distressed while crawling on a sunlit street, with water droplets visually distorting around her, creating an impression of melting.
I’m melting into a puddle………!!!!

Luckily my dungeon studio is still cool enough (sadly, it is not air conditioned) to work in comfortably. I have several fans on to keep the air moving, but when the heat finally infiltrates my space, it’ll get quite uncomfortable. That usually isn’t until August and September, though, but we’ll see what summer brings this year. Northwestern Pennsylvania is an interesting place to live – record amounts of snow and cold in the winter, a wet and cold spring, then – POOF! – record high temps in June. Only the strong survive……..

I finally got a little quality time with my sewing machine this week so I decided to put together a new tutorial for you. Augustina is a such great project for summer!

Of course Augustina is fast and fun – it’s a VRD pattern, but it’s also not so big that you feel like you’re wrestling an alligator while your body is dripping with sweat. I promise you, this quilt really is quick – I made the top in a couple hours and that included both cutting and photographing my step-outs for the tutorial. It’s a very satisfying afternoon project.

Augustina is a great sized quilt for a small throw or a juvenile quilt. And this is a pattern you are going to turn to over and over again for a beautiful quilt with little effort, yet it looks like a million bucks (sorry, it’s late and I couldn’t think of another phrase to use). So don’t forget to get your own Augustina pattern if you don’t have it yet.

A vibrant quilt pattern titled 'Augustina' featuring colorful fabric blocks in shades of purple, yellow, and orange, with floral and geometric designs. The quilt is displayed on a warm orange background, showcasing its cheerful and lively aesthetic.

Get your digital pattern HERE or your print pattern HERE

Let’s get started!

The first thing we need to do, of course, is round up our fabrics. Augustina is a fat quarter project, so you can march right over to your stash and find some coordinating fat quarters or you can use this project as an excuse to visit your local quilt shop to buy new fabric. Yeah, I know, we quilters really don’t need an excuse, but it is handy to have one anyway, isn’t it?

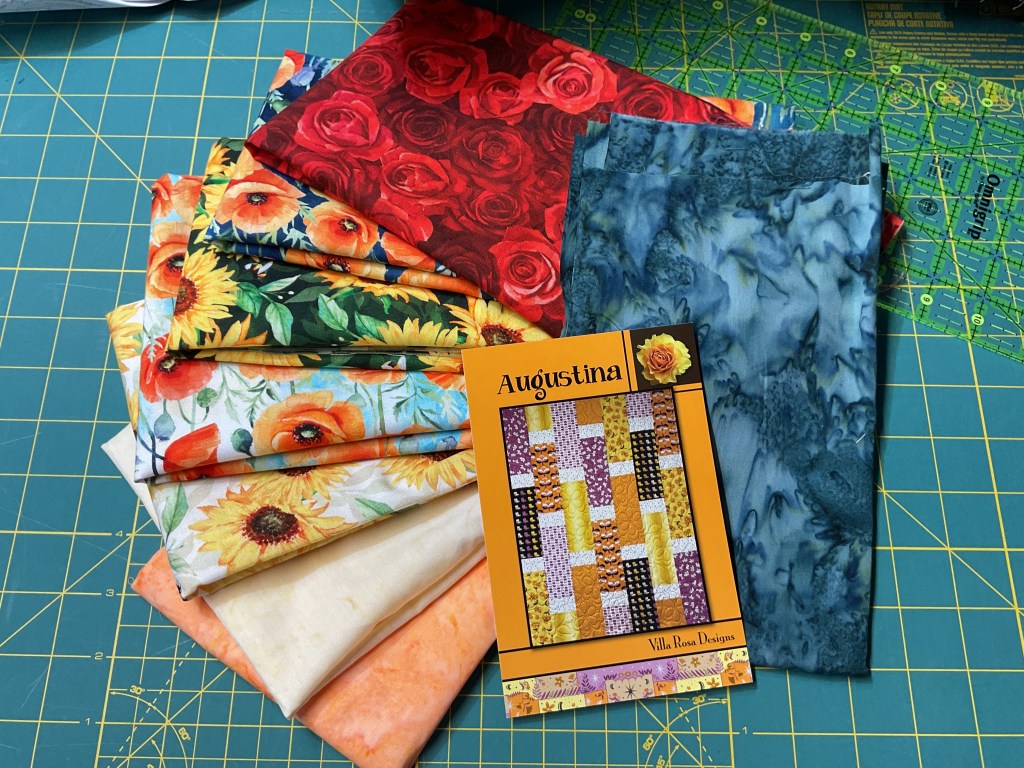
For this tutorial, I am using Flower Shoppe fabrics from our quilty friends over at Hoffman Fabrics. The flower fabrics are all amazing Hoffman digital prints – have you seen these in person yet? The colors are so bright and clear – I feel like I could pick these flowers right off the fabric. We’ve paired a few Hoffman batiks to balance out the gorgeous flower prints.

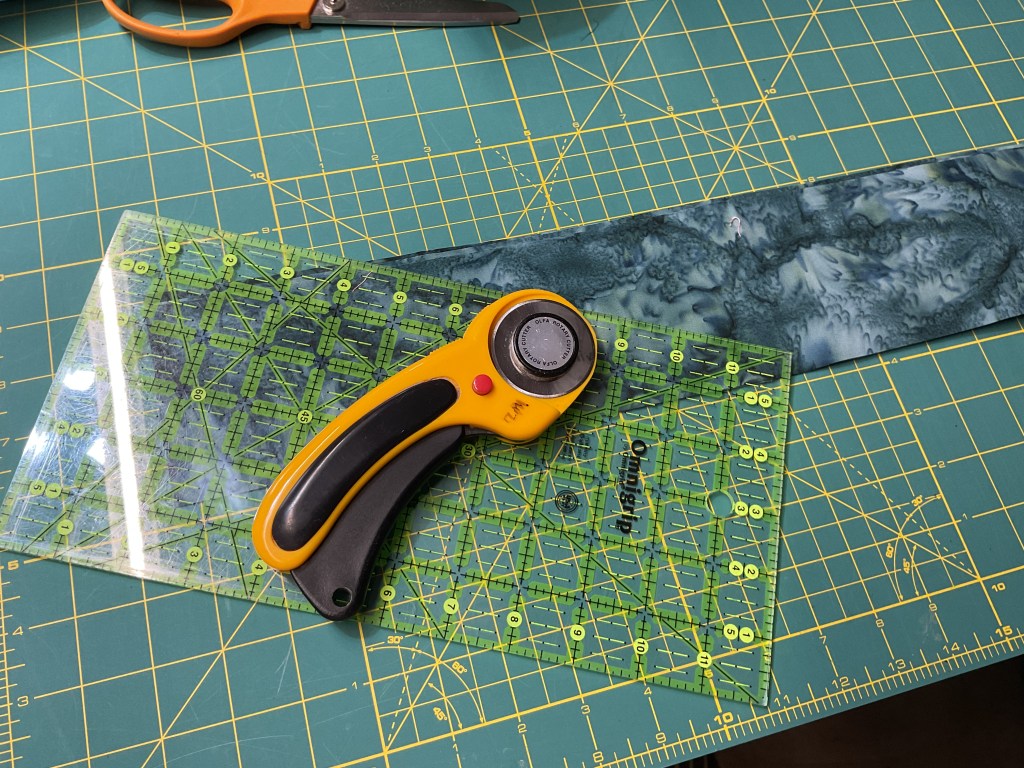
Please remember when using digital prints, that they do not react exactly the same as regular quilting cottons. Always start with a new needle in your machine so you are not pulling threads when sewing as well as a new rotary cutting blade so you are cutting cleanly through the fabric instead of sawing at it, which can damage the fibers.

A collection of fabric pieces featuring floral patterns, including sunflowers and roses, stacked with an Augustina quilt pattern booklet on a cutting mat.

Next up…..cutting.

SHHHHH! The secret of this quilt is that the pieces are big. Big pieces mean you don’t have to spend loads of time cutting little squares, rectangles, or triangles. Big pieces are a huge time saver! Big pieces also mean you can use bigger prints (when you use big prints in small pieces, the design gets all chopped up and you tend to lose what you loved about the print to begin with). Yay! Let’s GO BIG!

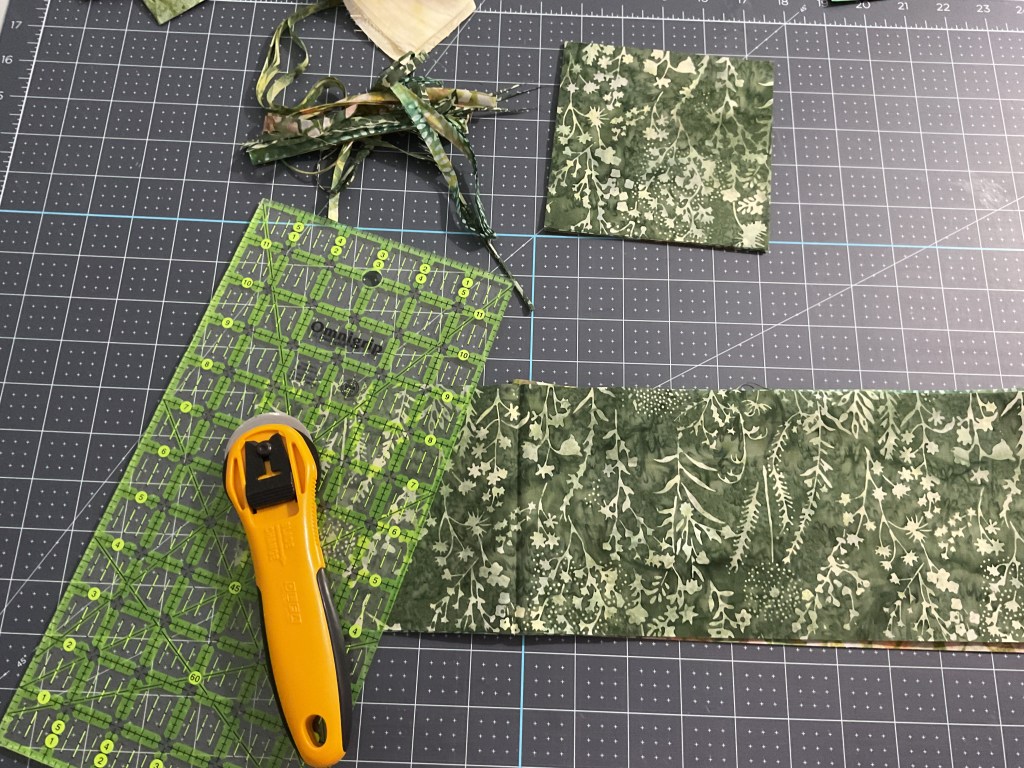
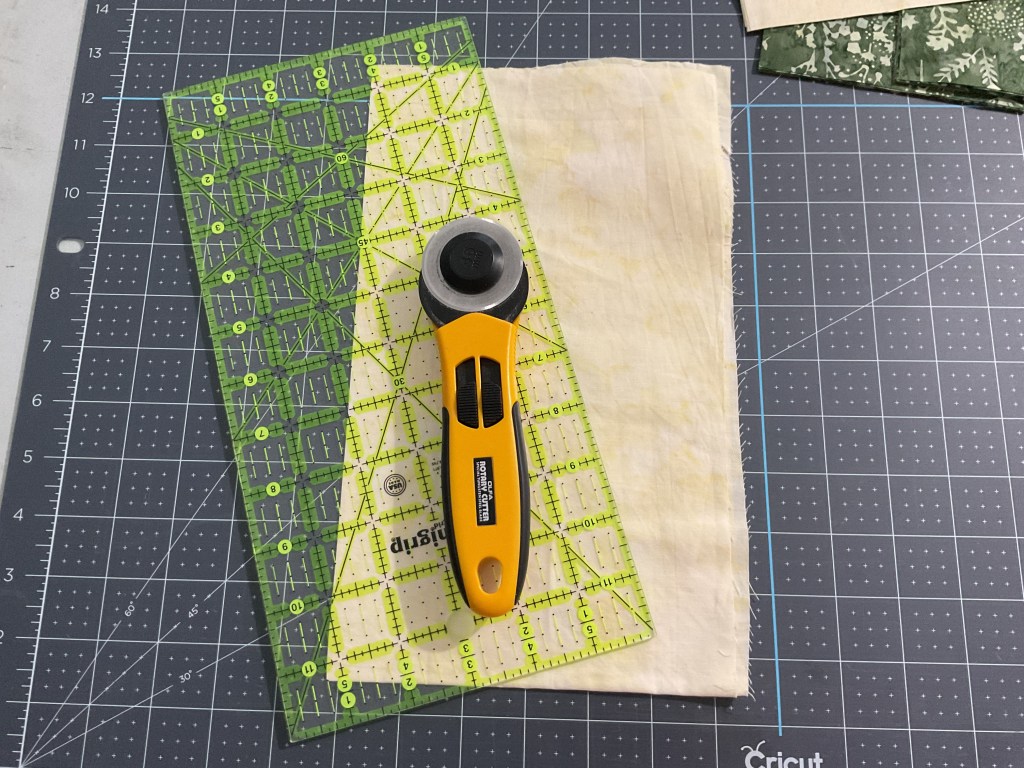
In the photos, below, we’re cutting our accent fabric into strips and then into rectangles.

Below, we’re cutting our FQs into strips and then into 2 different sized rectangles.

VIOLA! Cutting done. Easy peasy. Here’s all the pieces we need to make Augustina.

A selection of colorful quilting fabrics featuring vibrant floral patterns, including poppies and roses, arranged on a green cutting mat with a ruler and rotary cutter nearby.

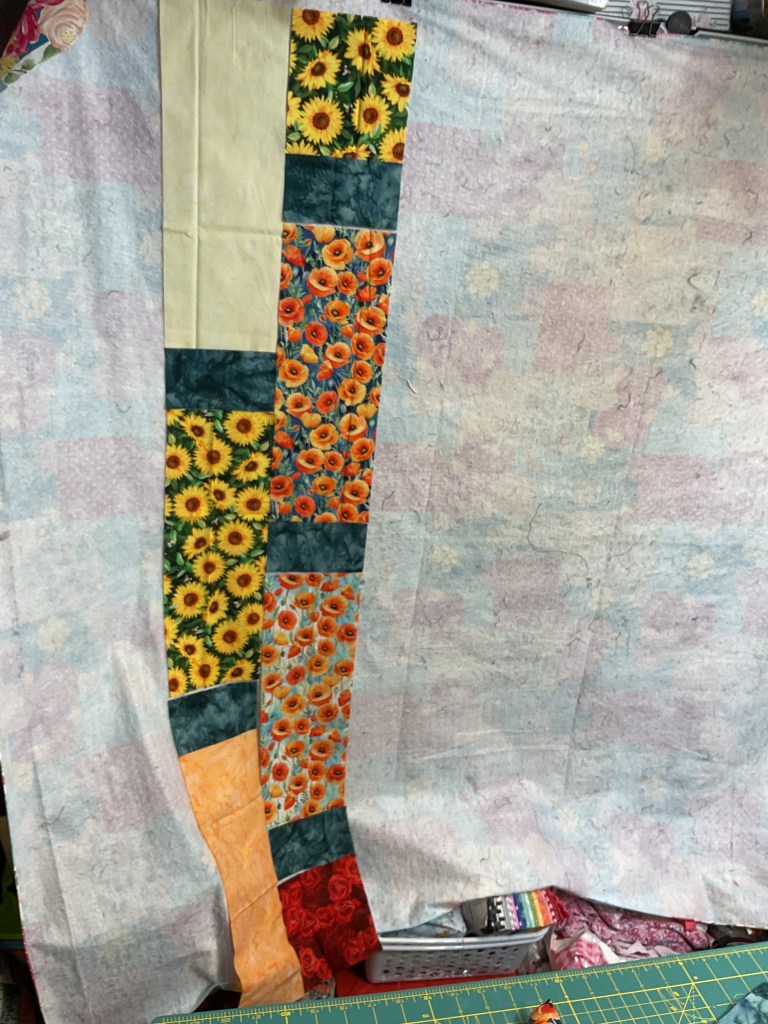
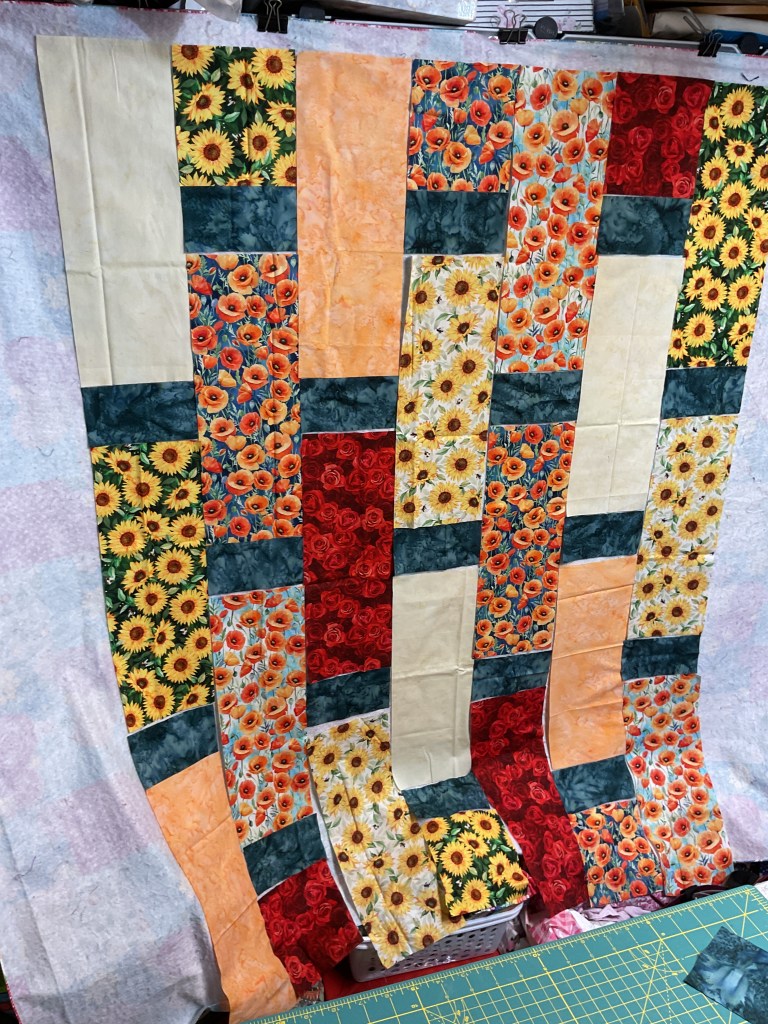
Before we can sew Augustina together, we have to lay out our fabrics. I’m going to put them up on my handy dandy flannel board which consists of a flannel-backed table cloth clamped to the tops of my fabric storage unit doors. As I’ve mentioned before, this idea came from my pal, Mary Lee. Kudos to you, Mary Lee! It’s a great option if you don’t have a spare wall to put up a more permanent quilt wall solution. I can simply take it down when I need access to my yardage stash. I’ve actually had this tablecloth for years now, so it’s even an economical option.

Hmmm……I think I need to move some fabrics around.

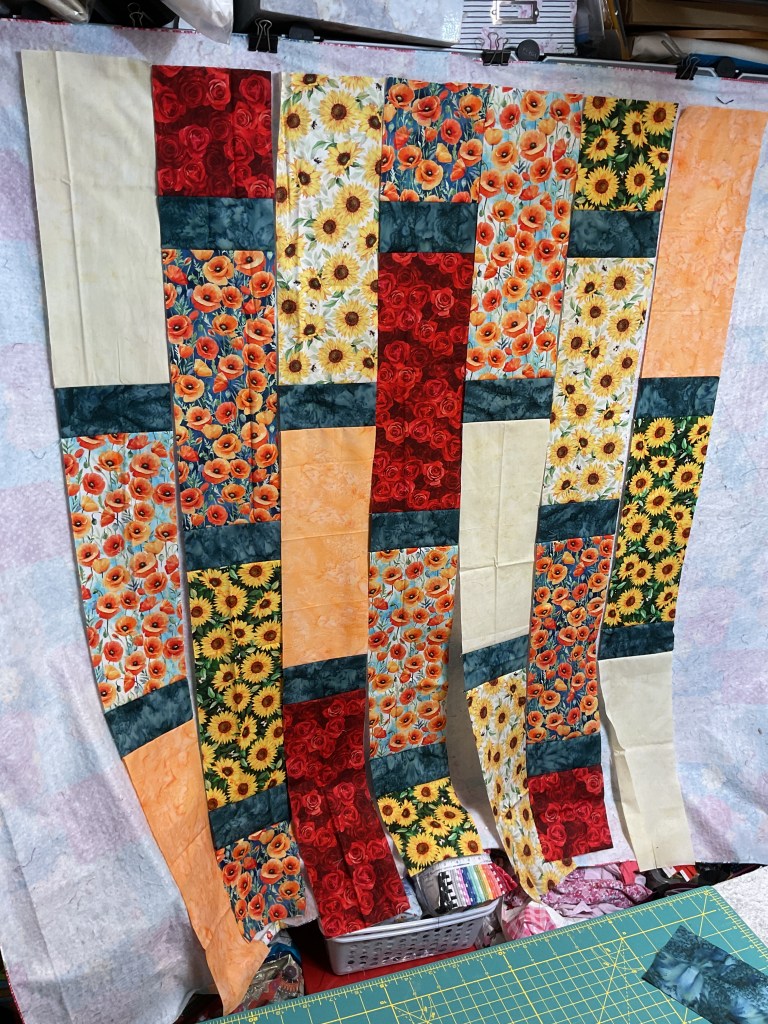
After several switcharoos, I think I’m happy with the layout now.

Let’s sew!

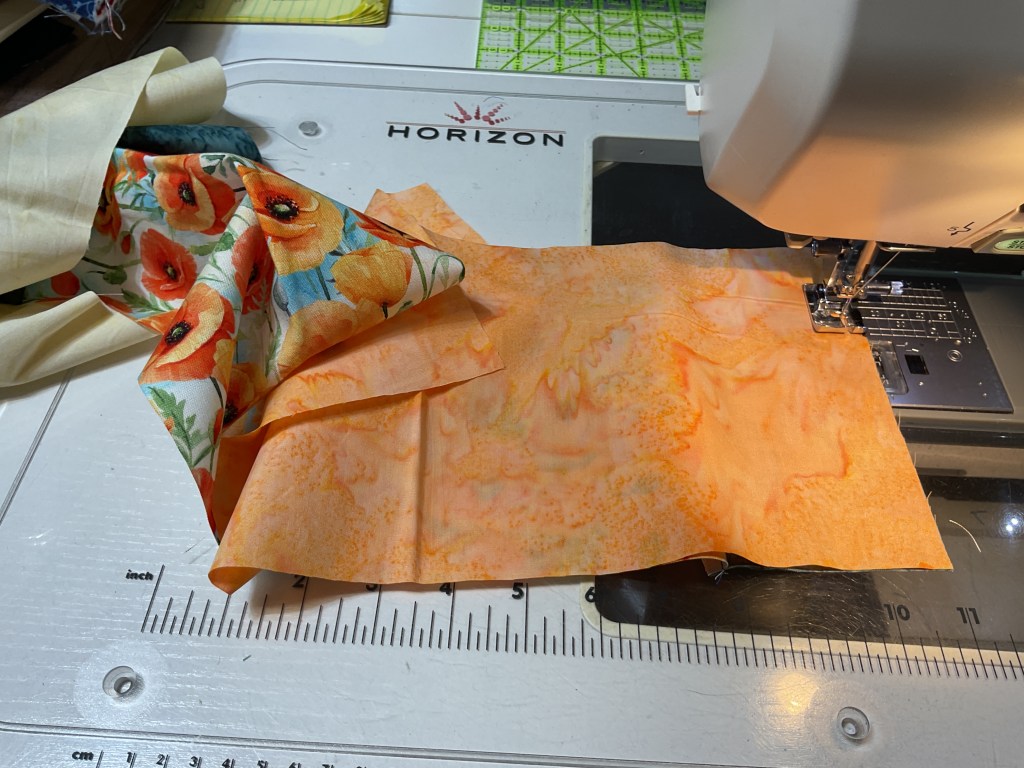
This quilt is sewn together in vertical rows. I took my time, only taking one vertical row off of my board at a time. I worked from the top down to sew the pieces together. It doesn’t matter whether you sew your strips top down or bottom up, just be consistent with all of your rows or else you might get your fabrics out of kilter.

Okay, all the fabrics are now sewn into vertical rows.

Vertical strips of colorful floral and solid fabrics are laid out for a quilt project, with a cutting mat visible below.

Now I’m going to sew the vertical rows together into pairs. As this quilt has an odd number of rows, the last row will have to hang out all by itself for a while.

Vertical strips of colorful floral fabrics arranged on a flannel board in preparation for quilting.

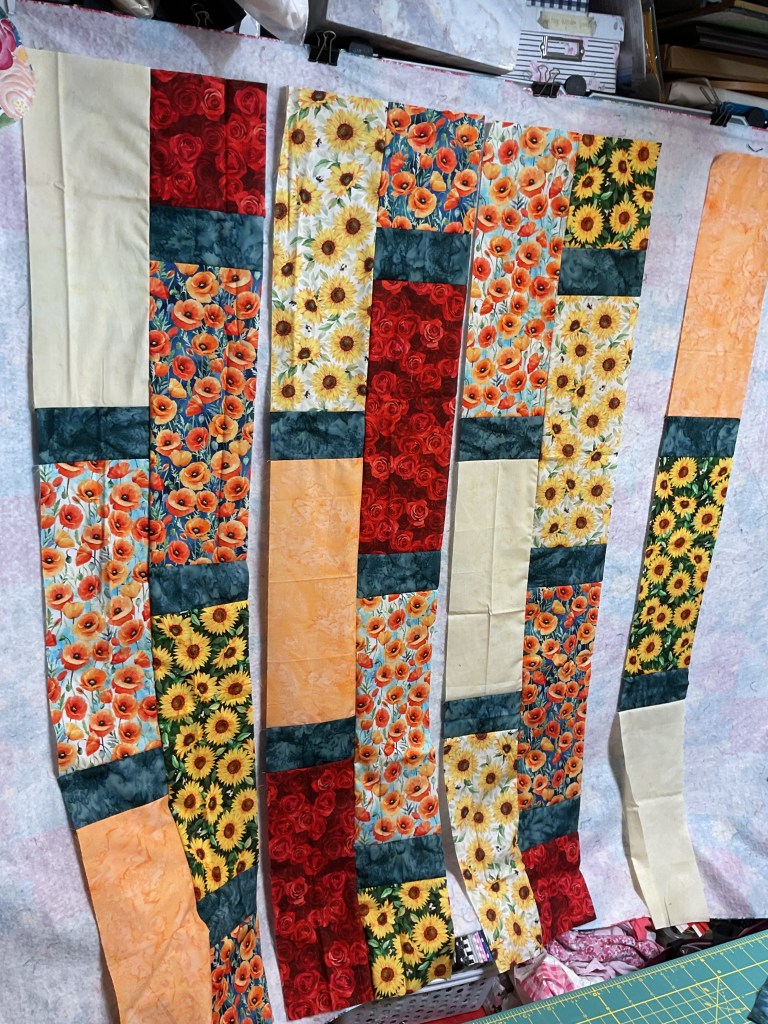
Next, I’m going to sew the first 2 pairs together into a foursome. Then I’ll sew the third pair and the last row together into a trio.

Two vertical quilt sections showcasing a colorful patchwork of floral and solid fabrics on a cutting mat.

One last seam to sew the 2 sections together and the Augustina top will be finished. Fast as can be! There isn’t a lot of matching seams, but you do want to make sure your accent pieces are relatively even-looking across the quilt.

And here it is! Our completed Augustina quilt top.

Colorful quilt top featuring floral and solid fabric blocks arranged in a vertical pattern.

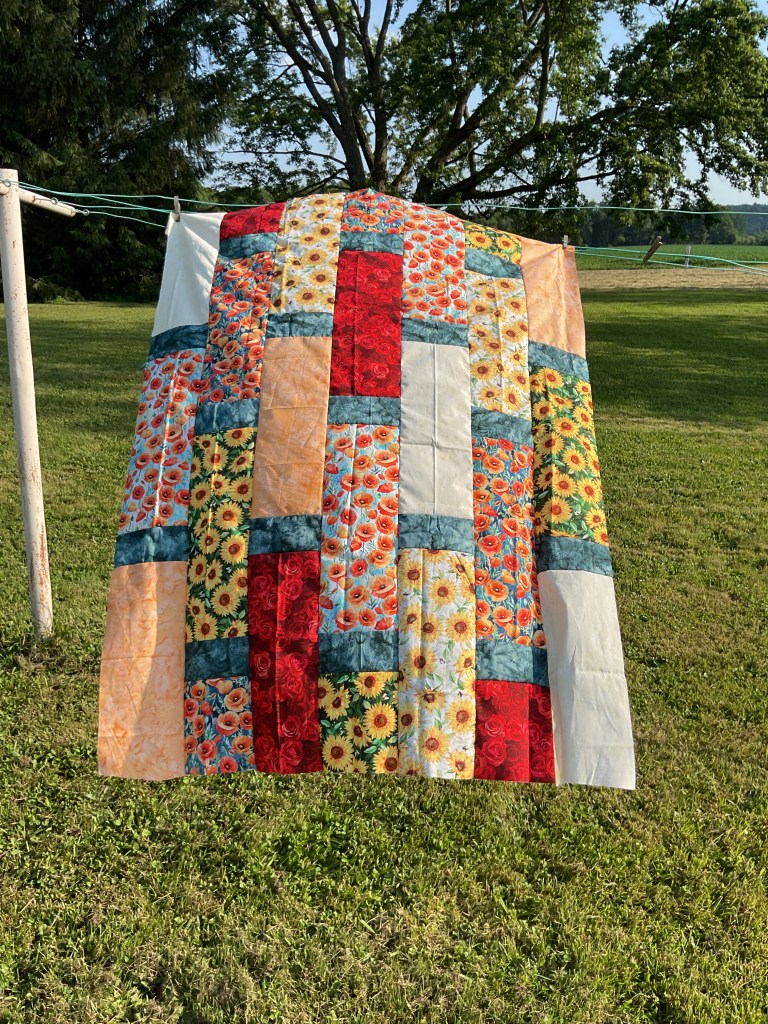
Although it was hot, I decided to take Augustina outside for a glamour photo. Sigh…….it was a little breezy out and I couldn’t get a photo with it hanging nicely for you. Bummer. But I do love how it looks surrounded by all the green – the flowers look like they are about to burst right off the quilt! That’s digital fabric for you – the number of colors that can be printed on fabric is phenomenal and creates stunning designs.

A colorful quilt featuring floral patterns and various fabrics, hanging on a clothesline outdoors with green grass and trees in the background.

And that’s it! Finito! Next I need to layer, quilt, and bind it…….someday, anyway.

If you’re looking for another great summer quilt pattern, check out the Jubilee tutorial from a few weeks ago. It’s also a super go-to project.

That’s it for me today, gotta go have me some summer……..in the air conditioning. LOL!

See you next week, same time same place —

Always,

Tricia @ VRD

Quilting Partners · Rose Cards · Tips and Tricks · Tutorials · villa rosa designs

NEW March VRD Rose Card Quilt Patterns and Lucky, a Quilt Tutorial for St. Patrick’s Day

Happy Thursday to you!

I trust you’re all having fun with your Free Motion Quilting (FMQ) practice. We’re going to take a quick break from our Beginner FMQ series this week because I have NEW March patterns to share as well as a fun table runner tutorial just in time for St. Patrick’s Day. We’re all Irish on St. Patrick’s Day, right?

Here are the new patterns for March – be prepared to be inspired….

Get the print set of all 5 patterns HERE.

The 5 main patterns are great, aren’t they?

Molly created a brand new St. Patrick’s Day throw-sized quilt called Clover Patch. I just love that she added a single Four Leaf clover to her quilt – can you find it in the Clover Patch?

Molly also created a second pattern this month called Jackknife. This clever block uses long quarters instead of fat quarters. We still have a few kits left, too, if you’re interested.

Get your Jackknife kit in Art Glass AbstrArt HERE.

Heidi wows with her new 24″ panel quilt pattern, Jerky. If you don’t already know, Heidi always gives her patterns a foodie name because she loves to cook.

Rachelle created a new modern pattern called Kenosha. I love the secondary design that happens in this striking quilt pattern.

Pat, our Rose Queen, has another fun and fast throw sized pattern for you called Zamora. If you didn’t know, Pat always names her quilts after a rose. Yep, Zamora is the name of a rose. Zamora only uses three main fabrics plus a binding fabric. Sew easy piezy. We still have a few Zamora kits left, too.

Get your Zamora in Indelible kit HERE.

We also have a new table runner pattern this month called Erin.

Get your digital Erin pattern HERE or your print Erin pattern HERE.

I’ve always wanted to make a green and white Double Irish chain for St. Patrick’s Day. I can now check that off my bucket list. The Double Irish chain looks complicated, but I promise you, it really isn’t when you break it down. Give it a try.

I guess I should have done a tutorial for today with Erin, but I’d already gotten Lucky stepped out and photographed before I even designed Erin. I’m sure I’ll do a tutorial for Erin sometime in the future – you’ll just have to stay tuned.

That being said, let’s move right along to our Lucky tutorial.

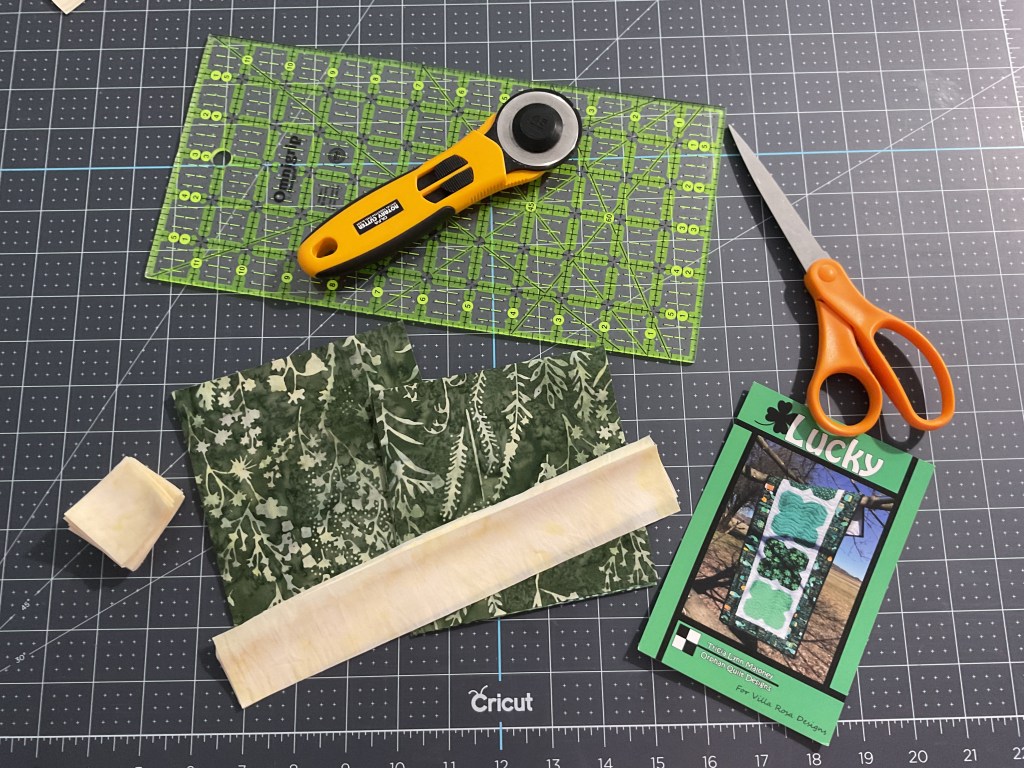
The first thing we’re going to do is gather up our fabrics.

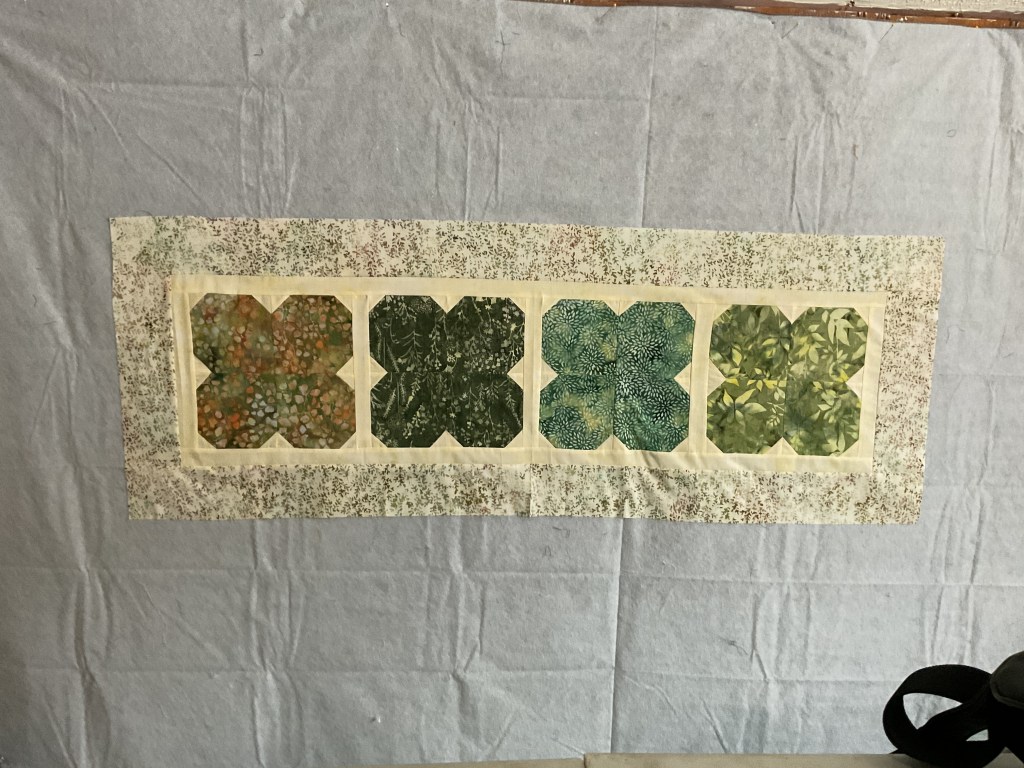
I’m using a beautiful Hoffman batik collection called Forest Floor. Don’t you just love the greens? With a pop of orange? Love Love Love it!

The first photo shows the background and the greens for the blocks. The second photo shows the border and binding.

Grab your rotary cutter, board, and ruler and let’s start cutting out our pieces!

Now that our pieces are all cut out, let’s start sewing!

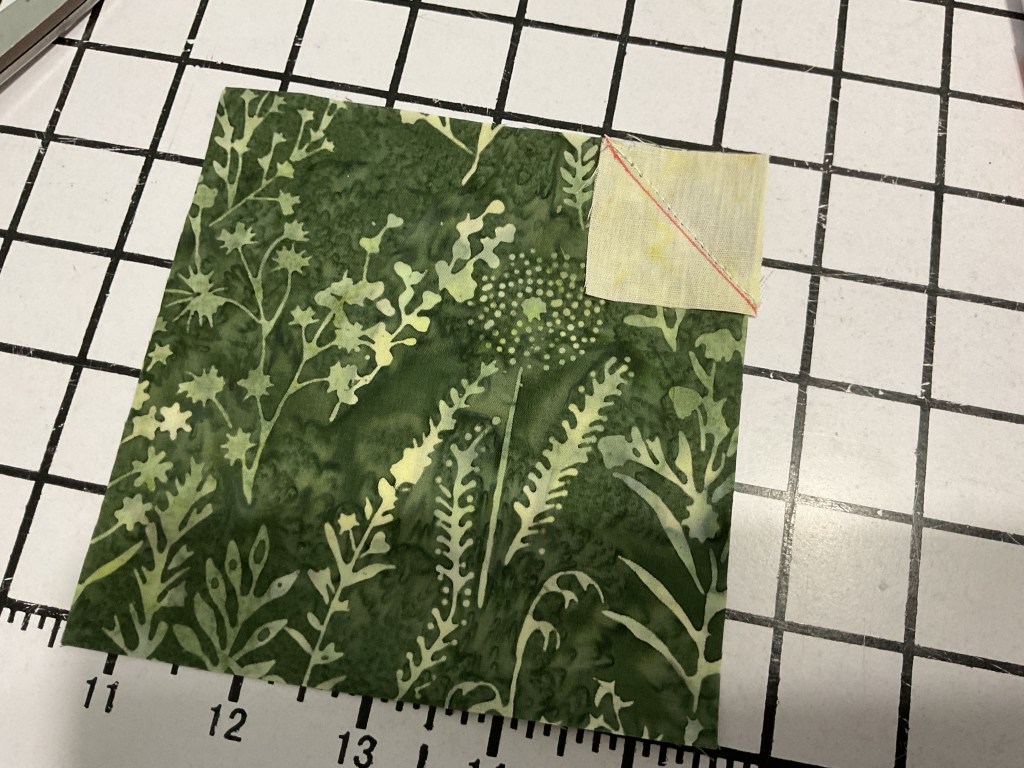
Layer a background square right sides together on the corner of a Clover square and draw a diagonal line from corner to corner. I love my Frixion Fineliner pens and my 1×6 little ruler for making my flippy corners and HSTs right at my sewing machine. What are your favorite tools for making yours?

Next we’re going to sew on the drawn line.

Let’s cut 1/4″ away from our drawn line. Did you knou can use these little cut off triangles for a scrappy little project? I’ve been saving mine for a long time, and have even started sewing them into HSTs, but I haven’t started making anything with them yet.

TIP: You might notice in the photo below that my seam is slightly to the right of the drawn line. This is actually on purpose because it gives a bit more room for the seam and my flippy corners are more precise. I learned this little trick from my quilty pal, Mary Lee. THANK YOU, Mary Lee!

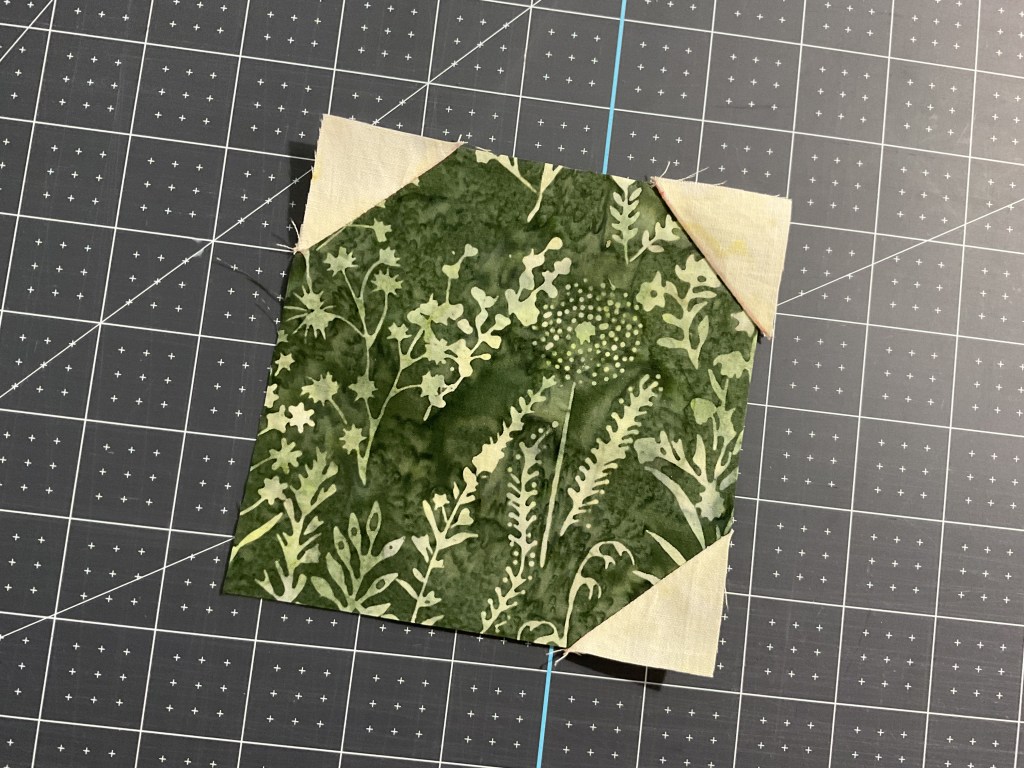
Don’t forget to press that flippy corner open.

We’re not done yet! Go ahead and make flippy corners on 2 more corners of the Clover square.

Okay, now we’re talking! Let’s repeat these 3 flippy corners for the rest of the Clover squares while we’re at it.

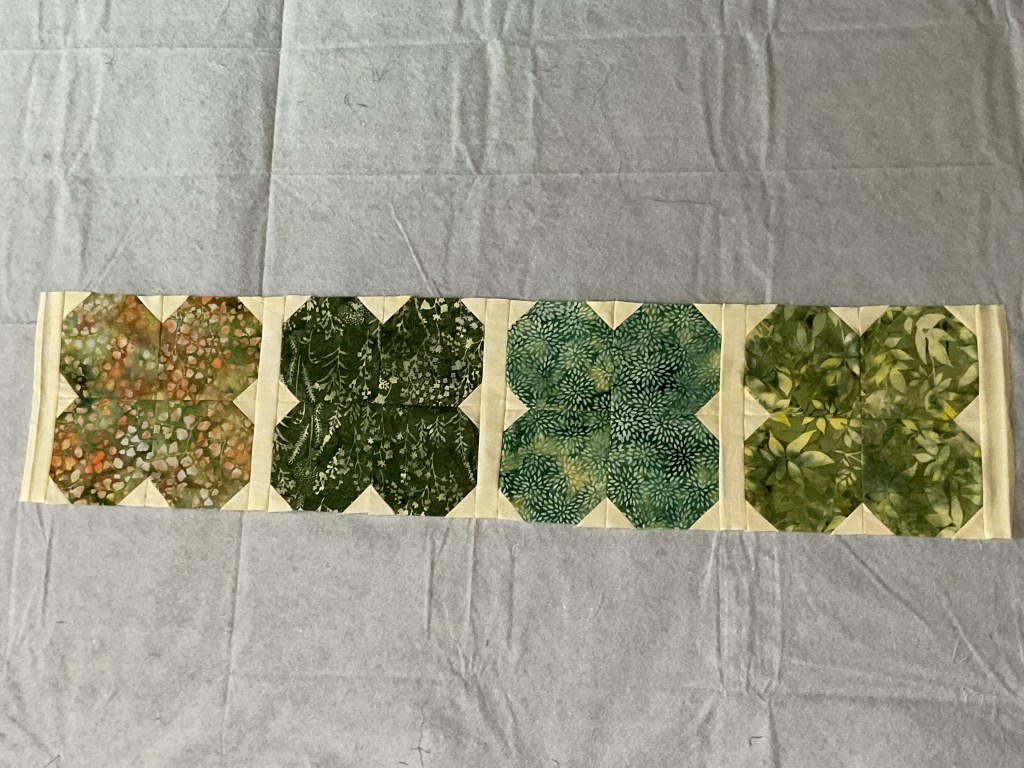
Finally it’s time to make a Clover block. Yeah! Sew 4 matching Clover squares together with the 4th unpieced corners towards the center so they all meet for the middle of the Clover block. Such a pretty block!

Repeat to make a total of 4 Clover blocks. Don’t you just love that pop of orange???

The next thing we need to do is sew the 4 Clover blocks together with background strips in between the blocks and at each end.

Then we’re going to add top and bottom background borders. Lookin’ good!

Now it’s time to add the side outer borders and then the top and bottom outer borders. And DONE!

Yay! All that is left to do is layer it with batting and backing, quilt it, bind it, and label it.

I hope you enjoyed the Lucky runner tutorial and are super inspired by the new March patterns. Next week we are going to wrap up our Beginner Free Motion Quilting (FMQ) series by addressing borders.

Until next week –

Always,

Tricia @ VRD

2025 Free Motion Quilting (FMQ) Series · Quilt As Desired · Tips and Tricks · Tutorials · villa rosa designs

Beginner Free Motion Quilting (FMQ) Lesson 5: Going Beyond Loops Part 1

Happy Thursday to you!

I am thrilled to tell you that we’ve had a little bit warmer temperatures for a couple days in row here in NW PA. I’m talking above 32 degrees! Actually it’s been in the 40’s, which feels so balmy compared to last week’s temperatures in the single digits and teens. Whew! But I don’t think winter is over yet for us, though, as the beginning of March is looking cold again. Spring can’t get here soon enough!

PSST! While we’re waiting for Spring to arrive, it is a great time to work on our Free Motion Quilting (FMQ) skills, don’t you think? So far we’ve talked about tools, equipment, and resources; doodling, making loops, and using cursive writing as a quilting design.

This week for Lesson 5, we are venturing beyond the Loopy design.

If you missed any of the earlier lessons, you can find them below:

Lesson 1: All the Background Information

Lesson 2: Let’s Doodle!

Lesson 3: Practice, Practice, Practice

Lesson 4: The Write Way to Doodle!

Let’s get started!

You might be wondering what exactly I mean by “going beyond loops”. Talk a deep breath — there is no need to panic. I promise we are not jumping right into Feathers. Relax, Feathers are ahead of you sometime in the future, but today is not the day. Instead, we are going to add some fun elements to our quilting to change up our basic Loopy FMQ design.

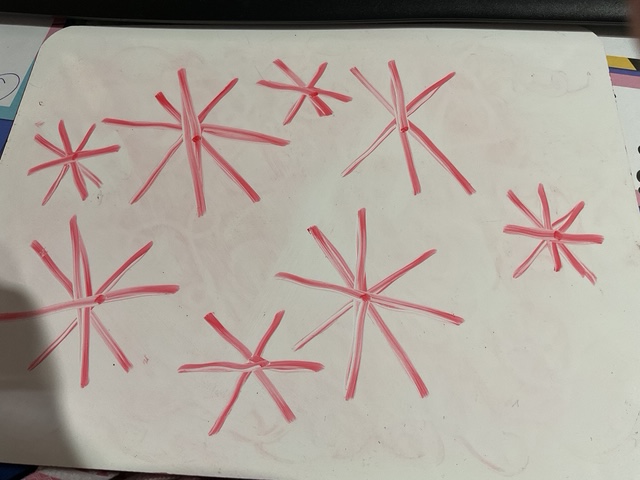
#1 Snowflakes with Loops

This design is absolutely one of my favorites, hands down! It is quite flexible and looks great on a lot of different quilts. Depending on the theme of the quilt, it can look like a snowflake, a star, fireworks, a starburst, or even a cool funky flower. Wow! That’s a lot of options for a single element, isn’t it?

Here is an example of the Snowflake and Loop design on a Christmas/winter place mat I created years and years ago for a magazine pattern.

Please note this place mat design was featured in Quilter’s World magazine some years ago and is a copyrighted design.

Grab your dry erase markers and let’s practice drawing Snowflakes or whatever you would like to call them on our white boards. You can decide how many spokes/rays you want your Snowflakes to have. You can even vary the number in your design to add more interest.

Next let’s add Loops to the Snowflakes and practice drawing our new Loopy variation design. Ready, set, go!Do you see how I surrounded each of the Snowflakes with my Loops? I like to use the Snowflakes as an accent, not the primary design. The primary design, of course, is the Loops. Additionally, I like to give my Loops lots of space to breathe.

Go ahead and practice drawing this design a couple times. Experiment with the Snowflakes (do you want 6 or 8 or more spokes/rays?).

Next, we’re going to FMQ this design on a practice square on our sewing machines. Are you ready? Take a deep breath and just do it.

To get you started, here’s a little video I made for you, showing how I create my Snowflake and Loop variation.

Here is a little example of quilting the Snowflake and Loop design.

Now it’s your turn to practice this design. Enjoy playing with it! Just imagine all the different kinds of quilts you can use it on!

#2 Kindergarten Star with Loops

Do you remember when you first learned how to make a five-pointed star? Probably around kindergarten, I should think. Can you remember how to make it now?

Here’s a little tutorial to jog your memory. Keep in mind that I am left-handed so you might draw your star differently than I do. Remember, you do you.

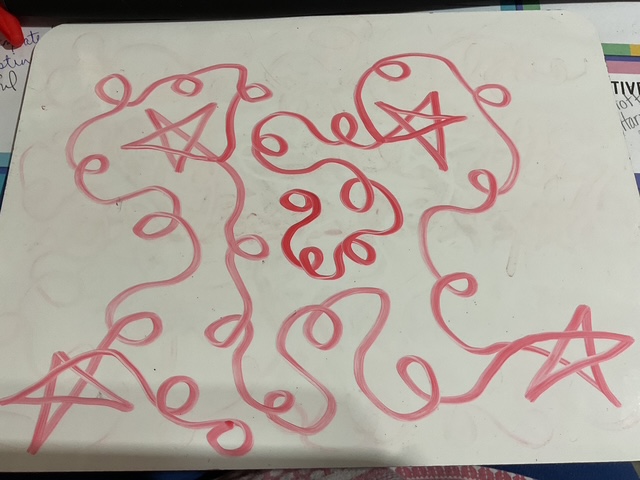
Kindergarten stars aren’t too much different from the Snowflake element above. And once you get comfortable making a five point star again (believe me, it will take some practice for some of you to remaster this shape), the design will flow more easily. Go ahead and draw some Five Pointed Stars on your white board. Make as many as you can fit onto the board. Make them all different sizes, too.

Now let’s practice drawing Kindergarten Stars combined with our FMQ Loop design. Feel free to do this several times until it feels more natural to you.

I bet by now (that is if you’ve been practicing) you are probably finding alternating the direction of the loops to be easier than when you first started several weeks ago. Go you!

Keep practicing on your white board until you can draw the five point stars without thinking about each line. Then I want you to practice making those stars upside down and sideways or else your design will come out very linear with stars lined up going the same direction.

This design looks amazing on patriotic quilts and on children’s quilts, too. What other kinds of quilts would look great with Kindergarten Stars and Loops?

Next up, we’re going to try quilting this design with our machines. Before we do, though, here’s a quick little video showing how I FMQ Kindergarten Stars and Loops.

Let’s make five point Kindergarten Stars!

Okay, now it’s your time to practice quilting Kindergarten Stars paired with Loops! This is fun, isn’t it?

#3 Hearts and Loops

Hearts will be our last design for today. So, how are you at making hearts? I have discovered that I can rarely make both sides of a heart exactly the same, so in my quilting (drawing and cutting, too), I intentionally make the sides of my hearts different. It lends a quirky funky look to my Hearts and Loops design, and that works just fine for me. LOL!

I have found that there are 2 basic ways to quilt hearts. Maybe you’ll come up with a different one and if you do, I hope you with share.

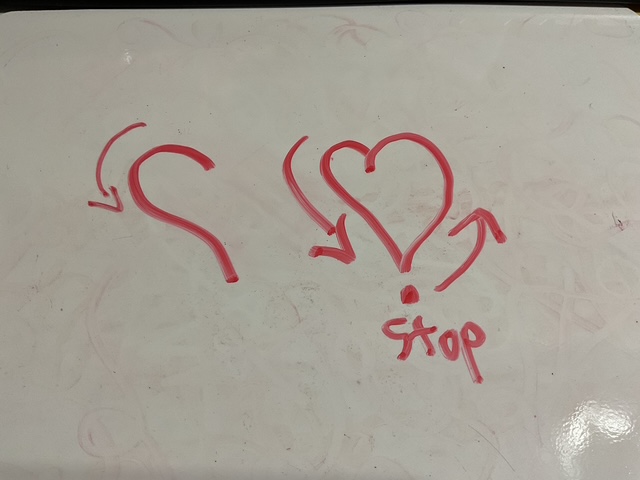
Anyway, the first way starts at the top center point and curves down and stops briefly at the bottom point before swooping back up and around to the center point once again. Remember, I’m a lefty so I usually move counterclockwise. Do what is comfortable for you.

The second way is one continuous line which might make it easier for you to FMQ hearts. It starts at the bottom point then curves up and around to the center point where you pause briefly before doing the second top bump and then swooping back down to the bottom point. This heart reminds me more of a heart shaped balloon – you’ll see this more when I quilt it.

So go ahead and practice your stars on your white board. Which style do you like better?

Now that I’ve mentioned both styles, I’m going to show and use the second style Heart design. I find that it can flow better with the loops than the first Heart style.

Now it’s your turn to practice drawing the Heart and Loop design on your white board. Repeat as many times as you want, experimenting with your Hearts.

Notice how I crossed the bottoms of the hearts in the design.

Let’s head back to our sewing machines and try FMQ Hearts and Loops. Here’s a quick video of how I do FMQ my Hearts and Loops.

Check out this cute little Hearts and Loops design!

Well, that’s it for me today. I hope you keep practicing your Loops and adding these fun elements to change up your designs. Next week I’ll have a few more Loop design variations to share with you. So stay tuned!

Take care!

Until then –

Always,

Tricia @ VRD

2025 Free Motion Quilting (FMQ) Series · Quilt As Desired · Tips and Tricks · Tutorials · villa rosa designs

Beginner Free Motion Quilting (FMQ) Lesson 4: The Write Way to Doodle!

Happy Thursday to you!

I hope you are ready for another Free Motion Quilting (FMQ) lesson! But before we do that, I want to take a moment and congratulate Janie in Texas, who is our 1000th email subscriber! WAHOO!!!!!! Thank you, Janie, for supporting the VRD Blog!

I trust you are all practicing your FMQ loops from last week’s leeson. Remember, don’t spend too much time doodling on your white boards before you actually start trying those loops out on your sewing machine.

If you missed our previous FMQ lessons, you can find them below:

Lesson 1: All the Background Information

Lesson 2: Let’s Doodle!

Lesson 3: Practice, Practice, Practice

I want to take a couple minutes to talk about useful beginning projects as you are developing your FMQ skills.

Please don’t tackle a king sized Double Wedding Ring quilt top made by your granny in the Depression as your first FMQ project. I can almost guarantee that you will end up tearing everything out. First you must crawl before you can run!

Maybe you have a whole stack of meticulously pieced antique or vintage quilt tops just waiting to be lovingly completed and that’s your motivation for learning to FMQ. Goodness knows, there are probably as many reasons to learn as there are quilting patterns! But please slow down a little bit.

Do you remember when you learned to tie your shoes? It took a lot of practice before you successfully tied those shoestrings. Same goes with riding a bike. What about driving a car? Or doing pretty much anything you want to master – it all takes work and practice.

FMQ is like that, too. It takes practice to get to the level of mastery you want to achieve. Remember that Rome wasn’t built in a day and most likely you will not be a master free machine quilter in a few practice sessions. It’s going to take some time to get where you want to be. But I promise you, if you put in the work you will get better every time you practice. And the more you practice, the more quickly you’ll be wow-ing your family and friends with your FMQ skills.

Okay, I’m jumping down off my soapbox now.

So you’ve been making up some practice squares and practicing those loops since Lesson 3 last week and you feel pretty good about alternating your loops to the left and to the right. Maybe those loops still look kind of like wiggly carrots sometimes, but you’re itching to quilt something for real.

I suggest starting with smaller projects that are not dear to your heart — potholders, baby bibs, snack mats, place mats, table runners, anything small so you won’t feel like you’re wrestling an alligator while you’re trying to FMQ. I bet you have some orphan quilt blocks lurking in your stash somewhere – make them into potholders or whatever. Then layer those practice quilt pieces with batting and backing (yes, I even give you permission to use up all your ugly fabrics as quilt backing). Now quilt them with loops! Loop to the left, loop to the right. Lots and lots of loops. Consider these practice quilt pieces as practice square variations. Hate how it turned out? Then recycle it into dust cloths. Guilt free. The important thing here is you are building up your FMQ skills by sewing over seams and through different fabrics. Just keep going and growing!

When I taught free motion classes for beginners, I asked the students to layer a printed panel with batting and backing as homework before class (along with their practice squares) and bring it with them. Panels are such a great beginner free motion quilting project because you haven’t put a lot of yourself into it with all the cutting, piecing, and/or applique that usually goes into a quilt.

If you love how your panel project turns out, that’s great! Put it on your wall and show it off or gift it to someone special and tell them you quilted it yourself. Enjoy that lovely feeling of pride in your work!

If you don’t love it, that’s okay, too, because panels are a nice size to make into lovely pet quilts for your own pets or your furry grandbaby. Or donate them to your local shelter or rescue. Either way, they will be used and loved. Of course, if any of your beginning projects end up a total mess, I give you permission to recycle them into cleaning rags.

Here’s great panel with borders already printed on it – just layer it and start quilting.
You can find this panel by P&B Textiles HERE.
Looking for more great panels?
We’ve got ’em at the VRD quilt shop.

Let’s keep moving and dive into today’s lesson – we are going to practice our cursive writing as free motion quilting! Yup, let’s write our way to a finished quilt.

Most likely you know how to write in cursive but if you do not or haven’t done so for a long time, never fear – there are great resources and tutorials on the Internet and how-to books out there, too.

If you are like me, your handwriting is a combination of printed and cursive letters. And that is just fine. I am not going to wrap your knuckles with my wooden ruler, I promise. Your cursive writing doesn’t have to be perfect 4th grade handwriting, the letters just have to connect together. You do you.

Let’s use our whiteboards to write the lowercase cursive alphabet, connecting the letters in one long string. The reason I said the lowercase letters is because they naturally flow into the next letter, while not all capital letters will do that. We’re not looking for perfection here, so stop thinking and just do it. I found if I did it quickly without too much thought, I actually wrote better.

Go ahead and practice this a few times, you might be a little rusty and writing the letters on your board will bring back some of your muscle memory.

I hope you have a little room on your most recent practice squares – or you can put together another one like I did – because I want you to try to free motion quilt the alphabet. Seriously. This is great practice to develop a smoother flow to your quilting. So go ahead and quilt the alphabet a couple times.

That was kind of fun, wasn’t it?

Next up is writing your name in cursive on your whiteboards. Depending on the first letter of your name, you might be able to use a capital letter. Mostly, I just use all lowercase letters to keep things simple and so I don’t forget whether I’m using capital letters or not.

Since I’ve been doing this for a while, I’ve already figured out how to dot my i’s and cross my t. Cute, huh? Just my way to incorporate those zany loops into my quilted writing.

Go ahead and practice writing your name. You might have to do this a couple of times until you get the look you want. You can even try different ways to dot any i’s or cross any t’s. Or maybe a capital letter works for your first letter. Just have fun with it.

And now it’s time to quilt your name on your practice squares. Feel free to do this as many times as you want to in order to get the look that makes you happy. I used both a lowercase and a capital T below in my examples and I definitely prefer the all lowercase letters. I think it looks more whimsical with my loopy dotted i’s and my curvy swoosh crossed t. Which one do you like better?

Isn’t this fun? I think it’s pretty cool that my quilted signature looks a lot like my written one. Does your quilted signature look like your written signature, too?

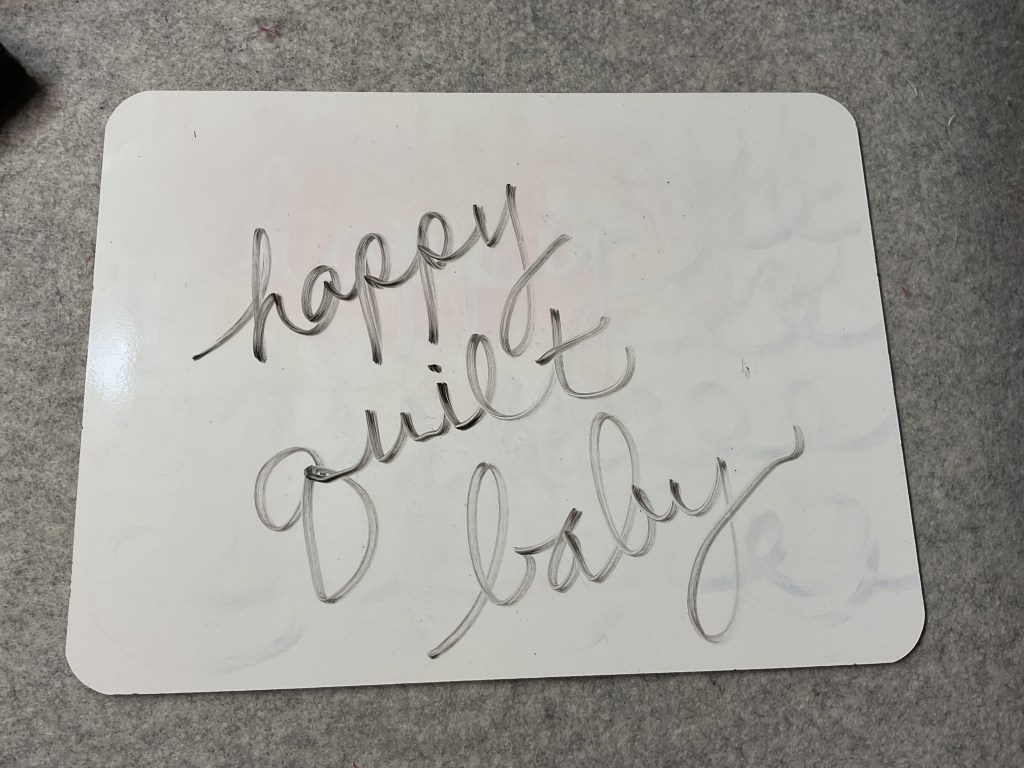
Now let’s try writing other words on our whiteboards. One time I had the brilliant idea to quilt the word “baby” in rows across a baby quilt I was making for my coworker. I loved how it looked after I quilted it, but quilting one word over and over became quite tedious and I was so glad when I finished it. Afterwards, I wished I had included other baby words like bottle, bib, crib, bear, love, etc. That would have made my quilted written design that much more interesting. Oh well. Live and learn.

Let’s write! Just make sure all the letter are connected. Go ahead and experiment with dotted and crossed letters.

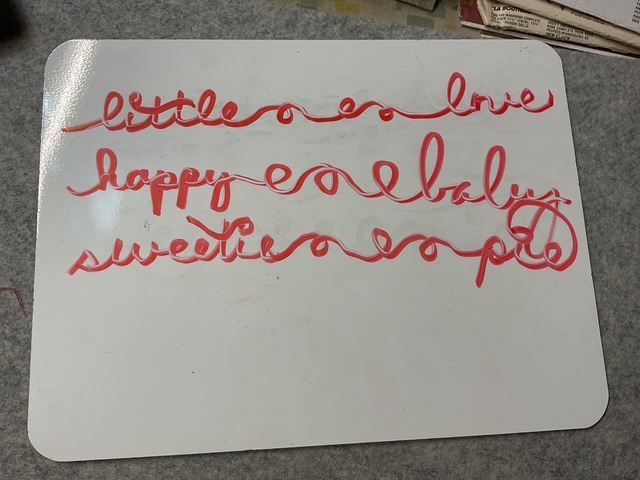
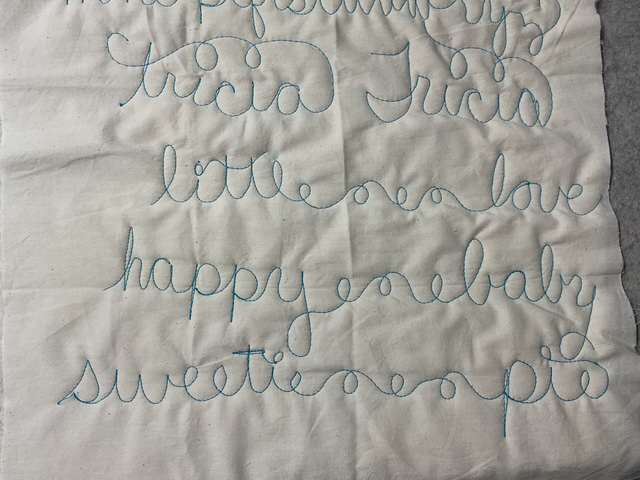
Now let’s connect words together into continuous lines. When I do this, I like to make a consistent number of alternating loops between the words to separate them and I leave lots of room between words to give them space to breathe, which makes the words a little easier to read.

Sorry, I couldn’t find a dry erase marker that wrote very well, but my quilting will look better.

Now let’s practice quilting the words together. Don’t forget to put loops between the words so you can read the words after you quilt them. You may have to be creative with any dots and crosses.

Now it’s your turn to use your cursive writing as a quilting design. Keep practicing. Don’t be afraid to try your FMQ on some actual projects, too — a panel or place mats or orphan quilt blocks turned into potholders. Go ahead – you know you want to! Keep practicing your alternating loop design, too.

Stay tuned next week for Lesson 5: Going Beyond Loops. See you then!

Take care and stay warm. It was -3 this morning here in northwest Pennsylvania. BRRRR!

Always,

Tricia @ VRD

2025 Free Motion Quilting (FMQ) Series · Tips and Tricks · Tutorials · villa rosa designs

NEW February VRD Rose Card Quilt Patterns AND Beginner Free Motion Quilting (FMQ) Lesson 3: Practice, Practice Practice!

Happy Thursday to you!

I hope all of you are weathering the winter so far. Here in NW Pennsylvania, Mother Nature is laughing at us this year and is giving us a good old-fashioned Pennsylvania winter with lots of ice and snow. We haven’t had this much snow or cold temperatures for something like 5 years. I guess Mother Nature wanted to remind us what Pennsylvania winters are really like. Sigh…..It’s been a long long winter and I am so looking forward to spring.

We have a lot to cover today, including NEW patterns and we’re going to continue with our Beginners Free Motion Quilting Series. Thank you for your patience while we celebrated Pat’s new fabric collection, Bedazzled!, here on the blog for the last couple weeks with 2 new quilt tutorials.

If you missed the tutorials, you can find them here:

Baby Zip Tease

2M Junior

Let’s jump right in. Of course, I’ll be wearing my winter boots, coat, mittens, hat, and a scarf. LOL!

Get the 5 pattern print collection HERE

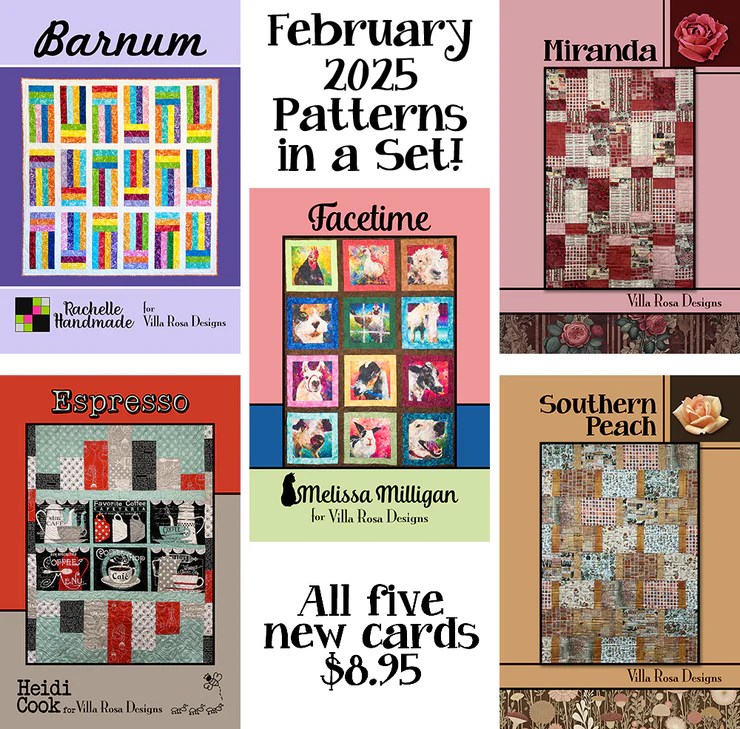
What a great group of quilts, right? Barnum is Jelly Roll friendly. Miranda and Southern Peach are fat quarter friendly. Espresso features a horizontal panel, which is super because it’s hard to find horizontal panel quilt patterns. Facetime uses panel squares or a focal fabric.

We’ve got kits, too! (PSST! A new quilt project is a great way to beat the winter blues.)

Espresso in Coffee Chalk (the fabrics in the pattern cover quilt)

Barnum in Dandi Duo

Facetime in Noble Menagerie (the fabrics in the pattern cover quilt)

Southern Peach in Tim Holtz Palette Orange (the fabrics in the pattern cover quilt)

Southern Peach in Sweater Weather

Miranda in Tim Holtz Palette Red (the fabrics in the pattern cover quilt)

Here’s February’s new table runner pattern, Love Books. I have to admit I’ve been doing a lot of reading lately, so why not a table runner to reflect my bookish nerdiness?

Do you have an embroidery sewing machine? Why not embroider the titles of your favorite books or the books you read in 2025 on the runner? You can make this runner as long as you’d like to, just add more fabric.

Get the digital pattern HERE or the print pattern HERE

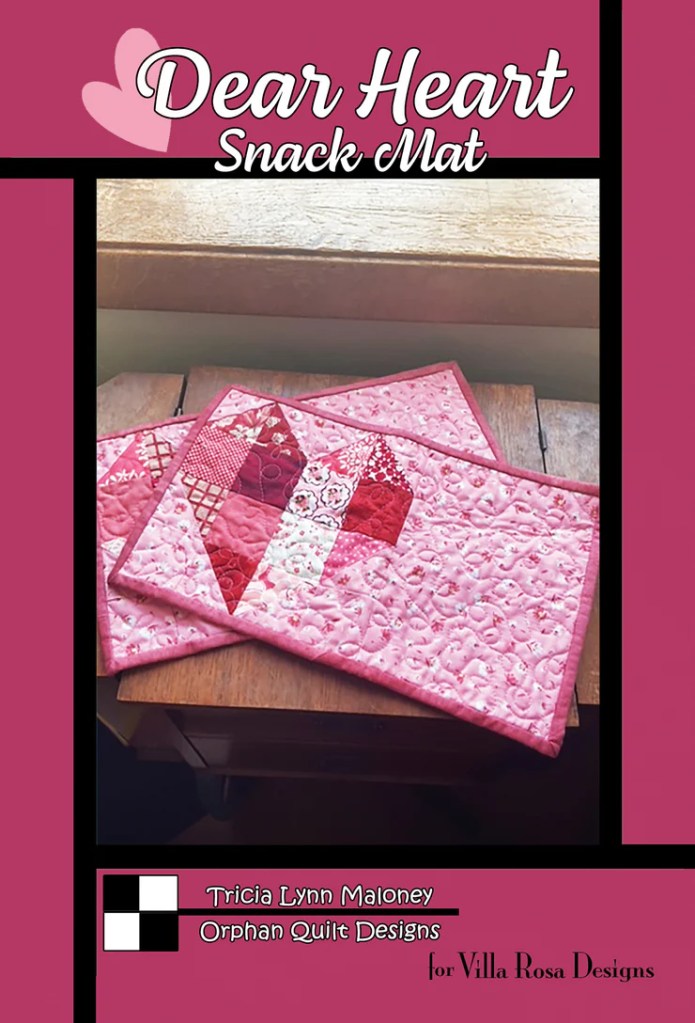
And here is our very last snack mat, Dear Heart. This makes me a bit sad because it’s been really fun creating a new snack mat for each month for an entire year, but at the same time, I’m excited about a couple new ideas, so stay tuned.

Get the digital pattern HERE or the print pattern HERE

So there you have it — fast and fun new patterns for everyone.

Now let’s get back to our Beginner FMQ series.

Today’s the day! We are finally going to do some actual free motion quilting. Yippee!

First, I’d like to suggest you do a little doodling to warm up before sitting down at your machine. Let’s practice some loops on our white boards. I wouldn’t doodle more than 10-15 minutes, though, this is just a warm up.

Next up, we’re going to put together a practice square.

I usually choose a light tonal or solid colored fat quarter and something from my ugly pile for the back fat quarter. And my usual 80/20 batting.

Next we’re going to go ahead and layer the 2 fat quarters with a piece of batting just like you would layer an actual quilt for machine quilting.

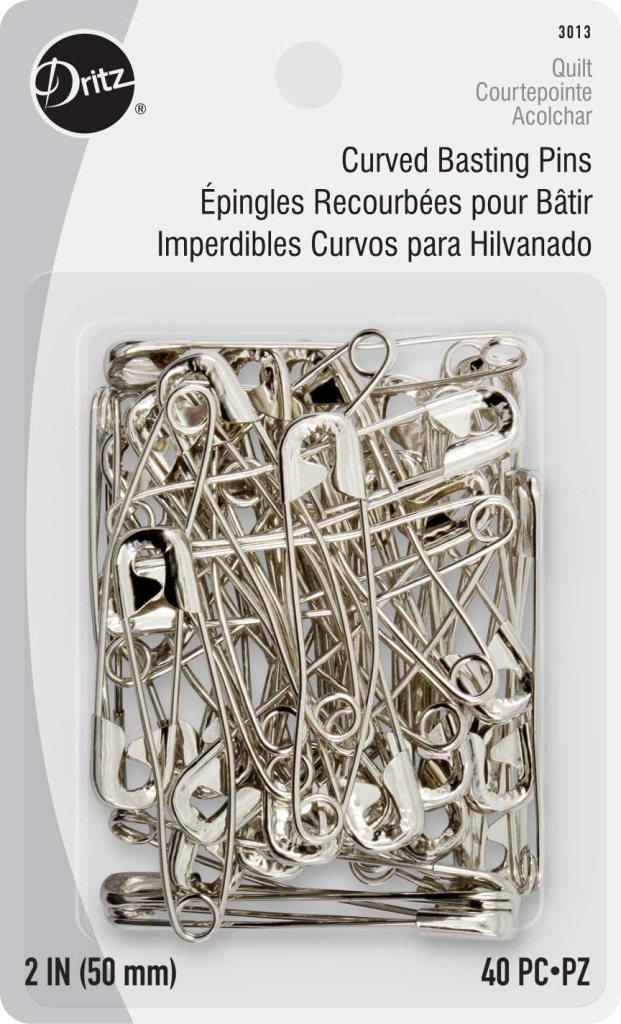
I’m a pinner, so I use curved safety pins, but you use whatever works best for you (pinning, spray basting, etc.). I like to use the size 2 (1.5″) or size 3 (2″) curved safety pins.

Go ahead and get your practice square ready, I’ll wait right here for you.

Did you know that cotton fabric will stick to cotton batting if you press it with your iron? Sometimes, I just press everything really good and I skip the pins.

Okay, now let’s practice!

Here are some important points to remember from the video:

  1. Don’t forget to put your presser foot down before you start quilting
  2. Pull the bottom thread up to the top before securing your stitching by stitching in place a couple of times
  3. Start in the middle of your quilt
  4. Use your hands as a frame around the needle — keep your fingers away from the needle, please
  5. Unless you are planning to pop a not into the batting to secure the stitching, cut the threads tails off so after you’ve secured them so they don’t get all tied up in your stitching
  6. Size your loops/quilting to your project
  7. Alternate your loops to the left and to the right
  8. Curve into and out of your loops for a more organic flow
  9. Don’t crowd your loops, give them room to breathe
  10. Quilt to an edge and then move around the quilt like you would a clock face
  11. Move at a comfortable pace, you are not racing the needle
  12. Aim for consistent regular stitches, not perfection
  13. Go for beauty, not perfection!
  14. Stop with your needle down in the quilt, then reposition your hands
  15. Remove the pins as you go, don’t sew over them

OOPS! I forgot to mention that for your practice squares, make sure to use a contrasting thread so you can see your quilting.

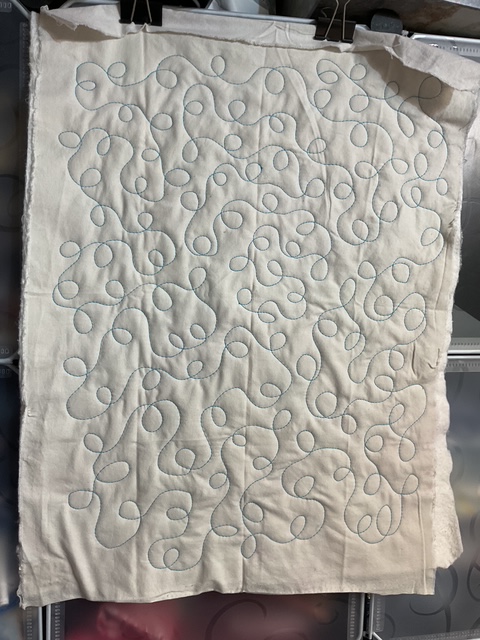
Here is the front and the back of my practice sample:

I’m quite pleased with how it turned out. I wish the thread hadn’t broken, but looking at it in the photo, you really don’t see it. See how the printed fabric on the back (my “ugly”) distracts your eye from the stitching. So, one of my best tips is to use a busy fabric on the back of your quilt to help distract the eye from your quilting, especially if you are still learning.

Do you have any questions right now about FMQ? If so, please post them in the comments section so I can respond.

Your mission, should you accept it, is to make more practice squares and practice. Practice, practice, practice makes better, not perfect. So get to it!

See you next week for our FMQ Lesson 4.

Take care and stay warm.

Always,

Tricia @ VRD
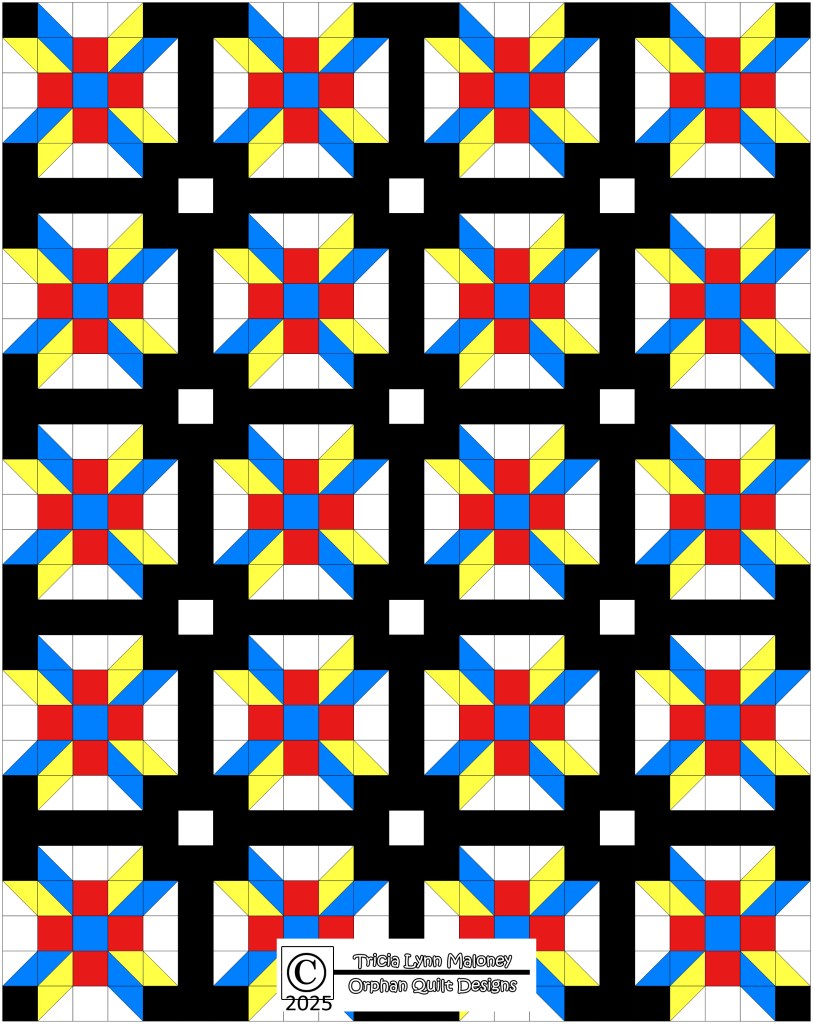
2025 Free Motion Quilting (FMQ) Series · Tips and Tricks · Tutorials · villa rosa designs

Beginner Free Motion Quilting (FMQ) Lesson 2: Let’s Doodle!

Happy Thursday to you!

I’m excited to continue on our Beginner Free Motion Quilting adventure! Put your seat belt on and get ready to ride!

I hope you had a chance to read last week’s post, which was a lot of information about things to know before you start. You can find Lesson 1 HERE.

Please note that I’m adding the FMQ series to the right side of the screen under the Blog Topic section so that it’s easy to find each lesson as they get posted.

All right! In Lesson 2, we’re going to DOODLE! Yep, that’s right! DOODLE!

Whenever I taught a Beginner FMQ class, I started out with doodling on a dry erase board. I actually bought a class set of boards which came with felt erasers and even markers, which was super for a class with 4-12 students.

Any kind of dry erase board works – you don’t have to buy a special classroom set (unless you plan to teach FMQ – LOL!). You can even find dry erase boards and dry erase markers at your local Dollar Tree store. So if you don’t already have one, they are easy to find and relatively inexpensive to purchase.

Just make sure you are using real dry erase markers (not sharpies!) on your board or else you won’t be able to erase it and use it over and over.

You might wonder why I’m starting off with doodling and not just jumping right into FMQ on the sewing machine.

Doodling gives you the opportunity to develop eye hand coordination and to build muscle memory. Believe it or not, but doodling really does help when you are starting out with FMQ. If you’ve practiced the movements on your board, they will come easier and more quickly when you are working with your sewing machine.

Besides, doodling is fun and relaxing. You can do it while watching TV, during the commercials, listening to your favorite audiobook, or even while waiting at the doctor’s office! AND you have the ability to erase your doodling whenever you want to. Yay!

Zigzags

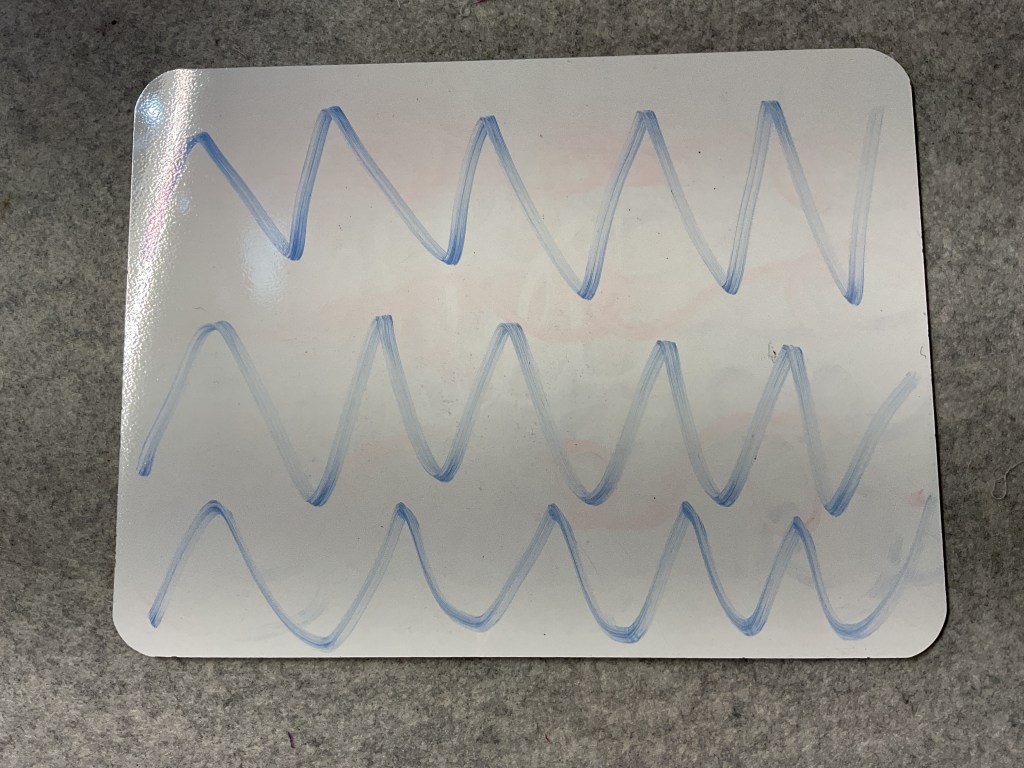
Let’s start out with some fun zigzags. Zigzags will help us to feel comfortable moving across the board and going up and down at the same time. Like hills and valleys. V’s and W’s. Give it a try. Make sure to connect each shape/letter with the next one.

Curves and Waves

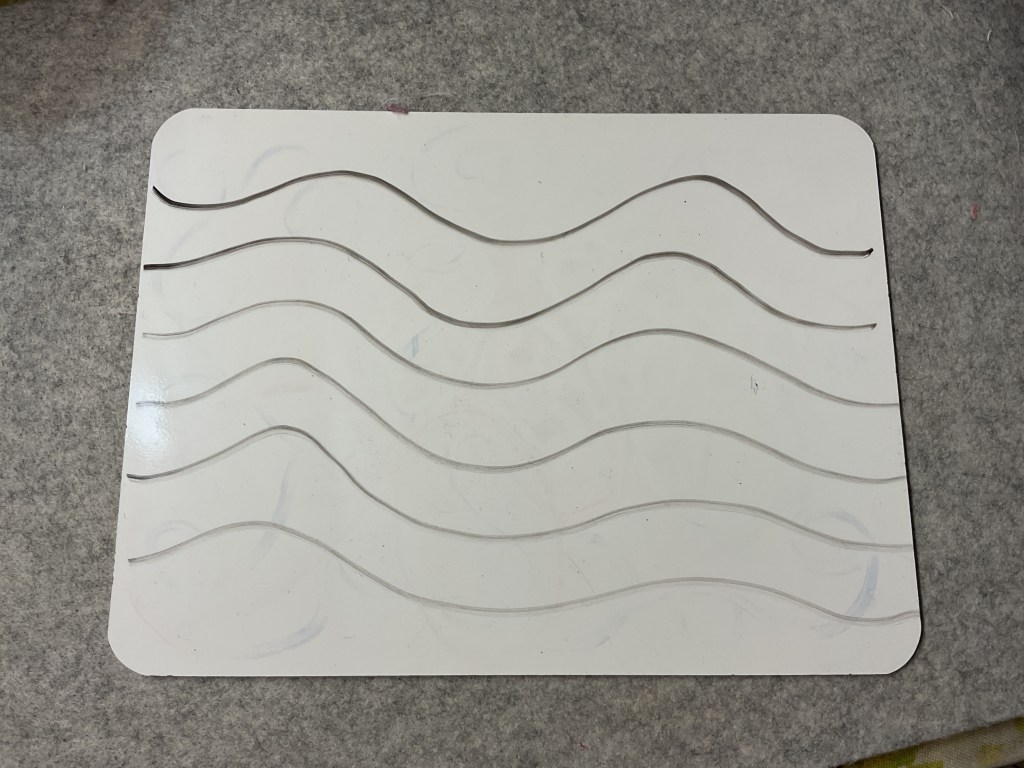
Let’s practice some gentle curves and waves on our boards just to get a feeling for the smooth movement. Don’t overthink this, just relax and glide across the board. If desired, you can even practice these motions in the air with your hands and arms. I’ve always been a big proponent of “air writing.”

ABC’s

Now let’s try some cursive writing! Believe it or not, but lowercase cursive letters are great practice for FMQ! Seriously! Make sure you are connecting the letters together. I find that the faster I write the alphabet in cursive, the better it looks. Don’t think about the shape of each letter – you already know it – just write it.

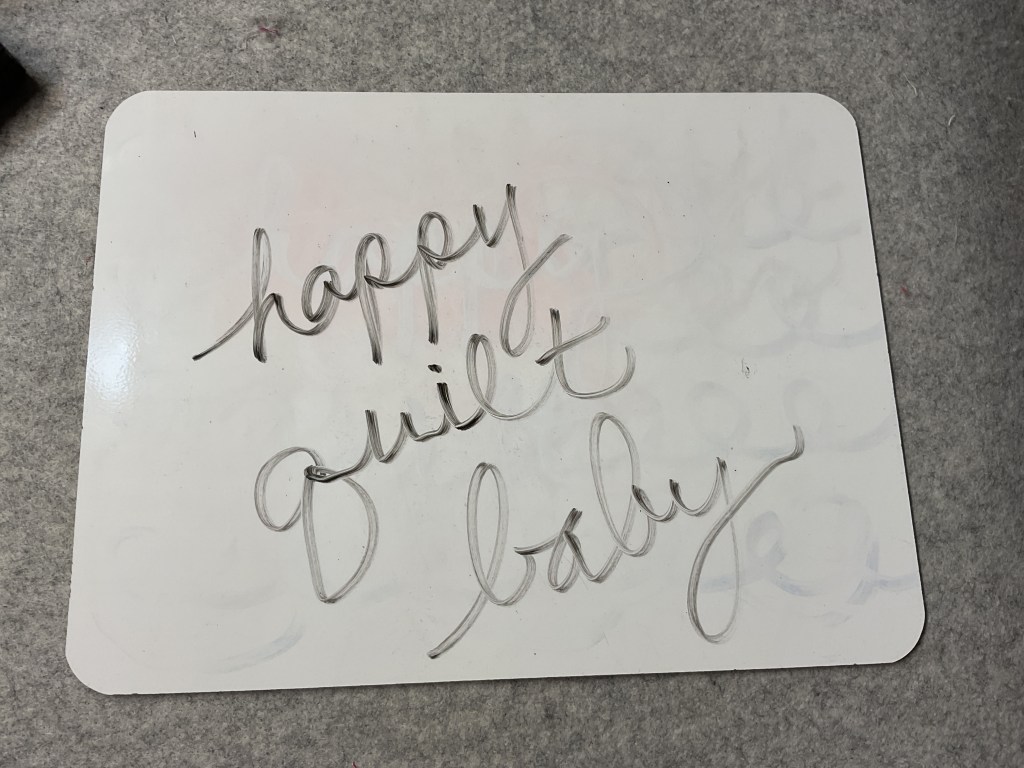
Go ahead and write your name in all lowercase cursive letters. You know you want to! Try some other words, too. Just remember to connect the letters together. Feel free to have some fun like I did with my name when I dotted my i’s and crossed my t.

Okay, now we’re going to focus on the cursive lowercase “E” (e) and the lowercase “L” (l). Just keep connecting them together.

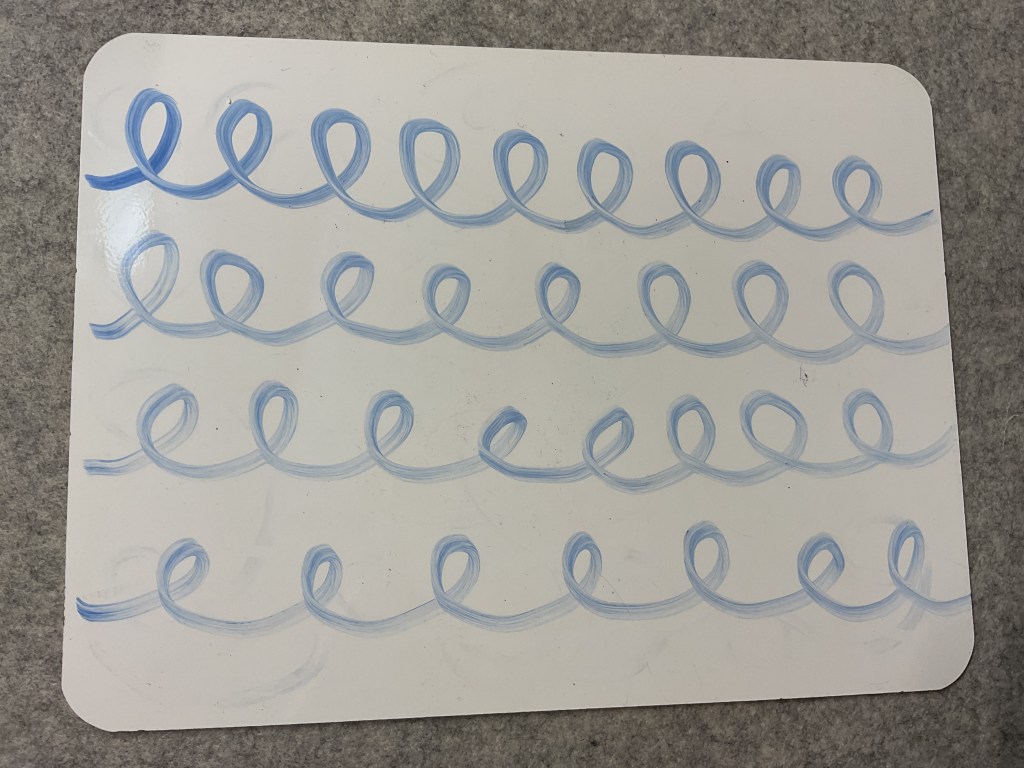
After you are comfortable making e’s and l’s, I want you to try alternating the loops. This may be challenging for some of you, but keep doodling until you feel more comfortable with this. Doodle, doodle, doodle.

We definitely want to alternate the loops, or else we’ll get something like this. Yikes! The idea is to move across the board and fill in the white space, not to make clouds and weird flowers.

Once you’ve got alternating the loops reasonably down, we’re ready to add more movement to this design. This time we’re going to move our loops up, down, and across the board while alternating the loops (yep, all at the same time!) so we can fill up the white space.

Try not to overthink things here. Don’t stress yourself out if things aren’t perfect – we’re not going for perfection here. I find the faster I go, the better it looks. Remember, you can keep erasing it and trying again.

Loops!

Wohoo! Pat yourself on the back! You are making loops!

Loops are one of my favorite and best go-to designs. AND it’s the design I start out with when I teach FMQ! Go you!

I’ve found Loops to be more beginner friendly for most people. Being able to cross over your lines gives you a little more feeling of control. I have found, though, that perhaps 1 in 10 quilters have a hard time mastering loops – mainly the alternating of them – so those folks I encourage to move on to stippling/meandering.

Have you ever taken a beginner FMQ class where the teacher starts you out with stippling/meandering? I bet there are a lot of you who felt really frustrated because you couldn’t master the design and may have even quit trying to master FMQ after that class.

Well, I’m here to tell you that –

YES, YOU CAN MASTER FMQ!

So “let’s start at the very beginning, a very good place to start” (kudos if you can name the movie, the song, and the actress for this quote).

And the very beginning is making loops!

I hope you’ll spend a little time doodling this week because next week for Lesson 3, we are going to start working with our machines and our Loopy design. I’d love to see your doodles in the comments or on our VRD Facebook page.

Until next time –

Always,

Tricia @ VRD