

Hello Quilty Friends!
Sigh……I’ve been thinking about cats lately. A lot. In addition to my own cats, I’ve been working on a couple cat quilt projects. If you don’t like cats, you might want to turn around now before it’s too late. (You can’t see me of course, but I’m rolling my eyes here. LOL!)
Let me tell you a little bit about MY CATS (sorry, not sorry — I did warn you).
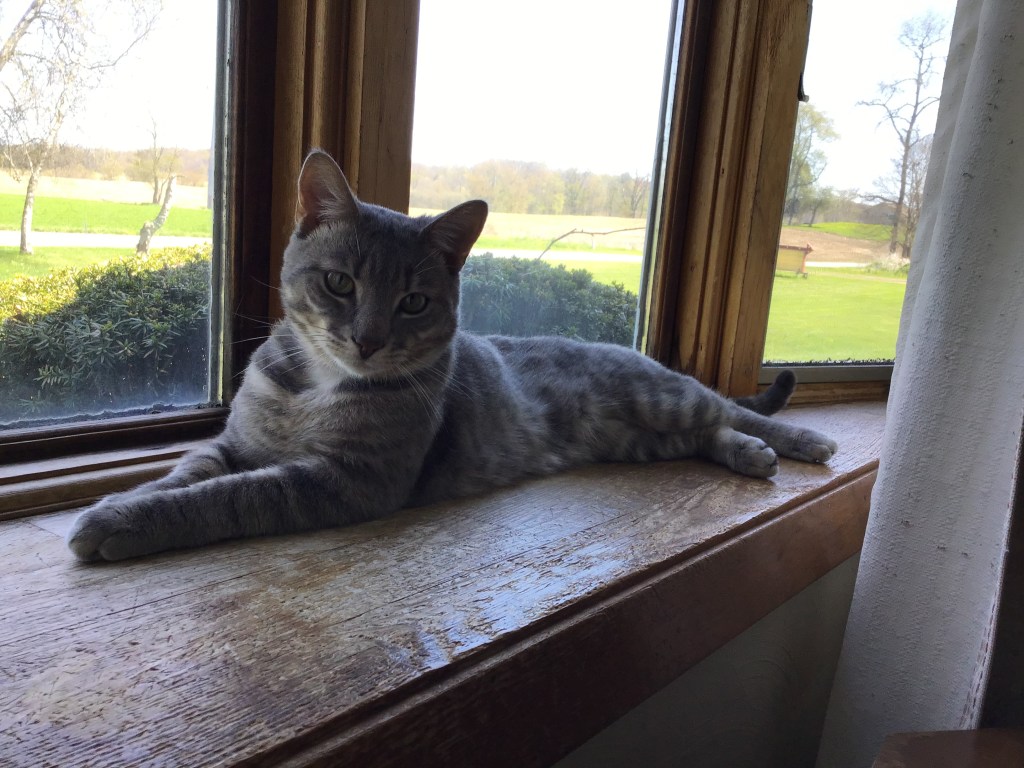
Pip is my beautiful 12 year old silver tortie. She is sweet, rarely says a word, and is very generously-sized. Pip is a real foodie like me. I tell her frequently that she’s “practically perfect in every way,” but she can be very stubborn. And sneaky! Especially when she thinks no one is paying attention and she tries to get her little brother’s food (she is usually successful, too). Silly Pip!

Griffin just turned 1 at the end of April and is my little wild child. He zooms from one end of the house to the other and then back again. Over and over. As energetic as he is, he’s also my snuggle bug when he eventually slows down. Seriously. He loves to be held and snuggled! Griffin likes to watch “bird TV,” loves to be rocked, likes music, and even enjoys painting on a cute game on my tablet. He’s quite a fella!
For some reason, cats and quilting just seem to go together. Like peanut butter and jelly! I just love seeing photos of cats “helping” their human quilters on social media, don’t you? Too bad neither of my cats are into that, but then again, if they were, I’d probably never get any quilting done.
In fact, as I sit here writing, Pip is hanging out in her favorite chair upstairs and Griffin is watching his birds on TV about 10 feet away from my desk. He is not only my little buddy but he’s also THE best coworker I’ve ever had.
Not long ago, Pat, our “Rose Queen” and the owner of Villa Rosa Designs, asked me to help her with some new quilt diagrams for her VRD pattern, Cat City.

I was really intrigued by the cat block in the pattern, and thought I’d try it out before making the diagrams so I knew exactly how to put the block together. I discovered it’s a really fun block, but it can be a little tricky the first time you make it.
Let me show you how to put the Cat City block together.
Cat City Block Tutorial

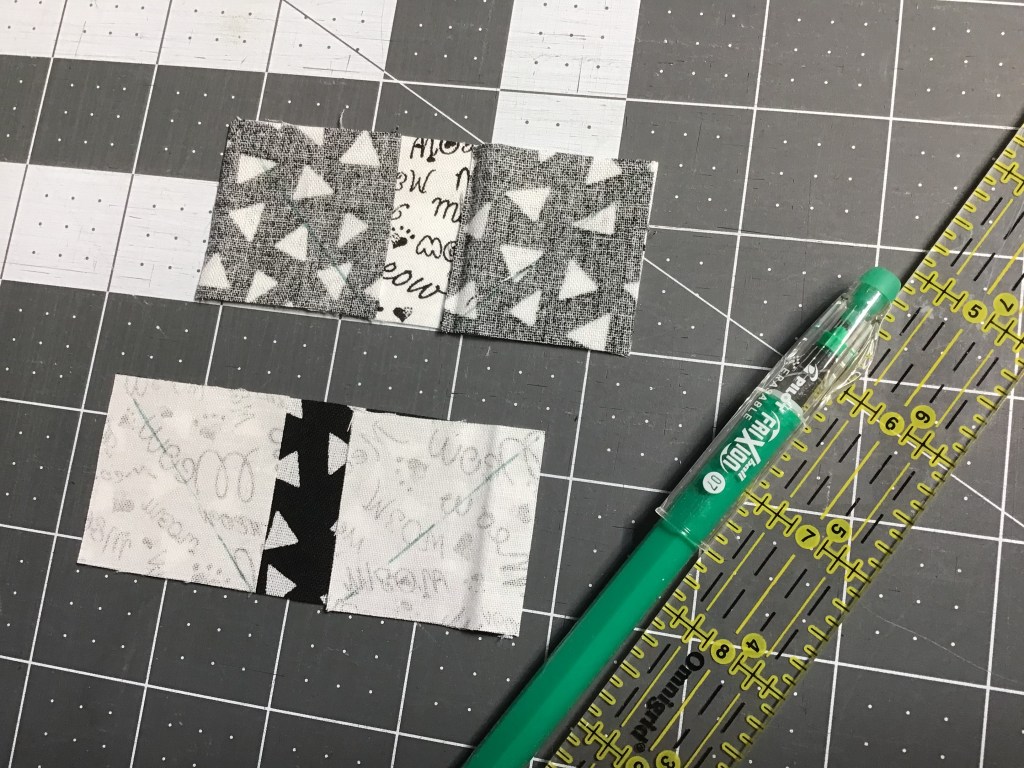
First things first, follow the cutting instructions for the pattern. I chose a white fabric and a black fabric for this tutorial (you’ll see why a little bit later). I layered the two fabrics and cut the pieces out at the same time.

Layer your background and cat fabrics as you see here. I am making 2 cats at the same time and they will be a mirror image of each other. I used a pin to help hold things together on my way to my sewing machine. I also drew a sewing line with my marking pen (I LOVE Frixion pens for marking sewing lines on my fabric). Now off to my machine to sew on the line.


Next, trim off the waste triangles and press the unit open. I pressed my seams to the dark fabric.

Now to make some little ears! Layer your squares right sides together (RST) on the background fabric. Draw diagonal sewing lines on your squares with your marking tool. Sew on the line. Then cut away the waste triangles and press the units open. I pressed the seams towards the cat fabric.


Okay, we’re in the home stretch now. Yippee! Sew the ear unit to the top of the cat body — the ear fabric should match the cat (unless you’re feeling wild and crazy) and then sew the bottom of the ears to the cat body.
OOPS! You will see in the second photo, my cat ears didn’t line up very well with my cat body. Argh! No, it’s okay after all — the one edge of the cat fabric was folded under — whew, I was afraid my cat was growing right before my eyes!
Darn, time to use the tool all quilters and sewists run from in fear — THE SEAM RIPPER. (Cue creepy music.)
Done. It only took me a quick minute to rip out the seam, press the folded-under edge straight, and resew. Now we’re back in business. I pressed the seam towards the cat body.


In the first photo here, you can see how my cats will look after I sew the cat backs to the cat body/ear unit. I am planning to sew my cats front sides together. Ying and Yang, I think I will call them.
The middle photo shows the cats stitched together …….furever (sorry, I couldn’t resist).
The third photo shows how I pressed the seams — center seam between the cats open because of sewing the fiddly little ears together and the cat body/back seam I pressed towards the cat body. The ears wanted to be a bit difficult but I pressed them into submission with a little pressing spray (my favorite is Mary Ellen’s Best Press).
There you have it — a cat block with mirror-image cats. Of course, instead of sewing them fronts together, you might want to sew them with their backs together — would this be a cat fight???? — take a look at the quilt on the front of the Cat City pattern above for ideas.
BUT WAIT — there’s more! I just love saying that, don’t you?

I decided to cut 2″ strips for a border around my cat blocks for a fast to finish little quilt. I sewed the sides on first and then the top and bottom strips.
Voila! A little quilt, mini quilt, doll quilt, table quilt, place mat or whatever you want to call it.
Now I just need to layer my little quilt with batting and backing. Quilt it. Bind it.
DONE! My favorite kind of project. 🙂
Here is my black and white Ying and Yang alongside my first little Cat City quilt in pink and brown. When I finished the pink and brown one (which was my original example to figure out how the block went together), I decided that I had to make a black and white one.

I hope you will enjoy making your own Cat City quilt. Or maybe you just want to play a little bit and make yours mini. Whatever you choose, I can’t wait to see your cat quilts (and maybe your cats)!
You can share them on our Facebook page. Not a member yet? Join us to take part in all the Villa Rosa Designs fun HERE . We really are a fun bunch. Really.
Until next Thursday —
Sew. Laugh. Repeat.
Always,
Tricia @VRD
