Today is the day! As you read this post, I’m on my way to Houston, Texas for International Quilt Market AND I am staying for Festival again this year. I wasn’t originally planning to do that, but things worked out and I am able to stay for Festival now. Yay!
I definitely have to thank my family for taking care of my Bailly pup, my kitty boy Griffy and our kitty girl Pip. I know they’ll be spoiled and loved, but I will miss them a lot while I’m down in Houston. It will be fun to come home again to my Bailly’s tail wagging a million miles a minute! And I can’t forget my Griffy’s show of affection when he gives me random whole body rubs against my legs. And Pip — what can I say? – she is very quiet and observant of everything around her, but she’ll walk right over to tell me she’s glad I’m home. If you’re a pet parent, I know you’ll understand exactly what I’m talking about.
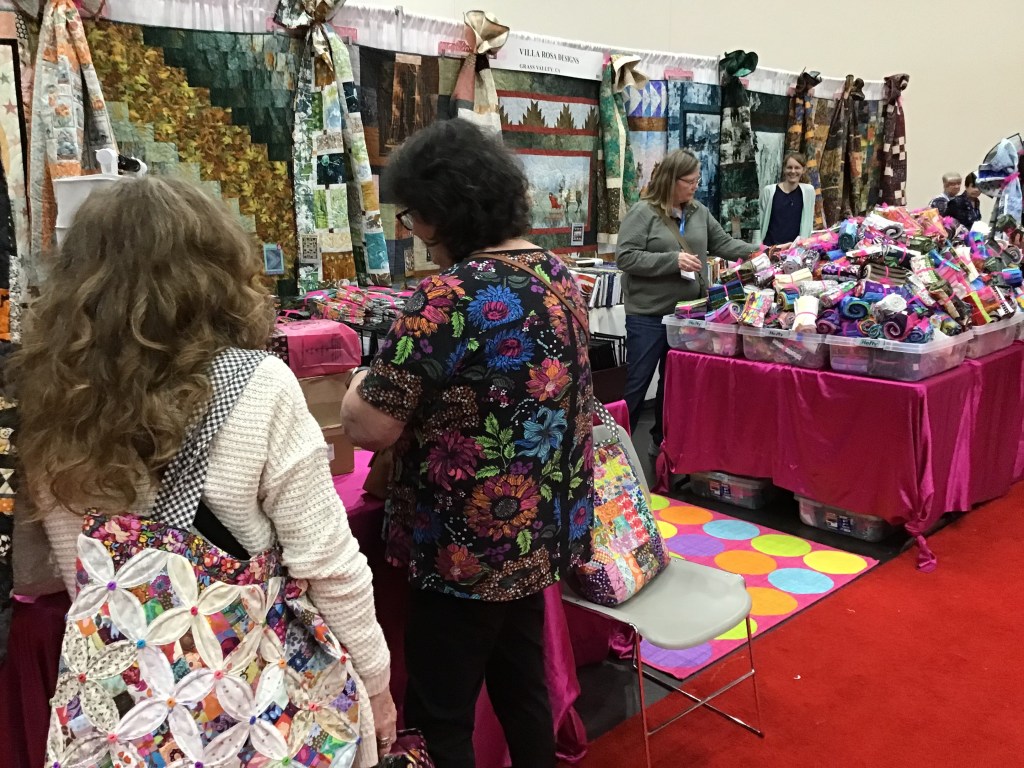
If you are planning to attend Market and/or Festival, I hope you’ll find time to stop over at the Villa Rosa Designs booth and say hello! Pat, Molly, Heidi, and I would love to meet all of you in person! 🙂
The VRD booth during Festival 2023.
I’m sitting here, smiling, thinking about last year’s Market and Festival. My friend, Cathey of Cathey Marie Designs, and I met for lunch during Market — we hadn’t seen each other since Market 2022. This year, our friend and fellow designer Leslie, is attending Market with Cathey. My fingers are crossed that we might be able to break away for a little lunch at Guadalajara, our favorite Mexican restaurant in downtown Houston, but we’ll see….
Last year my pal, Gaynel, and her sister Evie, went to Quilt Festival, so I was able to have a quick lunch with Gaynel — giant Texas-sized potatoes, of course! A long way to travel for lunch! LOL!
Here I am, showing off my yummy potato smothered in cheese, sour cream, and bacon!
Did I mention the food??? LOL! One of my favorite things to do when I travel (which is actually not very often) is to try different restaurants. Who wants to spend time cooking when you can spend time eating????
Of course, while I do get to have a bit of fun, I am also working at the VRD booth for Market and I get to help at the booth during Festival, too. Market and Festival are such a whirlwind of creativity, inspiration, and exhaustion.
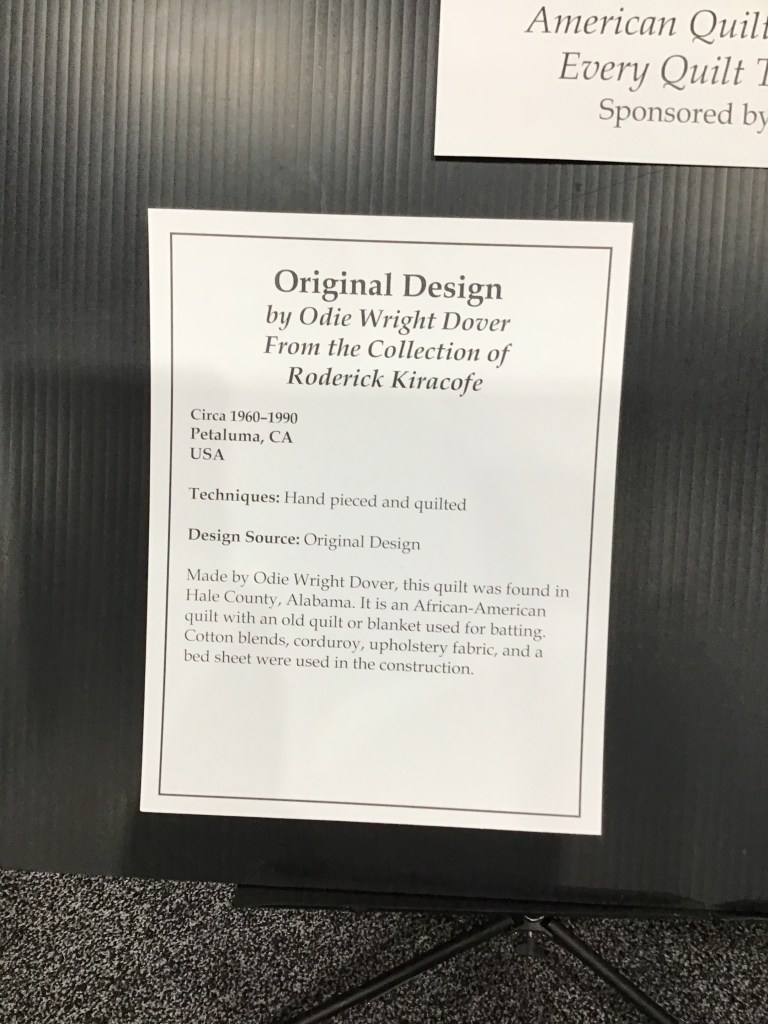
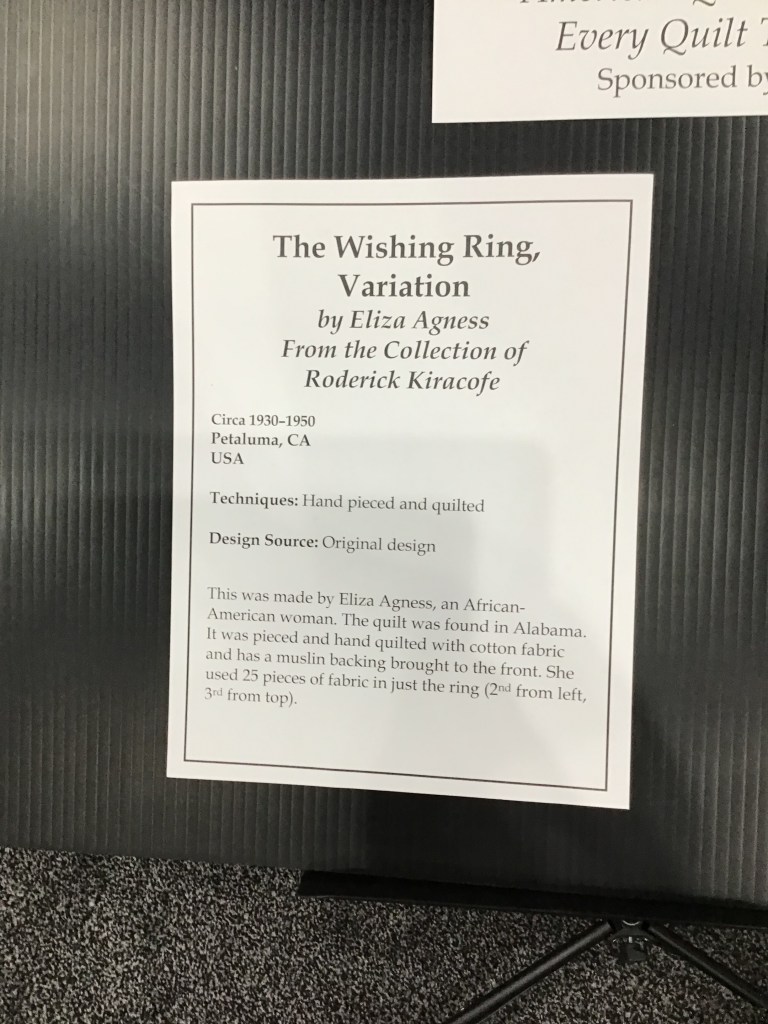
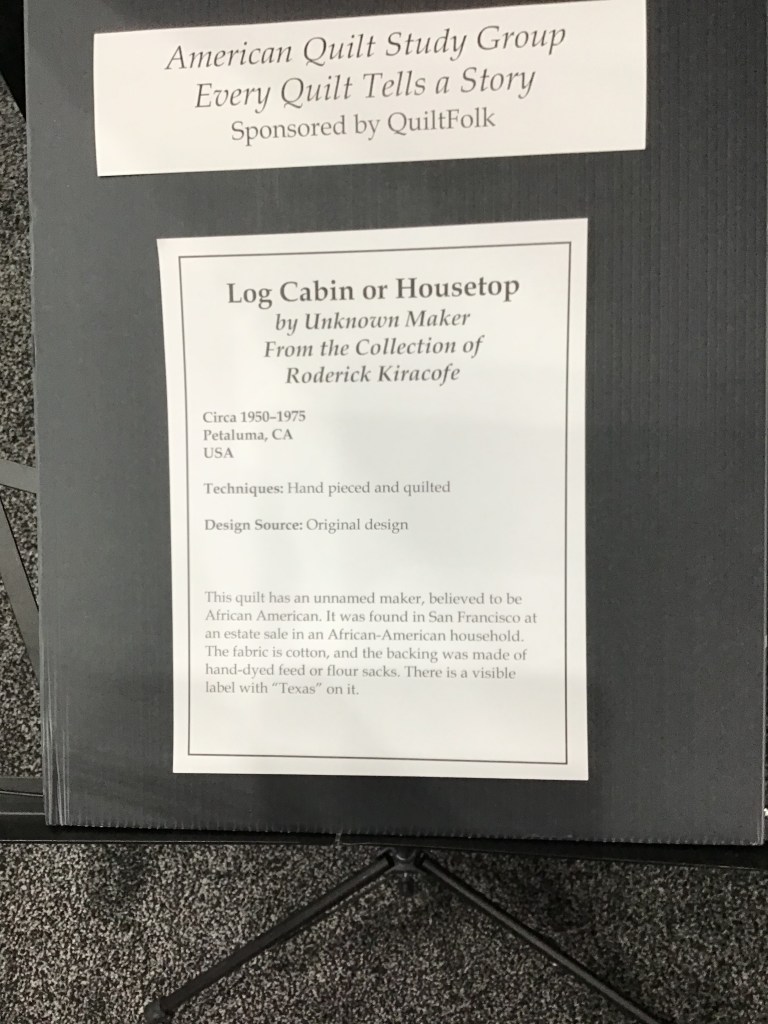
One of the biggest features of both Market and Festival is the HUGE amount of quilts on display in the exhibit area. Most of the time, I don’t get to see all of the quilts, but I sure do try to slip a little quilt-gazing into my trip. Last year, there was a wonderful antique quilt display and I was lucky to be in the right place at the right time to participate in a quilt walk through the exhibit. what fun! There were quilts from the 1800’s right up to the 1980’s! Some of my favorites were the unique and original African American quilts. I am in awe of the art these women created with what they had. I really could have stood there for hours just looking at the fabrics and how everything fits together!
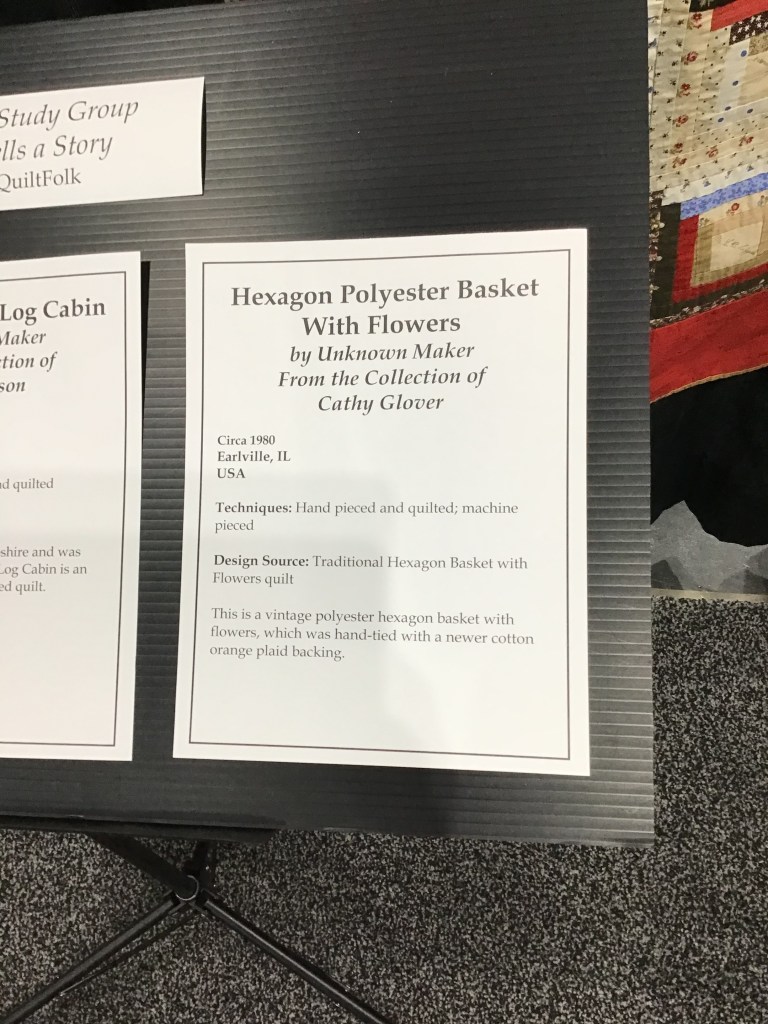
I was also totally mesmerized and amazed at how quilters in the 1960’s and 1970’s turned double knit polyester into gorgeous works of quilted art. I have always been fascinated with the idea of double knit quilts and I am very lucky to have a couple examples now — sweet little doll quilts. I will definitely have to share some of my sweet and wonky doll quilts sometime on the blog, won’t I?
What else is there to see at Market and Festival? Why, the people, of course! Lots and lots of folks from all over the world — it isn’t called International Quilt Festival for nothin’! I just love to hear all the happy and excited voices in different languages on the show floor, in booths, among the quilt exhibits, at the food court, and in the halls. The excitement and inspiration is so intense, you can almost taste it.
You might also get the chance to meet a famous quilting rock star, too. Over the years, I’ve met quite a few of my quilting heroes and they are always so gracious, even when they are mobbed by their fans.
Both Market and Festival offer a plethora of classes, too, although I rarely get the chance to pop into any classes these days. While Market Schoolhouse lectures are going on, we’re busy getting the VRD booth together for you. When it’s time for our VRD schoolhouse session, we grab the quilts and hurry upstairs. Then it’s back down to the show floor to finish setting up the booth.
If you’ve never been to Quilt Festival, I hope you’ll get the chance sometime — it’s the biggest most awesome quilt show and shopping venue! And if you are a quilting professional, I hope you get to attend Market at least once to experience all the sights and sounds of the quilt industry.
I count myself so lucky that I’ve been to Market more times than I can count and this year will be my second Festival. I’m ready — bring it on!
If you celebrate Halloween, I trust that you are buying candy and putting together Halloween costumes as well as possibly planning your Halloween parties and events. When I was a kid, my family was really into Halloween. Of course, my sister and I went trick or treating (only treating, I assure you) and we often hosted a family-friendly Halloween party for friends and their kids. I remember one fun year, we blacked out the the windows in our garage and made a spooky room with pumpkin-headed creatures and creepy music. Our guests arrived to the party at the garage entrance and toured our display before entering the actual party. We had a playroom in the basement part of the garage (where my dungeon office and studio live now) and all of us kids hung out there while the adults commandeered the upstairs space. Ahhhhh, those were the days.
Of course, not everyone celebrates Halloween, but for those of you who do, what are your traditions? And what are your most cherished Halloween memories? Any favorite costumes?
My favorite costume was when I dressed up as an “injured” person, complete with bandages and a pair of crutches (I really detested those crutches by the end of trick or treating, I can tell you!). My friend, Shelley, and I went trick or treating together that year. We’d visit the houses one block at a time while my Mom waited in the car at the end of the block. Shelley chose to wear a fancy purple dress, a tiara, high heels, and a white fake fur wrap. She told everyone that she was Barbie and she hit me with her Barbie car! This is really true — I couldn’t make this one up if I tried. Good times…….
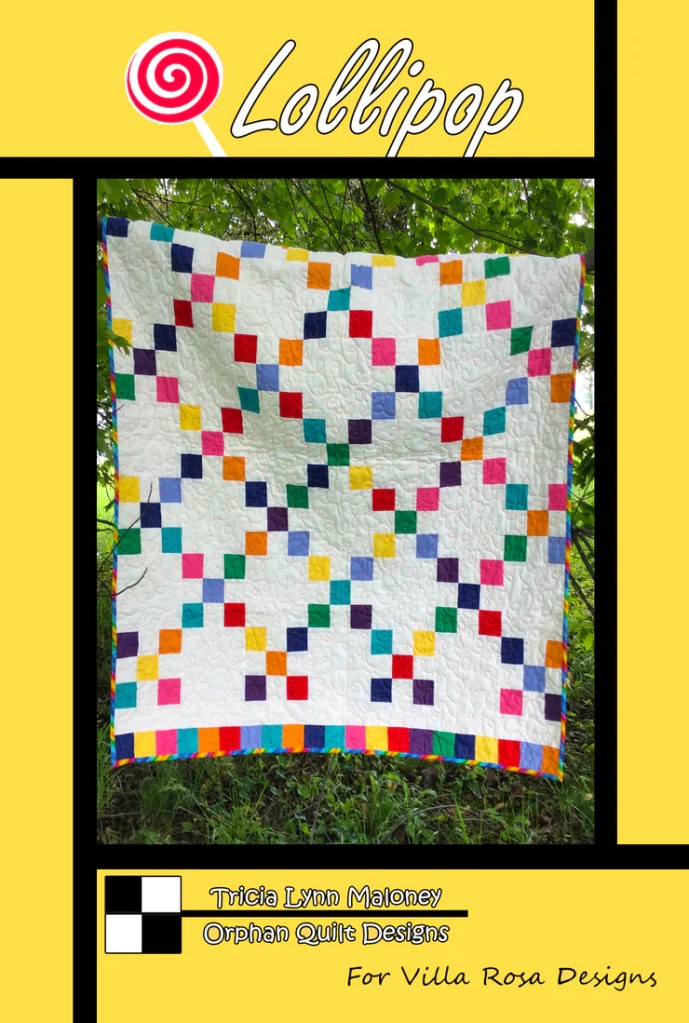
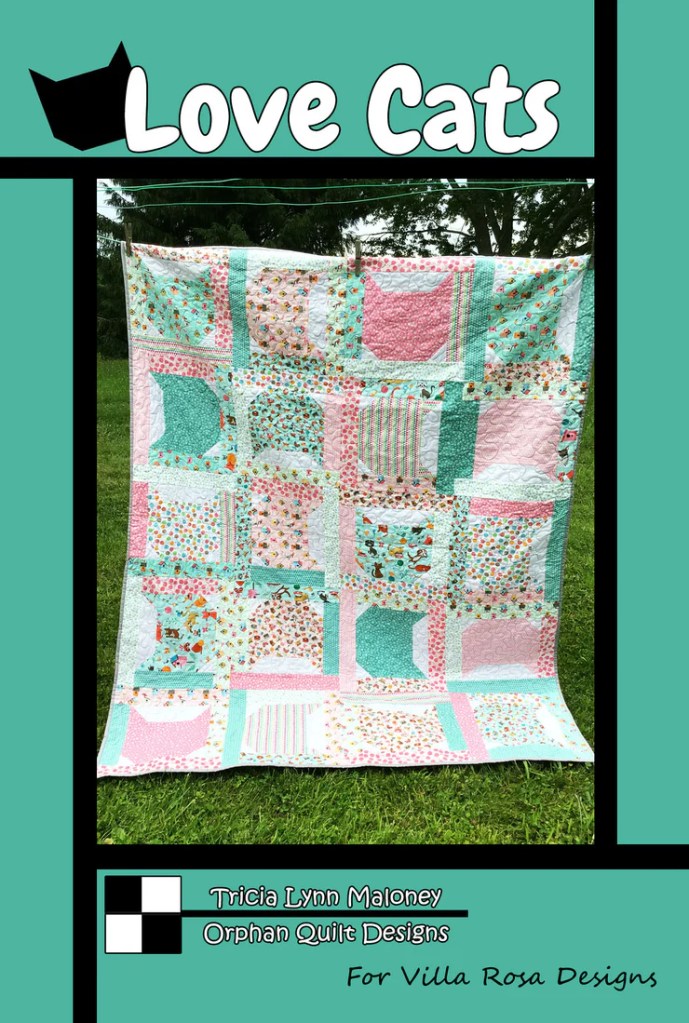
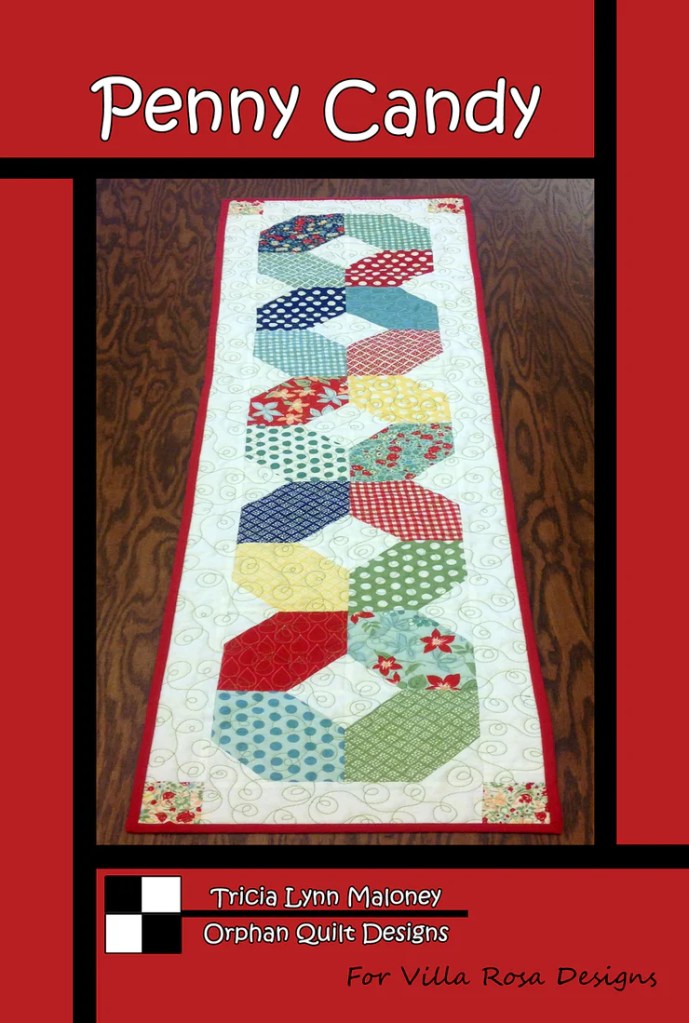
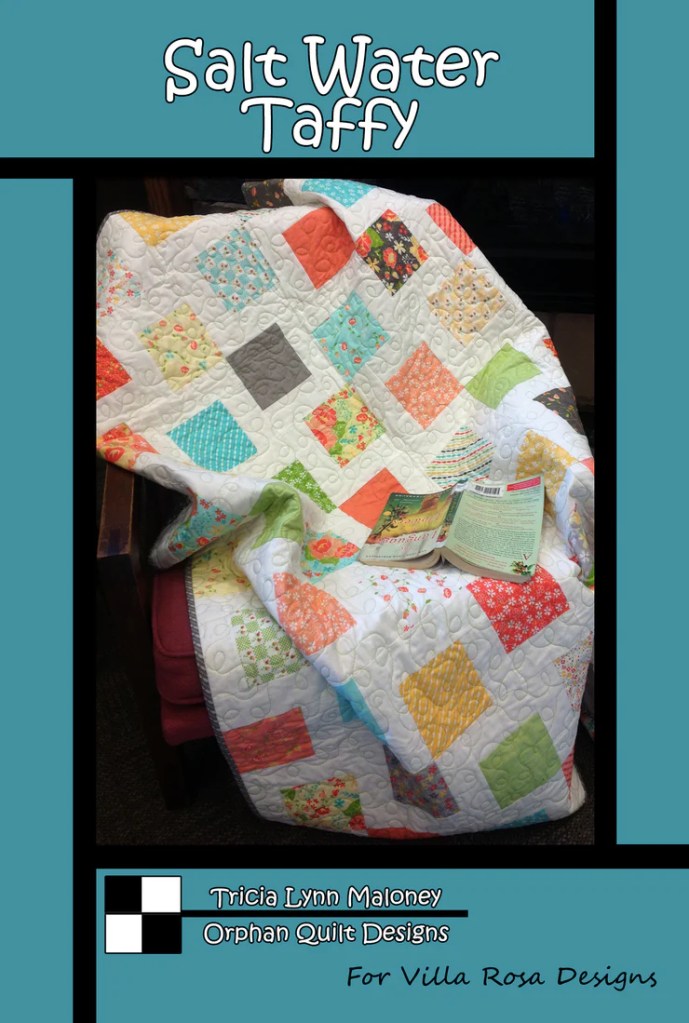
I know that you probably already realize Villa Rosa Designs has patterns for pretty much any occasion or need, but did you know we have some great Halloween quilt patterns, too?
Today I thought it would be fun to share them with you. And you know with VRD Rose Card patterns, you still have time to get a quilt finished before the holiday! Yes, they really are THAT fast and fun!
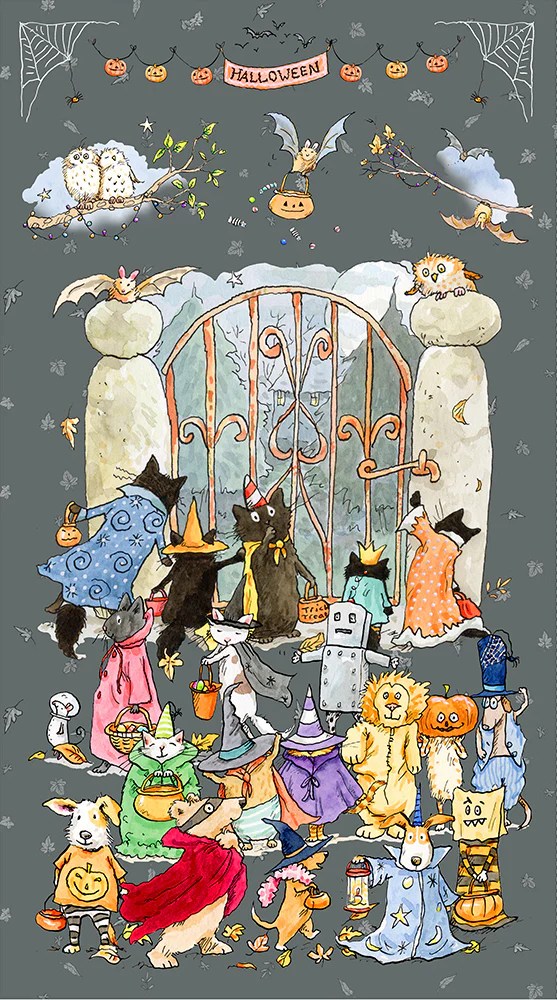
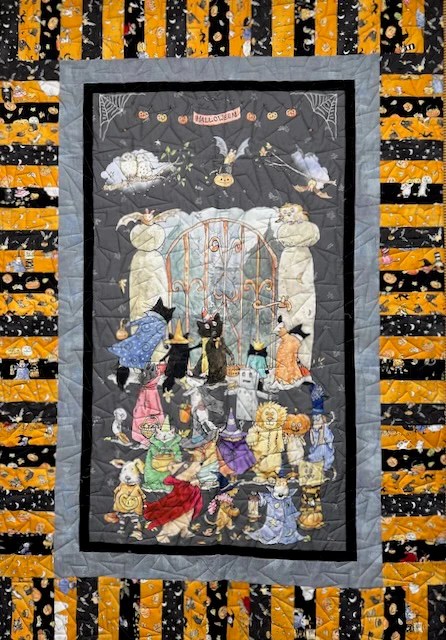
When I was strolling through the VRD website this evening, I even discovered this simply adorable Halloween Parade panel! And it’s still in stock. You can find it HERE.
But wait…..there’s more! The ladies at the shop put this panel and coordinate fabrics together into an On Key kit just for you! It includes the pattern, panel, borders, and binding. All you have to add is a little time, thread, batting and backing and you’ll have this too-cute-for-words Halloween quilt done and on your wall before the Halloween! There are a limited number of these On Key kits left so grab your kit HERE.
Time for us to get started on our curated list of Halloween Rose Card patterns! If you want, feel free to turn out the lights and turn on your flashlight for just the right touch of spooky………
Lucky you! The kit for the quilt sample on the Pumpkin Patch pattern, above, featuring the Candelabra collection, is still available. You can find the kit HERE.
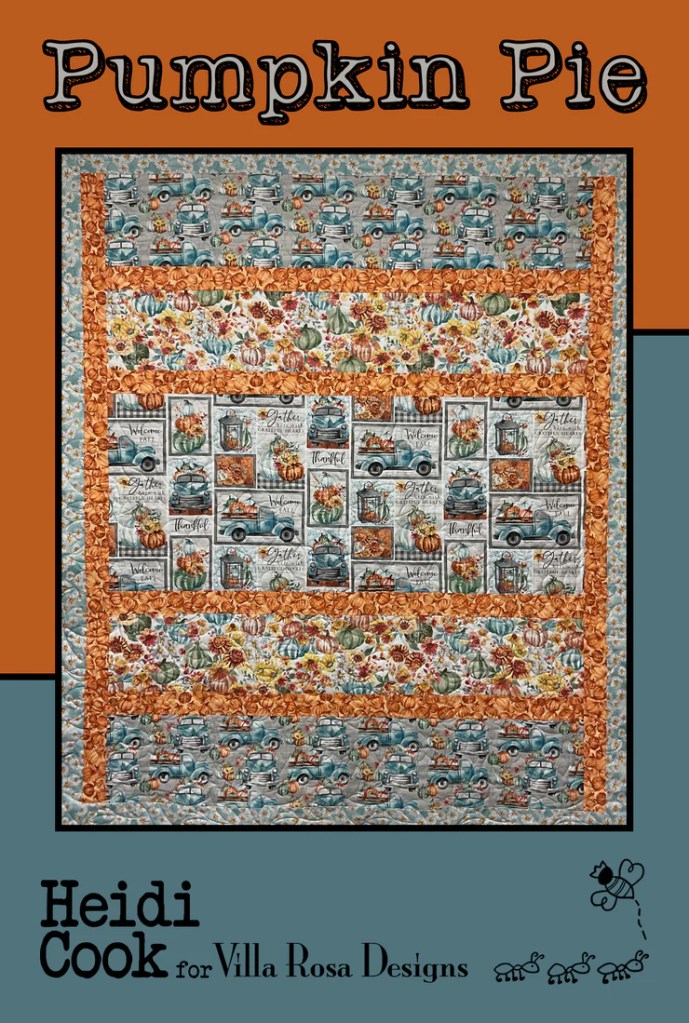
Again, lucky you — there a few Pumpkin Pie kits still available featuring the Happy Harvest fabric shown on the pattern front, above. You can get yours HERE.
Okay, go ahead and turn the lights back on – the list is over. Tehehe.
Seriously, though, I hope this list gave you some fun Halloween inspirations. And you still have time to make a new quilt before the holiday. Remember, Villa Rosa Designs Rose Card patterns are super fast and fun!
That’s it for me this week. Take care and enjoy a little bit of October color!
Guess what day it is????? The Thursday after the first Friday of the month. And you all know by now what that means — NEW PATTERNS!
Yay! I really love seeing the new patterns every month, they just make me feel SEW inspired. Do you know what I mean? And without further ado, here they are!
(If you are interested in digital patterns, you will need to purchase each pattern separately)
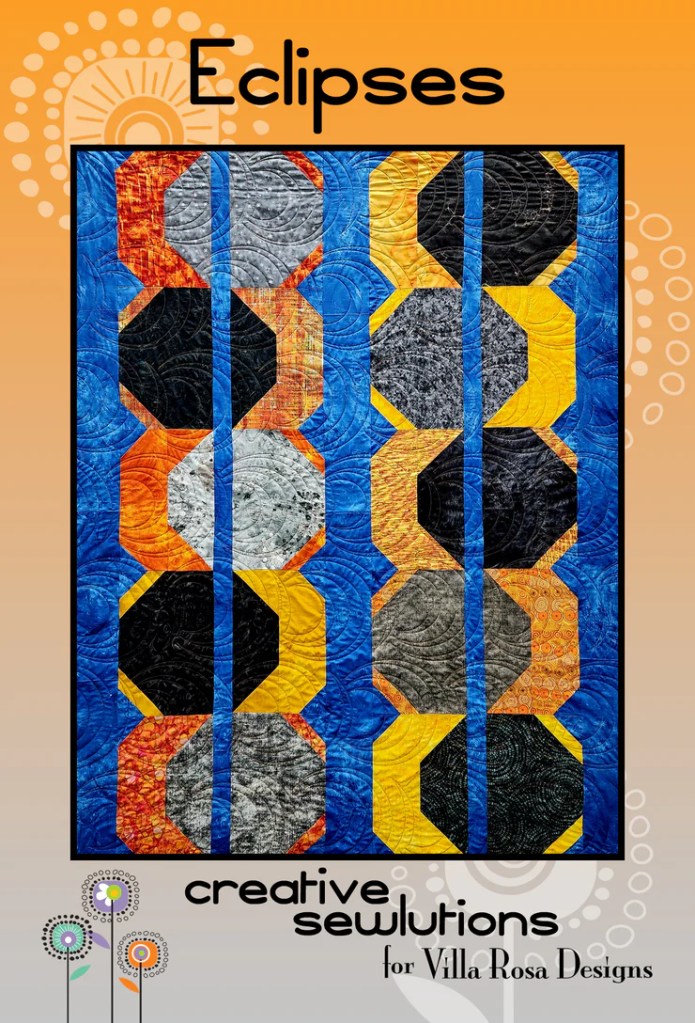
These 5 great patterns are a must-have for your growing Rose Card pattern collection! They include a delightful star quilt (Amelia), 2 panel quilts (Morning Spring and Surf & Turf), and 2 fun modern designs (Changing Lanes and Landina. I know I say this all the time, but the creativity of our VRD designers always amazes me. You rock, designers!
But wait We can’t forget this month’s Table Runner and Snack Mat can we???
Get the print pattern HERE or the digital pattern HERE
I designed the Pumpkin Spice pattern to showcase all those fantastic autumn fabrics out there we never want to chop up into little pieces! And who doesn’t love pumpkins — Log Cabin pumpkins. What a fun twist, huh? Depending on the fabrics you choose for Pumpkin Spice, this runner can decorate your table for both October and November. Just sayin’…..
Get the print pattern HERE or the digital pattern HERE
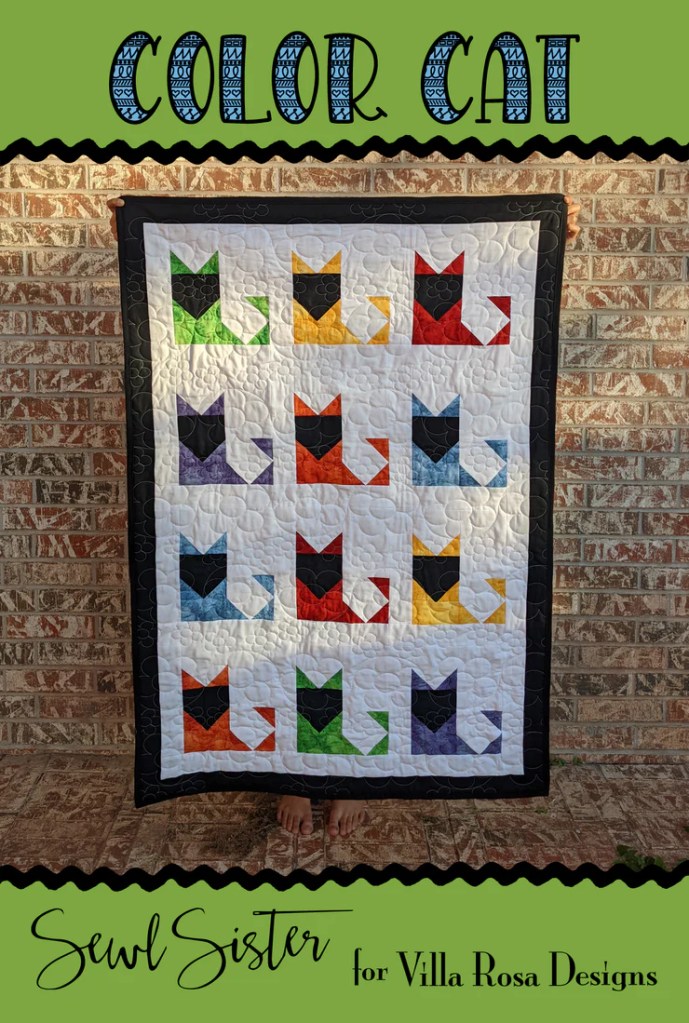
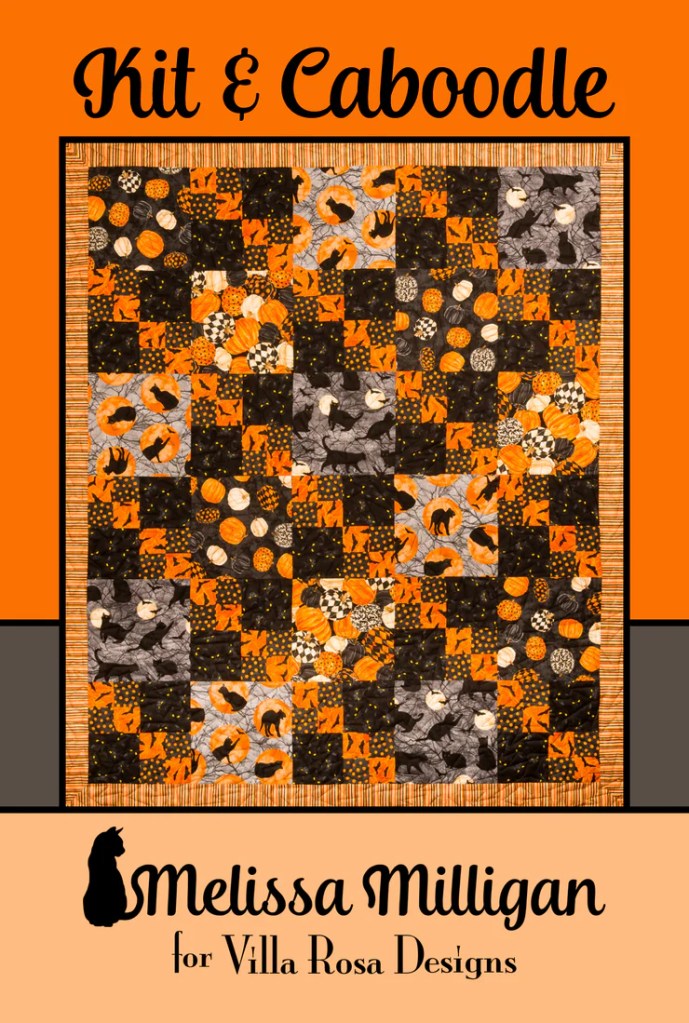
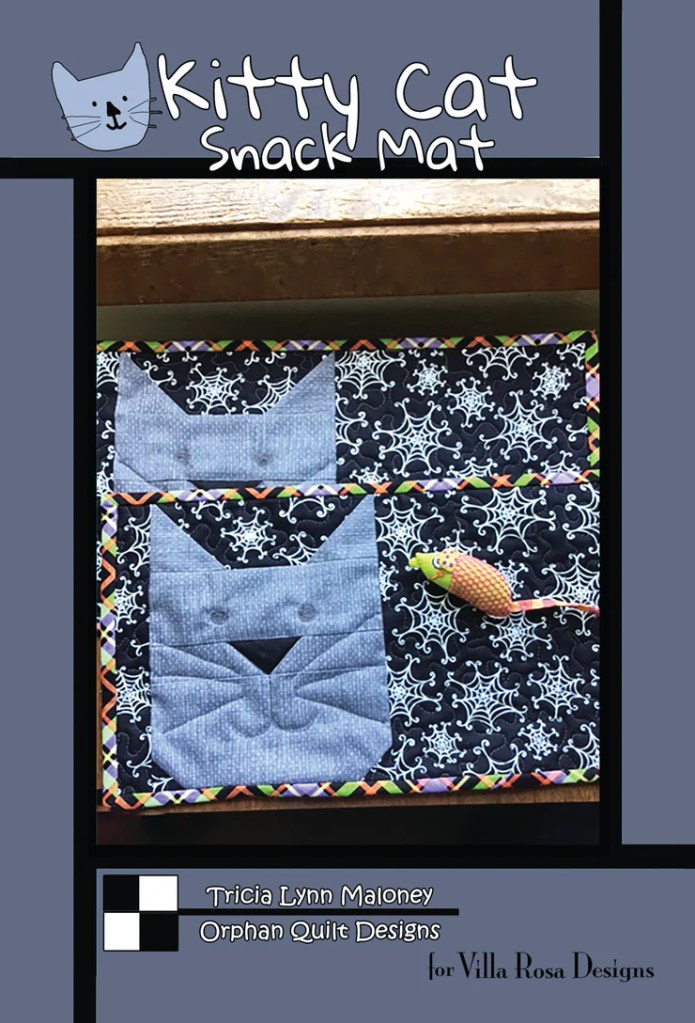
It just isn’t October with a cat or two, is it? My cats had to be grey because I actually have 2 grey cats. Pip is my senior citizen who is a 14 year old silver tabby with a very svelte figure. Griffin (or Griffy as I usually call him) is my 3 year grey tabby who is a real sweetie pie. My 2 year old shih tzu pup, Bailly, rounds out my little furry family.
Of course, you can make your kitties any colors you want — wouldn’t it be fun to make them look like your real cats, if you have any? I chose to use Halloween fabrics for the background and the binding, but you could make Christmas kitties or 4th of July kitties or any kind of kitties you desire.
Which pattern are you going to make first?
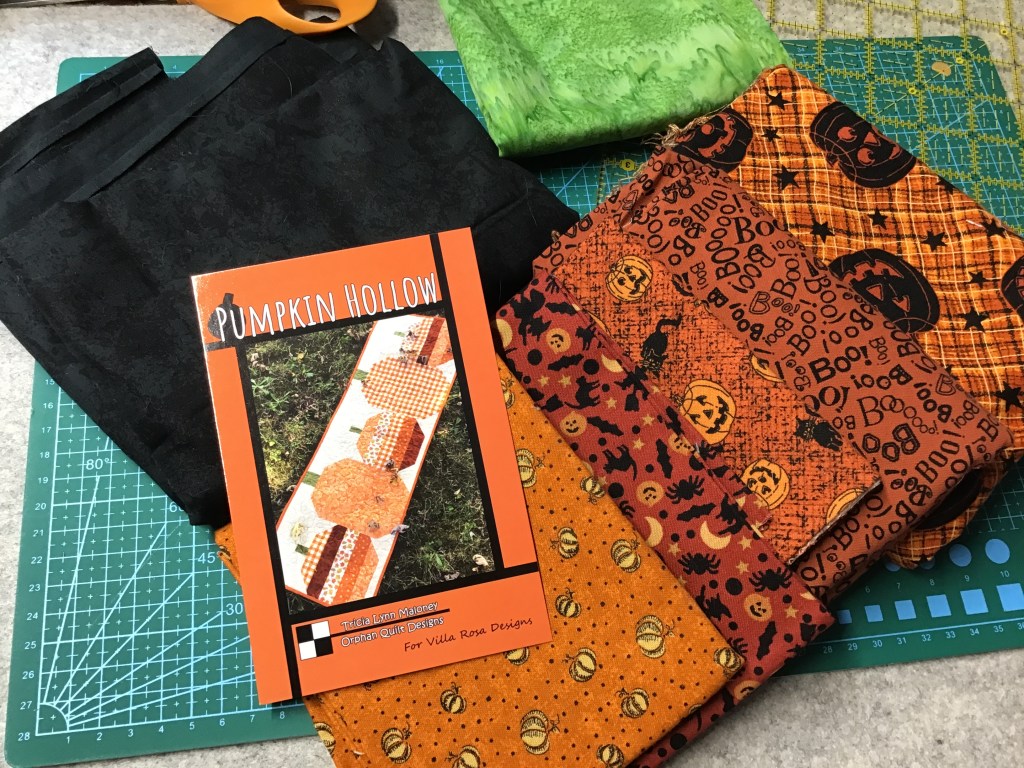
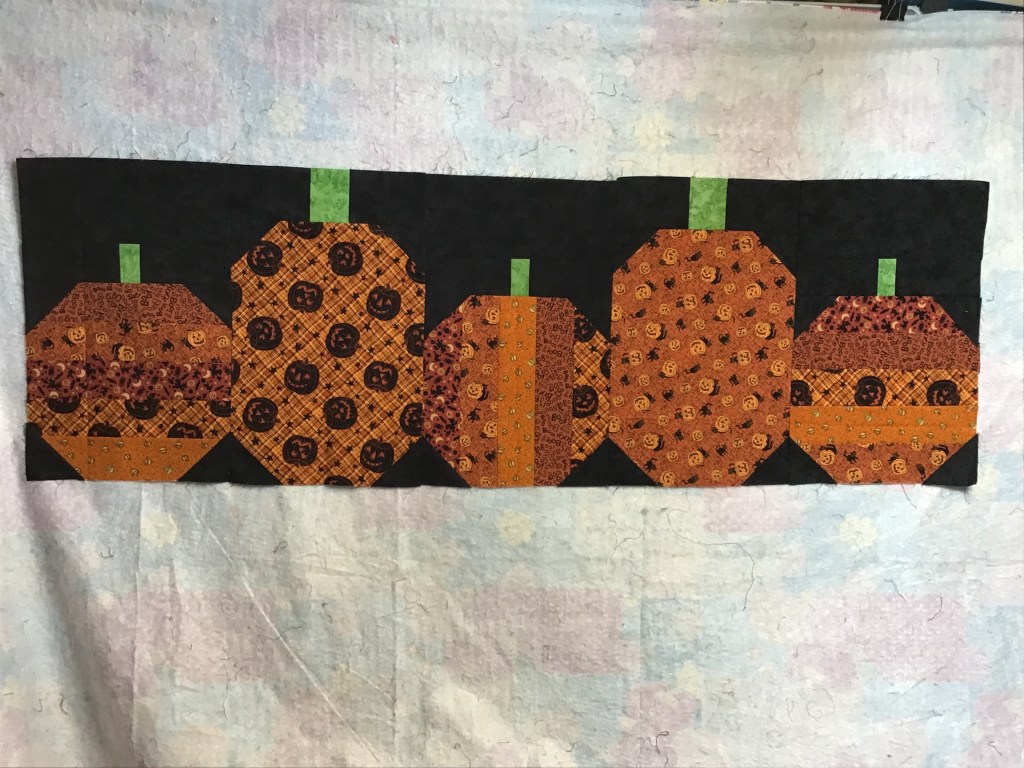
Speaking of fall sewing, I thought it would be fun to do a tutorial for my very first pumpkin runner pattern, Pumpkin Hollow. It’s been a popular pattern. Thank you! I’m thrilled you like it as much as I do. 🙂
Pumpkin Hollow VRD Tutorial
I have really enjoyed seeing all the different Pumpkin Hollow runners folks have been posting on our VRD Facebook page. If you’re looking for inspiration for your Pumpkin Hollow runner, please stop by the Facebook page and I promise you’ll find awesome quilts there. And a lot of friendly helpful quilters.
One of my favorite Pumpkin Hollow runners so far had appliqued vines and leaves added to the pumpkin stems. What a lovely addition to my humble little pumpkin pattern. Just another reason I love our VRD Rose Card patterns — there are plenty of opportunities for you to add your own touches!
Get the print version HERE and the digital pattern HERE
Well, let’s get started on our tutorial!
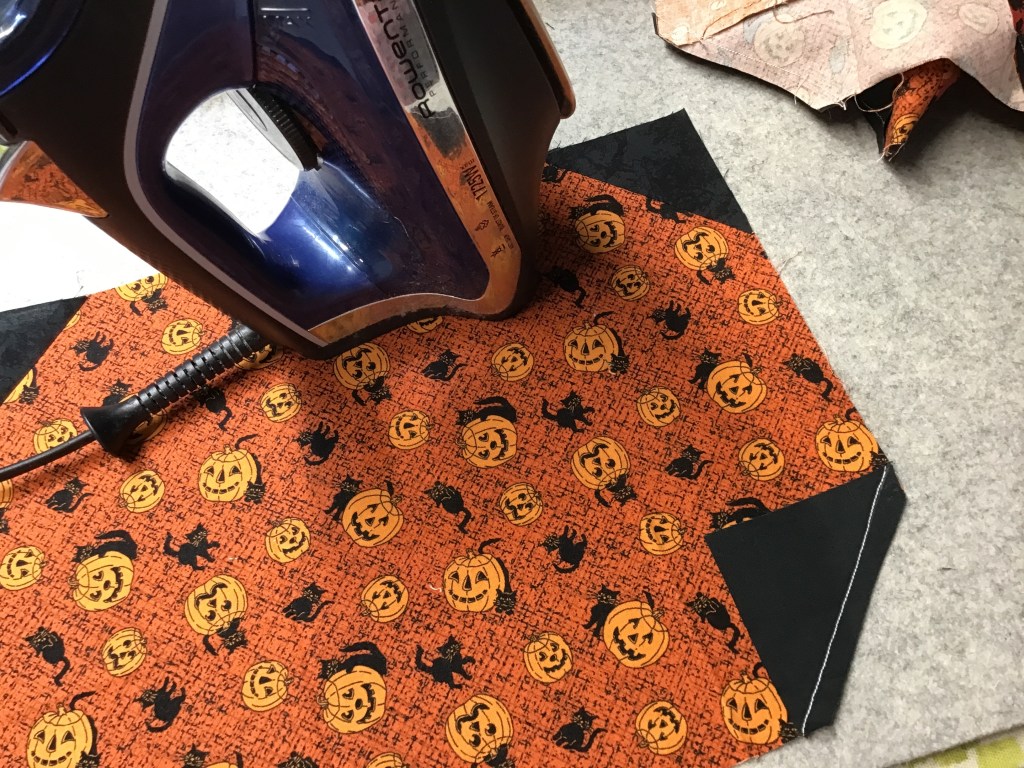
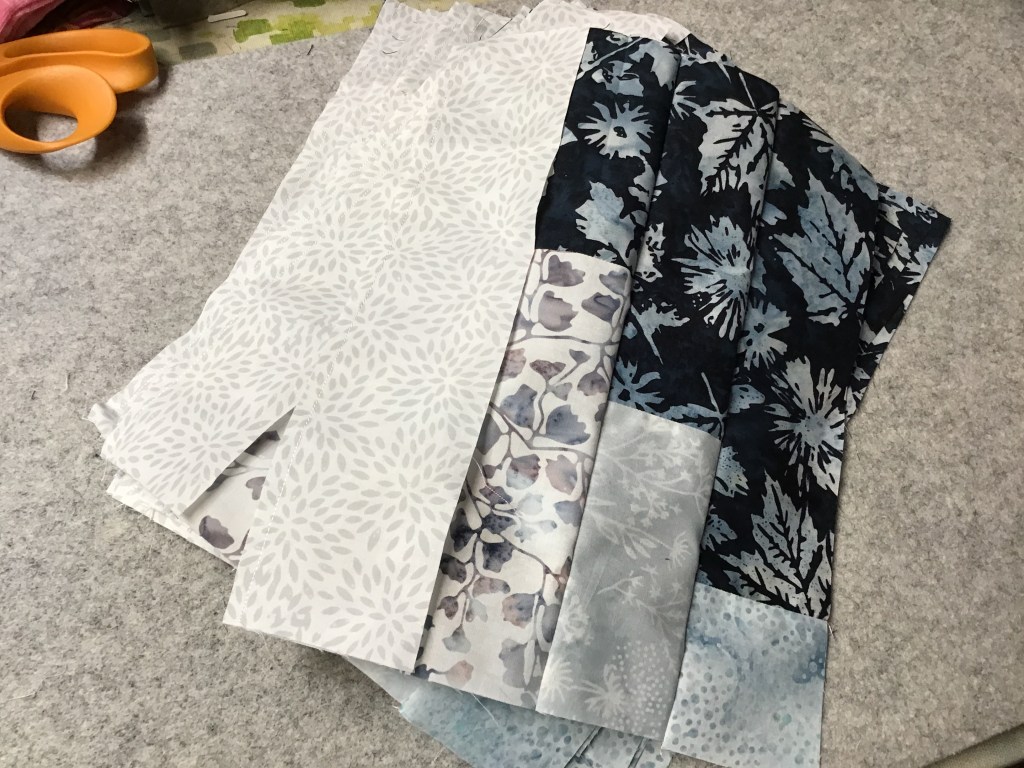
Of course, the first thing we need to do is gather up our fabrics. I pulled out some pumpkin and Halloween fabrics from my stash for today’s tutorial. I must admit that I’m embarrassed to even tell you how long these fabrics have been lurking quietly in my stash (I’m not actually sure, to be truthful), but now it’s finally their time to shine. I bet you don’t have any fabrics like that in your stash, do you? LOL!
I chose a mottled black background to compliment these burnt orange fabrics with black accents. I tried a couple different colors, but black looked the best, so black it is. And the green batik was just hanging out on my cutting table from another project, so that was an easy choice.
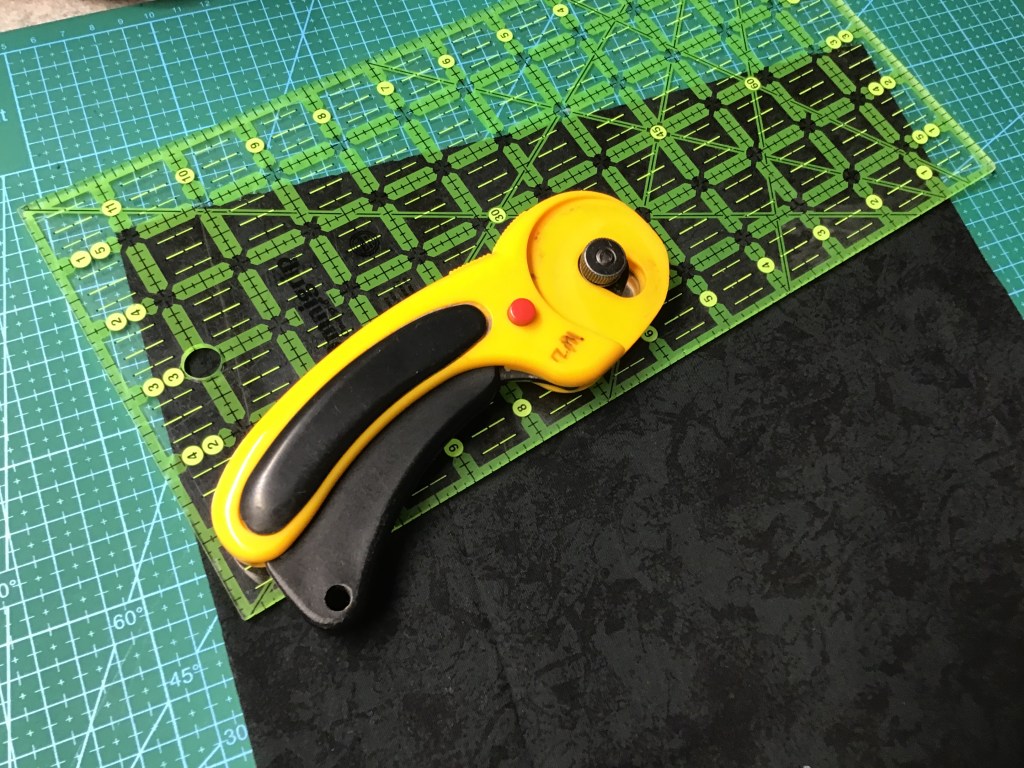
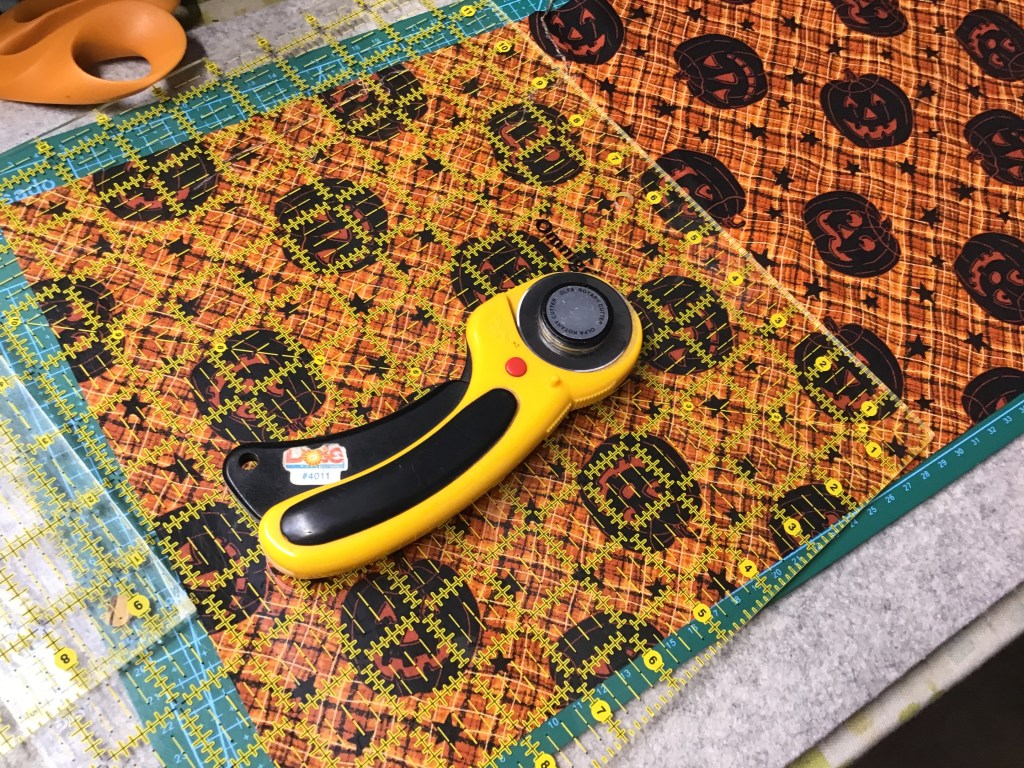
Lime to get started with the cutting.
Now that I’ve cut my fabrics, I’m getting kind of excited to see how this runner will look when it’s finished. It will definitely be different from my original version, which had a light background (the one on the front of the pattern, above).
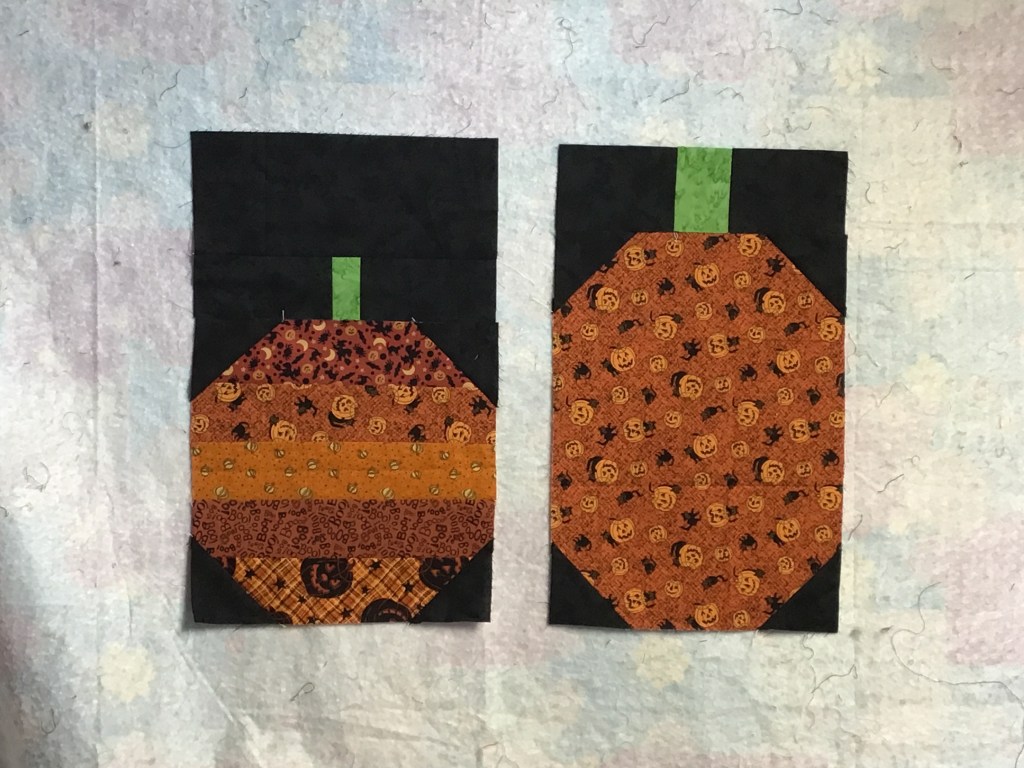
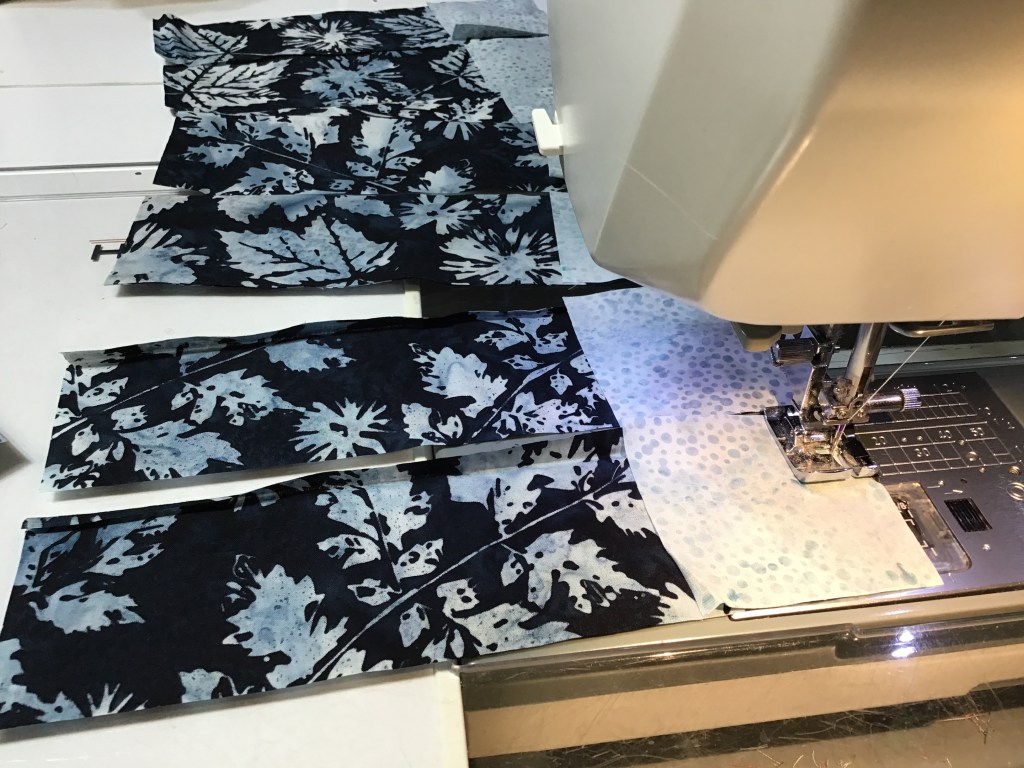
Let’s sew 5 strips together to make 3 small pumpkins. You can sew the strips for all 3 pumpkins in the same order or mix them up. I like to mix things up (wink, wink).
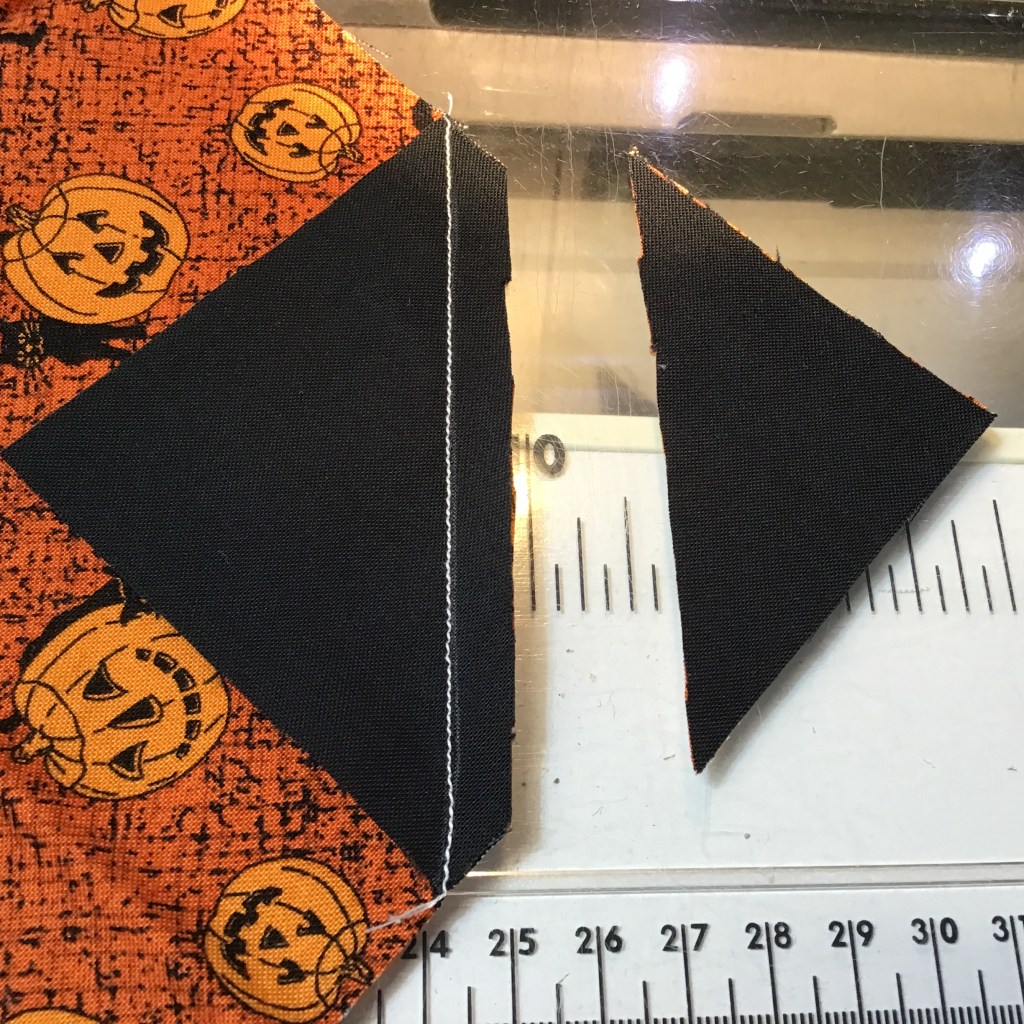
Time to sew some “flippy corners”! Yes, I am using the scientific name for this technique. You may have even noticed that lately I’m using that scientific term on my new patterns.
Layer a background square right sides together on the corner of a pumpkin. Draw a diagonal line. Sew on the line. Cut 1/4″ away from the line and press open. Now repeat this for all 5 pumpkins — the 3 strippy ones and the 2 tall single fabric ones.
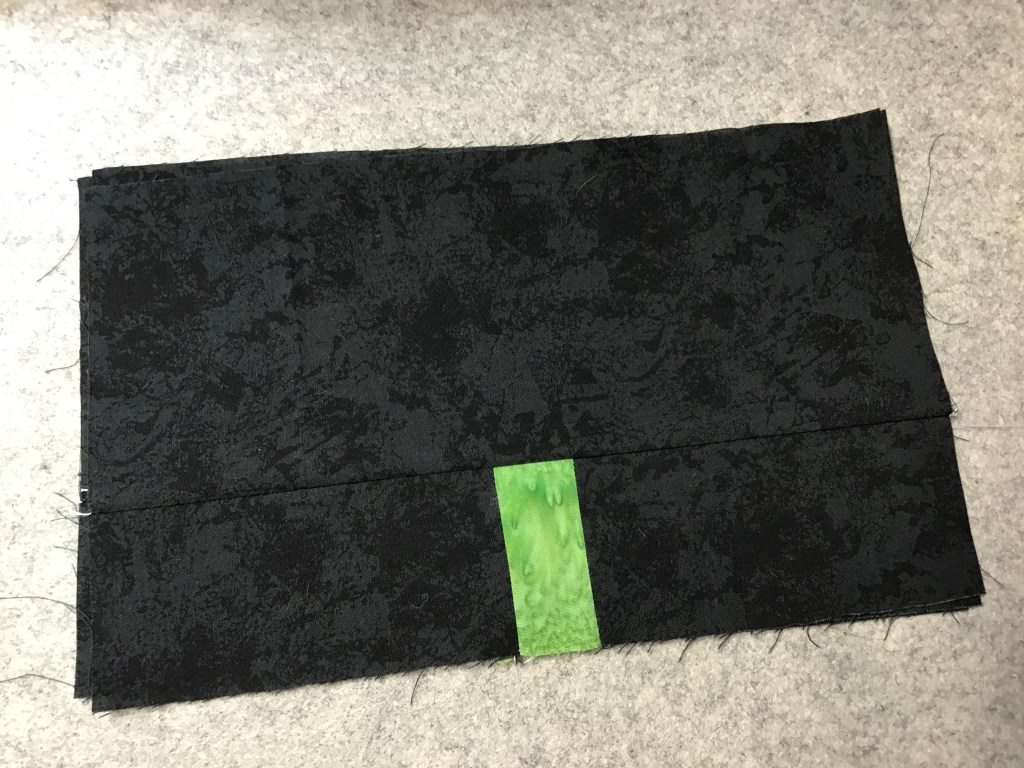
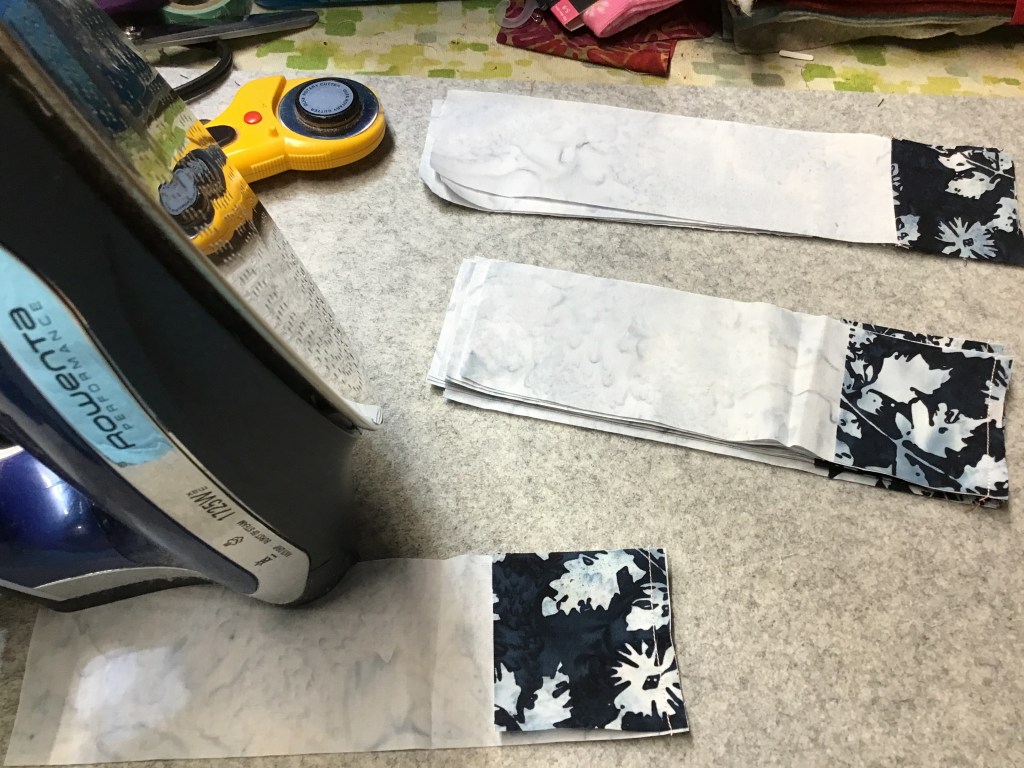
Next we are going to prepare our pumpkins stems. Sew a background strip to each side of the stems. Keep in mind that the smaller pumpkin has a smaller stem, so don’t get the background pieces confused between the 2 sizes of pumpkins.
Wow! This is coming together so quickly.
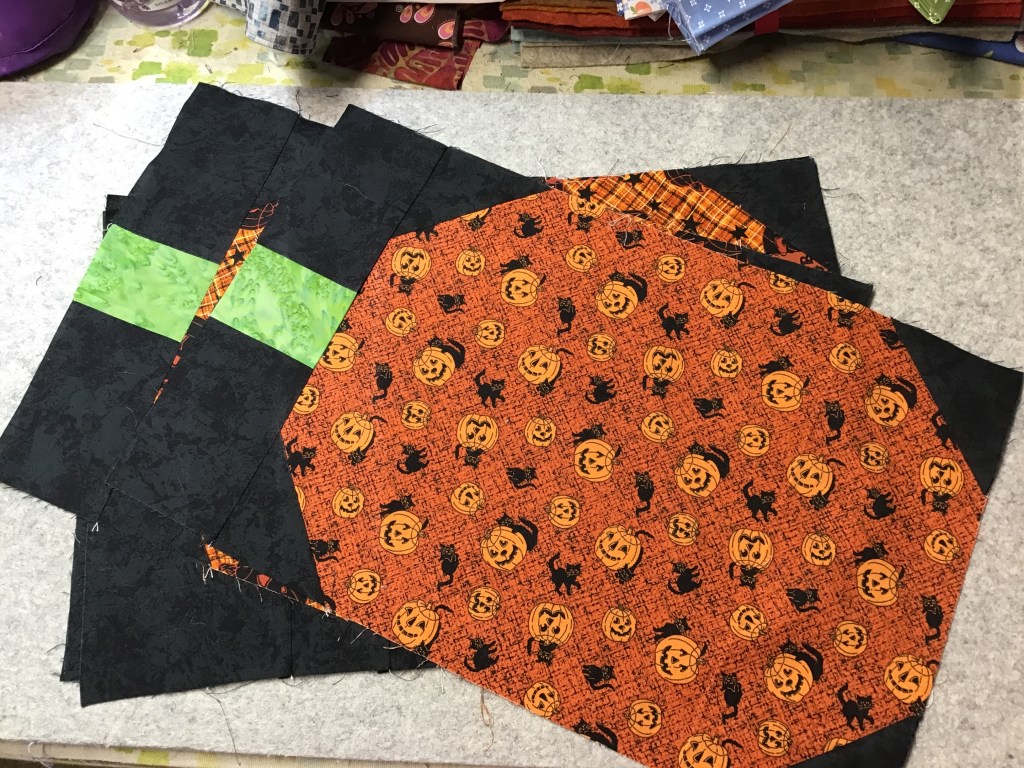
Now add the top background rectangle to the small pumpkin stems.
Let’s sew the stems to the tops of the pumpkins. Sheesh! We’re almost done. Wow! It really does go together super fast.
Okay, I’m going to put my pumpkins up on my design wall and arrange them. For fun, I decided to make the strips on the center little pumpkin go up and down instead of side to side.
I like how it looks. Isn’t it fun? I’m going to sew the blocks together.
Easy piezy! Done! Now all that is left to do is layer it with batting and backing, quilt it, bind it, and slap a label on it.
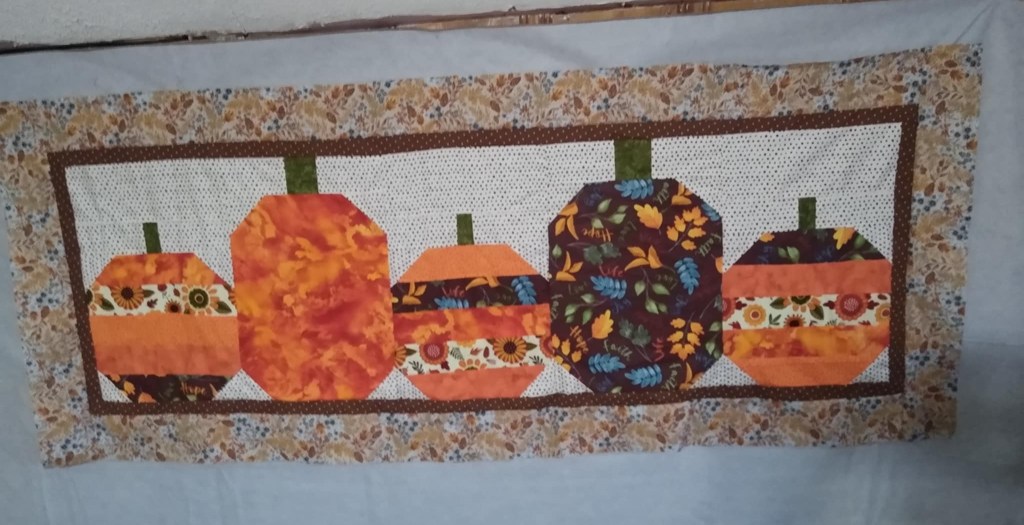
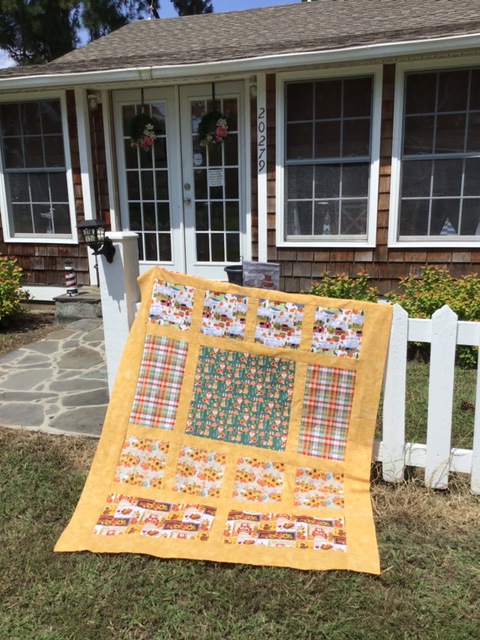
My pal, Robin (BIG Shoutout to Robin!), has already made 2 Pumpkin Hollow runners.
Don’t you just love her teal background in the first one? It’s an awesome unexpected pop of color paired with her mostly lighter florals and leaves.
In contrast, her second one is very warm and cozy with traditional browns and oranges. Love the little bit of blue! Robin even added a narrow inner border and a fall outer border to finish things off. Psst! Adding borders makes your quilt larger without having to make more blocks.
Great job! Thank you for sharing your runners with us! For more Pumpkin Hollow inspirations, please visit our VRD Facebook page.
Now you’ll have to excuse me. I’ve got to get back to my super secret projects for Quilt Market. Shhhhhh…….. Hang in there, you’ll see them very soon, I promise!
It’s October! How’d that happen? I feel like this year has been too short and yet too long at the same time. Does that even make any sense? So much has happened this year, yet there is still so much to accomplish, and now there is only a few months to do it in. Oh brother……… (me, smacking my forehead).
I know I mentioned last week that Fall is my absolute favorite season and happily, October is my most favorite month. October in northwest Pennsylvania is simply beautiful! You can almost watch the leaves burst into shades of red, orange, yellow, and purple . Then after a grand showing of color for a little while, they simply hop off the tree branches and drift down to the ground. There is nothing better than walking through those piles of color, crunching as you go. Raking leaves into a big pile and jumping into it is still an option for me too. Of course, I adore the cool nights and warm days, which make me feel more energetic and eager to get back on track to get things done after the lazy hazy crazy days of a hot summer.
Did I mention the food of autumn (and October)??? Goodness! How could I forget that? Apples are huge in our area this time of year, in fact I even have a couple neglected apple trees in my backyard. I was able to rescue some good-sized apples, even if they weren’t perfect. Apple pie, apple crisp, apple cider, homemade applesauce………need I say more? And if you have apple cider, you simply must have donuts to go with it. I don’t know if this is a regional thing or common all over, but I have fond memories of Friday and Saturday night cider and donuts.
In my hometown, there is also a huge nighttime Halloween parade later in October. When I say huge, I mean HUGE! Every firetruck and queen/princess for miles takes part! As well as all the area marching bands. There are floats, too. It was always a fun time when I was a kid, snagging all the candy thrown from the parade participants. I must admit that the Zem Zem mini race cars always made me nervous when they were doing their routines, — I was always afraid they’d run over my feet when they drove so close to the curbs where all of us kids were sitting. And after the parade, it was time for — you guessed it! — cider and donuts. LOL!
International Quilt Market
October also brings Fall International Quilt Market (the professional event) followed by Quilt Festival (the retail event) in Houston, Texas. YAY! Although there’s a lot of work that goes into getting ready for Market, it’s so much fun and totally exhausting. For me, it’s the one time a year I actually get to work with Pat and the VRD gang in person, which makes it super important to be there so we can brainstorm, discuss ideas, and dream up fun new VRD events just for you.
This was the VRD Market booth in 2022
This was the VRD booth for Festival in 2023
I attended my first Quilt Market in 2010 when my very first quilt book, Orphan Block Quilts, was coming out. It was also where and when I first met Pat and fell in love with Villa Rosa Designs. My pal, Leslie (who I went with to Maryland back in August) went with me for that very first Market — basically she help my hand and provided me with training wheels, or…………simply moral support. LOL! Thanks, Leslie! I’ll never forget when we saw superstar Ty Pennington from HGTV, who was there to promote his first fabric collection. OMG! Women were practically throwing themselves at him. He had a security guard trying to protect him and they even had to bring in stanchions and ropes to help control the crowd of rowdy women. Ahhh, good times.
Last year I was really fortunate to be able to stay on for Quilt Festival (the retail event) after Market. That was my very first Festival experience, even though I’ve now been to enough Markets that I don’t even keep track anymore. I had an amazing time and I met such terrific folks at both Market and Festival.
I don’t really have any specific goals in mind for Market this year, except to work in the VRD booth and to just enjoy the experience. I do hope to meet some new industry professionals, to put a face to people I’ve only worked with online, and to catch up with some old friends — like my pals, the Springers, of Quilts of Mulberry Lane, who kindly gifted me with an antique quilt last year. You can read the Story of the Quilt that Followed Me Home HERE. I might even line up some new fun sponsors for our 2025 VRD Blog Hop.
Bedazzled Fabric Collection
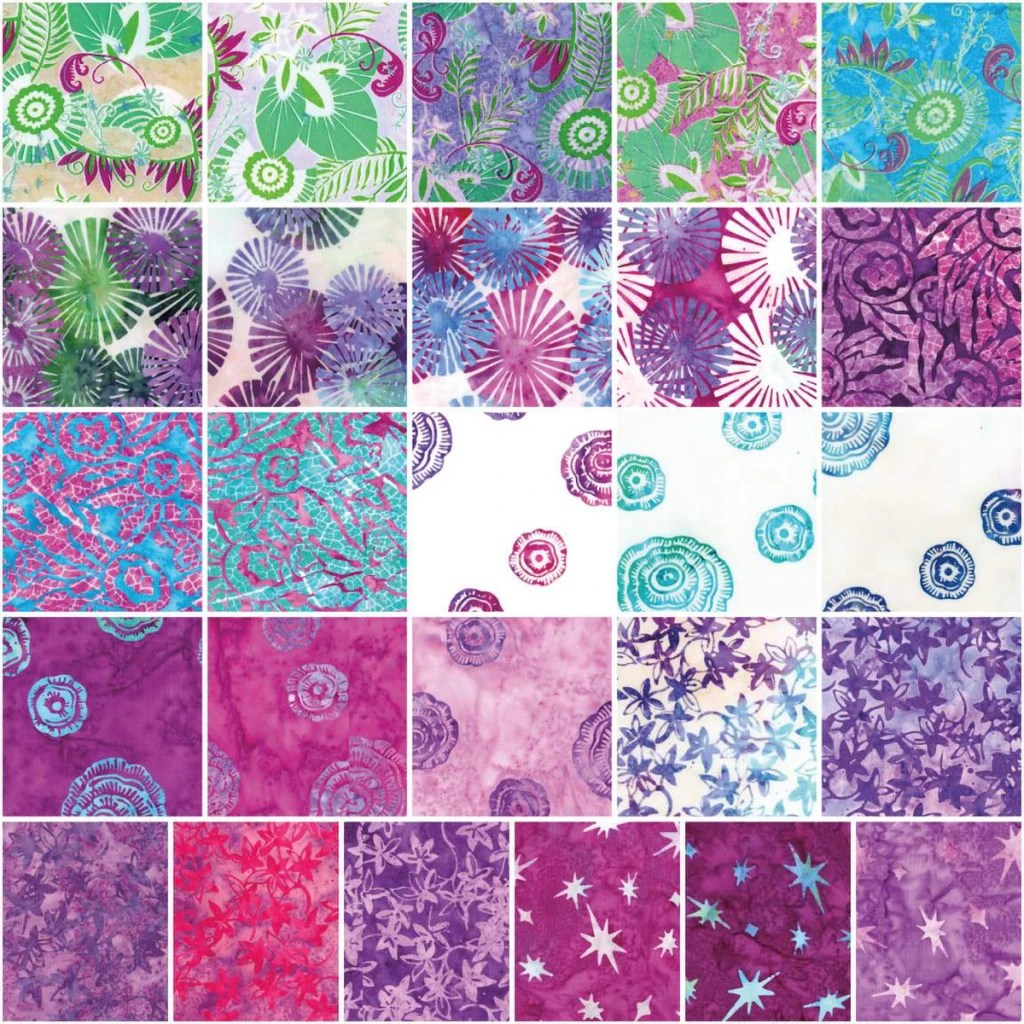
The most exciting thing going on for Villa Rosa at this year’s Quilt Market is Pat’s new fabric collection with Riley Blake Designs. It’s called Bedazzled and it is a batik collection. If you know Pat Fryer, then you know she adores batik fabrics!
Here’s our Pat’s RBD designer photo on the Riley Blake website.
There are 26 fabrics in the Bedazzled collection. Lots of purples and teals with hints of pink, jade, and blue. The fabric designs have a lot of movement and energy and the colors are just sooooooo rich. Of course, Bedazzled will be available in precuts — 5″ squares, 10″ squares, 2.5″ strips, and fat quarter bundles, so the collection will literally shine in lots and lots of VRD Rose Card patterns!
But wait……………….there’s more! There is a teeny tiny little extra detail that makes Bedazzled truly unique and special — it has bling! It isn’t called Bedazzled for nothing, you know. Tehehe. The main print has wonderful hints of sparkle and shine.
A close up of one of the main prints — can you see the gold stars and moons? That’s the sparkly bling!
Bedazzled will debut at Quilt Market later this month and is shipping to quilt shops in December, which is only a couple months for you to wait. Right now all of us at VRD are busy working on quilt samples to show off the Bedazzled collection for Quilt Market, so you will be seeing those soon, I promise. You will be SEW inspired! I’m also working on a couple new tutorials for you, which will go live towards the end of the month and into the beginning of November.
One of the things I’m most excited about Bedazzled is the collectible Bedazzled tin Riley Blake created for the collection. What makes this tin so special??? It will hold Villa Rosa Rose Card patterns! Yep. SERIOUSLY! A tin designed specifically for our Rose Cards. How many times have we talked about how to store our VRD Rose Cards right here on the blog and on the Facebook page?
Ridiculously, I am so in love with this tin already and I haven’t even seen one in person. Hmmm…..maybe Riley Blake will have one as part of their Bedazzled display. Guess we’ll have to wait until then to find out.
The collectible Bedazzled Rose Card tin. Isn’t it yummy???
Remember, Bedazzled is shipping to quilt shops in December. Of course, we’ll have it available at Villa Rosa Designs. Did you doubt we would? So, hang in there. December’s coming really really fast!
Well, that’s it for me. Time to get back to work on my Bedazzled sample quilts and tutorials. Stay tuned for updates coming soon.
Hello Autumn! Here it is — the season I’ve been waiting for all year. I don’t really know what it is about autumn, though, that inspires me so much. The colors? The sounds? The smells? Warm days and cool nights? Sweaters and fuzzy socks? Hot tea and a little snack in the afternoon? Huh! I think it’s all of the above!
Image bymoi
Many of you already know that Villa Rosa Designs partners with other companies in the quilt industry. You can see our quilting partners on the far right side of the blog (just click on the company to be directed to their website). Perhaps you’re wondering how that all came about? Well, the easiest and quickest answer to that question is that our wonderful fast and fun VRD Rose Card patterns pair beautifully with pretty much any fabric collection and we have patterns for just about any fabric cut or style. Rose Card patterns also provide a terrific way to feature and showcase new fabric collections because VRD patterns really are all about the fabrics, not fussy cutting or piecing. Yay, Rose Card patterns — you rock ! Want to check out our entire catalog of 650+ Rose Card patterns? Print Patterns HERE or Digital Patterns HERE
One of the really FUN things I get to do is work closely with fabric companies to match our patterns to their collections. If you’ve visited any fabric company websites recently to check out their newest fabric collections, you might have seen some of our Rose Card patterns hanging out there. How cool is that???
Hoffman California International Fabrics is one of the companies that we partner with. It’s really fun playing with digital fabrics in their new collections paired with our VRD Rose Card patterns. You know how a lot of quilters make quilts in their heads while others make quilts with fabric? I get to make quilts on a computer screen with digital files! Neat-o!
Did you know that Hoffman has been in business since 1924? Wowzer! That’s 100 YEARS!!! Imagine all the amazing fabrics they have produced in 100 years! It’s positively mind-boggling!
Let’s all sing Happy Birthday to Hoffman. On the count of 3 — 1…….2…..3! Sing! Happy Birthday to you…………..
SPeaking of Hoffman, I LOVE using yummy Hoffman batiks and stunning digitally-printed fabrics for blog tutorials. One of my all-time favorite tutorials is Hillside Charm featuring the Wading with Water Lilies collection from a couple years ago. Do you have a favorite tutorial? If so, which one?
You can find the Hillside Charm print and digital patterns HERE. There are some pretty cool kits available too!
If you missed the Hillside Charm tutorial, you can find it HERE.
PSST! We still have a few Wading with Waterlilies fabrics at the VRD shop, including a couple panels! You can find them HERE.
I certainly hope everyone is in the mood for a little Fall inspiration today because I’m going to share some with you whether you’re ready or not! LOL! I’m really excited to share Hoffman’s Fall 2024 Project Catalog with you. It is literally HOT OF THE PRESS! I just saw it the other day and I totally knew I had to share it with you. Yep, it’s that good!
Take your time and enjoy flipping through the catalog. I guarantee you will find A LOT of inspiration here. Pay special attention to our VRD patterns in the catalog because you might just see some of them in the future as blog tutorials. Just sayin’………
I hope you enjoyed the catalog. Stay tuned for lots of exciting things coming soon, including new blog tutorials. Who doesn’t love tutorials???
I wasn’t planning to write another blog post about decluttering, but right now it’s a topic that is very much on my mind so I thought I’d delve a little deeper into it by exploring some of the more popular techniques. I’m sure there are lots more, but for today, we’re limiting ourselves to 5 of ’em.
Image by moi
To be honest, I didn’t get back to decluttering my studio this week, but I did clean off 3 bookshelves in my bedroom, condensing them down to 2 shelves after I removed books I wasn’t interested in reading anymore or found duplicates. Yay! Empty space! Not really, though, as I rehomed part of my Sasha doll collection on that empty shelf. Sigh…………
I was also inspired to clean off and organize the family movie collection in the living room. Again, I weeded out the duplicates and the movies we just aren’t into anymore. I was surprised that when I was done, I had weeded out 2 bags of movies! Rockin’ Awesome!
Guess what? I felt a real sense of accomplishment by doing those 2 little tasks. Now I just have to get back to decluttering my quilt studio, don’t I?
Speaking of decluttering, I hope you had a chance to read last week’s post. If you missed it, you can find it HERE.
Blog reader, Sherri, made this comment about last week’s blog post:
I have been working on a declutter challenge but missed several days of the 30 day challenge and was feeling a little bummed. Read your idea of a “job jar” and just turned the five minute items into some of the jobs. Added fun ones like make two blocks from a current quilt project and go outside for ten minutes. Mostly chores but it will be fun to pull and not know if it is a chore or a reward when I pull that piece of paper. Thank you for this lovely idea!!!!
Big shout out to Sherri for her SUPER idea to combine the Rewards Jar with the Job Jar in the same jar — LOVE IT! Sherri’s comment reminded me that there are so so many different approaches to decluttering. So this week, I thought we’d take a look at some of them together. Thanks for the inspiration, Sherri!
The 30 Day Declutter Challenge
Sherri mentioned this one in her comment, so I thought it only fitting we take a look at it first. Perhaps the most popular decluttering method right now is The 30 Day Decluttering Challenge. But what exactly is it? Honestly, I’m a little confused about what it is because I’ve seen a couple different versions. Is it one or the other? Or both?
A 30 Day Purge
Each day of this 30 Day Challenge, you remove that number of items from your space. So on day 1, you remove 1 thing. On day 2, you take out 2 things. And so on until day 30 when you remove 30 items. If I did the math correctly, that’s like decluttering 465 items in one month. Wowzer! That would really make a dent in one’s decluttering project, wouldn’t it? This was the first version that I saw on Facebook and I was very intriqued by the concept, but I bet it’s a real challenge to gather up 30 items on day 30!
Here is more information and tips about this technique:
Another version is that on each day of the 30 Day Challenge, you focus on a small task in a different part of your home (or studio). For example, on day 1, you clean out your coats. Then on day 2, you clean off the bathroom counter. On day 3, a different small task in a new area. The idea with this one is that you work on one specific task for a short amount of time every day of the challenge. 10 minutes? 20 minutes? I’ve seen several different time suggestions, but I also know you can of course tailor this to yourself (I promise, there really aren’t any decluttering police,,,,,,,,,).
Hey! I think I started this challenge without even knowing it by tackling my bookshelves and the movies shelves! Wohoo! I am such a forward thinker, am I not???? Seriously, though, this idea is very similar to the Job Jar of last week’s post, but instead of writing tasks on a slip of paper and pulling one out, you are simply tackling one small task everyday.
I hope all of the resources above will help you understand the nuances of The 30 Day Challenge(s) and maybe they will help you to jumpstart your own decluttering adventure.
Marie Kondo Method
By now most of you have at least heard of Marie Kondo and her “spark joy” method of decluttering, which is often called the KonMari Method. This popular decluttering technique focuses on keeping only items that “spark joy” and letting go of everything else. So, how exactly do you do the Kondo method?
First things first, you will tackle your clutter by category instead of room-by-room. Start with clothes, move on to books, then papers, miscellaneous items (also known as komono), and finally sentimental items. This order will help you build decision-making skills along the way.
When sorting through each category, hold each item in your hands and ask yourself if it sparks joy. If it doesn’t give you the warm fuzzies, thank it for its service and let it go. Once you’ve decided what stays and what goes, it’s time to organize what’s left.
Marie Kondo wrote a best selling book that will guide you through the entire process.
The 12-12-12 Challenge is a simple yet effective way to declutter your home and maybe have some fun while doing it. The idea is to find 12 items to throw away, 12 items to donate, and 12 items to return to their proper places. It’s amazing how quickly you can make a difference in your space with just this small effort!
It’s a flexible way to go about organizing and decluttering your spaces because once you complete the 12-12-12 cycle, then you simply repeat it until you achieve the level of organization you are looking for and you can take as little or as much time as you need. It’s also a feel-good win-win experience as you are donating items you no longer need or want to local charities in order to help others in your community.
If you’re feeling overwhelmed by clutter and don’t know where to start, the 20/20/20 decluttering challenge might just be your new best friend. So, how does it work? It’s super simple and totally doable for anyone.
Here’s the deal: You spend 20 minutes decluttering, pick 20 items to either throw away or donate, and do this for 20 days straight. That’s it! The idea is to break down the daunting task of decluttering into bite-sized chunks that are easy to manage.
The beauty of this challenge is its flexibility. You can choose any part of your home each day—whether it’s your closet, kitchen drawers, or even your scary junk drawer. By dedicating just a small amount of time every day, you’ll start seeing big results without feeling like you are taking on an impossible mission.
The 10-10-100 Rule might just be the one you’ve been looking for if you are a procrastinator or don’t know where to start.
Like the other rules and challenges we’ve discussed, this one is also pretty simple — you focus on one specific spot in a larger space, like a particularly messy corner. The idea is that you declutter in 10 minute intervals to find 10 things to remove from the space (trash, donation items, items to sell, or even just items that need put back where they go). This is a very flexible technique because you don’t have to do 100 items all in one day – you can spread it out as long as you keep working towards that 100 item goal. Of course, your 10 minutes could be longer or shorter, say 20-10-100 or 5-10-50. The real purpose is that you get up, lose your paralysis, and get decluttering.
I hope learning a little bit more about these 5 decluttering techniques will give you inspiration to work through your own clutter if you struggle with too much stuff like I do. Of course, there is nothing that says you can’t combine and/or modify any of these techniques to better suit you and your individual needs.
Please remember that one technique, rule, or challenge will NOT fit absolutely everyone. You may need to try several different ones before you discover the one(s) that work for you. It’s not failing if a techniques doesn’t work for you, so try again. Instead of failure, look at it as trying to find the right fit for decluttering and keeping your spaces organized. It’s a truth universally acknowledged that having a clutter-free organized space is much healthier and happier than living with the unnecessary extra stress and anxiety of a perpetual mess.
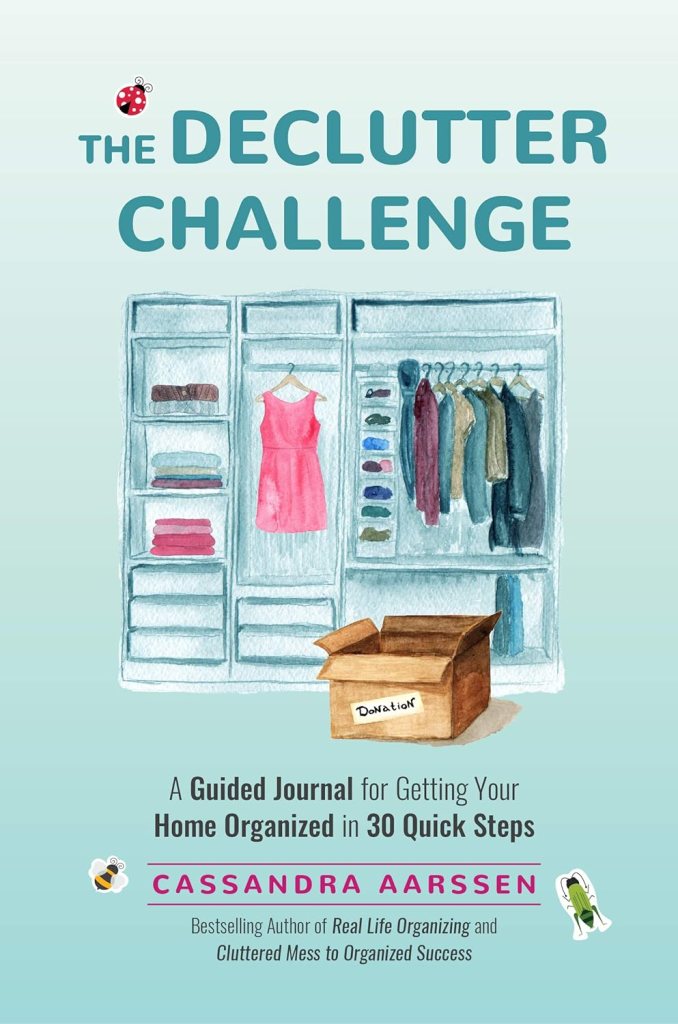
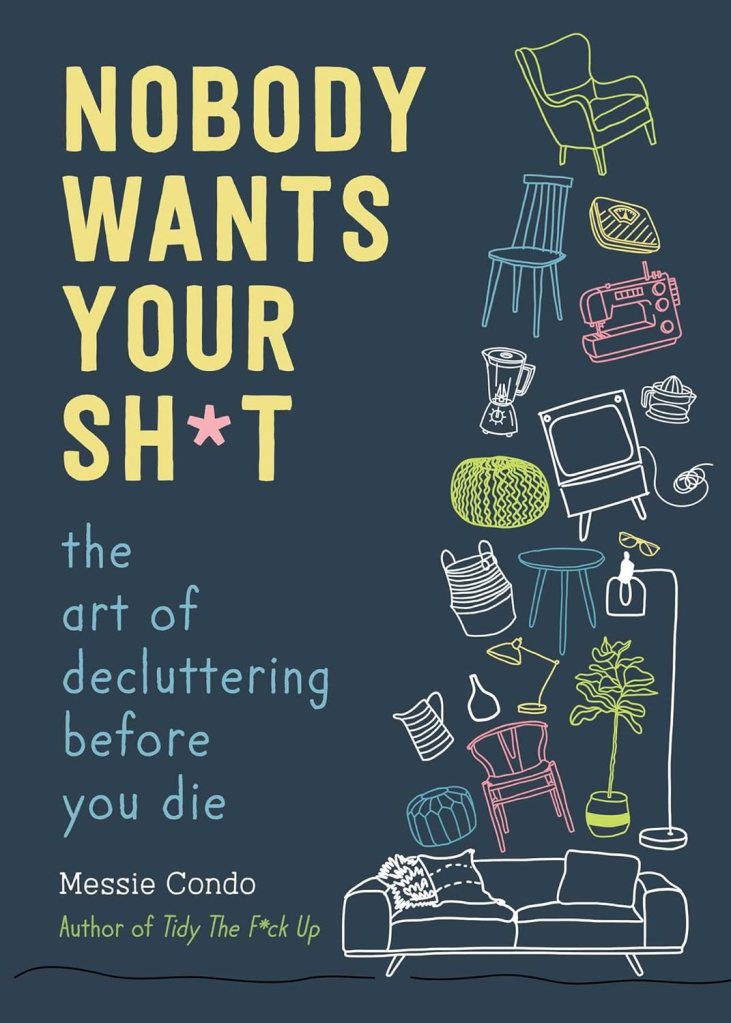
Since I’m such a book geek, I’m going to add a short list of great books to help you on your decluttering adventure! I chose these books because of their popularity and, of course, several of them are currently waiting for me to read them, too.
I love September and the approaching autumn season! It’s such a refreshing time of year. This summer was certainly one of the hottest on record here in northwestern PA. Wow! Then it was Labor Day and suddenly the weather turned very fall-like.
It reminded me of when I was a kid going back to school the first week of September, wearing my crisp new school clothes — sweaters, jeans, long sleeve tops, new school shoes, not like the shorts and tees of today.
Speaking of inspiration, today is the Thursday after the first Friday of the month and you know what that means — NEW PATTERNS. YAY!
Aren’t they fun??? Our designers never disappoint, do they? There’s definitely something for everyone here with a new panel pattern (Good for Gold), several fat quarter patterns (Roam, Stuffing, Pavers [can also use 10″ squares]), and a 2 1/2″ strip pattern (Ric Rac Roll). We’ve got traditional and modern. Sizes range from smaller throws to a large twin-sized bed quilt (Ric Rac Roll).
But wait! There’s more!
Check out this month’s table runner and snack mat.
By now you’ve most likely noticed how much I love to create seasonal patterns. You see, I have this goal to someday have my seasonal decorating organized into storage crates — one for each season/holiday. Then I can just grab the right crate for the season/holiday and add my decorative touches like quilted pillow covers, table runners, wall quilts, throws, etc. How close am I to achieving this goal? Not even close (eye roll here). But it’s important to have goals, isn’t it?
Speaking of Snack Mats, have you picked up on my evil nefarious plan yet??? Yep, my plan is to create a different Snack Mat for each month of the year. So far I’ve created 7 Snack Mat patterns, so that means I’ve got 5 more to go in order to have a full year of Snack Mats. And, yes, I’ll be adding these to my seasonal/holiday crates as well.
All of the Snack Mats finish at a generous 8″ x 14″, which makes the perfect landing spot for your mug of coffee/tea/cocoa and a little something yummy on the side. And at 8″ x 14″, they do double duty as a small place mat. When I worked at my local small town public library for 11 years, I ate lunch (or dinner) at my desk most of the time. It would have been super fun to pull out a new seasonal mini place mat (Snack Mat) for my desk every month to make my meal at work a little more special, even if it was leftovers from the day before. Snack Mats also make great gifts for yourself or for someone else. You can find all of the Snack Mats to date right HERE.
Now that you are super hyped about our NEW September patterns, grab ’em all and get started with your new makes because September is a great month to get back to quilting.
A Spot of Decluttering
As I mentioned earlier, I am feeling so much more inspired as autumn is only about 10 days away. Ever since I bought my new-to-me sewing table back in July, I haven’t been able to get back into the cleaning and organizing groove. Of course, the need to declutter and clean wasn’t just because of my new table, it’s been an ongoing project. In fact, I started 2024 off by having a goal to get my spaces cleaned and organized. Truthfully, I haven’t made much progress.
Over the weekend I was lamenting to my pal, Mary Lee (Hey Mary Lee!), that my spaces are such a disaster and that I really want to dive back into getting my space shipshape. In truth, I basically feel paralyzed because there’s so much that needs done, there’s only one me, and I feel so completely overwhelmed. I just don’t know where to begin.
Mary Lee, in all her wisdom (she is a retired children’s librarian, after all, so I suspect she knows everything!) shared some great ideas, so I thought I’d share them with you.
Think Small
Utilize small pockets of time to do smaller tasks. You will be amazed at how much you will get done by focusing on the small things.
Break Big Jobs into Small Bites
Instead of cleaning the whole bookcase, clean one shelf off at a time until you complete the entire big task. Instead of tackling an entire room, start with one corner. So, basically, stop looking at the whole overwhelming paralyzing picture and focus on smaller manageable pieces.
Institute a Job Jar
This goes right along with the previous suggestions of breaking things into smaller chunks except this time, you write the smaller chunks onto slips of paper and put them in a jar. For example, write “clean off one book shelf” on a slip of paper, fold it in half and pop it into the jar. Add other smaller chunks, too, like “clean the cobwebs from the corners of a room”, “Empty and clean out one drawer”, “pull 5 things out of the closet you don’t wear anymore,” or whatever works for you.
Mary Lee explained that you pull a slip of paper out of the jar and then you do that specific task – “clean off one book shelf,” for example. Once you complete that specific task, you can put the slip back in the jar (if there is more of the same specific task to do), toss the paper slip if it’s complete, or repeat the task if you’re still into it.
The key is, though, that you do not choose another slip of paper (or take on another project), until you have completed the task on the slip of paper you pulled out. You can repeat that task as many times as you want/need or put the slip of paper back into the jar and pull out another one. If you keep taking small bites of those big overwhelming projects, eventually you’ll get that big project done.
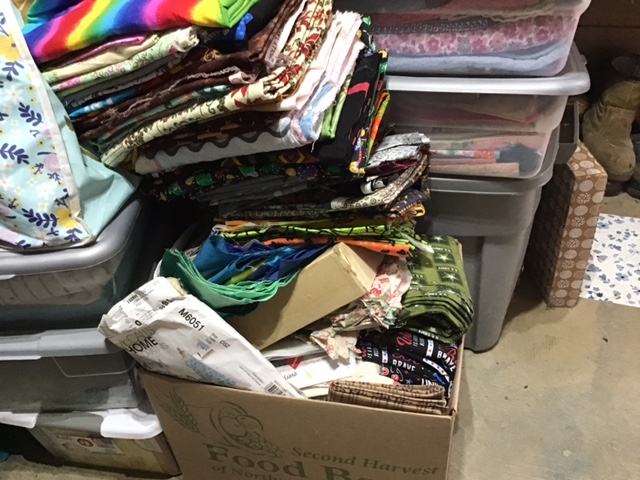
Mary Lee’s ideas really resonated with me so on Sunday night, I decided to tackle a corner of my studio. I started with a pile of fabric on top of an open plastic crate. The fabrics were from several recent projects, so I organized and rehomed them elsewhere. When I finally reached the crate itself, I was happy to see it was half-filled with vintage fabric, blocks, and a quilt in the bottom (these were some of my more recent vintage textile finds and I guess I forgot about them as the crate got buried). I found the matching lid to the crate, tucked more vintage blocks and fabrics inside (I spied these over on top of my cutting table) and closed it up.
Here’s a peak inside my crate of vintage blocks and fabrics.
Then I moved onto a pile of fabric and totes sitting on top of a cardboard box next to the vintage goody crate. I organized the fabrics and cleaned out the totes, throwing away a bunch of old papers and handouts from quilt classes I taught years ago. Fabrics were then organized into appropriate places, including a box for gifting and another I’ll call my bye bye box.
But I didn’t stop there. Once the pile was gone, I finally had access to a drawer unit I haven’t seen for a while. The top drawer had Halloween and fall fabrics, some old quilt kits from 2008 as well as miscellaneous fabrics. I happily surprised myself by emptying about half of the drawer. Some of the fabrics went into my fabric cubes (organized by color) while the rest went into my bye bye box (or should I say on top of my bye bye box as it’s overfull now).
My 2 drawers after my purge.My bye bye box!
These are my fabric storage cubes. I have 50 cubes in 2 units which cover the entire back wall of my studio. I am aiming to do the same thing with the opposite wall, but right now that wall is used as a pantry, so I’ve got work ahead of myself to tackle that project, too. Hello Job Jar!!!
I still wasn’t quite done yet, so I tackled the bottom drawer, too. That bottom drawer stopped me in my tracks. It was pretty smelly and such from being closed up with no air circulation behind the cardboard box with the totes and fabric on top. Methinks everything in this drawer needs a good washing.
All in all, not too shabby for a couple hours work.
On Monday, I washed and dried all the fabrics from the bottom drawer and spent the evening untangling the big mess from the dryer — talk about strings! After everything was folded, I sorted these fabrics too, some went into my panels cube while others went into color cubes. I found some fun stuff in that bottom drawer — 4 fabrics from a Cranston Elvis Blue Hawaii collection from way back when. Cool! A military panel I designed as a freelance designer for a fabric company a long time ago. There was Christmas fabric, too. What I didn’t love went into my bye bye box (or actually on top of it).
I haven’t gotten back to my corner clean up since Monday, but I plan to start getting my tasks written onto slips of paper and put into my very own Job Jar so I can start tackling the big jobs bit by bit.
I’m thinking about making myself a Reward Jar, too. I’d better not include any trips to the quilt shop to add more fabric, though. LOL! Maybe my Reward Jar will just have chocolate……
Well, that’s it for me this week. Wish me luck as I tackle my clutter one bite at a time.
I just got back from the grocery store – yikes, I cringe every time I go! Don’t you? The prices on everything just keep going up and up. And the more we quilters spend on groceries and such, the less we have to spend on our quilting passion. The good news is that we quilters have A LOT of different options available to help us for creating quilts. So, I thought, today would be a great day to talk about ways to get more bang for our buck when it comes to quilting.
Here’s you’ll find a useful list of ideas and inspirations to explore that go easy on your pocket, giving you a little bit more for a little bit less.
Buckle up! And let’s get started!
Villa Rosa Rose Card Patterns
Our newest patterns for August
Ha! You knew I was going to start off with this one, didn’t you? Of course, I am a huge fan and advocate of Villa Rosa patterns! They are inexpensive in price but big on style and quality! We have a wonderfully talented group of designers creating new patterns for you every month! That’s more than 60 new patterns a year. Nobody else in the world does that. Why do we do it? We do it for YOU! We’re quilters and fabric lovers, too, and we love to share our style and vision with you. From traditional to modern, from small projects to big bed quilts, we’ve got it all.
If you’re new to Villa Rosa, you can find our catalog of over 650 print patterns HERE or our digital pattern catalog HERE. We also offer tons of kits, fabrics, bundles, and more on our website, Villa Rosa Designs. Sign up for our newsletter and be the first to know what’s up with Villa Rosa, including our new patterns every month as well as markdowns on kits and fabric, and much much more. You can sign up for the Villa Rosa newsletter HERE.
Let us help stretch your dollar with $2 Rose Card patterns, sale kits and fabrics, AND free shipping on all orders in the US!
Embrace a Frugal Quilter Mindset – Why Budget-Friendly Quilting Rocks
Image created by Moi
Let’s face it, quilting can be a pricey hobby, but that doesn’t mean we can’t create stunning quilts without breaking the bank. Being a frugal quilter isn’t about cutting corners — it’s about getting creative and being resourceful!
Here are some GREAT reasons why budget-friendly quilting totally rocks:
More quilts, less guilt – When you spend less on materials, you can make more quilts without feeling guilty about the cost. It’s a win-win!
Upcycling magic – You can turn old clothes, bedsheets, or curtains into quilt masterpieces. It’s eco-friendly and gives new life to forgotten fabrics.
Scrappy happiness – You can embrace the charm of scrappy quilts. Use up those fabric bits and pieces and create unique, colorful designs.
Thrift store treasures – Let’s head out to scavenge secondhand shops for fabric finds. You never know what gems you’ll discover at bargain prices.
DIY tools – Think outside the box and make your own quilting tools. From DIY design walls to homemade templates, save cash and flex your creative muscles.
Skill-building focus – When we’re not splurging on fancy materials, we can concentrate on honing our quilting techniques. It’s all about the craftsmanship, not the price tag!
Community swaps – Go ahead and join local quilting groups or online communities for fabric swaps. Trade your extras for new-to-you fabrics and make new quilting buddies in the process.
Sales savvy – You can become a pro at spotting deals. Sign up for newsletters, follow quilting shops on social media, and pounce on those clearance sales like the quilt boss you are!
Piecing perfection – Challenge yourself to create intricate designs using simple shapes. It’s about the design, not how much you spent.
Stash-busting satisfaction – Use what you have before buying more. You might just be surprised – beautiful quilts can emerge from your existing fabric stash.
Treasure Hunting: Where to Find Inexpensive Fabrics and Supplies
Image created by Moi
Some of the best places to score inexpensive fabrics are at estate sales, garage sales, flea markets and the like. You never know what you will find. Keep in mind that the hunt can be just as rewarding and as fun as the actual find. Just be prepared to dig through boxes in search of those fabric treasures!
Don’t forget about remnant bins at the big box stores. These are usually filled with odd-sized pieces of fabric at rock-bottom prices. Perfect for smaller projects.
Another hidden gem is Facebook Marketplace. Lots of people sell their unused fabric stashes there, often in bulk and for a fraction of the original cost. Just be sure to ask about any pet or smoke odors before buying.
For quilting supplies, keep an eye out for going-out-of-business sales at local craft stores. It’s sad to see shops close, but you can snag some amazing deals on everything from rotary cutters to batting.
Lastly, don’t underestimate the power of coupons and loyalty programs at major craft retailers. Stack those discounts and you could walk away with a cart full of fabric for pennies on the dollar!
If you’re into upcycling, thrift stores can be a goldmine for inexpensive fabric options. Look for oversized clothing, curtains, or bedsheets that can be repurposed. You might find some unique patterns or high-quality materials for a fraction of the cost.
Check out online fabric warehouses. These sites often have clearance sections with deeply discounted fabrics. Just be sure to factor in shipping costs when comparing prices.
For those who don’t mind waiting, seasonal sales can offer huge savings. Many fabric stores have end-of-season clearances where you can stock up on holiday prints or summer cottons at bargain prices.
If you’re feeling adventurous, maybe you want to check out online auctions like eBay and/or in-person live auctions in your local area. Remember to practice buyer beware and ask questions, examine contents and/or photos closely, and read descriptions carefully before bidding.
What about joining a local sewing or quilting group? Members often swap fabrics or sell their excess stash at meetings. My guild has a free table. I’ve fund some wonderful goodies on that table over the years. Just sayin’……….
Upcycled Fabric Ideas: Turn Trash into Quilting Treasure
Image created by Moi
Got some old clothes lying around? Don’t toss ’em just yet! Let’s explore some awesome ways to breathe new life into those forgotten fabrics.
Denim jackets and jeans make killer quilt squares – those pockets are perfect for hiding little surprises. And how about those vintage printed tees? Add some interfacing, slice ’em up, and piece them together into a cozy memory quilt that’ll have you reliving the good ol’ days. But why stop there? Raid your closet for silk scarves, funky ties, or even those ugly Christmas sweaters. Don’t be afraid to mix and match textures for a quilt that’s as unique as you are. As an added tip – cotton bedsheets can make great quilt backings.
It’s all about getting creative and having fun. So grab those scissors, fire up that sewing machine, and turn your fabric graveyard into a quilting paradise. Who knows? Your next masterpiece might be hiding in that pile of clothes you were about to get rid of!
You can also add some pizzazz to your quilts with embellishments. Those spare buttons you’ve been hoarding? Perfect for adding texture and sparkle. And don’t forget about zippers – they can create cool, interactive elements on your quilt. Got some old jewelry lying around? Stitch on some beads or sequins for extra bling. Speaking of stitching (hand or machine), why not experiment with different patterns? Try some funky zigzags or swirls to really make your quilt pop. And if you’re feeling extra adventurous, throw in some applique. Cut out shapes from contrasting fabrics and layer them on top for a cool 3D effect.
Don’t stress if it’s not perfect. The beauty of upcycling is in the imperfections. Each wonky stitch tells a story, so go ahead – celebrate the quirks and let your personality shine through.
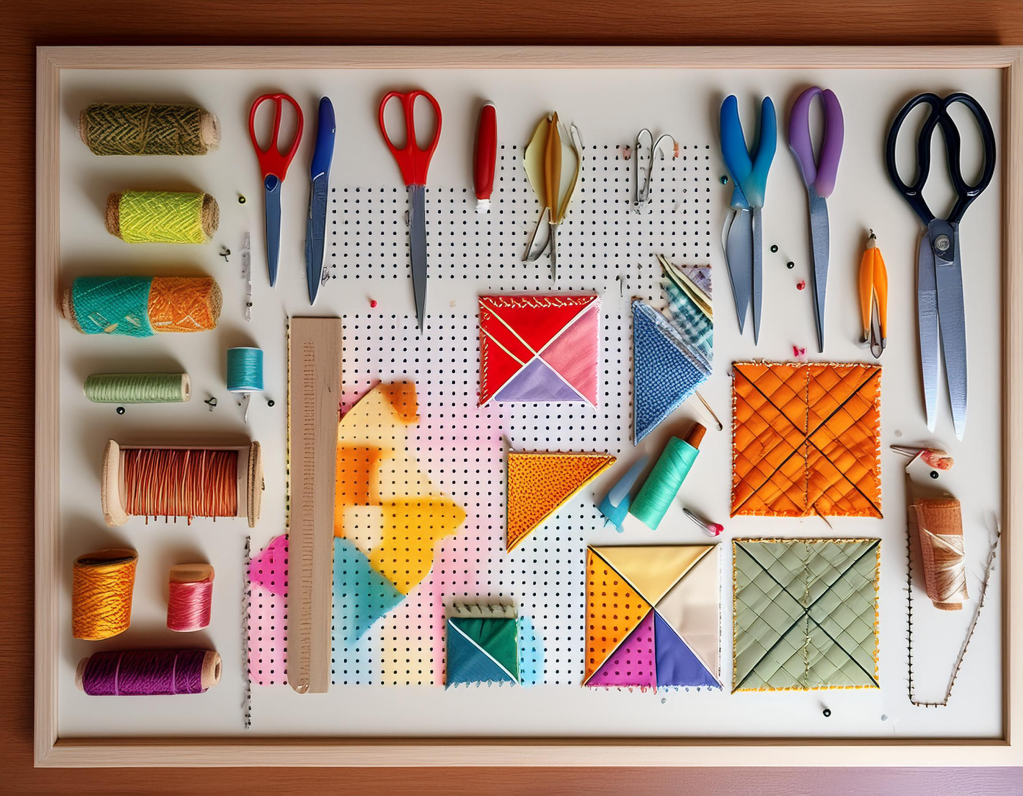
DIY Quilting Tools: Make Your Own and Save Big
Image created by Moi
Get ready to unleash your inner crafty genius and save some serious cash with these awesome DIY quilting tools! Who says you need to break the bank for fancy equipment? Here’s the lowdown on creating your own quilting supplies that’ll make your wallet happy and your projects pop.
Want a portable design wall? No problem! Slap some flannel onto a foam board, and you’re good to go. Or how about my favorite – a big flannel-backed table cloth hung on the wall?
Maybe some nifty fabric weights made from washers and pretty fabric scraps?
Or a homemade spray baste using simple ingredients you probably have on hand plus a little rubbing alcohol (or vodka if you prefer).
Next on our DIY list is a genius trick for making your own quilting clips. Just grab some binder clips and hot glue some felt to the edges – voila! You’ve got gentle, fabric-friendly clips that won’t break the bank.
What about the magic of a homemade seam pressing stick? A dowel rod, some batting, and muslin are all you need to create this handy tool for pressing those tricky seams.
These DIY solutions are not only easy on the wallet but also give you the satisfaction of making something useful and unique. So, roll up your sleeves, channel your inner MacGyver, and get ready to revolutionize your quilting corner. Who knew being frugal could be so much fun?
Scrap-tastic: Maximizing Your Fabric Scraps for Stunning Quilts
Image created by Moi
Let’s check out the world of scrap-tastic quilting! Who needs to buy new fabric every time you start every new project when you’ve got a treasure trove of scraps just waiting to be transformed? Sort those scraps by color and size first – trust me, it’ll save you tons of time later. Got leftover binding strips? Perfect for creating a scrappy binding that’ll give your quilt a fun, eclectic edge. Why not try your hand at improv piecing? It’s like jazz for quilters – no rules, just vibes! For larger scraps, consider whipping up some foundation paper piecing blocks. It’s a great way to use up odd shapes and create intricate designs without losing your mind. What about string quilts – they’re like the ultimate scrap-busting project? Grab your long, skinny strips and go to town!
But wait, there’s definitely more to scrap magic than just quilts. Turn those fabric bits into cute accessories like scrunchies, headbands, or even a patchwork tote bag. Your scraps will thank you, and your wallet will do a happy dance. Grab that overflowing scrap bin and get creative!
Don’t forget about those teeny-tiny leftover scraps either. They’re perfect for stuffing pet beds (no thread or needles/pins, please) or making eco-friendly confetti for your next party.
If you’re really drowning in scraps, maybe you should host a swap with your quilty friends. One quilter’s trash is another’s treasure, after all!
The key to successful scrap quilting is embracing the chaos. Mix patterns, colors, and textures with wild abandon – that’s where the magic happens! And if you’re feeling really adventurous, why not challenge yourself to a scrappy quilt-along? It’s a great way to connect with other fabric hoarders, ahem, quilters, and get inspired by their creations.
Speaking of treasures, keep an eye out for vintage fabrics at thrift stores or yard sales. They can add a unique and special touch to your scrap projects and give new life to forgotten textiles. And hey, if all else fails, you can always use your scraps to practice your free-motion quilting. Who cares if it’s not perfect? It’s all about the journey, right?
Quilting on a Shoestring – Your Wallet and Creativity Will Thank You!
Alright, people, we’ve reached the end of our thrifty quilting journey so you can unbuckle your seat belts now!
Who knew you could create such stunning masterpieces without breaking the bank? By now, you’re probably itching to dive into your stash of fabric scraps and start piecing together your next budget-friendly quilt.
Quilting on a shoestring isn’t just about saving money – it’s about unleashing your creativity and making the most of what you’ve got. So, enjoy those wrinkled mismatched fabrics, repurpose those old clothes, and let your imagination run wild! Whether you’re a seasoned quilter or just starting out, these money-saving tips and tricks will help you keep your hobby alive without emptying your wallet. And hey, think of all the extra cash you’ll have for, I don’t know, more fabric? Uh huh…….
Don’t forget that thrifty quilting is also eco-friendly quilting. By repurposing fabrics and using what you have, you’re reducing waste and giving new life to materials that might otherwise end up in landfills. Pat yourself on the back for being both budget-conscious and environmentally savvy!
Lastly, don’t be afraid to experiment with unconventional materials. That old curtain with an interesting pattern? Perfect for backing! Those worn-out jeans? They’ll make a sturdy, unique quilt top. The possibilities are endless when you look at the world through a quilter’s thrifty lens.
So go ahead, raid Grandma’s closet, hit up those yard sales, and get ready to stitch up a storm. Your wallet – and your creativity – will thank you for it.
Please feel free to comment with your own frugal and thrifty quilting tips!
That’s it for me this week. I’m off to play with my own fabric scraps to see what I an create.
As I write this post, I am still in Colton’s Point, Maryland with 2 of my (I want to say oldest here, but I don’t mean ages, I mean the number of years we’ve known each other) quilty pals, Leslie and Cathey.
I must confess that I am having a wonderful time here! Colton’s Point is a very special hidden treasure right on the Potomac River, it’s about 1.5 hours from Washington D.C. and a couple hours from Baltimore. Of course, we’re not here during any festivals or events, so it’s been quiet and peaceful — 2 things I’ve been craving for quite a while now. Too bad Leslie and I are only visiting Cathey and her husband, Bryon for 4 days — 4 days is barely enough time to unzip my suitcase, let alone unwind completely. Then again, not sure I could ever truly unwind completely, even if I tried — I don’t think it’s in my nature. LOL!
It was about a 7 hour drive to get to Colton’s Point from northwestern PA. Of course, Leslie and I do not live in the same area anymore, so we met about halfway in between. My sister, Tracy, kindly drove me to meet Leslie and then we were on our way! I rode shotgun and Leslie drove. I totally could not believe her car was getting 48.3 miles per gallon on average! Wowzer!
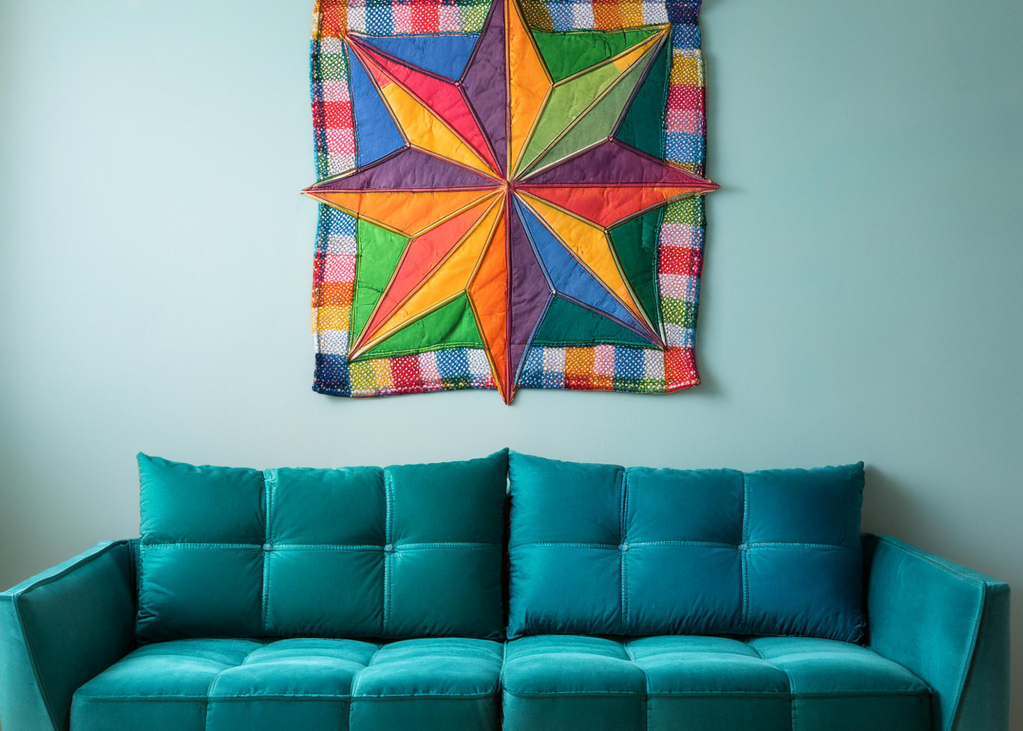
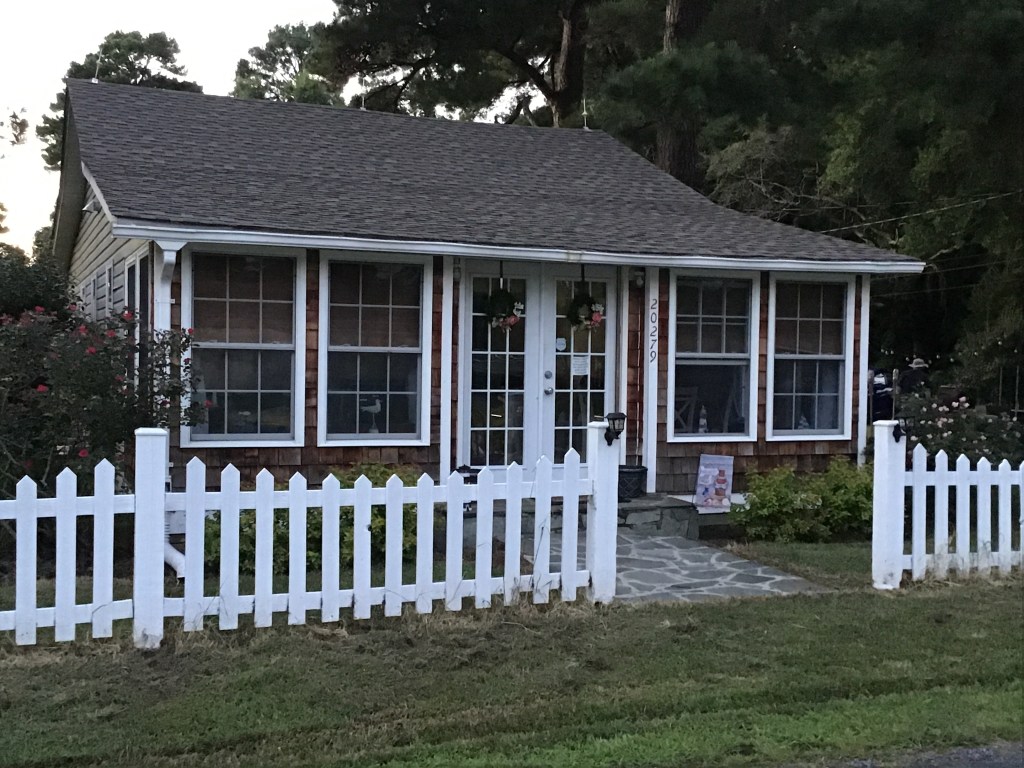
Here is Cathey and Bryon’s adorable cottage (it’s bigger than it looks as it is quite deep). It has a wonderful beachy vibe and is very welcoming.
One of the coolest things about their home is that mere steps away from their cottage is Cathey’s lovely quilt studio. This is, of course, where we definitely will be spending A LOT of our time together on our little “quilt retreat.”
Don’t you just love her barn quilt out front??? Cathey brought it all the way from PA when they moved here.
It didn’t take the 3 of us long to settle back into sewing together, although it’s been simply ages since our last quilt retreat experience. We certainly had a lot of catching up to do!
I know I packed too many projects to bring with me, but I wanted to be prepared. And I really wanted to do some free motion quilting — I have way too many unfinished tops, or flimsies, right now — so I brought along 3 table runners and my Whirly Bird top from last week’s summer tutorial to machine quilt. If you missed the Whirly Bird tutorial, you can find it HERE. I also brought a challenge project for the 3 of us — I think I’ll talk more about this project in next week’s post, though — I also brought several quilt kits in case I had time to do any cutting and piecing.
Luckily, Cathey has the same model of machine as I do — a Janome 8900 — so quilting on her machine felt a lot like quilting on my machine, although no 2 machines ever feel quite the same. In fact, Cathey is the person who got me into Janome machines, when she bought her first Janome 6260, it was such a nice machine, I had to get one too. Later she upgraded to a 8900, and so did I.
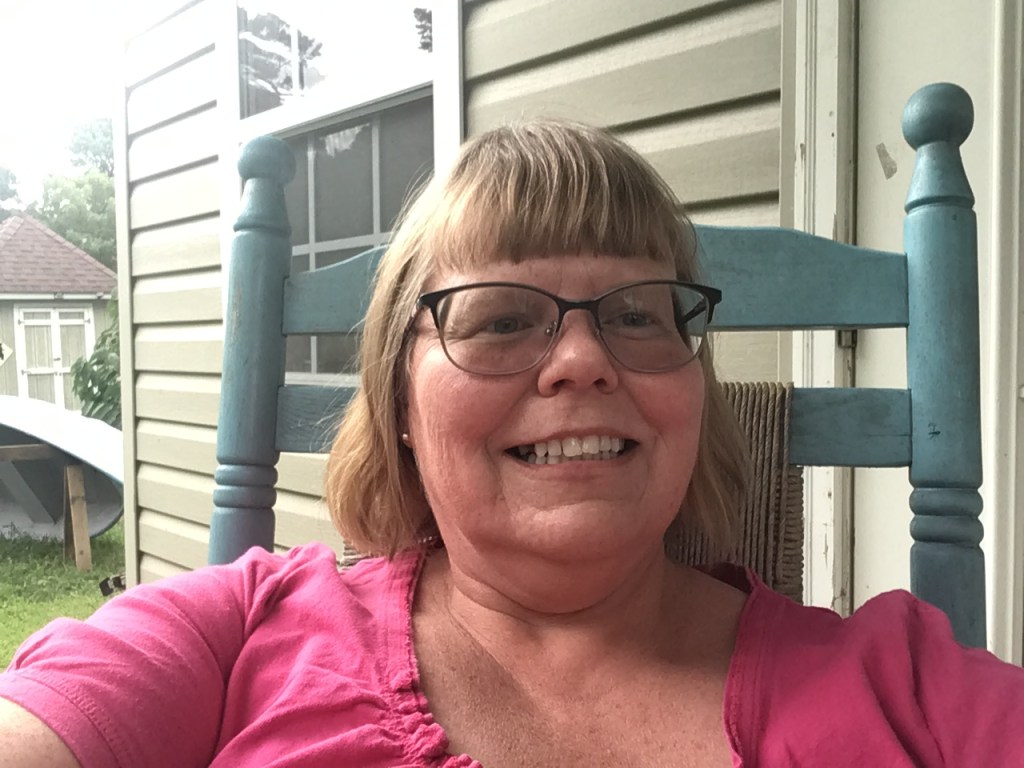
Here I am sitting on Cathey’s studio front porch, just chilling for a few minutes.
Here is Cathey, working on cutting out some projects.
Here is Leslie working on a second version of a quilt she designed several years ago.
Here is the view from where I am sitting in front of Cathey’s 8900 while I machine quilting Whirly Bird.
I think I’ve mentioned before that Cathey is a quilter/designer and is the owner of Cathey Marie Designs.
And after a long hiatus from quilting when life happened, Leslie is getting back into quilting once again.
And you all know little ol’ me. LOL!
Cathey, Leslie, and I have all designed quilts for magazines, too.
We’ve been trying to figure out when we first met and Leslie thinks it was 2007. Both Leslie and Cathey were relatively new quilters when we met on a bus trip to Chautauqua Institution in New York for Quilting Around Chautauqua. Cathey and I had met in the summer when I was seated behind her on the bus for our local Shop Hop. It was both our first Shop Hop. Those meetings led to many Shop Hops and quilting road trips, along with some quilting retreats (and staying in a cottage at Chautauqua for Quilting Around Chautauqua with our quilty pal, Mary Lee — HEY MARY LEE!) sprinkled in for good measure. But as things happen, life got in the ways and over time we didn’t spend as much time together. How wonderful to spend 4 days together quilting, sewing, catching up, and eating (yep, who can forget eating??).
The Potomac River….and Quilts!
We walked down to the river just to take it in, but we didn’t have a lot of time to soak it all in, as thunder started to rumble in the distance and before we arrived back at the cottage, it had started to rain.
What really amazed me was how wide the Potomac is right here at Colton’s Point! I could barely see the land on the other side of the river (which just so happened to be Virginia). I tried to find out how wide the Potomac was at Colton’s Point but could only find that the widest section was around 11 miles across and that was farther down towards Chesapeake Bay.
Do you see the little island there on the right beyond the pier? That is St. Clements Island, which is where the first settlers to Maryland landed in the 1600’s. Of course, back then the island was something like 10 times larger!
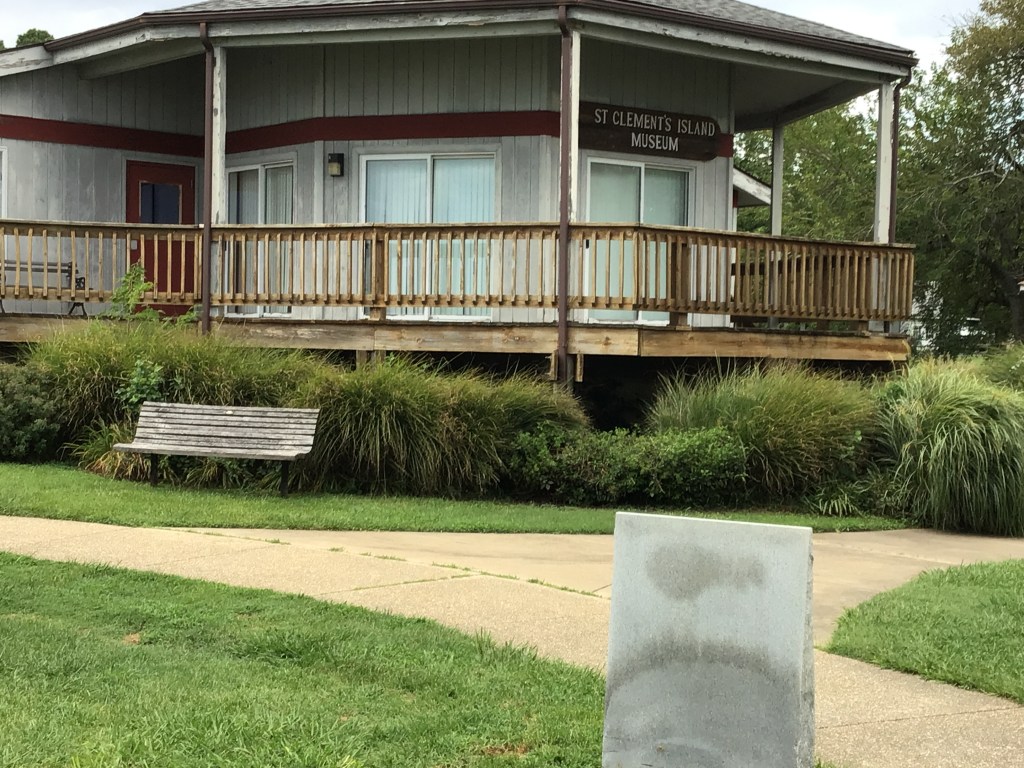
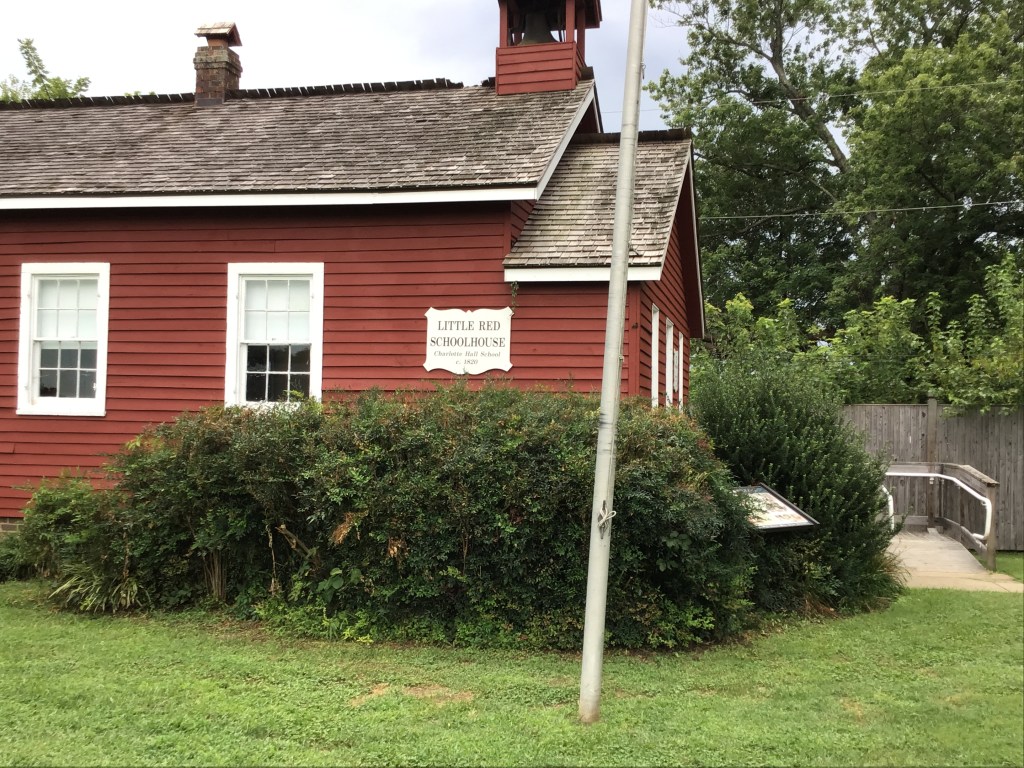
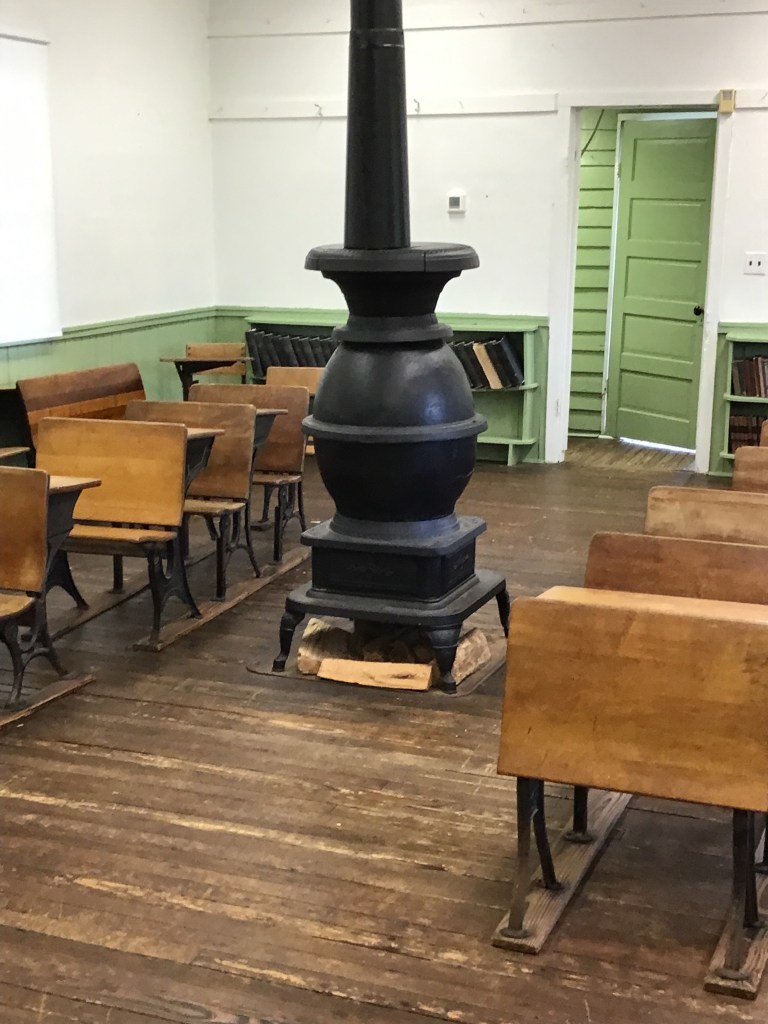
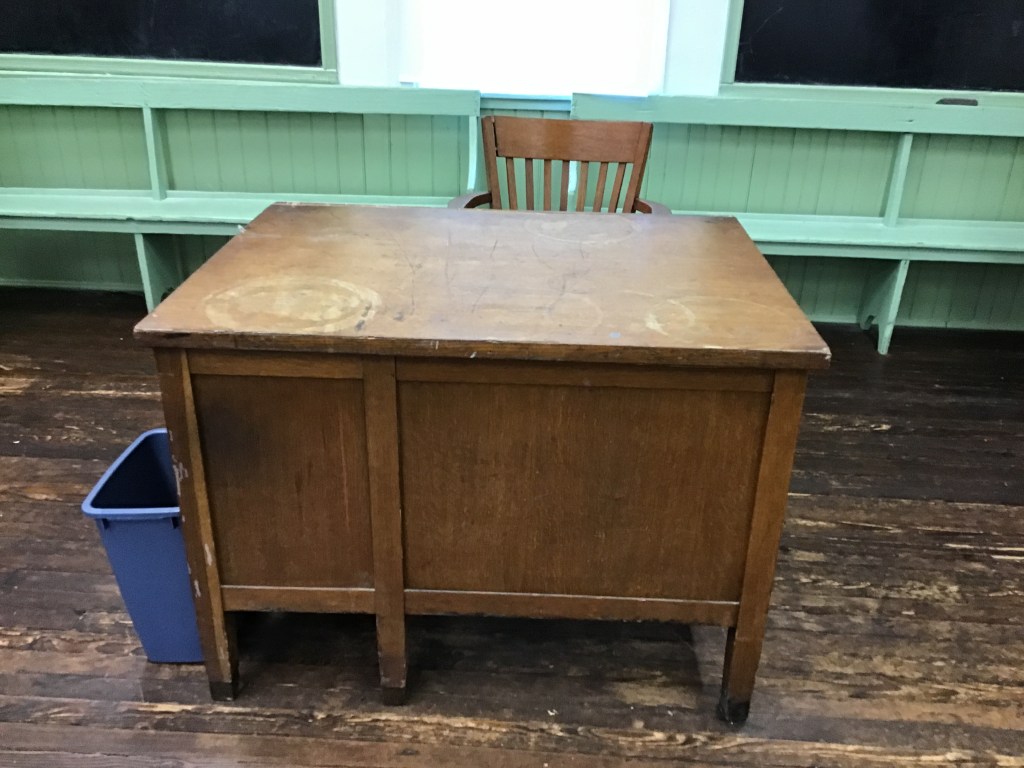
You can find the St. Clement’s Island Museum Campus down near the river. And on the museum grounds is a lovely Little Red Schoolhouse, built in 1820. We were able to go right into the schoolhouse, which is used for school field trips and events. It was like stepping back in time to Little House on the Prairie……
As a former children’s librarian, I was thrilled to see a Little Free Library right outside the Little Red Schoolhouse!
The next day, Bryon kindly shepherded Leslie and I back to the river, this time out on a pier, to witness the sunset. I was a little apprehensive walking out on the boardwalk to the pier, but I really wanted to have a front row seat for the sunset. Mother Nature did not disappoint! Not at all! My, what a sight! We also went to see the sunset again Wednesday night.
Tuesday night’s sunset.
Wednesday night’s sunset.
And on Wednesday afternoon, I wandered back down to the pier for more photos, taking the 2 runners I quilted, Whirly Bird, and the Discovery top I had just completed (stay tuned for a Discovery tutorial next week).
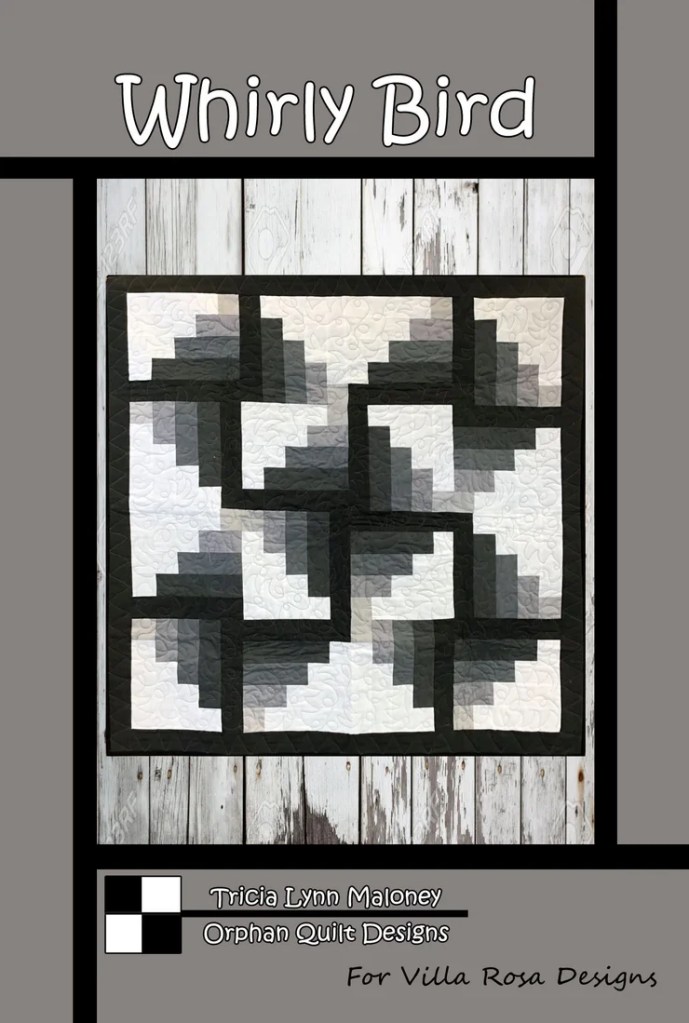
Here is my Whirly Bird quilt from last week’s tutorial! I haven’t added the binding yet, but it still looks beautiful. Being down at the river was really peaceful — I felt like I was the only person in the world for a little while, which really was priceless. I felt like I could really breathe here.
Get your own print Whirly Bird HERE or digital Whirly Bird HERE.
Here are 2 of the 3 table runners I brought with me to machine quilt. The one on the right is Molly’s Amen runner and the runner on the left is a variation of Amen.
You can get your own print Amen HERE or digital Amen HERE.
And here is my Discovery quilt top. I did a couple photos down at the river, but I think the autumn colors looked better on the picket fence in front of Cathey’s cottage.
Get your print discovery HERE or your digital Discovery HERE.
Sadly, Leslie and I are heading home in the morning, but we will be back. Soon.
Just one more photo…………
Well, that’s it for me this week! Stop back next week for a final Summer Tutorial.
I hope your summer is still going strong and you are getting to do the things on your summer bucket list.
This has been my busiest summer since before the Pandemic, that’s for sure. I’ve been doing things I haven’t done for years — gardening, the adult summer reading program at my local library (I even won a nice prize at the program potluck last week!), I’ve been to Presque Isle Park (Lake Erie) twice so far, made multiple trips to the big farmer’s market in Erie (PA), and even visited a relatively new local museum I’ve never been to before. Luckily, I’ve been making quilt tops for our Summer Tutorial series so I’ve even gotten in some fun sewing. Yay!
The only issue with my busy crazy summer is that I’ve been neglecting a lot of things at home and in my studio space. So I guess I’ll have a lot to catch up on this fall. Sigh………..
Road Trip
Artwork by moi
This Sunday, I’m even going on a summer road trip with my friend, Leslie — Hi Leslie! — to Maryland to visit our friend, Cathey — Hey Cathey!
Looks like we’re going to have a good old-fashioned quiltathon/quilt retreat like we used to do years ago at Chautauqua Institution (Chautauqua NY) during Quilting around Chautauqua every September (sadly, the amazing quilt weekend is no more….). The three of us along with our other quilty pal, Mary Lee — Hey Mary Lee! — would rent a cottage and start our quilt weekend on a Wednesday so we could have a quilt retreat as well as enjoy the show on Saturday and Sunday. Ahhhhh, those were the days.
I can’t wait to catch up with these gals because we’ve all kind of gone in different directions since Chautauqua.
I’ll tell you all about my adventures in next week’s post, so stay tuned until then.
Now let’s continue our Summer Tutorial series with an oldy, but a goodie — my pattern, Whirly Bird.
VRD Whirly Bird Quilt Tutorial
Today we’re going to have a little fun with Whirly Bird. Have you made this quilt yet? If so, please please please share it on our VRD Facebook page ’cause I’d really like to see them!
If not, it’s fun and fast (of course) and has a lot of room for creativity.
Get your print Whirly Bird HERE or your digital Whirly Bird HERE.
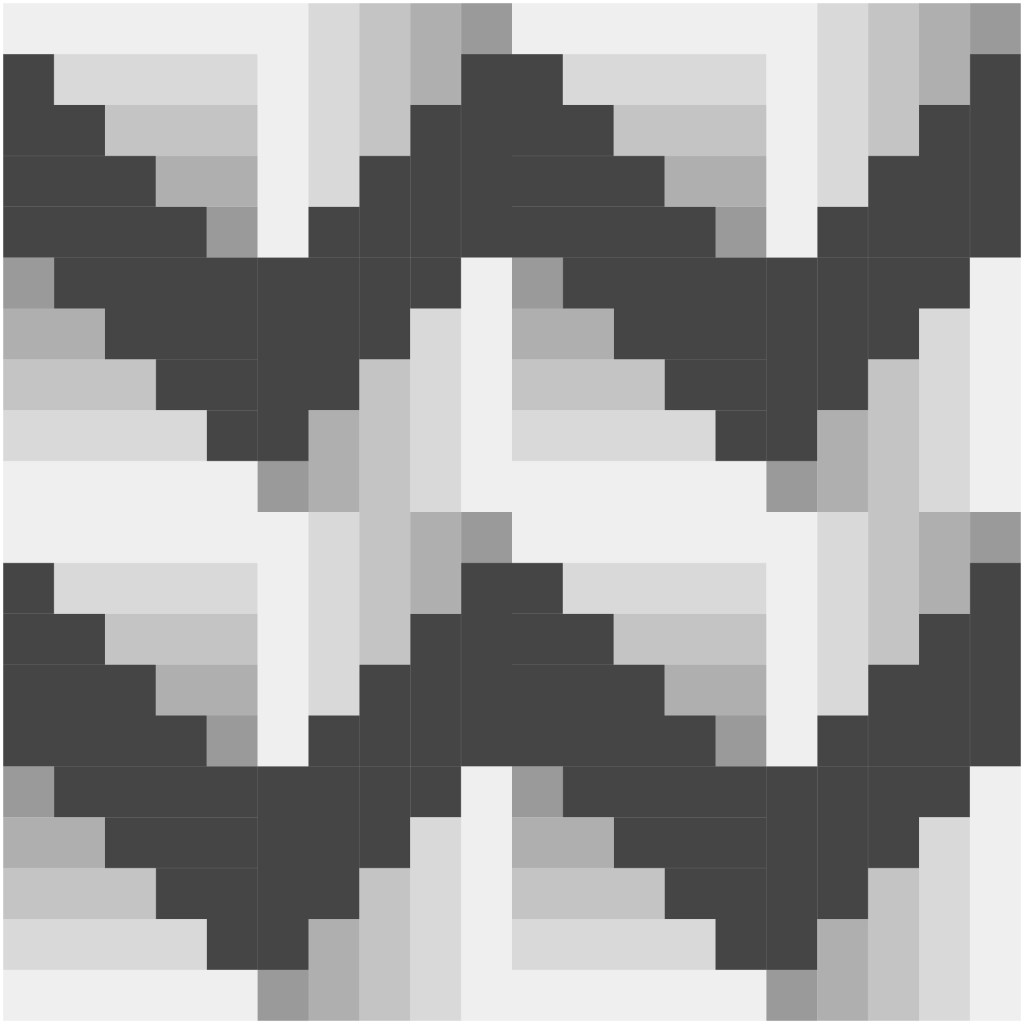
When I designed Whirly Bird, I really wanted to do a gradation quilt featuring black, grey, and white. It turned out to be a pretty cool quilt with a very modern feel, which was what I was going after.
Let’s change things up today by swapping the lights and darks! I think you’ll be really surprised when you see the finished top.
So let’s get this party started, shall we?
For today’s Whirly Bird, I am using the Touch of Grey collection by our quilting partner, Hoffman Fabrics. Yep, I’m sticking with a neutral theme for this version, but that’s really where the similarities end.
The charcoal fabric at the bottom of the photo will be my background fabric and the 5 light fabrics in the center at the top will be the gradation strips in the quilt. The border is on the left and the binding is on the right.
The first thing we’re gong to do is cut the fabrics according to the pattern, but swapping out the dark charcoal for the background (or light) fabric and the light greys for the graduated grey strips.
While I cut, I am organizing my pieces on a flannel board so that I have the correct background piece paired with the correct light grey strip. Want to make your own flannel board? You can find the tutorial HERE.
By arranging my pieces on my flannel board in order, I can simply take the board right to my sewing machine and start sewing immediately.
So let’s do that!
Let’s sew the charcoal background pieces to the corresponding light grey strips. This step went really fast because I used chain piecing for each pair for each block, stacked them back on my board, and then moved onto the next pair.
Moving right along, we’re going to head to the ironing board. I pressed my seams to the dark, but this doesn’t work perfectly all the time. So press your seams in a way that makes sense to you.
A note about pressing — I don’t usually give directions for pressing seams in tutorials and even on my patterns because every quilter has their own way of doing things. For me, I usually make those decisions on the fly as I sew. I usually do press to the dark, but sometimes I find that when sewing the the pieces of a block together, I have to flip my seams to the other side.
Wanna hear a joke — an old favorite of mine?????
What has a light side, a dark side, and holds the whole universe together???
Keep reading to find the answer. Tehehe!
After I pressed each strip pair, I put them back on my flannel board to keep things neat and tidy.
And….back to the sewing machine!
Next we are going to sew the pieced strips together into a block. One word of caution about having your pieces laid out on your flannel board — make sure you have them laid out in the right order or else your blocks won’t turn out the way you want them to. As a lefty, I sometimes have to double and triple check block or even quilt layouts before I sew the pieces together because it’s just too dang easy for me to flip things the wrong way.
I used chain piecing to sew the blocks together. This process went super fast as I made all the blocks at one time, one step at a time, without stopping to press in between.
Now, back to the ironing board to give these blocks a good press. I like to press the seams from the back first. Then I repress the block from the front, making sure everything is nice and flat.
Remember, we PRESS in quilting, we do not IRON. Need a little refresher on pressing vs. ironing? Check out a blog post about pressing techniques from our 2022 Quilting Basics series HERE.
Woohoo! The blocks are done and pressed — let’s arrange them on my design wall!
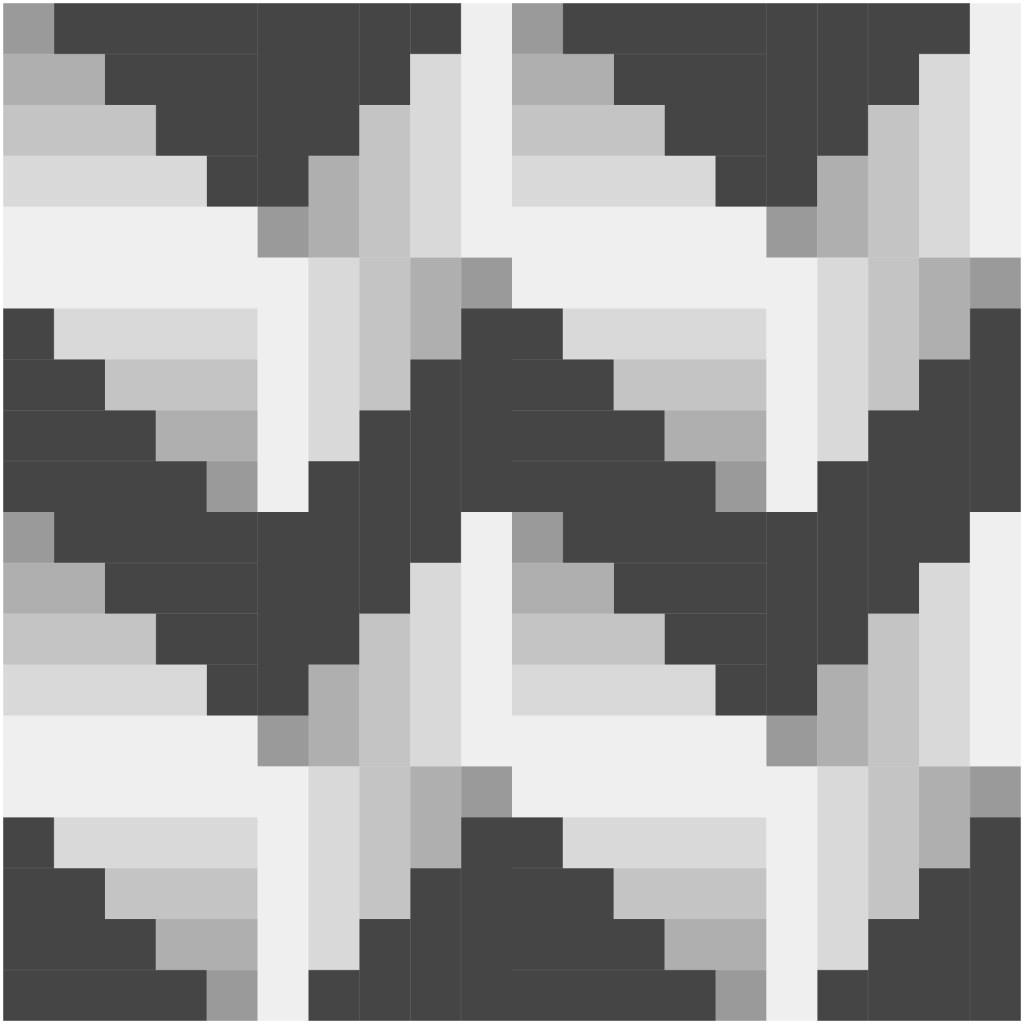
This is the same arrangement of blocks as in the original Whirly Bird quilt on the front of the pattern. Wow! What a difference when you swap the lights and darks out in this design! What do you think???
This is just one of many arrangements. Here are some other possibilities to give you food for thought when you make your own version of Whirly Bird.
I bet you could even come up with 1 or 2 more!
I decided to go with the original arrangement, so now let’s sew the blocks into rows and then sew the rows together.
LOVE LOVE LOVE IT! Especially the repeating little pop of grey print in the middle of the light grey tonal strips — yep, I planned that on purpose for added interest. 🙂 I really like how those center print strips flip up, down, and sideways in the blocks — it really does add a bit of a secondary design and helps move your eyes around the quilt.
Next up, we are going to add the border, although this quilt doesn’t have to have one — it would finish beautifully with a dark binding to frame the blocks. But, we’re adding a border.
Sew the sides on first and then add the top and bottom. For more added interest, I added dark fabric squares in the 4 outer corners. This is a little bit different than the original pattern, so let me tell you how I did it:
As this quilt is a square, I cut 4 borders the same length as my quilt top through the center and the same width as the pattern calls for as well as 4 squares. I sewed border strips to the sides of the quilt center. Next I sewed dark squares to both ends of the remaining 2 borders and then sewed them to the top and bottom of the quilt center. Easy piezy!
If you don’t want corner squares, though, simply cut and sew the borders like you normally would.
Here it is — my completed Whirly Bird quilt top. I really like how the dark corner squares connect to the dark block sections in all 4 corners.
What are your thoughts?
I’m planning to take this quilt with me to Cathey’s — I hope to get some machine quilting done. Fingers crossed……………
DUCT TAPE!!!
See you back here from Maryland next Thursday and I’ll tell you all about my trip. I hope Cathey’s hubby, Bryon, is doing all the cooking while we quilt, gab, laugh, and eat chocolate.