
Hello Quilty Friends!
Happy Thursday to you!
Today is a kind of blah day — raining off and on, overcast, and grey — not what I’d call a typical summer day at all. It’s been looking more fall-like here in NW PA. In fact, I was looking at one of the maple trees in the back yard yesterday and I actually saw the leaves starting to change on ends of several branches. As much I hate to see summer going, I do love autumn. What’s your favorite season?
As I’ve mentioned before, I get fall fabrics on my brain this time of year! Then I can’t wait to start making fall quilts. What better day than a dreary one to share an awesome FALL tutorial with you? And you can’t get more fall than October Sky!

Get October Sky HERE
October Sky VRD Tutorial
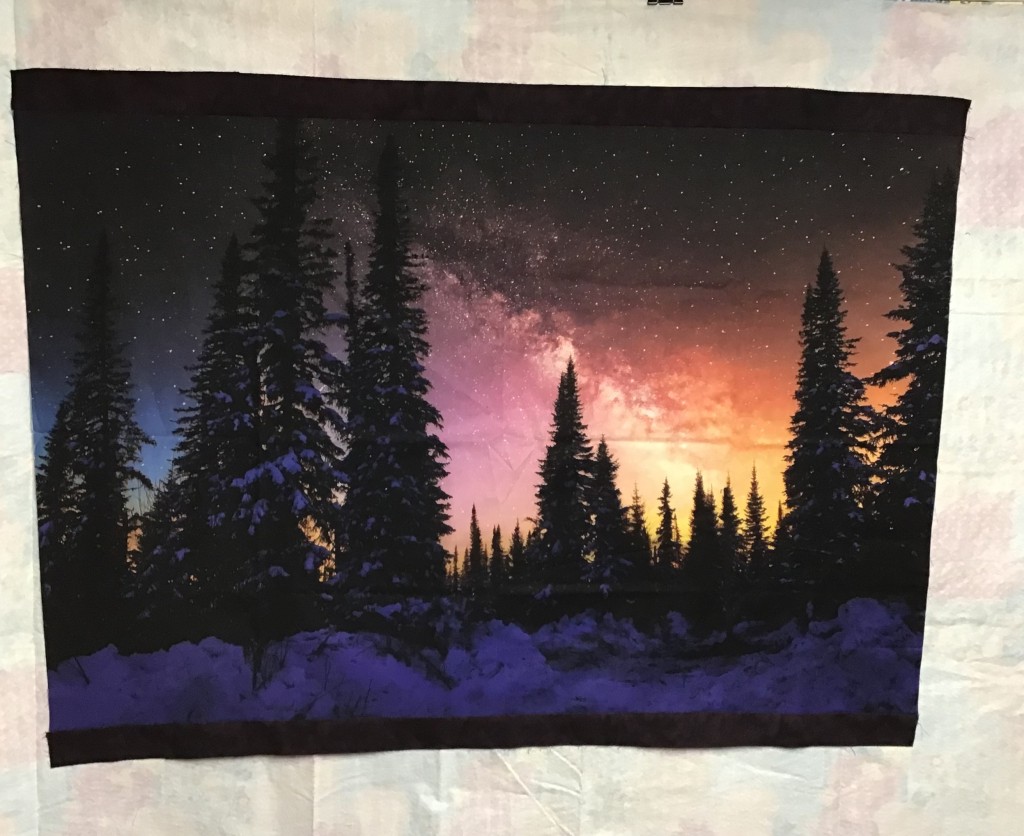
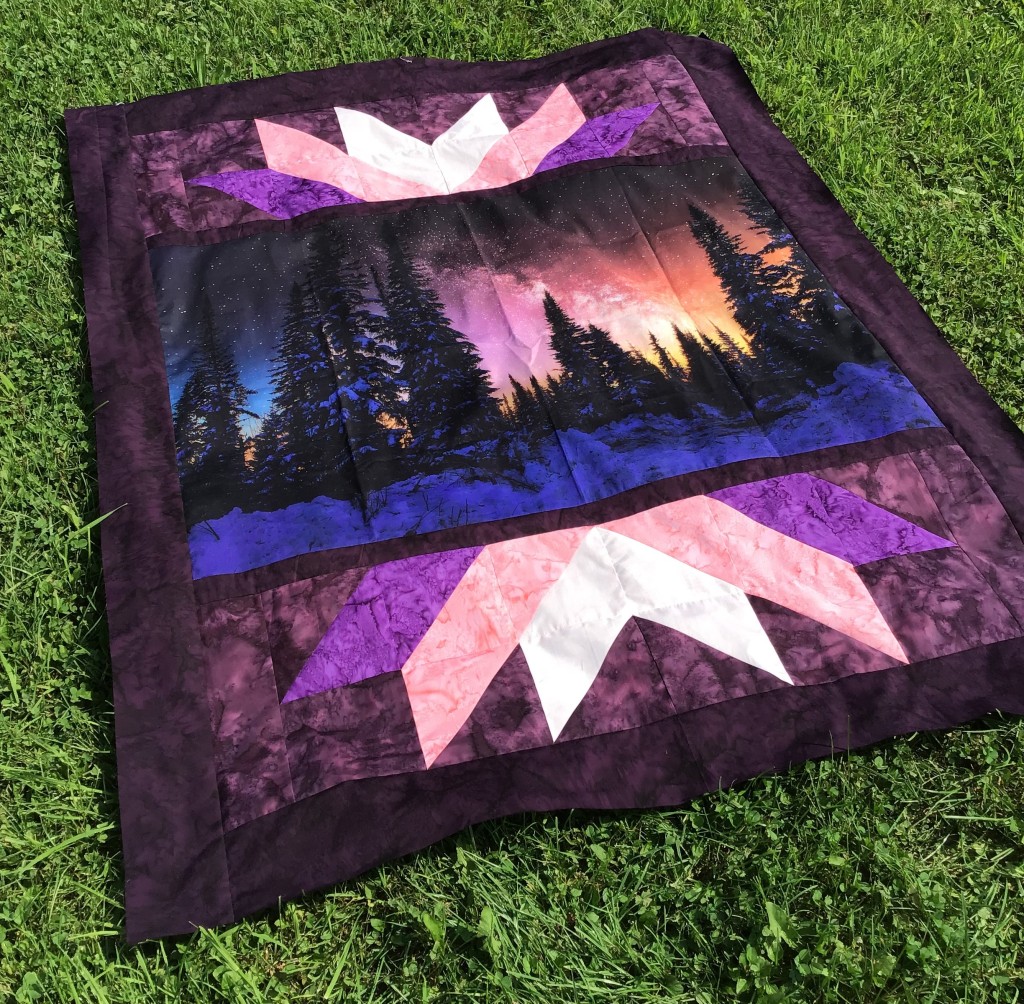
Don’t let the name of the pattern fool you — you can use any kind of horizontal panel — any one your little hear desires. I’m not using actual fall fabrics for this quilt, but to me, it still feels like a fall quilt. I think it’s the jewel-tone colors. Take a look at these yummy fabrics from Hoffman California Fabrics, one of our quilting partners. The digital panel is called Nightshade and the fabrics are coordinating 1895 Watercolors batiks. Simply scrumptious!


Let’s get started!
1. Trim the selvages off your panel. Horizontal panels can vary slightly so it doesn’t hurt to do a quick measurement of your panel, then you’ll know how it compares to the pattern. You don’t really need these numbers right now, but if your panel is not as wide as the pattern, you will need to make a small adjustment a bit later in the construction process.

2. Cut your border strips for the top and bottom of the panel and sew them on.

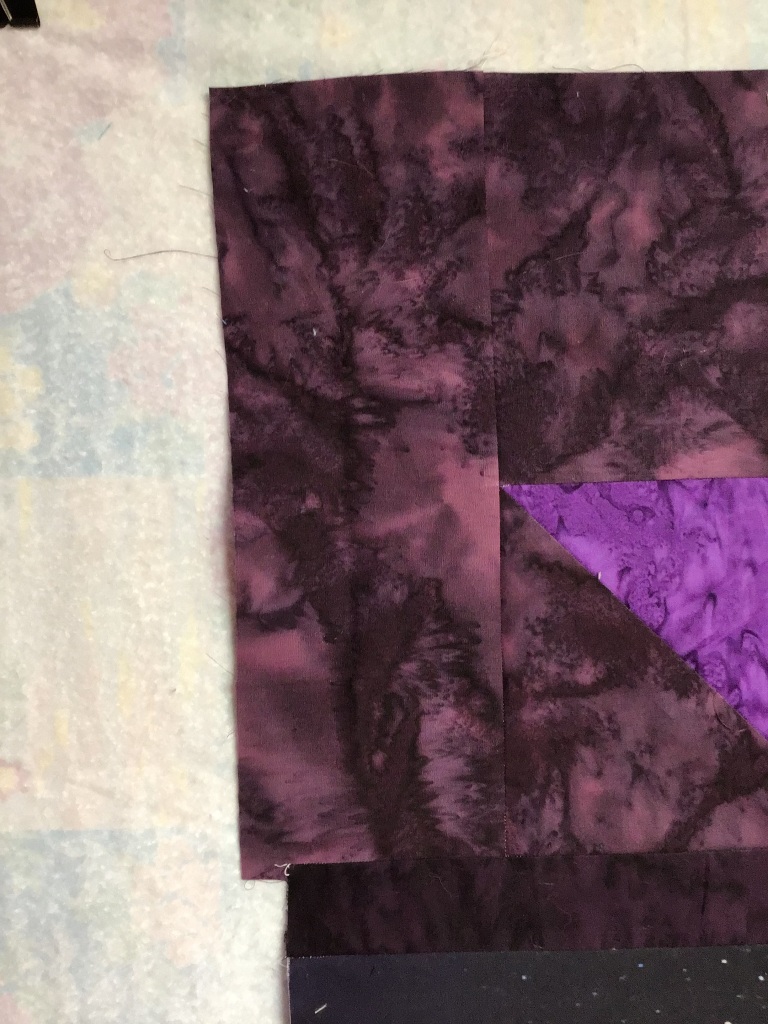
3. Now we are going to cut out the squares for the pieced sections at the top and bottom of the panel. I just love these 1895 Watercolors batiks — they go with everything. The dark plum in front is my background.

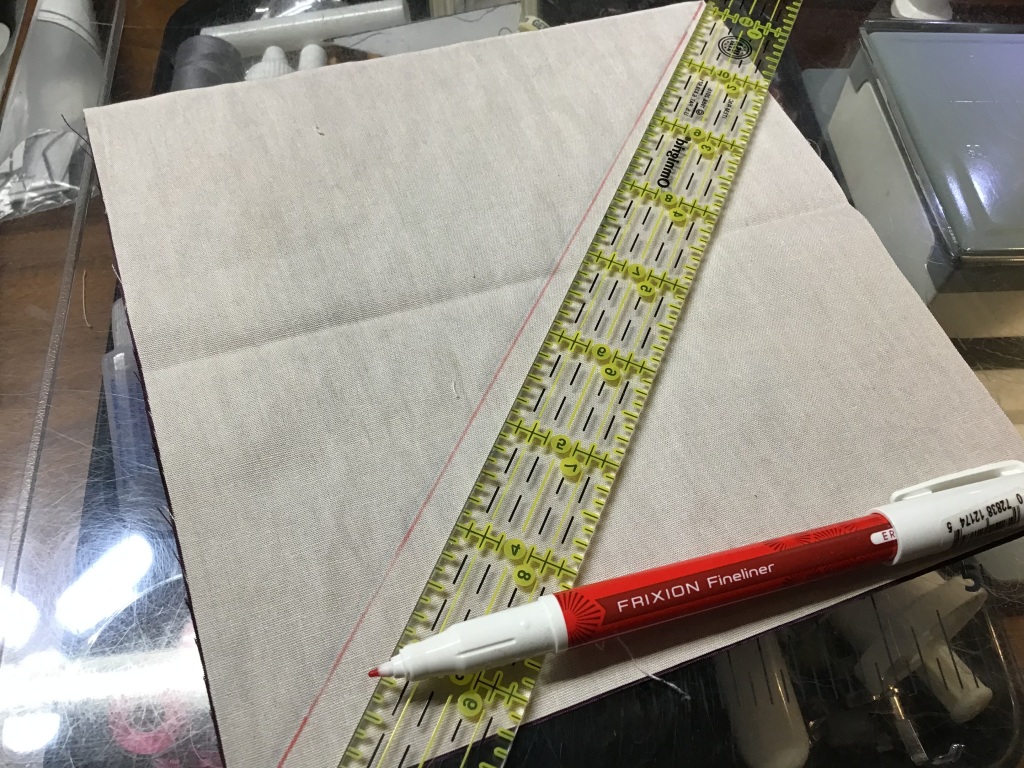
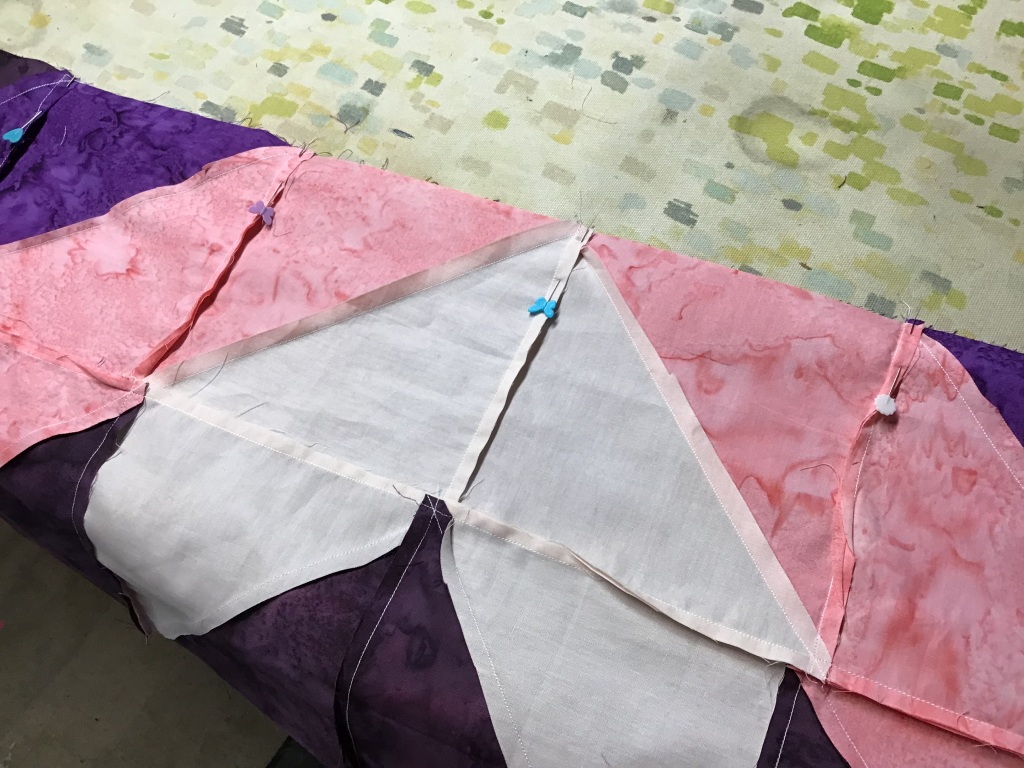
4. Time to make some Half Square Triangles, or HSTs. Layer 2 squares right sides together, drawn a diagonal line from corner to opposite corner. Sew 1/4″ away from both sides of the drawn line. Cut apart on the drawn line and press open.


5. Having a flannel board — or in my case, the back of a flannel tablecloth clipped to my wall cube unit — to arrange the HSTs makes getting the arrangement right the first time much easier to accomplish.
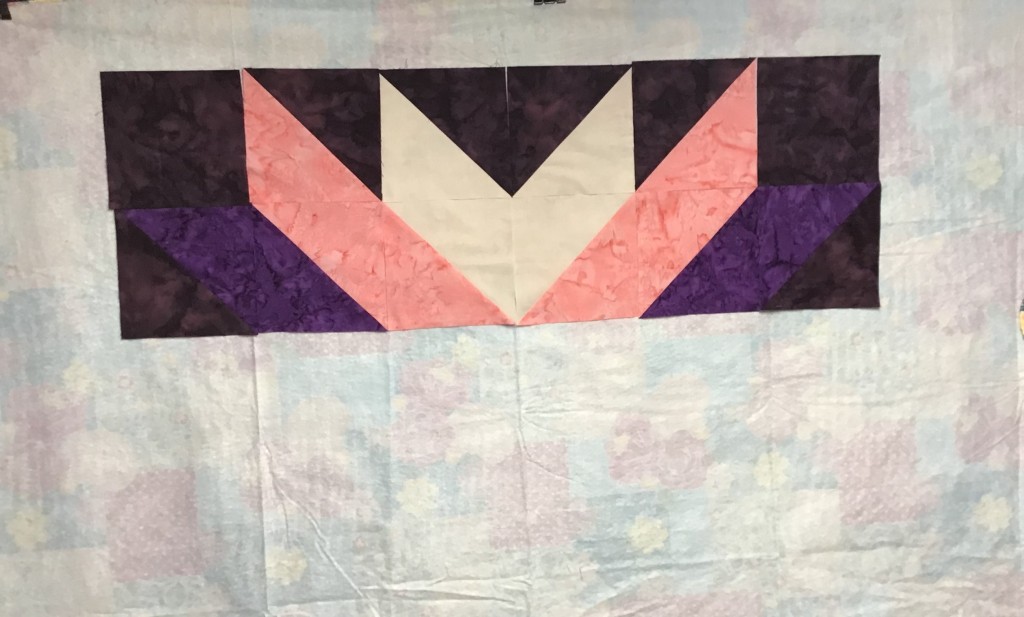
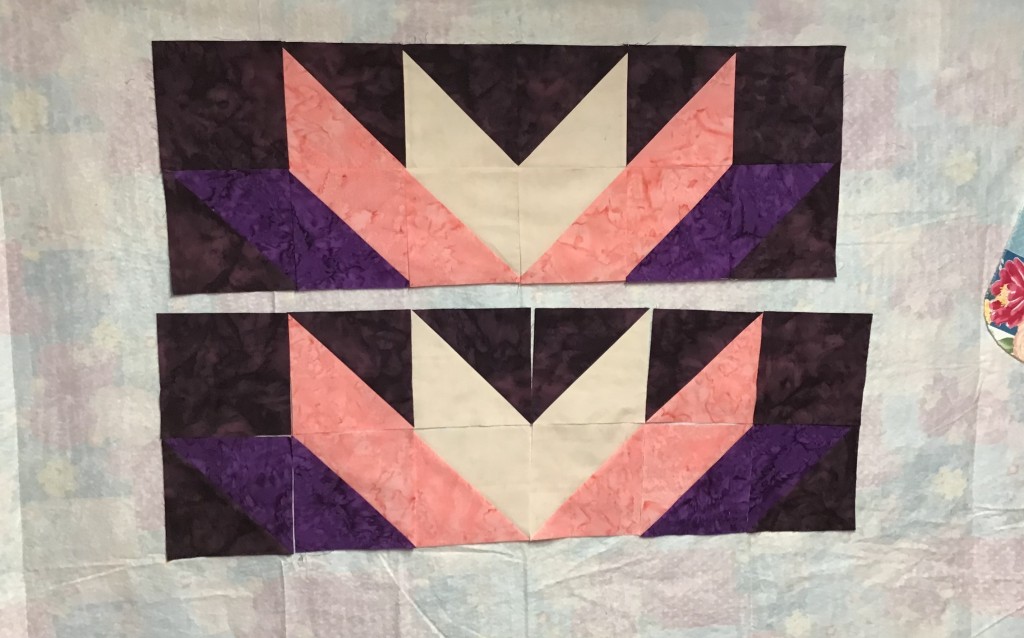
6. Sew the HSTs together. Make 2 identical pieced sections. You will be flipping one upside down to sew t the bottom of the panel. It makes an interesting design even without the panel in the middle though, doesn’t it?

7. Refer back to your panel measurements. If your panel is not as wide as the panel measurement in the pattern, you may need to add a little extra width to the side background rectangles. To be on the safe side, I added an extra 1″ or so to the side rectangles just to make sure my pieced sections would be wide enough because my panel wasn’t quite the same size as the one listed in the pattern.
It’s okay if the side rectangles make the pieced sections a little wider than the panel — you can trim and square things up in a later step.
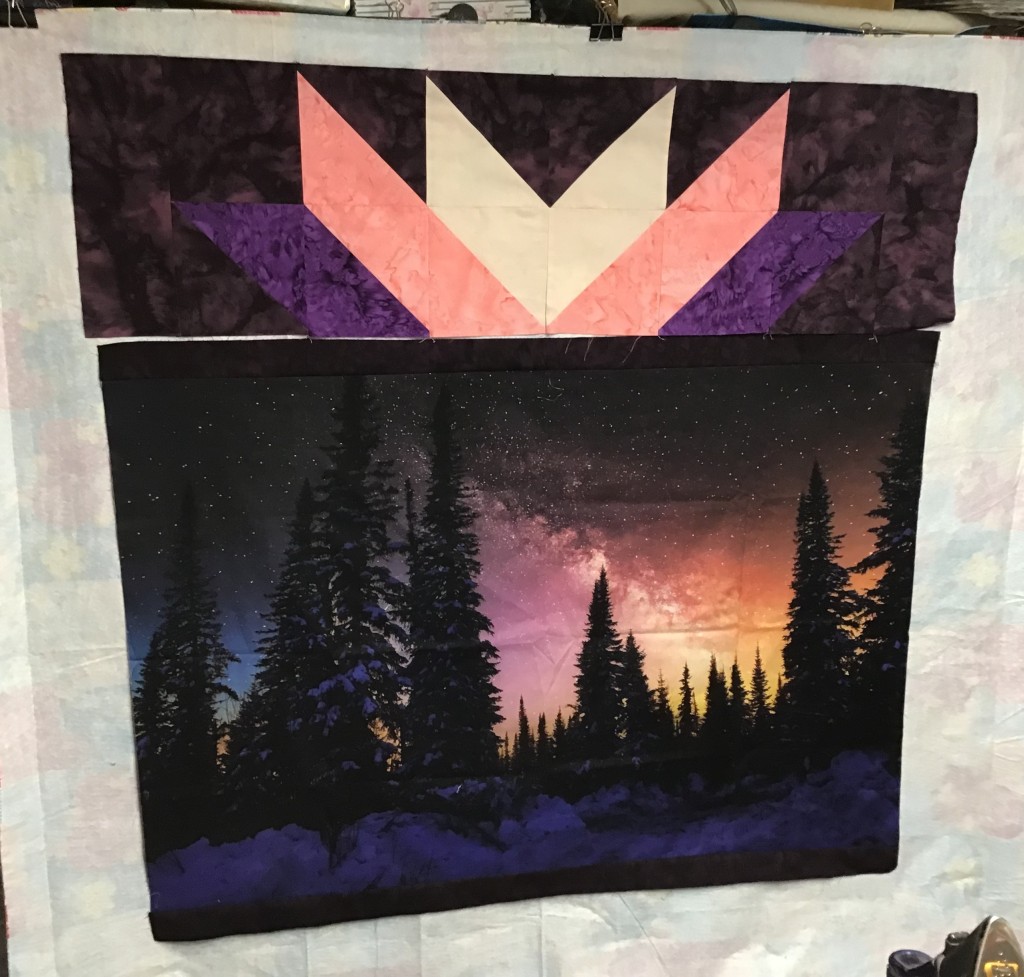
8. The most important part of this step is to find the centers of both the pieced sections and the panel. Then match those centers up before sewing because nobody wants off-center sunbursts! LOL!
Once you’re happy with your placement (I used pins to keep everything lined up just right), sew the pieced sections onto the panel. Lookin’ good!

9. Now it’s time to trim and square up the sides of the pieced sections. Ahhh! Much better!


10. Time to add top and bottom borders. I actually increased the width of my borders a couple inches to make the quilt just a little bit bigger as a throw. Do the same if you’d like. Just keep in mind, you might need more fabric if you increase the width of your borders.
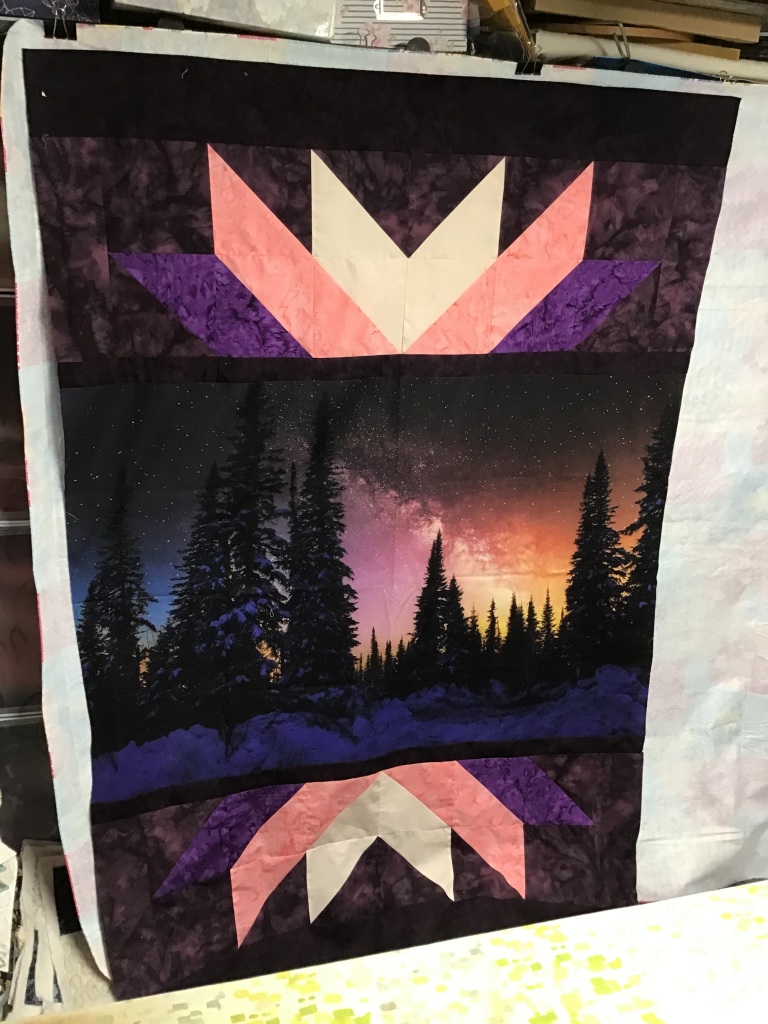
11. Ready to add those side borders now? You will need to piece those side borders to make them long enough. VOILA! The top is done!

Since I couldn’t get the breeze to cooperate with me, I took another photo of the October Sky out flat. Gorgeous, isn’t it? The colors are so rich and yummy.
12. The next steps will be layering, quilting, binding, and labeling the quilt. And then….another VRD quilt DONE!
I hope you enjoyed this tutorial! I’d love to see your October Sky quilts — you can post them on our Facebook page HERE or drop me an email if you’d like. And there will be more fun VRD tutorials coming, so stay tuned!
Well, that’s it for me. See you next week!
Sew. Laugh. Repeat.
Always,
Tricia

so far, was be 8 hours to type to to. please help me
LikeLike
Hi Valerie, I’m sorry you’re having difficulties, but I do not understand your comment and what you need help with.
LikeLike
I’m sorry, I had a stroke and it is difficult for me to convey my problem. I will try again at a later time.
Sincerely,
Valerie
LikeLike
Hi Valerie, please feel free to email me at tricia@villarosadesigns.com if there’s anything I can help you with.
LikeLike