
Hello Quilty Friends!
Happy Thursday to you!
Hope you enjoyed last week’s post about the quilt show I attended. I’m still smiling. 🙂 If you missed last week’s post, you can go HERE to see the fun slideshow I created with some of the amazing quilts on display at the quilt show.
Before we get to this week’s tutorial, Berry-Licious — which is lots of fun and very timely — let me tell you a little bit about the inspiration for this table runner. In my area of Northwestern PA, we always look forward to late spring/early summer for a lot of reasons, but one of my favorites are the local strawberries, which are only available for a few weeks in June. Yum, yum, yummy!
When I was a kid, my older sister and older cousins (I was too little) all worked at a local strawberry farm, picking berries. They would meet in town at like 6 AM, and someone from the farm would pick up the kids and drive them to the farm outside of town. Horrors! The kids actually road in the back of the truck to the farm! Then the kids would pick berries for hours, and got paid per quart that they picked. My sister only did it once because it was such hard work, but my older boy cousins did it every summer all through high school and were often the best pickers. The work only lasted 2 or maybe 3 weeks right after school was out for the summer. If you were a teen in my area, this was kind of a rite of passage. I don’t remember if when I was old enough to pick berries, kids didn’t do it anymore or if I just wasn’t interested, but picking strawberries was a rite of passage I never did.
Strawberries have always been one of my favorite fruits, though. When I was really little, we even had a tiered strawberry patch in the backyard. My Mom (Hey Mom!) would make the most delicious strawberry jam and we’d enjoy that all winter long. If I close my eyes I can almost taste it and my mouth is watering, just remembering….
Ahhhh, good times.
VRD Berry-Licious Table Runner Quilt Tutorial
Have you made Berry-Licious yet? It’s a fun and very satisfying runner. You can grab your very own Berry-Licious Rose Card print pattern HERE or digital pattern HERE.

In the sample runner on the pattern, I used a fun collection of plaids, dots, and geometrics in delicious bright red for the strawberries.
For my tutorial example today, I am using fabric from the Garnet Glow Batik Collection by our pals Hoffman California-International Fabrics. Fun fact — did you know Hoffman’s been around since 1924???
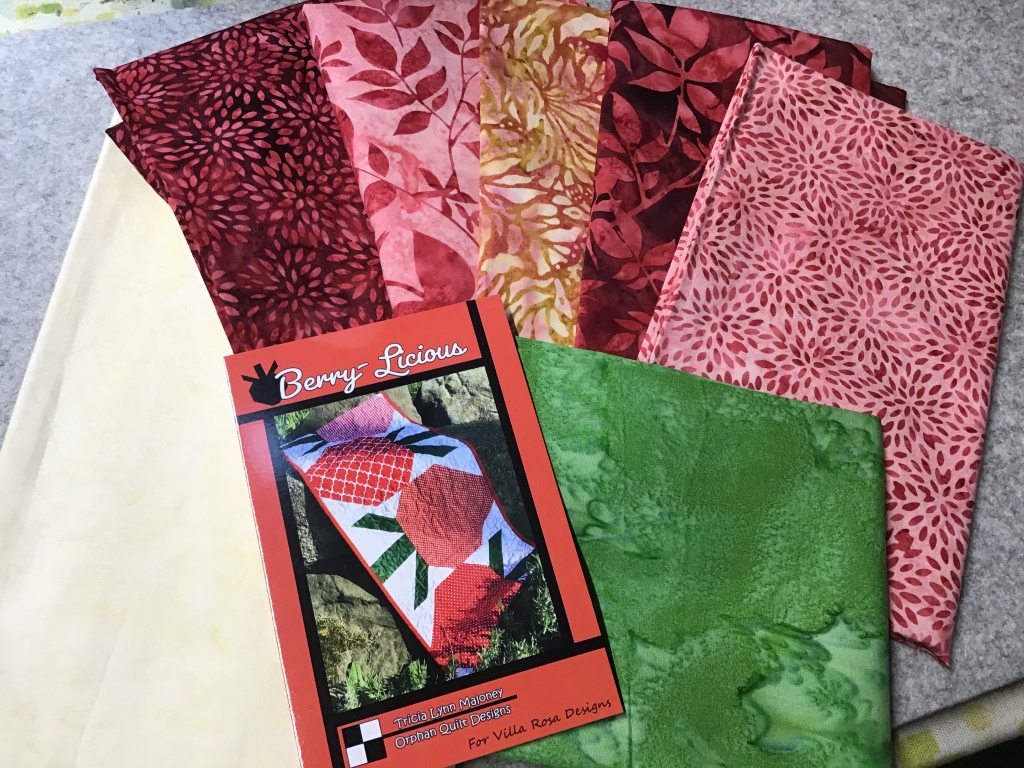
Aren’t they just delish? The peachy fabrics makes me think of a strawberry not quite ripe yet.
I just love seeing how different fabrics look in the same pattern, don’t you? That’s one of my absolute favorite things about our VRD Facebook group.
Check out these Berry-Licious runners made by Renay Trolinger (Hi Renay!) in our VRD FB group! Aren’t they just too much fun??? I especially love the runner on the left — you know, the one with all the attitude. Great work, Renay!
Let’s get this tutorial going, shall we?
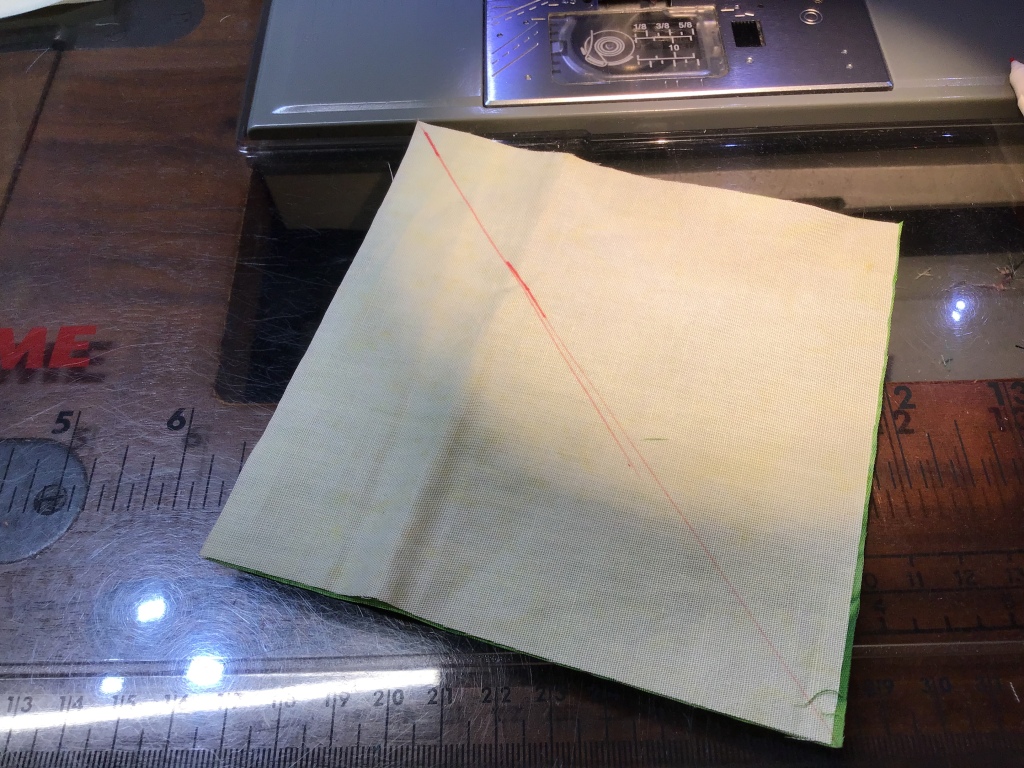
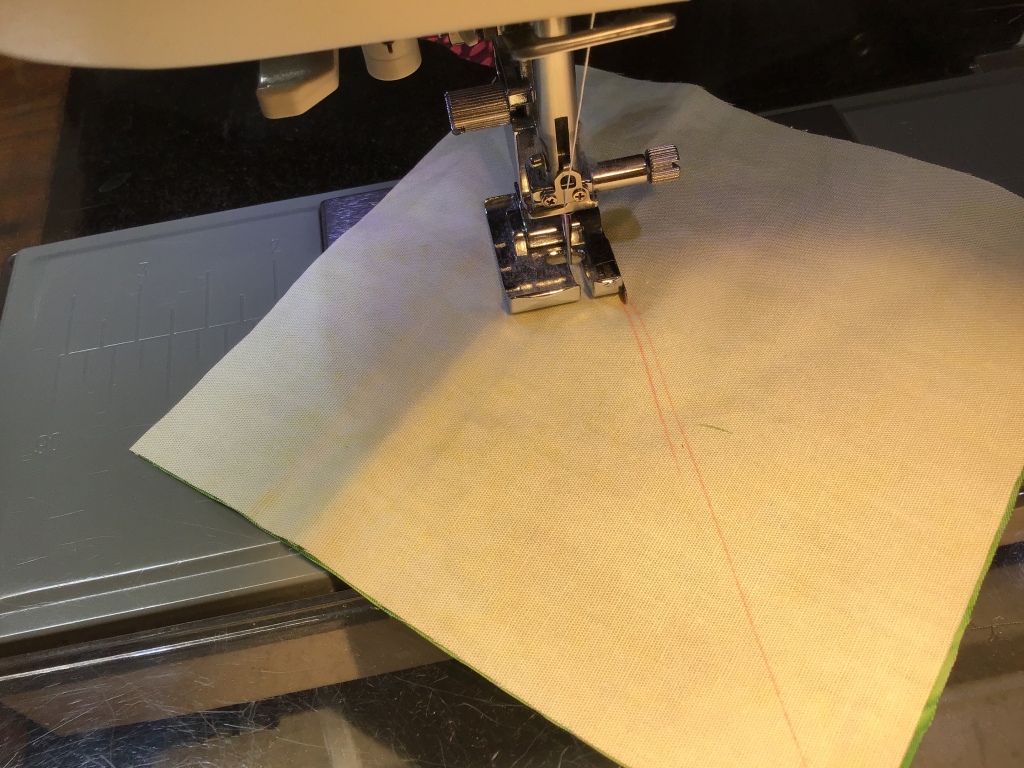
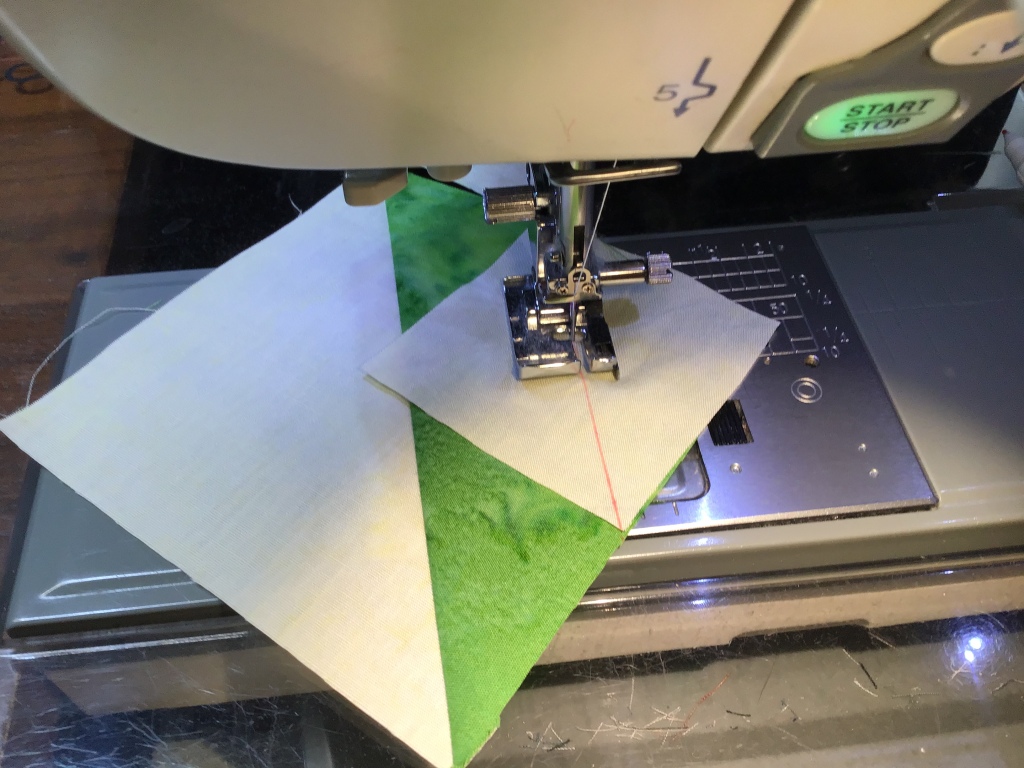
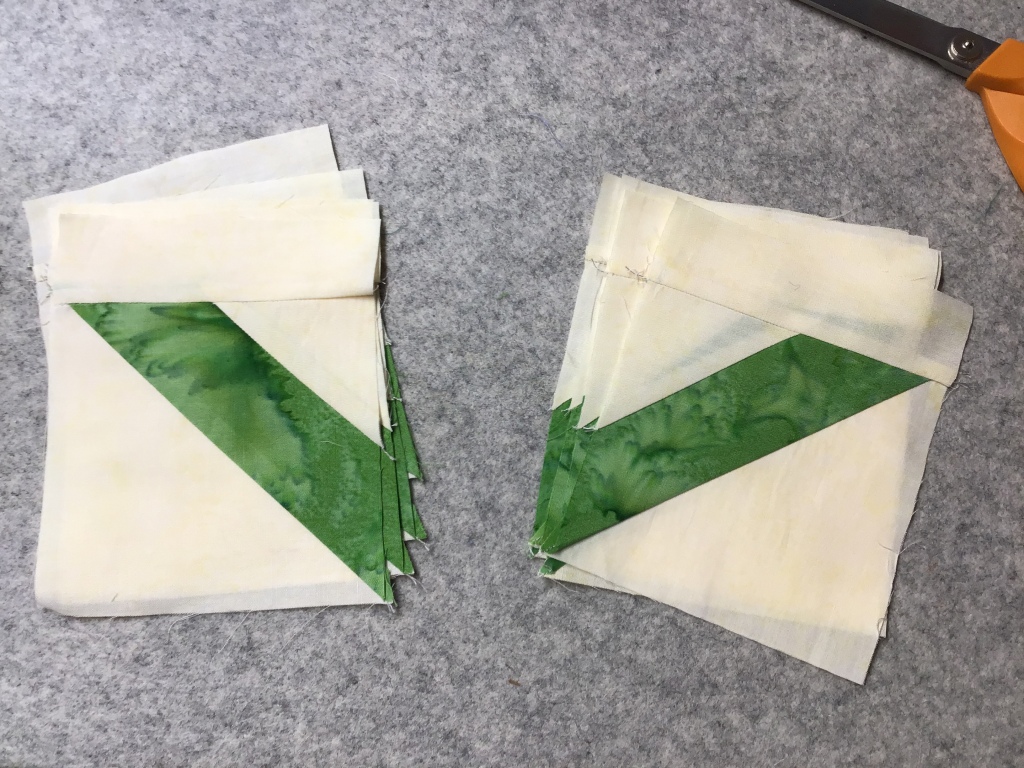
After I cut all the pieces for the runner, I layered my large green and background squares to make Half Square Triangles (HSTs) for the leaves on the stem. Layer those squares right sides together (RST), draw a diagonal line from one corner to the opposite corner, sew on both sides of the drawn line, cut apart on the drawn line, and press the HST open (I like to press my seams to the darker fabric, but that doesn’t always work all the time).
Then like magic you get 2 HSTs! You’ll need to make 10 HSTs. Don’t forget to trim off those little dog ears on the corners!


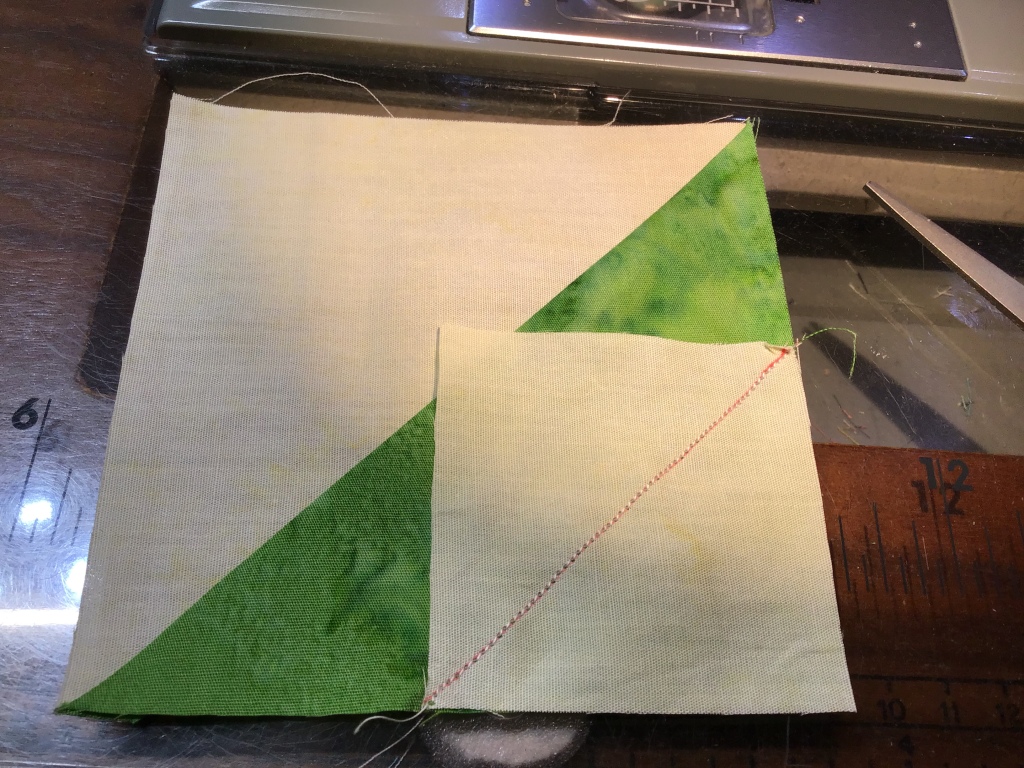
Wait! We’re not done with those HSTs yet. Now we’re going to use the small background squares to make “flippy corners” — yes, I’m using the professional term here — on the green triangles of our HSTs.
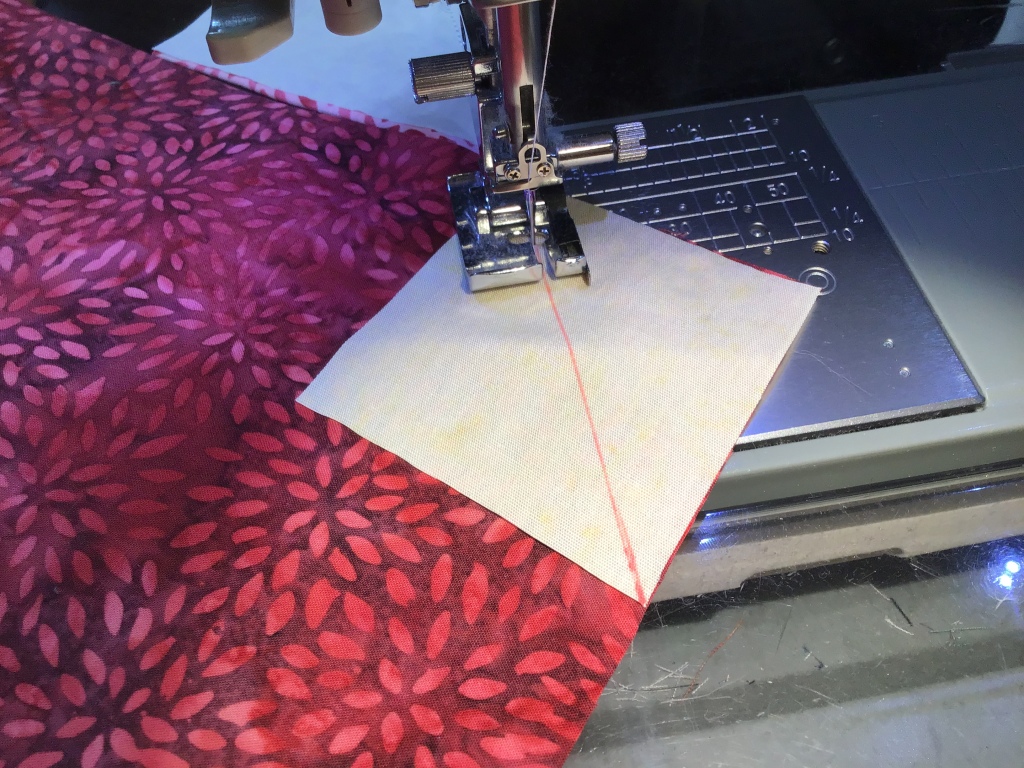
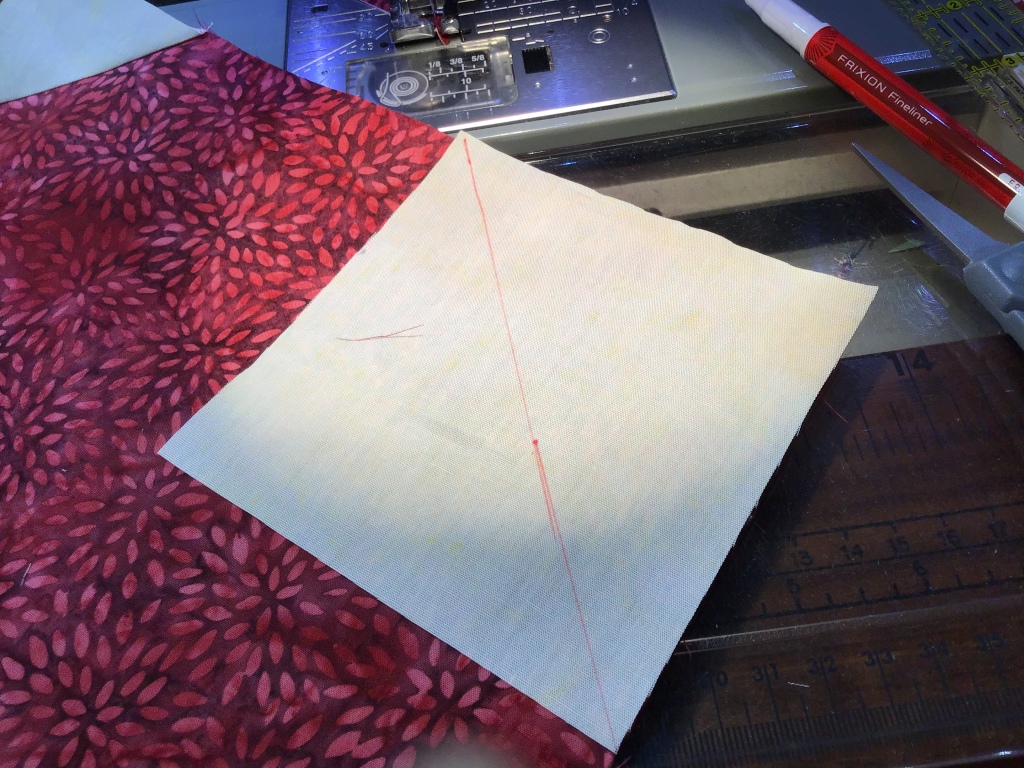
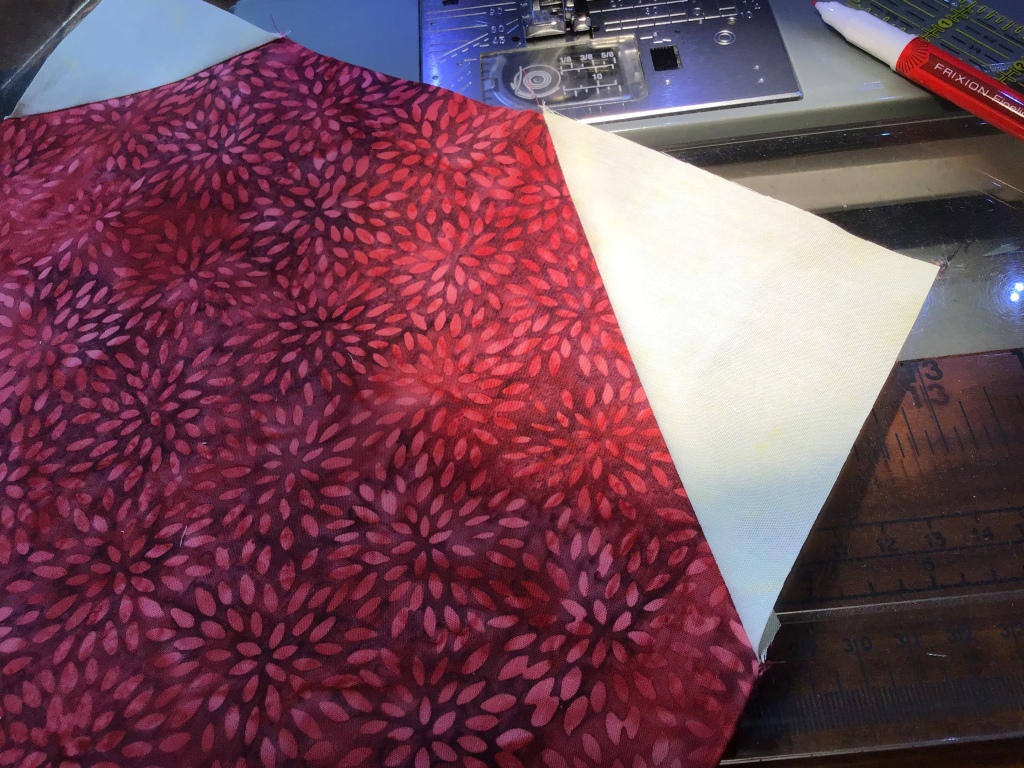
Layer a background square RST on the corner of the green triangle. Draw a diagonal line from the bottom left corner to the opposite corner on the background square. (Yup, LOVE my Frixion pens, especially the Fineliner ones. This red one has been my favorite for a while now and shows up on almost everything.)
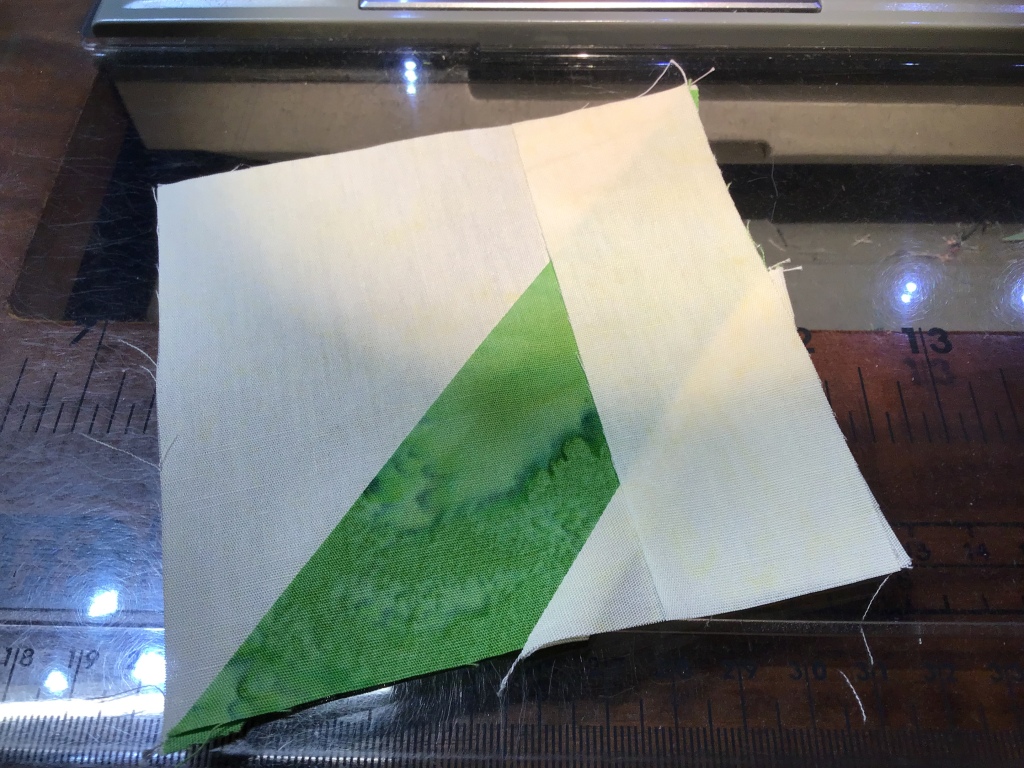
Sew ON the line this time and cut 1/4″ away from the line. Open and press. Repeat with all 10 HSTs.


We’re still not done with these HSTs! Tehehe……
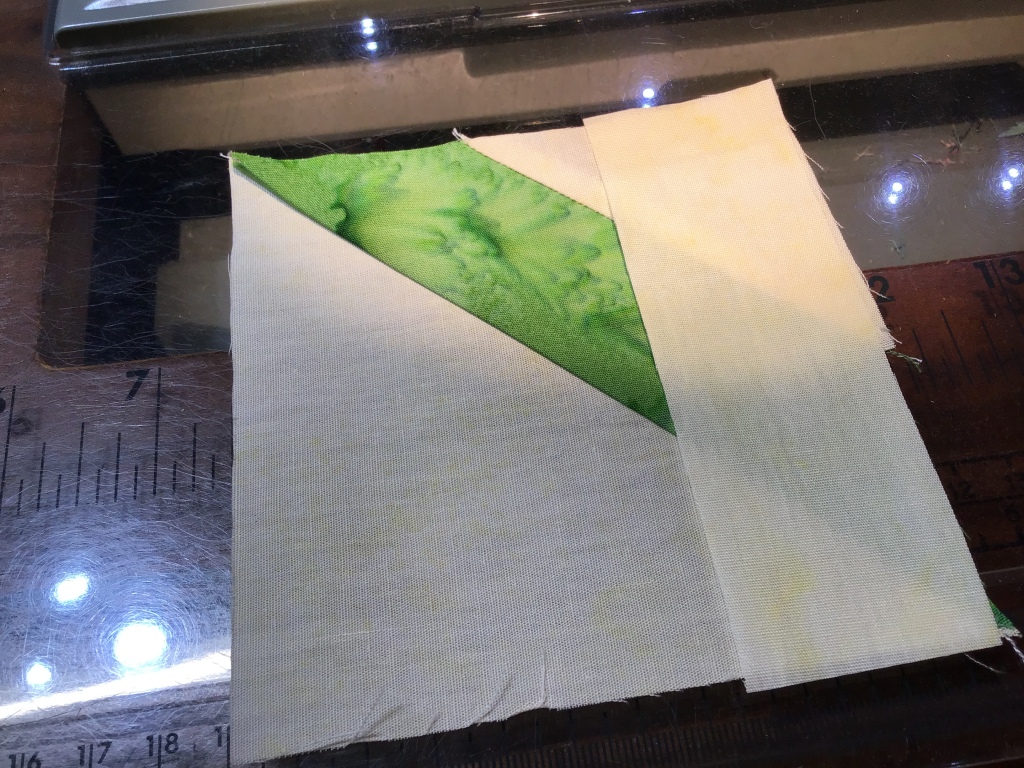
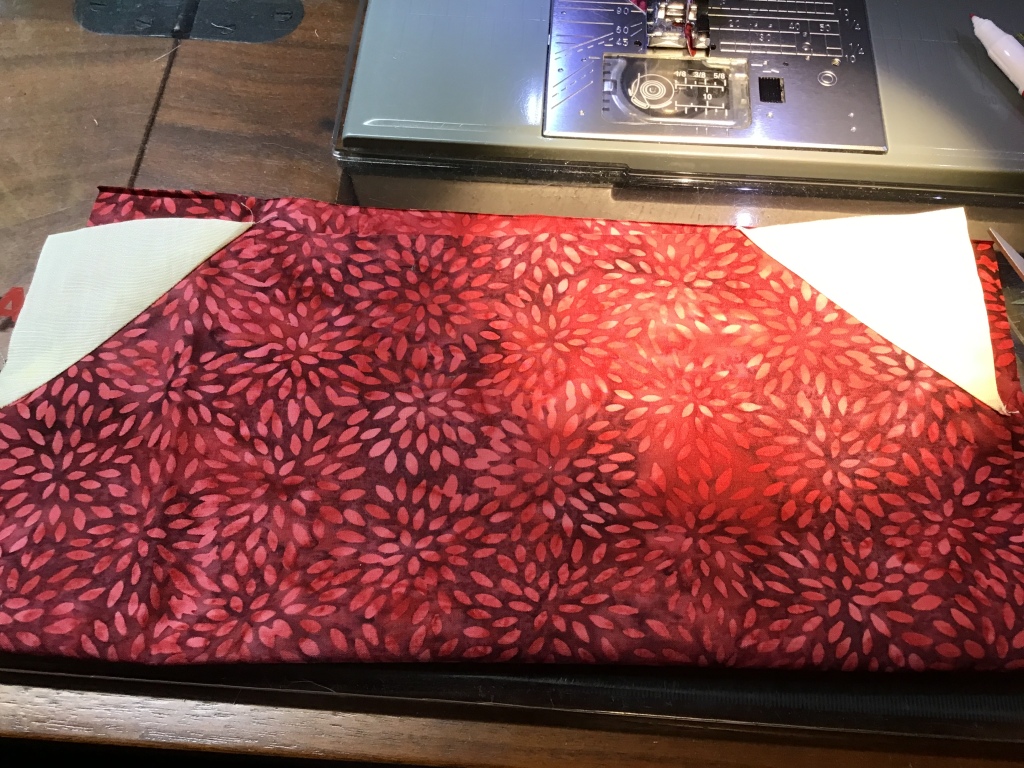
Now we need to sew a background rectangle to the top of each HST, but we need to make 5 left side leaves and 5 right side leaves (simply turn 5 of the leaves so they are mirror images).
Whew! Last step with the HST’s for now!
Sew a left leaf and a right leaf together with a green stem in between. Strawberry tops are done!


Now we’re going to make our strawberries — yum, the best part of the runner!
We’re going to make 2 small flippy corners on the top corners and 2 large flippy corners on the bottom corners. Repeat for all 5 strawberries.


Now let’s add the stems to the tops of the strawberries! Make 5 blocks.
Isn’t this just the cutest yummiest quilt block ever??????


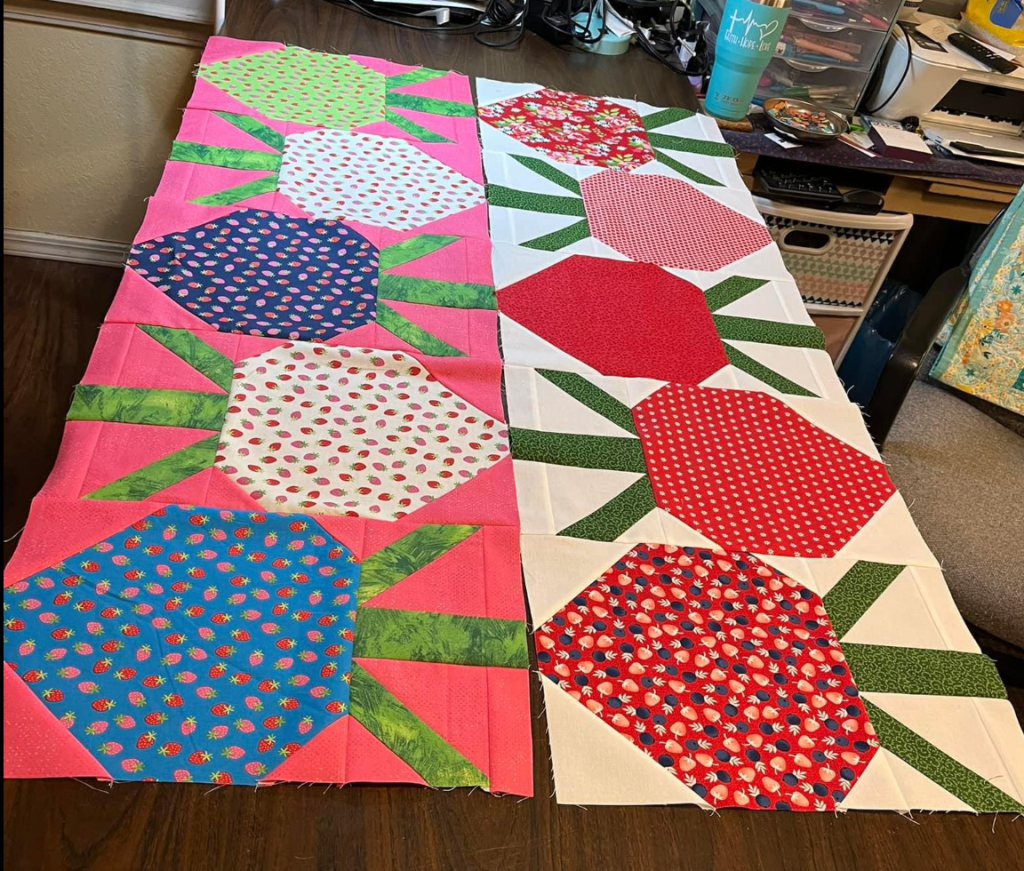
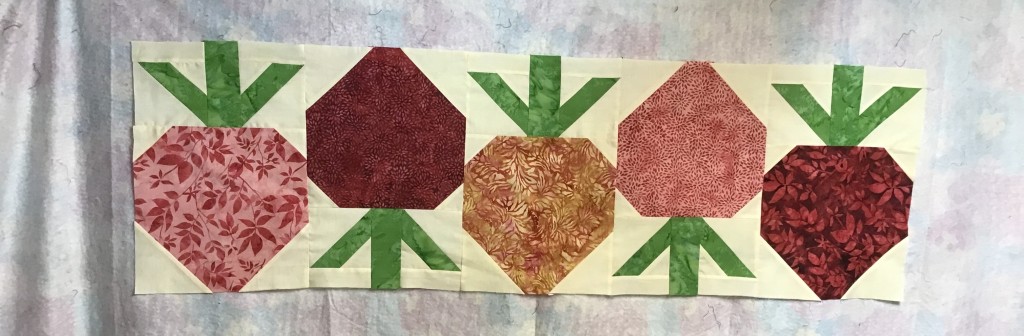
Now the blocks are done, let’s put them together into a runner. You actually have 2 options — you can flip the second and fourth blocks upside down like I did in the original runner on the pattern front or you could have all the strawberries going in the same direction. Which way do you like better?
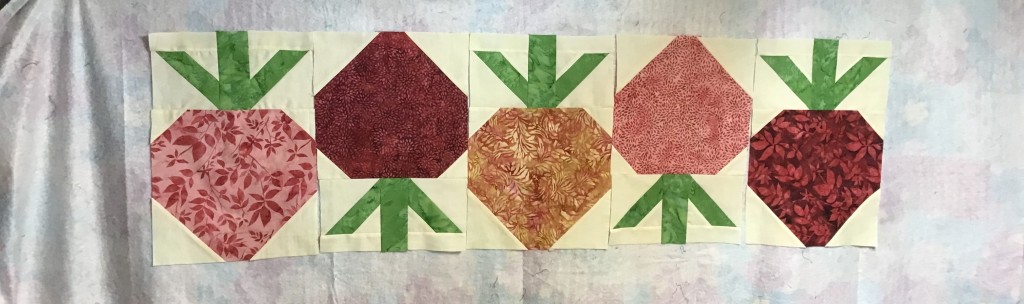

Which one do you think I chose?
The flipped block version. I just love how the blocks look arranged this way. Take a look at the “negative space,” isn’t it interesting?
Maybe when I go to quilt it, I’ll play around with those cool shapes created by the strawberries and stems. How would you quilt it? My original version was quilted with loopy loops.
I had some fabric left over so I made this fun little wall quilt or pillow — I haven’t decided yet. It’s about 21″ square, so it could go either way. What do you think?

Well, that’s it for me for this week. I hope you enjoyed this truly scrumptious (anyone know what movie this phrase was in???) Berry-Licious runner and I look forward to seeing yours on Facebook soon.
Come back next week to see my next summer tutorial! Hmmm…..what should I do next???
Until next week —
Sew. Laugh. Eat Strawberries. LOTS of Strawberries. Repeat.
Always,
Tricia @VRD

Love your berry table runner! I just picked a load of berries for jam and freezing! I will need to make this one for sure! Thanks for showing the tutorial. I like the berries flipped myself – That is how I would make it! Have a great week!
LikeLike
Thanks, Lee! It really is a fun one to make! 🙂
LikeLike