
Hello Quilty Friends!
Happy Thursday to you!
Summer time. Summer time. Sum-sum-summertime.
Don’t you just love classic summertime songs, especially from the 1950’s and 60’s? I do! When I was a kid in the summertime, we camped every weekend and probably every Friday and Saturday night we were all hanging out around a campfire with our camping friends, sharing stories and roasting hot dogs, making s’mores and camper pies. We’d have the Saturday night oldies program (Cousin Brucie, I think?) blaring on the radio and we’d all be singing along.
Ahhhhh, those were the days……. Thinking back, my wonderful childhood memories growing up in the 1970’s and 1980’s, lead me to yet another classic song, Time in a Bottle.

I am happy to share that my sewing machine is finally up and running again on my new-to-me Koala Quiltmate III sewing table. YAY! This table is such a better height for little short me (under 5′ 4″ on a tall day) and I feel more comfortable now with my chair lower along with more leg room under the table, too. My old cabinet was lovely but a bit too tall for me and there wasn’t much leg room so I always felt crowded.
Hooray! Let’s hear it for new-to-you sewing tables! OH! I also bought a new cover for my old sturdy sewing chair to freshen it up from its drab 1980’s dark green tweed. Now to finally get the arms taken off my chair which will make “bellying up” to my machine much easier.
Please excuse my mess in the photo, but I am still sorting out my sewing area. I’m getting there….slowly. The important thing is I CAN SEW AGAIN!

Now that I can sewing again, I’m thrilled to put together another Summer Tutorial for you! I chose Duffy for a several reasons —
- It’s super quick
- I had a new fabric collection from Studio E ready to go
- It’s July’s Top Along selection for Running Doe’s 2024 Top Along
- Who doesn’t love making Christmas Quilts in July?
Sew, let’s get started!
VRD Duffy Quilt Tutorial
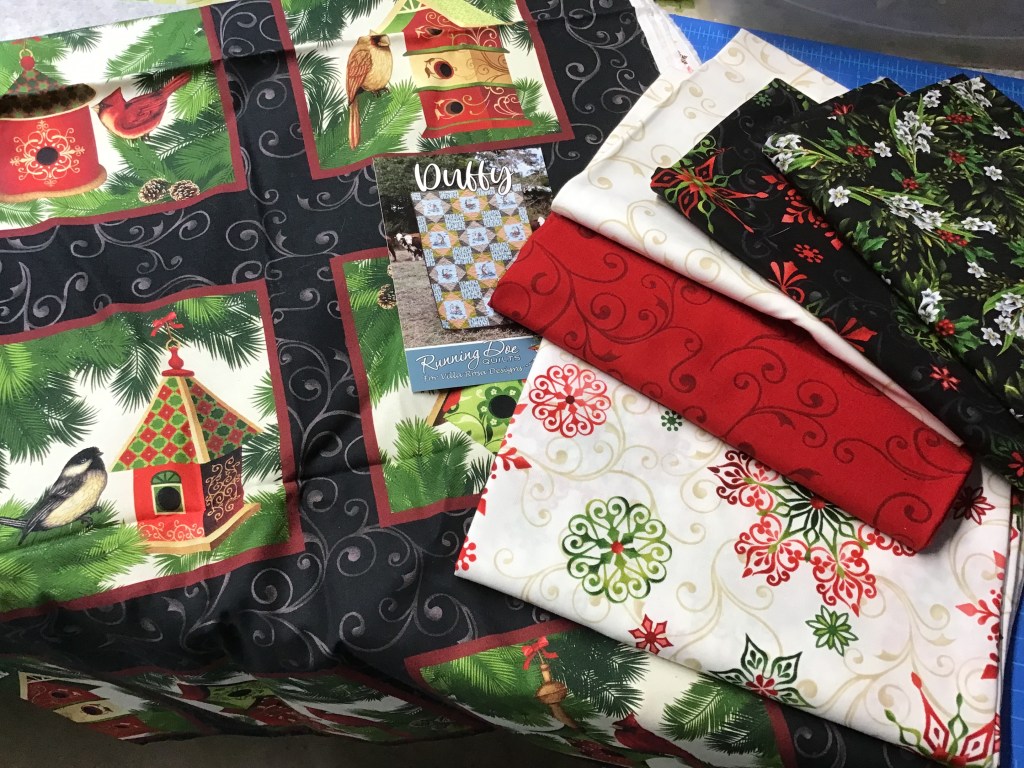
My fabric today is from one of our friends and quilting partners, Studio E — thank you! The collection is called ‘Tis the Season and it is shipping to quilt shops as I write this, so make sure to ask for it at your local quilt shop. Duffy is one of the featured patterns for Studio E’s ‘Tis the Season collection. Pretty cool, huh? VRD is popping up everywhere!
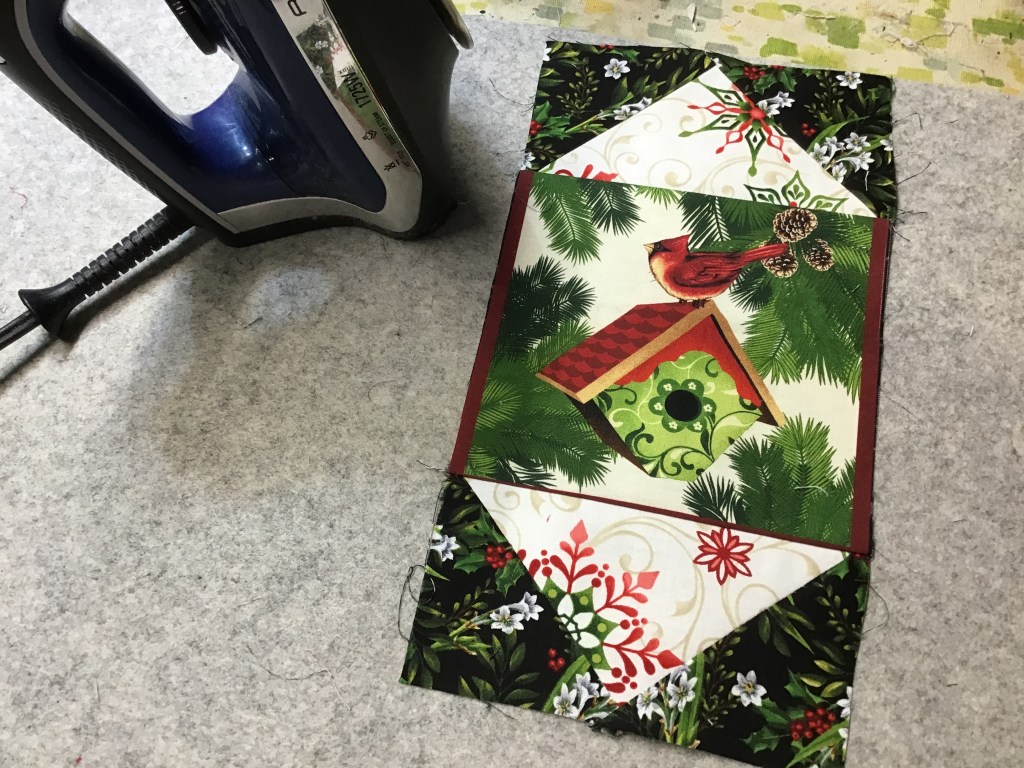
I’m using the gorgeous holiday birdhouse block fabric from the collection for my focal print in the blocks. Lucky me, the square are just the right size.
I don’t usually enjoy making swiss cheese out of my fabric (or, fussy cutting, if you prefer that term), but I didn’t mind with this project because I was cutting the printed blocks out, which really only left bits and pieces of the black swirl fabric between the blocks. I love that I even had a ruler to rotary cut the correct size square for the pattern.


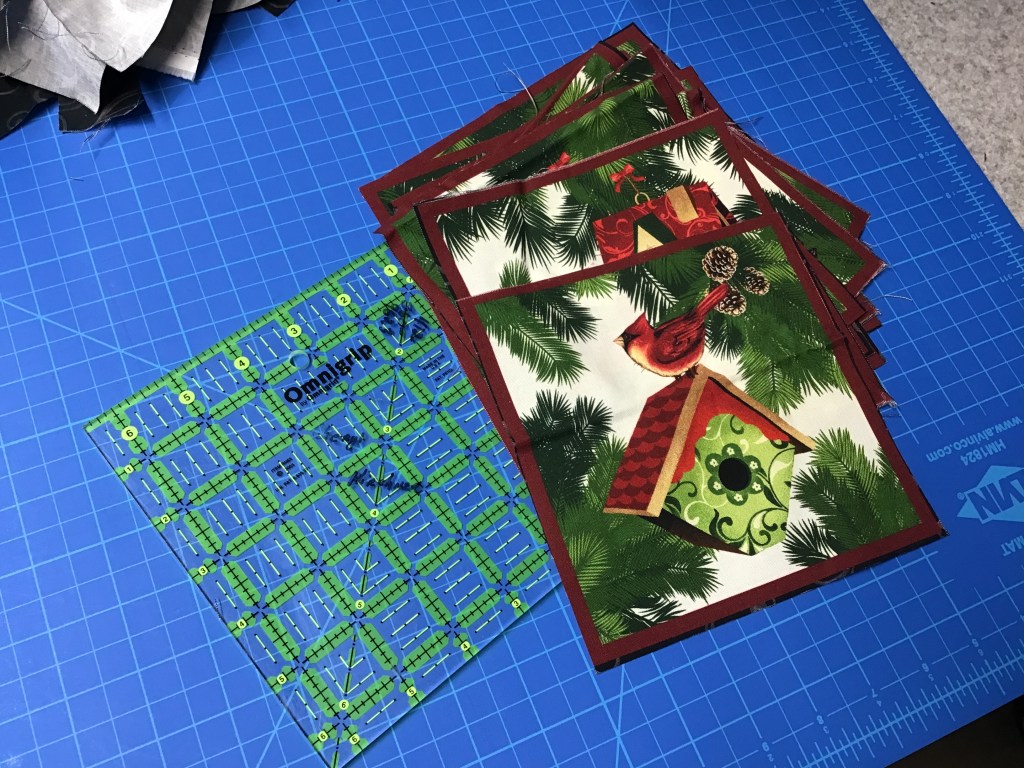
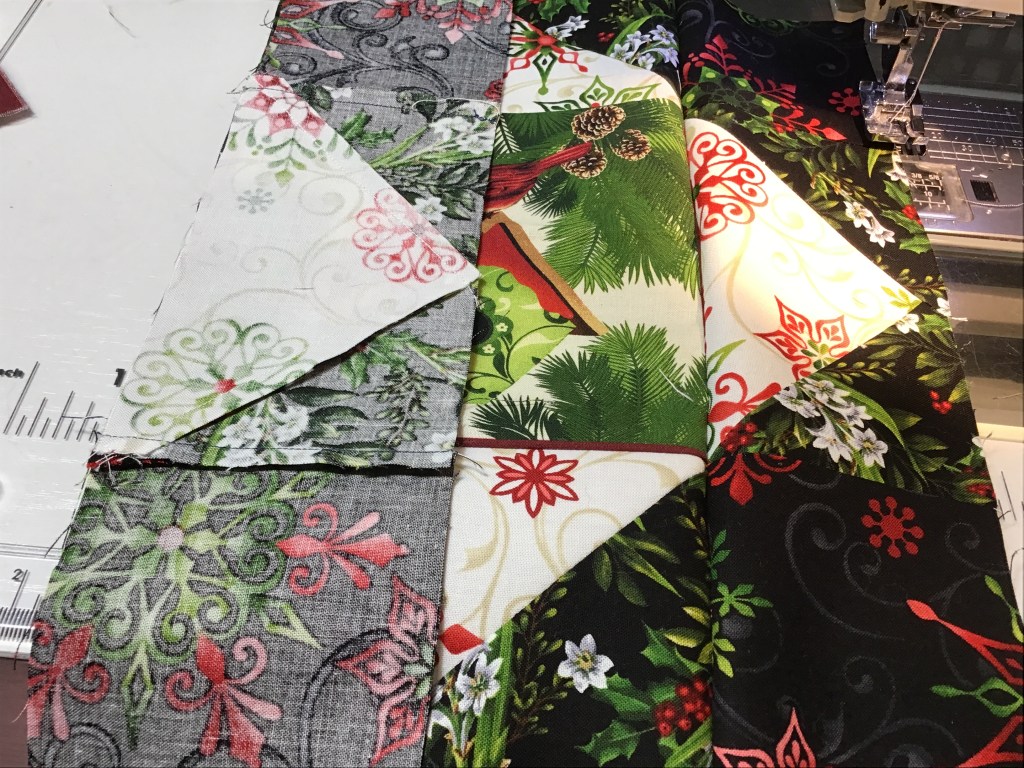
The squares are ready, so let’s cut the rest of the fabrics.


Now it’s time to get down to the business of putting this delightful quilt together!
Please note there are 2 blocks in this quilt — the block is the same, but the fabrics are different in each one. As you make your own quilt, please make sure to keep your fabrics organized.
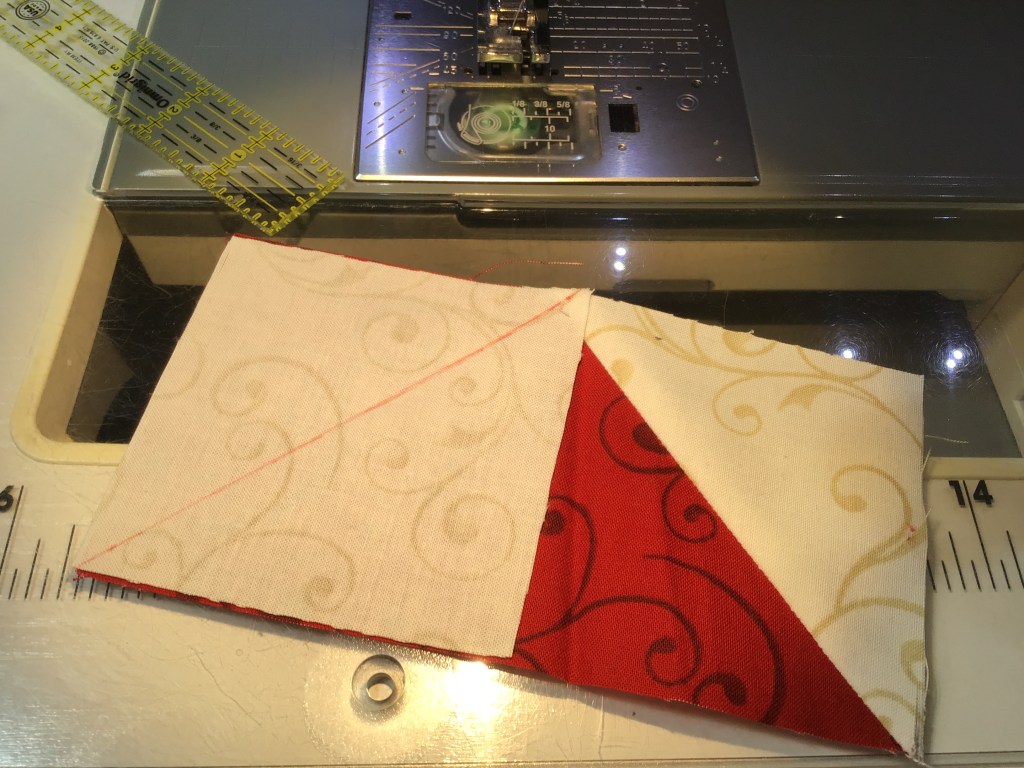
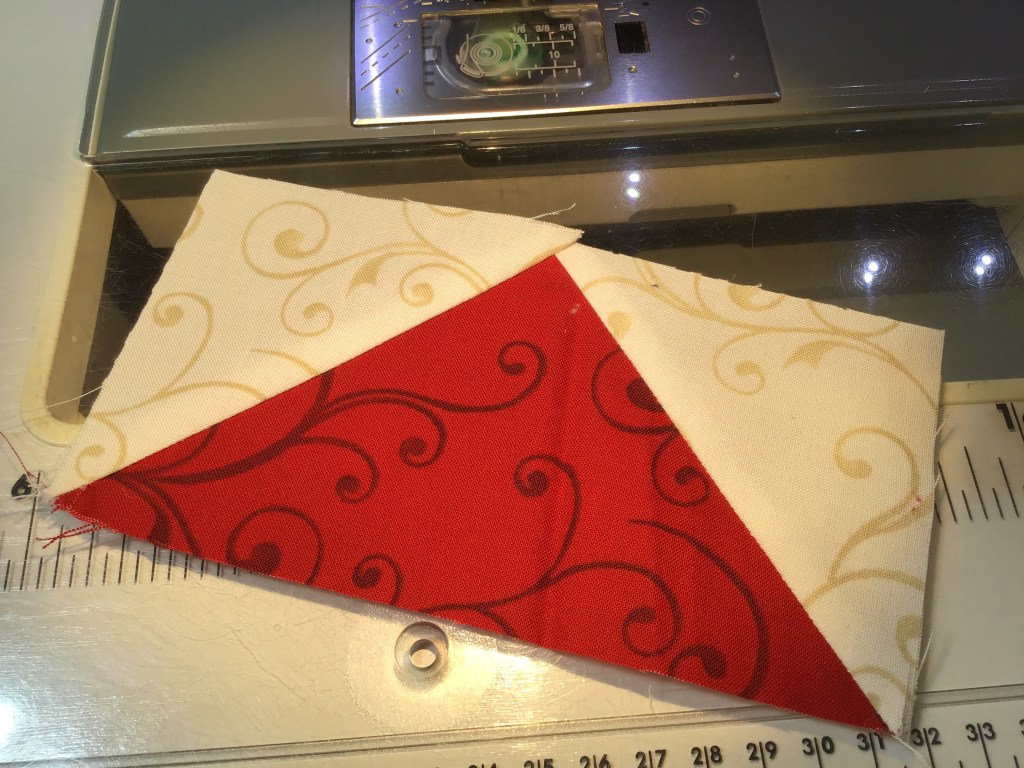
Let’s make our Flying Geese units for the first block. Layer a square RST on the right side of the Block 1 rectangle. Draw a line from the top left corner of the square to the opposite bottom corner and sew on the line. Cut 1/4″ away from the line. Feel free to save the cutaway triangles for another project (PSST! Sometime in the future I plan to create a pattern using all those cutoff triangles, so tuck them away until then). Open the unit and press towards the triangle.


Okay, let’s make the left side of our Flying Goose unit. Place the square RST on the left side of the rectangle this time. Draw a line from the bottom left corner of the square to the top right corner and sew on the line. Trim 1/4″ away from the line and save your cutoff triangles if you wish. Press open.
Voila! One Flying Goose unit.
Did you know that the center large triangle is the goose while the smaller outside triangles are the wings???


Now we are going to repeat the steps above to make Flying Geese units for the second block.
Check! Flying Geese units for both blocks are done.

Moving on, we are going to start making our quilt blocks. I told you this quilt goes together quickly, didn’t I?
Sew Flying Geese units to the sides (or in my case in the photos, the top and bottom) of the focal print square. I pressed my seams towards the center square.


Next sew Block 1 (OOPS! or 2 in my case — don’t ask me why I did things backwards here….) squares to the ends of 2 Flying Geese units. Then sew to the top and bottom (or sides in my case) of the focal print square. I pressed my seams towards the center. Make 6 Block 1s.


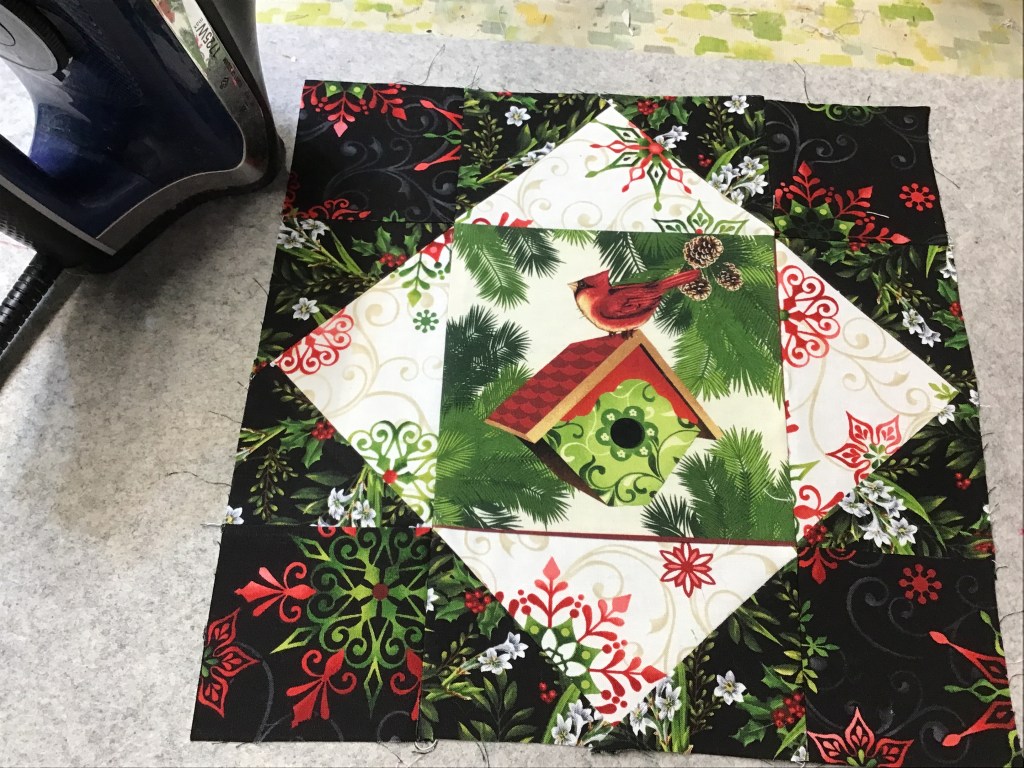
Okay, now on to Block 2 (or 1 in my case). Repeat the steps we did for Block 1 (or 2 for me). For Block 2, I pressed my seams towards the Flying Geese units, hoping that by doing so will make my seams nestle nicely together when I sew the blocks together. Make 6 Block 2s.


Woohoo! Super fast. Told you!
The blocks are done and let’s take a look at 2 variations of the quilt — all I did was change the placement of Block 1 and Block 2.
I bet there are lots of other variations, especially if you play around with your fabric placement.
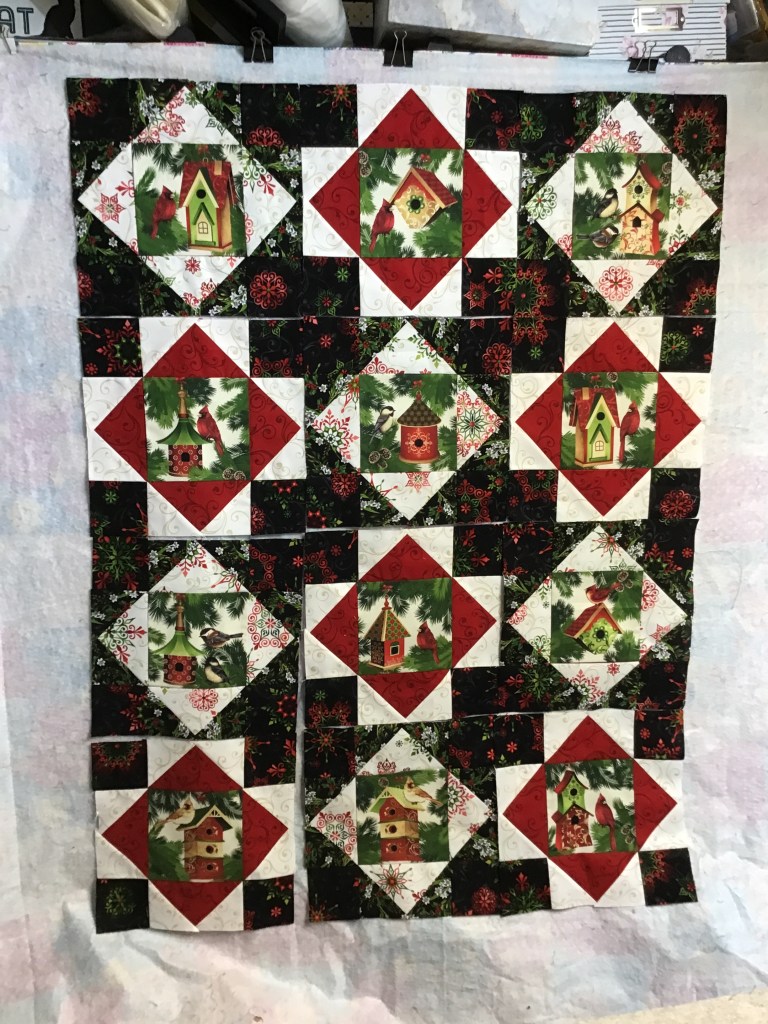

These 2 are pretty much the same since it’s just switching the blocks, but which one do you like better? Which one do you think I chose?
If you guessed the second photo, you are right! Now it’s time to sew the blocks together.
I found that most of my seams did indeed nestle together. For the couple that were being stubborn, I forced them to behave.
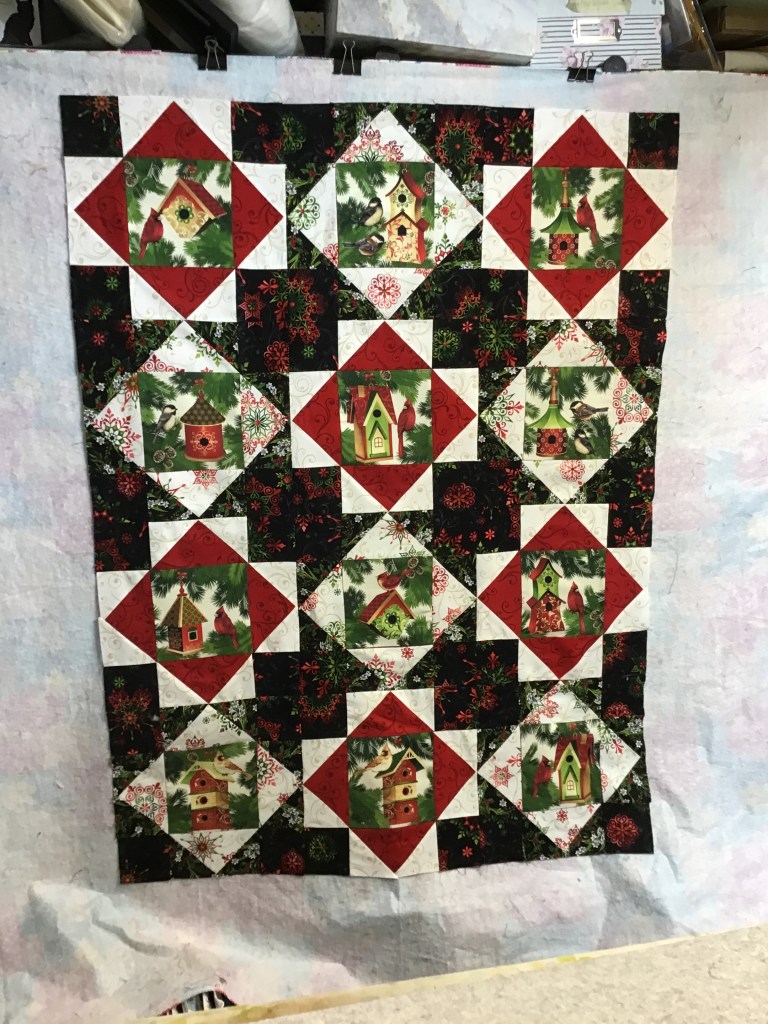
It turned out really cute, don’t you think??? I really like the secondary designs that pop out. Because Duffy is baby quilt sized, I might just add an outer border to make it into a small throw-sized quilt because I just don’t have extra wall space for quilts.
Which brings me to some final thoughts for you about Duffy:
- Add a border (or 2) to make it bigger — I’m thinking maybe a 6″ finished border as I have another fabric from the collection that I didn’t use.
- Make more blocks to make the quilt bigger — just make sure you purchase enough fabric.
- You could use Duffy as a jumping off point and add a series of pieced or appliqued borders, using Duffy as the quilt center.
- You could add sashing between the blocks to give it an entirely different look and make it a bit bigger. When I add sashing to a quilt, I usually stick with cutting my strips 2 1/2″ wide.
Well, I hope you will have fun making your own Duffy quilt. I’d LOVE to see them so please share on our VRD Facebook Page.
Enjoy your summer! Do something fun with the ones you love. And don’t forget to squeeze in a little quilting.
See you next week, same time same place —
Sew. Laugh. Repeat.
Always,
Tricia @ VRD

I love this!! What a fun panel and design!!
LikeLike
Hey Brenda, It IS really fun and went together sew quickly!
LikeLike
Very pretty.
LikeLike
Thanks Jocelyn. It’s a fun pattern to make.
LikeLike
Oh I am a sucker for anything Christmas. I love how this turned out!
Blessings, Donna
LikeLike
Thanks, Donna! I know, right? And who doesn’t love Christmas in July!
LikeLike