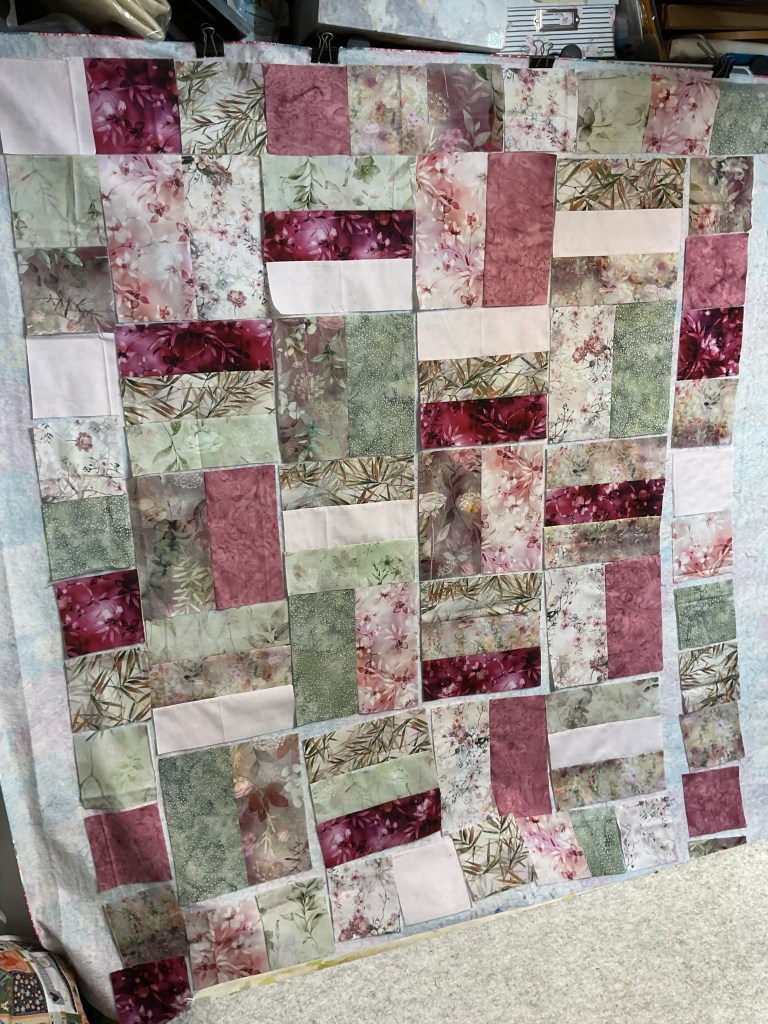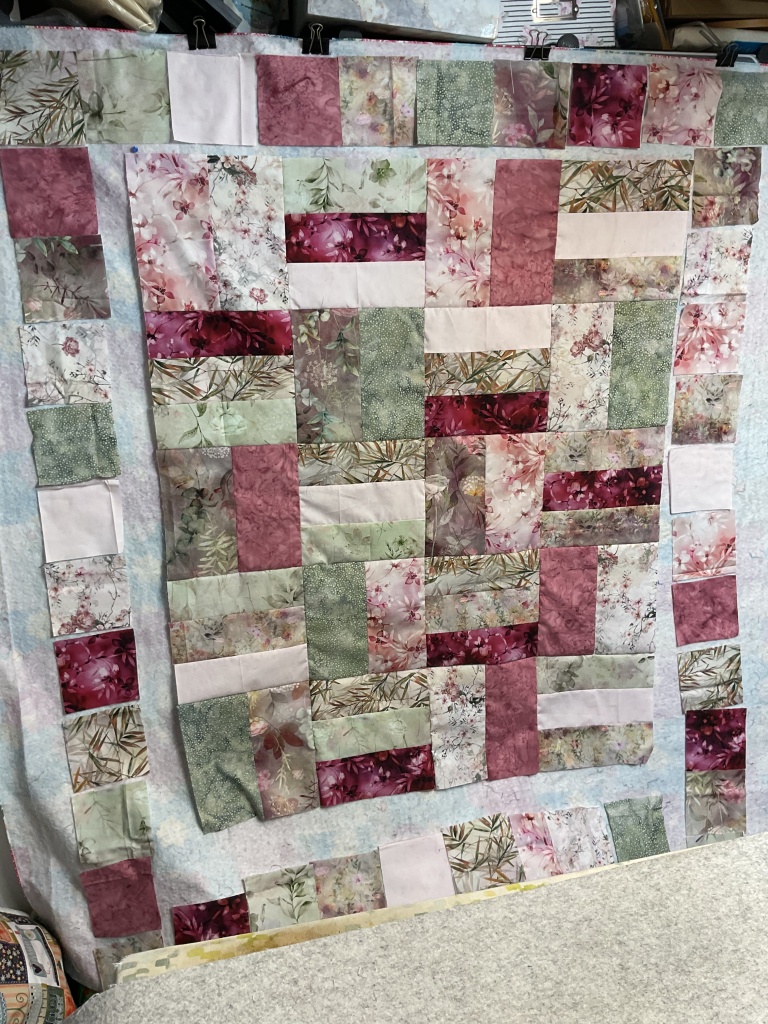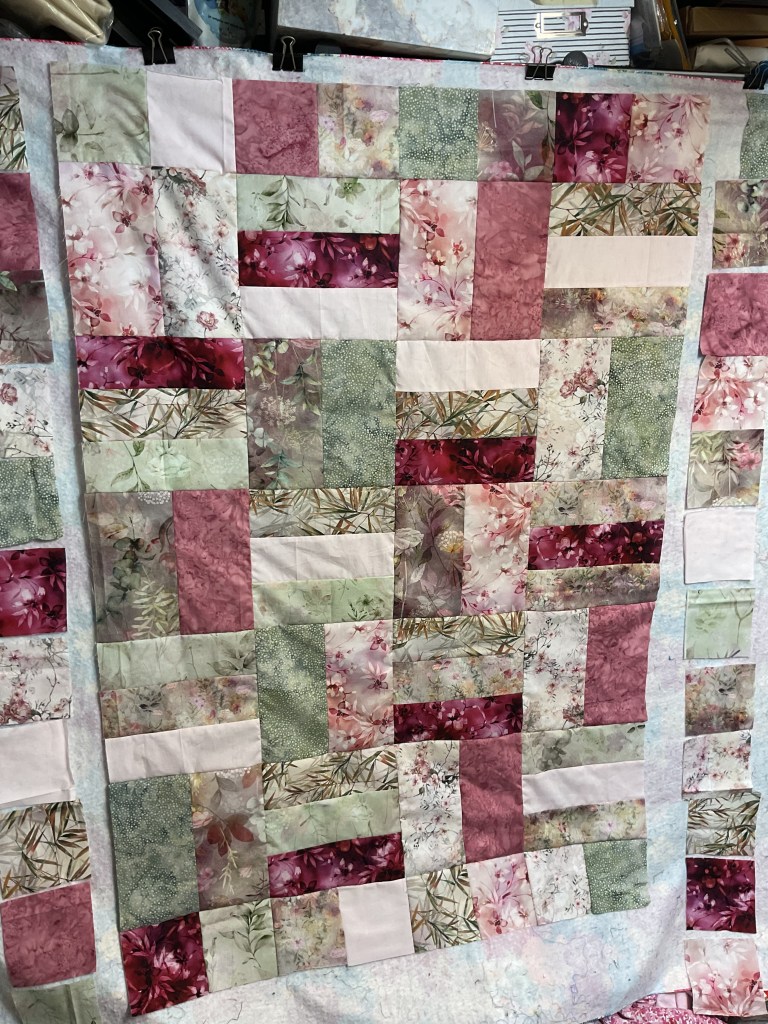
Long time no see! I’m stealing the blog from Tricia this week – it’s been a while since I snuck in here and did a tutorial. Sorry it’s been so long, but things have been awfully busy at the VRD shop and I’ve been working hard to create new patterns for you, too.
I heard Tricia’s doing a bunch of tutorials to help everybody get back into quilting this fall, so I thought I’d add one to the mix – Morning Tea. Yup, another Tea quilt. LOL!
Anyway, let’s get back to today’s tutorial, Morning Tea.
VRD Morning Tea Quilt Tutorial
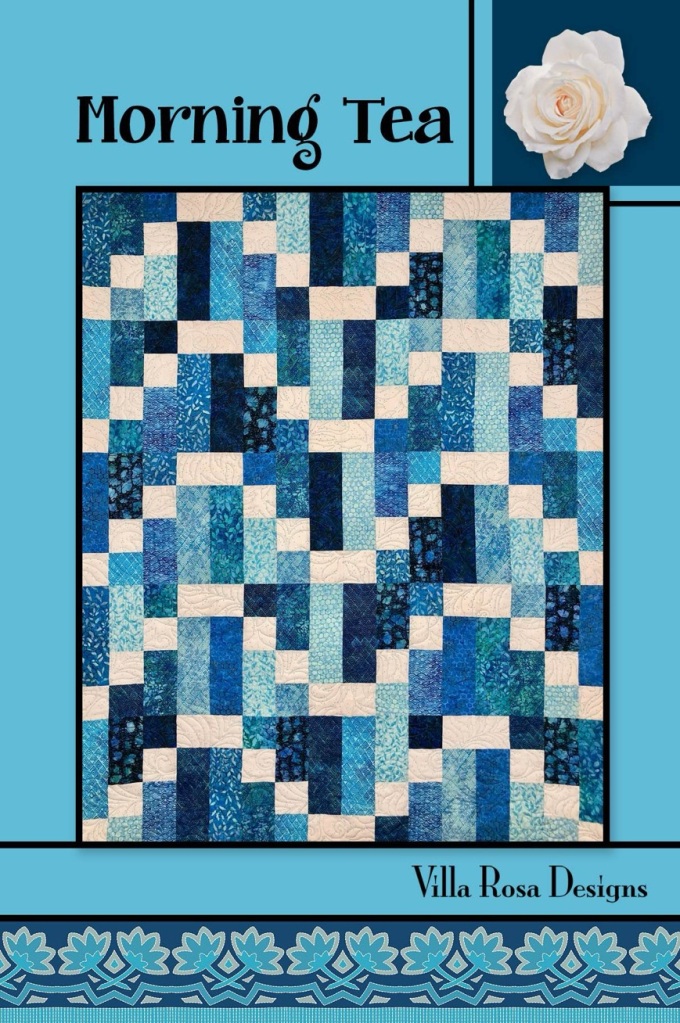
Here’s Morning Tea, designed by our very own VRD Rose Queen, Pat. It’s a fat quarter (18″ x 21″) friendly pattern plus you need to add a background fabric. And of course, it’s fast and fun!
If you don’t have the pattern yet, you can get your print copy HERE or digital copy HERE
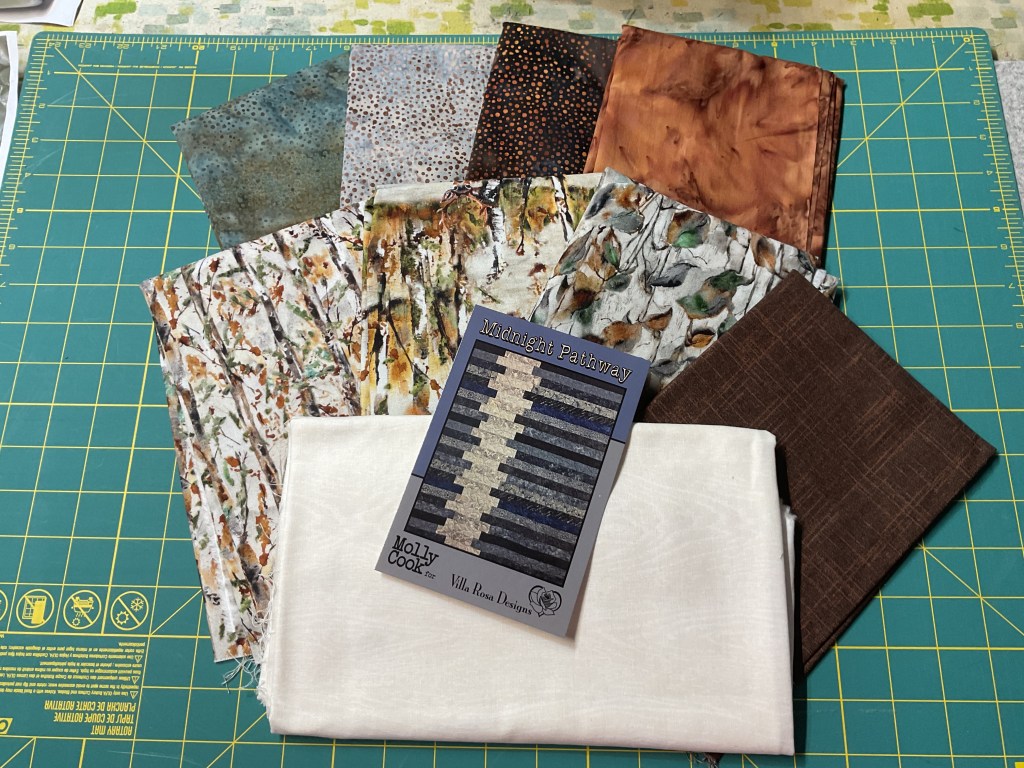
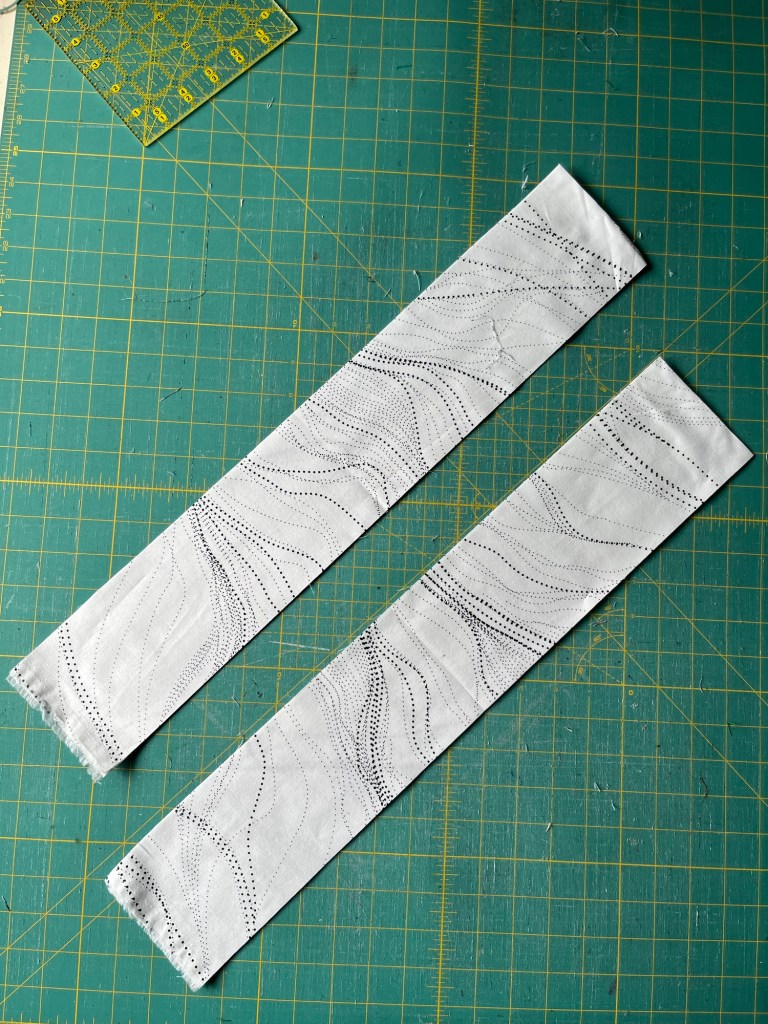
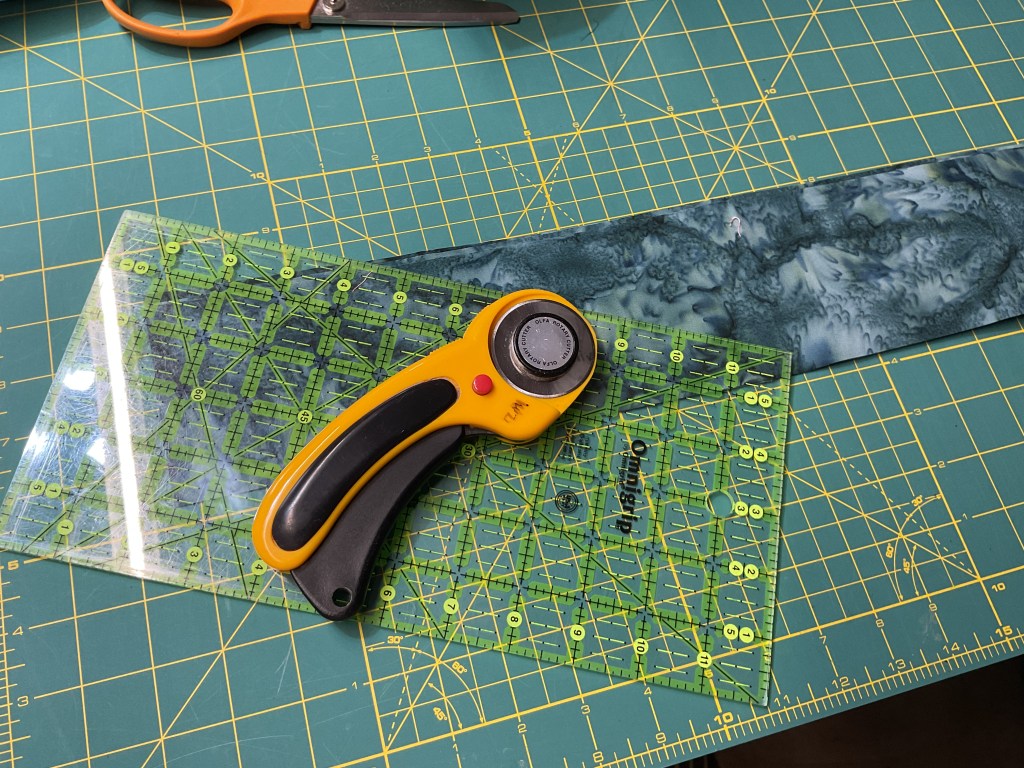
I wanted to play around with some of our Aboriginal fabrics in the VRD shop again and decided on this range of blues. Fun, huh? The squiggly light fabric towards the bottom of the photo is my background and the one in front if it is my binding.
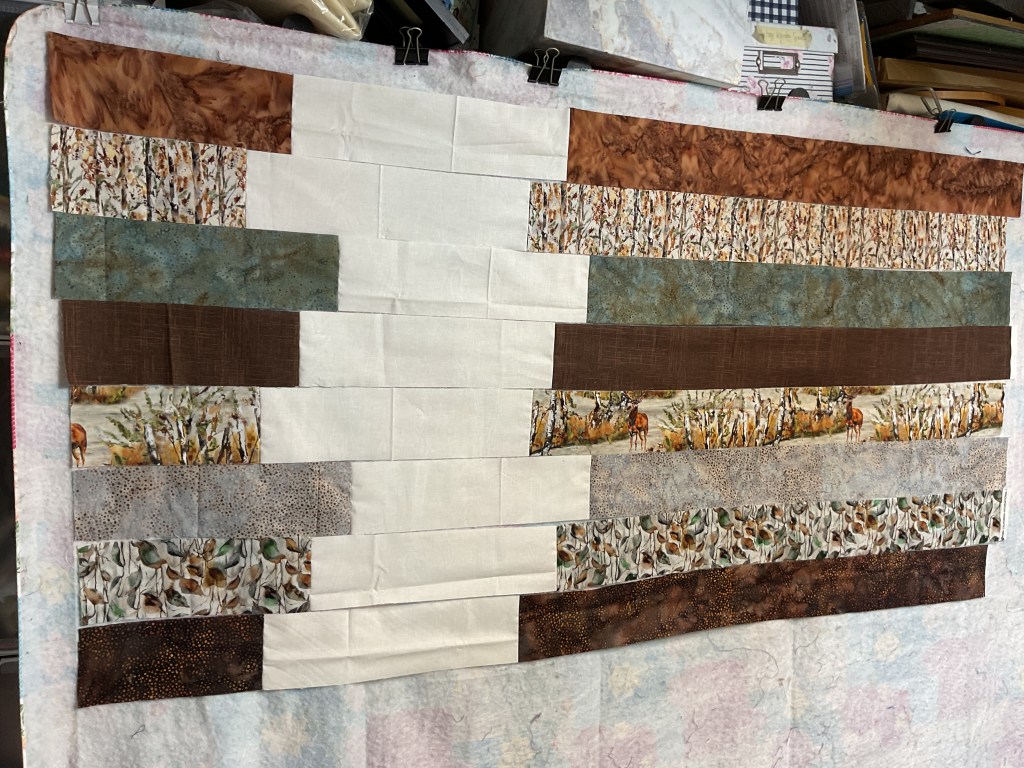
Lucky you! We even have some kits left, and you can get yours HERE. Your kit comes with the fat quarters (FQs), background fabric, binding, and the pattern. I do have to say some of the fabrics have been discontinued but we did add some great replacements and they work perfectly too.
Let’s rock this quilt!
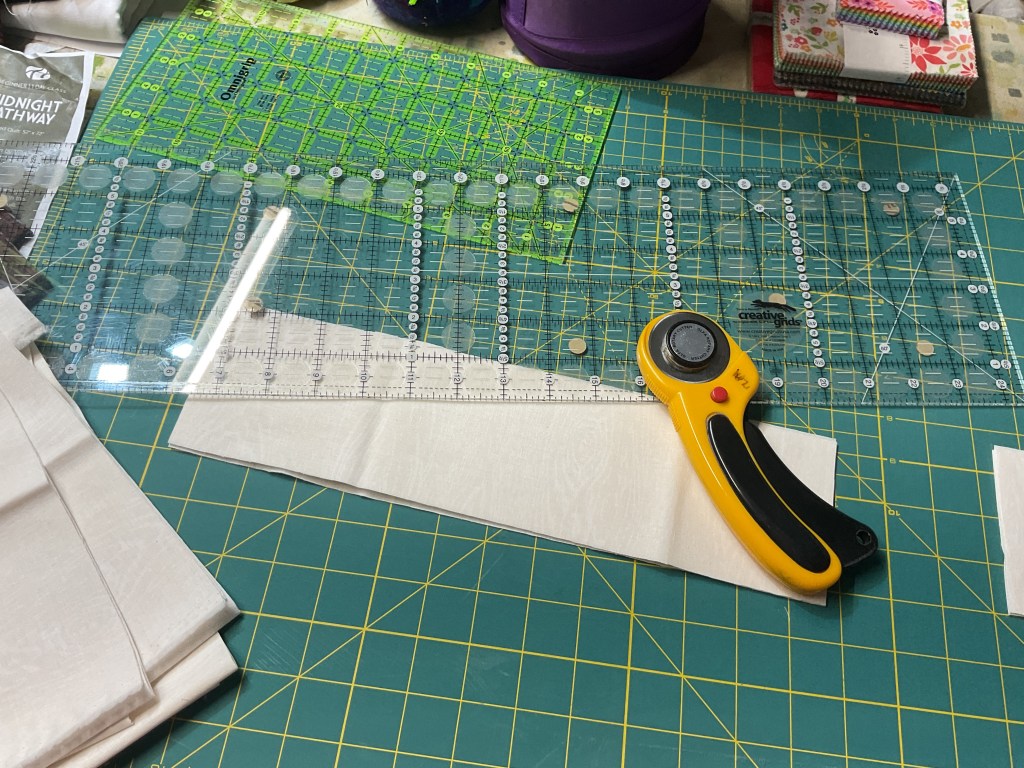
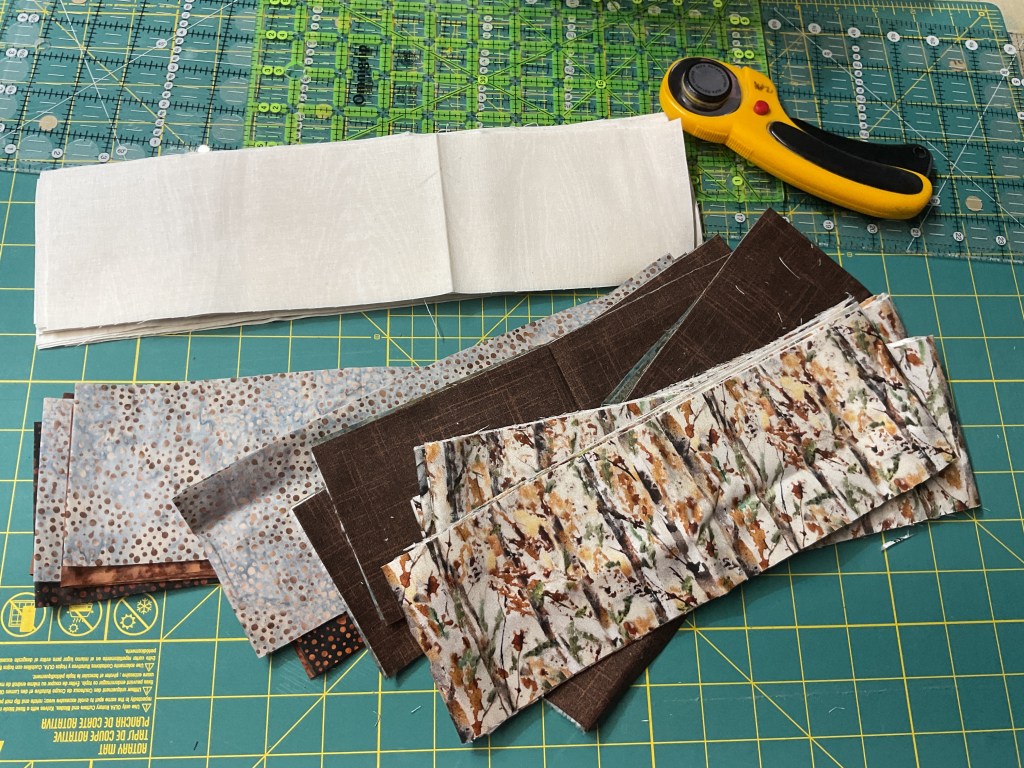
First step is to divide your fat quarters into 2 piles. From the first group, we’re going to cut them into 2 different widths.
2. From the remaining smaller group of FQs, you’ll cut the strips all the same width.
3. The background strips are all cut the same size by the width of the fabric, then we’re going to cut the long strips in half so our strips are the same length as our fat quarter strips. Genius!
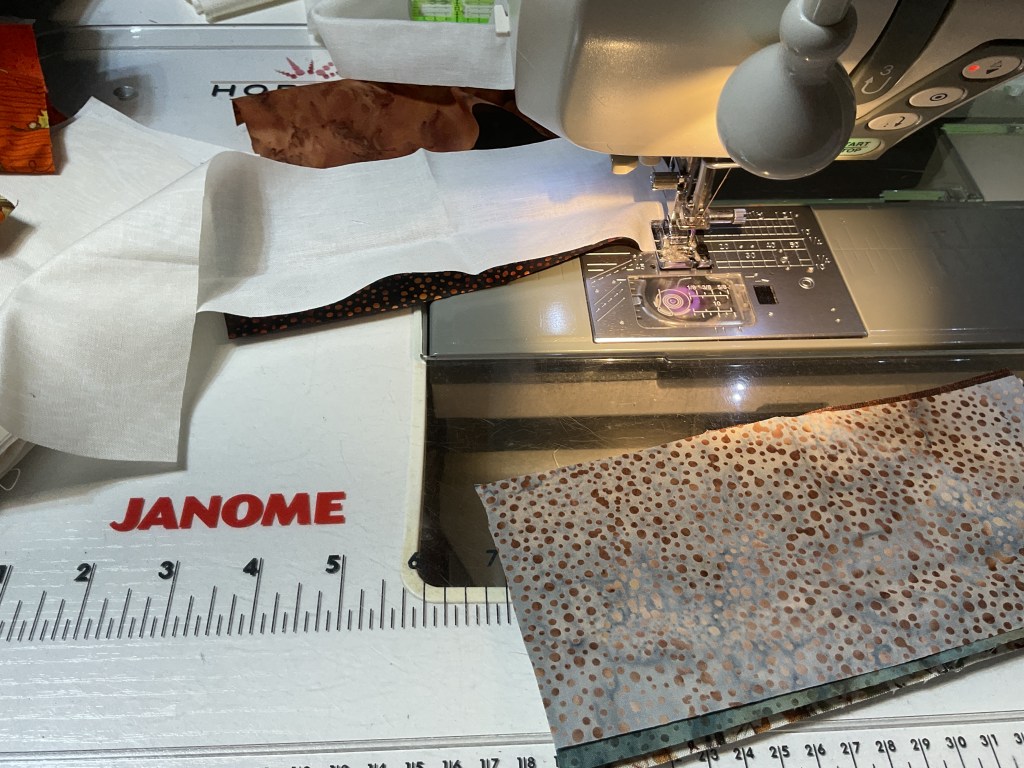
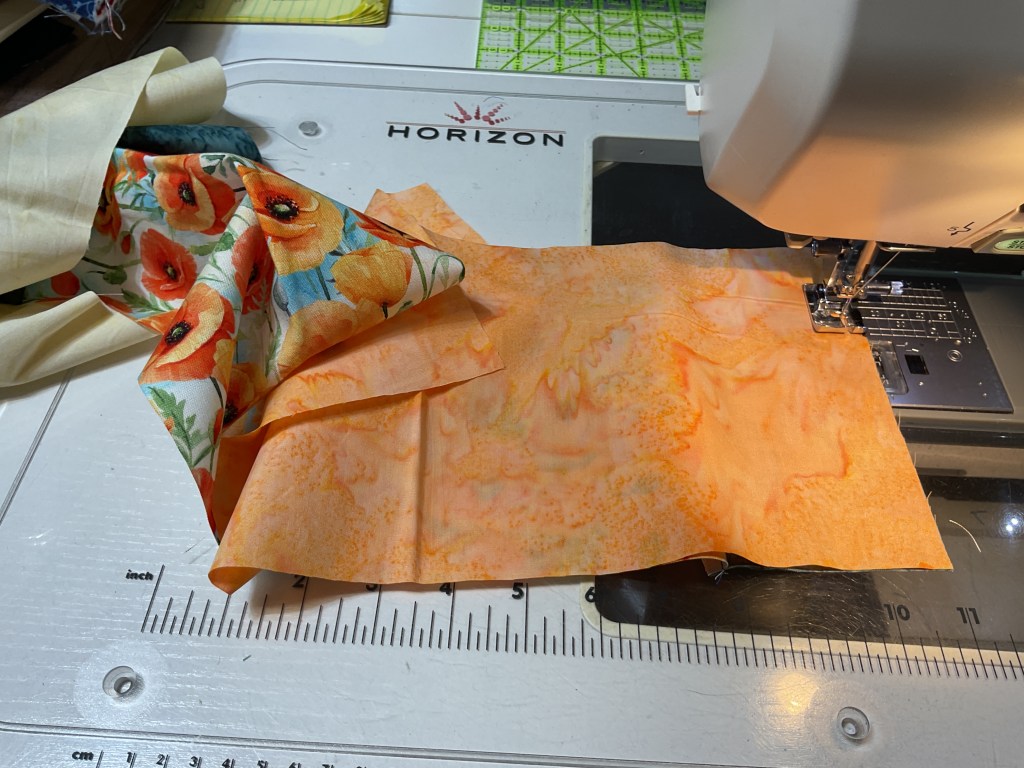
4. Sew a background strip to each of the largest FQ strips. Next cut each of those strip sets into segments. I’m going to name these Unit A so we can keep everything straight as we go along.
5. Sew the remaining background strips between the small and the medium FQ strips. Subcut them into segments. These strip sets, I’m naming Unit B.
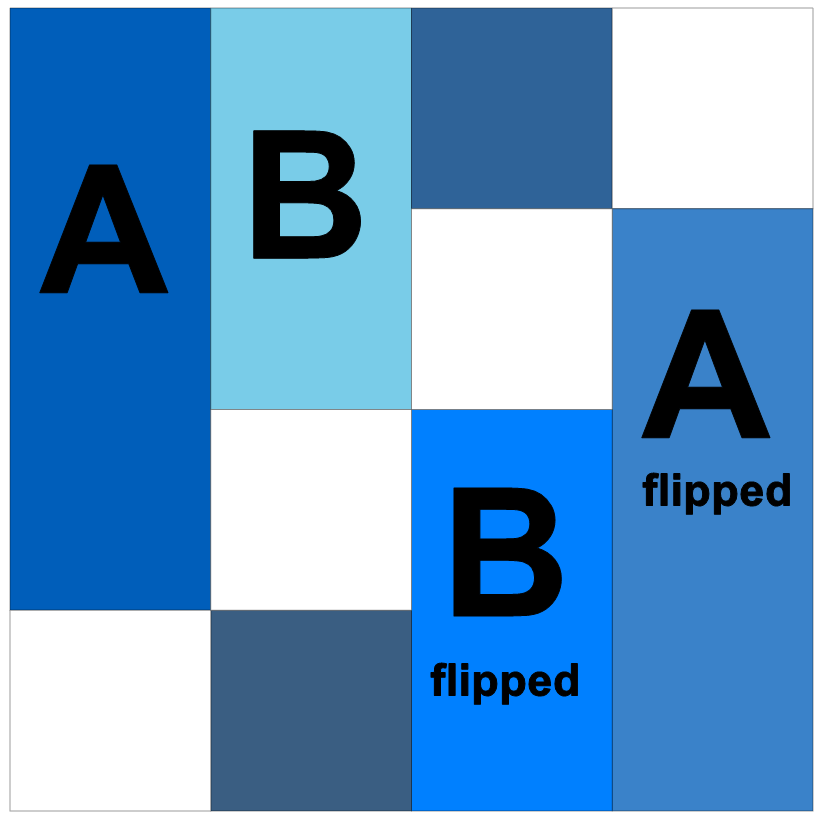
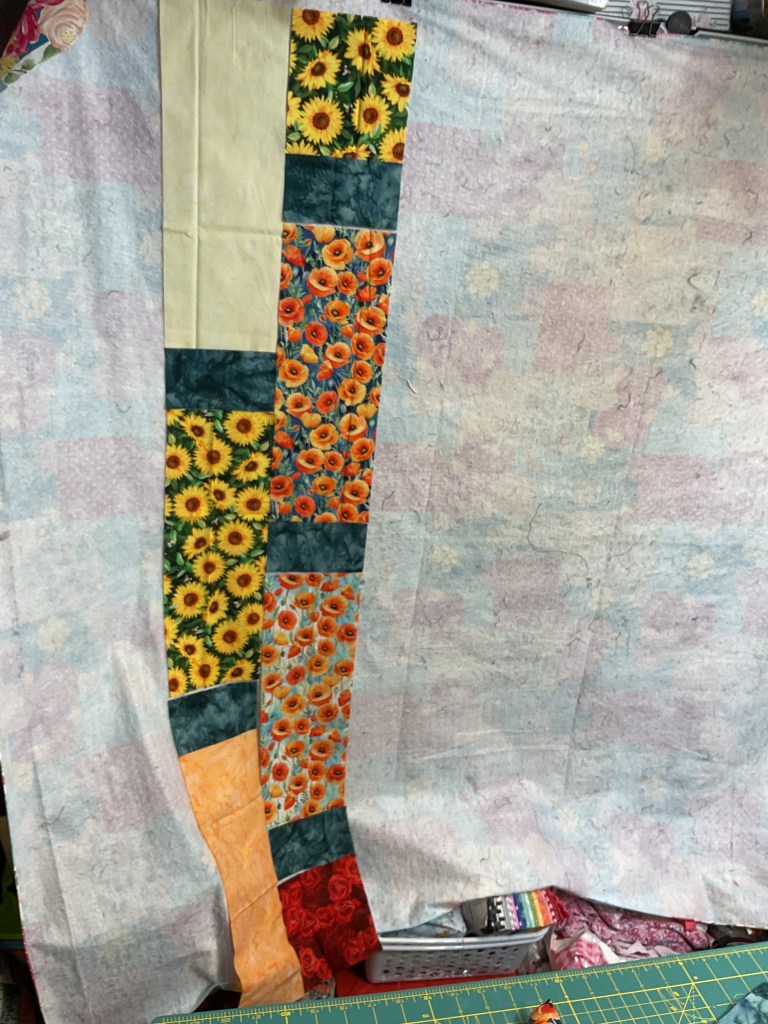
6. Are you following along? Because now we are going to sew our A and B units into blocks. Taking 2 of unit A and 2 of unit B, sew together with As on the outside and Bs in the middle. You’ll need to flip the last 2 units.
7. You will now make a reversed block with 2 more of each A & B units, turning the last 2 units as shown.
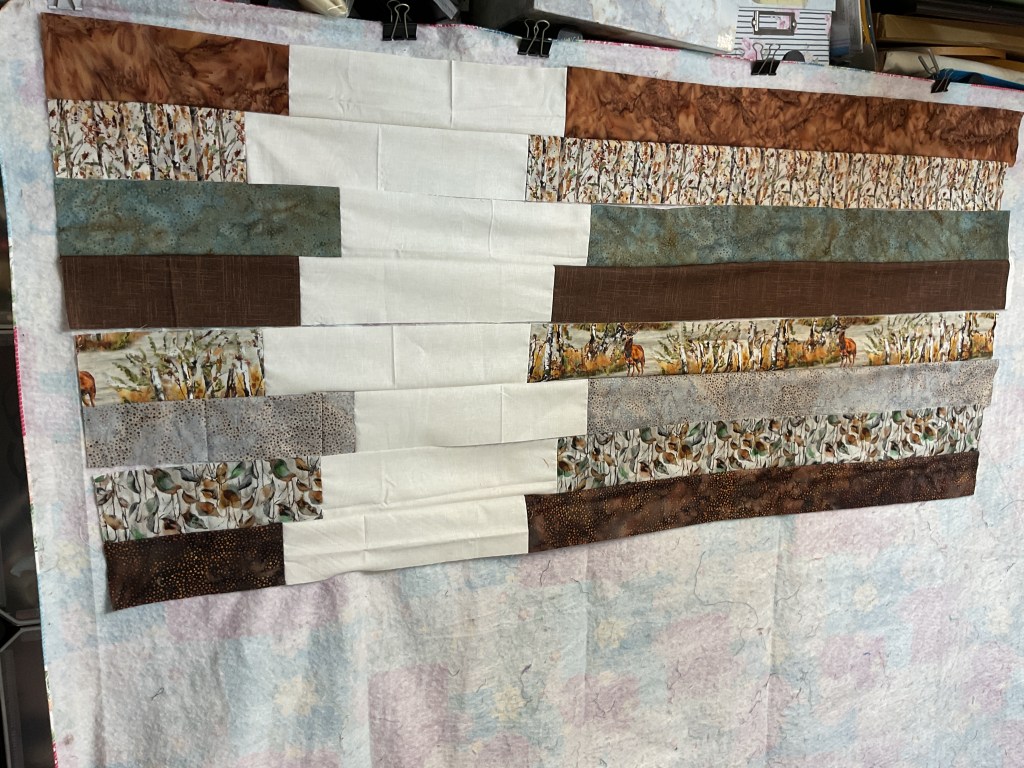
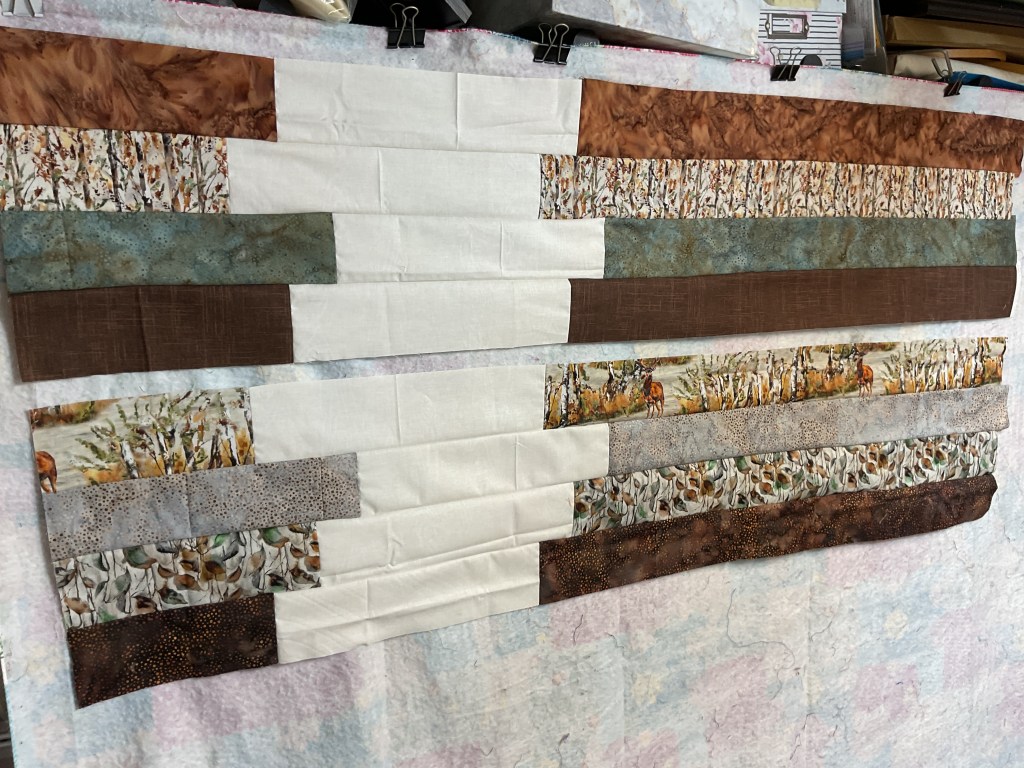
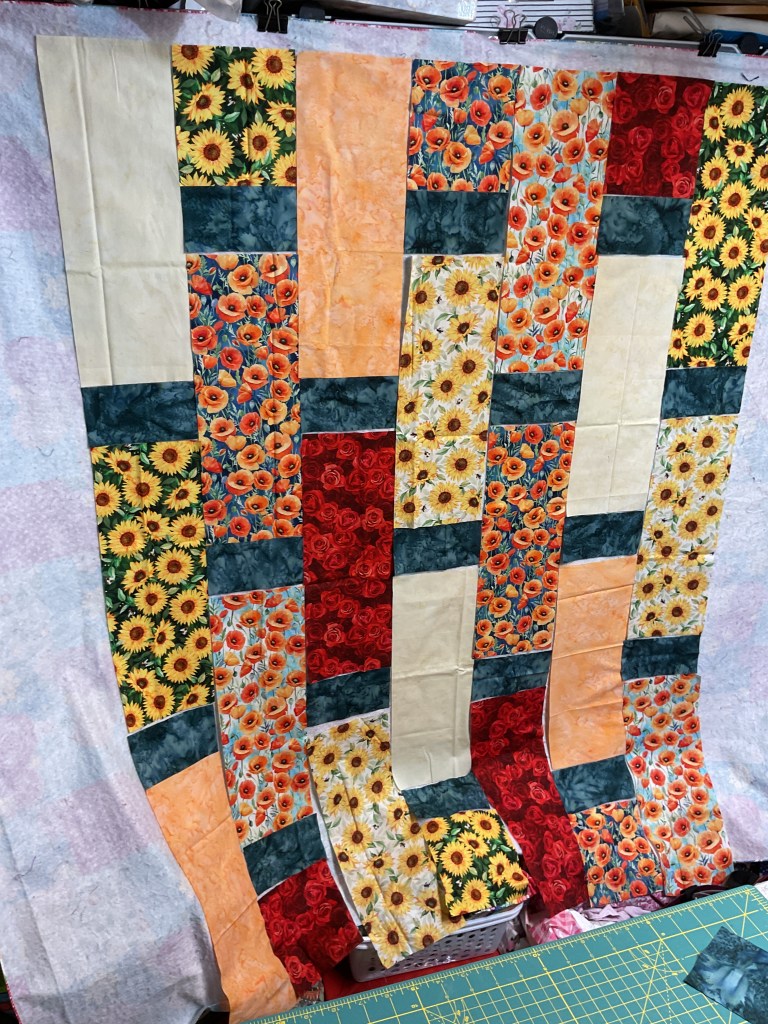
8. You should now have the same number of each block. Time to play! You can lay your quilt out just like the pattern or you can play around with the layout and create some fun variations.
Here’s the original layout.
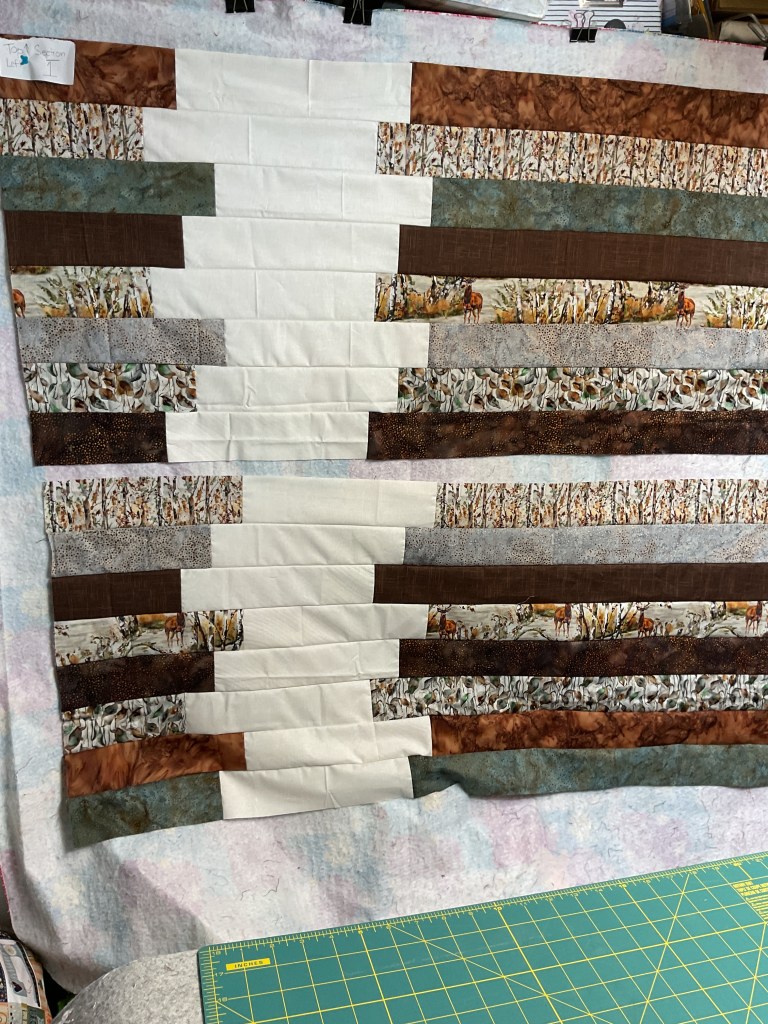
And here’s some cool variations to try out.
I bet you can even come up with your own block arrangement, so have fun!
9. When you’ve decided how you want to arrange your blocks, it’s time to sew the blocks into rows and then sew the rows together into the quilt top.
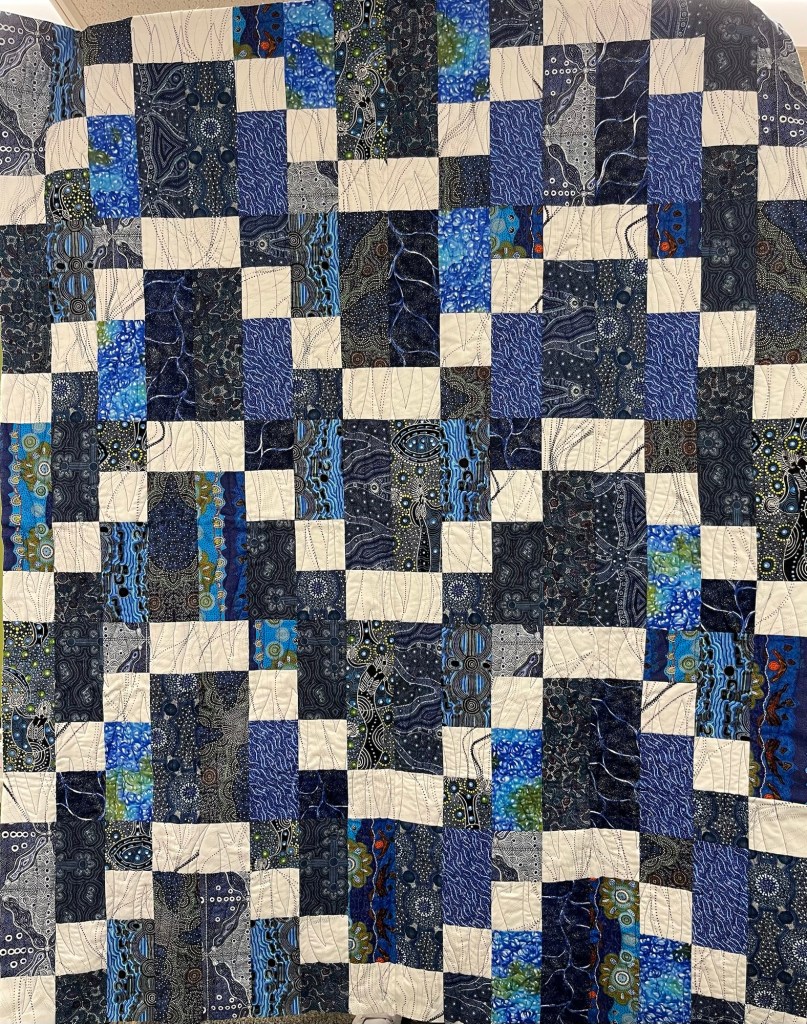
For my Morning Tea quilt, I’m going to stick with the original layout. Totally loving how it turned out!
10. Next up – layer, quilt, bind, and label your quilt.
Don’t forget to post your quilts on our VRD Facebook page or tag us on Instagram, #villarosadesigns. We love seeing your creations!
Thanks for stopping by and sewing with me!
Next week, Tricia will be back with another great tutorial for you.
After our super fun Let’s Design a Quilt series (if you missed it, please check out the right side bar on the blog to find all of the links for the series) wrapped up last week, I promised a new group of tutorials to jump-start your autumn quilting.
You know how this time of the year is filled with local fairs and such right before the kiddos go back to school? Well, this week we’re off to the rodeo! Yippee!
Have you ever been to a rodeo? I have a vague memory of going when I was a kid. My Grandma (my Dad’s mom) was always crazy about horses and always had at least a couple on the farm (my Grandpa always had his cows). I spent a lot of time on the farm as a kid as my grandparents’ farm was just down the road from our house. I have lots of good memories on the farm from when I was a kid. Baby animals were probably my favorite. Of course, running through the fields at midnight in the summer chasing down stray cows or horses was always fun, too. Good times.
Let’s slap our cowgirl (or cowboy) hats on our heads, put on our boots, and get started!
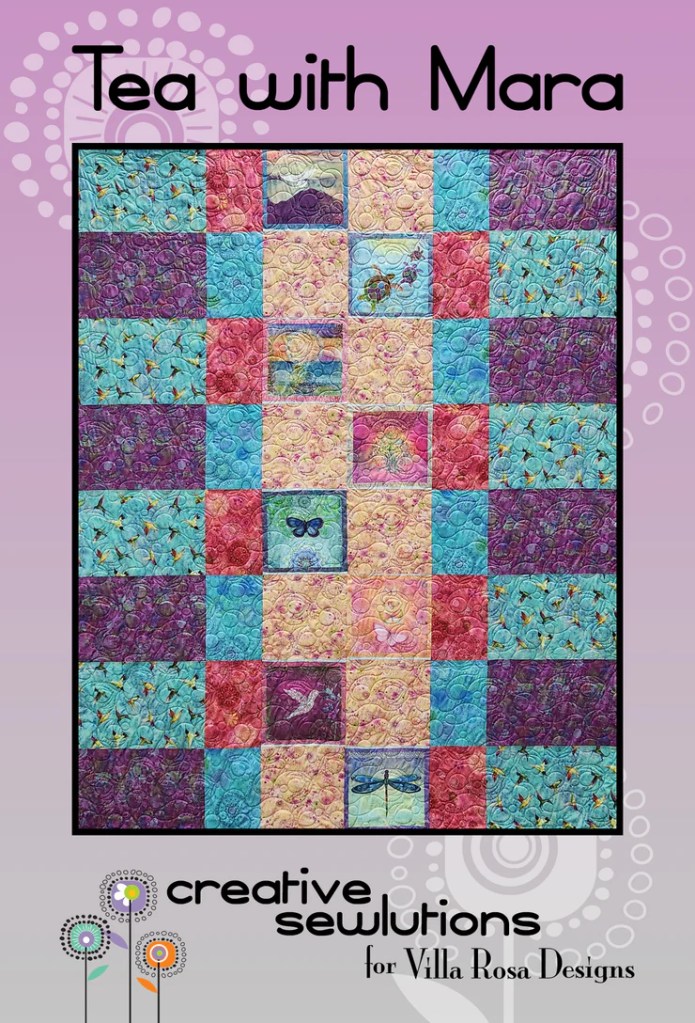
VRD Tea With Mara Quilt Tutorial
Tea With Mara is designed by Deanne of Creative Sewlutions, one of our talented VRD designers. This quilt finishes at a generous 58″ x 72″ and it can handle those large prints we are so loathe to chop up. Use printed panel squares……or not down the center. Sew many options……..sew little time!
PSST! Don’t forget, patterns always ship free, so grab a few more while you’re perusing the VRD patterns at the online shop.
For today’s tutorial, I’m using fabric from our friends over at Hoffman. It’s a digital-printed collection called Rodeo Dreams. When I saw this collection, I loved it! Maybe because it brought back fun memories from my childhood? So I’m letting you know right now that you’ll be seeing a couple more tutorials featuring Rodeo Dreams.
Just a quick word of caution when using digitally-printed fabrics – start with a brand new needle because if your needle is dull, you run the risk of damaging the fabric and we certainly don’t want to do that.
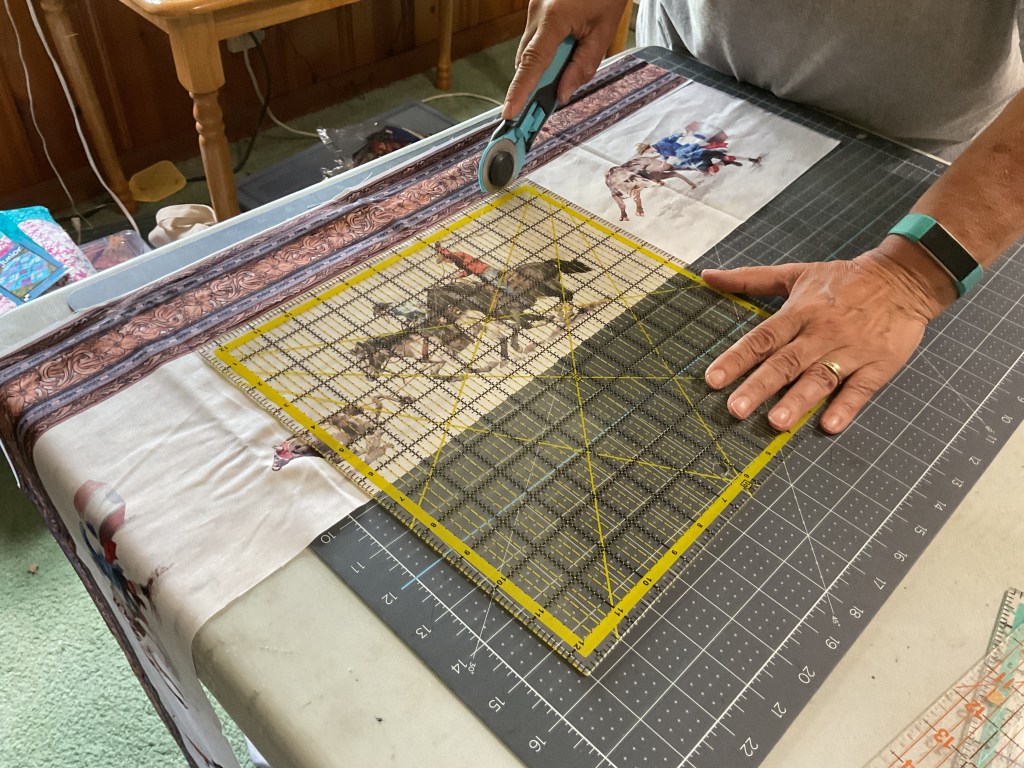
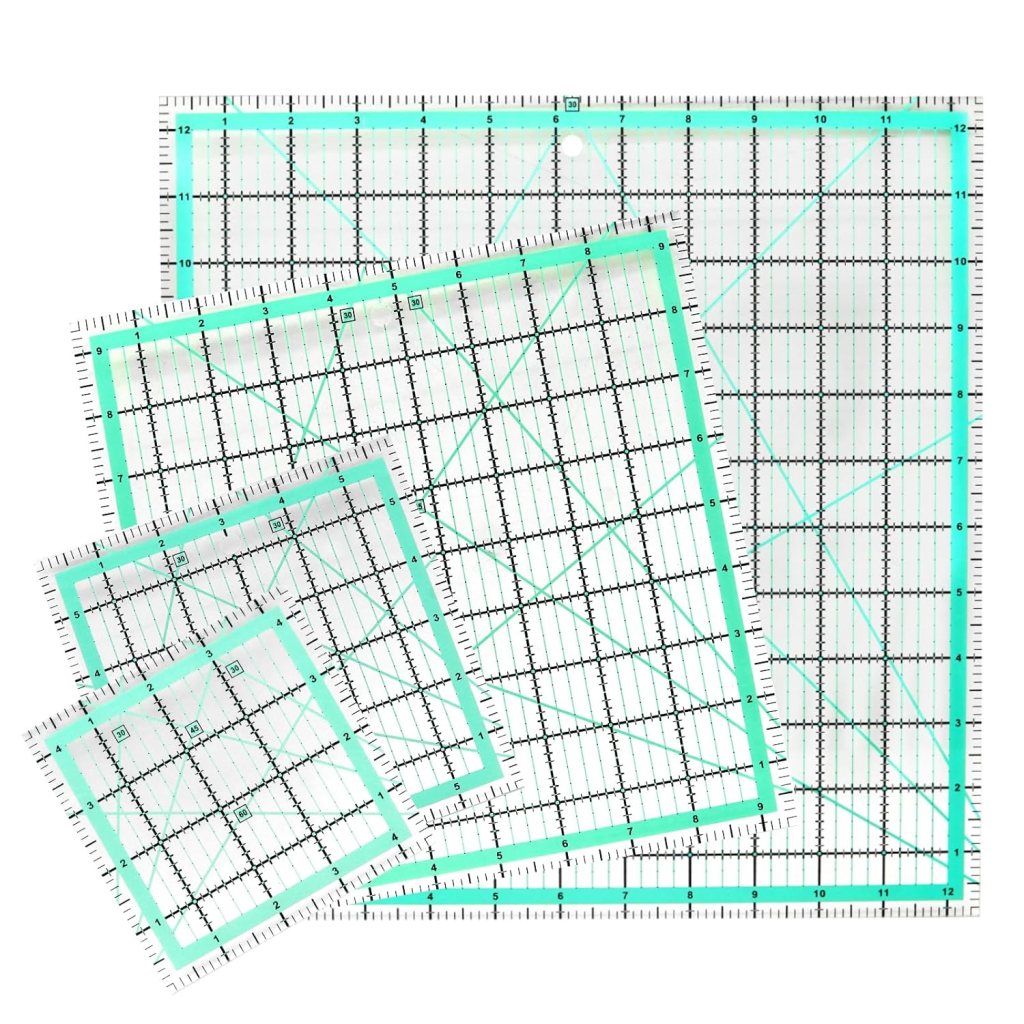
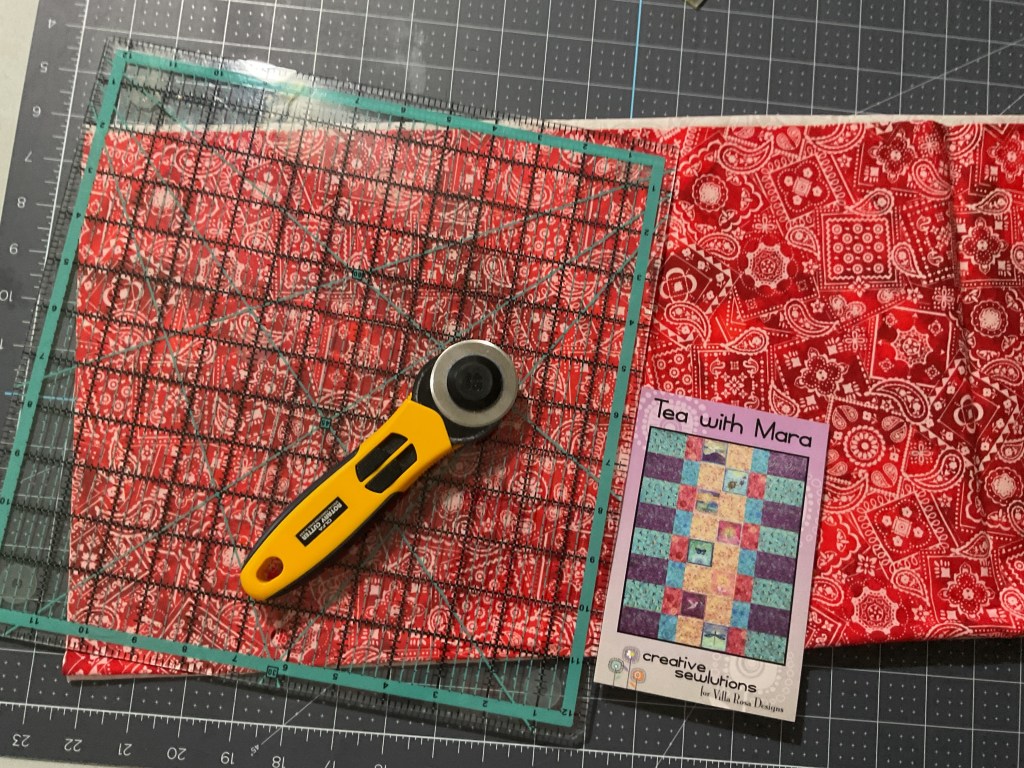
The first fabric I’m going to cut is the running yardage of the rodeo vignettes. I’m very glad I have a ruler the same size as the required block size in the pattern so I can fussy cut the squares easily and accurately.
Having the right sized ruler makes it a lot easier to fussy cut these vignettes than trying to cut strips and then cutting the strips into squares. This type of fabric makes strips and squares kind of tricky because the vignettes aren’t all the same size nor do they line up in a perfect grid.
Love quilting rulers! Boy, they do make quilting so much easier, faster, and more accurate.
Mostly, I rely on my 6×24 and 6×12 rulers for cutting, but it’s always a great idea to have a collection of square rulers in the most common sizes, which are not only good for fussy cutting, but also for squaring up blocks.
The only problem with fussy cutting is that your fabric will look like Swiss cheese when you get all done! LOL! Check mine out below. I can still fussy cut more pieces out of the fabric, but there is definitely more waste doing it this way than cutting strips into squares. Just something to think about if you’ve never fussy cut before.
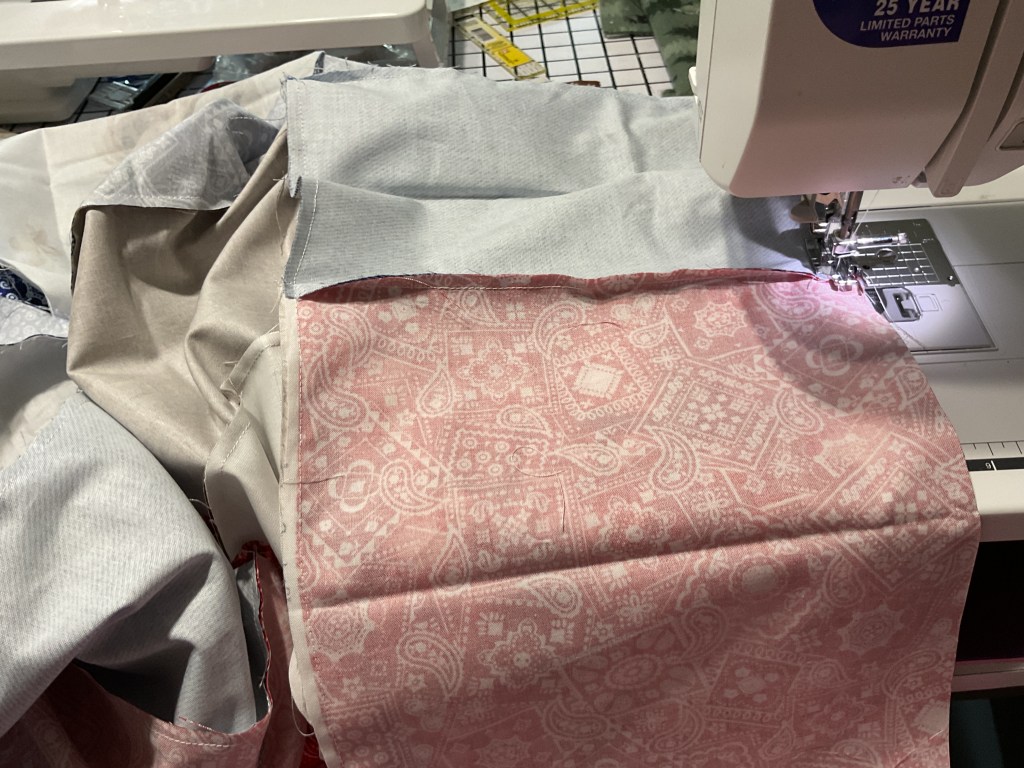
Now I’m finished making Swiss cheese, it’s time to cut the rest of my fabrics. Loving this red bandana print – it looks like the real thing (digitally printed, of course)!
Here are all my fabrics cut and ready to sew.
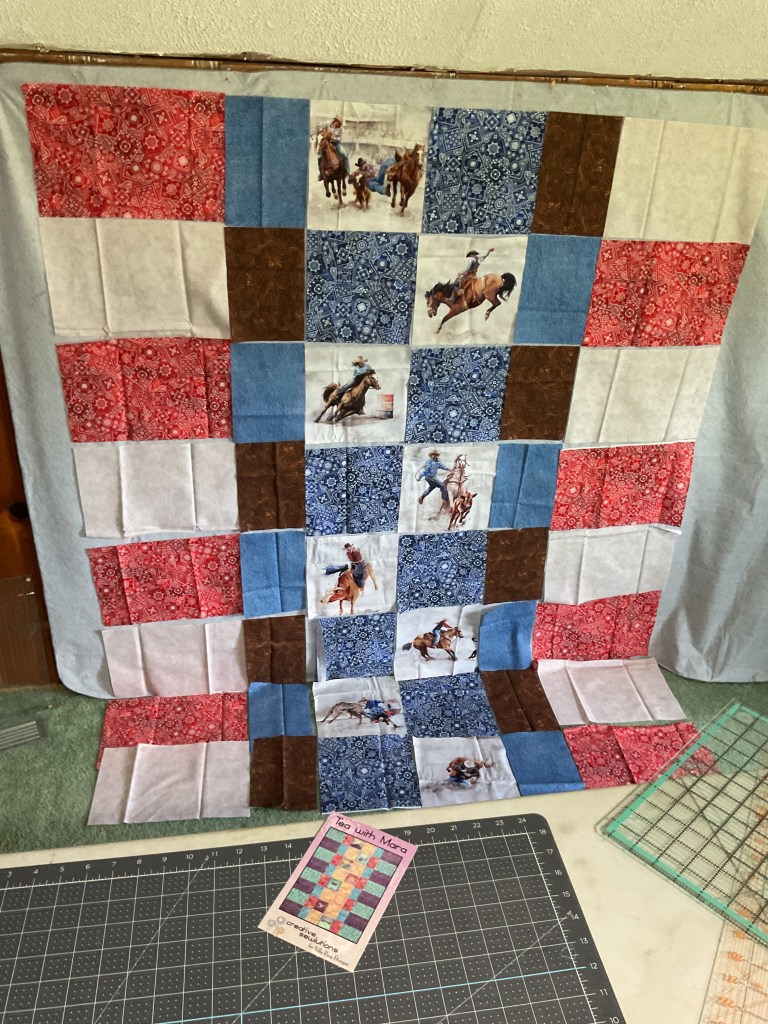
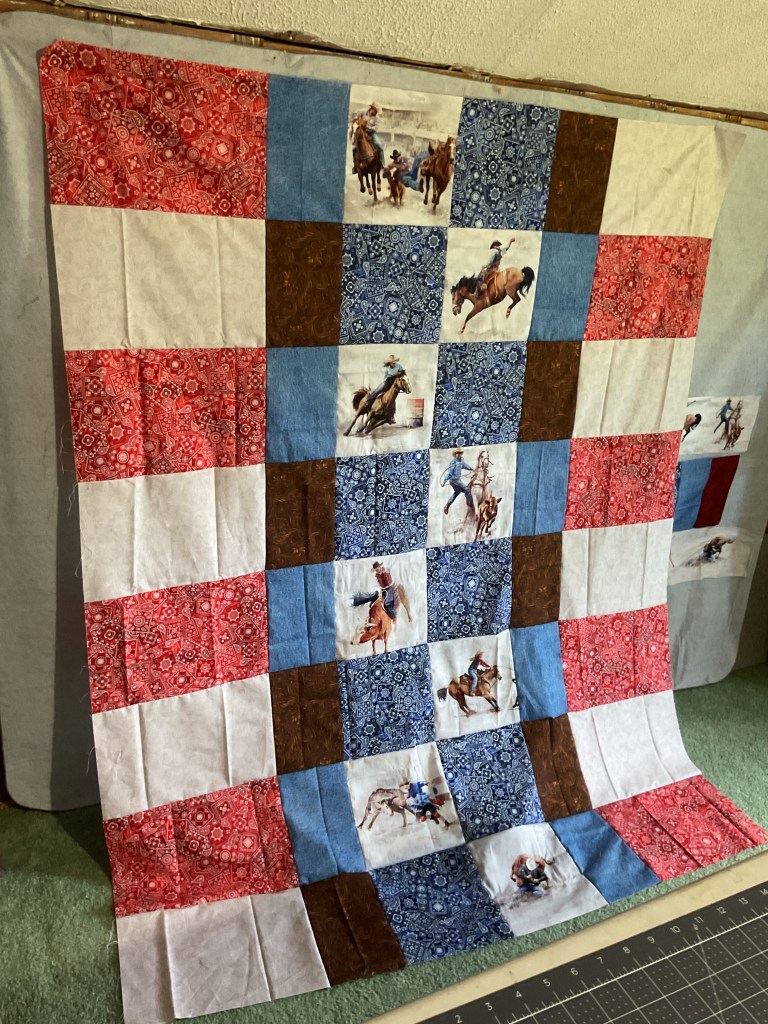
But before I start sewing, I’m going to lay out all of the pieces on my flannel wall. I want to make sure I like the placement of the rodeo vignettes before I commit to their positions permanently.
I really like the nice big pieces in this quilt, even if I have to layer pieces on the floor because the quilt is going to be longer than my flannel wall. It’s going together surprisingly fast, though.
Of course, you don’t have to fussy cut your fabrics like I did – you could use any fabric you wanted for the center squares. Or you could even scrap this quilt up and use some of your stash. Such a versatile pattern – I could totally picture this quilt in a great collection of fall or harvest fabrics! Hmmmmmmmm….
You could even add a 6″ finished border, which would make the quilt a big 70″ x 84″!
Now I’ve got all my pieces up on the flannel wall. I switched a couple of the rodeo vignettes around, but other than that, I think it’s ready to sew. I like how it looks.
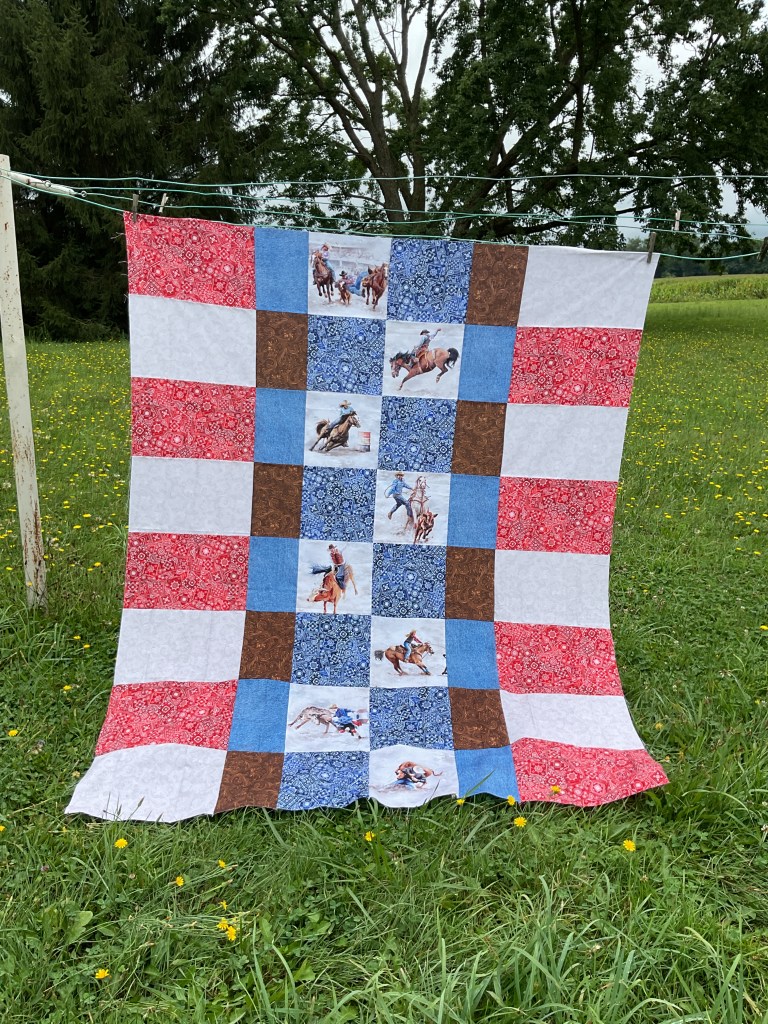
Yippee-ki-yi-yay! Let’s sew this little dogie together! I really like how the fabrics alternate in placement from side to side – it definitely helps to keep your eyes moving around the quilt. The red and blue bandana fabrics really make this quilt in addition to the rodeo vignette squares. LOVE IT!
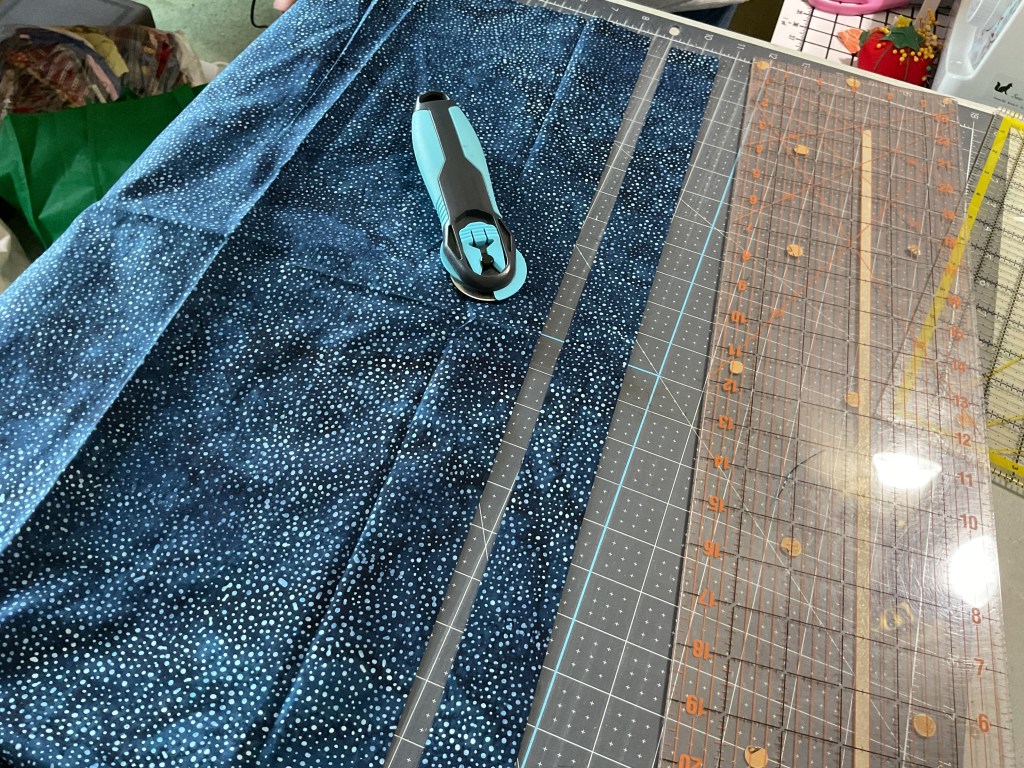
And here it is outside on the clothesline. All I need is a horse or 2 grazing in the backyard, right? I’ll be binding this quilt with the dark blue batik you see in the fabric and pattern photo way up at the beginning of this tutorial. I think it will frame the quilt nicely.
Now to get this quilt top layered, quilted, bound, and labeled…….some day, anyway. Right now I’m going to add it to my teetering pile of flimsies and UFOs. I’m hoping to make a good-sized dent in that pile this fall and winter. It’s just been way too hot this summer to machine quilt and do binding.
Here’s to autumn with its warm days and cool nights. And the brilliant colors of the season…. I can’t wait!
I know I say it every month, but our VRD designers are totally outstanding! Every month, they exceed the previous month’s designs. Let’s take a look at each pattern this month.
Grated by Heidi
Grated uses a stack of fat sixths (which are between a fat eighth and a fat quarter, measuring 12″ x 21″) or 10″ squares. This is a big quilt measuring 65″ x 75.” There are still kits available, which feature Klimt fabrics like the pattern cover. You can get your Grated kit, which includes the pattern, HERE.
Lady Banks by VRD (Pat)
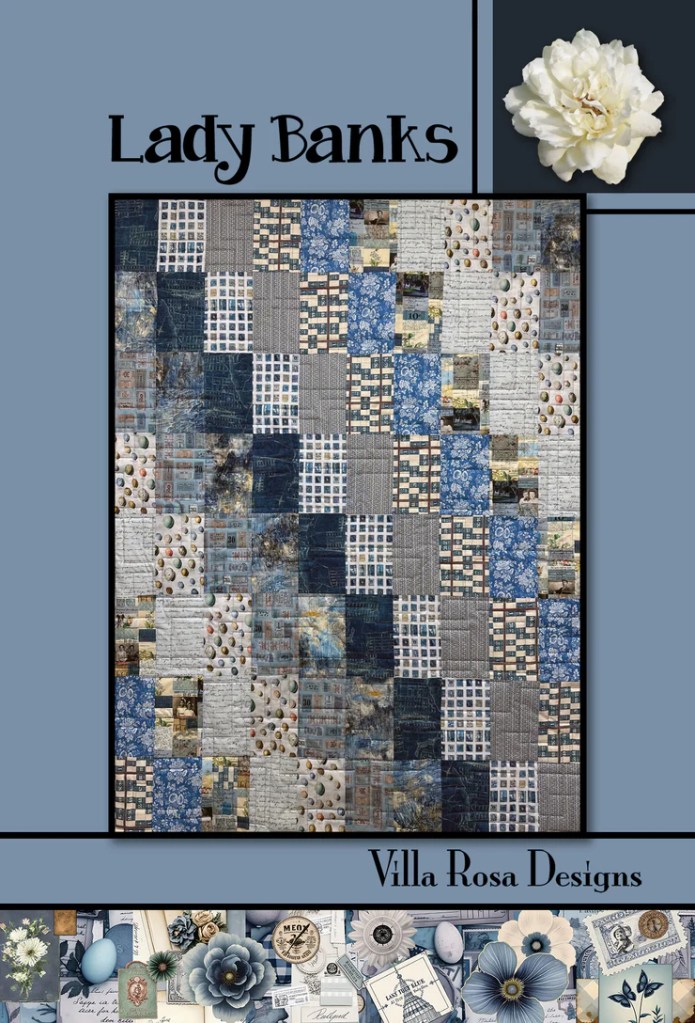
If you are following along with the Tim Holtz Palette collections then Lady Banks is for you. It features the blue palette and finishes at 45″ x 60″. You can find the kit (including the pattern) HERE.
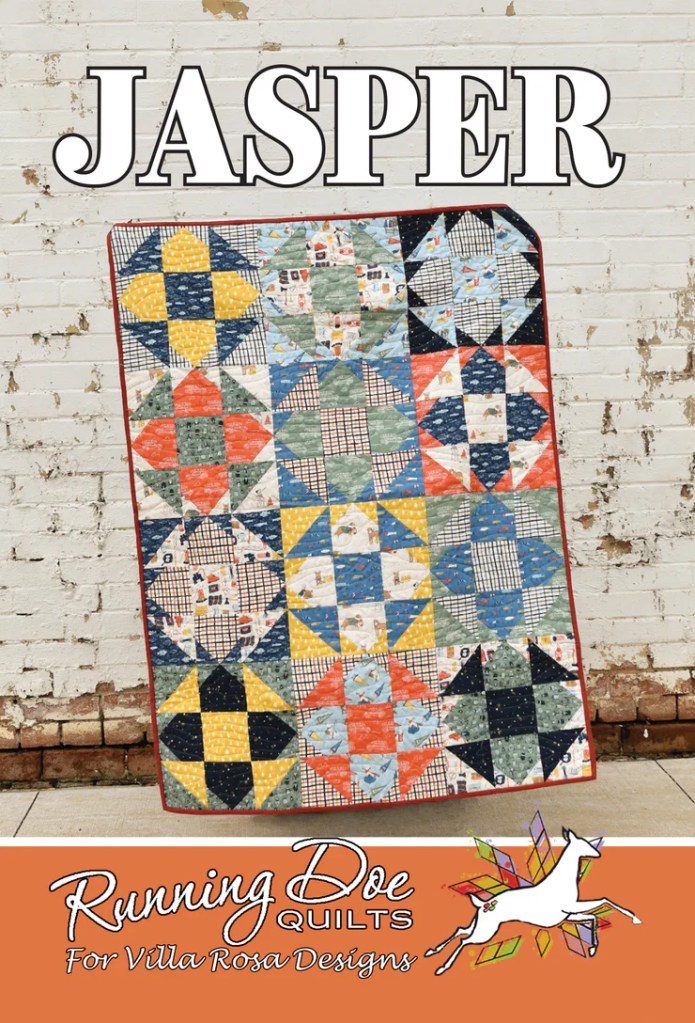
Catherine is back with 2 new mod patterns this month! Jasper is FQ friendly and finishes at 36×48, which makes a nice baby quilt or lap quilt. You can find the kit HERE featuring the Camp Canine collection at Running Doe Quilts.
Jolene is Catherine’s second quilt this month. It uses FQs and finishes at a generous 63″ x 84″. You can find the kit HERE at VRD featuring the Thirty-One collection or HERE at Running Doe Quilts featuring the Camp Canine collection.
Snap Shot by Molly
Snap Shot is another one of Molly’s creative panel quilts. It is FQ friendly and finishes at a nice 45″ x 54″, which could be a wall quilt or a throw. Sorry, but VRD is out of Snap Shot kits already.
Apologies, but there is no table runner this month. Stay tuned for next month’s runner!
SEW, which NEW pattern are you going to make first?????
Now let’s turn our thoughts to our ongoing Quilt Design series.
Let’s Design a Quilt: The Farmer’s Daughter Block
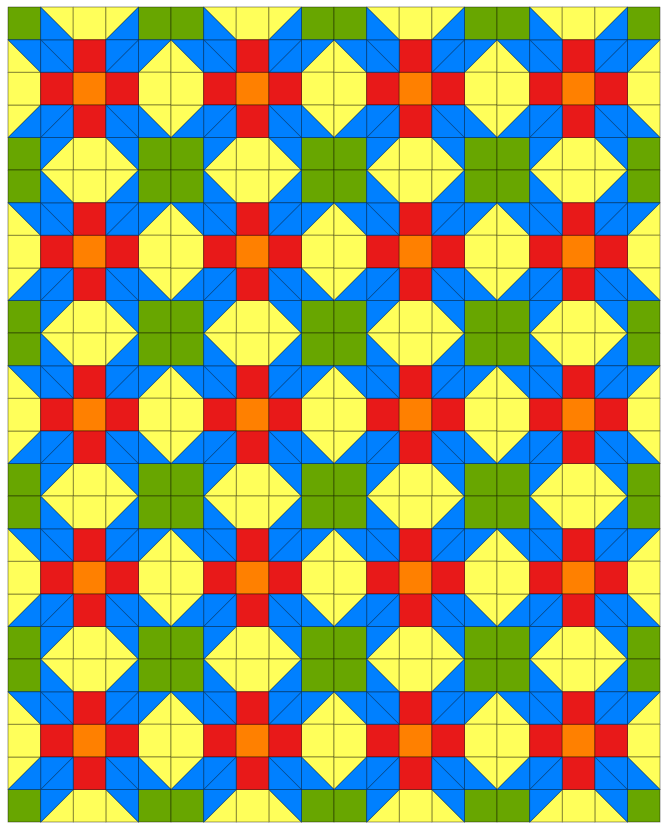
Here is the traditional Farmer’s Daughter block. According to Barbara Brackman, this block was first published in Clara Stone’s 1906 booklet, Practical Needlework: Quilt Patterns, which was part of a needlework booklet series by C. W. Calkins & Co. in Boston. Of course, like most quilt patterns, it was probably being made long before it was published. One of our readers suggested this block last week and I just couldn’t resist it. Thank you, dear reader! I hope I do the block justice for you!
Yikes! See how the four corners of the block feature set-in seams? Well, the first change to this block we are going to make is to change the four corners to be much friendlier by using Half Square Triangles (HSTs) instead of set-in pieces. Ahhhh! That’s more like it!
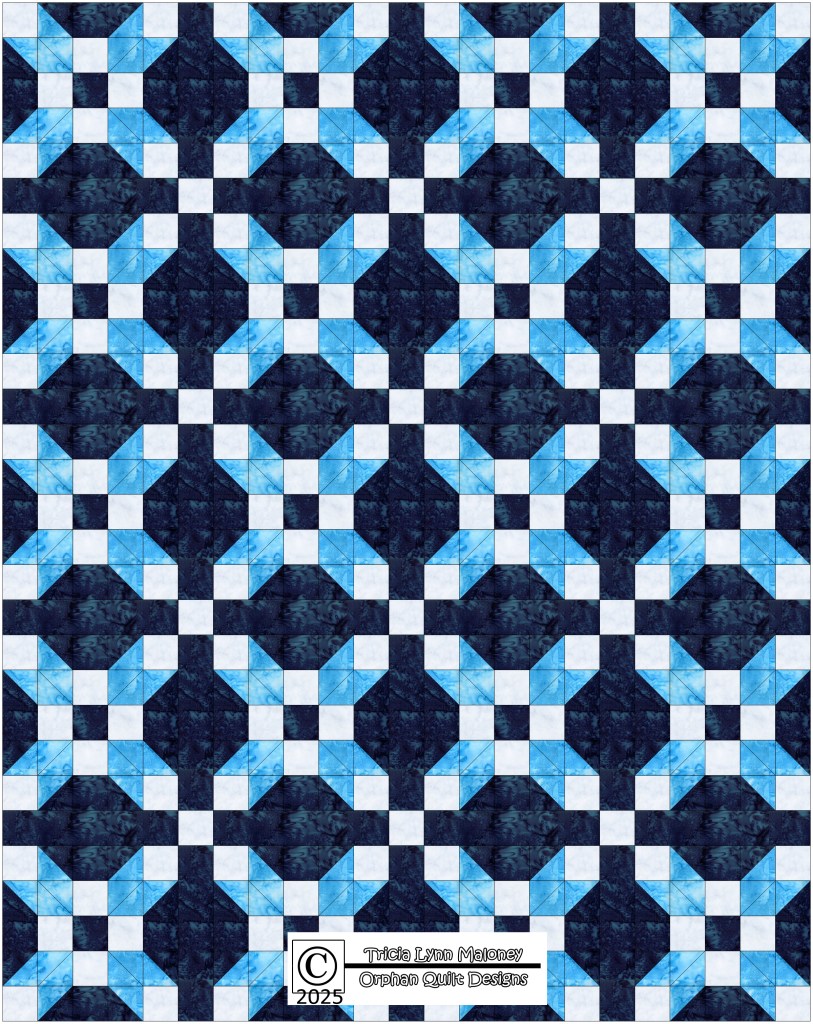
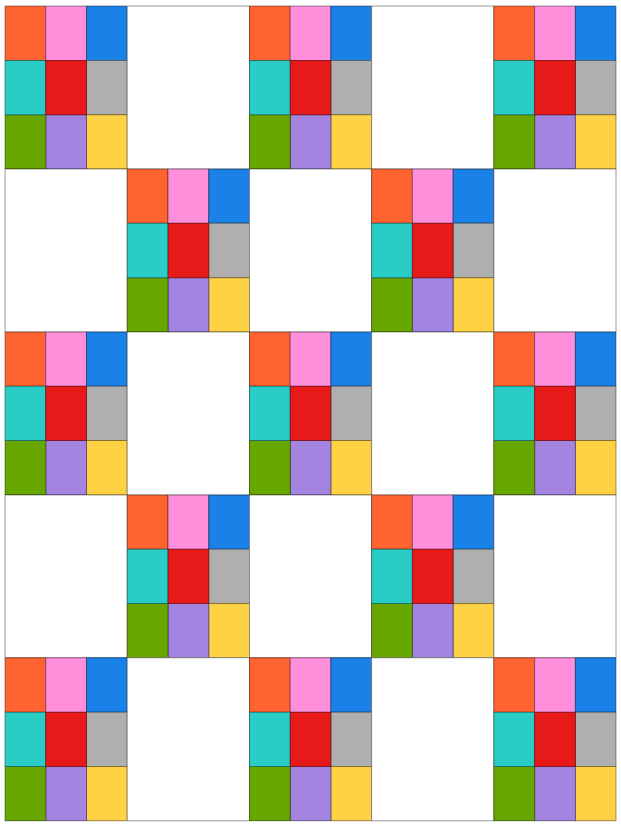
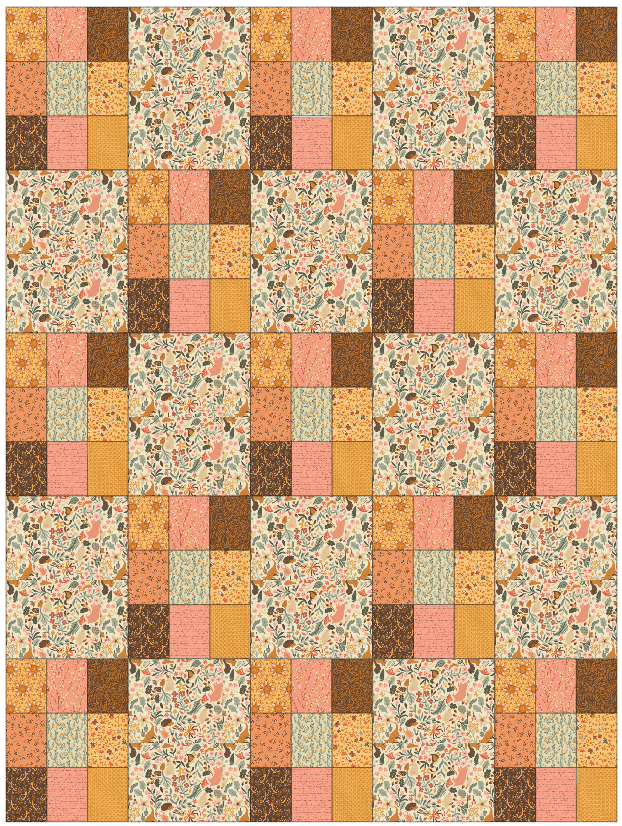
Now we’re ready to play — er, design! Let’s put Farmer’s Daughter blocks in a quilt. Huh! When you set the blocks side to side, you lose the block and a whole new design emerges. Pretty cool!
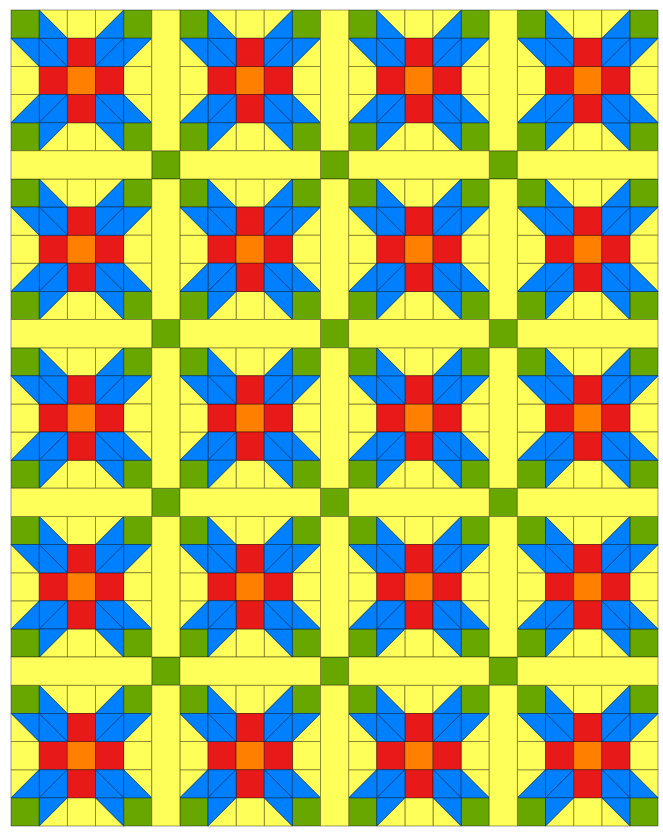
Now let’s add some sashing to see what that looks like. Neat-o! Sashing shows off the block. I just love the secondary design where the block corners (with the green squares) meet the sashing squares. Both designs have a lot of movement already and I haven’t done anything except the HSTs.
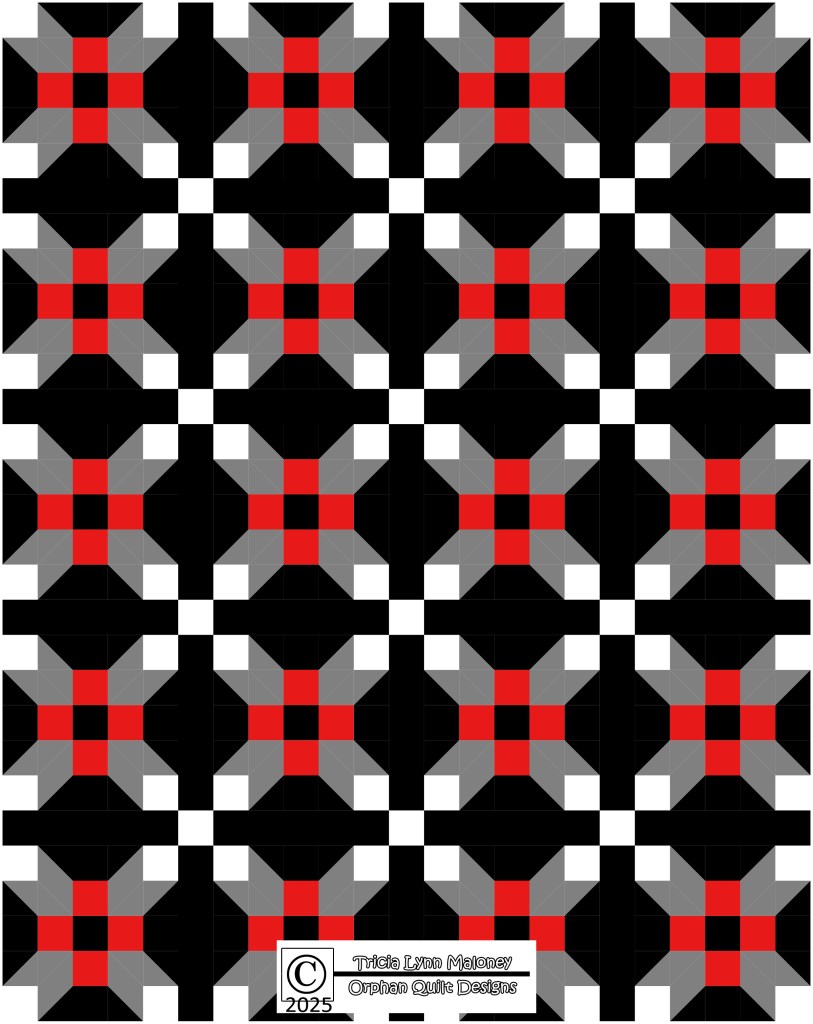
Wowzer! Look what happens when I change the colors to black, grey, white, and red. I’d call this a finished design right now, wouldn’t you???? It almost has a 3D effect. Cool beans!
Here’s the same design, but I changed the red to white. Holy cow, Batman! It’s really eye-catching and the black negative space is just itching for some really cool machine quilting.
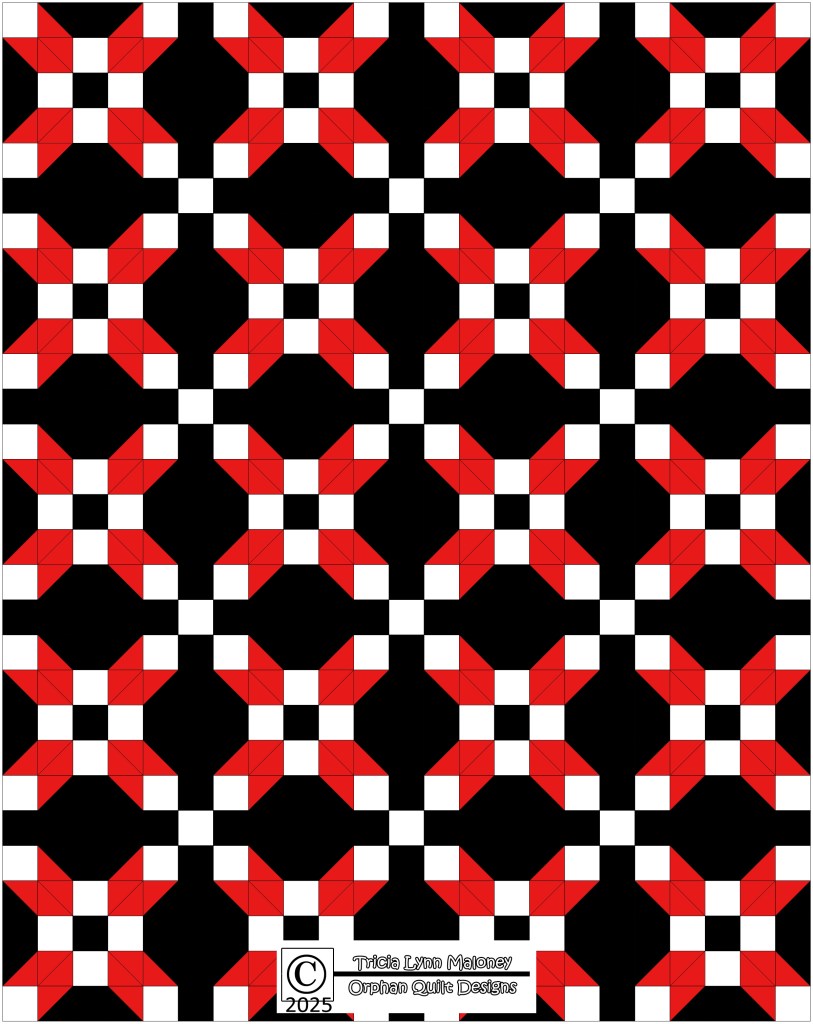
Here’s the same design again, but I changed the grey to red. Oh my! It just about leaps off the screen. Just by playing around with the colors.
This is only ONE of sew many reasons why I love my Electric Quilt 8 software. I can tweak some tiny little thing and if I don’t like it, I can go back or keep tweaking. If you haven’t ever tried EQ8, you really should. It is a total game changer for quilters everywhere!
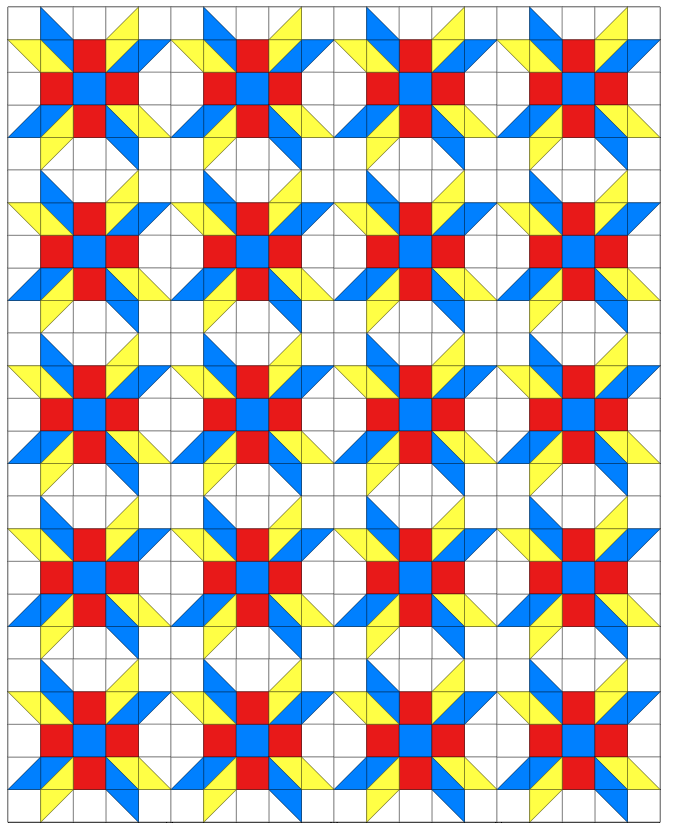
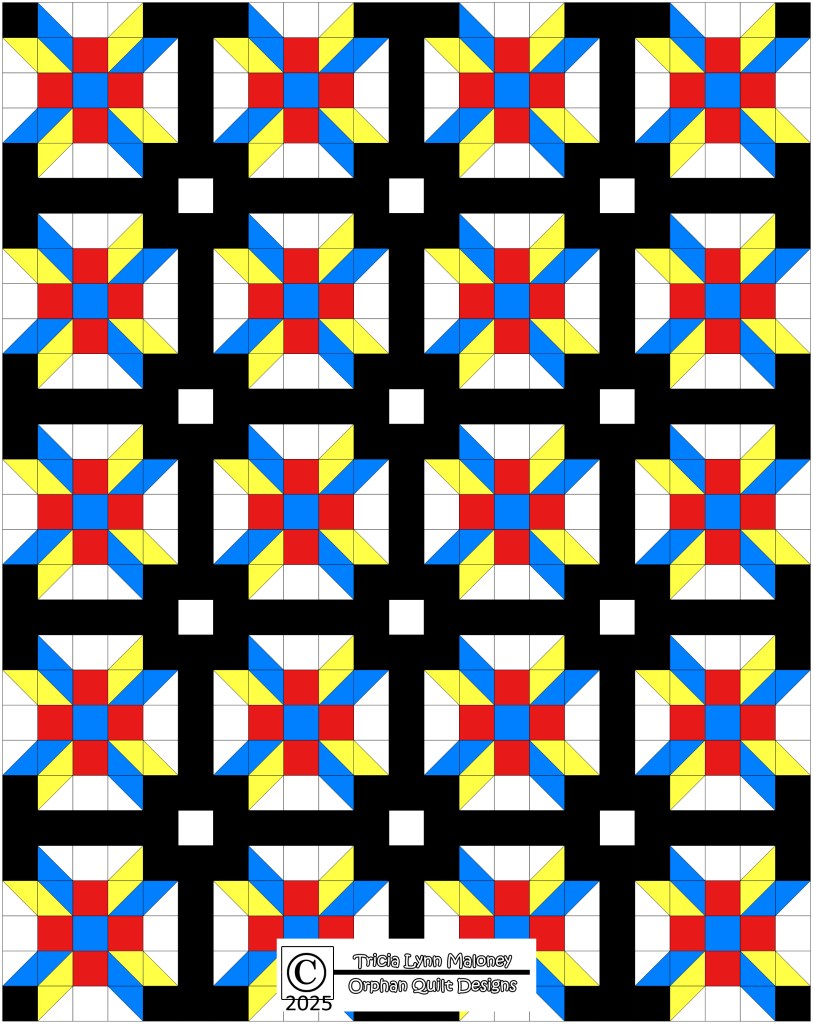
But wait! We’re not done yet. Let’s go back to the block and split the corner sections into 2 colors, instead of just 1 color. I also changed the center square to blue, which gives it an interesting pinwheel design in the center.
Let’s see what it looks like in a quilt. Hmmm. Not very interesting. At least not yet.
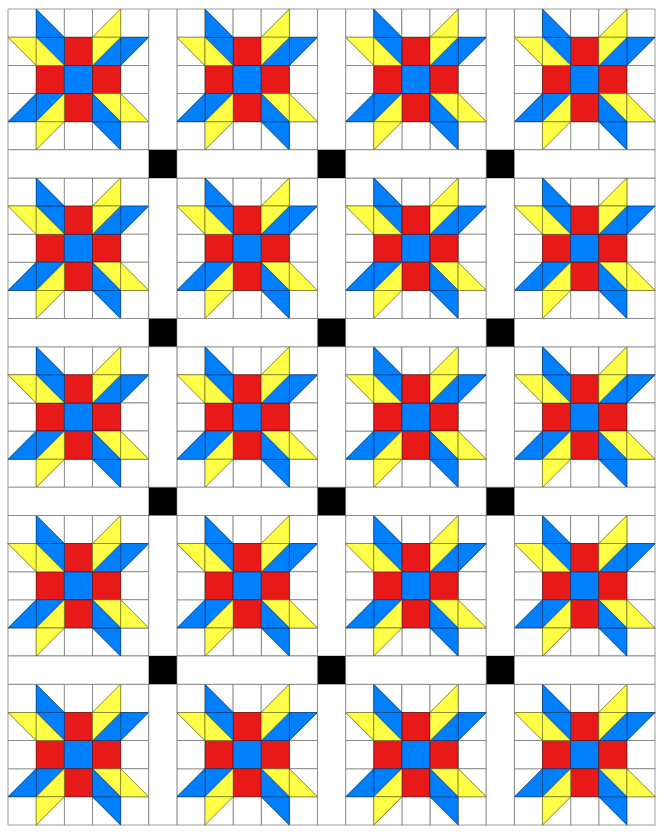
Let’s add some sashing. I’m gong to introduce black for the sashing squares. Better, but no way near finished. Let’s keep going.
Let’s flip the black and white for the sashing and sashing squares. WHOAH! I am loving this sashing idea – it is incredibly graphic! But now we need to tweak the blocks some more.
Before we work on the blocks some more, it needs a border to frame it. It just looked a bit unfinished without it, don’t you think?
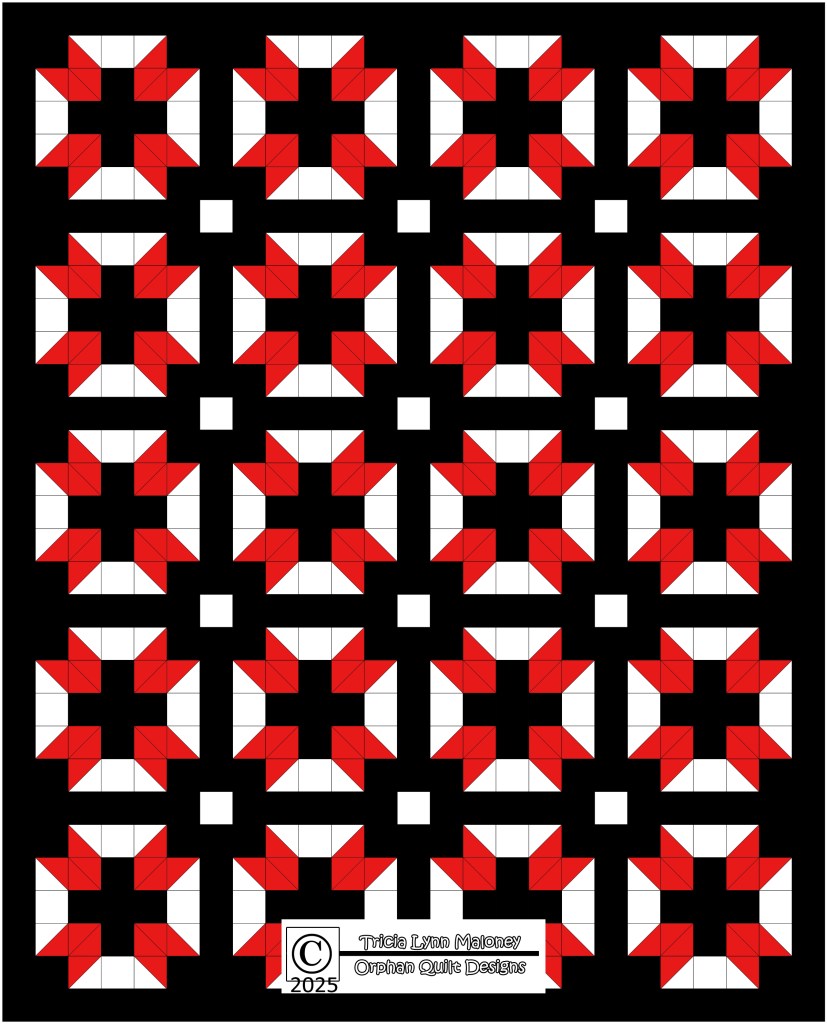
That’s it! Okay, on to the blocks. Let’s swap the blue and yellow in the 4 corners back to 1 color, red. And change the blue center to white so it repeats the white sashing square. I love how graphic it is. Your thoughts?
One more tweak. Let’s change the center square in the blocks to black. Yup! That’s it! Love the plus sign in the center of the blocks! This design has a clean modern look yet it feels traditional, too. It is totally the best of both worlds.
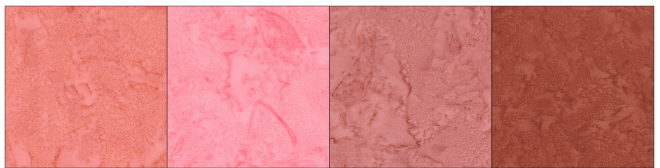
All right! Let’s add some fabric. Again, I’m using batiks from Hoffman’s 1895 Watercolors collection. I did make one more tweak by changing the sashing squares to match the plus signs. Don’t you just love it in pinks? The black has a slight bluish tinge for added interest. Again, it has a bit of a 3D effect. Done and done!
Do you remember where we started? A Classic Farmer’s Daughter block.
How far we came just by changing the colors, playing with the fabric placement, and adding sashing/border.
How are you going to explore these ideas with your quilts???
Well, that’s it for me for our 4th week in our Let’s Design a Quilt Series. If you missed any posts, you can catch up here:
Hope you are enjoying these lazy, hazy, crazy days of summertime. Me, still making my summer to-do list. Ha Ha!
We’re just going to jump right in today because I’ve got some fun stuff for you. Yippee!
First up – NEW July patterns.
NEW July VRD Rose Card Quilt Patterns
I just love the first Thursday after the first Friday of every month because it means NEW VRD patterns.
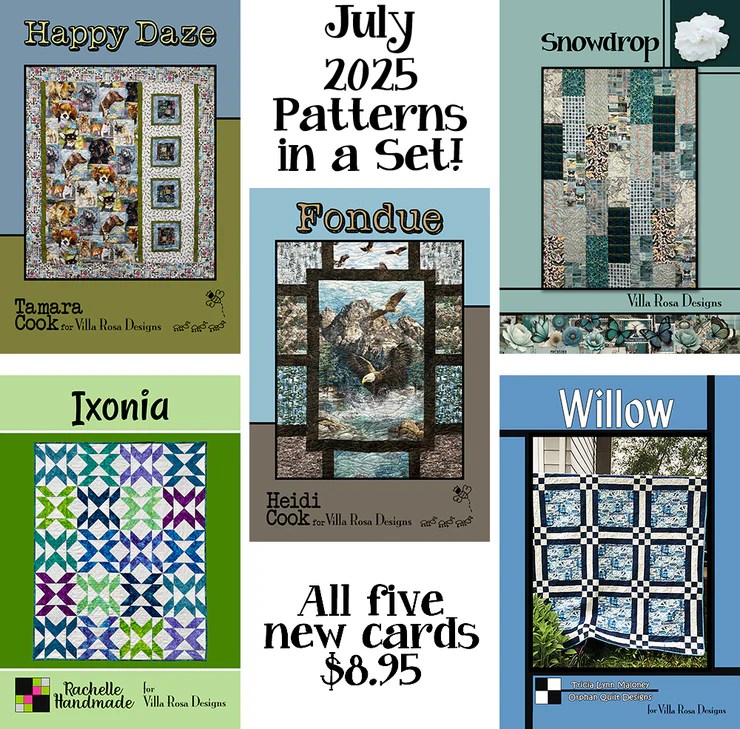
Here’s the set of 5 patterns. As always, our talented VRD designers do not disappoint! You can get the print set of 5 HERE (they are also available individually as print patterns too) or you can get the digital patterns individually below:
Happy Daze features a panel (or substitute a novelty print if you wish) in a fun modern setting. Quilt kits are still available HERE, but get yours ASAP because they’re going fast.
Fondue is also a panel quilt with a very interesting and unique setting. We still have a few quilts kits left, so get ’em HERE while they last.
Snowdrop uses your favorite collection of fat quarters. This is Pat’s latest pattern in her Tim Holtz Palette patterns. You can get the kit HERE.
Ixonia is Rachelle’s latest mod quilt. It also uses fat quarters.
Willow is a super versatile pattern – use a single fabric for the centers, panel squares, or even quilt blocks! We kitted it up with the Playgrounds collection (see below), get your kit HERE.
Willow kit in Moda’s Playgrounds collection
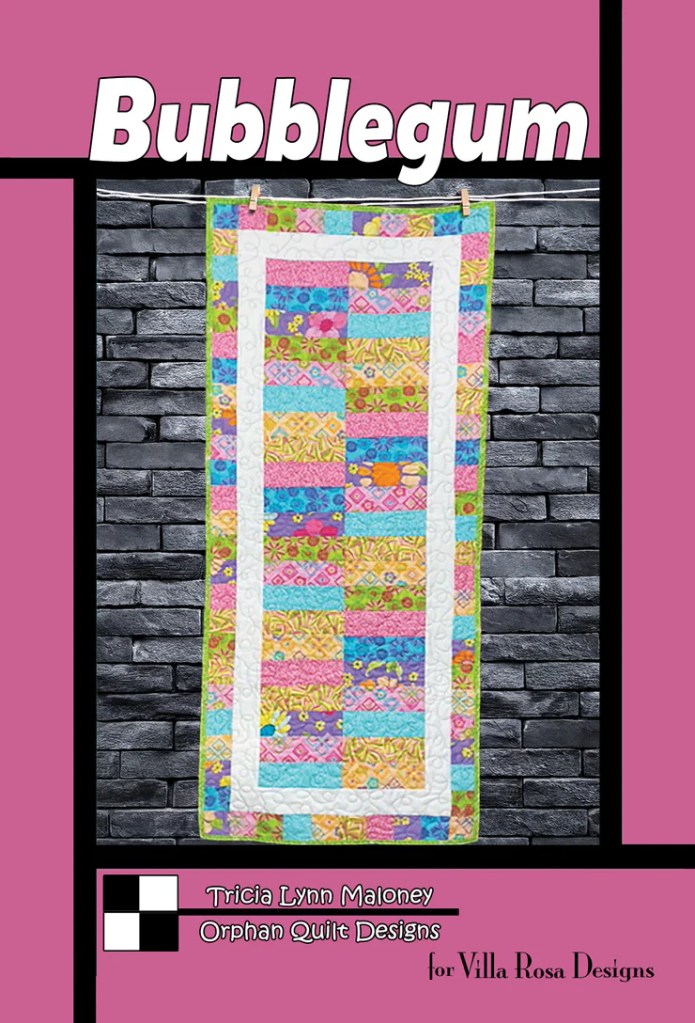
And here’s this month’s table runner, Bubblegum. It uses a collection of fat sixths, but works equally well with leftover Jelly Roll strips or your stash.
Get your digital pattern HERE or your print pattern HERE.
I know it’s summer and most of us don’t quilt as much, but I think these new patterns will inspire you. Besides, VRD patterns go together like greased lightening. Make one in a weekend or even a day.
Why not get your quilty friends together for a summer sew day? You could each have a quilt top done at the end of the day and enjoy some overdue friend time, too.
Next up – let’s play with the Nine Patch block and design a quilt together.
Let’s Design a Quilt Together: Nine Patch Blocks
Nine Patch blocks were on my mind the other day. Why? Because I was thinking about antique quilts and Nine Patch blocks are one of the oldest quilt block patterns as well as one of the most humble. Have you ever gone to see an antique quilt display or perused a book about antique quilts? If you have, I bet you’ve seen A LOT of Nine Patch quilts.
I started wondering what kind of interesting designs I could create from the historic humble Nine Patch. Then it hit me – this would be a really fun blog post idea. So here we are.
If you’re interested in designing your own quilts, there are several ways to do so.
1. Graph Paper
Graph paper, a pencil, and a calculator are often a designer’s first tools for creating one of a kind quilt designs. I started out with this, but quickly found I didn’t have the patience for figuring everything out all the time. I still draw lots of doodles with blocks or setting ideas, but these aren’t my primary design tools anymore.
And guess what?!? Even graph paper for quilting has evolved over time! There are many different options available these days for quilters such as quilter’s graph paper books. Some even include stencils and other goodies to help you in your design process, like C&T’s QuiltGenius Design Tool kit.
A design workbook with prompts and space to draw is a step up from plain old graph paper. Last year I actually created such a workbook because I got tired of losing all my little scraps of paper when I came up with a new idea. Now I can keep all of my ideas in one place.
Electric Quilt 8 software by the Electric Quilt Company is a fantastic design program! I couldn’t do what I do without it. Seriously. One of the great things about this program is all the support out there so you can learn how to use it. The EQ website offers tutorials, classes, and even fun design challenges. There are books galore available to teach you all the ins and outs of the program. And EQ is always coming up with new add-ons to enhance your design capabilities.
So now we’ve talked about the 3 top ways to design quilts, let’s play with Nine Patches using EQ8, of course!
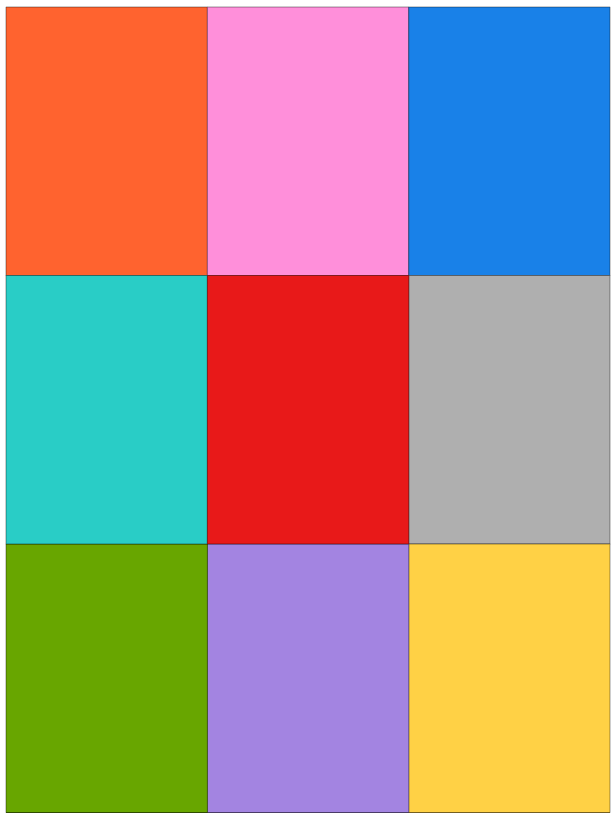
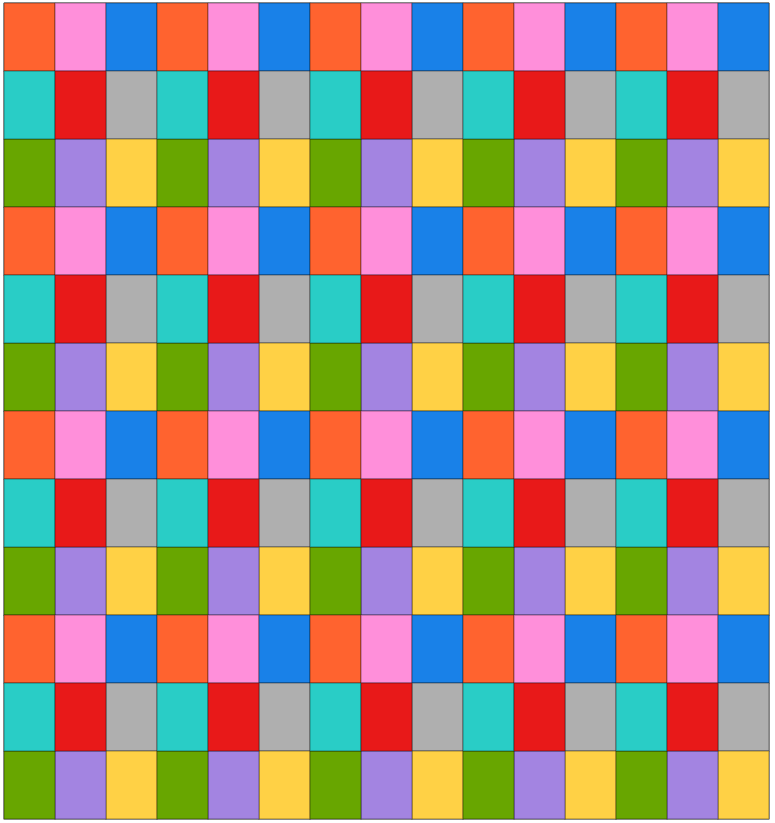
Here is our humble Nine Patch block. It uses 9 squares all the same size in a 3 square across by 3 square down layout. Easy peasy.
This block is a Nine Patch, too. Nobody ever said you had to use only 2 fabrics for a Nine Patch block. The 3 across by 3 down is what makes it a Nine Patch. And my personal philosophy is the more fabric, the better!
Time to play — er, design. To me designing is playing with blocks, colors, fabrics, shapes. I ask myself a lot of “What if?” questions as I go along.
What happens if we make our Nine Patch block rectangular instead of square?
It’s still a Nine Patch, only it’s elongated. Let’s see what this block looks like in a quilt.
Hmmm. It doesn’t really do anything for me, but it would make a nice simple scrap quilt, wouldn’t it? Let’s add some sashing.
Okay, I’m liking this one better. Now I can see the individual blocks. But it’s still basically a decent scrap quilt. Let’s try taking away the sashing and adding plain alternate blocks instead.
This one’s okay, too, but it just doesn’t quite do it for me, either. I could use a cool novelty for the alternate blocks and use coordinating fabrics in the Nine Patch blocks. Let’s try that.
Here is our design using Moda’s collection Acorn Hollow. I like it, but something is still missing. What do you think we need?
Let’s go back to our elongated Nine Patch block and try splitting some of the rectangles into 2 pieces so we can add more fabric.
Okay, that’s interesting, but now I think I want to split the other 4 patches horizontally to add movement.
Yay! Now we’re getting somewhere. I like the look of our Elongated Rainbow Nine Patch block. Like I said, designing is all about playing and exploring. Ask those “What If?” questions and you’ll be surprised where they will take you in your designing.
Let’s try our block in a quilt setting now.
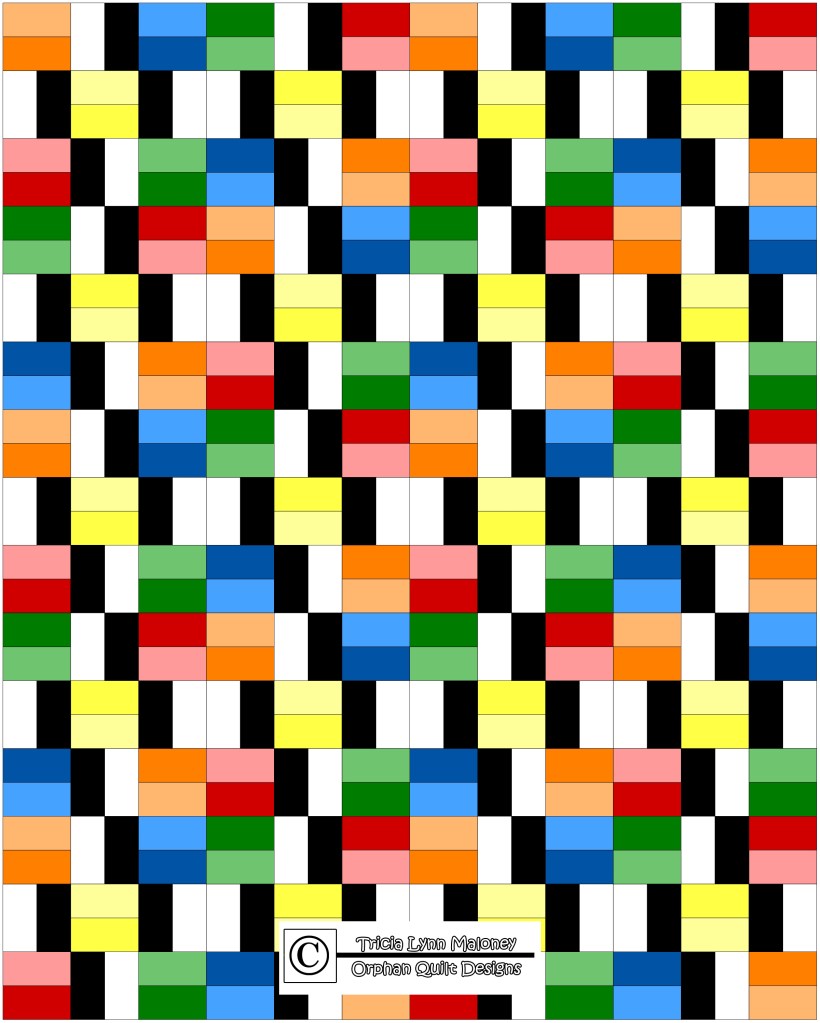
Now that is starting to look like something. I really love the diagonal thing going on with the black rectangles. Hmmm. Let’s keep going. It still needs tweaking.
With a little flip flopping and switcheroo, I discovered this layout. I am loving the elongated Four Patches in black and white that showed up when alternating blocks were turned upside down. What are your thoughts on this design?
Let’s try it in real fabric this time.
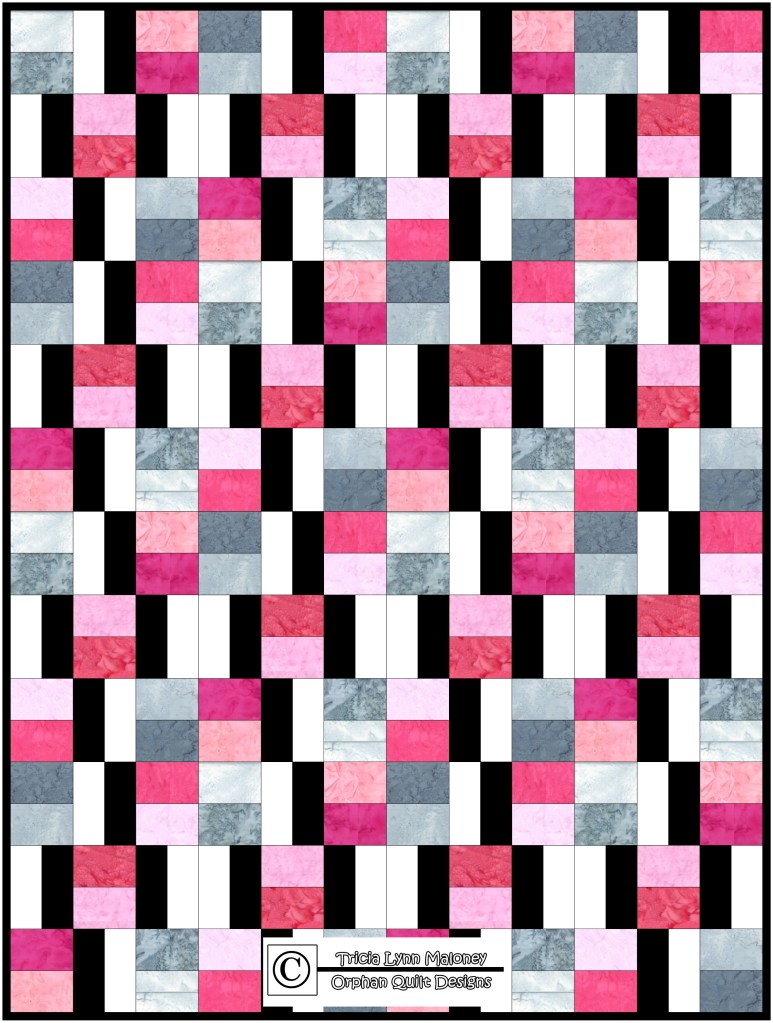
LOVE LOVE LOVE it! I am using a selection of Hoffman’s 1895 Watercolors batiks in pink and grey with solid black and white here. I added the solid black binding to frame everything nicely as well as accent the black in the blocks. Now it’s a finished design. And it started with a humble little Nine Patch block.
Well, that’s it for me today. I hope you enjoyed coming along on a quilt design adventure with me. After showing you how much fun I have designing a quilt, I thought maybe this would make a fun new series for the summer. What do you think? Would you like to see more of this in maybe a 4 or 5 part series using different quilt blocks as the inspiration? Any suggestions on blocks you’d like to see (think simple and pieced, though)?
See you next week, right here at Villa Rose Quilts.
Hard to believe it’s July already and the July 4th holiday is tomorrow. It’s not every year that the holiday falls on a Friday, so I see a 3 day weekend ahead for many of you. What are your plans for the holiday weekend? Me, I plan to take in some fireworks and maybe eat some fab picnic foods. Yum, yum, yummy!
Happy Independence Day!
July 4th with Quilts
In celebration of Independence Day, I have a few fun quilty things to share with you today! Woohoo!
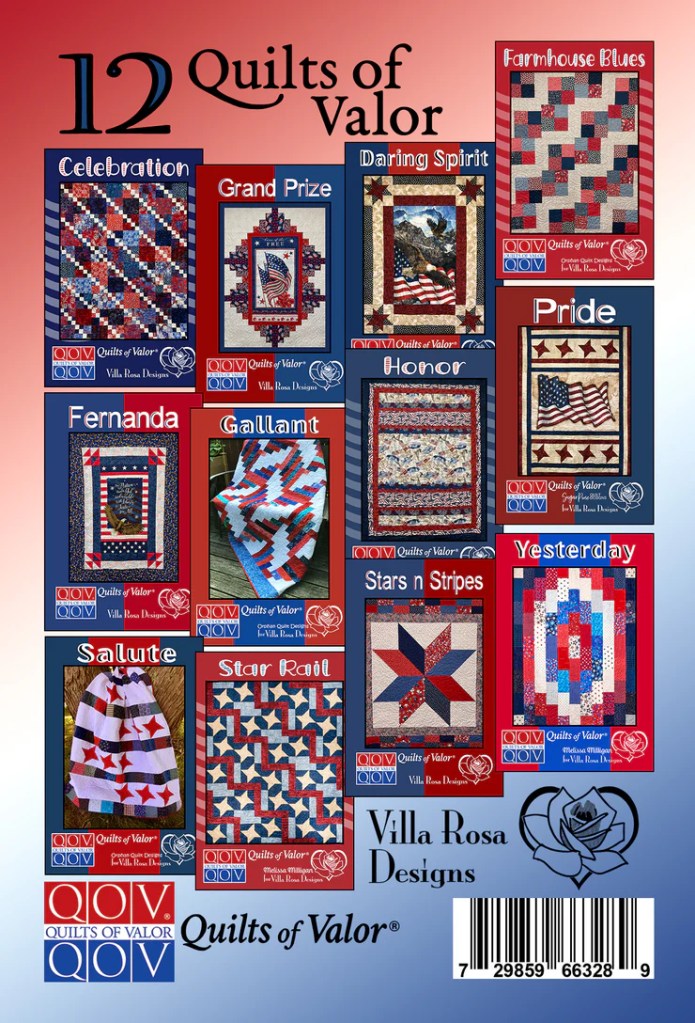
So I wanted to feature our 12 Quilts of Valor Pattern Collection on the blog. A lot of you probably already have the 12 QOV collection among your VRD patterns, but for those of you who are new to VRD or haven’t added the collection yet, let me tell you about this great collection of patterns.
The collection includes 12 patterns sized perfectly for your Quilts of Valor (QOV) projects – no more trying to figure out if a pattern is the right size for a QOV. You will find patterns that use yardage, fat quarters, 5″ squares, and panels (4 panel quilts in the collection and 1 of them uses horizontal panels). Finally, several of our talented VRD designers have patterns in the collection so you get a nice variety of styles in this collection. And of course, all of the patterns are fast, fun, and quickly done!
Almost forgot to mention – shipping is free on patterns on the VRD website, regardless of how many print patterns (or collections) you order!
At this time, the collection is only available in print format, but if you prefer our digital patterns or are an international friend, the patterns are also available as individual downloads. Please note that the download pattern covers will be different from the print pattern collection covers.
Last year on the blog for the 4th of July, I created a curated a Red, White and Blue Pattern list. You can find it HERE.
I hope your July 4th holiday is filled with new memories, American pride, picnic food, and quilts!
Dolls and Quilts
I realize this section of the blog isn’t really connected to the 4th of July at all, but I just had to tell you about my very first Sasha Doll Festival. Oh! I’m wrong – I just realized the theme for this year’s Festival was “Sasha Explores the USA” so it is kind of related to the 4th of July after all.
This past weekend I had the absolute pleasure of attending my very first Sasha Doll Festival. It was held in Columbus, Ohio which made the drive doable for me. Let me tell you though, last Thursday when I was on my way to the hotel/conference center where the Festival was being held, I kept running in and out of severe weather. There were times when I couldn’t seen anything at all due to the deluge and the steam coming off the road (the temps were in the 90s). It was kind of scary as this was my first longer road trip alone, but I followed the big trucks in front of me and everything went okay.
I got to the hotel/conference center safely, although it did take me an extra couple hours. I must admit I missed one exit and had to drive back around to catch the exit again. Thank goodness for my GPS.
Maybe you’ve never heard of Sasha dolls. Sasha dolls were created by Swiss doll artist Sasha Morgenthaler. She created personally created dolls in her studio from the 1940’s to the 1970’s (these surviving dolls are called studio dolls). She also taught classes to others about her techniques and the dolls created during those classes are called course dolls today. In the mid 1960’s, Sasha worked with the German doll company Gotz to manufacture vinyl play dolls based on her studio dolls. She wanted children to have quality dolls at an affordable price. Gotz made Sasha Serie (series) dolls from 1965-1969. A company in England also began making Sasha dolls in 1966 and continued until 1986. Then, Gotz made Sasha dolls once again from 1995-2001.
For more information about Sasha the artist and her dolls, you can go HERE.
I am a relatively new collector and enthusiast, although I saw my first Sasha doll as a child at my local public library. The library had a very special toy collection and you could check out the toys just like books when I was a child. They had Sasha dolls in the collection and I was so in love with the blond girl doll in the blue gingham dress (she would have looked something like this, below). Over the years I saw Sasha dolls here and there in doll clothes books or on the Internet. A couple years ago, I wondered if I could find Sasha dolls for sale online. And I did. My modest collection now includes 11 girls, 10 babies, and 7 boys.
Image from eBay
Here are 3 of the 10 dolls I took with me to the Festival. All 3 dolls are from the English production. Eden (1968) is on the left, Penny (1975-1980) is in the middle, and Annabelle (1969) is on the right.
I just love that the dolls are so realistic looking and no two are alike. They are lovely to pose and to dress (and make clothes for!), and each one seems to have their own personality.
It was an amazing Festival (of course being that it was my first one, I don’t have anything to compare it to). I met so many lovely people! I went to the Festival hoping to find some Sasha people in my own area, and I did! I even met Gina (Hi Gina!) and discovered not only did she live within 2 hours of me, but we actually know some of the same people. Crazy, isn’t it???
At this point, you might be wondering how Dolls and Quilts go hand in hand? Doll Quilts, of course!
As a gift to you, I am sharing a sweet and simple little doll quilt pattern. Make it for yourself, a child, or even another doll lover.
Sweet and Simple Doll Quilt
By Tricia Maloney
18″ x 23″
Fabric
20 – 5″ Charm Squares or 20 assorted scraps at least 5″ square
½ yd for backing
20″ x 25″ thin batting or flannel
¼ yd binding
Cut
20 – 5″ squares
20″ x 25″ for quilt back
3 – 2″ or 2 1/4″ width of fabric strips for binding
Sew
Sew 4 assorted 5″ squares together into a row. Make 5 rows.
Sew the rows together.
Finish
Layer your quilt top, batting, and backing.
Quilt as desired.
Bind your quilt.
Don’t forget your label!
If you’d like to download and print my Sweet and Simple Doll Quilt pattern, you can find the PDF below:
WHEW! If you’re like me, you are having a heatwave right now. 90’s every day. It even hit 100 on the thermometer on Monday! YIKES! I’m sooooo not ready for these temps. It’s like we went straight from 50’s to 90’s in a couple weeks.
90’s are definitely not normal for this time of year here in northwestern Pennsylvania. AND we have high humidity to go with the heat which makes me want to just melt into a puddle on the ground every time I have to step outside. I literally had to scramble on Sunday to get the window AC units in, but we’re all good now. I just don’t want to go outside anymore.
I’m melting into a puddle………!!!!
Luckily my dungeon studio is still cool enough (sadly, it is not air conditioned) to work in comfortably. I have several fans on to keep the air moving, but when the heat finally infiltrates my space, it’ll get quite uncomfortable. That usually isn’t until August and September, though, but we’ll see what summer brings this year. Northwestern Pennsylvania is an interesting place to live – record amounts of snow and cold in the winter, a wet and cold spring, then – POOF! – record high temps in June. Only the strong survive……..
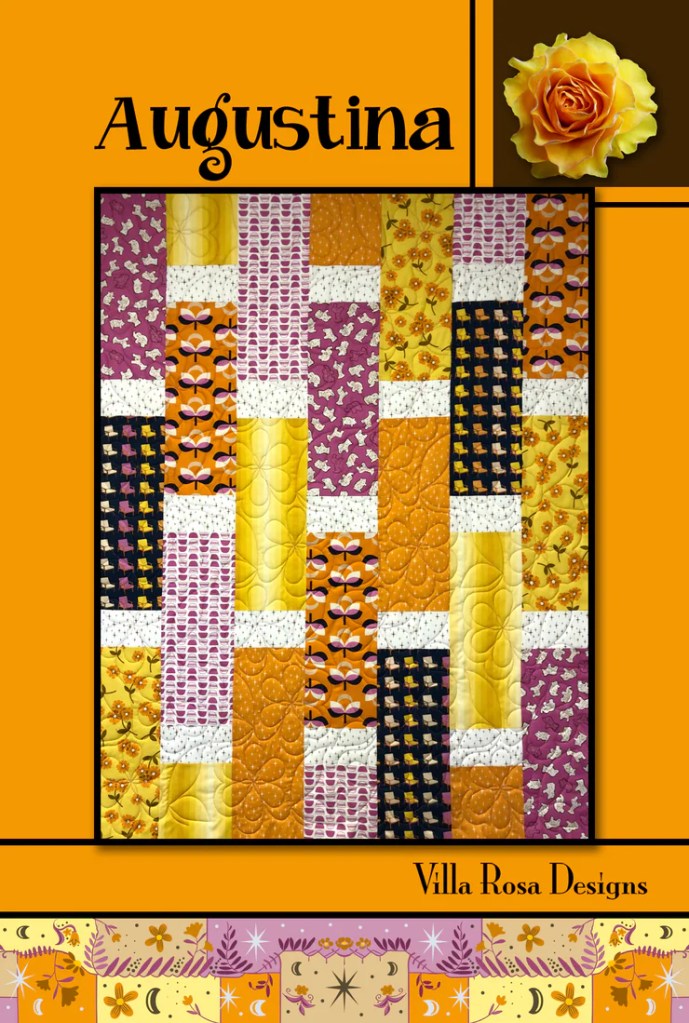
I finally got a little quality time with my sewing machine this week so I decided to put together a new tutorial for you. Augustina is a such great project for summer!
Of course Augustina is fast and fun – it’s a VRD pattern, but it’s also not so big that you feel like you’re wrestling an alligator while your body is dripping with sweat. I promise you, this quilt really is quick – I made the top in a couple hours and that included both cutting and photographing my step-outs for the tutorial. It’s a very satisfying afternoon project.
VRD Augustina Quilt Tutorial
Augustina is a great sized quilt for a small throw or a juvenile quilt. And this is a pattern you are going to turn to over and over again for a beautiful quilt with little effort, yet it looks like a million bucks (sorry, it’s late and I couldn’t think of another phrase to use). So don’t forget to get your own Augustina pattern if you don’t have it yet.
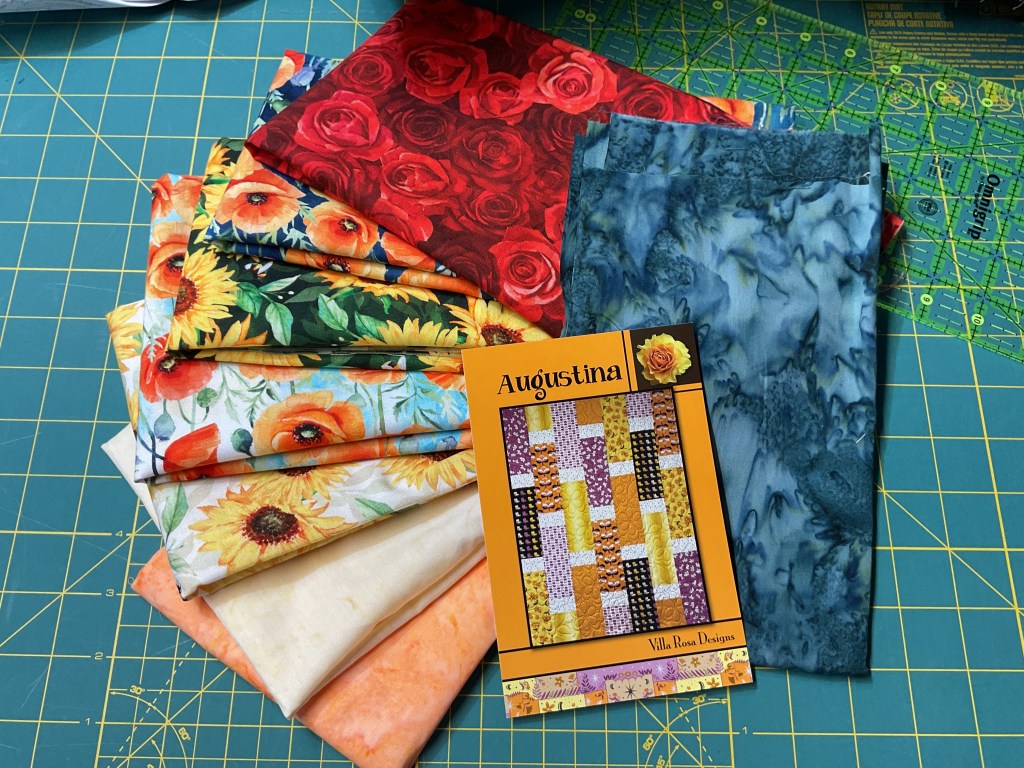
The first thing we need to do, of course, is round up our fabrics. Augustina is a fat quarter project, so you can march right over to your stash and find some coordinating fat quarters or you can use this project as an excuse to visit your local quilt shop to buy new fabric. Yeah, I know, we quilters really don’t need an excuse, but it is handy to have one anyway, isn’t it?
For this tutorial, I am using Flower Shoppe fabrics from our quilty friends over at Hoffman Fabrics. The flower fabrics are all amazing Hoffman digital prints – have you seen these in person yet? The colors are so bright and clear – I feel like I could pick these flowers right off the fabric. We’ve paired a few Hoffman batiks to balance out the gorgeous flower prints.
Please remember when using digital prints, that they do not react exactly the same as regular quilting cottons. Always start with a new needle in your machine so you are not pulling threads when sewing as well as a new rotary cutting blade so you are cutting cleanly through the fabric instead of sawing at it, which can damage the fibers.
Next up…..cutting.
SHHHHH! The secret of this quilt is that the pieces are big. Big pieces mean you don’t have to spend loads of time cutting little squares, rectangles, or triangles. Big pieces are a huge time saver! Big pieces also mean you can use bigger prints (when you use big prints in small pieces, the design gets all chopped up and you tend to lose what you loved about the print to begin with). Yay! Let’s GO BIG!
In the photos, below, we’re cutting our accent fabric into strips and then into rectangles.
Below, we’re cutting our FQs into strips and then into 2 different sized rectangles.
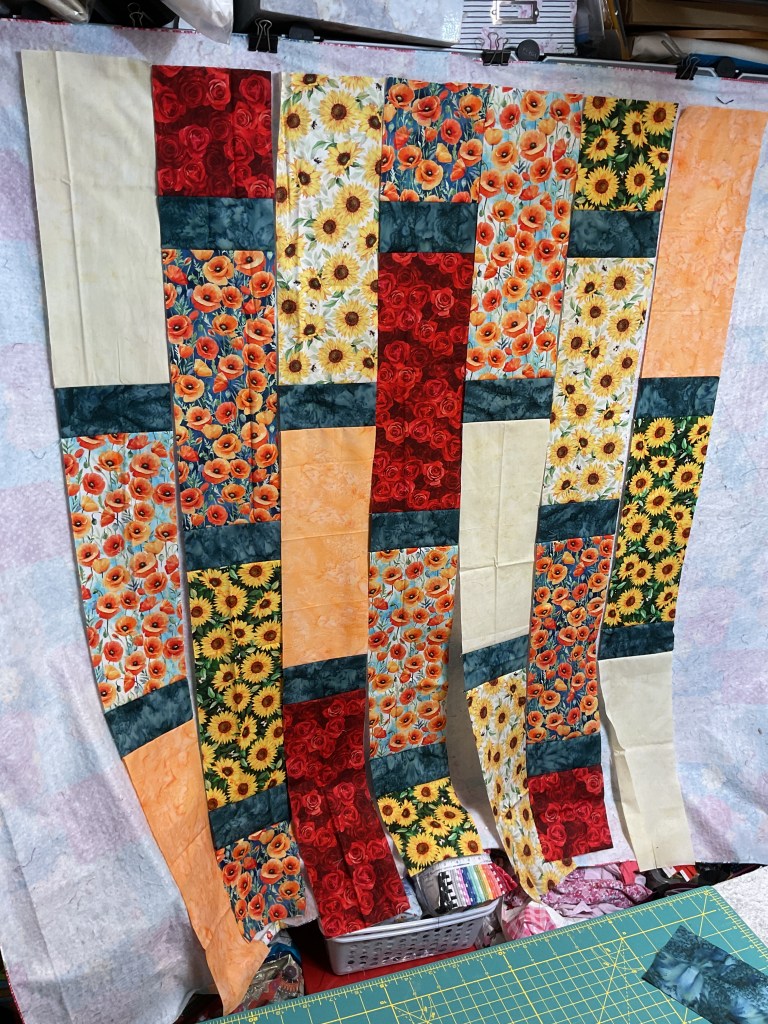
VIOLA! Cutting done. Easy peasy. Here’s all the pieces we need to make Augustina.
Before we can sew Augustina together, we have to lay out our fabrics. I’m going to put them up on my handy dandy flannel board which consists of a flannel-backed table cloth clamped to the tops of my fabric storage unit doors. As I’ve mentioned before, this idea came from my pal, Mary Lee. Kudos to you, Mary Lee! It’s a great option if you don’t have a spare wall to put up a more permanent quilt wall solution. I can simply take it down when I need access to my yardage stash. I’ve actually had this tablecloth for years now, so it’s even an economical option.
Hmmm……I think I need to move some fabrics around.
After several switcharoos, I think I’m happy with the layout now.
Let’s sew!
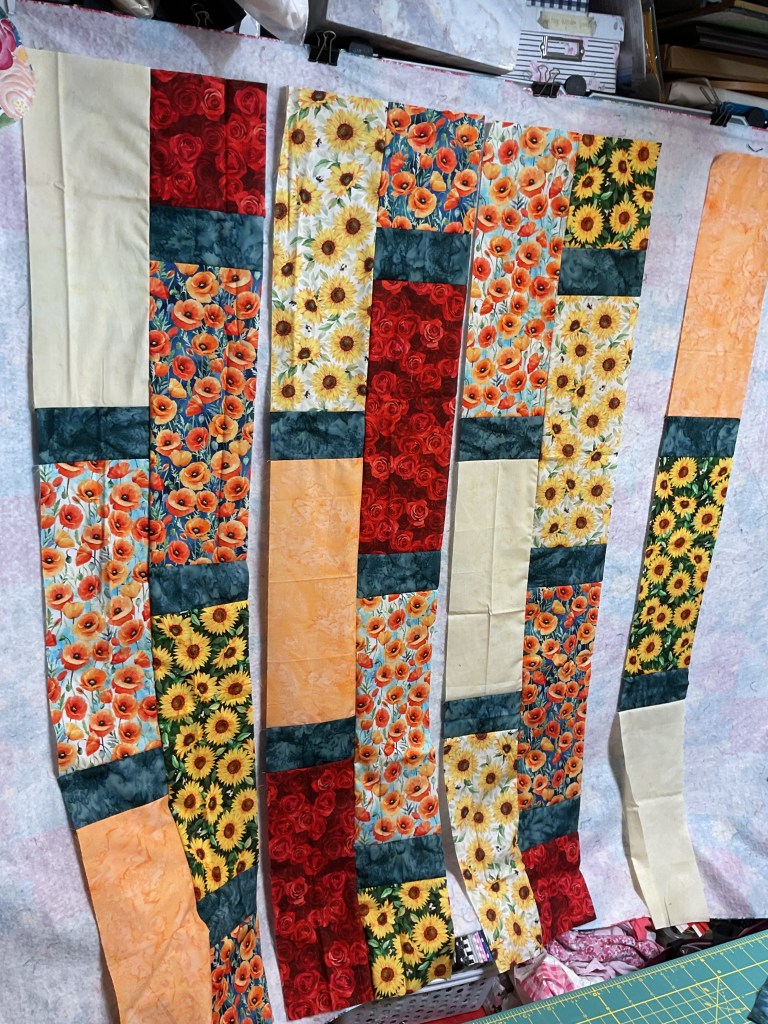
This quilt is sewn together in vertical rows. I took my time, only taking one vertical row off of my board at a time. I worked from the top down to sew the pieces together. It doesn’t matter whether you sew your strips top down or bottom up, just be consistent with all of your rows or else you might get your fabrics out of kilter.
Okay, all the fabrics are now sewn into vertical rows.
Now I’m going to sew the vertical rows together into pairs. As this quilt has an odd number of rows, the last row will have to hang out all by itself for a while.
Next, I’m going to sew the first 2 pairs together into a foursome. Then I’ll sew the third pair and the last row together into a trio.
One last seam to sew the 2 sections together and the Augustina top will be finished. Fast as can be! There isn’t a lot of matching seams, but you do want to make sure your accent pieces are relatively even-looking across the quilt.
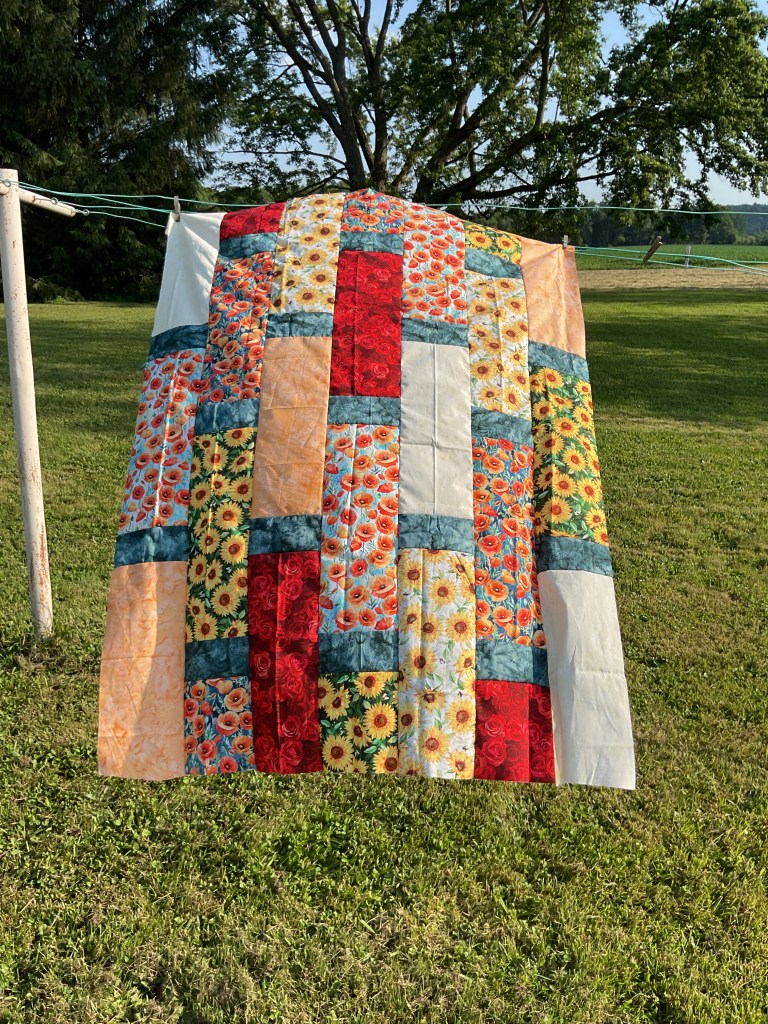
And here it is! Our completed Augustina quilt top.
Although it was hot, I decided to take Augustina outside for a glamour photo. Sigh…….it was a little breezy out and I couldn’t get a photo with it hanging nicely for you. Bummer. But I do love how it looks surrounded by all the green – the flowers look like they are about to burst right off the quilt! That’s digital fabric for you – the number of colors that can be printed on fabric is phenomenal and creates stunning designs.
And that’s it! Finito! Next I need to layer, quilt, and bind it…….someday, anyway.
If you’re looking for another great summer quilt pattern, check out the Jubilee tutorial from a few weeks ago. It’s also a super go-to project.
That’s it for me today, gotta go have me some summer……..in the air conditioning. LOL!
Aren’t they lots of fun? Tomah is spot-on for your upcoming July 4th celebration. Escalate makes a BIG bed quilt and uses 1/2 yards. Sunita uses just 3 fabrics! Limerick and Well Seasoned are both fat quarter friendly and make nice throw-sized quilts. Although we offer them as a set of 5, you can get them as individual patterns, both as digital or as print.
And in case I haven’t said this for a while, there is zero shipping on print patterns in the US (we only offer the digital format internationally). Yep, that’s right – ZERO shipping on print patterns regardless if you purchase 1 or 100!
But wait……there’s more!
I can’t forget this month’s table runner, can I? It’s called Stars & Ribbons and will make a wonderful statement on your July 4th table next month.
Get your digital pattern HERE or your print pattern HERE
Which pattern are you going to make first???
I was planning to do another tutorial for this week, but life got in the way. Ho hum….. Hopefully I’ll have a new tutorial for you next week.
Instead, let me tell you about my impromptu road trip!
Road Trip
So today I’m on an acquisition road trip with pal Robin and her brother Dan in Robin’s big blue truck. We are heading to Apollo PA, which is in the Pittsburgh area, to pick up a new desk solution for me for my studio/office space.
Currently, my desk is an old sewing table with a wooden top and metal legs. Good and sturdy, but not very ergonomic because it’s a bit too high for short little ol’ me. I’ve been on the lookout for a new desk for a while now, hoping to maybe find an L-shaped desk with at least one file drawer and as much storage as one can possibly cram into a desk to help keep me organized – most of the time my desk looks like an office and quilt store collided. LOL!
Sigh……I have found that if I don’t have a specific place to put something, then I just end up with piles on my horizontal surfaces. My defense – I think paper and fabric multiply like rabbits…….. So because of my tendency towards clutter, I am totally a storage junkie. Can you relate?
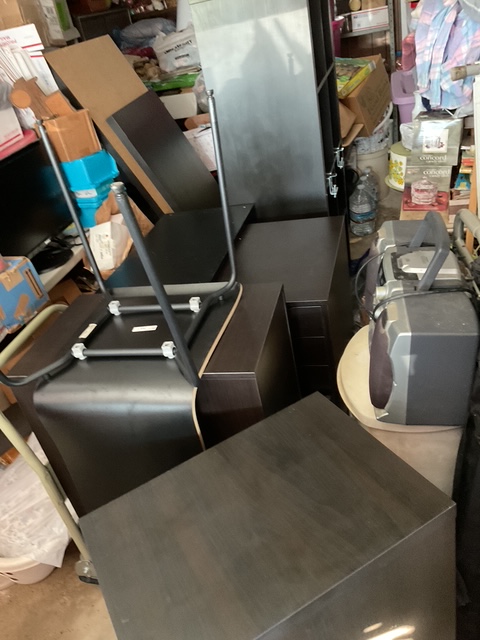
I’ve been watching Facebook Marketplace for a gently used desk and the other morning, an intriguing possibility popped up. I’d seen it before, but I didn’t take a closer look then. This time, I stopped and took that closer look and I liked what I saw – a group of Ikea (YAY! LOVE Ikea!) office pieces that could be arranged in lots of different configurations. A tall shelf, 2 desktops, a small desk (which had one of the desk tops on top), 3 drawer units, and a chair. Exactly what I have been looking for, but I didn’t know that I was looking for it until I saw it! Does that make any sense? I really really like the flexibility of the pieces.
Here are all the desk components.
The pieces looked to be in decent condition; however, there were a few hesitations before I messaged the owner. First, the pieces were dark brown instead of my usual white. I thought about that for a quick second and decided I could accept it because the flexibility made up for the color. Second, and it was a biggie – the pieces would definitely not fit in my cute little red Jeep Compass.
I needed a truck!
I messaged the seller and asked a few questions. She was quick to reply. OK, now what???? I still needed a truck. So, I sent an SOS to my quilty pal, Robin, who just so happens to have a really big blue truck. Yay! Problem solved. ROAD TRIP!
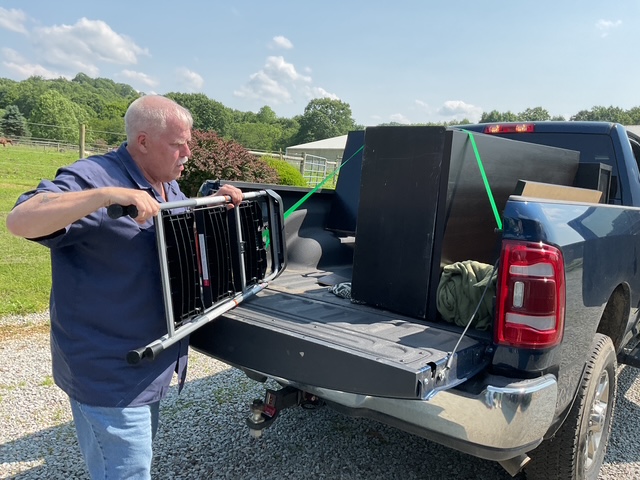
On the road in Robin’s big blue truck to pick up my new desk and storage! Dan is driving and Robin is navigating. Lucky me! I get to chill in the backseat.
It was around 2 hours to drive to get to the seller’s home in the Apollo area, which turned out to be a lovely farm with horses running in a fenced field right beside the driveway to the house. What a pretty setting it was! I wanted to get a photo of the horses for the blog, but by the time we were all loaded (which seemed to take only minutes with the owner’s husband and Dan teaming up), the horses had all headed to get water further down in the field and I couldn’t see them anymore. Dang it!
Dan took on the important task of arranging the desk pieces in the truck. What a pro – he fit them together just like puzzle pieces and we had room to spare.
Robin and I were the supervisors while Dan and the owner’s husband loaded the truck. Tehehe!
Here’s Robin’s big blue truck all loaded up and ready to head home.
It took longer to come home than it did to get to Apollo because we stopped off for dinner at Eat n’ Park and then to get fuel. Once we made it to my home, we unloaded all the pieces and Dan helped me get them into the space I had carved out in the back of the garage.
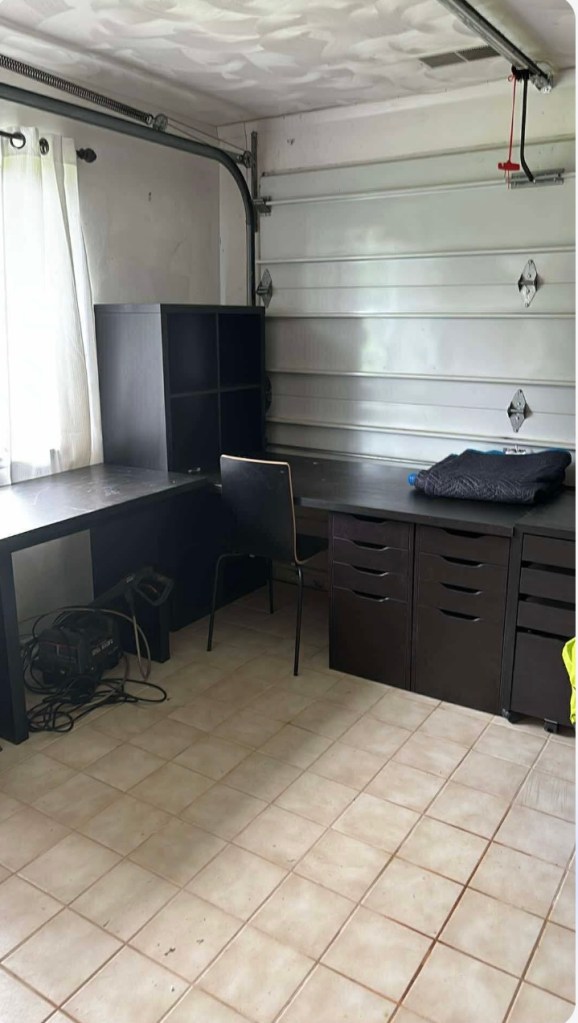
Here’s my desk and storage – I can’t wait until I have space for them in my studio/office.
Of course, before I can set up my new workspace, I have to do a HUGE clean/sort/purge in my studio/office to make room. Not only is it my work area, it’s also the pantry and storage (most of the crates are mine, but not all of them). Luckily, I’ve been cleaning the garage and I have some space to store the pieces until I’m ready for them. Now that the pieces are stashed in the garage, I think that will really motivate me to get the clean up in my space done ASAP so I can arrange my lovely Ikea pieces into a configuration that will work for me.
I am thrilled there are lots of storage drawers with multiple file drawers! That means I will have no excuse for a messy desktop anymore. There is also a wonderful cube storage shelf as part of the desk system. Finally! A place for my books. Piles of books – begone!
I’ve been trying to visualize different configurations, but I know I’ll have to wait until my space is cleared out so I can create my dream office space in my dungeon studio. It will be some time yet before I will be able to get everything just the way I want in my studio/office, so there won’t be any before/after photos right now. Of course, I’ll show it off when I’m all done, so you’ll just have to stay tuned.
A BIG thank you goes out to Dan, Robin, and her big blue truck!
That’s it for me this week. I think I’ll head outside to enjoy a little sunshine now because I think summer has come before spring even had the chance to hang out.
Warm temps are here……..finally! Maybe a bit too much too fast, but I’ll take it! The sun is shining, the sky is blue, it’s actually warm in the upper 80s, but there’s a nice breeze to make the heat tolerable. Believe it or not, I’m sitting here in shorts and a t shirt as I write this blog post. Last week, I was wearing a fleece jacket and long pants. Oh, the difference a week can make. I hope you are having some nice weather wherever you are, too.
I thought we’d kick off the gorgeous weather here in my little corner of the world with a fun quilt tutorial.
VRD Jubilee Quilt Tutorial
Let’s make Jubilee today. It’s a super fast and fun fat quarter quilt and it’s a great option when you need a quilt in a hurry. Looks great in just about any fabric. Perfect for summer quilting. Make it in the afternoon and still have time for dinner and s’mores around the campfire in the evening.
Get your digital Jubilee pattern HERE or your print Jubilee pattern HERE
The first thing we need is fabric! YAY FABRIC!
Today I’m using batiks from the Sweet Shoppe collection by our friends at Hoffman Fabrics. Aren’t these fabrics yummy? I can’t wait to see how the quilt turns out!
Of course, we need to do some cutting before we can sew. Let’s get to it.
In the left photo, below, you can see how many layers I’m cutting at once. I find batiks to be great for layering for cutting as the fabric is finer. When I’m cutting thick or slippery fabrics, I only cut one layer at a time.
Let’s get the rest of the fabrics cut. For Jubilee, we only need 2 different shapes, which is one thing that makes this quilt go together so quickly. Wow! That was fast!
Time to start sewing the strips together so we can make strips sets and then we’ll cut the strip sets down into the block size we need.
I like to set all my strips to the left of my machine while I sew. Then I select strips randomly to sew together, making sure I don’t grab 2 of the same strip. We want these strip sets to be as scrappy as possible.
Once I’ve sewed 2 strips together for the required sets, I then go back and add the third strip to all of the sets. I find it more efficient to complete each step for all the pieces at once before moving onto the next step.
Once our strip sets are sewn together, it’s a good idea to press them before we begin cutting out the blocks.
Do you struggle with which way to press your seams on the back of your blocks? Me too. More often than not I end up flipping the seams in the other directions when I go to assemble blocks. Oy vey!
The good news with Jubilee is that it doesn’t matter which way you press your seams because the blocks do not line up and the seam do not cross – another reason why Jubilee is quick as a wink.
Next we need to cut our strippy blocks from our strip sets. I’m layering 3 strip sets on top of each other for cutting. To do this, I line then up on the left edge (or the right edge if you cut from that side), but I stagger them a bit top to bottom so the seams are not sitting right on top of each other because stacked seams make a big lump. It’s not a good idea to attempt to cut through lumpy seams or you might accidentally miscut something.
Awesome applesauce! All of the blocks are pressed, cut, and ready to go. Time to head to my flannel wall to lay them out.
I’m going to put the blocks up, alternating the squares with the pieced blocks. I’m just going to slap the blocks up randomly and then I’ll shuffle them around to distribute both colors and fabrics until I find a layout that pleases me. When you are putting blocks together, what is your process?
Below are 3 photos showing shuffled blocks. Sometimes this step takes longer than actually making the whole quilt top (eye roll here).
Here is my final layout.
Because the blocks don’t line up horizontally, we’re going to sew the blocks into columns and then sew the columns together.
And done! Here is the finished quilt top. Isn’t it pretty? I love that the blocks are large so one can enjoy the beauty of the batik fabrics. It turns into a nice throw at 45″ x 60″, but it would be easy to make the quilt larger by adding a border or additional blocks.
Now I just have to layer, quilt, and bind it.
Looking for info on finishing your quilts? Check out these posts in our Basic Quilting Skills blog series:
Here we are at the end of May following Memorial Day and the “unofficial” beginning of summer and I’m still waiting for spring to stick around for more than a couple of days in row here in NW PA. We actually did have 2 nice dry days in the 60s/70s but now we’re back to cold and rain again. It’s been a real challenge to get the lawn mowed and keep it that way, not too mention getting my small gardens shipshape all while dodging rainstorms and cold temps. Most likely, at the rate we’re going, summer will just land suddenly with hot weather out of nowhere. Sometime in December. 2035. I personally prefer a gradual build up to summers and winters, however; Mother Nature sure has her own agenda these days.
I thought it would be fun to talk about magical 2.5″ squares today. If you read last week’s post about my shop hop around Chicago with Pat following the H&H Show, you may have noticed I bought quite a few 2.5″ Mini Charm Packs (see my photo below). And you might have wondered what the heck I was going to do with all of that eye candy besides tucking them away or dropping them into a canning jar on a shelf to look sew adorable.
Here’s a recap from last week’s post showing my goodies from our Chicago shop hop. Note the pile of Mini Charm packs.
A Little Background
I suspect you know all about 5″ Charm packs and how much fun they are (whether you actually use them or you just collect them), so let’s start there and backtrack our way back to 2.5″ Mini Charm Packs.
Moda Fabrics is responsible for gifting us with the 5″ Charm Pack, which contains on average 40-42 5″ squares of fabric from a single collection. Thank you Moda! Of course, many fabric companies also offer 5″ square packs and each company calls their 5″ pack by a different name because “charm packs” are synonymous with Moda, even though as quilters, we use the term “charm packs” to describe pretty much any 5″ pack manufactured by any fabric company. Yep, it’s all a little’s a bit confusing.
Hey! Here’s a fun little tidbit perfect for Jeopardy – Moda coined the phrase “Charm Pack” as a nod to Charm Quilts of the past. A true Charm Quilt was said to contain no duplicate fabrics and quilters often exchanged squares of fabric with other quilters to have enough unique pieces to make their quilts. You can find an interesting historical article by Barbara Brackman HERE about Charm Quilts.
Are you wondering why I started out with 5″ square packs? It’s quite simple really, and includes a bit of math! Yay! MATH!
What is a 2.5″ square, but exactly 1/4 of a 5″ square. That means if you cut a 5″ square through the middle both vertically and horizontally, you get 4 – 2.5″ squares. There, I said it – math! (If you know much about me, you probably already know how much I love quilt math.)
It’s not completely clear who actually came up with the 2.5″ square pack idea, as several companies have been producing them for a long time, but Moda certainly comes to mind. I think all of the 2.5″ Mini Charm Packs I bought recently were from Moda. If Moda didn’t invent the whole 2.5″ idea, they are certainly the most well-known manufacturer of the 2.5″ Mini Charm Pack. Moda really was on the forefront of the development of precuts way back when with their Charm Packs, Jelly Rolls, Layer Cakes, Turnovers, Dessert Rolls, and more exploded onto the quilt scene.
Now that you know a little bit of background, let’s sashay our way back to those delightful 2.5″ squares.
2.5″ Mini Charm Pack Fun
So, you might be wondering what I do with with my 2.5″ Mini Charm Packs besides hoard them.
Here are some of my favorites:
EPP Hexies – of course! 2.5″ squares are perfect for using the English Paper Piecing technique to make hexies which I then use to make a variety of small projects (I make small projects because I just don’t think I have enough patience to make a classic
Pin cushions
Doll quilts
Table runners
Snack mats
Bags
As you can see, I do lots of different things with them. Maybe you do, too. If you love 2.5″ squares, please share what you like to use yours for in the comments. 🙂
If you haven’t tried EPP and you are interested in learning more, please check out the class offerings at your local quilt shop or look up some tutorials online.
But Wait – there’s MORE!
VRD even has some Rose Card patterns featuring 2.5″ squares! Did you ever doubt that for a second??? LOL!
I hope you enjoyed this list of fun 2.5″ square Rose Card patterns. Remember, VRD doesn’t charge shipping for patterns, so anytime is a good time to add a few more patterns to your collection. And don’t forget to join our Facebook Group and show off your VRD quilts and be inspired by the projects of others. Hope to see you there!
I’m now back home after the H&H Americas Show last week in Chicago and I’m trying to get everything caught up, which to be honest, I probably never will completely, but I’m sure going to try.
H&H was a really busy show. The show vibe was very vibrant and youthful with a unique blend of quilting, wool, fiber arts, and cosplay. I found it really interesting to see one area spill into another such as quilted garments in cosplay.
One of my favorite parts of the show was the opportunity to work with our VRD owner and Rose Queen, Pat. As I live in Pennsylvania while Pat and the VRD shop are in California, we usually only get to work together in person in Houston for Quilt Market. So, some extra time this year being face to face was amazing!
The VRD booth was insanely busy during the show and I want to thank everyone who stopped by. We LOVE our shops! Here’s a big thank you hug to all of you who came by the VRD booth to chat, share stories, and show quilts. Your energy is what keeps us going!
About H&H
H&H Americas is a relatively new trade show in the US for handmade industry businesses and professionals. The Americas show stemmed from the H&H Cologne (Germany) show. Let me share some of the numbers from this year’s show:
Over 550 booths
5000+ professionals attended
48 countries, 50 US states, and 2 US territories
Awesome applesauce!
Good news! In 2026, H&H is adding a Fiber+Fabric Craft Festival for consumers from April 30-May 3 in Chicago. So that’s something new to look forward to next year.
Upcoming Shows
Of course, in October 2025, Fall International Quilt Market will be in Houston, TX. It will be followed by Quilt Festival October 9-12, also in Houston. If you’ve never had the chance to attend a Festival, I highly recommend it. It’s the perfect place to see hundreds (or more) quilts on display along with tons of great vendors. It is overwhelming and wonderful at the same time!
I don’t know if you’ve ever heard of the Road to California show? Well, to make everything even more exciting in 2026, Road to California is debuting their Road to California Quilter’s Conference & Showcase event in January.
Spring International Quilt Market will return in April 2026 in St. Louis, Missouri. So far, I haven’t heard anything about Spring Quilt Festival for 2026, but if I hear anything, I’ll let you know.
Wowzer! Sew much is happening in the world of quilting!
Cool Stuff
Whenever I attend a show, I always like to share cool stuff I find, booths I visit, folks I see, and any trends I notice with you. Please enjoy!
Here are the booths of a few of our quilting partners. I apologize, but I didn’t get a lot of time to snap photos of our quilting partners.
The fun thing about the Banyan display is that it includes a quilt block from our VRD pattern, Waverly (top left block). Also in the display are 2 blocks from my friend, Cathey Laird of Cathey Marie Designs (the Bumblebee on the left of the sign and the House block to the right of the sign). What fun!
I stopped by to see my pals at Best Press and get some of their new Lemon Mist scent. I cannot find it anywhere around here, not even on Amazon so I bought the rest of the Lemon Mist bottles they had and also grabbed a refill bottle of Peaches and Cream. I should be set with Best Press for a while.
I even caught up with a few quilty pals –
Here I am with Swan of Swam Amity Studios, who is the designer of my favoritemachine quilting gloves. Swan also designs patterns and teaches classes. She kindly took the time to show me the Designers Showcase section at the show which featured 18 different designers.
Here is Swan’s mini booth at the Designer Showcase.
I also got some time to chat with Christa Watson of Christa Quilts. Christa is an amazing machine quilter, teacher, pattern designer, fabric designer, and author. We are standing in front of Christa’s booth in the Designer Showcase area. She has a fun modern aesthetic and is definitely NOT afraid of color. LOL!
I found this really fun designer booth, Whole Circle Studio, in the showcase section, too, and I just had to snap a few photos to share with you. Sherri, the owner, created an amazing miniature quilt shop featuring teeny tiny patterns and quilts (all her designs, of course). What a showstopper!
I stopped by the Purple Moose Designs booth in the Designer Showcase and I discovered a cool new quilting card game called Quilter’s Block Party. It’s kind of like Pictionary for quilters. Can’t wait to try it out with my Friday gals.
I must admit that the show layout was a lot different than I am used to and I got lost frequently, trying to find specific booths or simply the ladies room – LOL! On one of my meanders, I found a fabulous Kaffe Fasset display with his quilts and knitted items. I couldn’t tell you where I found it – by that time I had no idea where I was. Kaffe and Brandon Mobly were there at the show, but I never really got a chance to say hi. Please enjoy.
During the show, there was a cosplay contest as well as a cool cosplay display. Check out these awesome costumes. Which one is your favorite?
What’s Trending
Whenever I am at a show, I try to see what’s new and upcoming and what’s trending. Here is a list of the things I noticed at the show:
Mini, Mini, Mini — mini quilts, mini animals, everything is getting smaller
Quilted jackets and wearables
Combining different crafts such as cosplay and quilting or wool and quilting
Small handwork projects and kits everywhere — handwork is hot!
Animals — stuffed, patchwork, knitted, quilted, etc., etc.
One thing I was quite fascinated with was the use of puffy batting in machine quilted quilts on display at the Art Glass Fabric booth. Not sure if this is going to be trending or if it was just to catch attention (which it did). Have you seen or heard anything about puffy batts making a comeback?
Well, I guess that’s it for me this week. My final photo is an aerial view of Chicago and Lake Michigan as I was headed back to Pennsylvania.
Take care and make time this week for some quilting. With all the inspiration from the show, I hope to get some quality time with my sewing machine, too.