Quilt Shows and Trade Shows · Quilting Partners · Rose Cards · villa rosa designs

H&H Americas Show in Chicago

Happy Thursday to you!

I’m now back home after the H&H Americas Show last week in Chicago and I’m trying to get everything caught up, which to be honest, I probably never will completely, but I’m sure going to try.

H&H was a really busy show. The show vibe was very vibrant and youthful with a unique blend of quilting, wool, fiber arts, and cosplay. I found it really interesting to see one area spill into another such as quilted garments in cosplay.

One of my favorite parts of the show was the opportunity to work with our VRD owner and Rose Queen, Pat. As I live in Pennsylvania while Pat and the VRD shop are in California, we usually only get to work together in person in Houston for Quilt Market. So, some extra time this year being face to face was amazing!

A booth display at the H&H Americas Show featuring colorful quilts and fabric designs by Villa Rose Designs, with a table showcasing various quilting products.

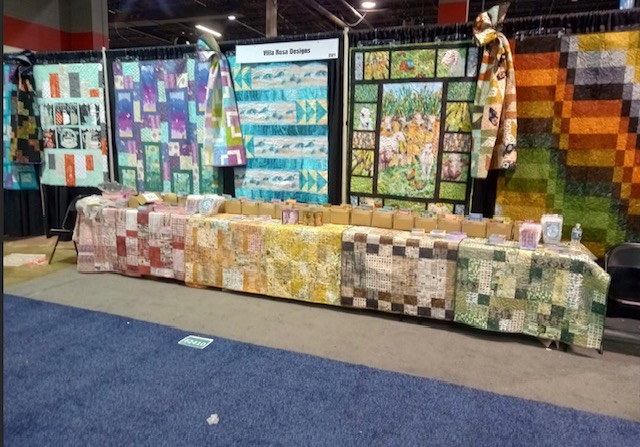
The VRD booth was insanely busy during the show and I want to thank everyone who stopped by. We LOVE our shops! Here’s a big thank you hug to all of you who came by the VRD booth to chat, share stories, and show quilts. Your energy is what keeps us going!

H&H Americas is a relatively new trade show in the US for handmade industry businesses and professionals. The Americas show stemmed from the H&H Cologne (Germany) show. Let me share some of the numbers from this year’s show:

  • Over 550 booths
  • 5000+ professionals attended
  • 48 countries, 50 US states, and 2 US territories

Awesome applesauce!

Good news! In 2026, H&H is adding a Fiber+Fabric Craft Festival for consumers from April 30-May 3 in Chicago. So that’s something new to look forward to next year.

Of course, in October 2025, Fall International Quilt Market will be in Houston, TX. It will be followed by Quilt Festival October 9-12, also in Houston. If you’ve never had the chance to attend a Festival, I highly recommend it. It’s the perfect place to see hundreds (or more) quilts on display along with tons of great vendors. It is overwhelming and wonderful at the same time!

I don’t know if you’ve ever heard of the Road to California show? Well, to make everything even more exciting in 2026, Road to California is debuting their Road to California Quilter’s Conference & Showcase event in January.

Spring International Quilt Market will return in April 2026 in St. Louis, Missouri. So far, I haven’t heard anything about Spring Quilt Festival for 2026, but if I hear anything, I’ll let you know.

Wowzer! Sew much is happening in the world of quilting!

Whenever I attend a show, I always like to share cool stuff I find, booths I visit, folks I see, and any trends I notice with you. Please enjoy!

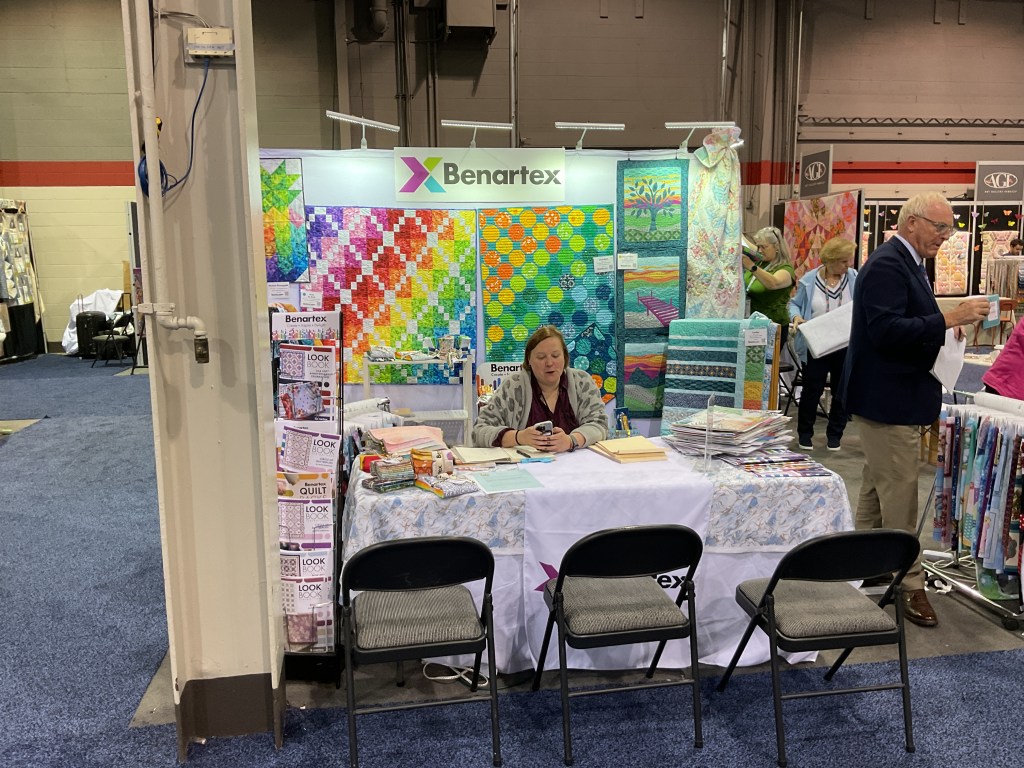
Here are the booths of a few of our quilting partners. I apologize, but I didn’t get a lot of time to snap photos of our quilting partners.

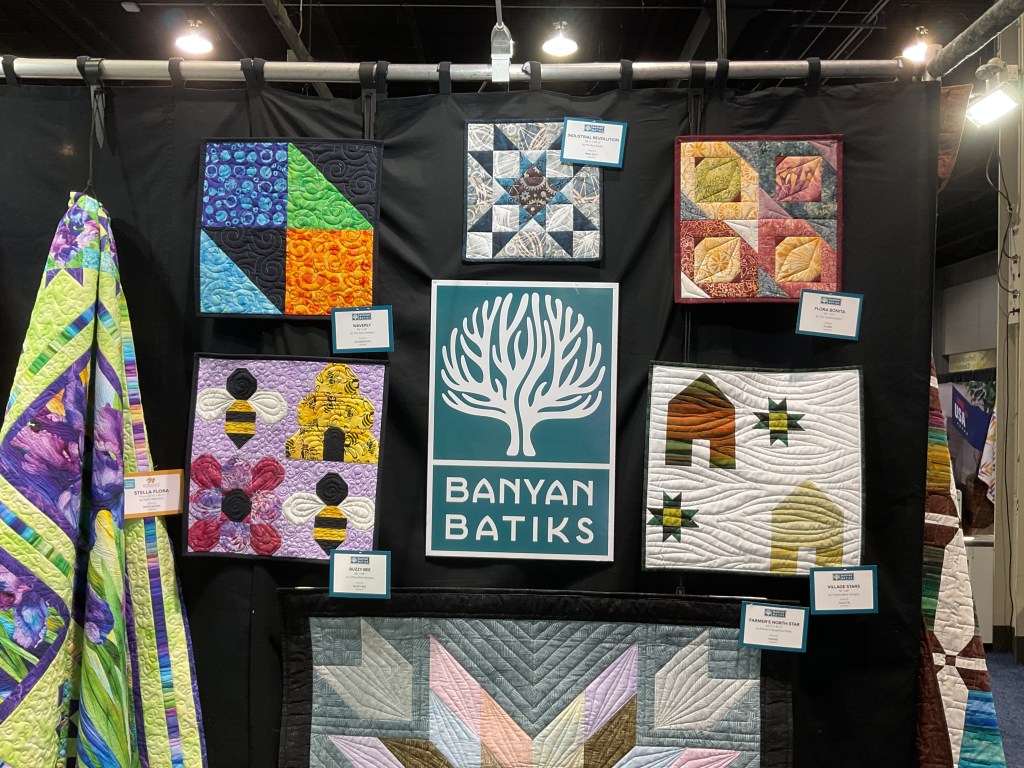
The fun thing about the Banyan display is that it includes a quilt block from our VRD pattern, Waverly (top left block). Also in the display are 2 blocks from my friend, Cathey Laird of Cathey Marie Designs (the Bumblebee on the left of the sign and the House block to the right of the sign). What fun!

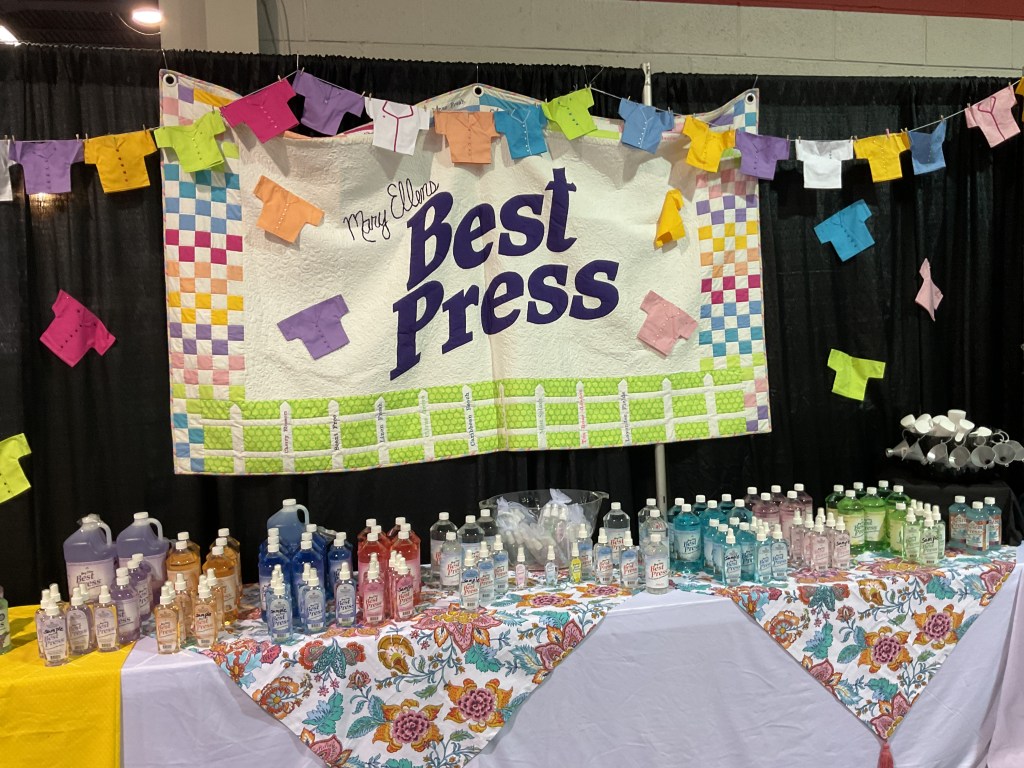
I stopped by to see my pals at Best Press and get some of their new Lemon Mist scent. I cannot find it anywhere around here, not even on Amazon so I bought the rest of the Lemon Mist bottles they had and also grabbed a refill bottle of Peaches and Cream. I should be set with Best Press for a while.

A booth display for Mary Ellen's Best Press at a quilting show, featuring colorful quilted decorations, various sizes of spray bottles, and a floral tablecloth.

I even caught up with a few quilty pals –

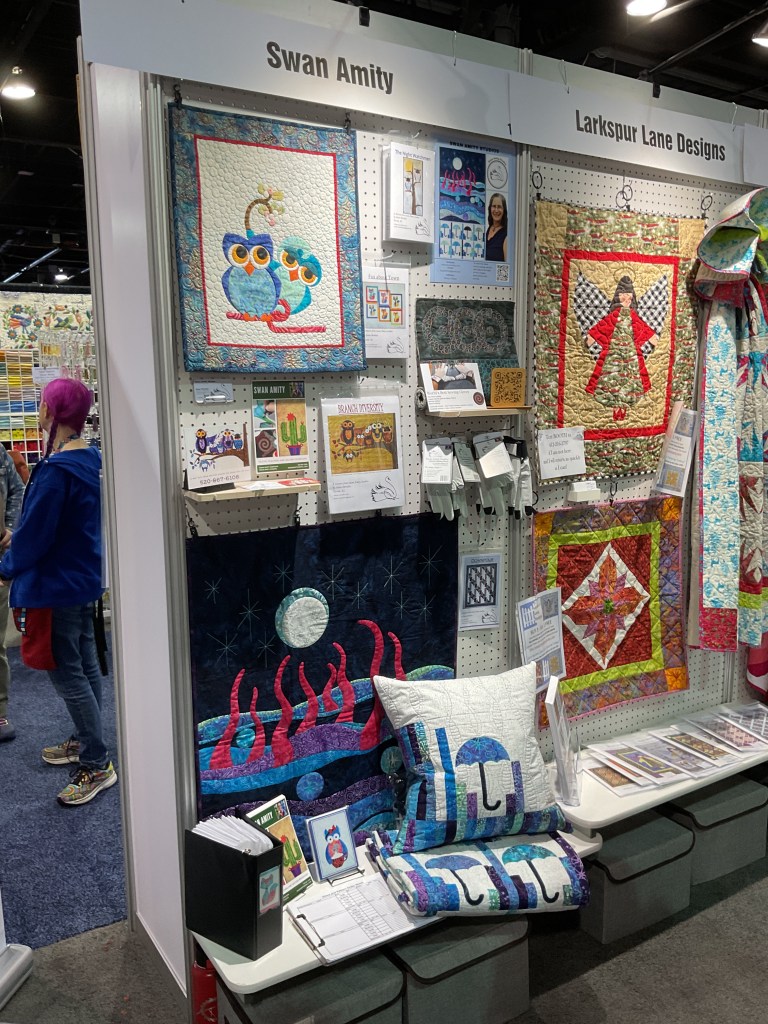
Here I am with Swan of Swam Amity Studios, who is the designer of my favorite machine quilting gloves. Swan also designs patterns and teaches classes. She kindly took the time to show me the Designers Showcase section at the show which featured 18 different designers.

Two smiling women posing for a selfie in front of a colorful quilt display at a quilting show.

Here is Swan’s mini booth at the Designer Showcase.

A colorful quilting booth featuring designs by Swan Amity and Larkspur Lane Designs, showcasing various quilted items, including wall hangings and pillows, with a vibrant display of fabrics and patterns.

I also got some time to chat with Christa Watson of Christa Quilts. Christa is an amazing machine quilter, teacher, pattern designer, fabric designer, and author. We are standing in front of Christa’s booth in the Designer Showcase area. She has a fun modern aesthetic and is definitely NOT afraid of color. LOL!

Two women smiling together at a quilting show, standing in front of colorful quilts and quilt patterns displayed on a wall.

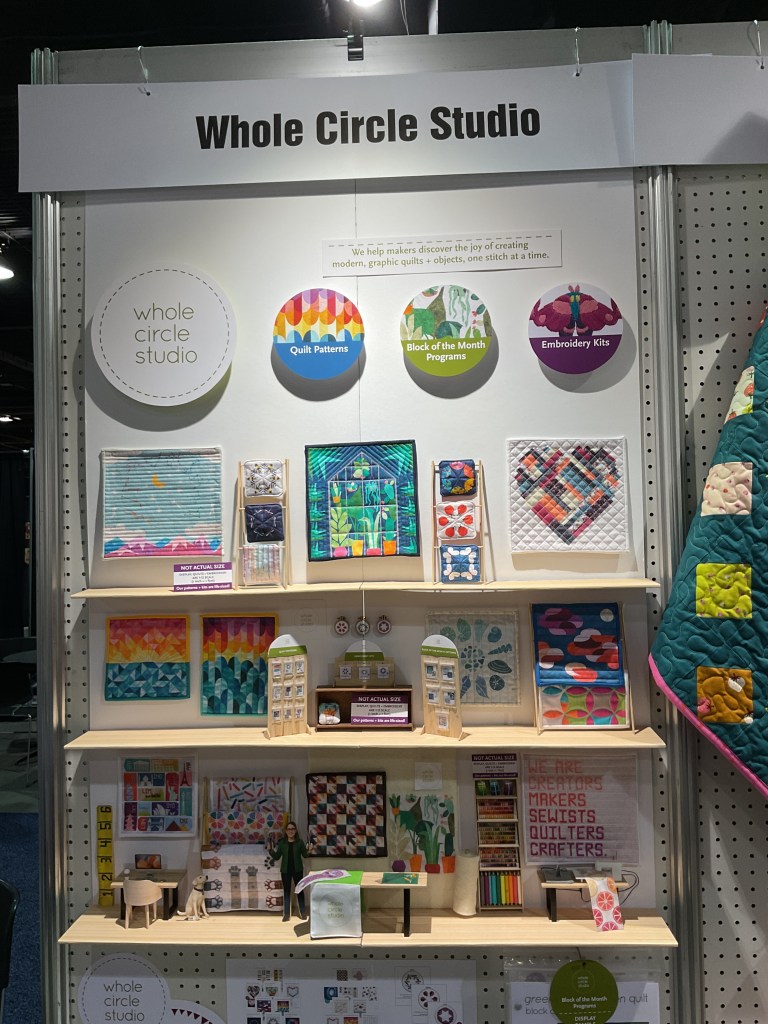
I found this really fun designer booth, Whole Circle Studio, in the showcase section, too, and I just had to snap a few photos to share with you. Sherri, the owner, created an amazing miniature quilt shop featuring teeny tiny patterns and quilts (all her designs, of course). What a showstopper!

I stopped by the Purple Moose Designs booth in the Designer Showcase and I discovered a cool new quilting card game called Quilter’s Block Party. It’s kind of like Pictionary for quilters. Can’t wait to try it out with my Friday gals.

Cover of the Quilter's Block Party card game, featuring colorful quilt block designs and a playful typography that states 'Quilter's Block Party!'

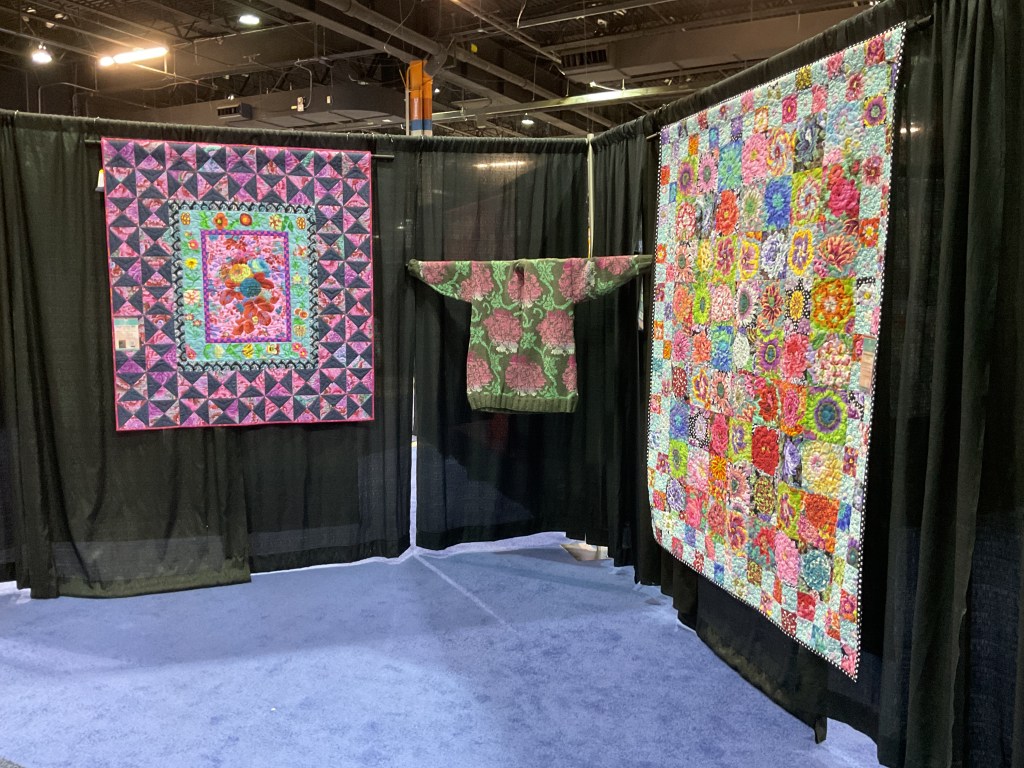
I must admit that the show layout was a lot different than I am used to and I got lost frequently, trying to find specific booths or simply the ladies room – LOL! On one of my meanders, I found a fabulous Kaffe Fasset display with his quilts and knitted items. I couldn’t tell you where I found it – by that time I had no idea where I was. Kaffe and Brandon Mobly were there at the show, but I never really got a chance to say hi. Please enjoy.

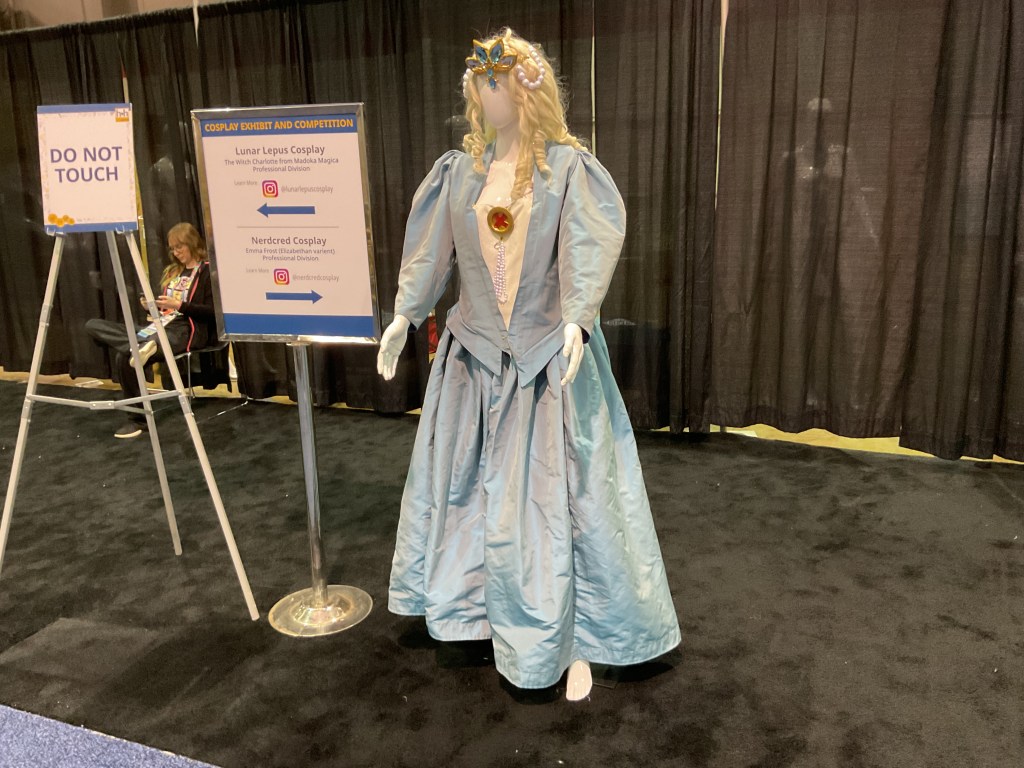
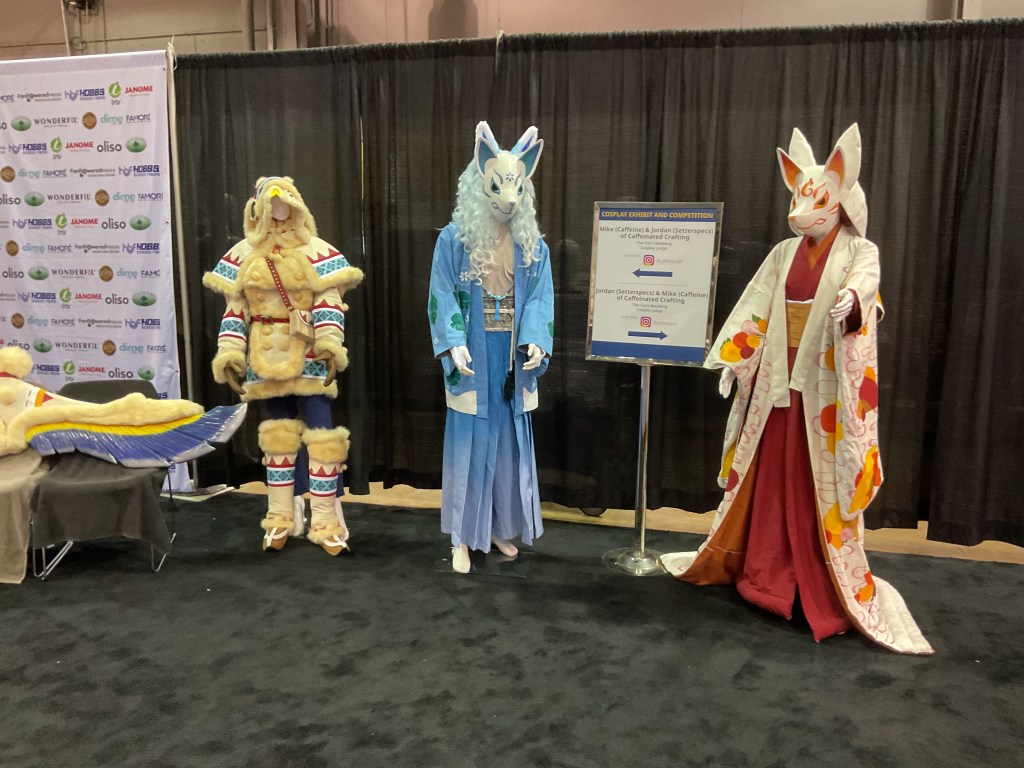
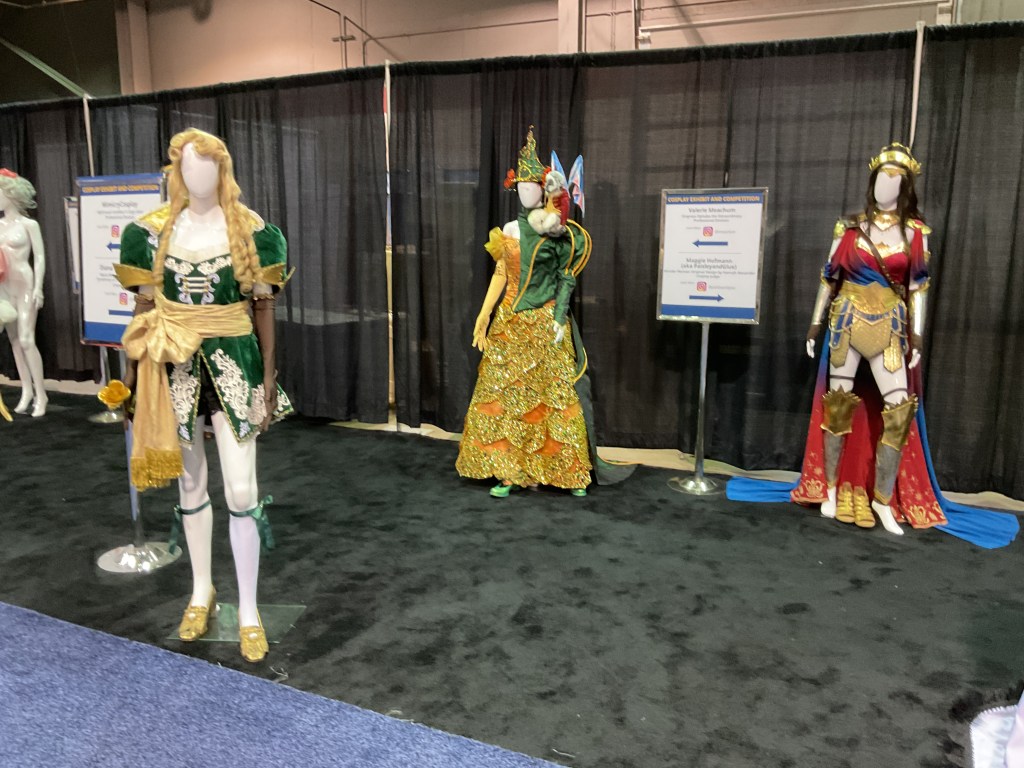
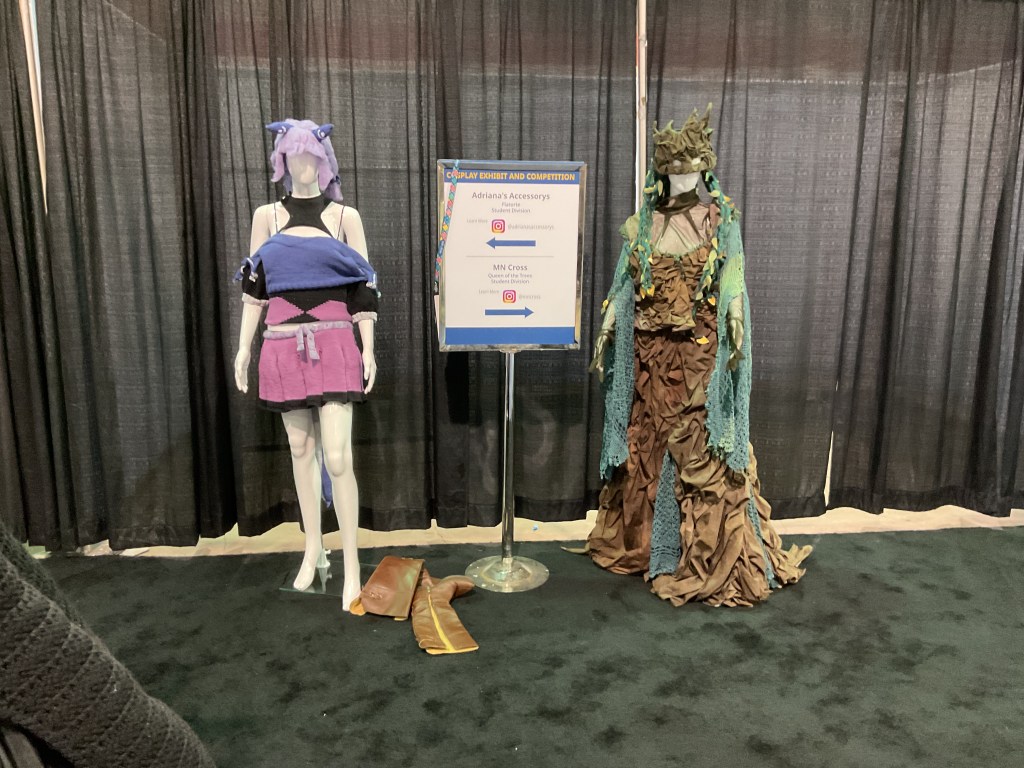
During the show, there was a cosplay contest as well as a cool cosplay display. Check out these awesome costumes. Which one is your favorite?

Whenever I am at a show, I try to see what’s new and upcoming and what’s trending. Here is a list of the things I noticed at the show:

  • Mini, Mini, Mini — mini quilts, mini animals, everything is getting smaller
  • Quilted jackets and wearables
  • Combining different crafts such as cosplay and quilting or wool and quilting
  • Small handwork projects and kits everywhere — handwork is hot!
  • Animals — stuffed, patchwork, knitted, quilted, etc., etc.

One thing I was quite fascinated with was the use of puffy batting in machine quilted quilts on display at the Art Glass Fabric booth. Not sure if this is going to be trending or if it was just to catch attention (which it did). Have you seen or heard anything about puffy batts making a comeback?

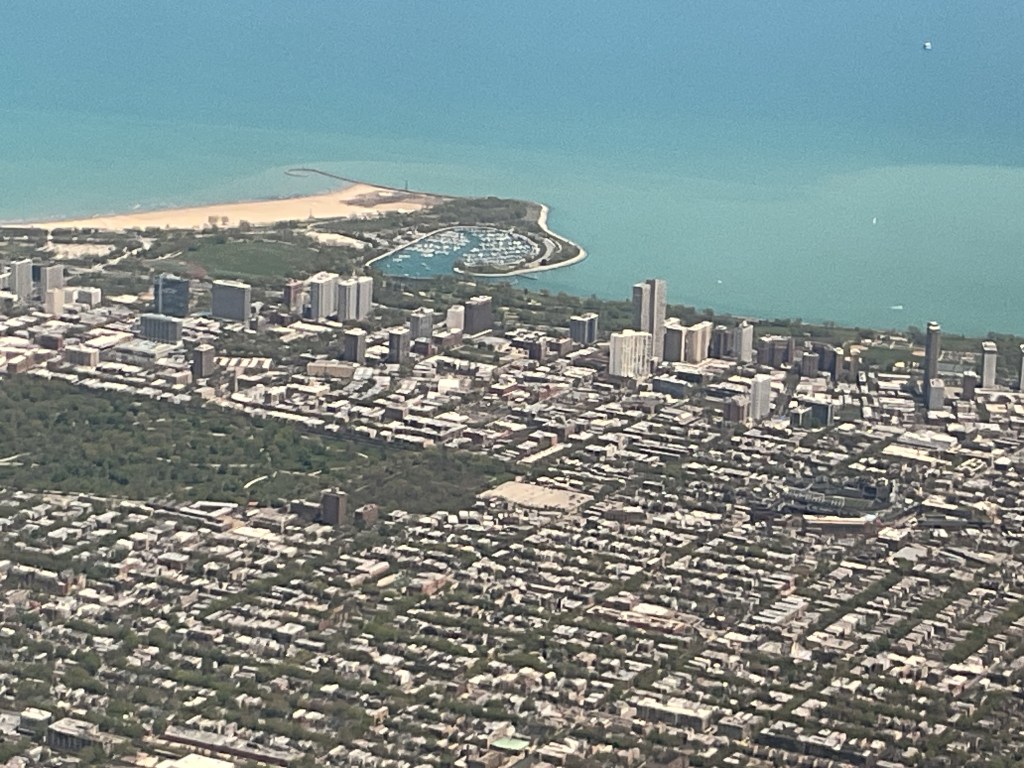
Well, I guess that’s it for me this week. My final photo is an aerial view of Chicago and Lake Michigan as I was headed back to Pennsylvania.

Aerial view of Chicago featuring a mix of buildings, green spaces, and Lake Michigan in the background.

Take care and make time this week for some quilting. With all the inspiration from the show, I hope to get some quality time with my sewing machine, too.

Until next week –

Always,

Tricia @VRD

Rose Cards · villa rosa designs

H&H Americas and NEW VRD Rose Card Quilt Patterns for May

Happy Thursday to you!

I hope you are getting a bit of nice spring weather where you live. Everything is greening up nicely now in Pennsylvania and a lot of the spring flowers are finally blooming. I just love ALL the colors – it’s sew inspiring after a long grey and white winter.

I’m sorry, but this week’s post is going to be a short one. Pat and I are at the H&H Americas show in Chicago, IL right now. I was planning to walk around the show and scope out new and interesting things to show you on today’s blog post but that simply isn’t going to happen.

The VRD booth was completely swamped all day today with excited quilt shop owners and other industry professionals. I want to thank each of you who stopped by and shared your VRD stories and quilt photos with us. b Connecting with you really makes us happy.

This very lonely photo is the only one I managed to snap last night after Pat and I were finished setting up.

A booth display at the H&H Americas show features a variety of colorful quilts hung on walls and draped over tables, showcasing designs from Villa Rosa Designs.

I hope that I’ll get the chance to see some of the new and interesting things and show you my cool finds on next week’s blog. No promises, though – if the rest of the show is as crazy busy as today was, I probably won’t get to wander and take photos.

It’s the first Thursday after the first Friday of the month and we all know what that means – new VRD Rose Card patterns. YAY! Let’s take a look.

Here is the May set of 5 patterns:

Promotional image showcasing the May 2025 quilt patterns including 'Charlie', 'Mint Julep', 'Heritage', 'Shear', and 'Triple It' with price information.

Get the set of 5 patterns HERE

Aren’t they fun? Another great panel pattern, several fat quarter patterns, and a really neat mod pattern. Can you guess which is which?

Of course, a new monthly pattern set would not be complete without a new table runner, would it? This month, we have a new runner pattern by Molly:

A quilt titled 'Tea for 2' designed by Molly Cook, displayed on a vibrant background of blooming flowers, showcasing its intricate patterns and colors.

Get your digital pattern HERE or your print pattern HERE

I just adore the fabrics Molly used in her cute runner from the Let’s Partea collection (isn’t that just too clever???).

Guess what???? We still have some Tea for 2 kits which include the fabrics for the top and binding along with a pattern. You can find Tea for 2 kits HERE.

Here are some of the other kits we still have in stock for the May patterns. Get ’em before they’re gone.

Heritage featuring Tim Holtz Palette Neutral

Mint Julep in Moda’s Botany collection

Triple It in Winged Garden

Charlie in Fur Friends (see below)

A quilt featuring a colorful cat pattern with playful cat illustrations framed by vibrant borders in various prints.

If you love kits as much as we do, you can find all of our quilt kit offerings HERE.

Well, I must admit that I’m fading fast after the busy day Pat and I had, so I’m going to wrap up here. Have a wonderful week and take a little time to admire the flowers and maybe, just maybe, do a spot of quilting while you are at it.

Until next week –

Always,

Tricia @VRD

Quilting Partners · Rose Cards · Tutorials · villa rosa designs

VRD Stepped Quilt Tutorial

Happy Thursday to you!

I’ve got a fun and happy quilt tutorial for you today – Stepped by Running Doe Quilts for Villa Rosa Designs.

But before we get into the tutorial – I have an AMAZING announcement for you!

Drum roll, please!

Cue the confetti! Or how about a balloon drop from the ceiling this time?

Our Rose Queen and owner, Pat Fryer, has done it again!

She has a new batik fabric collection with Riley Blake Designs coming this October!

It’s called Kalinda.

WOOHOO!

Here’s a sneak peak –

Kalinda is simply perfect for all your autumn projects! You can download the collection PDF with all the fabrics and skus below.

Guess what????? There will be another collectible pattern storage tin for the Kalinda collection, too! I can’t wait! I love love love my tin from Pat’s first collection, Bedazzled. I can’t wait to collect them all as she designs new collections in the future!

Mark your calendars for October – when Kalinda makes its debut. Don’t forget to ask your local quilt shop to order the collection if they haven’t already.

Now I’ve spilled the beans about Pat’s new collection, it’s time to jump into our tutorial.

Stepped is a fun modern Rose Card pattern designed by Running Doe Quilts for Villa Rosa Designs. It is a large quilt, finishing at 66″ x 78″ and is fat quarter friendly – yay!

Get your digital pattern HERE or your print pattern HERE

For this tutorial I chose a wonderful warm and sunny collection from our friends, Hoffman Fabrics, called Sunset Hour. I chose the bright blue as the frame and binding for a wonderful pop of color against the warm sunset tones.

As usual, the first thing I’m going to do is cut the pieces for the blocks. Since this quilt doesn’t have a border (which is common for modern quilts, by the way), we don’t have to worry about that.

I’m wondering – do you cut your borders when you cut the fabric for the blocks or do you wait until after the center of the quilt is assembled? For me, I usually cut the border strips when I cut the block fabrics, but I don’t piece and cut the borders to size until after I finish the blocks.

Oops, let me get back to the cutting. LOL!

Here are all the pieces I need to make the whole quilt top. Isn’t that blue striking?

Now we’re ready to rock and roll at the sewing machine! The Stepped block goes together really quick (of course, it’s a VRD Rose Card pattern!). I like to put the large rectangle to my left and the blue frame strip to my right so I can grab a rectangle, place a frame strip on top, and zip it through the sewing machine. Then I repeat this same step for all the blocks, using chain piecing (meaning I’m not cutting the thread between blocks as I sew).

Working with batiks is lots of fun – you don’t usually have to worry about right or wrong sides because they are dyed the whole way through.

I could just flip the frame strip over, give it a finger press, and add the 2nd frame strip on, but I want my blocks to be nice and crisp, so I’m going to head to my ironing board to press the blocks before adding the 2nd frame strip.

Now I’m ready to sew the 2nd frame strip on the side of each block. Easy piezy – just the way I like ’em!

Then it’s back to the iron to press the blocks one more time. I warn you – there are a lot of blocks! Seriously!

Next I’m heading to my flannel board, which is actually behind my pressing station, to lay out my blocks. SHHH! My flannel board is really a flannel backed tablecloth hung in front of my fabric storage wall. To hang it, I clip the tablecloth to the tops of my storage doors with big binder clips. That way, I can take it down whenever I need access to the fabric cubbies (these particular cubbies hold my yardage and fat quarters by color).

Now the fun begins. As I lay out the blocks, I’m moving them around to spread the colors and fabrics out over the whole quilt. Laying out your blocks is an important step in making a quilt because you don’t want all the same fabrics or colors clumped together in the same area by accident.

Yikes! I’m actually running out of flannel board for this quilt because it’s big, so I think I need to sew this section together before I can add the final 4 rows. Off to the sewing machine I go…..

All right, here’s the section sewn together. Sorry, just noticed in this photo, I have it turned upside down from the previous photos. Mea culpa.

Finally, I can lay out the final 4 rows and add them to the quilt top. Ugh, you can’t see the bottom section I just added because my ironing station is in the way. Did I mention this is a BIG quilt???

I know! Let’s go outside so I can show you the completed quilt top!

I LOVE the warm and sunny colors of the sunset and the blue plays nicely. I reminds me of photos of the sun setting over the ocean. I say photos as I’ve yet to actually see an ocean. Someday…….

OH! Rats!

Take a look at the bottom of the quilt, I ended up with too much light colored fabrics bunched together. This happened because I couldn’t lay out the entire quilt on my flannel board all at once before I stitched the blocks together. ARGH!

Looks like I will be doing some un-sewing with my trusty seam ripper sidekick, Jack. Then I can relocate some of those light blocks from the bottom towards the center. Sigh……definitely a project for another day. Sorry about that.

Have you ever made the Stepped quilt? If so, I’d love to see your quilts on our VRD Facebook group.

Well, that’s it for me. Have a great week! Find some time to do a little sewing this week. Or maybe some un-sewing……

Until next time –

Always,

Tricia @ VRD

Quilting Partners · Rose Cards · villa rosa designs

NEW VRD April Rose Card Quilt Patterns and A Fabulous Catalog by our Quilting Partner, QT Fabrics

Happy Thursday to you!

Guess what today is??? It’s the Thursday after the first Friday in April, which means………..NEW PATTERNS!

If you are a new blog follower, you might not know that at Villa Rosa Designs, we add 5-7 NEW Rose Card patterns each and every month, all year long. New monthly patterns are usually launched the first Friday of the month on VRD’s Fry-Day Live event online. You can find Fry-Day Live events HERE most Fridays at 4:00 PM Pacific Time (7 PM Eastern time).

With 5-7 new patterns every month, that adds up to between 60-84 NEW patterns every year – WOW! Then add those to our over 700 patterns already in print! It’s almost mind-boggling. We really do have something for everyone!

I know you’re anxious to see this month’s patterns, so here they are –

Collage of five new quilting pattern cards for April 2025, including Butterfield, Dakota, Havenwood, Cadott, and Turtle Soup, featuring colorful quilt designs.

Get the set of 5 print cards HERE

As usual, our talented VRD designers do not disappoint!

Butterfield is by our own Rose Queen, Pat, uses a collection of fat quarters and goes together really fast. You can find the Digital pattern HERE or the Print pattern HERE. We also have Butterfield kits (includes the pattern) featuring Tim Holtz Palette Yellow fabrics.

Dakota is also by Pat and is a quick to make fat quarter quilt. You can find the Digital pattern HERE or the Print pattern HERE. And we have Dakota kits (includes the pattern) featuring Victory Garden fabrics.

Havenwood, designed by Rachelle, is Jelly Roll or scrap friendly. It works up fast with your favorite quick piecing techniques. You can find the Digital pattern HERE or the Print pattern HERE. We have Havenwood kits (includes the pattern) featuring the Sweet Melodies collection (below).

A colorful quilt featuring a patchwork design with various patterns and fabrics, arranged in blocks of different colors including red, blue, yellow, green, and floral prints.

Havenwood in Sweet Melodies

Cadott is also by Rachelle and is a fun modern quilt with A LOT of visual appeal. It uses yardage or your stash. You can find the Digital pattern HERE or the Print pattern HERE. Sorry, no kits for this one.

Turtle Soup by Heidi features a theme fabric or border stripe – and what a fun name! You can find the Digital pattern HERE or the Print pattern HERE. Sorry, the kits are already sold out.

But Wait………there’s more! (Tehehe, you know how much I love writing this.)

Our NEW April Table Runner (by moi) is called Window Boxes. You can use panel squares or fat quarters for this pretty runner pattern.

Cover of the quilt pattern 'Window Boxes' featuring a quilt with hexagonal shapes in yellow, turquoise, and pink fabrics, surrounded by floral prints, set against a peach background.

Get the Digital pattern HERE or the Print pattern HERE.

That’s it for the new patterns this month. Which one are you going to make first??? I can’t wait to see your April projects on our VRD Facebook Group.

Now let me tell you about QT Fabrics and VRD.

As many of you already know, Villa Rosa Designs has made lots of connections with other companies in the quilting industry in recent years. We call them our Quilting Partners. You can find our Quilting Partners over on the right side of the blog towards the top.

Are you familiar with our pals over at QT Fabrics? They are an employee-owned and operated company and have been in business for a long time. You can find QT fabrics at your local quilt shop AND you can check out VRD’s QT Fabric offerings on our website HERE.

We’ve been partnering with QT Fabrics for a while now and I’m really excited to share with you their recent publication featuring our Rose Card patterns and QT’s newest fabric collections, which will be out in quilt shops this Fall. Aren’t you the lucky ones to get a sneak peak???

Here’s the PDF version of the wonderful catalog that QT put together featuring ALL VRD Rose Card patterns paired with their new 2025 Summer Collection, which will available this fall.

I definitely have some of these on my to-do and look forward to sharing new tutorials here on the blog featuring some of these fun designs and fabrics. Woohoo!

If you’d rather check out the really cool digital Flipbook version, you can find it HERE.

I hope you found a lot of inspiration in this catalog – maybe some new-to-you patterns and/or great upcoming fabric collections. If you see a collection you love, ask for it at your local quilt shop – the fabrics will be available this fall. All of the featured patterns in the catalog are available on our website, villarosadesigns.com.

Well, that’s it for me. Take care and do something fun this week.

Until next time –

Always,

Tricia @ VRD

Curated Rose Card Pattern Lists · Rose Cards · villa rosa designs

A Super Fun Spring Bingo Download and a Curated List of VRD Rose Card Quilt Patterns for April

Happy Thursday to you!

Well, I’m happy that spring is finally here in NW PA. I think it’s here, anyway. Sometimes it’s hard to tell.

Tulips, Daffodils, and Crocuses are blooming which is a welcome burst of color against our still dreary winter landscape. The trees are just staring to wake up a little bit, but we won’t have full leafy coverage until the end of April into May. Spring weather here is also quite unpredictable — we’ve already had a few days in the 70’s, but we’ve still gotten a bit of snow. And rain. And hail. Even with its craziness, spring is definitely one of my favorite seasons.

Spring also gets me re-energized for quilting with spring colors, Easter, flowers, birds, blue skies with fluffy clouds, baby animals…I could keep going but you get the idea. Spring is all about renewal, so go ahead and welcome the season in your quilting world, too.

YAY! Lucky you! I created a fun Spring Fling Bingo download to help you enjoy the season. Please download the PDF below and have fun completing the 20 spring ideas!

Now let’s have a pattern shower for April! Because a collection of Spring quilts will surely brighten your day and give you some Spring inspiration. It certainly inspired me as I put it together.

If you’re a blog follower, you might have seen my Curated Spring List from last year, so instead of repeating that lovely collection of patterns, I thought I’d create a new collection of patterns just for April. And April means showers, rainbows, Easter, gardening, babies, and….

Digital Pattern or Print Pattern

Print Pattern only

Digital Pattern or Print Pattern

Digital Pattern or Print Pattern

Digital Pattern or Print Pattern

Digital Pattern or Print Pattern

Digital Pattern or Print Pattern

Digital Pattern or Print Pattern

Digital Pattern or Print Pattern

Digital Pattern or Print Pattern

Digital Pattern or Print Pattern

Digital Pattern or Print Pattern

Digital Pattern or Print Pattern

Digital Pattern or Print Pattern

Digital Pattern or Print Pattern

Digital Pattern or Print Pattern

Digital Pattern or Print Pattern

Digital Pattern or Print Pattern

Digital Pattern or Print Pattern

Digital Pattern or Print Pattern

Digital Pattern or Print Pattern

Digital Pattern or Print Pattern

Digital Pattern or Print Pattern

Digital Pattern or Print Pattern

Digital Pattern or Print Pattern

Digital Pattern or Print Pattern

Digital Pattern or Print Pattern

Digital Pattern or Print Pattern

Digital Pattern or Print Pattern

Digital Pattern or Print Pattern

Digital Pattern or Print Pattern

Digital Pattern or Print Pattern

Digital Pattern or Print Pattern

Digital Pattern or Print Pattern

Print Pattern Only

Digital Pattern or Print Pattern

Digital Pattern or Print Pattern

Digital Pattern or Print Pattern

Digital Pattern or Print Pattern

Digital Pattern or Print Pattern

Digital Pattern or Print Pattern

Digital Pattern or Print Pattern

Digital Pattern or Print Pattern

Digital Pattern or Print Pattern

Digital Pattern or Print Pattern

Digital Pattern or Print Pattern

Digital Pattern or Print Pattern

Digital Pattern or Print Pattern

Digital Pattern or Print Pattern

Print Pattern Only

Digital Pattern or Print Pattern

Digital Pattern or Print Pattern

Digital Pattern or Print Pattern

Digital Pattern or Print Pattern

Digital Pattern or Print Pattern

Digital Pattern or Print Pattern

Well, I hope you enjoyed this great selection of VRD Rose Card patterns. I really enjoyed putting it together. Did you know we now have around 700 patterns in print? How many do you have?

Don’t forget — there’s FREE SHIPPING on patterns. Always.

Stay tuned for next week’s post showcasing our brand new April Rose Card patterns.

Until then –

Always,

Tricia @ VRD

Rose Cards · Tutorials · villa rosa designs

VRD Brickwork Quilt Tutorial

Happy Thursday to you!

Although it’s really March 26th as I write this post, it sure feels more like April Fool’s Day here in NW PA! Mother Nature is laughing loudly at us because this morning we woke up to a layer of snow on the ground. Of course, it’s already beginning to melt away as the temperature increases a bit, but it was certainly a deja vu moment. Just another crazy weather day….

So, I definitely think it’s a fitting day to do a new tutorial for you featuring a beautiful blue and lavender batik collection.

Brickwork is a super fun fast fat quarter quilt designed by our VRD designer, Molly Cook. Don’t know Molly? Check out an interview with Molly HERE.

Get your digital pattern HERE or your print pattern HERE

We do have a few different Brickwork kits available (sorry, not the fabrics used in this tutorial, though) – you can find the kits HERE

For this tutorial, we’re using yummy batik fabrics from the Hoffman collection Dragonflies at Dusk. I just love these gorgeous blues and lavenders – perfect for a snowy day like today.

Who am I kidding??? I just love the saturated colors, smooth hand, and interesting designs of batiks regardless of the weather outside. LOL!

Let’s get started with our cutting. If you feel comfortable layering a couple fat quarters with the right side facing up, the cutting goes super fast. But if you are only comfortable cutting one layer at a time, that works great too. You do you.

Next you need to pair up 2 matching smaller rectangles with a different larger rectangle. Sew the larger rectangle between the 2 matching smaller rectangles. This is a great block on which to practice your chain piecing skills.

Once you have all of the blocks pieced, head to the ironing board and press everything. It doesn’t matter how you choose to press these ones, just be consistent.

After pressing the blocks (sorry, for some reason I didn’t snap a photo of this step), we’re heading to the design wall (ie: a flannel-backed tablecloth – LOL!) to arrange our blocks.

Okay, now the real work begins – rearranging the blocks so we have a nice balance of colors and lights/darks. The funny thing is that sometimes this process takes longer than actually making the blocks added to the actual time spent sewing the blocks. Just take your time and keep arranging until you are happy with what you see.

This quilt did give us some challenges, though, because the fabrics looked either light or dark and we didn’t have a lot of medium values to balance things out.

Here are some photos showing subtle changes in block placement while we try to achieve a better balance of colors. Bear with us while we keep changing blocks around….

Finally! We found a pleasing block arrangement and then it was time to sew the blocks together into rows and then sew the rows together.

Here is the finished Brickwork quilt top! Now to layer it with batting and backing, quilt it, bind it, and label it. Not sure how to do all of that? You can check out our 2022 Basic Quilting Skills Series over on the right side of the blog for useful tutorials on

Batting, Backing, and Preparing a Quilt for Quilting

Quilt As Desired

Squaring Up Your Quilt

Binding 101

Label Your Quilt

Of course, if you’re interested in learning more about Free Motion Quilting (FMQ), we just wrapped up a 7 part series about Beginner FMQ, which is also located over on the right side of the blog.

I want to thank my pal, Robin, for helping me with this tutorial – thanks, Robin!

Have fun making your very own Brickwork and I look forward to seeing your quilts on our VRD Facebook Page.

Well, that’s it for me. Take care and find a little time to quilt this week.

Until next time –

Always,

Tricia @ VRD

Quilting Partners · Rose Cards · Tips and Tricks · Tutorials · villa rosa designs

NEW March VRD Rose Card Quilt Patterns and Lucky, a Quilt Tutorial for St. Patrick’s Day

Happy Thursday to you!

I trust you’re all having fun with your Free Motion Quilting (FMQ) practice. We’re going to take a quick break from our Beginner FMQ series this week because I have NEW March patterns to share as well as a fun table runner tutorial just in time for St. Patrick’s Day. We’re all Irish on St. Patrick’s Day, right?

Here are the new patterns for March – be prepared to be inspired….

Get the print set of all 5 patterns HERE.

The 5 main patterns are great, aren’t they?

Molly created a brand new St. Patrick’s Day throw-sized quilt called Clover Patch. I just love that she added a single Four Leaf clover to her quilt – can you find it in the Clover Patch?

Molly also created a second pattern this month called Jackknife. This clever block uses long quarters instead of fat quarters. We still have a few kits left, too, if you’re interested.

Get your Jackknife kit in Art Glass AbstrArt HERE.

Heidi wows with her new 24″ panel quilt pattern, Jerky. If you don’t already know, Heidi always gives her patterns a foodie name because she loves to cook.

Rachelle created a new modern pattern called Kenosha. I love the secondary design that happens in this striking quilt pattern.

Pat, our Rose Queen, has another fun and fast throw sized pattern for you called Zamora. If you didn’t know, Pat always names her quilts after a rose. Yep, Zamora is the name of a rose. Zamora only uses three main fabrics plus a binding fabric. Sew easy piezy. We still have a few Zamora kits left, too.

Get your Zamora in Indelible kit HERE.

We also have a new table runner pattern this month called Erin.

Get your digital Erin pattern HERE or your print Erin pattern HERE.

I’ve always wanted to make a green and white Double Irish chain for St. Patrick’s Day. I can now check that off my bucket list. The Double Irish chain looks complicated, but I promise you, it really isn’t when you break it down. Give it a try.

I guess I should have done a tutorial for today with Erin, but I’d already gotten Lucky stepped out and photographed before I even designed Erin. I’m sure I’ll do a tutorial for Erin sometime in the future – you’ll just have to stay tuned.

That being said, let’s move right along to our Lucky tutorial.

The first thing we’re going to do is gather up our fabrics.

I’m using a beautiful Hoffman batik collection called Forest Floor. Don’t you just love the greens? With a pop of orange? Love Love Love it!

The first photo shows the background and the greens for the blocks. The second photo shows the border and binding.

Grab your rotary cutter, board, and ruler and let’s start cutting out our pieces!

Now that our pieces are all cut out, let’s start sewing!

Layer a background square right sides together on the corner of a Clover square and draw a diagonal line from corner to corner. I love my Frixion Fineliner pens and my 1×6 little ruler for making my flippy corners and HSTs right at my sewing machine. What are your favorite tools for making yours?

Next we’re going to sew on the drawn line.

Let’s cut 1/4″ away from our drawn line. Did you knou can use these little cut off triangles for a scrappy little project? I’ve been saving mine for a long time, and have even started sewing them into HSTs, but I haven’t started making anything with them yet.

TIP: You might notice in the photo below that my seam is slightly to the right of the drawn line. This is actually on purpose because it gives a bit more room for the seam and my flippy corners are more precise. I learned this little trick from my quilty pal, Mary Lee. THANK YOU, Mary Lee!

Don’t forget to press that flippy corner open.

We’re not done yet! Go ahead and make flippy corners on 2 more corners of the Clover square.

Okay, now we’re talking! Let’s repeat these 3 flippy corners for the rest of the Clover squares while we’re at it.

Finally it’s time to make a Clover block. Yeah! Sew 4 matching Clover squares together with the 4th unpieced corners towards the center so they all meet for the middle of the Clover block. Such a pretty block!

Repeat to make a total of 4 Clover blocks. Don’t you just love that pop of orange???

The next thing we need to do is sew the 4 Clover blocks together with background strips in between the blocks and at each end.

Then we’re going to add top and bottom background borders. Lookin’ good!

Now it’s time to add the side outer borders and then the top and bottom outer borders. And DONE!

Yay! All that is left to do is layer it with batting and backing, quilt it, bind it, and label it.

I hope you enjoyed the Lucky runner tutorial and are super inspired by the new March patterns. Next week we are going to wrap up our Beginner Free Motion Quilting (FMQ) series by addressing borders.

Until next week –

Always,

Tricia @ VRD

Quilting Partners · Rose Cards · Tutorials · villa rosa designs

VRD 2M Junior Quilt Tutorial Featuring Pat Fryer’s New Fabric Collection, Bedazzled!

Happy Thursday to you!

It’s OFFICIAL! Throw the confetti! Toot your party horns! YEAH!

Pat’s NEW fabric collection for Riley Blake Designs, BEDAZZLED!, is finally here and we are all SEW excited!

To celebrate Pat’s new fabric collection, I’m sharing another great tutorial with you this week – 2M Junior.

Next week, we’ll dive right back into the Free Motion Quilting Series, I promise.

2M Junior is the little brother of 2M. Junior has the same block, only it’s a bit smaller so the quilt finishes as a throw quilt instead of a big bed-sized quilt like big brother 2M. It also uses a different block configuration, which gives it its own personality.

For the pattern cover quilt, I actually used samples of Bedazzled! and, boy, does it sparkle. And I mean that both figuratively and literally – don’t forget that Bedazzled! features glitter and glam. OHHHHH, SHINY!

Here’s another photo I took of 2M Junior.

Get your digital Junior HERE or print Junior HERE

I’m happy to say we have some kits made up for 2M Junior featuring Bedazzled! You can get your Bedazzled! 2M Junior kit HERE.

OH! I can’t forget big brother 2M, can I?

You may already know the story, but let me share it again. I designed 2M for my youngest niece, Morgan, as her high school graduation quilt. She asked for something modern. Yes, she loved it (and still does).

You can get your digital 2M pattern HERE or your print 2M pattern HERE

If you enjoyed the Baby Zip Tease tutorial last week also featuring Pat’s Bedazzled! collection, we now have kits for it, too. You can get your Baby Zip Tease kit HERE.

All right, back to our previously scheduled programming….2M Junior. Tehehe….

First thing we always do is gather up our fabrics for the project. The 2 teal batiks are from Riley Blake’s Expressions basics. And the fat quarters are, of course, from Pat’s Bedazzled! collection. Simply scrumptious, aren’t they???

Once I’ve gathered up my fabrics, I like to cut all the pieces out for the quilt before I begin sewing. Do you do that or do you cut your pieces as you go?

Okay, now we’re ready to sew!

Let’s add a background rectangle to the left side of a block center.

Next we need to sew a background rectangle to the top of the unit.

Then we’re going to sew accent strips to the sides and then to the top and bottom of the unit.

Now we are going to sew a background rectangle to the smaller block center rectangle and sew it to the bottom of the unit.

The next step is to sew another background rectangle to the longer block center rectangle and then sew it to the right side of the block. Our first block is done!

Easy Piezy, right? Now repeat to make the rest of the quilt blocks.

We’re going to lay out the blocks and move them around until we’re happy with how things look.

Warning – sometimes this step takes longer than actually making the quilt top (especially if it’s a VRD Rose Card pattern – they’re fast and fun, you know!). Yikes!

Okay, I like how the fabrics are distributed around the quilt now, so I’m going with this arrangement. Don’t you just love how the squares and boxes tumble down the quilt?

Hurry! Let’s sew the blocks together and then sew the rows together before any furry helpers make an appearance and rearrange the blocks when I blink.

And – guess what????? No borders on this one! Yippee!

It is my humble opinion that not all quilts need borders. What are your thoughts on borders?

Here’s another photo of the 2M Junior quilt top. Yummy, yummy, yummy!

Now the top is finished, it’s time to layer it with batting and backing (or fleece for a cozy back). Quilt it. And please, don’t forget your quilt label! DONE!

Need a little help with batting, backing, and layering everything together? VRD to the rescue! Check out this post from our Basic Quilting Skills for Beginners series, Basic Quilting Skills for Beginners: Batting, Backing, and Preparing a Quilt for Quilting. You can find all the lessons in the Beginner series over to the right of the blog, under the Blog Topics Heading or down further as a heading with the lessons listed below.

Once everything is layered together, then it’s time to quilt! Yay! And we are right in the middle of a new series for 2025 — Free Motion Quilting. Lucky You!

We interrupted the series for a couple weeks to celebrate Pat’s new collection with a few new tutorials, but next week, we’ll be moving on to Lesson 3 in the FMQ series.

If you missed the first couple FMQ lessons, you can find them below:

Lesson 1

Lesson 2

You can also find the different series we’ve done over on the right side of the blog, farther down, each under its own heading. Have fun checking them out!

Since last week’s post, we’ve added some more fun Bedazzled stuff to the shop (physical and online). Here’s the 411 –

Fat Quarter and Half Yard Bundles!

This group of 9 is called Lilac Mint

9 Fat Quarters HERE or 9 Half Yards HERE

This group of 8 is called Prismatic Bliss

8 fat quarters HERE or 8 half yards HERE

This group of 9 is called Stardust Splash

9 fat quarters HERE or 9 half yards HERE

BUT WAIT! There’s MORE!

We do have a few more kits available besides 2M Junior and Baby Zip Tease.

San Julian (light) kit HERE

San Julian (black) kit HERE

And here’s the San Julian Rose Card pattern. Please note that the pattern comes in each kit, so you don’t need to order it separately. I’m adding the links below, though, in case someone needs it by itself.

Get your digital San Julian pattern HERE or your print San Julian pattern HERE

You can find all the precuts, yardage, fat quarter bundles, kits, and the exclusive Bedazzled! Rose Card storage tin HERE.

And this is the Bedazzled Rose Card pattern that inspired the whole Bedazzled! collection.

Get the digital Bedazzled pattern HERE or the print Bedazzled pattern HERE

Whew! That was a lot today, wasn’t it? Thanks for celebrating Pat’s new fabric collection, Bedazzled!, with us here on the blog. I can’t wait to see your new Bedazzled! quilts on the VRD Facebook page soon.

Well, that’s it for me today. Remember, next week we’re jumping back into our Free Motion Quilting series.

Until then –

Always,

Tricia @ VRD

Quilting Partners · Rose Cards · Tutorials · villa rosa designs

Pat’s VRD Bedazzled Fabric Collection for Riley Blake Designs is HERE and VRD Baby Zip Tease Quilt Tutorial

Happy Thursday to you!

Yay! Yay! Yay!

Pat’s new fabric collection for Riley Blake Designs, BEDAZZLED!, is finally here!!!

I’m so sorry, but I have to pause our new Free Motion Quilting series so I can celebrate Pat’s new collection. I promise to continue our FMQ series in a couple weeks because I have 2 new tutorials to share, featuring Pat’s Bedazzled! collection.

Here she is – Pat Fryer, owner and Rose Queen of Villa Rosa Designs and designer for Riley Blake Designs

A yummy color-drenched batik collection with glitter accents because one can never have enough glitter!

Get the 5″ Stacker HERE

Get the 10″ Stacker HERE

Get the 2.5″ Rolie Polie HERE

Or you can find the Bedazzled fabric by the yard HERE

Although they aren’t ready yet, soon we will have kits for Baby Zip Tease in Bedazzled!, so check back soon. I’ll add the link HERE just as soon as it’s available.

BUT WAIT! There’s MORE!

There is one more piece to the collection – a one of a kind Bedazzled tin just the right size to store your VRD patterns! I’m not sure how many patterns it holds yet because I haven’t received my tin yet, but I’ll be sure to let you know when I find out. There’s no question about how to store your VRD Rose Card patterns now. Get yours ASAP, because I know they’ll sell out quickly.

Get the Bedazzled tin HERE

To celebrate Pat’s new fabric collection, here is the 1st of 2 new tutorials just for you!

Baby Zip Tease is a really fun and fast pattern that finishes 36″ x 38″, which is a nice size for a wall quilt or a baby quilt.

Get Baby Zip Tease digital HERE or print HERE

PSST! If you like Baby Zip Tease, you’ll love Zip Tease, which is a throw-sized version.

Get Zip Tease digital HERE or print HERE

I was at my pal, Robin’s house (Hi Robin!) the day I created this tutorial. We have sew days as frequently as we can. Robin has a lovely sewing room upstairs in her farmhouse with room for at least 2 people to sew.

In fact, I leave one of my sewing machines there all the time so I don’t have to drag one back and forth. Her husband, Rich (Hey Rich!), threatens to charge me rent. LOL!

Robin and her big kitty boy, Tigger. Tigger has a very important job — to hold down any project Robin tries to work on! LOL! Anyone else have one of these special furry helpers?

So let’s get started with our Baby Zip Tease tutorial!

Of course, the first thing we need to do is gather up our fabrics and cut what we need for the project. I’m using a 5″ stacker from Pat’s new Bedazzled! collection and a yummy Riley Blake Designs Expressions Batik basic.

Let’s make some Half Square Triangles (HSTs).

Photo 1: Layer a print square right sides together (RST) with a background square. Draw a diagonal line from one corner to the opposite corner.

Photo 2 and 3: Sew 1/4″ away from both sides of the line.

Photo 4: Cut apart on the drawn line.

Photo 5 and 6: Press open to make 2 HSTs.

Don’t stop now, go ahead and make the rest of the HSTs .

Square up and trim your HSTs. Cut off all the little “dog ears.”

At this point, you can sew your HSTs into rows and then sew the rows together. But where’s the fun in that???

I wanted to make sure the colors and fabrics were spread evenly throughout the quilt, so I put the HSTs up on Robin’s flannel wall and spent some time moving HSTs around to distribute colors and patterns. Argh! Sometimes this part of the process takes the most time.

This was actually a very important step for me because I kept turning the HSTs the wrong way. This was certainly one quilt project that being left-handed made more difficult. Of course, Robin pretty much just laughed at me every time I had to rotate a block in 90 degree increments until I got it going the right way. SHEESH!

Once I was happy with how it looked, it was time to sew the HSTs into rows. Finally!

Sigh…….I can’t tell you how many times I ended up turning a block on my way to the sewing machine. Time to unsew…….

What’s your favorite seam ripper? Mine is the Clover Ergonomic Seam Ripper seen in the photo below, but have you seen Clover’s latest seam ripper?

I just ordered one and I’ll let you know what I think after I try it out. If it’s as good as the one I already have, I’ll probably love it. Just sayin’……

Got that flipped HSTs fixed and survived sewing the blocks into rows – barely! Now it’s time to sew the rows together.

I’m really liking the cool zig zag effect! Let’s keep sewing those rows together! We are making progress!

YAY! Quilt top finished! Woohoo!

Now you get a chance to see how the fabrics of Bedazzled! play together. Aren’t they really great with the dramatic purple background fabric?

Next week I’ll have another Bedazzled quilt tutorial for you. The week after that we’ll continue on with our FMQ series. So please stay tuned!

Be sure to tune into our Fry-Day Live Sale tomorrow for more information and a closer look at the Bedazzled collection. You can find the Live Sale HERE on Fry-Day from 7-8 PM EST. You can also find the Live Sale on Facebook HERE.

See you there!

Until next week –

Always,

Tricia @ VRD

Guest Bloggers · Rose Cards · Tips and Tricks · Tutorials · villa rosa designs

VRD Adobo Quilt Tutorial and NEW VRD January Rose Card Quilt Patterns

Happy Thursday!

Hi guys! Psst! It’s me, Molly!

It’s been a long time since I jumped on here for a tutorial, but I finally got this one put together just for you!

I was looking at some panels in the shop recently (to see my tour of the VRD shop, go HERE) to sew up into a quilt. I was SEW inspired by the National Parks panels and I LOVE that there are a couple of different choices. Have you seen these yet???

You can find the Utah panel HERE and the California panel HERE.

We also have some awesome Rose Card patterns to showcase these great panels!

Both are fun and amazing patterns — of course, I might be a little biased, since one is my sister’s pattern and the other one is mine. LOL! 😁

If you don’t already have these great patterns in your stash, you can find digital Picture Perfect HERE, digital Adobo HERE, print Picture Perfect HERE, and print Adobo HERE.

For today’s tutorial, though, I’m going to do Heidi’s pattern Adobo because I really want to use the Riley Blake Utah panel.

GUESS WHAT????

You can sew along with me! We made up kits for today’s tutorial. Go grab your Utah Adobo kit HERE and we can sew together! How cool is that?

Your Adobo kit will include all the fabric for the top and binding as well as the pattern.

I wanted to make this Adobo quilt in all Riley Blake Designs (RBD) so I found some RBD fabrics that pulled out the colors from the panel — Poparazzi sand for the background, Poparazzi brown for the sashing, with Dapple orange, Blossom brown, and Blossom green for the Flying Geese.

Let’s get started!

Cut the squares from the background and the coordinates. Pair up each coordinate square to a background square.

Make Half Square Triangles (HSTs) by drawing a diagonal line then sewing 1/4” on either side. Cut apart and press open. Don’t forgot to square up your HSTs if needed.

Tip from Heidi (who’s keeping an eye on me as I work on this tutorial) – Press half the seams of each color HST to the background and the other half to the color.

Now sew 2 matching HSTs together to make a Flying Geese Block A. If you pressed half of the HSTs to the colored fabric and the other half to the background, use one of each to make a Flying Geese Block A. Like magic, the seams will lock together! Great tip, Heidi!

Next we need to create a Flying Geese block for the sashing center. We’re going to use a slightly different technique for this one.

Layer a background square right sides together (RST) on the side of a rectangle sashing fabric. Draw a diagonal line from the bottom outside corner to the opposite top corner. Sew on the drawn line and cut 1/4″ away from the line. Repeat for the other side. Make 4 Flying Geese units.

Next sew background squares to the ends of 2 Flying Geese units.

Sew the 2 Flying Geese units to the sides of an orange square. Then sew the Flying Geese units with the background squares on the ends to the top and bottom. Make 1 Block B.

Molly’s Tip – If using your main print for the center square, cut it from the yardage after you cut your main print/panel C pieces.

Instead of using a main print, though, I’m using the Utah panels so we just need to cut them apart (make sure they are the right measurements – trim if needed).

If using a main fabric, cut the C pieces to the size listed on the pattern.

Next, cut the sashing and add them to sides first, then to the top and bottom. Make 4.

Lay out the main print/panel C pieces and the Flying Geese Block A’s so the Geese are flying away from the center. Sew together (please note that I added an extra background strip to the top and bottom of my quilt. Feel free to do the same, but you will need a little bit more background fabric).

Layer your quilt. Quilt it as desired. Bind it. And don’t forget your label!

TA DA! That’s it! Done! Eazy piezy!

I’m going to add one more little detail to my quilt — I’m going to embroider UTAH in the center square!

Here are some other fun Adobo quilts VRD has as kits. You can find them HERE.

Thanks for stopping by and sewing with me!

Now let’s check out the new January VRD Rose Card patterns!

I’m excited that I get to show the new patterns off today! Tricia usually does it, but today it’s my turn. Yay!

Here are the 5 main patterns.

Look! There are 2 panel quilt patterns this month – one using a 24″ panel and the other one uses a 36″ panel. Cool!

Rewey uses fat eighths, Pink Piece uses fat quarters, and Yorkshire uses half yards.

This set of patterns gives you a nice variety to add to your VRD Rose Card collection. You can get all 5 print patterns HERE (if you want digital patterns, you can order each pattern individually).

But wait — there’s more (Sorry, been wanting to say that)!

Tricia has a new table runner for you called Snowfall.

You can get the print Snowfall HERE or the digital Snowfall HERE.

And here’s our 11th Snack Mat, Woolly Mitten (just in case you’re keeping track, this is the next to the last one).

You can get the print Woolly Mitten Snack Mat HERE or the digital Woolly Mitten Snack Mat HERE.

We still have some kits available for this month’s patterns (if you know me, I’m all about kits). Get yours now before they’re gone cause they’re going fast.

Farm Fresh (with the Out of Farm’s Way collection)

Pink Peace (with the pink Tim Holtz fabrics)

Yorkshire (with the Elegance collection)

Yorkshire (with the Toil & Trouble Halloween collection)

Rewey (with Australian fabrics)

Well, that’s it from me. I can’t wait to see your Adobo quilts.

Until next time —

Later,

Molly