
Hello Quilty Friends!
Happy Thursday to you!
After talking about our VRD Rose Card patterns featuring quilt panels a couple weeks ago, I thought it would be fun to do a series of Panel Quilt Tutorials for you. You can find the Panel post HERE.
There’s no way I would be able to do ALL of the Rose Cards I featured in the Panel post, but I thought it would be fun to do some of my favorites. I hope these Panel Quilt tutorials will inspire you to reduce your own stash of panels by making quilts — what an unusual thing to do with fabric, right???
So let’s make Hillside Charm! I just really love this Panel pattern — it looks great with whatever panel and fabrics you use. Don’t have 5″ charm squares? Cut fat quarters, scraps, or even yardage into the number of squares you need. Want to make it bigger? Add another border? Want it smaller? Don’t add the extra border. LOVE LOVE LOVE Hillside Charm! You can buy the pattern HERE.

Right now we even have some great Hillside Charm kits for sale on the website — Halloween, Christmas and more — so check them out HERE.
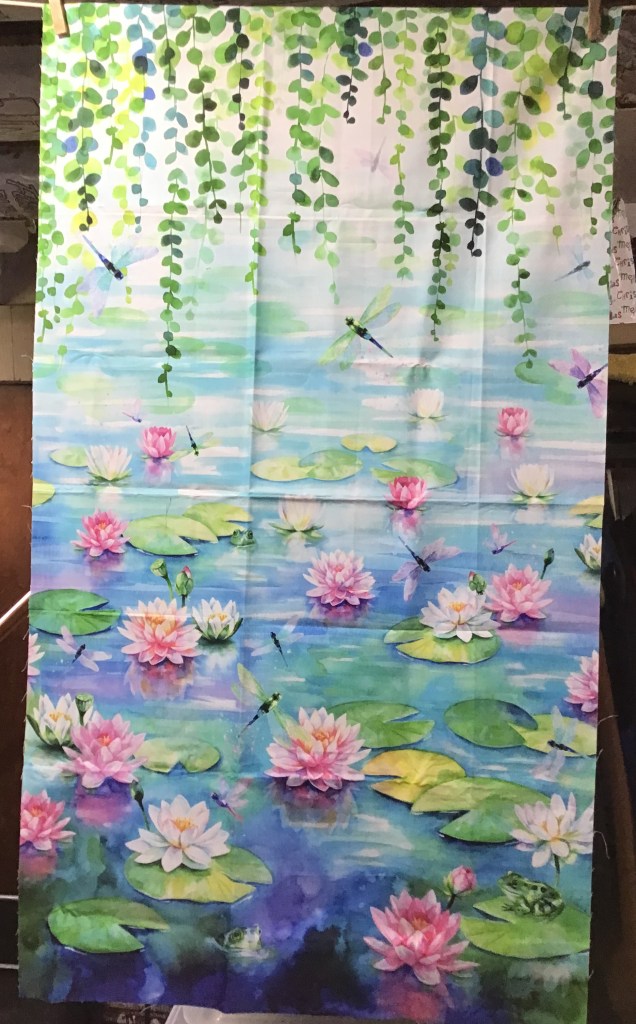
Before we jump into the tutorial, I have to do a SHOUT OUT to Hoffman Fabrics and a big thank you to them for providing the fabrics for this Hillside Charm Quilt. The collection is called Wading with Water Lilies. Isn’t it beautiful? In addition to the gorgeous digitally-printed panel and coordinates, I also used some of the basics from the 1895 Watercolors collection and 885 Dot Batiks collection.
YAY! We have the panel and some of the coordinates on the website. You can find them HERE. Grab them now because when they’re gone, they’re gone!
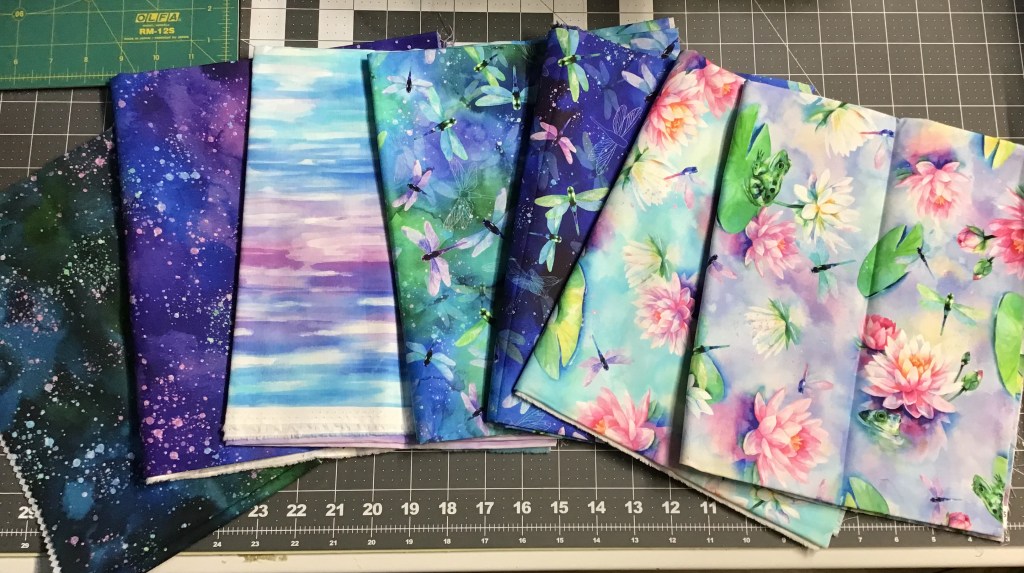

Now you’ve seen the fabrics, lets get to the tutorial!
Hillside Charm Tutorial
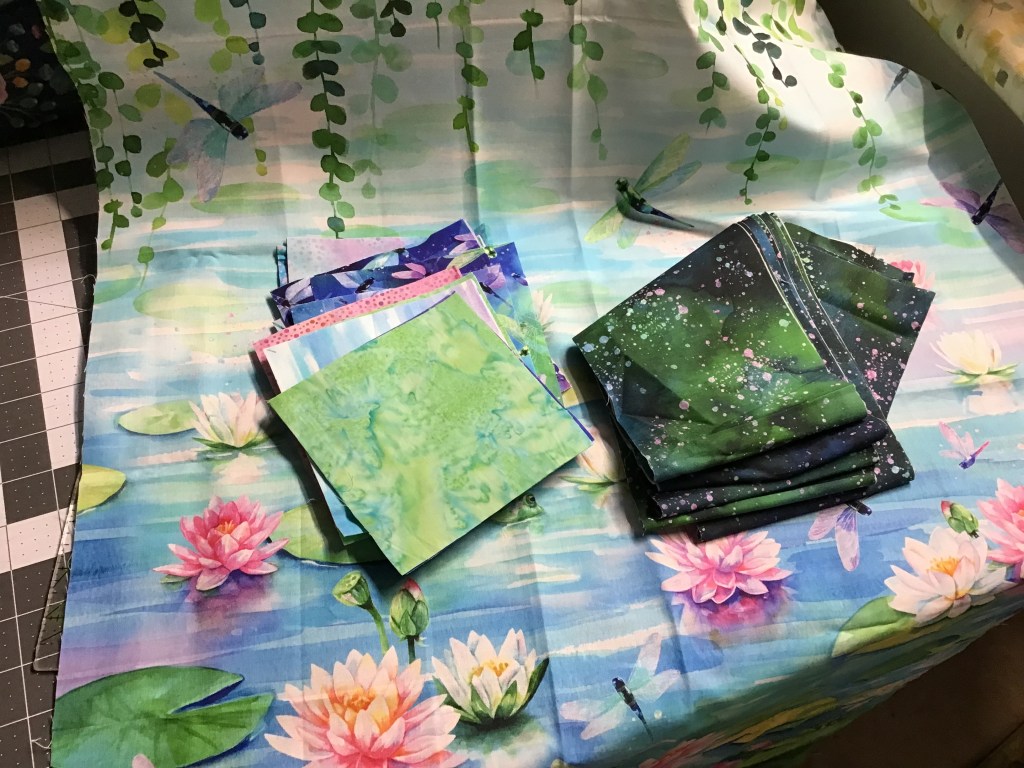
The first thing I did was trim the panel to the dimensions listed in the pattern. Sigh……I really hated cutting anything off this amazing panel but if I wanted to make the quilt, it had to be done. So I did it. I also cut out the squares and the strips. The pattern actually calls for a pack of charm squares, but since I didn’t have an actual charm pack, I went ahead and cut the squares I needed. I won’t have as much variety as I would have with a charm pack, but it will still be beautiful. Sometimes, less is more.
Next I sewed the side strips on to the panel. Then I sewed squares to the ends of the top and bottom strips before sewing them into the panel. It’s already taking shape. I’m really excited about this quilt — it is going to be really gorgeous!

Time to sew my charm squares into strips for the next border. I just had to make sure not to sew 2 of the same fabric side to side. Easy peasy.

Here you can see that I took the time to pin the pieced charm square strip to the framed panel. This is an important step because I don’t want my quilt to be a funny shape. Nope, I like ’em squared up as much as I can as I go along. And one of the best ways to do that is to match your centers and your ends and pin generously.

Yay! Let’s sew the pinned charm square side borders on. Sigh….I must admit I hate removing my pins as I sew and I am guilty of sewing over my pins. Mea culpa.

Here are the pieced charm square borders added to the sides. I am so excited how this quilt is coming together.

Now let’s add the top and bottom charm square pieced strips. Pin, pin, pin. Sew, sew, sew. I really like how the pieced border is giving the look of Four Patch blocks in the corners. Tricky, tricky!
More side borders to add. This time I have to be more careful with the placement of the squares so that I don’t accidentally line up 2 of the same fabric, especially since I’m not using as much variety as a charm pack would provide (although, nowadays there are lots of duplicates in a charm pack because fabric collections are a lot smaller than they used to be).

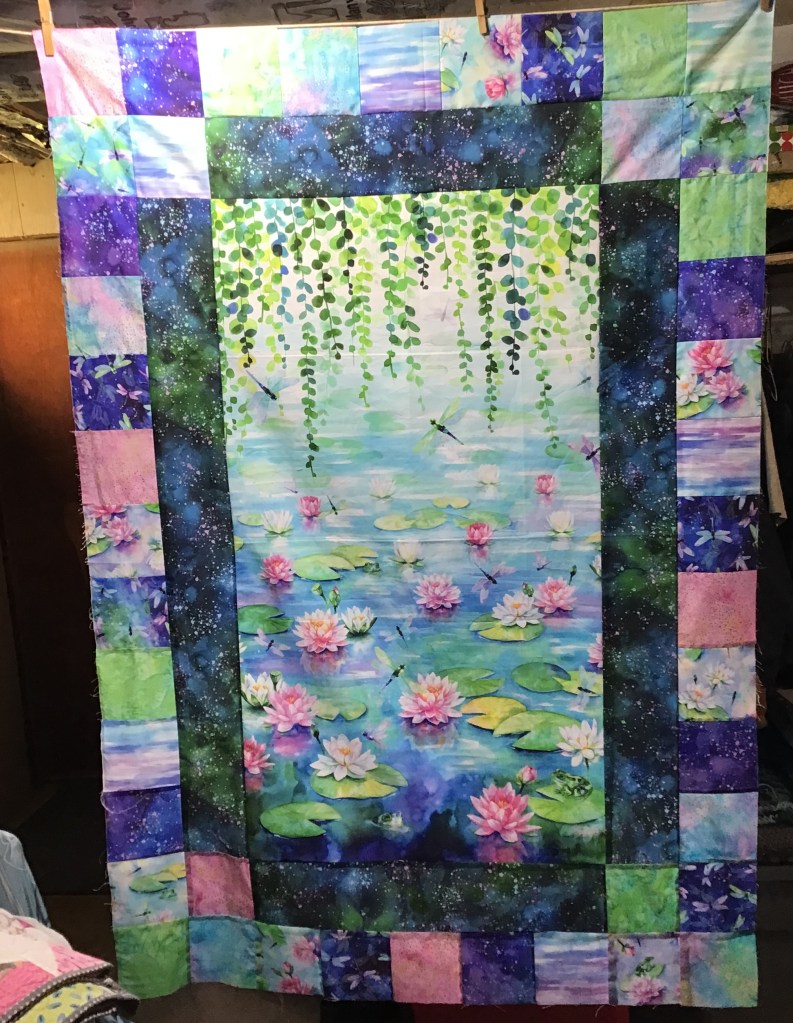
Here are my last borders — the top and bottom pieced borders. Now you can see the rectangles of the blue/green marbled fabric at each corner, mimicking the inner blue/green marbled inner border. Cool detail!

DONE!
I can’t wait to see your Hillside Charm Quilts! You can email your Hillside Charm photos me at tricia@villarosadesigns.com and I’ll share them on the blog and Facebook.
Thanks for sewing along with this tutorial. Stay tuned for another tutorial next week.
Wait! I can’t go yet without showing you the NEW November Rose Card patterns.
Check out these awesome new patterns. If you attended Quilt Market or Festival last week, you already had a sneak peak. Lucky you!

Oh look! Another Panel quilt! You can buy the November set of 5 Rose Cards HERE for $8.95.
This is my new table runner, Baskets, for this month:

You can buy the Baskets pattern HERE.
As always, shipping is free.
I hope you find a little time to get sewing because the Holidays are right around the corner and if you are like me, you have a long list of quilty gifts you want to make even though you know you’ll never get them all finished. The New November Rose Cards could help you jump start your holiday sewing! Just sayin’….
Until next Thursday —
Sew. Laugh. Repeat.
Always,
Tricia @VRD
