Panel Quilts · Quilting Partners · Rose Cards · Tutorials · villa rosa designs

VRD October Sky Panel Quilt Tutorial

Hello Quilty Friends!

Happy Thursday to you!

Today is a kind of blah day — raining off and on, overcast, and grey — not what I’d call a typical summer day at all. It’s been looking more fall-like here in NW PA. In fact, I was looking at one of the maple trees in the back yard yesterday and I actually saw the leaves starting to change on ends of several branches. As much I hate to see summer going, I do love autumn. What’s your favorite season?

As I’ve mentioned before, I get fall fabrics on my brain this time of year! Then I can’t wait to start making fall quilts. What better day than a dreary one to share an awesome FALL tutorial with you? And you can’t get more fall than October Sky!

Get October Sky HERE

Don’t let the name of the pattern fool you — you can use any kind of horizontal panel — any one your little hear desires. I’m not using actual fall fabrics for this quilt, but to me, it still feels like a fall quilt. I think it’s the jewel-tone colors. Take a look at these yummy fabrics from Hoffman California Fabrics, one of our quilting partners. The digital panel is called Nightshade and the fabrics are coordinating 1895 Watercolors batiks. Simply scrumptious!

Let’s get started!

1. Trim the selvages off your panel. Horizontal panels can vary slightly so it doesn’t hurt to do a quick measurement of your panel, then you’ll know how it compares to the pattern. You don’t really need these numbers right now, but if your panel is not as wide as the pattern, you will need to make a small adjustment a bit later in the construction process.

2. Cut your border strips for the top and bottom of the panel and sew them on.

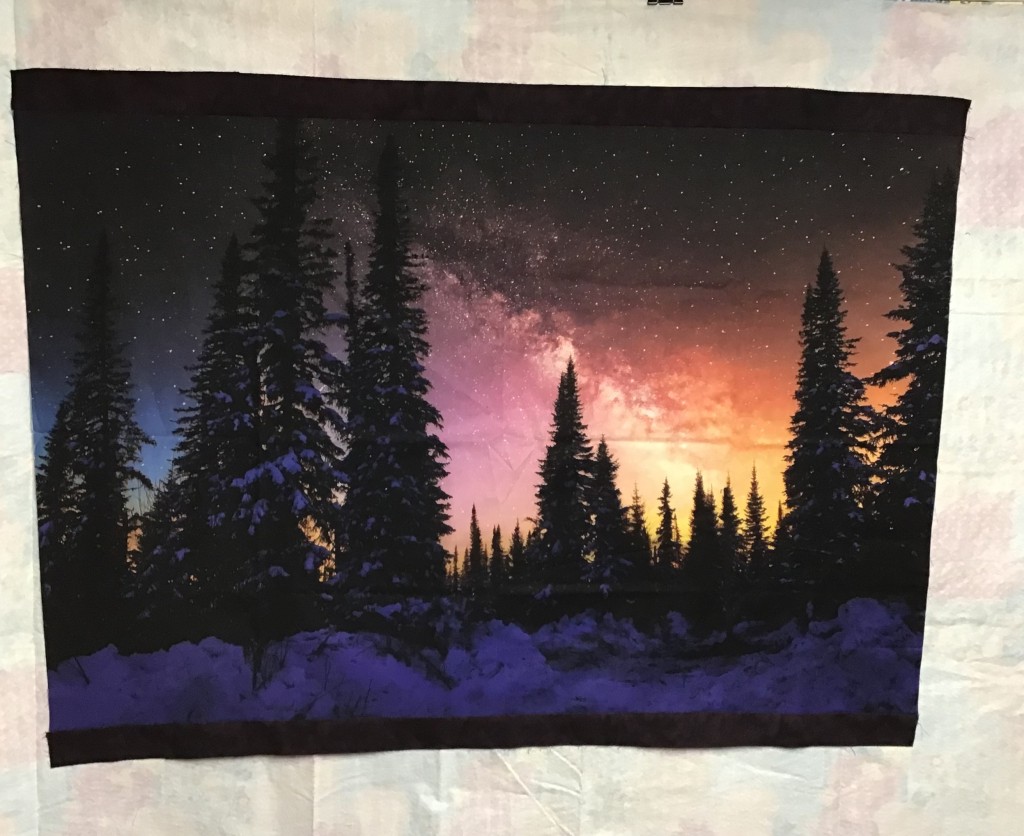
3. Now we are going to cut out the squares for the pieced sections at the top and bottom of the panel. I just love these 1895 Watercolors batiks — they go with everything. The dark plum in front is my background.

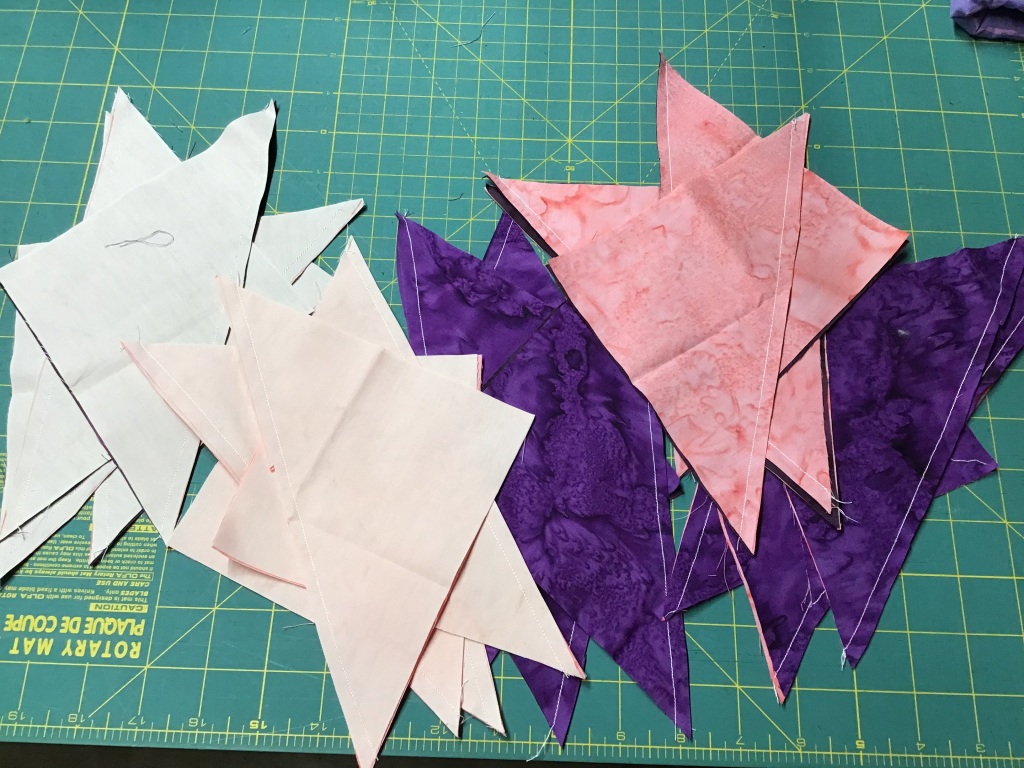
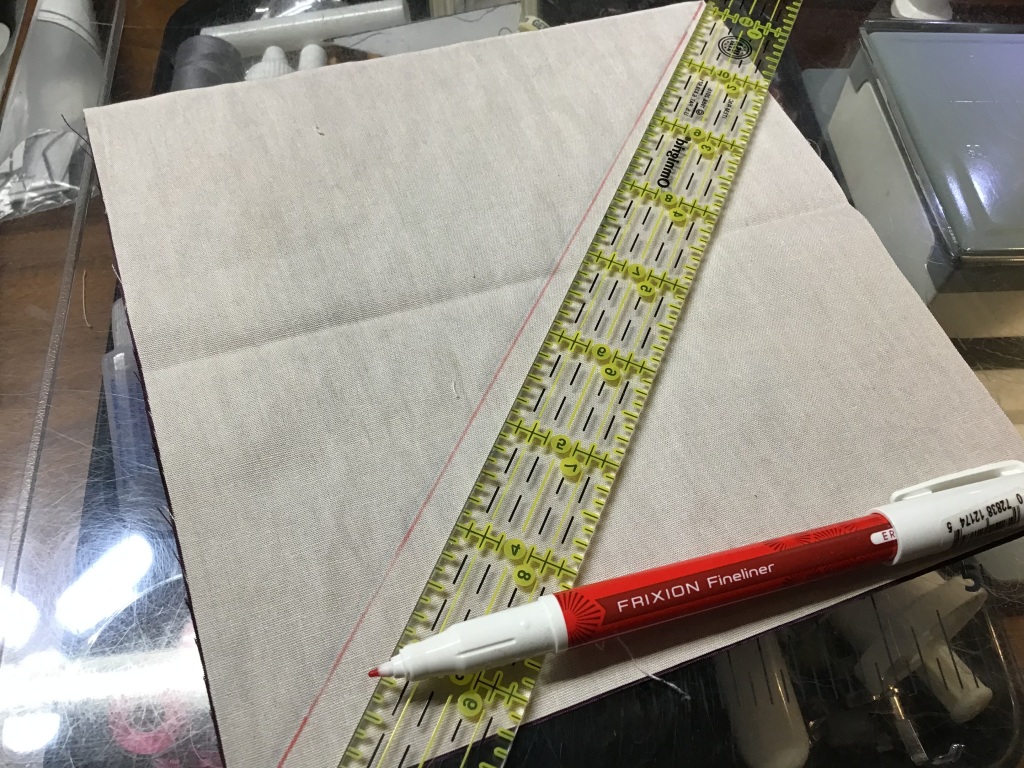
4. Time to make some Half Square Triangles, or HSTs. Layer 2 squares right sides together, drawn a diagonal line from corner to opposite corner. Sew 1/4″ away from both sides of the drawn line. Cut apart on the drawn line and press open.
5. Having a flannel board — or in my case, the back of a flannel tablecloth clipped to my wall cube unit — to arrange the HSTs makes getting the arrangement right the first time much easier to accomplish.
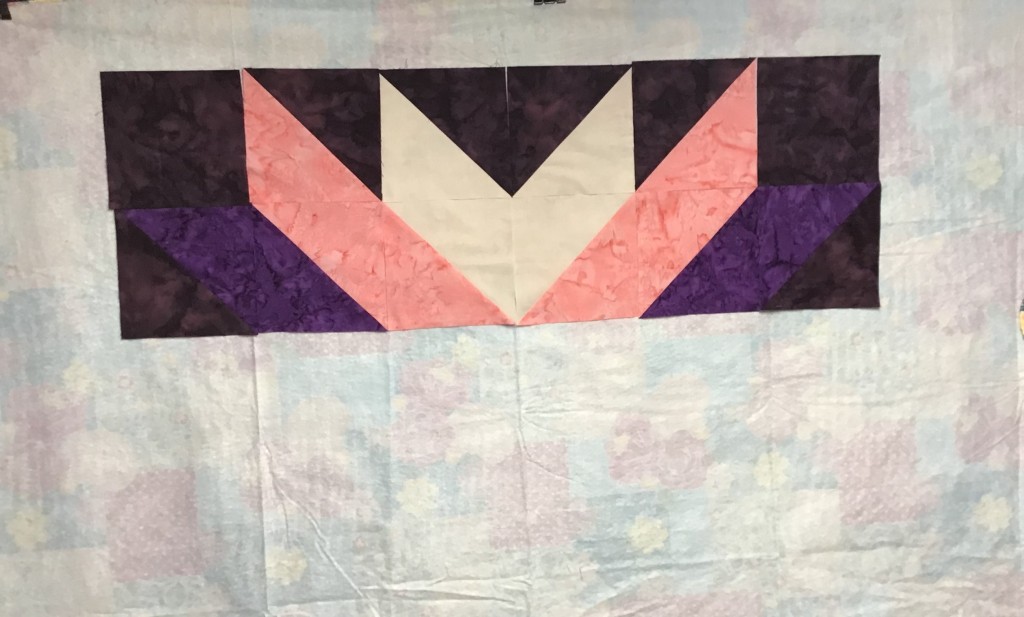
6. Sew the HSTs together. Make 2 identical pieced sections. You will be flipping one upside down to sew t the bottom of the panel. It makes an interesting design even without the panel in the middle though, doesn’t it?
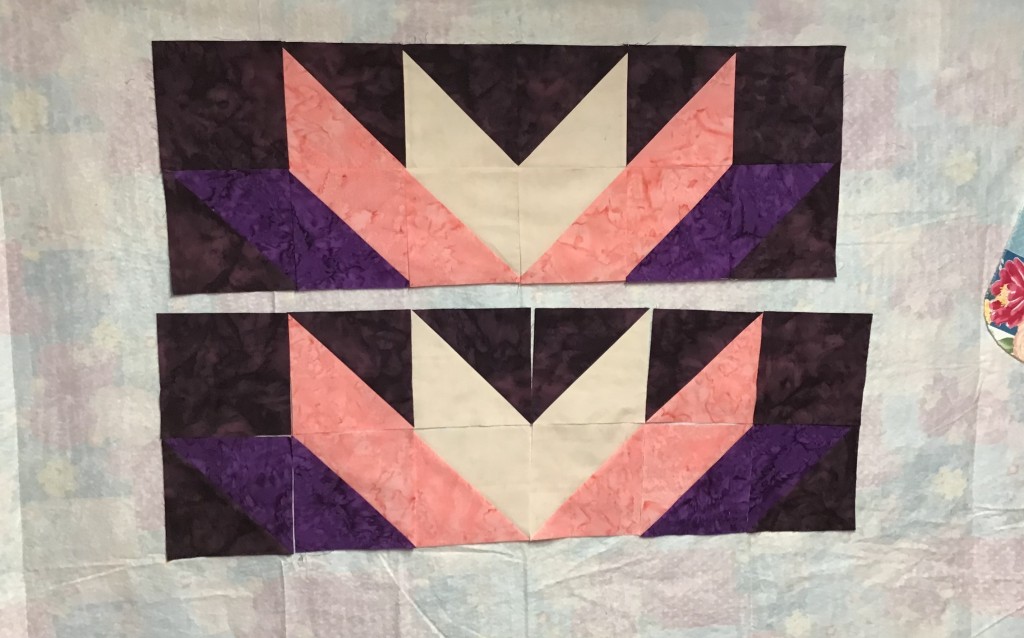
7. Refer back to your panel measurements. If your panel is not as wide as the panel measurement in the pattern, you may need to add a little extra width to the side background rectangles. To be on the safe side, I added an extra 1″ or so to the side rectangles just to make sure my pieced sections would be wide enough because my panel wasn’t quite the same size as the one listed in the pattern.

It’s okay if the side rectangles make the pieced sections a little wider than the panel — you can trim and square things up in a later step.
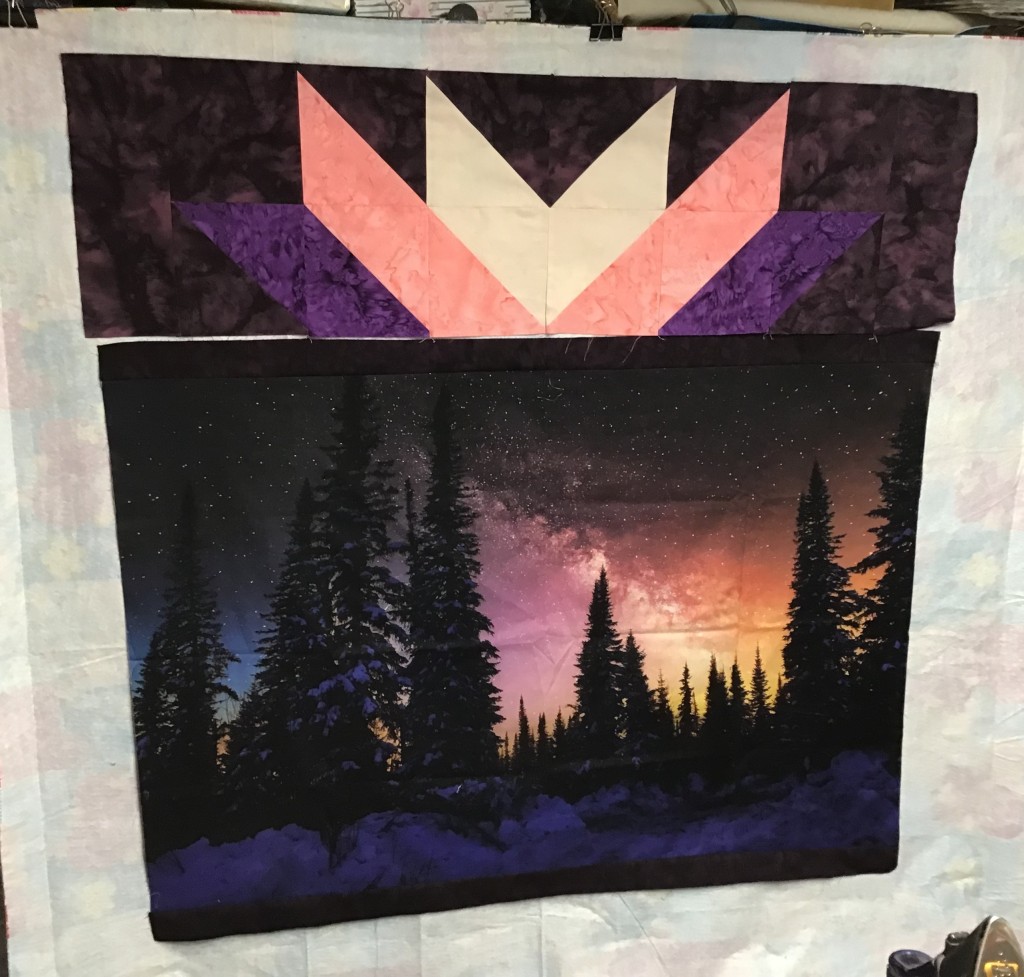
8. The most important part of this step is to find the centers of both the pieced sections and the panel. Then match those centers up before sewing because nobody wants off-center sunbursts! LOL!

Once you’re happy with your placement (I used pins to keep everything lined up just right), sew the pieced sections onto the panel. Lookin’ good!
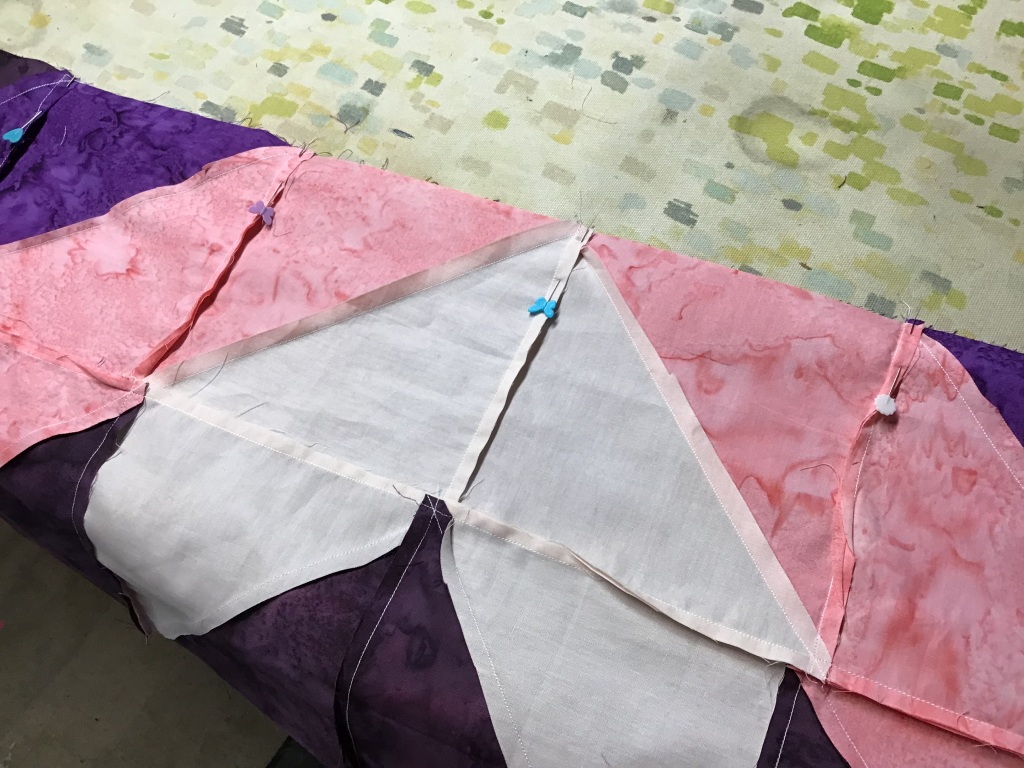
9. Now it’s time to trim and square up the sides of the pieced sections. Ahhh! Much better!
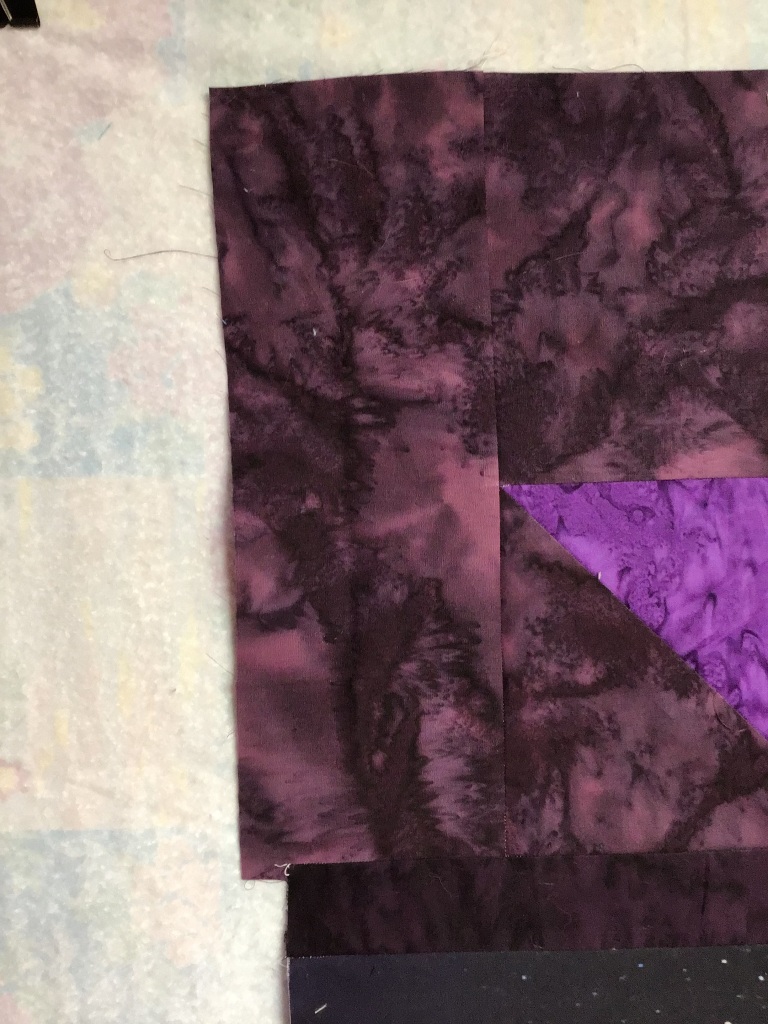
10. Time to add top and bottom borders. I actually increased the width of my borders a couple inches to make the quilt just a little bit bigger as a throw. Do the same if you’d like. Just keep in mind, you might need more fabric if you increase the width of your borders.
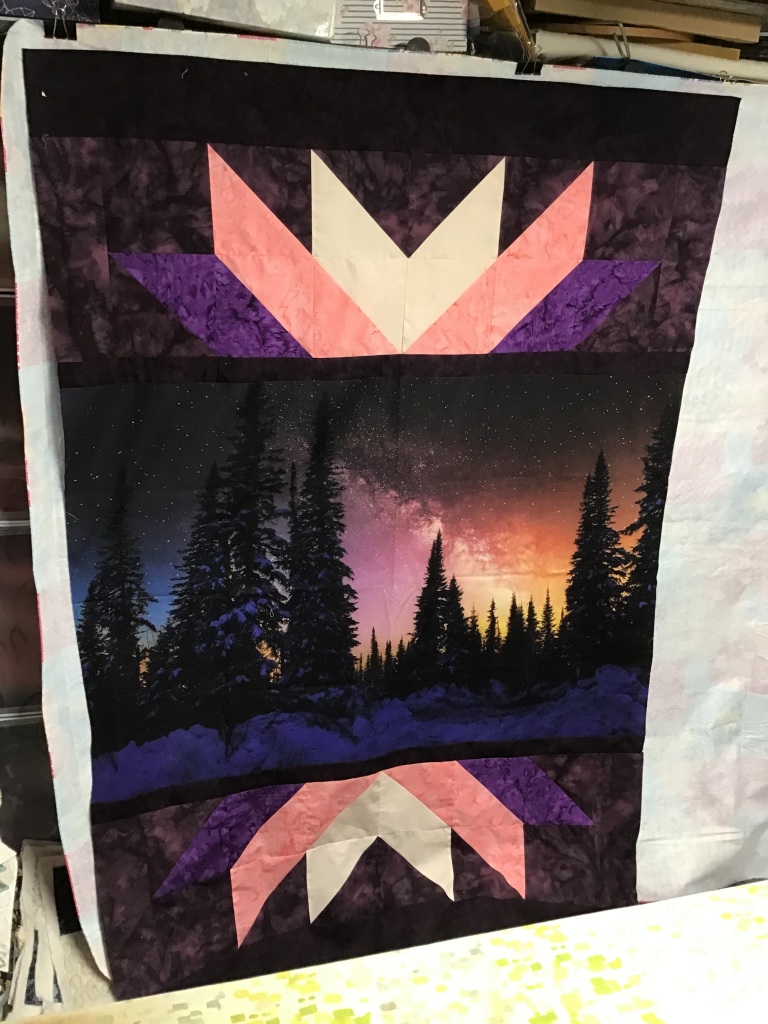
11. Ready to add those side borders now? You will need to piece those side borders to make them long enough. VOILA! The top is done!

Since I couldn’t get the breeze to cooperate with me, I took another photo of the October Sky out flat. Gorgeous, isn’t it? The colors are so rich and yummy.
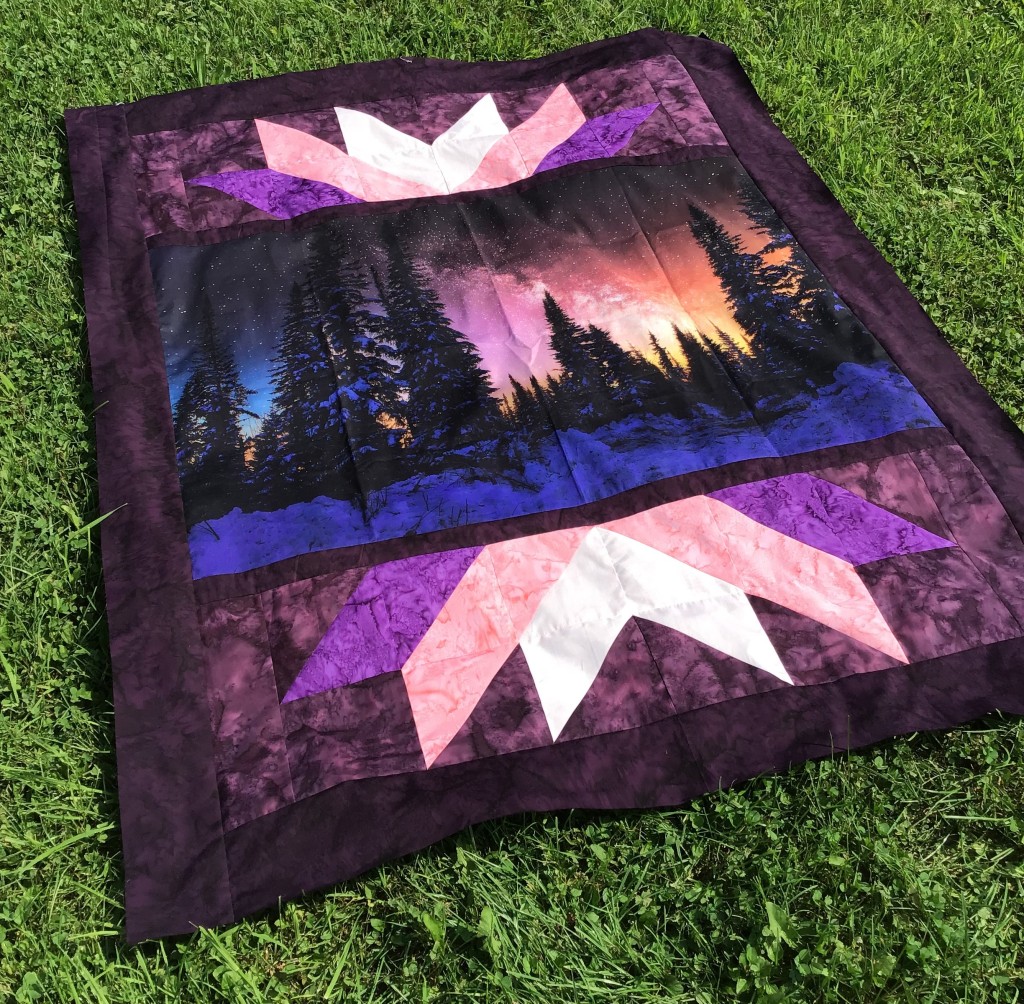
12. The next steps will be layering, quilting, binding, and labeling the quilt. And then….another VRD quilt DONE!

I hope you enjoyed this tutorial! I’d love to see your October Sky quilts — you can post them on our Facebook page HERE or drop me an email if you’d like. And there will be more fun VRD tutorials coming, so stay tuned!

Well, that’s it for me. See you next week!

Always,

Tricia

Panel Quilts · Rose Cards · Tips and Tricks · Tutorials · villa rosa designs

VRD Splendor Panel Quilt Tutorial

Hello Quilty Friends!

Happy Thursday to you!

I hope you all had a wonderful Thanksgiving Day last week. Did you get a chance to make the Talking Turkey Quilt block yet? If you didn’t stop by and read last week’s post with my cute Thanksgiving turkey block tutorial, you can find it HERE.

On another note, I just finished making the quilt top for the Villa Rosa Designs Rose Card pattern, Splendor, so thought I’d share another panel tutorial for you. Then beginning next week for the rest of December, I’m going to blog about Christmas-y quilty fun things, but we’ll probably go back to tutorials again in January when you are all itching to start some new projects.

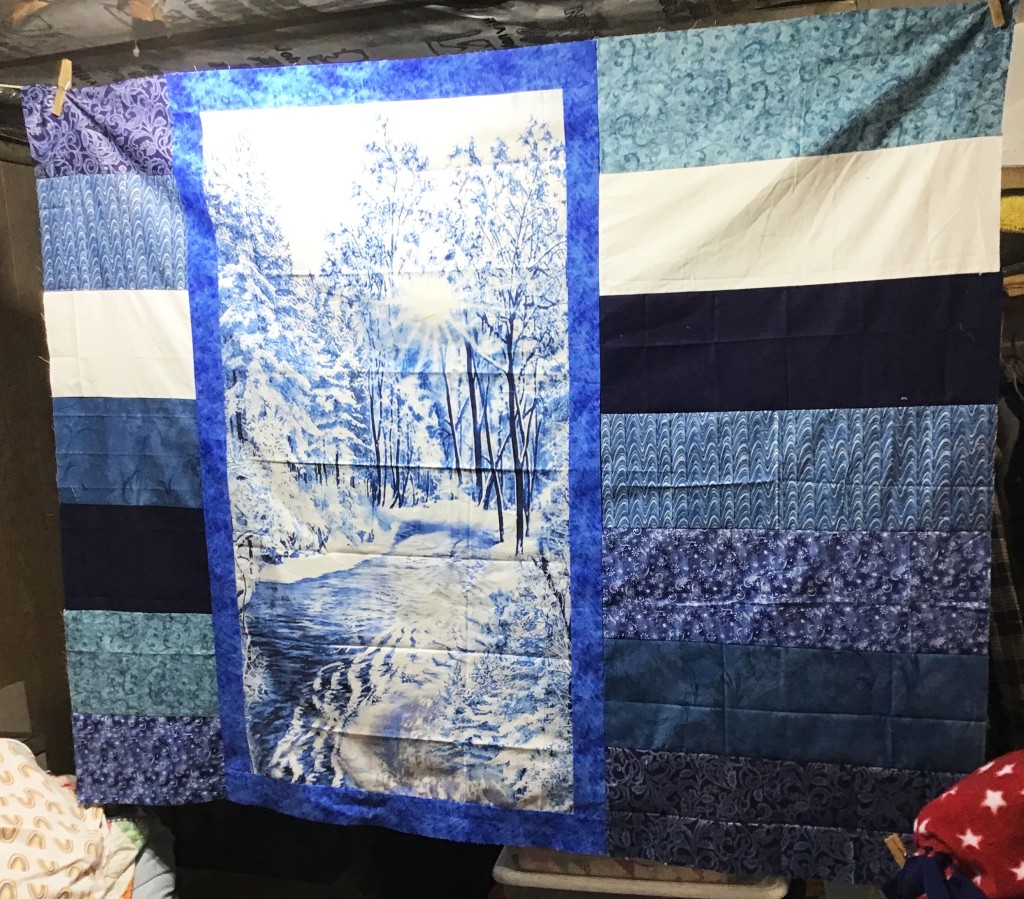
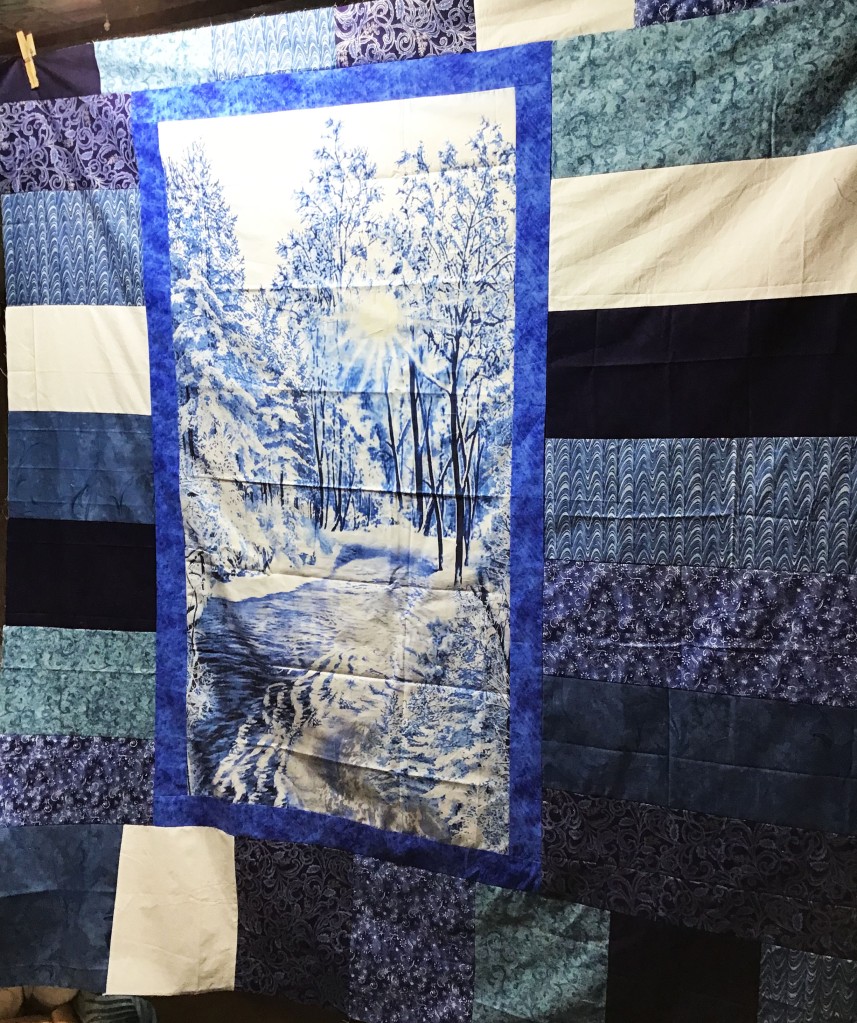
This is Splendor. It is an AWESOME pattern — who knew you could take a panel, some fabric for sashing, and a handful of fat quarters and come up with a quilt as big as this one turns out. It’s an incredibly clever pattern by our VRD designer, Molly Cook, and uses the whole fat quarter to build the sections around the quilt. I was so amazed to see how slick everything went together and how nicely everything fit.

LOVE LOVE LOVE this pattern! If you don’t have it, you need to get it! You can buy the Splendor pattern HERE:

Great quilt, huh? I can already see visions of sugar plum quilts using the Splendor pattern dancing in your head. Don’t you just love how the panel is offset? Isn’t that unique? And everything truly goes together like magic!

Let’s get started!

Splendor Panel Quilt Tutorial

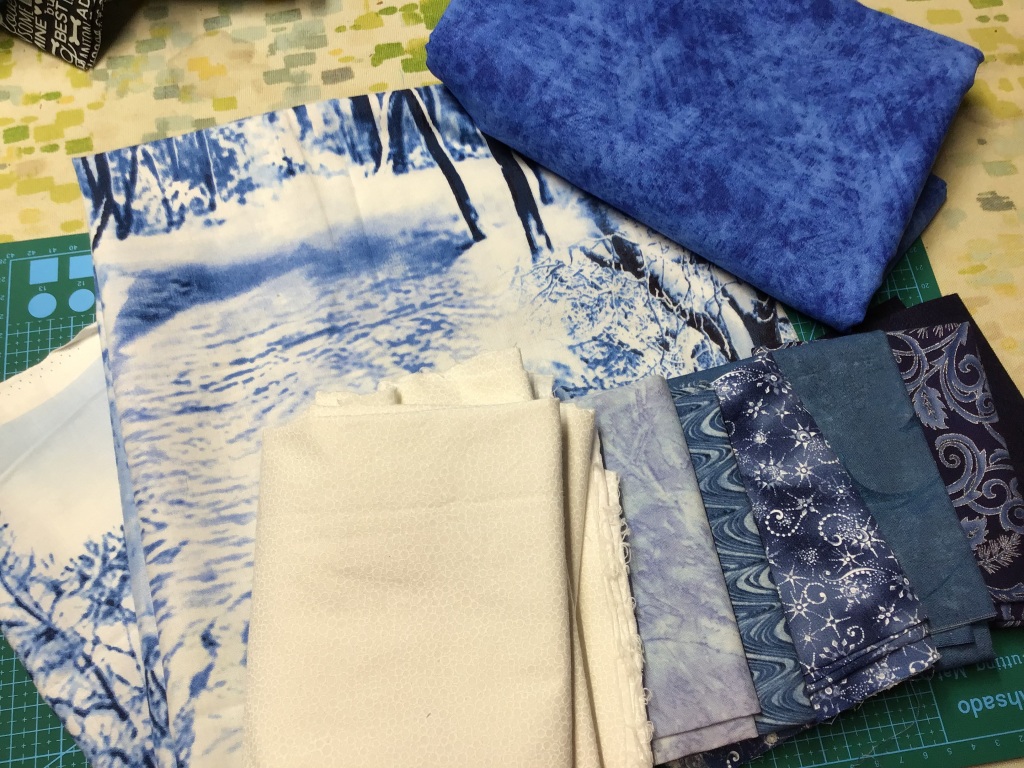
Time to gather up your panel, sashing, and fat quarters. I had this great winter panel in my stash and thought a blue and white version of Splendor would be fun. I grabbed the blue tonal for my sashing and then “shopped” in my blue fat quarter bins. As a final thought, I added the white on white fabric from my yardage drawer to represent the snow. Looking back, though, I think I could have skipped the white on white and just went with shades of blue, but that’s okay. I think the quilt will still turn out just fine. Let me know what you think once you’ve seen how the top turned out down below.

I did end up swapping out the light silvery blue fabric you see in the photo because when I opened it up to cut, the fabric had some fading. I didn’t think I could cut around the faded areas and have enough fabric to cut the pieces I needed so I found a replacement. No worries.

Next you need to measure your panel, because panels come in all different sizes these days. My friend Mary Lee and I were just talking about this. 24″ x 42″ used to be the standard size for panels, but now they come in 36″ x 44″, 44″ x 44″, and everything in between!

So take the time to measure your panel. You may need to trim your panel to the size noted in the pattern. Or if your panel is a bit narrower, you may need to add a bit to the sashing so your center ends up the correct size. If you don’t want to trim your panel, you can also adjust the size of the sashing if needed.

I can’t stress enough how important these measurements (for the panel plus the sashing) are. This is what makes the whole quilt work so if your measurements are off, you will have problems sewing the sections to the center of the quilt. Isn’t it better to take your time right now and get the measurements correct right up front? You know the saying, “measure twice, cut once?”

Once you’ve measured your panel and decided whether you need to trim it or add a little extra to the sashing, then it’s time to cut out your sashing strips. My panel was a bit too narrow so I ended up adding a half inch all the way around to the sashing in order to get the correct size. Then I was ready to sew on the sides and the top and bottom.

Tricia’s Tip: When I add borders to a quilt, I take my time. First, I find the center of both the side of the quilt and the border strip. Then I match my centers and pin (see the lime green circle in the photo). Next I pin the ends and I add a pin perpendicular to the edge of the quilt/border in order to keep things all nice and square (see the red circles in the photo) — I do this at both ends of the border. Finally, I add pins spaced between the middle and each end. Sounds like a lot of work, but it really helps me to keep my borders straight. Who wants borders that stand up and wave?

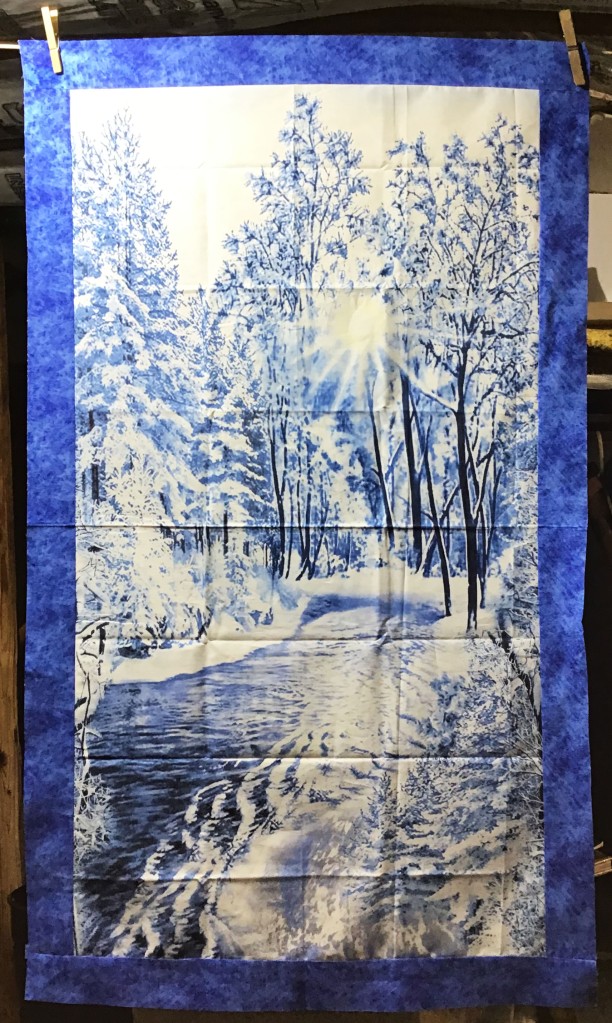
Here is my panel with the sashing around it. I love how the mottled blue really brings the color out of this mostly monochromatic panel. It reminds me of winter here in Pennsylvania.

Let’s keep moving! I promise you, this is the fussiest part of the quilt. Once you get the right measurements, it’s a breeze from here out.

Time to cut out the pieces from the fat quarters. Follow the cutting diagram in the pattern. If you feel comfortable, you can stack a couple fat quarters together to reduce some of your cutting, but it’s perfectly fine to take your time and cut each fat quarter individually.

Something to think about — as all fat quarters are NOT cut a true 18″ x 22″, it’s not a bad idea to have an extra coordinating fat quarter around just in case you can’t get all four rectangles out of each fat quarter or in case you make a cutting mistake. Extra fabric are not bad words in my vocabulary. Besides, it will go into another project……..someday……..

So the next thing to do is to sew each group of rectangles together into strips. There are a couple options here:

  1. You could organize your fabrics and keep them in the same order in each section — wouldn’t it be cool to organize your pieces from light to dark or dark to light?
  2. You could sew your rectangles together and make sure that each section has a different arrangement of fabrics, making your quilt look scrappy and relaxed.

I chose to do the second option (big surprise to those of you who know me!!! LOL!), which takes a bit more time, but I really like the finished result. Either option will turn out great, so just pick one.

I sewed the pieces together for the right side section first. I just did it randomly at my sewing machine. Then I pressed the seams, folded the pieced strip, and found the center of the strip. Next I folded the sashed panel and found the center on the right side of it. Finally I matched up the centers, pinned the pieced section to the sashed panel, and sewed them together.

After I got the right side section on and I pressed it, I laid out the pieces for the left side. Pinned. Sewed the rectangles together. Pressed.

I was totally excited when I realized how fast the sides went on the sashed panel. Like magic!

I did find I’d somehow made a mistake when I went to match up my centers and pin my left side section to the sashed panel. My pieced section was too long. Huh! What was going on here?!?

I reread the instructions and looked closely at the cover quilt and diagrams. After a couple minutes, I went back and remeasured only to discover I had cut each of my pieces a half inch too big, so of course the pieced section was too long when I went to pin it to the panel.

What do you think I did?

I matched up my centers and ignored the excess fabric sticking out beyond the sashed panel. I pinned and sewed like normal and then I trimmed the excess off of each side with an acrylic ruler and my rotary cutter (with a cutting mat underneath), making my left pieced section flush with the sashed panel.

You might notice in the photo that my top and bottom rectangles on the left side are a bit narrower than the other rectangles. But that’s okay. Everything will still fit together great and I really doubt it will make much difference in how the quilt looks in the end because of the different-sized pieces all around the sashed panel.

I wouldn’t have even mentioned my oops, but I like to point out my mistakes and how I handle them. Sometimes my mistakes are just happy accidents — or good things in disguise. It helps to share my mistakes with other quilters so they don’t do the same thing I did. Just ask the members of my Friday group (BIG Shout out to Gail, Mary Lee, Robin, Sherry, Gaynel, Missi, Deb, Anita, Jean, Donna and Kim).

Now it’s time to sew the top and bottom sections together. Again, I did each one separately to make sure I liked my random fabric placement — I didn’t want any fabrics to be touching the same fabric in another section of the quilt.

So here it is — my completed Splendor quilt top. What do you think?

This was definitely a FUN and FAST quilt project and I hope that you will give it a try! If you’ve made Splendor before, I’d love to see your pictures. You can email them to me at tricia@villarosadesigns.com or post them on our Facebook page.

Before I go, here’s a fun video tour at Quilt Market recorded by Jaftex, just click the link below:

https://www.facebook.com/jaftexpresident/videos/813565436398044

Until next Thursday —

Sew. Laugh. Repeat.

Always,

Tricia @VRD